The Battle Tank Build

This week MyBuildGarage caught up with Ted, the owner of this 92 Mitsubishi GSX and had a few questions for the builder of this monster build.
1. As a car enthusiast and builder, what keeps you motivated?
Family, crew, the DSM community, Racing, Welding, tuning, and learning new things. Its always fun when the car improves and you have a good group of people motivating you. Especially lending you a hand in the garage at 4am the night before a race. Cruising the car on the streets is probably what drives me the most. I have always kept this car streetable with working lights, signals, mirrors and a stereo.
2. With all the different platforms out there, why did you choose a DSM?
When I knew that I wanted to build a fast car, I explored my options. I looked at Honda’s, Toyota’s, Subarus, Muscle cars, etc., It all came down to what I could afford, and what would net me the best bang for buck. DSMs were it for me. I wouldn’t start over at all, I have learned so much with this adventure.
3. Many builders out there have jobs, kids , and other responsibilities, how do you manage to find time to work on your build?
I haven’t been blessed with kids just yet, but I do have the privilege of working as a driver at UPS here in the NorCal district. We get a generous amount of vacation time. Being part of a car club has also helped me out for the past 7+ years. WyldKardz has helped me get where I am today. The honda guys learn from me when we work on my car, and I learn from them when we work on their cars. Its a cool trade off, and its a tradition that we try to keep alive as car enthusiasts. Being up 24hrs working on a car is not uncommon at my garage.
4. There is a lot of fabrication and DIY in your build, where did you learn your building skills?
My oldest brothers, as well as people around me today, inspired me to do my own work. My bro’s used to build lowriders from the ground up, and my brother Angel is always working on custom cars. He especially loves spraying clean custom paint jobs.
I remember being in elementary school, and both of my bro’s would be in the garage working on cars till the sun came up. I will never forget a mustang 5.0 they did. I seen my brother Angel honing the engine block for new pistons and rings. It was one of the coolest things I seen as a kid, and will never forget watching him do that. Working on cars is in my family blood I suppose. I have always felt the need to learn how to do things myself. I really dont like handing people my money when I know that for a few bucks more, I could have purchased the tools and learned how to do the work myself. If something went wrong, there is nobody to blame but myself. If I succeeded, I could help my crew out later on down the road and get a very satisfying feeling of accomplishment. Finding people that do good work in a timely manner is another one of my pet peeves. I suppose thats why I learned how to do most of my work as well.
5. What tools can you not live without?
My tig, chop saw, laptop, ecmlink, wideband, and knock sensor 🙂
6. Whats next for the Green Monster?
To inch it up little by little. Since the car was converted to automatic, it responds so well to minor changes. I can now make small adjustments on the car, then see the results at the track via E.T.s , MPH, or 60 ft. times. I have been into the DSM game since 2000. A solid 10 years of learning things by trial and error, reading DIYs from other users, and getting help on the Link forums. This car will run 9s one day. But being a garage built self funded car, things move at a different pace.
Ezequiel Ted Marquez
WyldKardz est. 1999
The Build
So many people would like to know what the Green Monster has in it. The real question is, what HASN’T been in it. I am going to cut to the heart and soul of my DSM building experience.
A DSM enthusiast turned into a DSM guinea pig when I got my 1st 1G.
The old champagne gold talon. It was a 90 tsi awd, and came into my hands via a tragic event. I let a friend drive me home while I was drunk, and he was doing a pull which landed my red fwd laser into a cement filled pole.
I got the talon through him as a replacement. Long story short, it ran low 12s on a stock shortblock, an HRC 20GH, 880s, 100 octane and alcohol injection. I of course had the usual DSM things such as a 3 inch exhaust, wires, and GM Maft, data logger, 2600, 255hp, johnny racecar FMIC, etc. I soon popped that motor and freshened up the tired motor with new bearings, bored .040 over, crower springs and retainers, arp studs, and more boost.
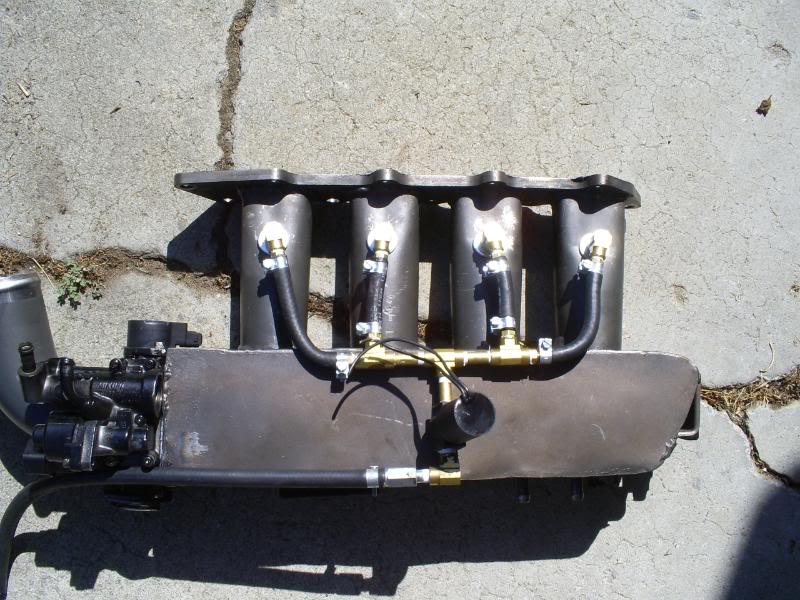
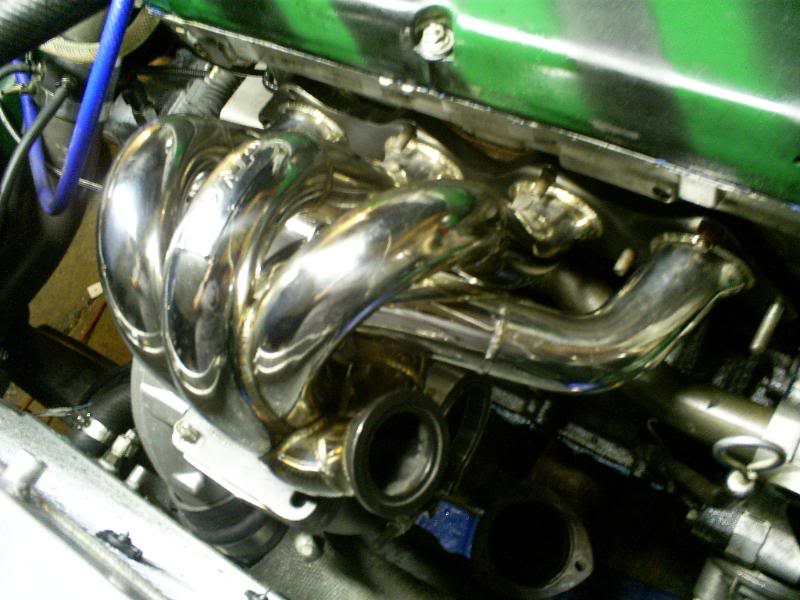
Being a cheap bastard, and always looking for a technical “build not bought” challenge presented my DIY/custom/homemade mistake manifold. I have been a fan of alcohol injection since day one, and took it a step further with a direct port meth setup. It is controlled via DSMlink to this day and ran many 11 second passes, and opened up the upper RPM band by a significant amount at the high 11 second power level. Not too shabby if I dont say so myself.
The car went through a transfer case in high eleven second trim. This was after NUMEROUS hard launches and many, MANY occasions of wheel hop. I was all smiles when I busted it because it was the first time I ever went through a tcase. It served a very abused life, and I was glad to see it go.
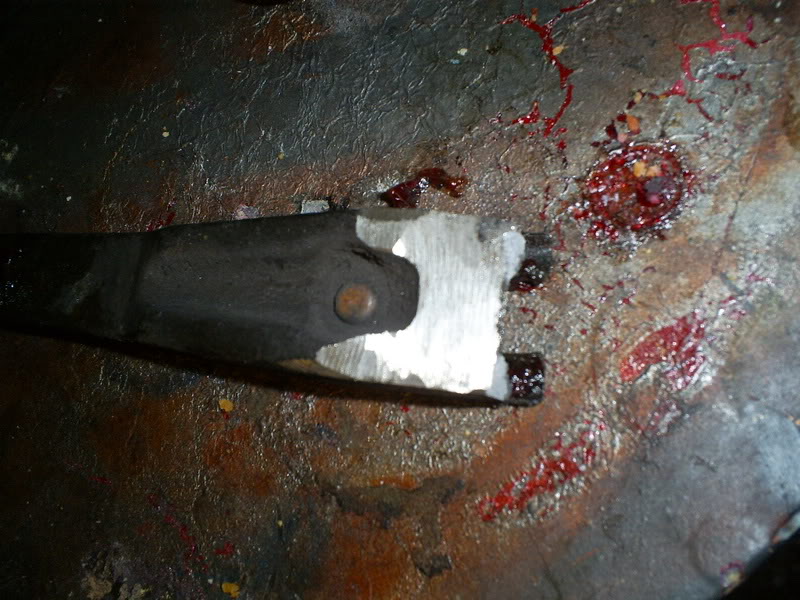
Soon after I cracked the mounting tab or “ear” off the block. I arc welded it back on using Ni-Rod and it went on to run high elevens again.
Not satisfied with the HRC 20G-H I set out for something bigger. I abused my HRC 20gH for 4 years, it never saw less that 20 psi its first year, and ran around 25 psi for the remaining 3 years of its life. Granted the car was down about 6 months of the year, but hanging off the 4G63 has to put some wear and tear on it right?
Over time I ended up with a buschur stage 3 shortblock, 1600s, -6 lines from pump to rail, DSMlink, Blitz DSBC boost controller, blitz TT, GM MAFT, FP2s, direct port meth, a real front mount intercooler, short route piping, and high 11s all day on 24 psi. I finally nutted up, cranked up the boost to 30 psi and 11.4 on 110 octane on the HRC 25GH…. still, I was not satisfied. The car was getting more and more “ghetto”.
I was looking for a fresh start at this point and I found it.
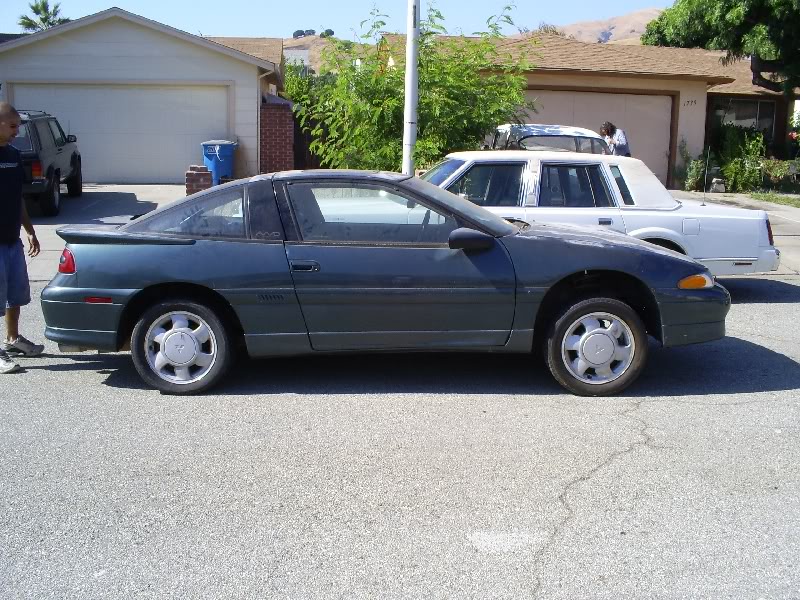
A local DSMr and now friend (Mahesh Rao), was parting with his parts car. Not just any parts car, a clean shell with uncracked glass, and all body panels in tact. It had no engine or drivetrain. The interior had no seats in it either. It was perfect.
This was it. I emailed him instantly and offered him a 12 pack of corona, and somehow I ended up throwing in a Viscous coupling as well. I picked it up the following weekend and brought her home.
I swapped everything over from the champagne talon, and held onto it for as long as I could…then finally scrapped it. It was like loosing a child really. I never felt so attached to something non human 
The help I recieved from the crew helped me get the Green monster on the road in 3 months. Just in time for the local CMI event at Sac raceway.
I ordered a 35r through FFTec and was hoping for the best. The shakedown passes weren’t that impressive, but it was a start. 11.7 on 23 psi with 91 octane and meth injection. I let it rest for a bit due to clutch issues, and other small problems (leaking headgasket, solid lifters unscrewing themselves and making valves kiss each other) and rebuilt again.
I dropped off my motor at full function and the engine was machined by Robs in hayward. 5 miles into the break in, and about 15 minutes of running time led me to spin rod bearings number 1 and 2. I pulled the motor out that same weekend, and brought it back to FFTec for a tear down. We never really reached a conclusion as to why they spun. That aside, I received the utmost help from the team at FFtec. A couple weeks later, we had the shortblock rebuilt and back in the car.
I acquired a venom intake manifold with a mustang TB from a local DSMr and company co-owner Kamil from Hi-Rev. I hated to drill 4 holes in the bottom of it but that direct port meth was something I was never letting go of.
After going through a “freshen up” I put everything back in and ran low 11s on 2 gallons of 100 octane mixed in with 7 gallons of 91, as well as the meth. Very happy with the progress, I ran that motor for a month of weekend abuse on the highway, as well as the track. The trap speeds were there for that 10 second pass, but traction and money were limited. I managed an 11.012 @ 133 spinning through 1st and part of 2nd.
In early October that 2nd rebuild decided to quit on me. I spun rod bearing #1. Ready to throw in the towel, I explored my options.
I was looking into getting a datsun 510, and throwing a SBC in it. I was seriously considering getting out of the DSM scene, more than I ever have.
Sick of all the issues, the down time, the parts that break, the leaks, the headaches, and all the usual DSM things.
I thought of one last thing; the raw power the 4G63 produces. That feeling of being THROWN into your seat. It was all worth it again, especially the build. Welding, cutting, fabbing, bleeding, aching the day after a long night up till 6am with my honda buddies and crew friends. It was always a learning experience. In the end it was all going to be alright.
I talked to Jake (evil eagle) about a possible shortblock build. It would have happened but plans changed, and time went by.
I settled on a local machine shop that has build experience beyond my wildest dreams. Recommended by domestic owners, and almost every other breed of car out there, I settled on Daves engine and machining (Mopar engines west).
I spoke with Angie, and told her my goals. 30psi, right off the bat and possibly a small shot of nitrous. All on unleaded fuel, plus a healthy dose of methanol.
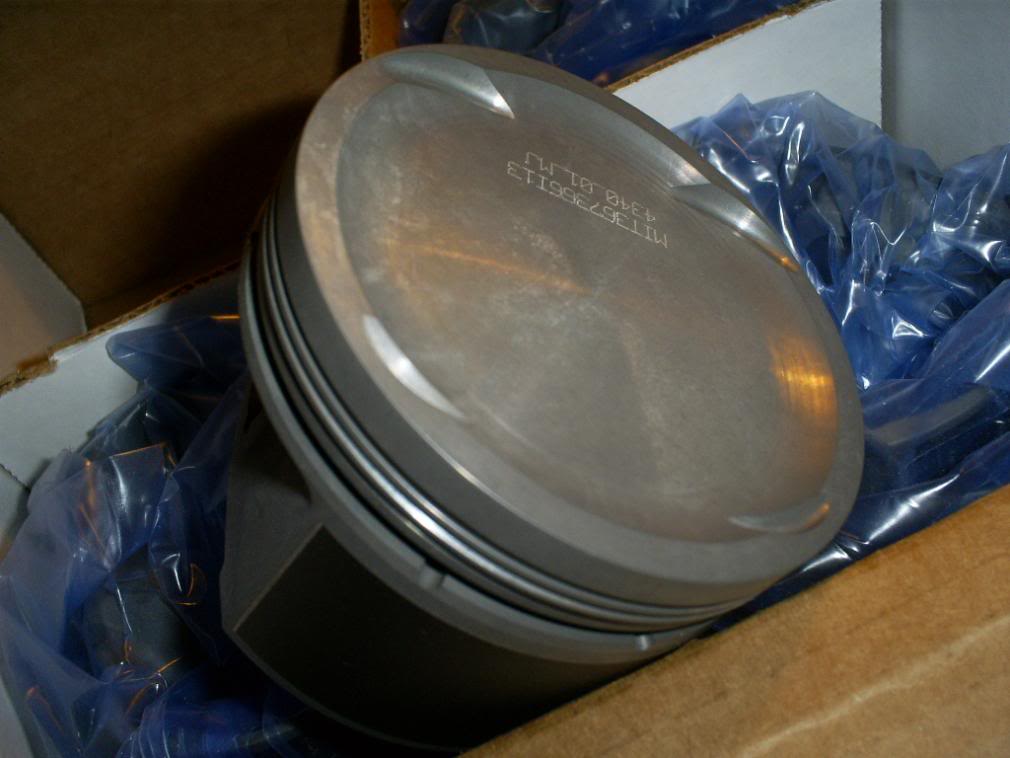
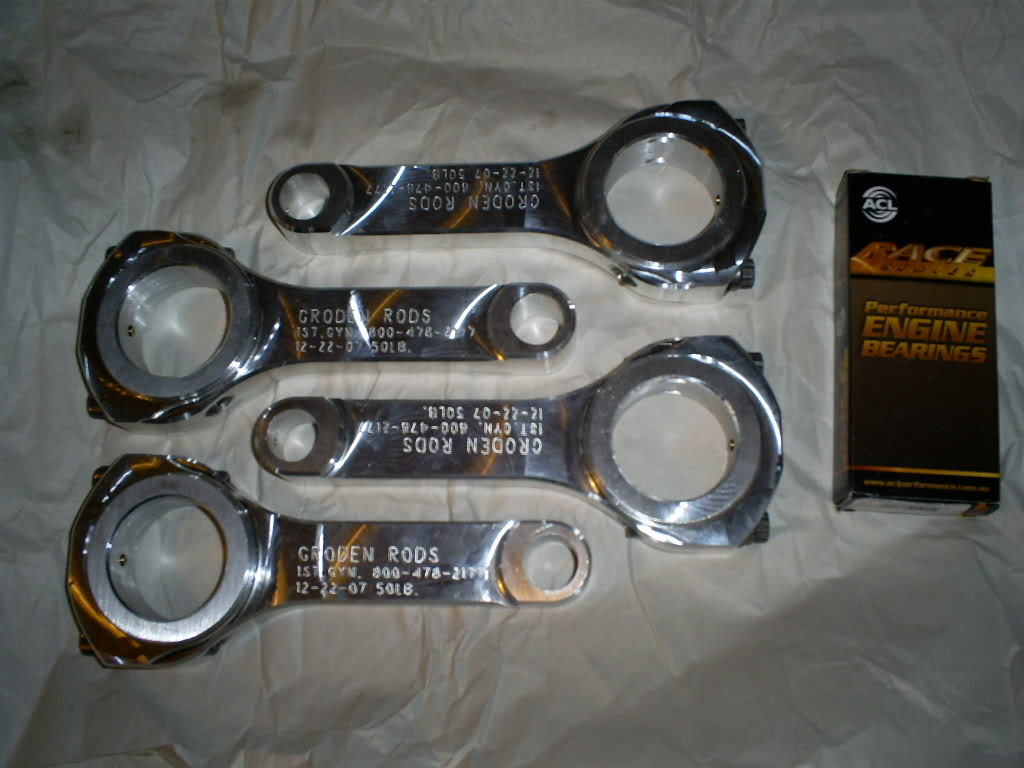
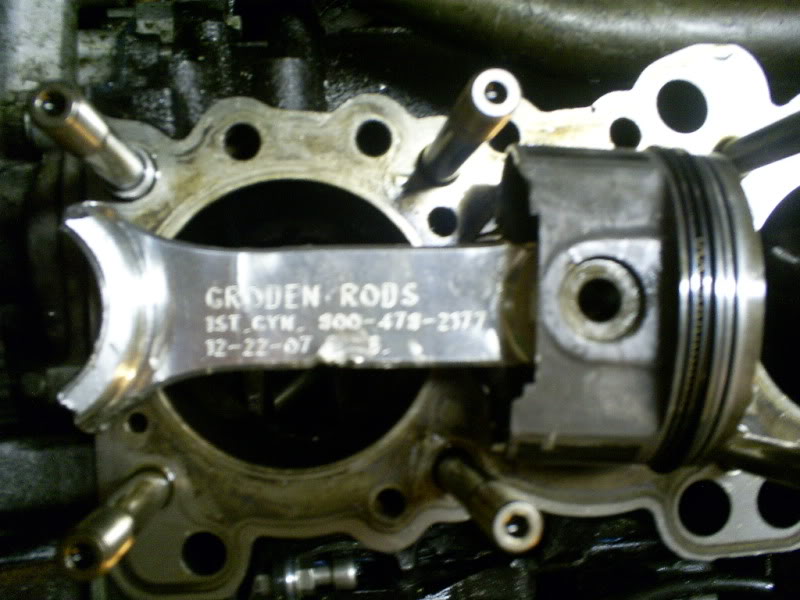
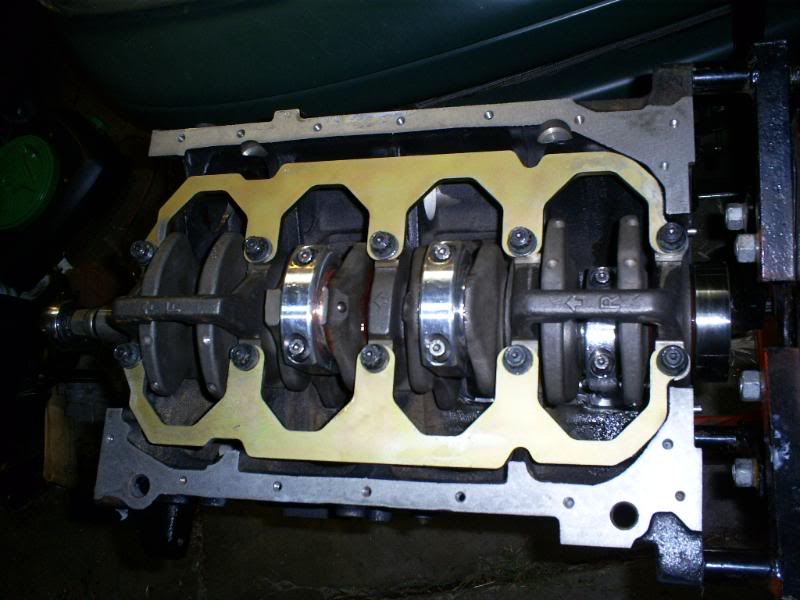
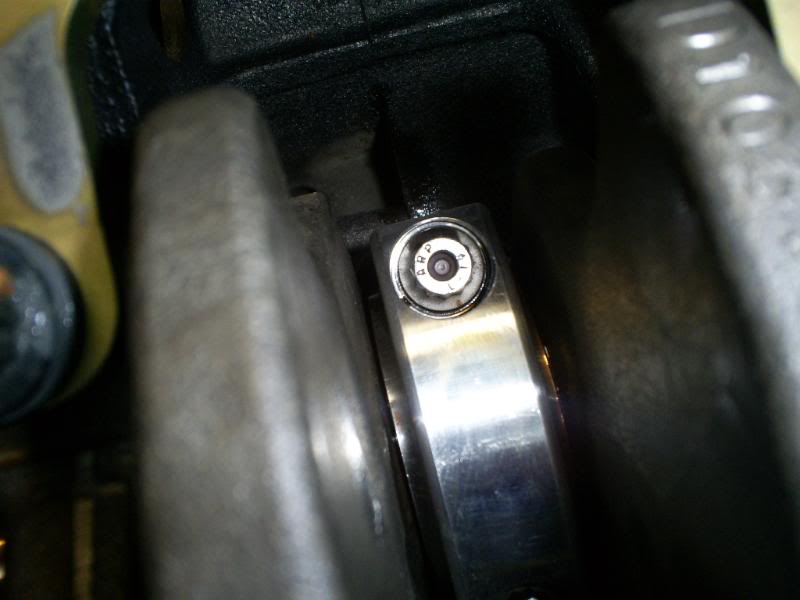
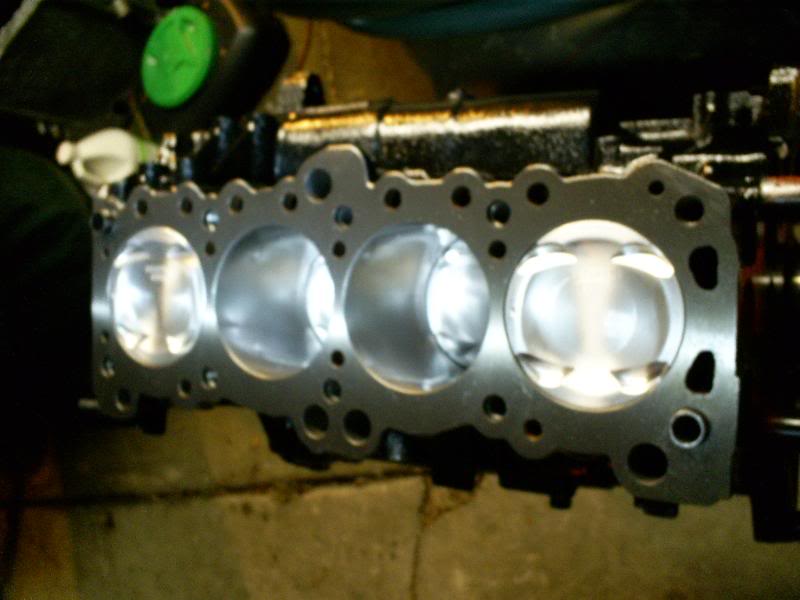
I selected Groden aluminum rods, topped off with Mahle pistons. Everything glides on ACL race coated bearings. A Kiggly girdle secured the main caps while ARPs held it together. I made sure to run the ARP L19 head studs, and took the advice of Angie and ran a Cometic Headgasket. I had a bad taste in my mouth from the Cometic years ago, but ran it anyways. Everyone deserves 2nd chances right?
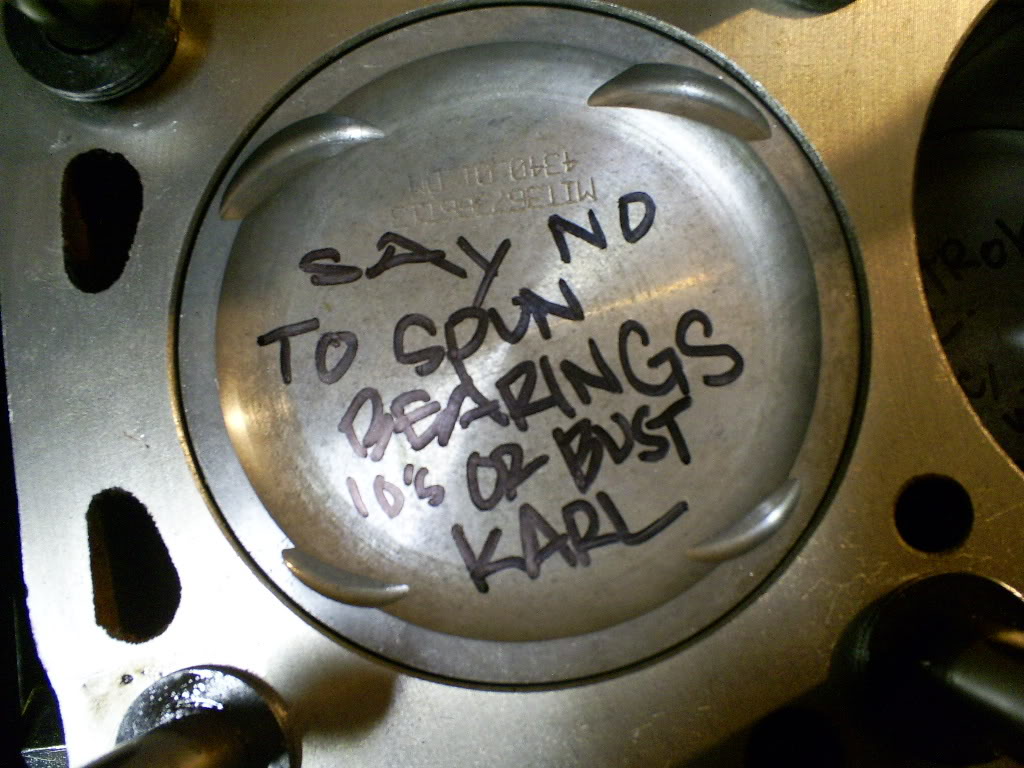
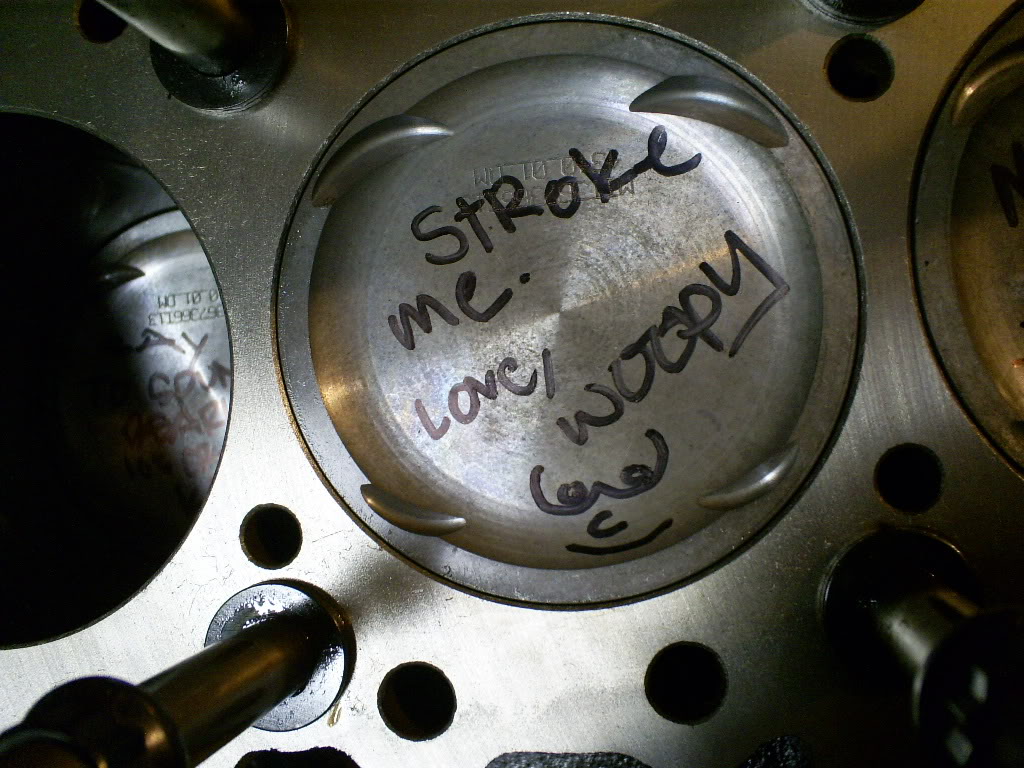
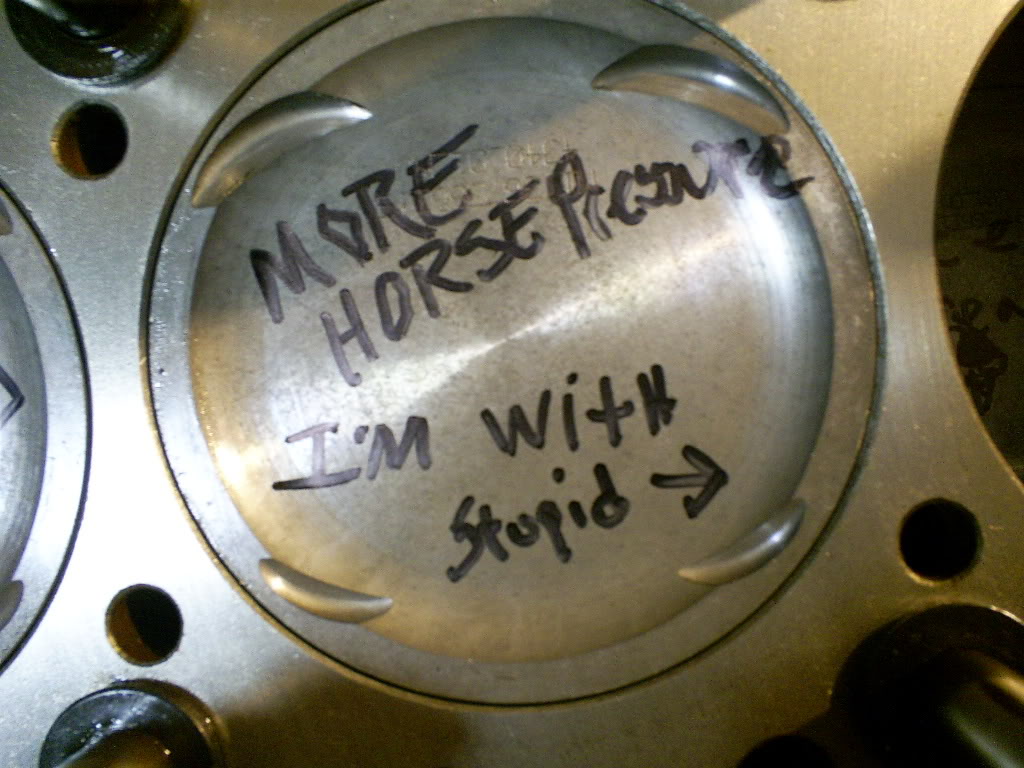
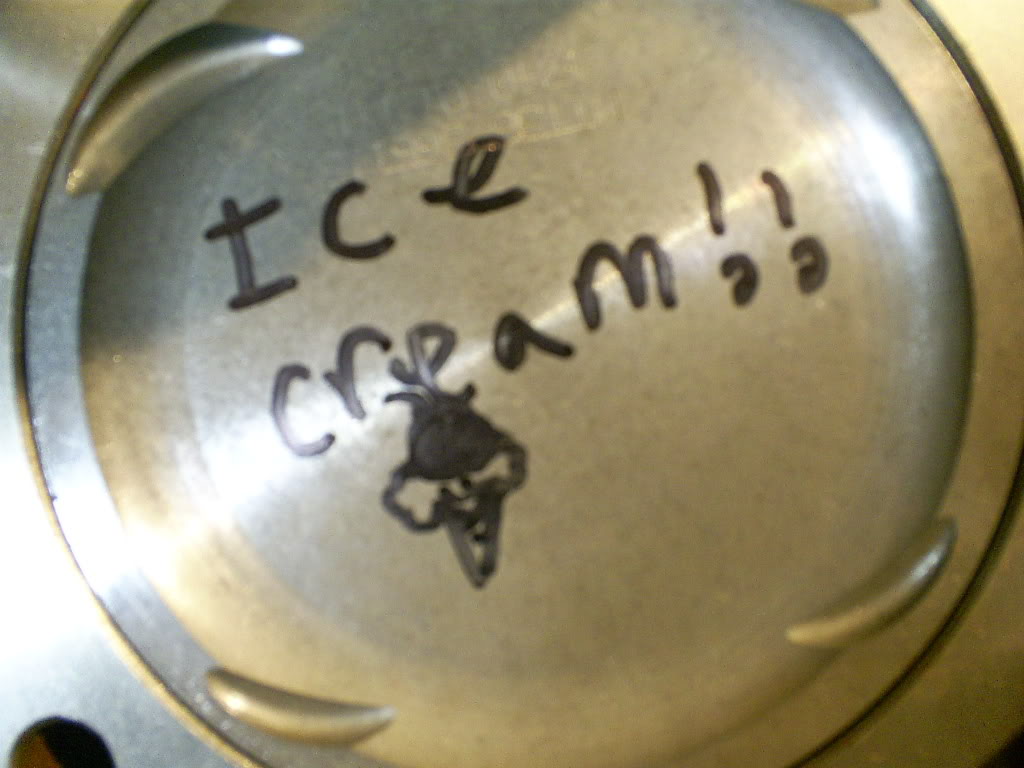
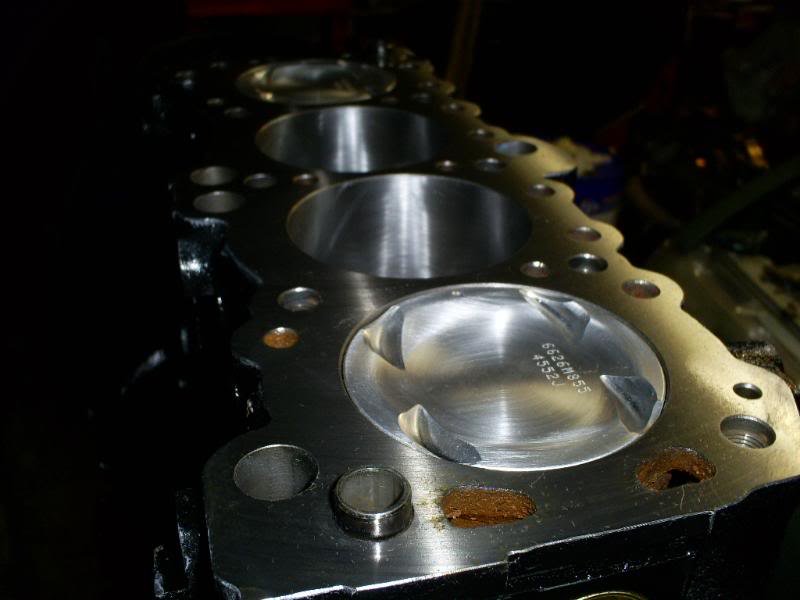
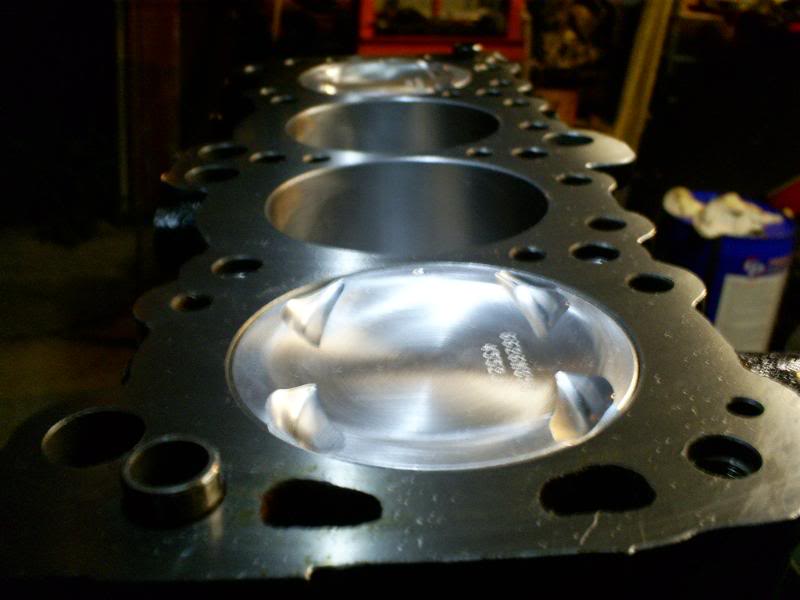
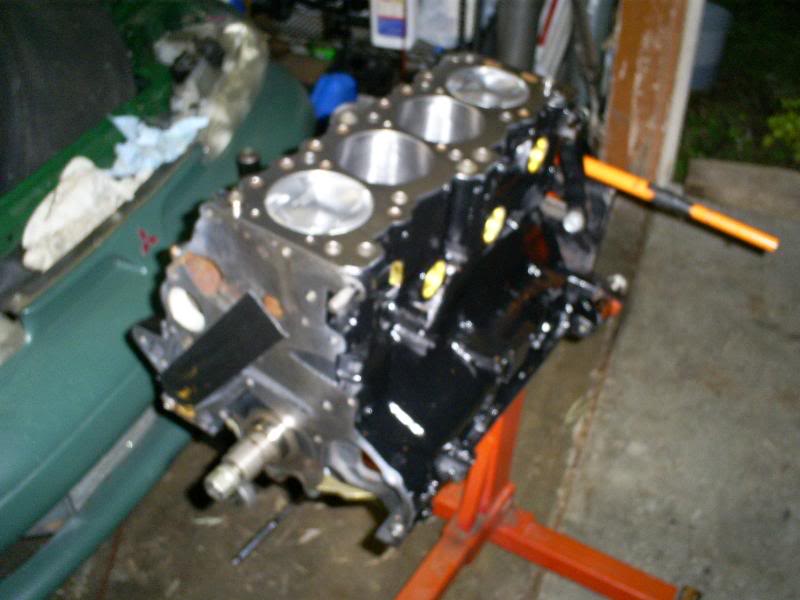
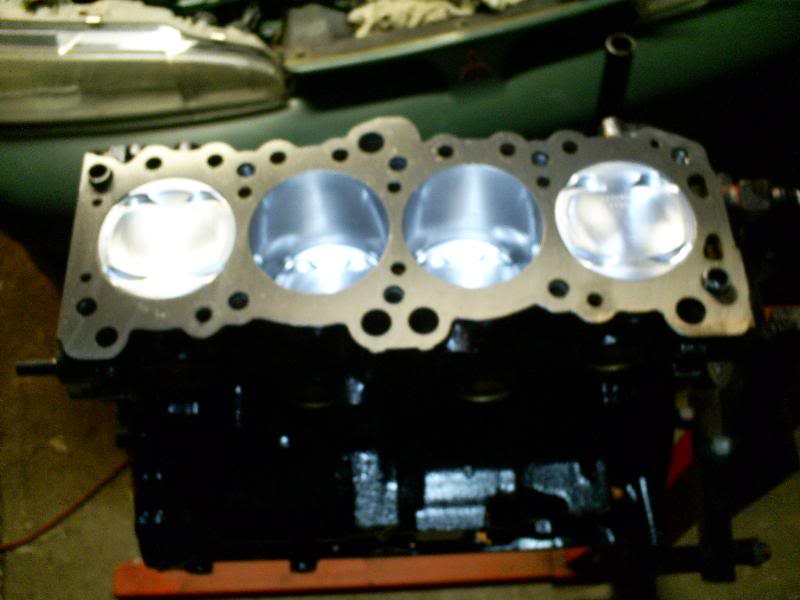
A month went by, and Dave’s delivered. Getting ready to start mating things together, me and my friends decided to sharpie up the piston tops.
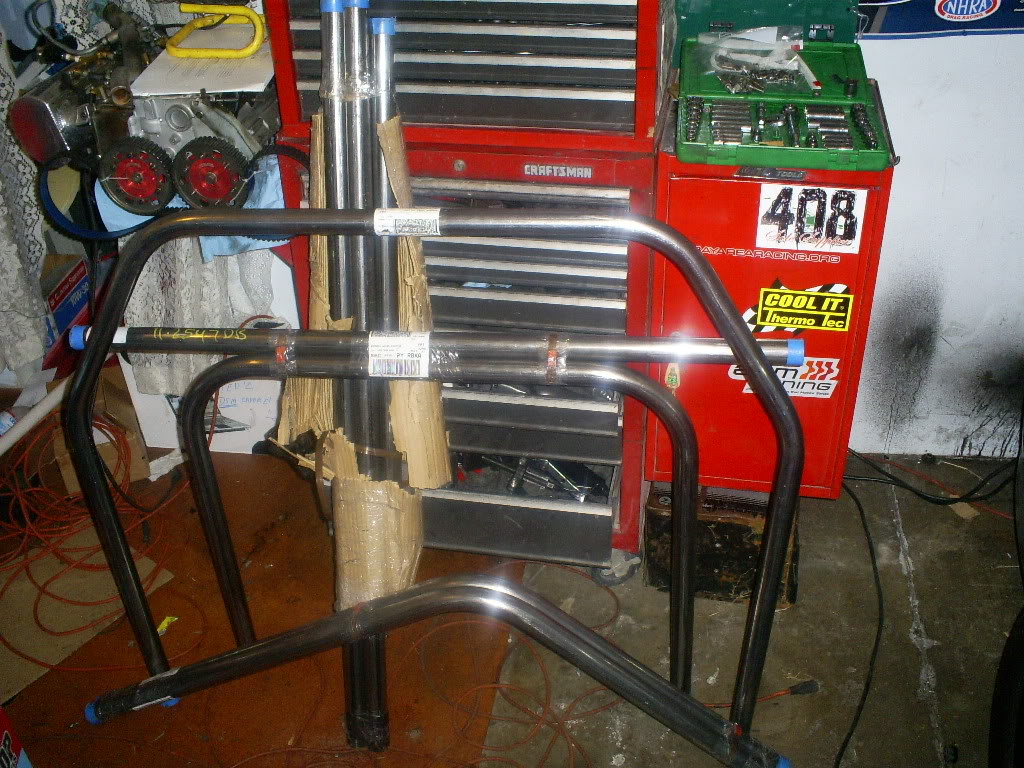
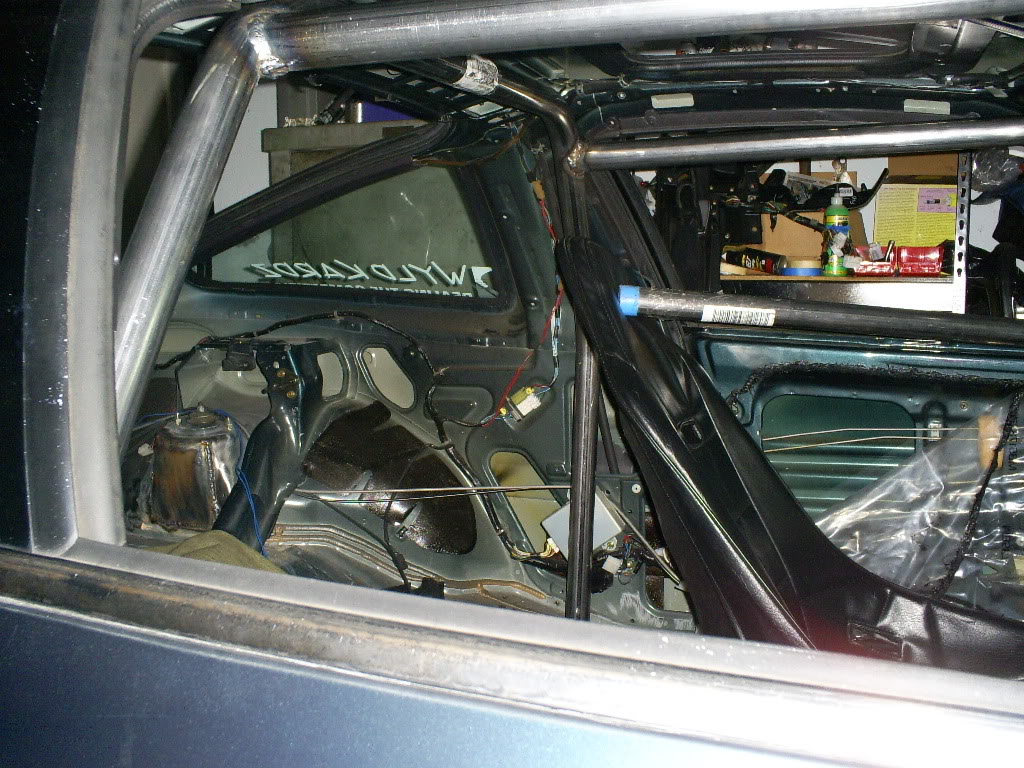
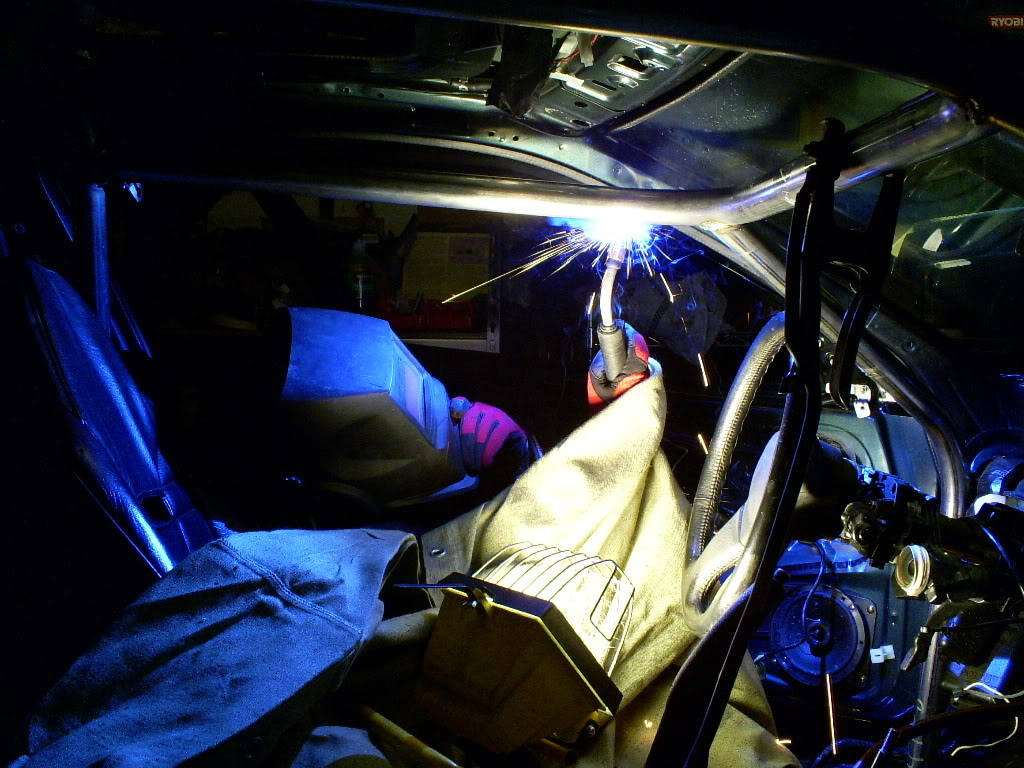
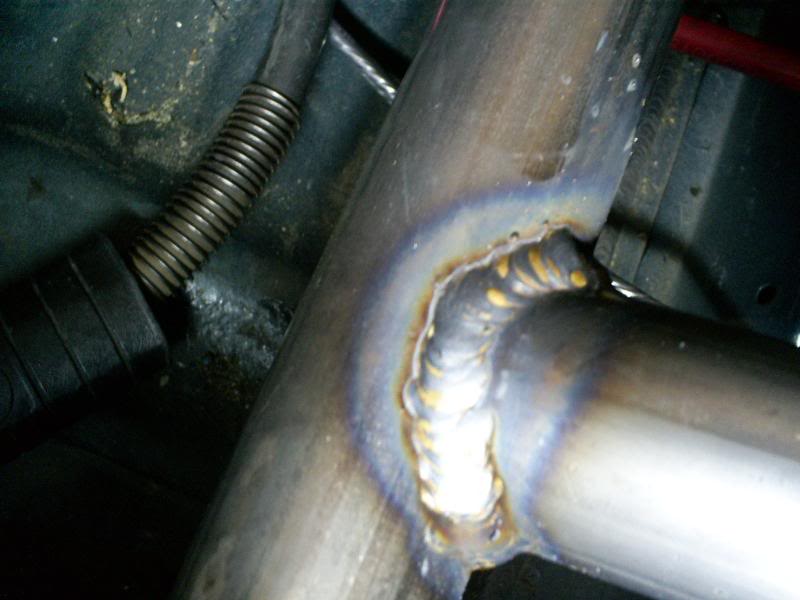
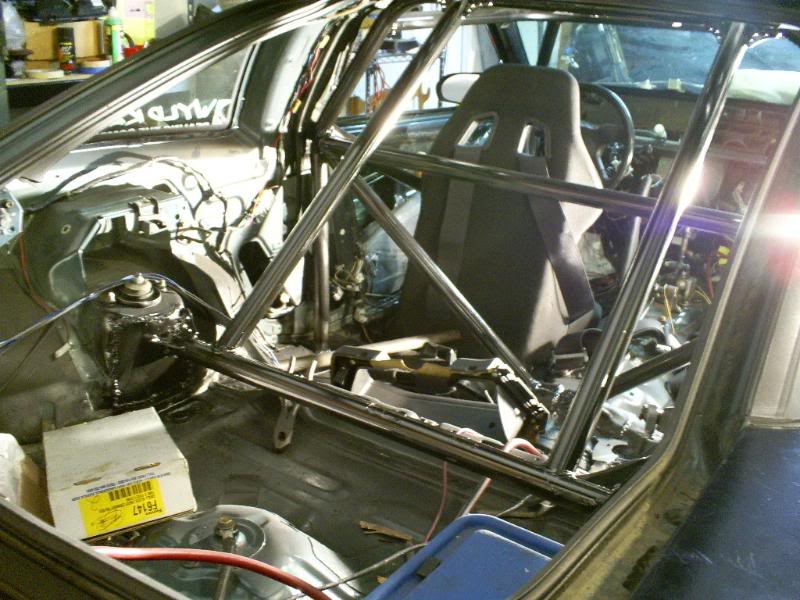
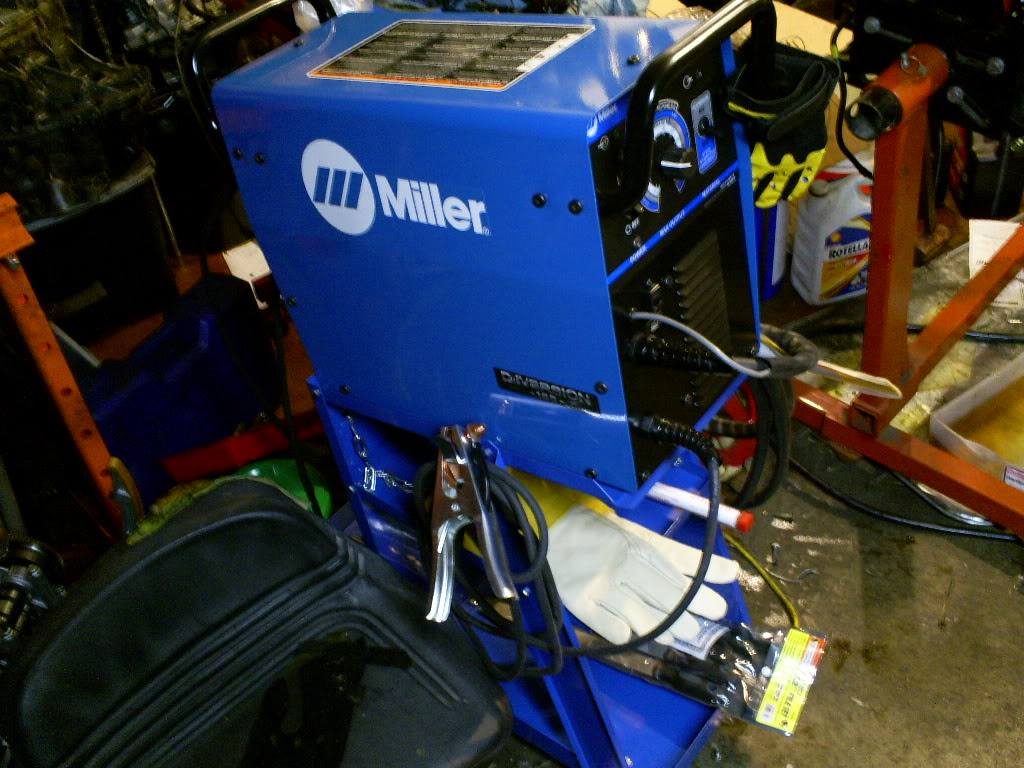
That whole month while the motor was in the machine shop, I went to work on an SW Racecars 10 point roll cage. It was one of the hardest things I have done to this DSM. My brother has been welding for about 15 years, and gave me a quick 10 minute lesson on how to bust decent beads using his millermatic 185.
This is what I got in the mail, shipped to my door for under 450 bucks.
My buddy Woody, and I went to work on stripping out the interior getting things right for the roll cage install ahead.
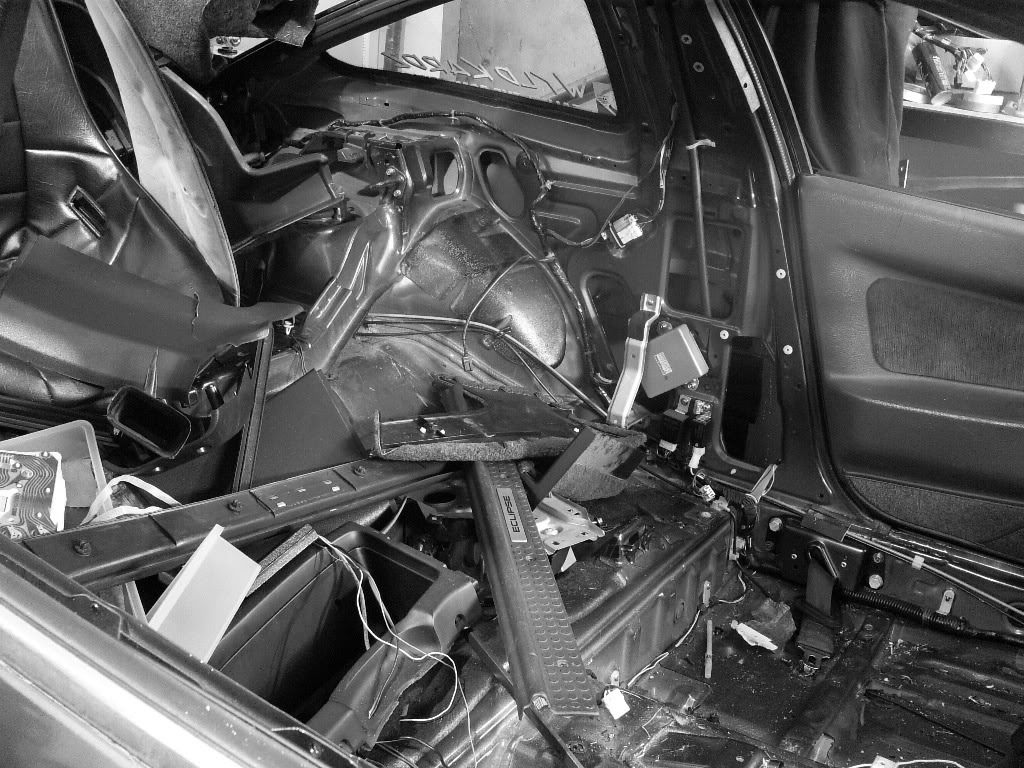
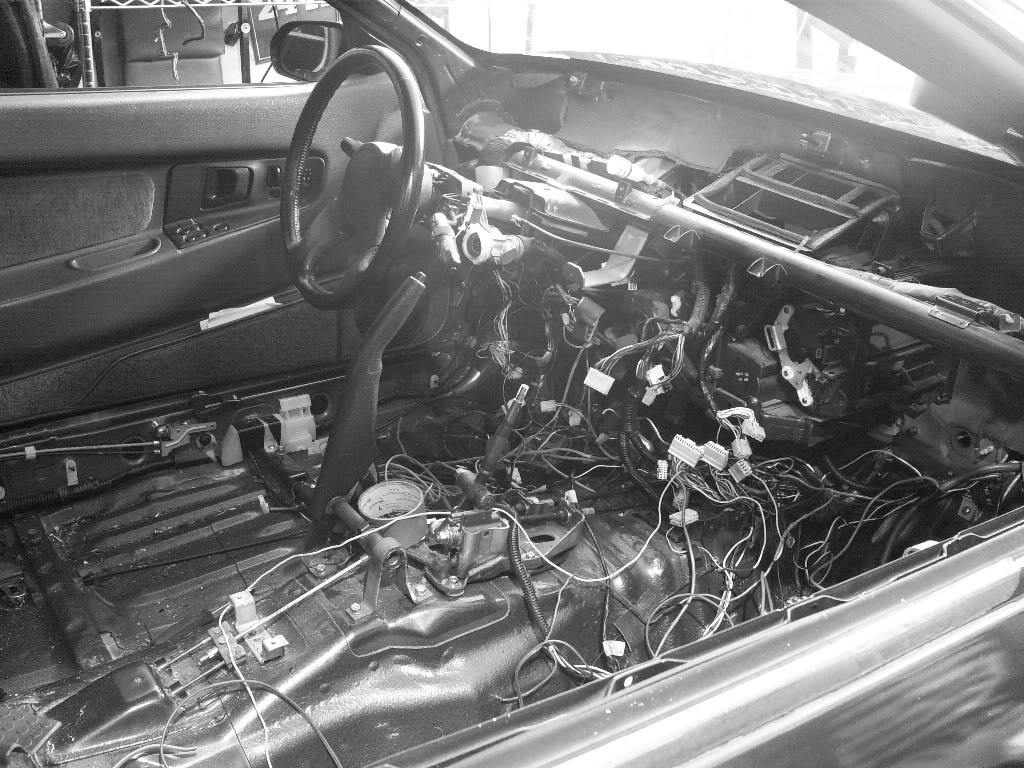
It was a week long project, on my first cage. Grinding, cutting, welding, measuring. Making sure everything was to spec for my height and size.

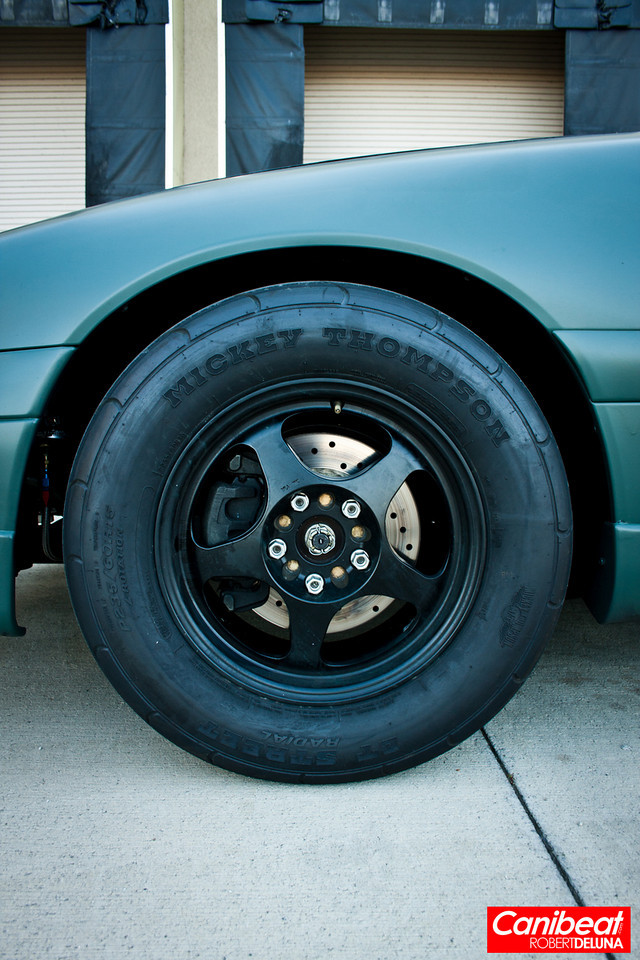
The traction issue was resolved with some budget wheels, and BFG Drag Radial 2’s. 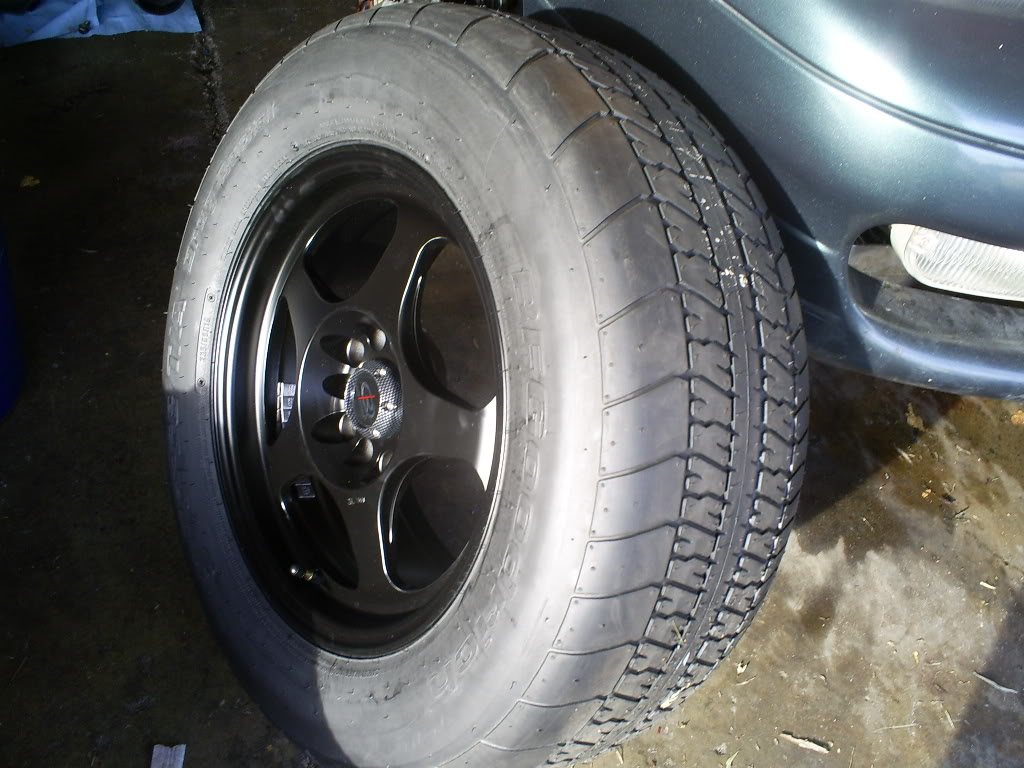
Here it is sitting on the meaties, caged up awaiting the heart transplant.
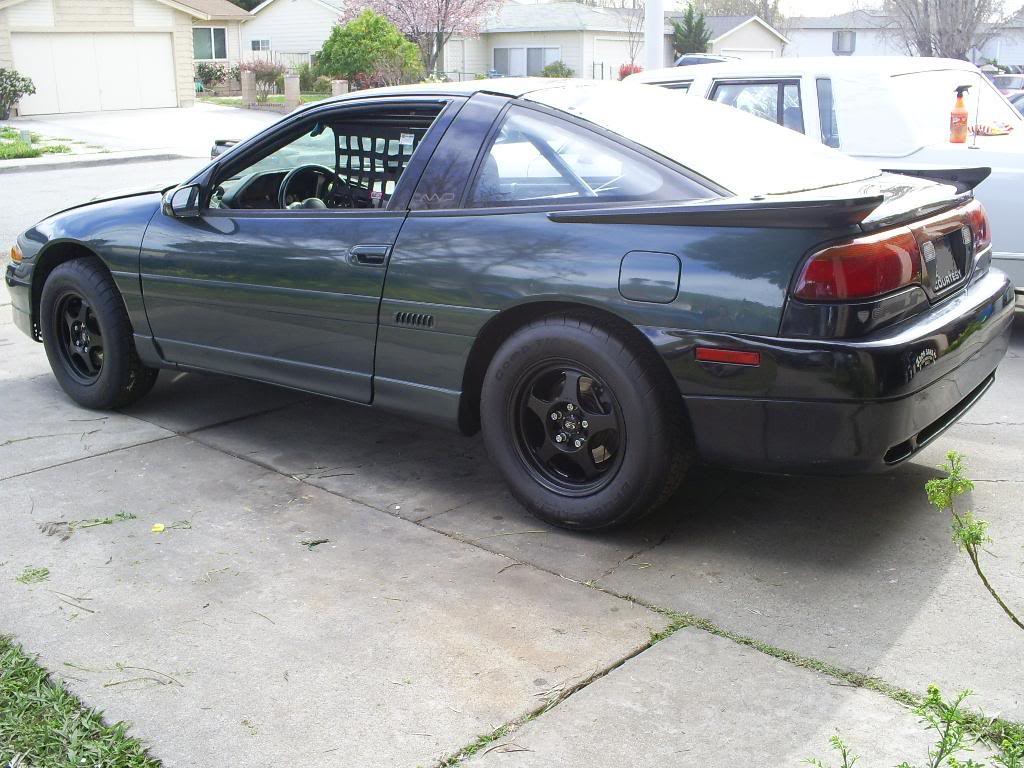
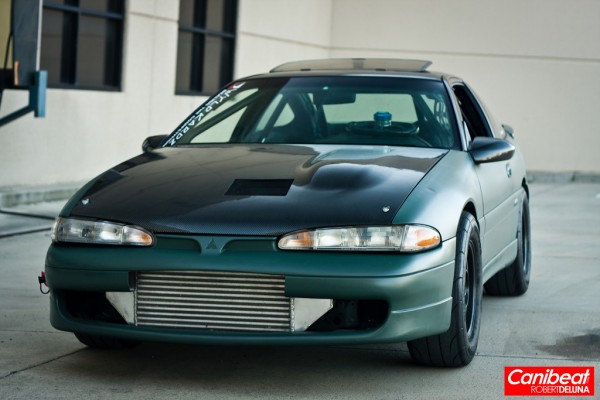
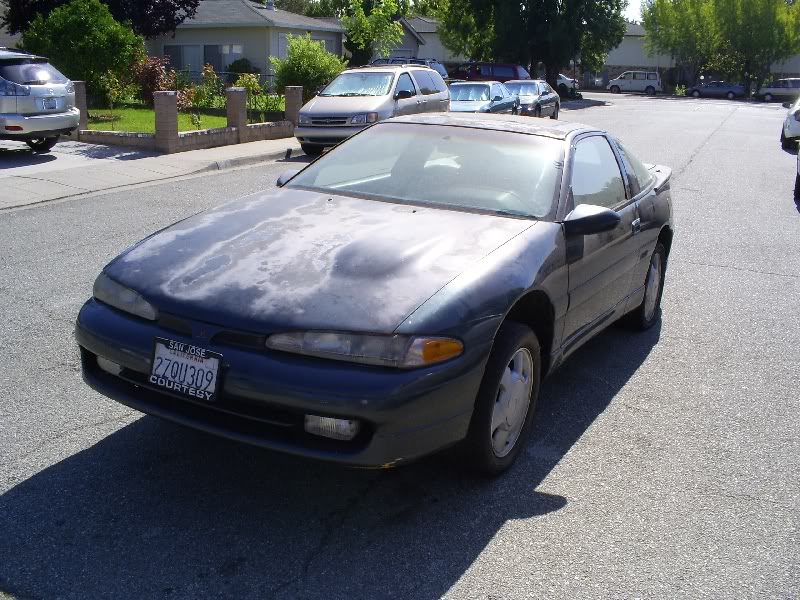
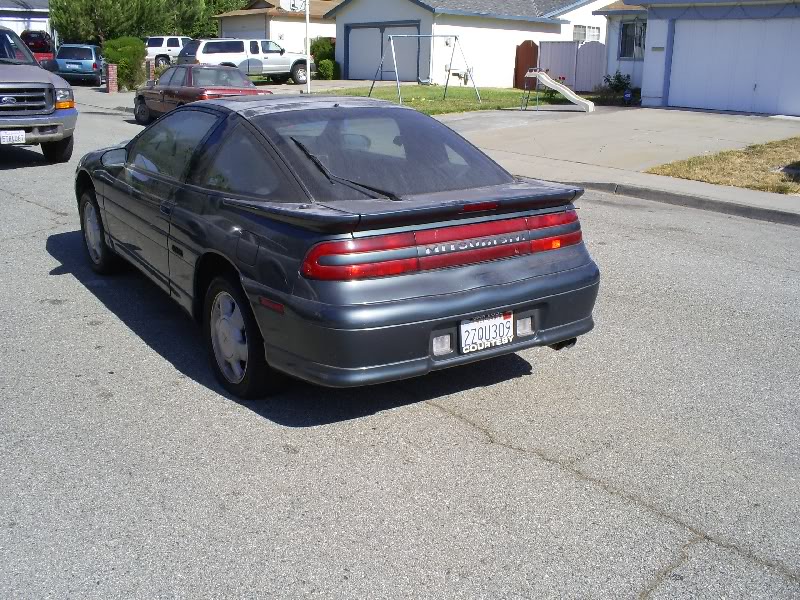
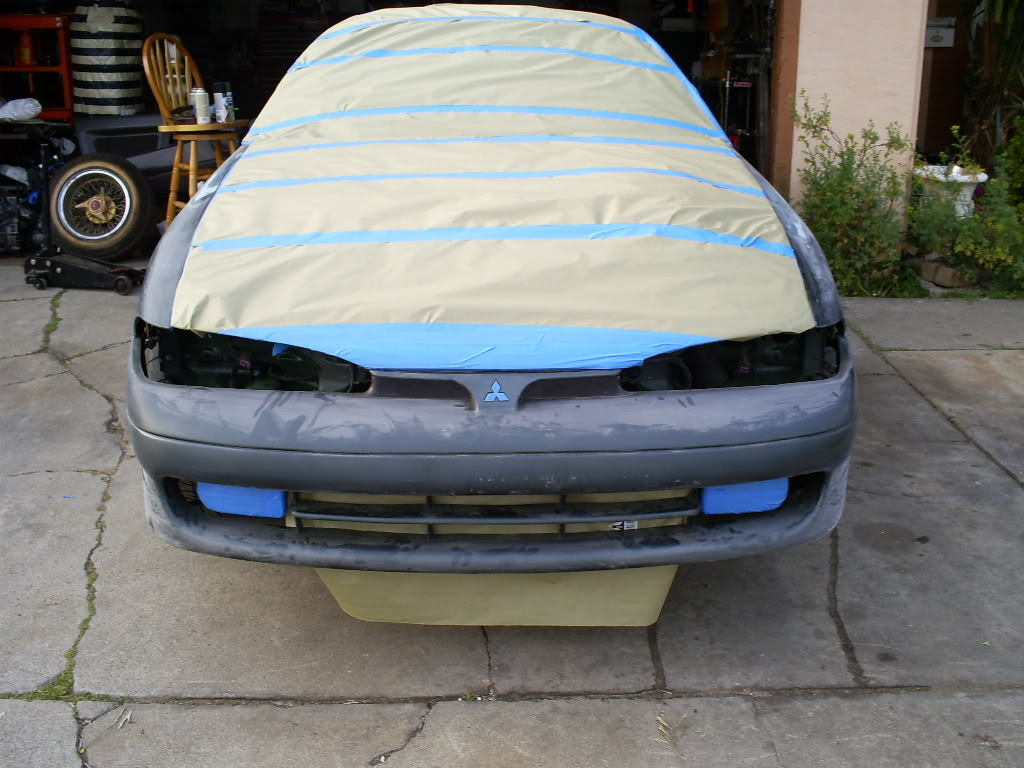
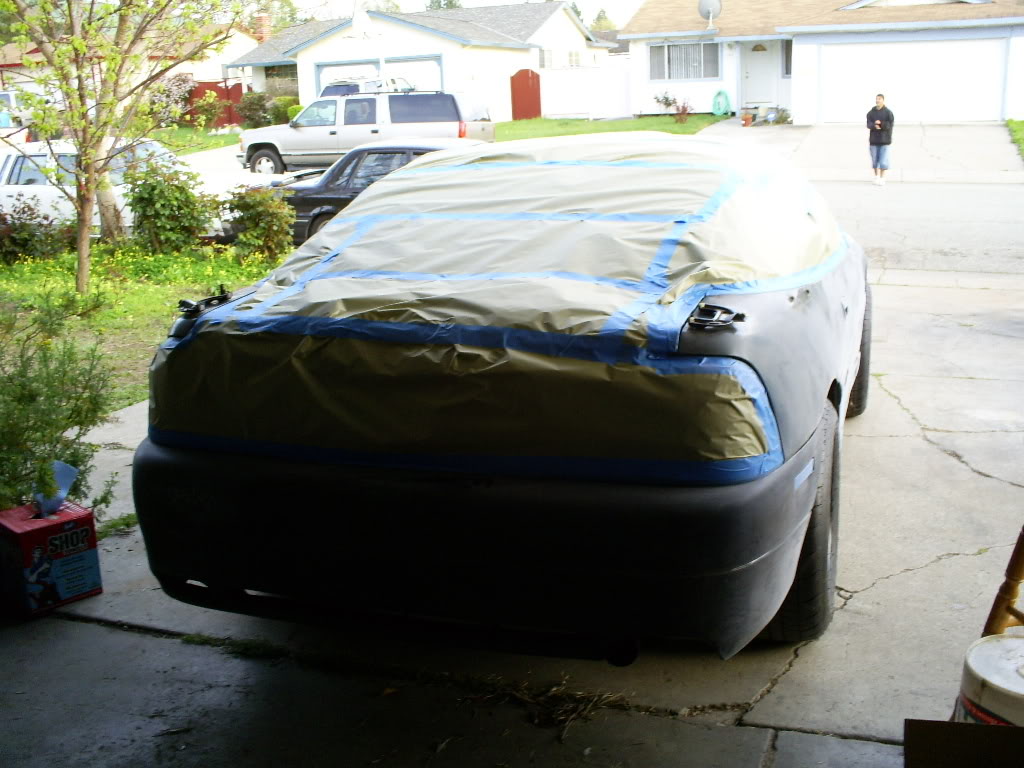
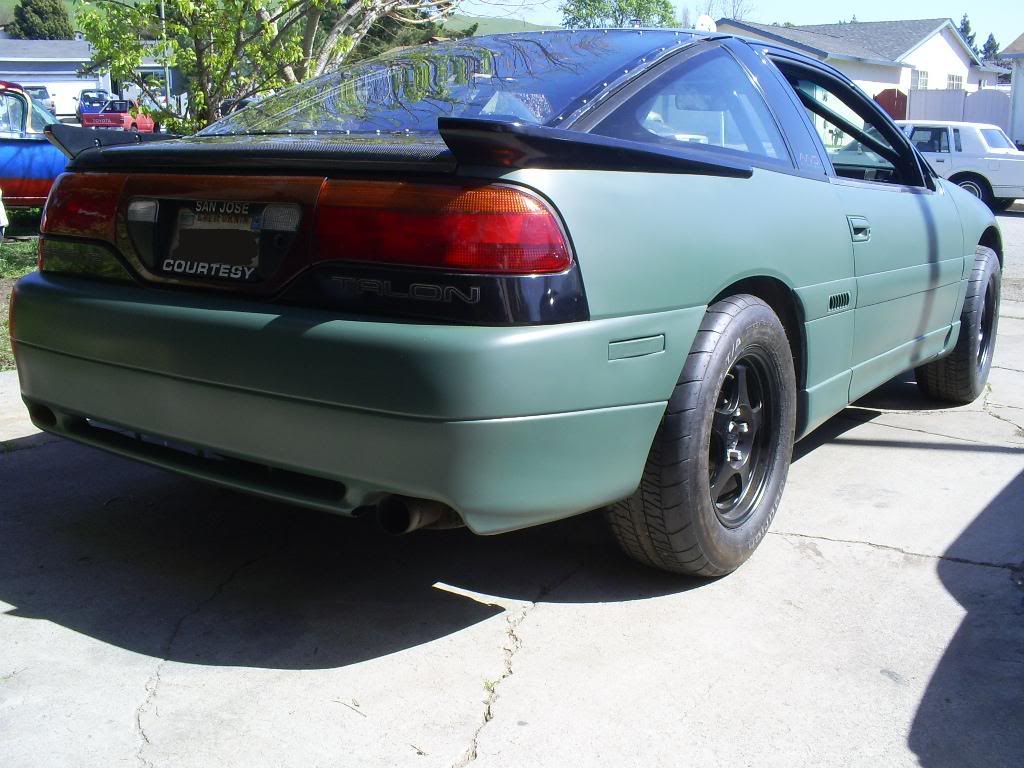
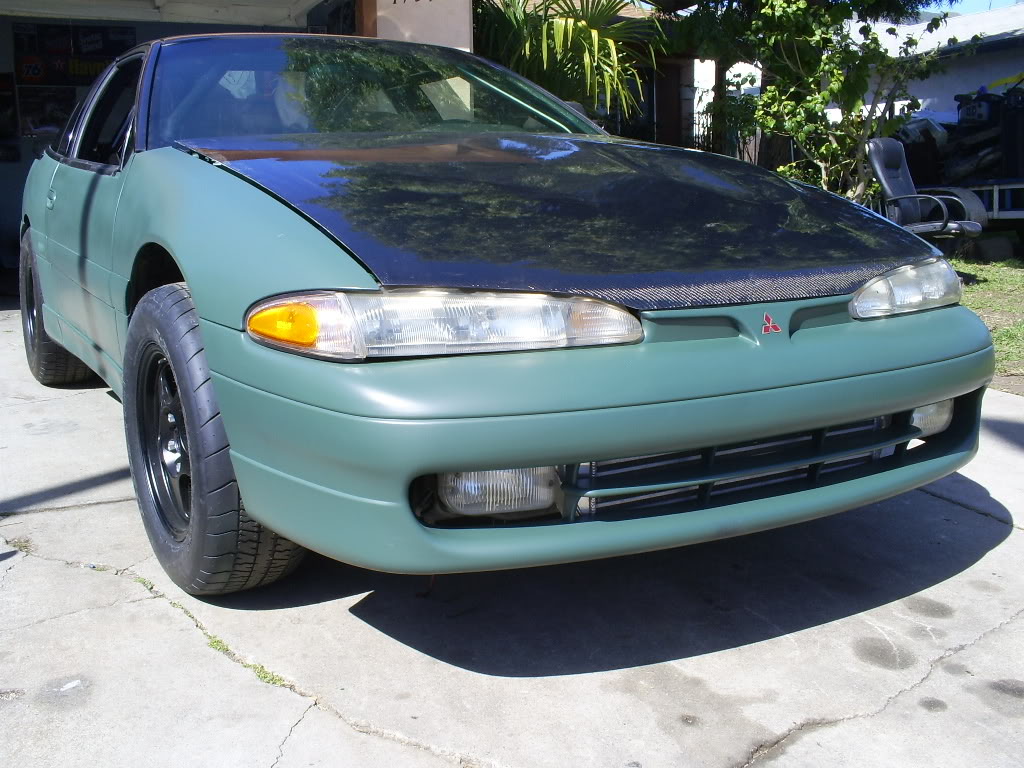
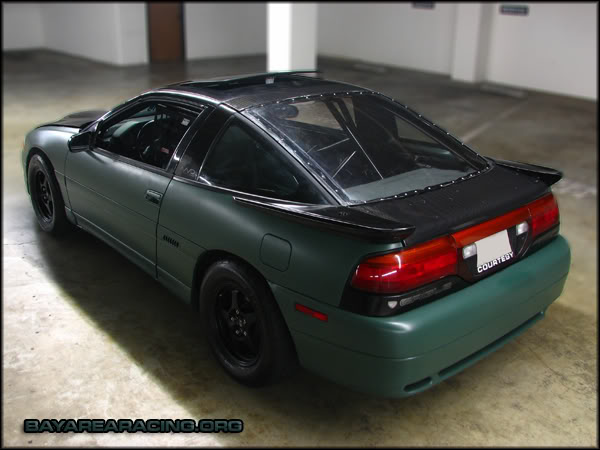
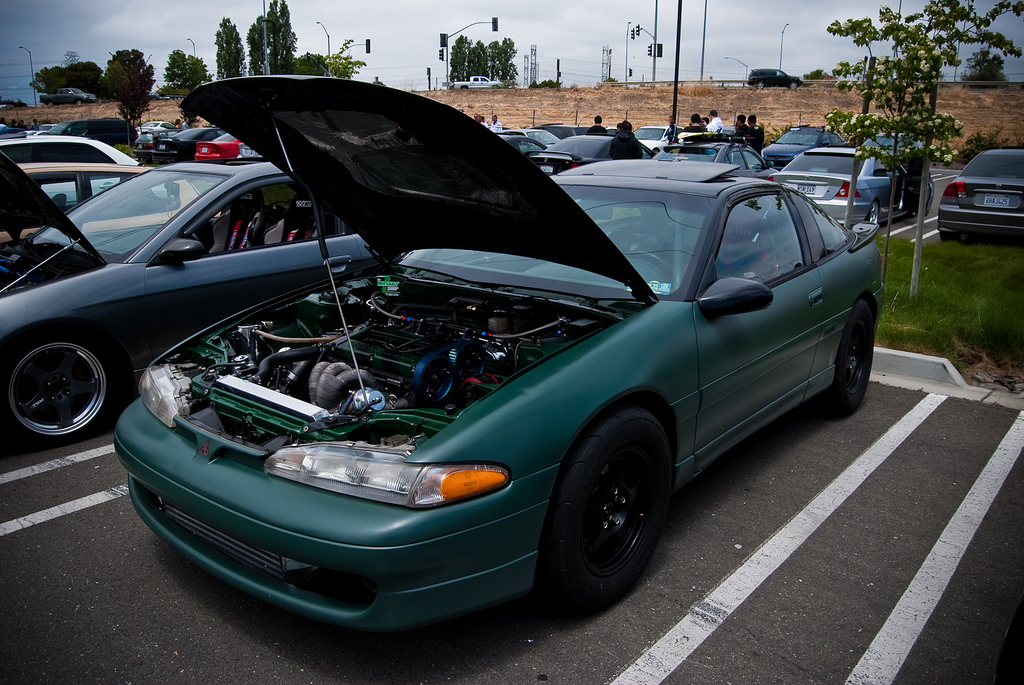
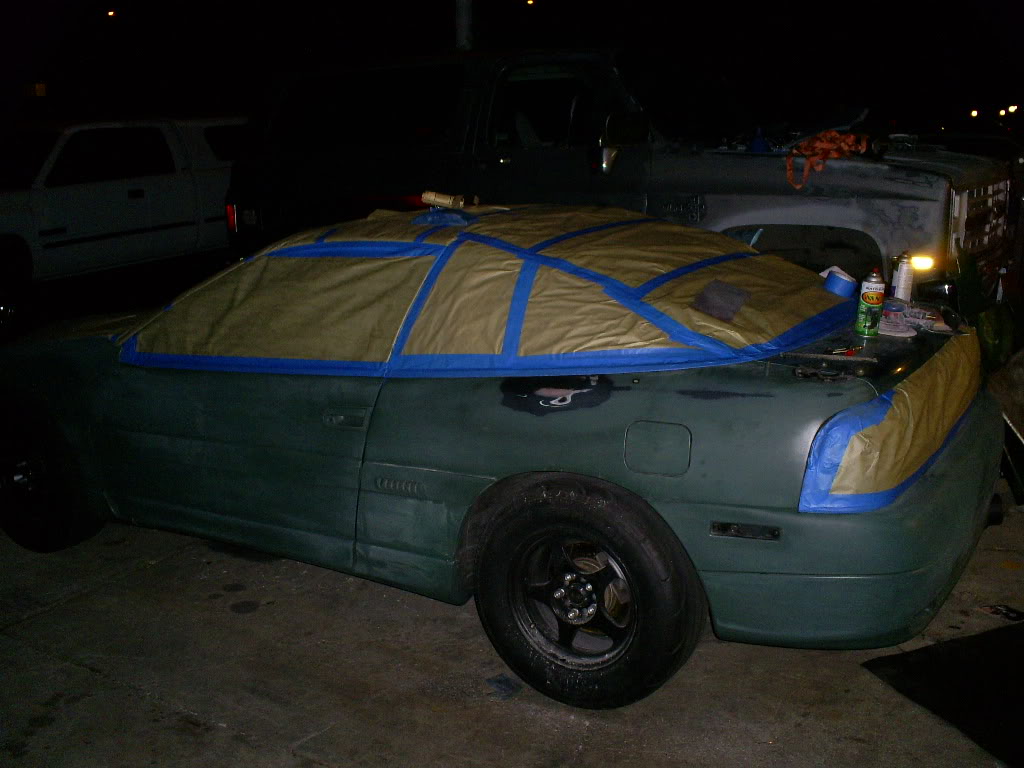
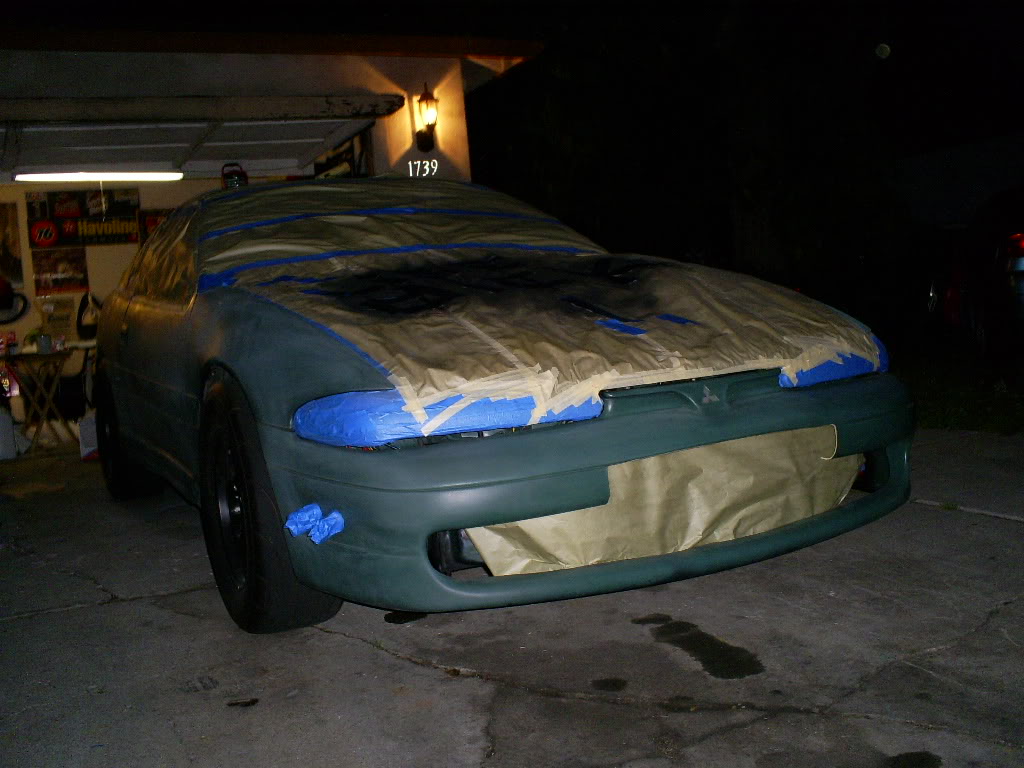
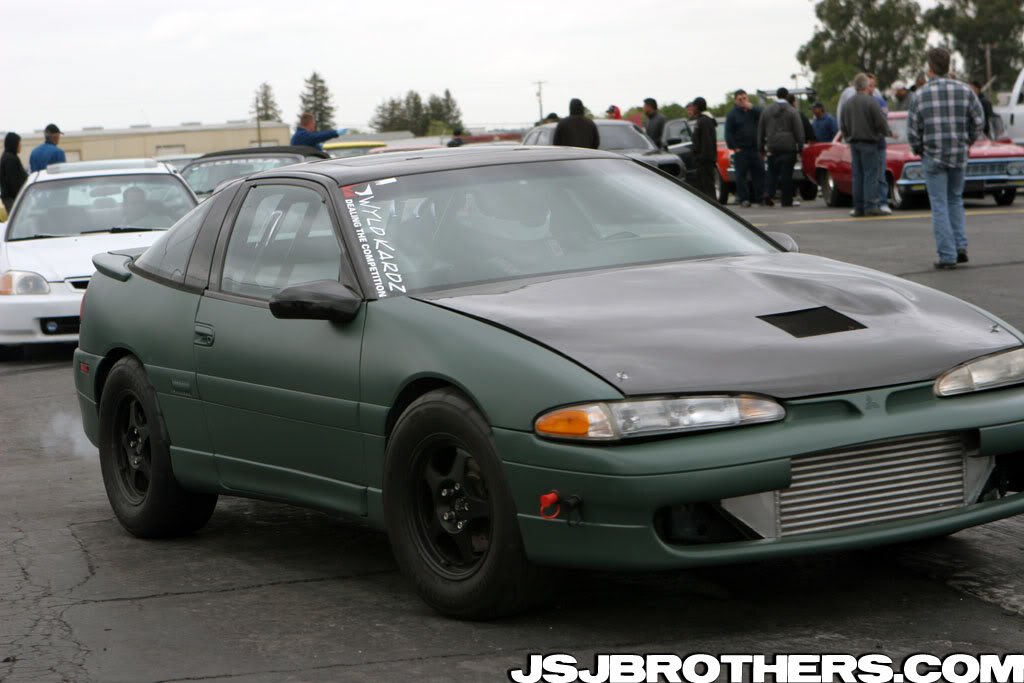
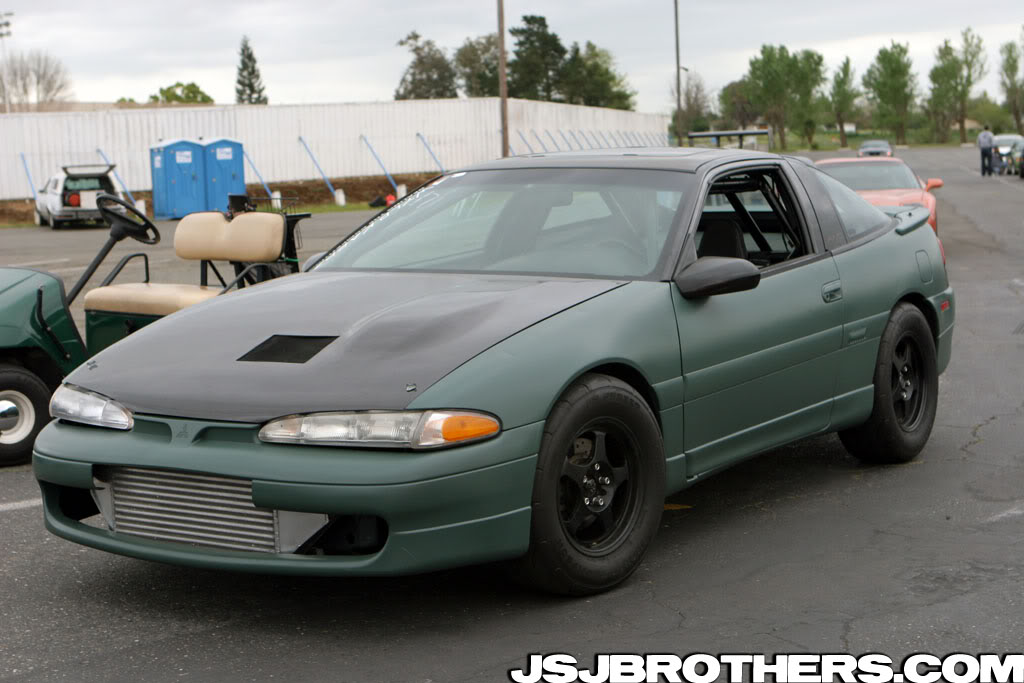
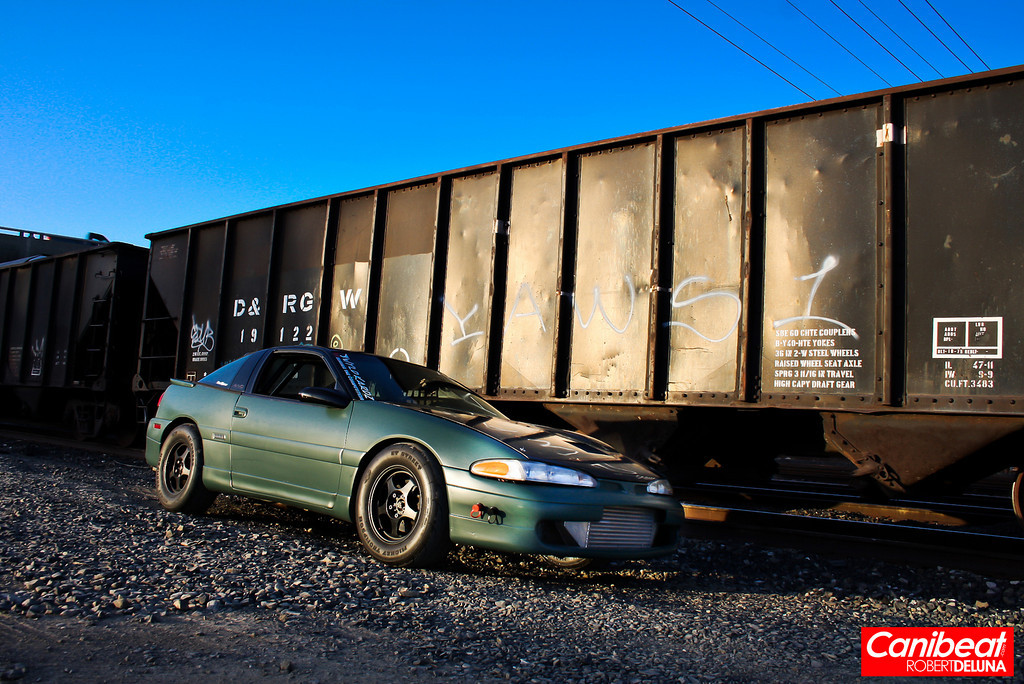
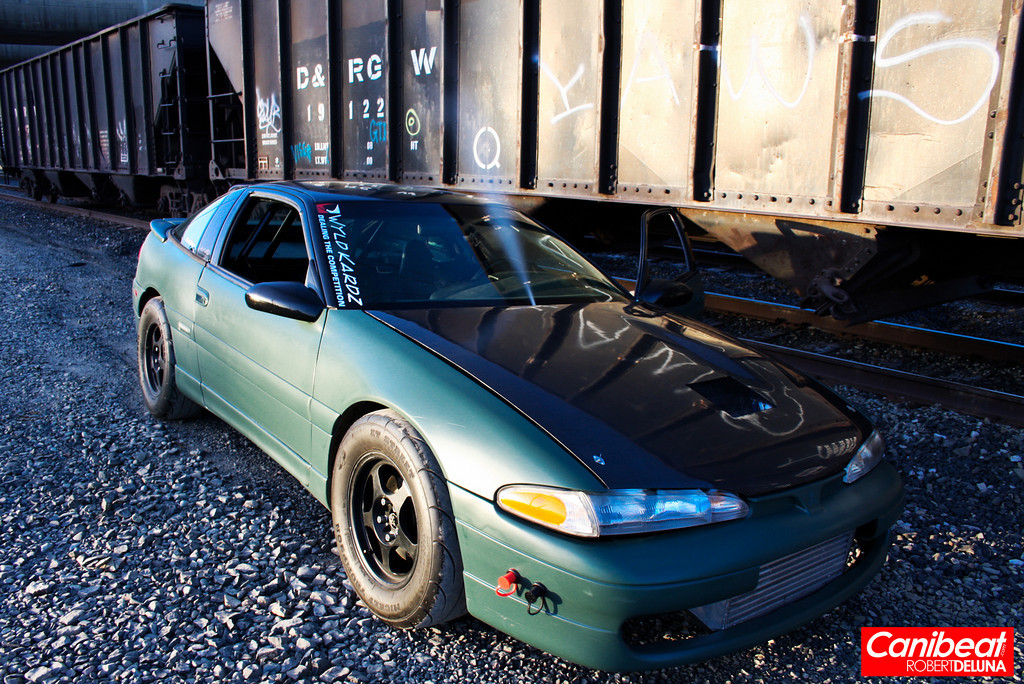
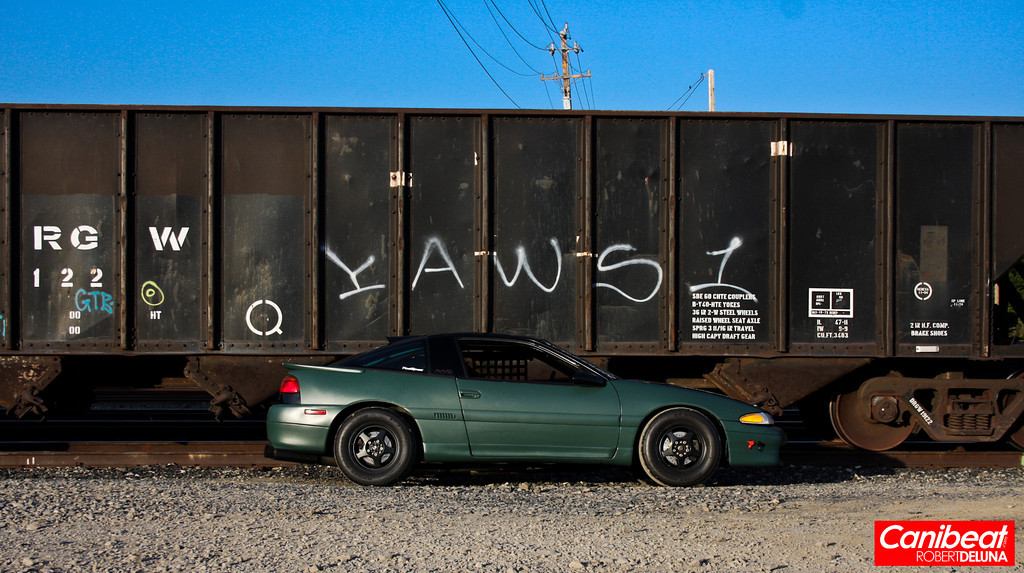
I decided the car needed a different look. Something that was cheap, quick and dirty. I headed down to my local OSH, and started looking at colors. I didn’t want to rattle can the whole car, I needed something that could be sprayed. Settling on a hunter green shade, I started to prep the body.
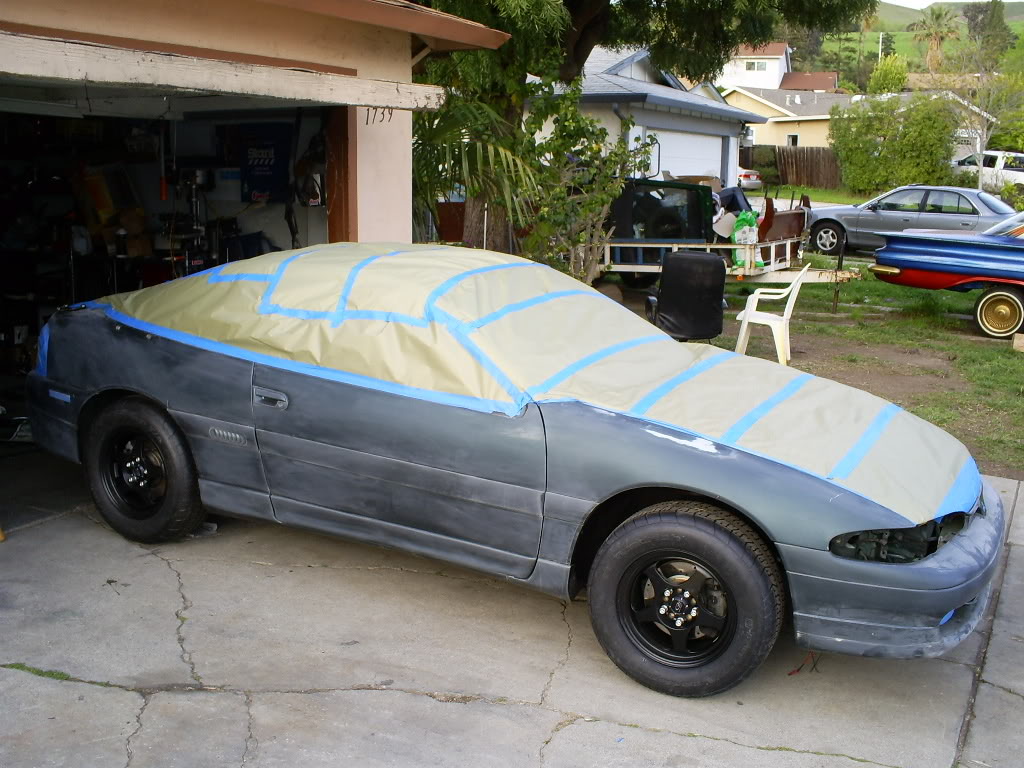
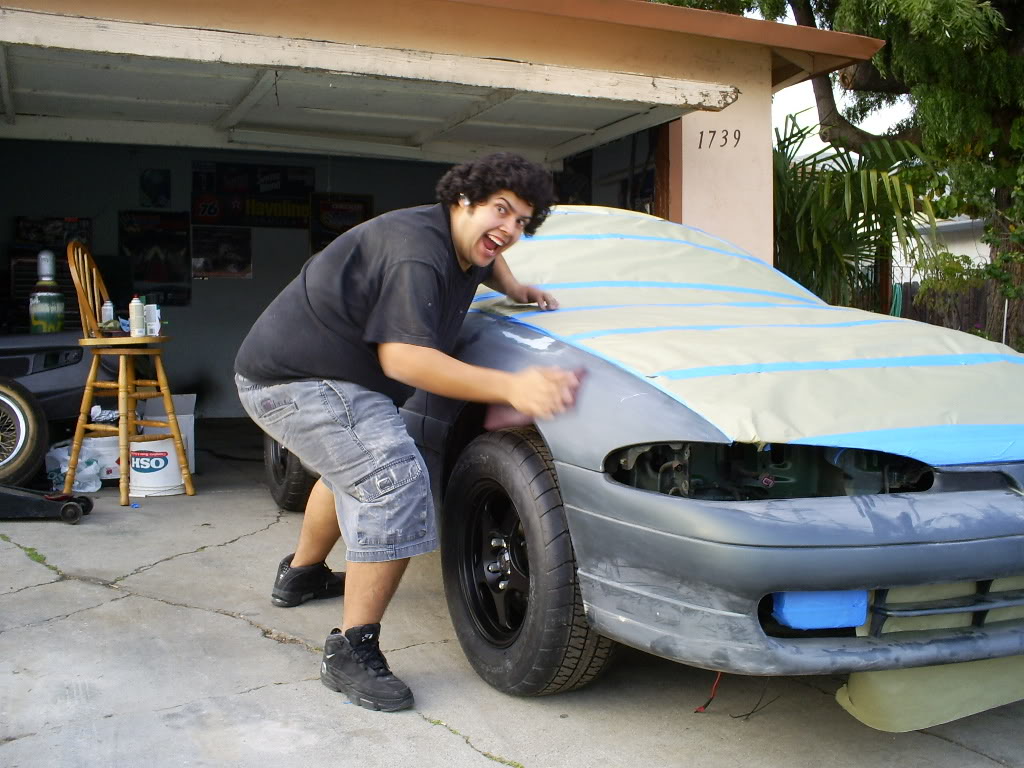
Yours truly with a fro.
I ended up spraying the paint on a warm sunday afternoon at about 1:30. I was waiting on the fire dept. to swing by and ask me what I was doing spray painting a car in my driveway? I had the air compressor running full blast, and the spray gun spewing paint all over the place. I was ready to show them that I was spraying a water based latex paint. You heard that right.
Giggle all you want, here she is. $20 for 2 quarts of paint and I only used one.
After wrapping up the engine install, redoing some wiring, and finishing up the cage it was time for a break in. I followed the previous steps of breaking in the engine, and set off to do a hard break in. I pulled timing, set the boost low at 20 psi and had a fresh 5 gallons of 100 octane in her. A few half throttle rips brought a warm feeling that I almost forgot. I was in love with boost all over again. Drove her back home, and changed the oil again. 20w50 VR1 went in, as well as a fresh set of BPR8ES’s.
I turned on the meth, raised the boost and went out to get a rough tune. This friday night was going to make or break the CMI event. I did a few rips and settled on 30 psi out of the 35r, and the tune was prety safe. The car was ready for the local CMI event.
My oldest brother Angel wanted to head out to the track with me and the crew. I was excited to have him with us because he is the die hard V8 guy, and wanted to see what I had going on.
First pass, straight off the trailer netted me something I have been waiting for and working so hard to achieve.
[youtube]http://www.youtube.com/watch?v=IvU1Gl3ydrY[/youtube]
10.5@133 with an easy going launch. The car felt so alive, and powerful. Bull frogging it out of the hole like never before. This Saturday test and tune was going to be one to remember.
I left the track that day with a 10.4@136 on the same tune from the night before.
After a couple runs, I decided to save it for Sundays main event.
First pass that day against TrecTec’s talon ended the fun. I roasted the clutch, but went on to baby it in hopes that I would catch a nice streak of luck in the qualifiers. It was a no go. I was eliminated and ended up with an overall great weekend, and new standards.
Specs on the car.
92 GSX
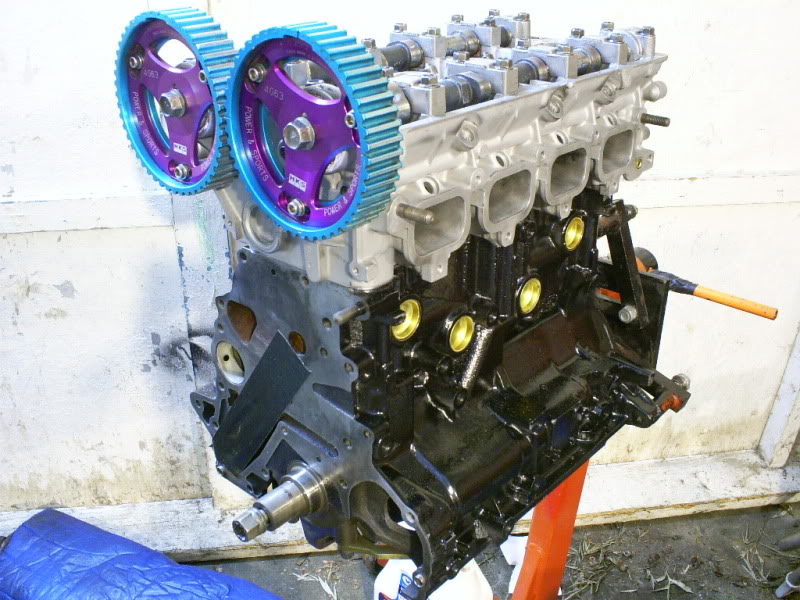
Dave’s engine & machining built shortblock
Groden/Mahles 8.5:1 bored .020
4 inch intake/ K&N filter
Balanced short block
ACL coated race bearings
Stock weight crank other than undersized .010
ARP mains, rod bolts, head bolts(L19s on the head).
Kiggly Main girdle
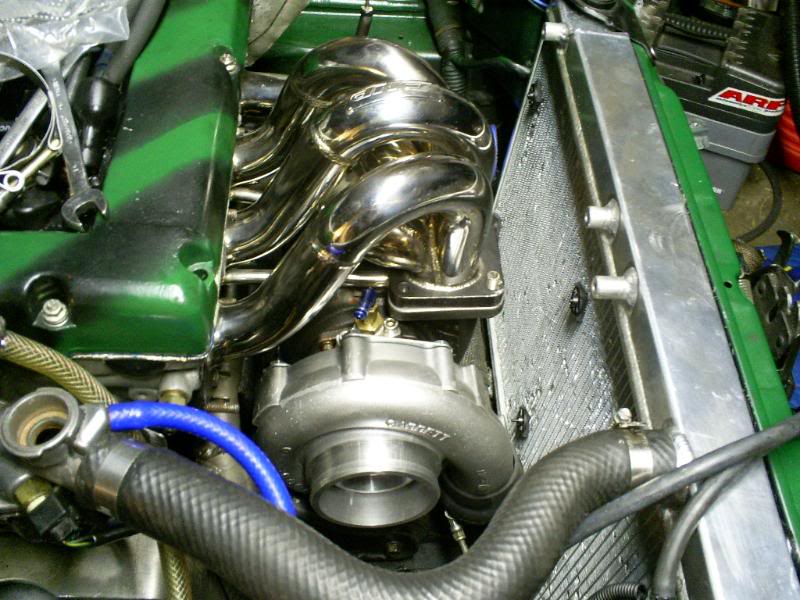
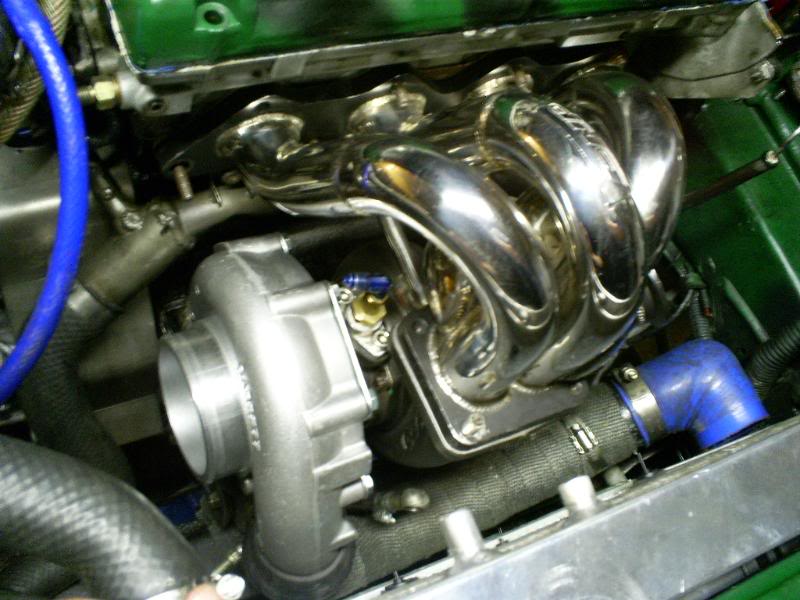
Off the shelf GT35R with a .63 A/R turbine housing
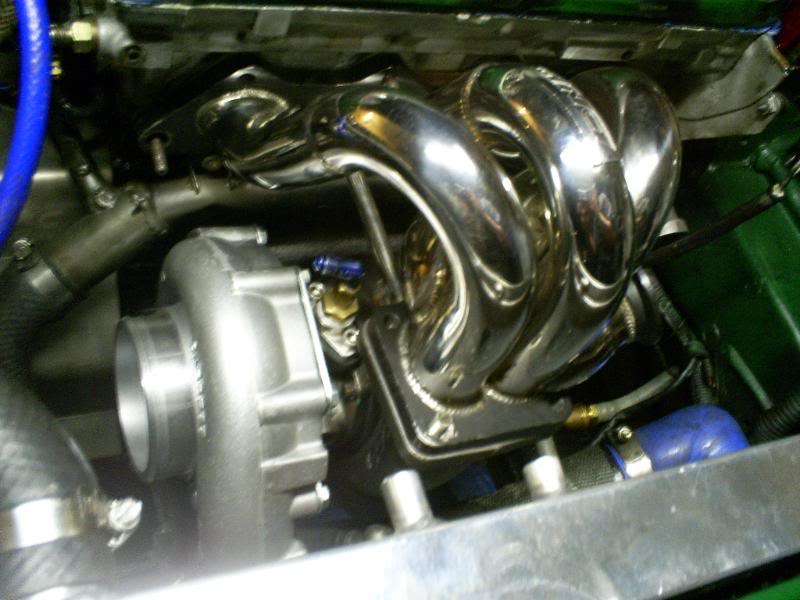
Turbonetics T3 mani with the wastegate hole ported all to hell.
Tial 35mm WG
3 inch turbo back DIY mandrel bent exhaust. Summit resonator topped off with a magnaflow muffler.
Weapon R fpr, and catch cans.
Venom intake manifold
BBK Mustang throttle body.
Direct port meth injection activated via DSMlink.
GM Maft.
GM 3.3 bar map.
GM (saturn) alternator
Modified Jays racing relocation kit for the saturn alt.
2.5 inch intercooler piping all the way to GM MAF. Goes to 3 inches on the other side to throttle body.
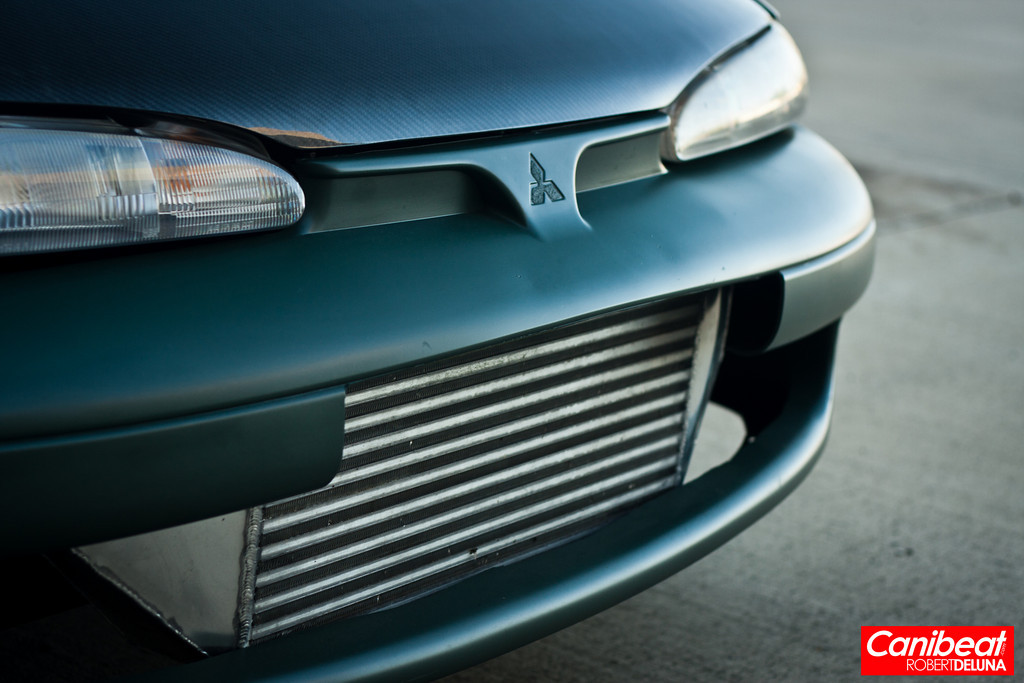
FFTec front mount. 2.5 in 2.5 out
Bowl work on the head.
FP2 cams
Crower springs and retainers
EngnBldr.com stock sized/undercut valves, magnese bronze guides and lifters.
Cometic HG (non hp) non o-ringed head/block
BPR8ES
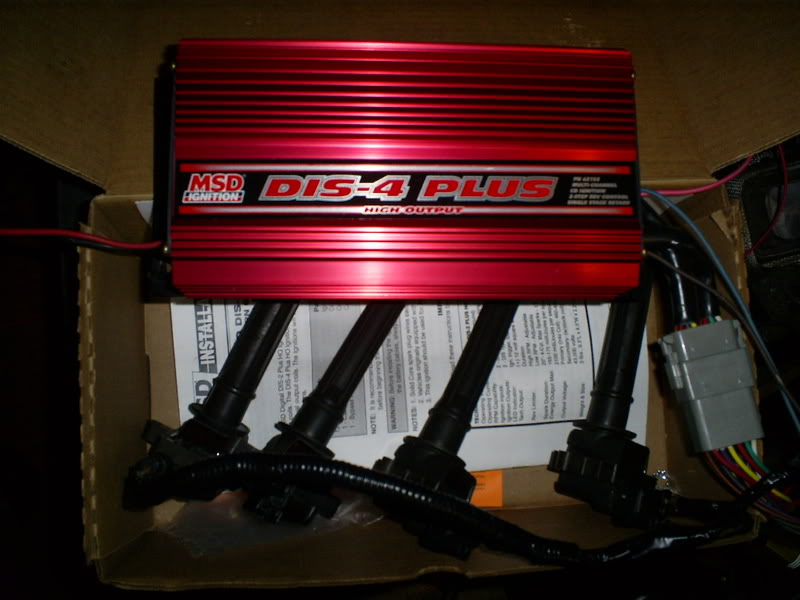
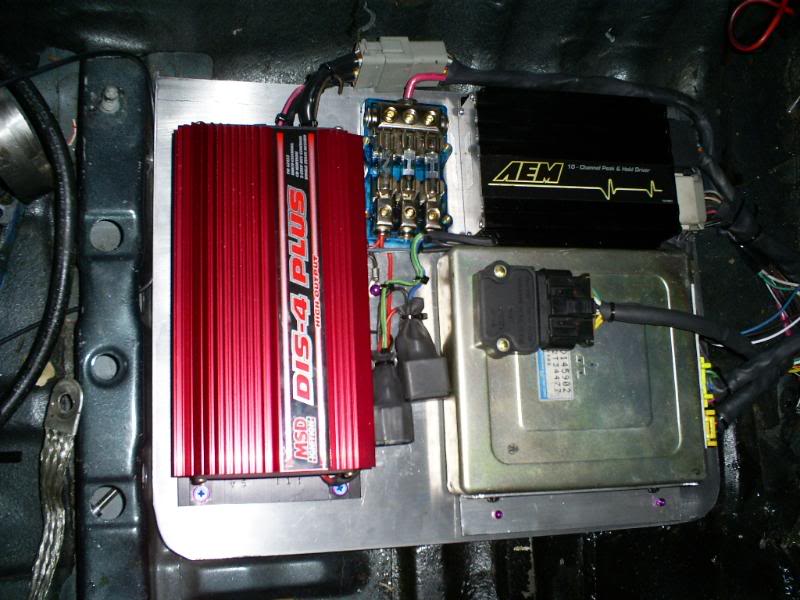
MSD Wired
NO ignition amplifiers/boxes
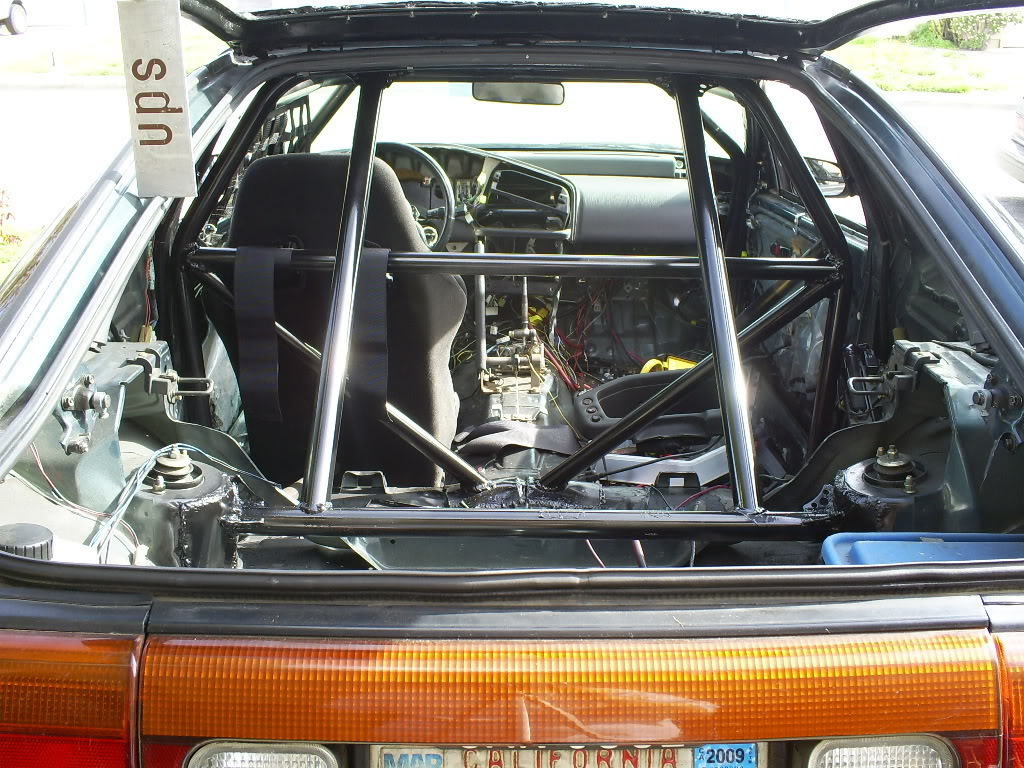
SW Racecars 10 point roll cage.
5 Point camlock G-Force pro series harness.
RJS window net.
Competition Engineering swingout.
Corbeau seat
Removed: front and rear bumper beams, P/S, a/c, heater.
Moroso battery box
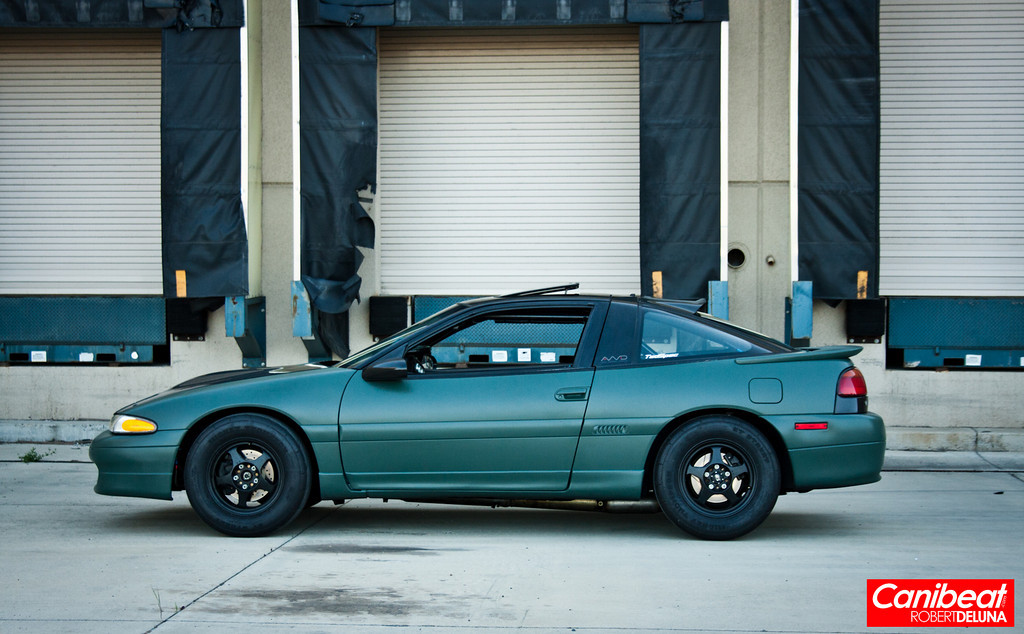
BFG DR 2’s 235/60/15
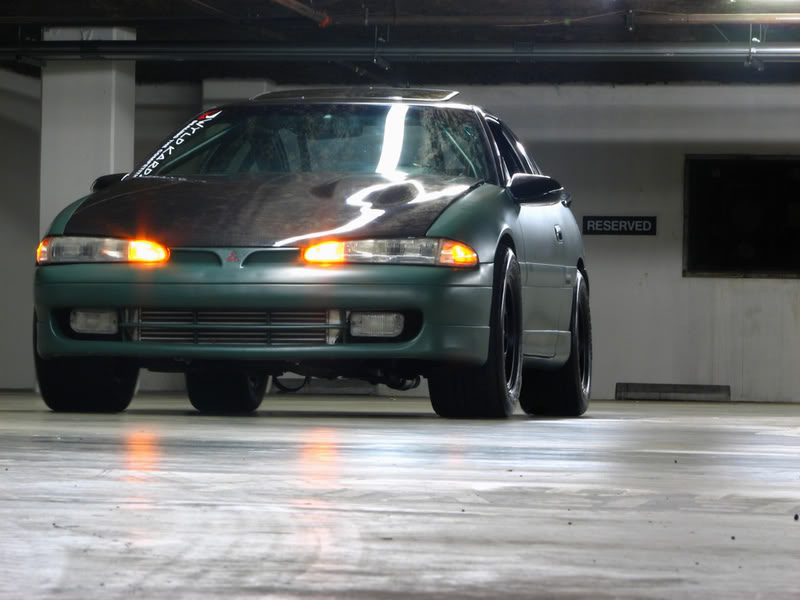
Rota Slipstream 15×7’s 40 offset.
EBay special coilovers in the rear, on AGX shocks.
Eibach sportlines in the front, on stock blown shocks.
Driveshaft shop aluminum driveshaft.
Summit driveshaft loop.
4 bolt
Transmission is a garage special-Welded center diff, dual synchro 2nd gear.
Used to run act clutches (2600 on the street disc, then 2900 on the street disc).
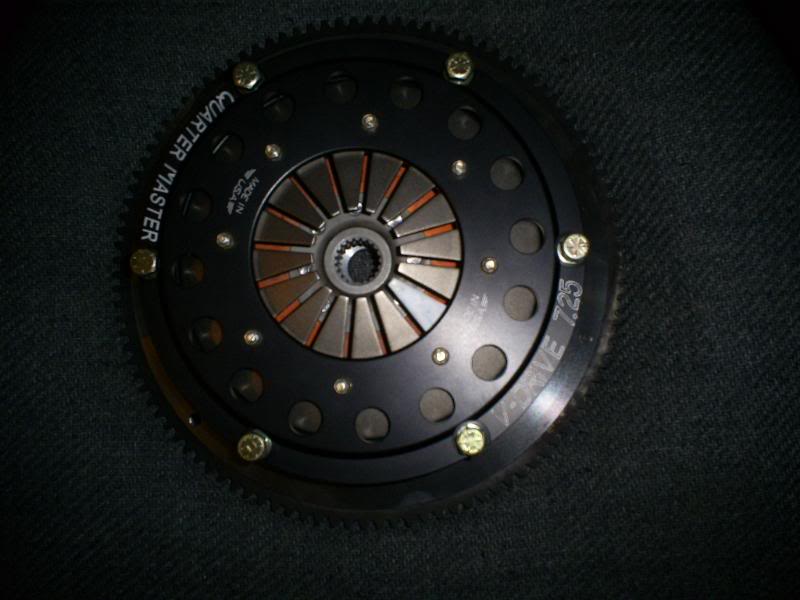
Now running the Competition clutch 4 puck sprung hub setup.
Stock clutch fork, stock master and slave cylinders.
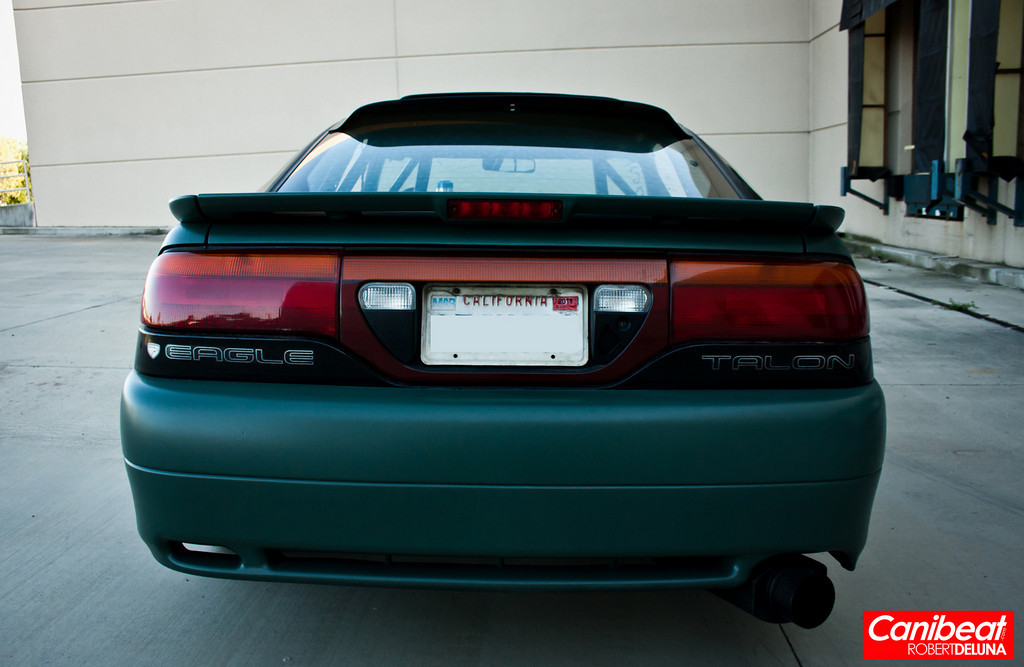
92-94 Talon rear end conversion.
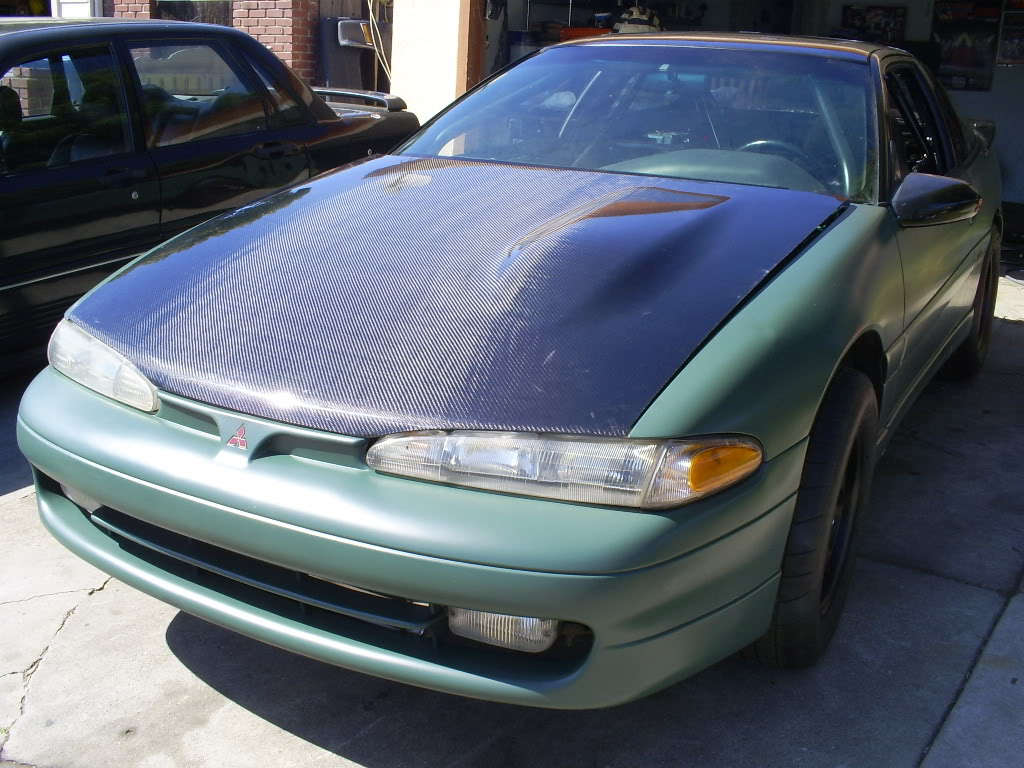
Hi-Rev Carbon fiber Hood and hatch.
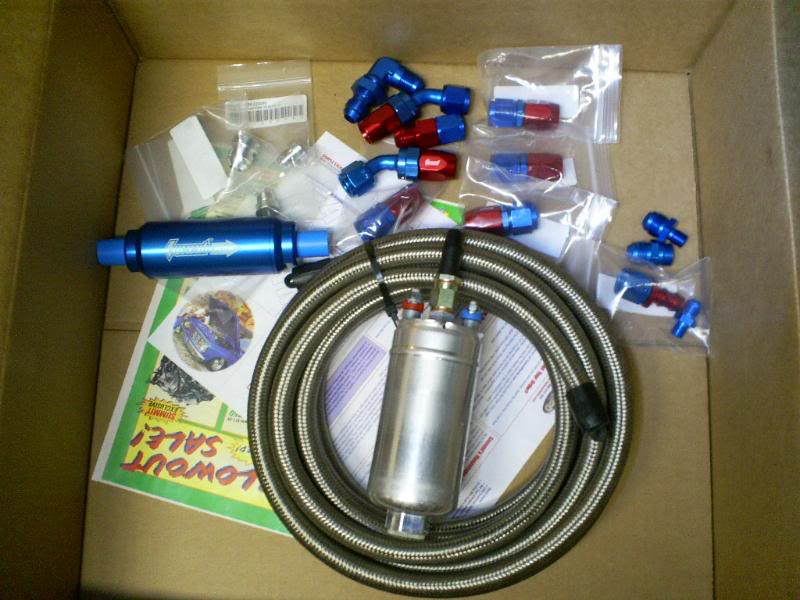
Cooling mist meth pump
Walrbo 255hp pump
-6 lines from trunk to fuel rail
1600cc injectors
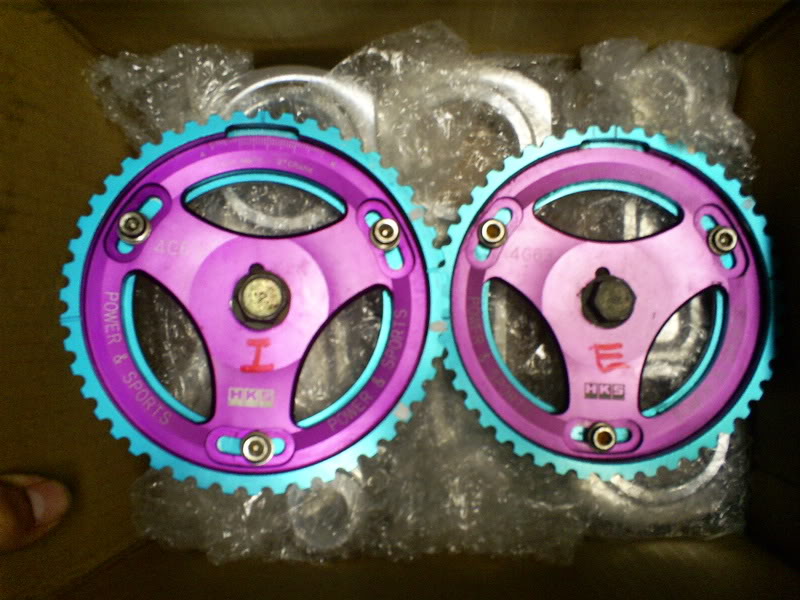
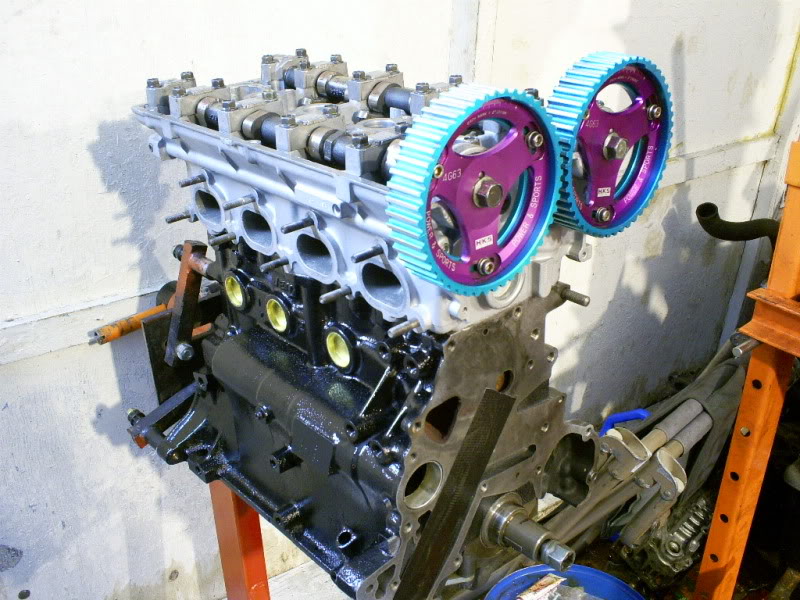
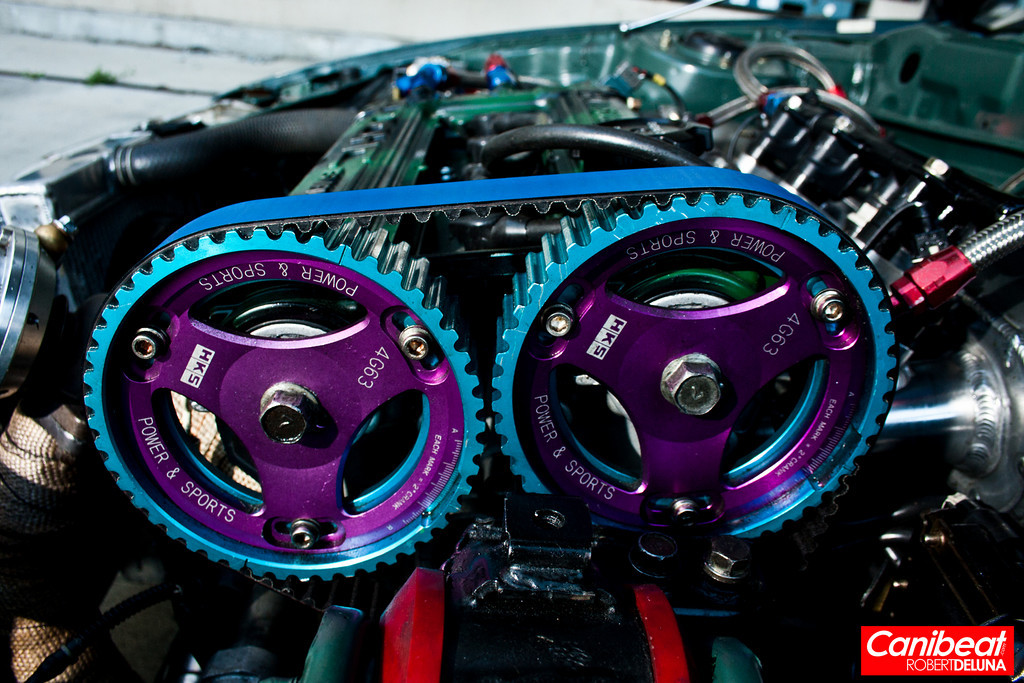
Skunk 2 Cam gears
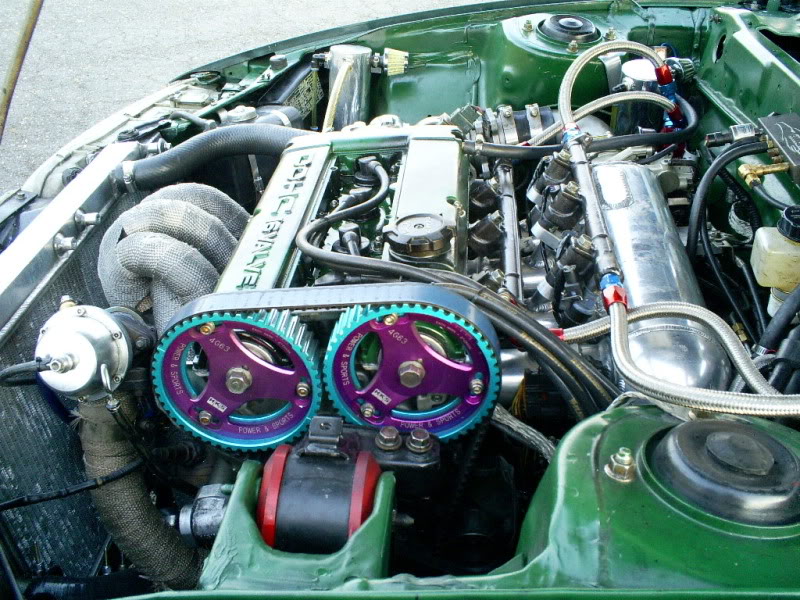
Greddy T-belt
The build has been handled in my garage, and driveway. Only things someone actually did for the build was handle the shortblock, and machine/port the head. I will give much credit to the DSMlink folks. That community is one of the most informative, non b/s places to be!
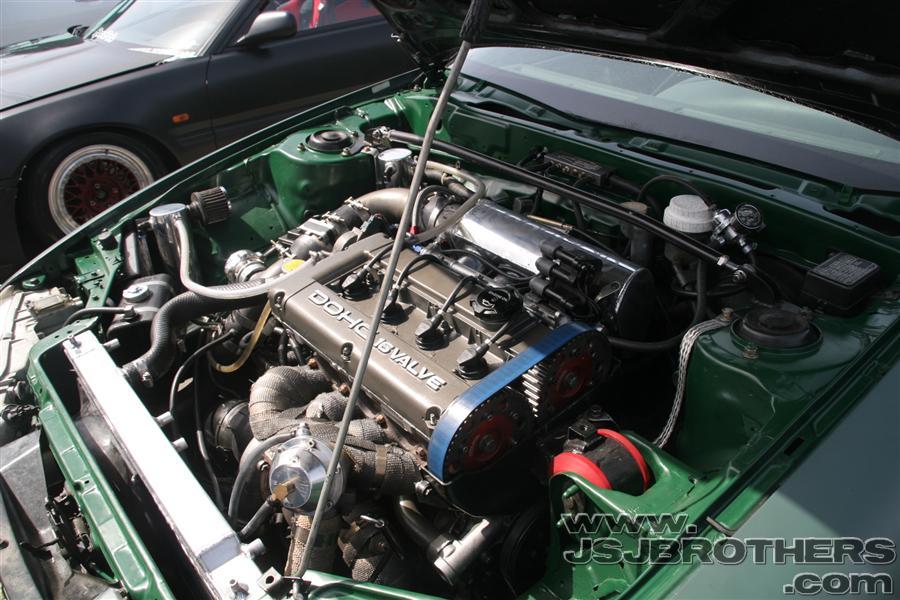
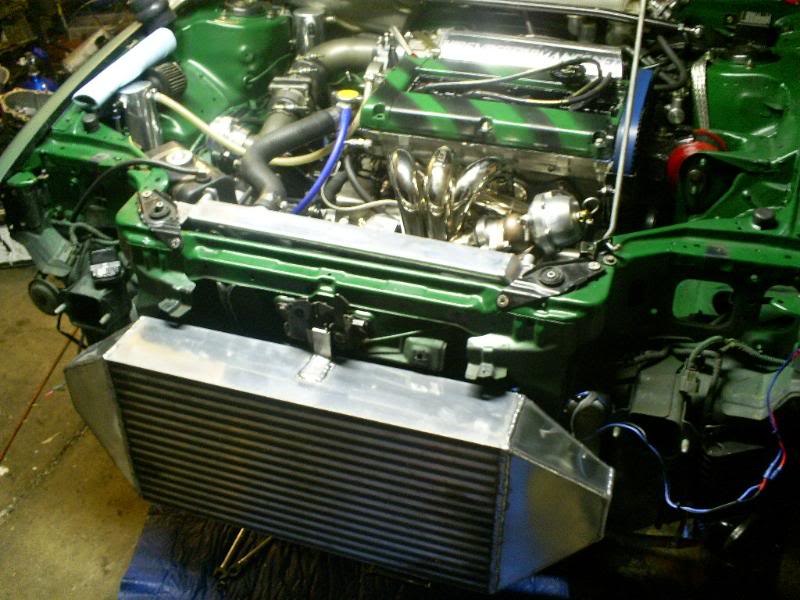
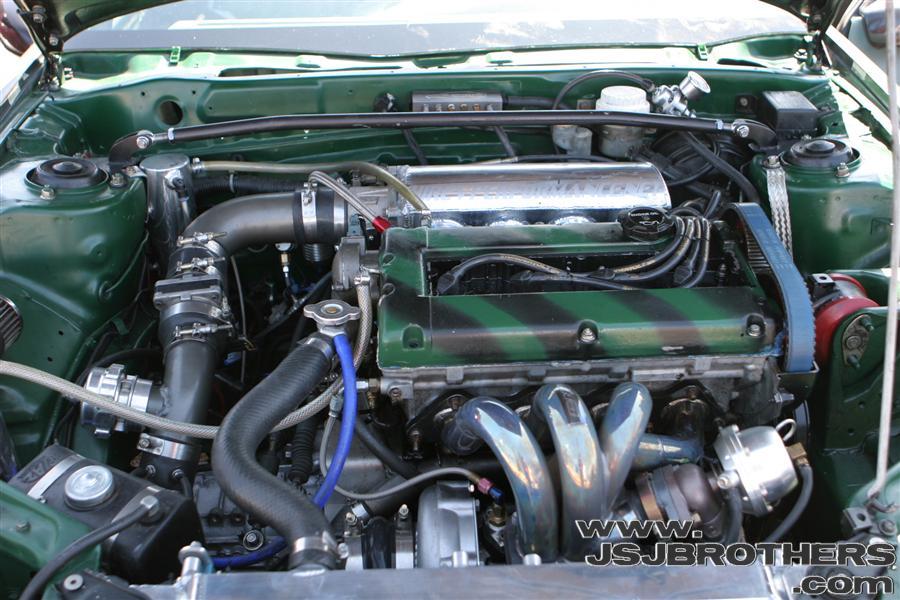
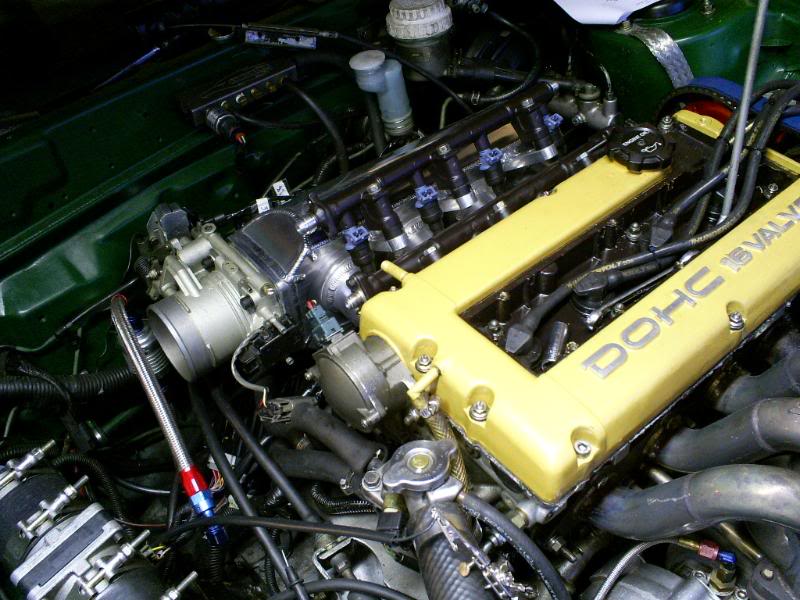
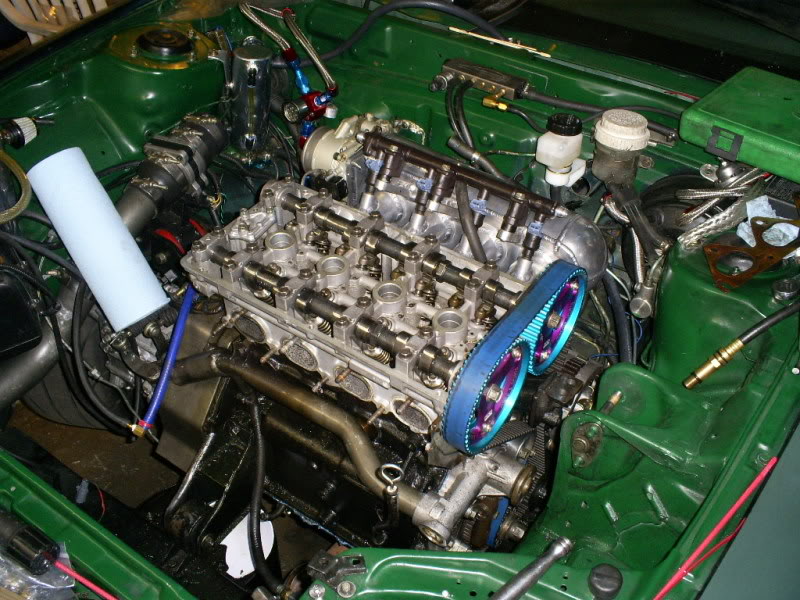
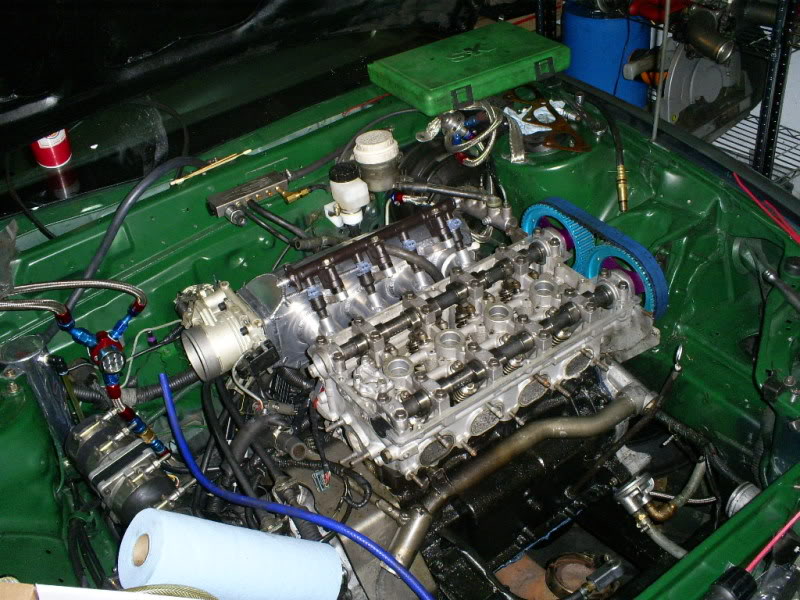
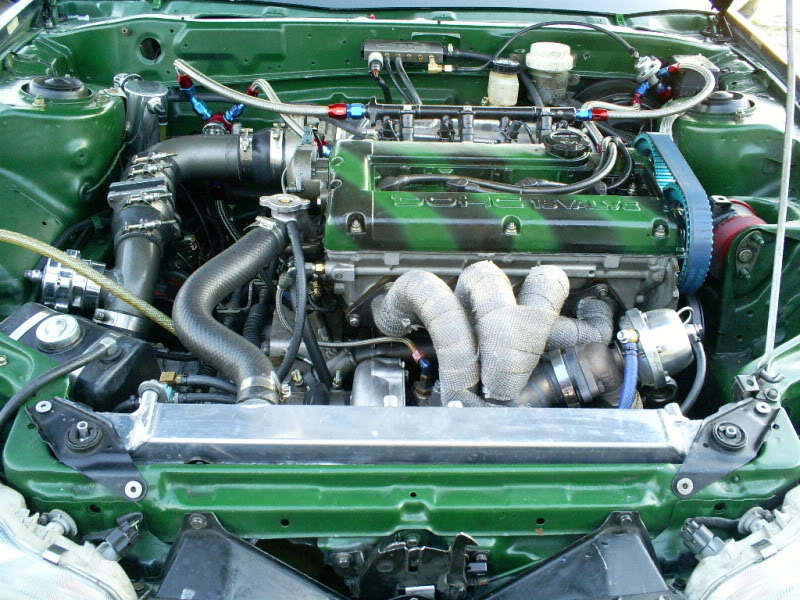
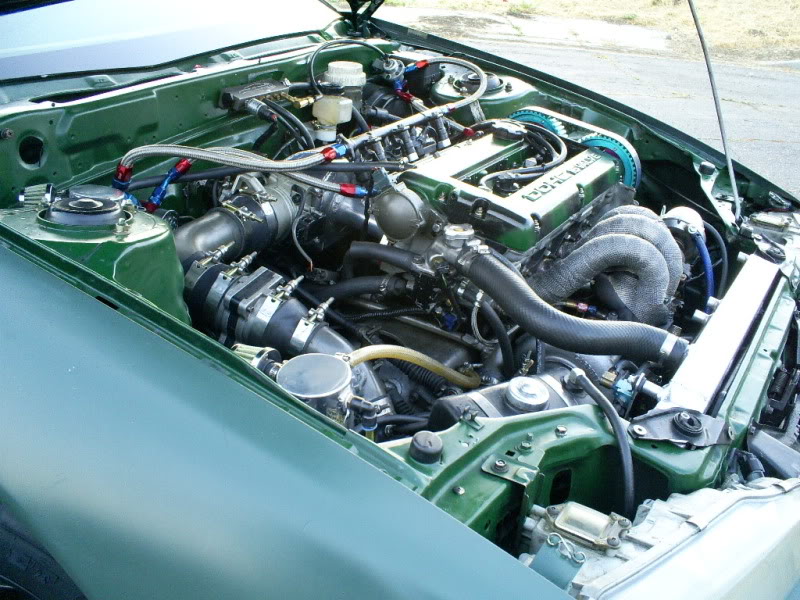
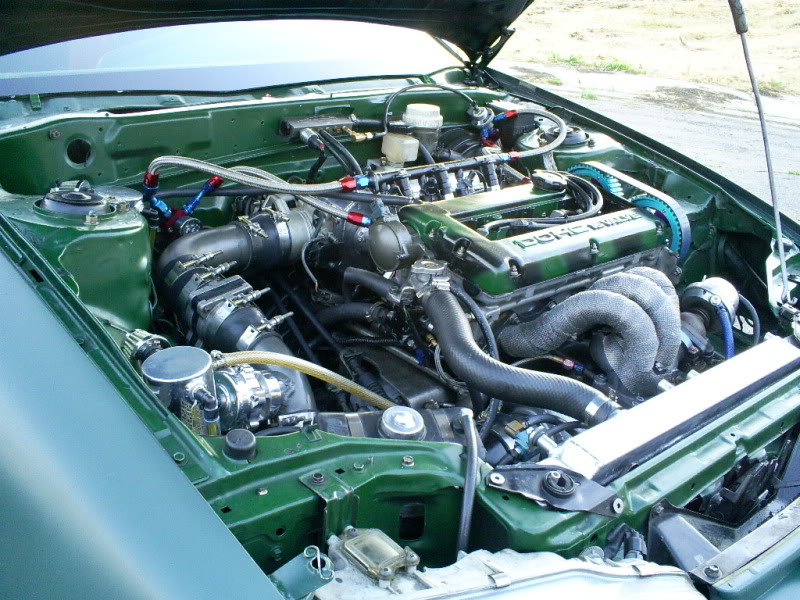
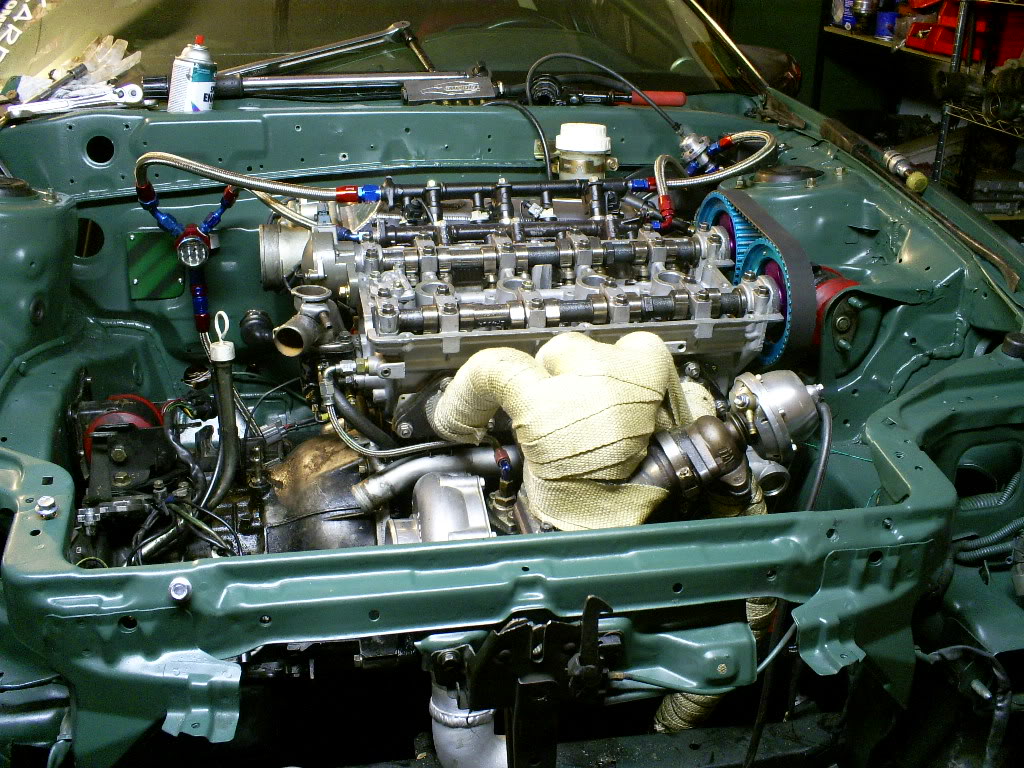
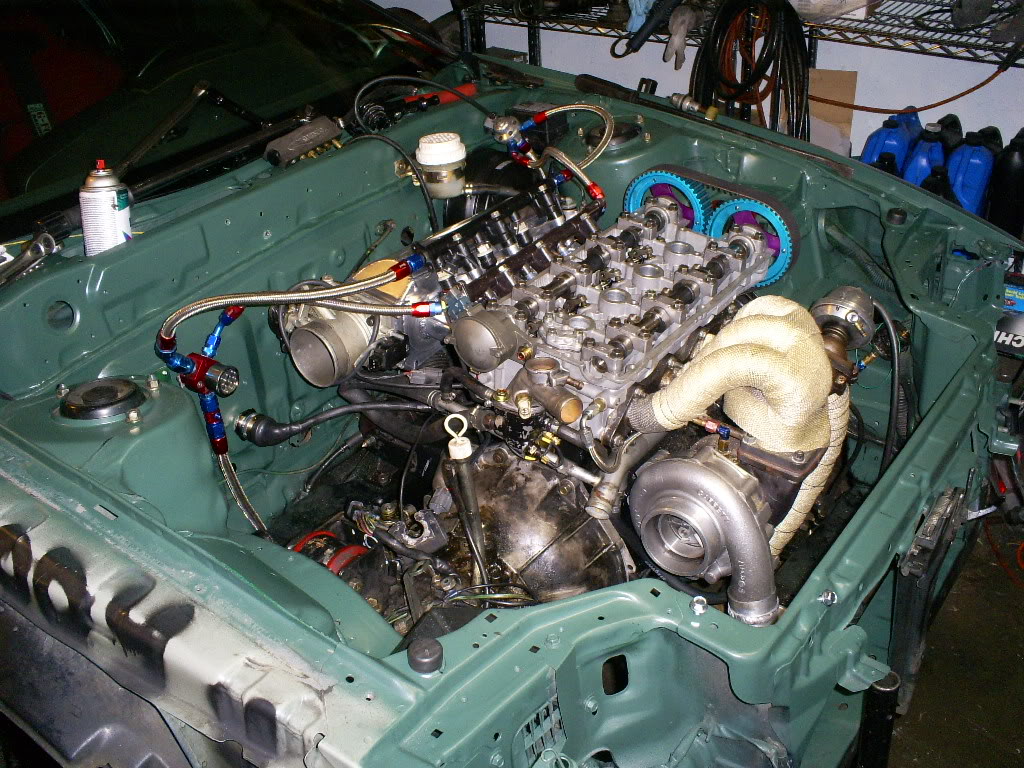
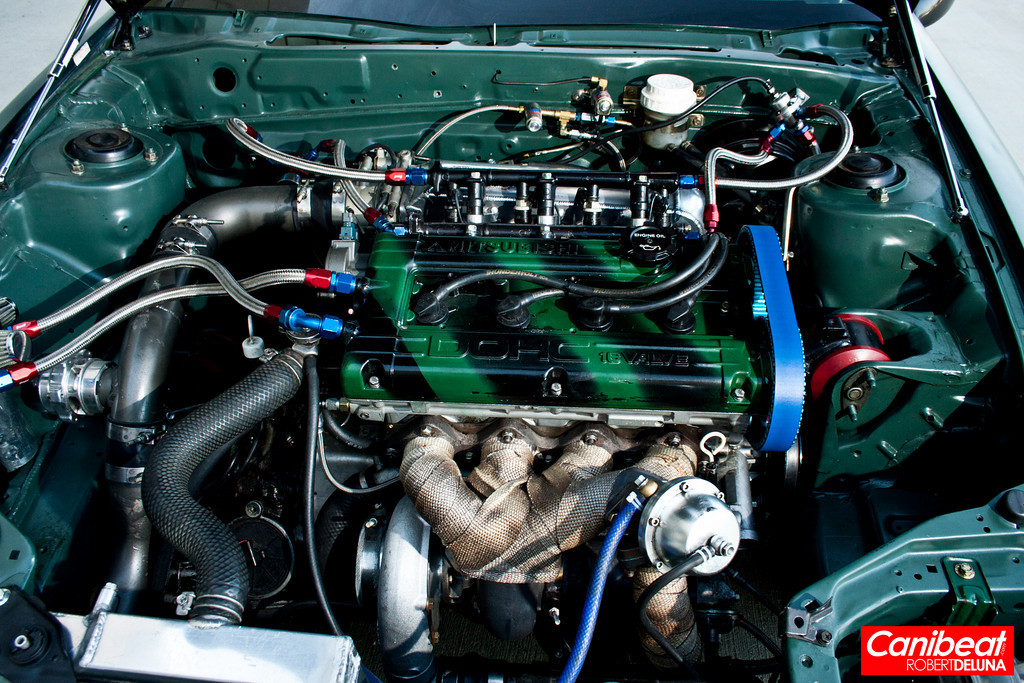
For those looking for a recent engine bay pic……yes that is a different green in the bay.
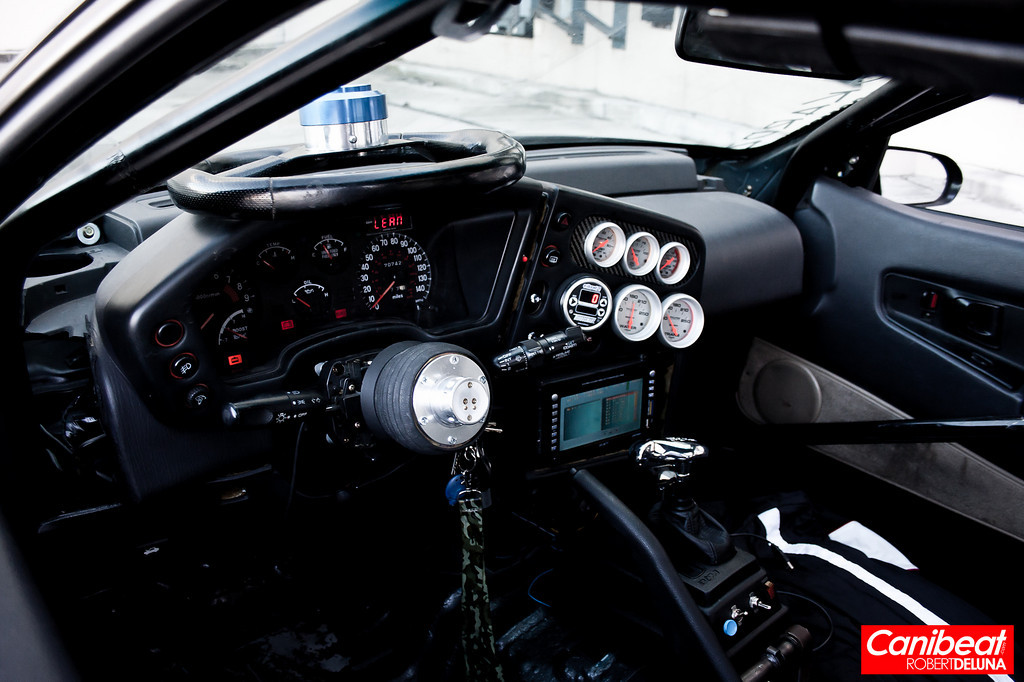
The cage is the through dash version. Im not exactly your normal sized driver. I am a 5′ 11″ heavyweight mofo and needed all the legroom I could get entering and exiting the car.
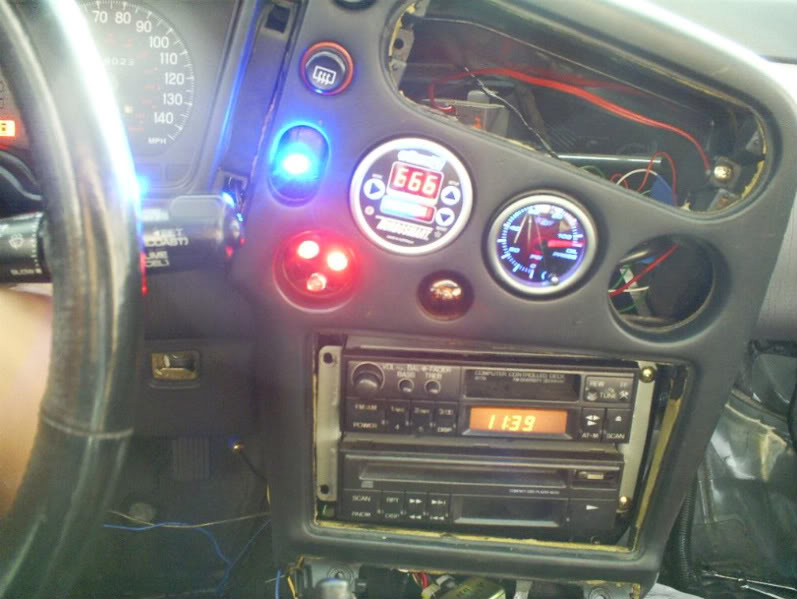
On a sidenote, I pulled out the blitz dsbc and upgraded to the eboost2 (60psi version).
Excuse the wiring mess, I am almost done.
I went down to radio shack and got some 3 volt leds, wired 3 red ones in series and a blue one on the other output. I have a yellow bulb as well. This boost controller has so many features and tweaks that you can do, its freakin amazing. This is the LAST boost controller I will ever have to buy 
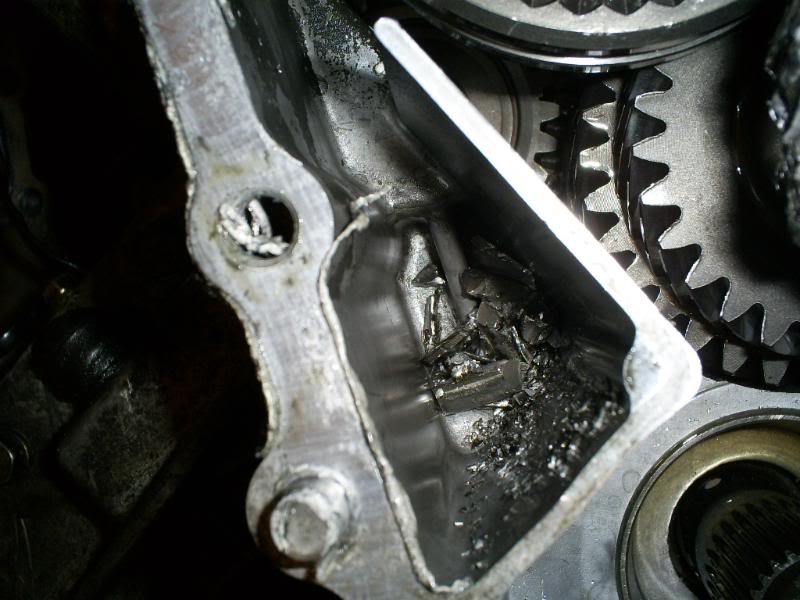
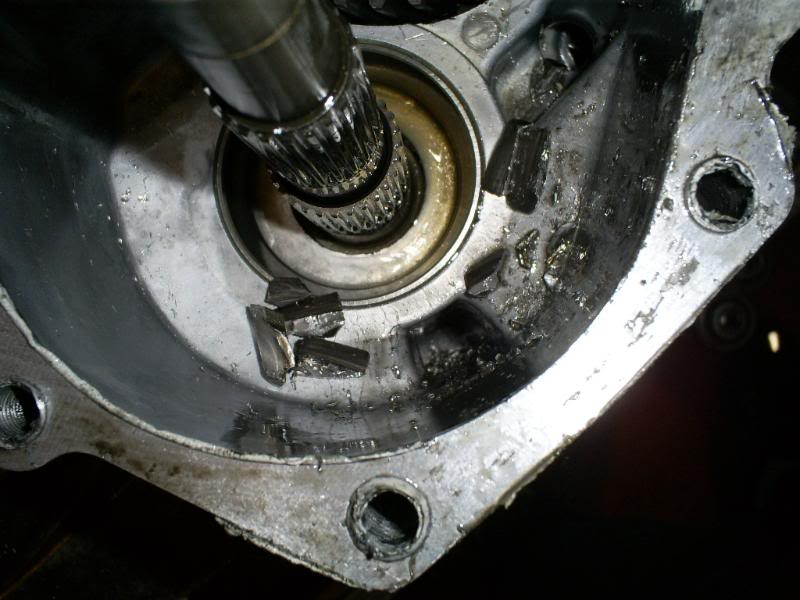
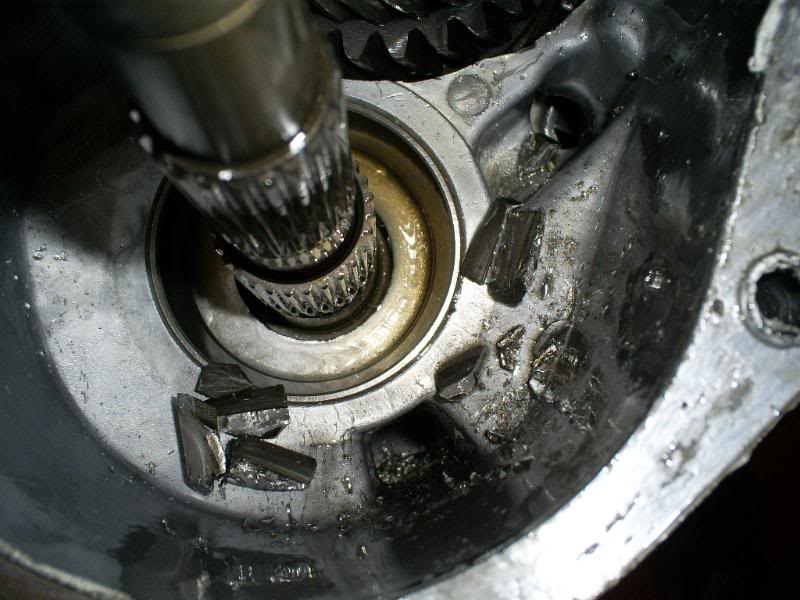
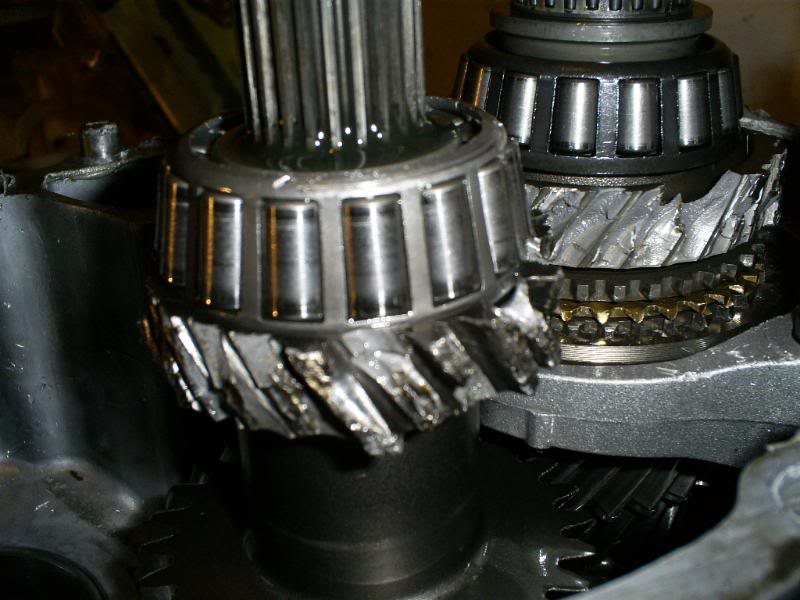
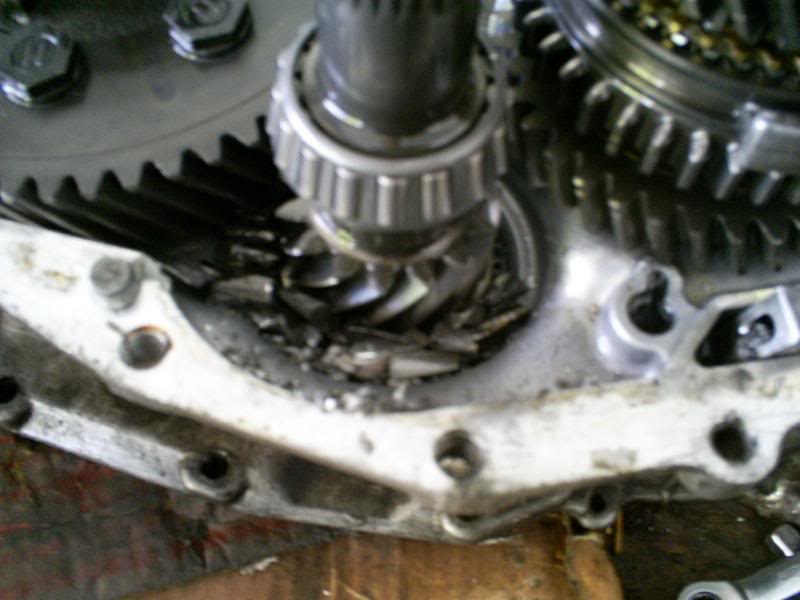
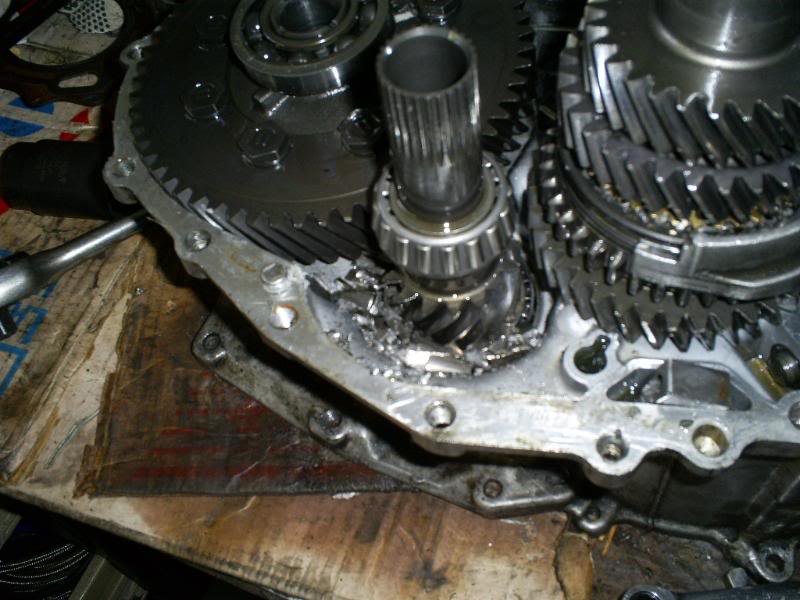
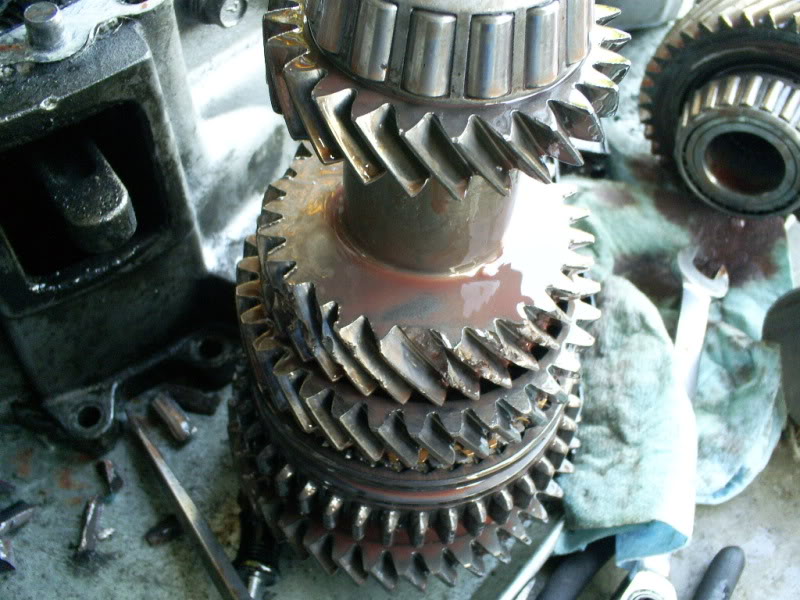
Seems that the gear oil I switched to is too thing for my tranny, or this poor 2 year old tranny has run its course. Either way, I am ditching the amsoil and going back to synergyn fluid.
Here are some pics of the damage.

Update
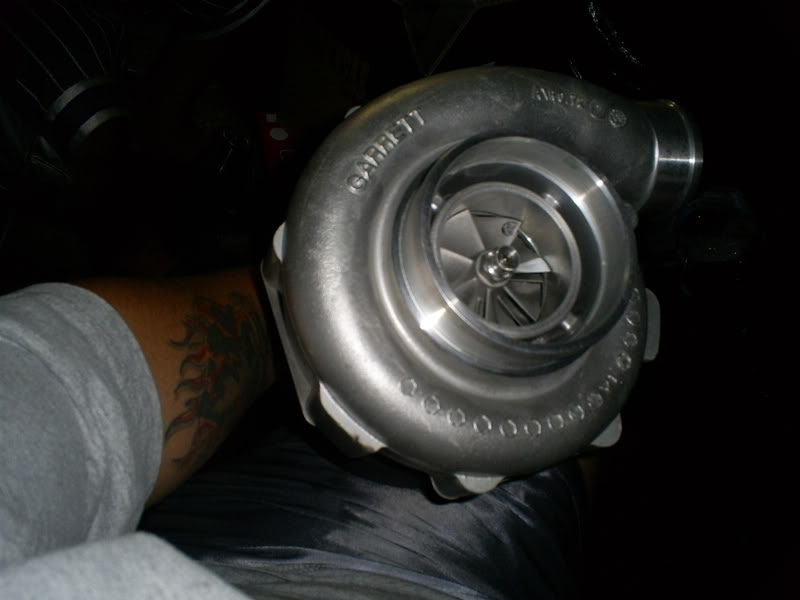
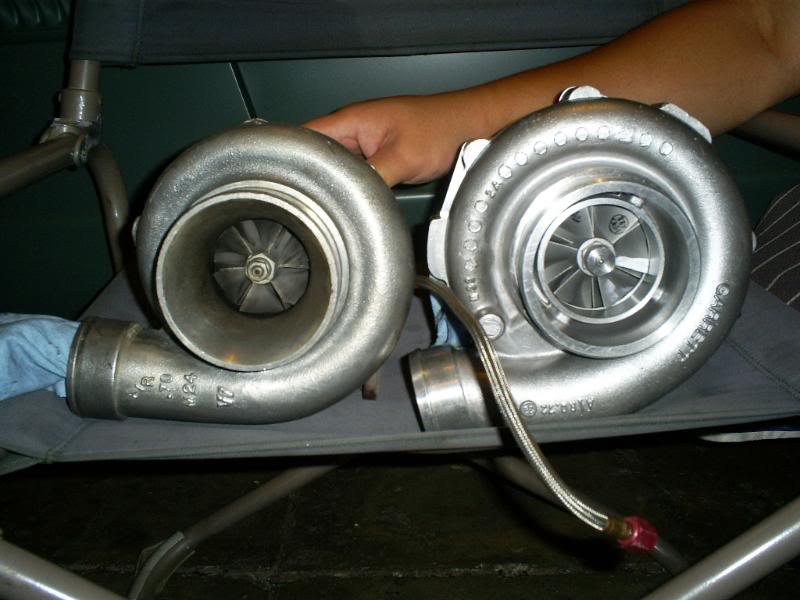
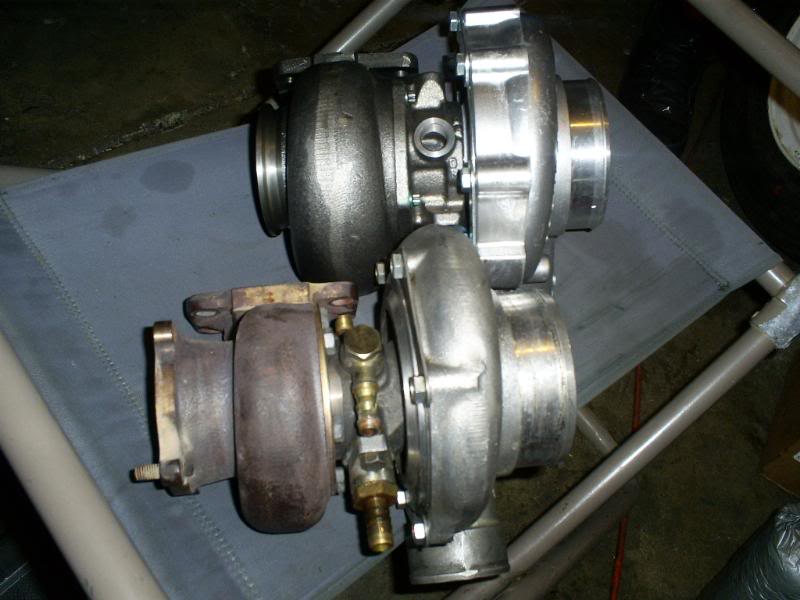
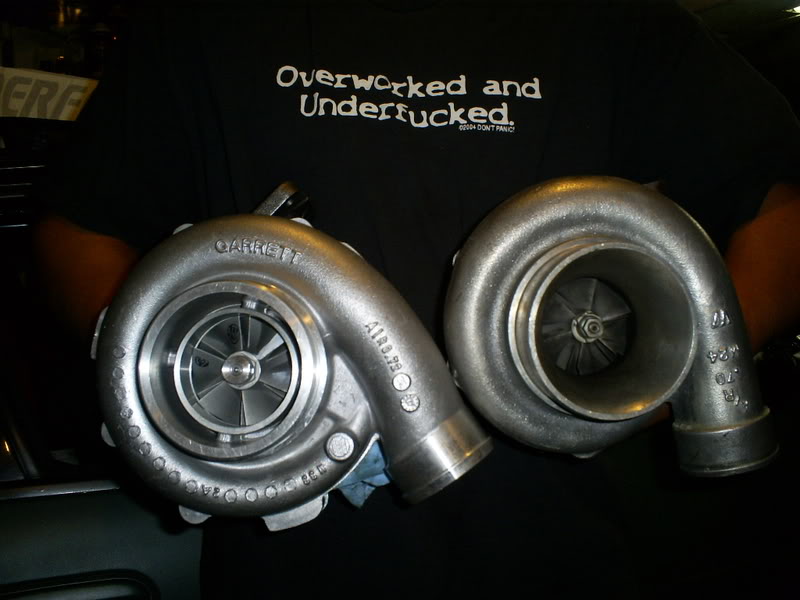
Compressor wheels/covers.
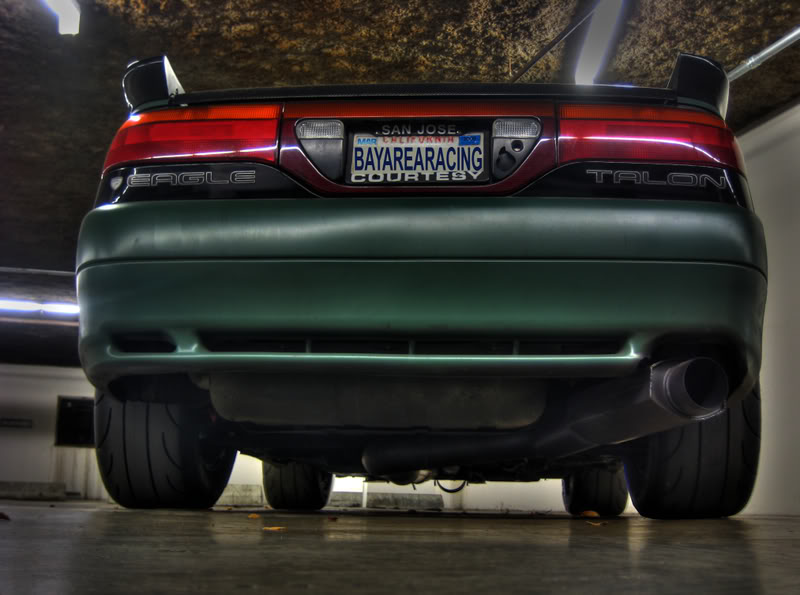
Ass shots

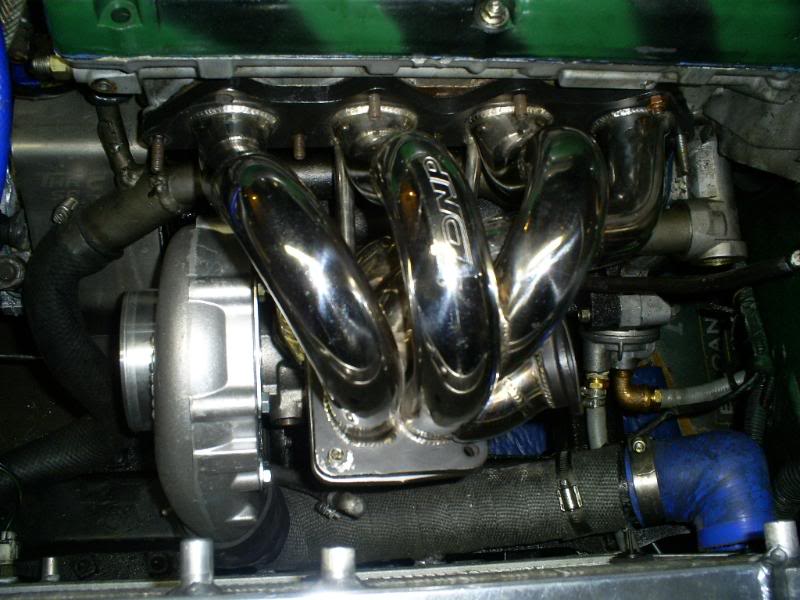
Mock up with the DNP that arrived today!
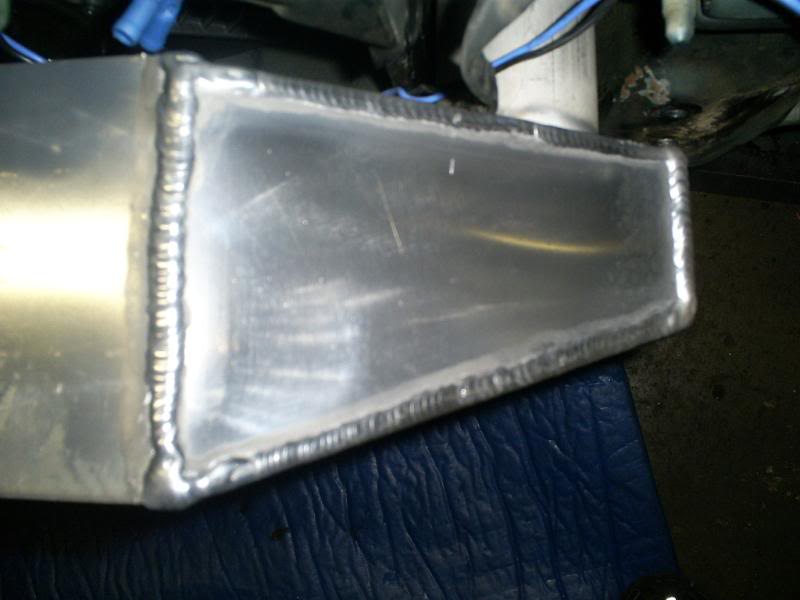
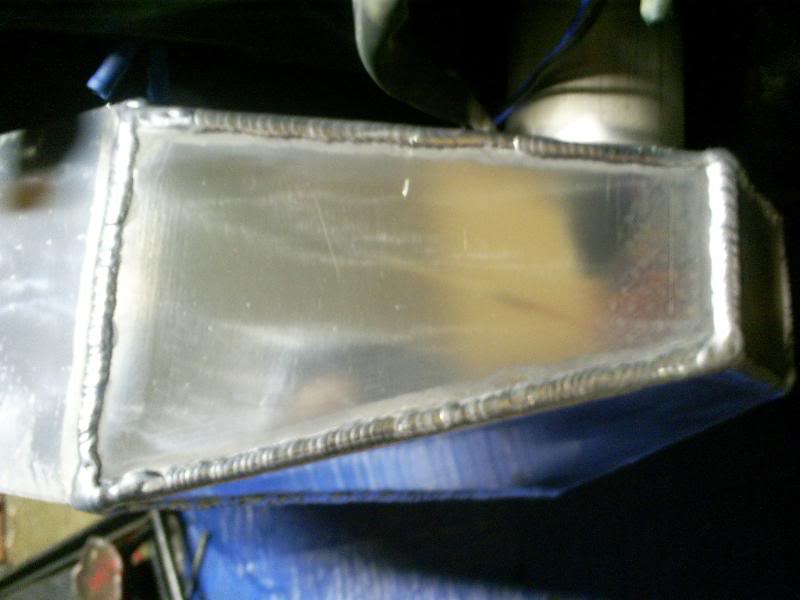
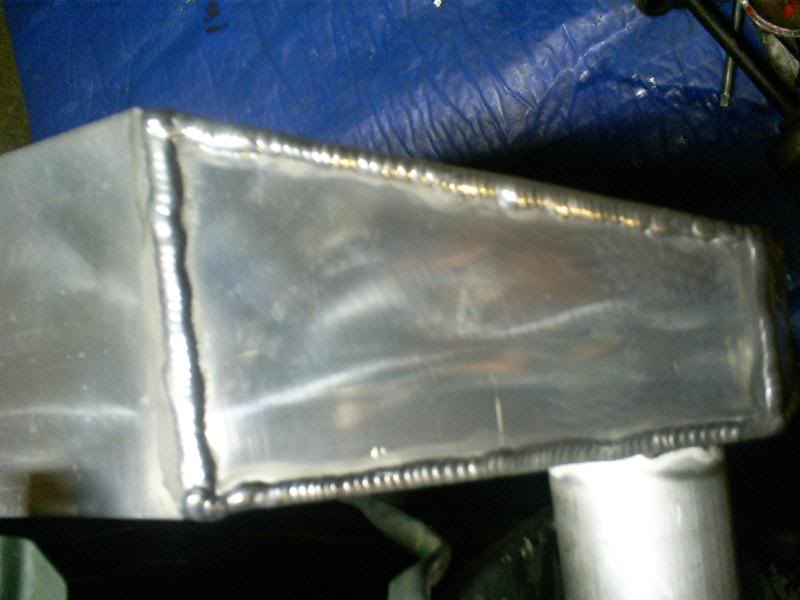
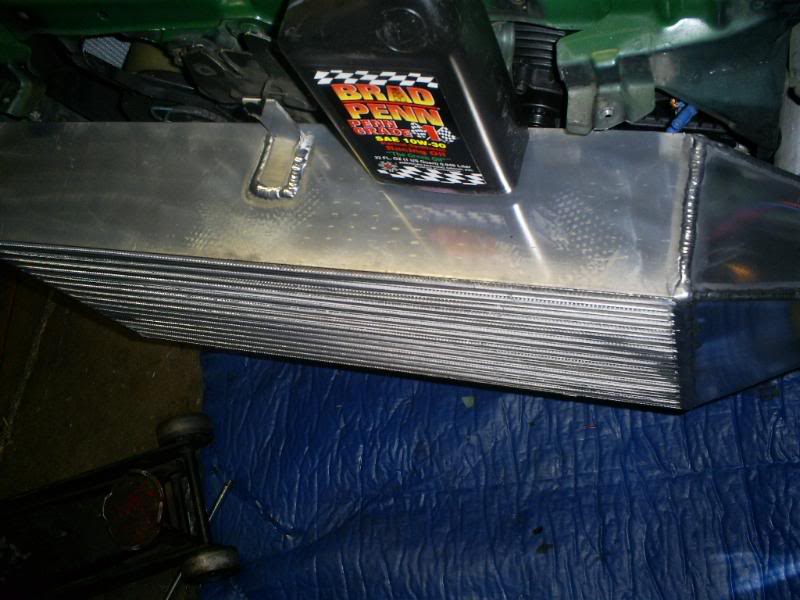
I also have to give thanks to sean from FFtec for taking care of my FMIC issues. Apparently I have been running his older design with 1/16th end tanks. He redid a new front mount for me with 1/8 in. thick plates and welded them inside and out. “If this doesn’t hold, I don’t know what will” 
This core is 4.5 inches thick and retains the 2.5 in and out. I opted to stick with the smaller outlet for ease of install and less fabwork. I did upgrade my universal 3 bolt flanges on the downpipe and 02 housing to v-bandstyle flanges. It makes it easier to drop the transmission at the track 
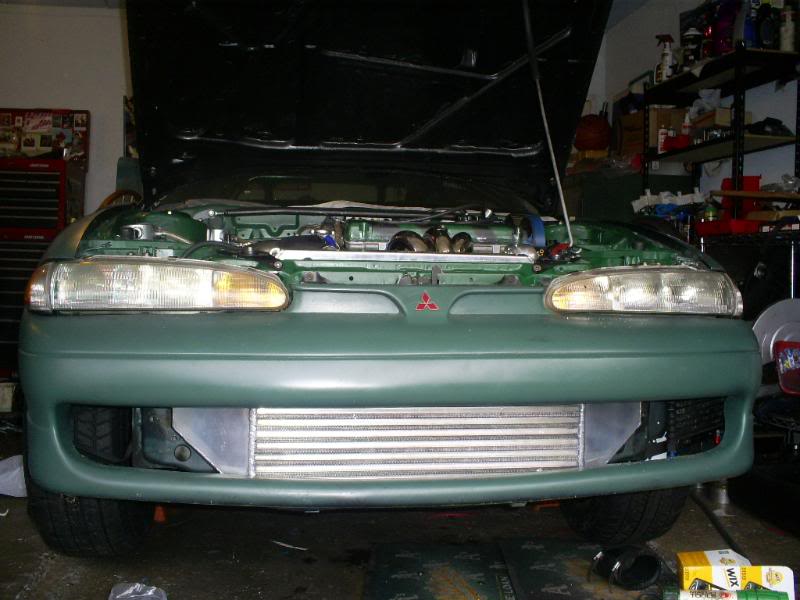
Its almost back together. I just gotta do some cutting on the bumper cover.
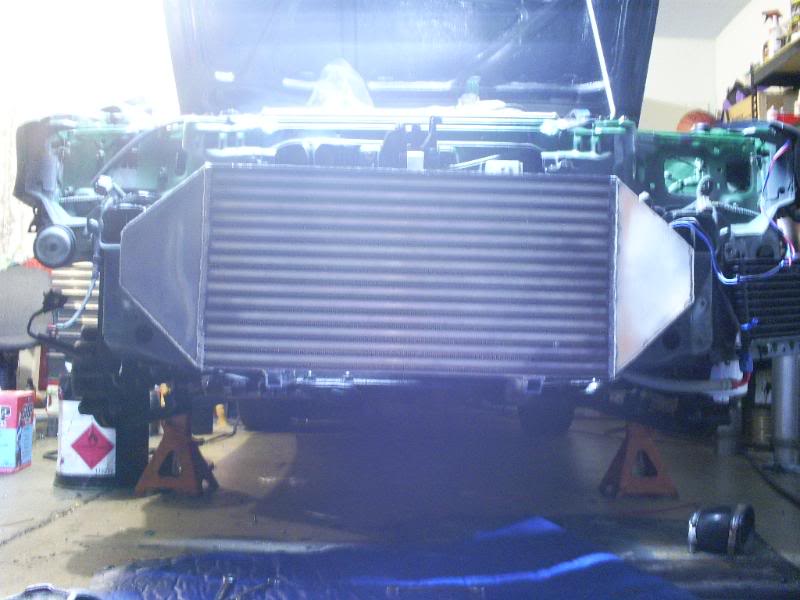
Here is the finished product. Im about to head out and do some tuning pulls in a bit here. Its a nice sunday afternoon, and my “test strips” are calm and quiet.
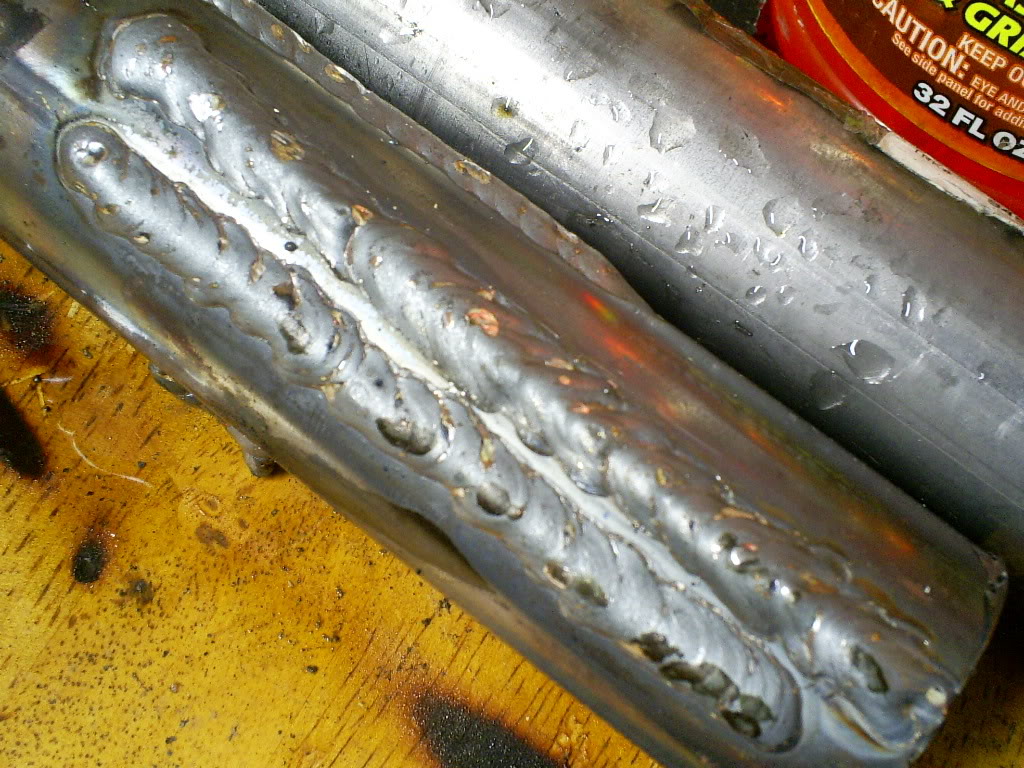
Here is my new exhaust I just built. Took me about 4 hours to do, and it came out ok.
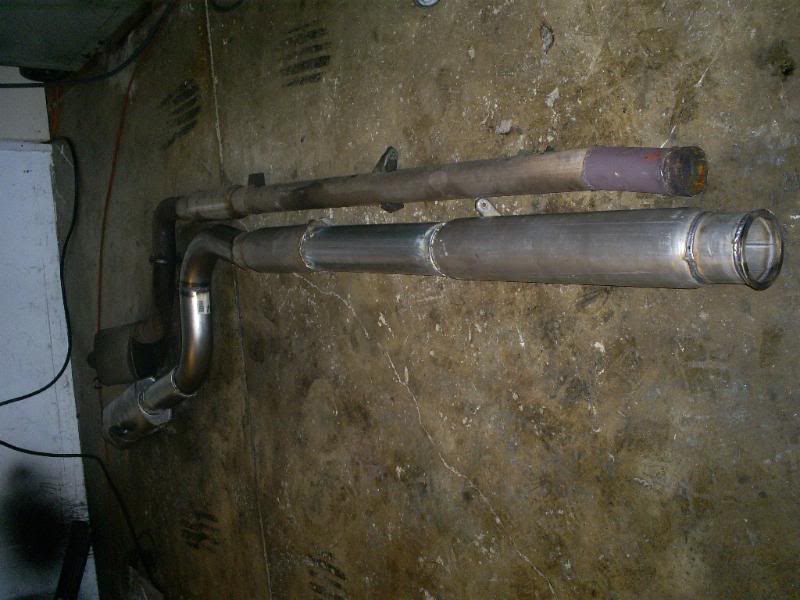

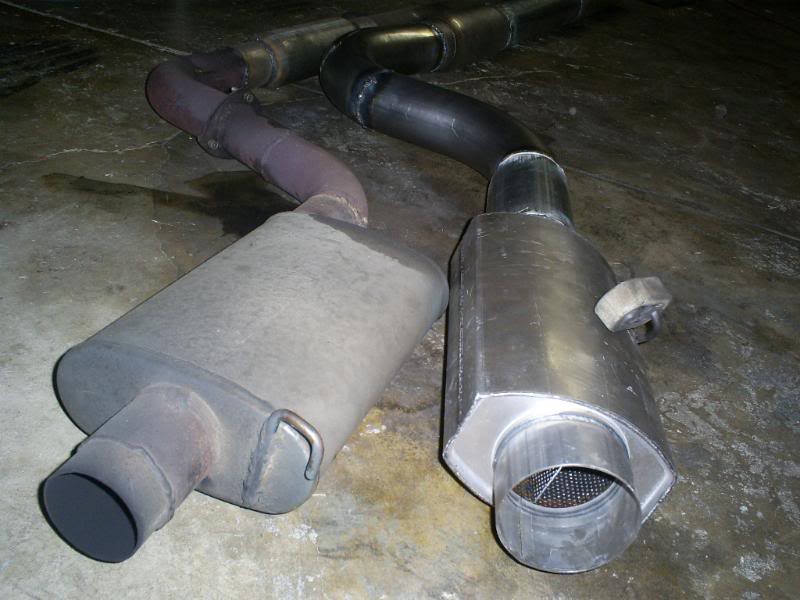
Thats the 4 inch next to my old 3 inch.
It was a fun weekend, even though I only got a couple hours of sleep saturday night. Me and the guys that trailer’d our cars took a nap at the gates. First in line FTW!
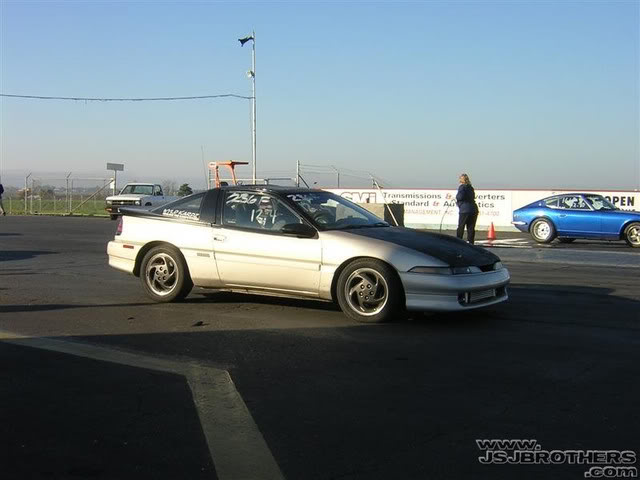
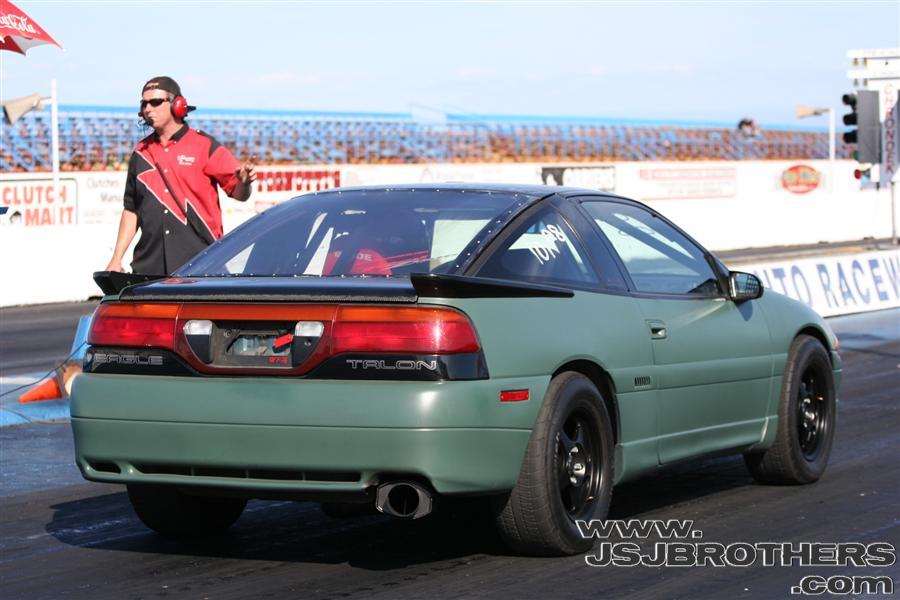
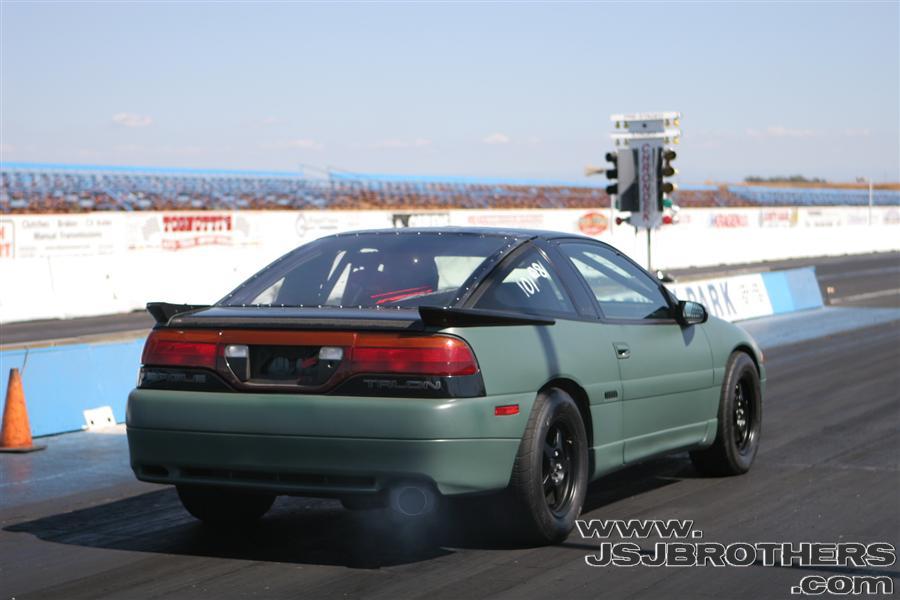
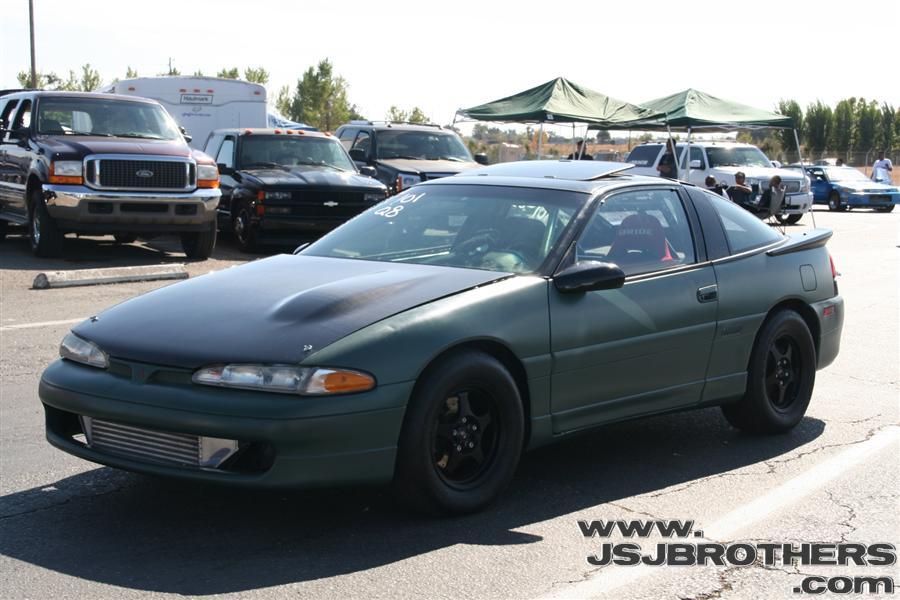
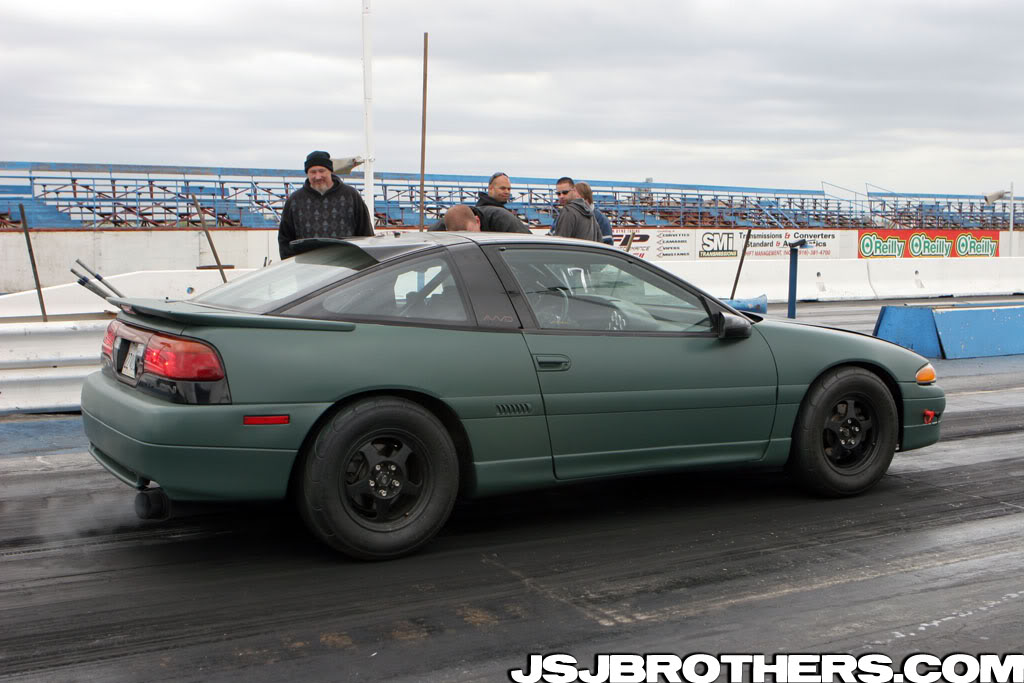
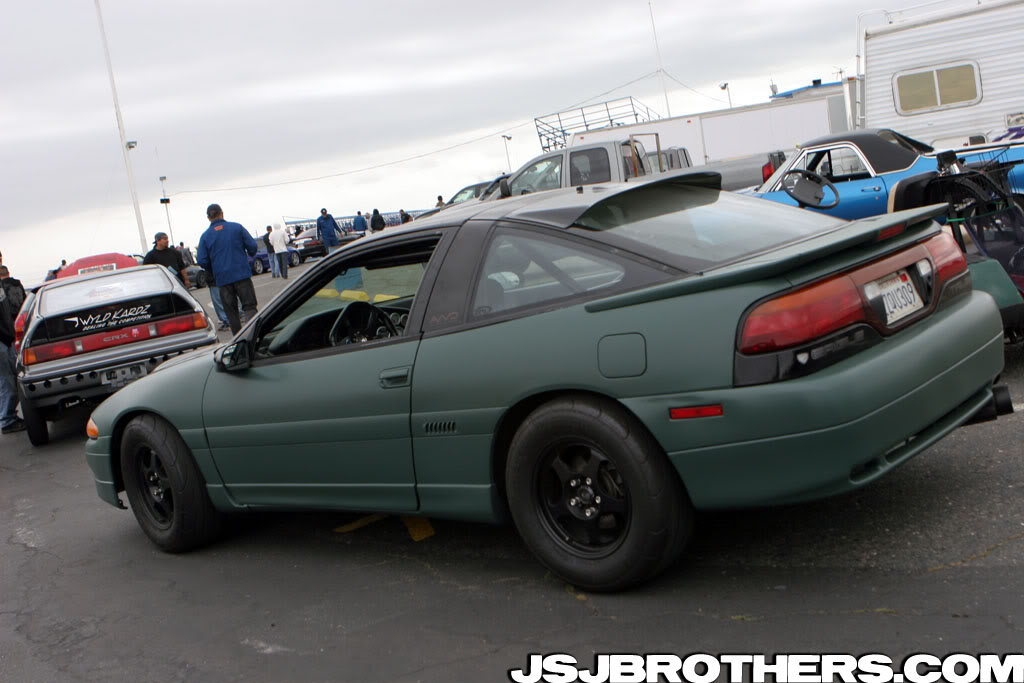
Here are some JSJ brothers pics.
Even the track guys know whats up! 
New ignition box.
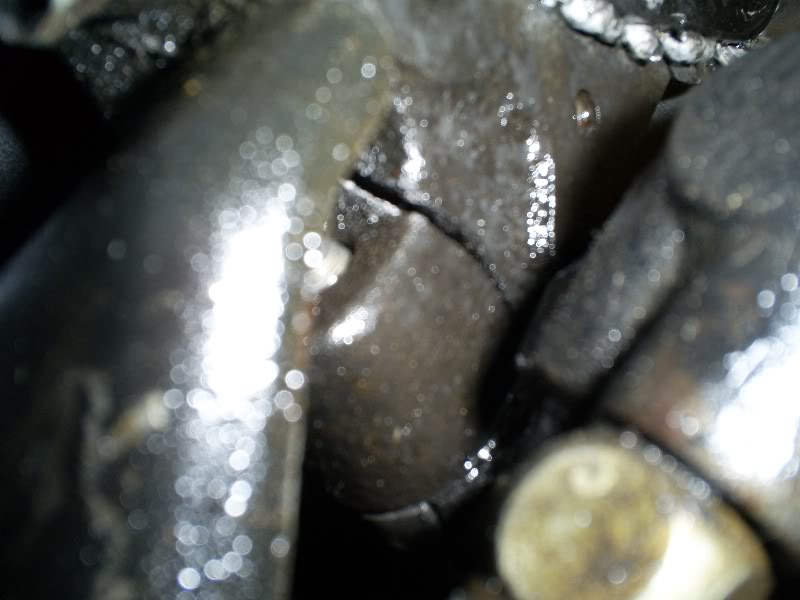
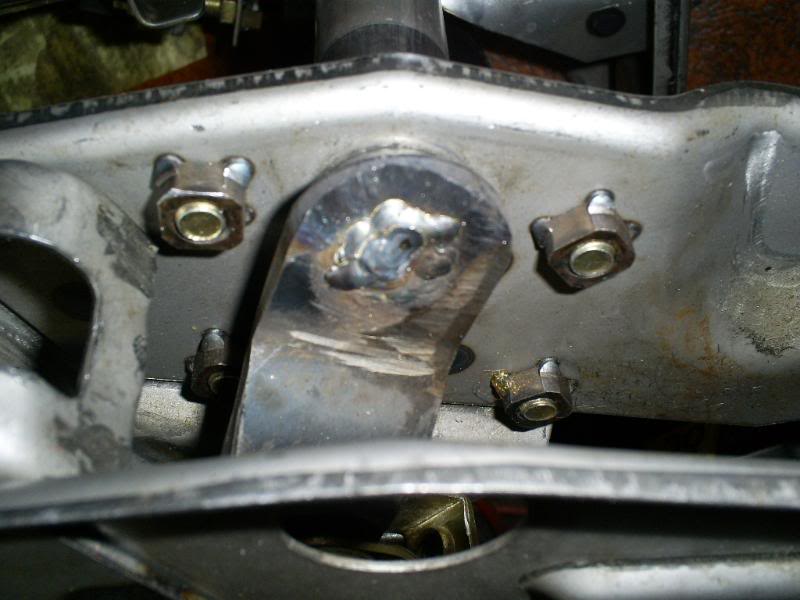
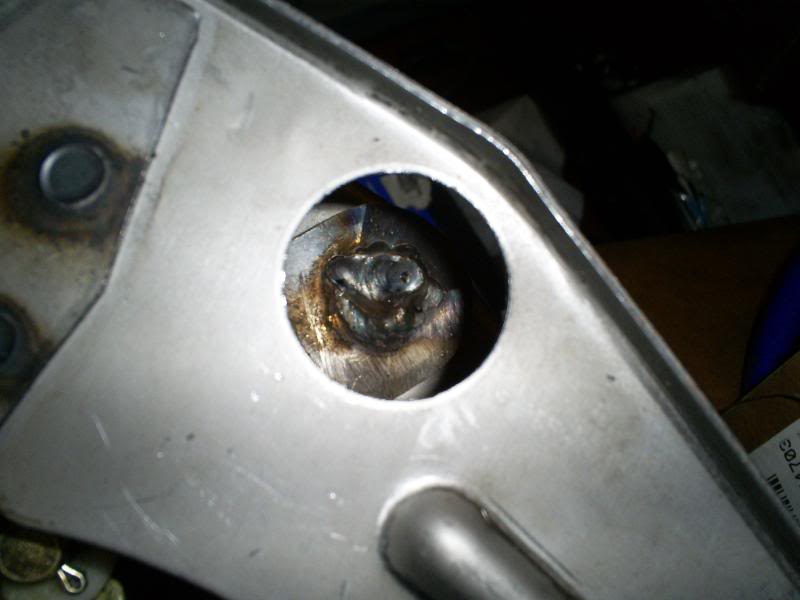
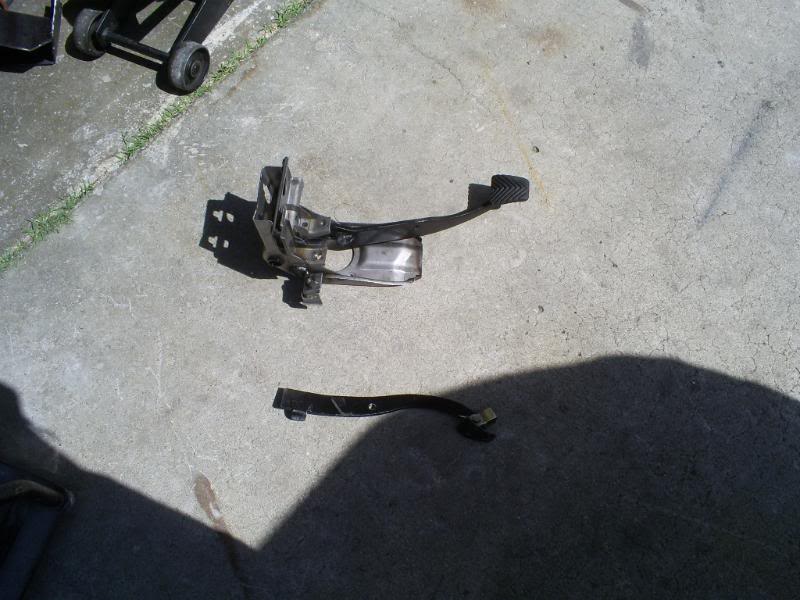
I welded up the clutch pedal, and it busted again.
So, I pulled off the pedal in about 25 mins. And everything looks fine right?

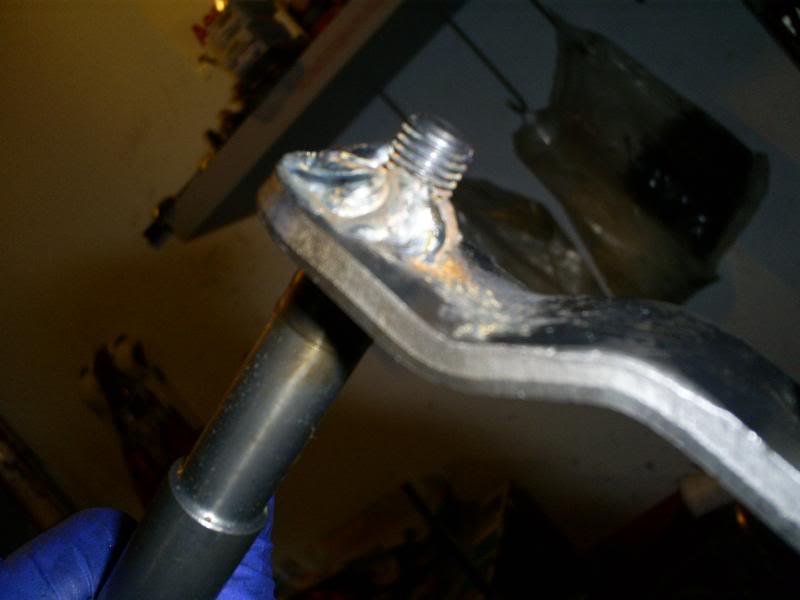
Good?
Oh wait.

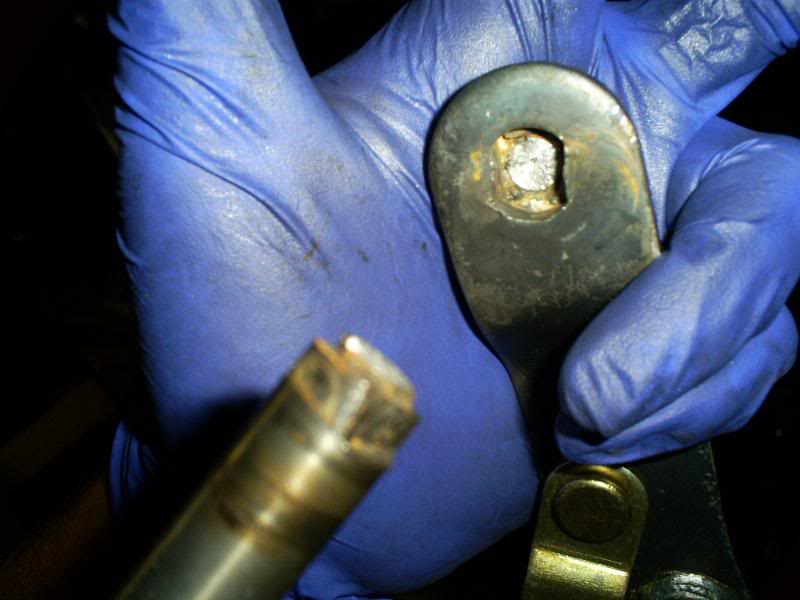

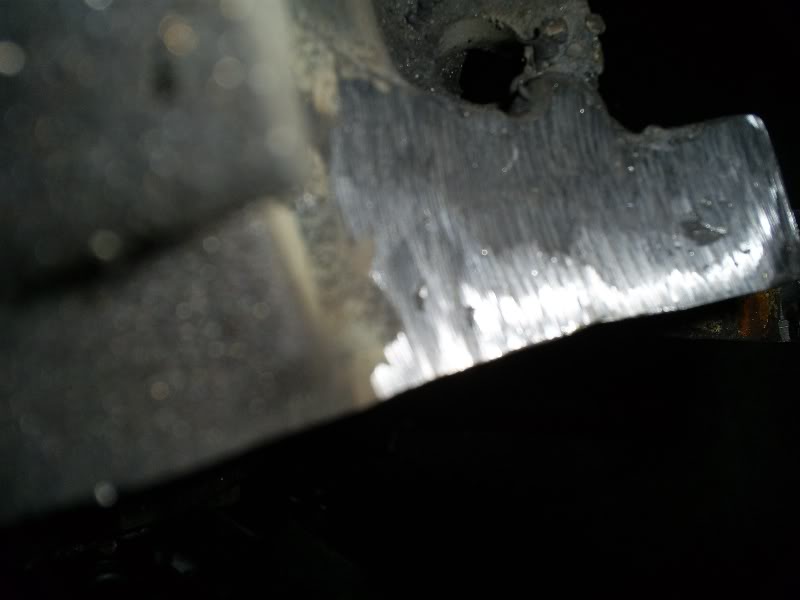
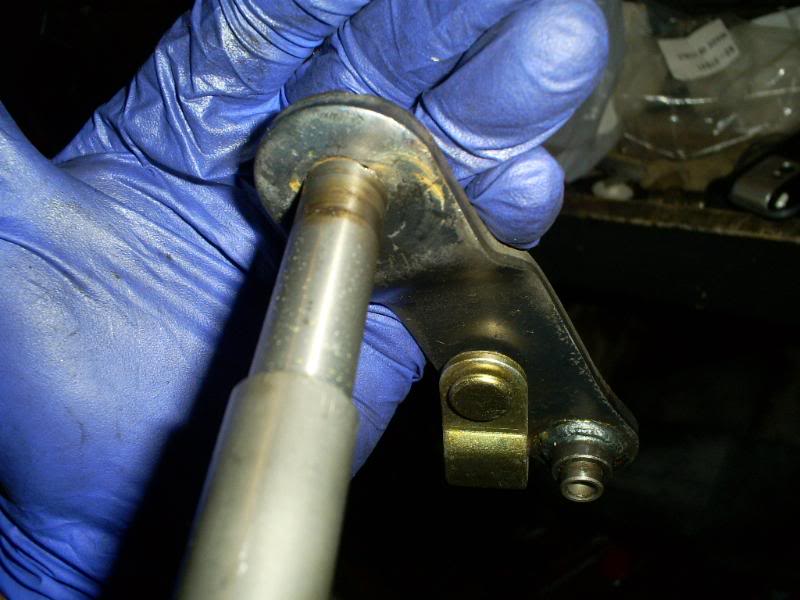
Verdict? My spot welds held up just fine, its just the stud that didn’t. So, looks like im gonna grind it flush, and try again.
Seems to me holding up just fine now.
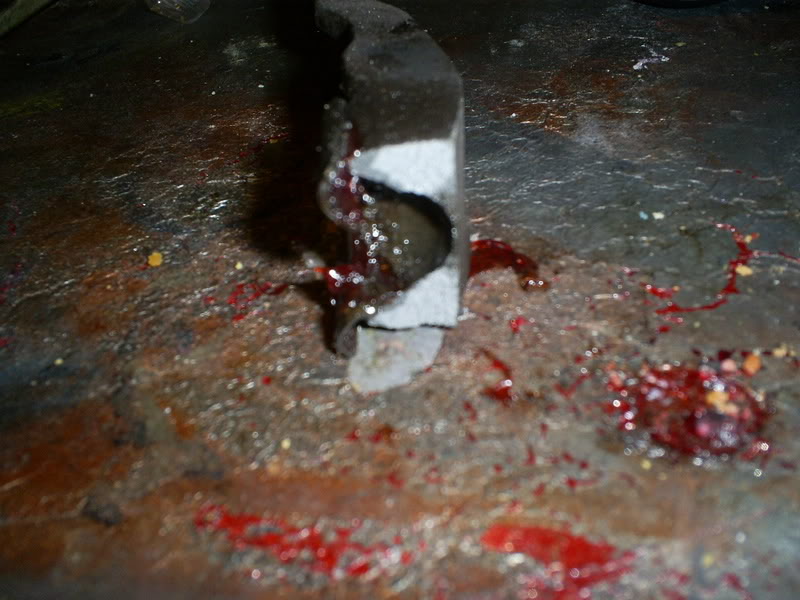
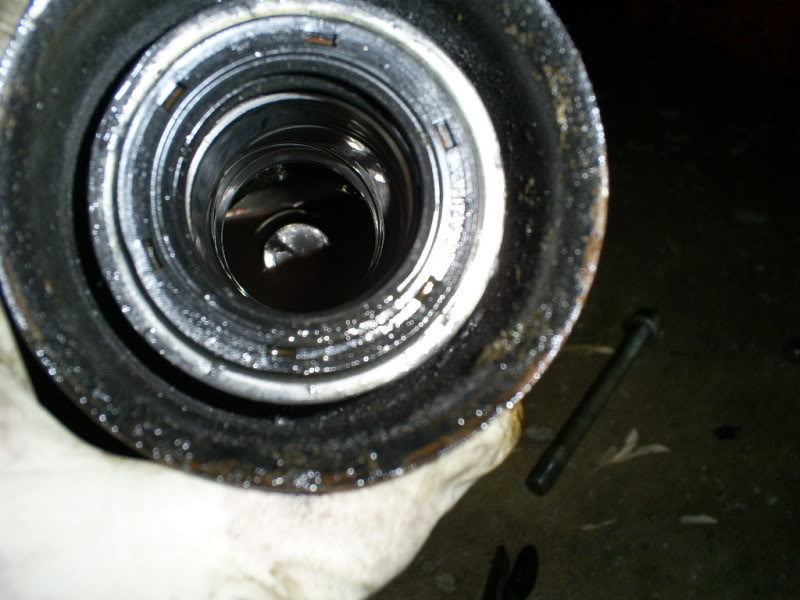
Oh ya, this is what happened to my Golan fuel filter.
So now that I got my transmission shifting like it should, my clutch decides to start slipping. I can’t blame it, all that timing on E85 isnt gentle
I am impressed that the competition clutch held this long. 6 months of NON stop abuse, not bad for 320 bucks!
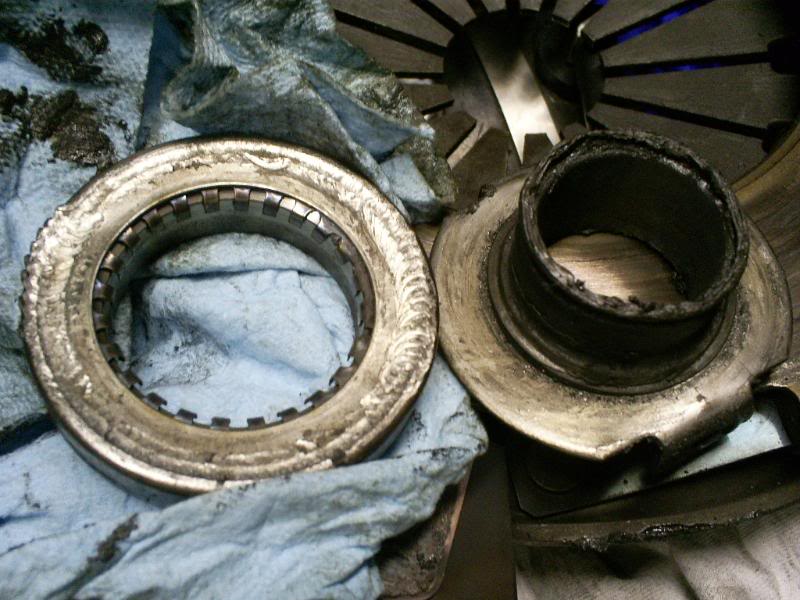
Looks like its twin disc time for me.
This Throwout bearing was gone 

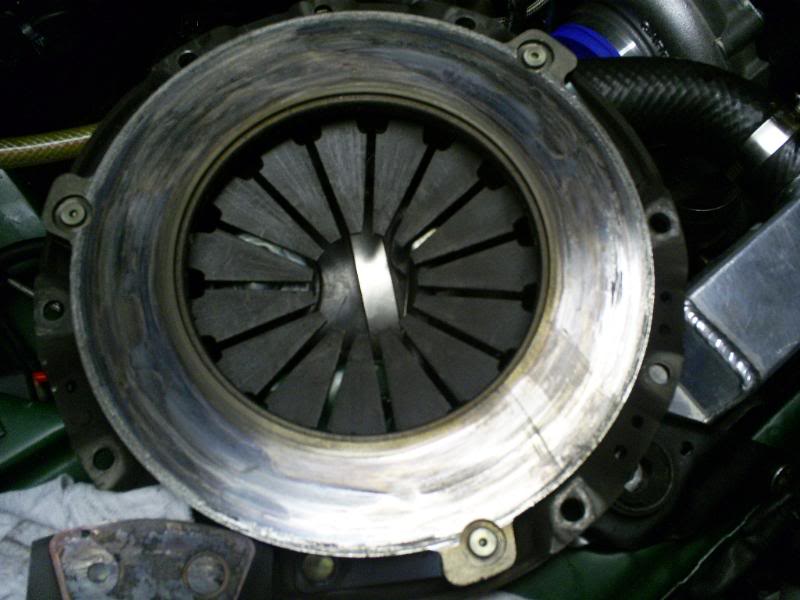
Pressure plate.
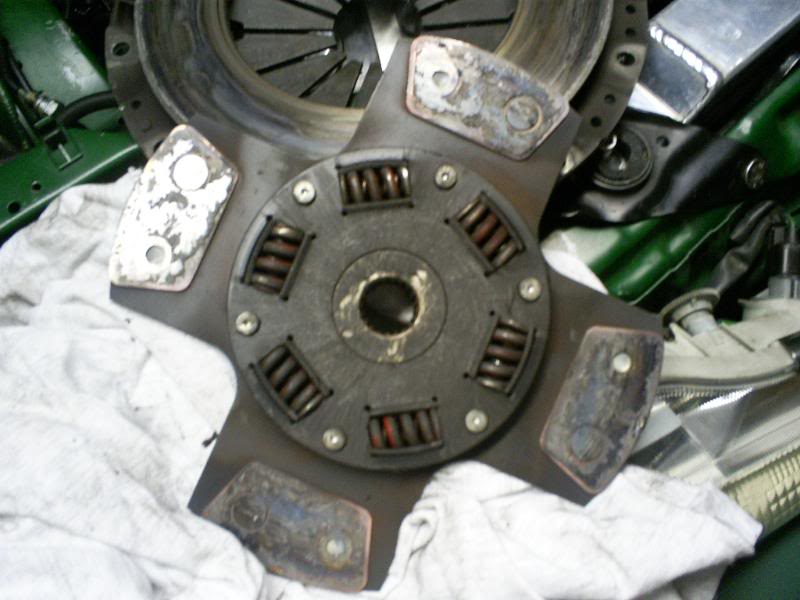
Disc side 1
Disc side 2
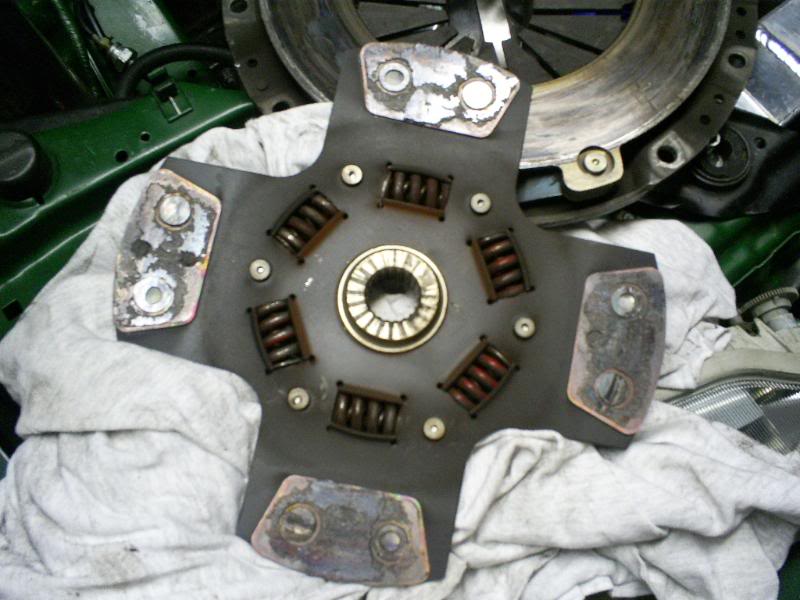
Like I said, I am VERY happy with this clutch and its performance. Especially with how long it lasted under the conditions I put upon it. I will say that the OEM throwout bearing is the best way to go on a clutch like this.
Ah yes, I got a few visits today. Fed-Ex, USPS, and UPS earlier this week
I will be picking up some 650cc injectors from an evo buddy for the second fuel rail. I know I will need to go bigger later, I just want to give em a shot to see how everything works. So 1600cc injectors will be run by a single bosch -044, -8 lines. The 660s will be run by the dual 255s, -6 lines. I think the bosch -044 can hang with the demand of the 1600s on the -8 hose compared to the -6. I dunno, we’ll see how this goes in a few weeks. Xmas is coming up and I gotta save $ for the nephews and nieces gifts!
The smaller housing is in, and the 40R spools like the 35R. Im getting 30PSI at 5500rpms. Now I gotta retune V3 because I didn’t download my V2 chips config
Got some more pics of the car tonight also. Sporting the new M/T radials.
I’ll post more later on today.

It was fun tonight driving the car home rev matching the gears. I busted my clutch fork tonight. Looks like I took waaay to much out of it. Don’t mind the red stuff, its just grease.
I’ll be dropping the transmission tomorrow morning, and putting it back on as well. Good thing I am on vacation this week!!!
This year will be the year for me. 9s or bust!
So I pulled off the intake manifold tonight. I am going to start working on the dual fuel rail setup. I am on the fence about which throttle body to go with. I have been running the mustang TB for a good year and half now. I finally had an issue with it. Here is the video.
[youtube]http://www.youtube.com/watch?v=D-Y8GYoBklU[/youtube]
Its just one of those things that make you go….hmmm
Aside from that, here is a pic with the stock 1G TB, Mustang 70mm, and the Q45.
That Q45 TB, is MASSIVE.
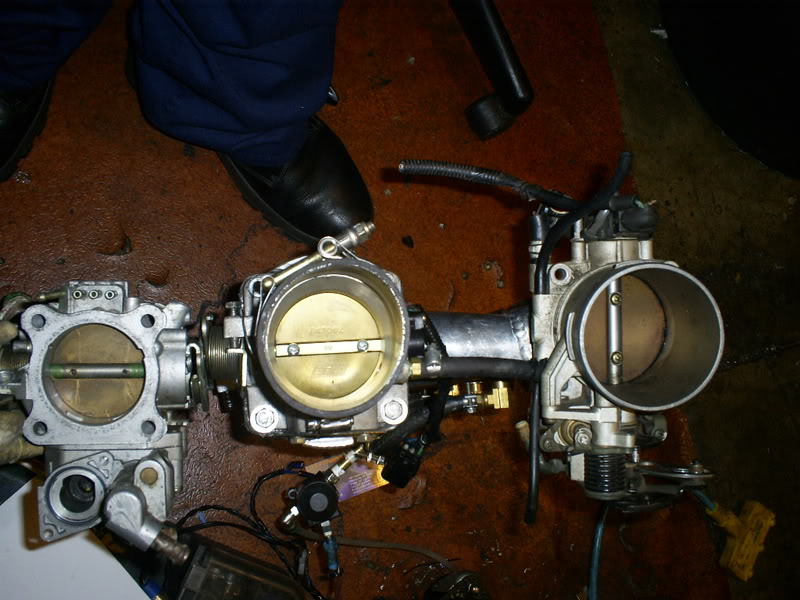
The mustang TB is an easy fix. The tab/stop just needs to be bent out a bit. It’ll serve its purpose just fine in the future.
I got some new toys for the spare motor build. Lets just say, I will be trying out the RnR aluminum rods, a nice ported head, and some hong kong style cam gears
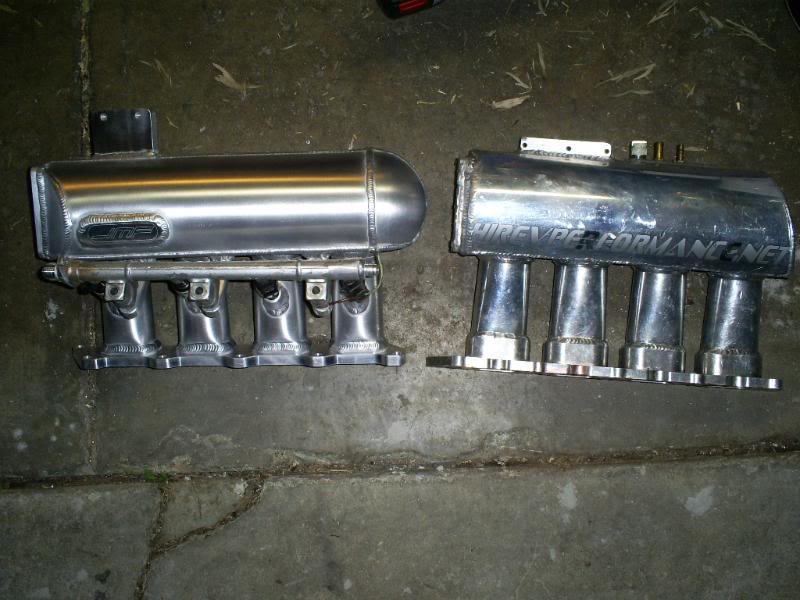
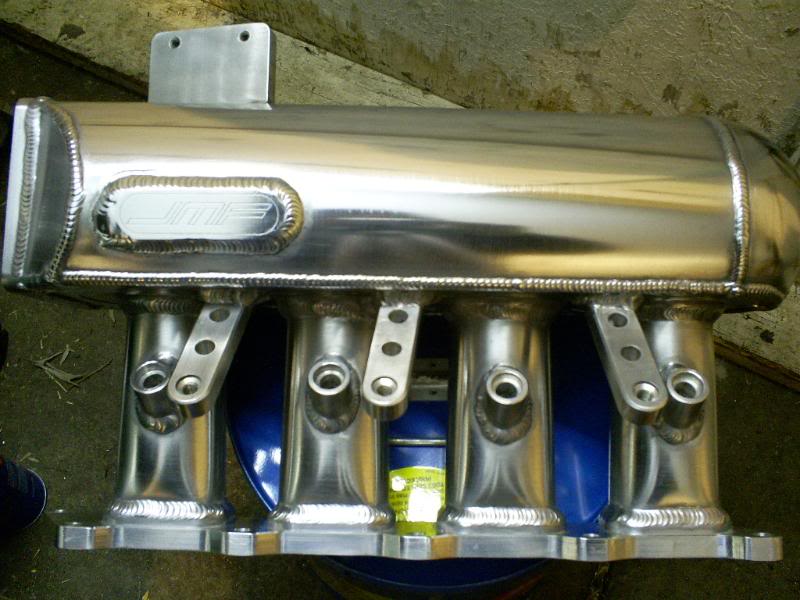
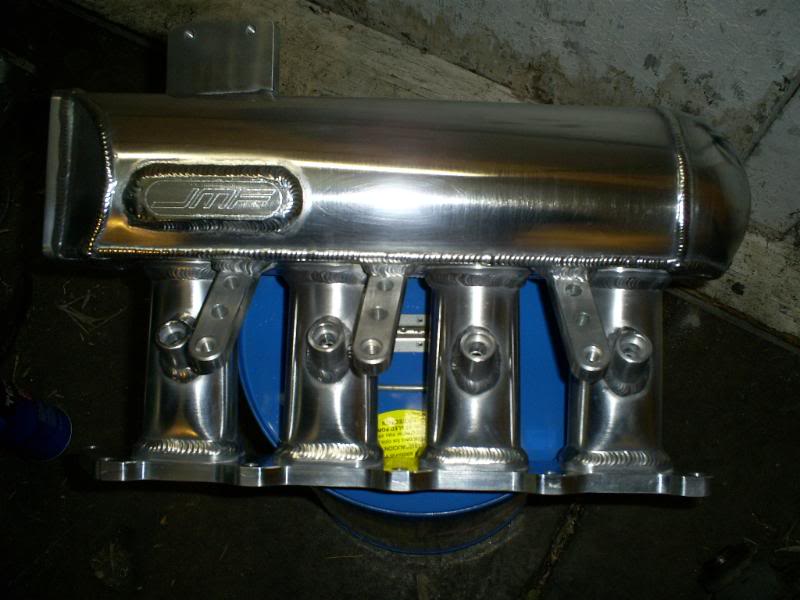
New intake on the left.JMFab Drag intake manifold. Old venom is on the right.

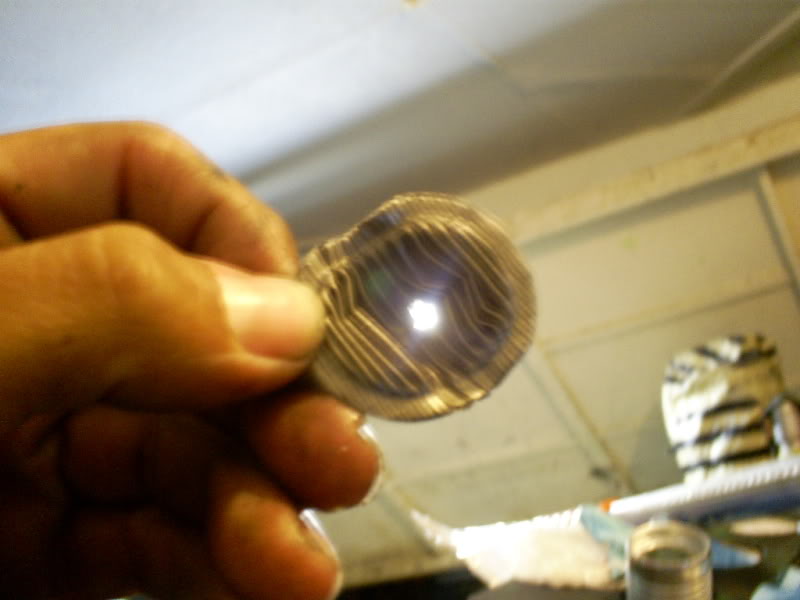
I am not much of a polishing freak since I have a friend in the wyldkardz crew that does a mighty fine job at it. Unfortunately, he will be out of town for a few days and I have no patience. This intake manifold had to be on yesterday. So, I headed down to the local auto parts store, picked up a mothers power ball, mini ball the paste polish as well as the liquid.
After a couple hours of polishing I got it shining a decent amount. I hit the intake manifold a couple times on the more “seen” areas just for good measure. I then hit them by hand for a final finish. Up front it would have been worth the 80-100 bucks or so to have the intake manifold polished by JMFab. In the long run, my hispanic side does like shiny things. So for about 70 bucks worth of polishing materials I can continue to polish even more things.
Oh, incase anyone wonders…I found a small crack on the endtank of my VENOM intake manifold. I was about ready to have the injector bungs welded on as well as the mounting points by a local. Luckily for me, my federal tax returns arrived on time!
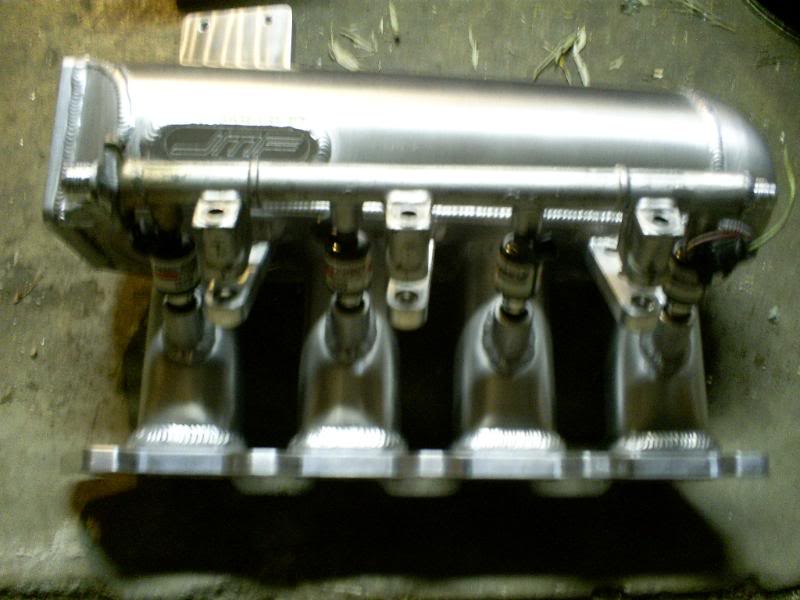
So I abandoned the dual fuel rail project on the venom intake manifold, and just bought a JMFab drag manifold with the dual fuel rail/injector bung option. Just incase anyone is wondering, ECMLink already has a small patch out for the control of secondary fuel injectors. I will be doing some street testing for the ECMlink crew here VERY soon as you all can see.
But for the finished product.
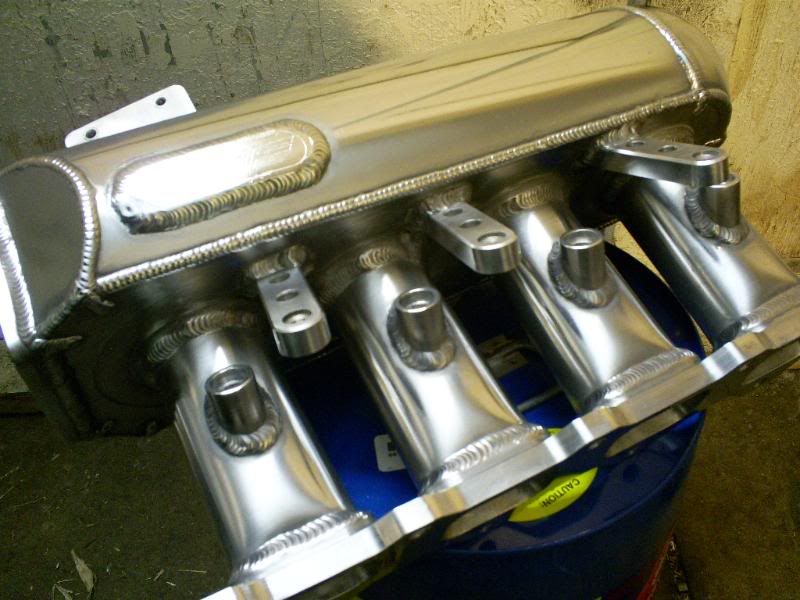
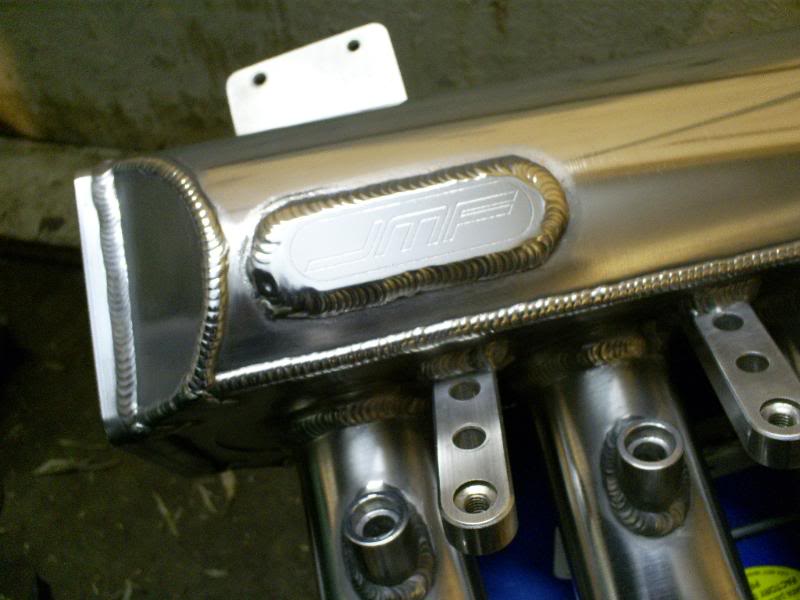
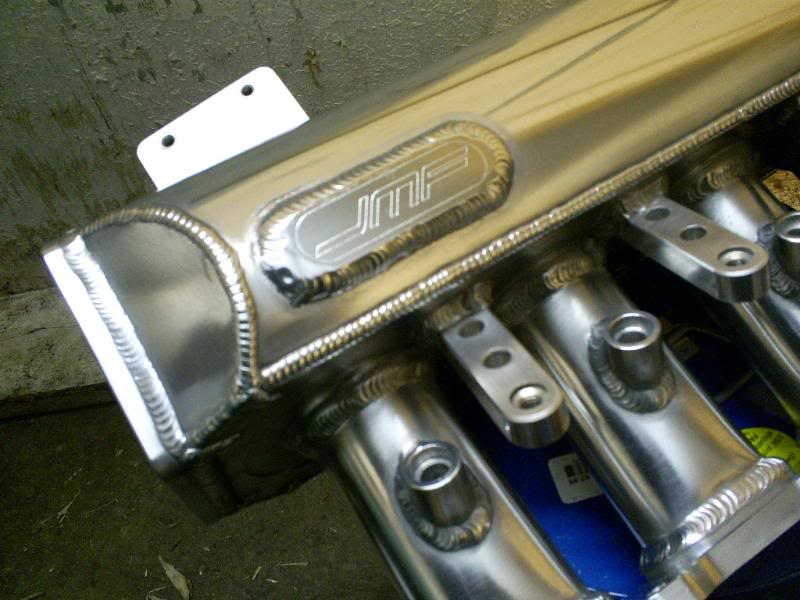
One with flash…
Anywho, I got the AEM injector driver box hooked up for the most part. I just need to solder 4 wires on the ECU harnes for the injectors.
I’m waiting on a few more fittings from summit and it should be back to its old self again
Heres an update.
OMG this clutch pedal is terrible.
I finally broke down and said F-IT. I gotta figure something better out than the OEM clutch pedal.
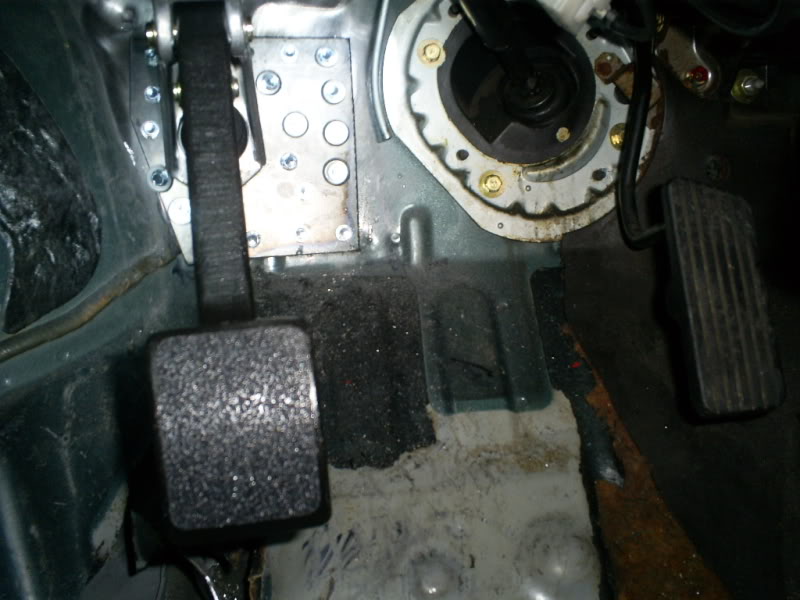
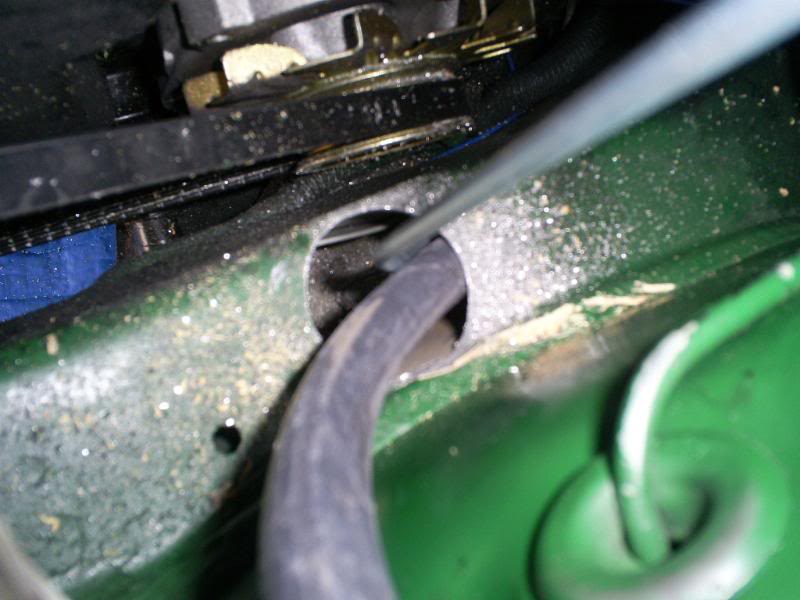
I bought a wilwood clutch pedal and master kit from summit for 125. I then went to work on figuring out how to mount this bitch. I spent a whole damn day trying to figure it out.
I had to go THROUGH the frame rail behind the firewall. 2 pics should tell the whole story.
This was the 4th time I had to pull out the clutch/brake pedal assembly and I had enough.
All thats missing from the pics is some welding I am going to do on the upper side of the 1/8th inch backing plate.
I will update on how the wilwood master cylinder performs. It is physically larger by about 1/4 of an inch. I imagine the piston is larger and the throw is greater as well.
Wish me luck!
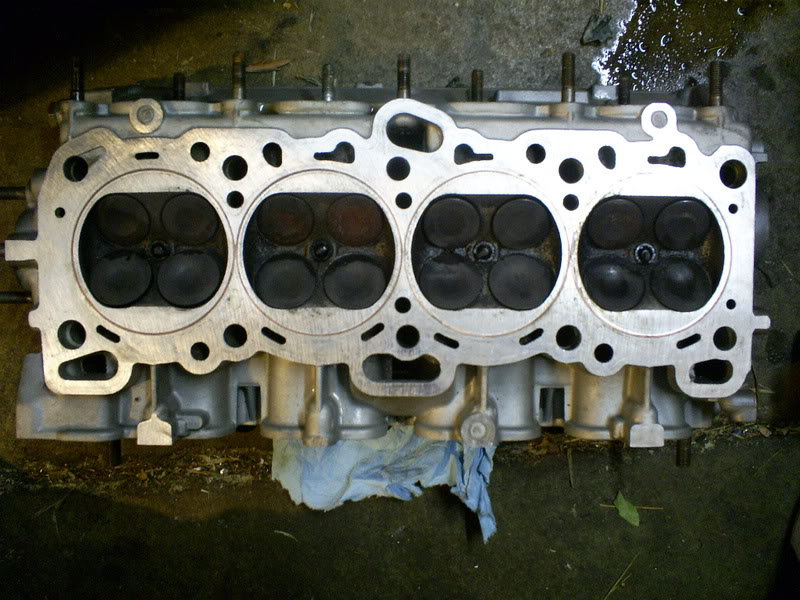
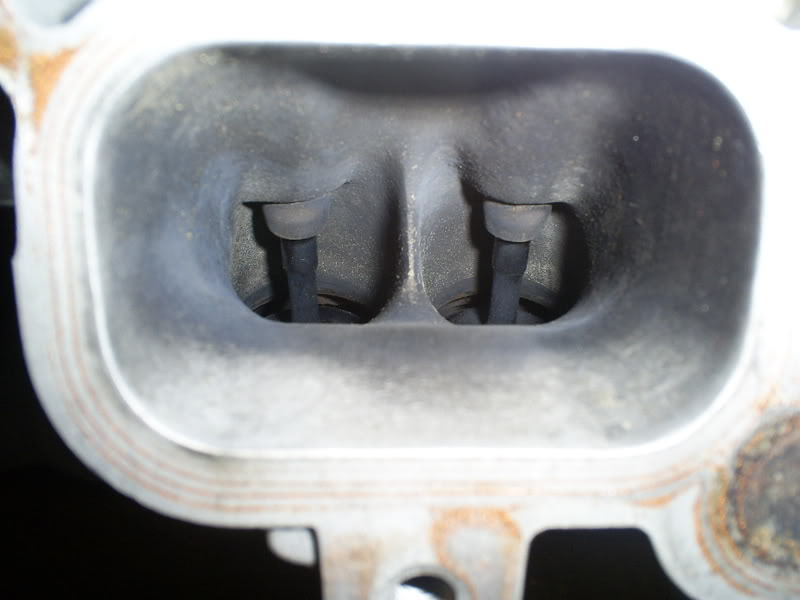
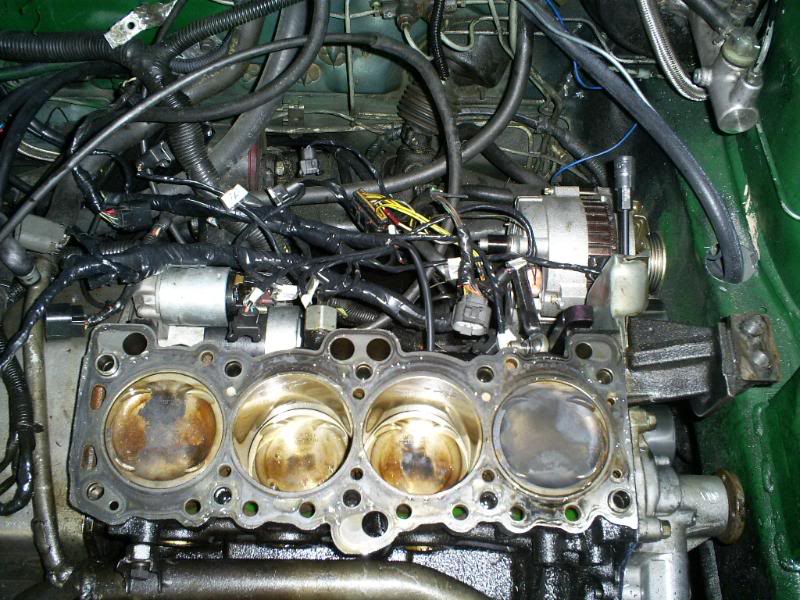
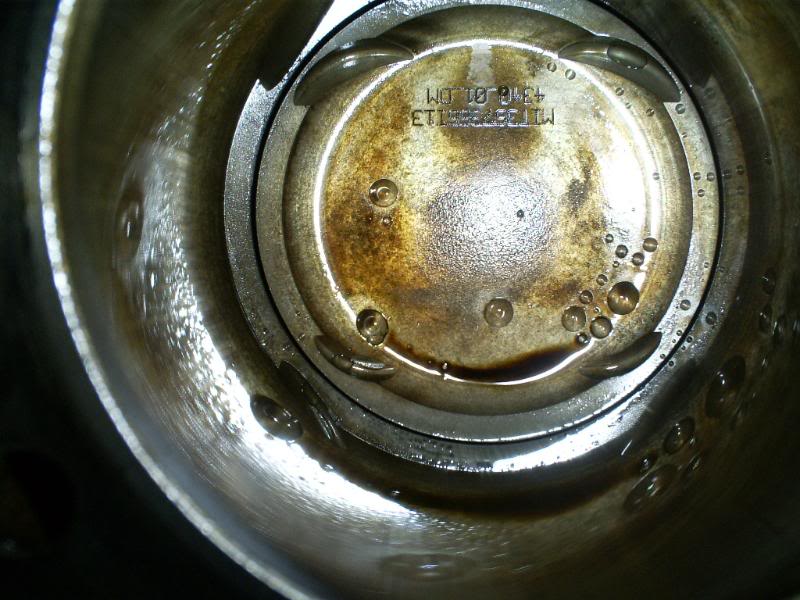
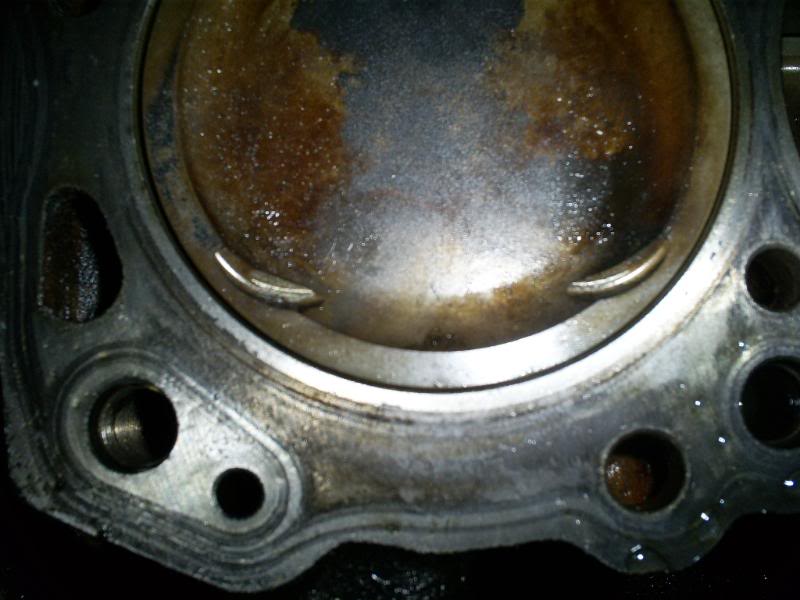
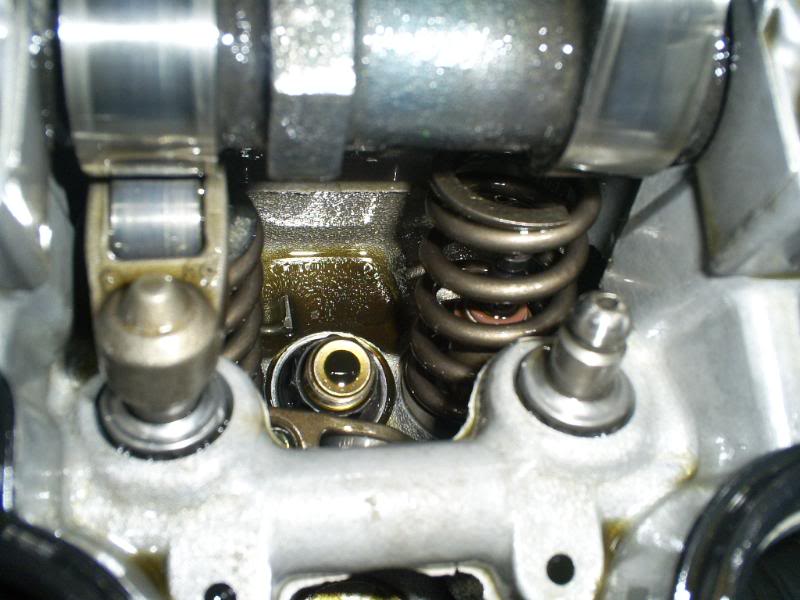
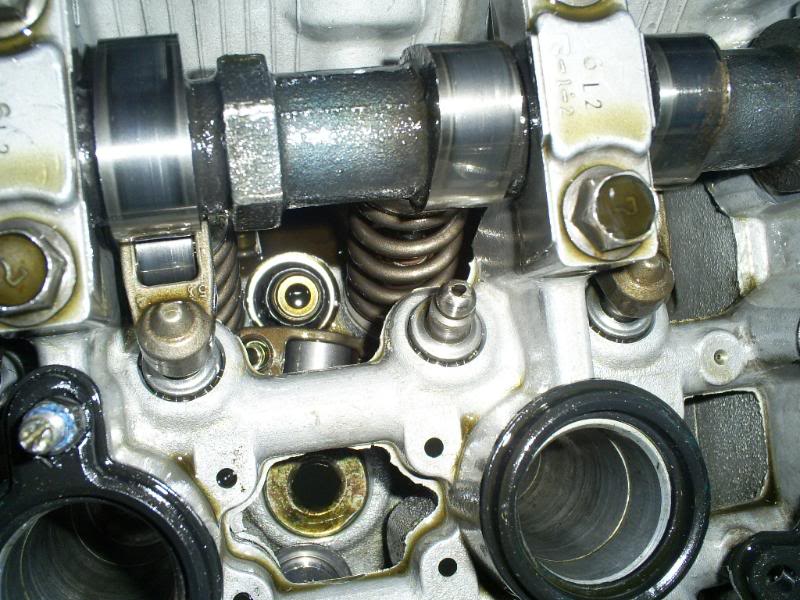
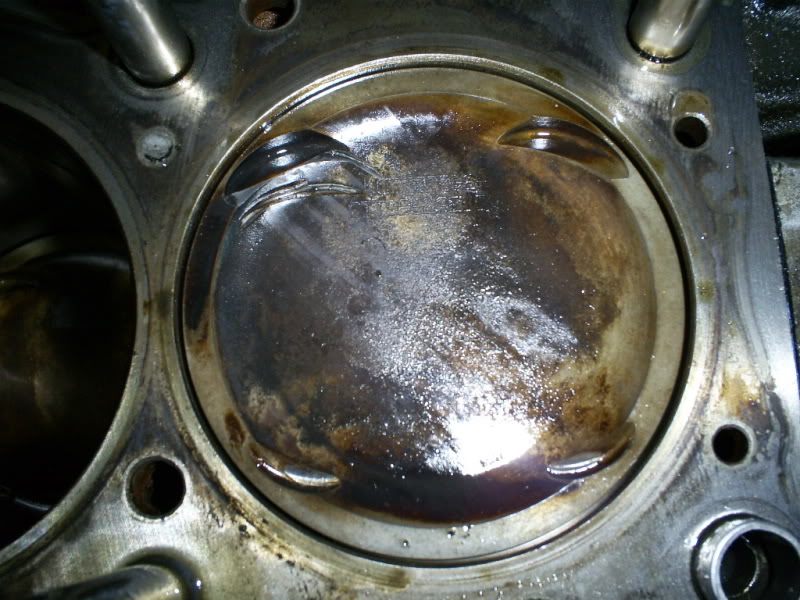
So after a year of abuse, i decided to pull the head off and throw the other head I had here on.
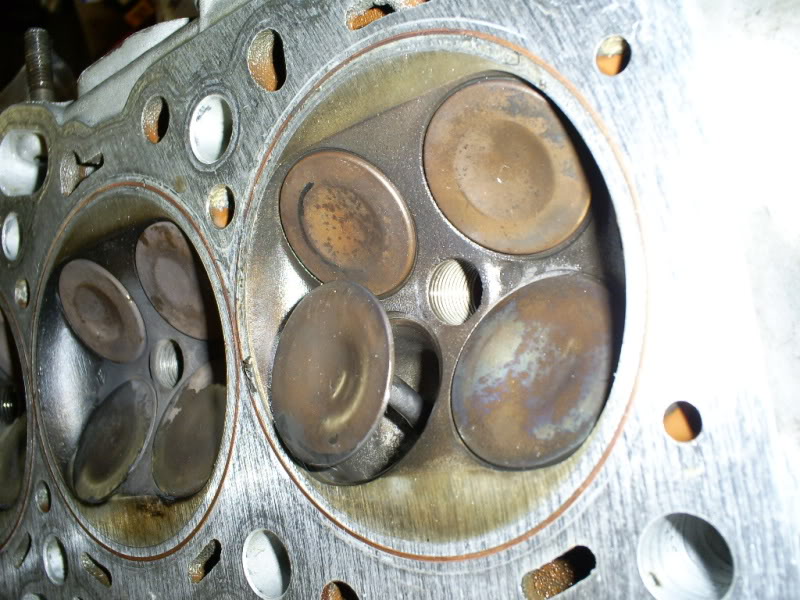
Here is what the cylinders look like. Seems that 7 of the exhaust valves decided to kiss the pistons The intake valve seals were also leaking like a mofo. I would say there was about a cap full of oil in each intake runner. I guess I didn’t notice it when I swapped the new manifold on.
The carbon build up is pretty nasty on cylinder 1, but 2-3 were pretty damn clean!
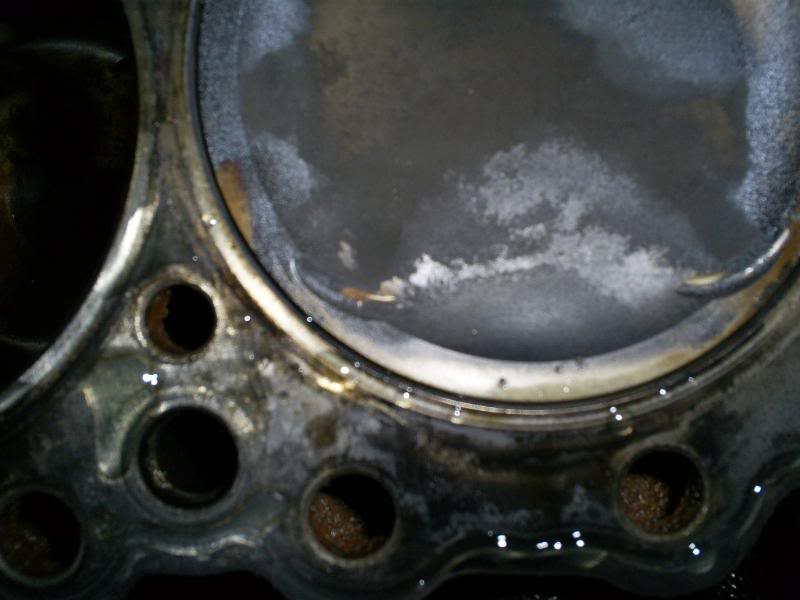
Cylinder 1.
Cylinder 2.
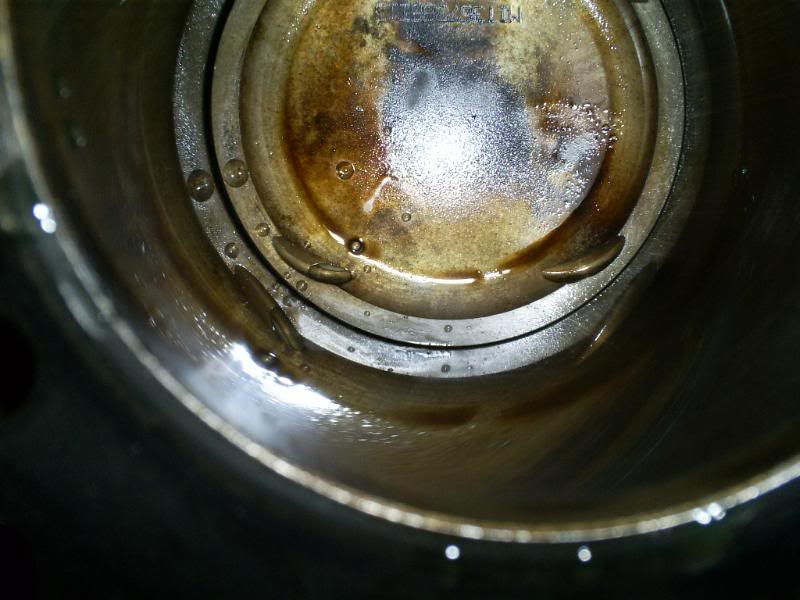
Cylinder 3.
Cylinder 4.
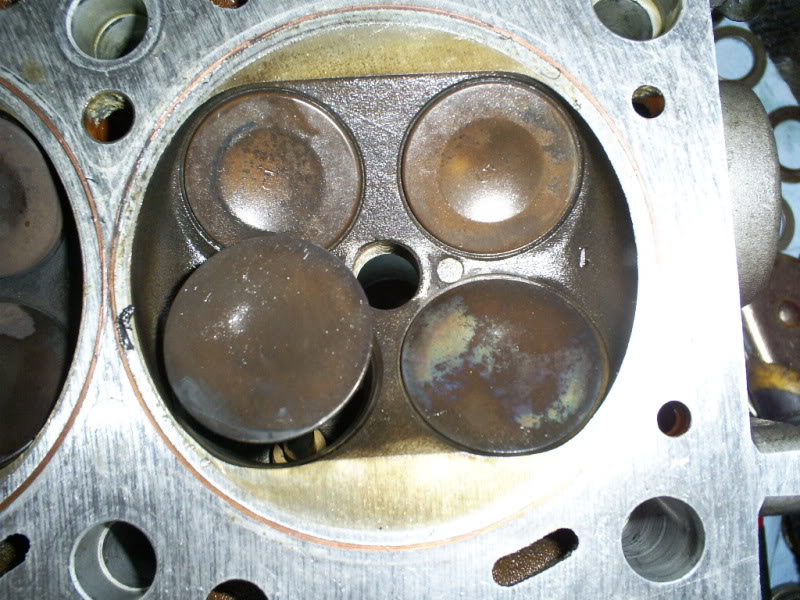
Head.
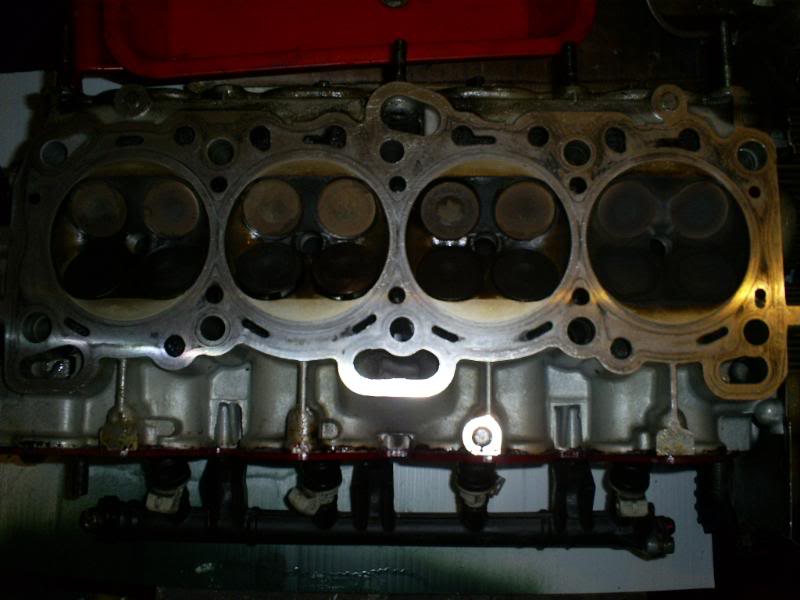
Here is the head back on. I should have her back up this weekend
Just when you thought it was safe to go outside……
Looks like I floated a valve, or one of the keepers decided to quit his job.
I’d say its time for me to take a break off this shit.

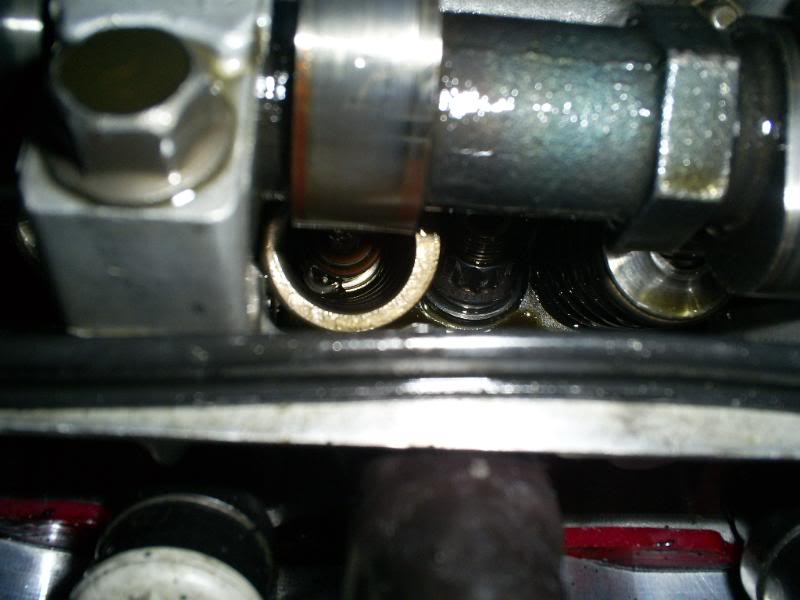
Look at it as you may. Lucky or not, it still sucks.
I got a couple single valves coming my way. Standby…..
Got the head back on and running this weekend. For the record I am REUSING the cometic head gasket here. Its the same old cometic non-hp version I have had for over a year now.
I was just cruising out of a local starbucks parking lot when I lost a cylinder. This time I smelled nothing but E85. I thought one of my injector seals started leaking really bad. So I pull into a parking lot (12:30 at night) and decide to do some troubleshooting.
Turns out one of my 1600s got stuck OPEN! ACK!
I get the injector unstuck by fingering the pintle, I then switch the injector clip to the other 1600 in the same runner.
While in the parking lot I pulled out the plugs and found cylinder number two (the injector that went to shit) FILLED with E85. It was like my own little fish bowl. I get her home and park it.
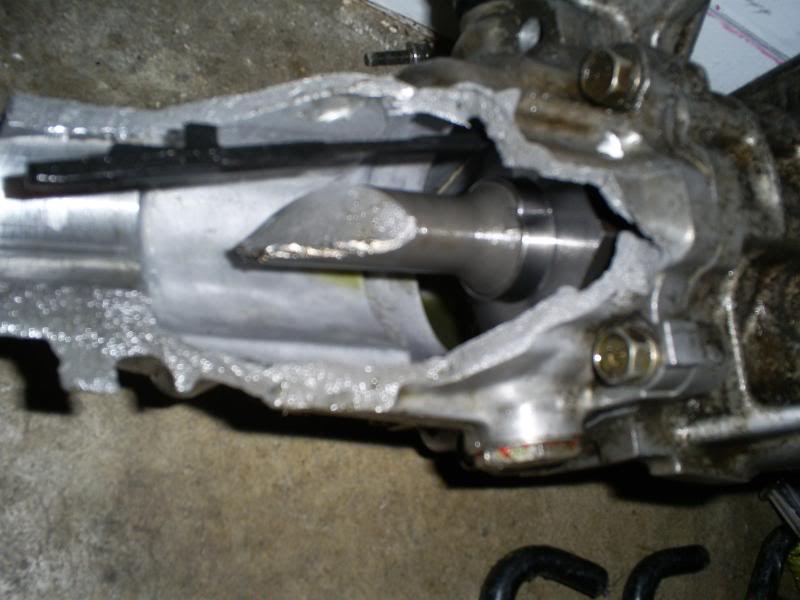
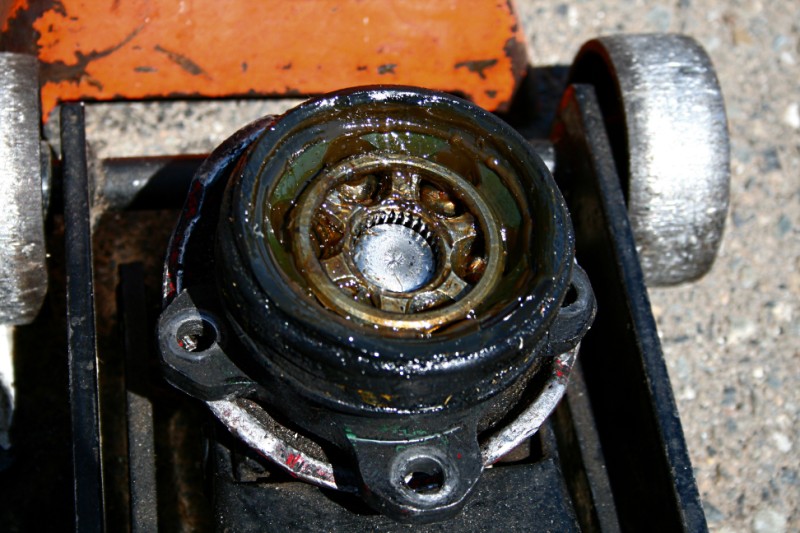
So its time for that monthly tcase swap.
Looks like I got me a dummy tcase incase I want to dyno in fwd mode. This is easier than dropping the driveshaft and tcase. Im sorry, but I despise FWD…especially with this much power. No traction in any gears!

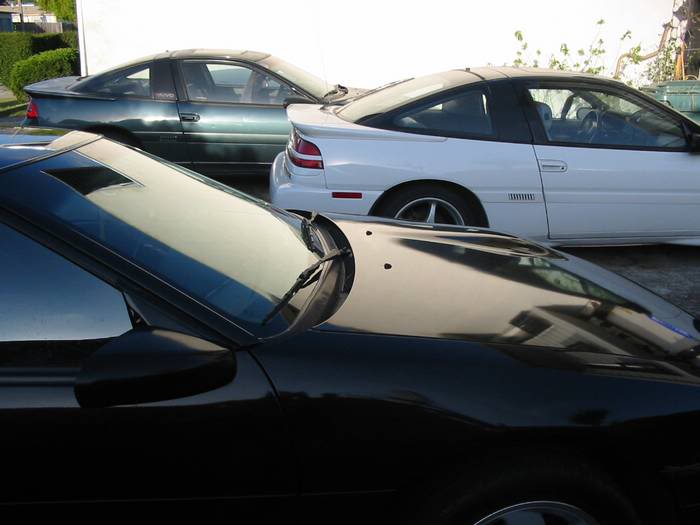
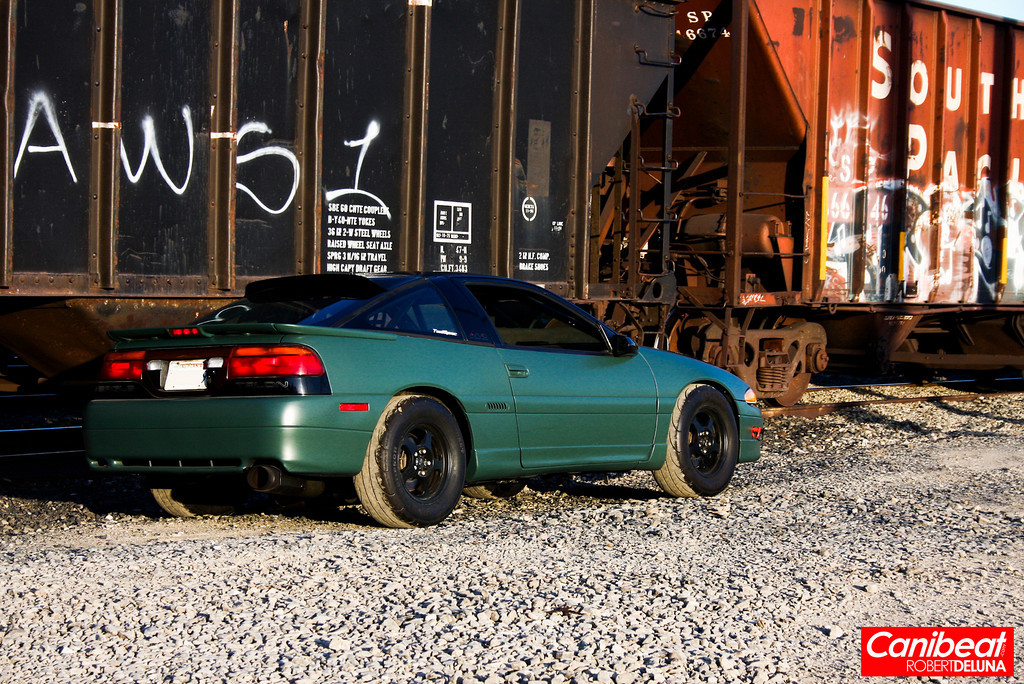
A local meet here in the bay. Pics taken by Robert.
No new vids yet. I hope I can get some new gears here soon. I dont wanna run the stock 3rd and 4th. I loved the way the EVO III gears shifted.
Regardless, I’ll be at CMI with the backup transmission if I can’t get this one put together in time.
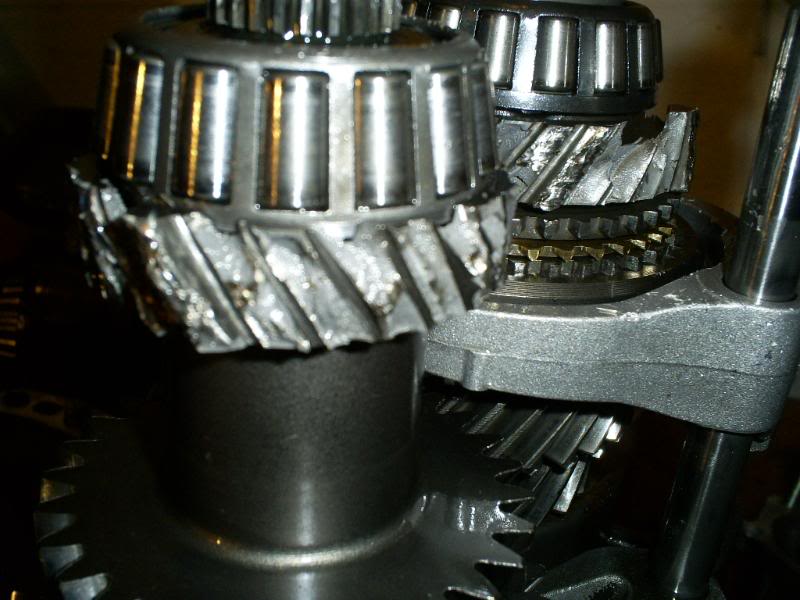
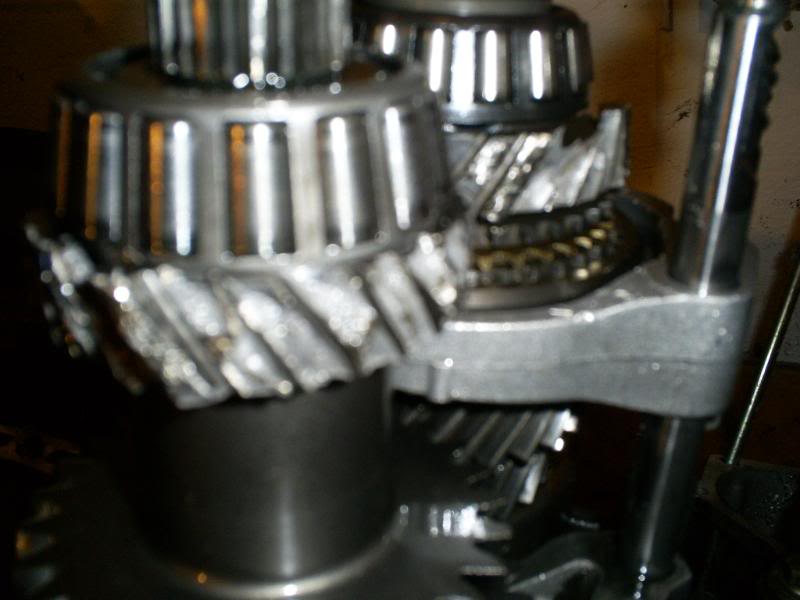
Yes, this is whats left of the dual synchro EVO III 3rd. Happy Memorial day
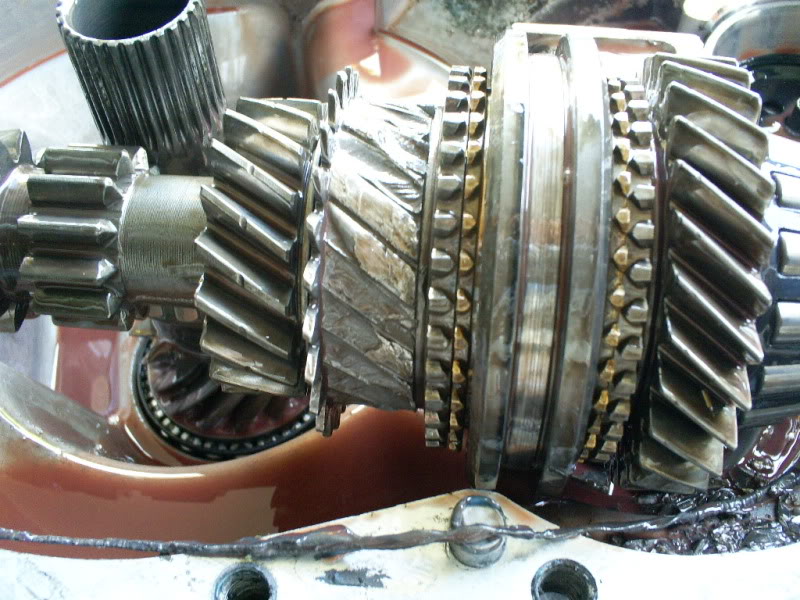
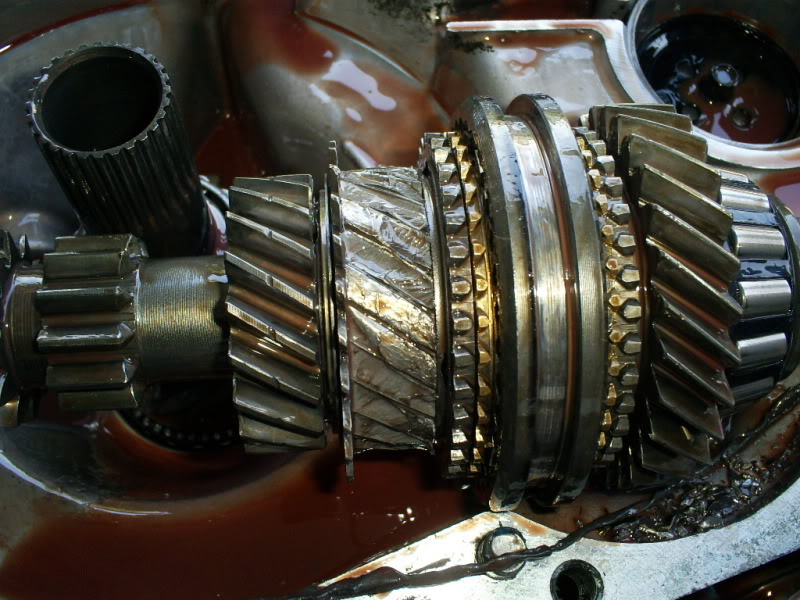
So, after putting on my backup transmission it decided to take a shit at CMI earlier this month. I haven’t posted here since then because of disgust with the car. The backup transmission stripped the intermediate shaft gear that mates to the center differential. This time the welded center didn’t survive. I just rebuilt another transmission with evo III 3rd and 4th gears (again). We shall see how long it lasts.
I also broke my first stock 4 bolt rear axle. I ended up ordering a new set of DSS 300m axle bars. I figured I would go brand new, just incase I broke one and wanted it warrantied.
Here is a pic courtesy of Yuri on what happens when the tires dead hook, and the car wants to spin. Now that the transfer case is bulletproof (not a sheptcase BTW) Everything else is hating life.
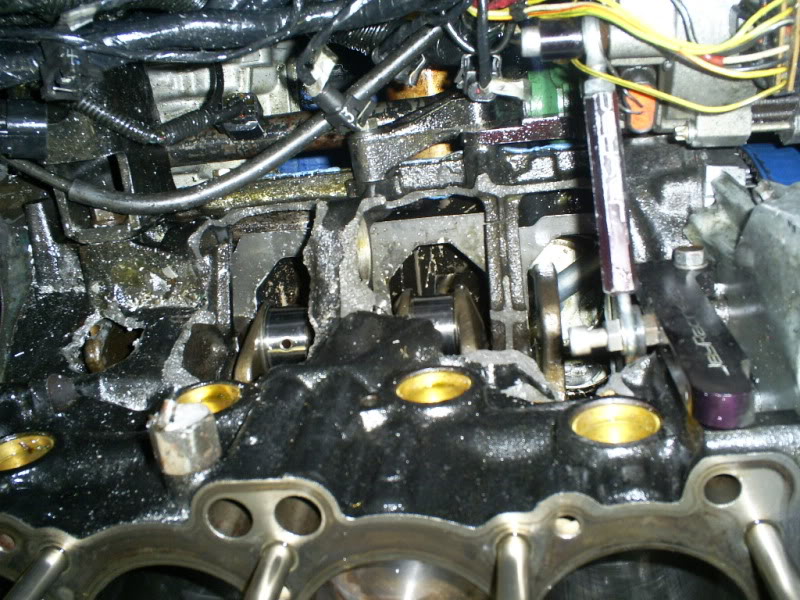
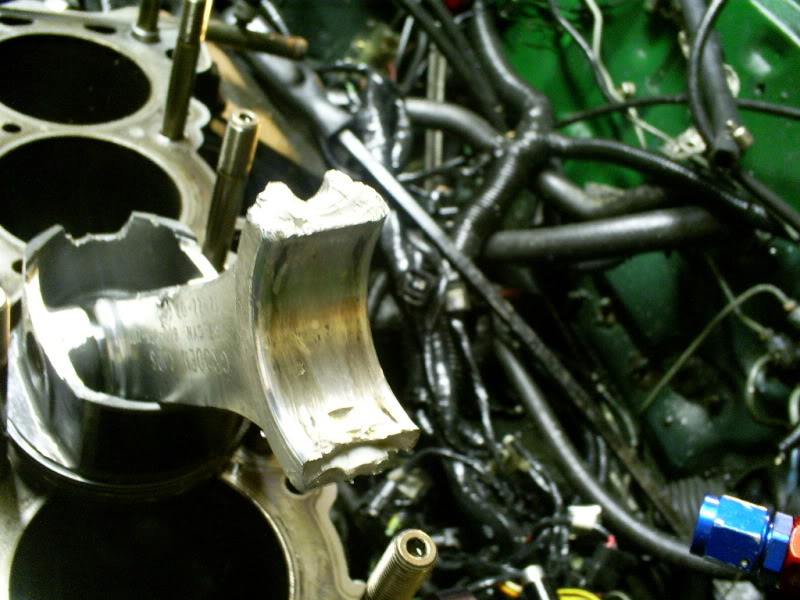
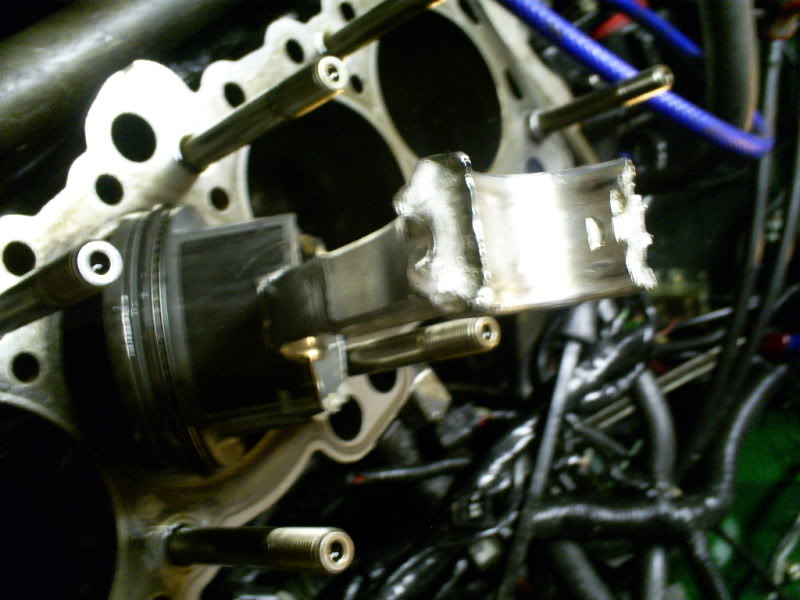
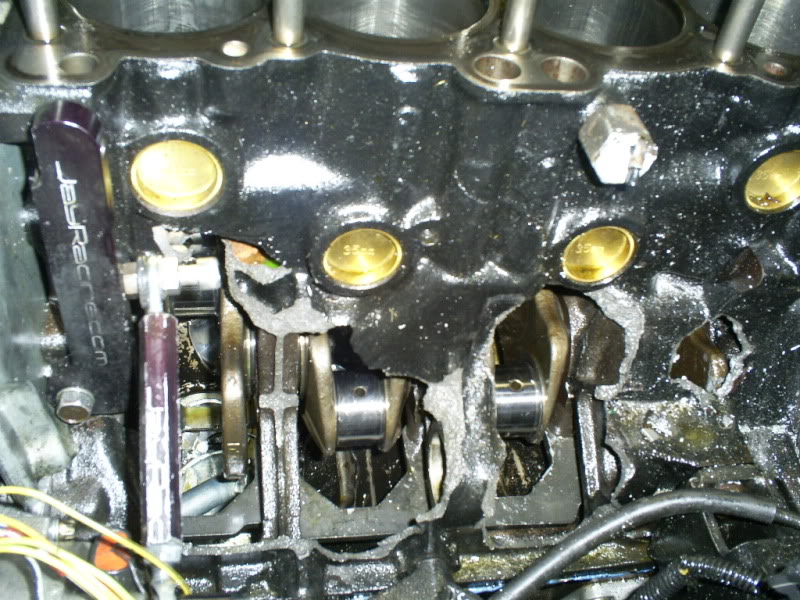
Pictures are worth a thousand words. Here is what happened yesterday at the track. She ran an 11.3@142mph on a 35 shot of nitrous. I bogged the snot out of the car in 1st, then she spooled up and got me to the end of the track.
I have to say this motor has been abused to shit since march of 08. The short block never gave me ANY issues. A little bit of piston slap for the past few months, but nothing out of the norm. She worked hard, pumped out some decent power and responded well to the 35shot of giggle juice. It was long overdue, to go boom.
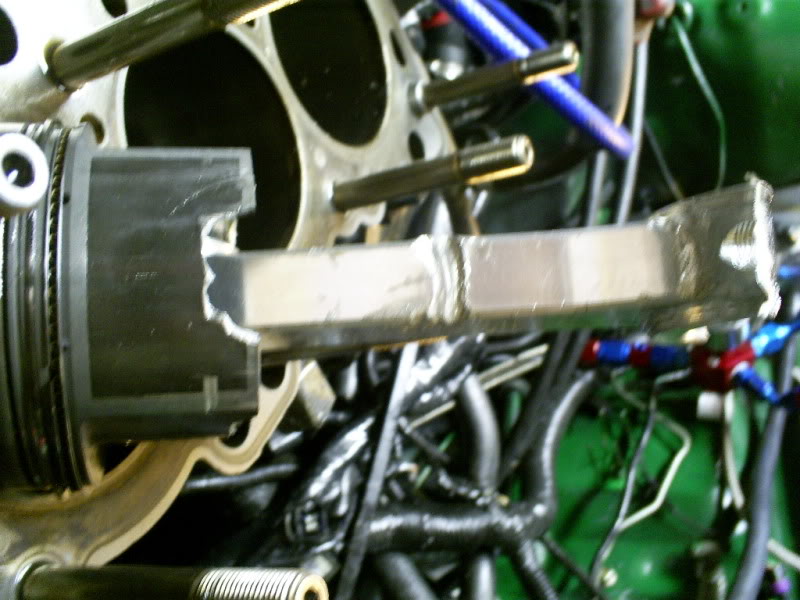
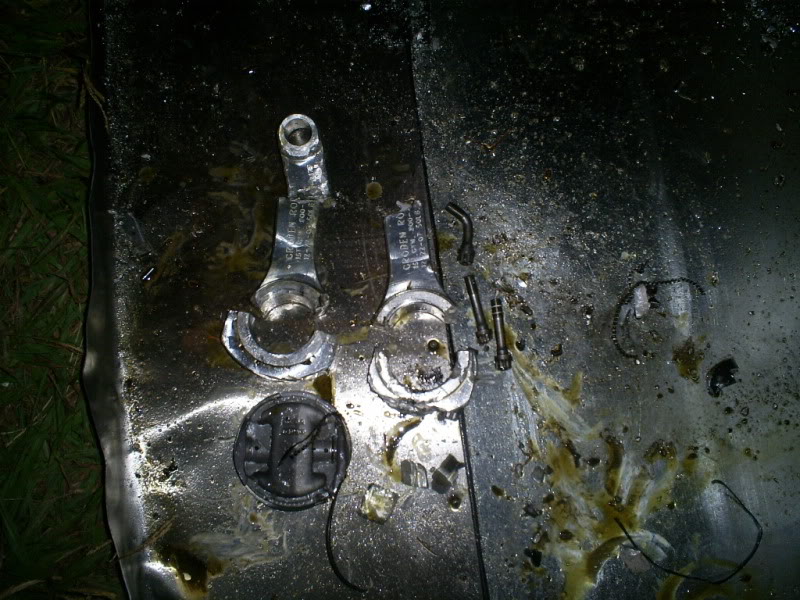
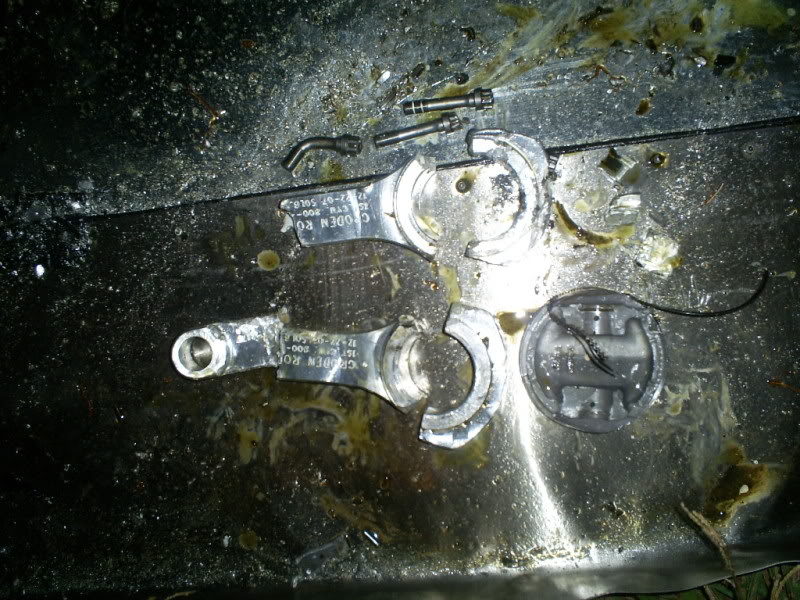
I really don’t know where the failure started. One of the pistons looks like the wrist pin pulled right out from underneath it. Another rod end shows sign of the threads pulling out. All of the rods look like they split in half violently.
I will say the new oil catch pan we have to run caught 90% of the fluids that came out of the engine. There wasn’t really any cleanup on the track. Maybe 10 minutes of downtime to inspect and brush off a couple things.
Oh yes, I got a new setup ready to go. It should be done by september or so.
Looks like its time to rebuild that stock tranny I got
I just dropped off the shortblock components at the machine shop today. Pretty much the same build minus the rods and pistons.
ACL Tri-metal rod and main bearings.
ARP mains
ARP L19 head studs
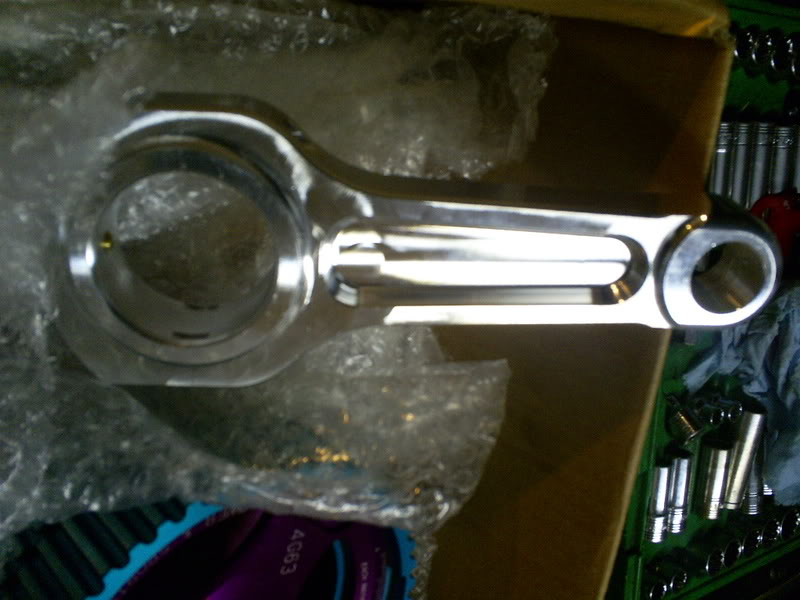
RnR rods with L19 rod bolts
Wiseco HD pistons with the 22mm pin .020 oversized
Kiggly main girdle
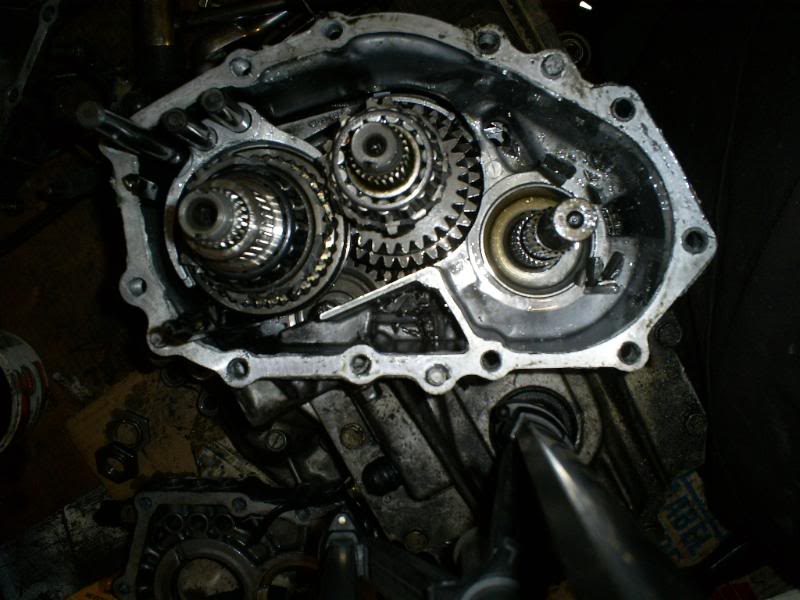
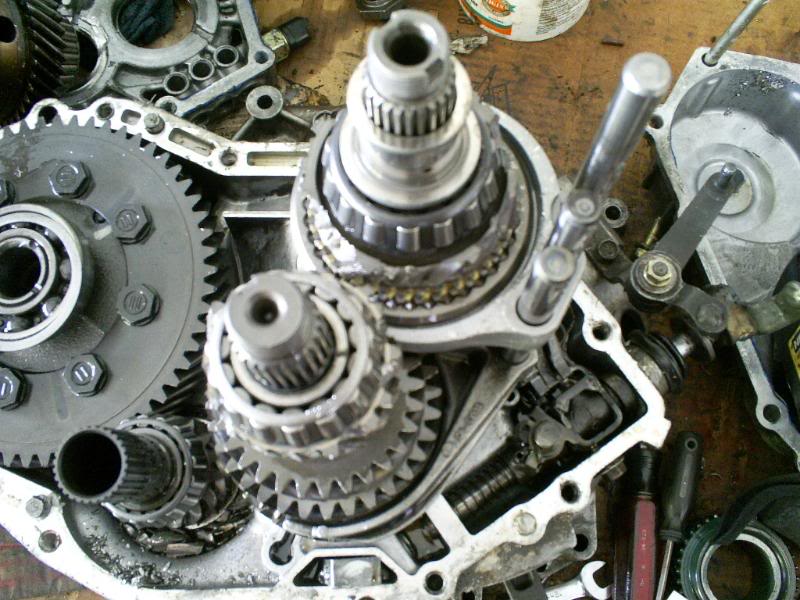
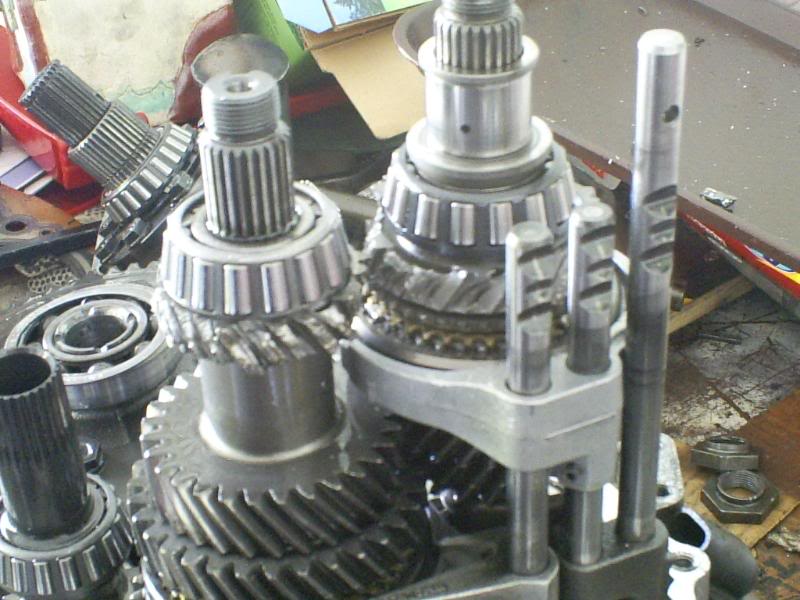
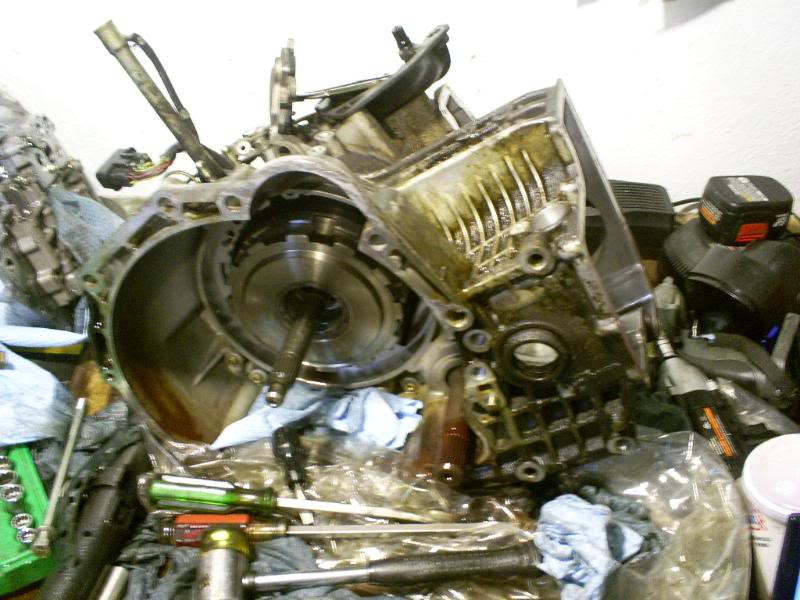
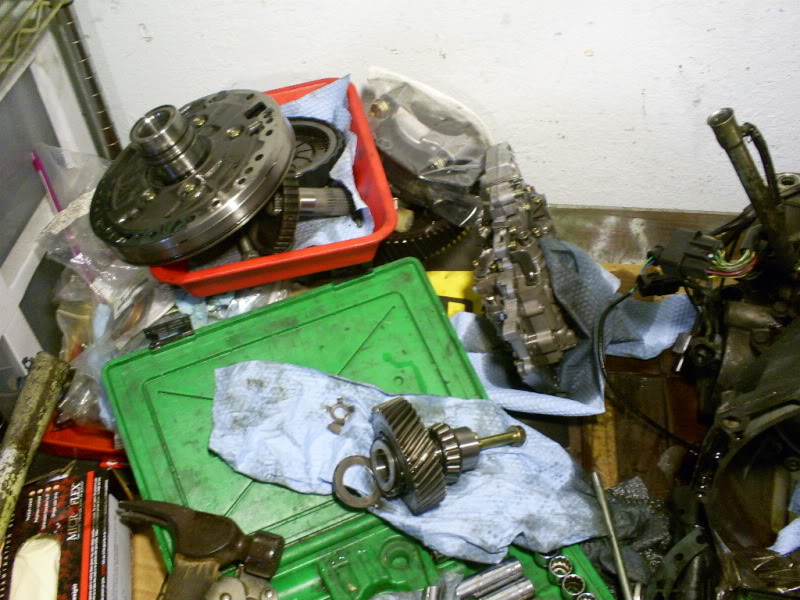
So me and some crew members pulled the auto transmission tonight. We were all curious to see what really goes on in an auto transmission. To me its been a long while since I have learned something new about DSMs. This brought back some great old feelings. You know, the ones that made you feel the excitement of putting in an afc, injectors, logger, and cranking up the boost. Its that fresh old satisfaction, and sense of accomplishment.
Seems that these auto internals take up a larger amount of space! I wasn’t ready for this, as I am used to building 5 speeds.
I’ll probably get it buttoned up and put back in the parts car in a couple weeks for some testing. Just getting it ready for the battle tank when the motors done

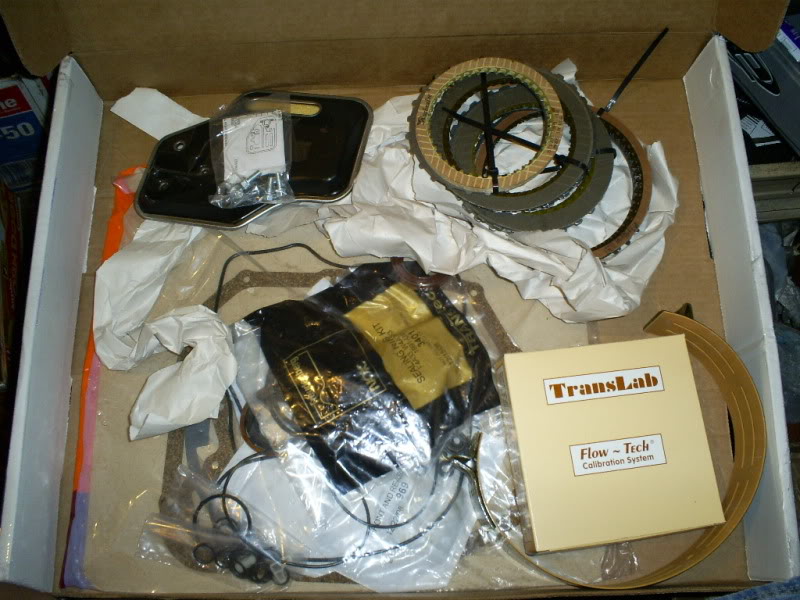
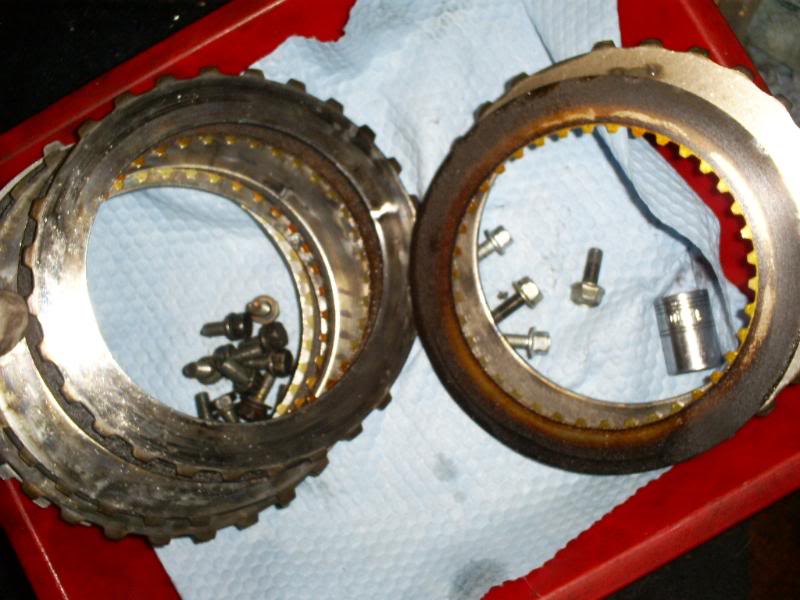
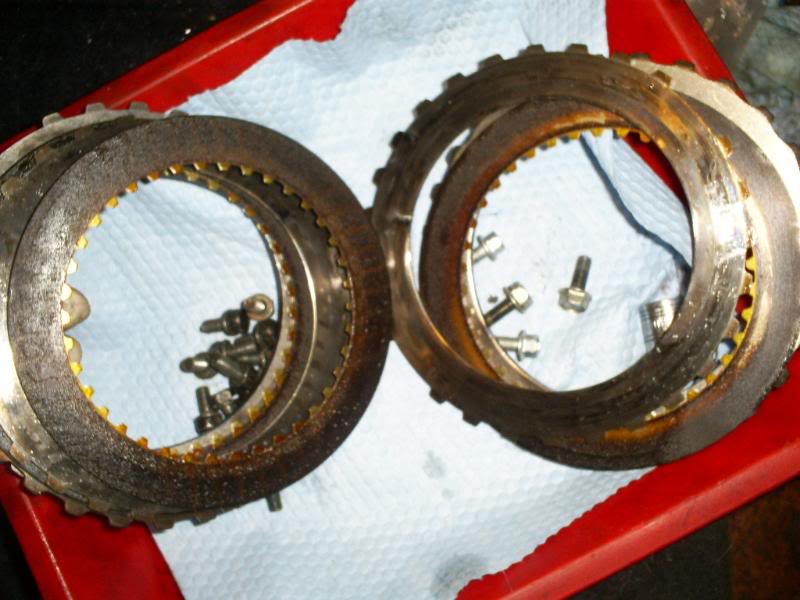
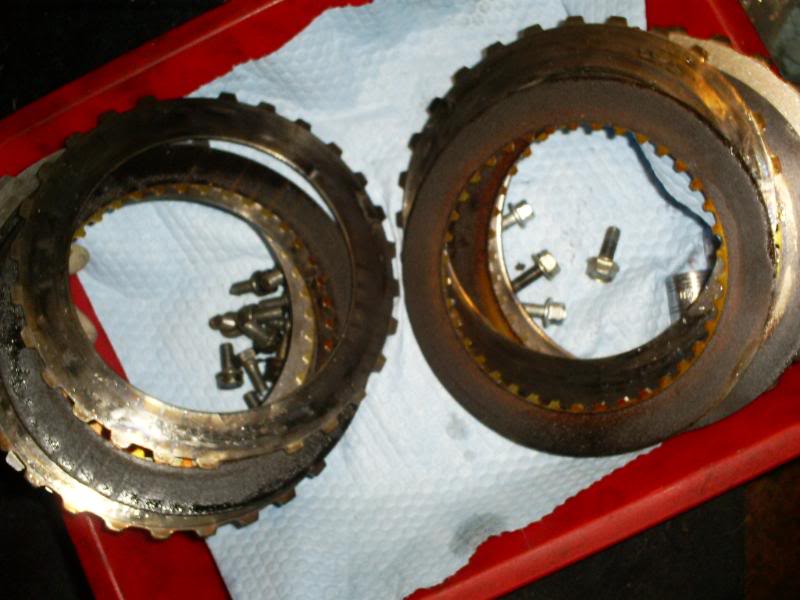
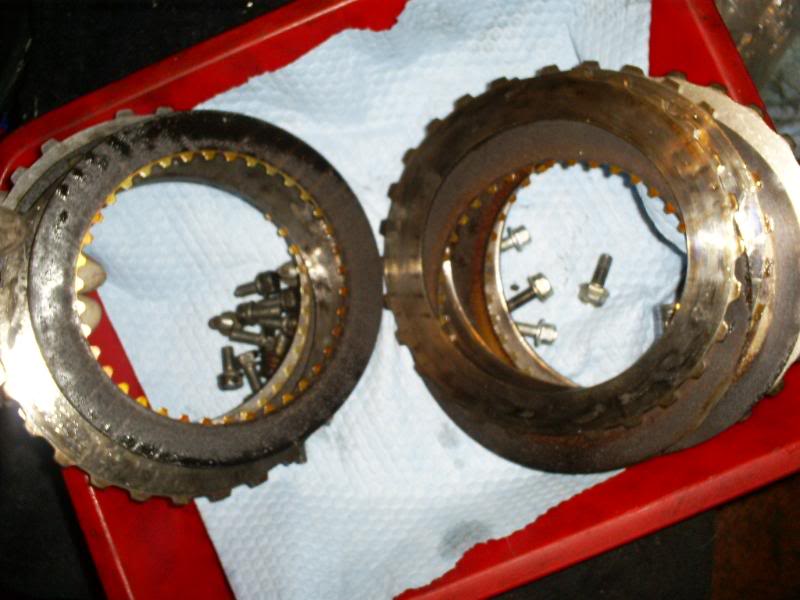
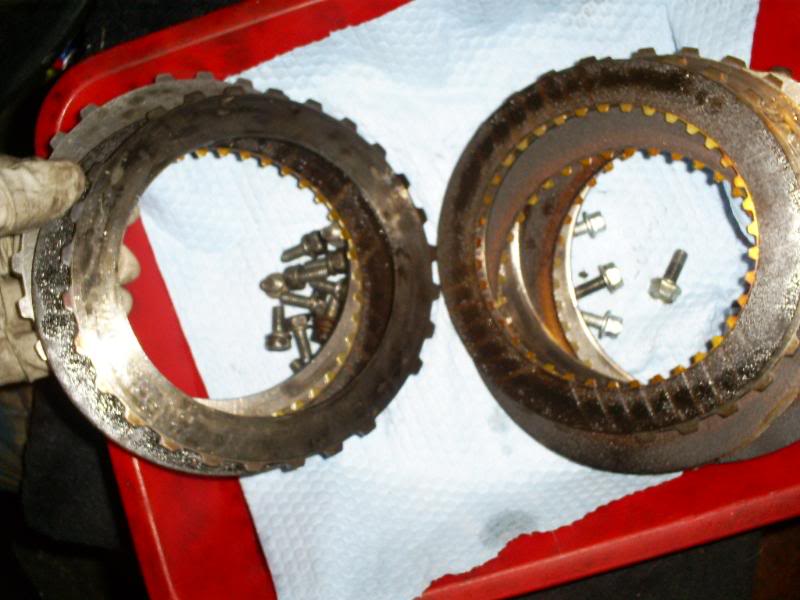
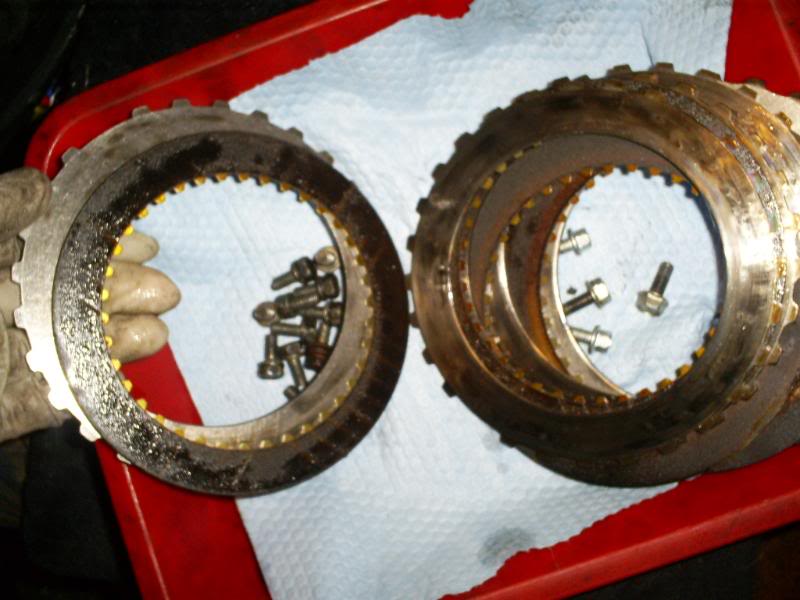
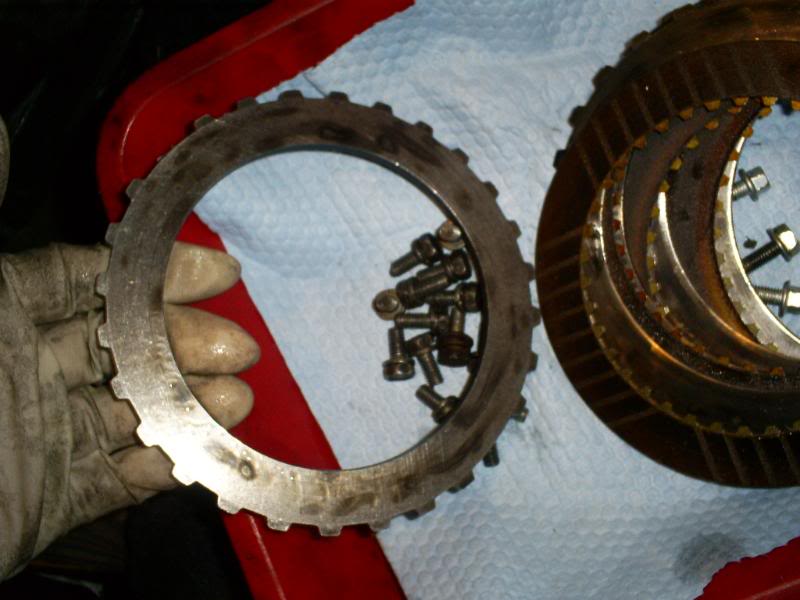
I am almost done rebuilding the auto. So far it hasn’t been as hard as I thought. With the right manuals, its not to bad.
I figured I would post up some pics of the worst clutch pack. Worn down to the metal on a couple disc’s.
The new IPT kit replaces the low and reverse with Borg Warner packs. The others are Raybestos. Doesn’t look like they use the famed alto kits anymore.
Since I am on vacation this week, I’m gonna put this tranny back on the parts car to make sure it all works right.
As promised.
I remember I got one of the older non zinc coated kiggly girdles. Now he zinc coats them. L19s on the rod bolts. 22mm wrist pin on the wiseco HDs. Balanced and blue printed Thank you Daves engine and machining!
I just finished changing the copper orings out for steel ones in the head. Why would I do this? Because I am going to run a fuse. What kind of fuse? A cheap one known as a felpro composite headgasket. Now lets put the debate aside, of mls vs composite vs cometic vs belly button lint; I did this for the sake of saving the motor.
With the new drivetrain setup I will be cranking up the abuse on the longblock, and things may get a bit sketchy. I have no problem changing the head gasket at this level of trouble. I am at 5 months and seven days of downtime, and I do NOT like it. I like enjoying my DSM too much to have it collect dust.
Granted I will be doing some neat things under the hood, but still. Video games, alcohol, hondas and girls can only fill up so much of a void. There is no replacement for my little monster. You guys should already know, I luck mucking shit up and doing what I set out to do. Speaking of alcohol, its time for a drink and a nap.
With that said.
Teasers!
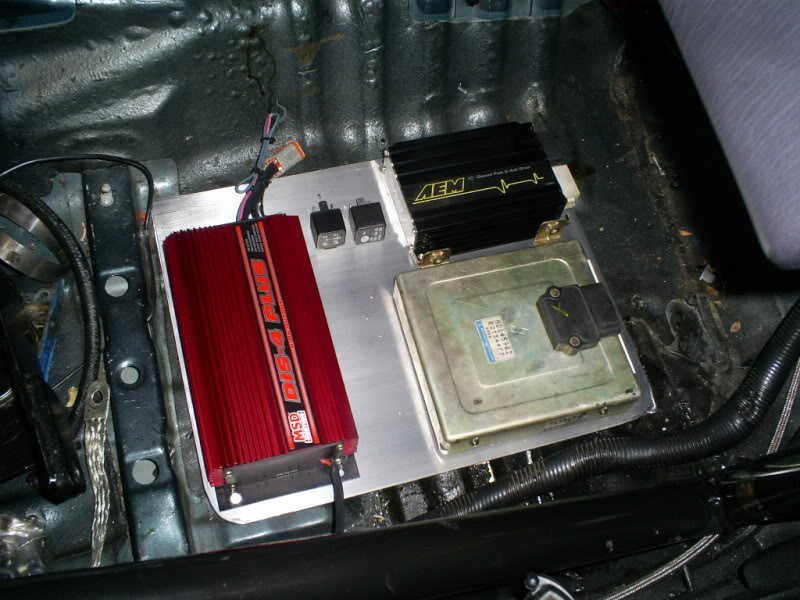
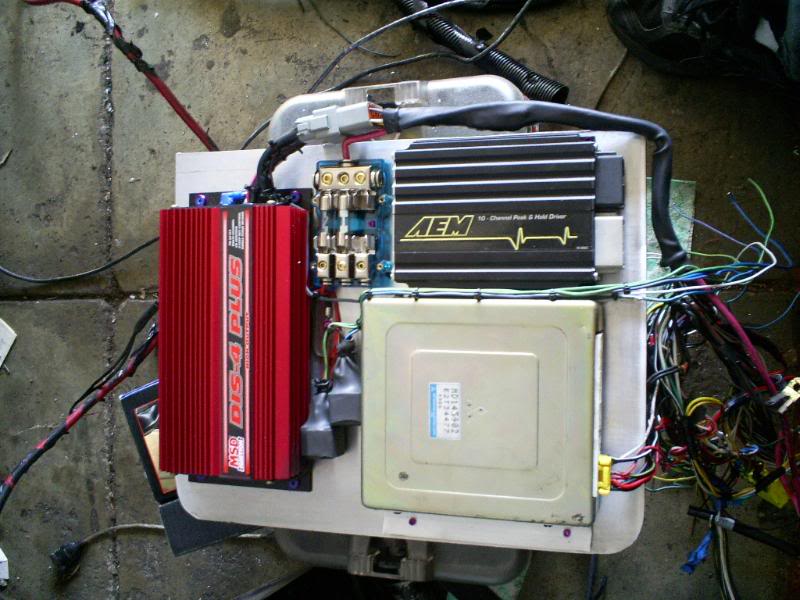
We are relocating the transistor pack wiring right where the ecu plugs are. This is a little something Ryan suggested, a nice plate with all the equipment in an easily accessible place.
Ok I want all you guys to understand how time consuming wiring is, incase you didn’t already know.
With that said, I got impatient and went ahead and did some of the wiring myself without ryans supervision.
After damn near most of the day, I just got one plug left to do. Thats where his help comes in.
We gotta wire the injectors, as you can see I am running the aem injector driver. We need a hot wire that comes on with the ignition plus 4 wires from the box to the primaries. Then we gotta wire the hot wire from the relay (triggered via link) to the secondaries. I already wired them in once when I first installed the aem box. Now, we are doing this a bit cleaner….and Ryan has all the supplies to make it perfect.
Here’s how it looked before a break earlier.
Then as of now.
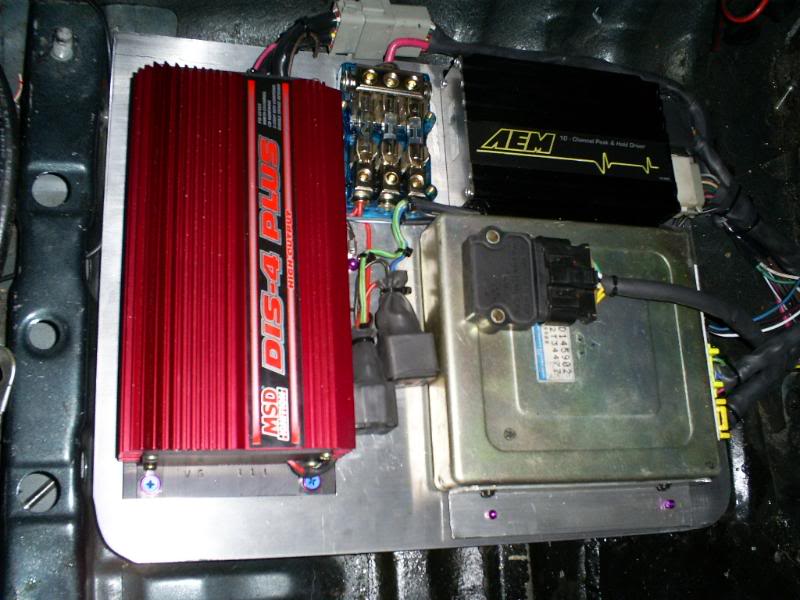
It doesnt look much different but trust me, the main part of the harness has changed alot.
Here is how much left over loom and wire has come out. The box is 12x12x8, do the math.

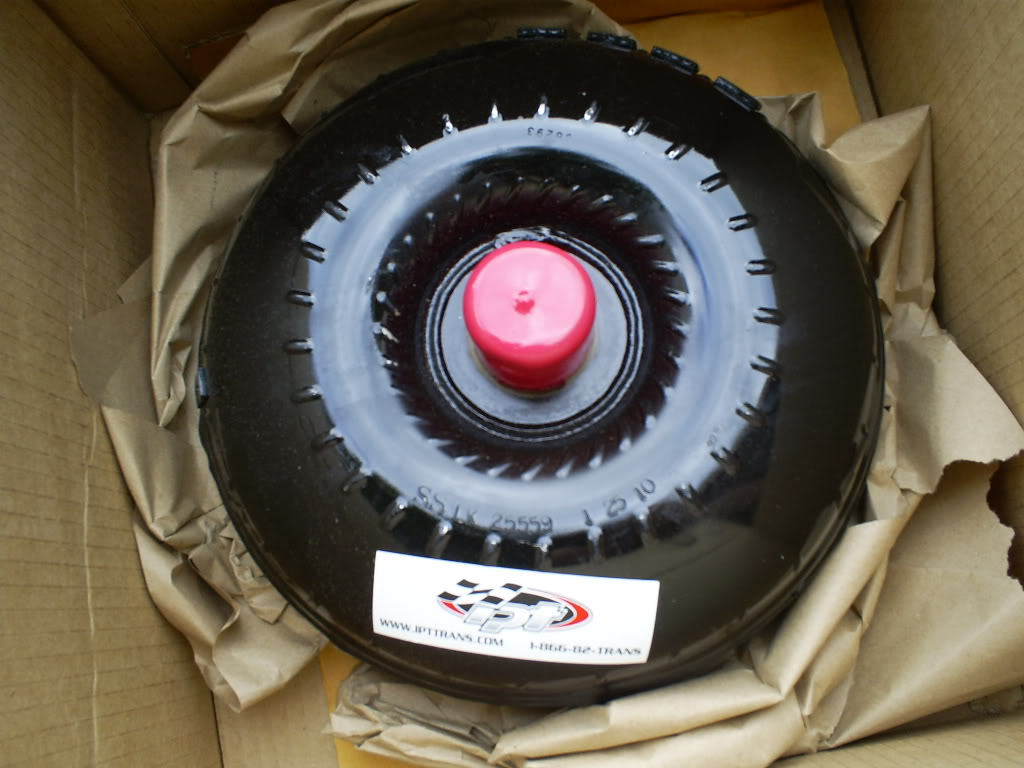
My new baby
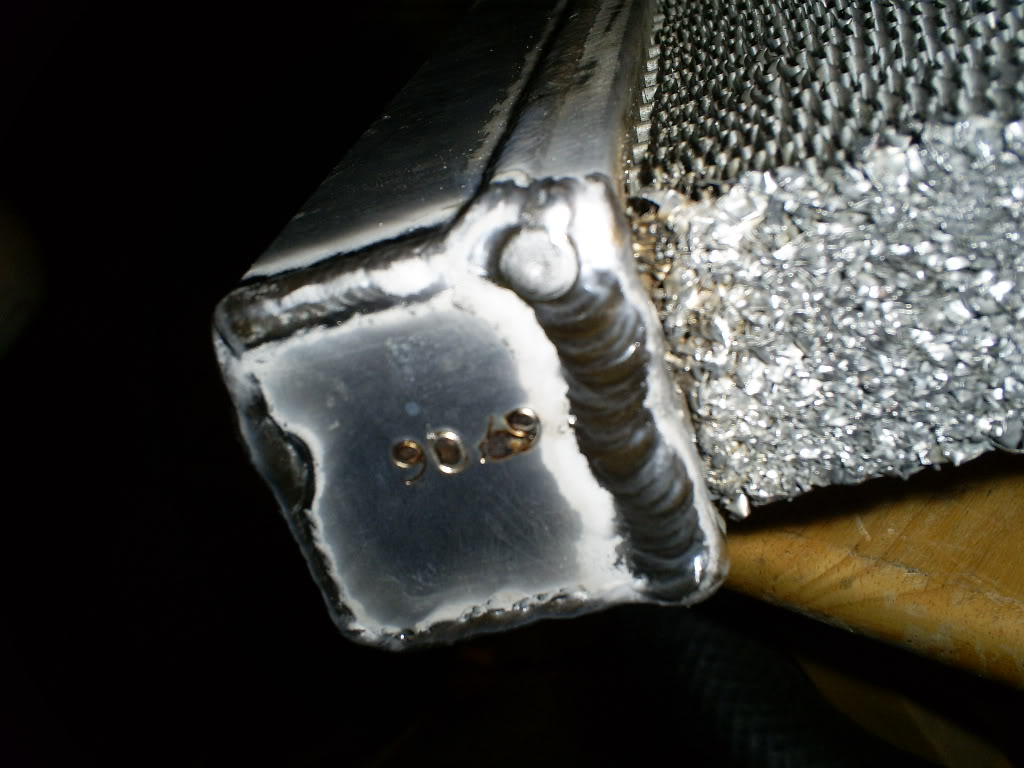
I had to cut my fluidyne radiator in half, and capped off the ends. When my block went the shrapnel took out half the core, so here I am with a honda sized half core.
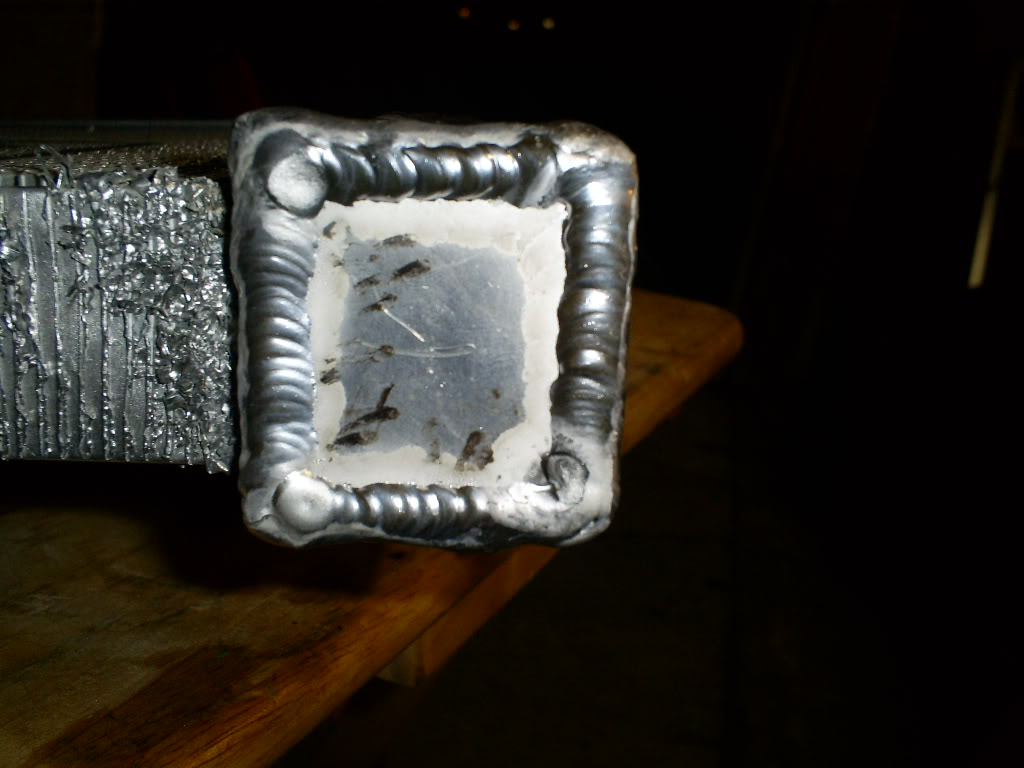
I started messing with an old valve cover too. I welded a bung to the top of it and it came out semi decent. At least it wont leak Looks like a got a bunch of best friends now. I’m practicing welding an intake and other piping for friends.
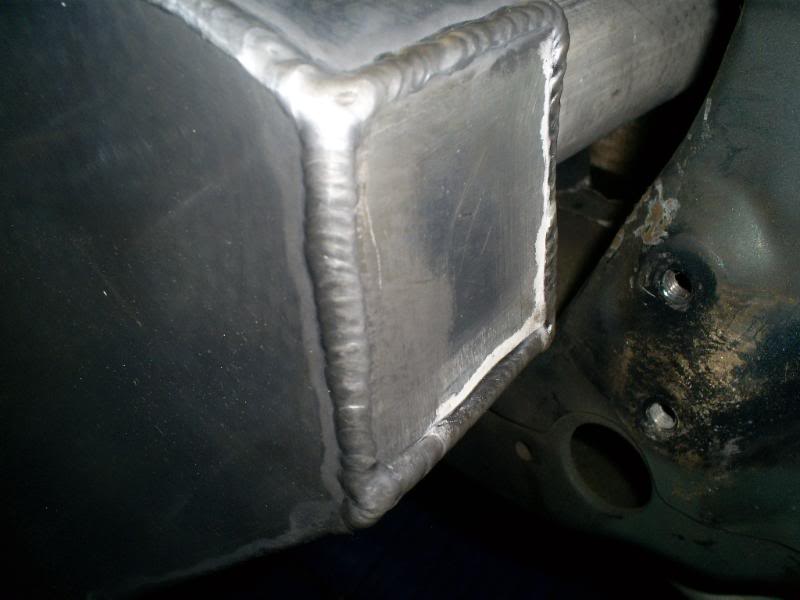
Here are the end caps. The bottom right corner of the first pic is fine. It was just something with the camera flash that makes it look like its not filed. Wierd. Second time Tig welding aluminum, I think it came out semi-decent.
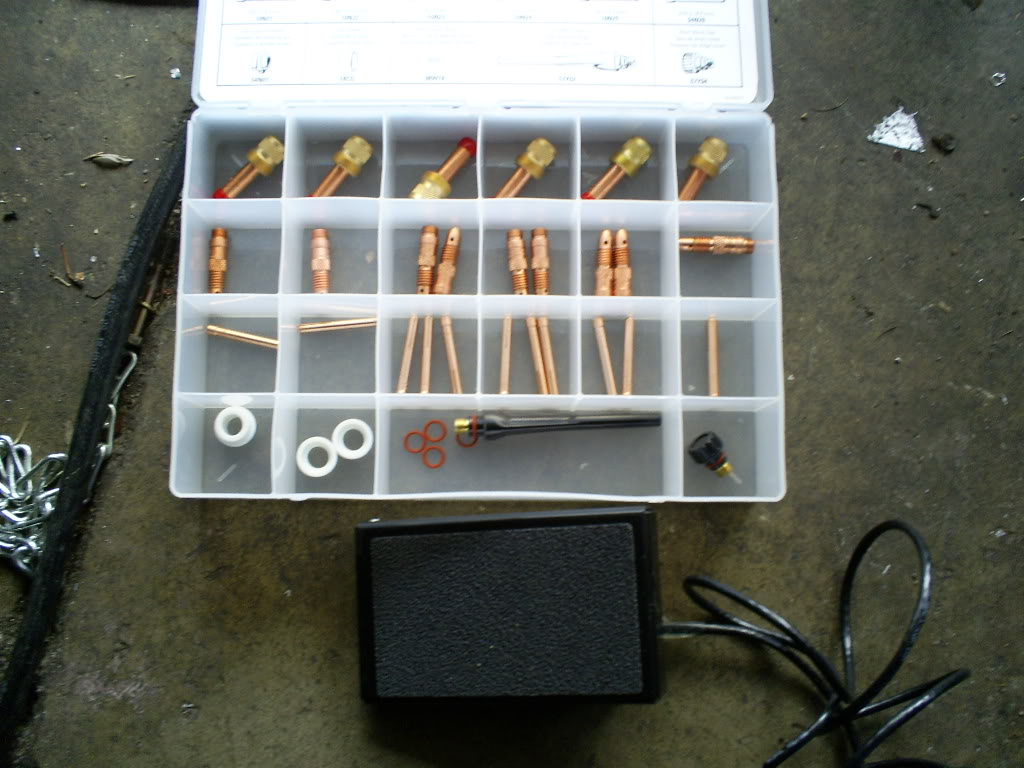
I went shopping online and came up on quite a few supplies for the tig as well as the much adored foot pedal.
I also got the missing piece to my puzzle today.
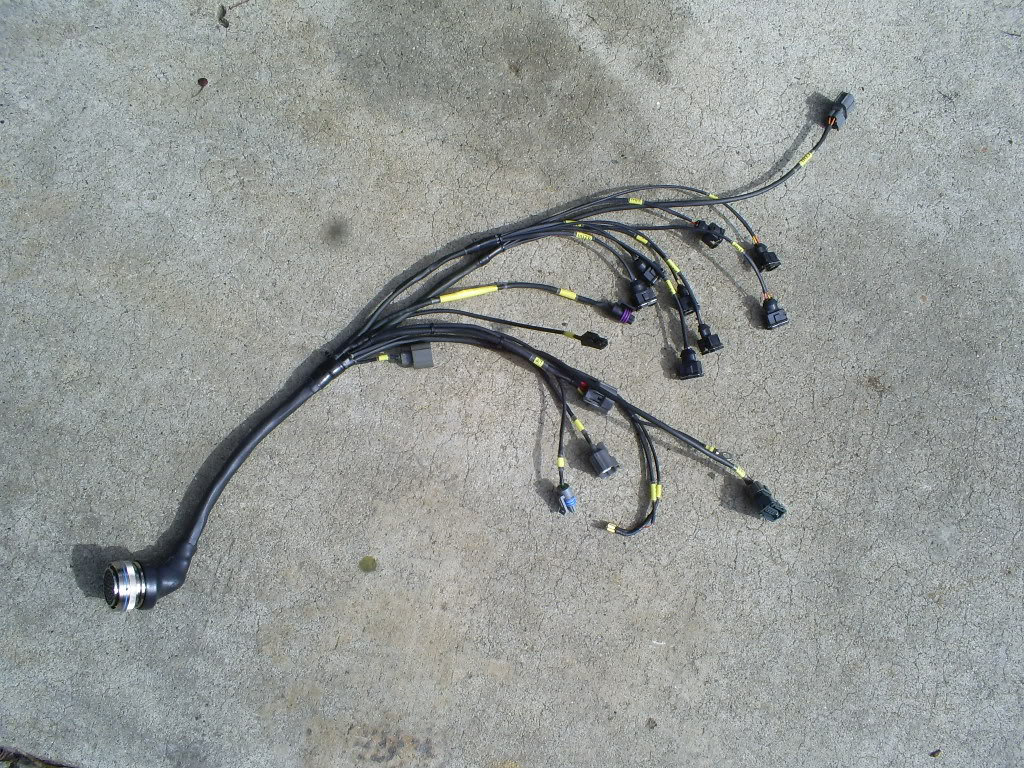
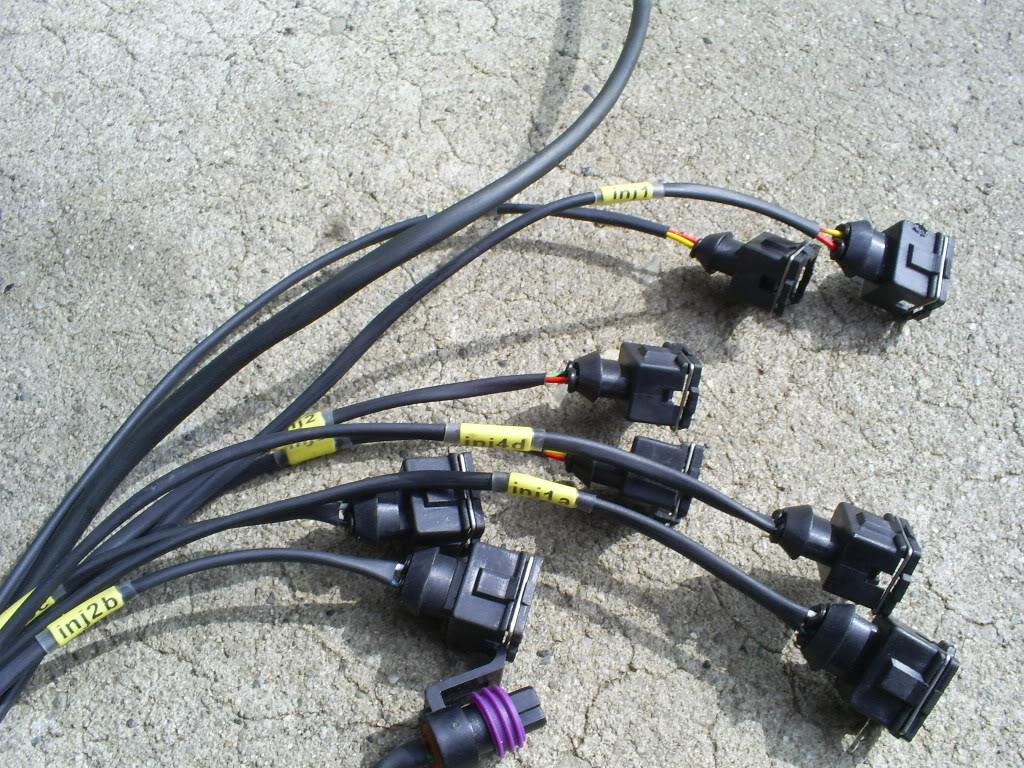
The harness is done folks. Here is the engine side of things. Everything is labeled and crisp. I ended up doing most of the work on the harness with guidance from Ryan and help from Woody over at Rywire. I gained a great amount of knowledge out of this and hanging over there at Rywire’s. All in all it turned out nice. I wasn’t going for that tucked look, it was more function.
A small update here for you guys.
I decided to drop the body on top of the transmission since the auto is quite a bit heavier than the 5 speed transmissions. It was a bit less labor intensive, but you had to get smart with the way it went on. I think a transmission jack is in my near future
I will be degreasing the transmission where it sits. I dont know if I mentioned it earlier in this thread, but my crewmate Jesse got me this stuff called D’gel. That stuff works better than anything I have ever used. Its like E85, or methanol when it touches oil. The grease and gunk just dissolve into thin air. It smells citrousy too, so it doesnt get you all light headed like brake cleaner or other variants. I got some more wiring to do, and then I shall start her up for the first time in 7 months. I can’t believe its been so long, I miss driving this car!
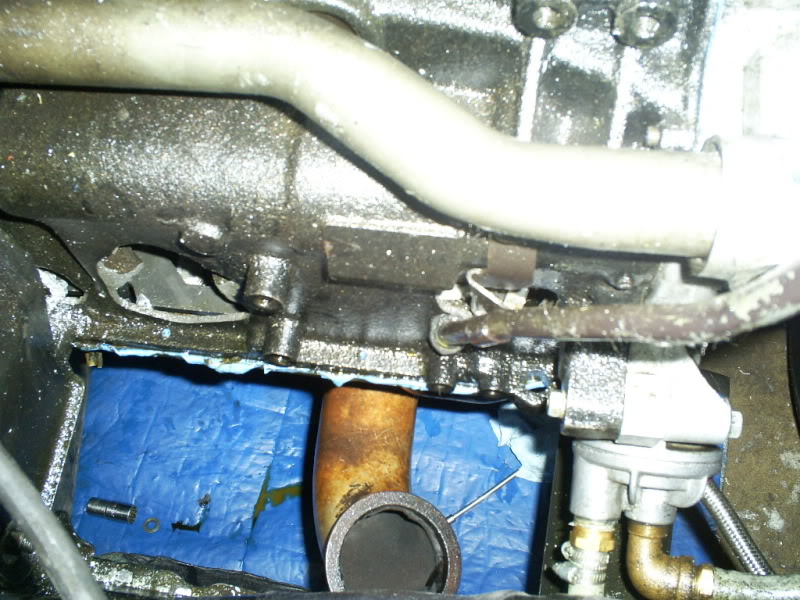
Here are some current pics of whats going on with the car. The oil filters checked out good after a little scare. BTW dont EVER reuse an oil cooler from a blown motor 
The auto is a blast to drive so far, it REALLY needs nitrous and yes the PTE 6262 is on. I went back to my old turbonetics manifold and the turbo is a journal bearing setup. So far it seems….aite I don’t want to hype it up until I see some track results. The 40R let me down without the nitrous. With the 35 shot it was a different story thats for sure!
Whats going on in the pics?? I’ll leave you guys hanging for a bit until I get some pro pics of the car after the paint job
Track guy asked where this thing has been! It ran 11.7 on low boost. 1.8 60ft starting off in 2nd gear
I only ran once because I developed an oil leak by the oil pump. After spending money on a fresh motor, I wasn’t gonna run it again until further inspection.
I dodged a bullet folks! That oil pump was toast! It was grooved beyond recognition. This is the second one that failed on me in the past 10 years. I have only done 3 or 4 pulls through all the gears reaching 9500rpms on this thing. It was an oem one I had sitting on the shelf that checked out fine per the manual’s specs. I just installed the grooved stubby shaft, primed the engine on the stand and went on my way. One thing I did use on it was an impact gun to tighten the sprocket nut. Used a torque wrench to tighten it up last. I wonder if that had anything to do with it???
On this other pump, I tightened it by hand, then tightened it up with the torque wrench. I will be watching this pump closely for leaks/signs of failure. Whats funny is the pump sounded louder and louder as I got to the staging lights. I noticed a bit of smoke on the return road. When I got to the pits, there was oil dripping on the downpipe and thats what prompted my worry. I guess that good ‘ol DSM instinct kicked in
Both pumps that failed were the 90 style, straight cut teeth ones FYI. The one I just put in is the same.
[youtube]http://www.youtube.com/watch?v=16ty8e5FlZQ[/youtube]


Flat green . . . love it!
Great write-up.
Foarte interesat, Mersi admin.
love the car the color was okay. but the car has power . im building a fwd turbo eclipse as we speak where did you buy your paint? im looking to do a cheap paint job but somthing that lookes good….