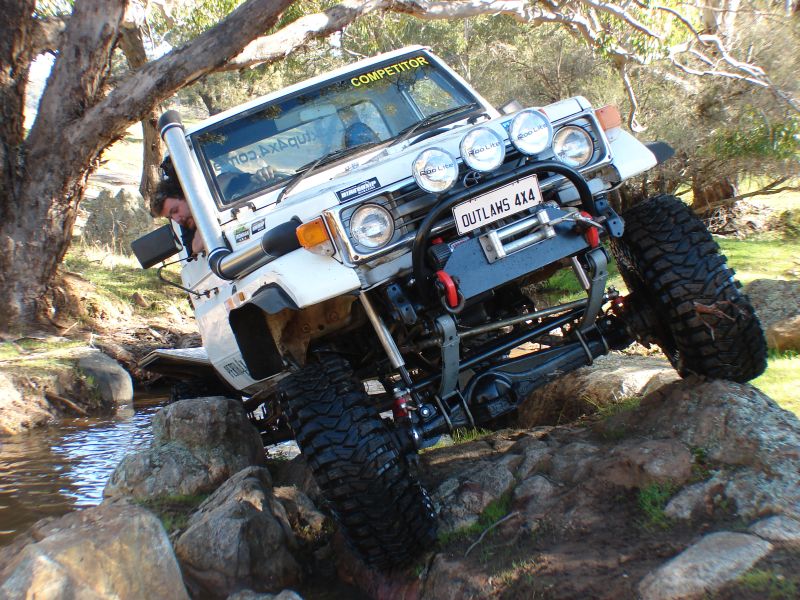
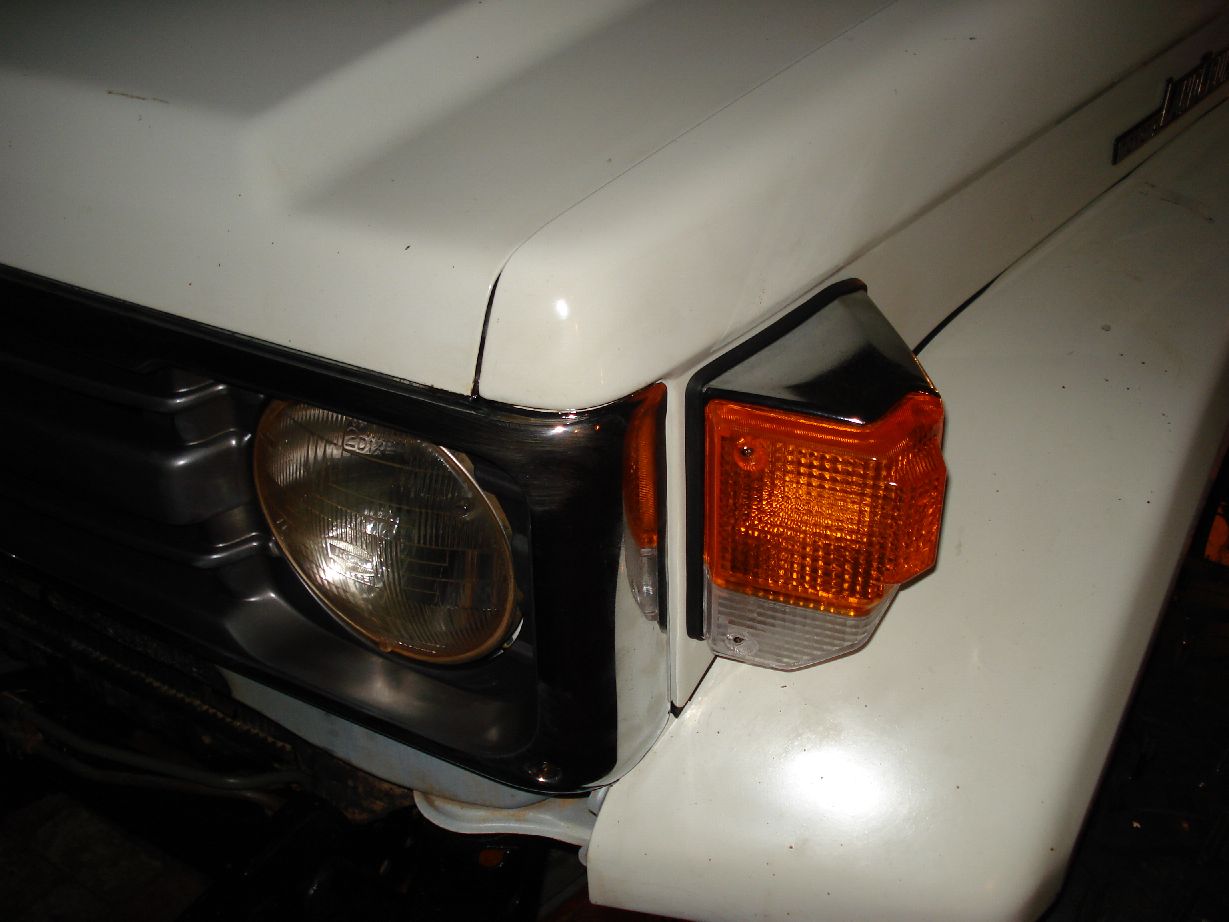
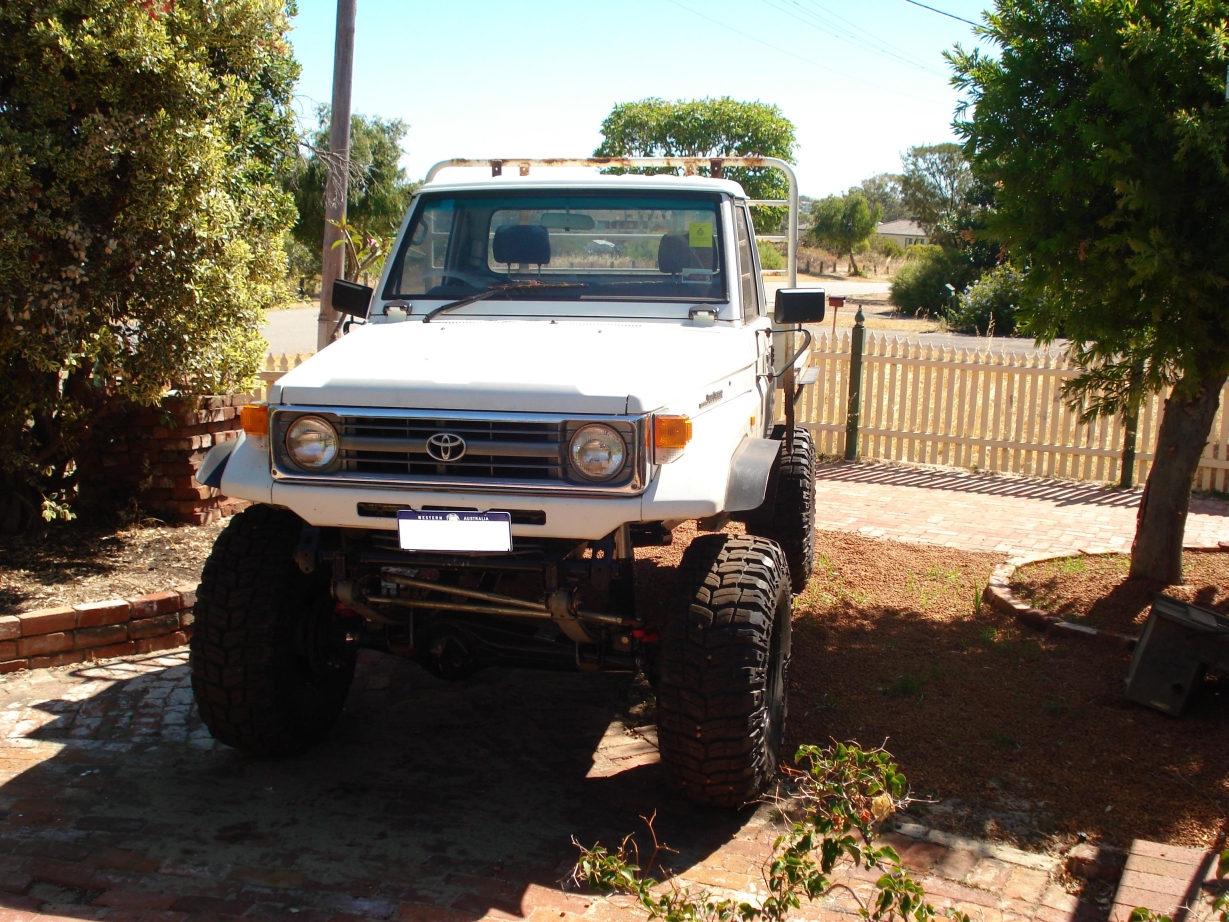
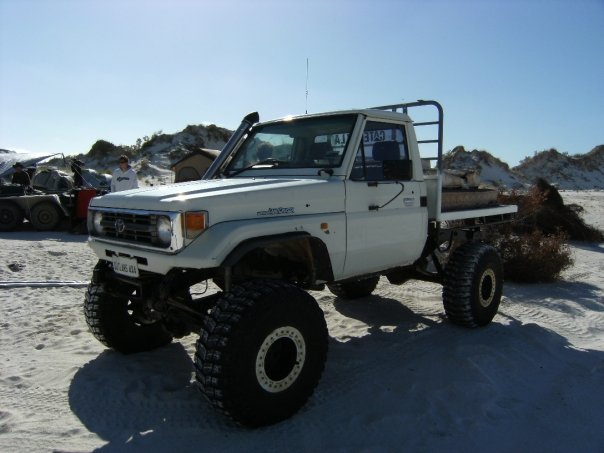
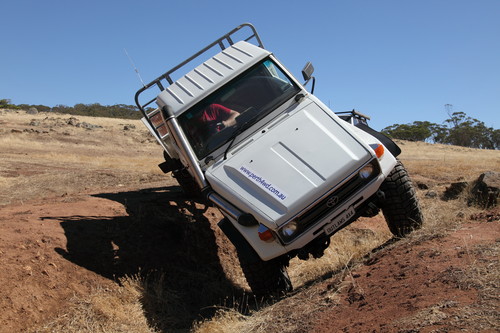
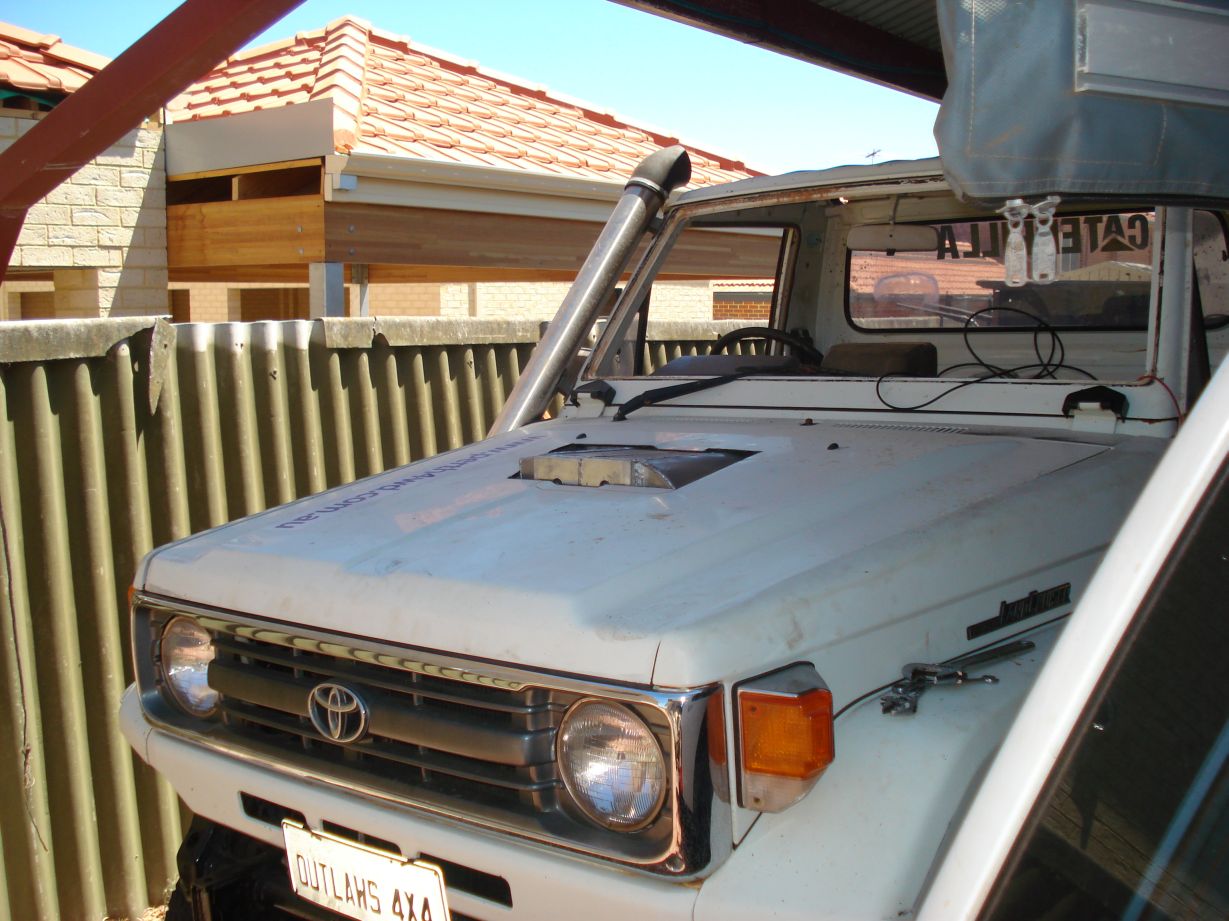
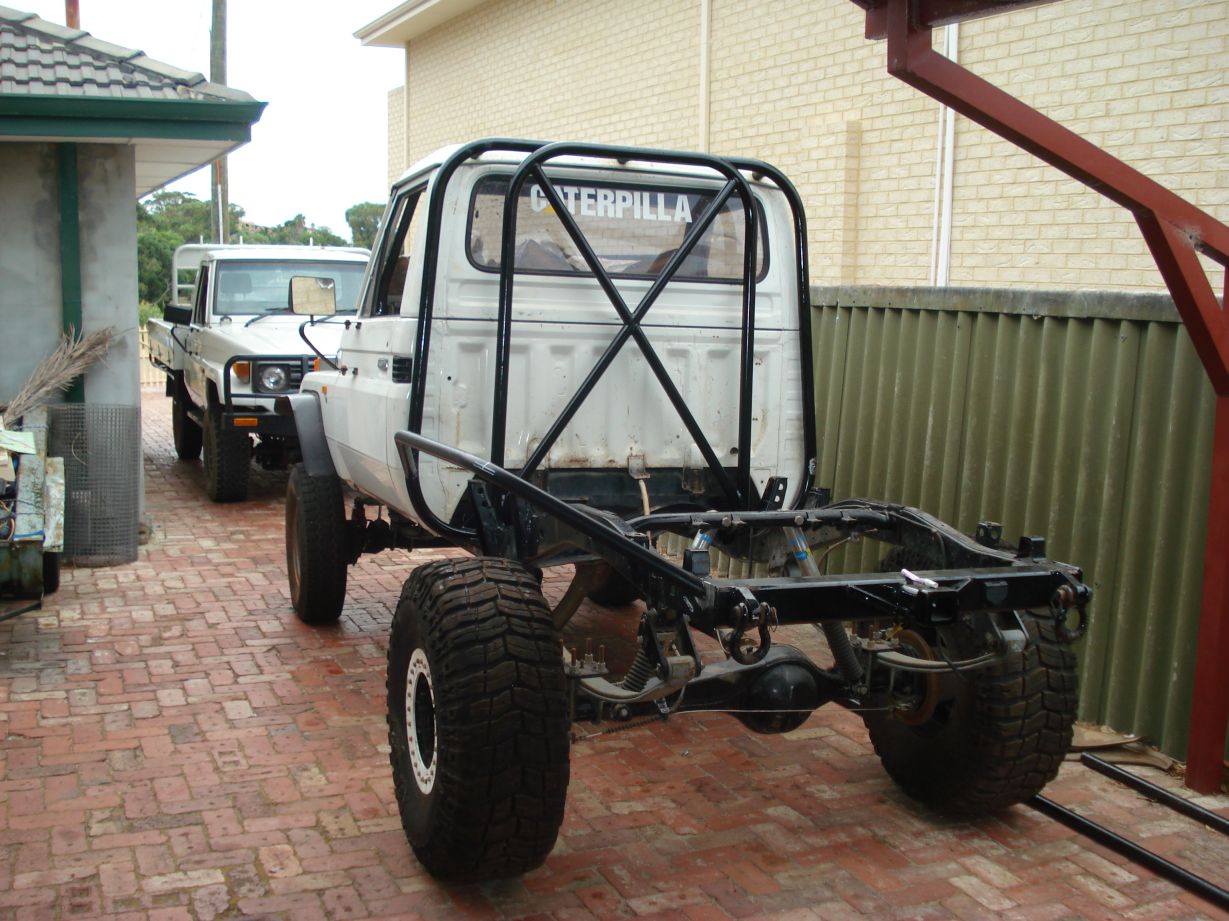
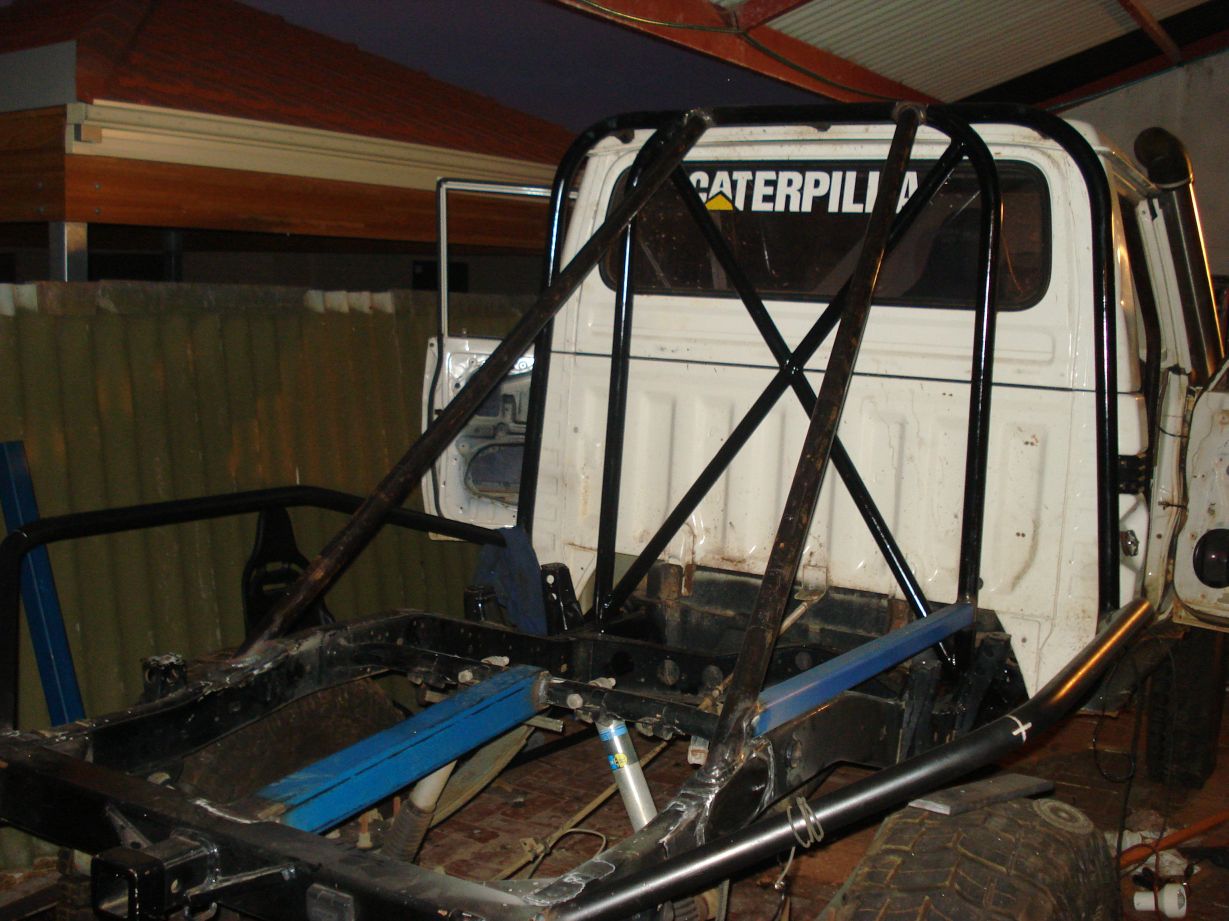
1997 Toyota Land Cruiser UTE Build

Howdy all, I’m coming to you from Western Austrailia
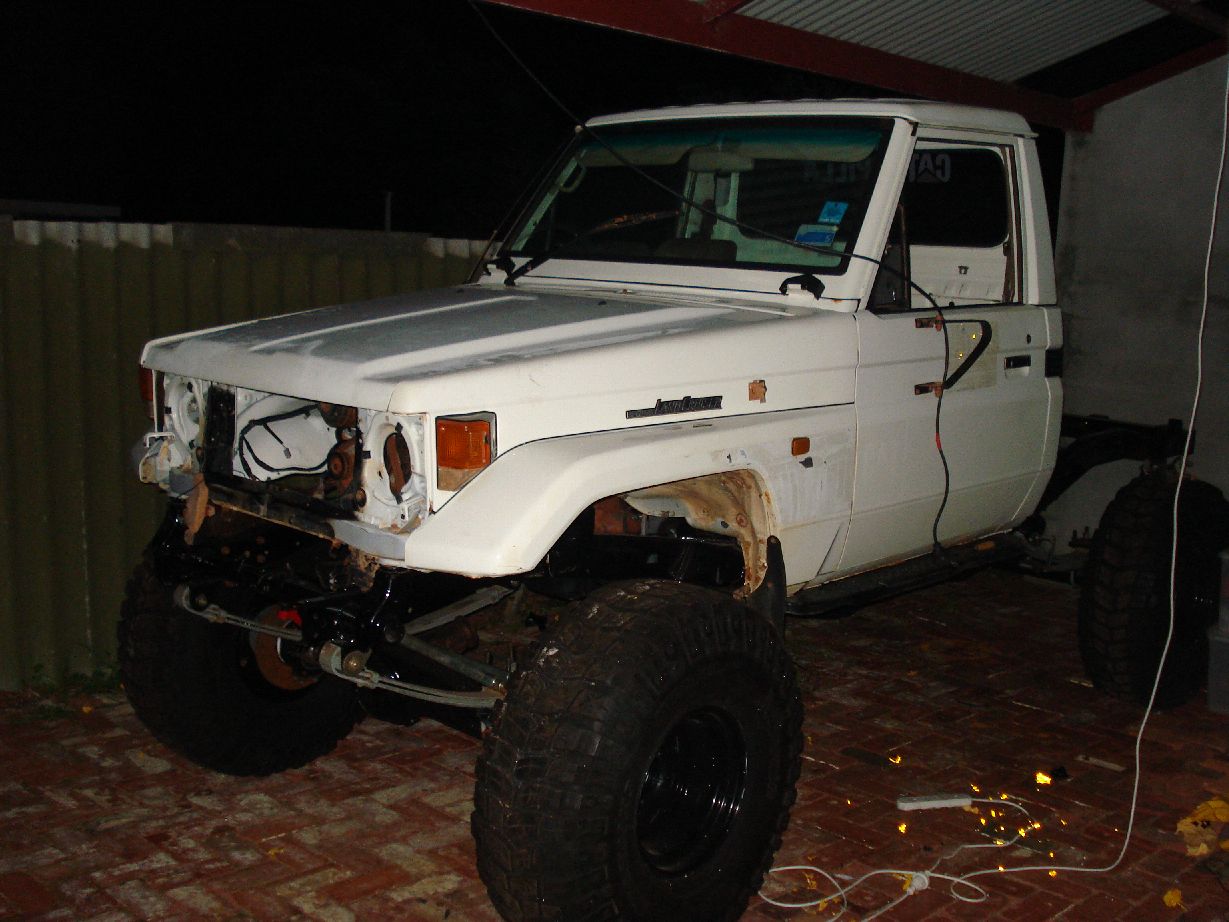
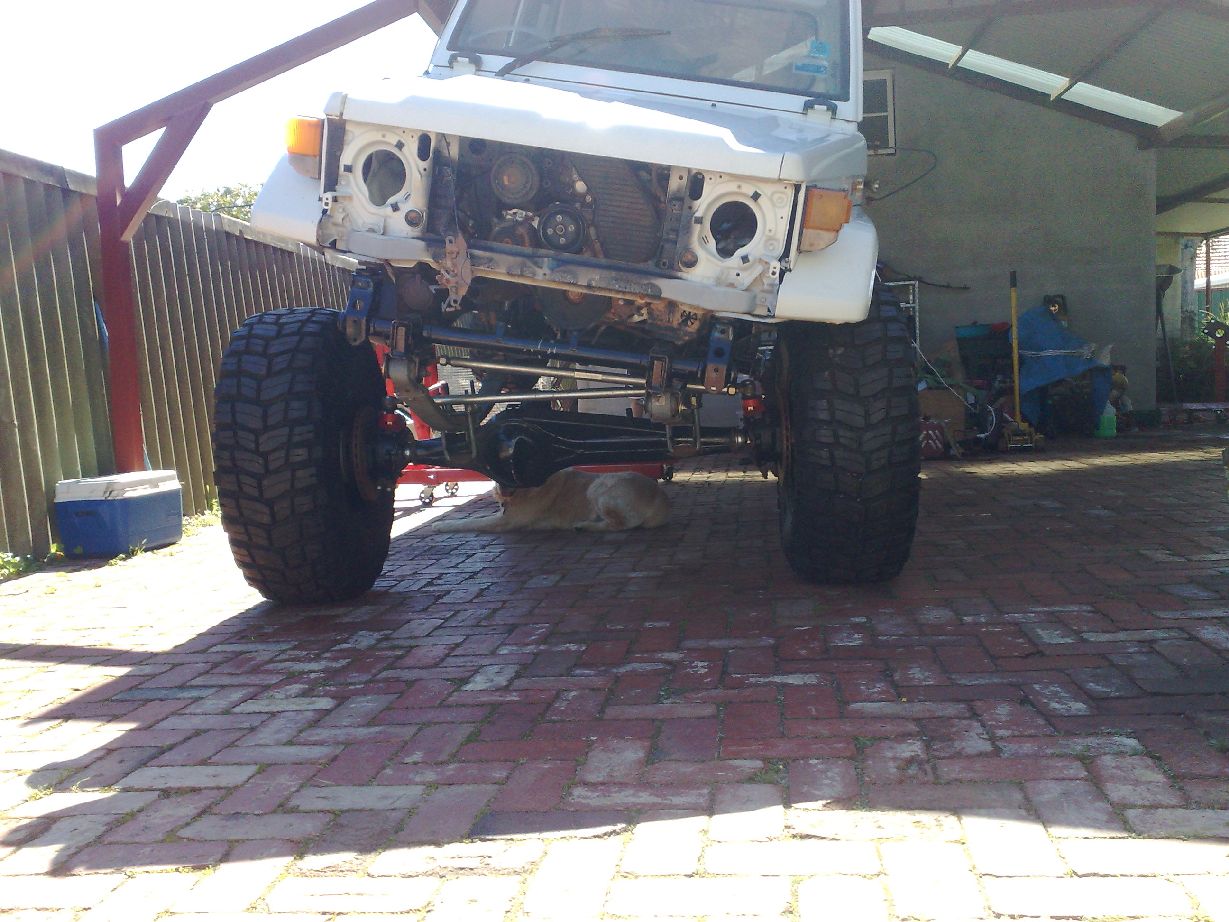
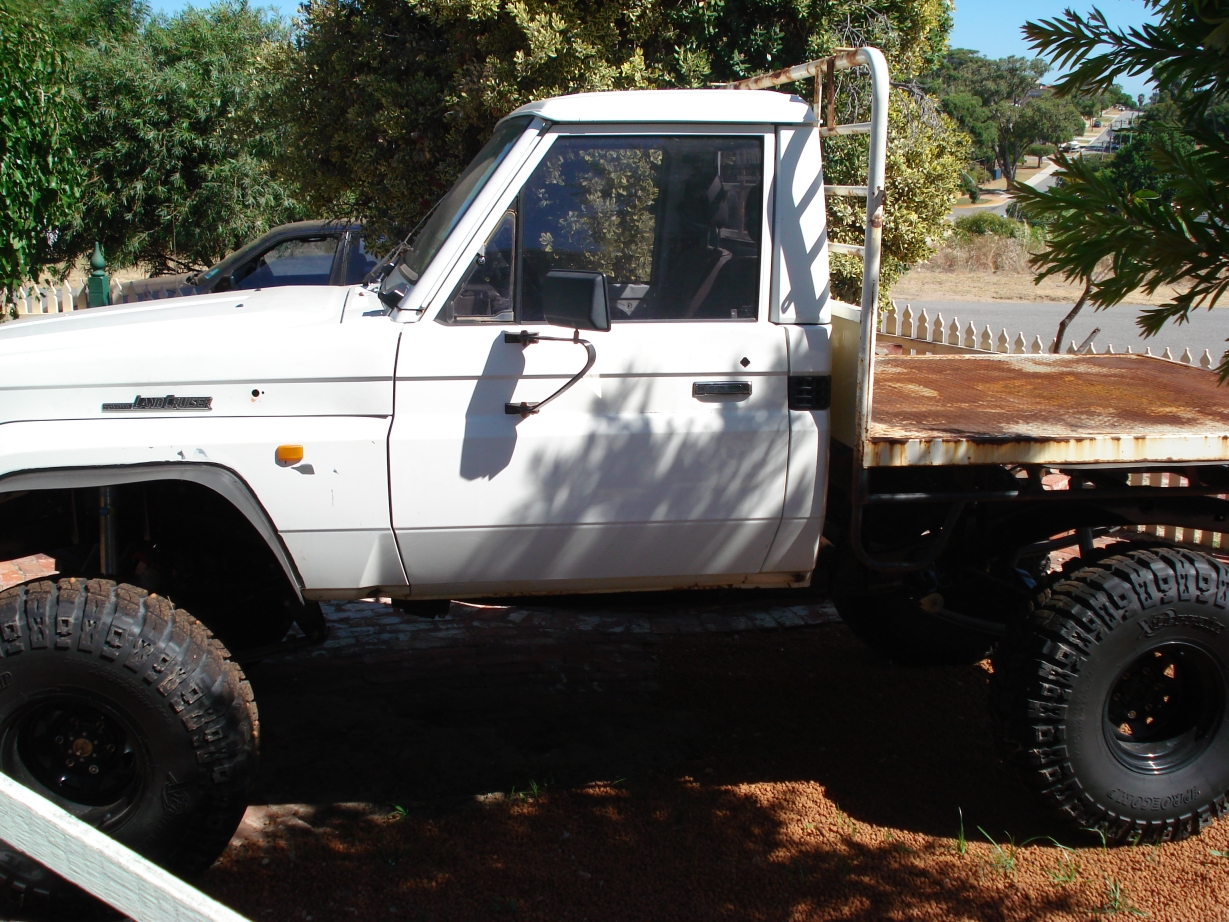
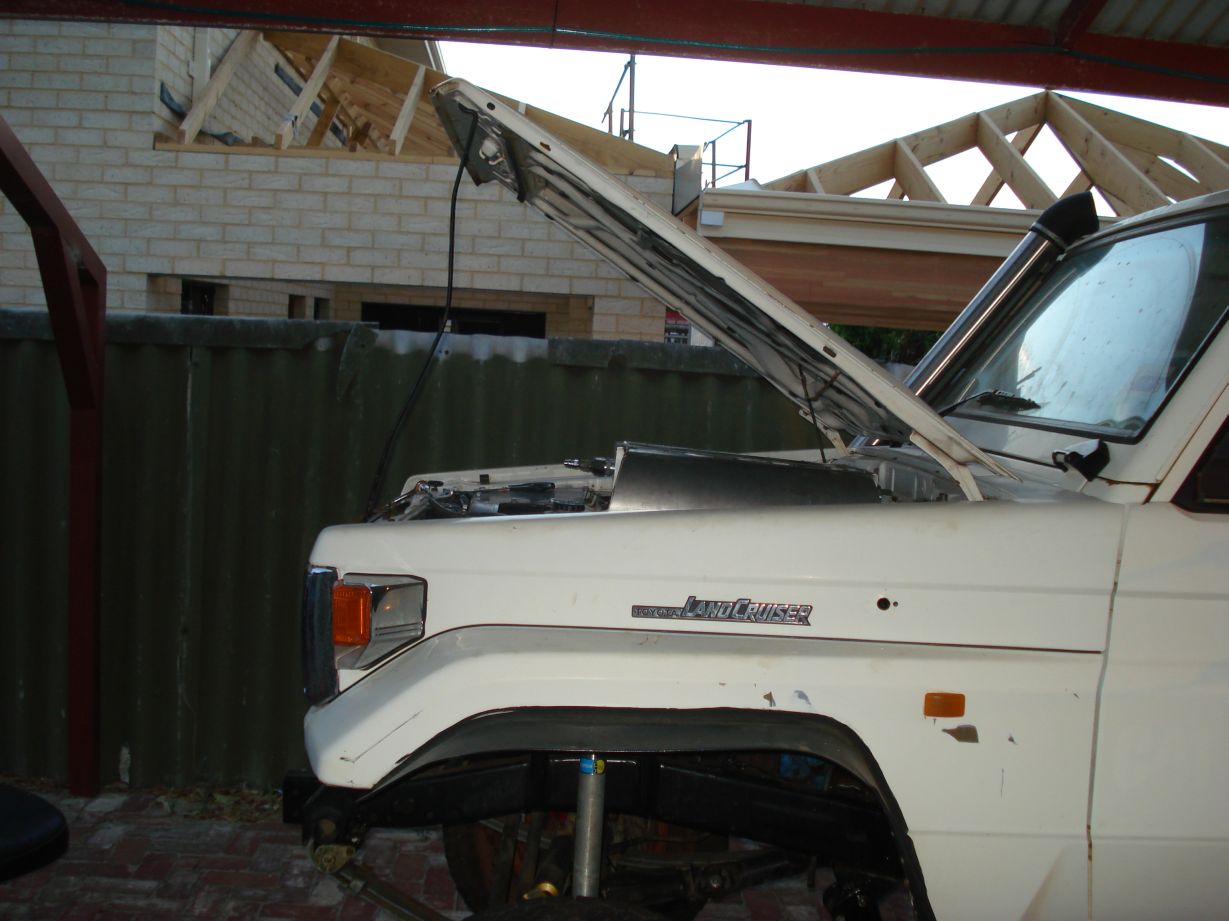
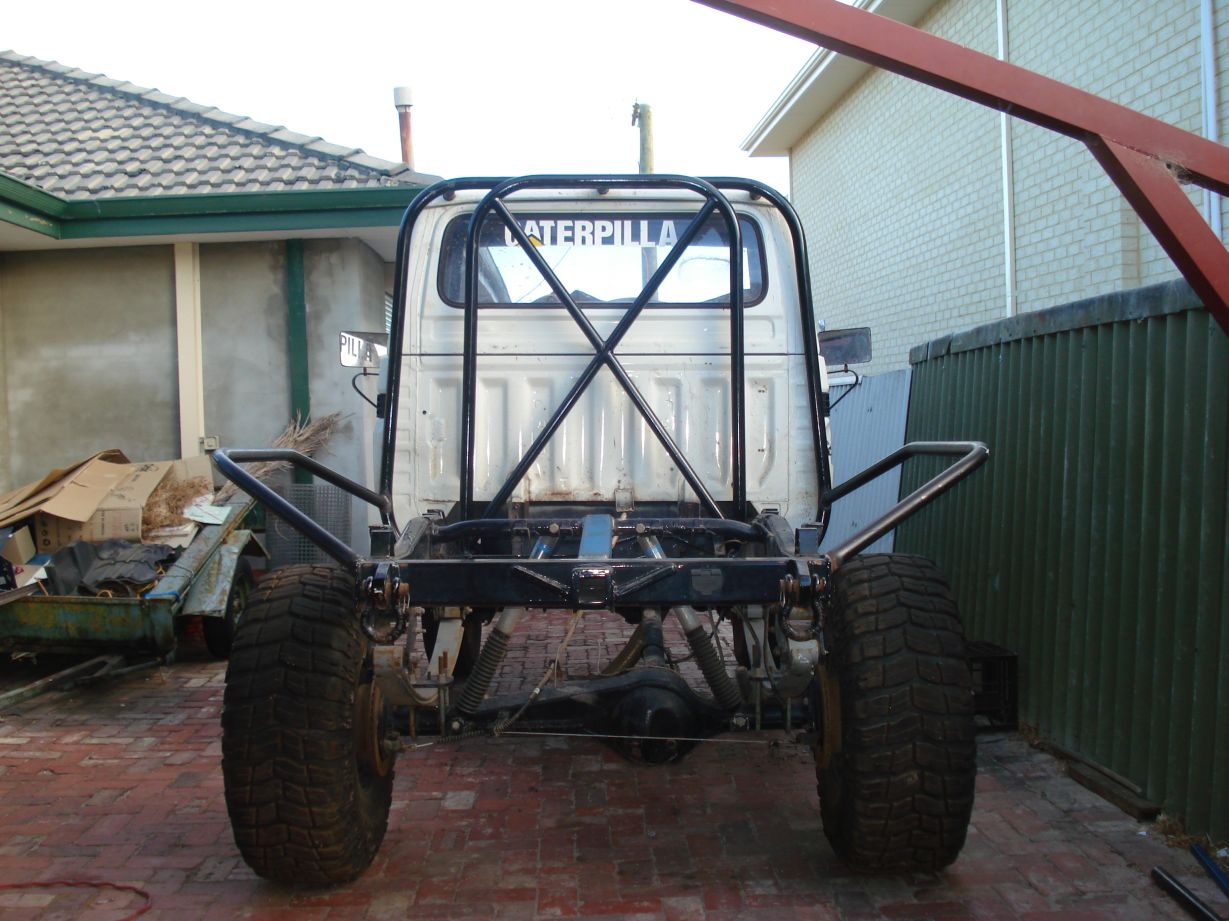
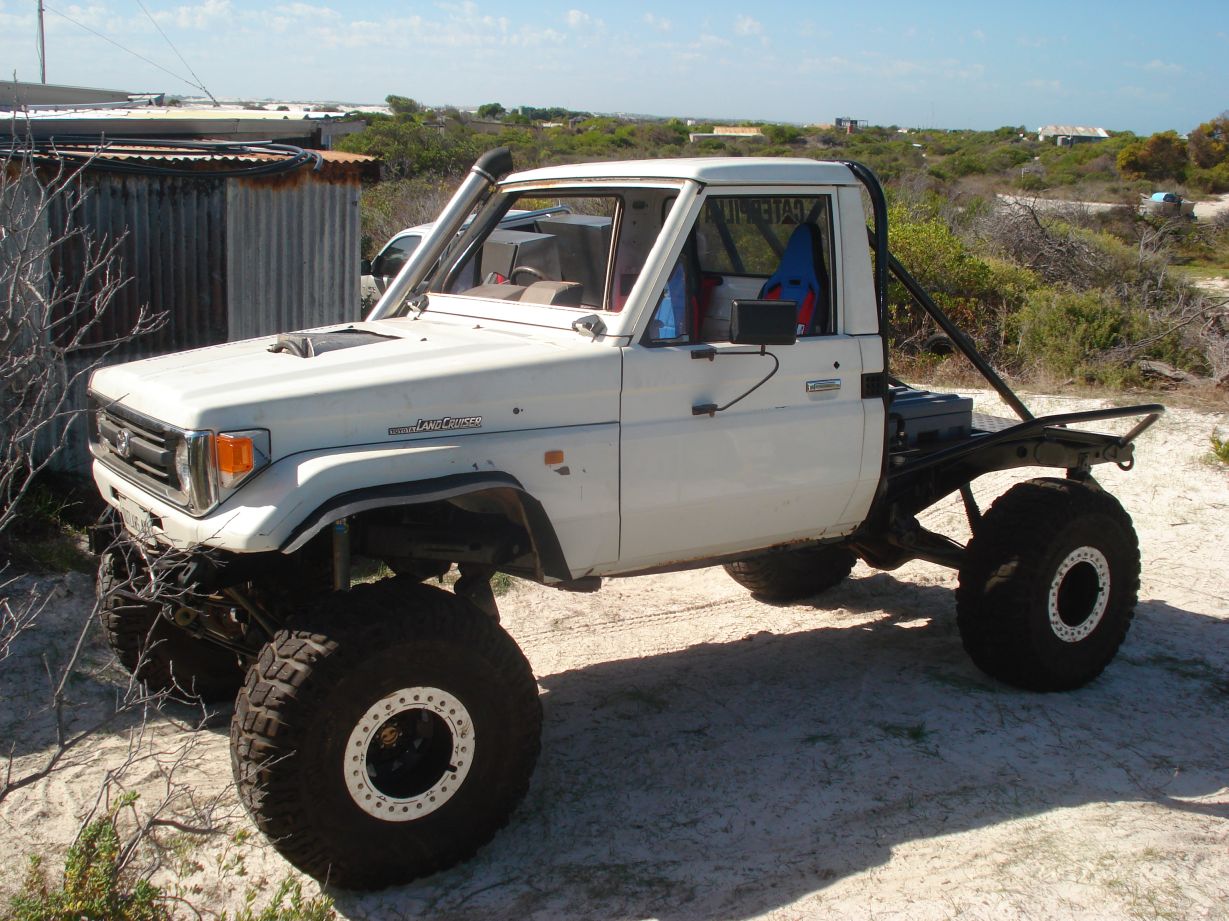
I have a 75 that I’m building
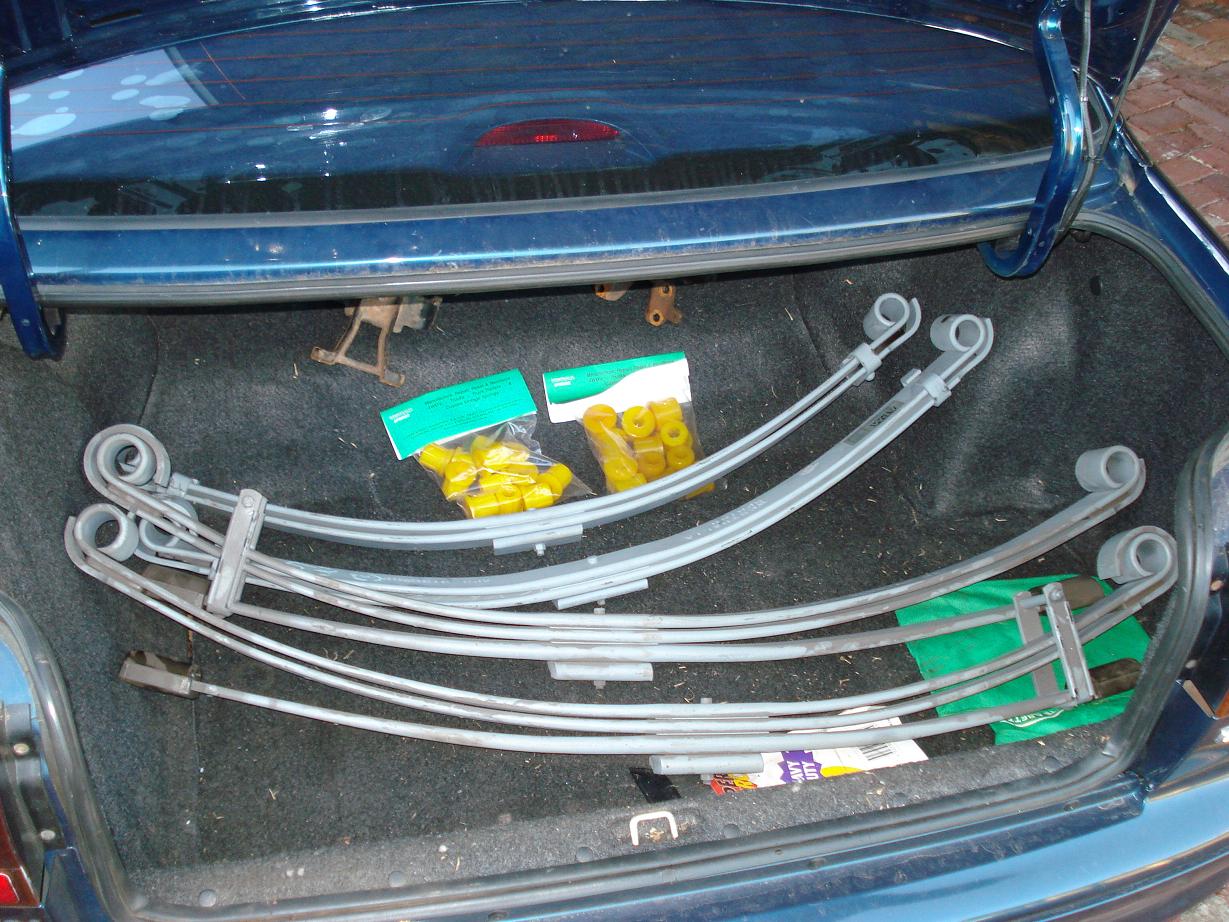
The usual SOA, dual lockers, new 1HZ to be fitted with custom turbo inter cooler setup @ 14psi, custom parabolic springs, custom everything else lol.
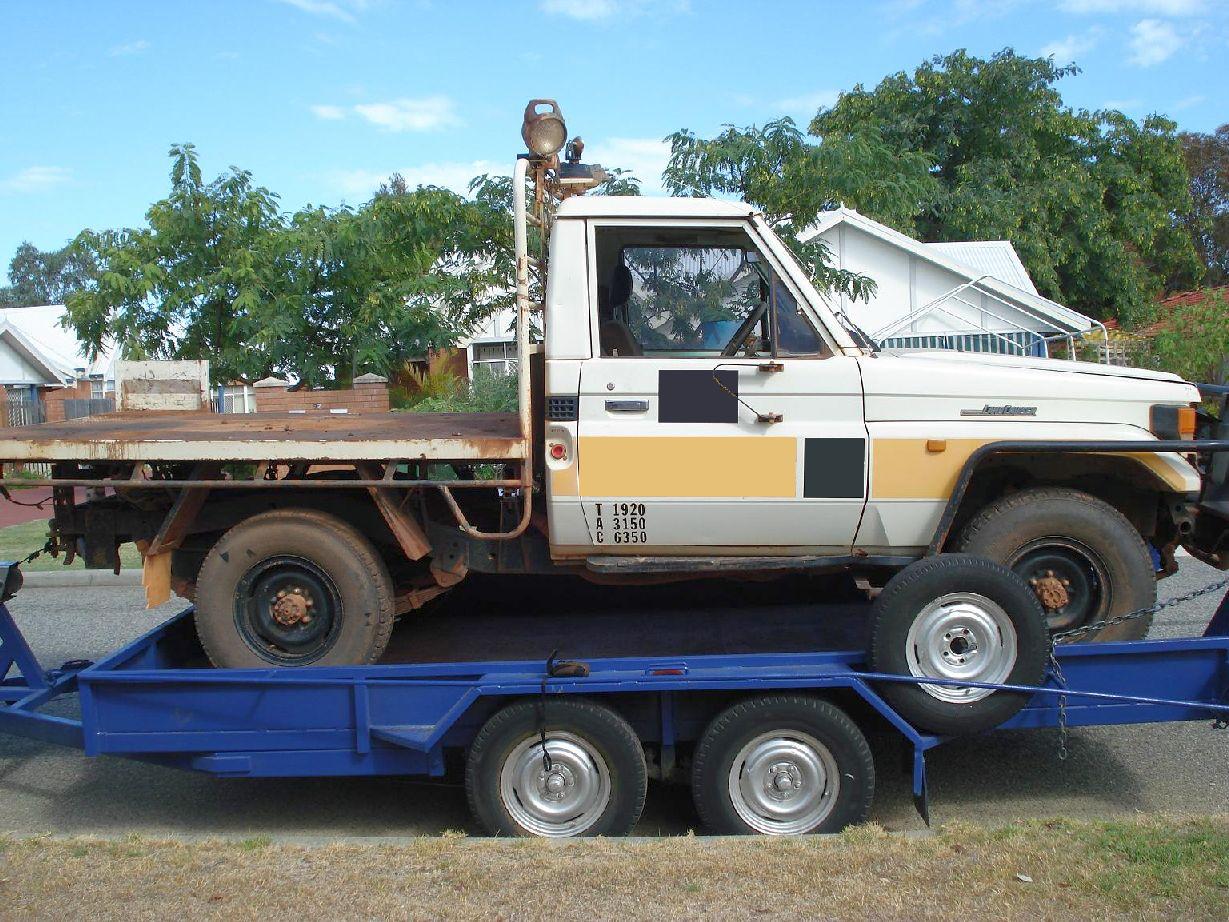
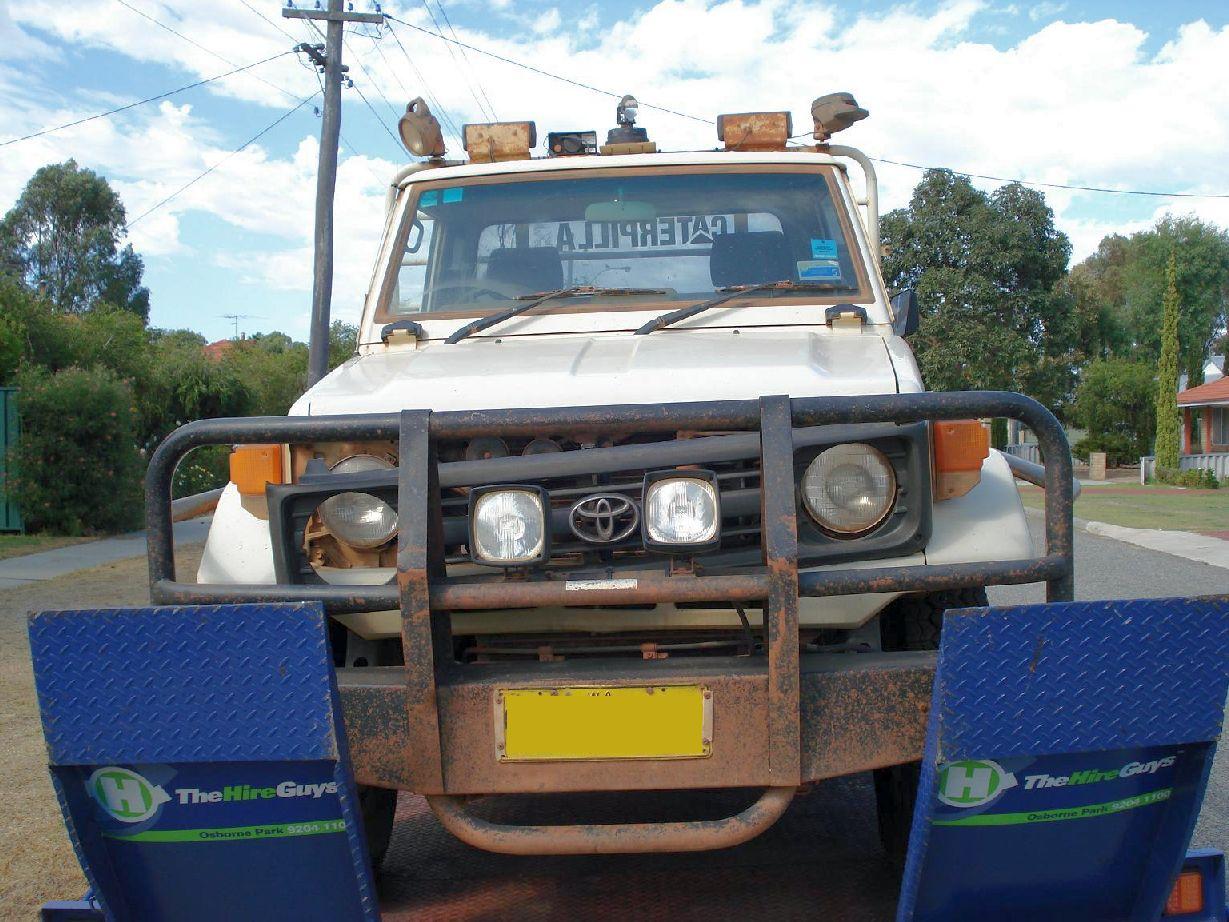
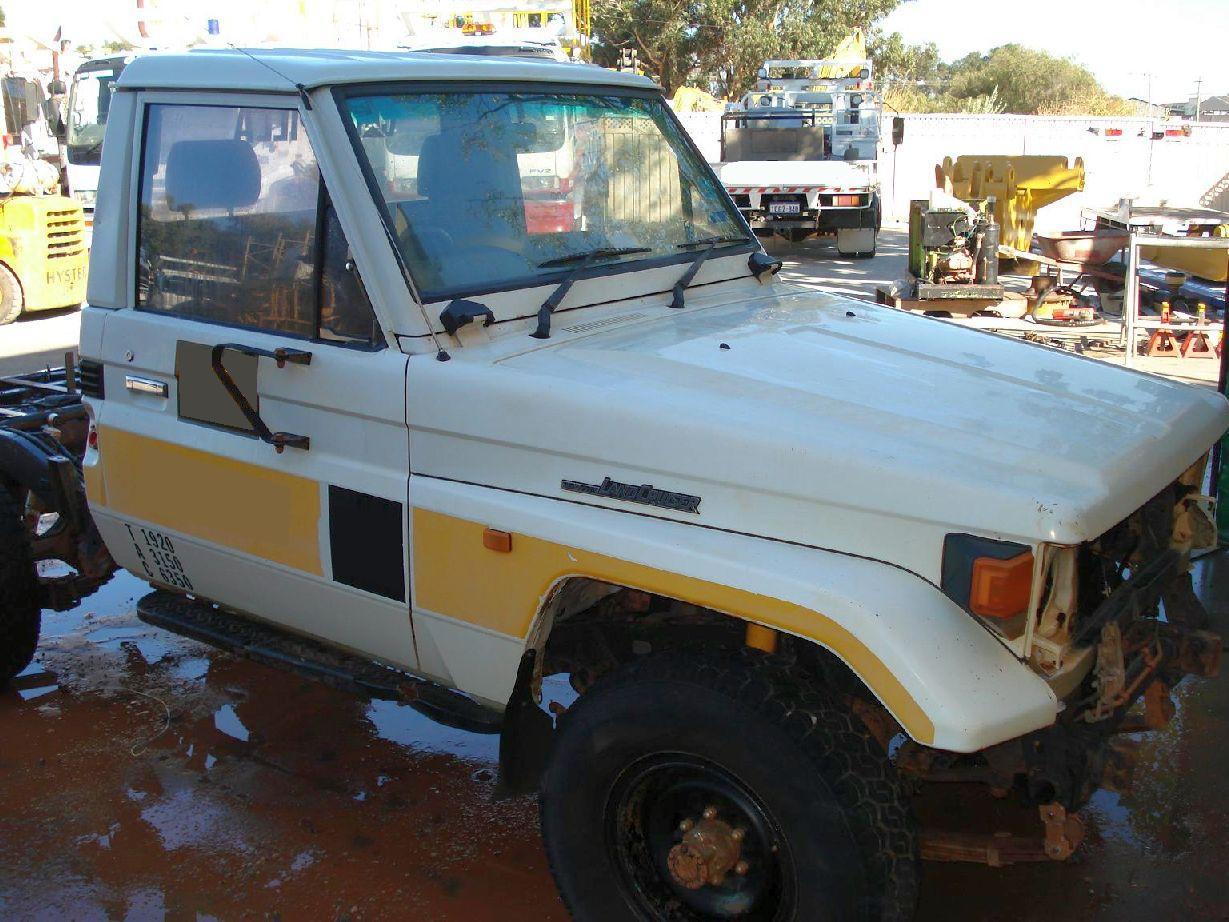
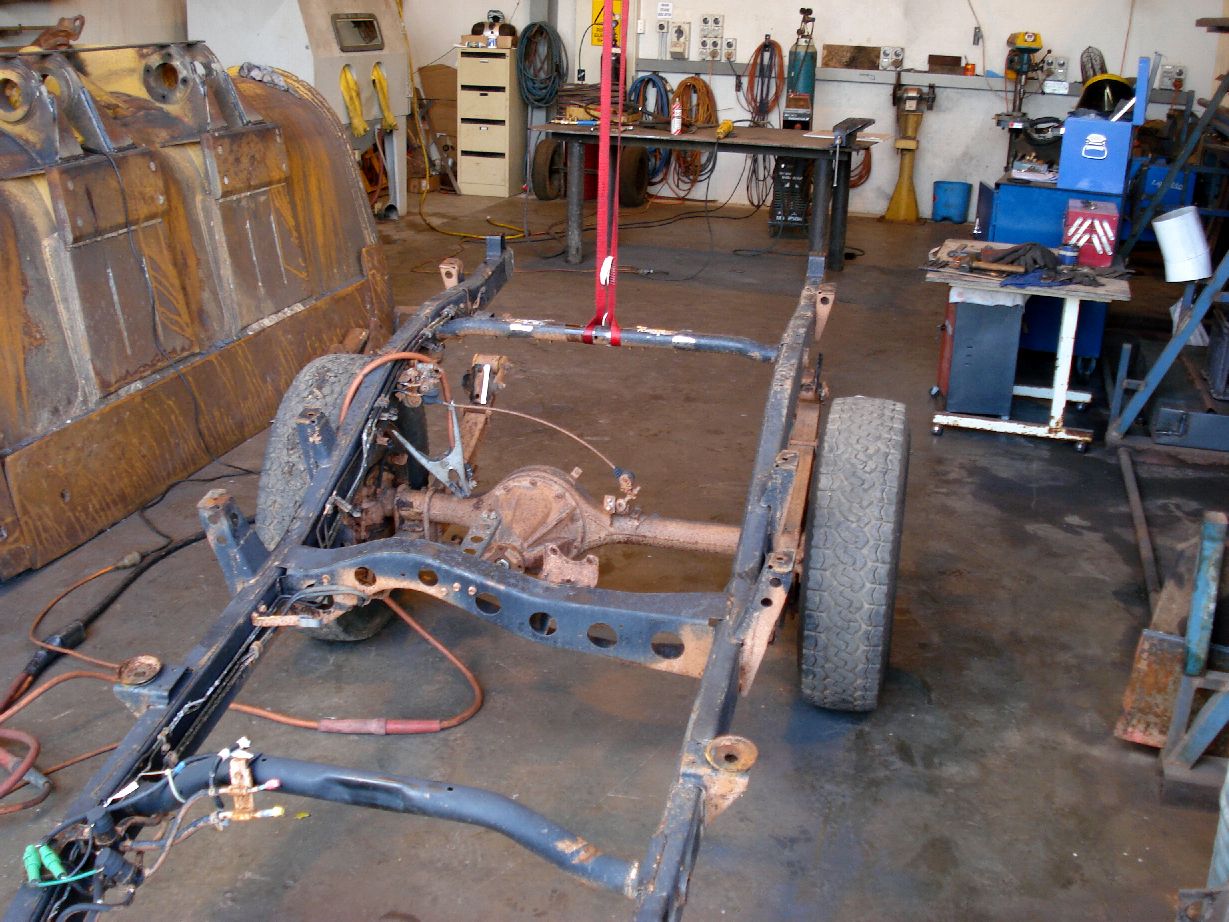
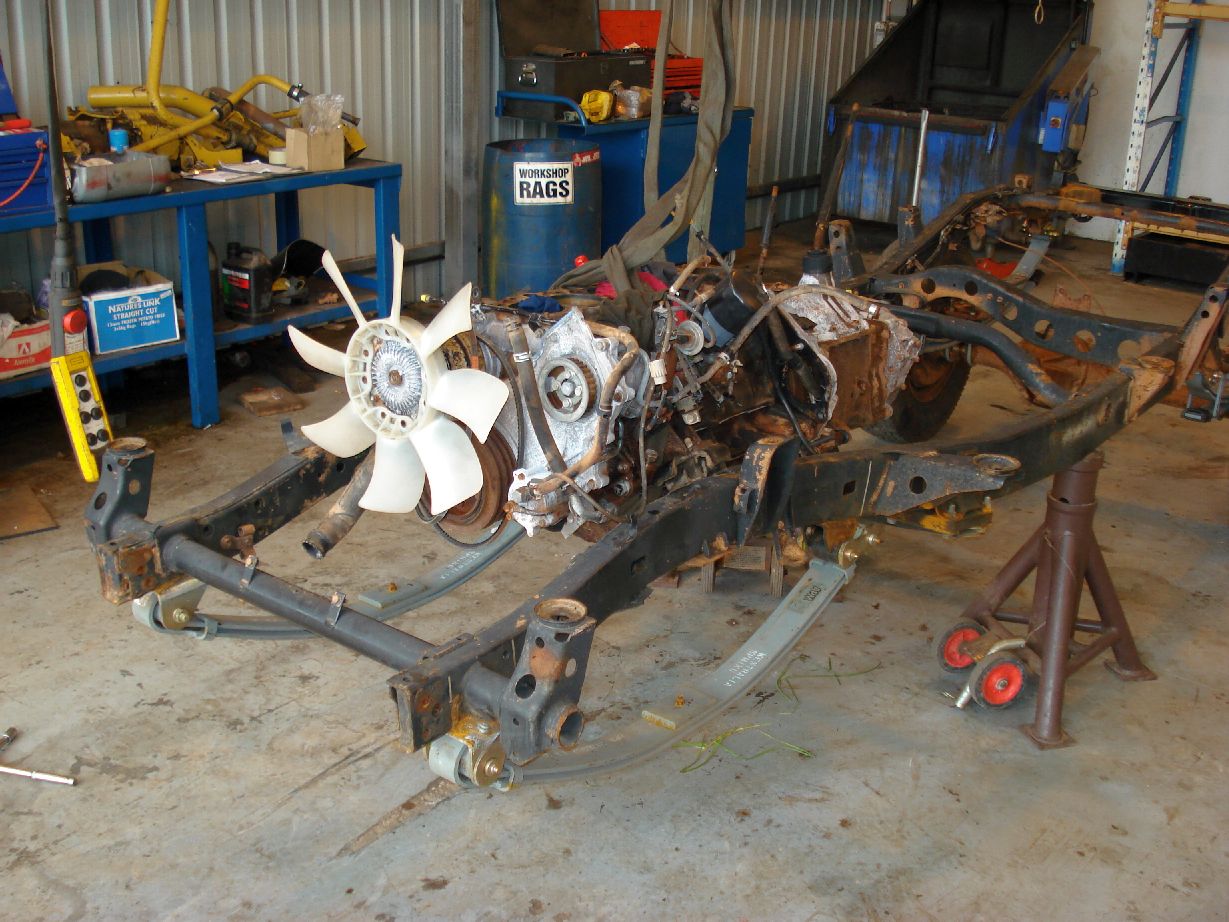
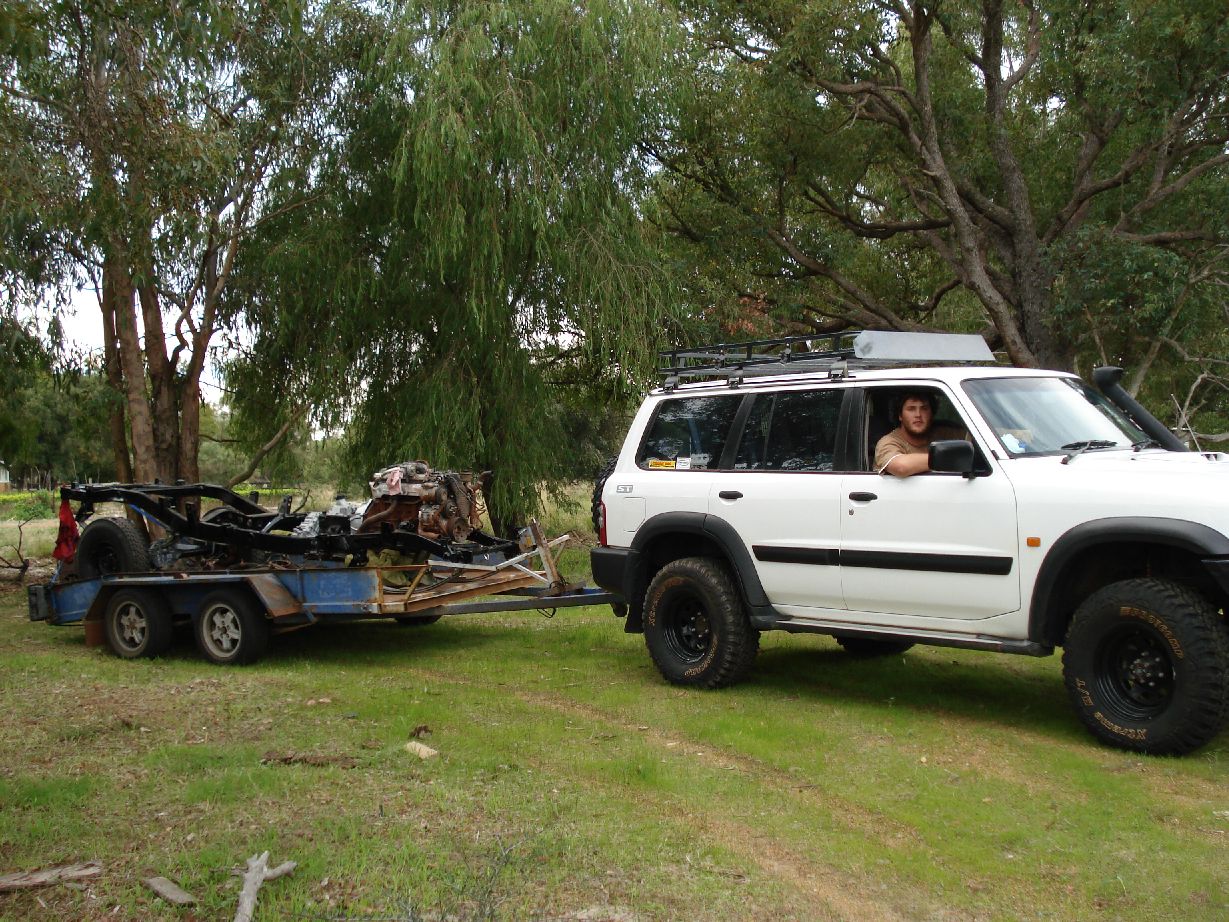
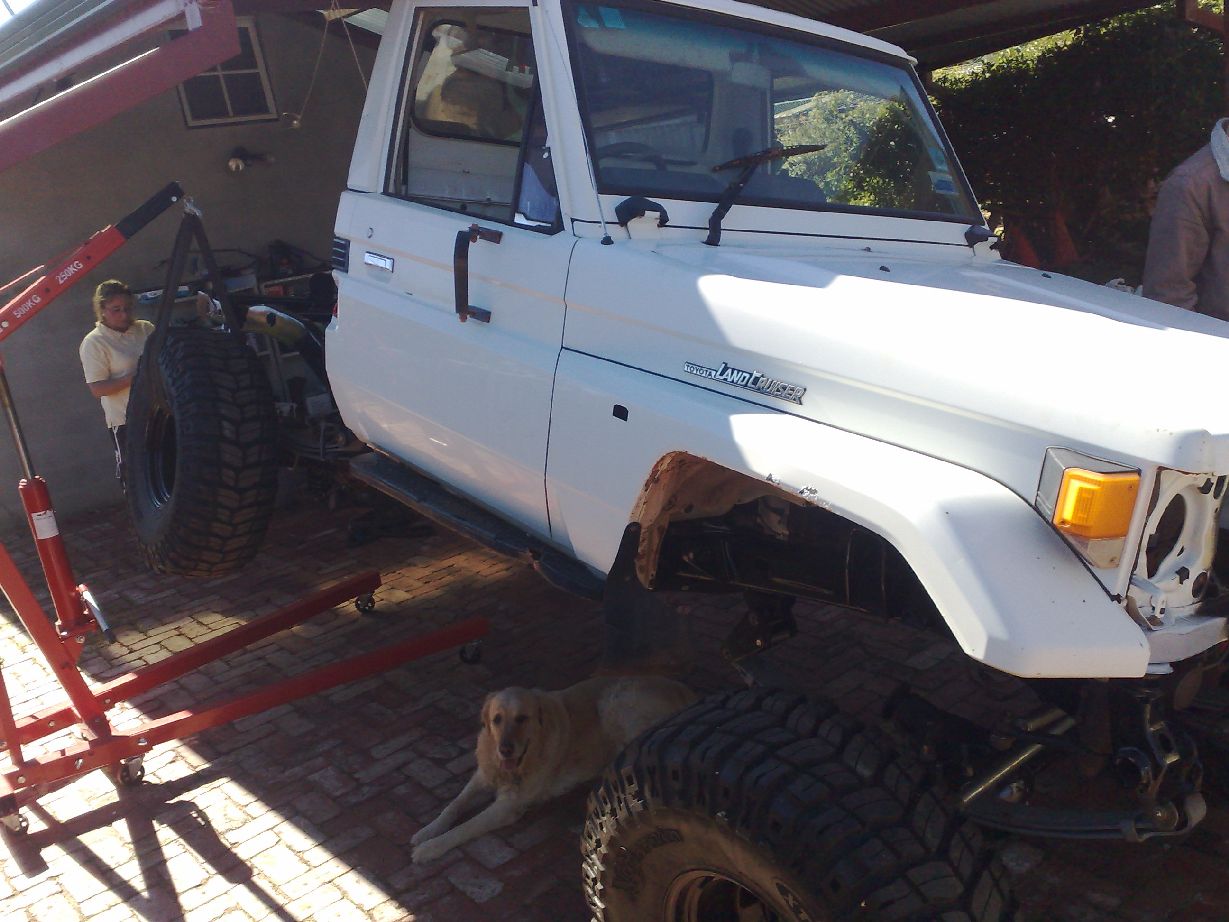
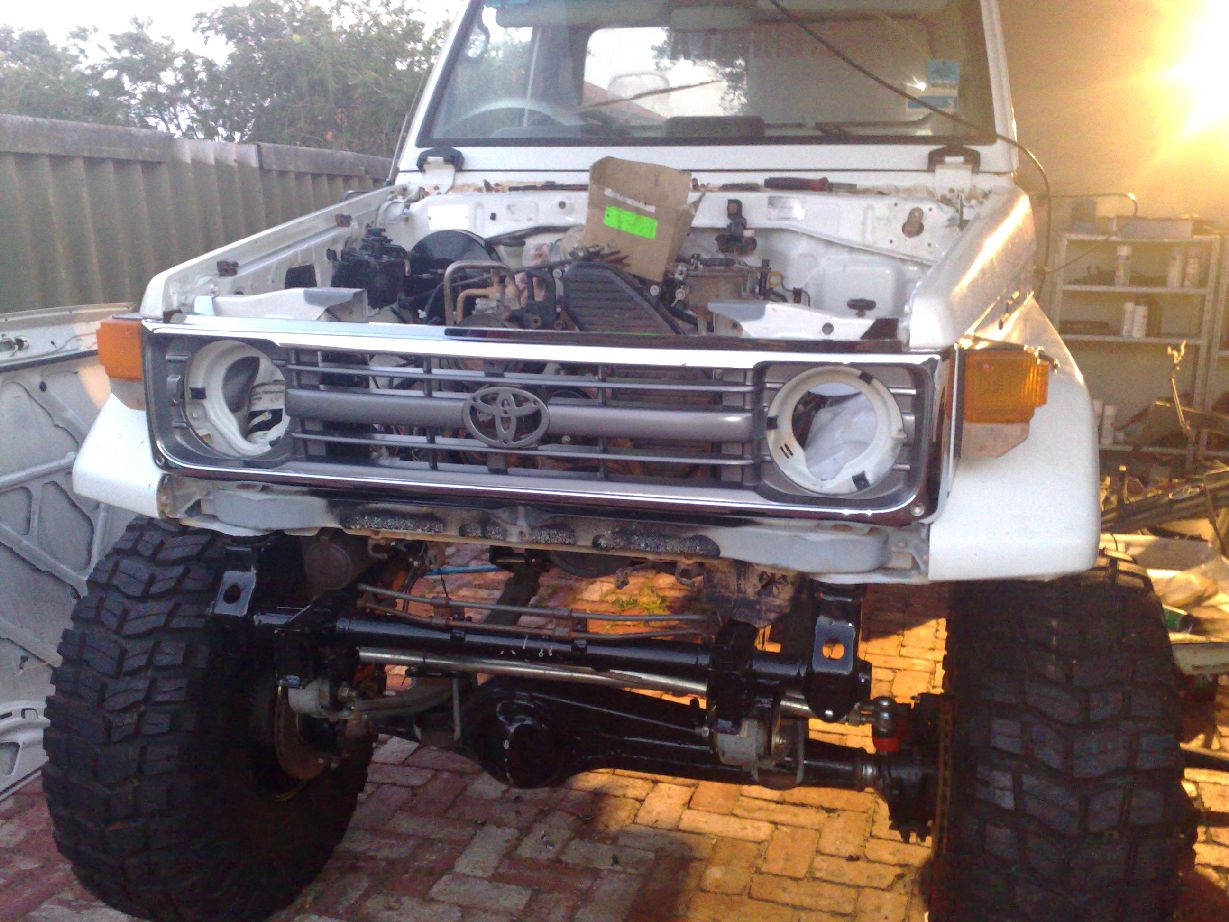
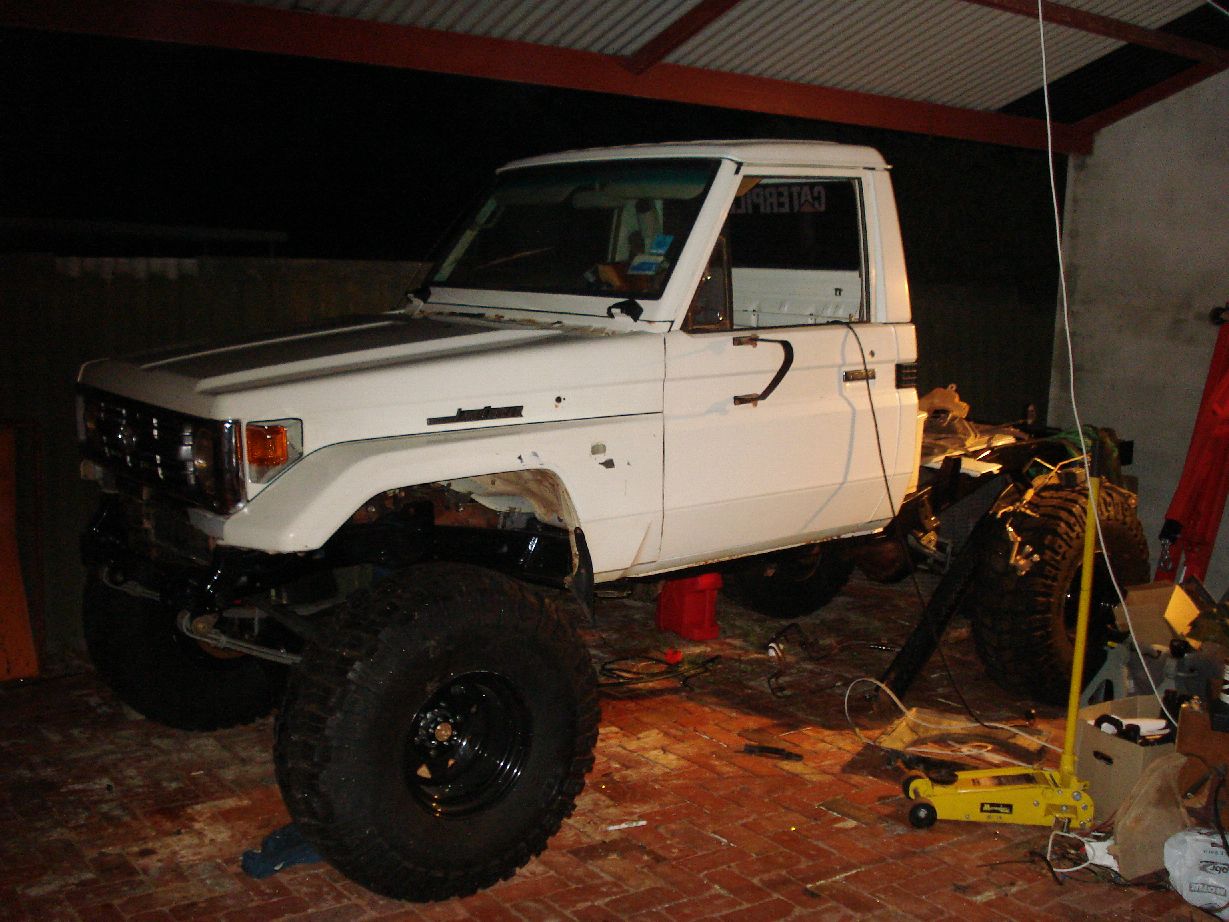
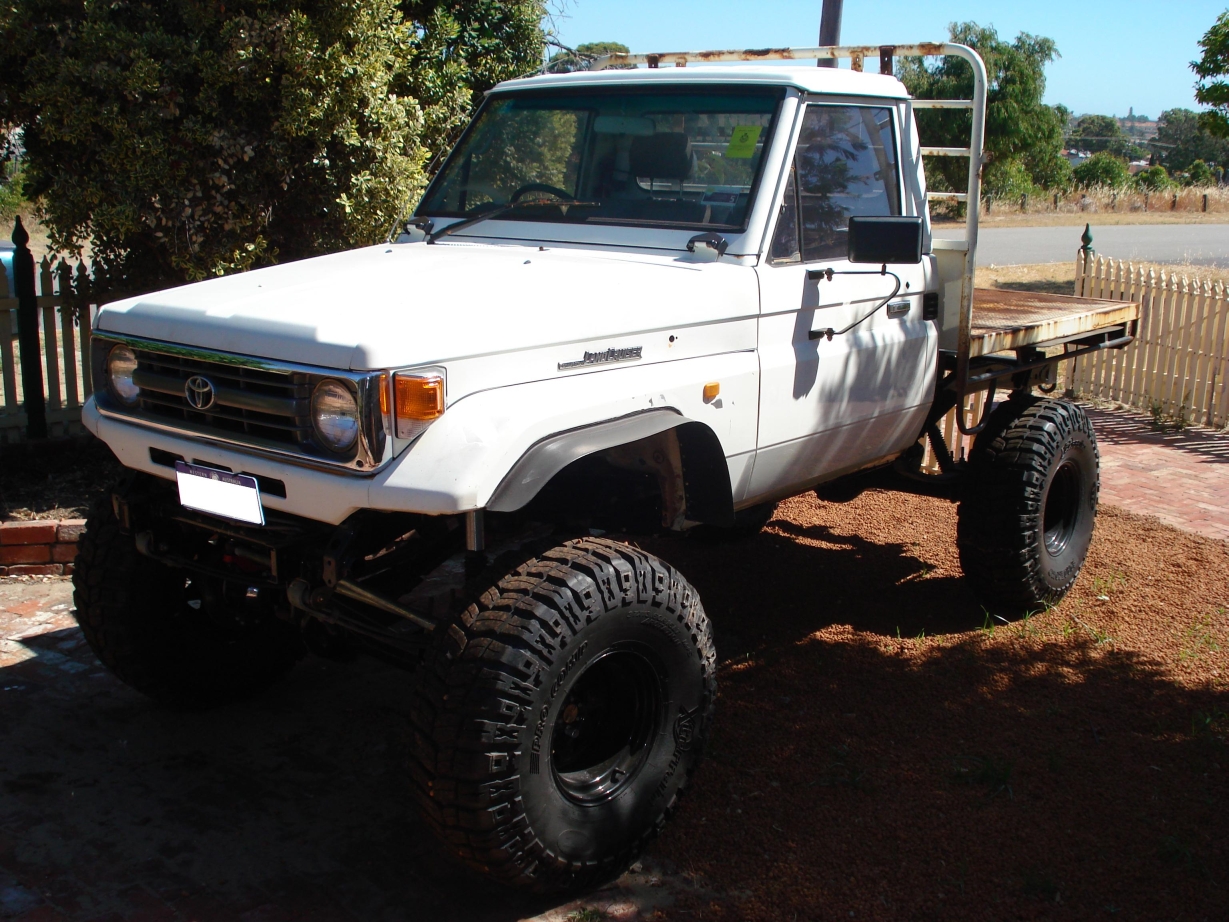
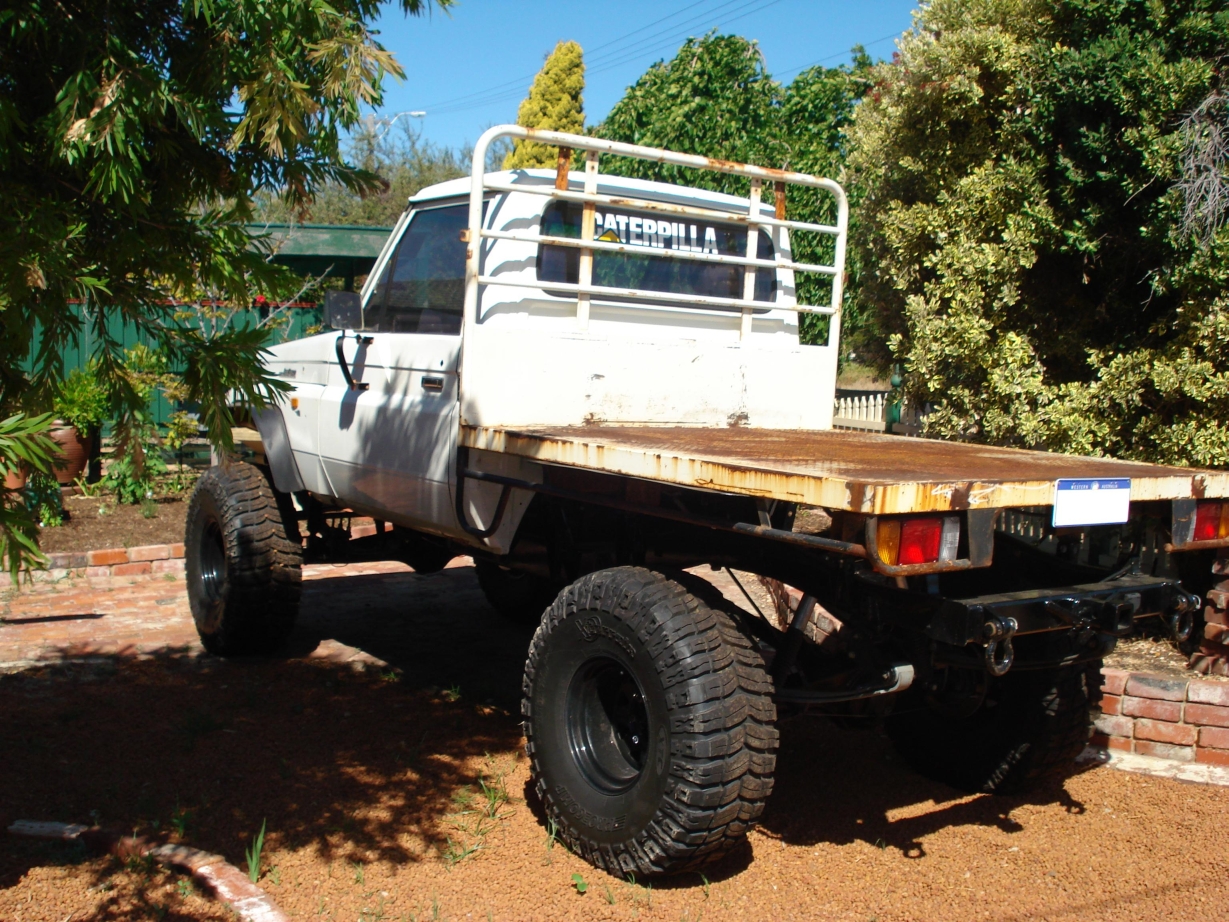
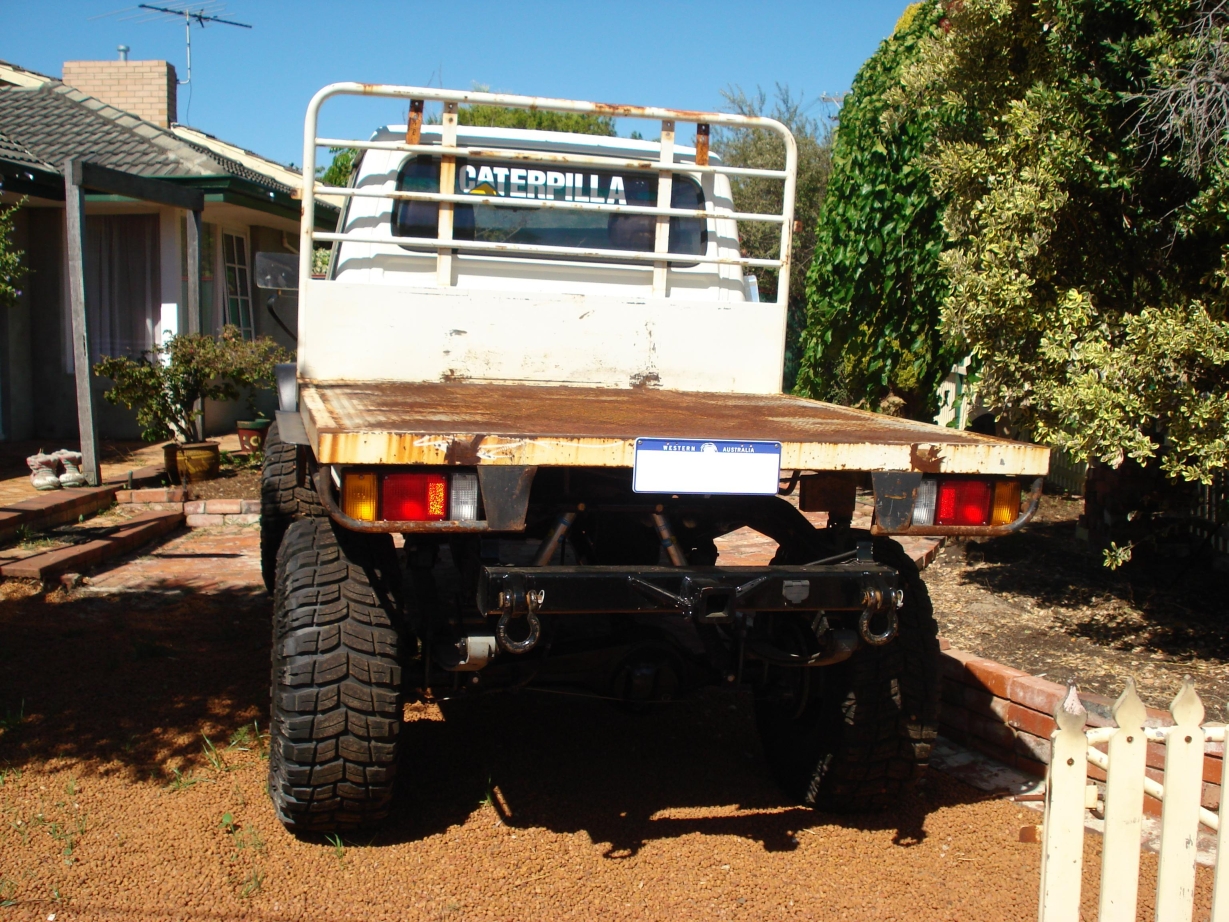
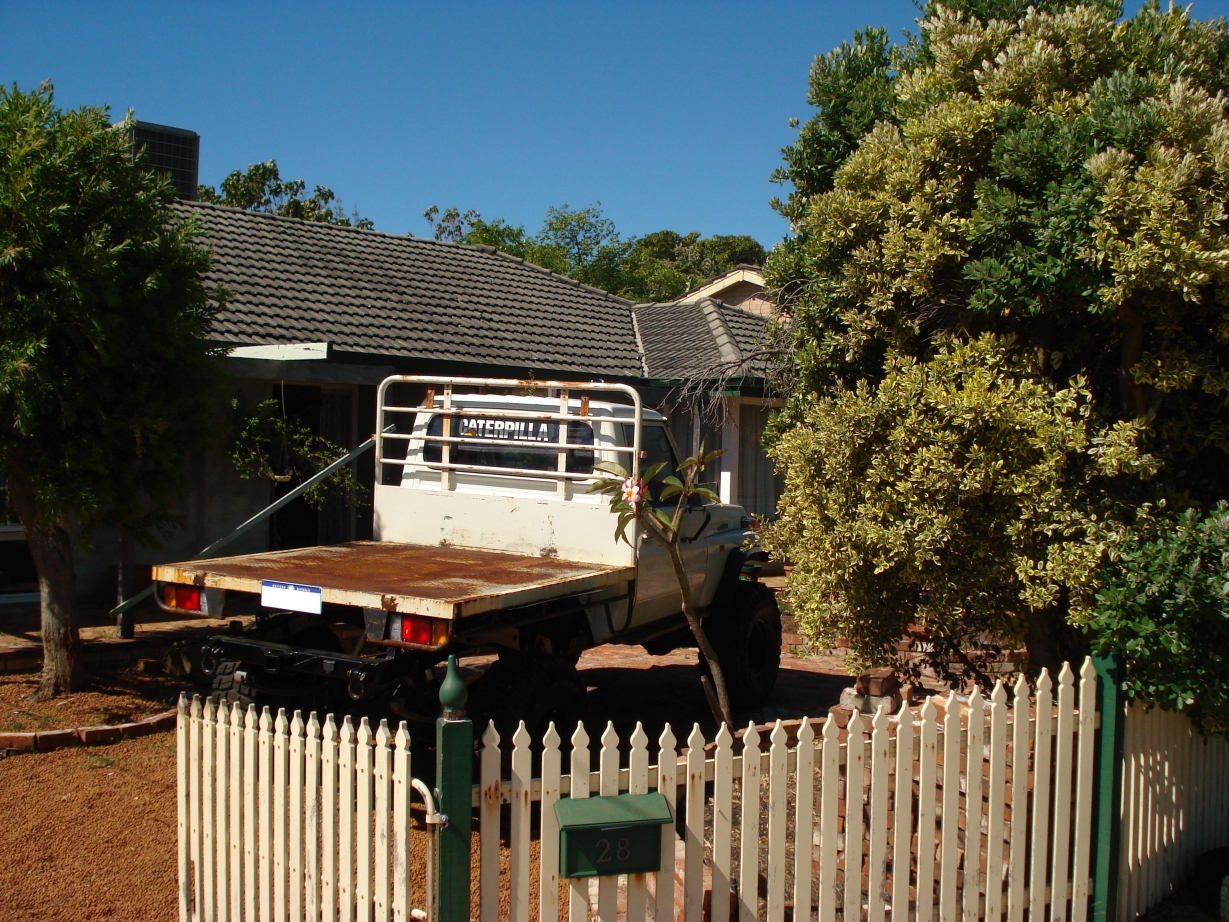
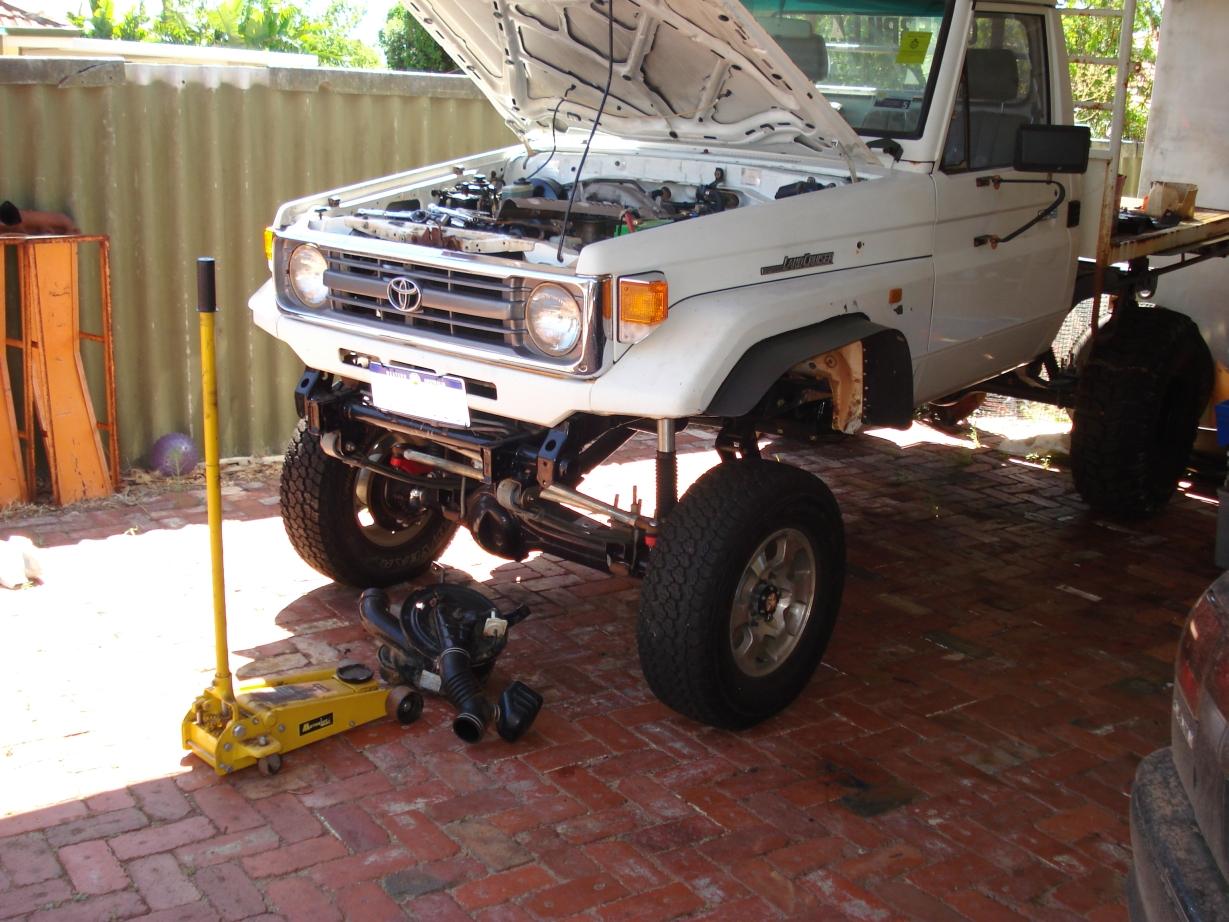
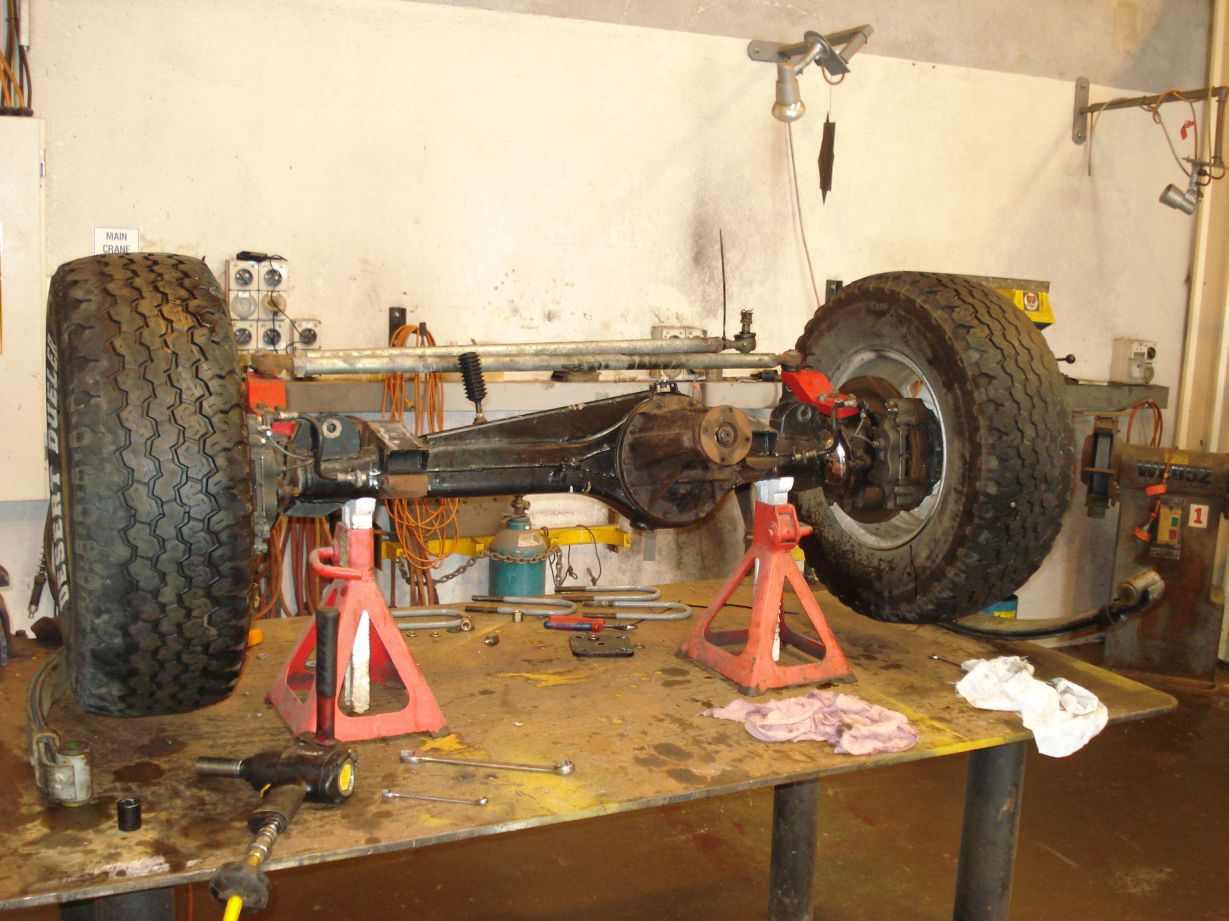
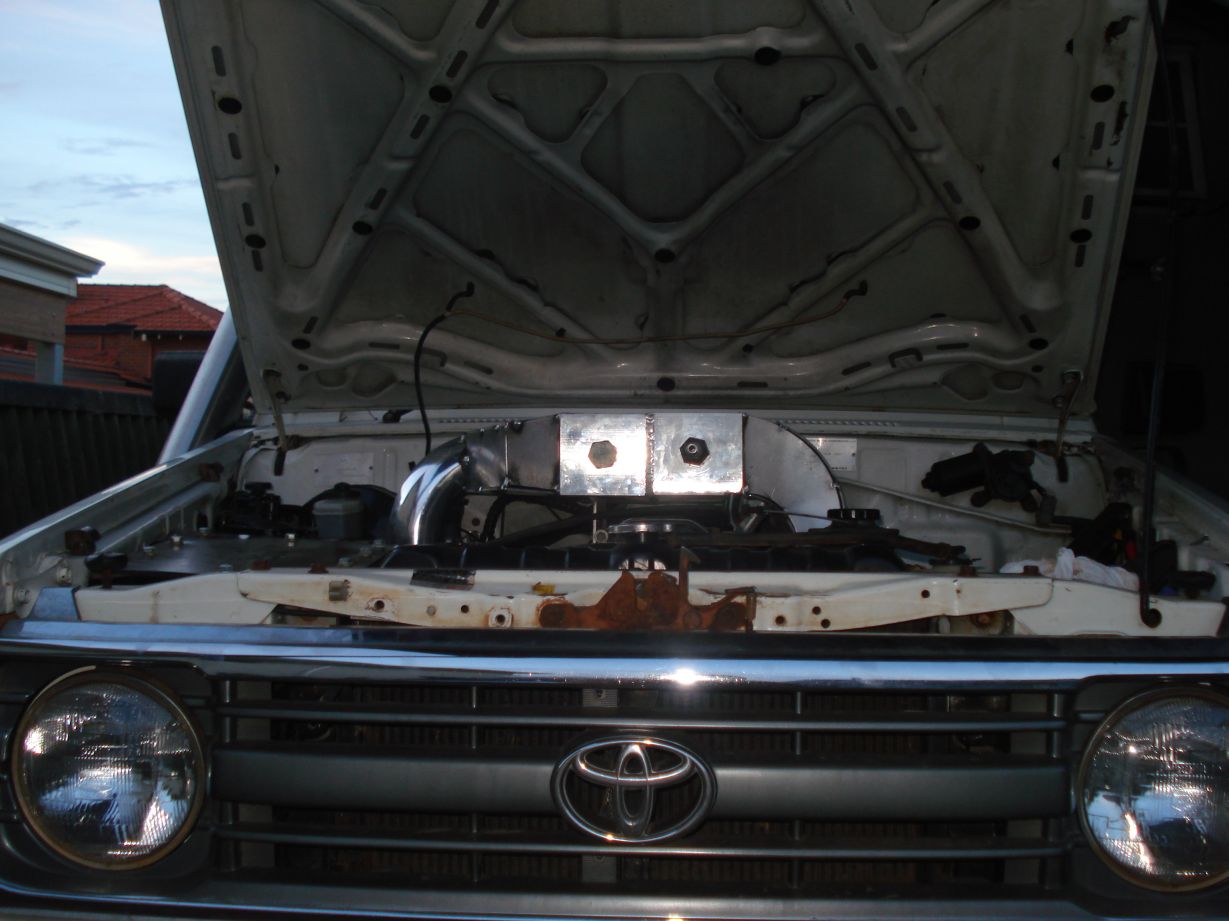
How i bought it


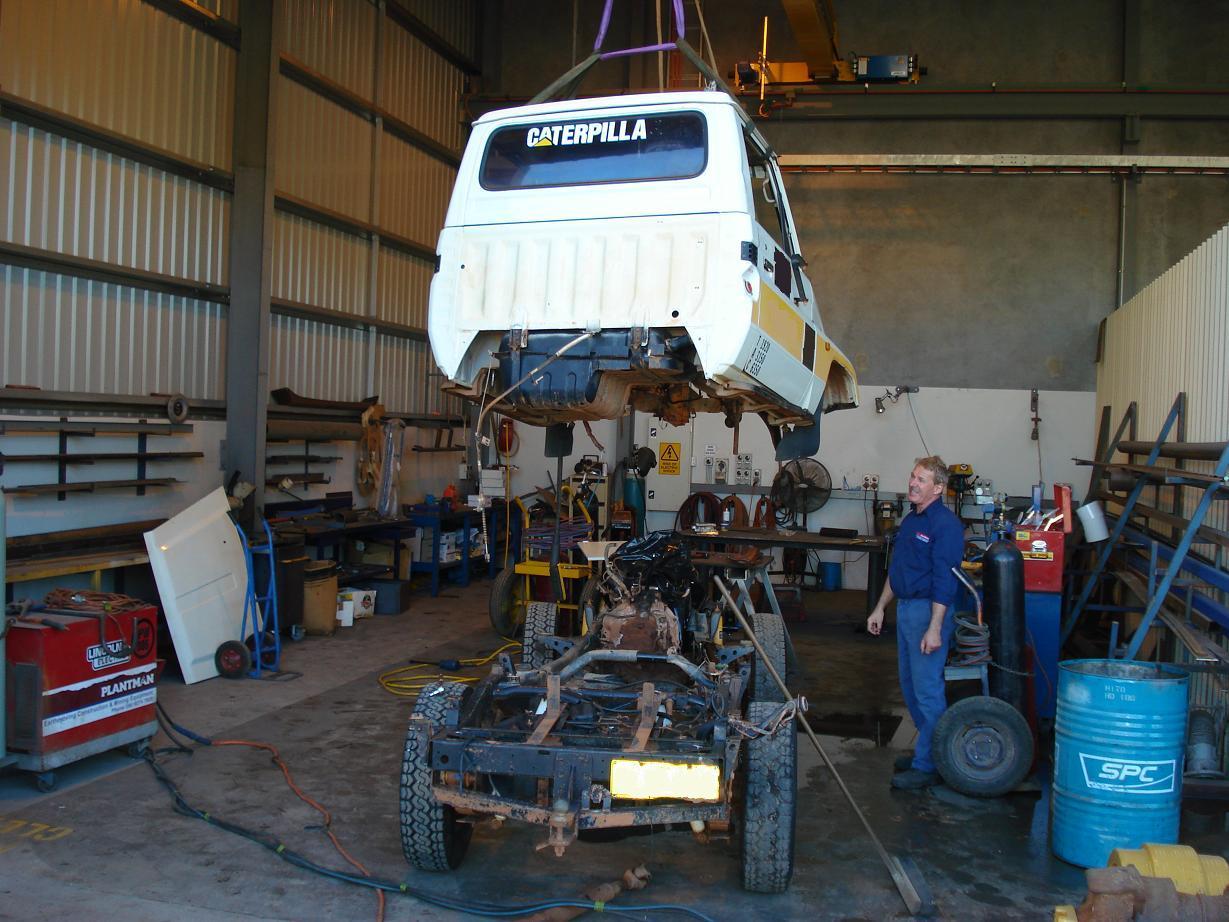
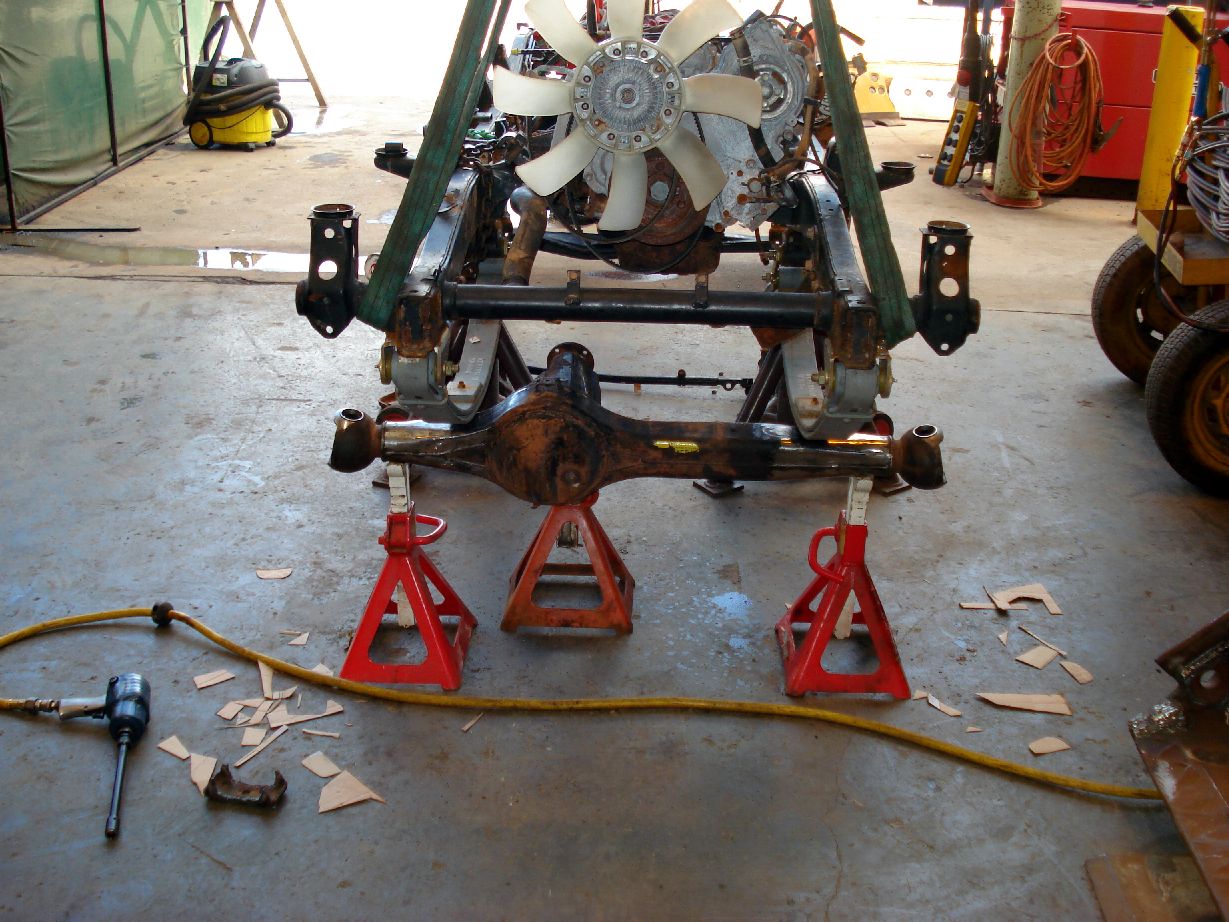
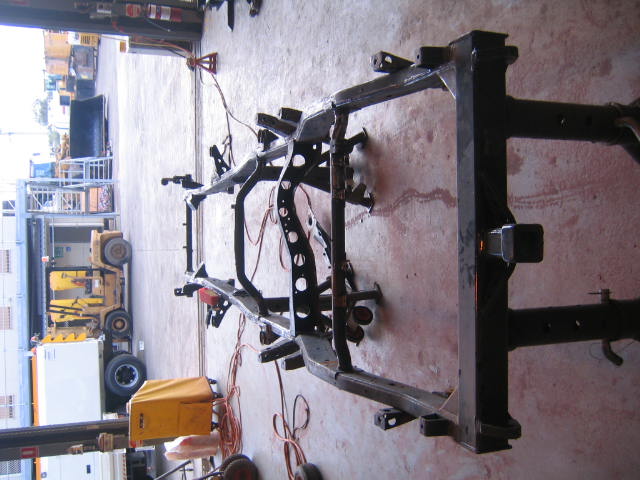
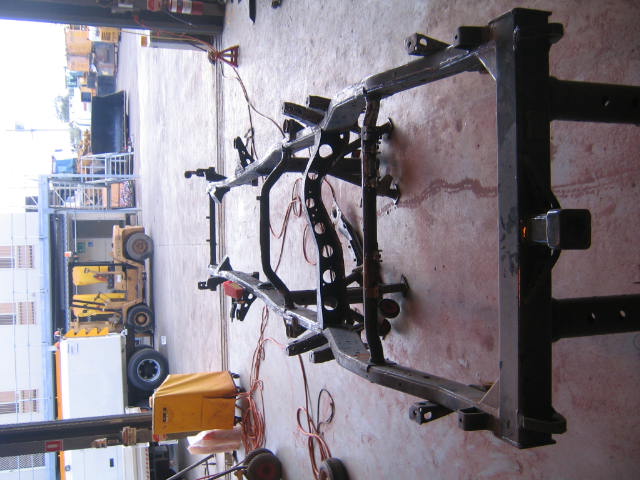
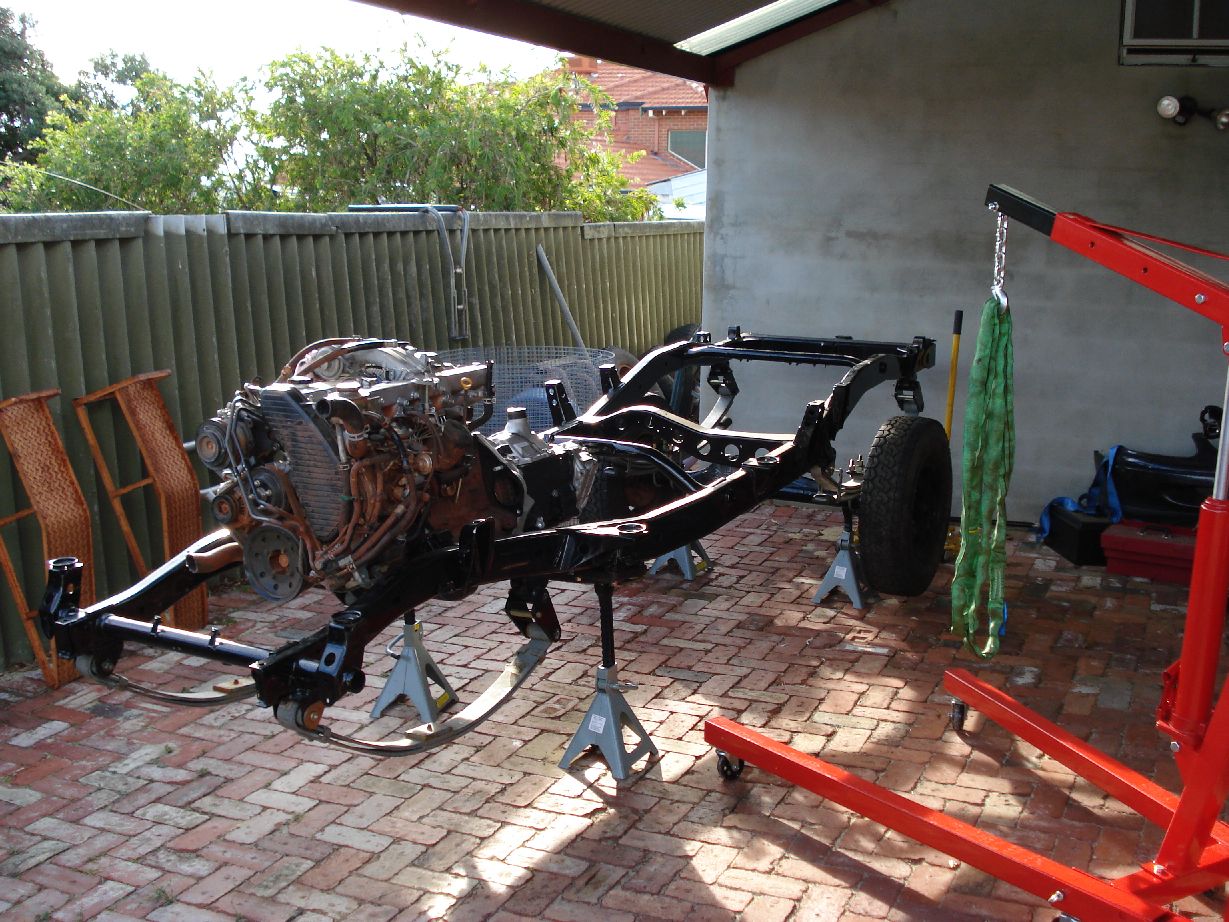
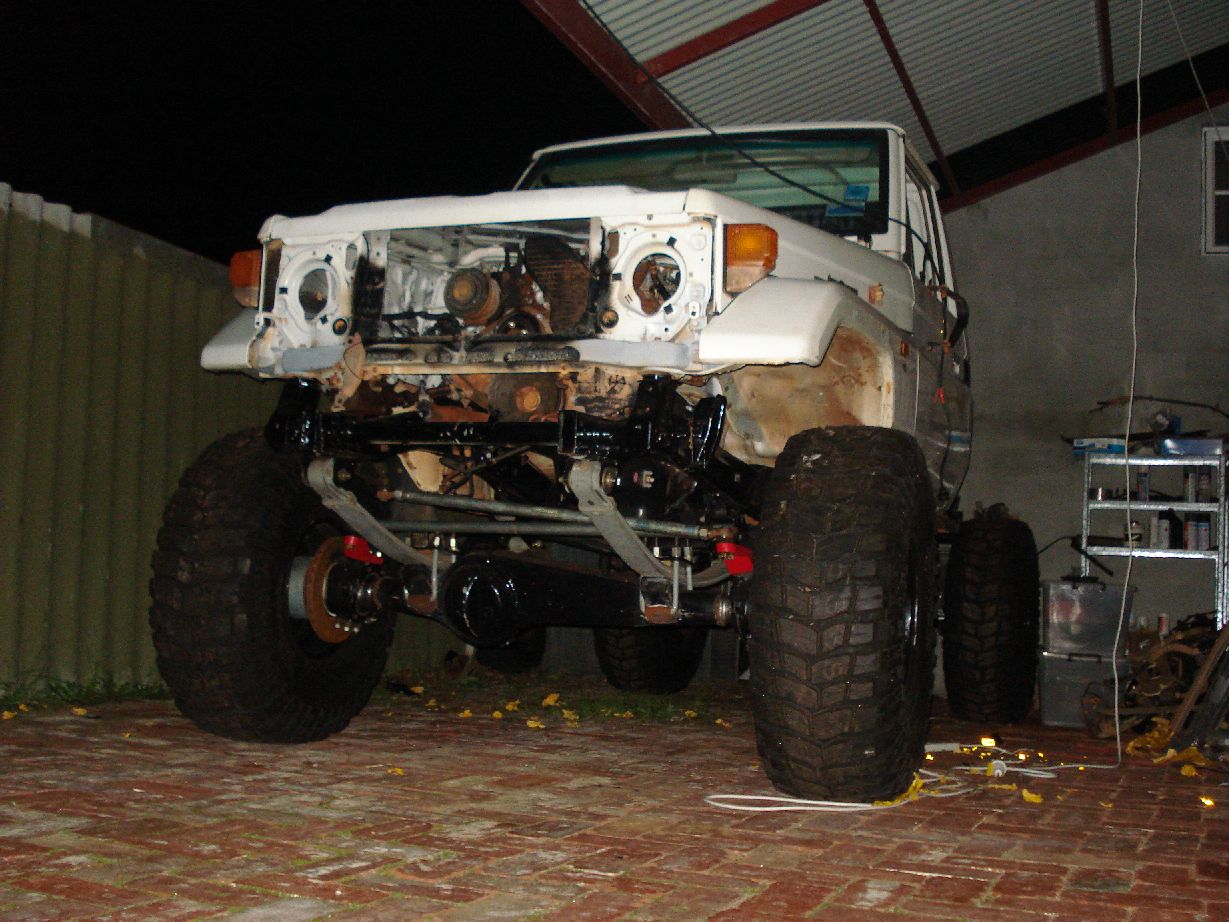
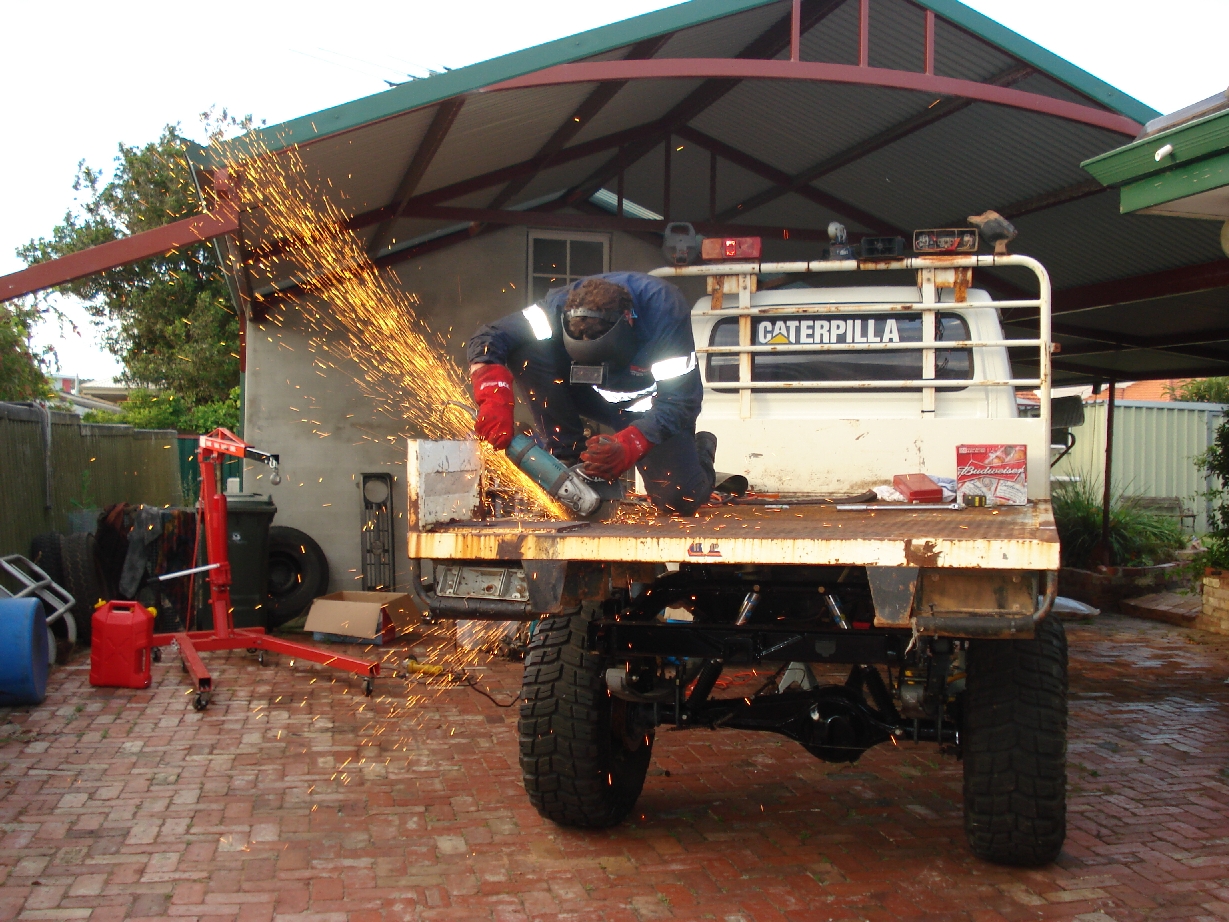
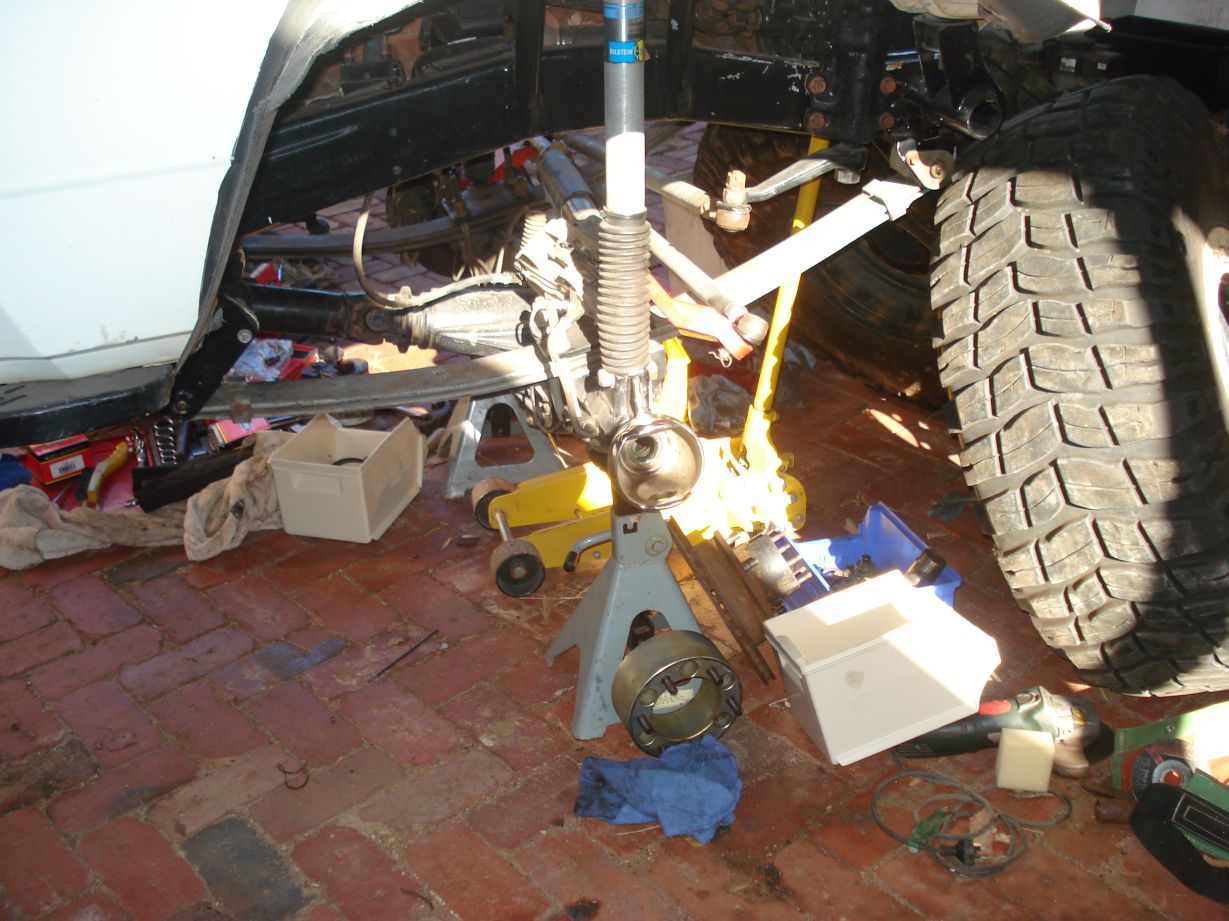
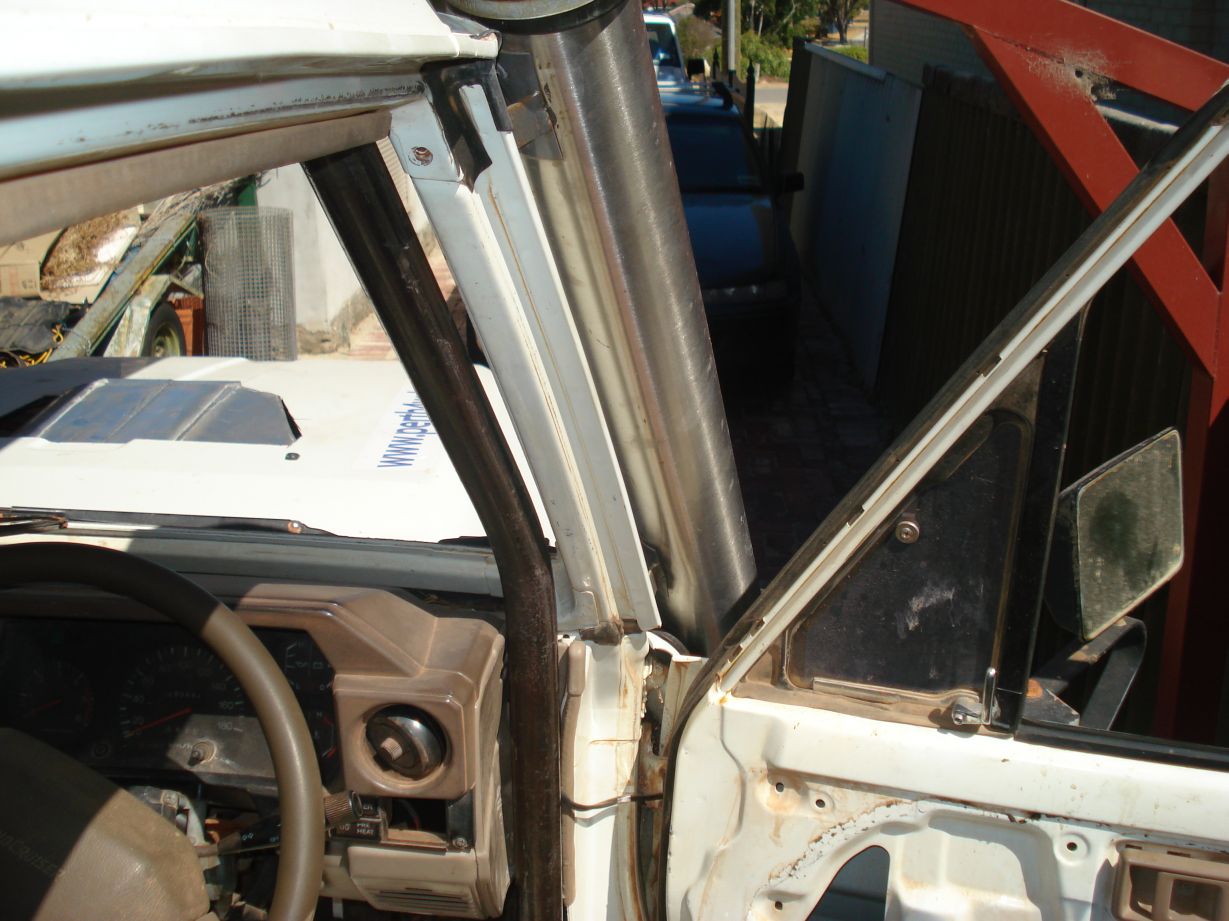
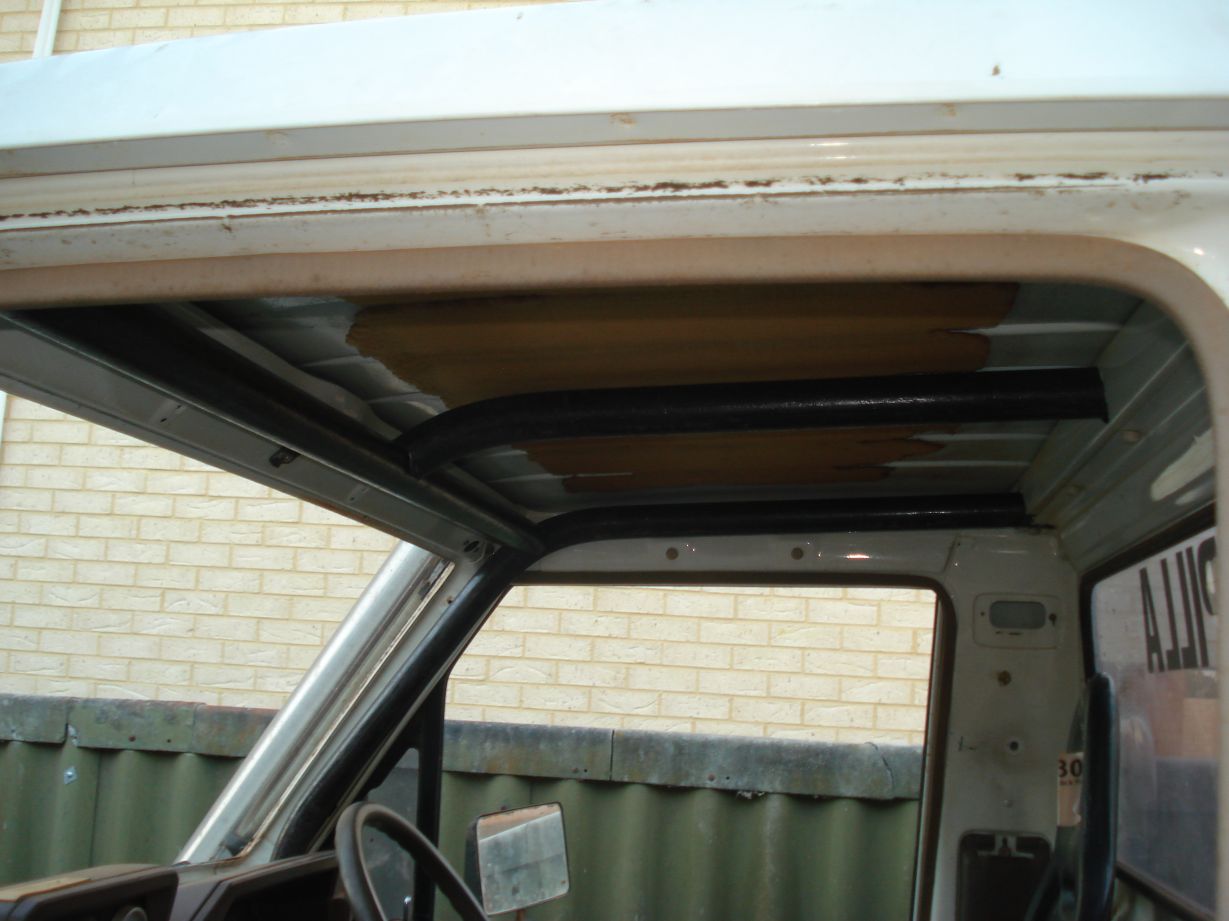
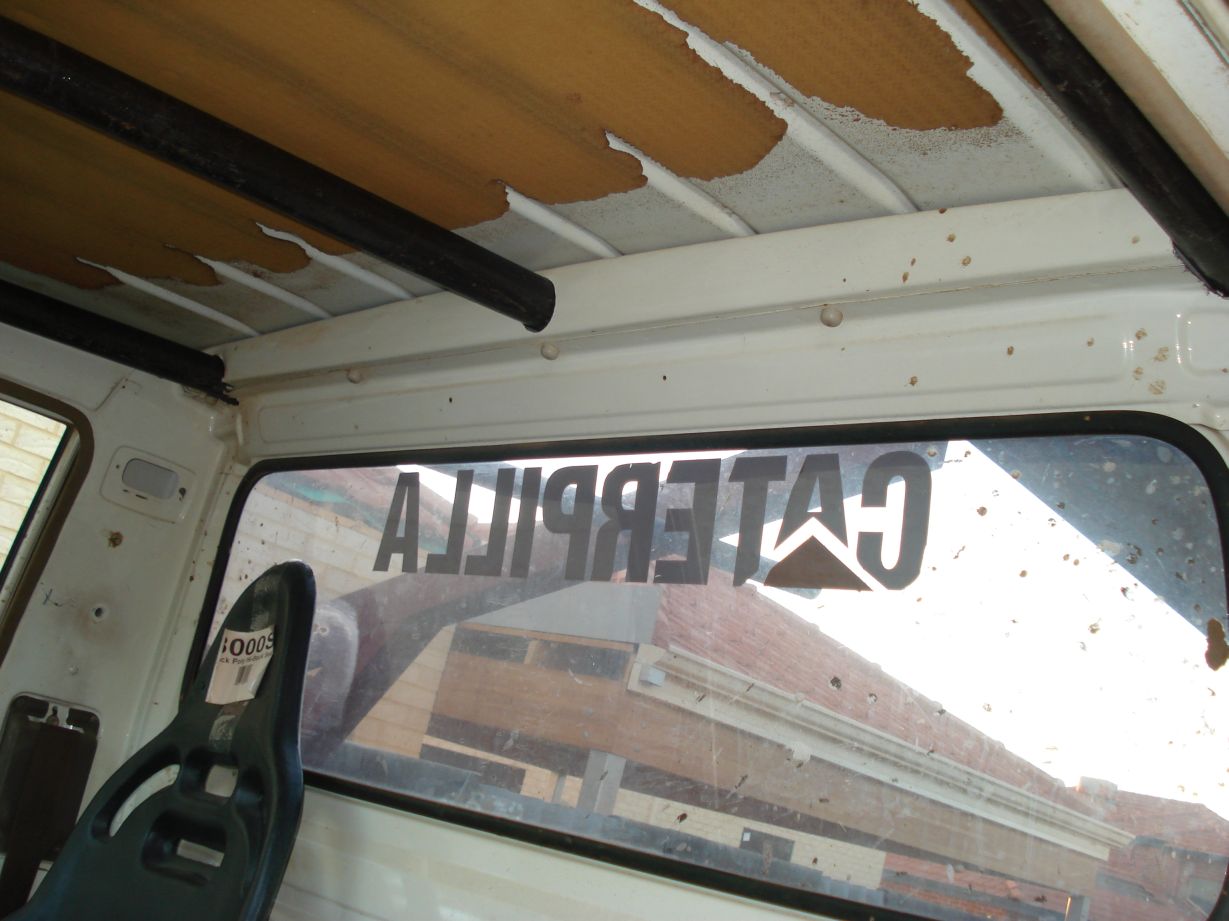
Rippin it apart
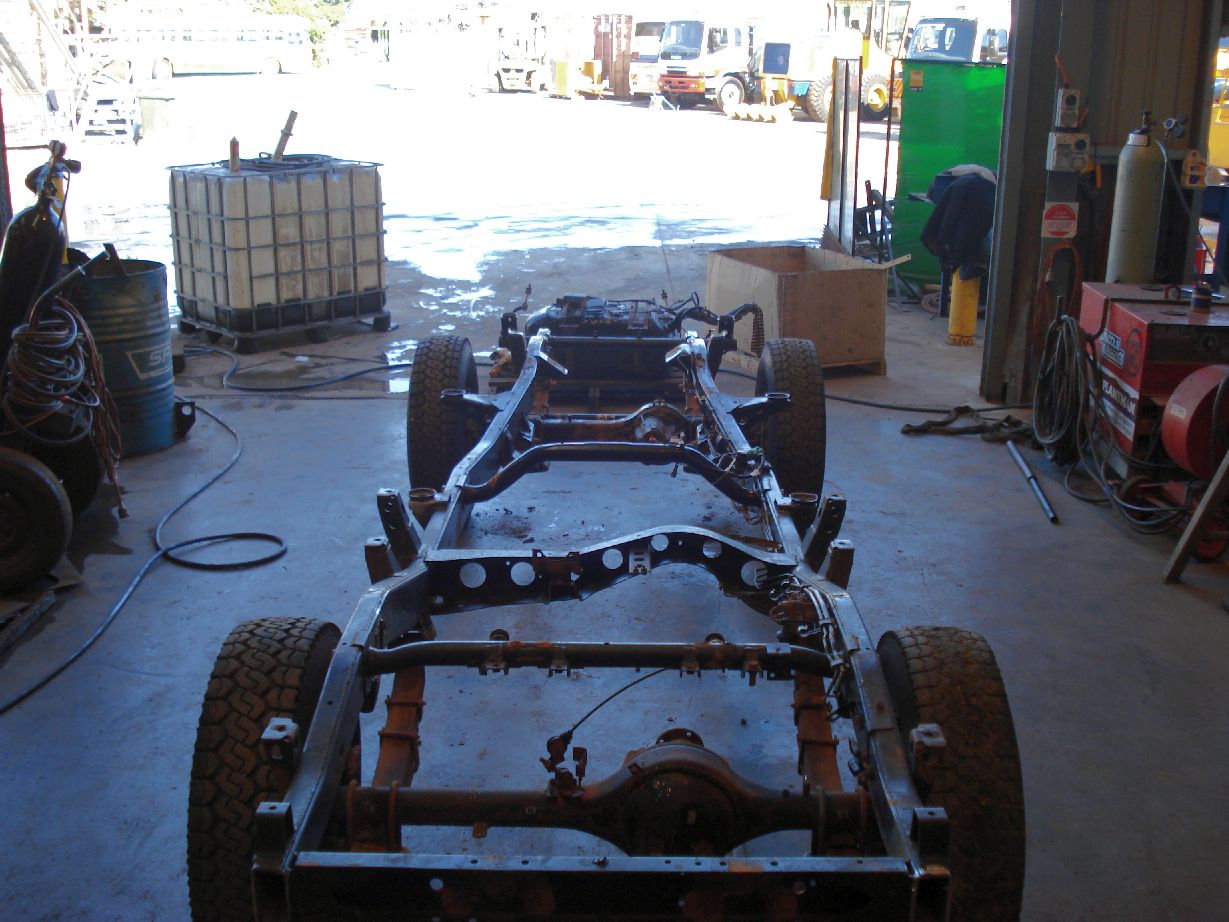
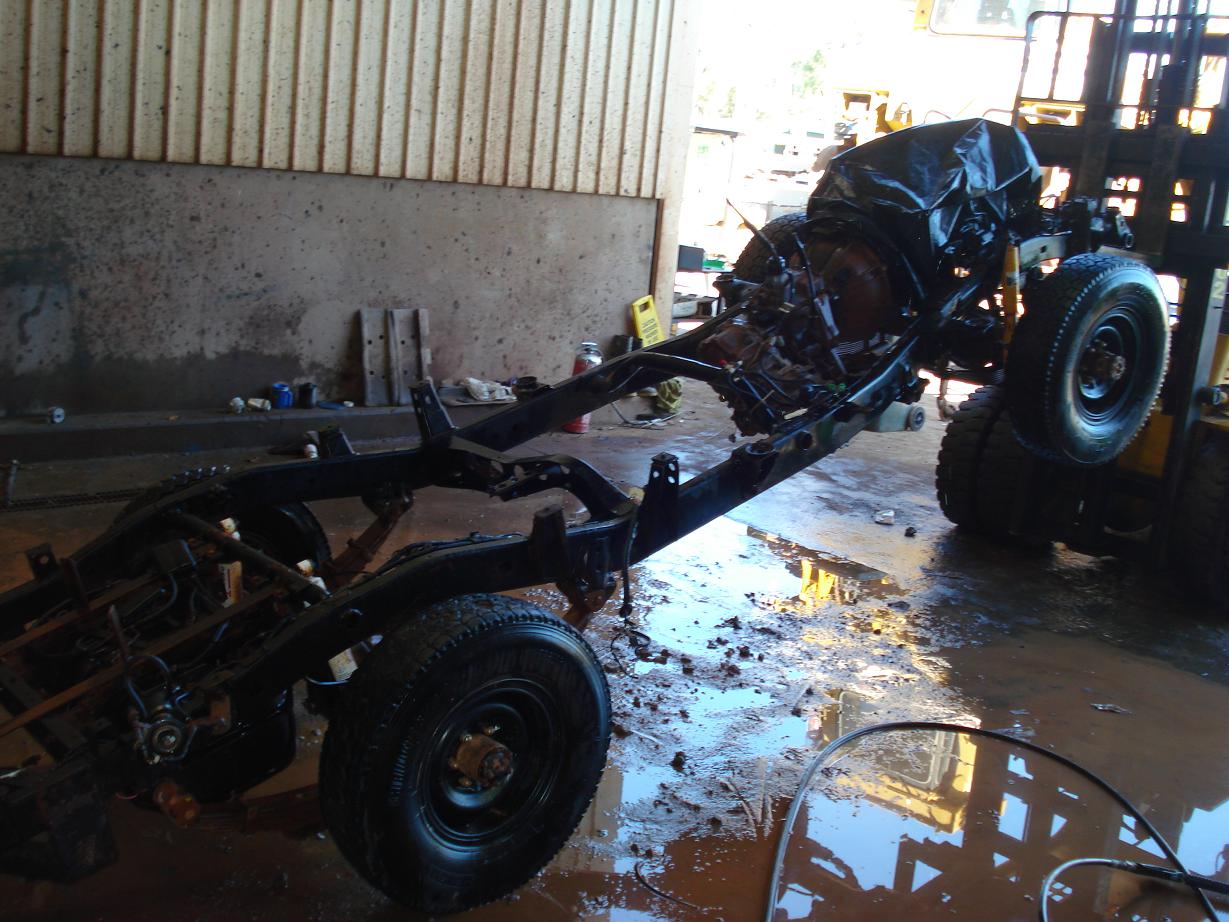
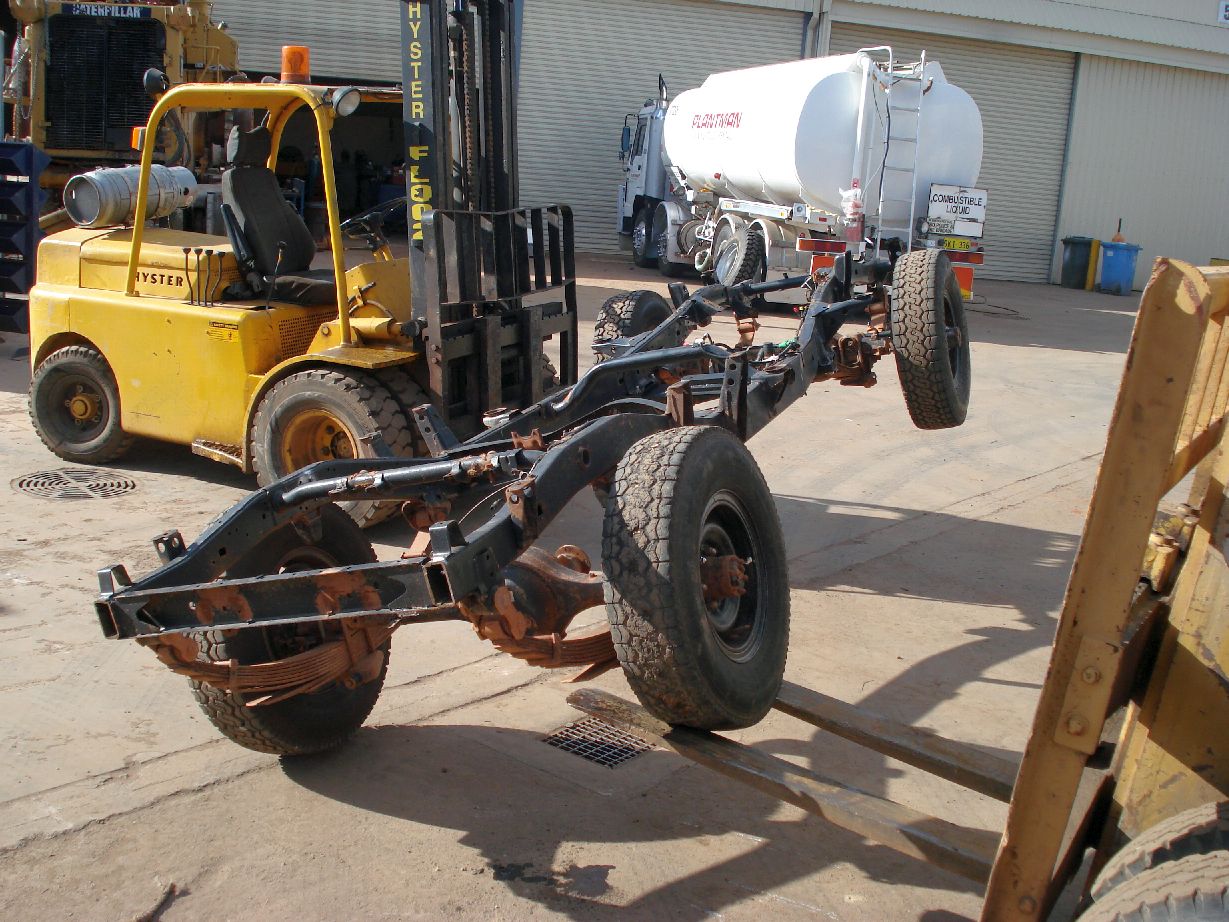
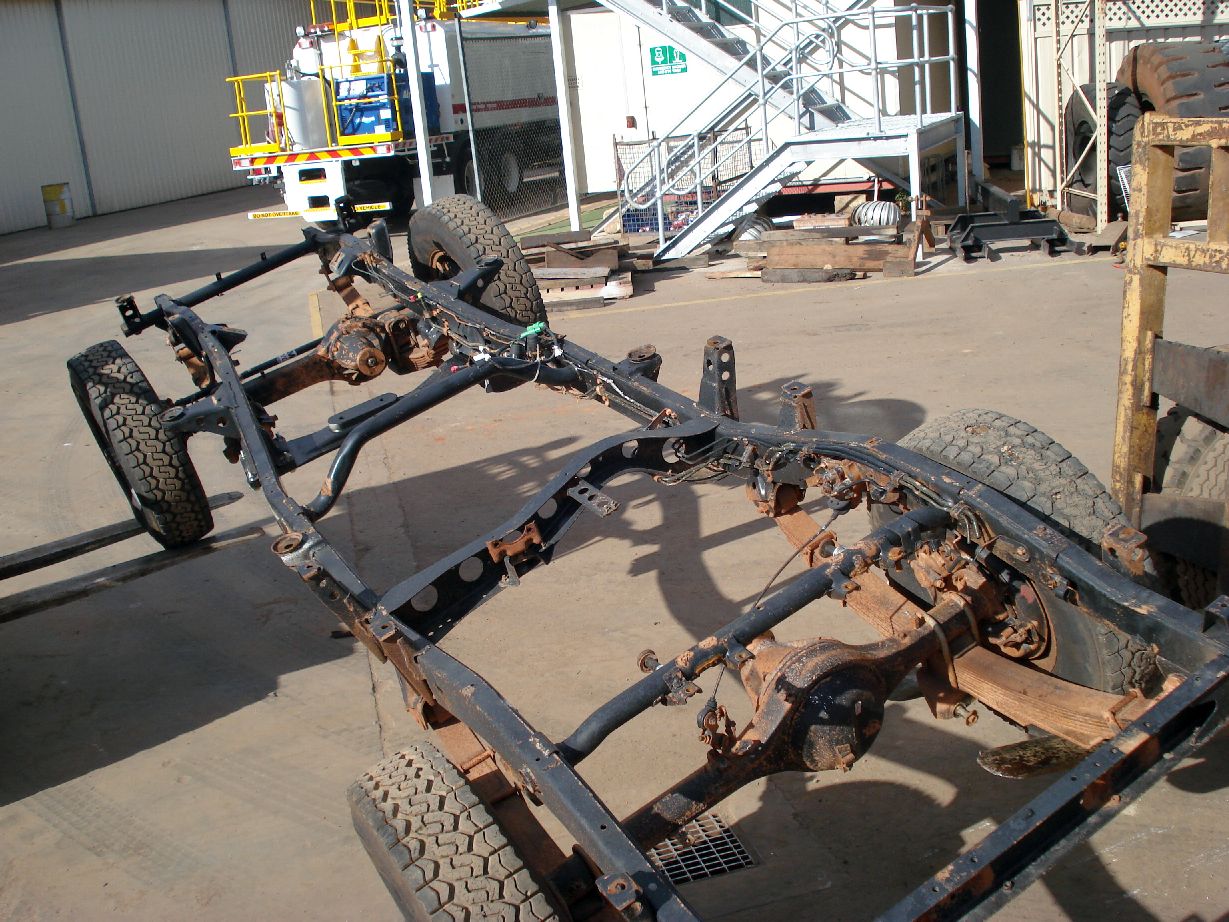
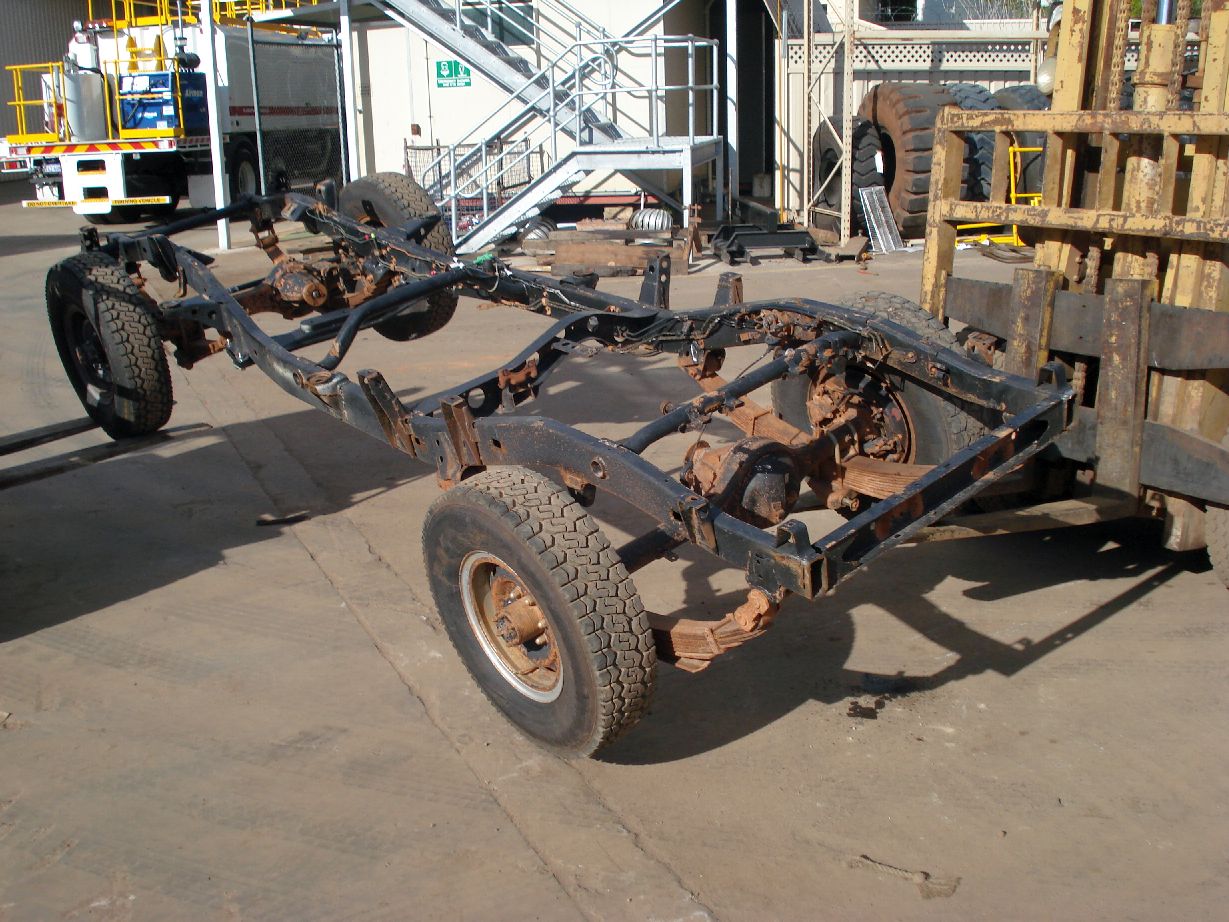
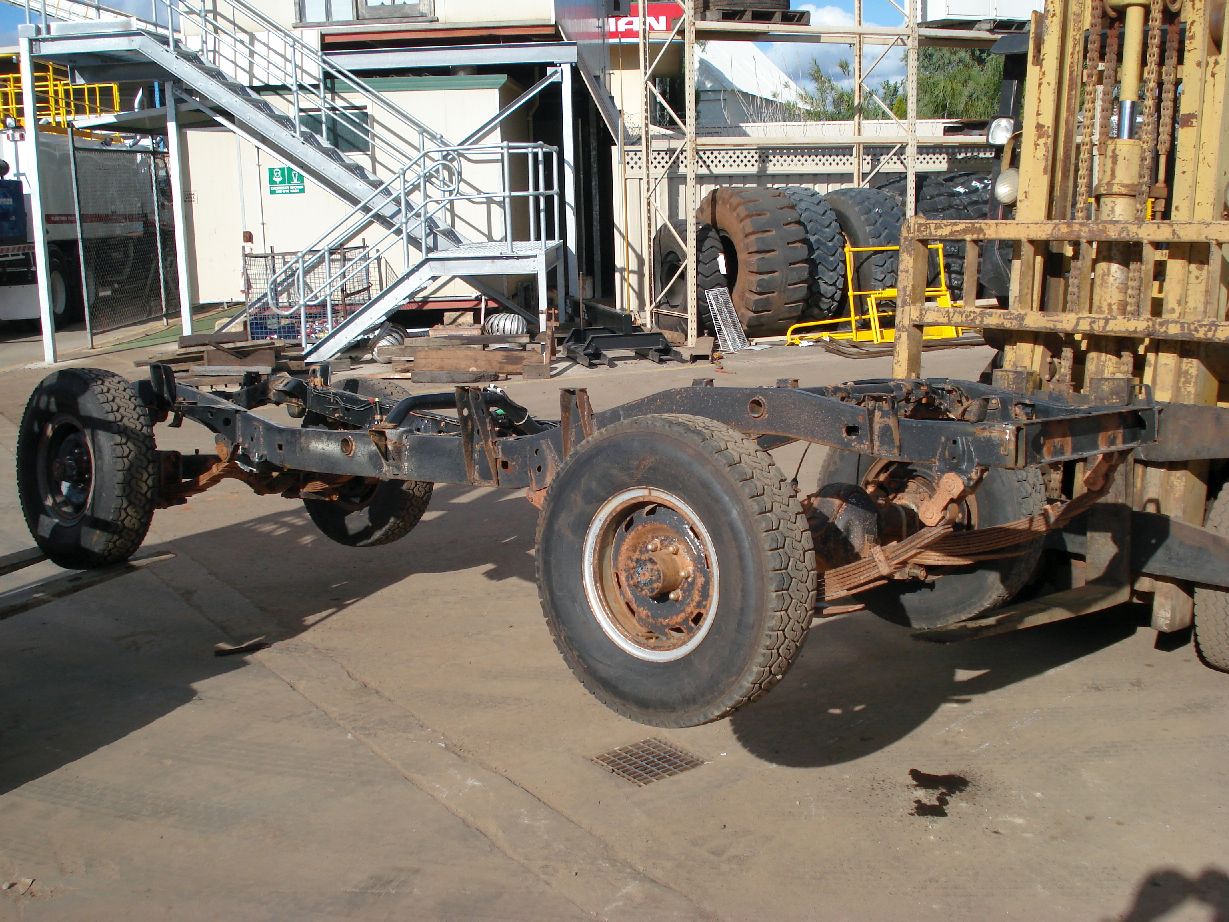
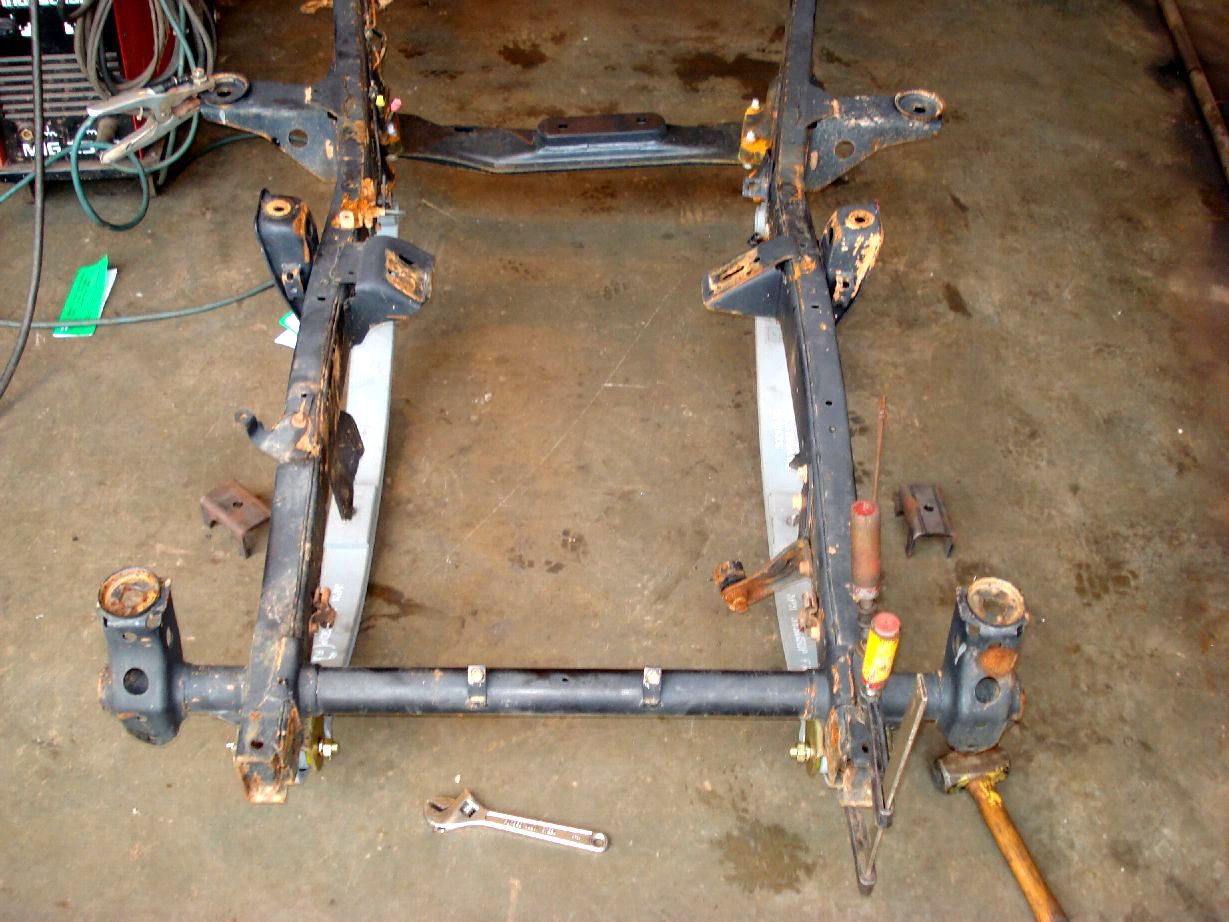
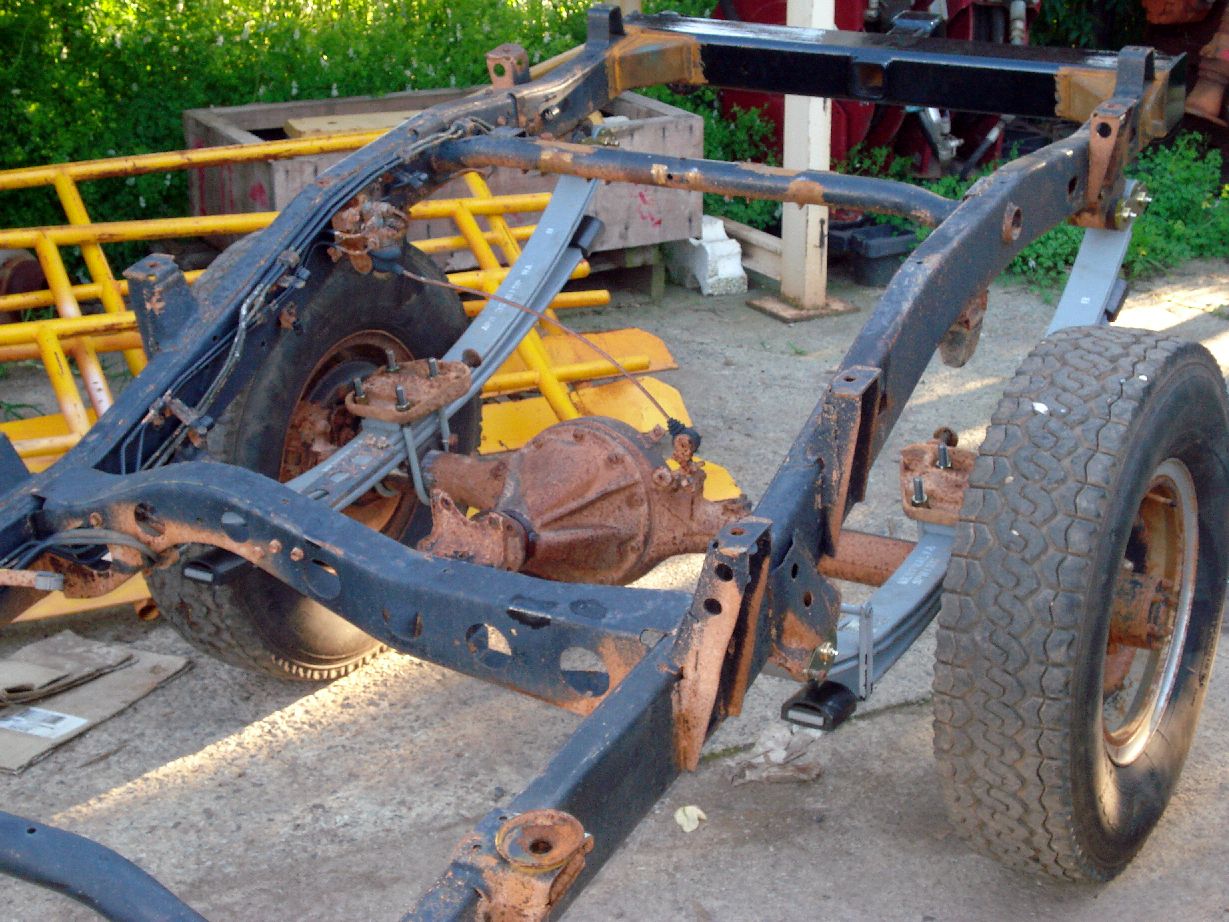
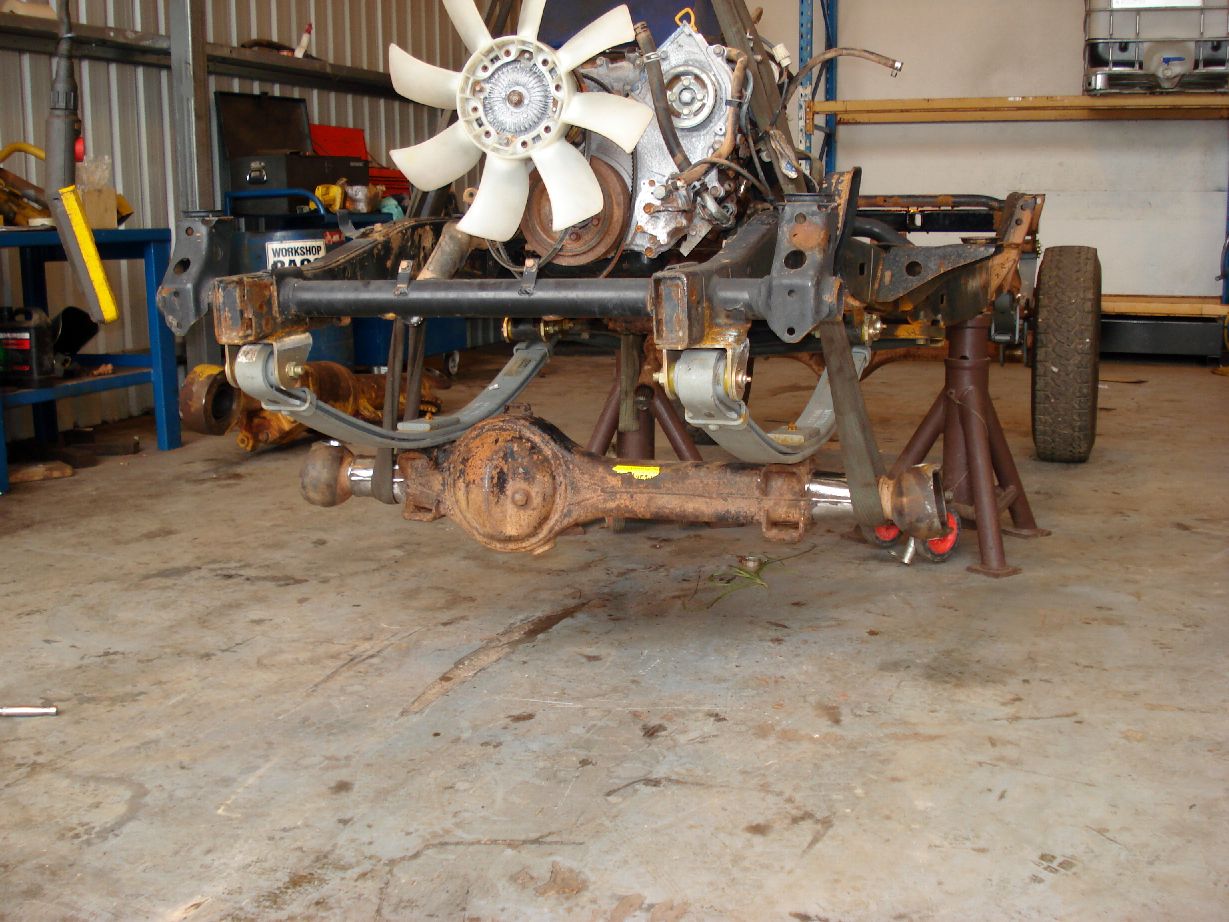
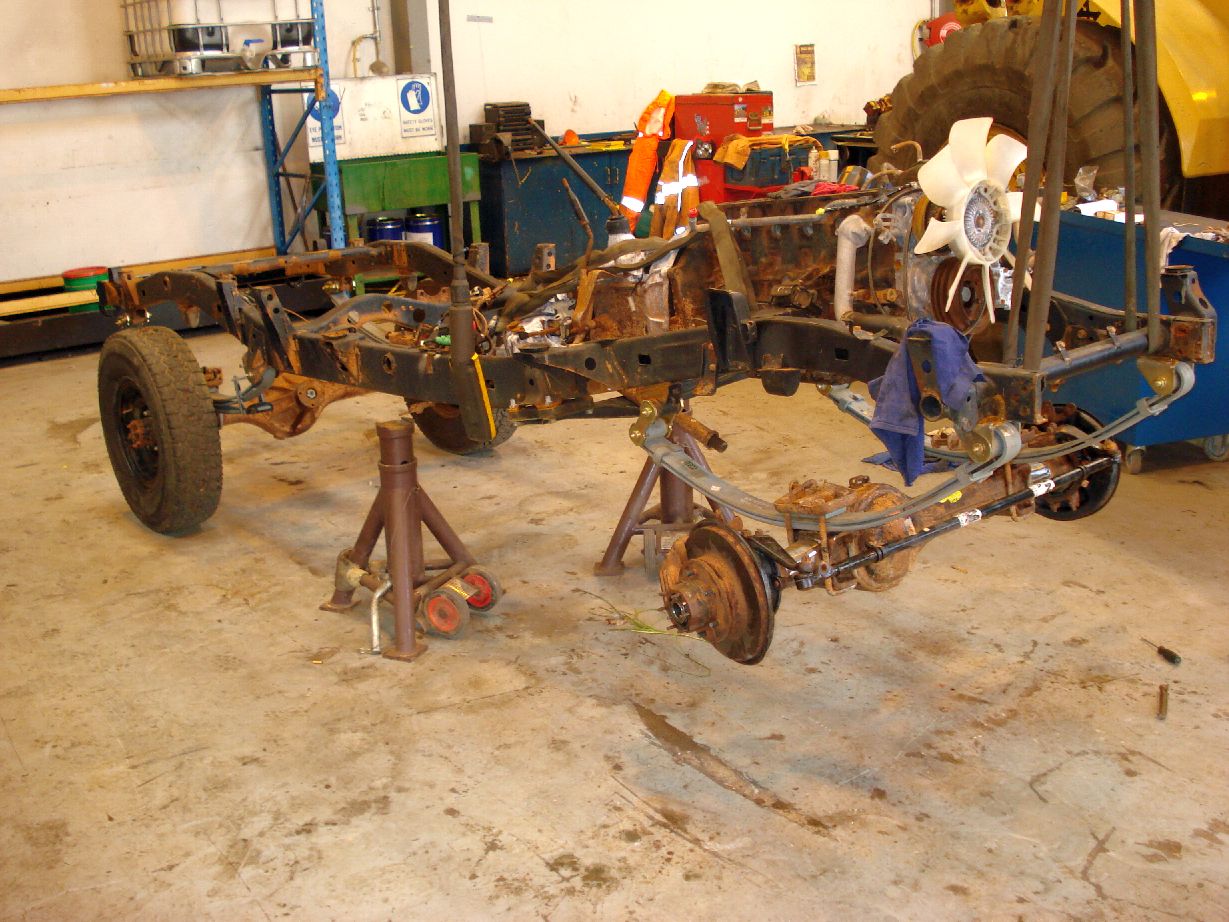
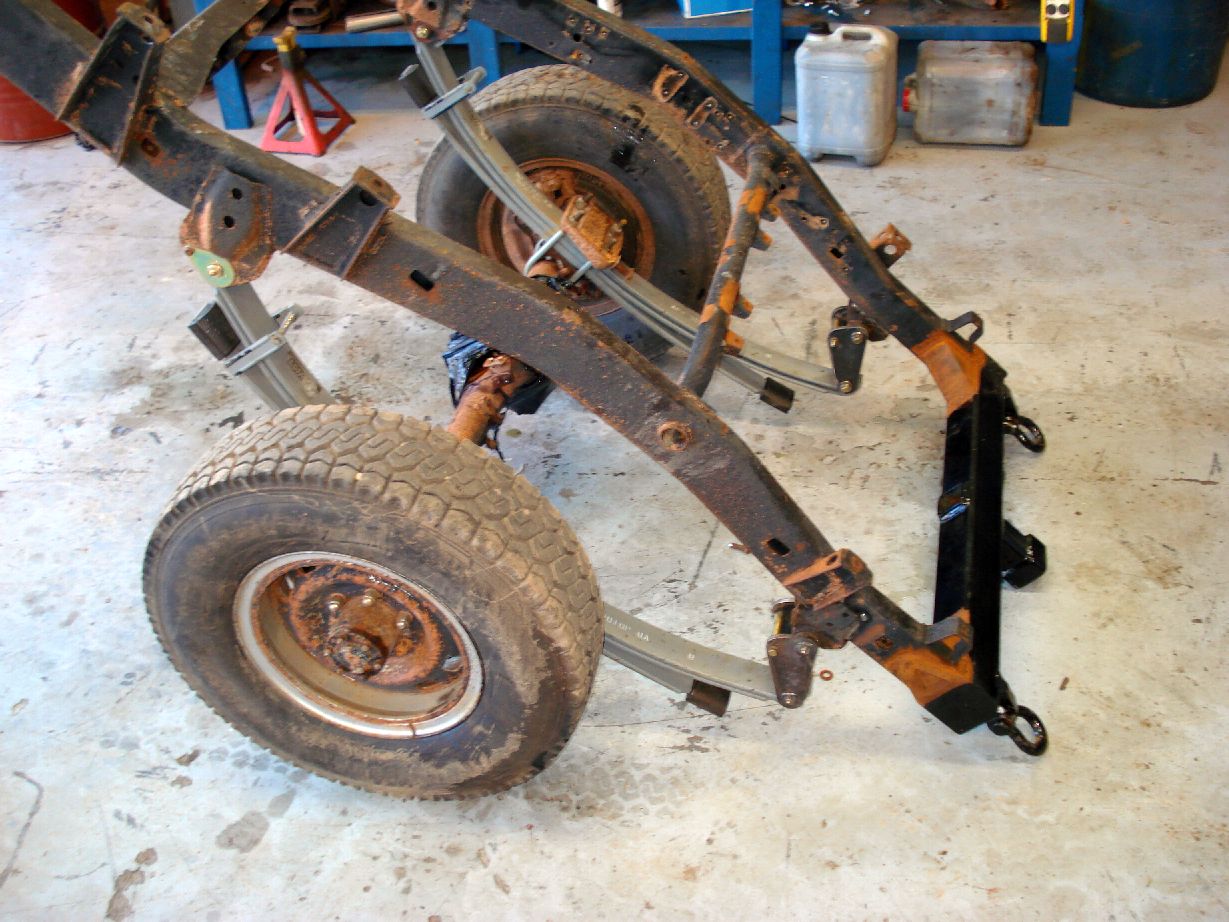
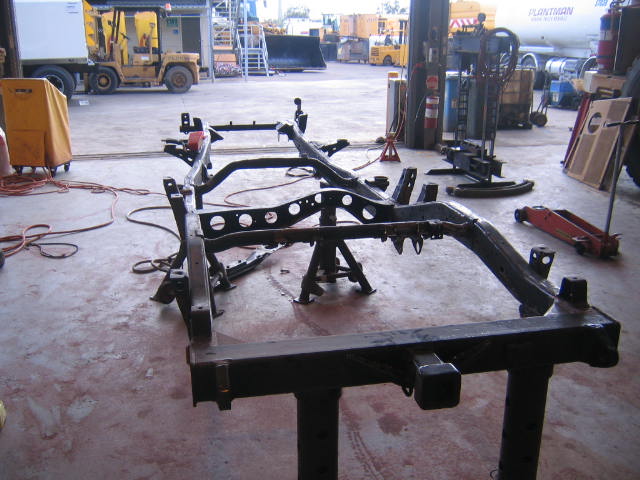
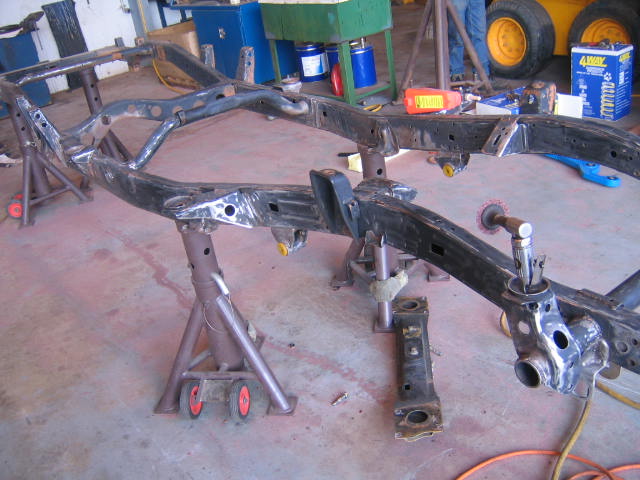
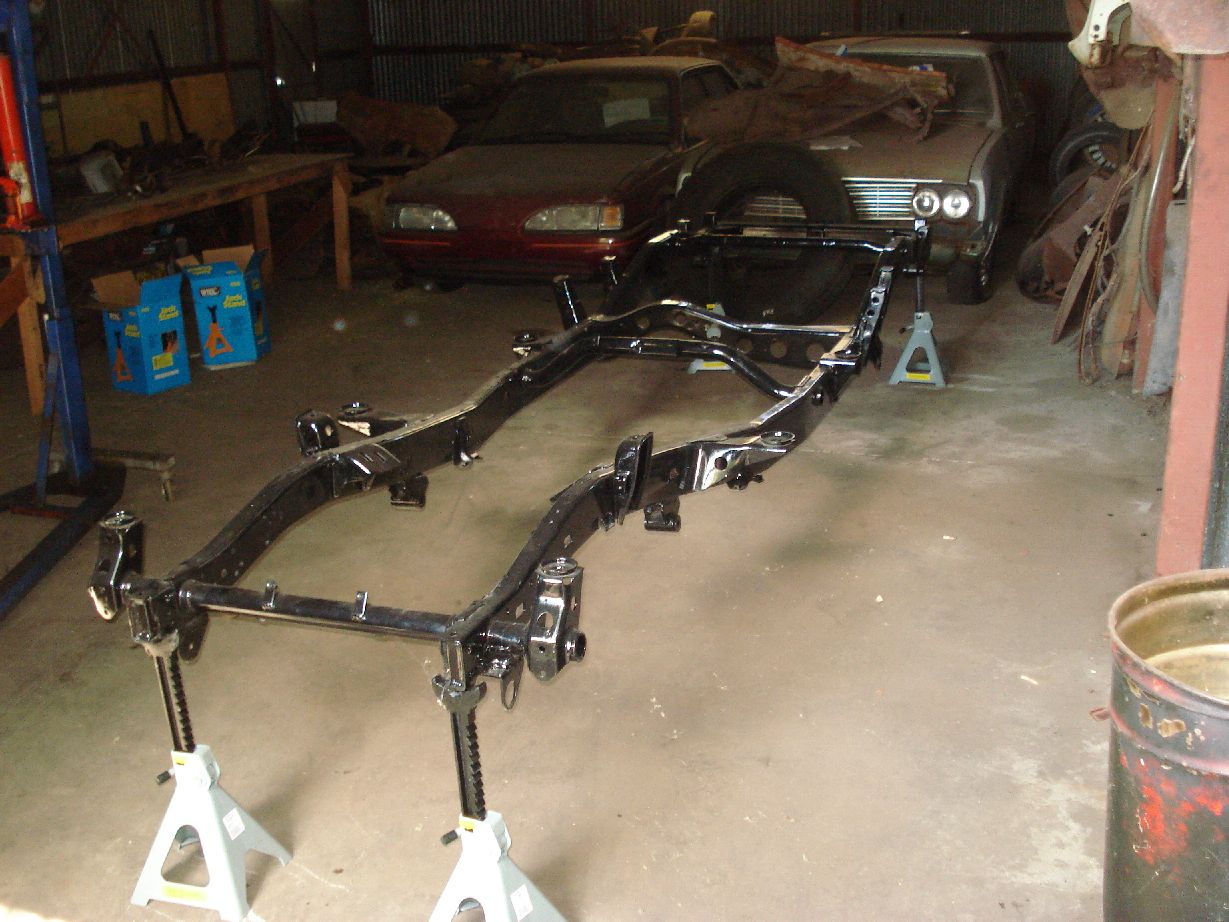
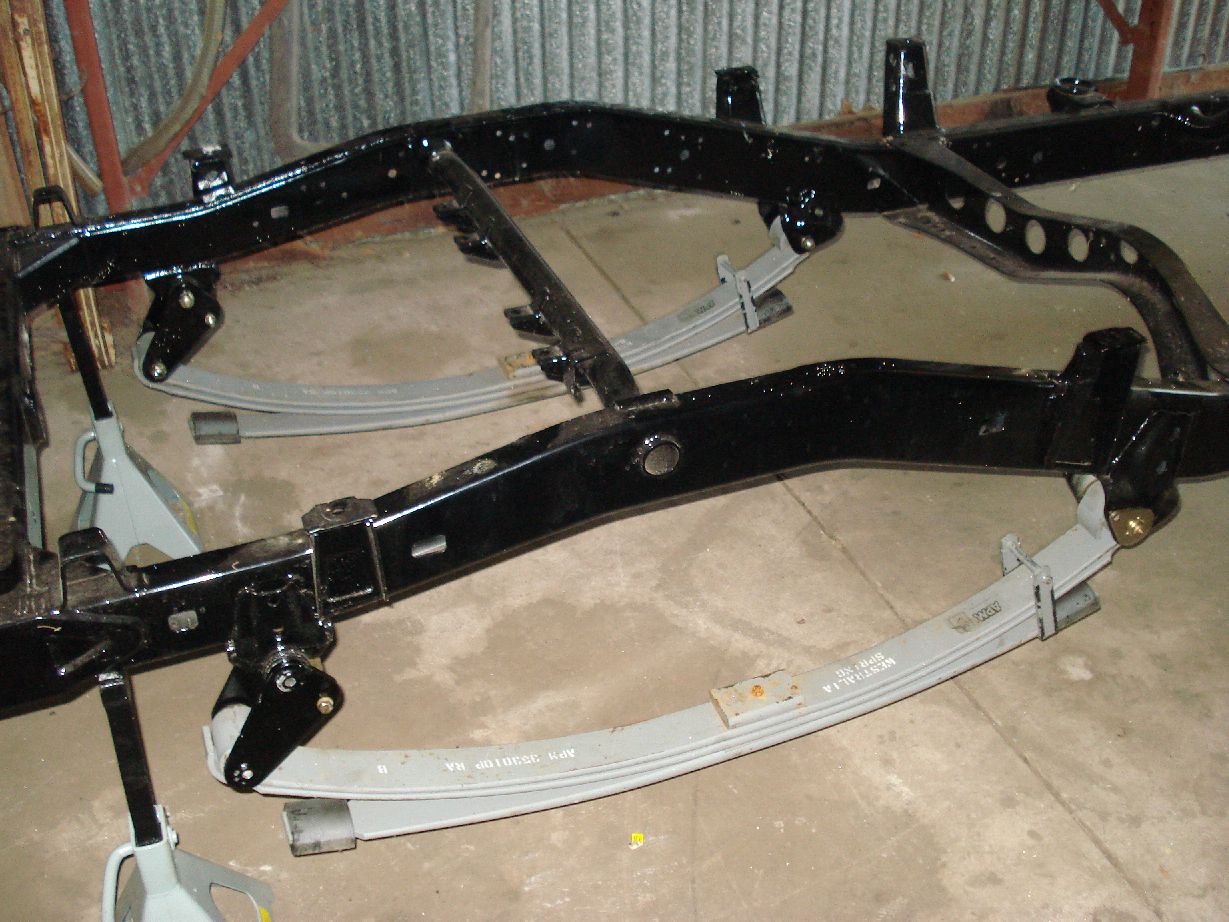
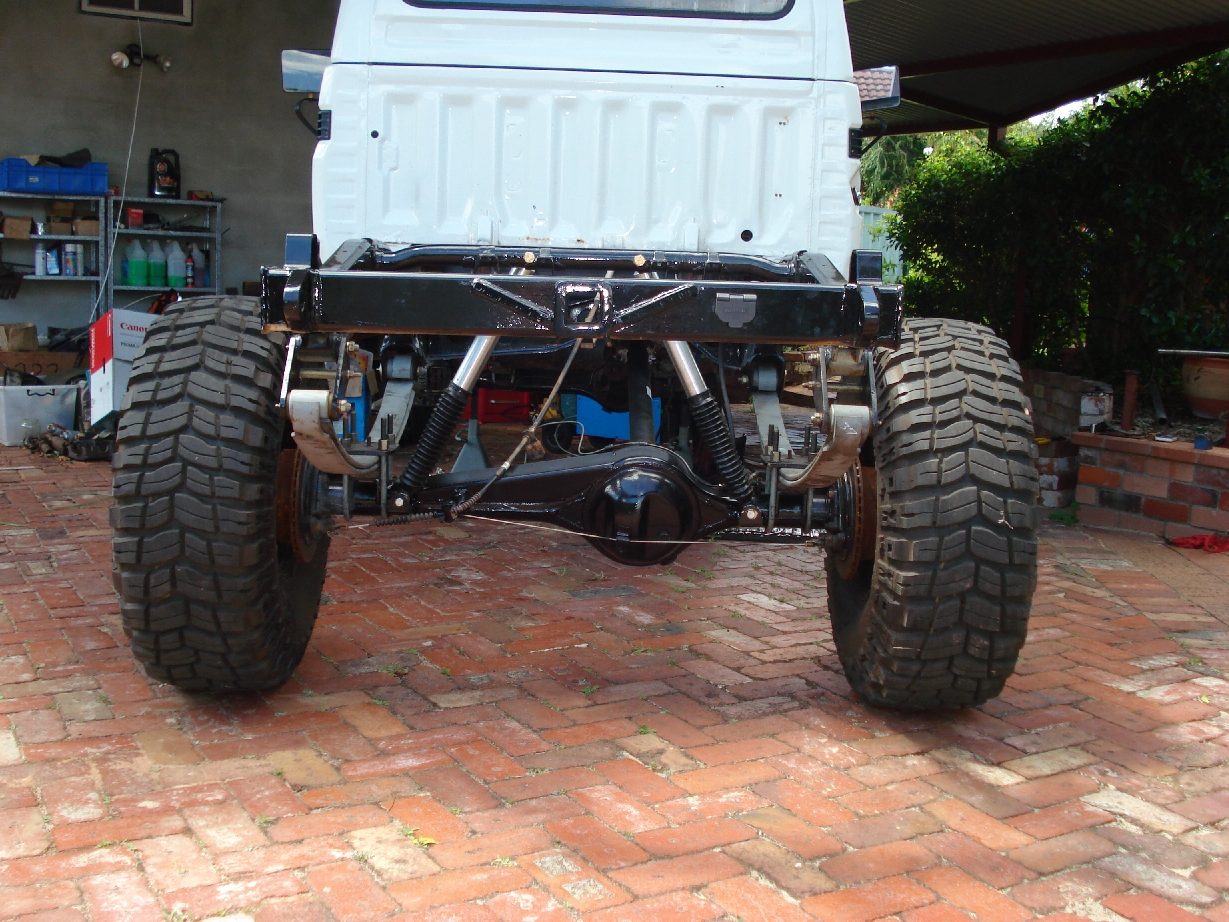
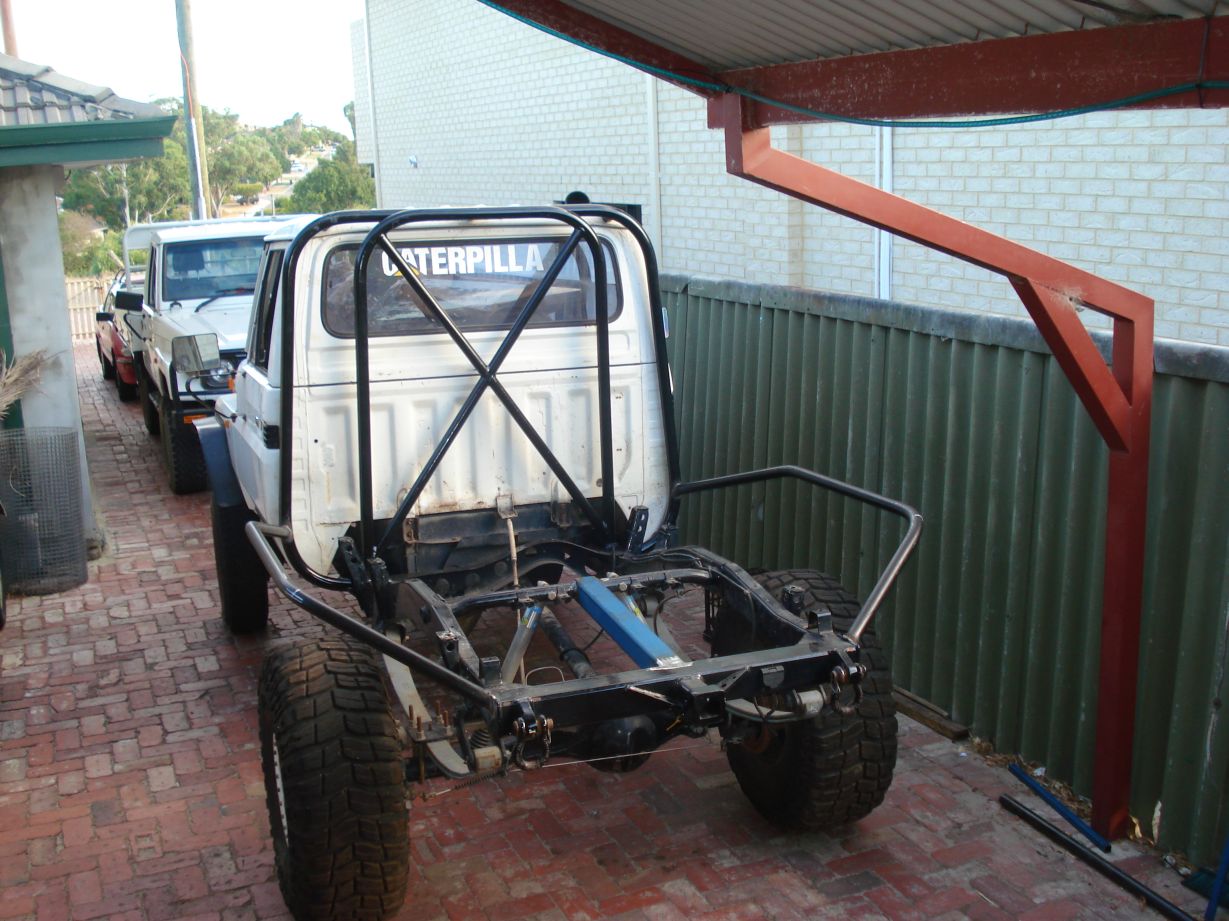
Rollin chassis
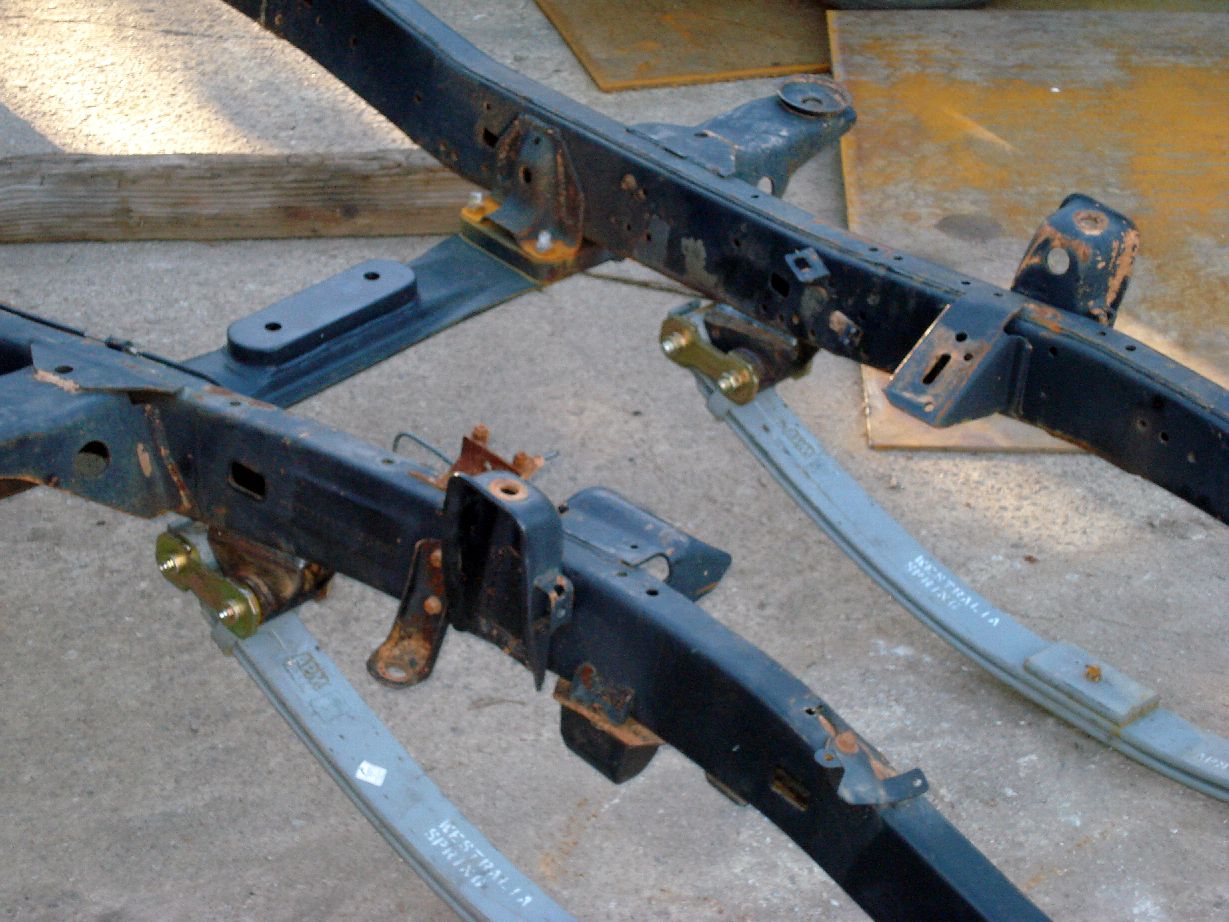
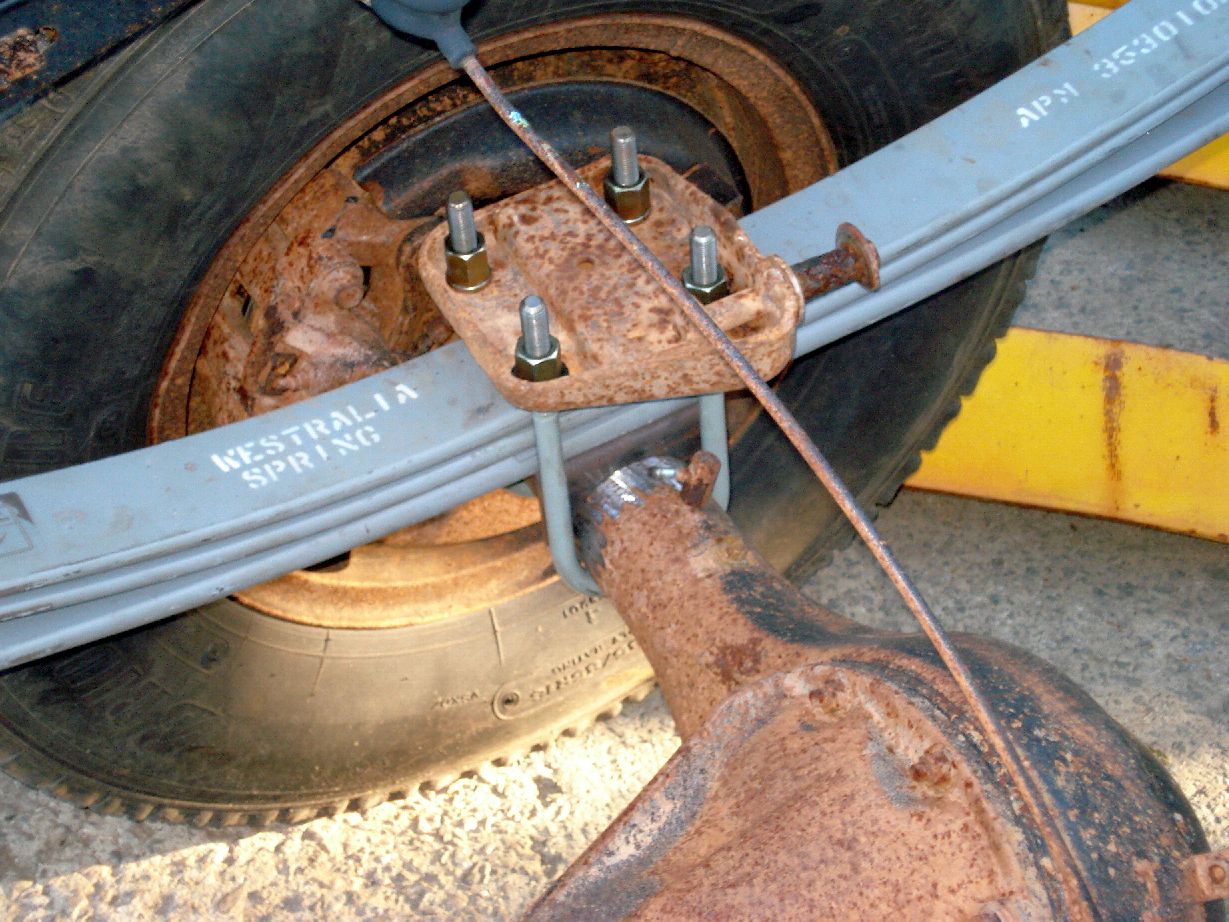
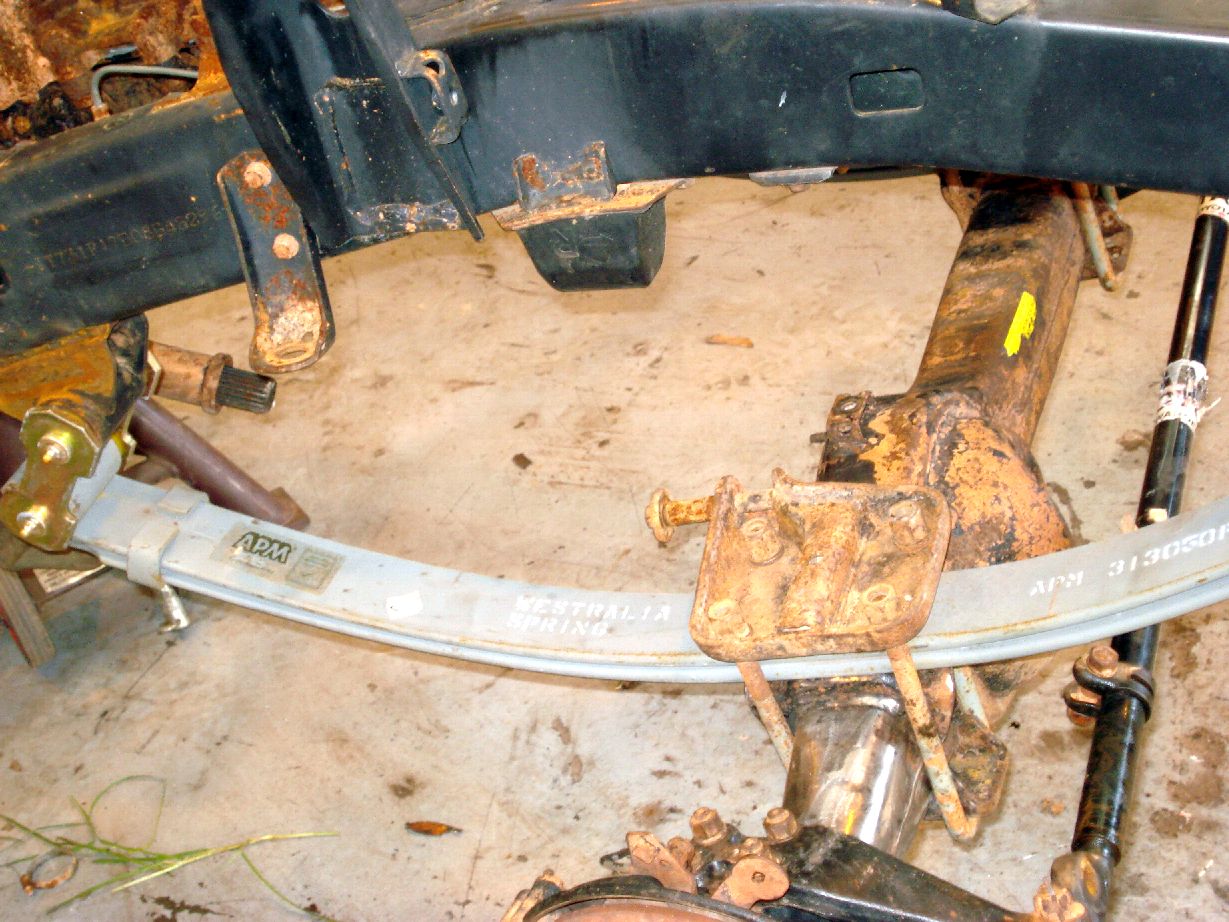
springs
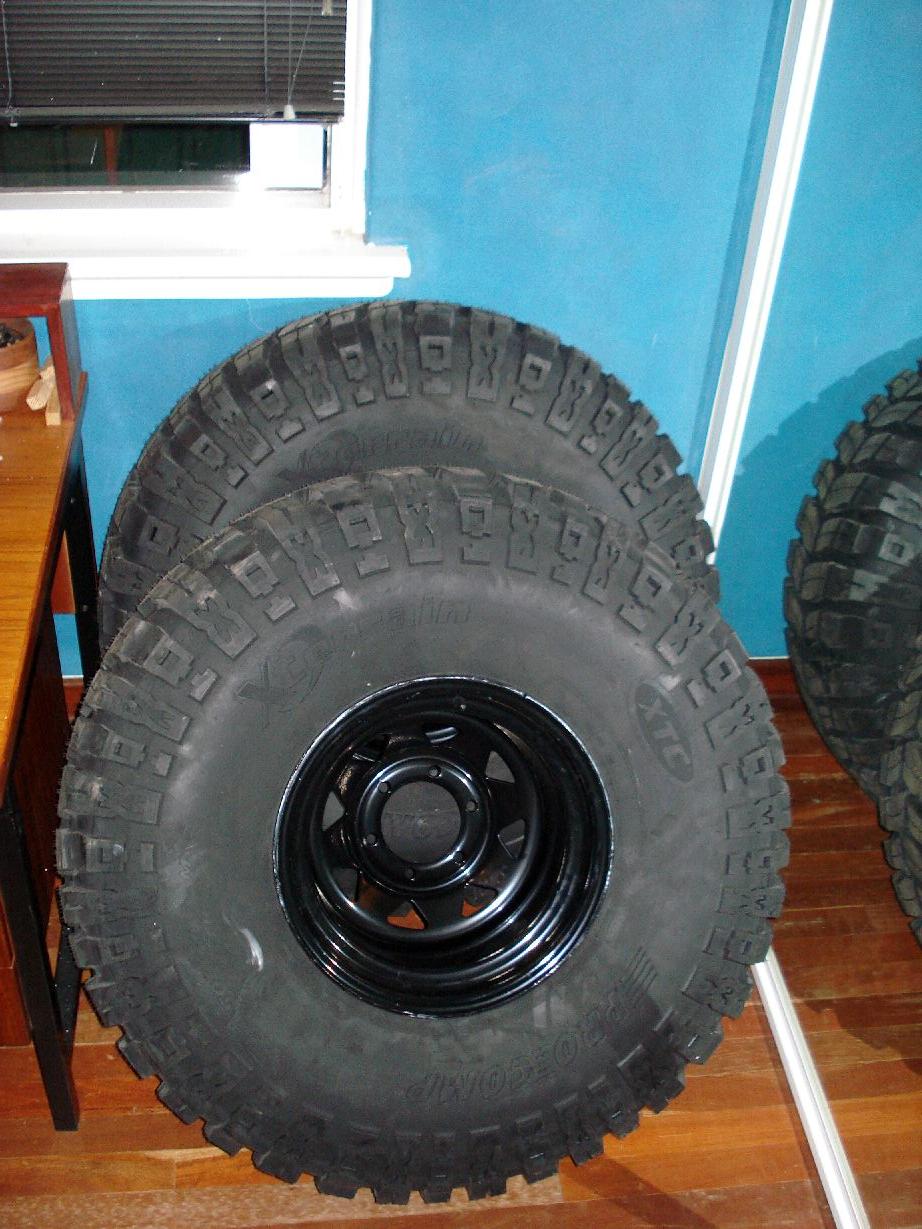
Tires
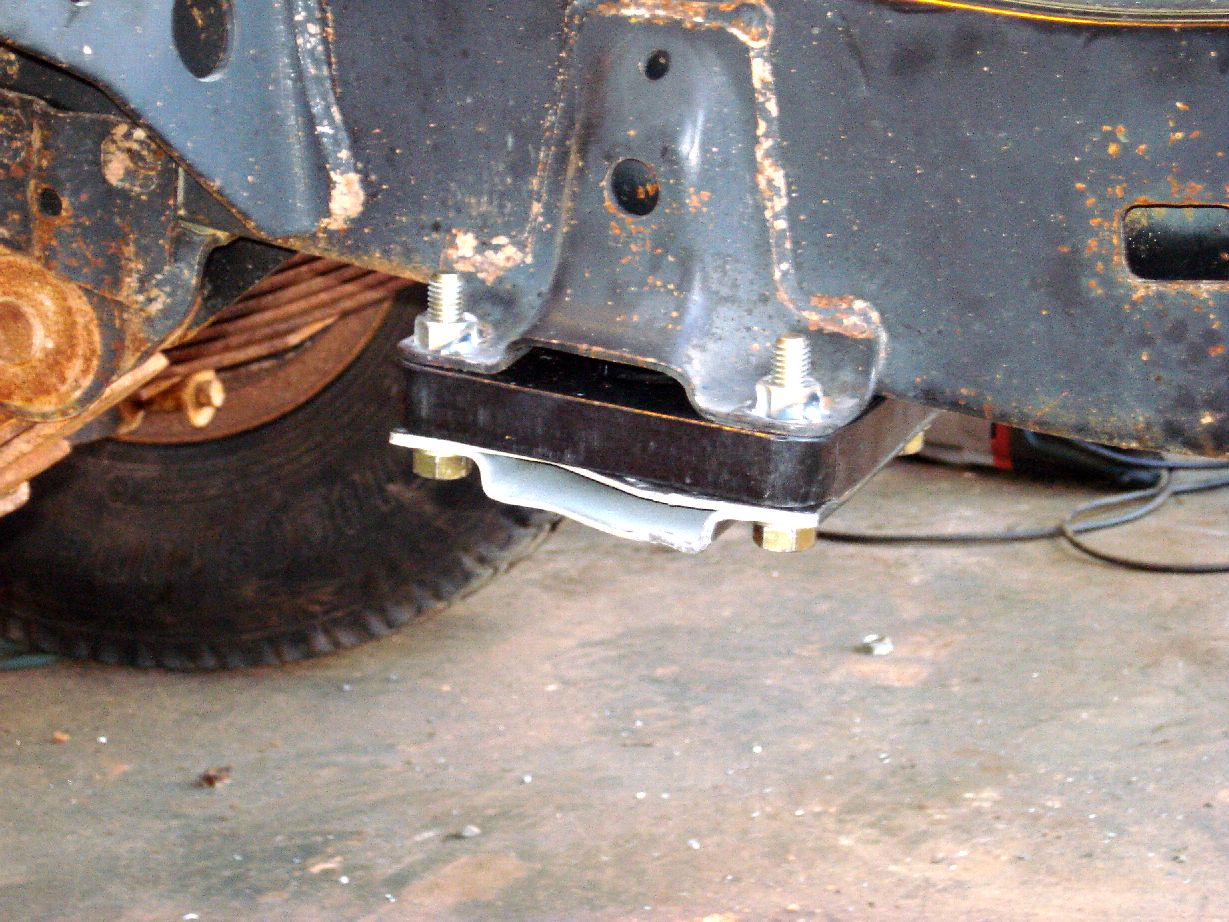
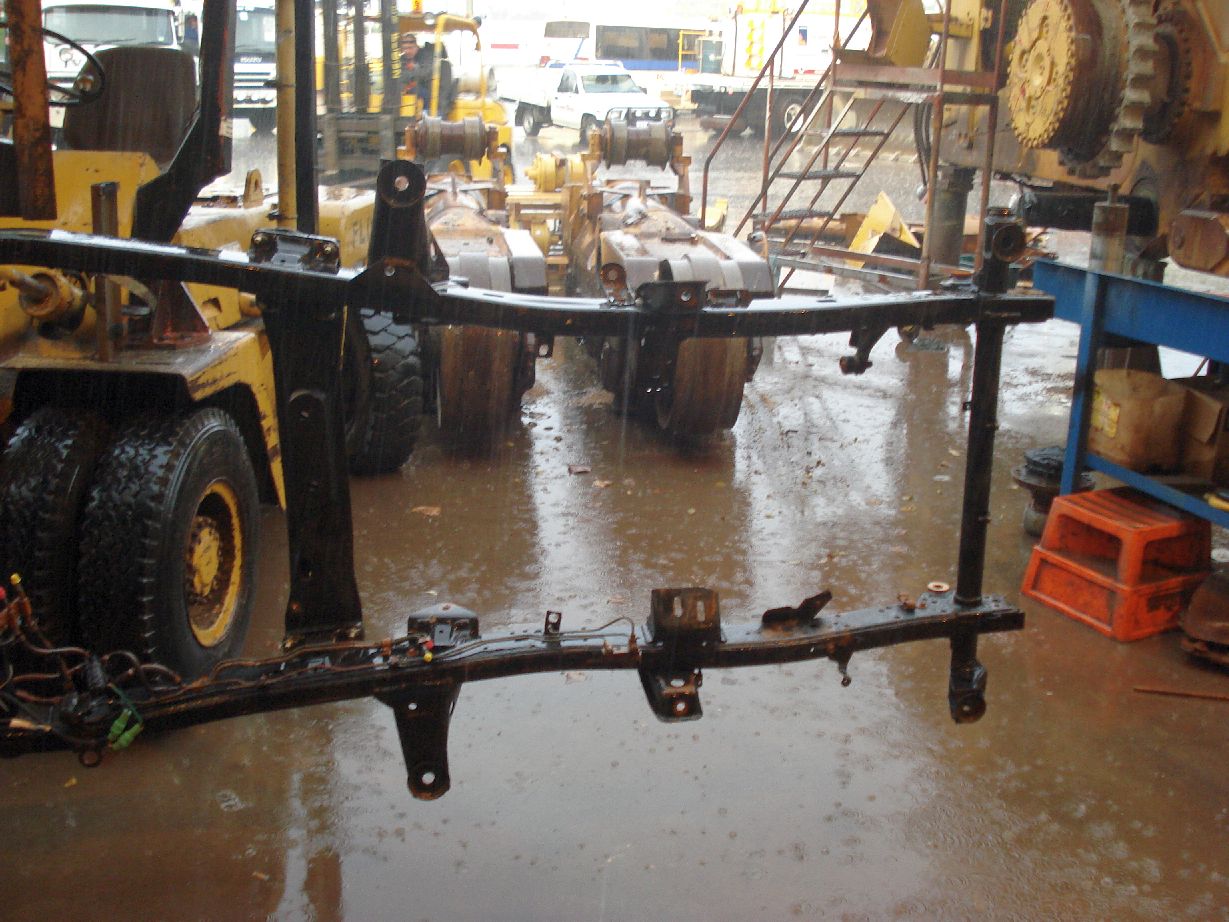
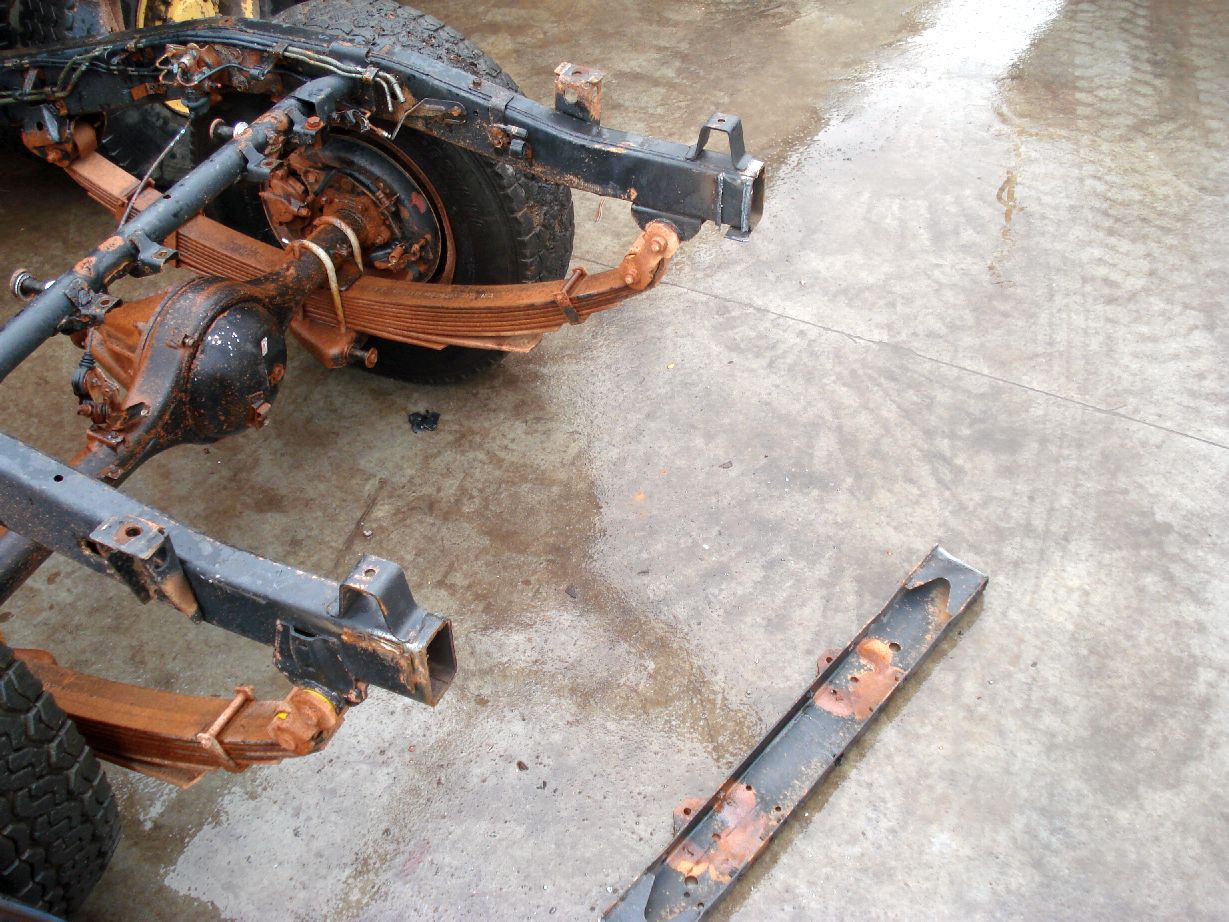
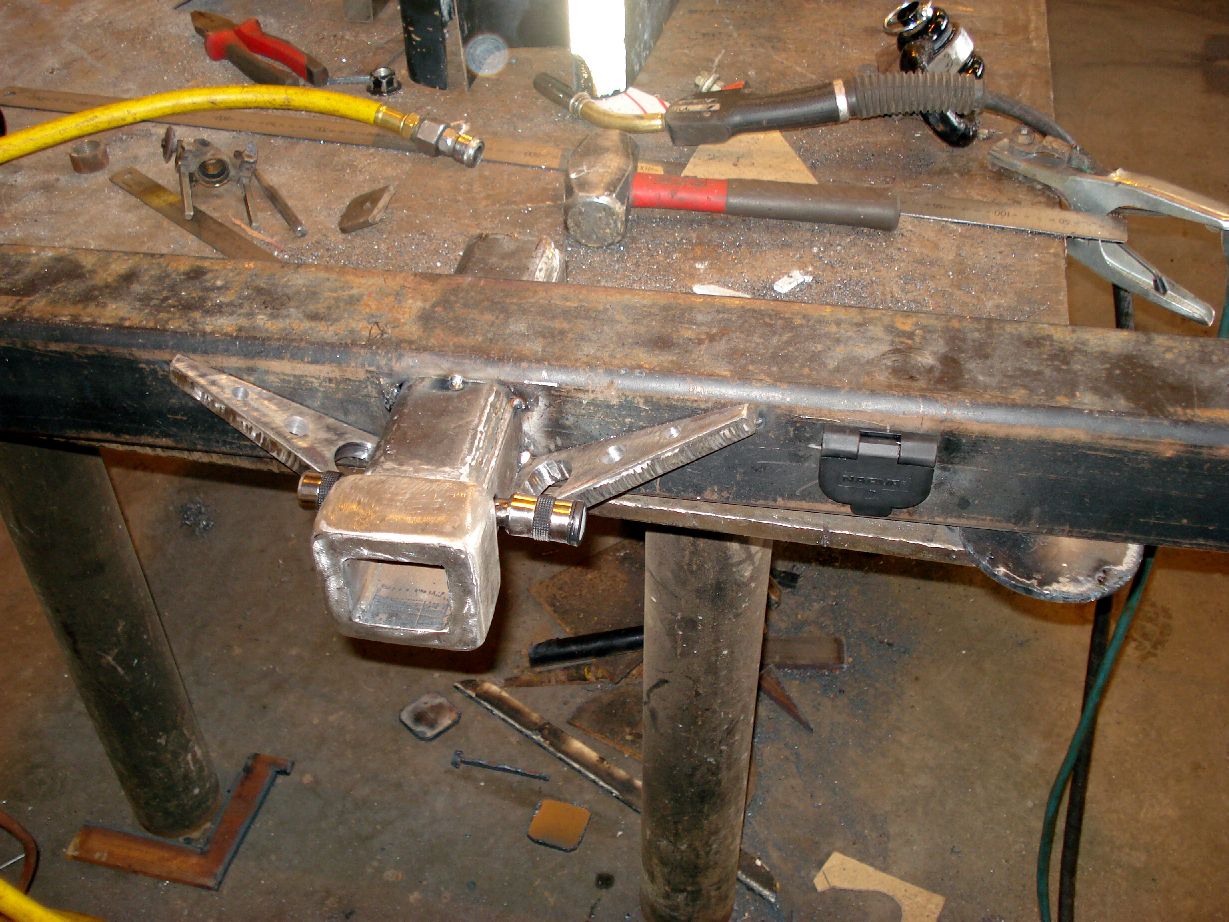
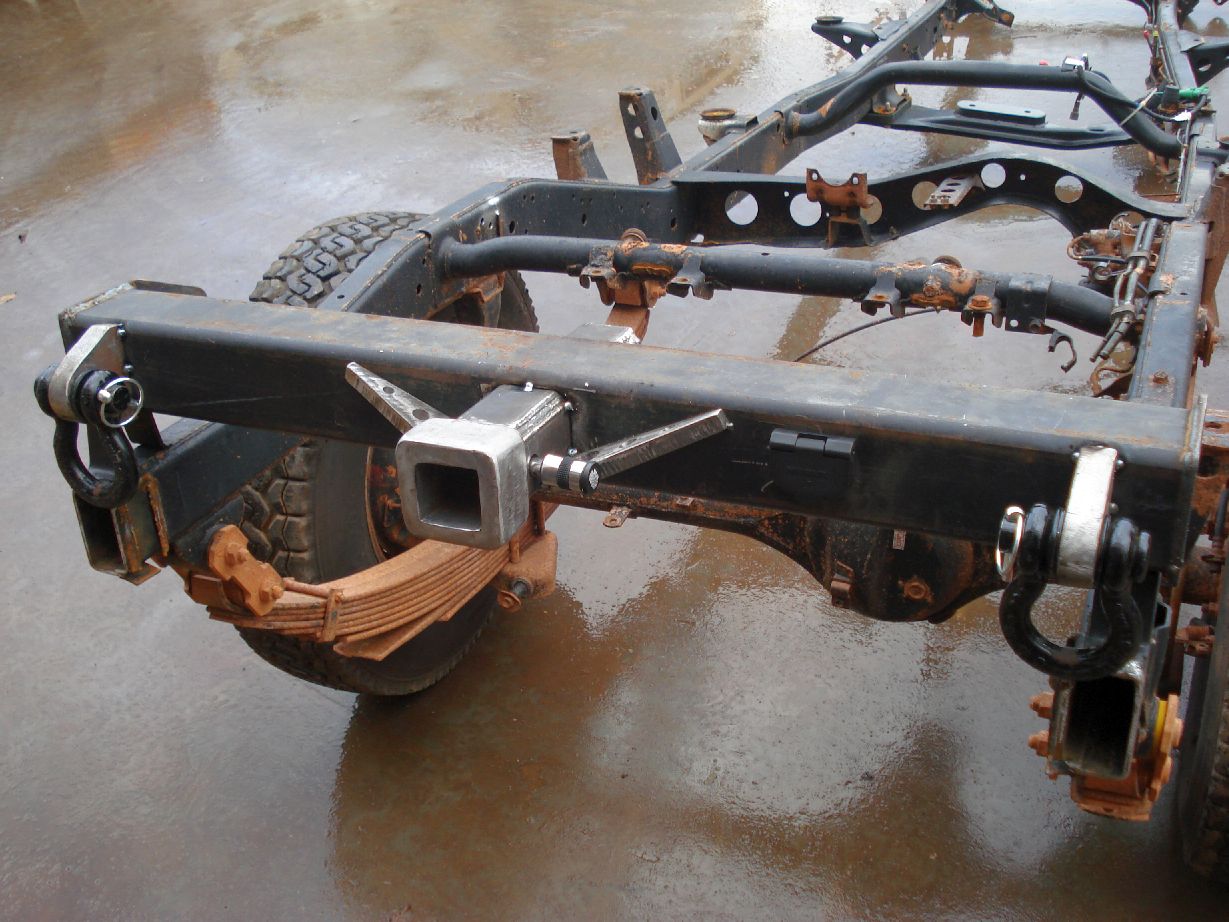
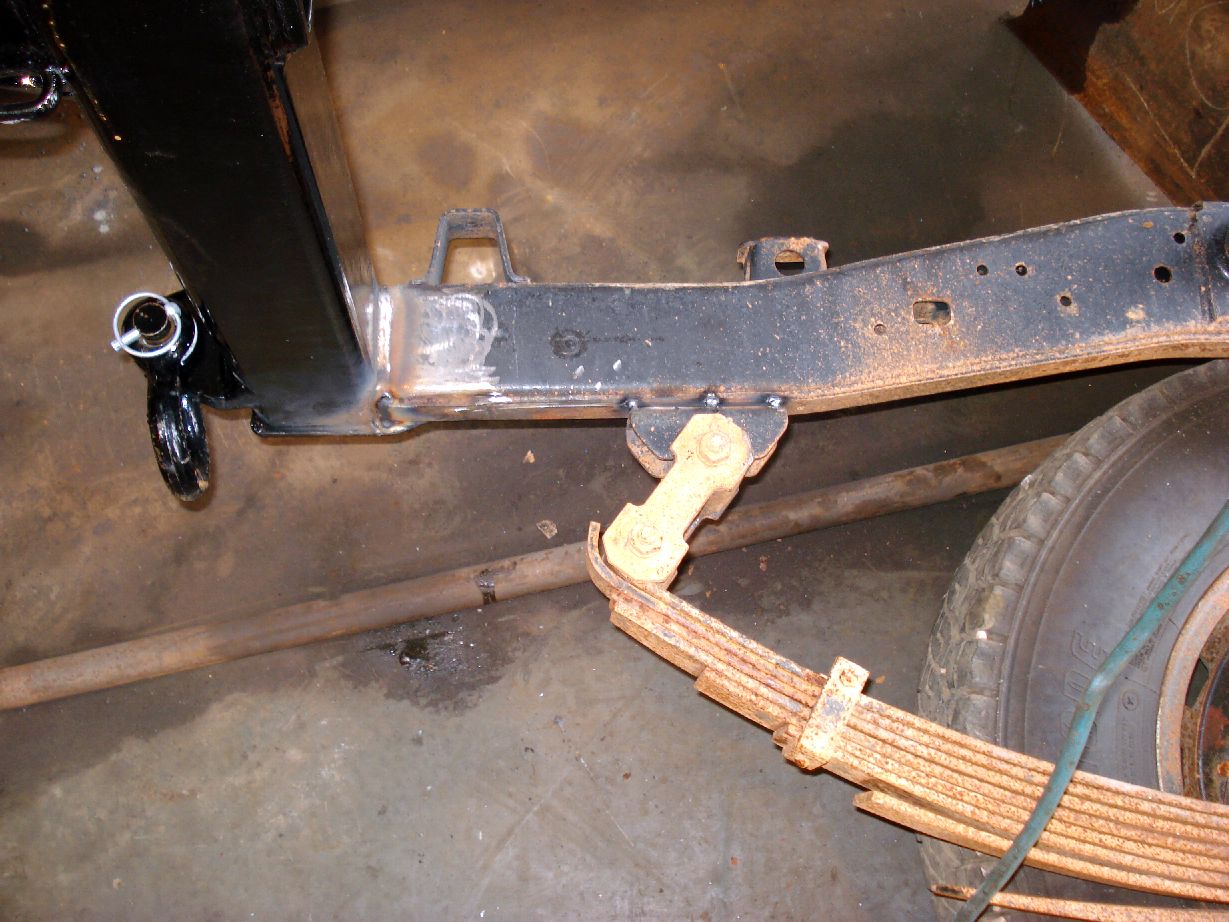
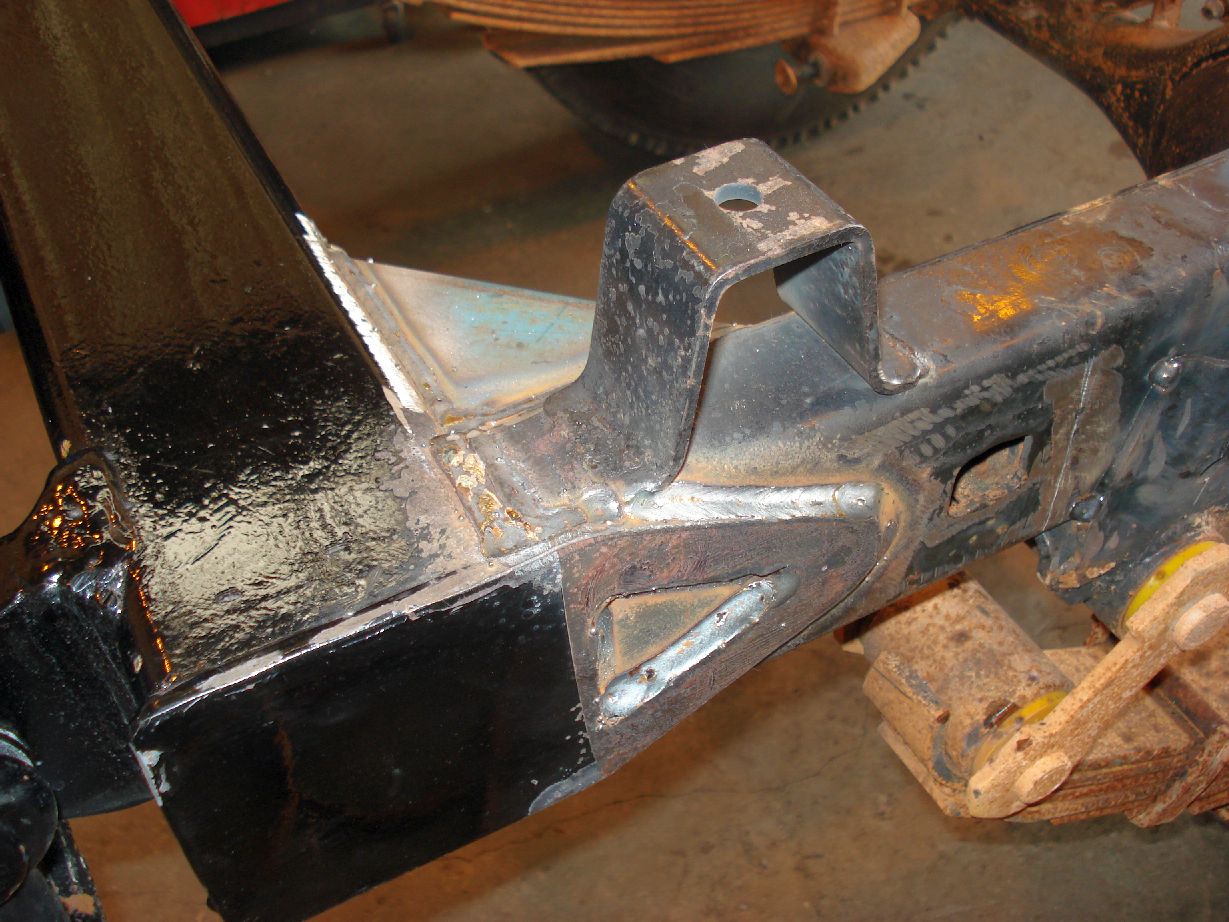
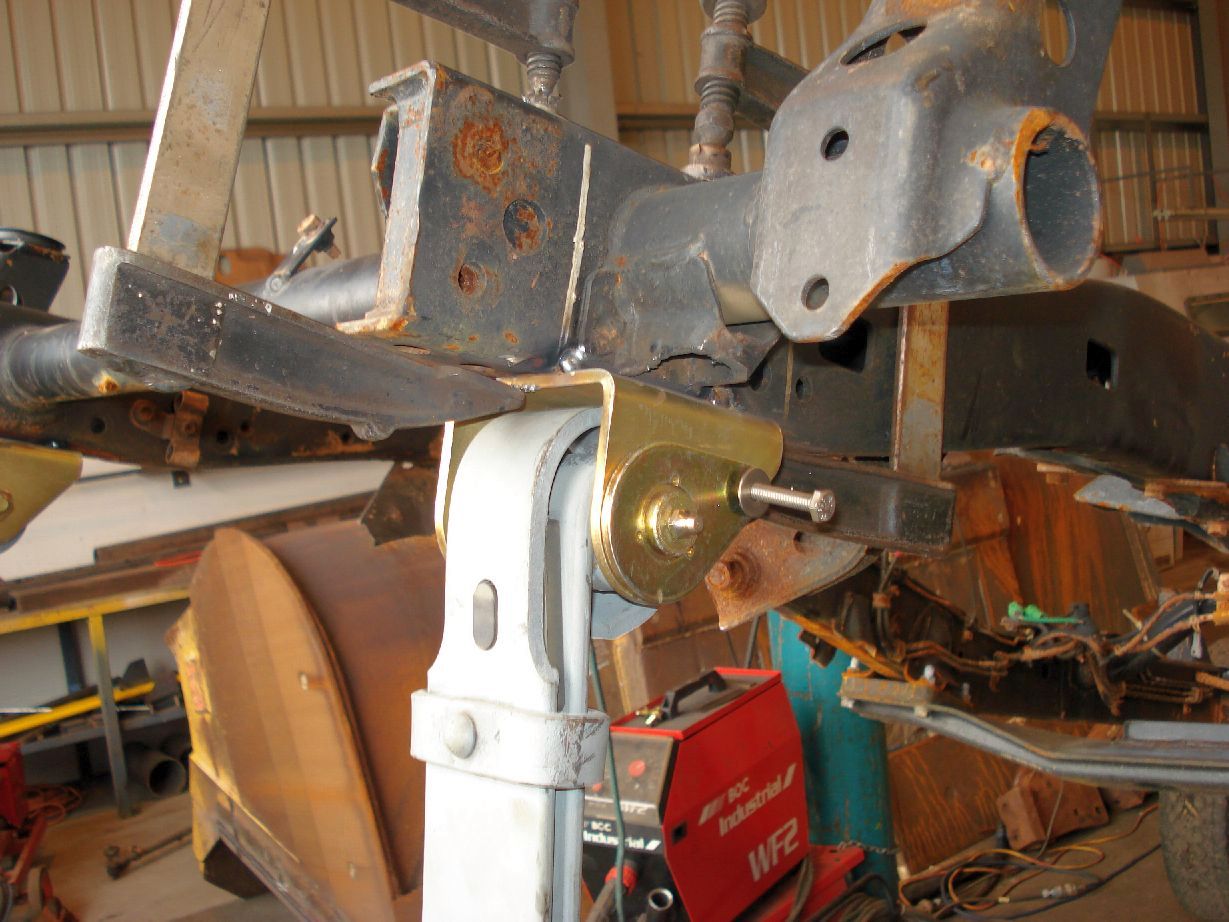
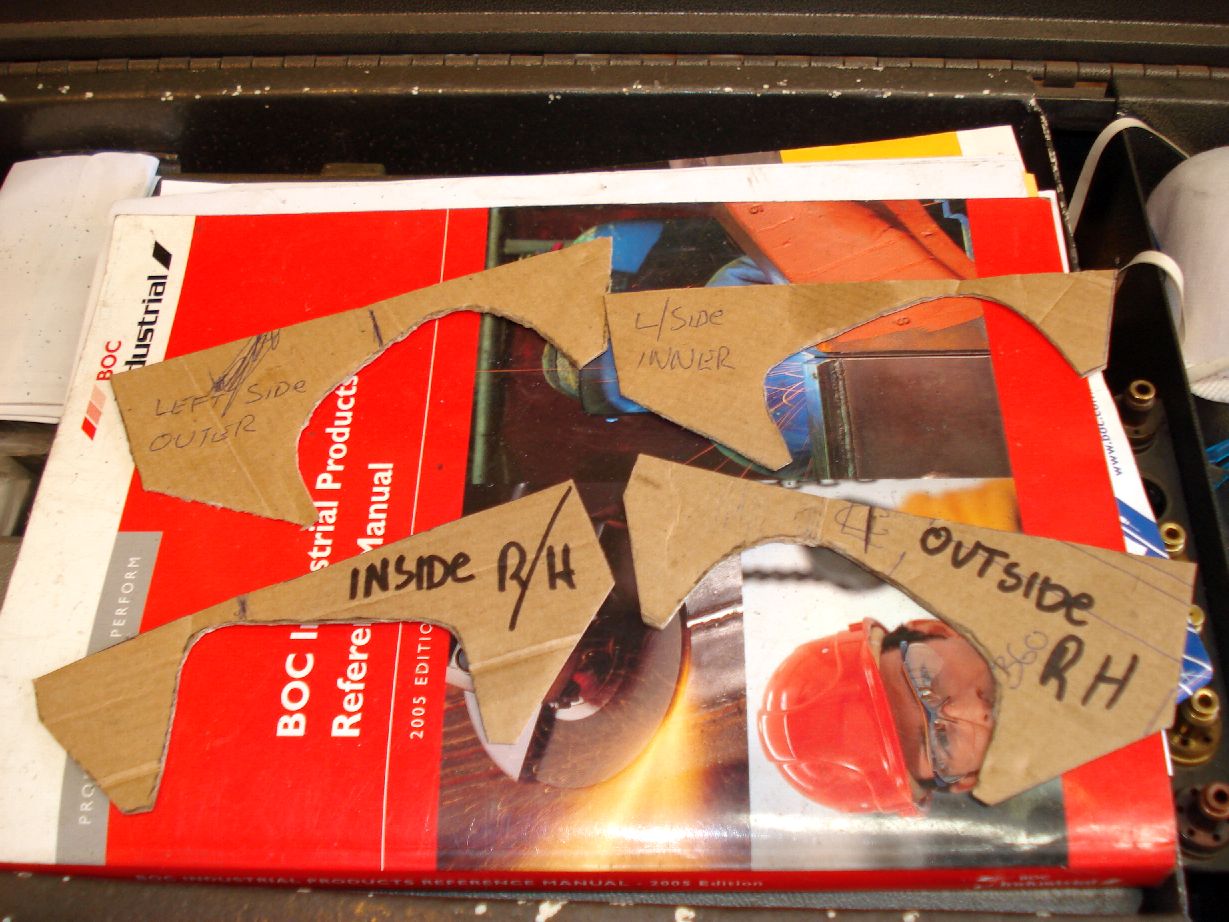
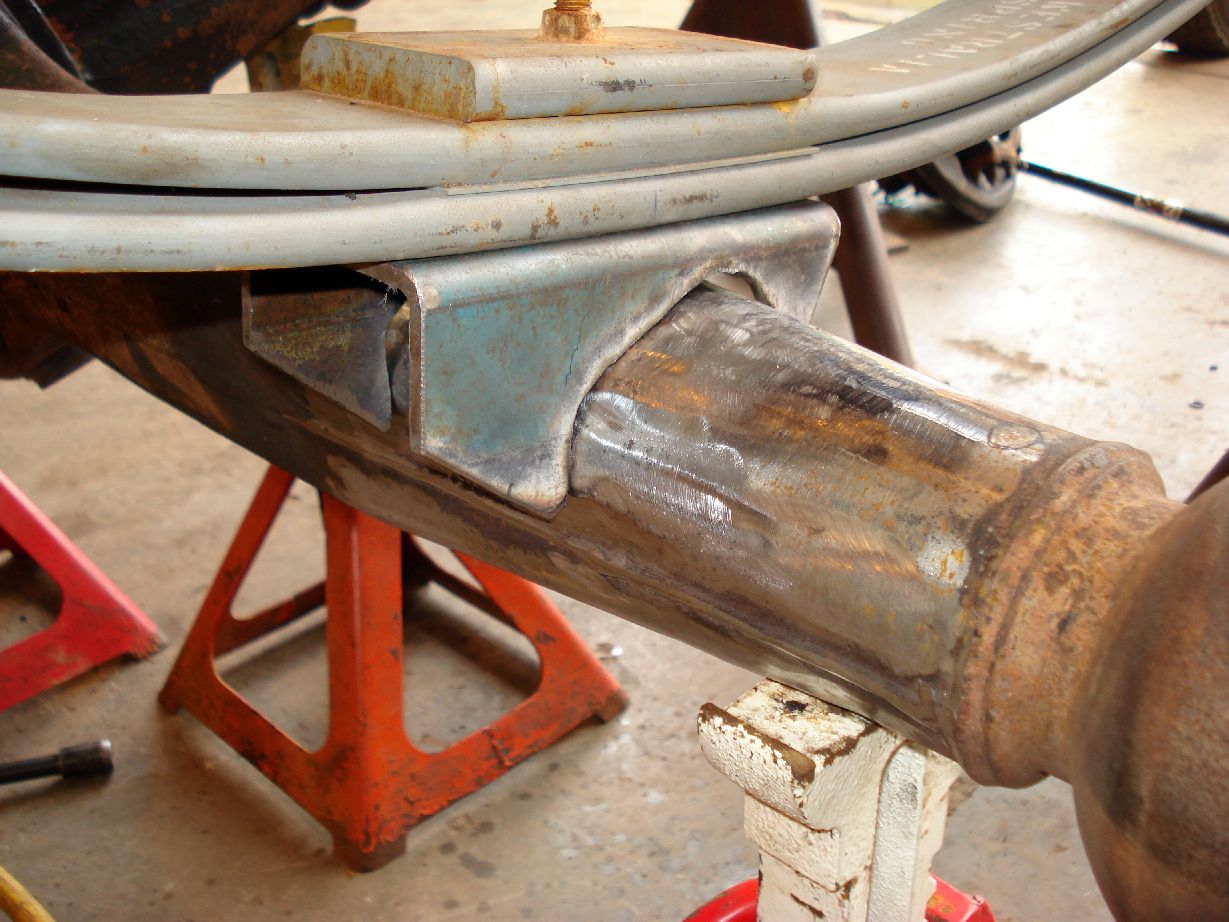
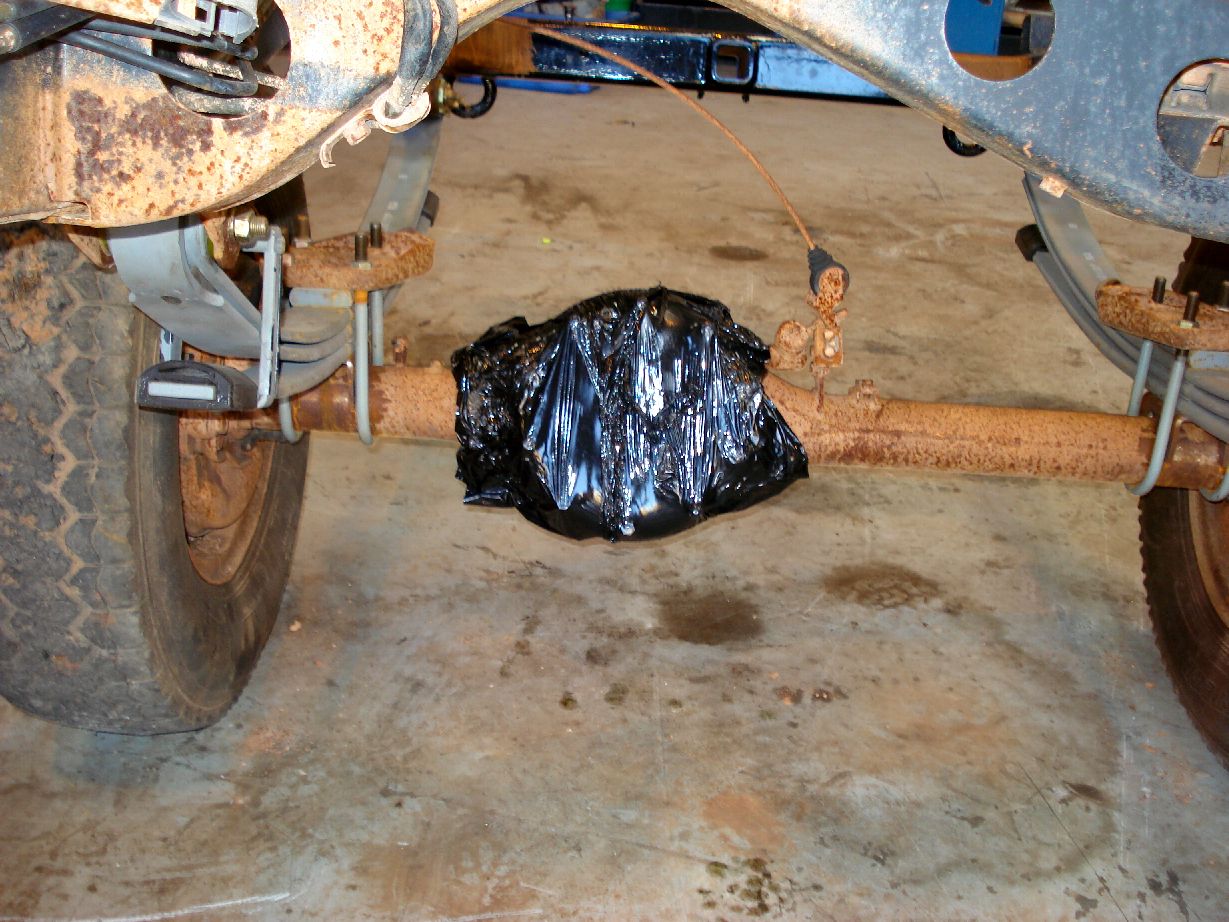
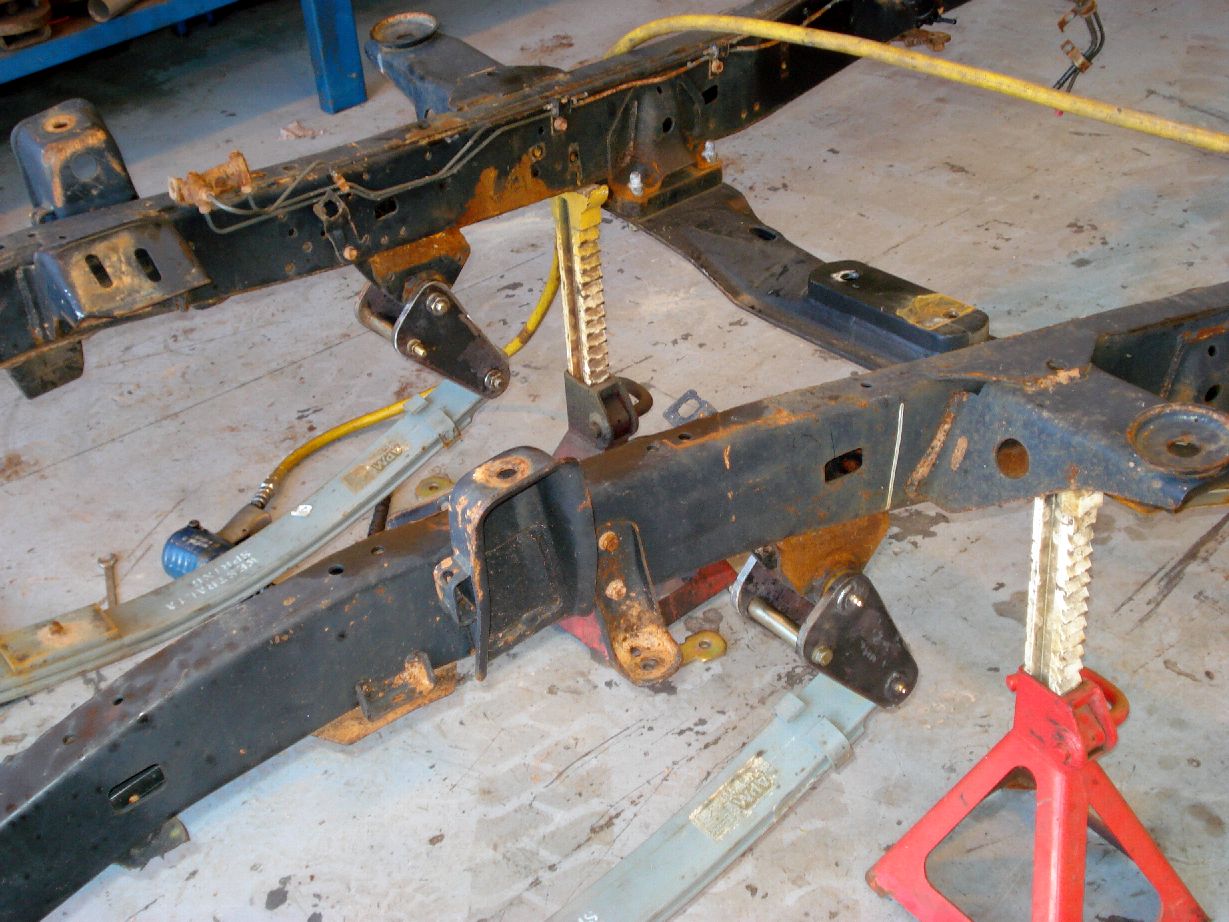
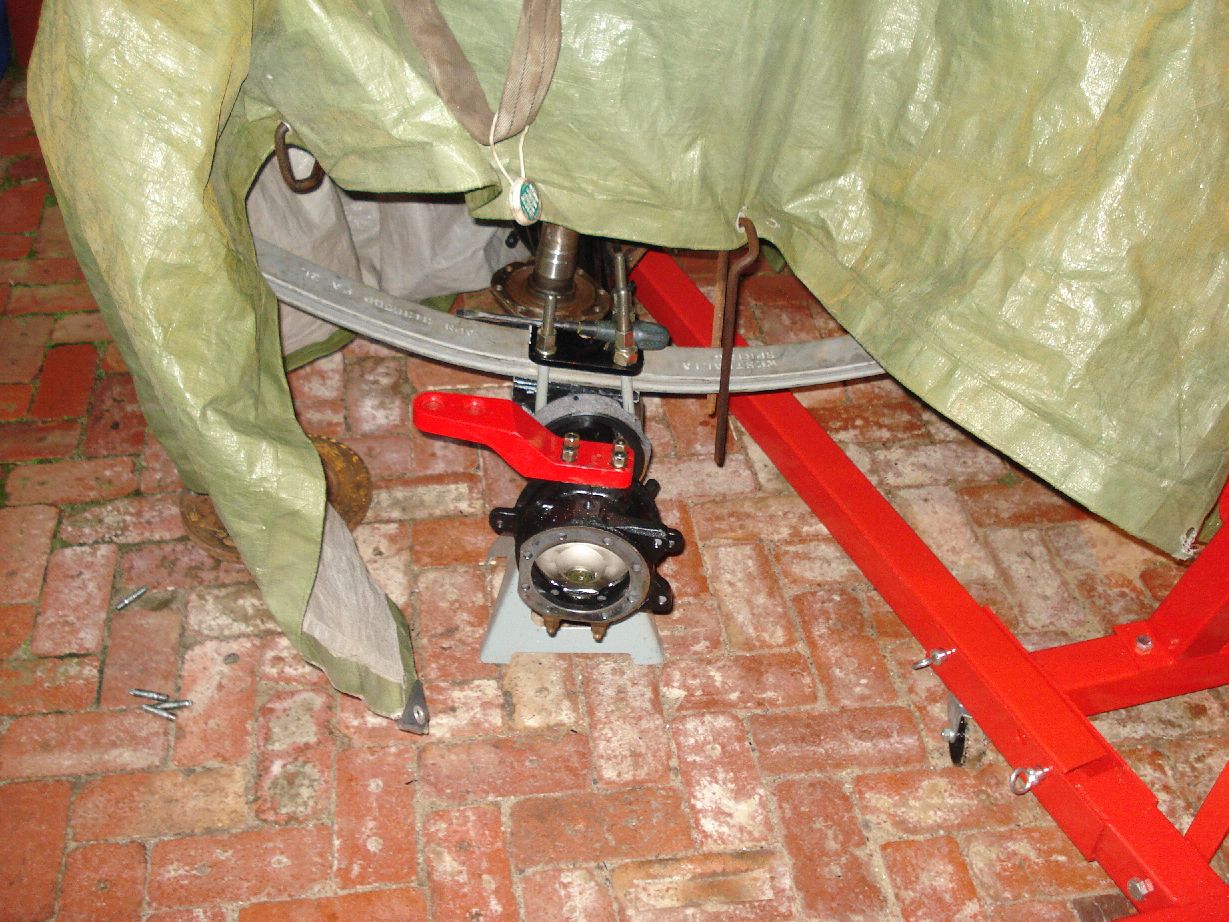
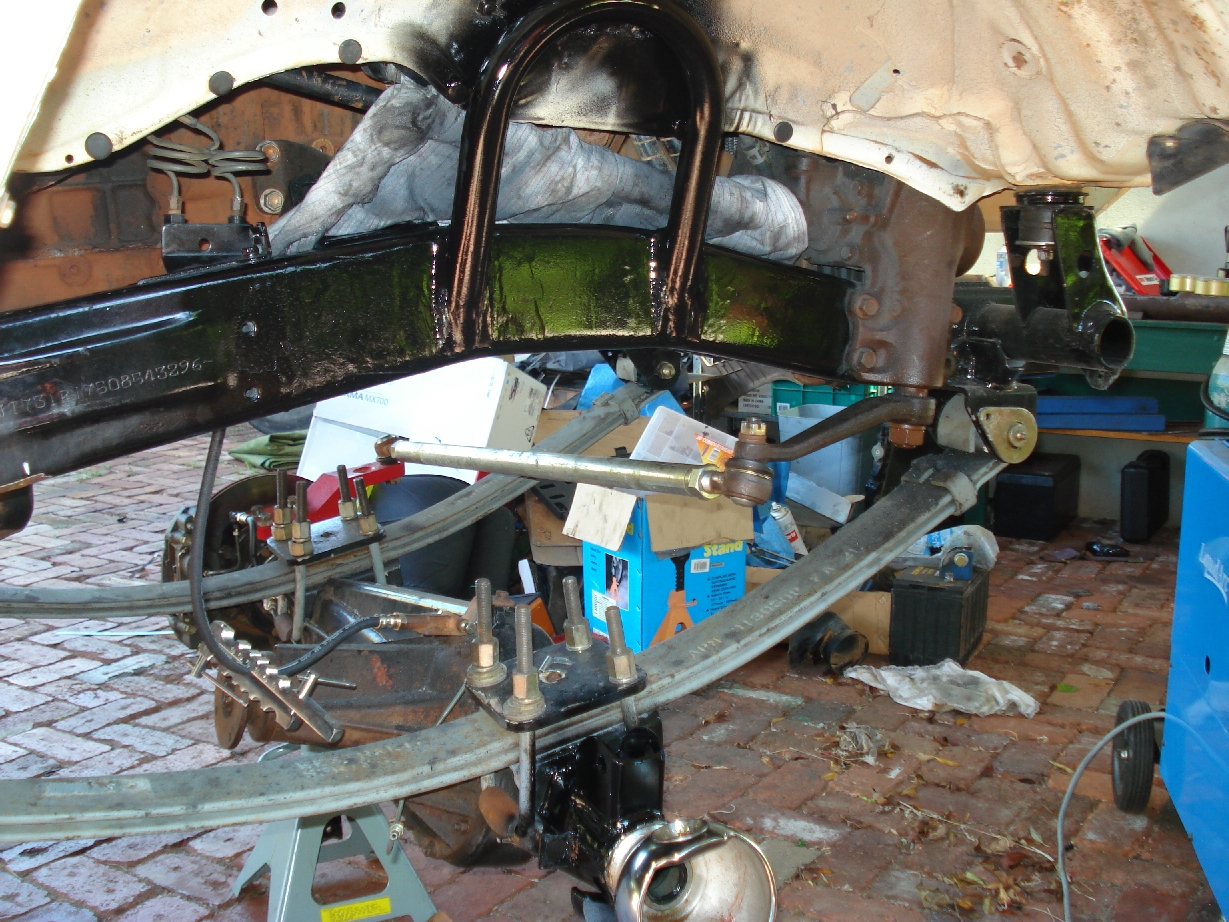
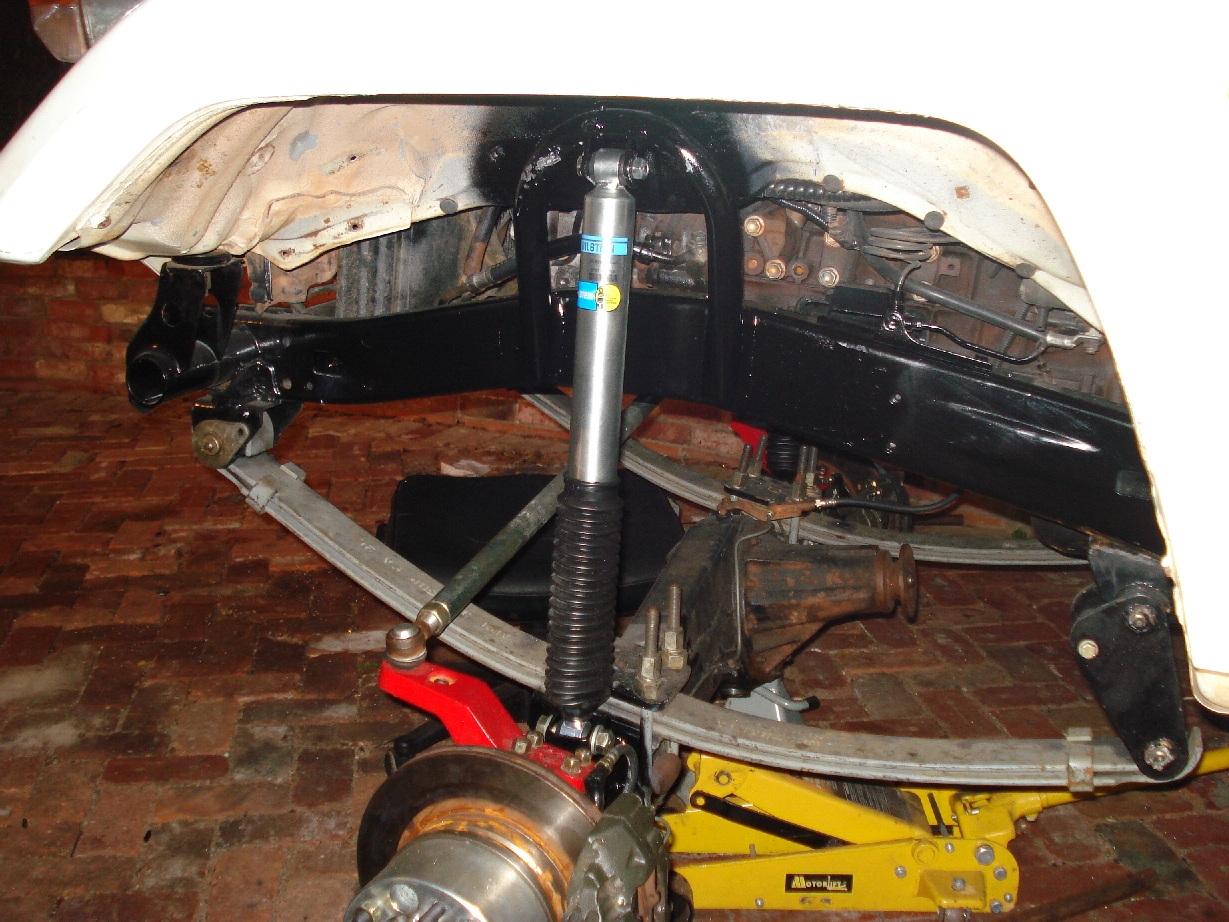
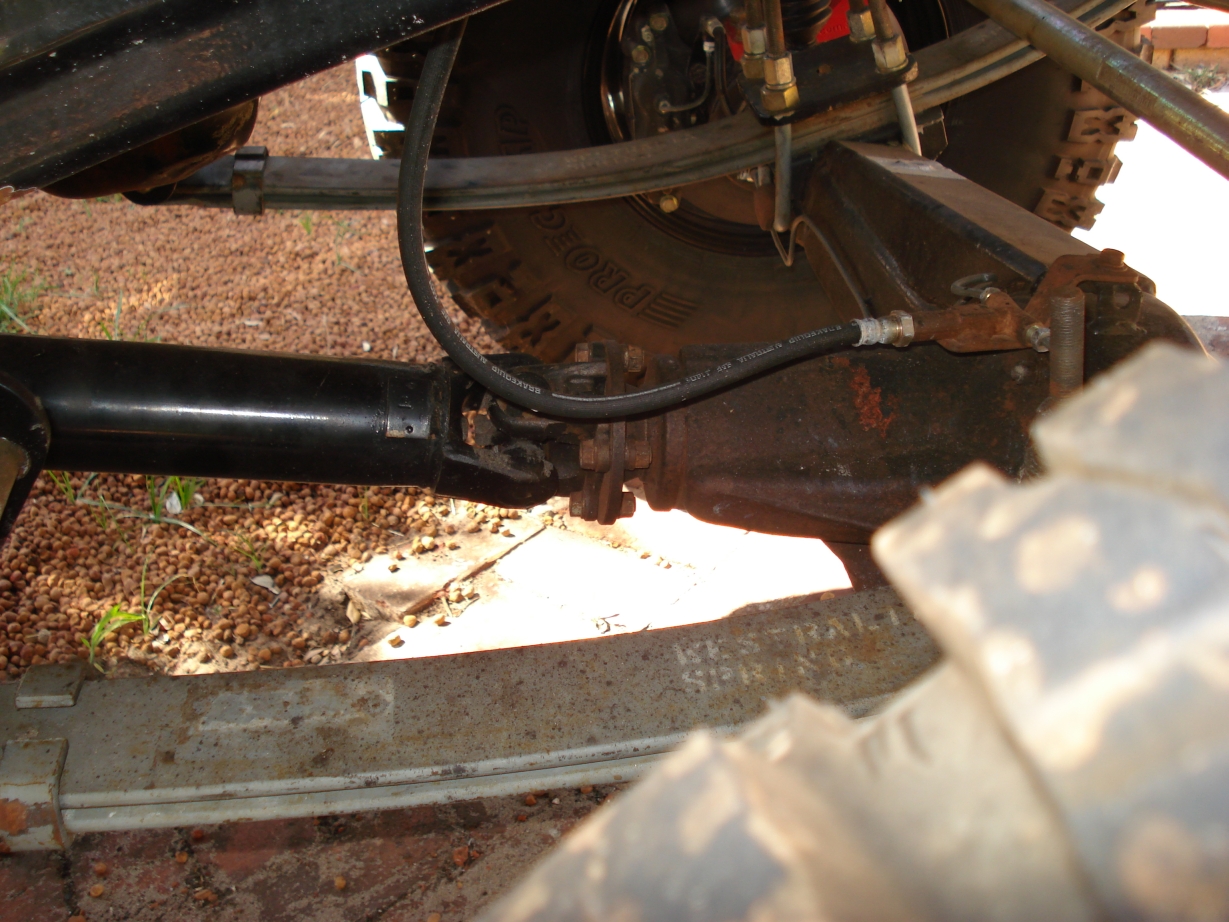
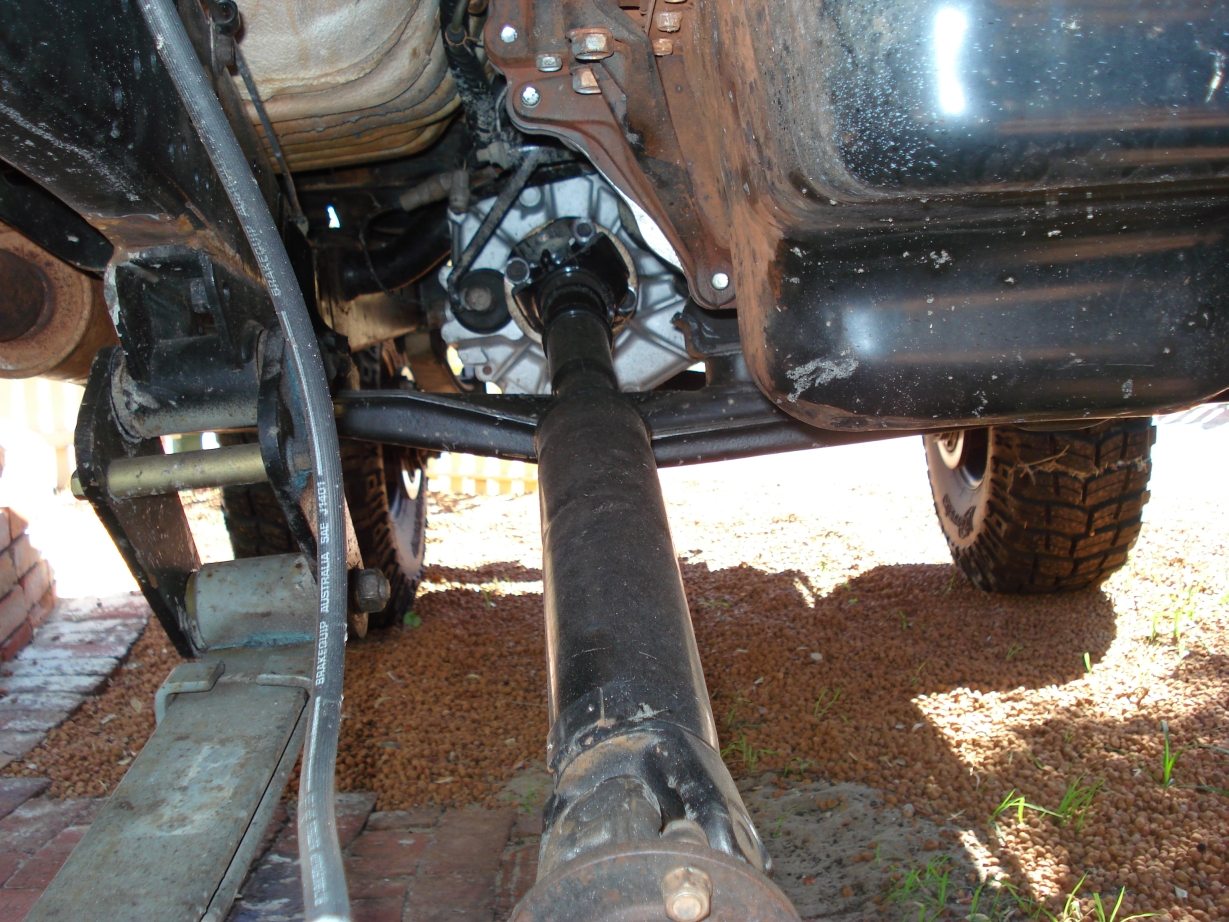
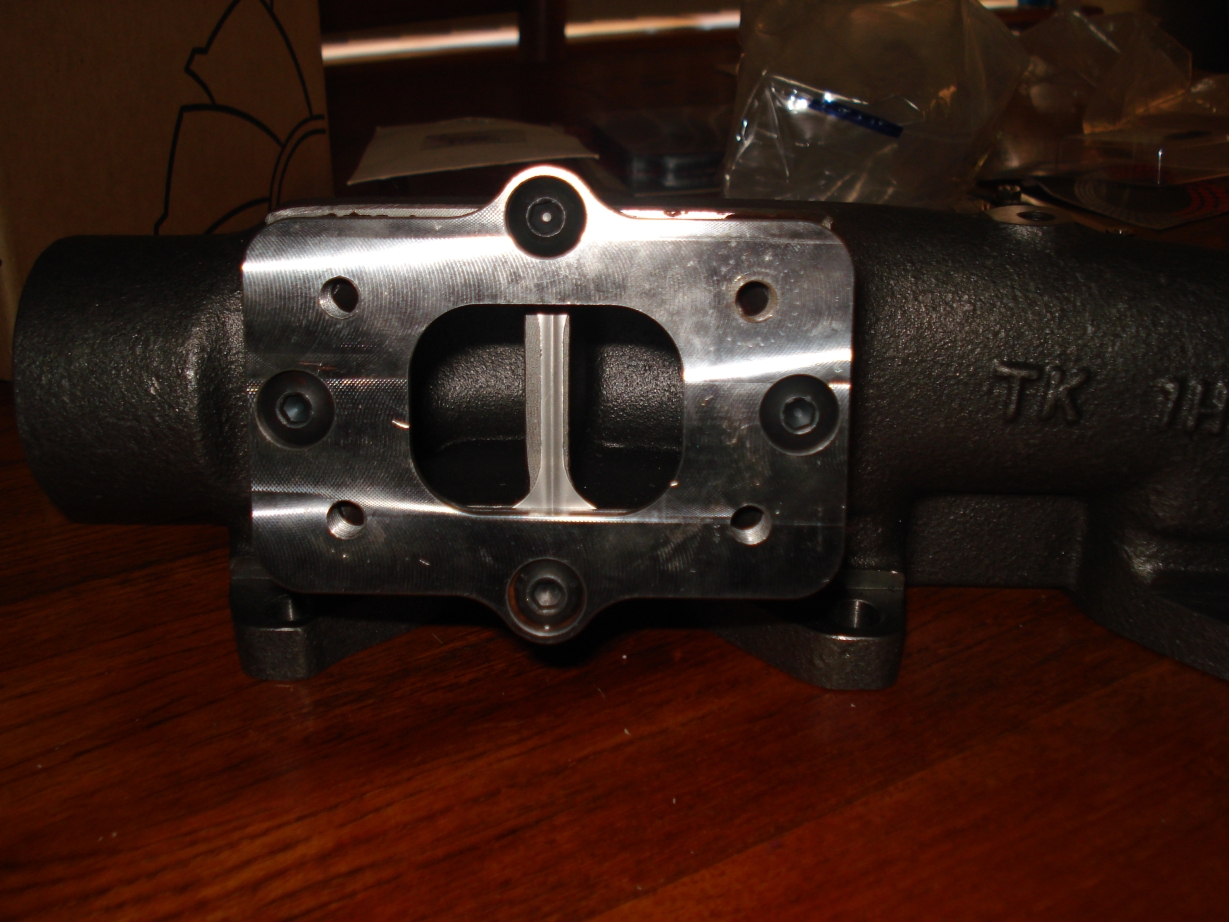
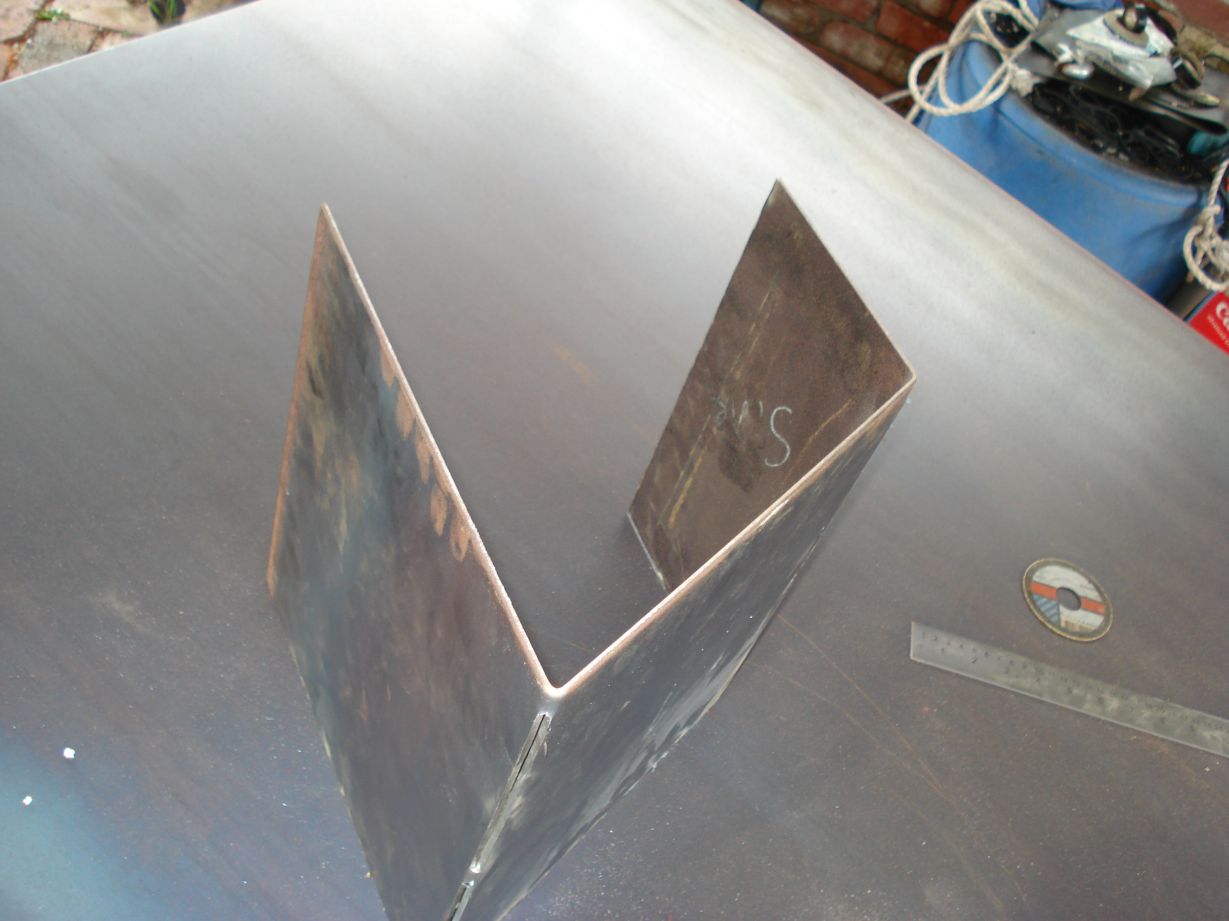
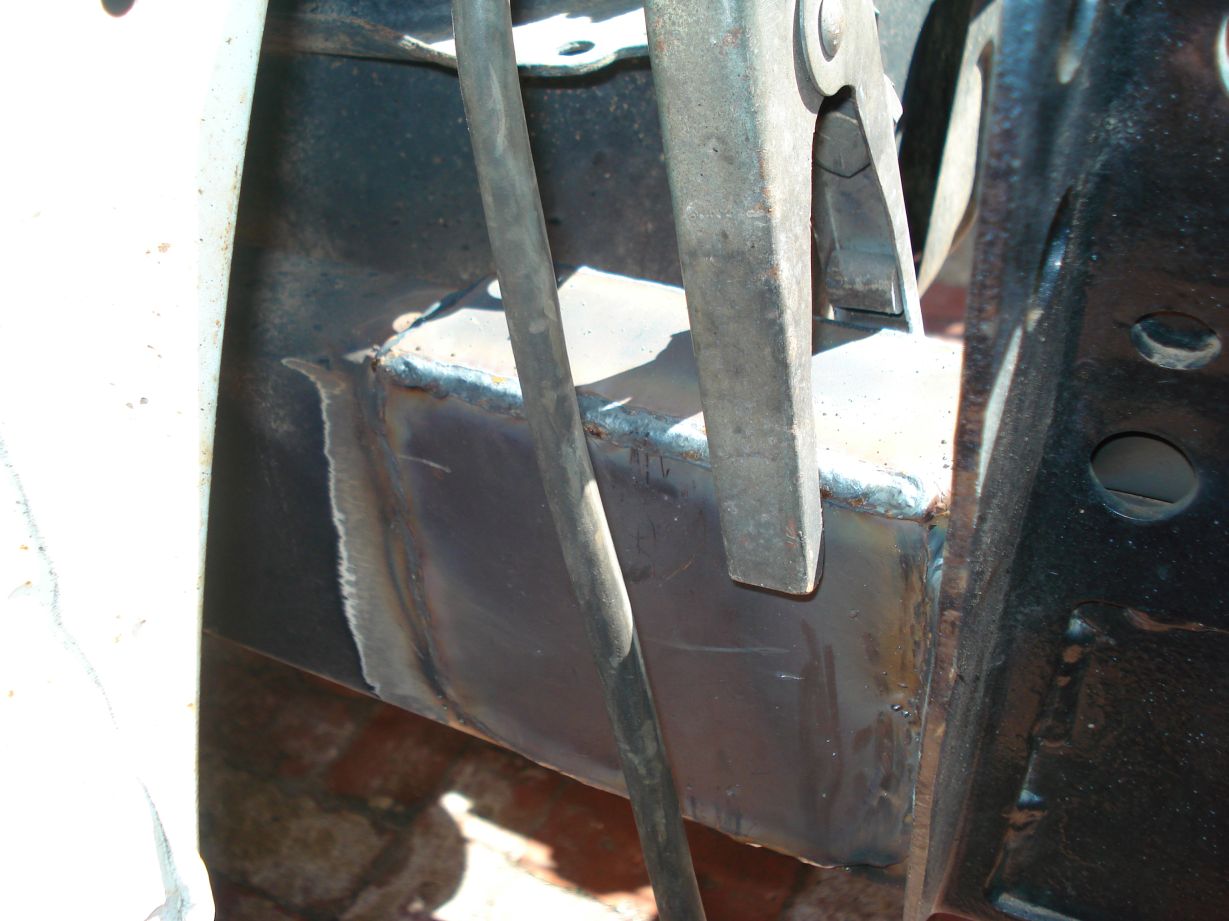
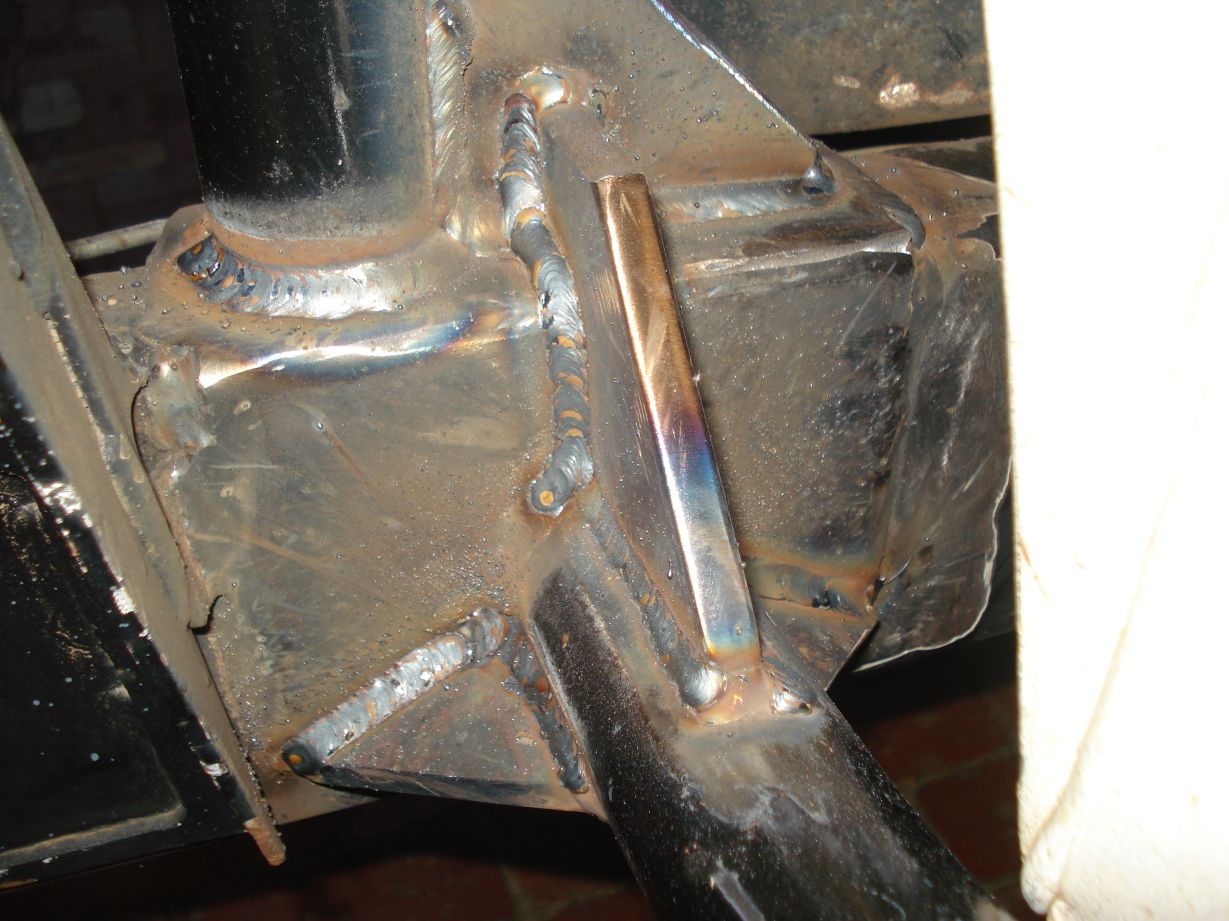
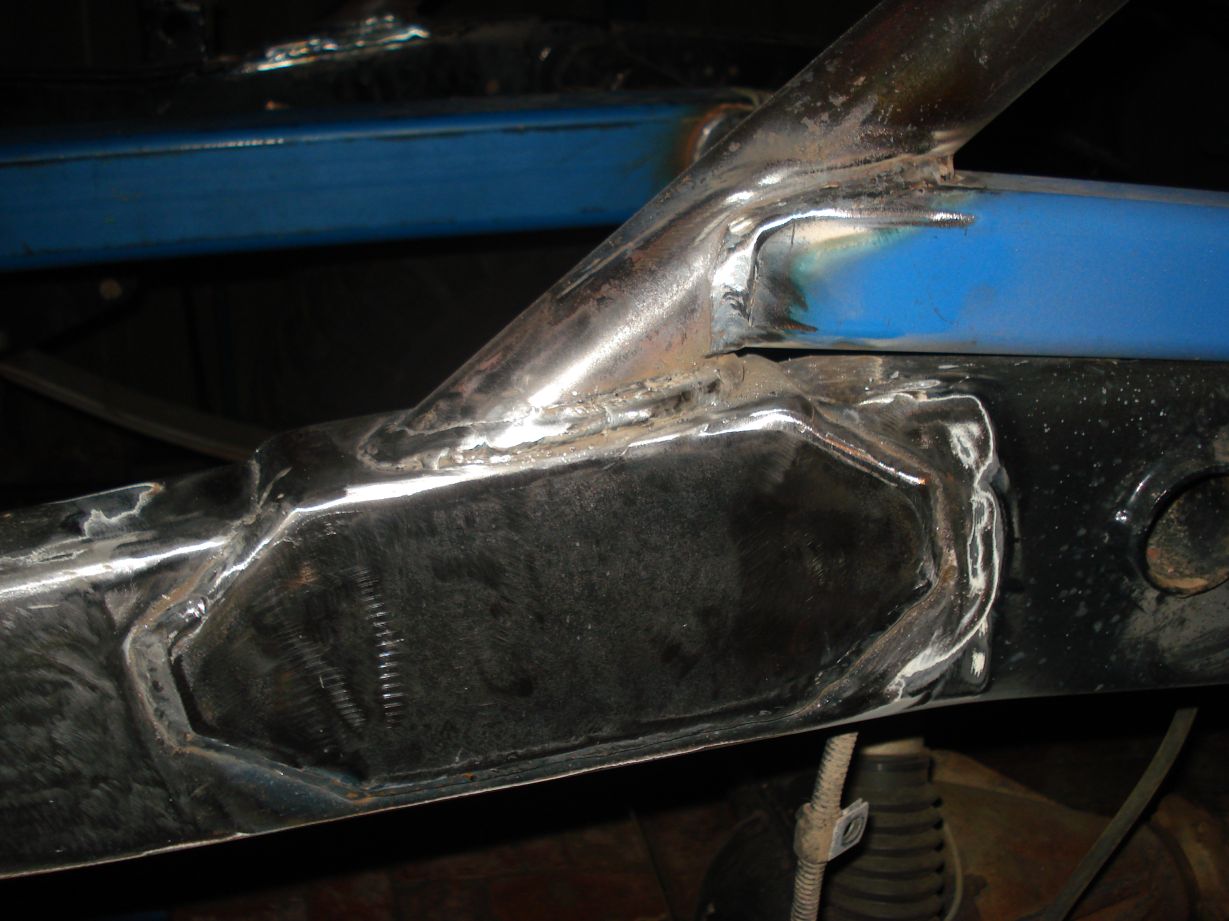
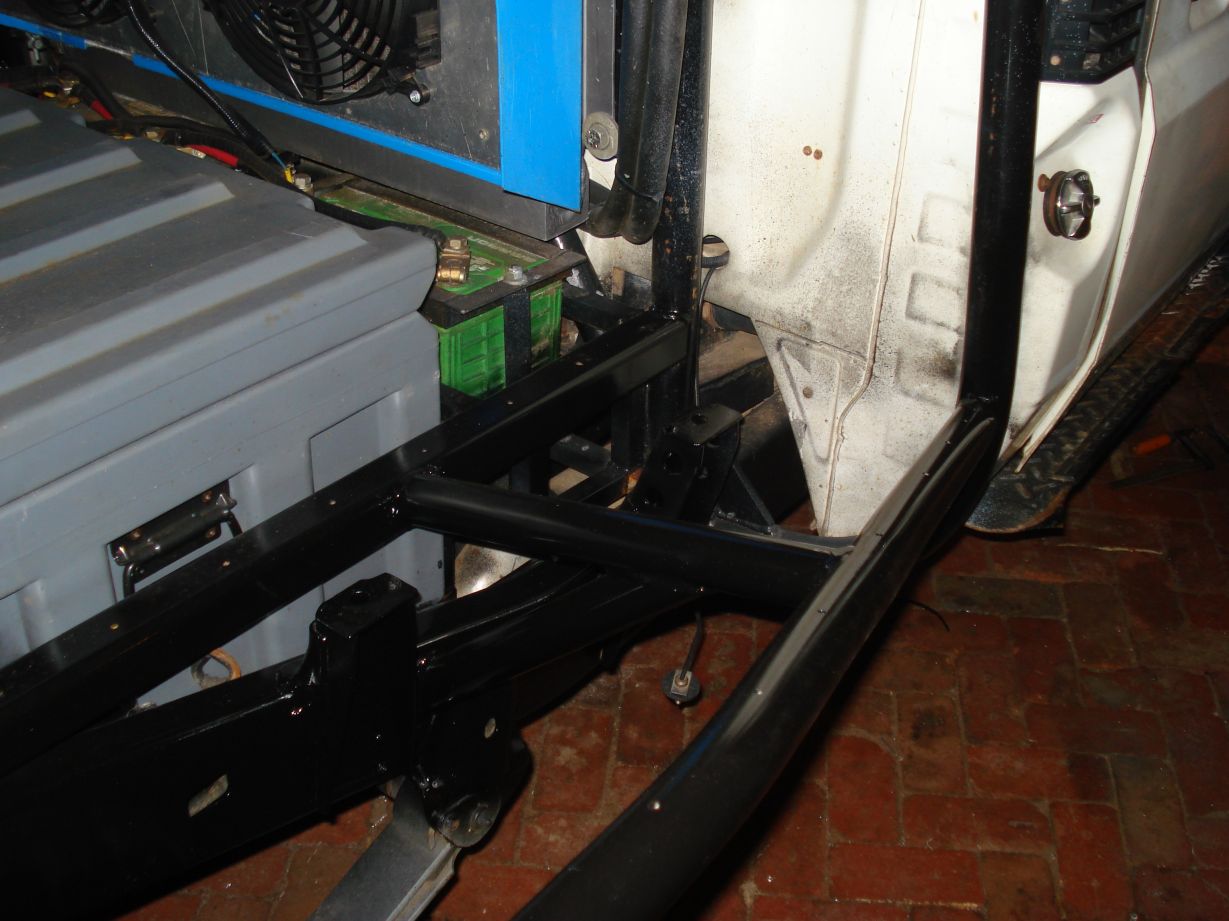
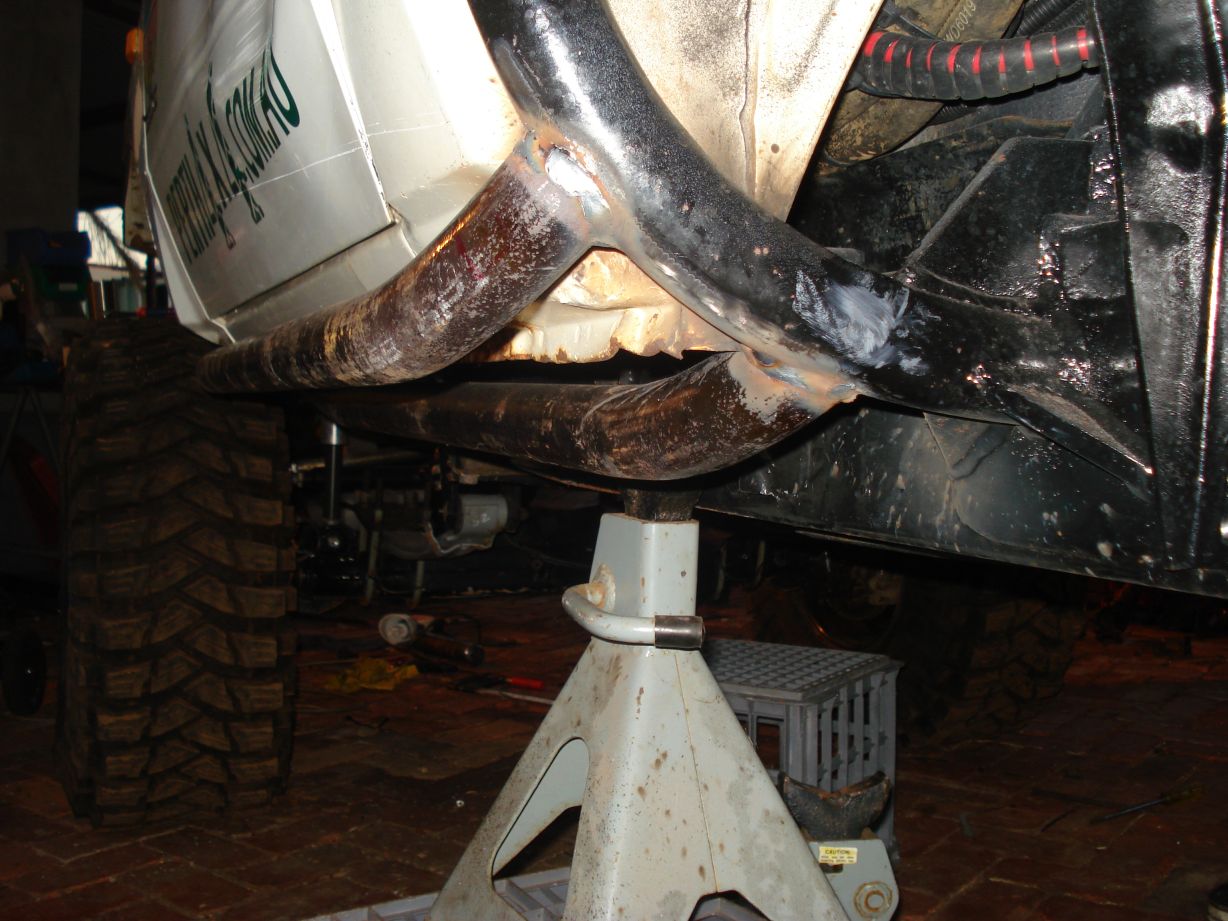
There are a few ways of getting around the front drive shaft hitting cross member problem on a 75 series, all of which i think are dodgy, as cutting out the interfering part of the cross member takes all the strength out of the cold rolled 2 layer cross members…
So i think, how to fix this?
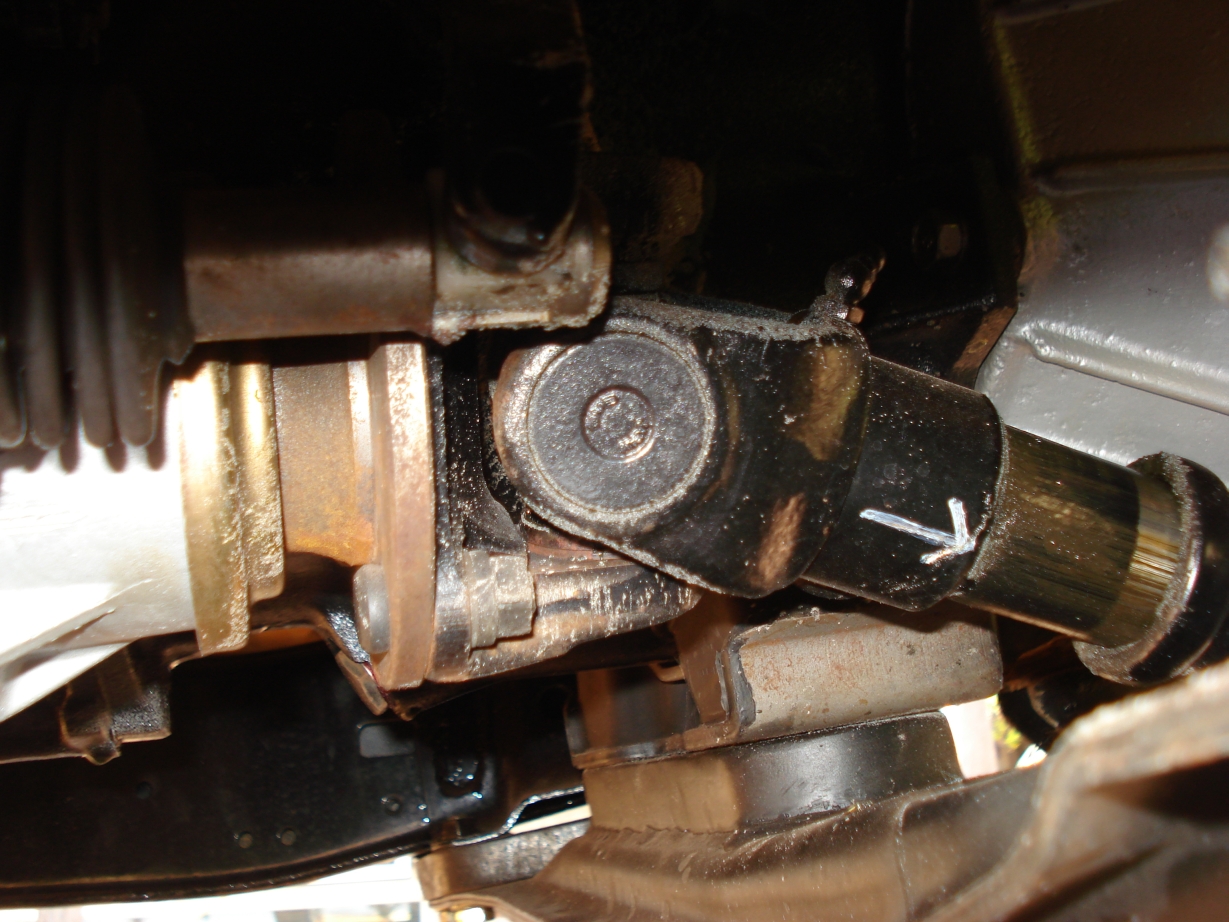
I come up with an idea that will work for me in a few ways,
- Clearing the drive shaft
- anchor point for bash plate below transfer case
- strong
- no way it can catch and rip the cross member off like other designs
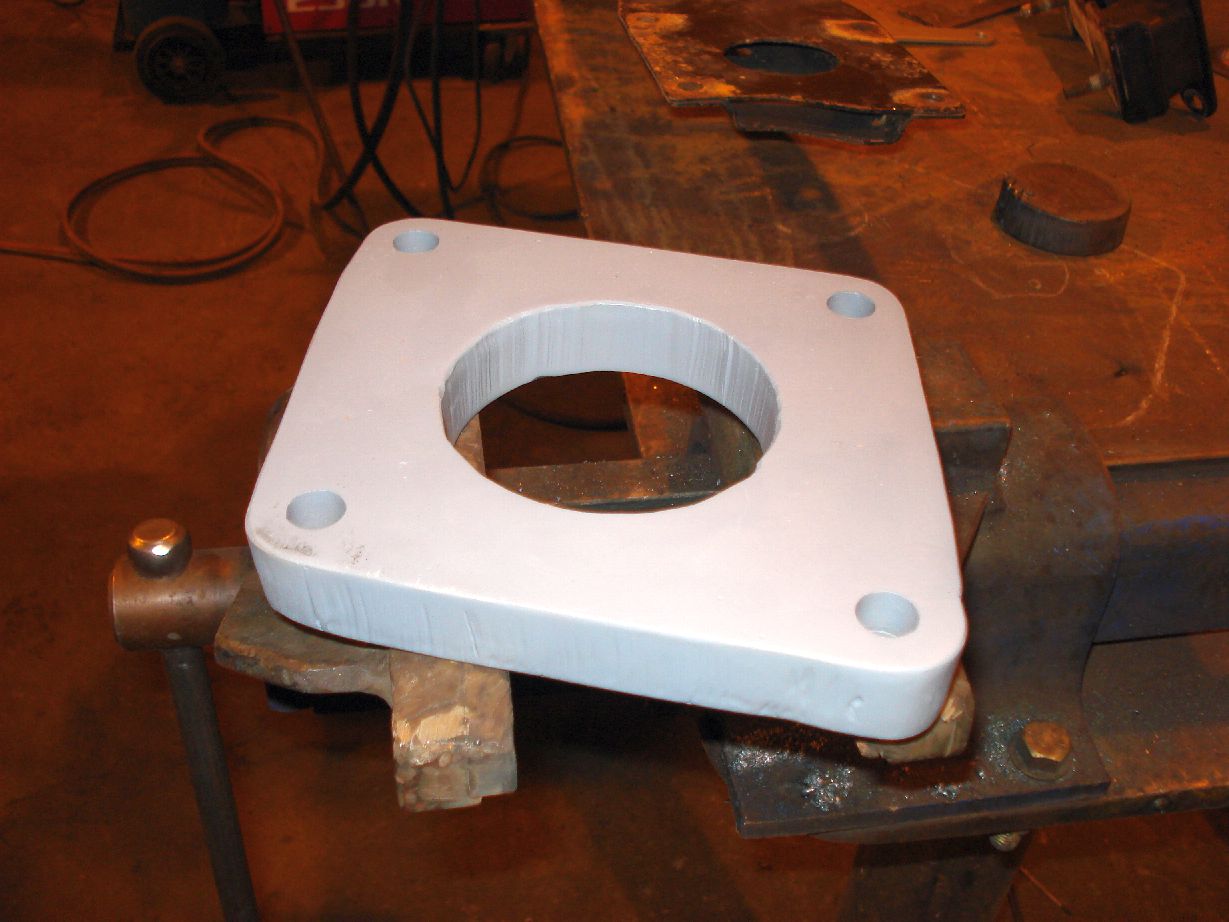
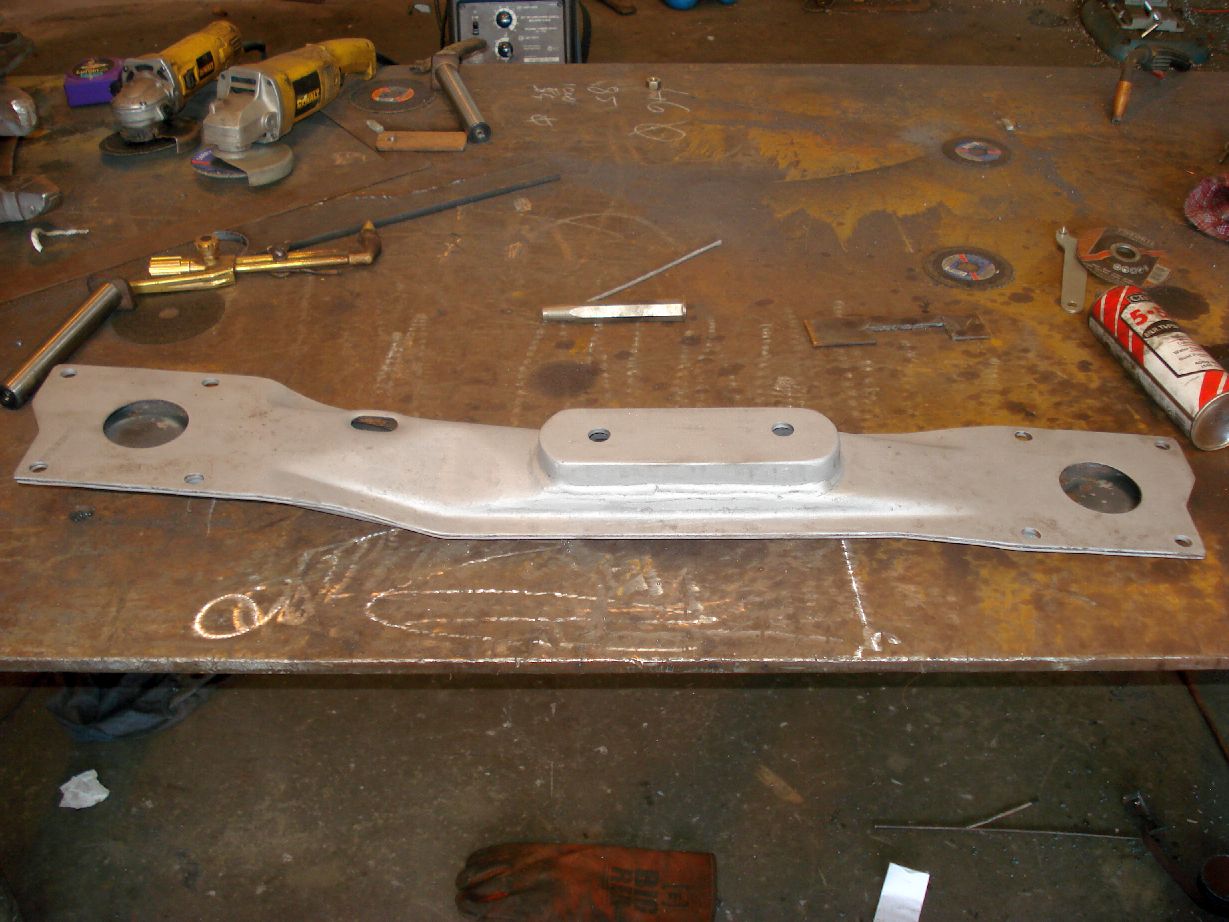
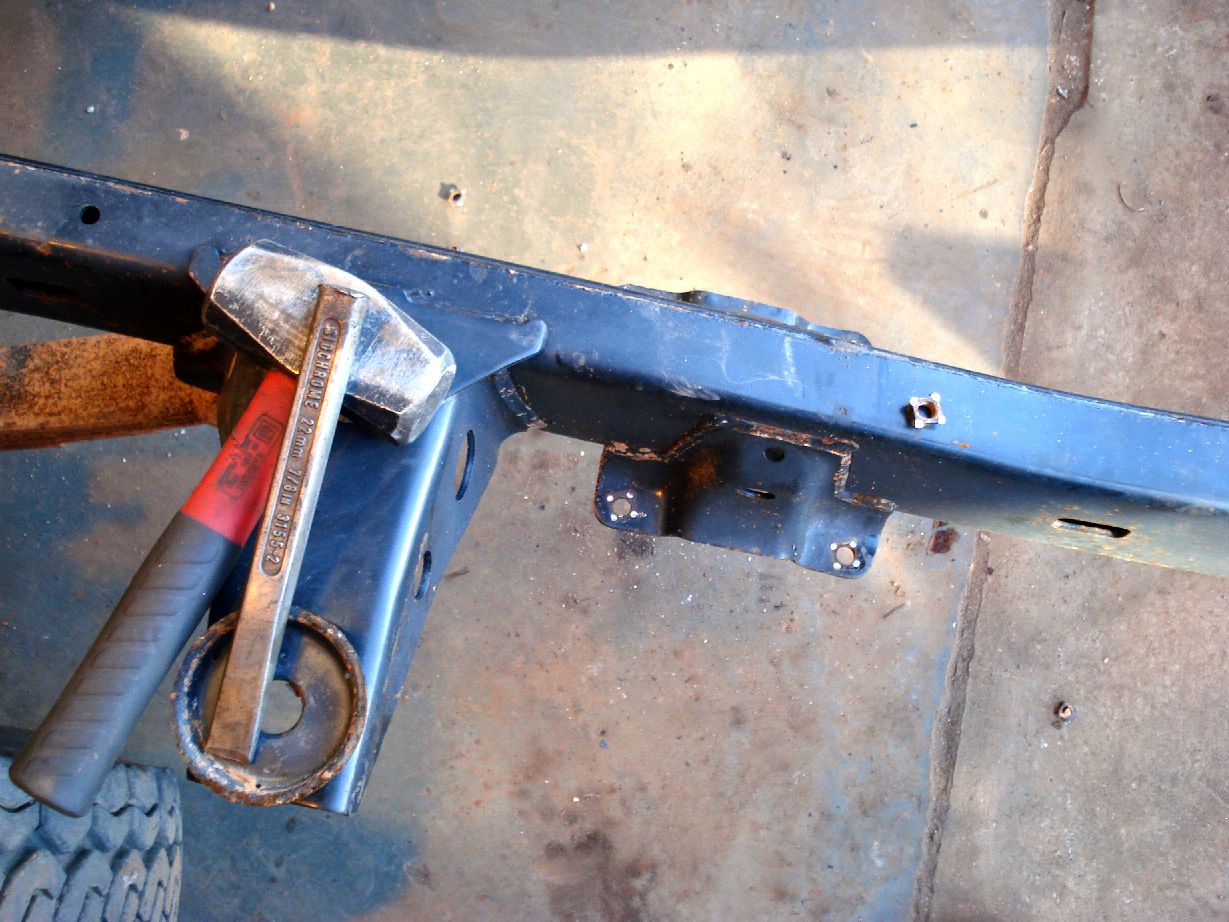
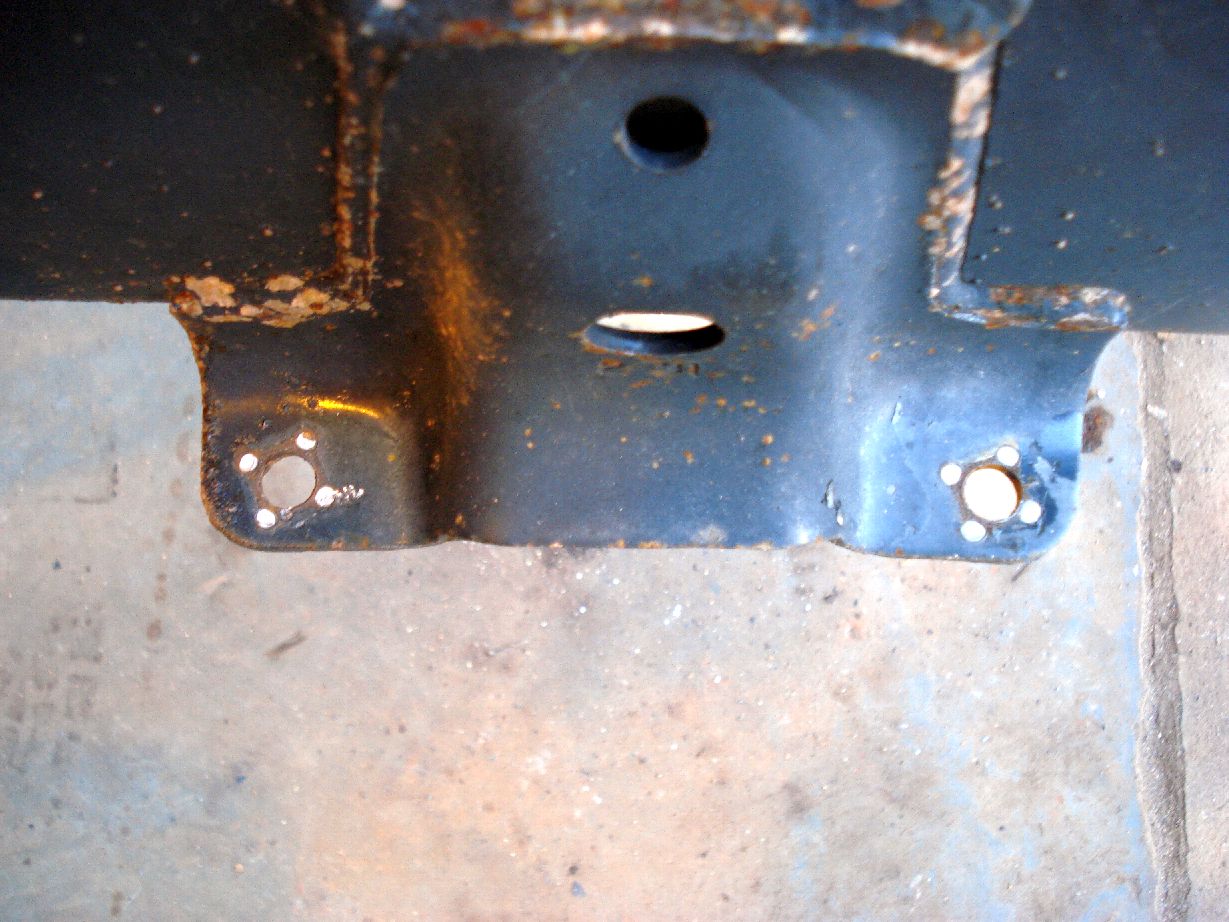
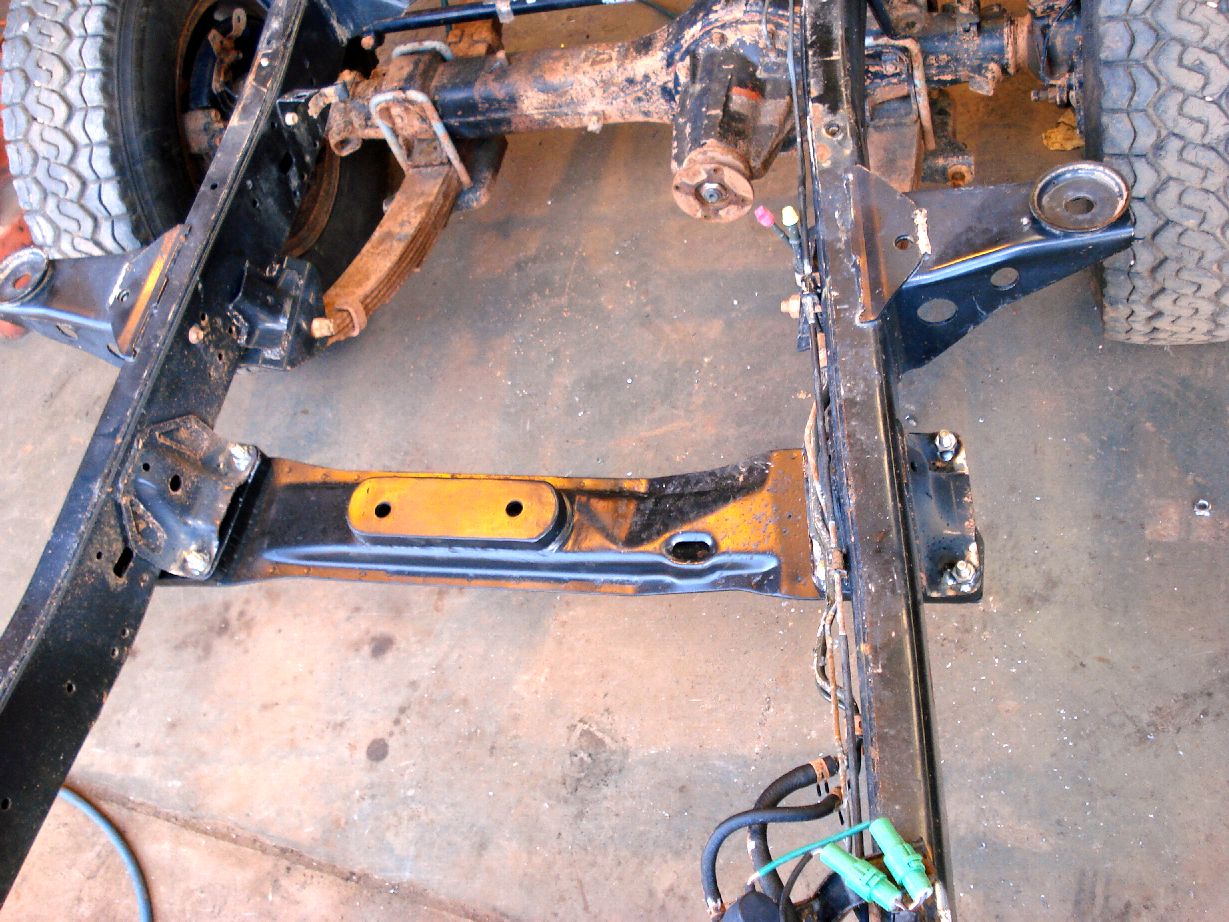
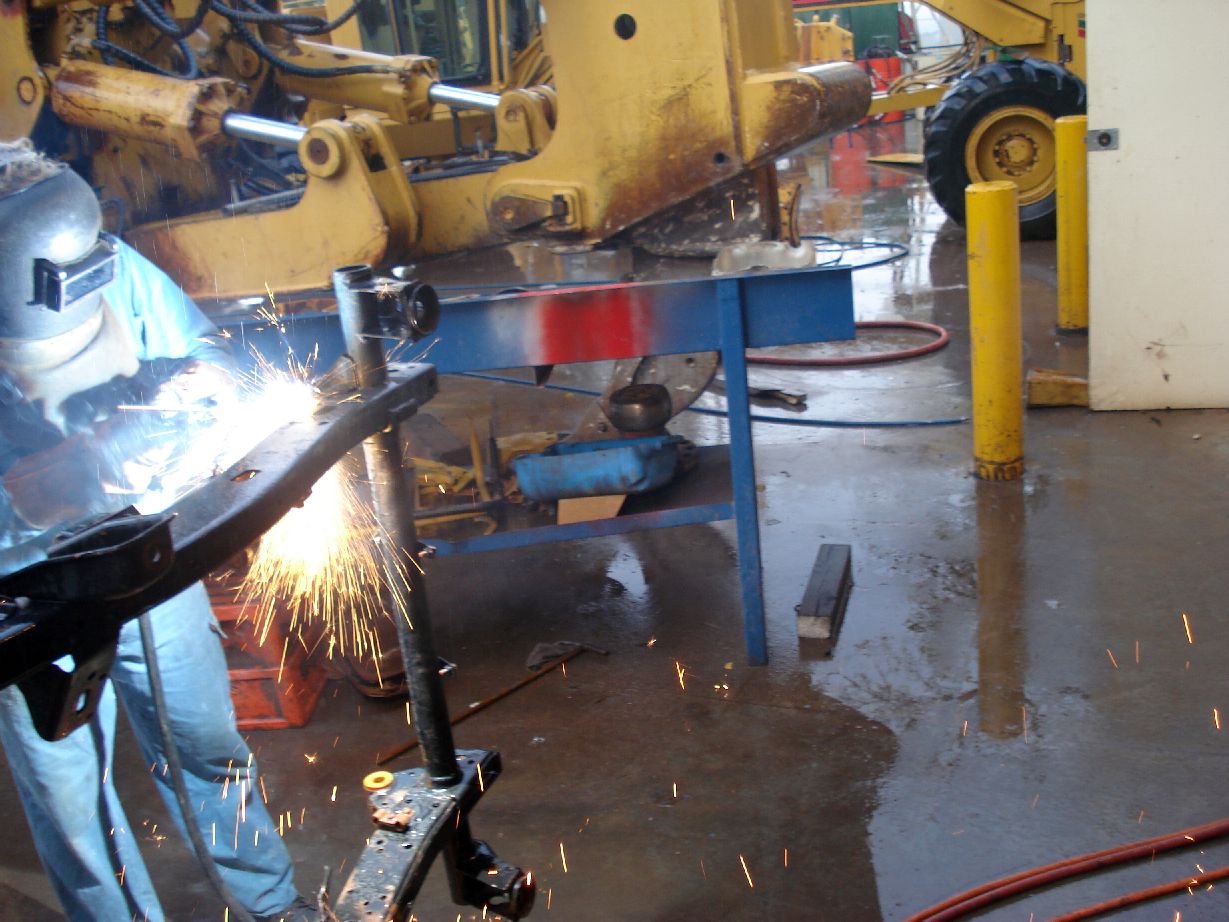
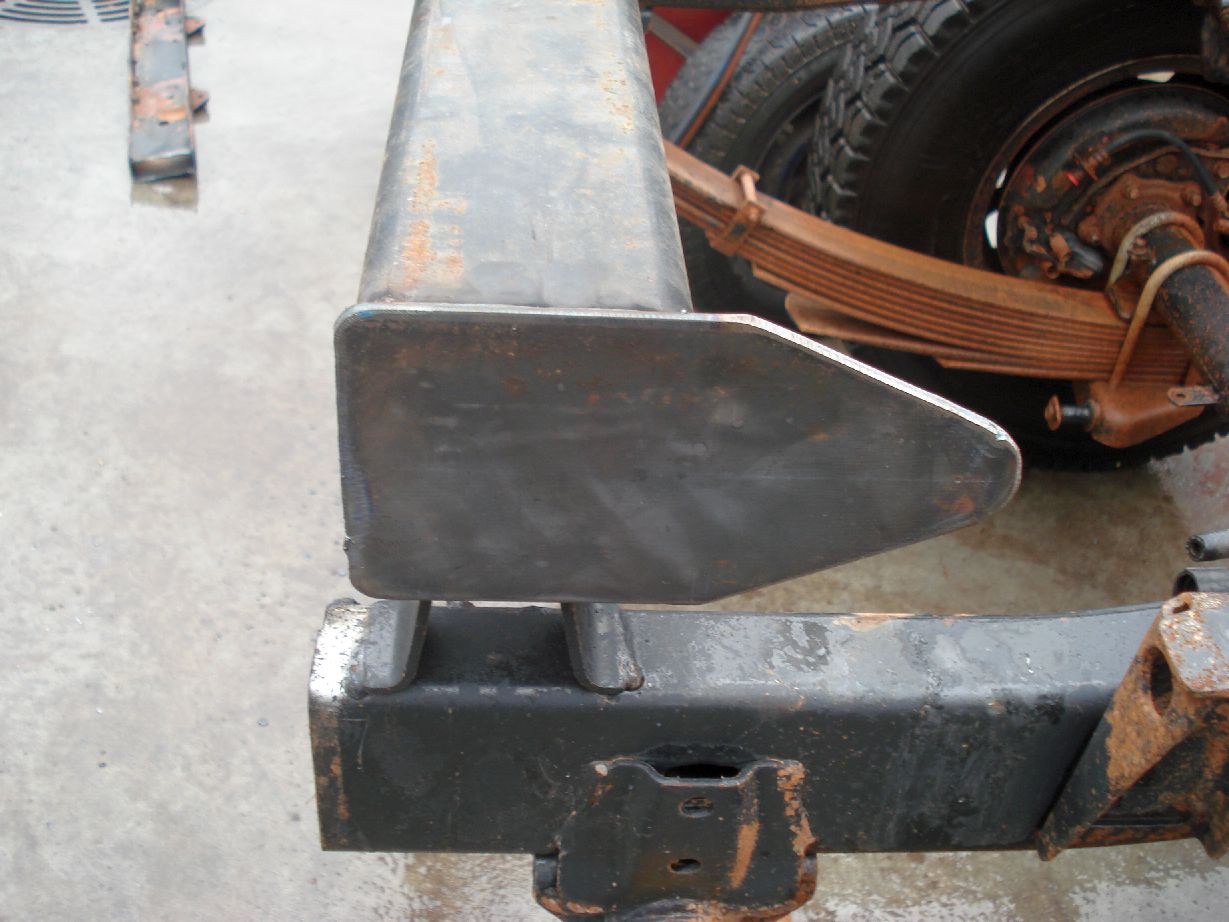
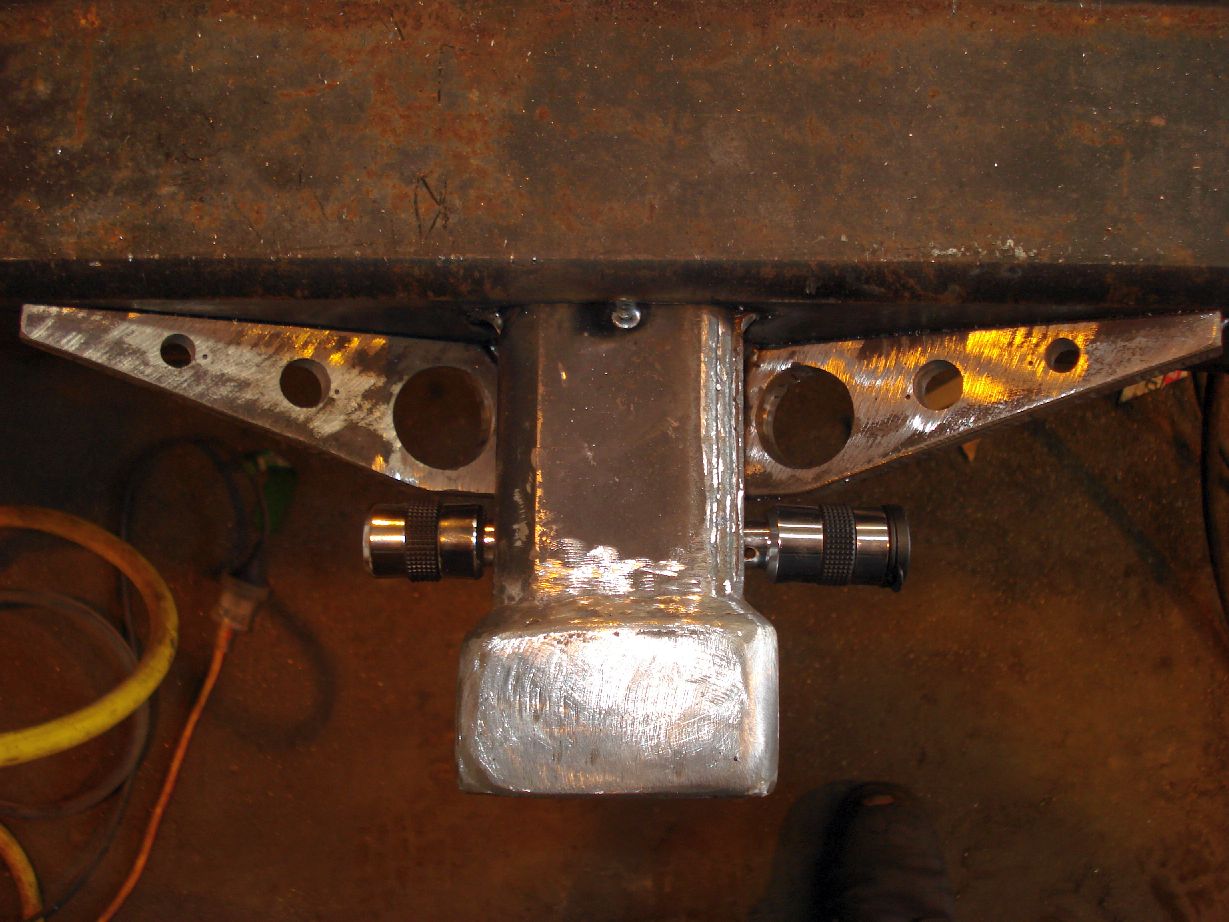
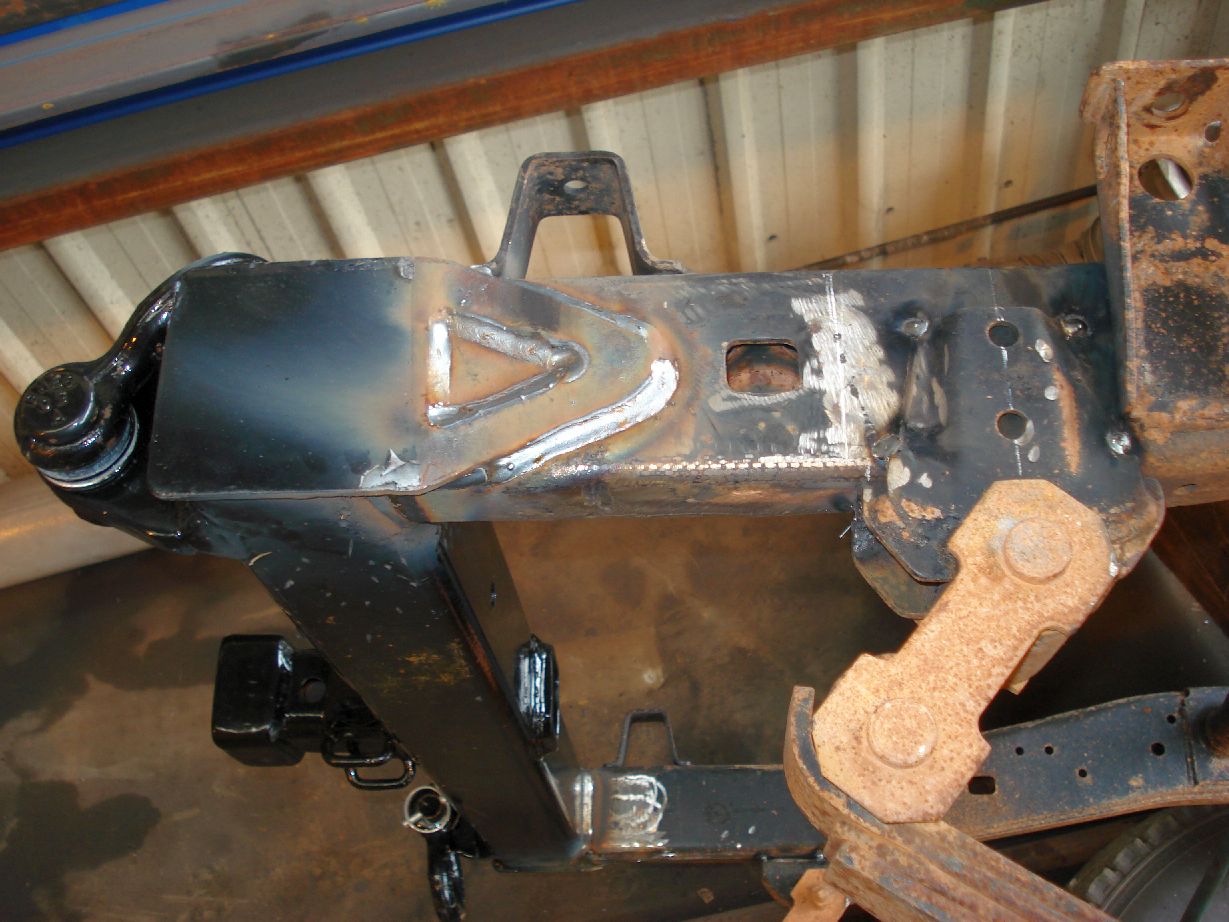
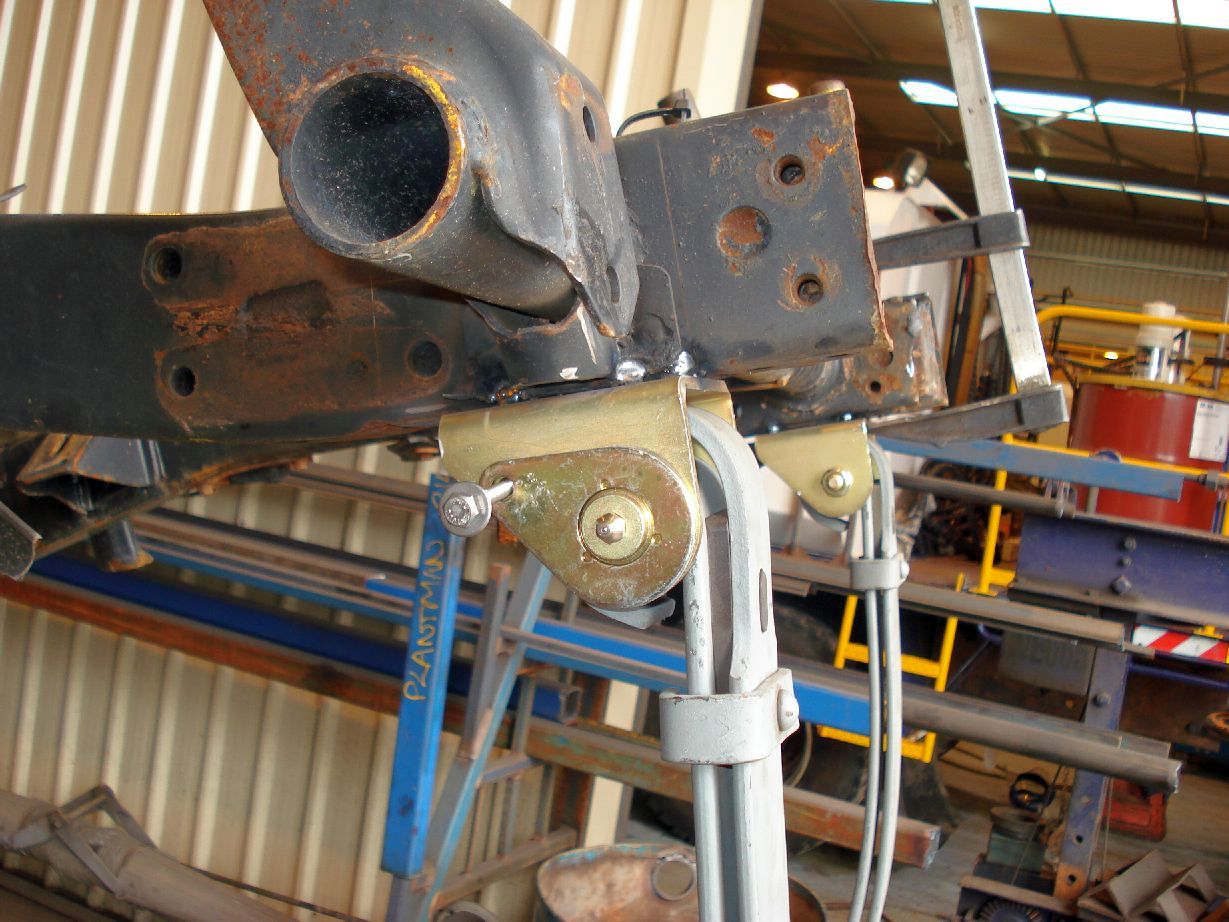
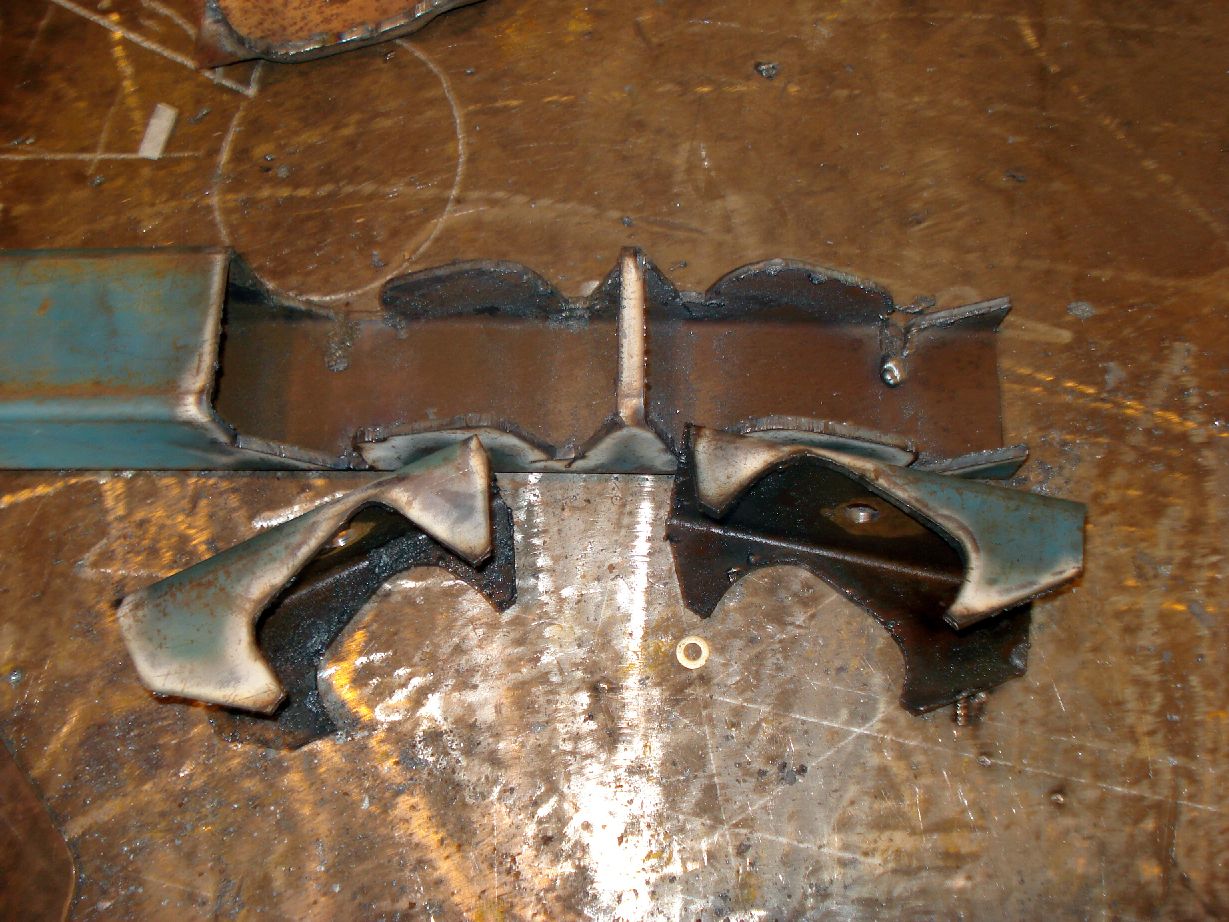
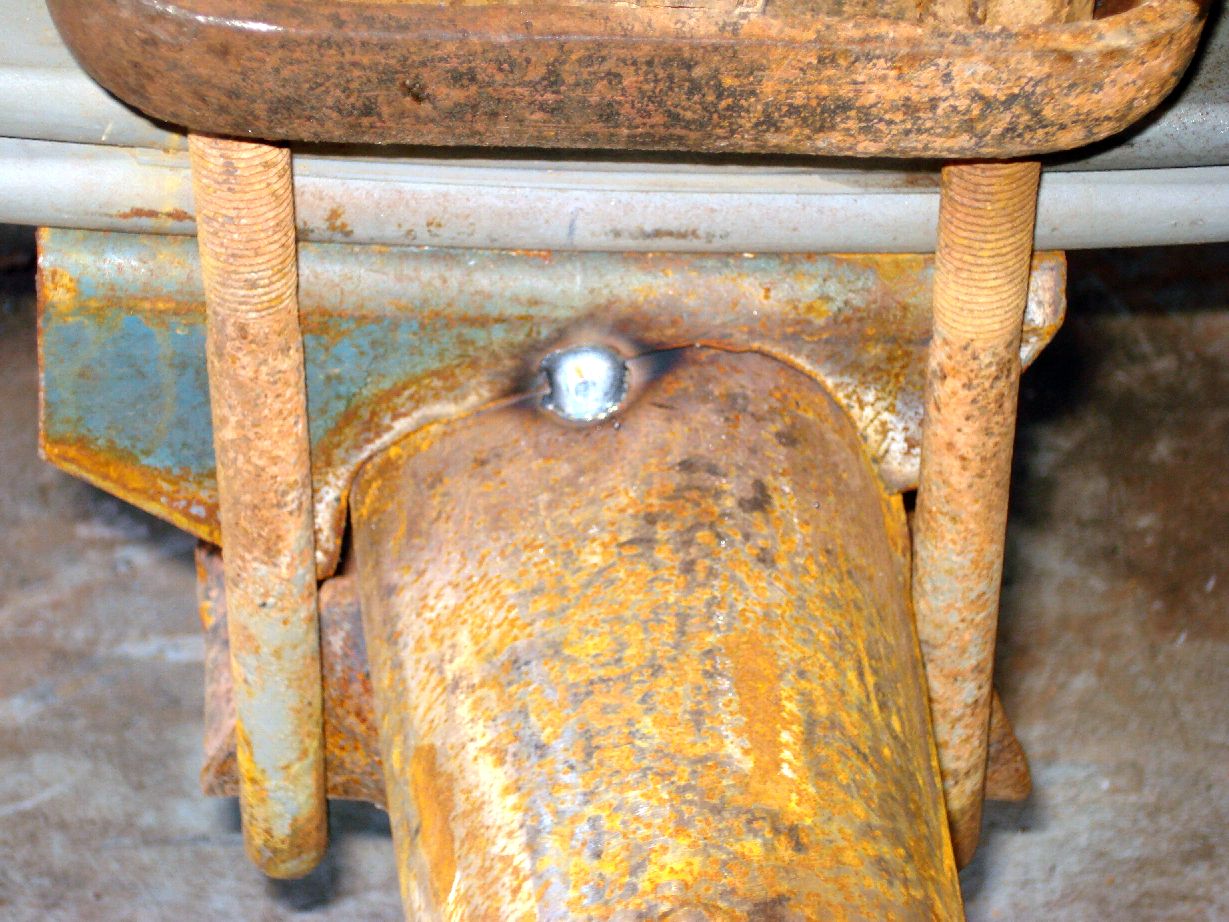
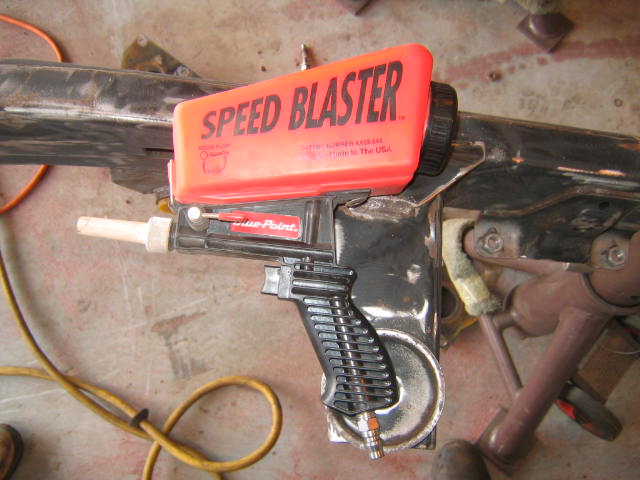
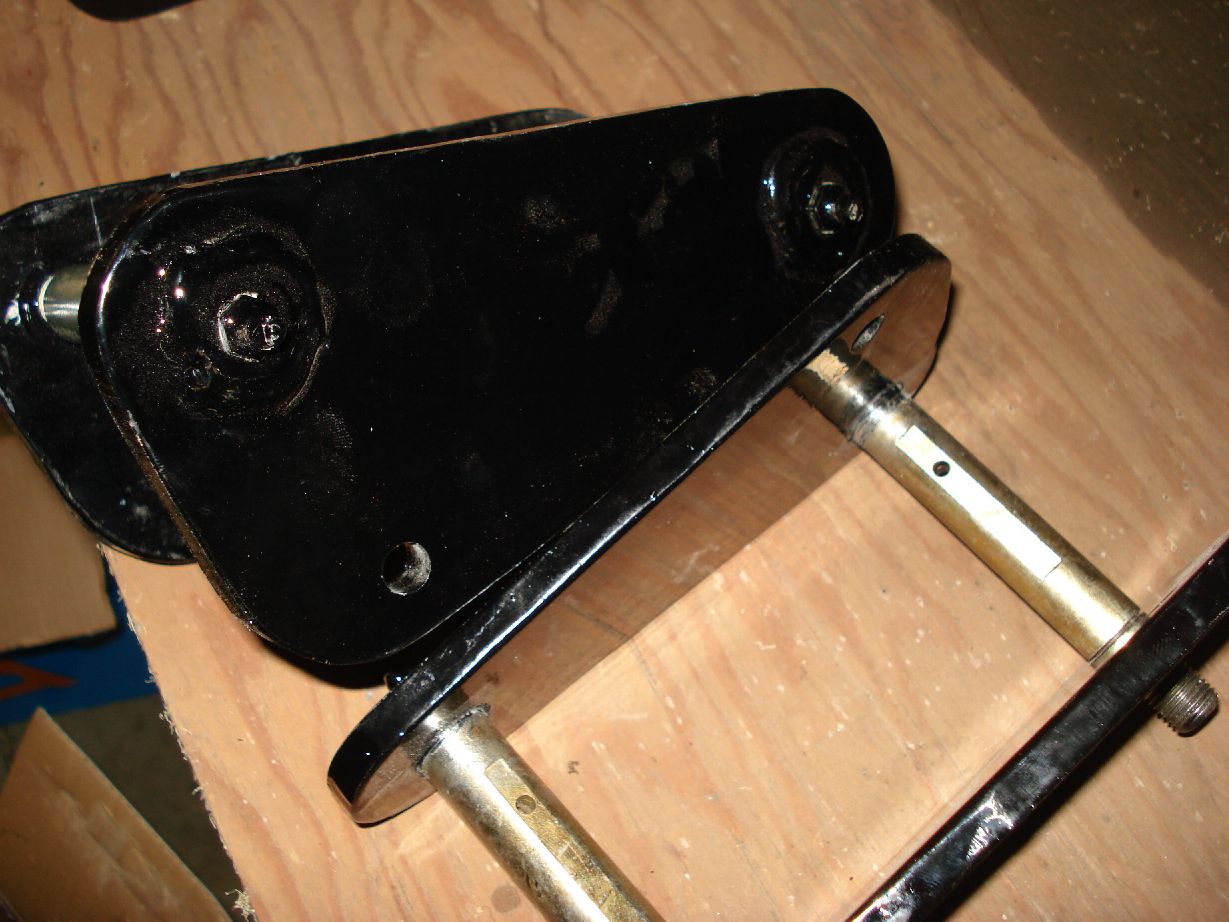
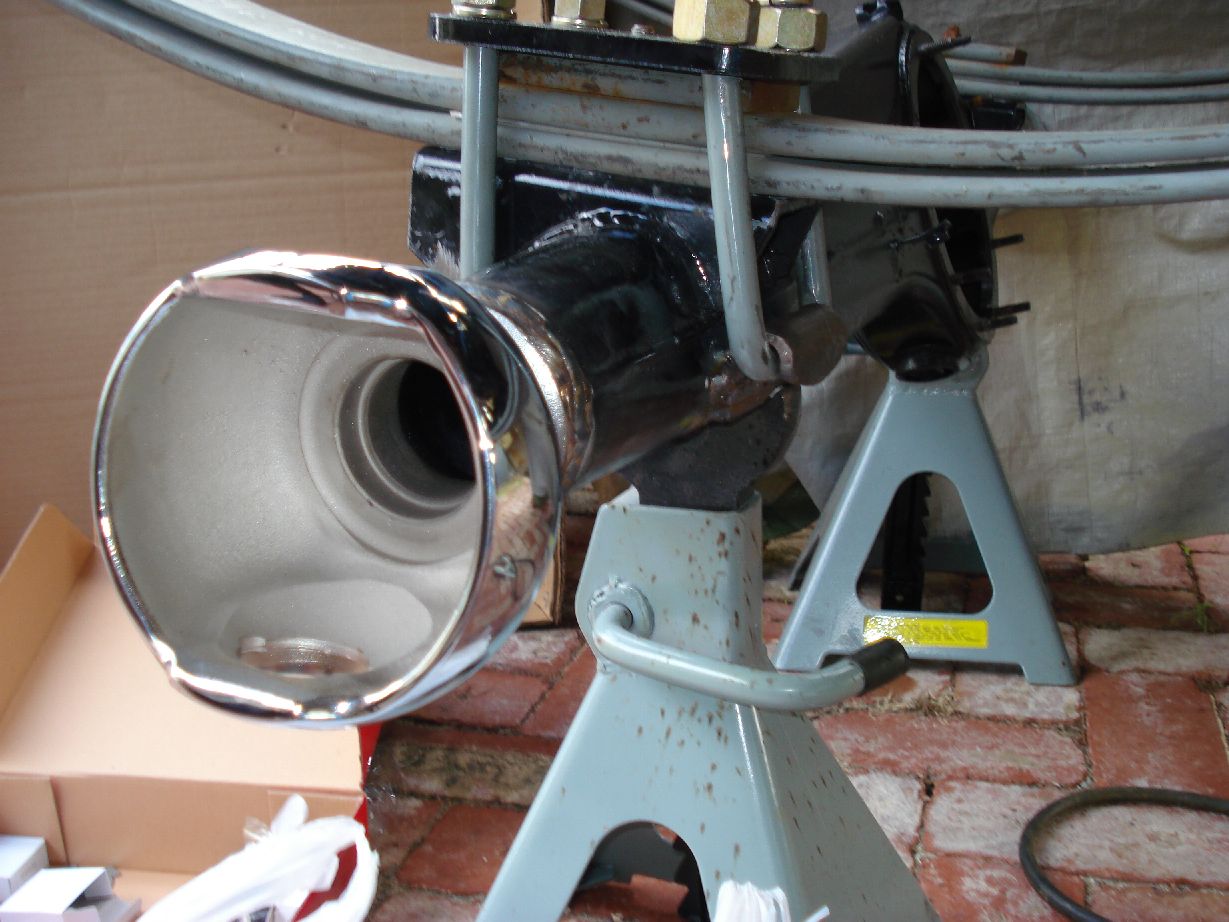
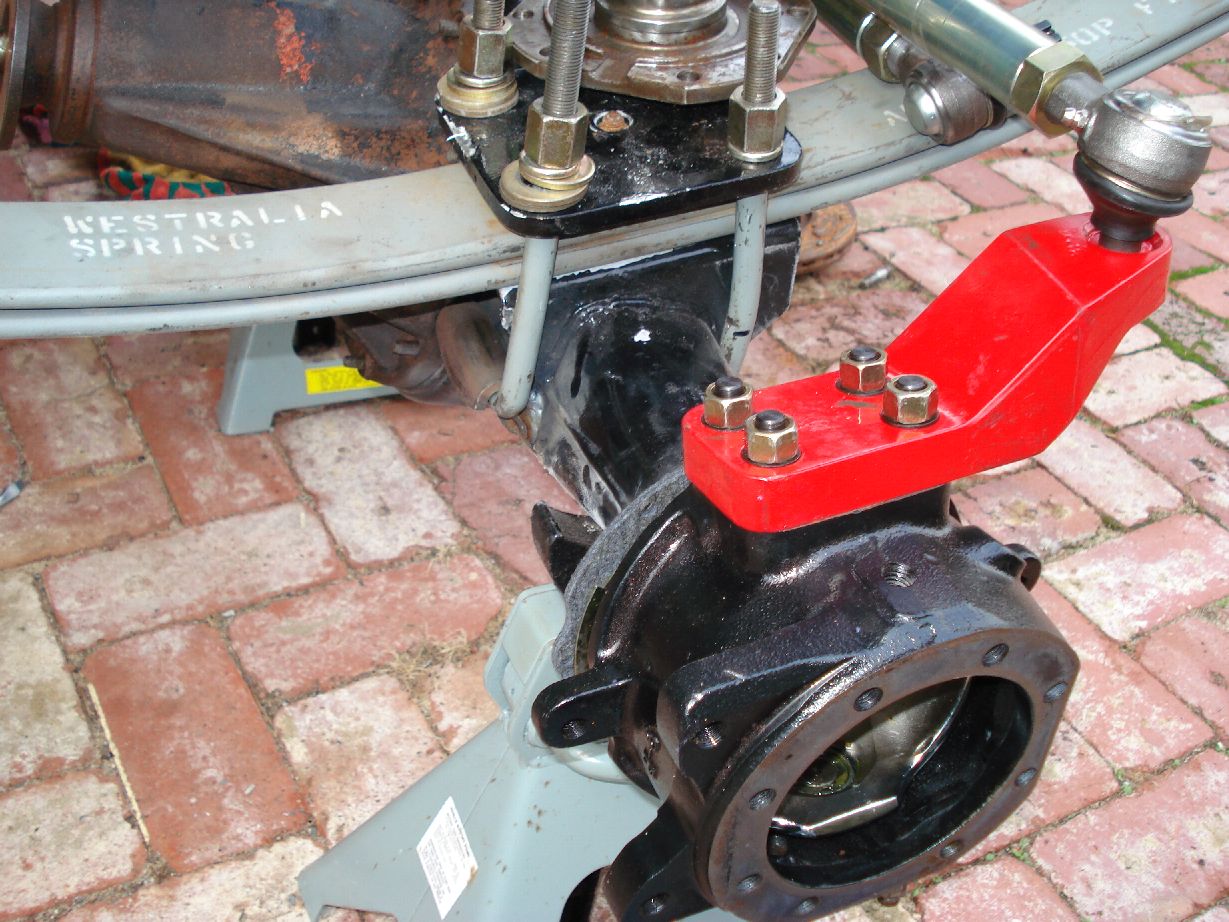
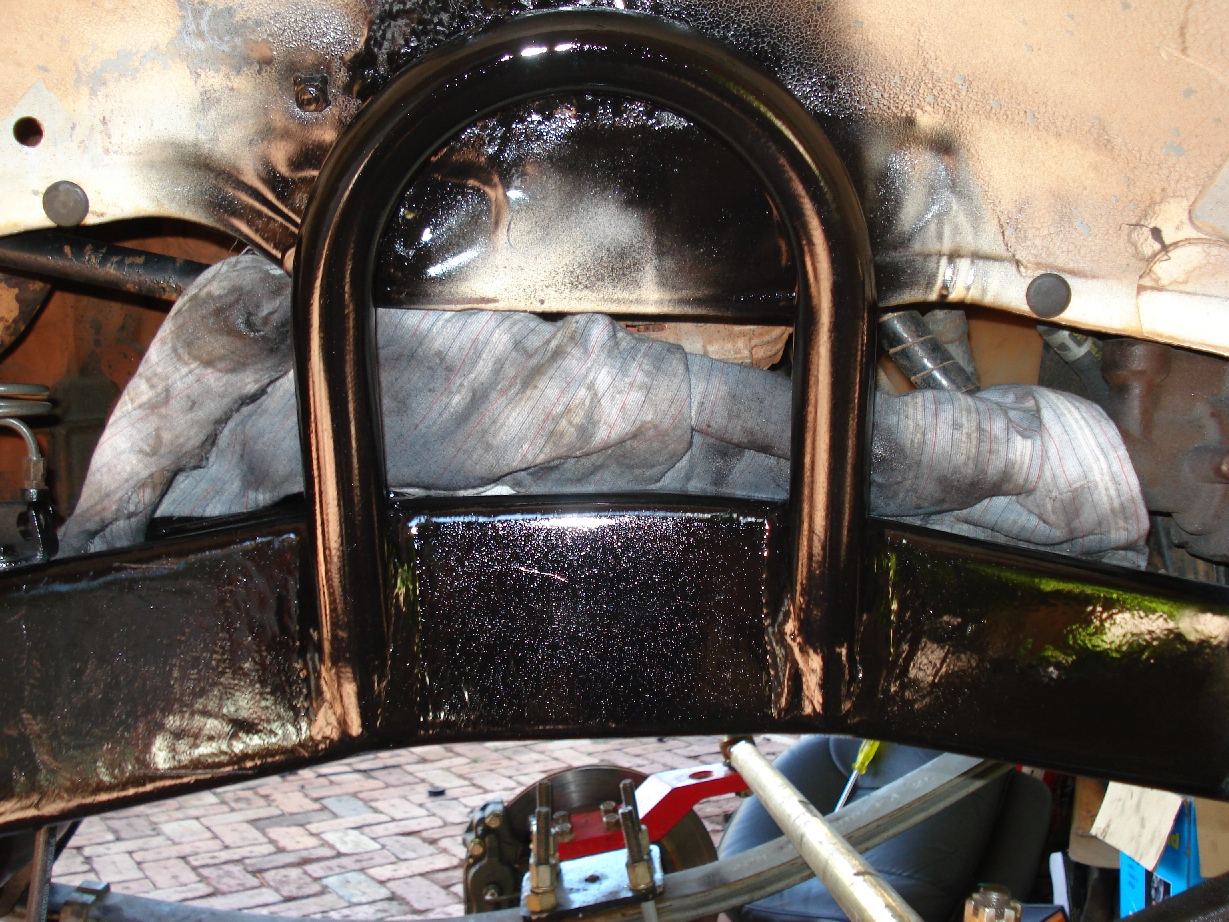
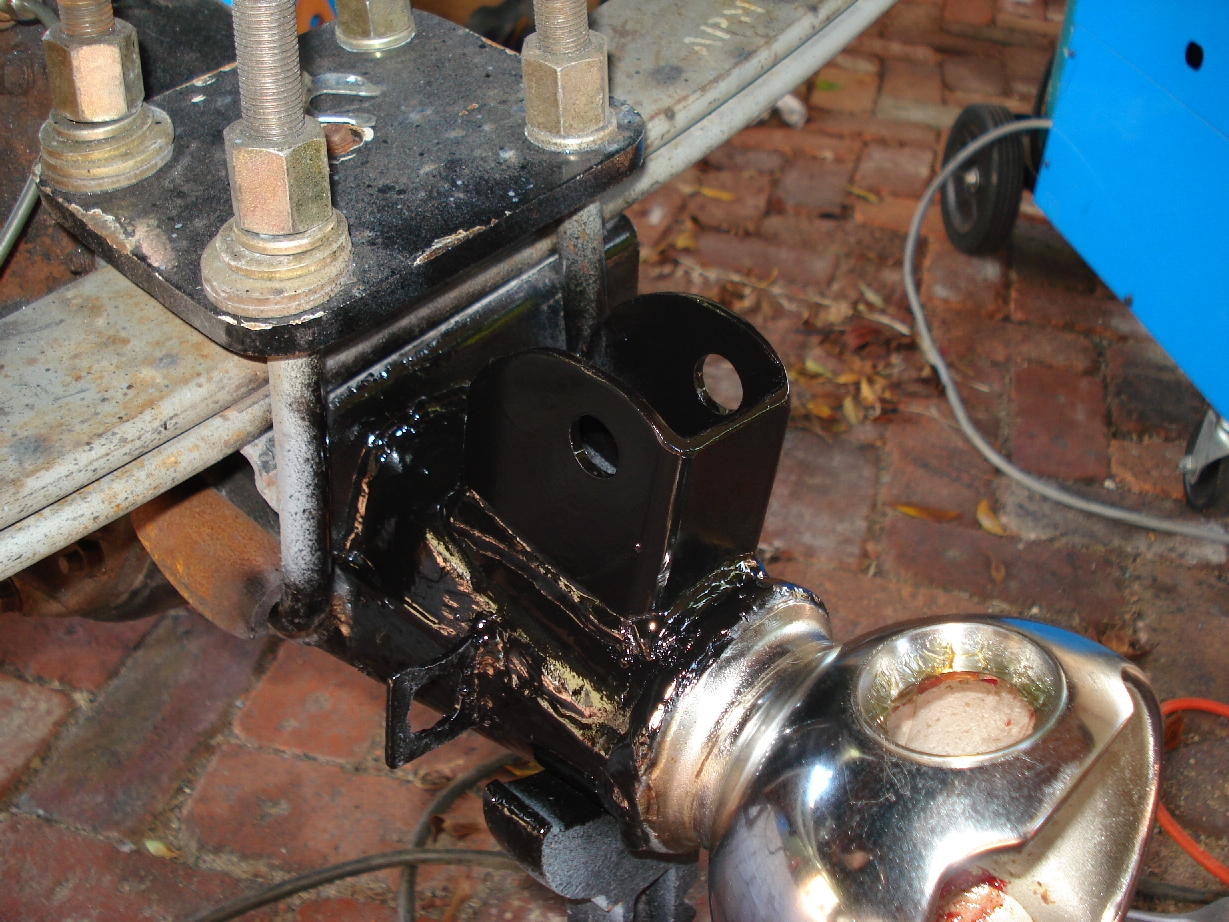
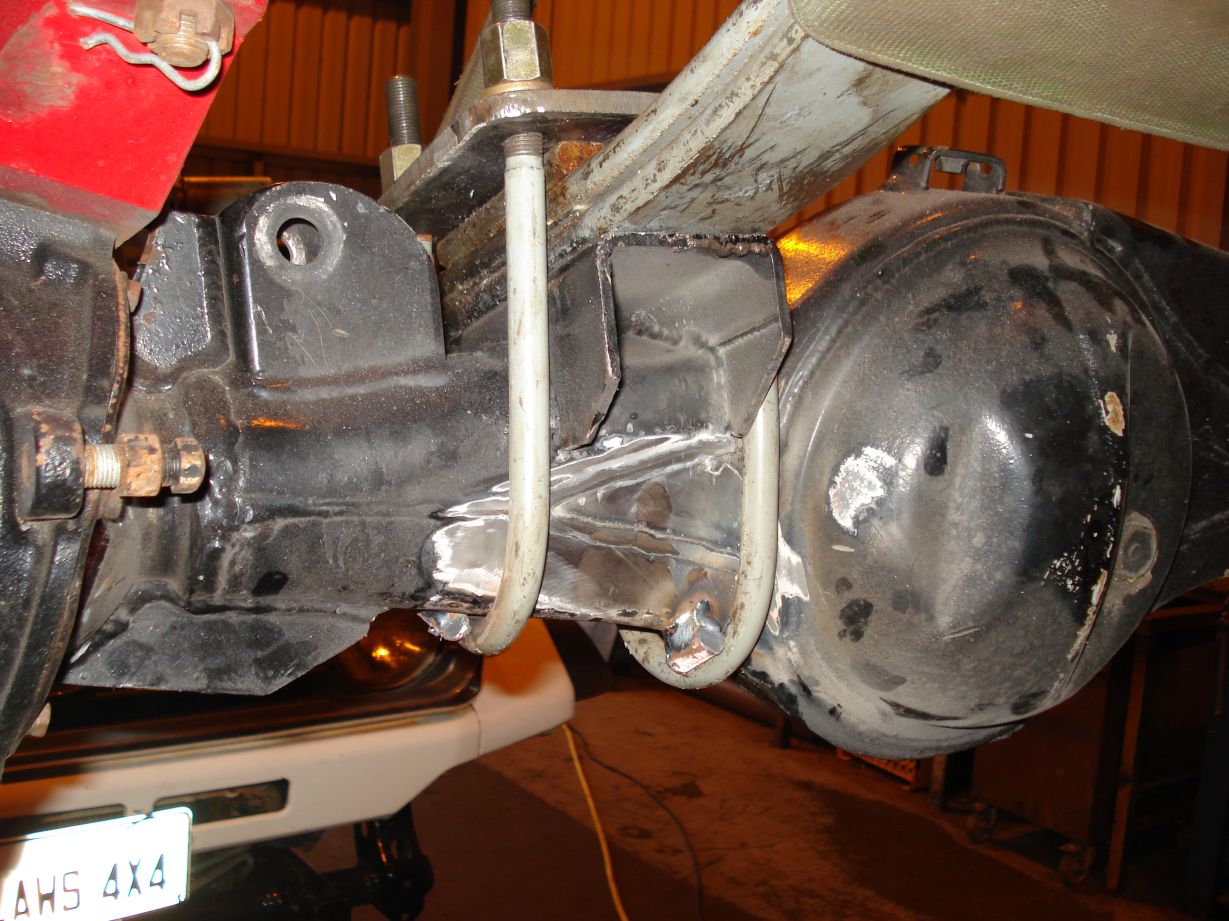
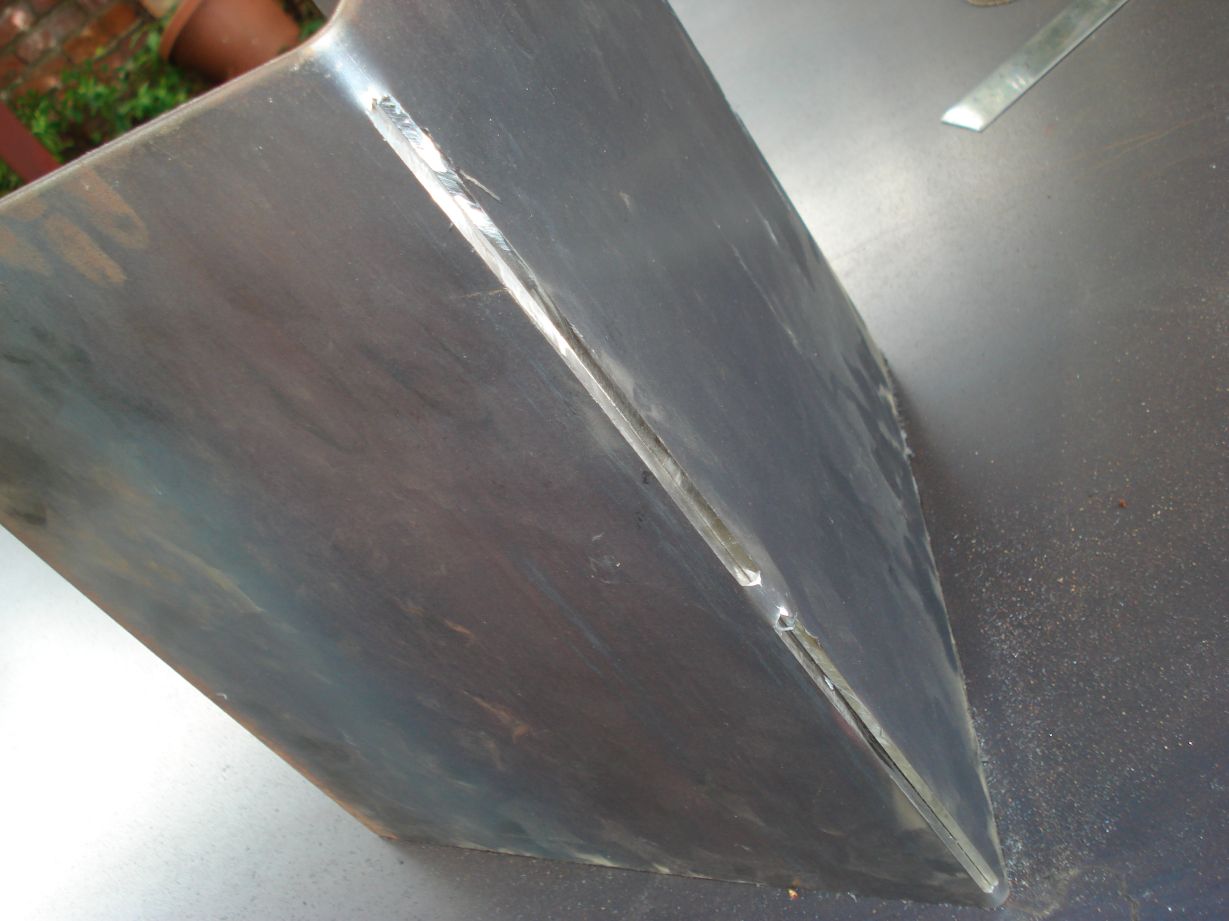
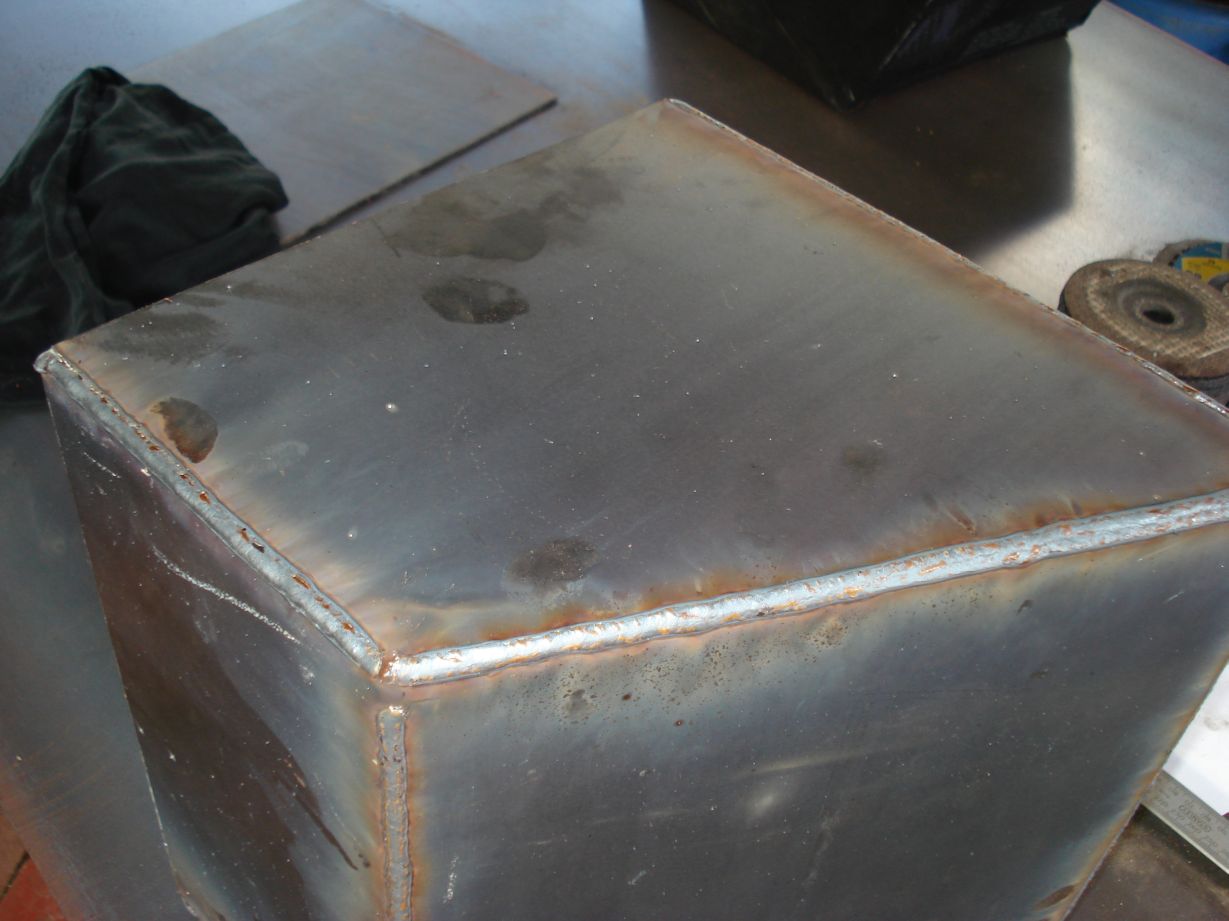
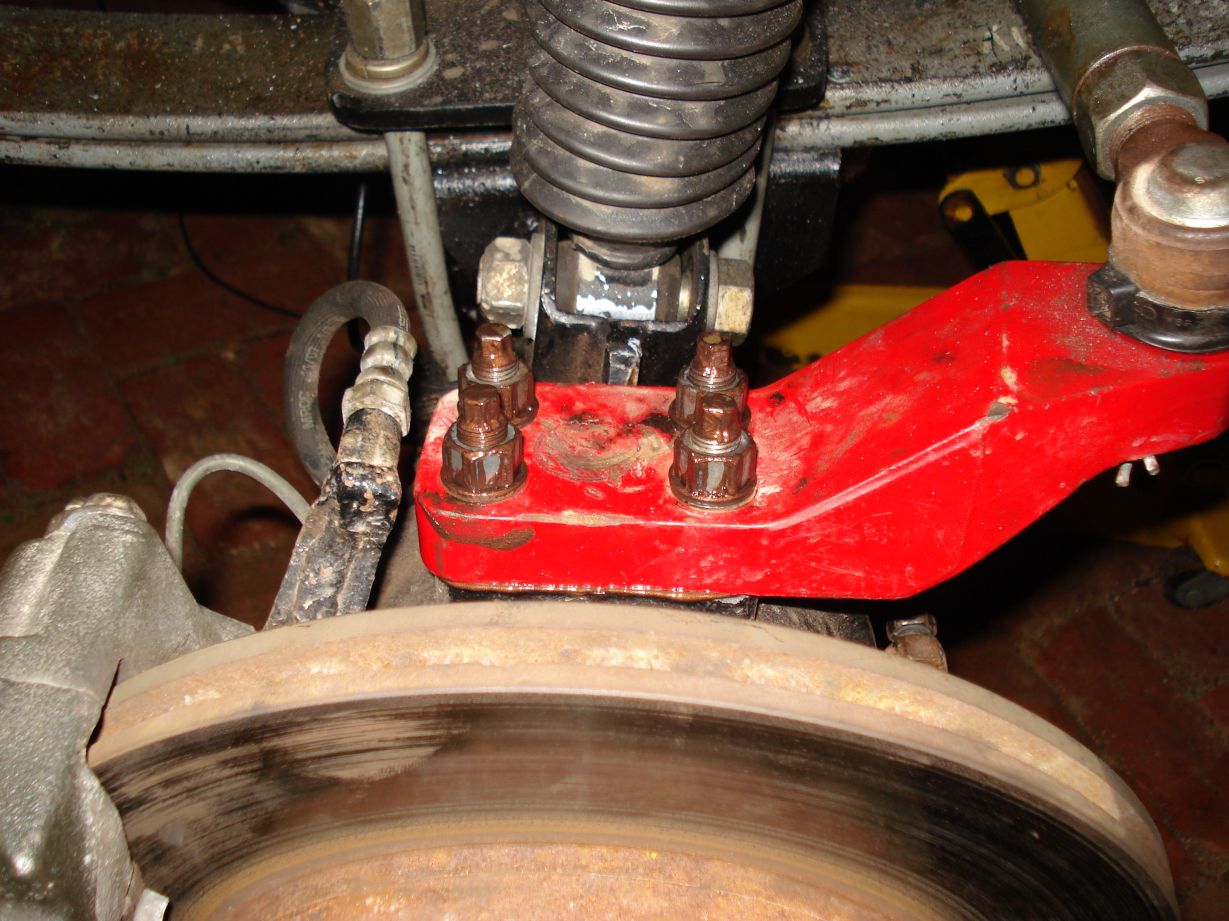
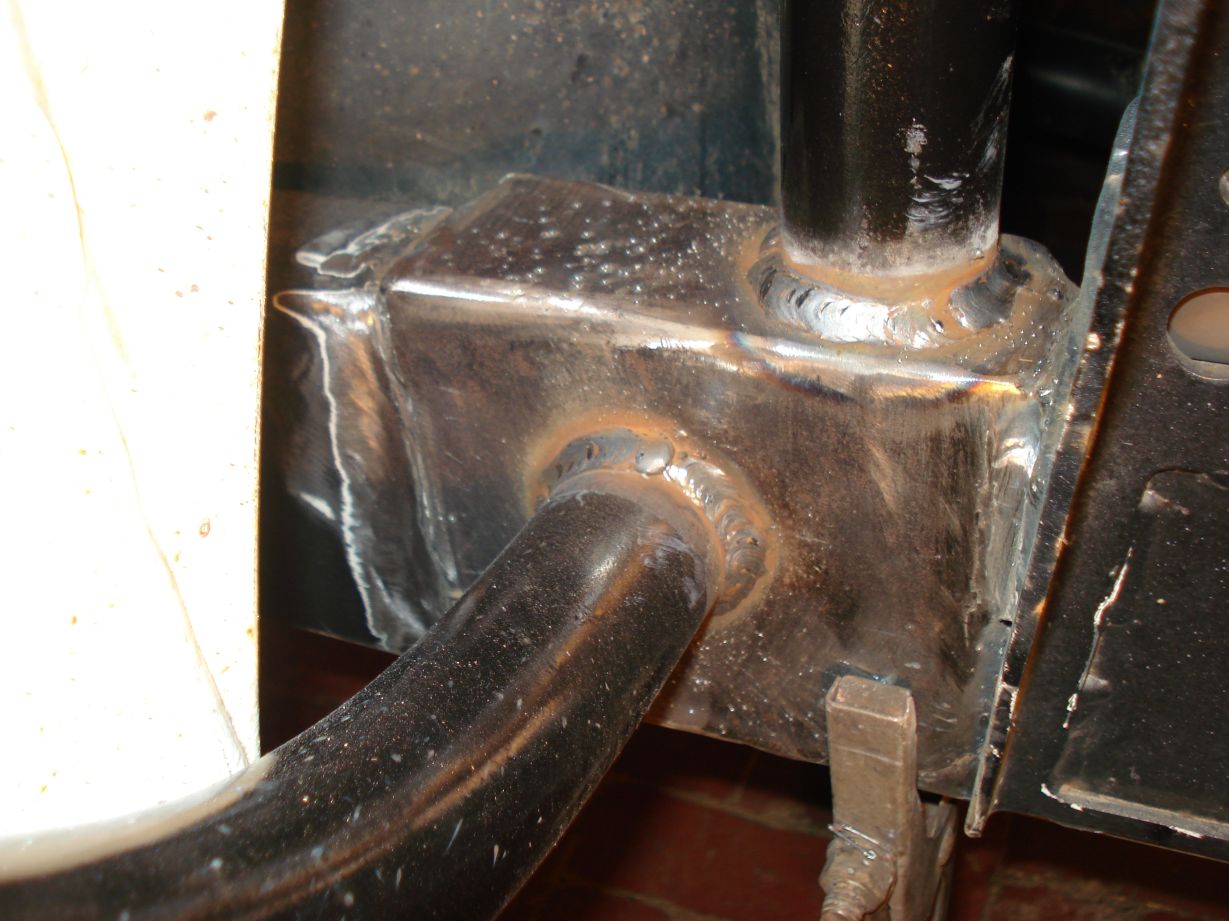
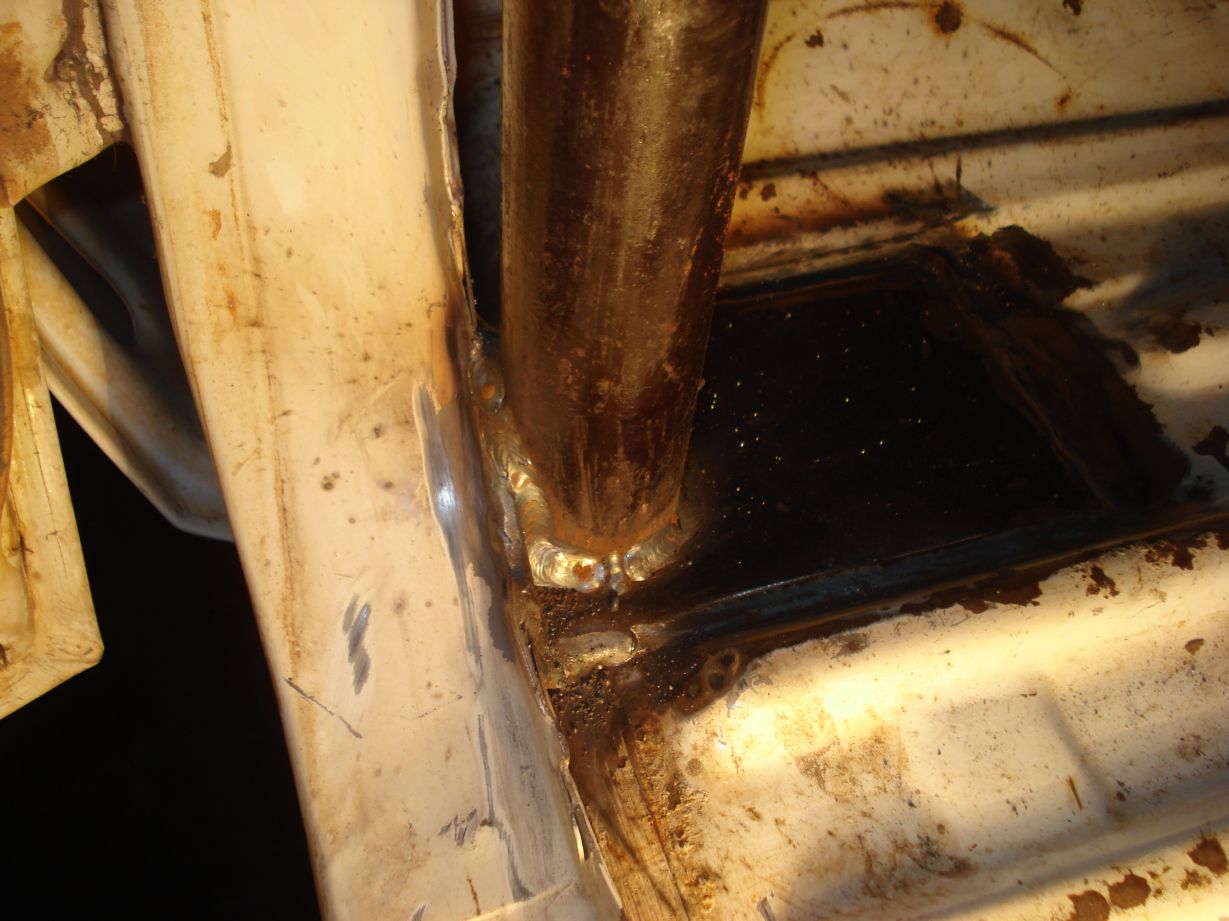
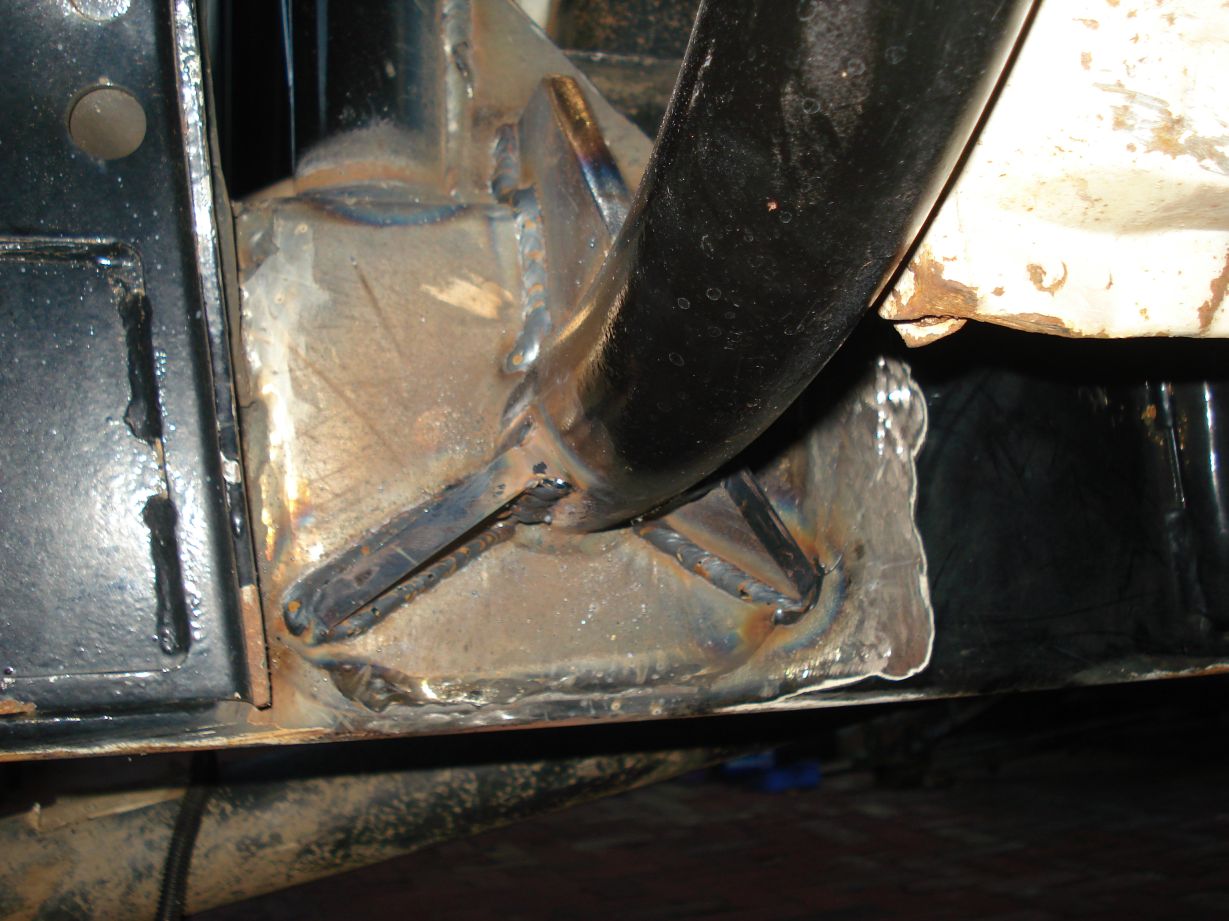
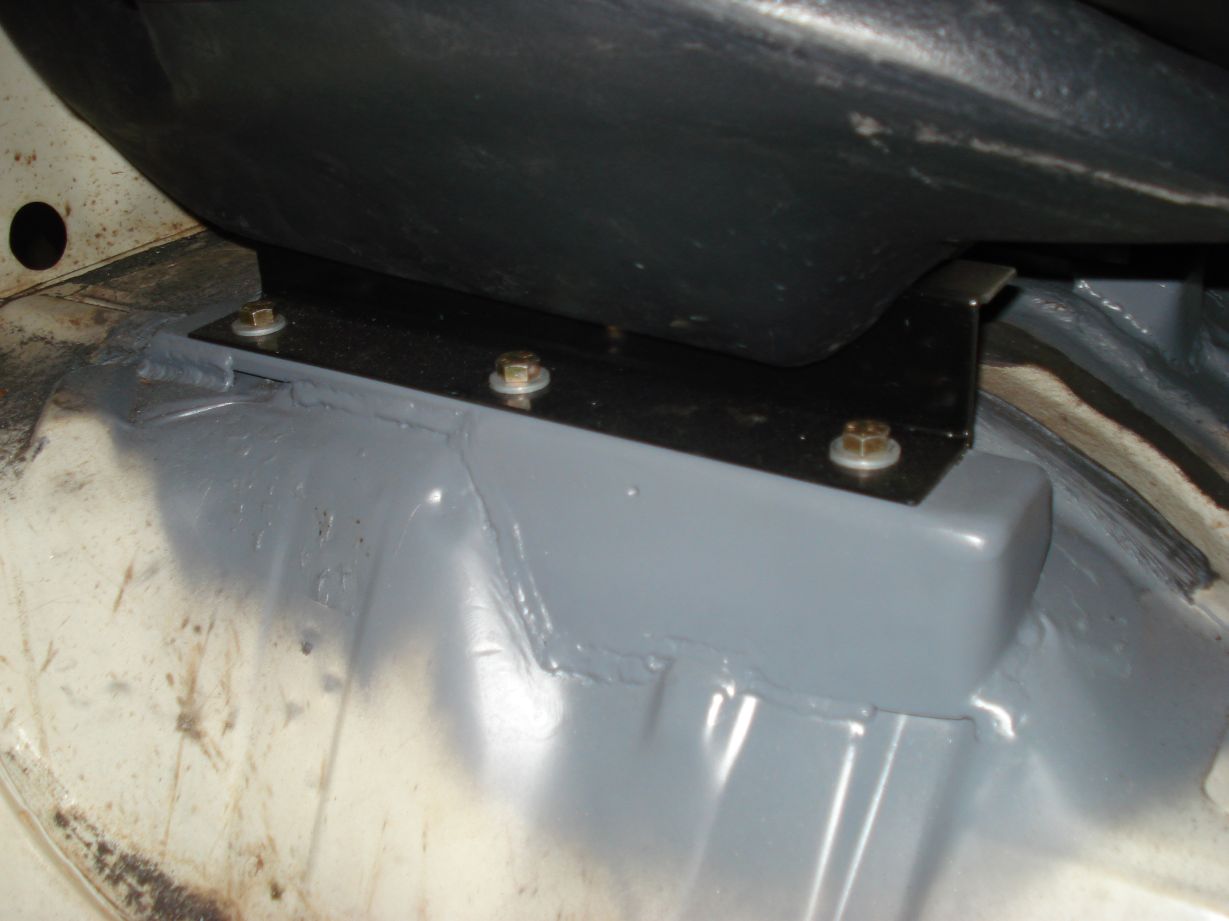
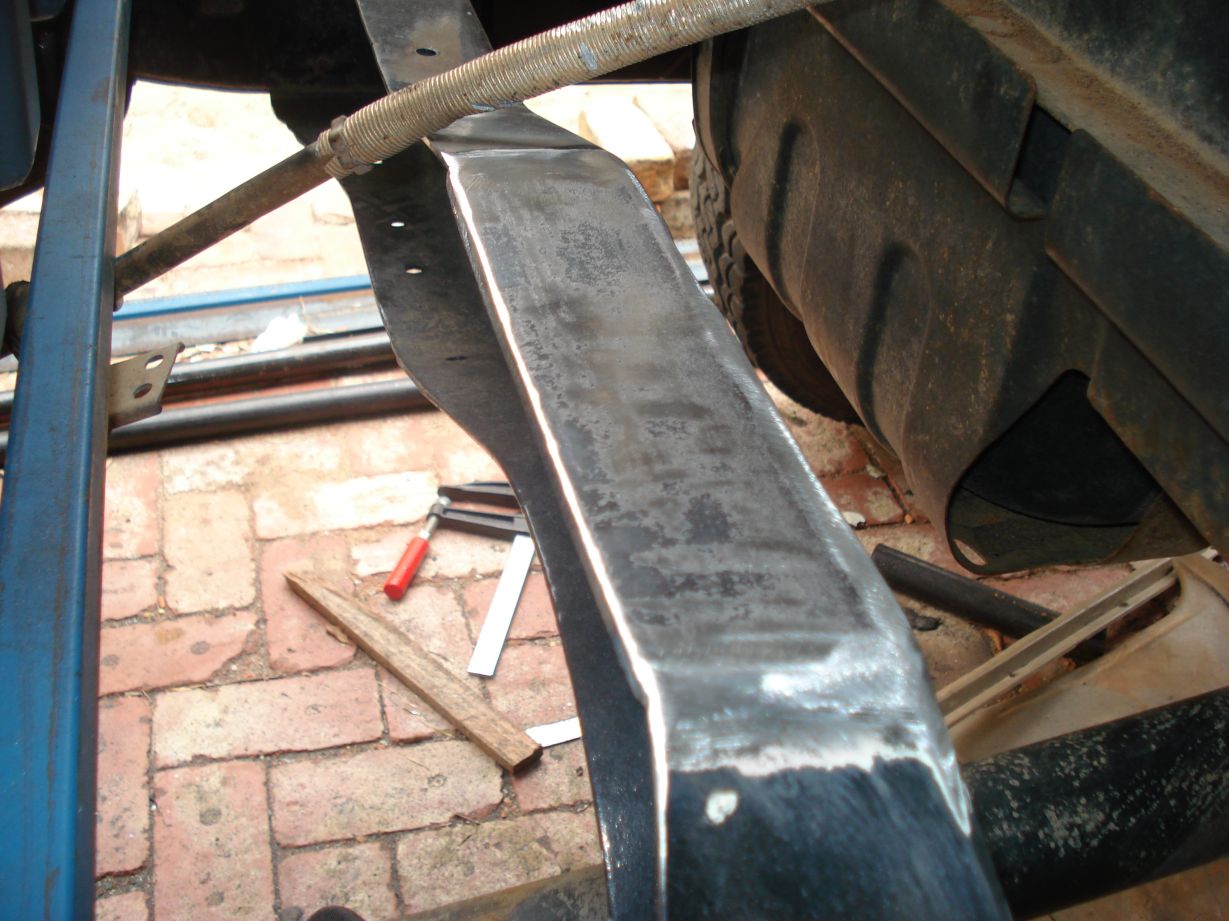
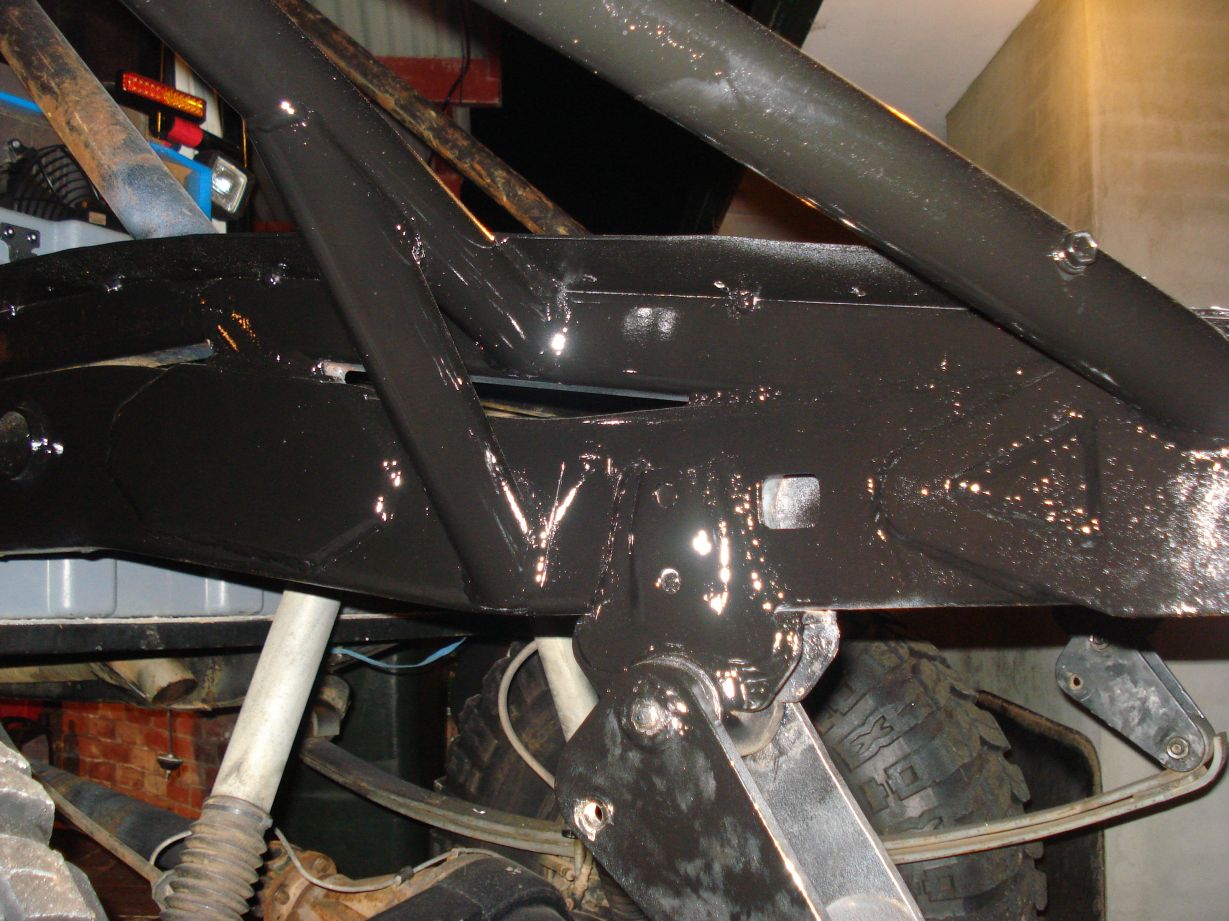
By meens of 2x Custom 1″ spacers and a modified transmission mounting point this is what i have, sand blasted and ready for paint
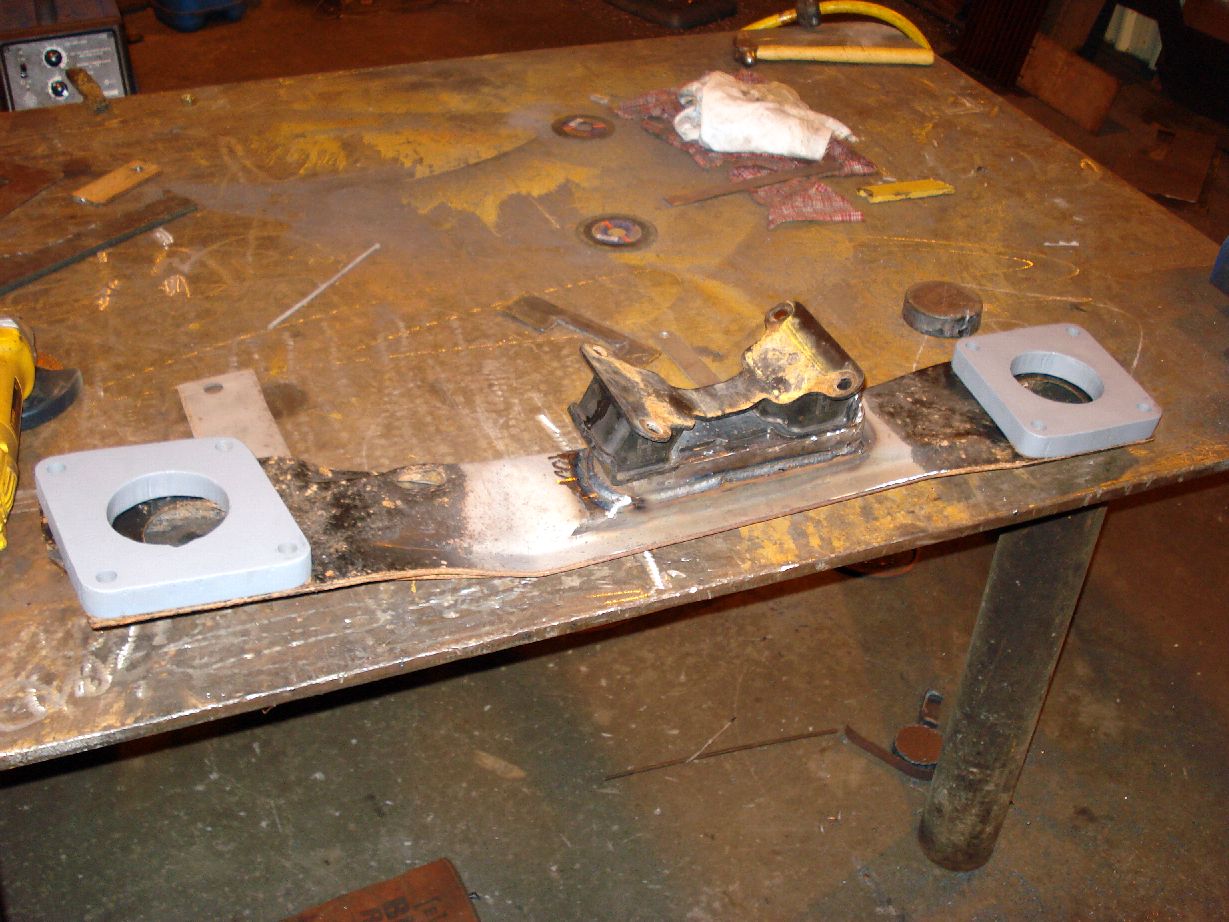
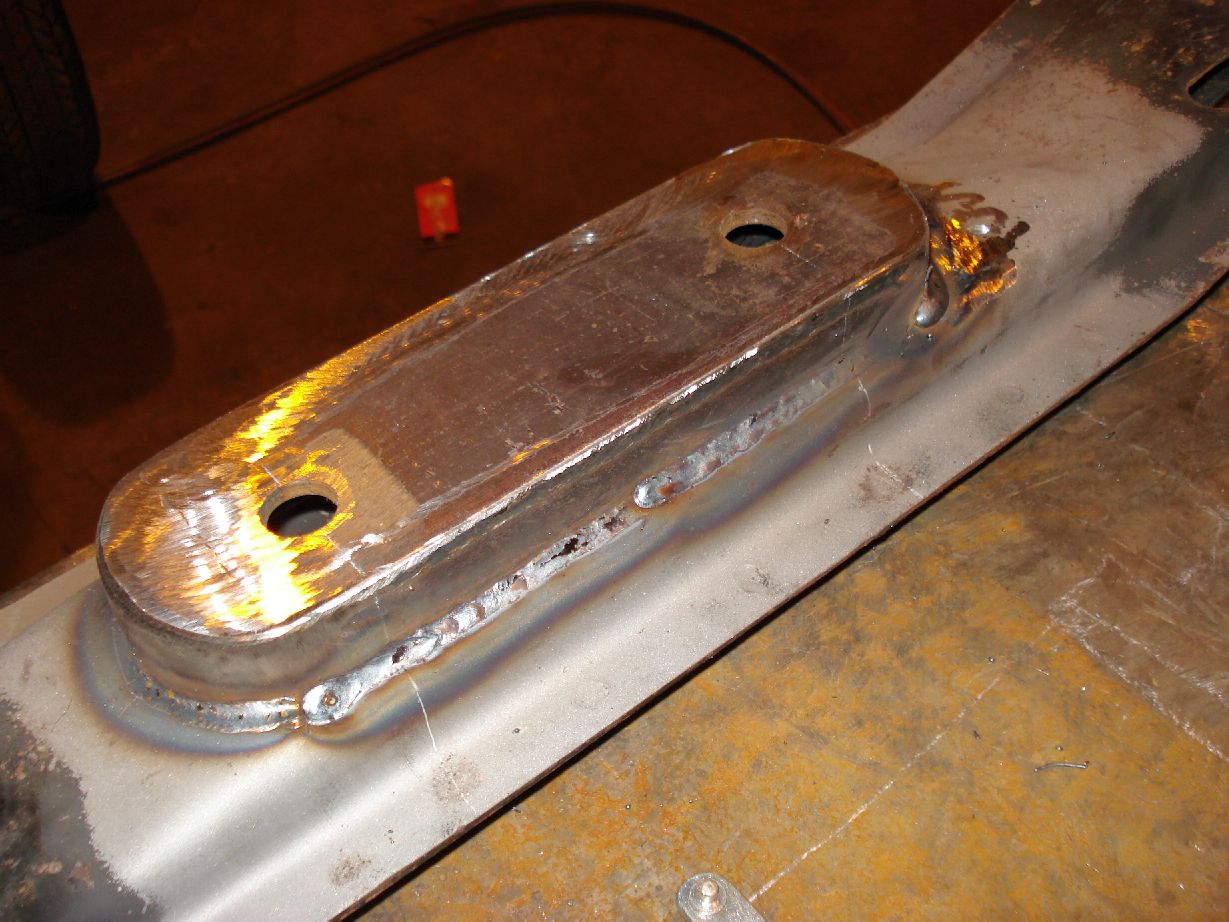
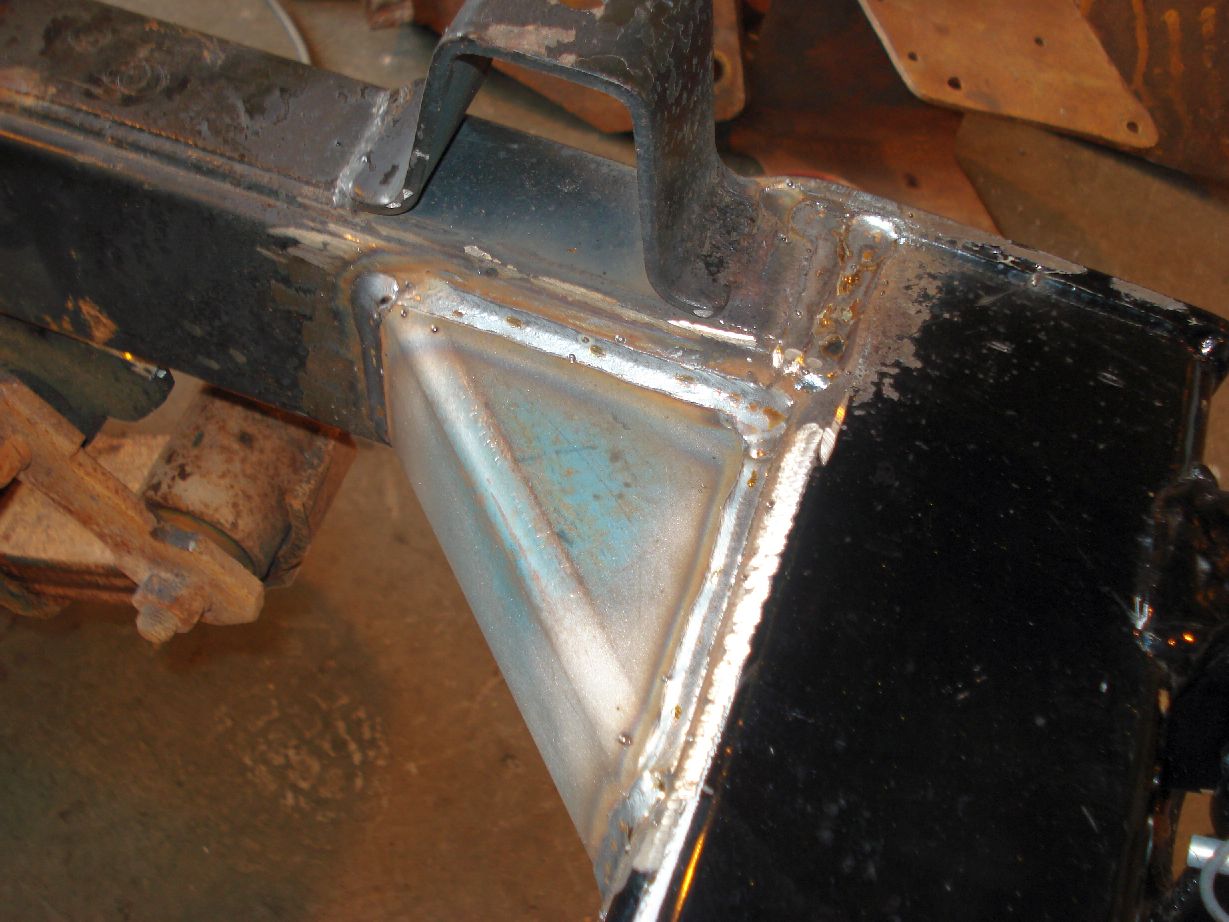
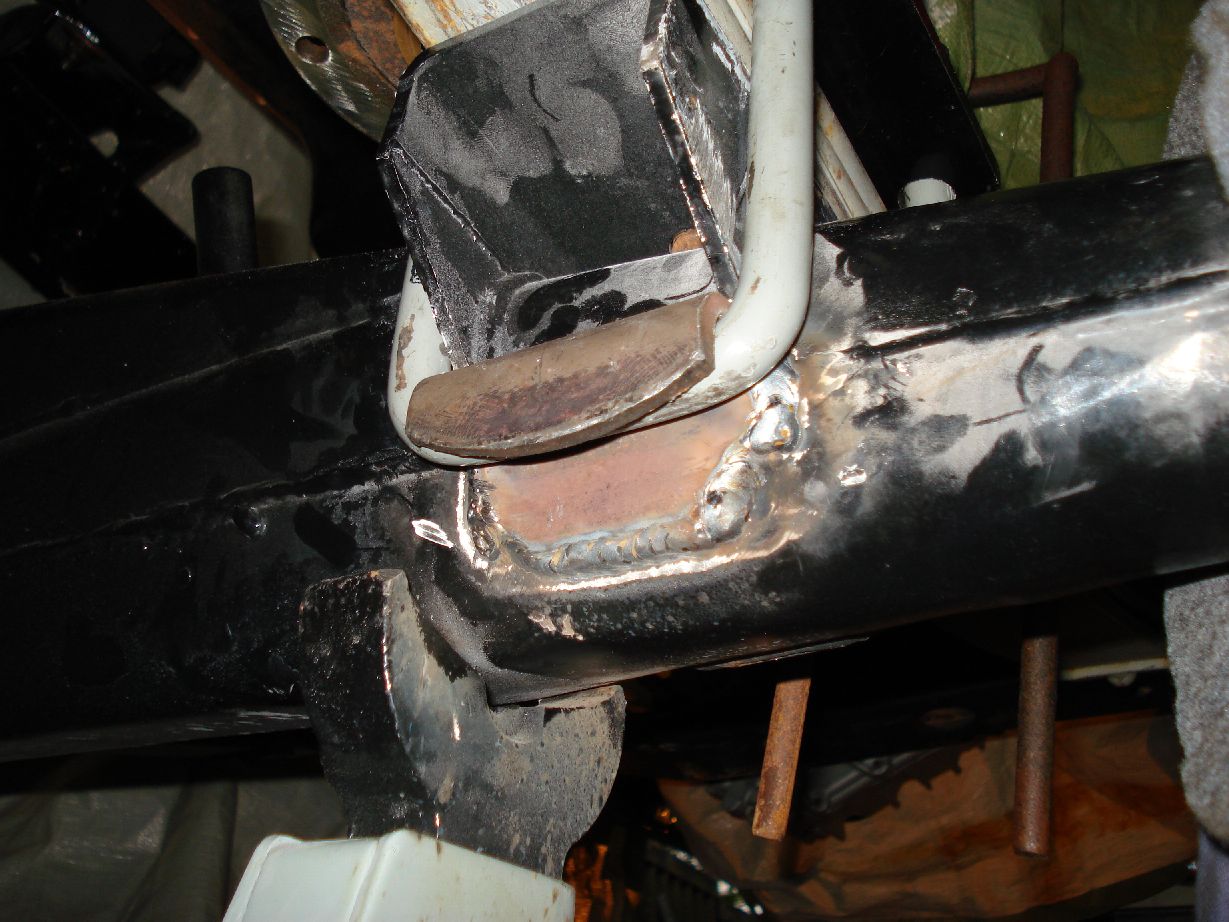
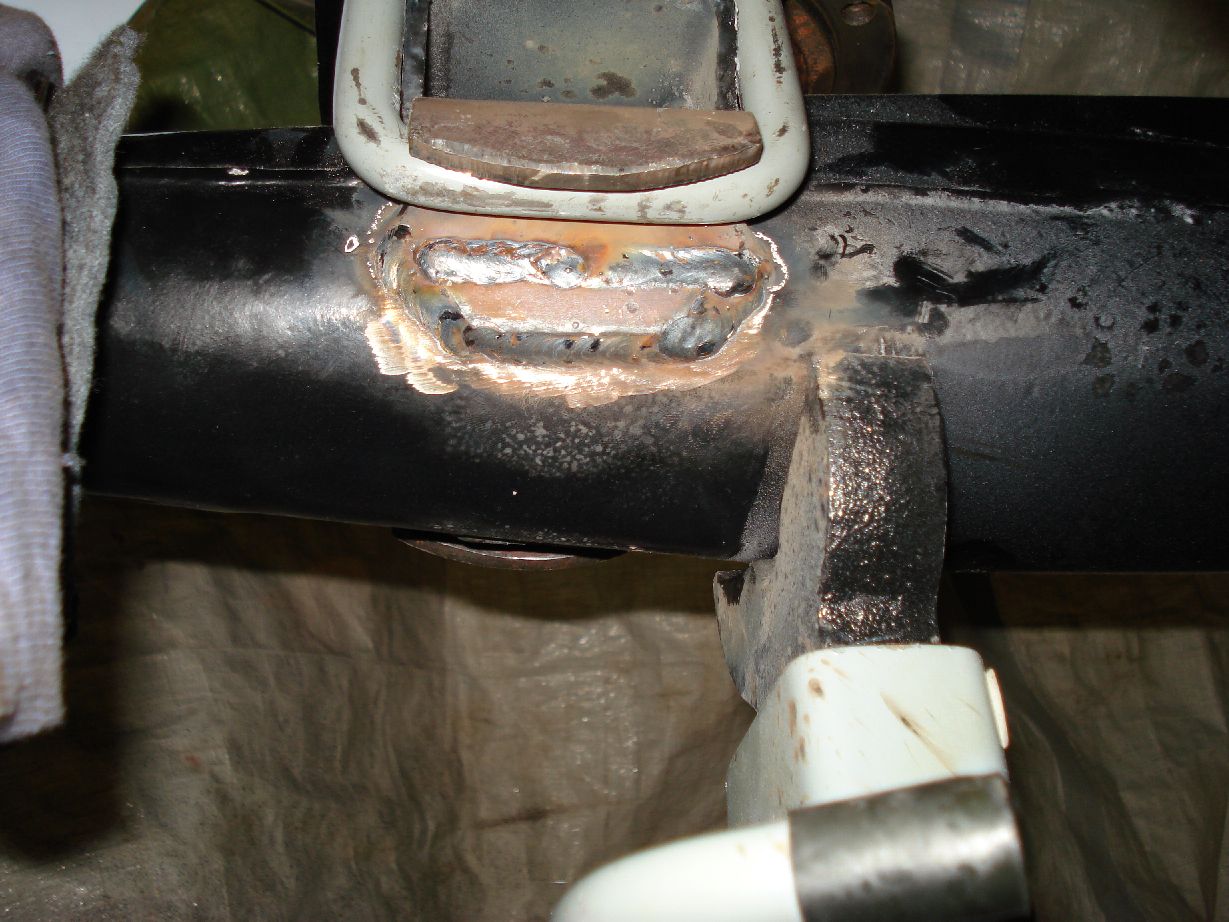
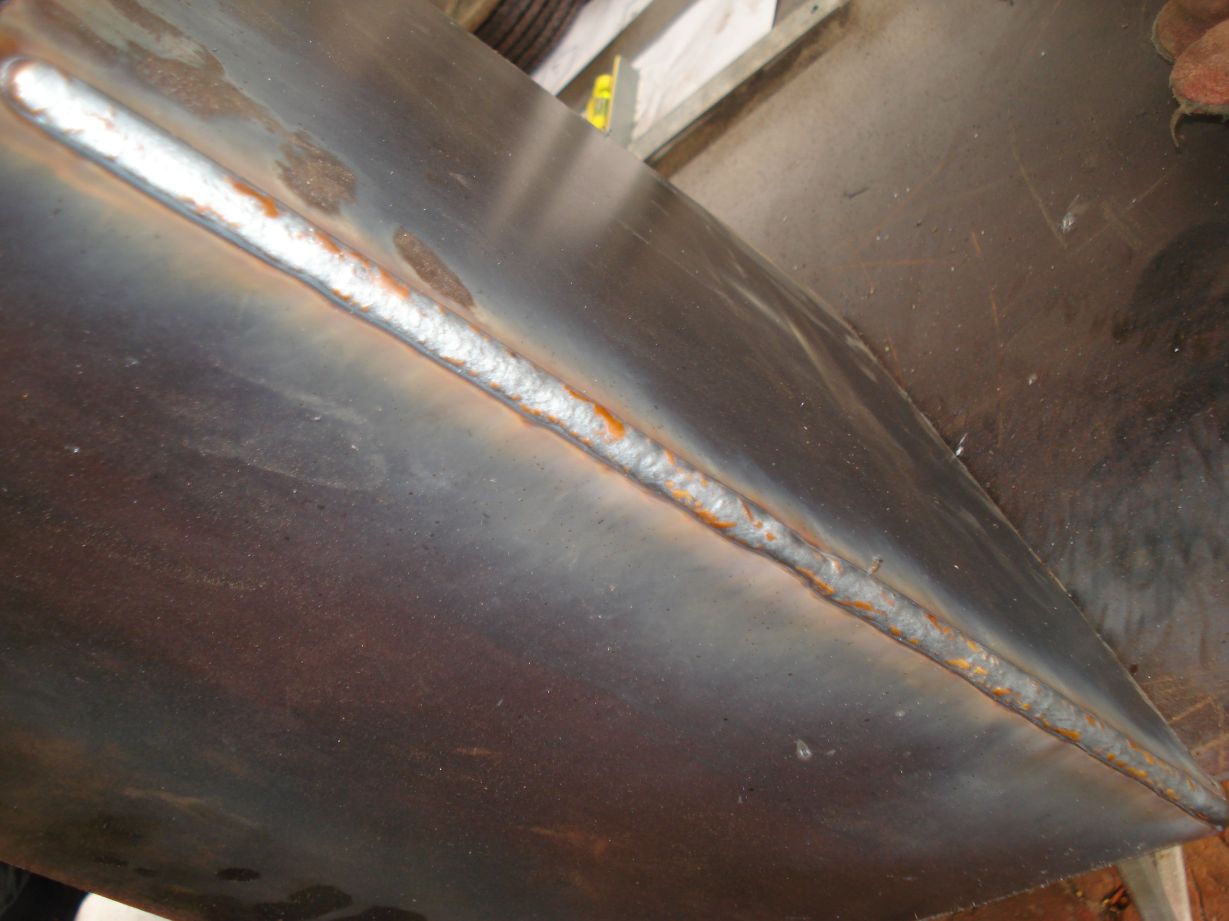
Fully welded with 3 run fillets and final HOT run over the top, inside and out.
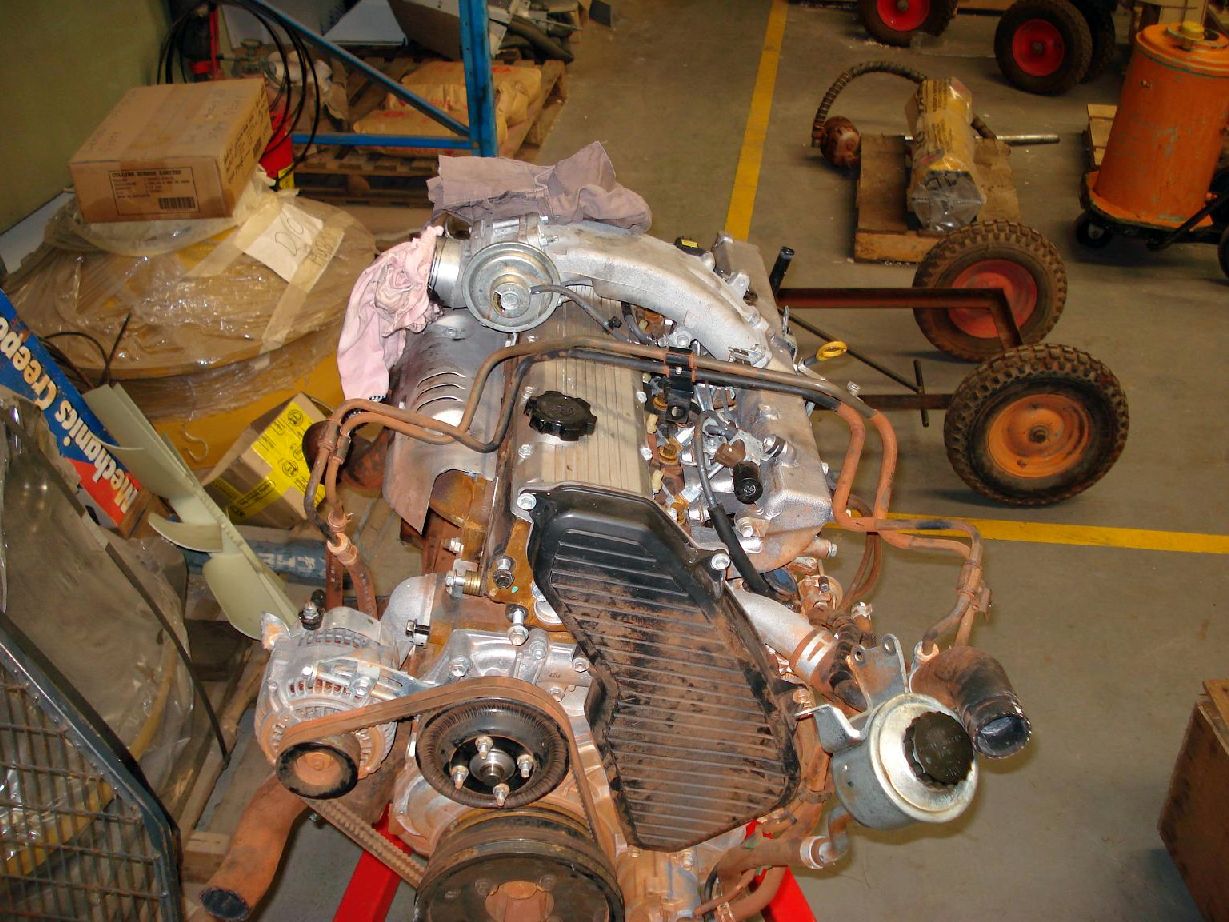
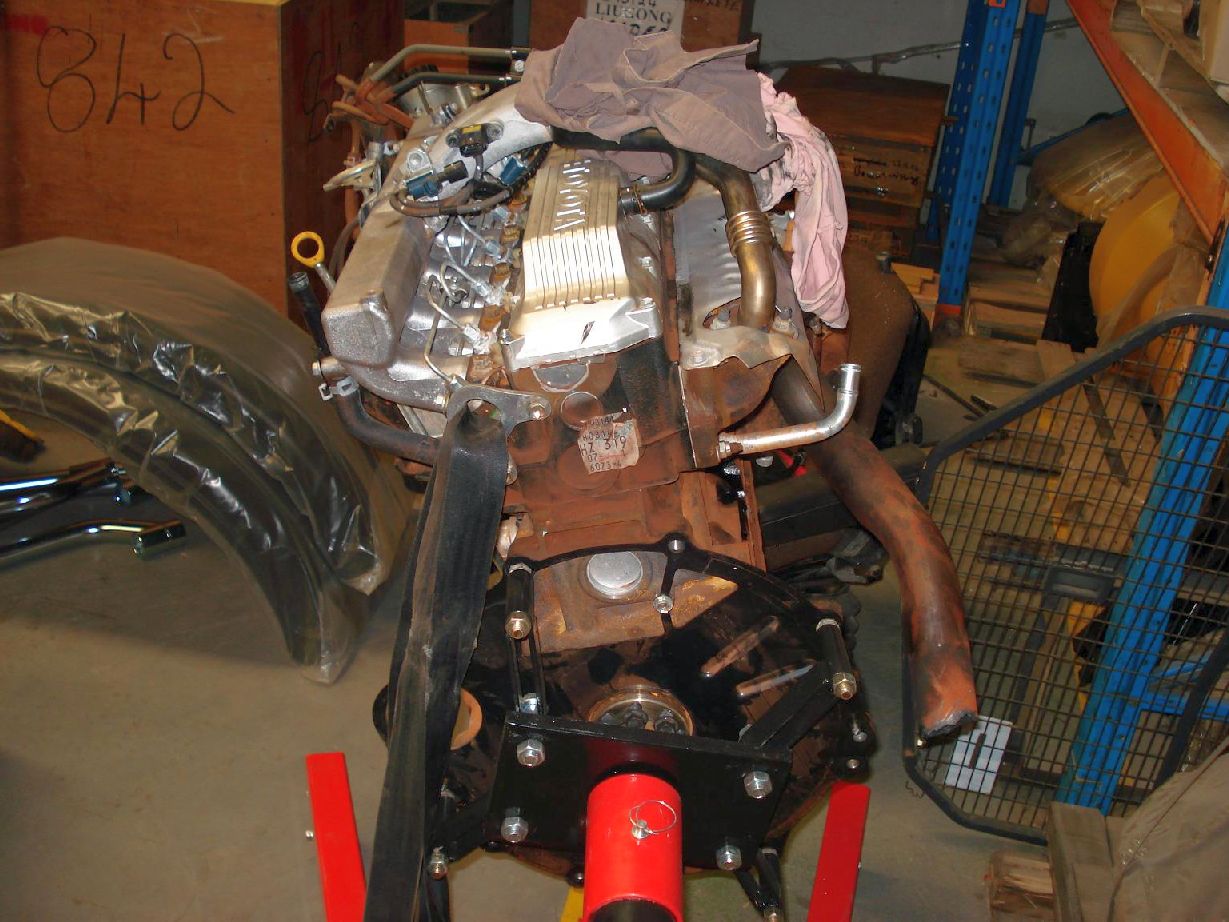
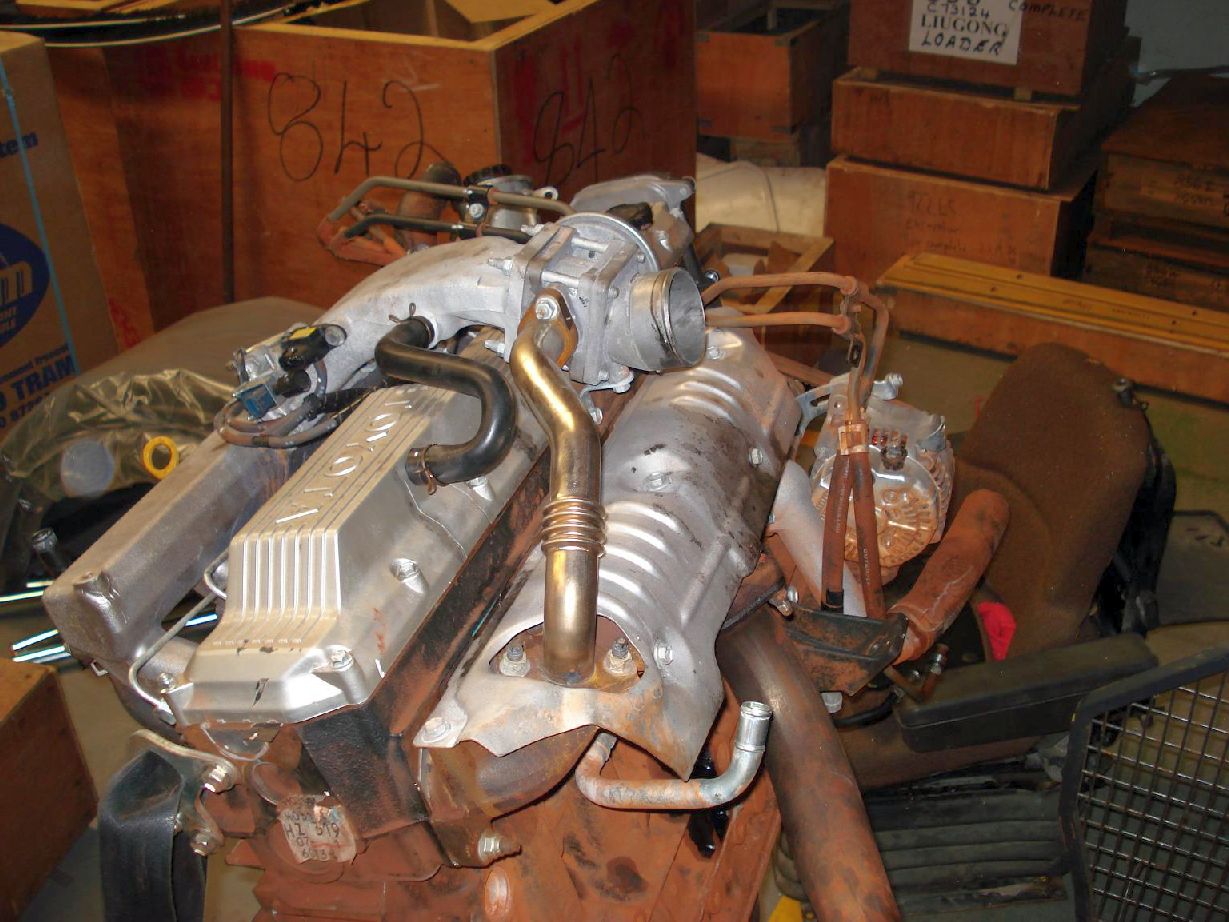
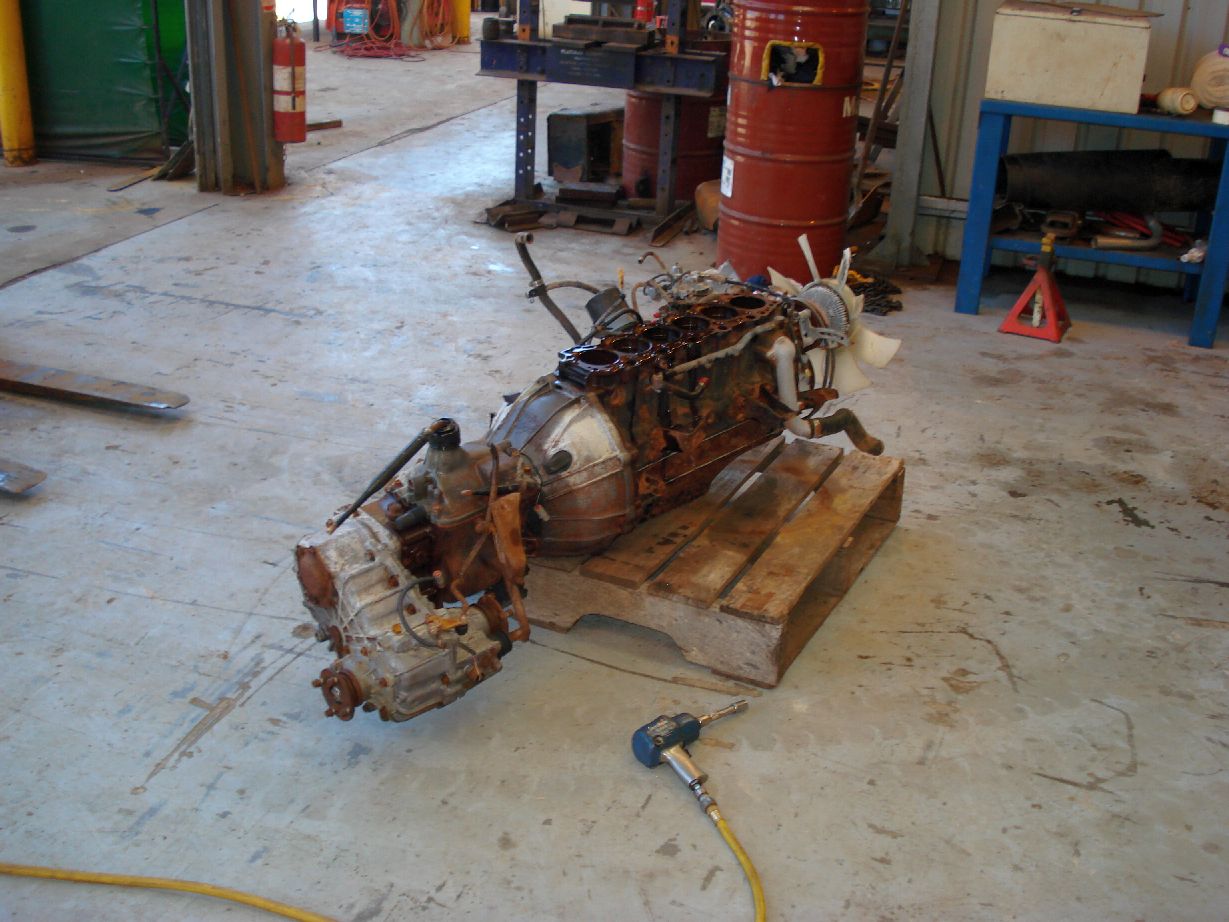
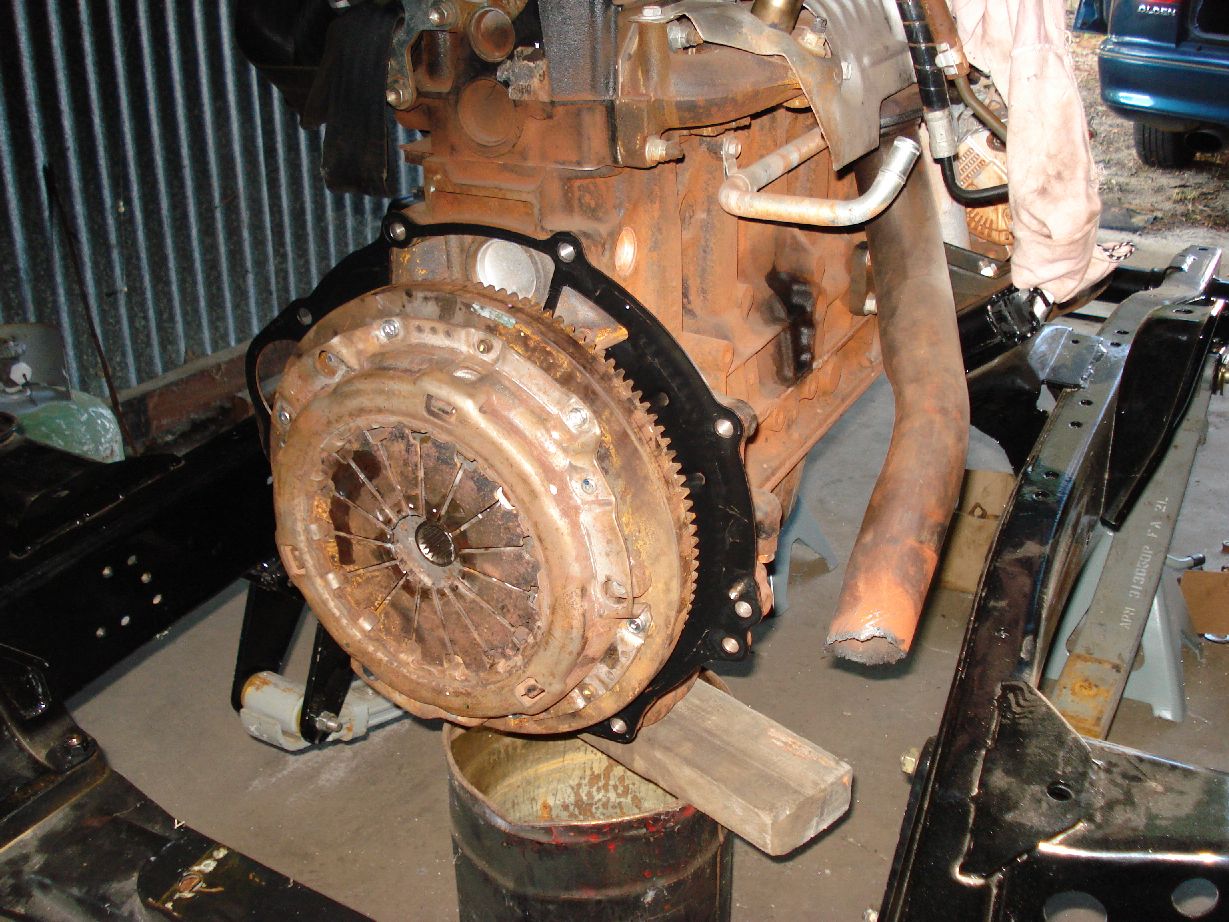
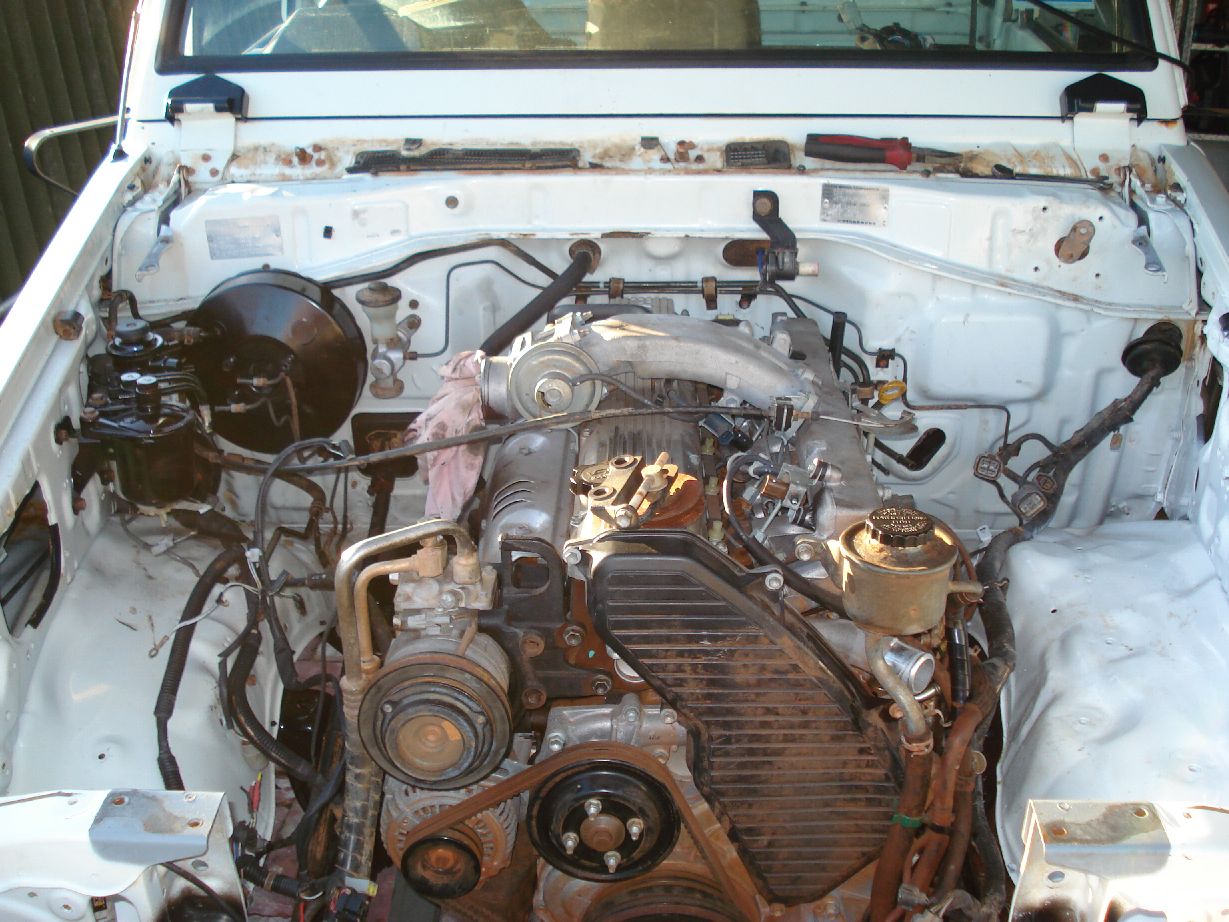
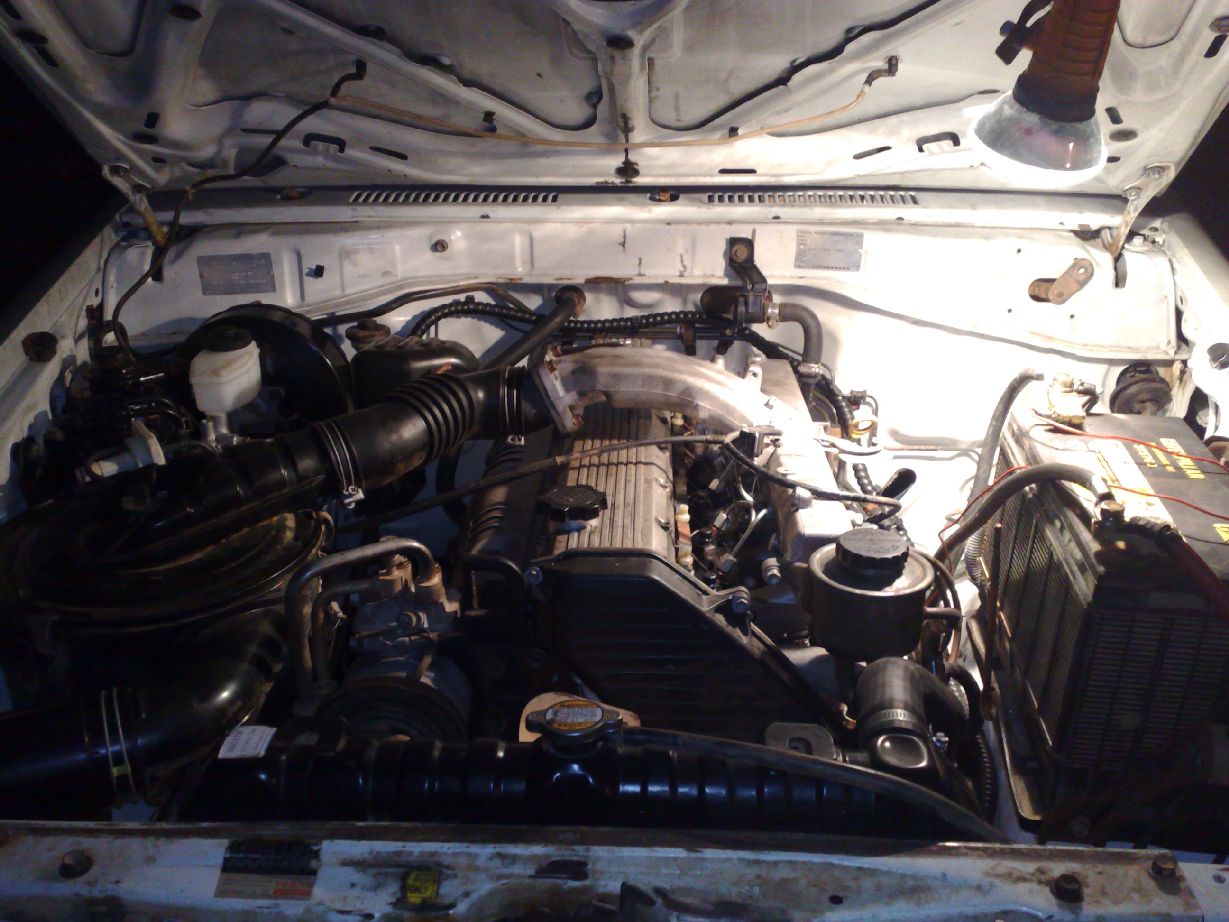
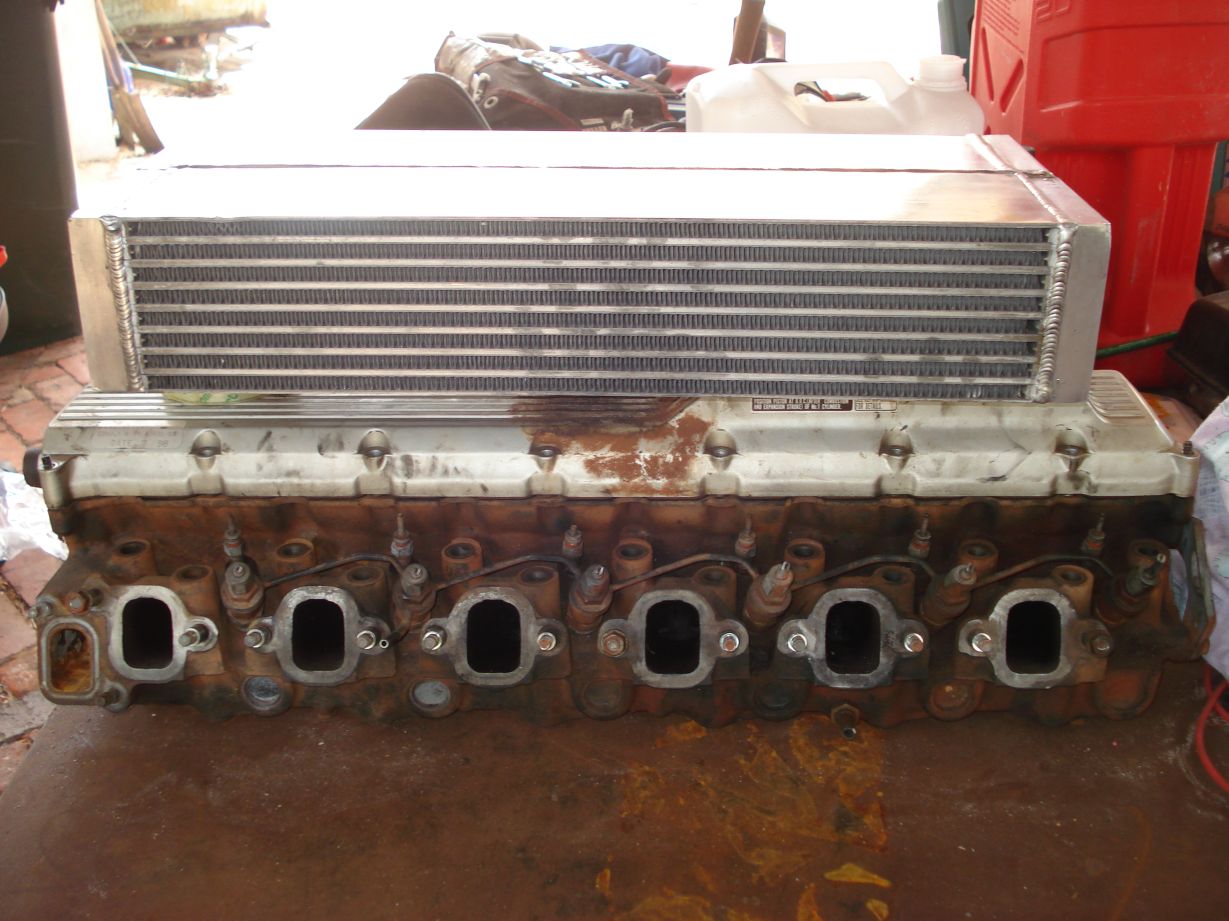
i have a new engine for her too, its a 2007 model 1HZ out of a 105 series with only 5000kms on it, the car rolled and crushed all ‘A’ and ‘B’ pillars so was written off..
I picked it up for a cool $5k Aus


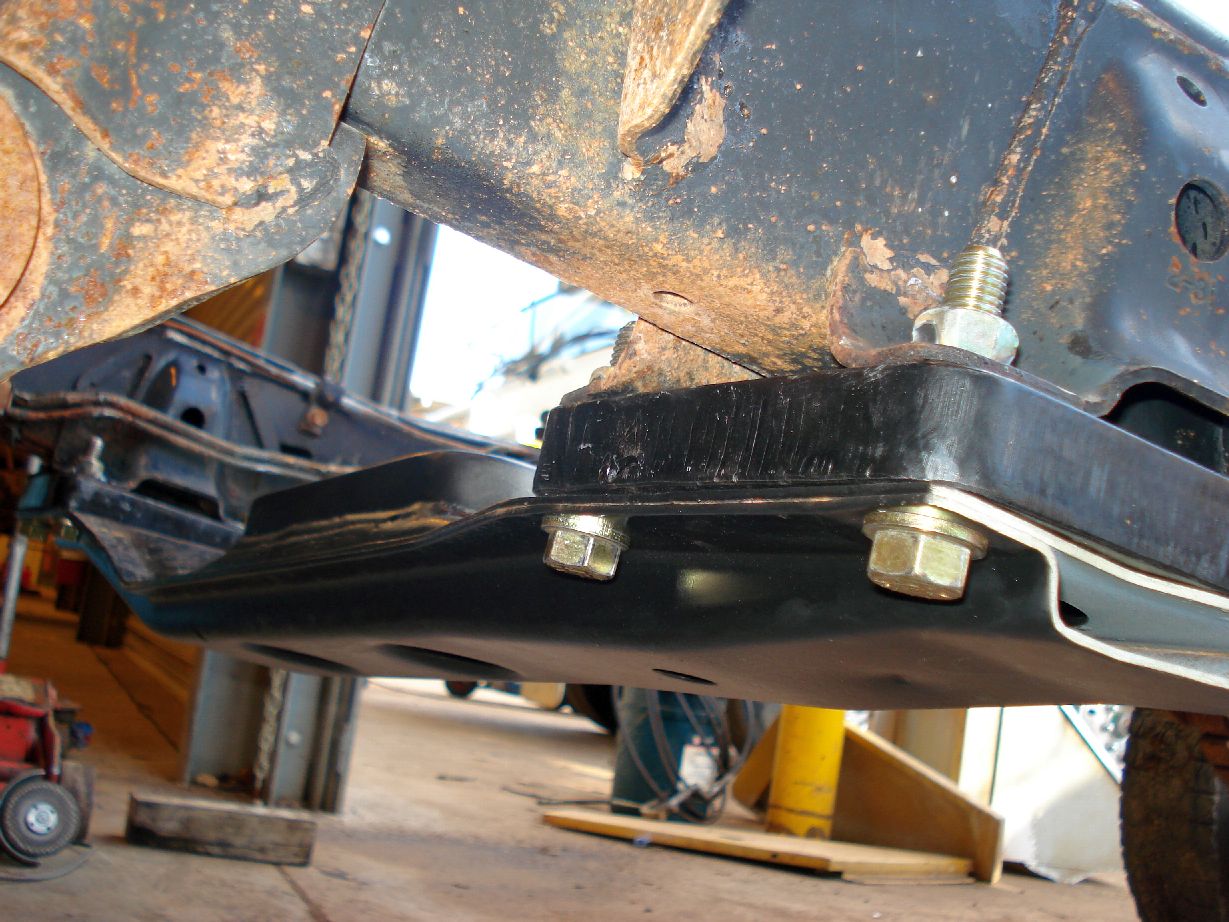
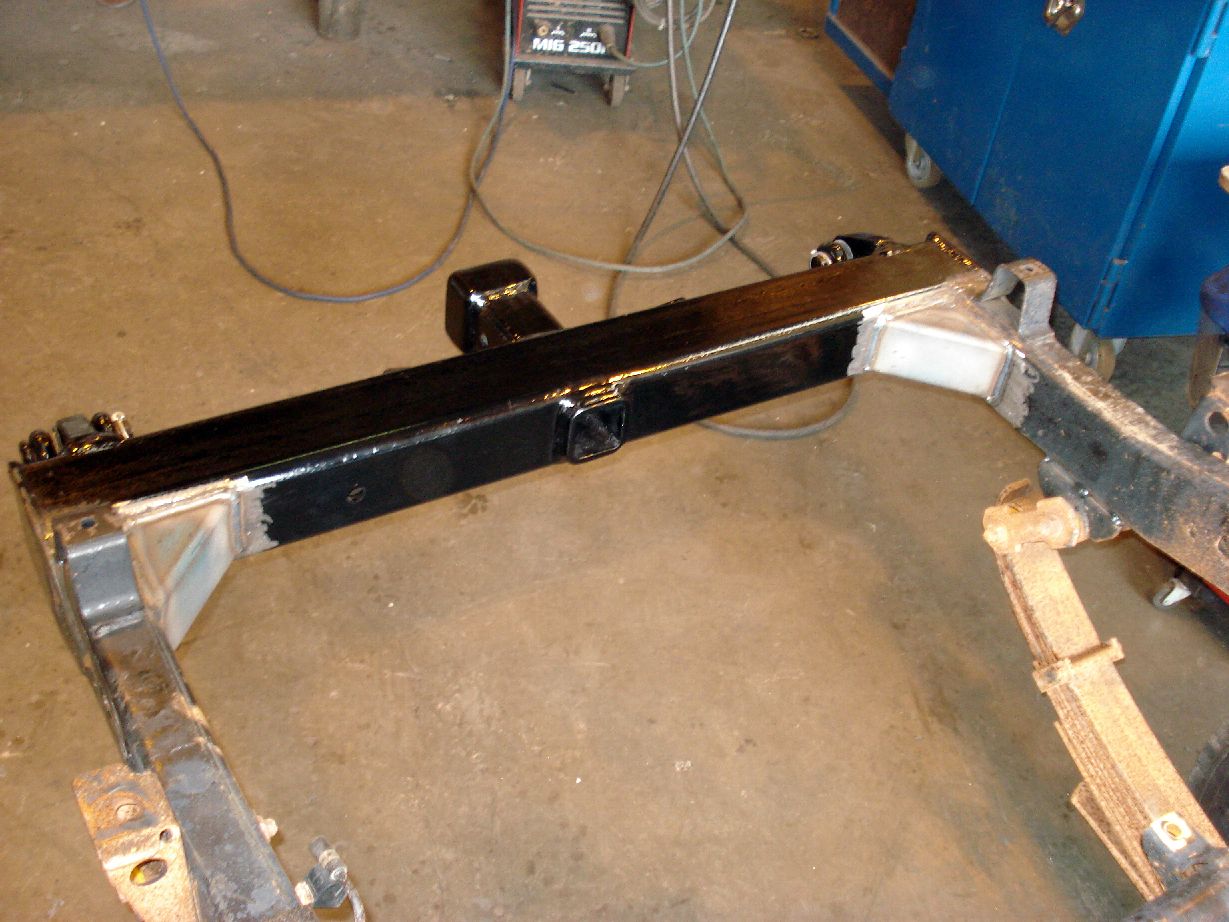
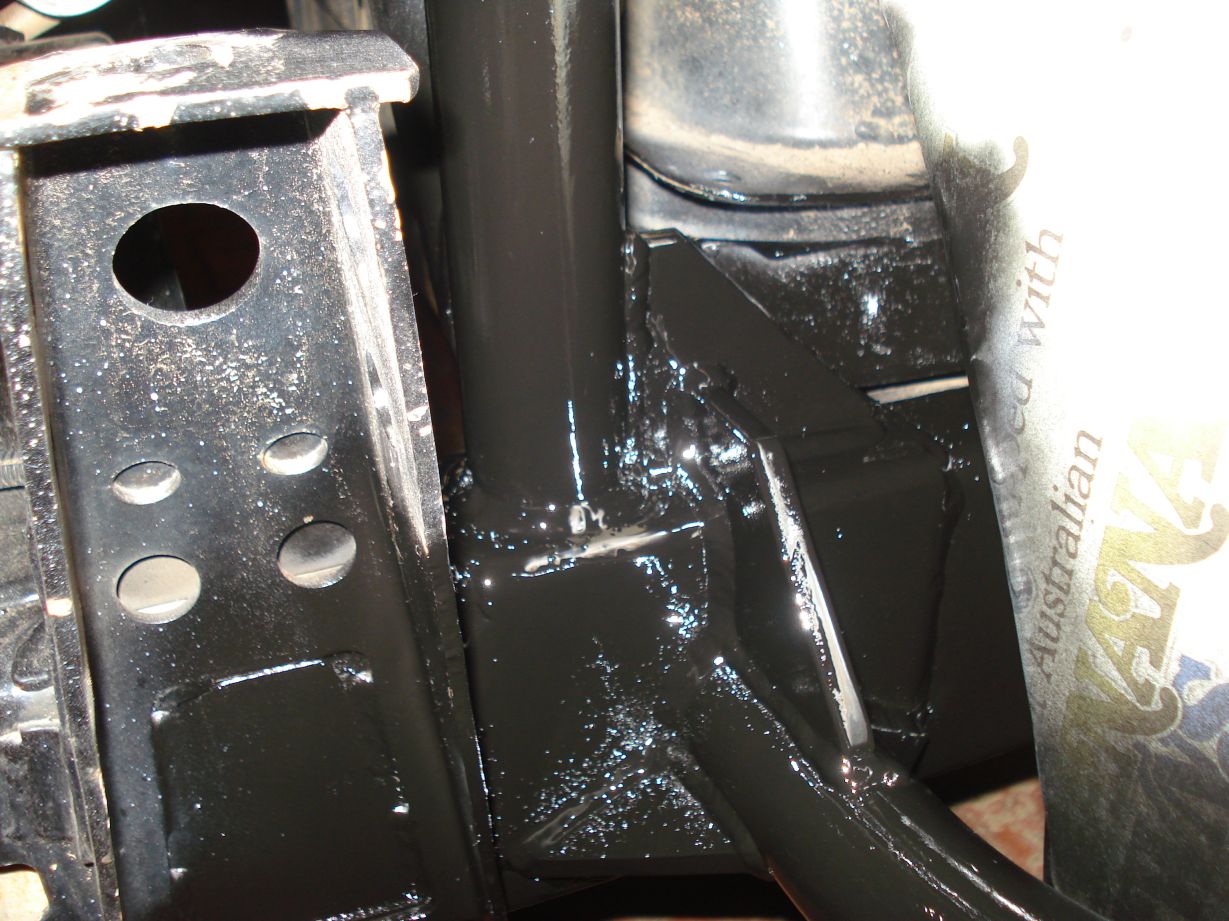
Update:
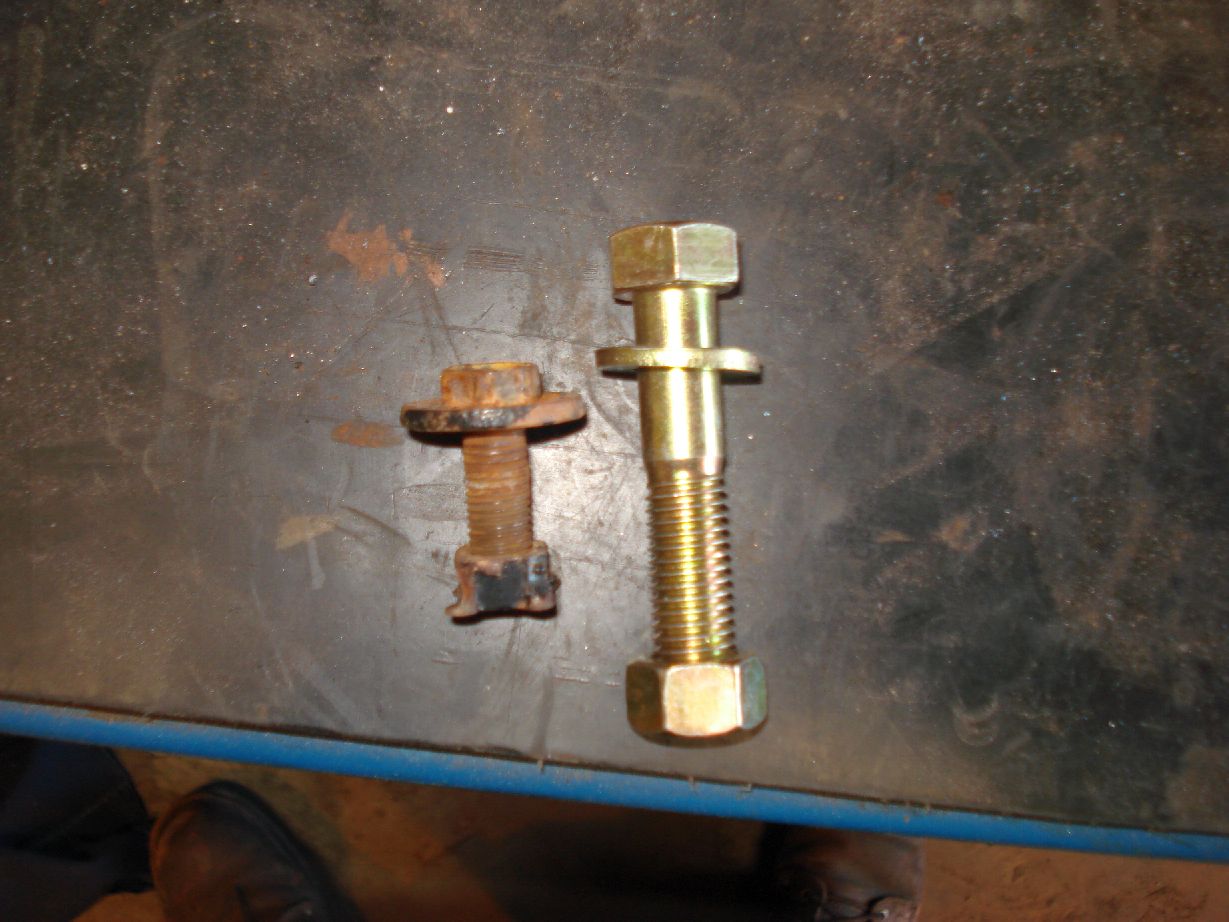
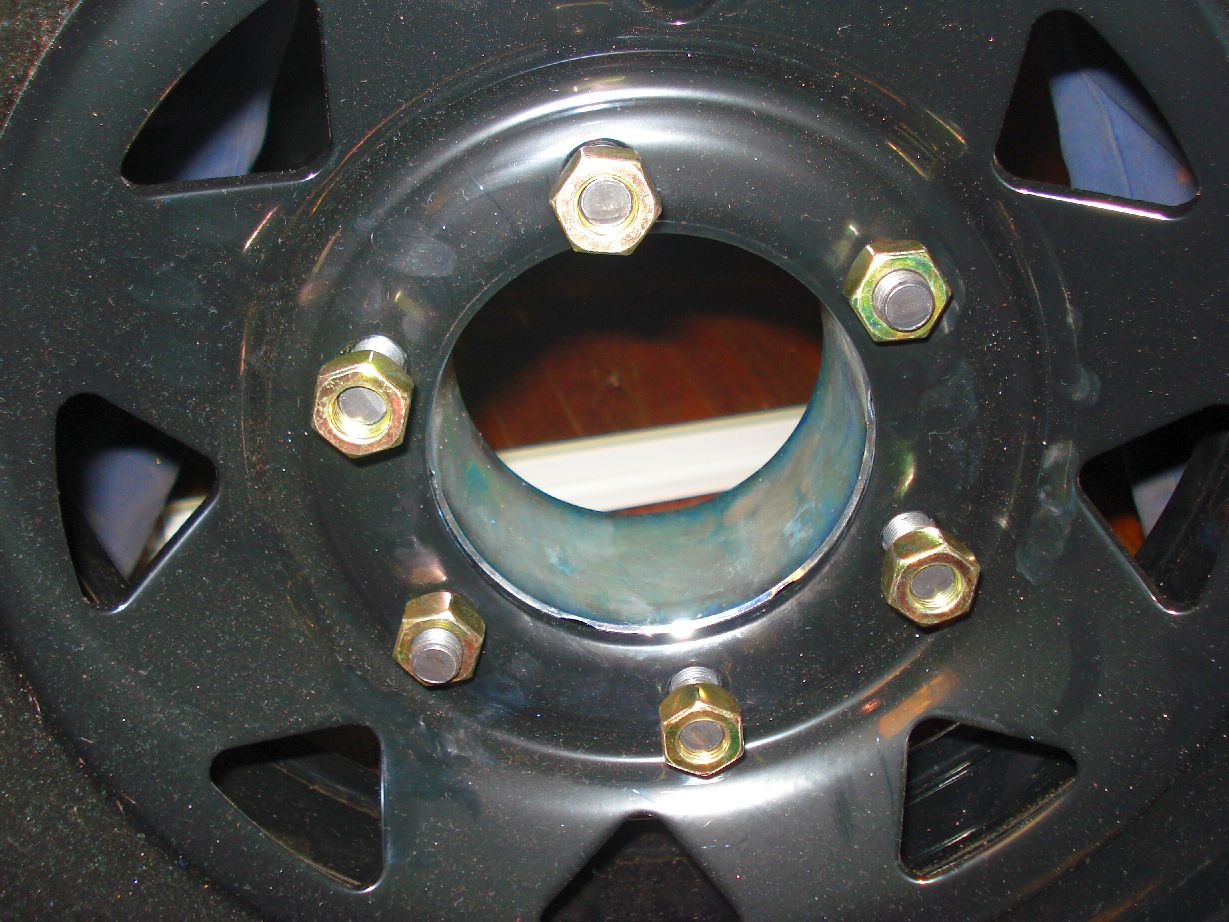
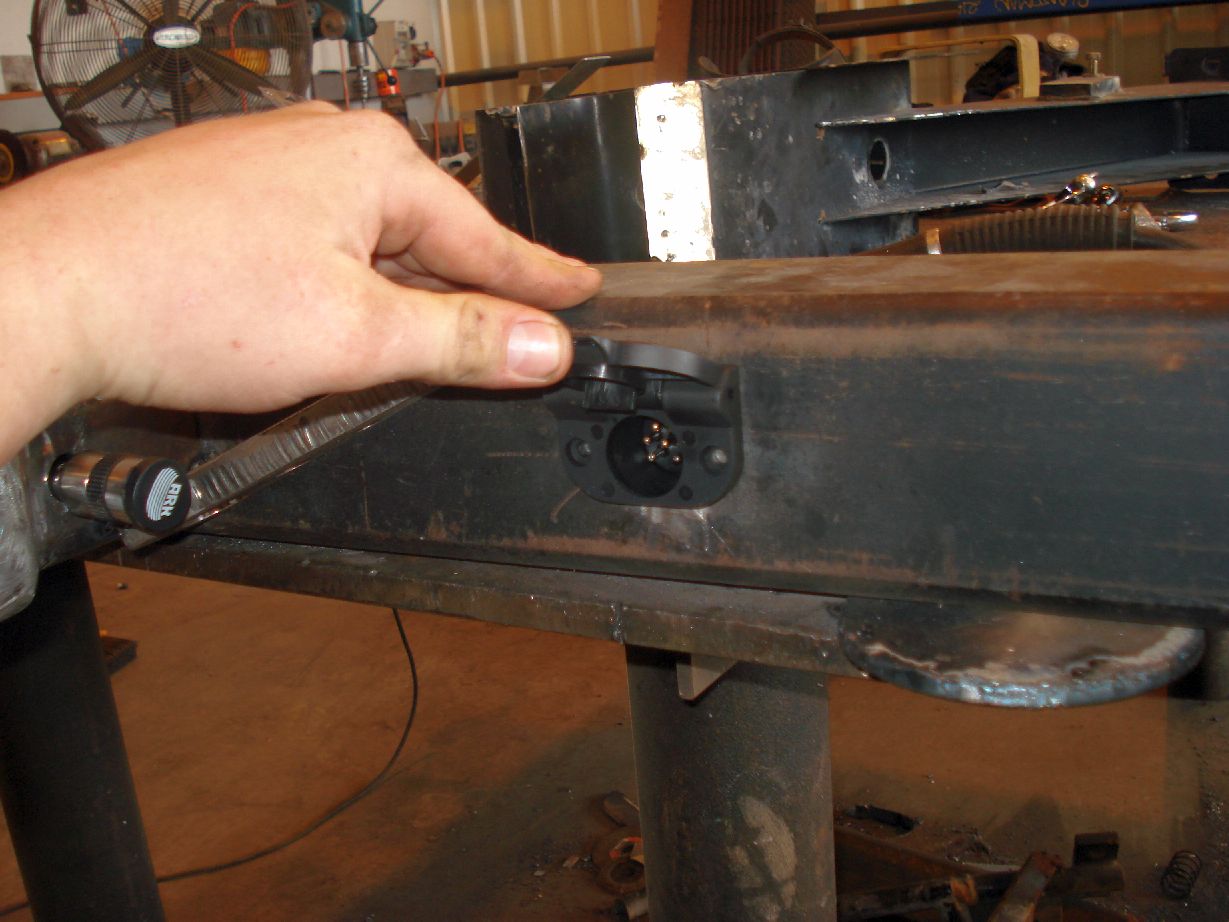
The fitting of the modified cross member, spacers and the upgrading of the bolts.
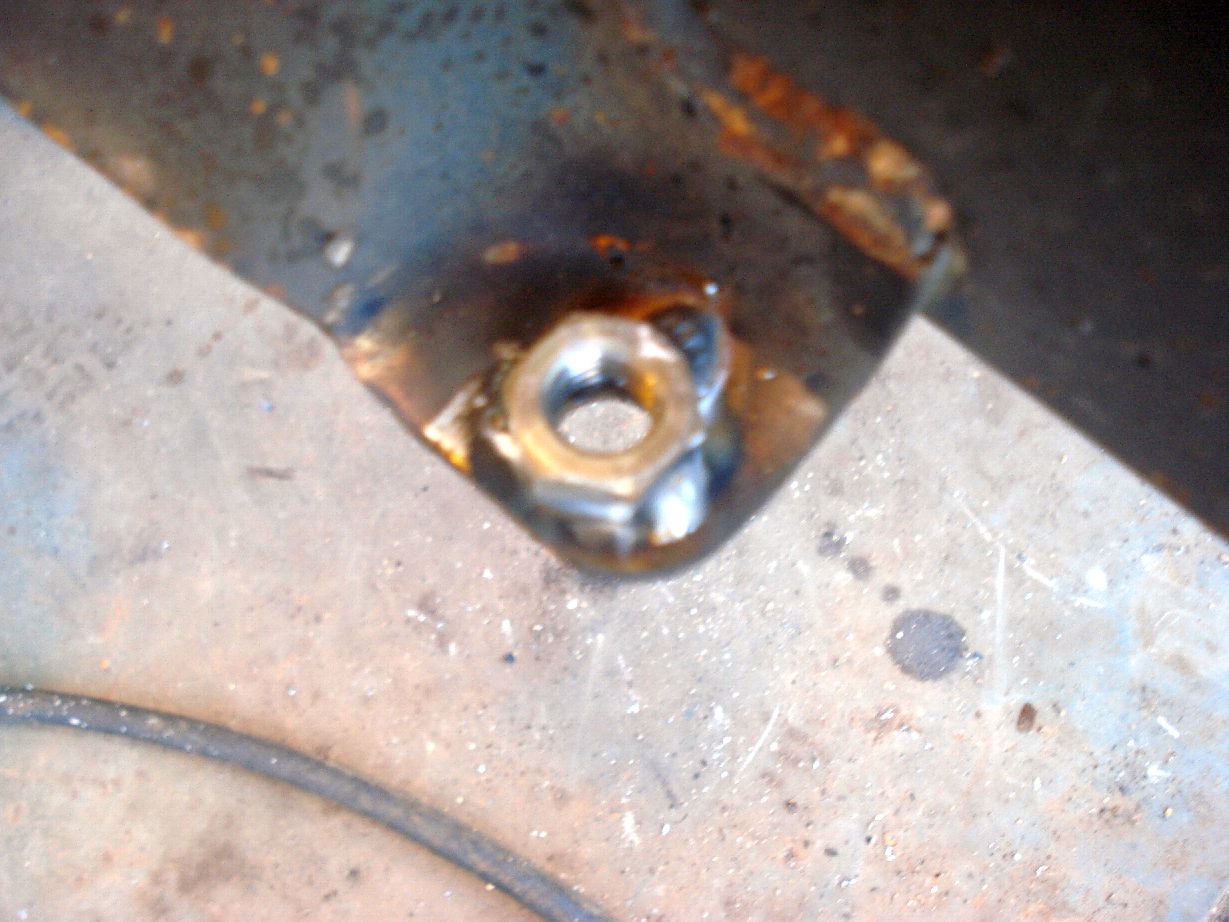
Removing old 8mm metric nuts with a cold chisel and a gimpy
New for old
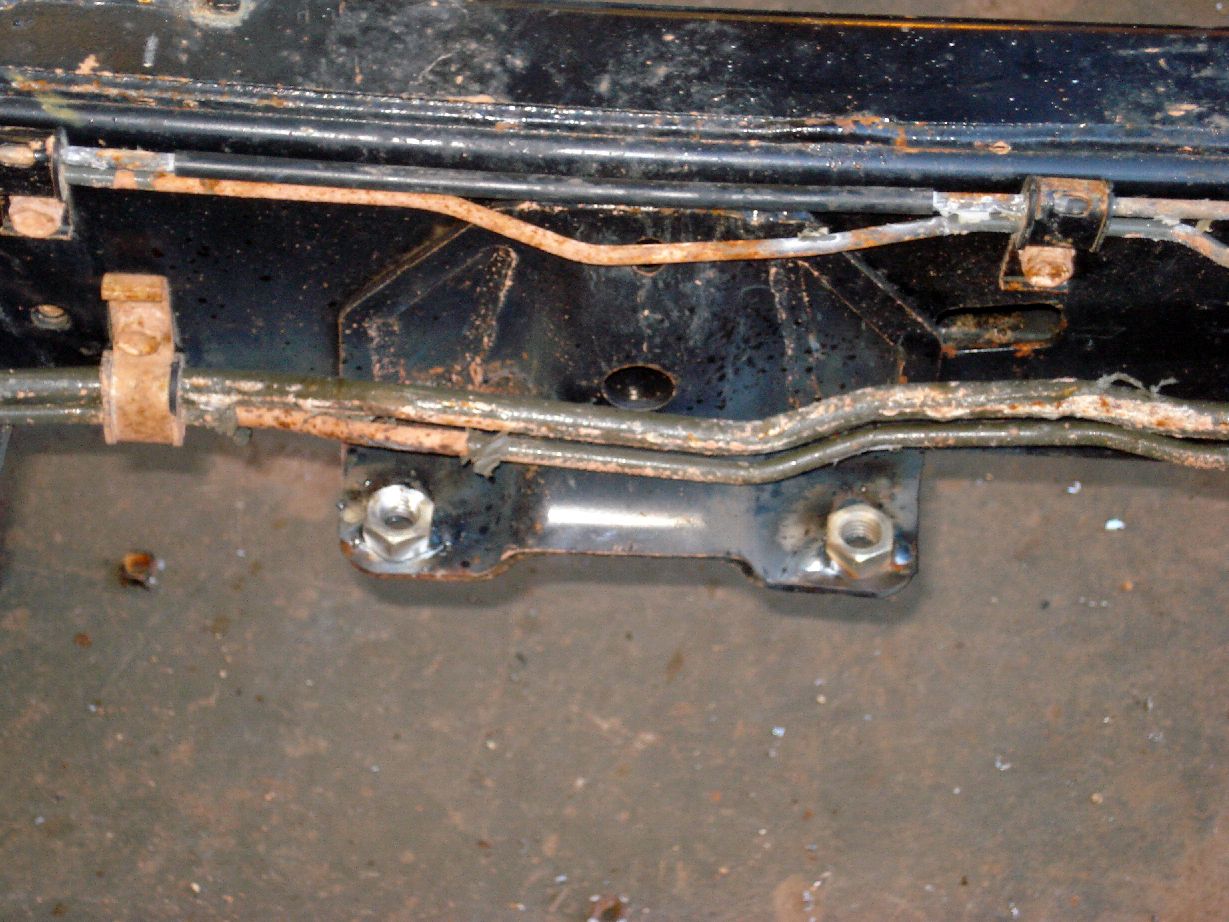
The end product
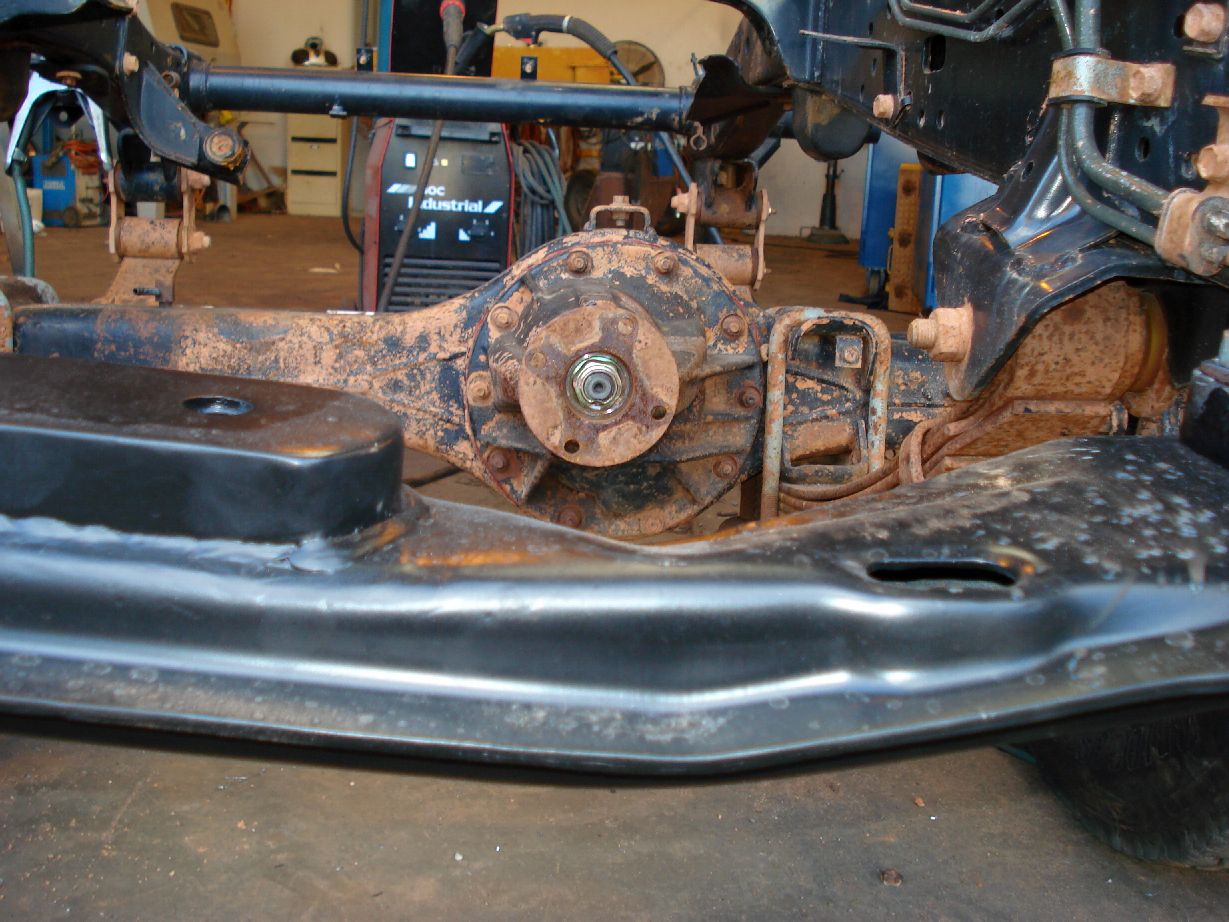
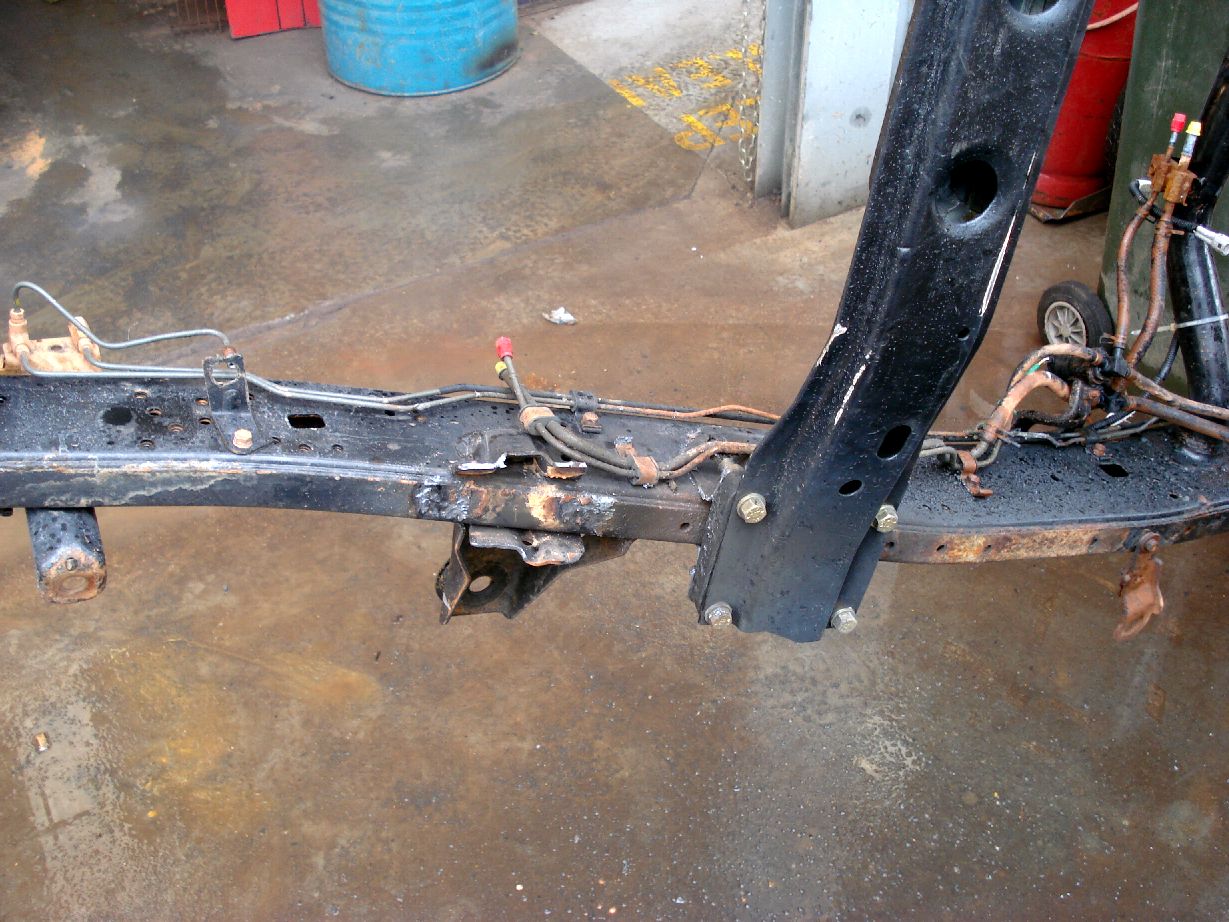
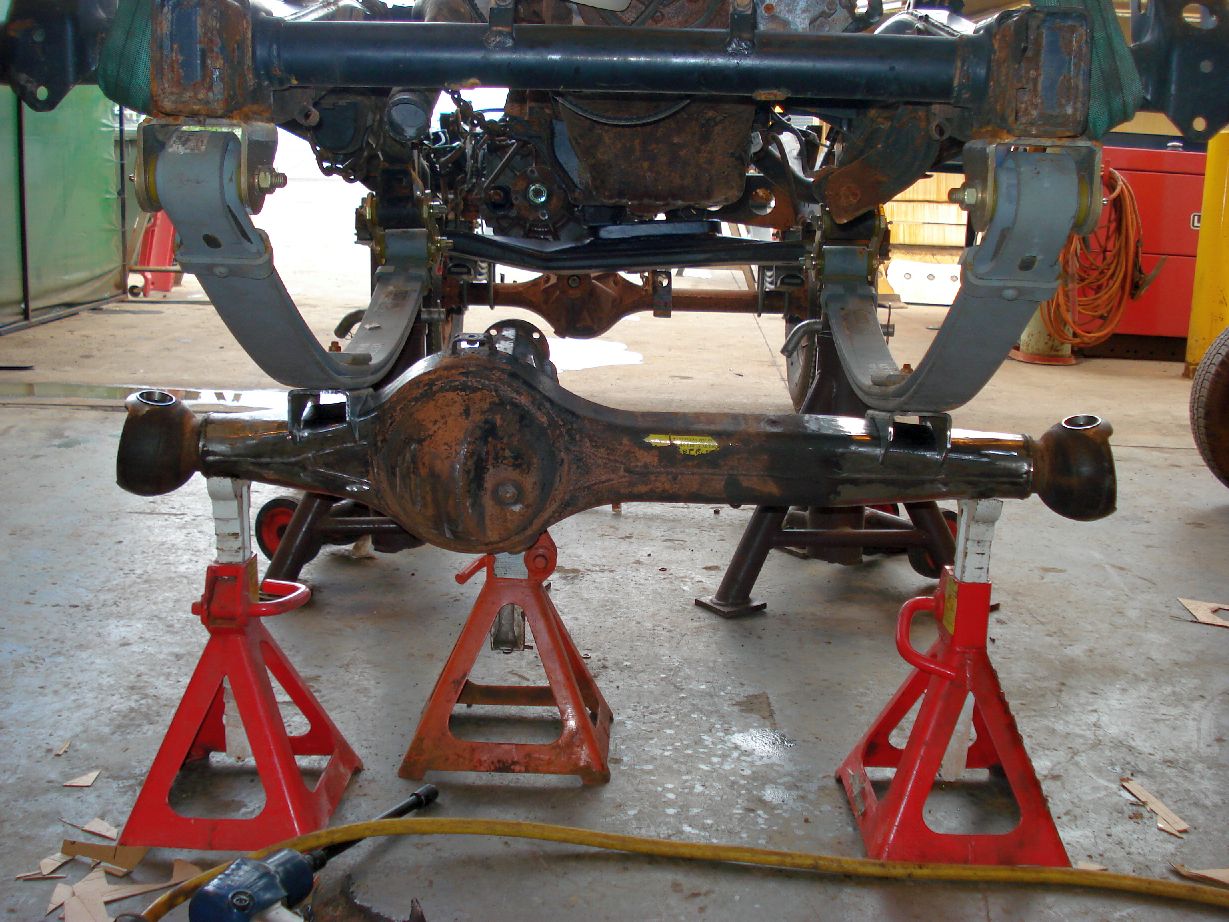
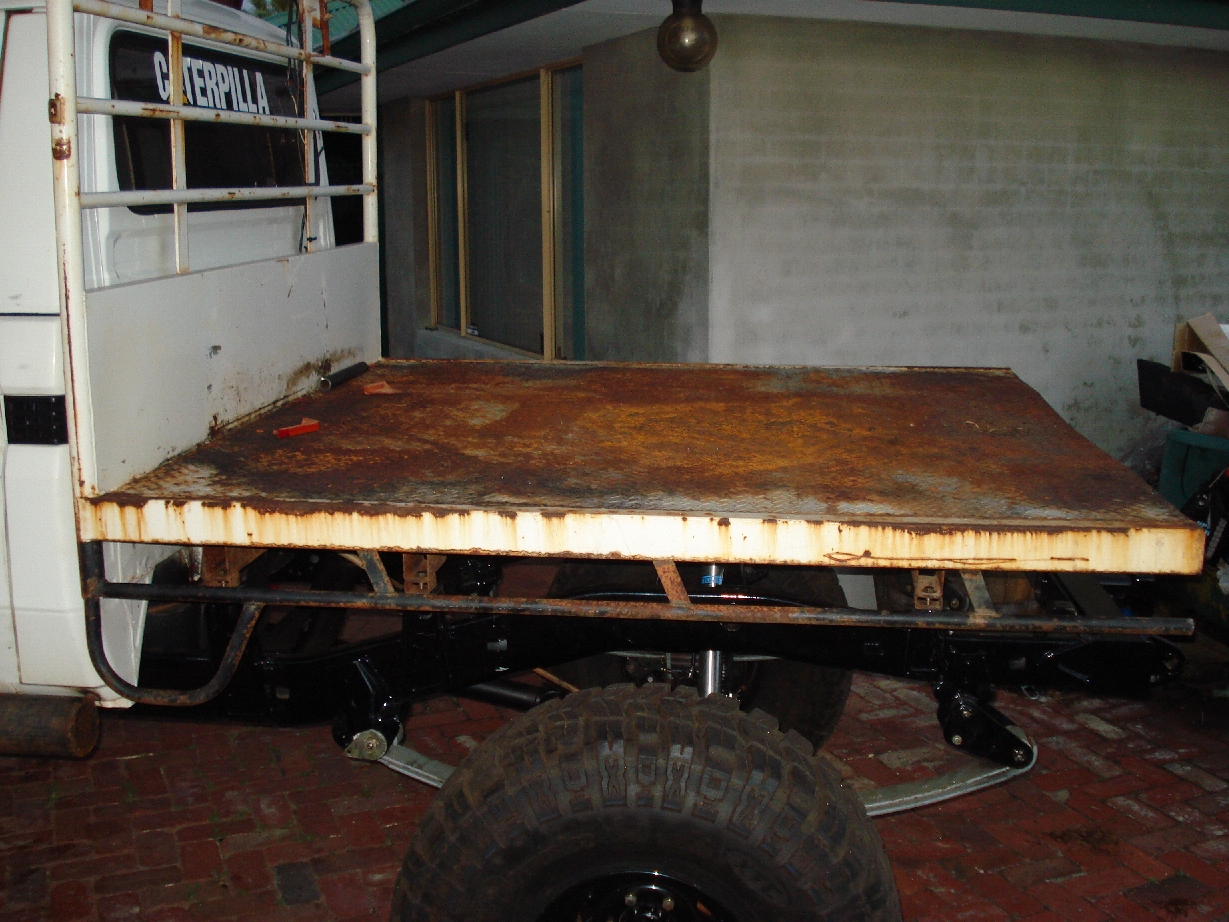
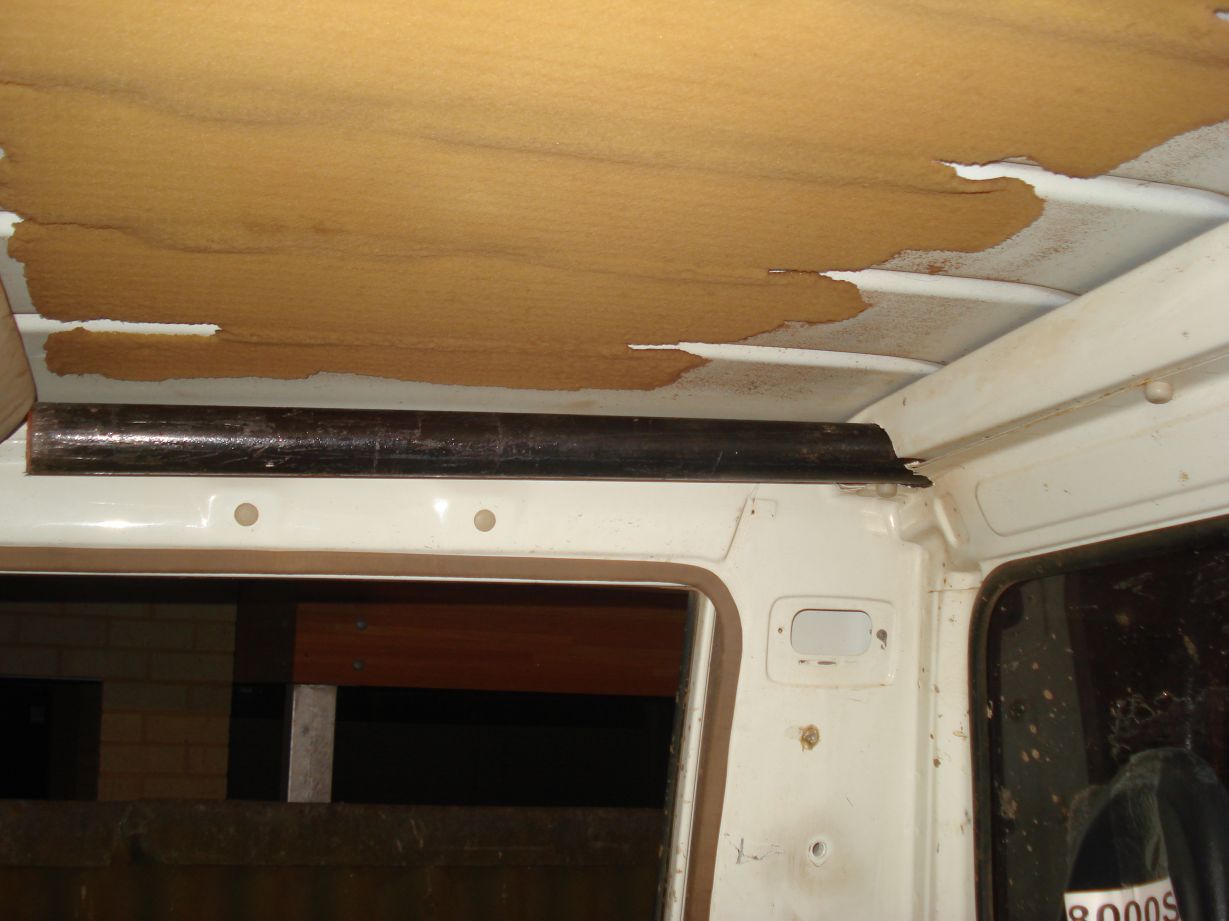
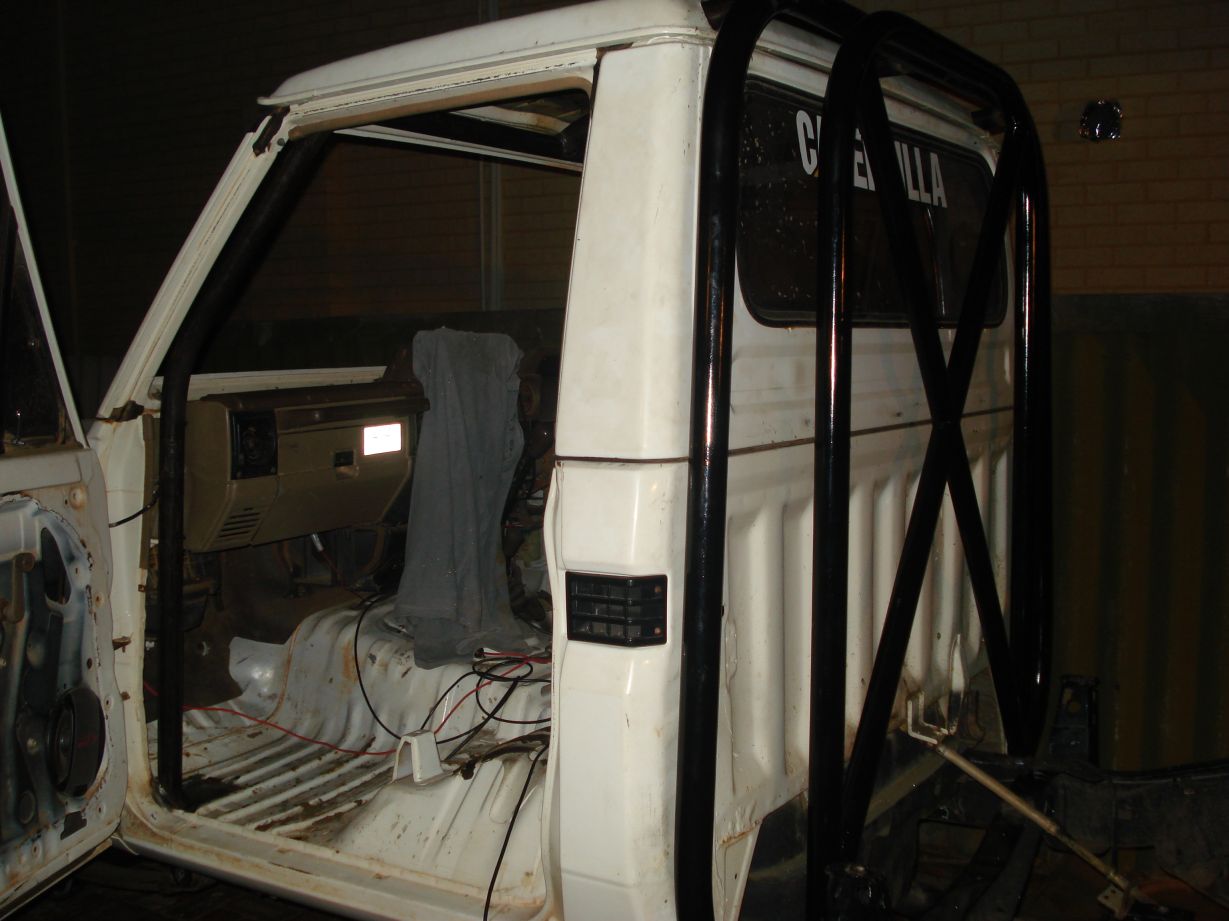
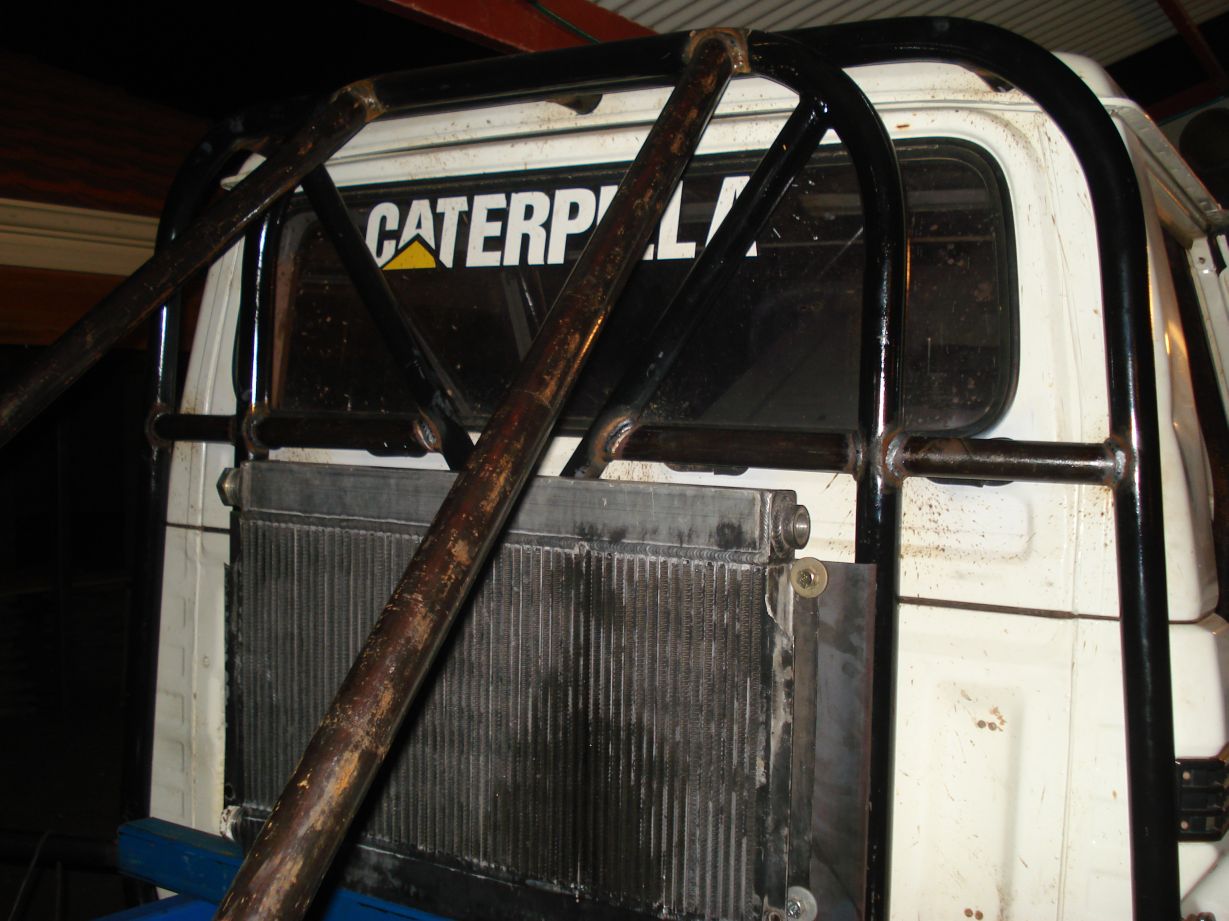
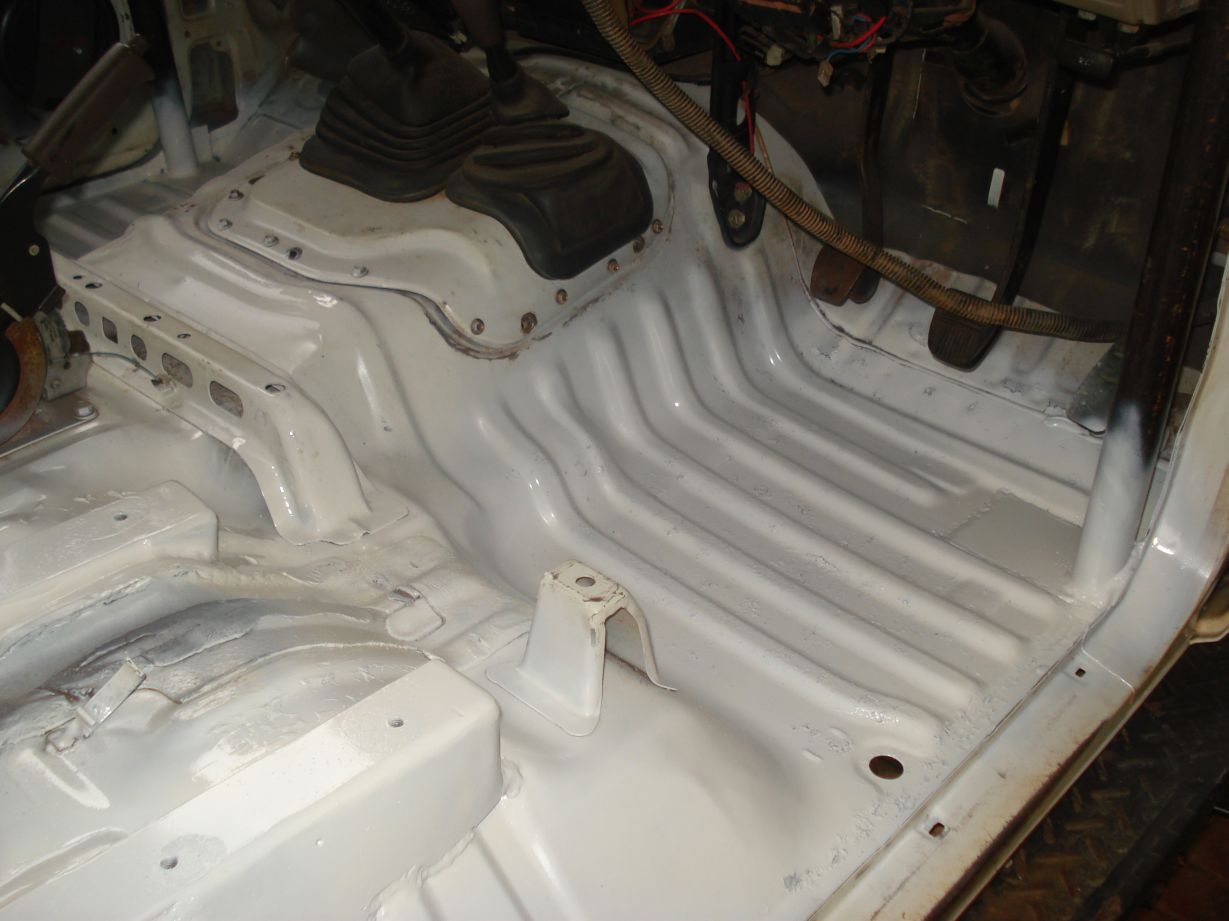
Surprisingly the body is in excellent condition (only 1 minor dent), its more or less complete and the interior i have since cleaned.
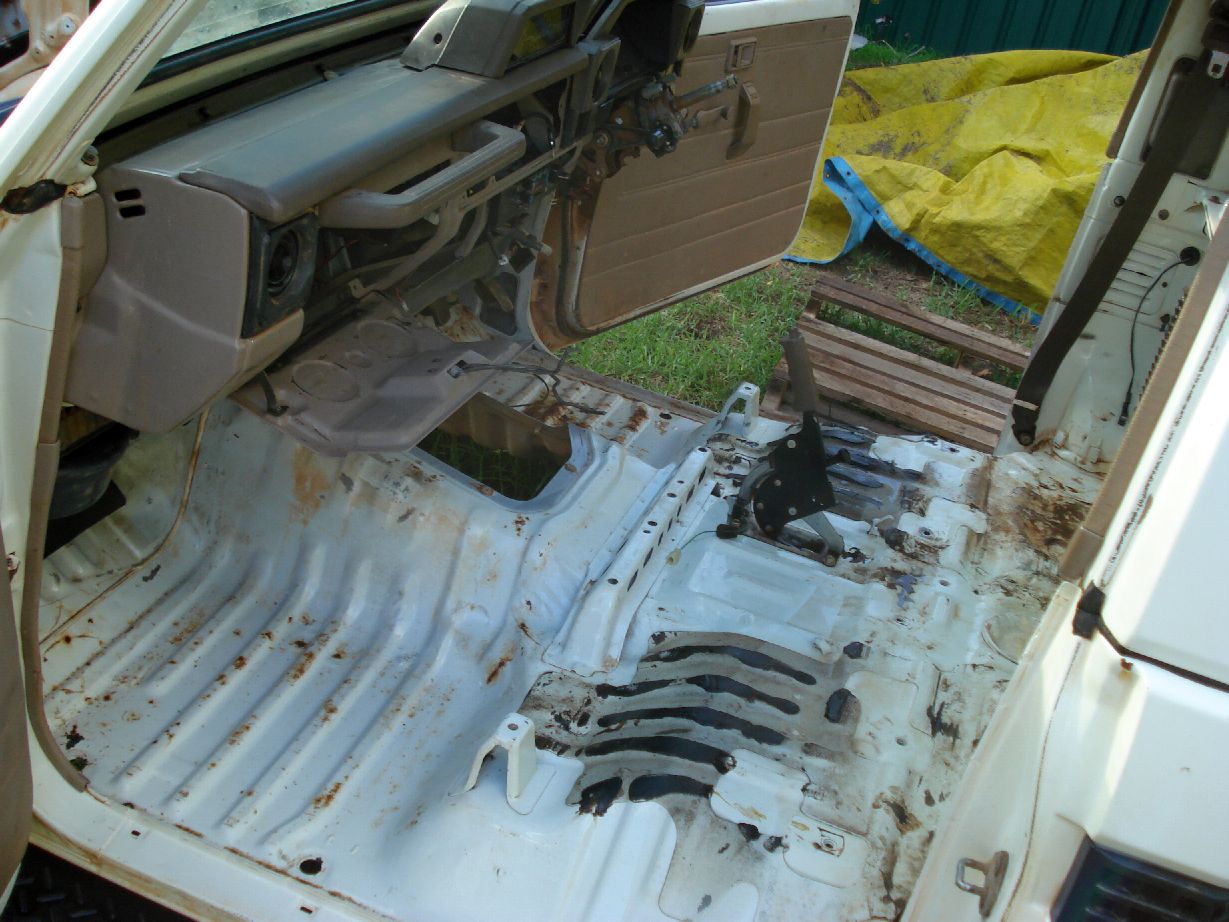
All the rust you see on the chassis is thankfully only surface rust, this vehicle was a field service truck that used to drive on mine roads that were watered down with water 20 times saltier than the ocean…
The rails were chokkas with mud, but there is no rust evident in the rails themselves so thats another plus
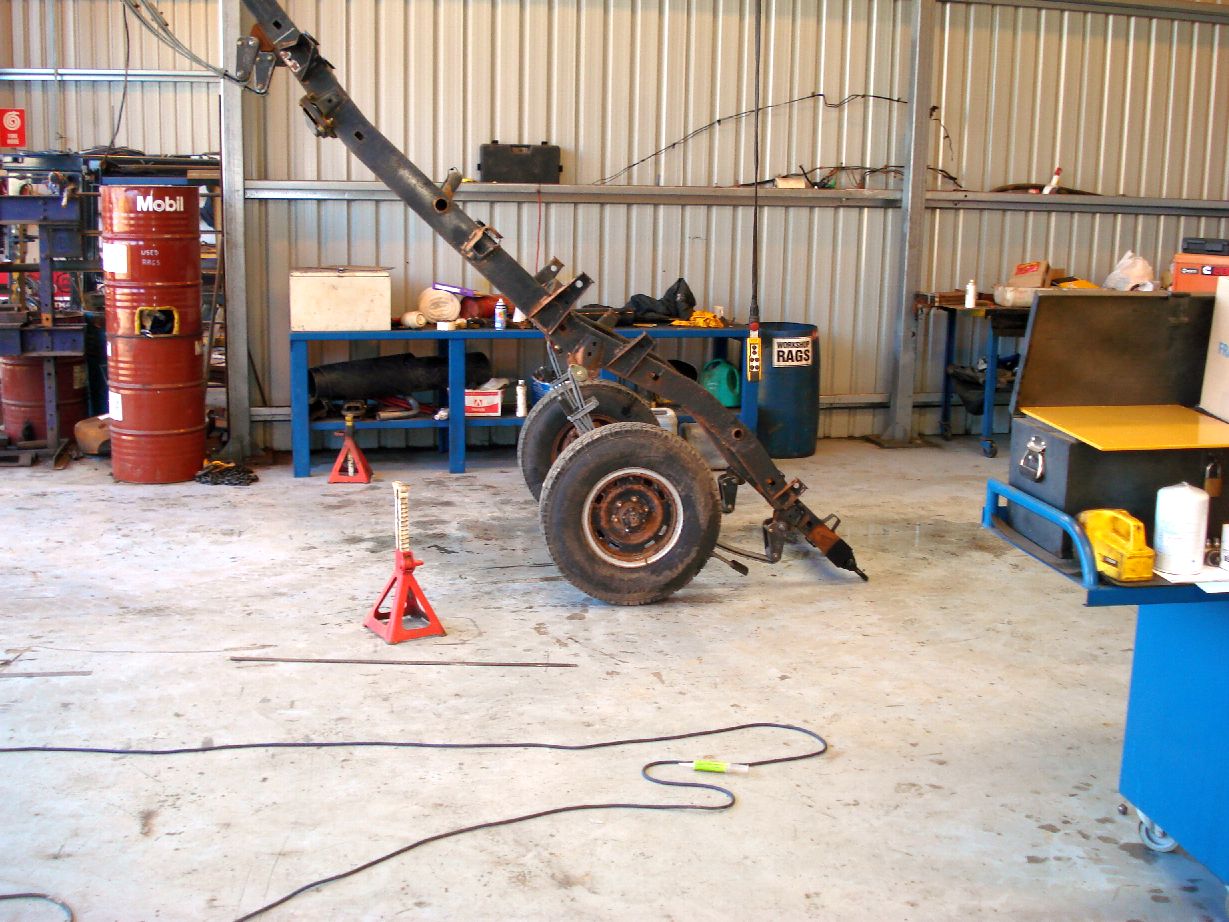
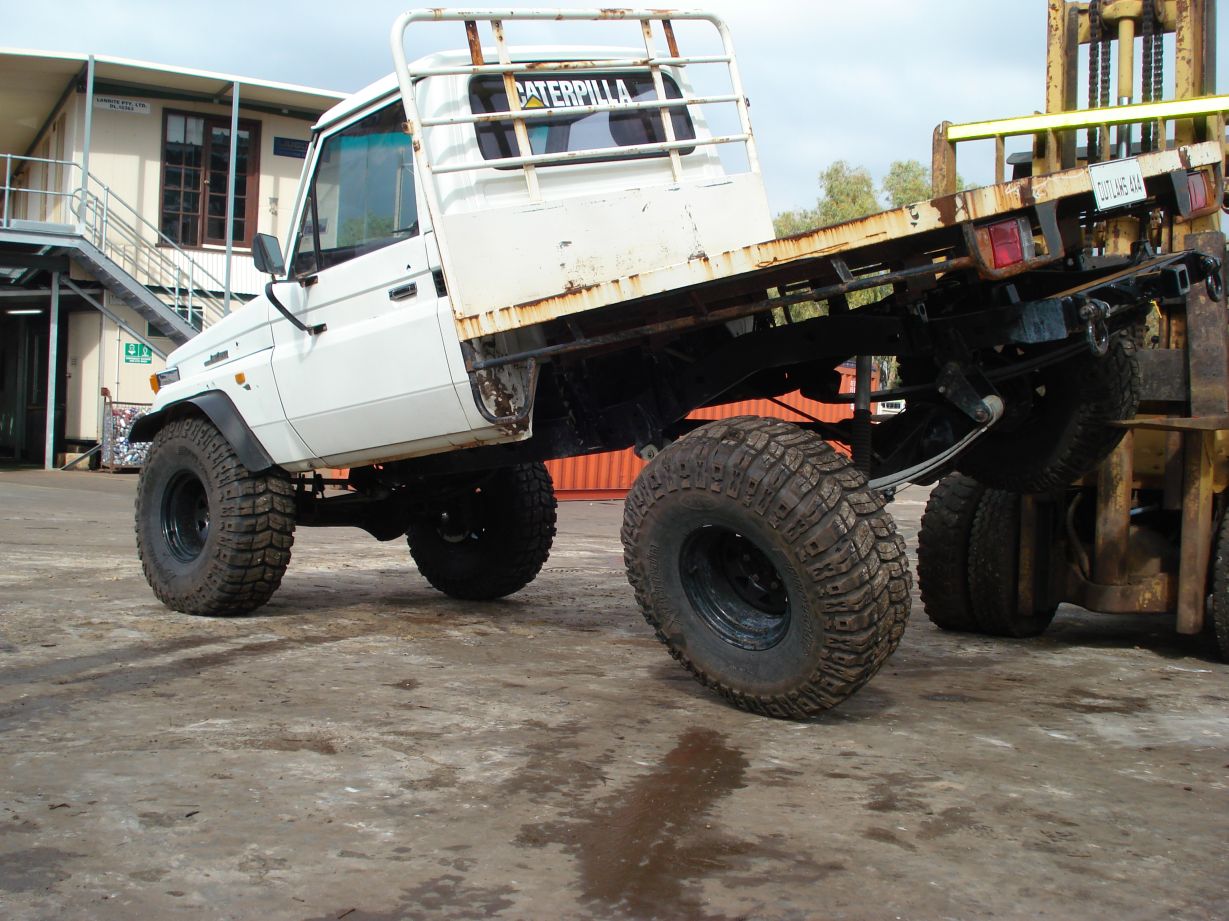
i played around a bit this morning, testing the static flex on a SUA no load…
its laughable!
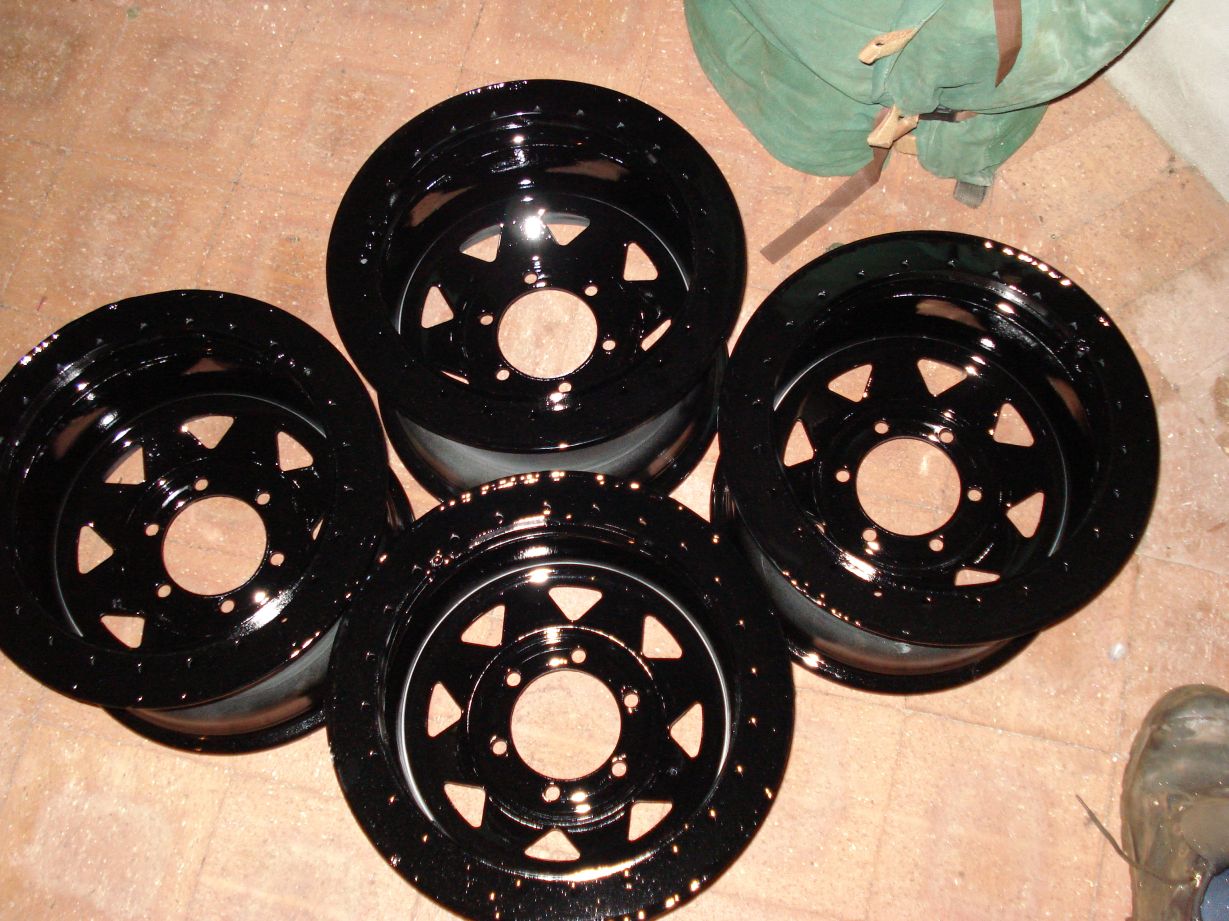
My new acquisitions ")
Flash solid stainless 3″ wheel spacers
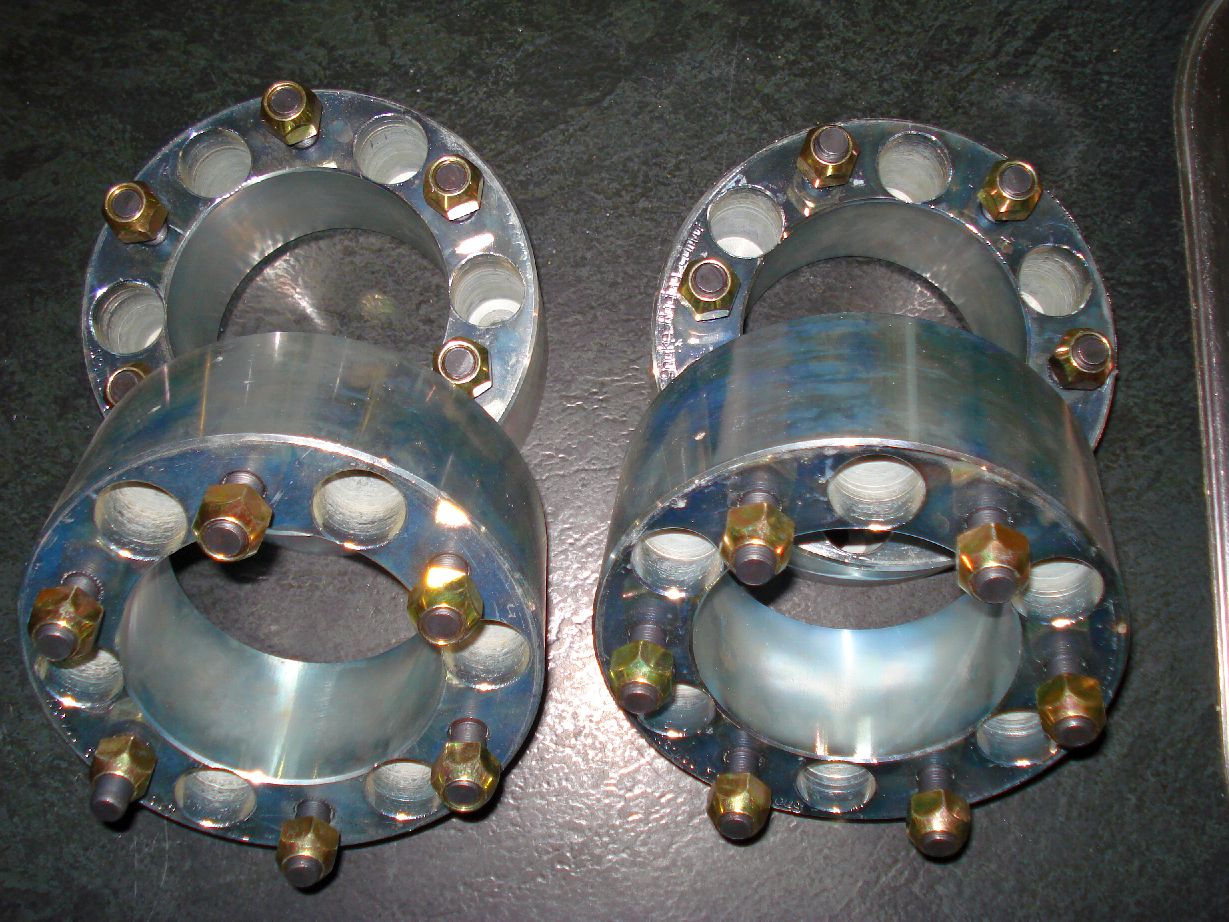
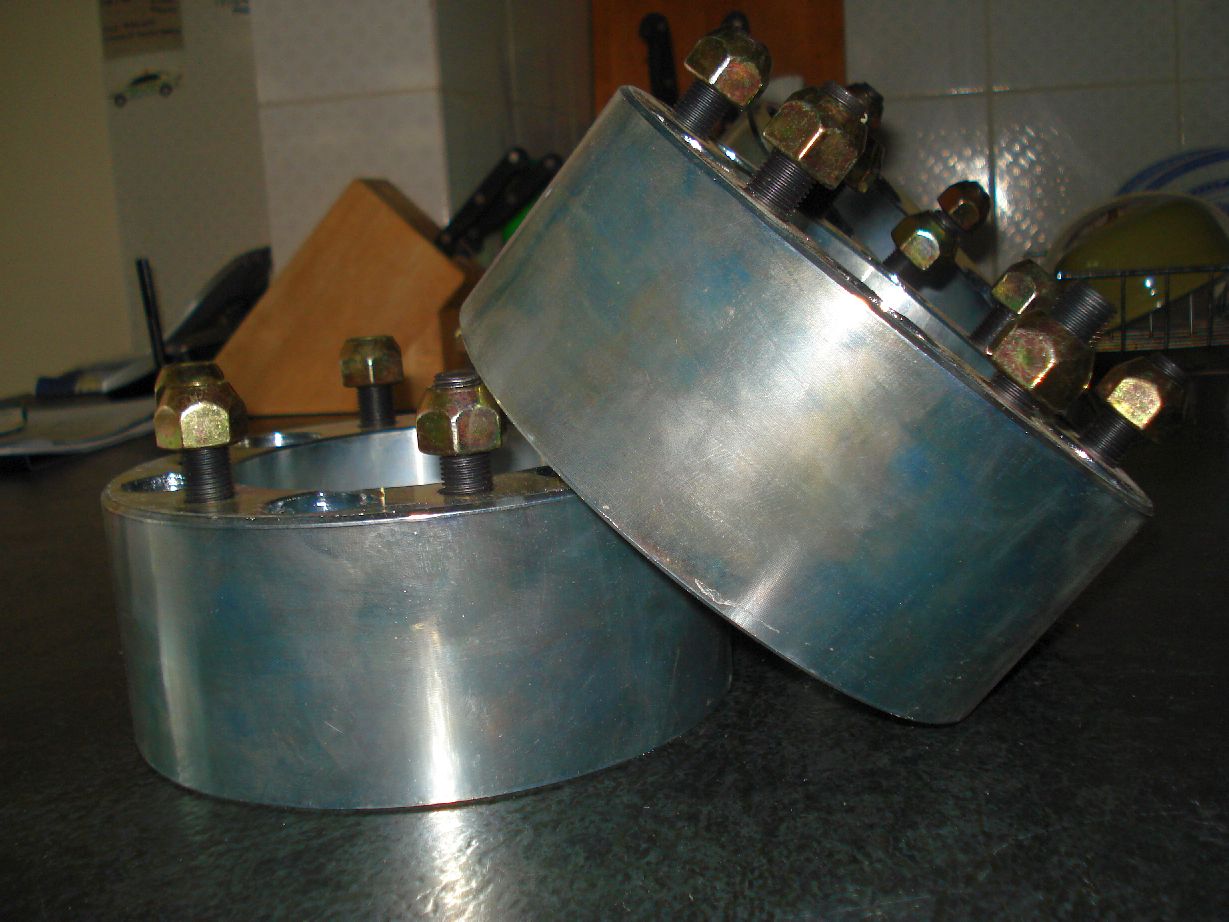
hmmmmmmm……. they are on 15×10 rims with 5″1/2 offset already GOT OFFSET???
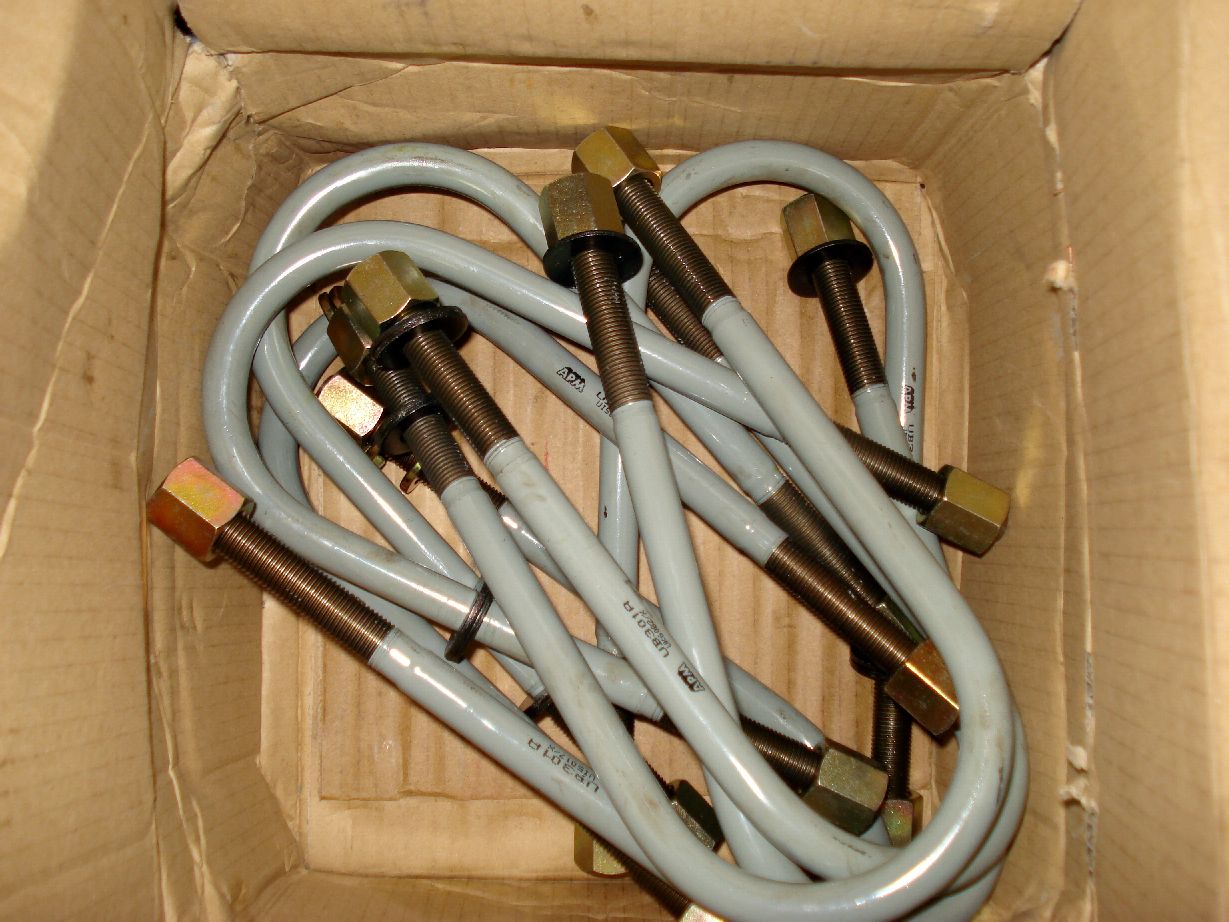
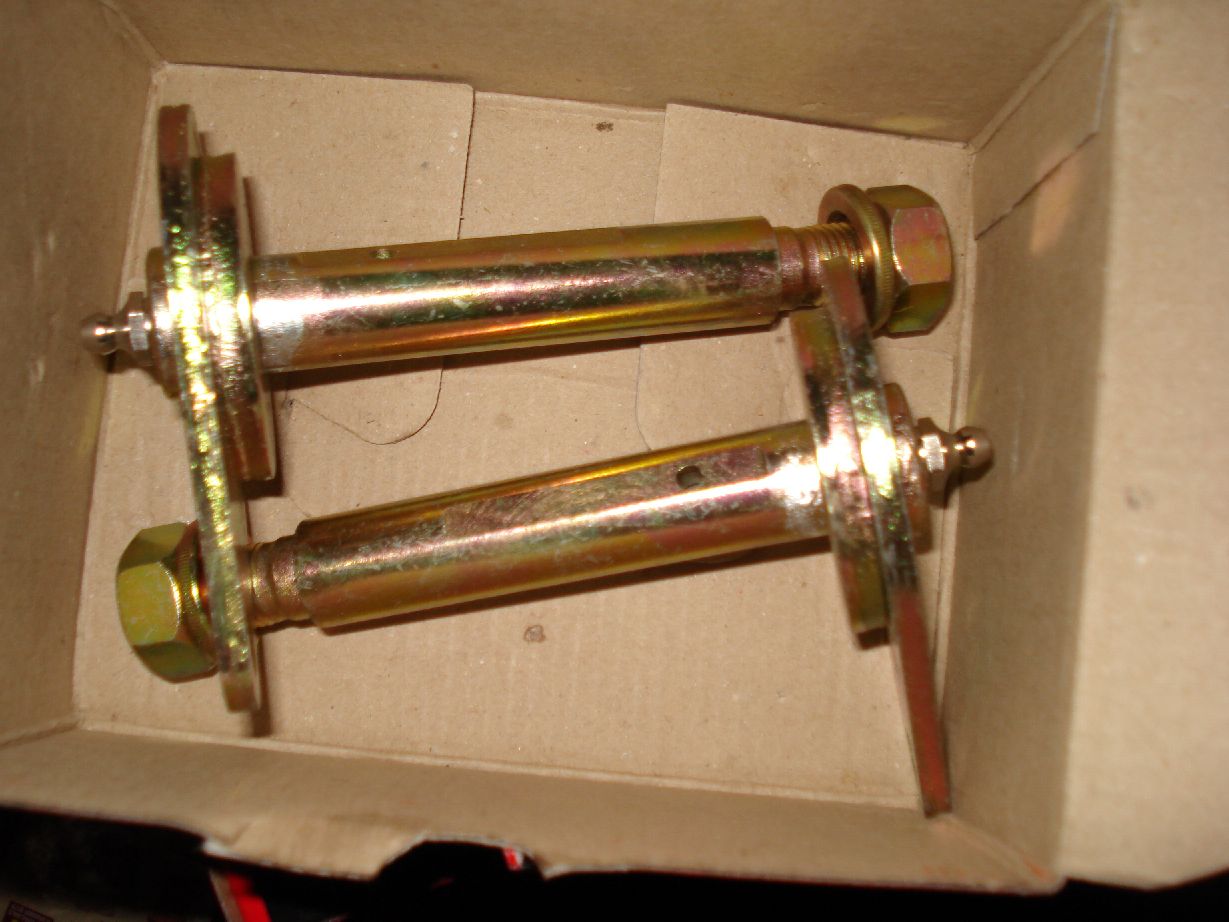
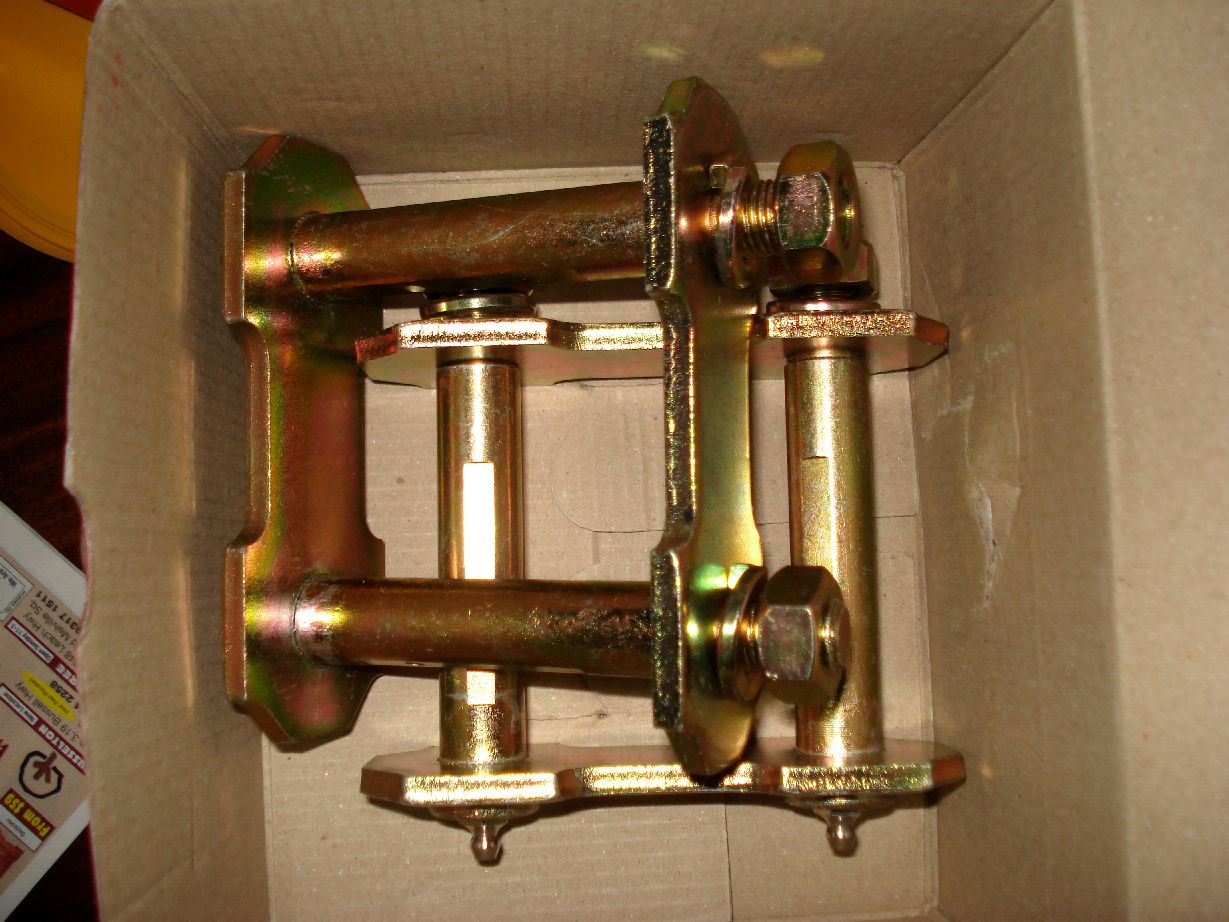
Got a couple of extra bits and pieces today
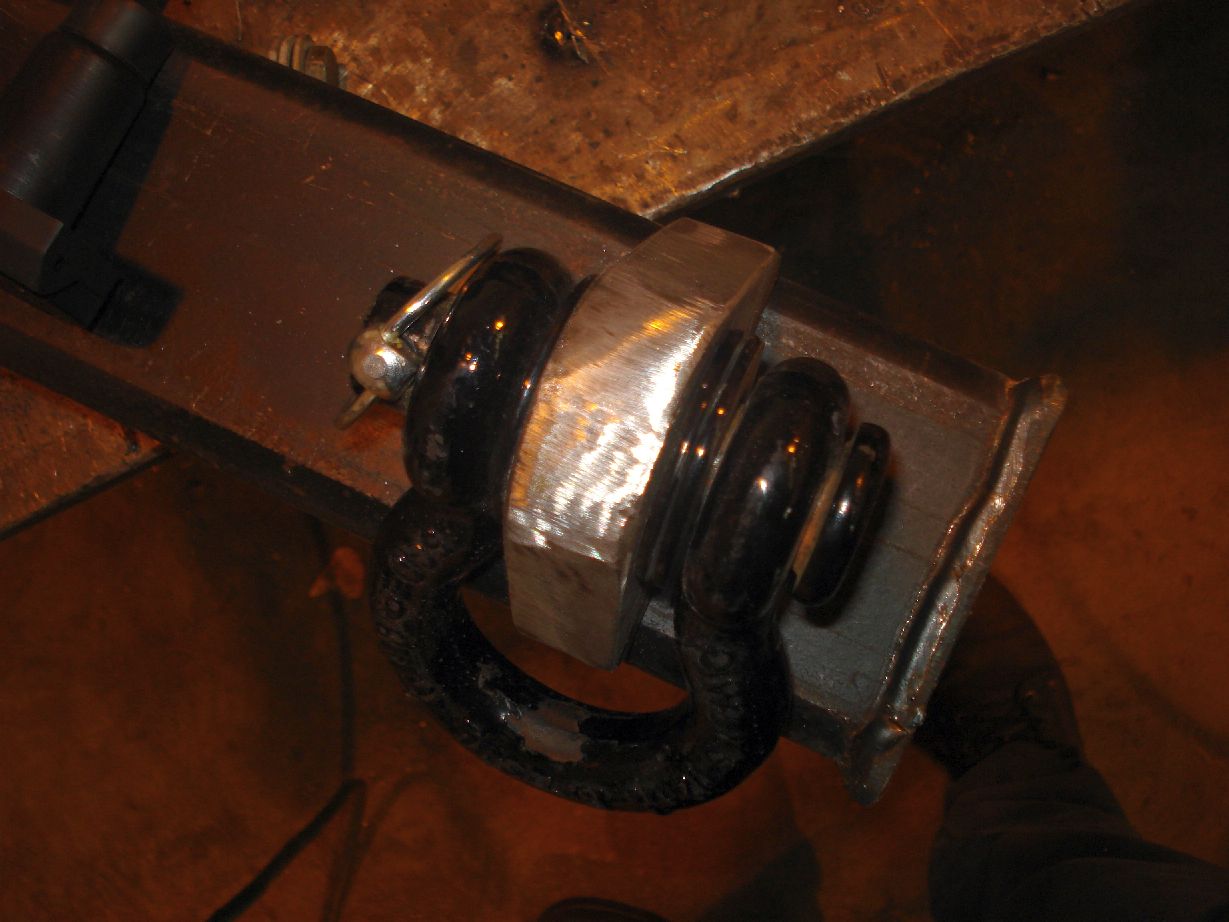
New U bolts
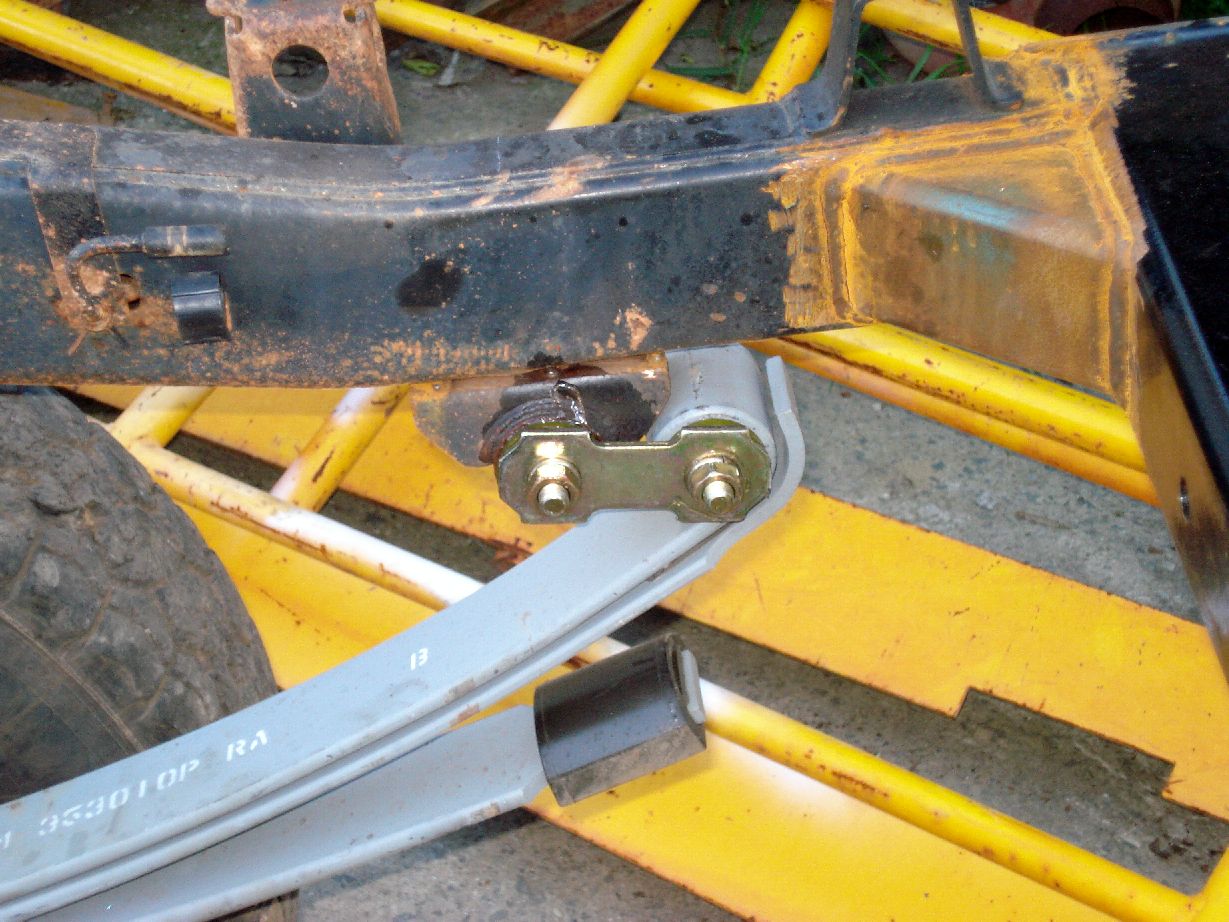
New Greaseable shackles (standard size for now)
New Greaseable Pins
Update:
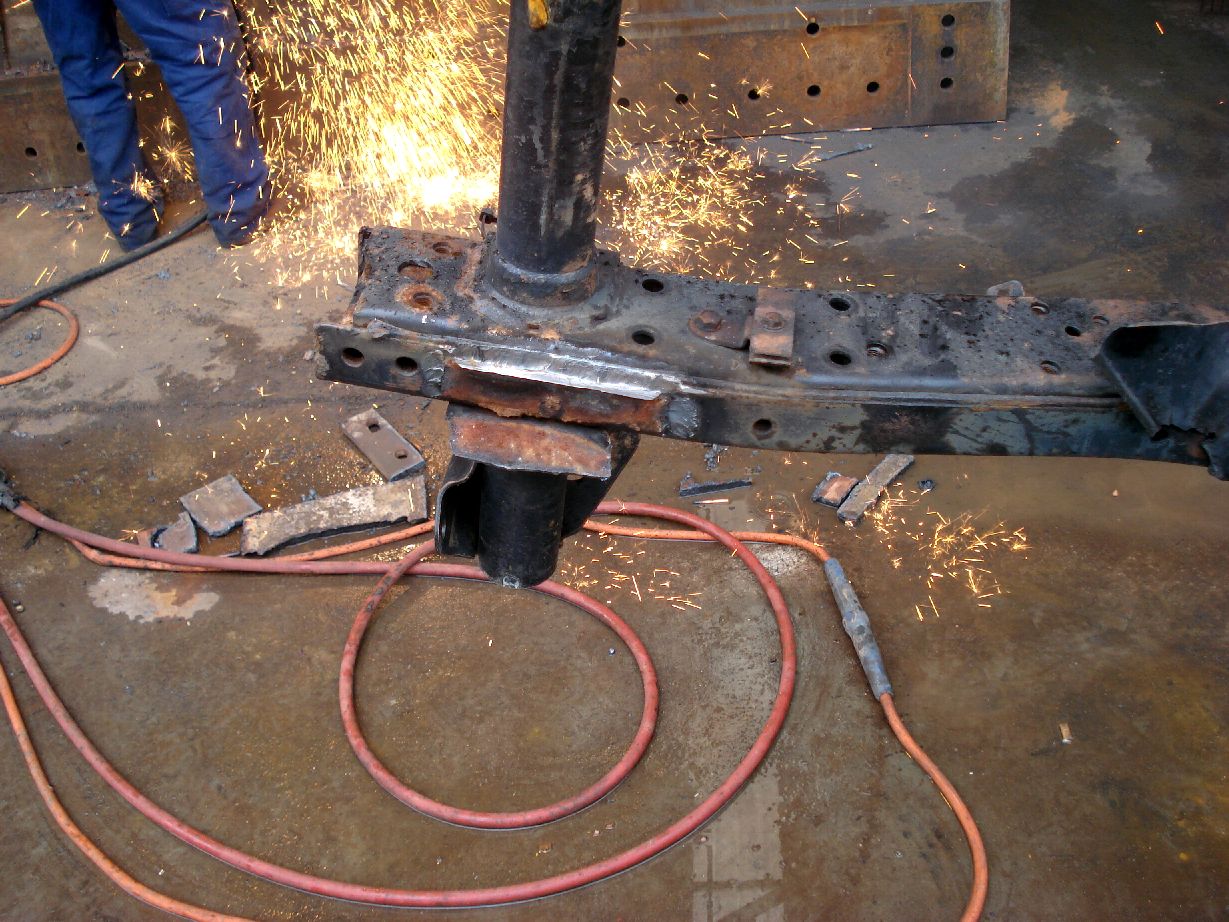
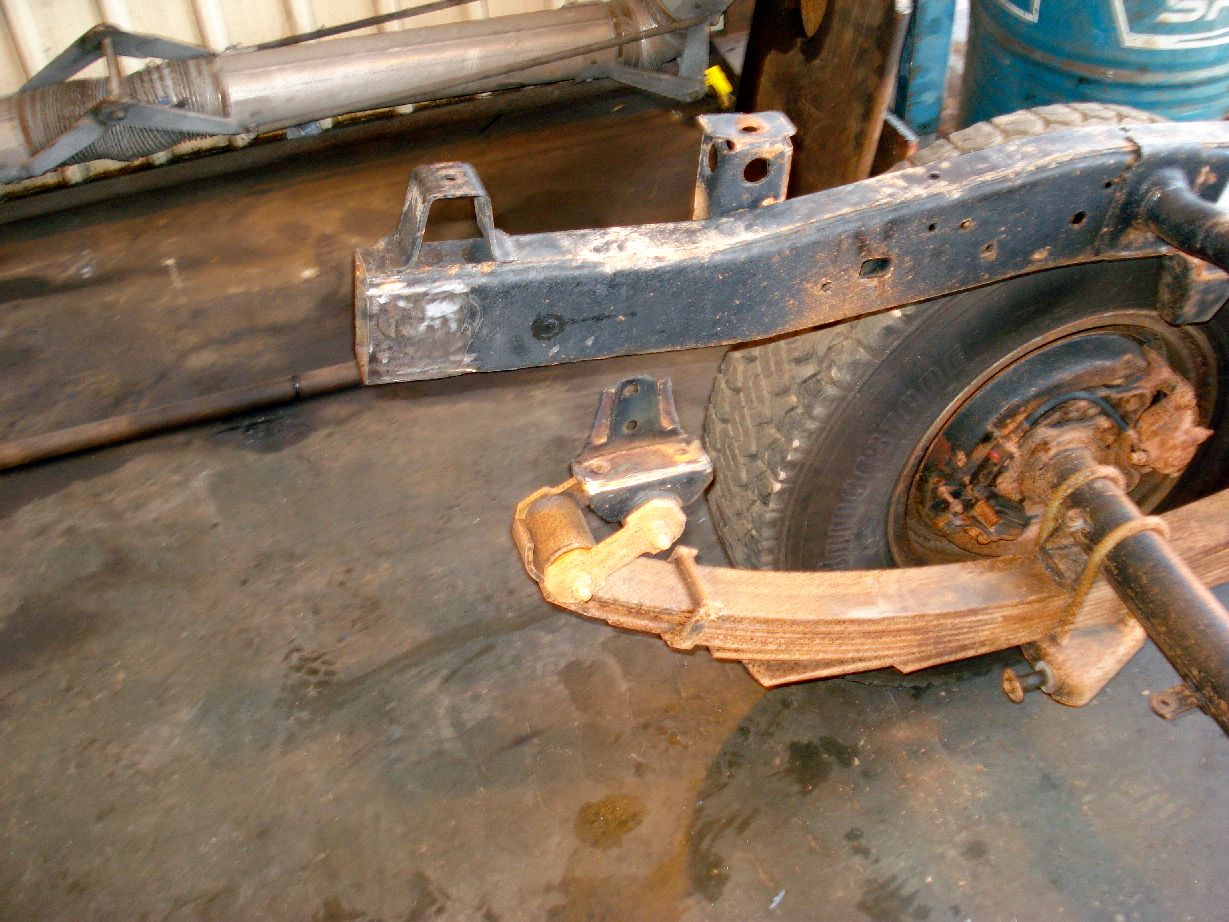
- Cut the front hangers off for shackle reversal and SOA
- Cut more off rear chassis
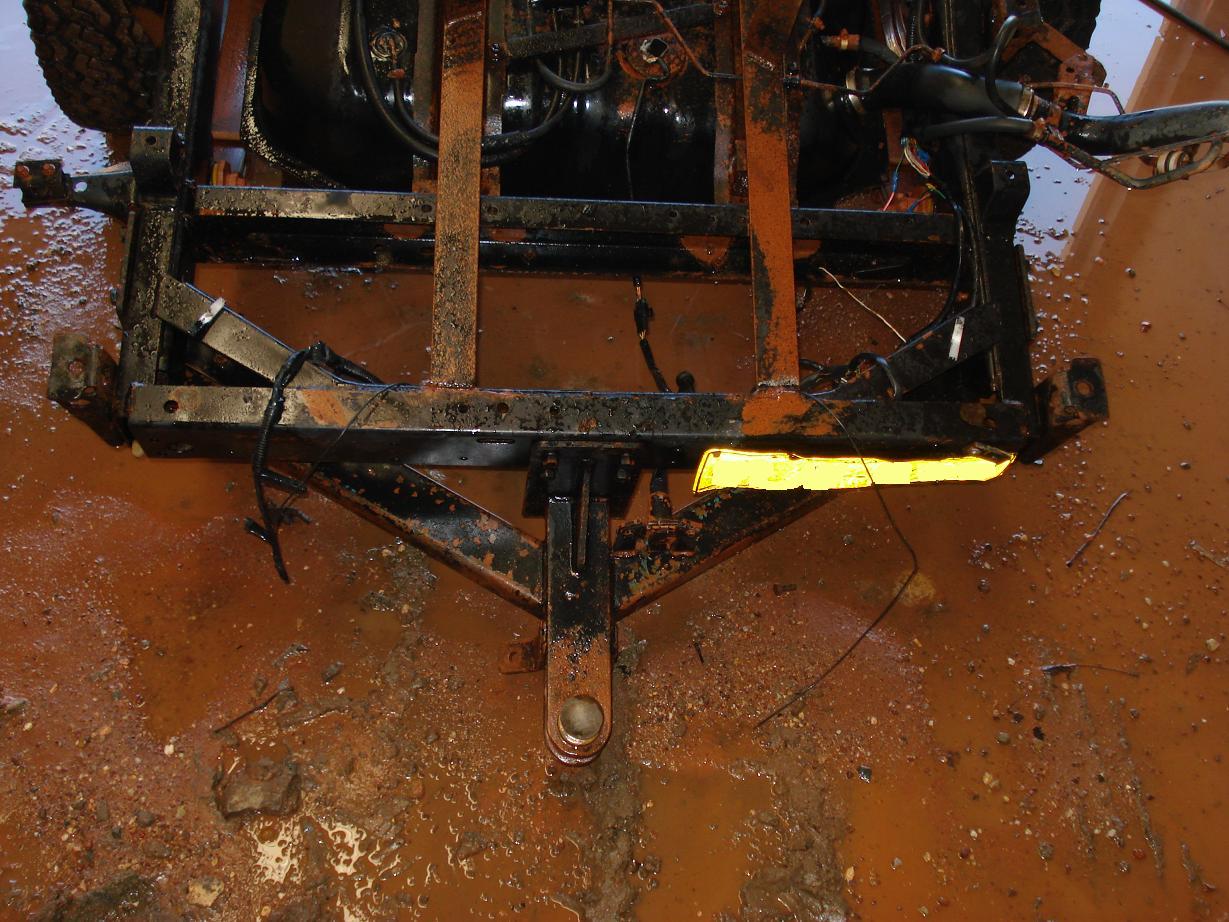
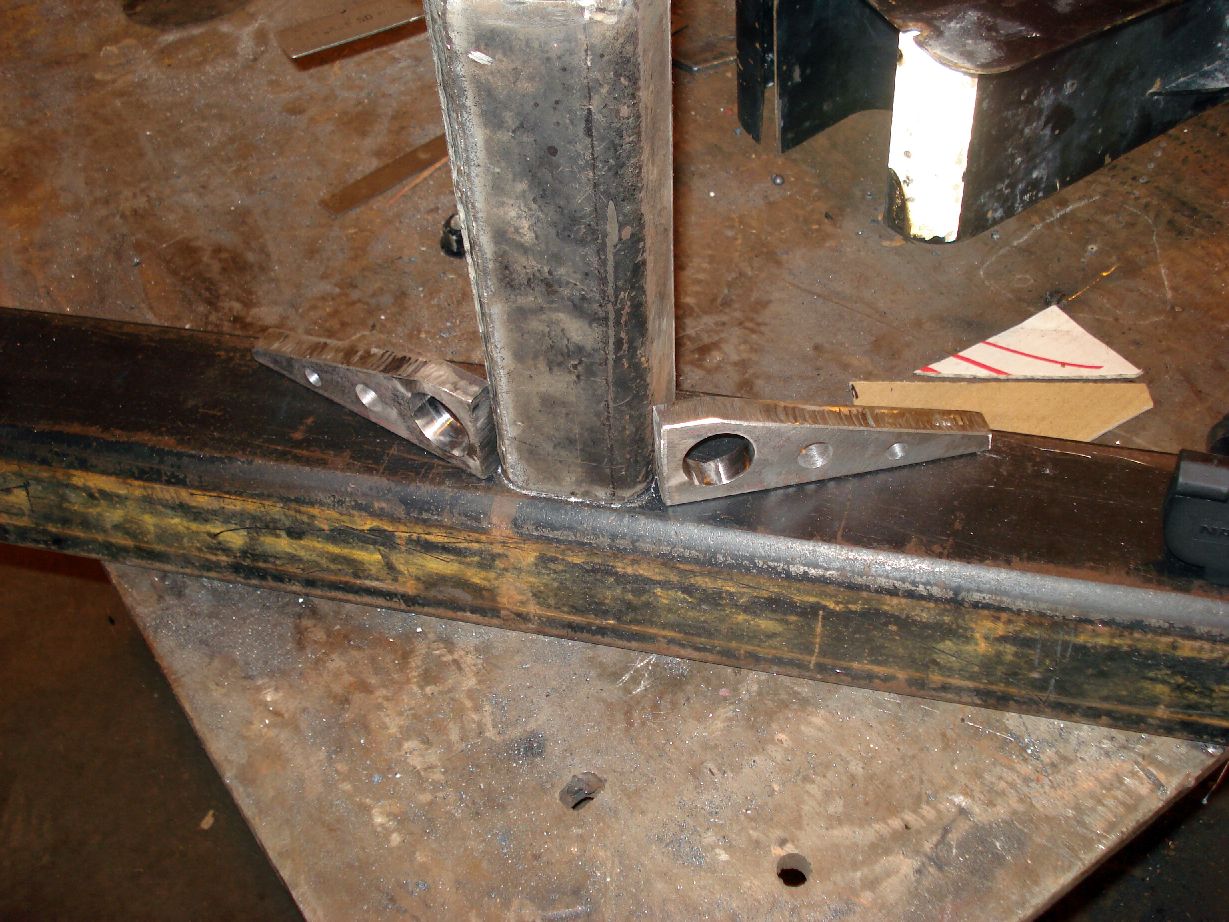
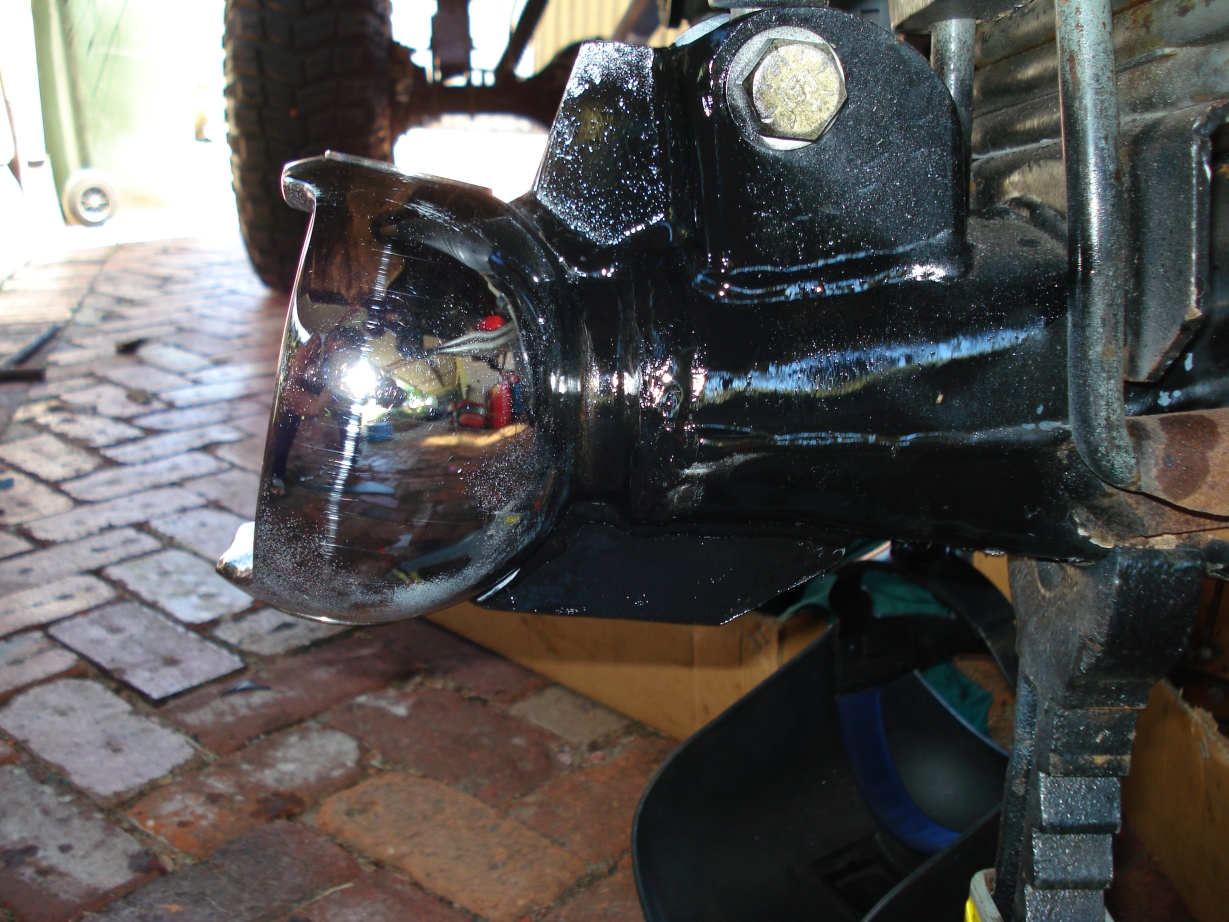
- Built Rear tow hitch to replace rear cross member (unfinished)
- Fish plates for hitch to chassis
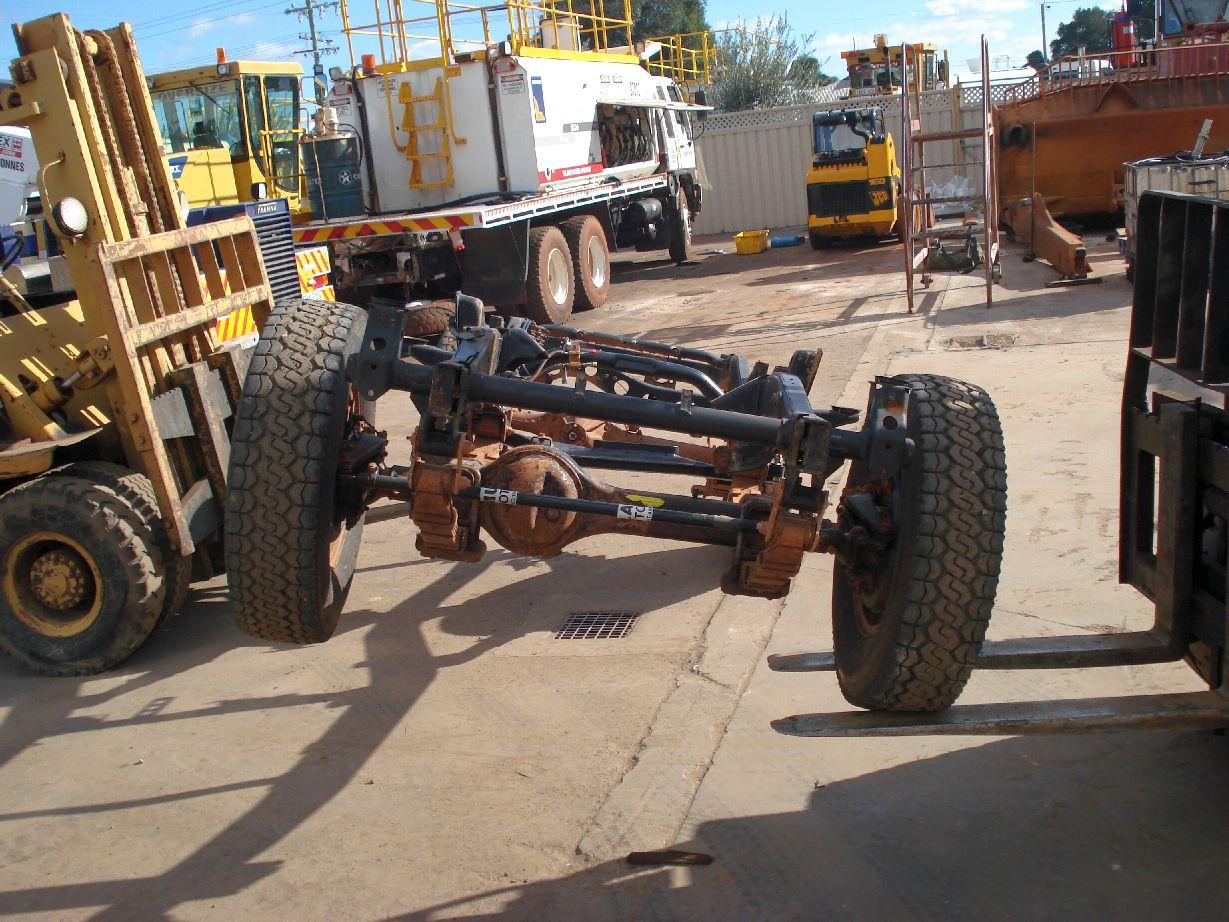
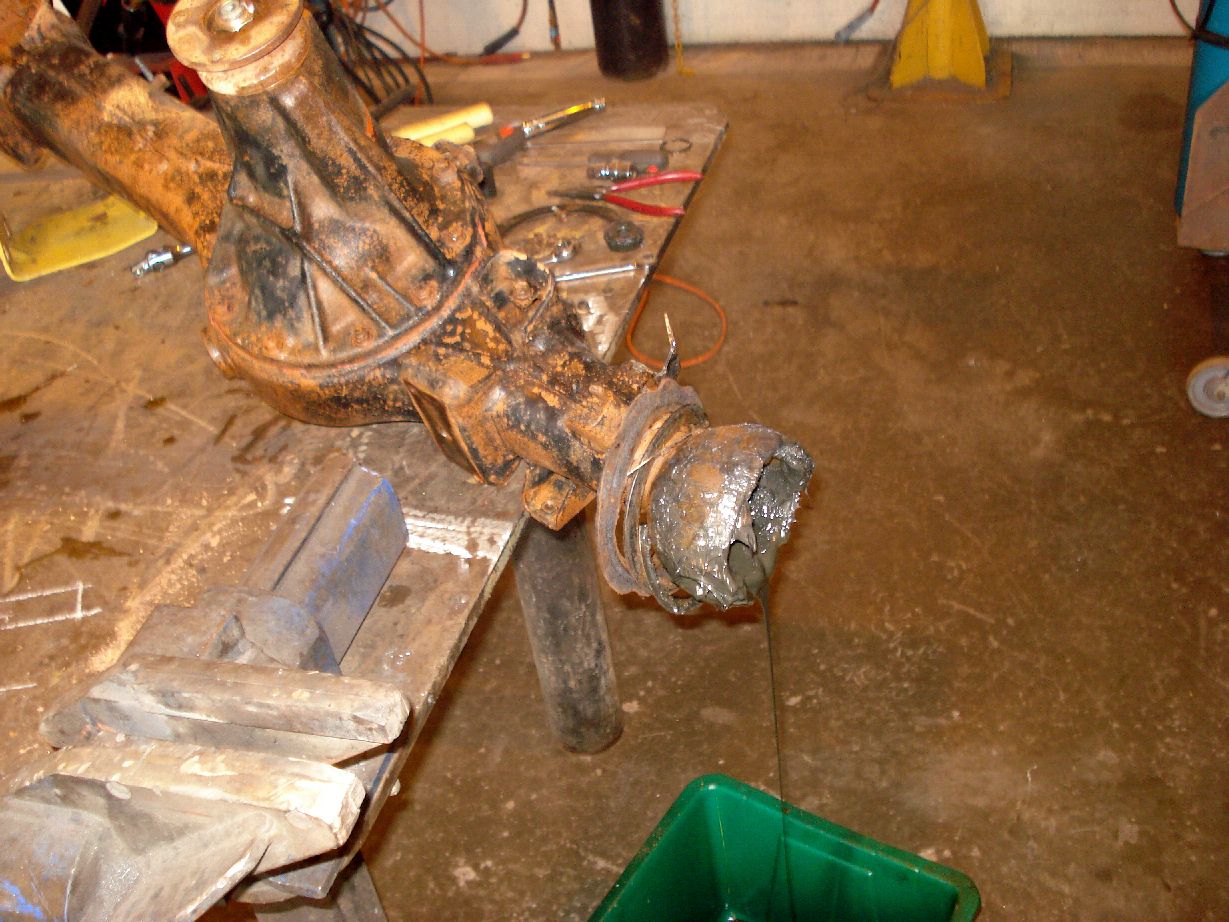
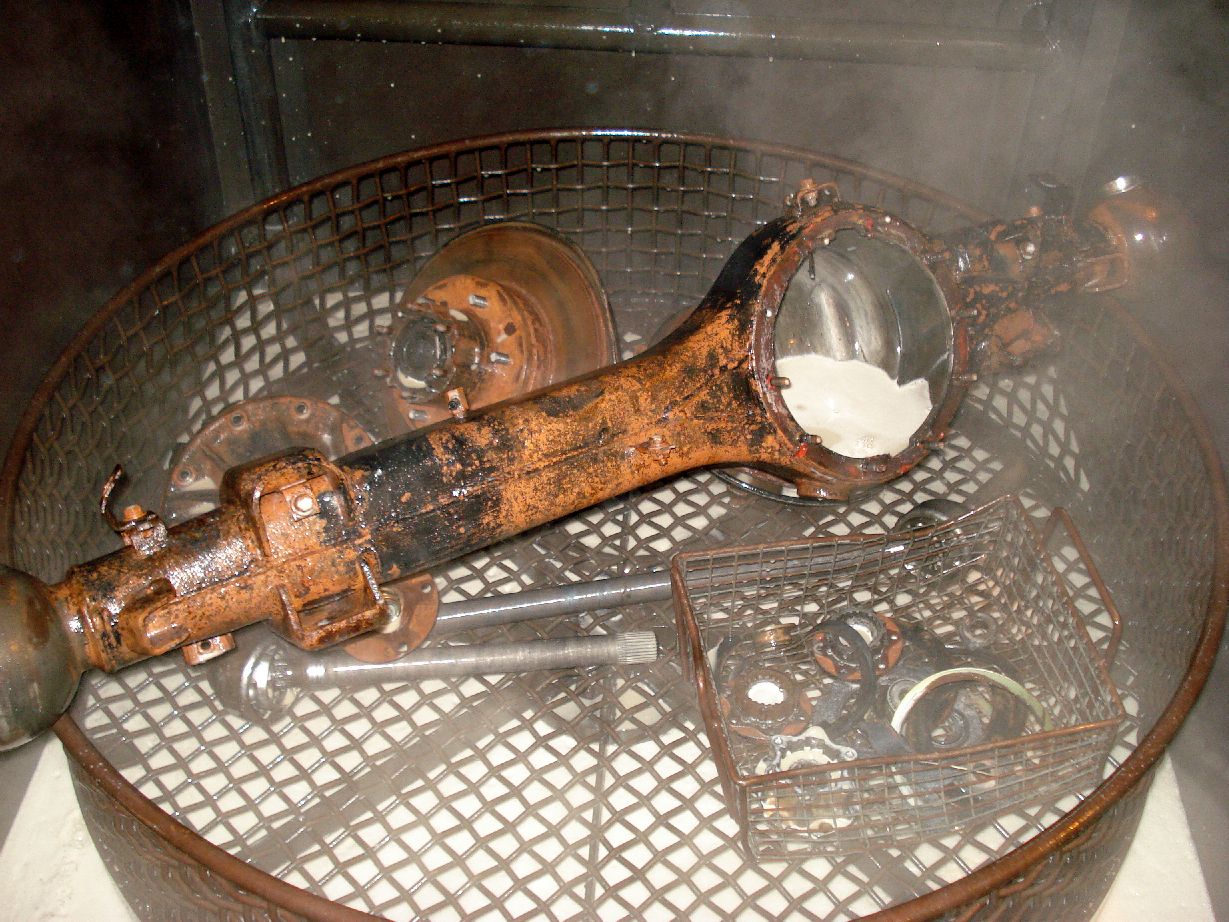
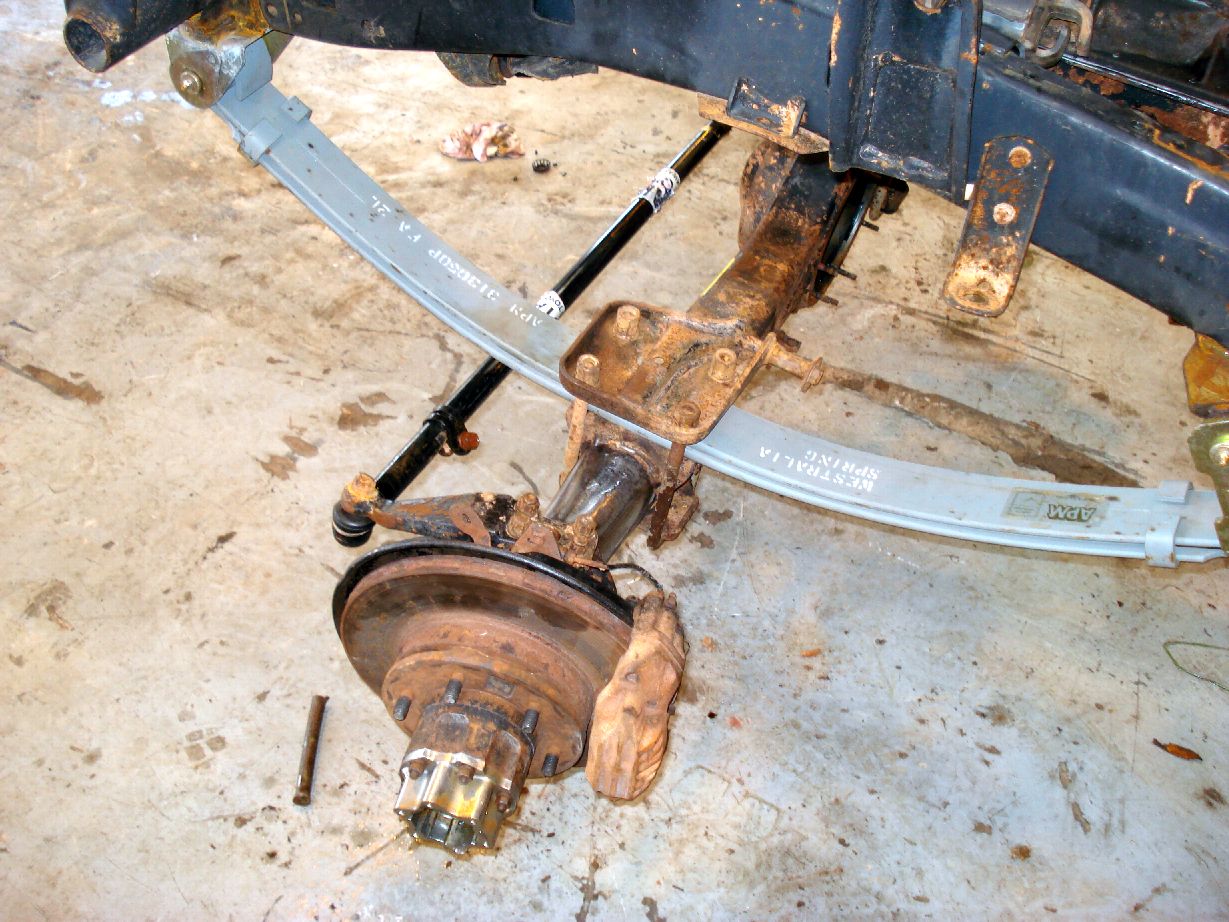
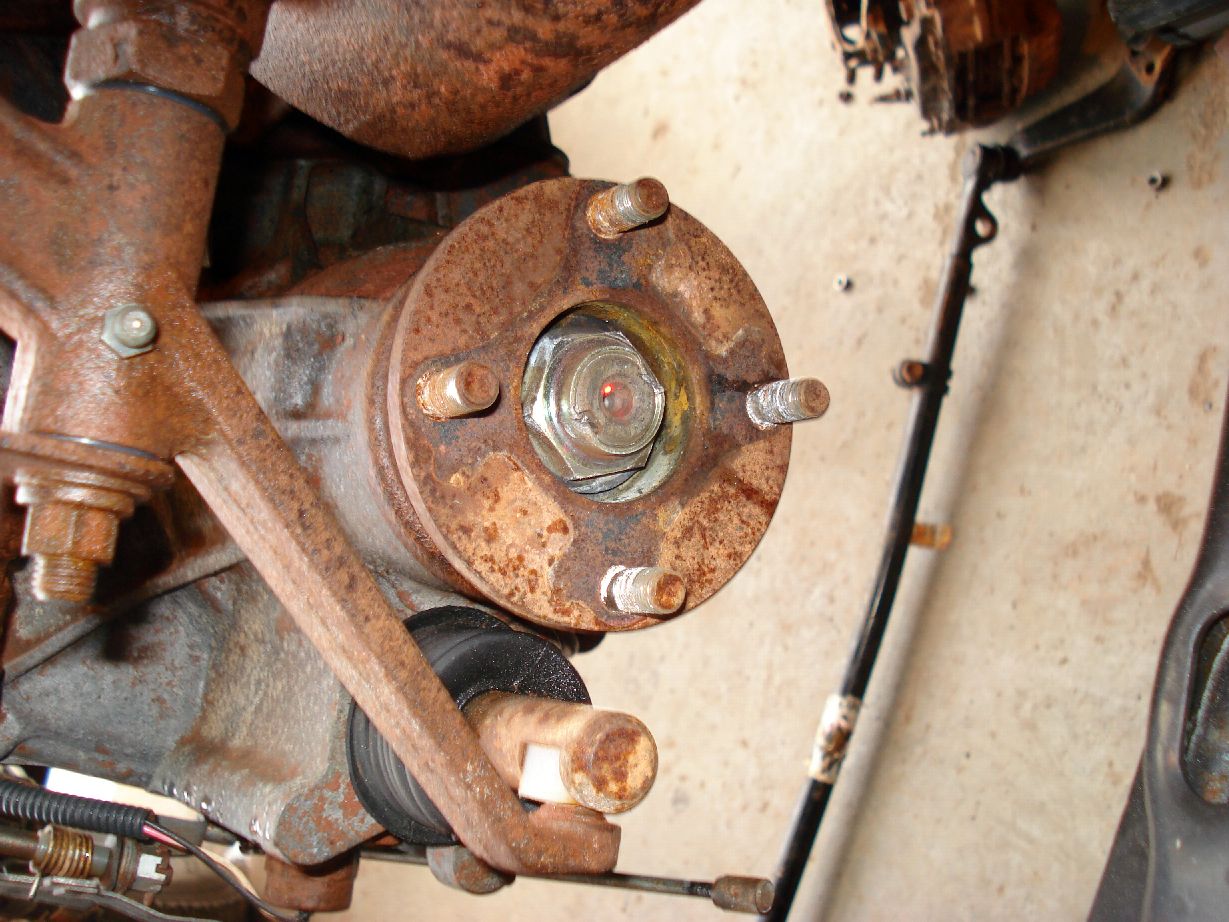
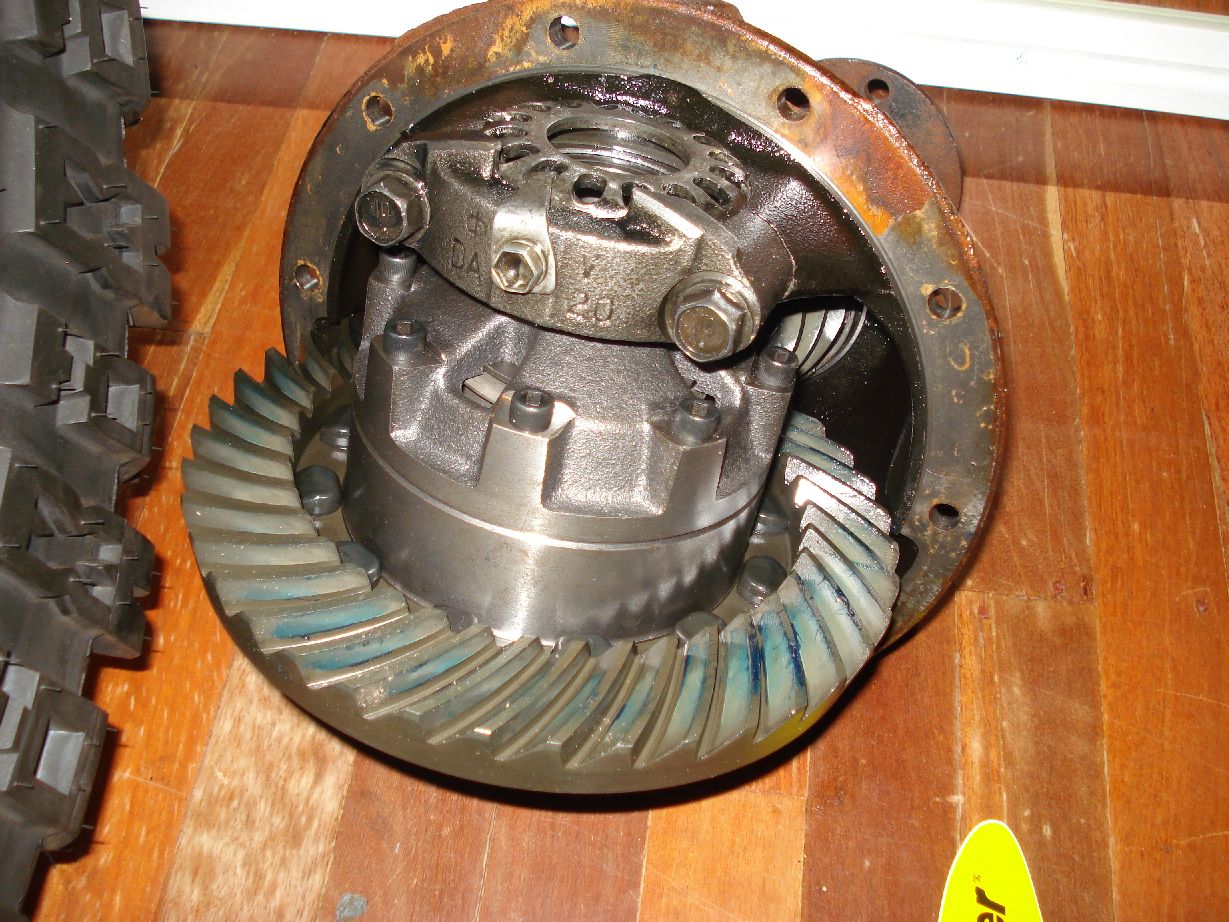
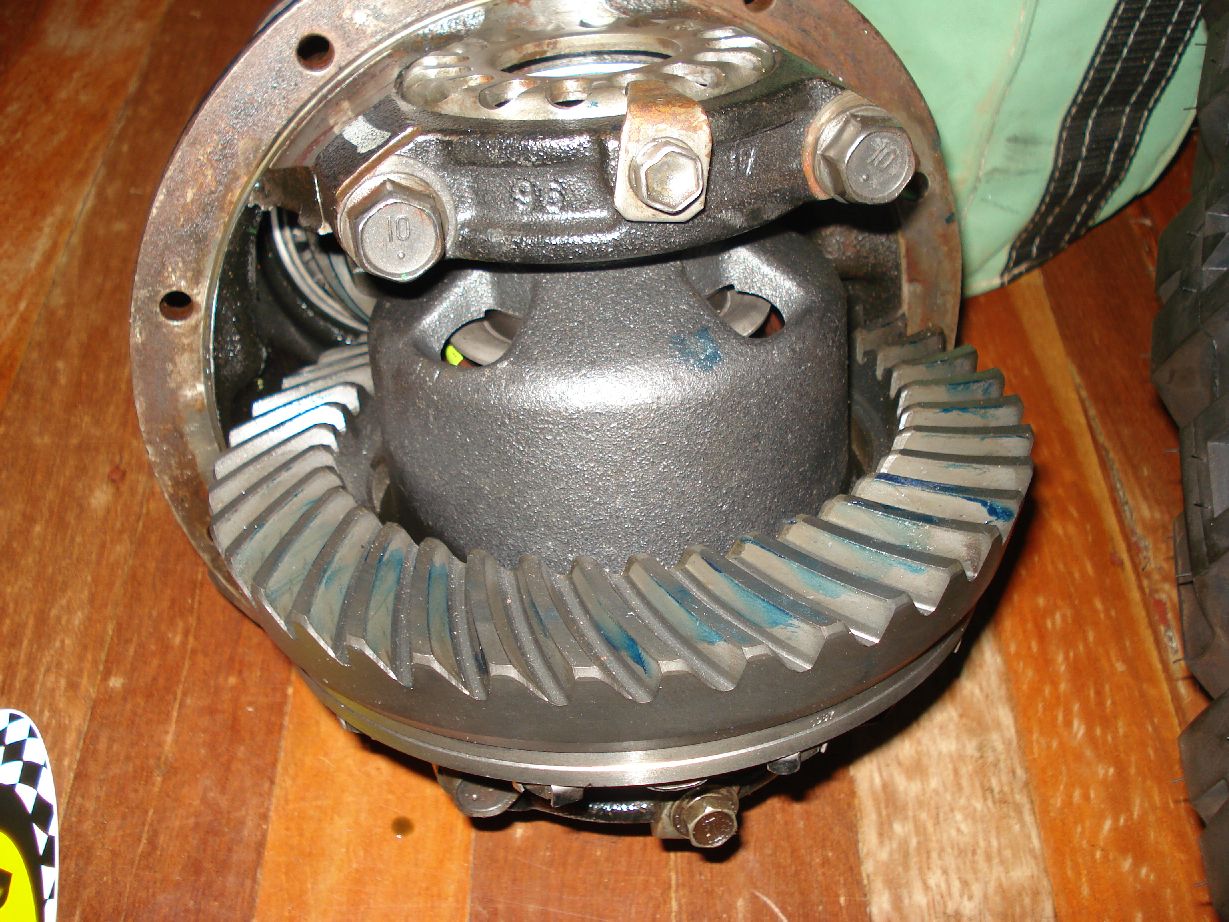
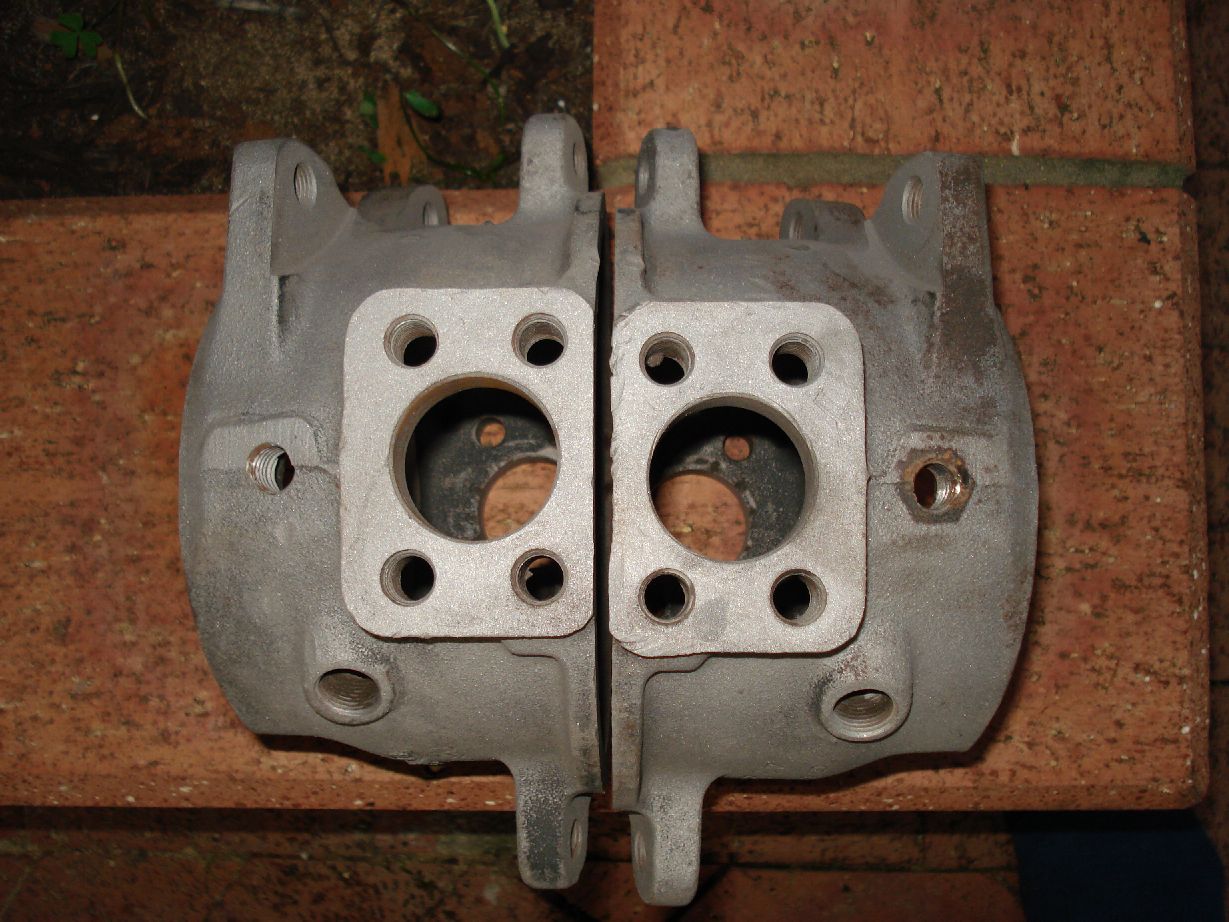
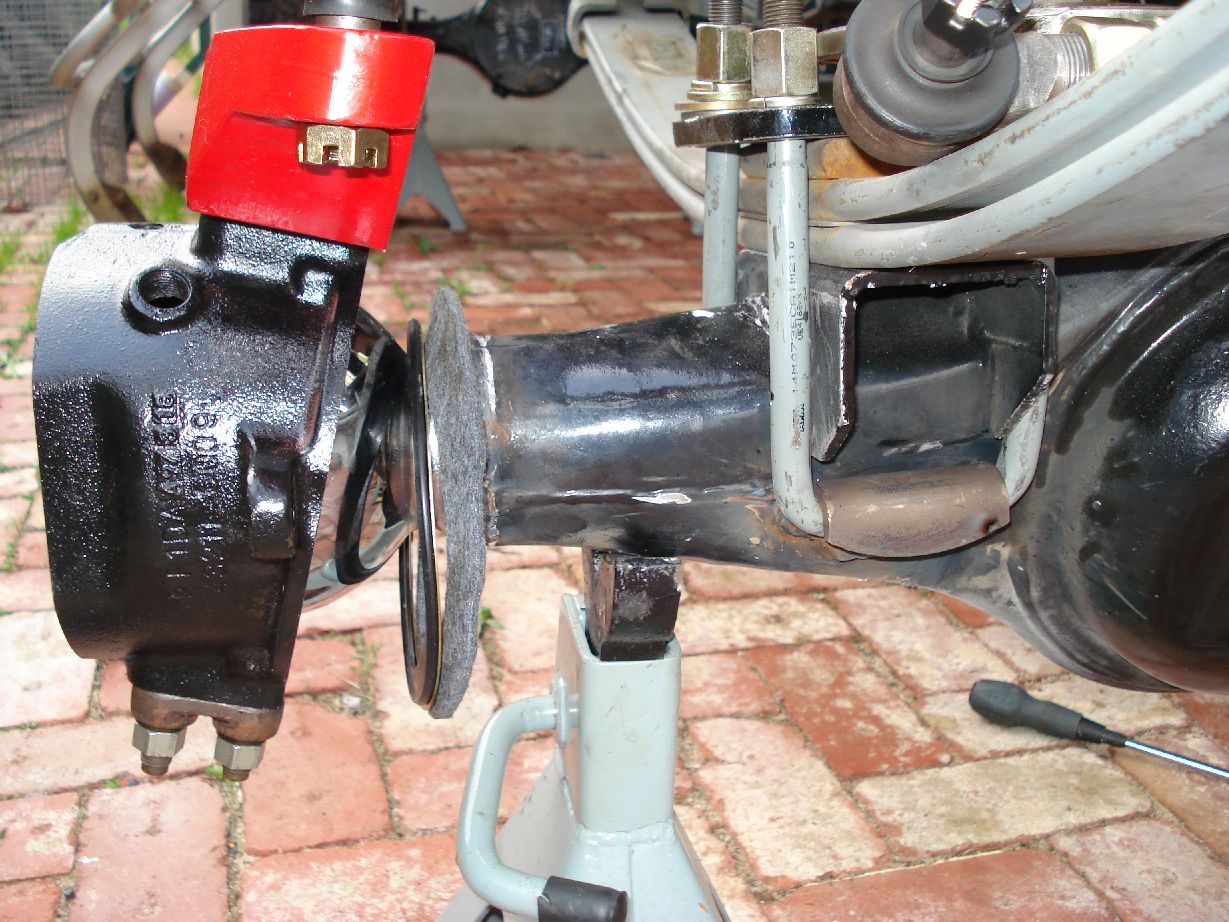
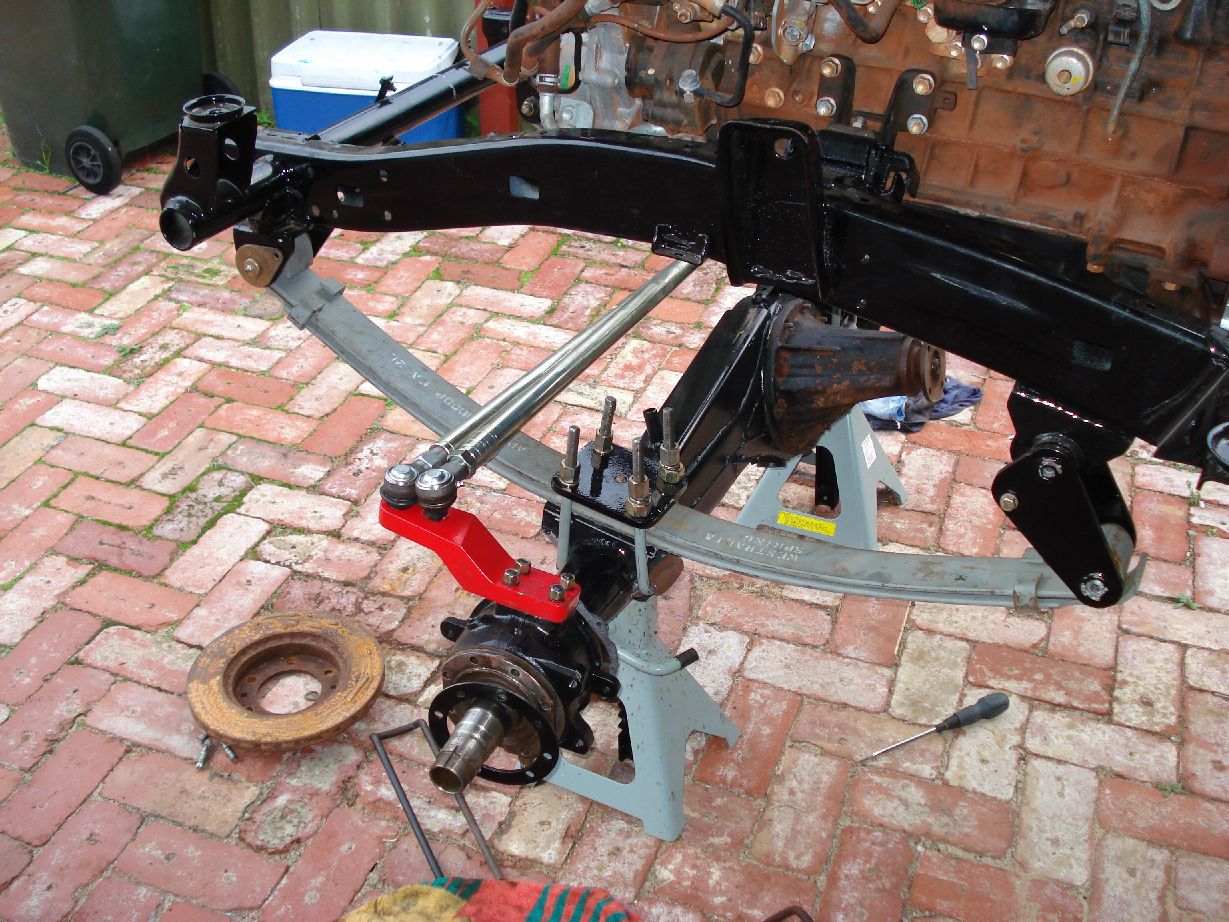
- Took front diff off
- Stripped and made ready for cut and rotate, new perches
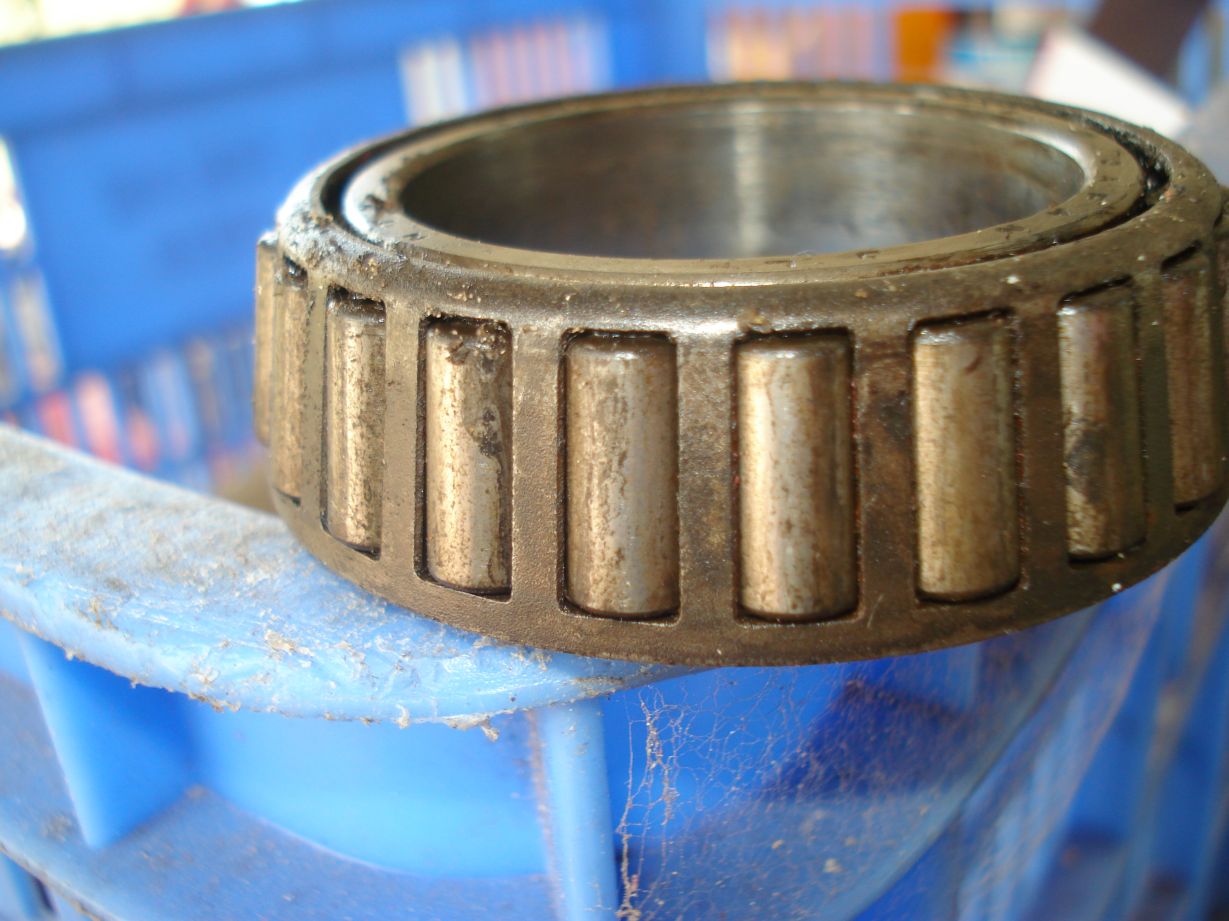
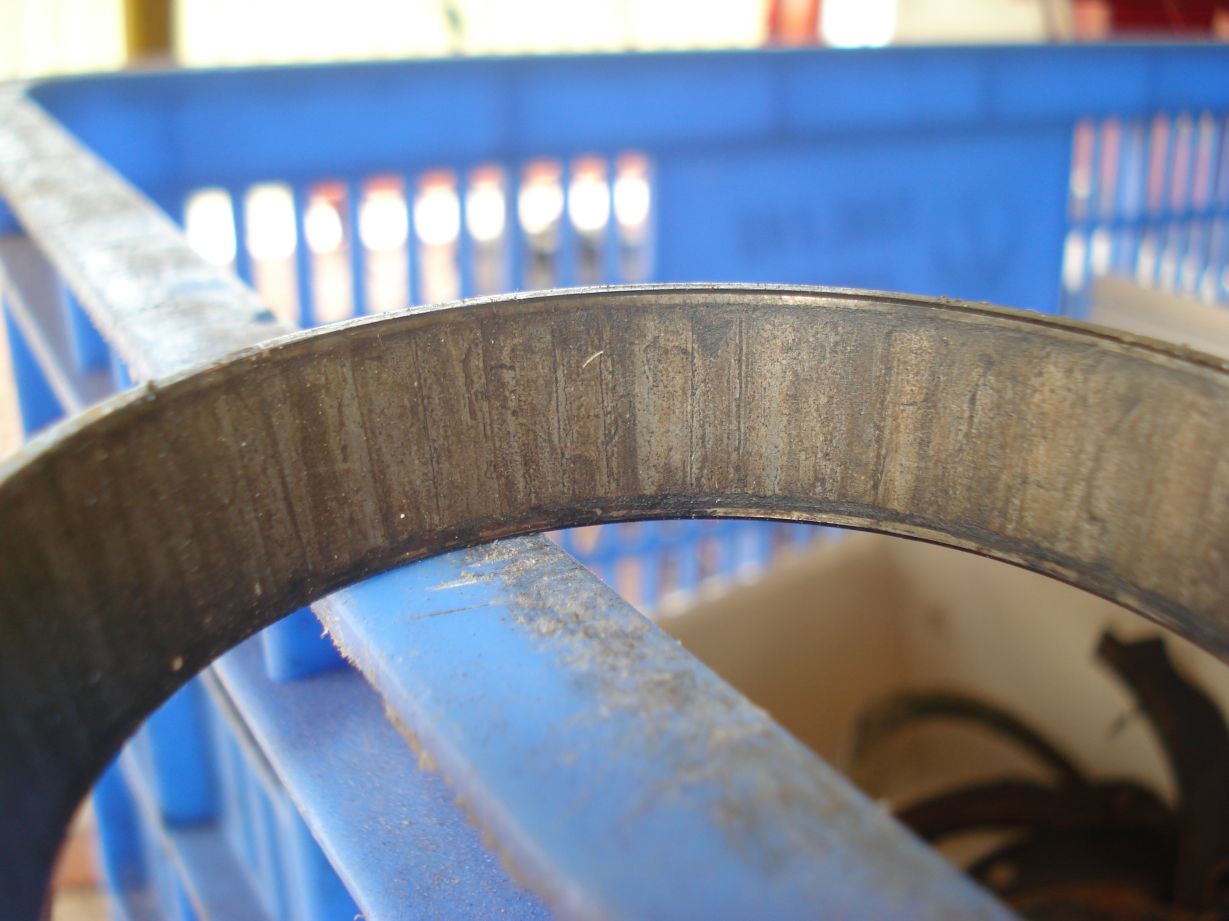
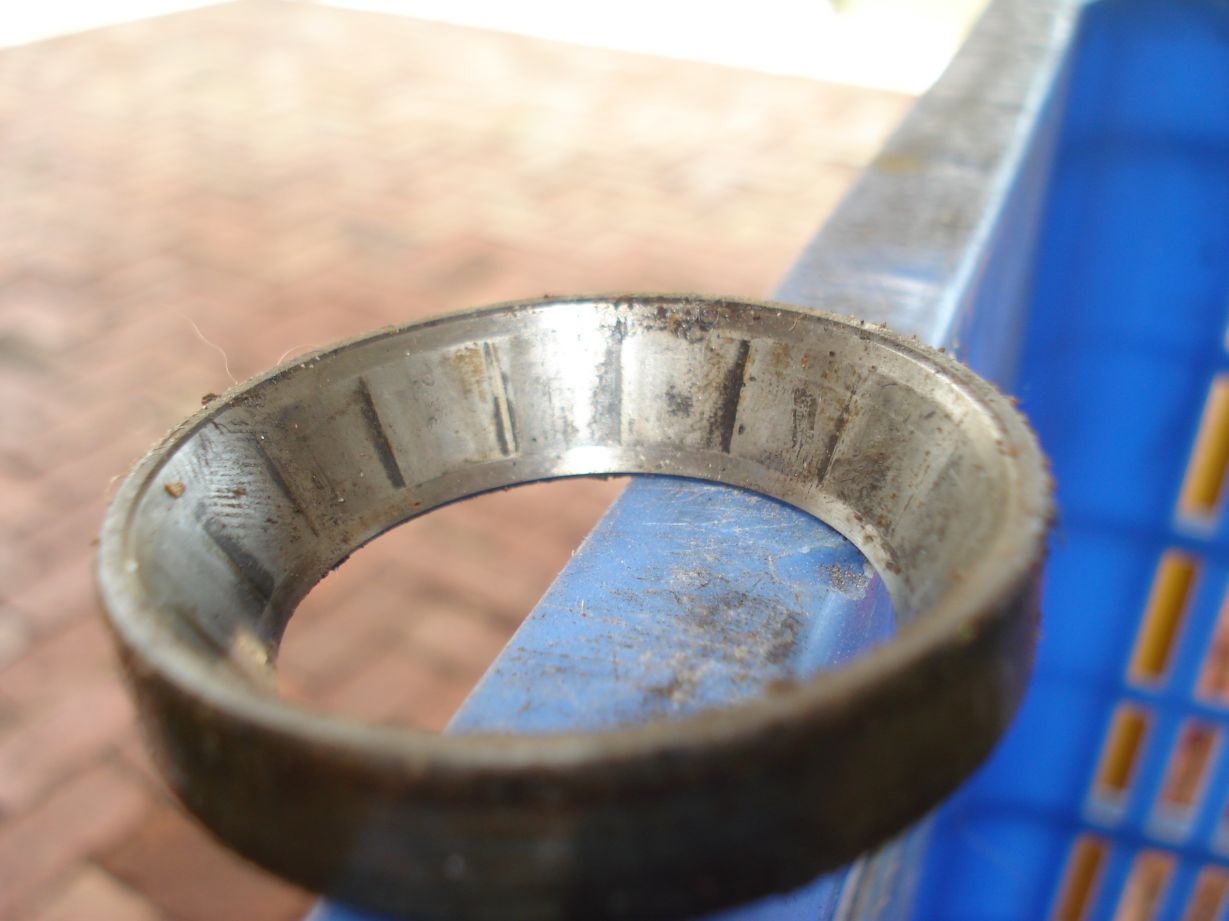
- Cleaned and inspected CVs to find them fairly rooted
- Center is near new
- Ready for full rebuild and swivel upgrades
- May upgrade the full floaters to 100 series studs


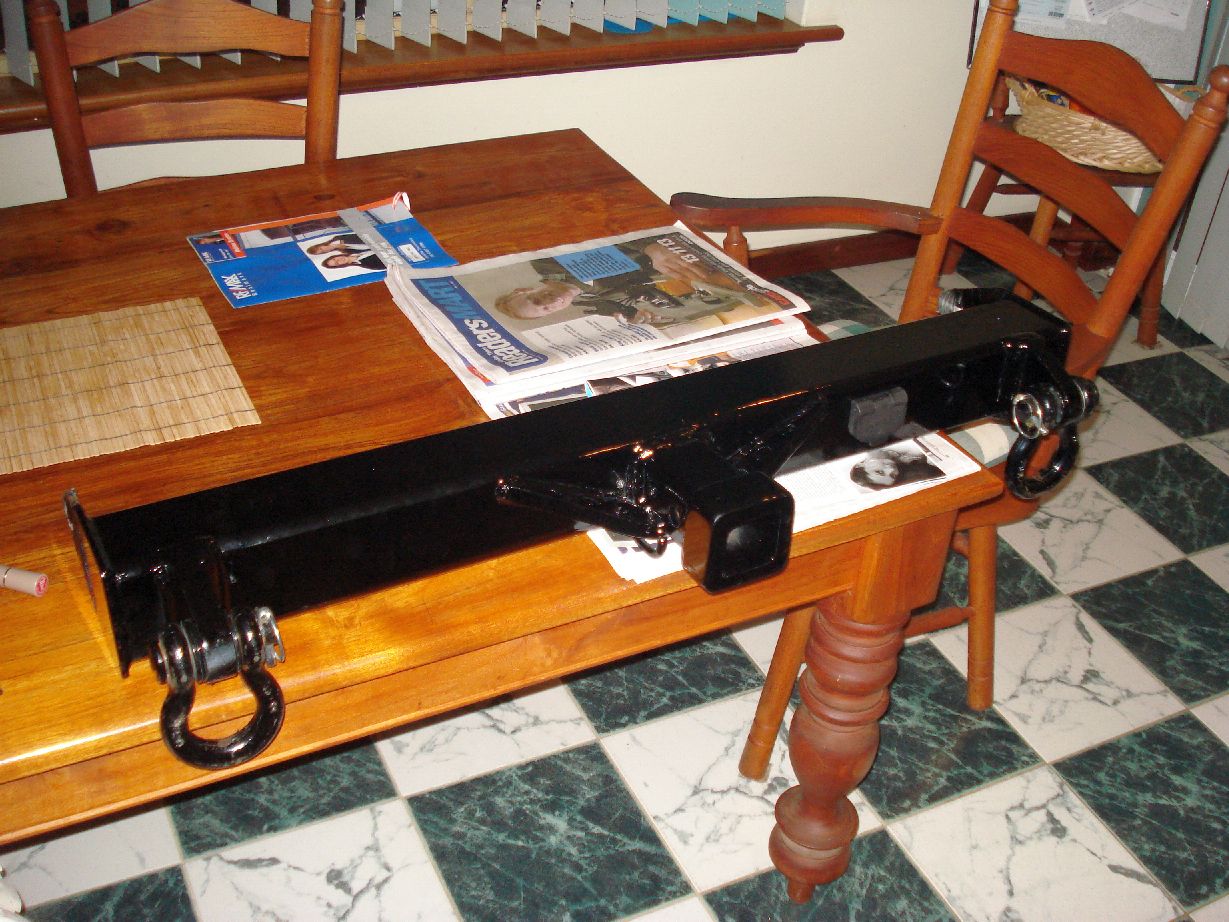
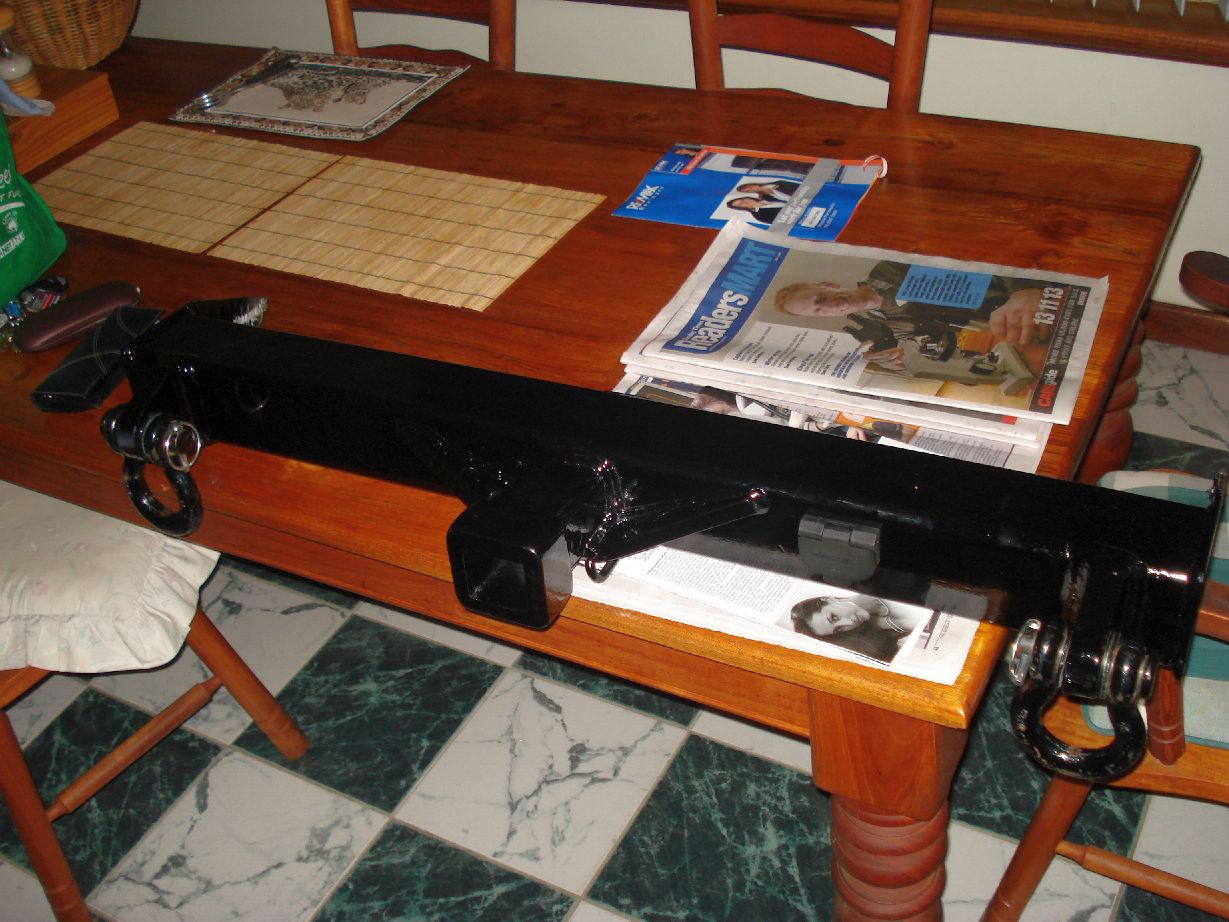
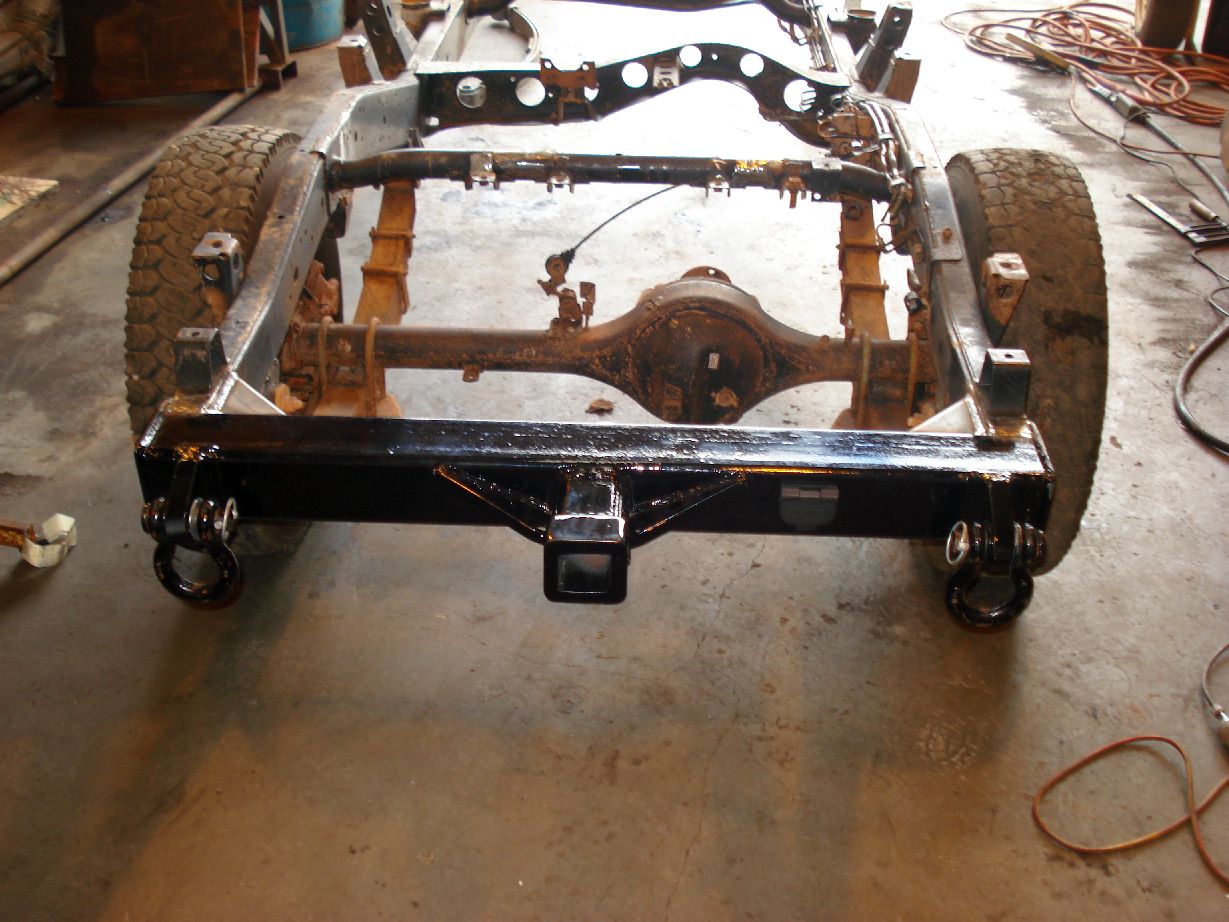
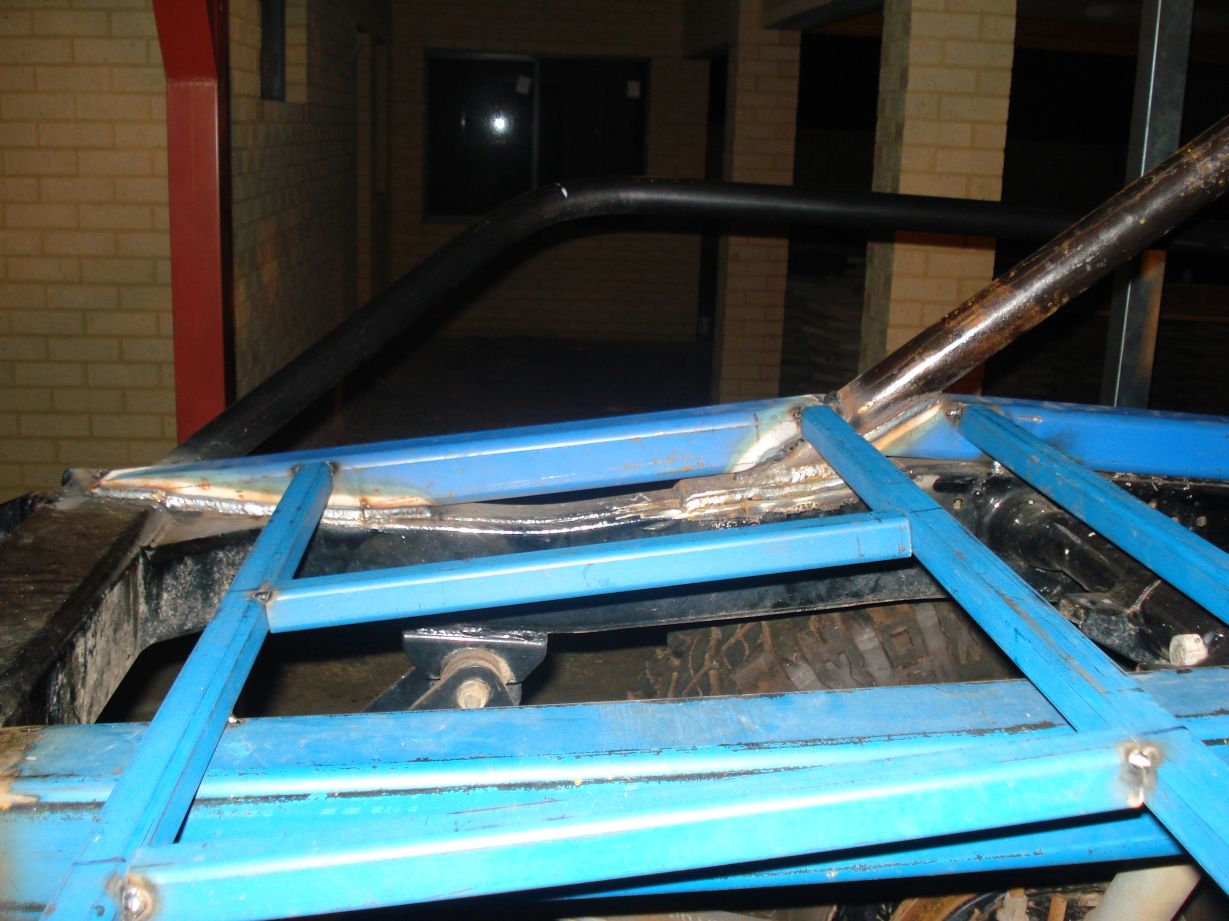
Fabbing up my new rear crossmember / tow hitch / recovery point during lunch times, Pix late saturday.
Here is a little teaser

Well this is the start of it
i was busy today… Almost finished the hitch, just need to weld it up on Monday
I reckon this thing will withstand 300 atomic bombs a 3000 foot drop and one supernova…
but thats just what i think…
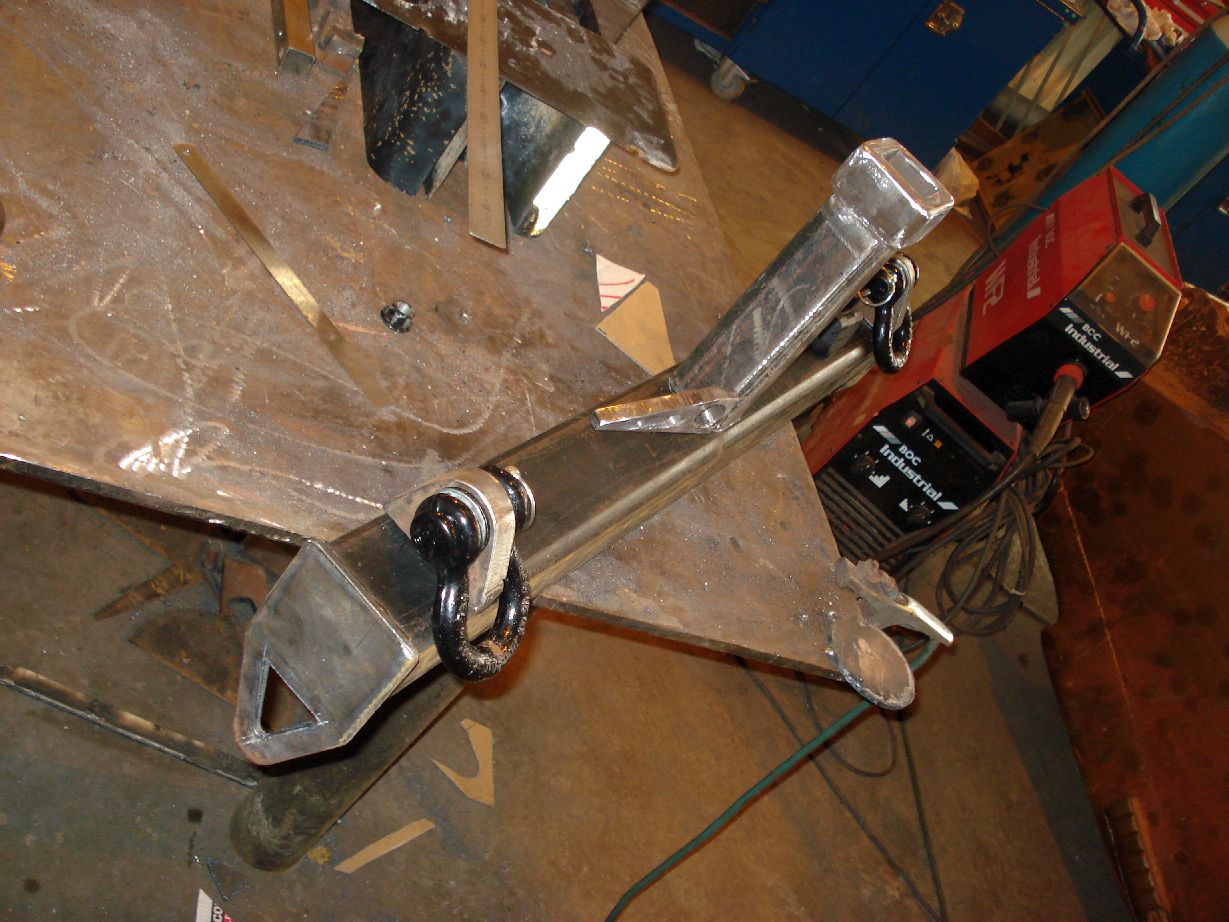
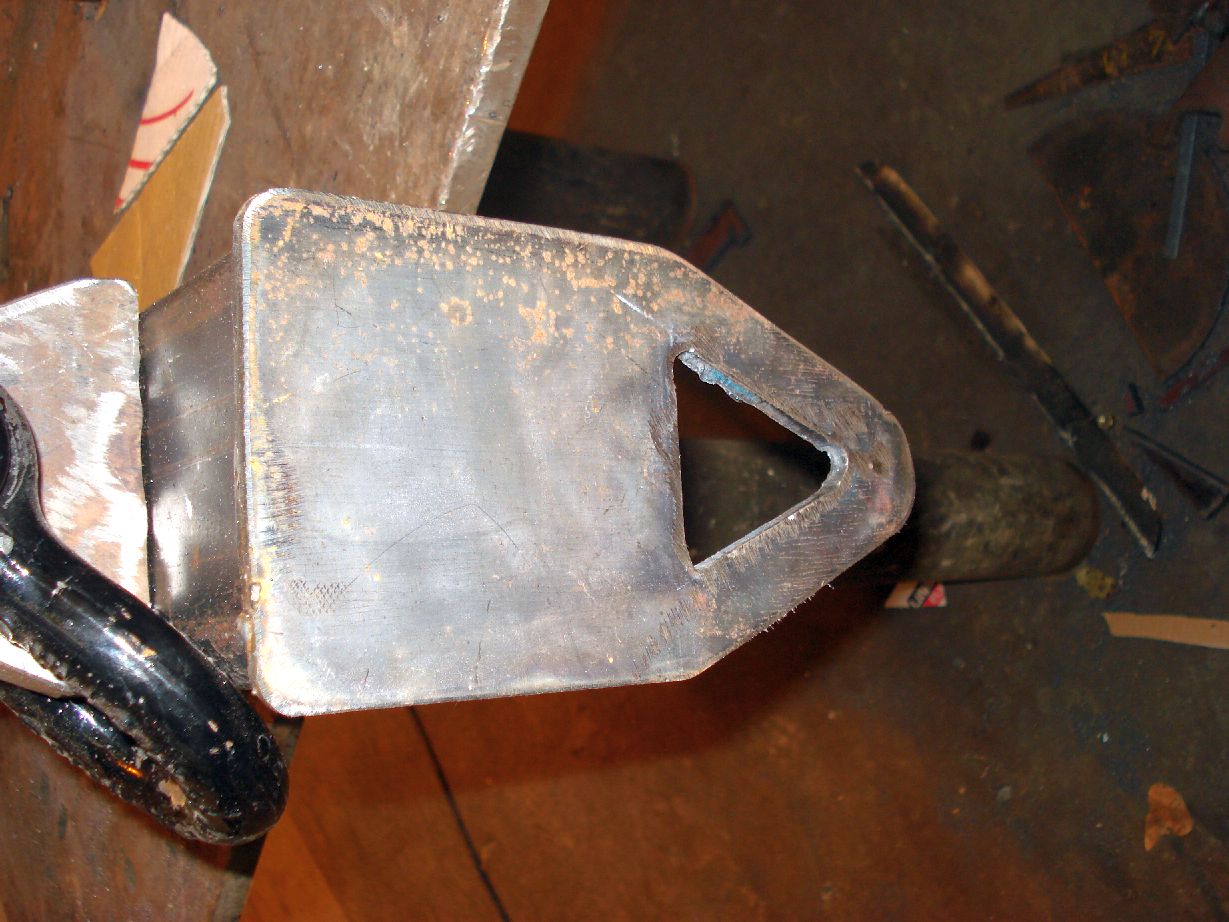
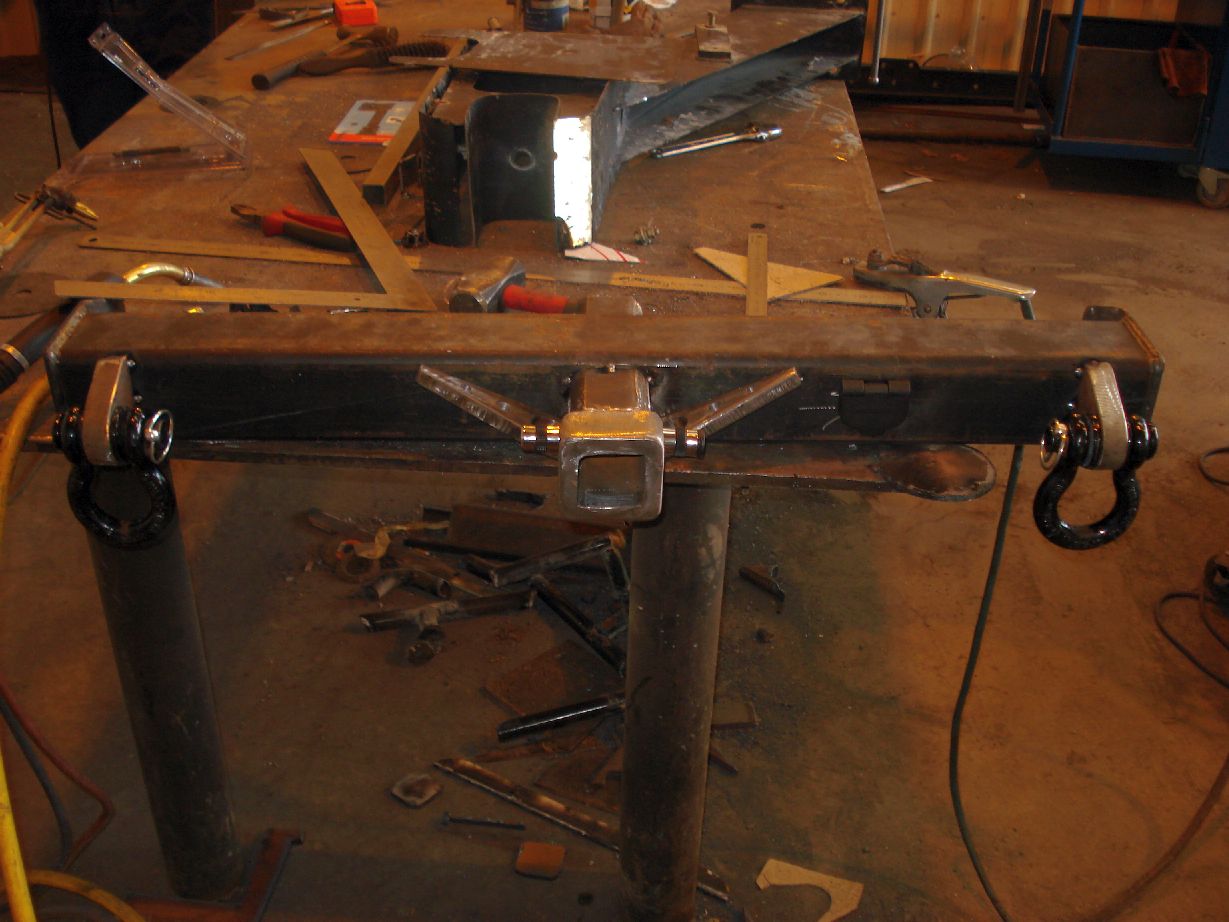
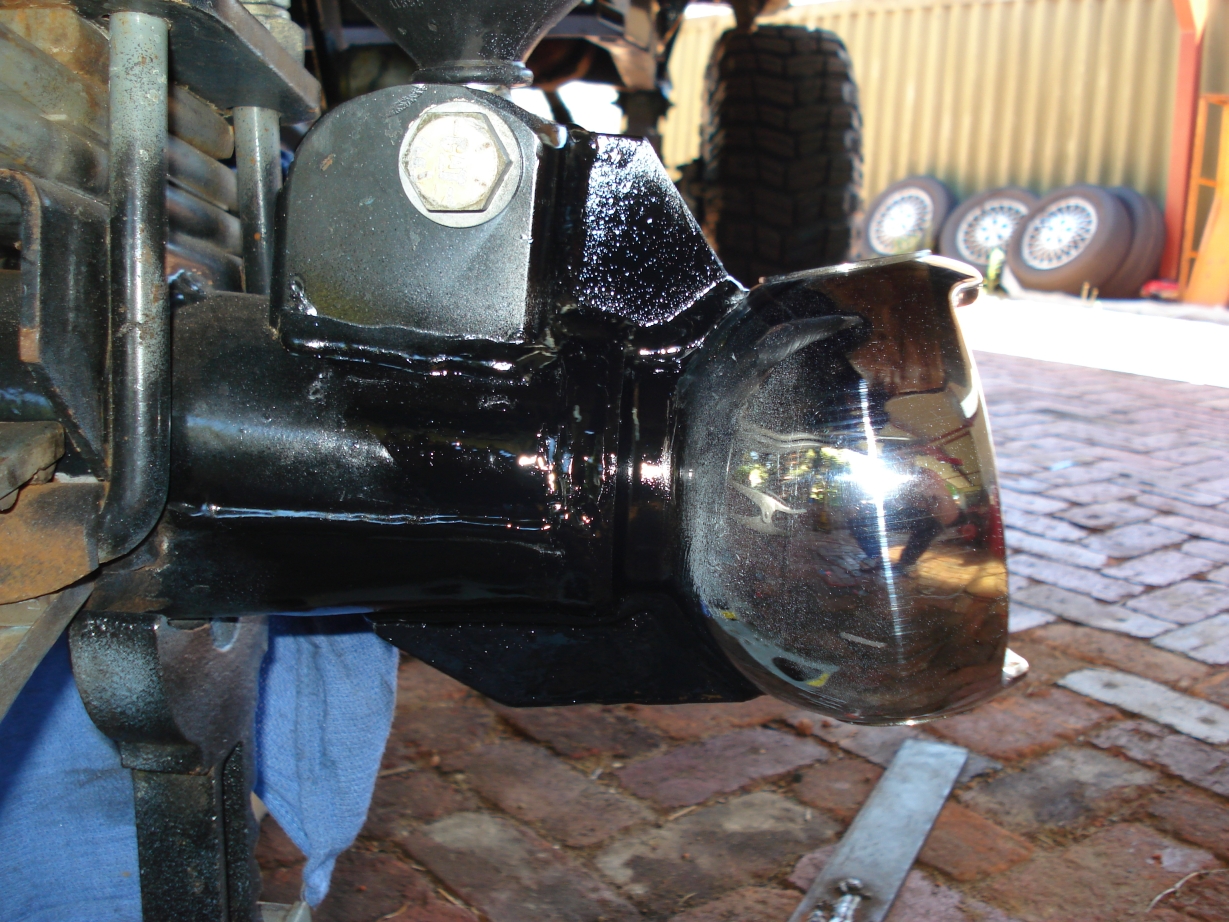
Heres the finished product.
SOME PROGRESS!
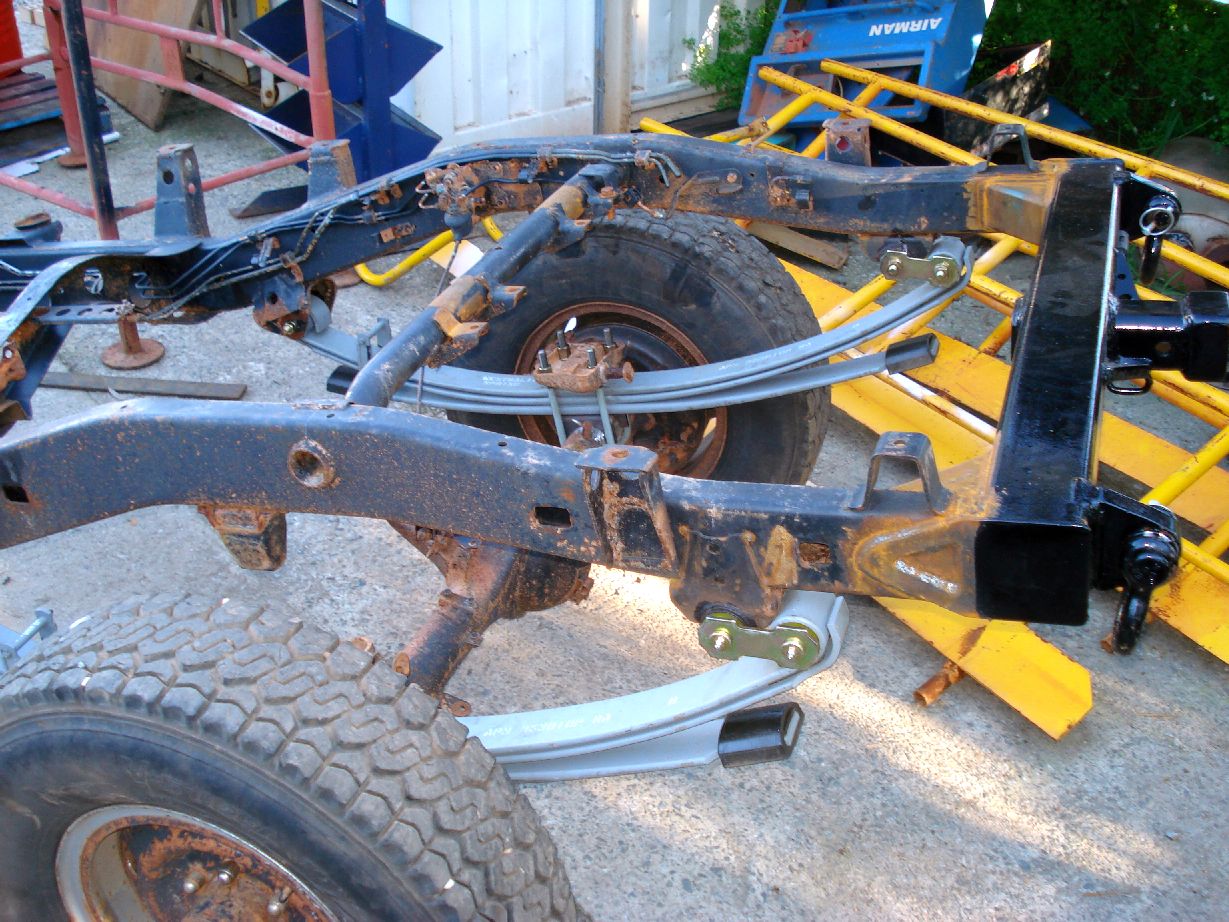
- Rear Hitch in place
- Gusseted
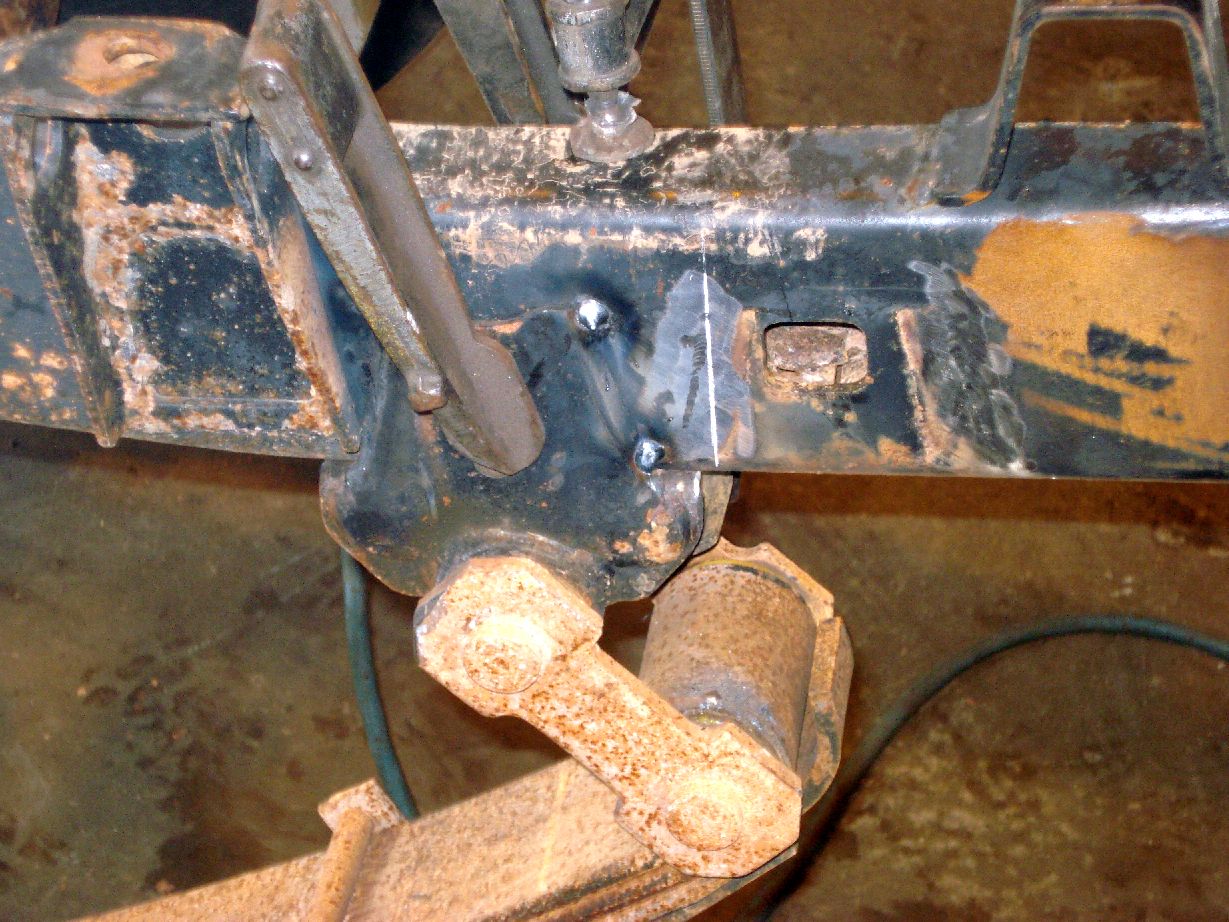
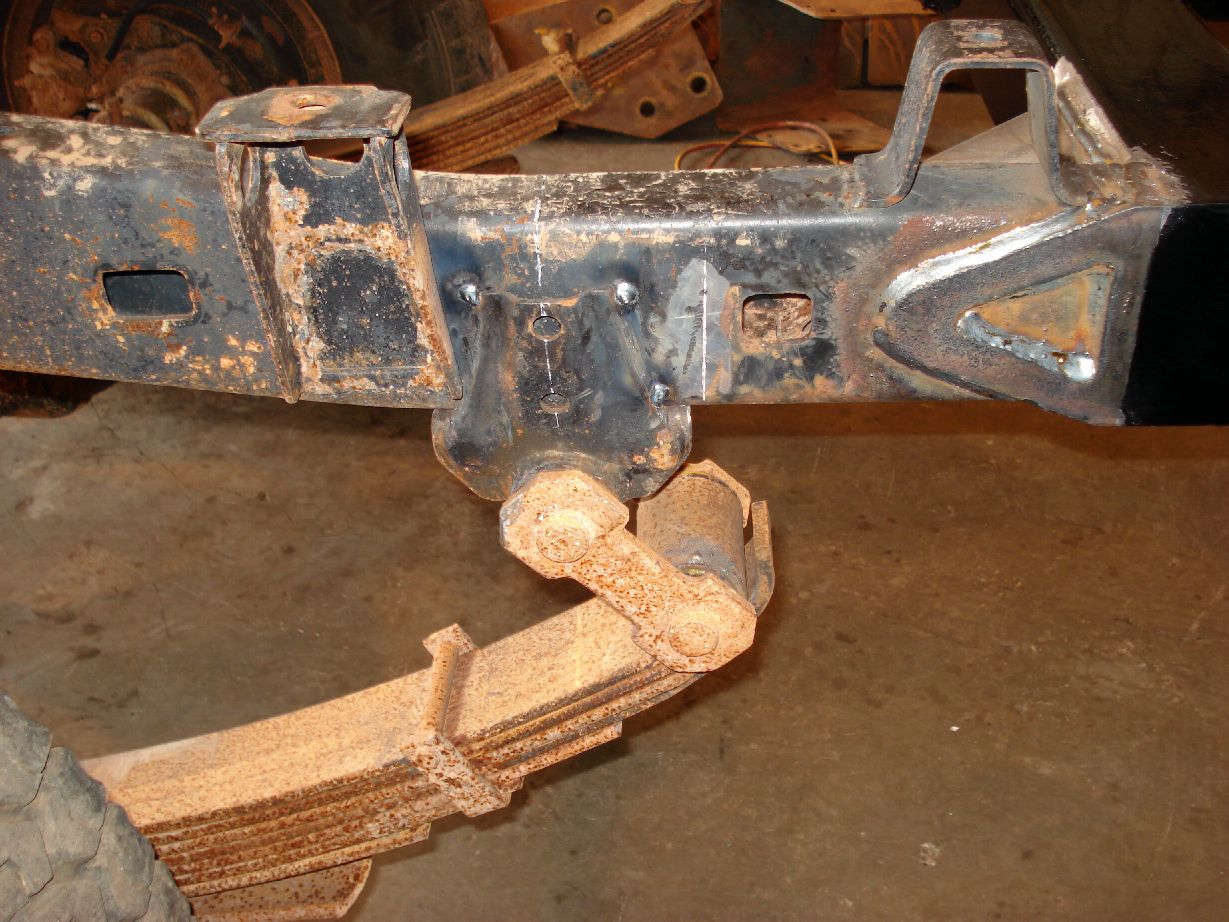
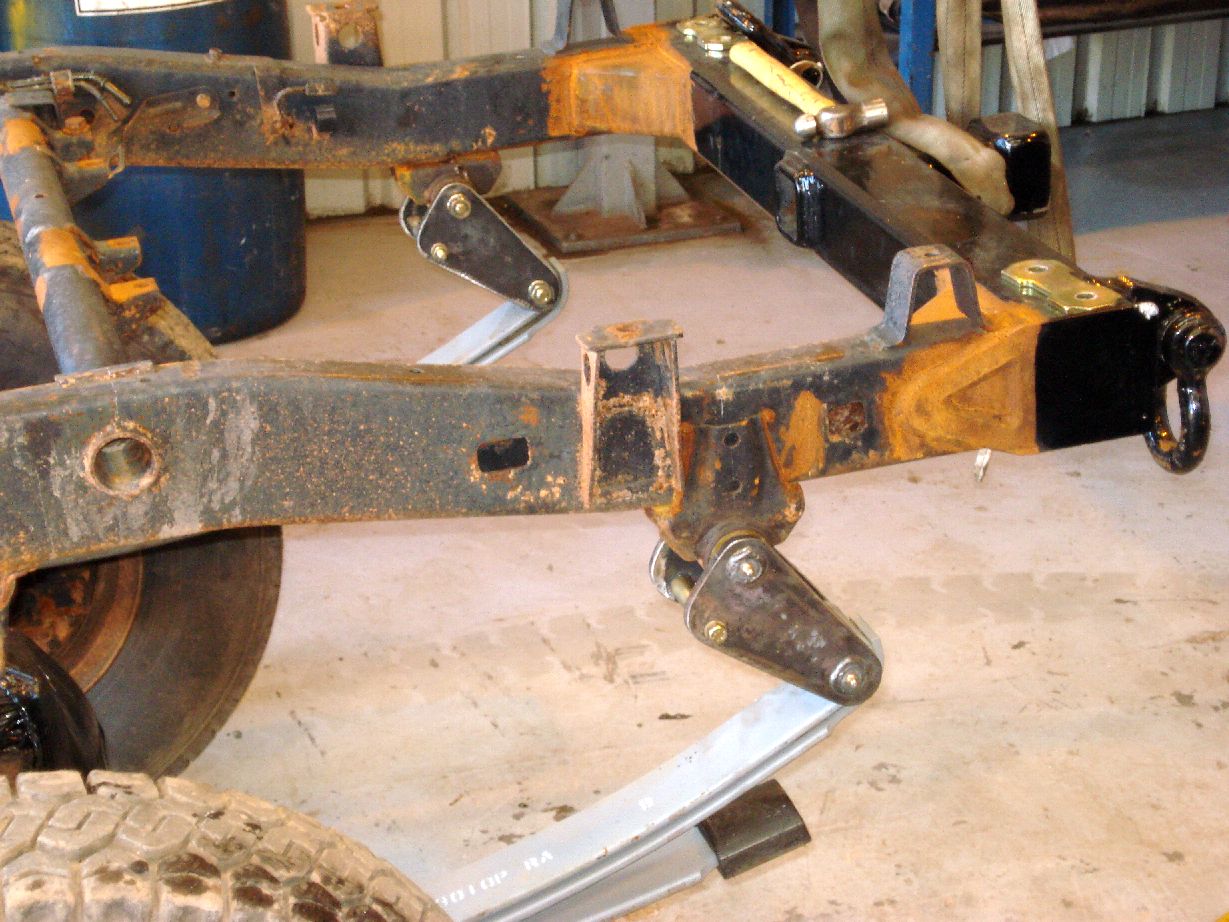
- Rear Shackle angle revised
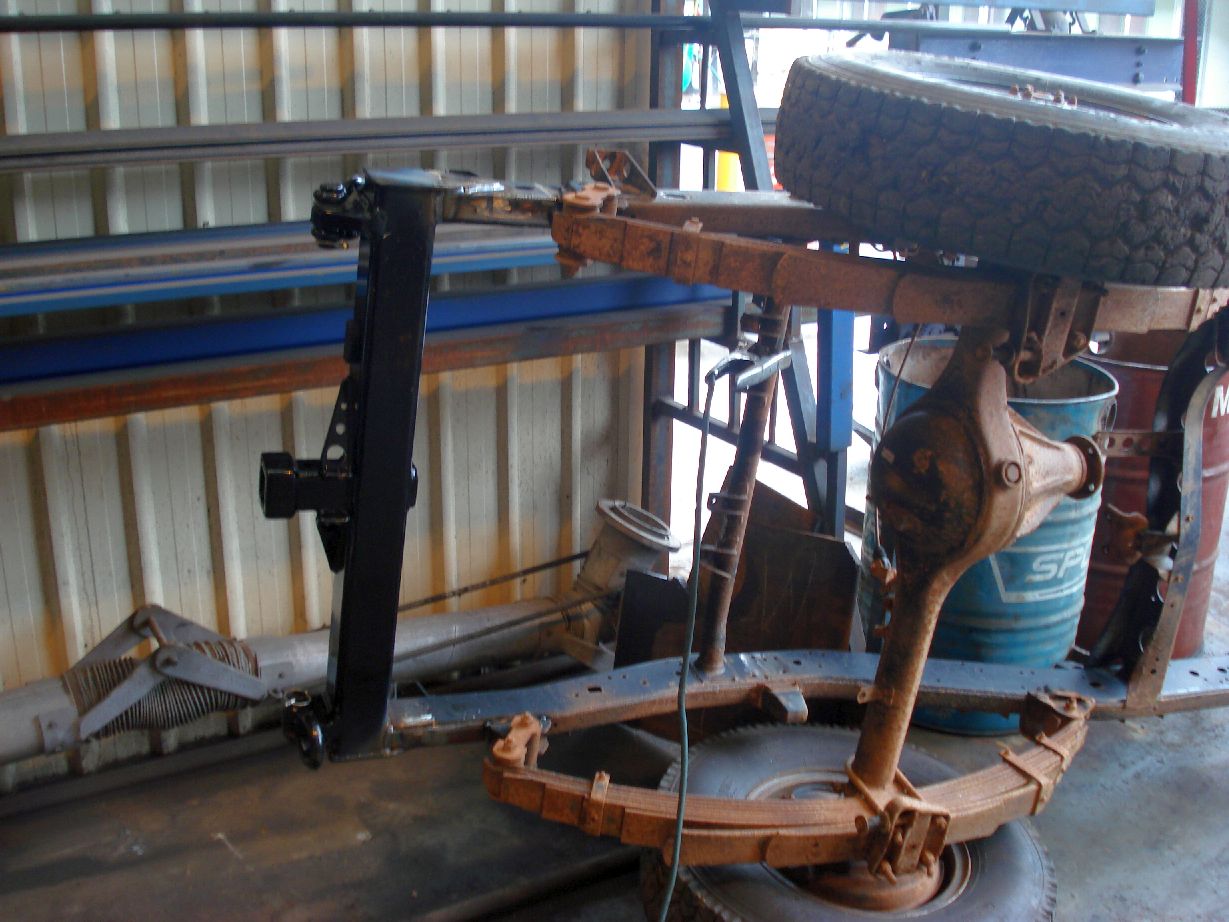
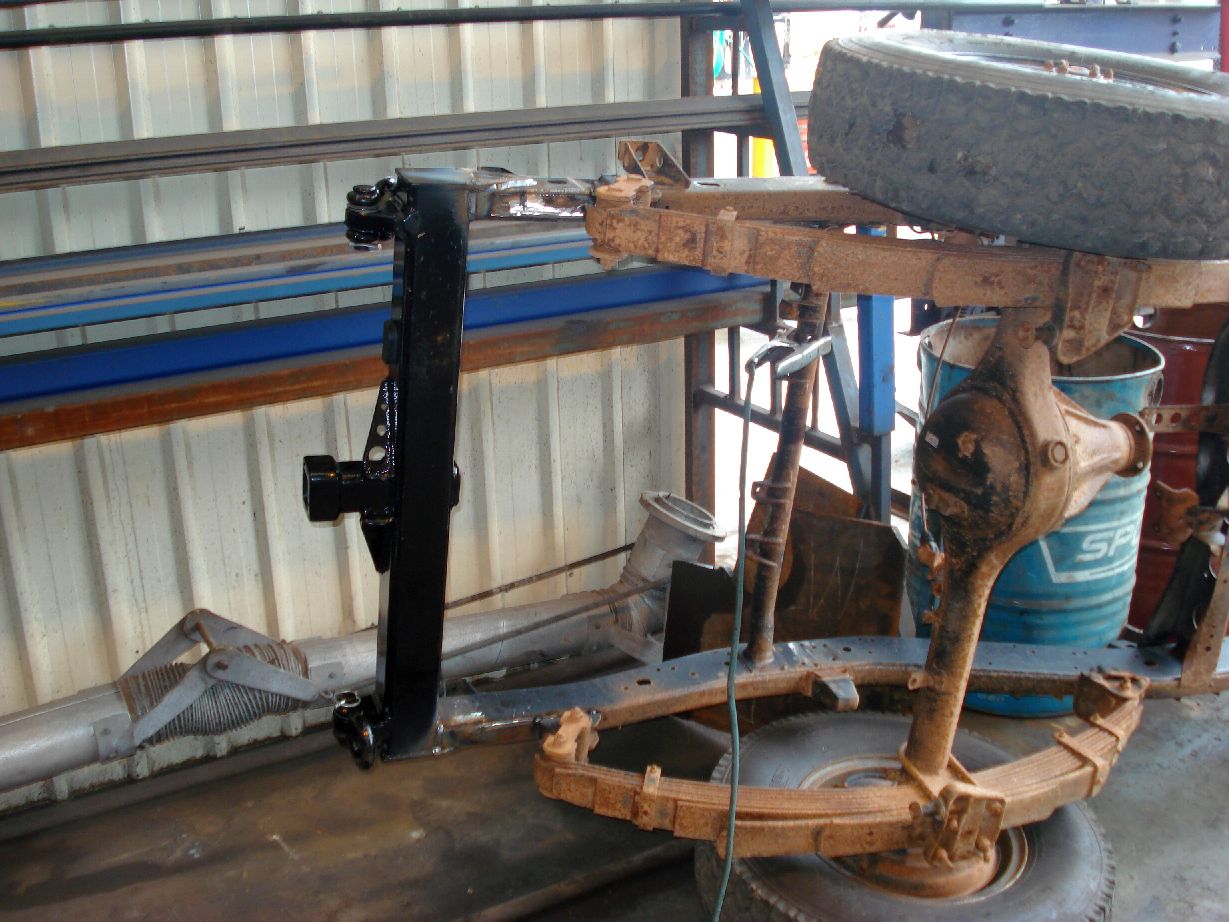
- Front Hangers in place
- Front springs hung
The mating of the hitch to the chassis could not have worked out better, looks grouse and i reckon its plenty strong enough.
Changing the rear shackle angle was a sinch, air arc and a steady hand. Has made the rear end flex heaps more already.
The front spring hangers are tacked into position appx 2.5″ – 3″ further forward to allow the 37″s.
More work to come later i hope
Got a fair bit done today but my camera decided not to put out so i have no pikkies…. Ill take some on monday
What i did
Finished mounting front springs (bastard of a job)
Mounted new rear springs
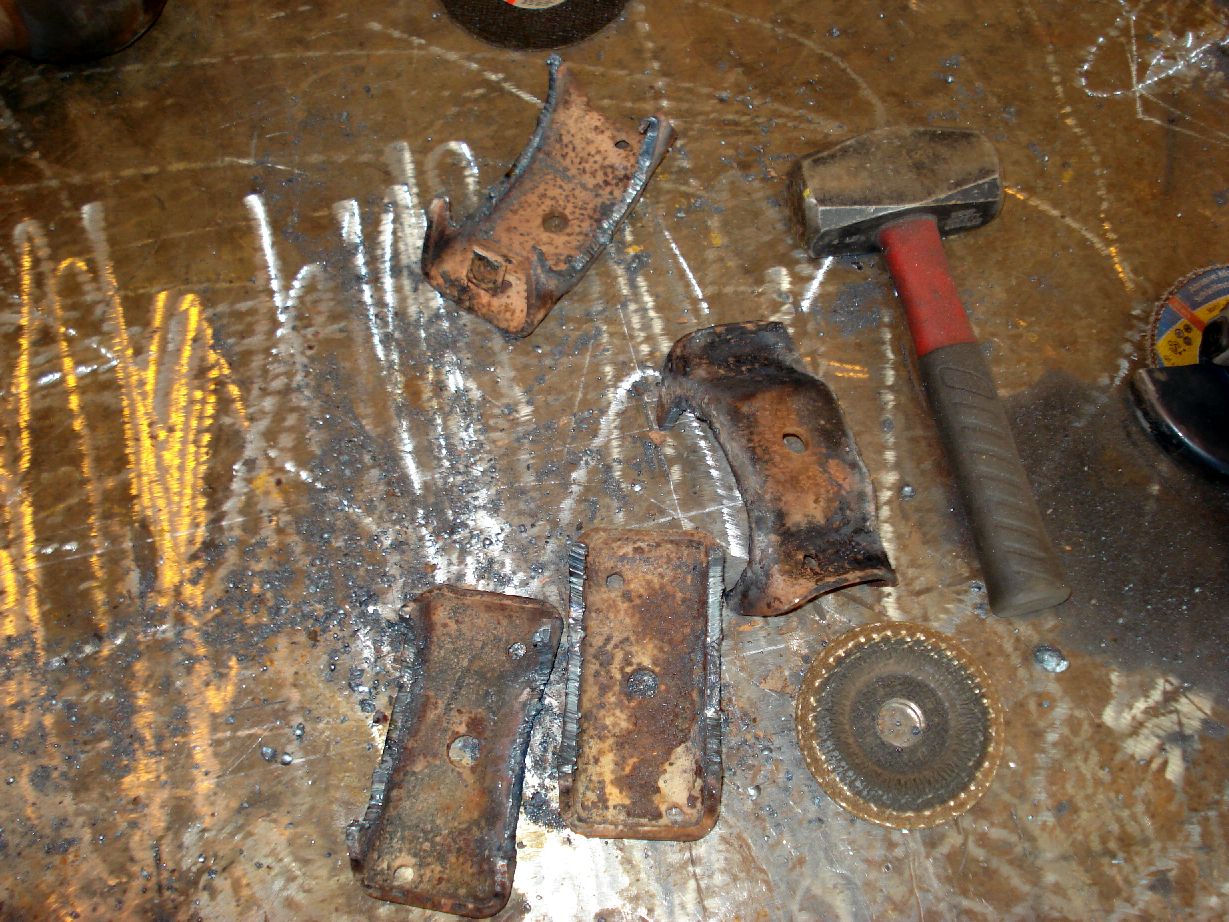
Cut mounts off rear diff
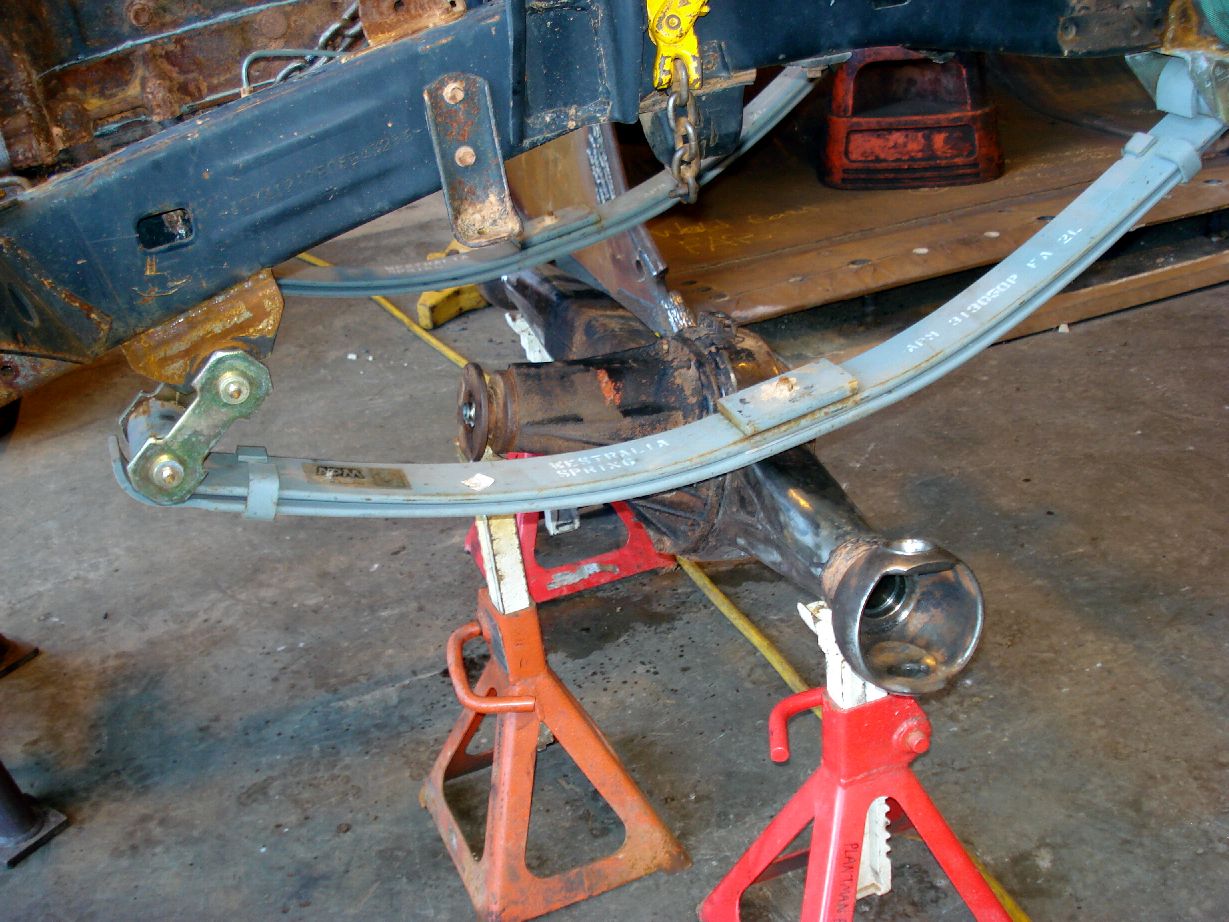
Bolted rear diff in SOA (haven’t welded perches on yet as i have no transfer to work off)
Then after all that and working with a perfect 45deg shackle angle i decided to flex the springs up a bit to see what id get.
Instantly the front and rear shackles rolled back and hit the chassis and got stuck there….
Whats the deal? are my shackle angles all wrong or are standard shackles no good working at 45deg?
sigh… so much work yet so little actually acheived..
Here are the pix i promised…
Those top ubolt plates are crapola old ones ill change them later…
i hate that shackle angle LOL!
Heres a little update, i didnt get much done as i was helping a mate sort his car out (he bent his front diff).
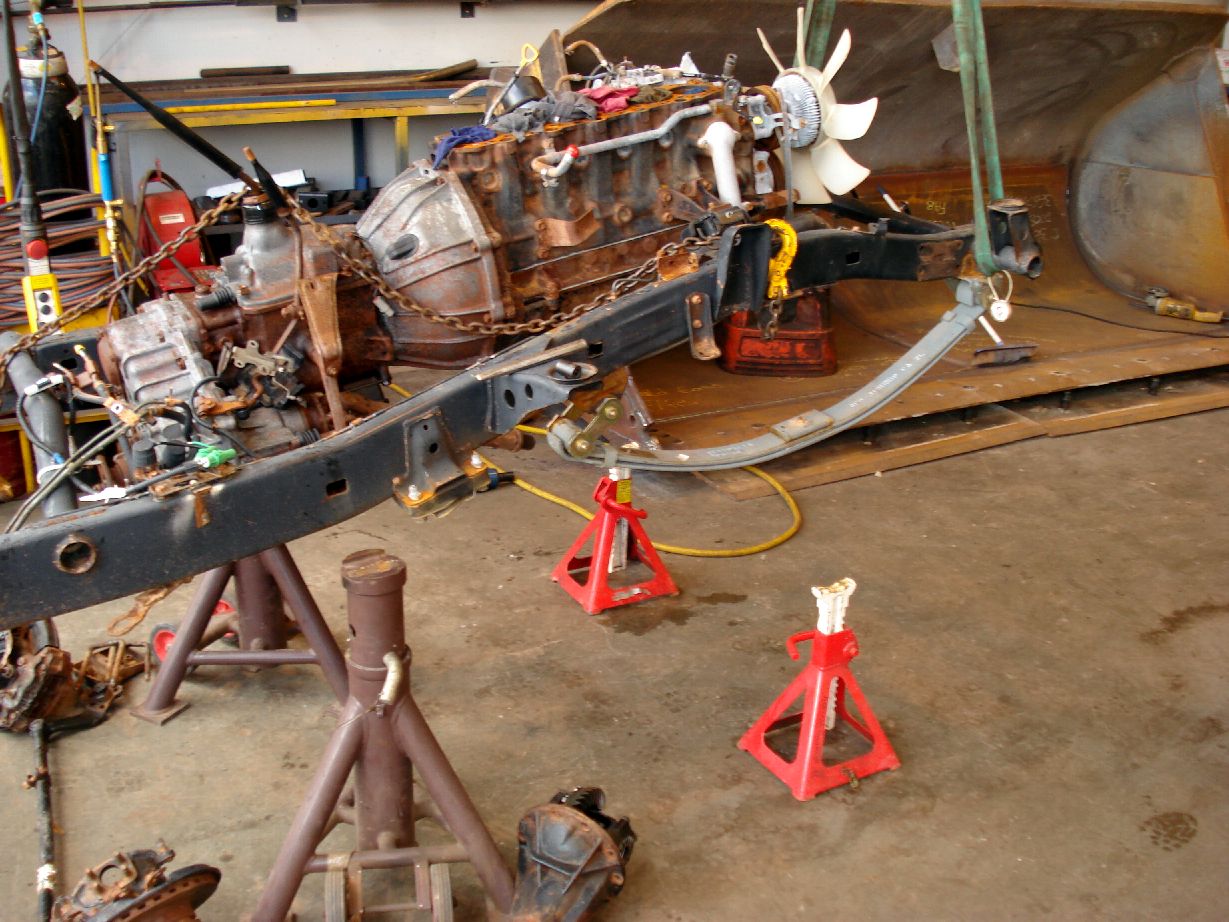
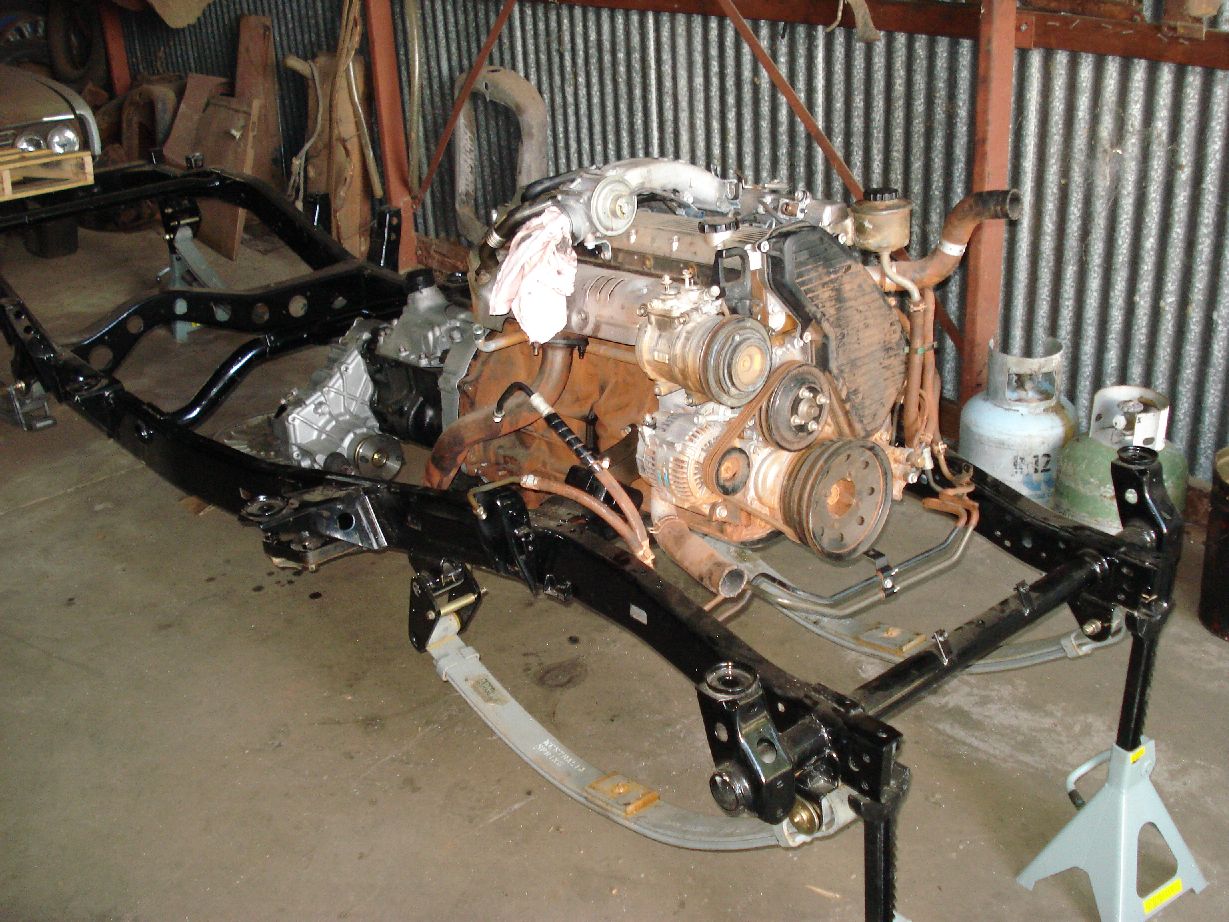
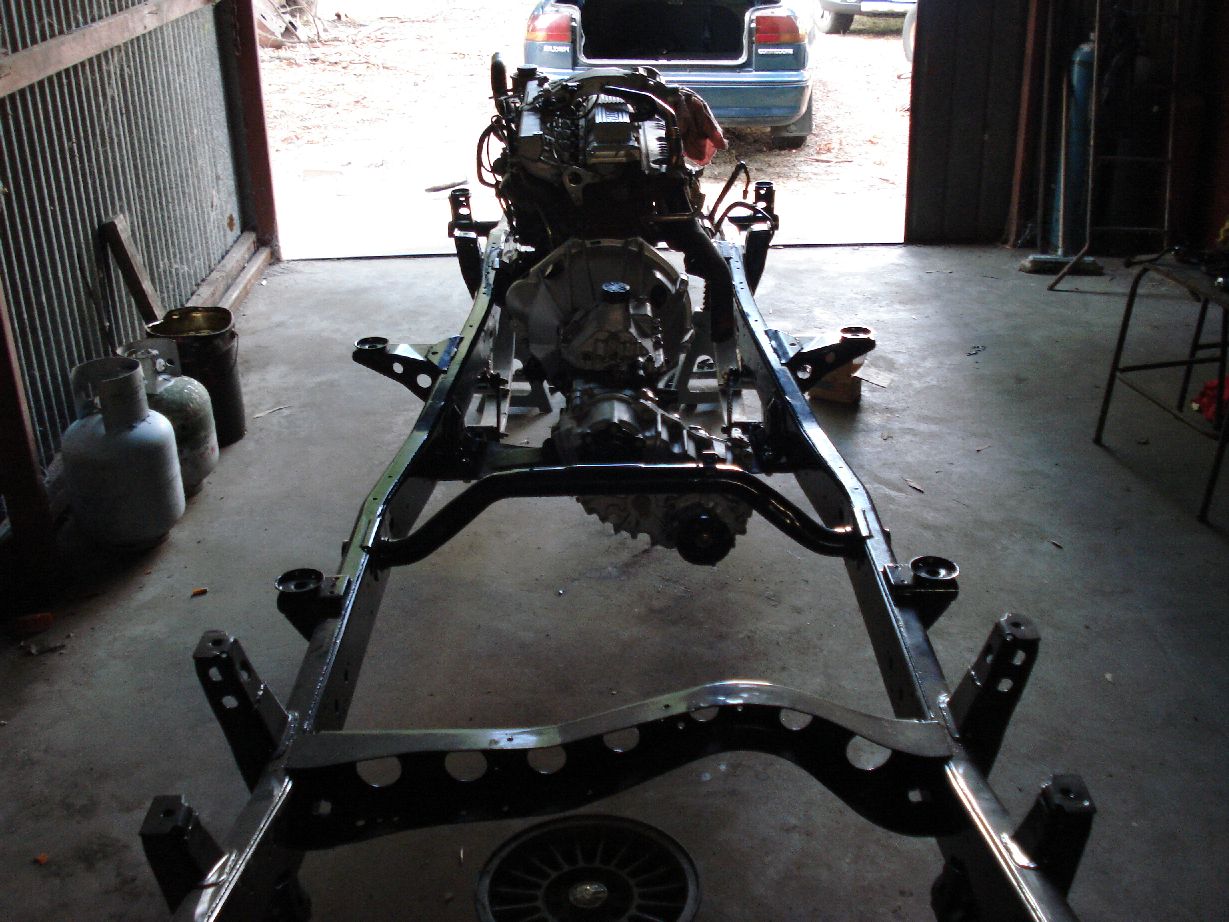
Anyway i managed to get the old block and gearbox/transfer siting in for the output flange angles.
I was running out of time so i did a quick bodjy job and put the front diff in SOA just so it can be wheeled around easier now that the engine is in.
Hehe a super quick 10 min front SOA comprising of only 2 holes hahaaha (remember its super temporary!)


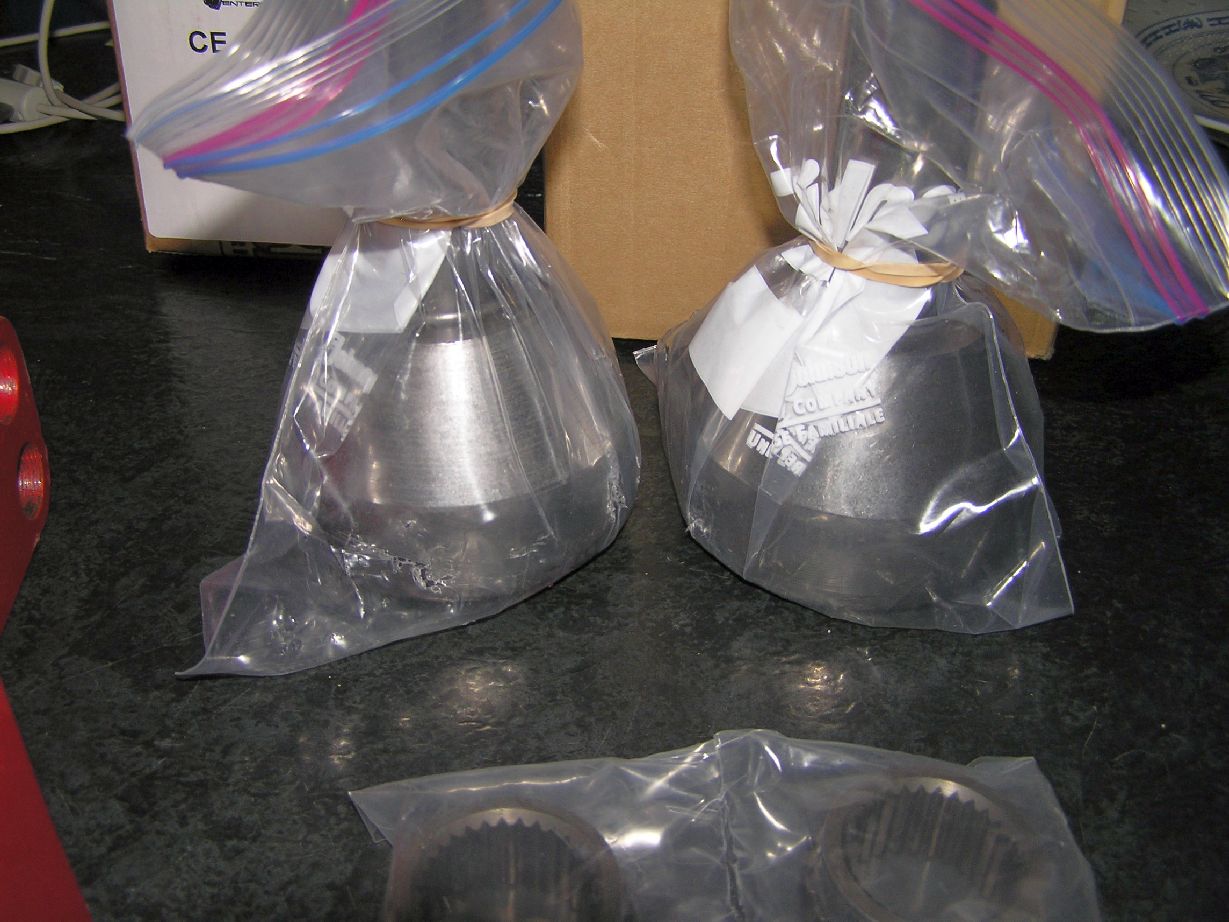
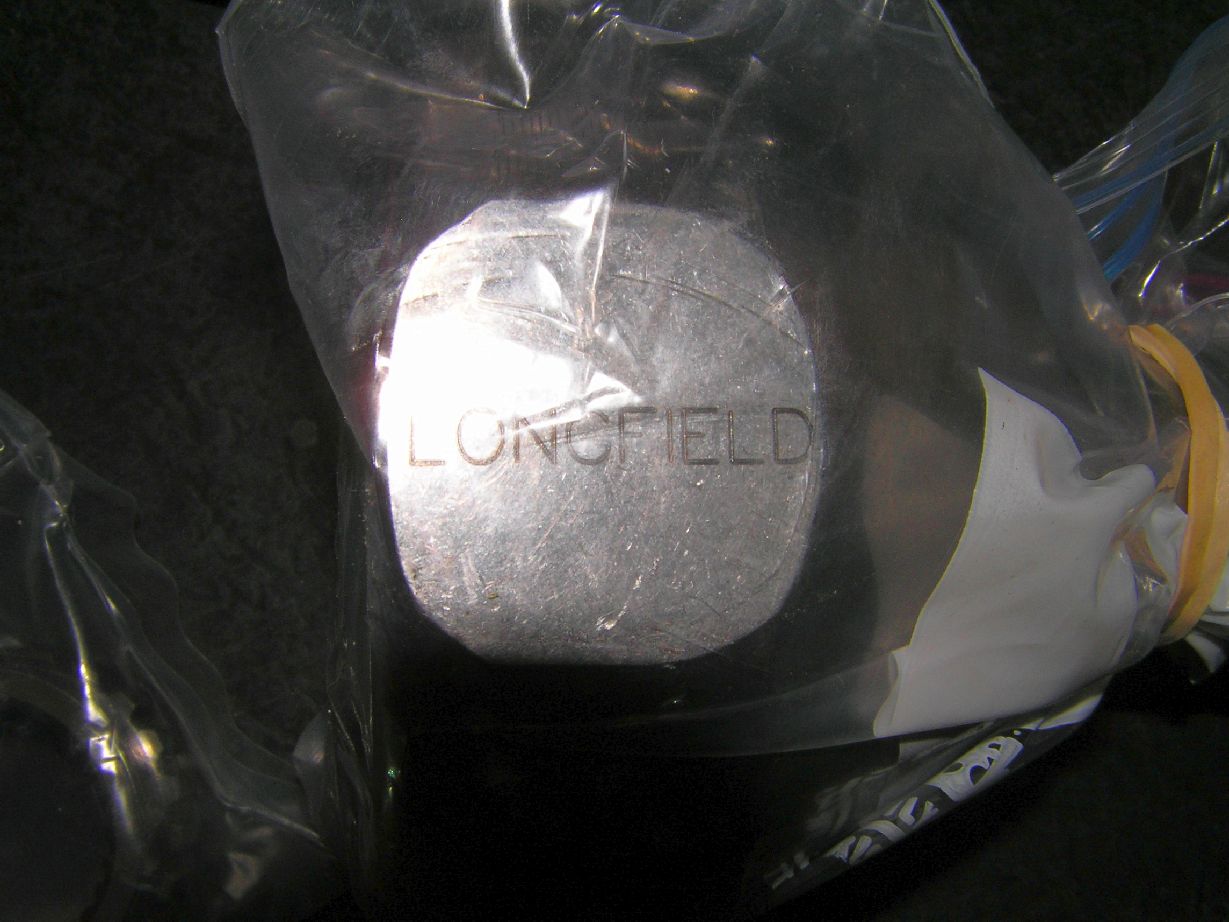
Got some new stuff comin my way now
Chyro Longfeild CVs
Chryo Hub gears
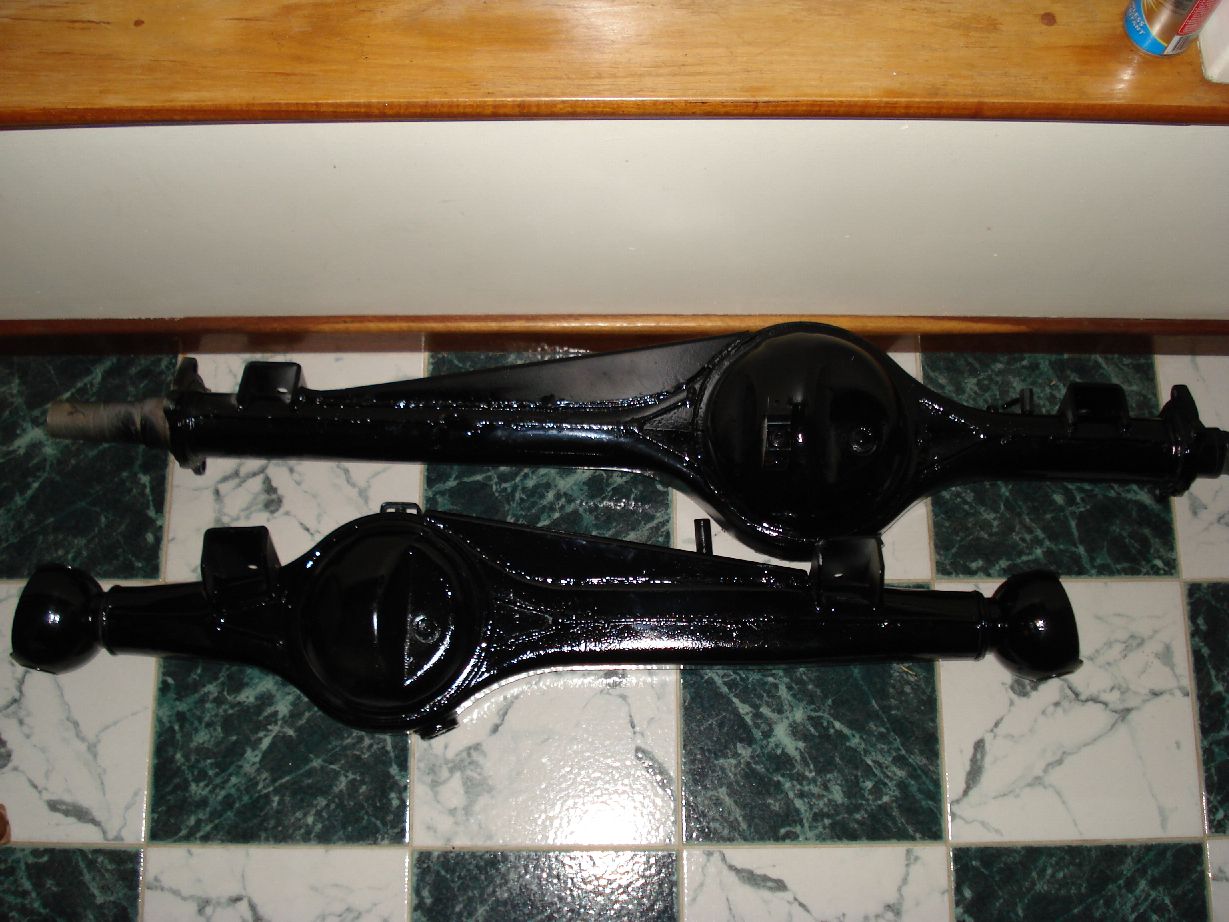
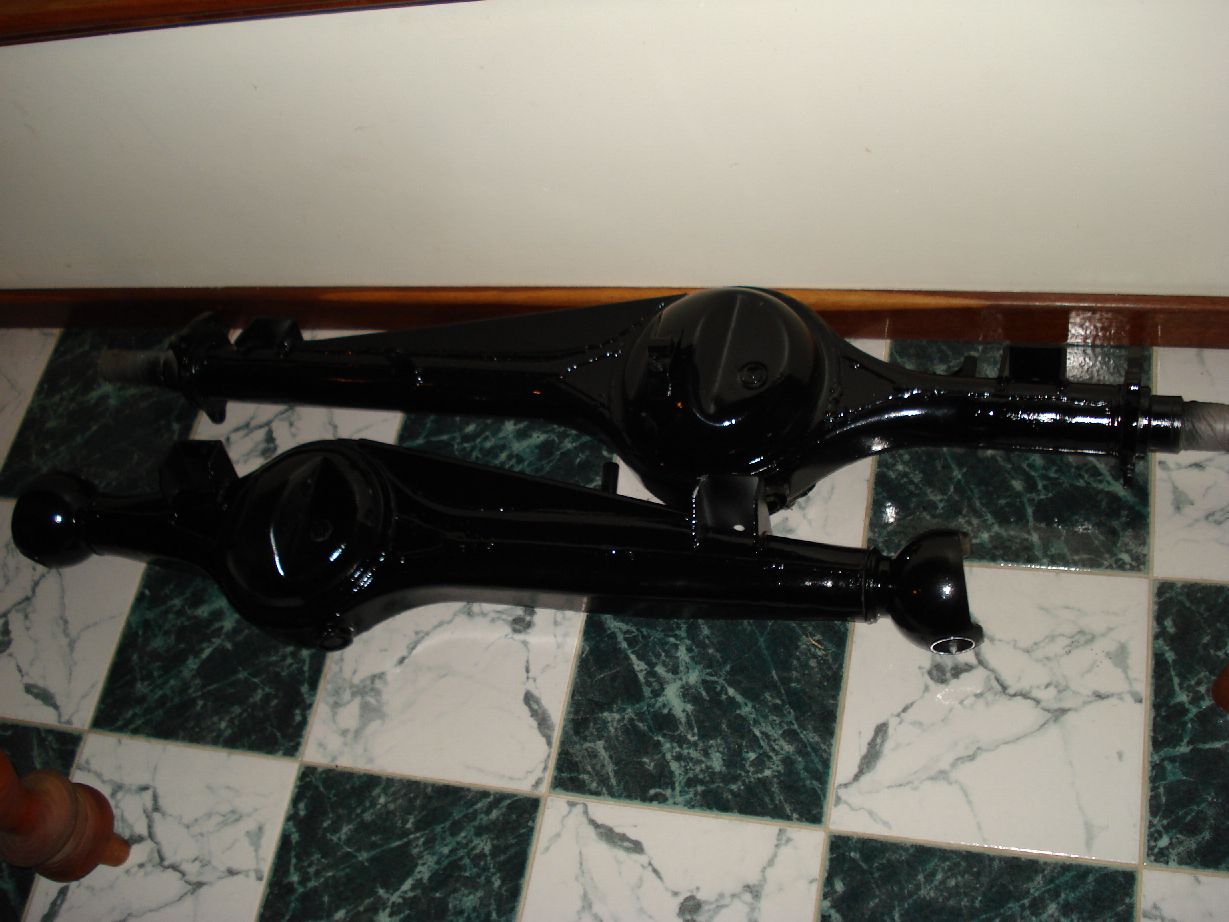
4.88 chryo ring and pinion (front and rear)
Front and rear full Detroit lockers with solid inners
Fully rebuilt into my old housings with new bearings and seals
High steer with chrome molly rock rods.
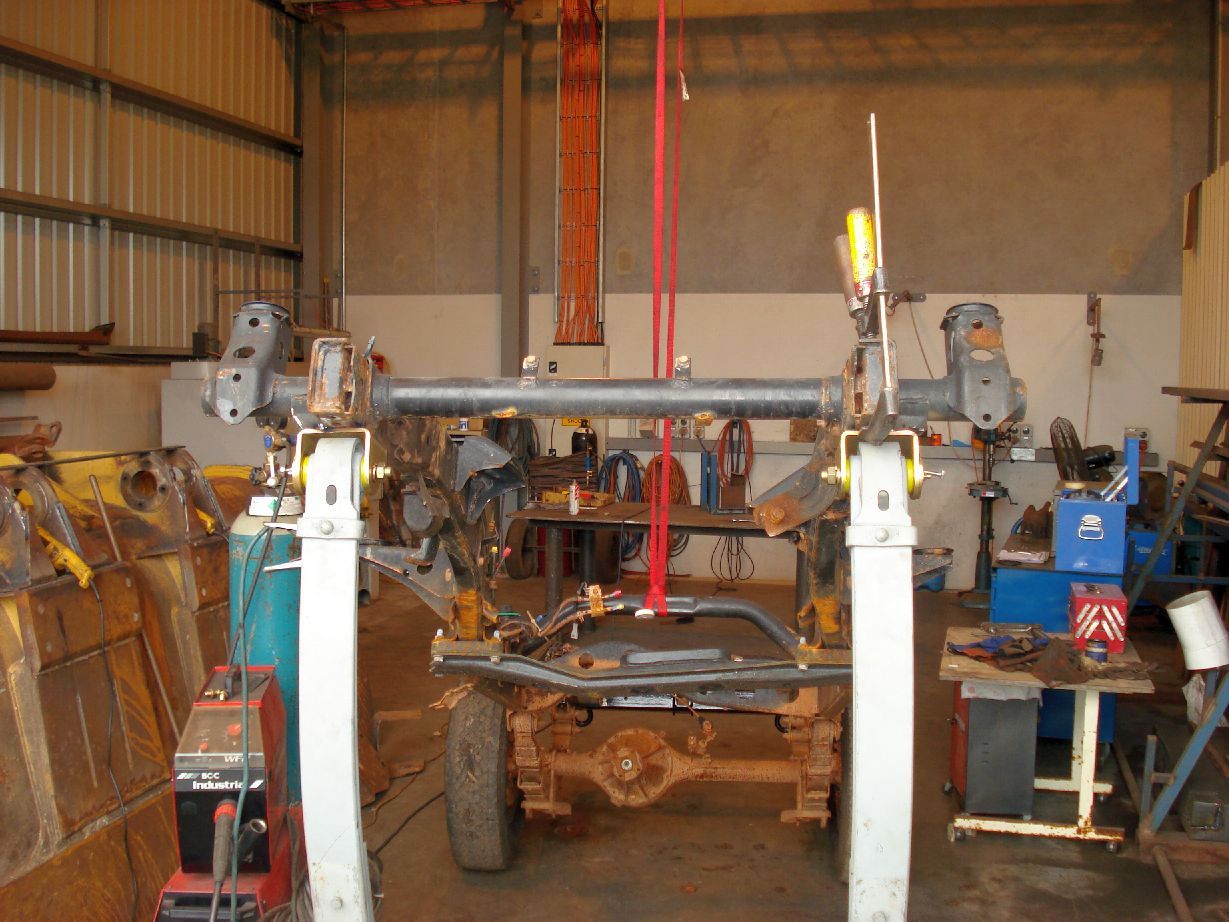
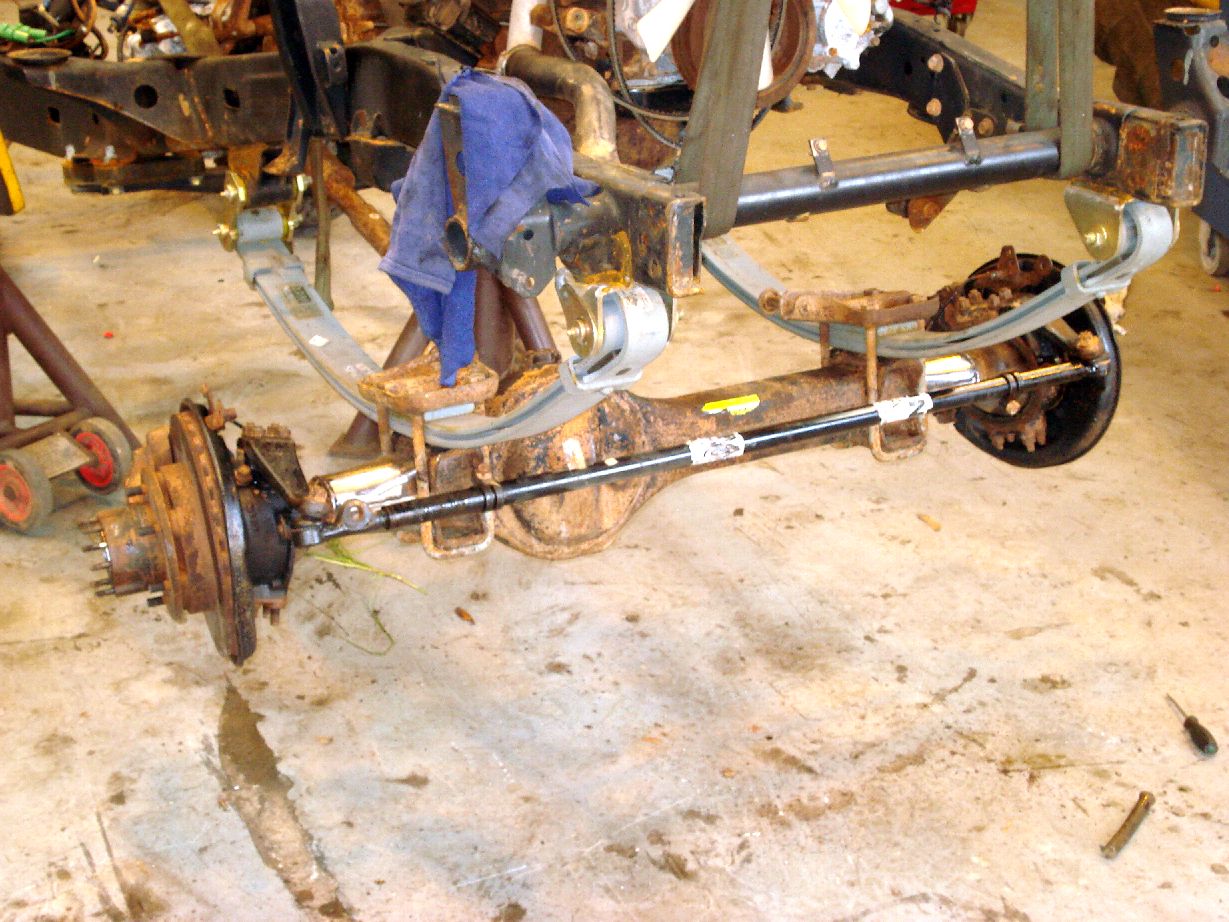
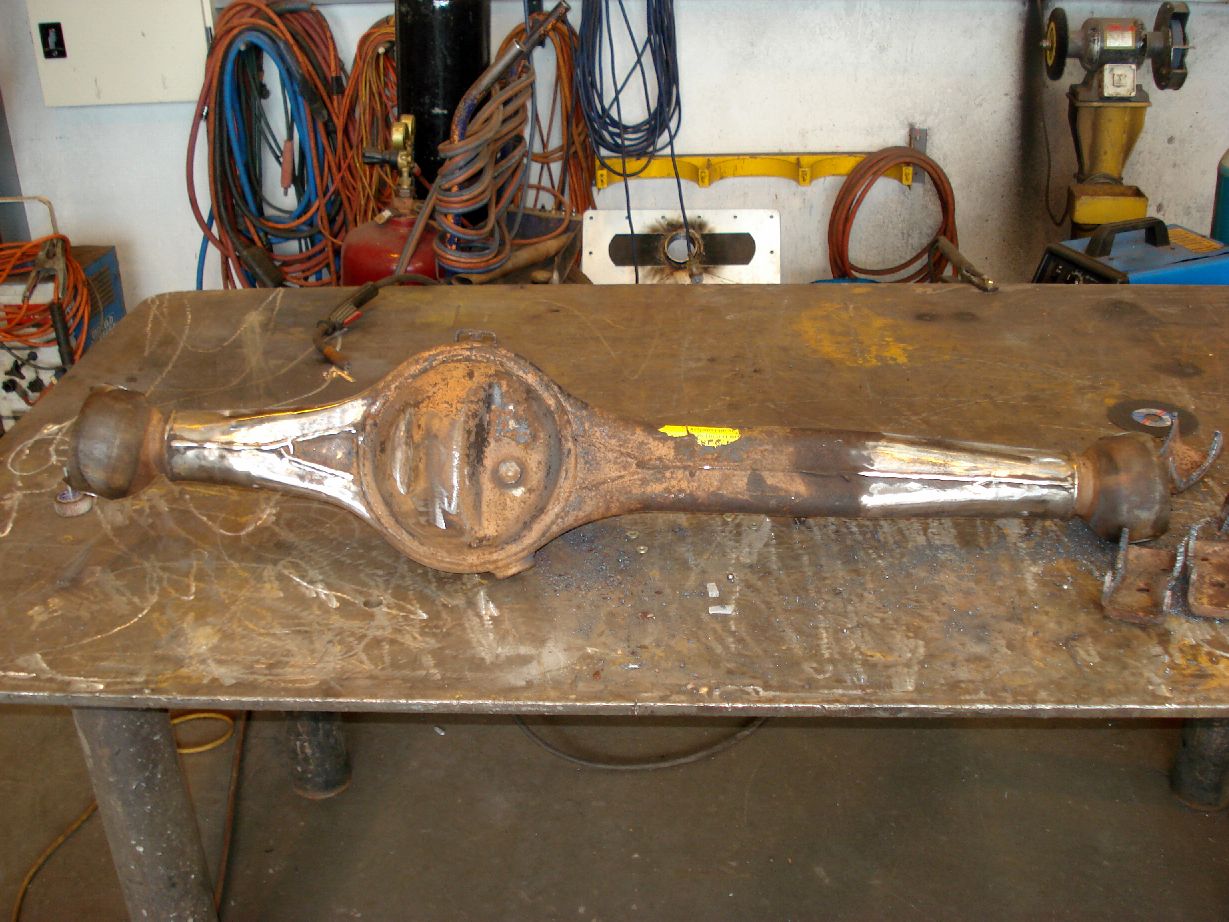
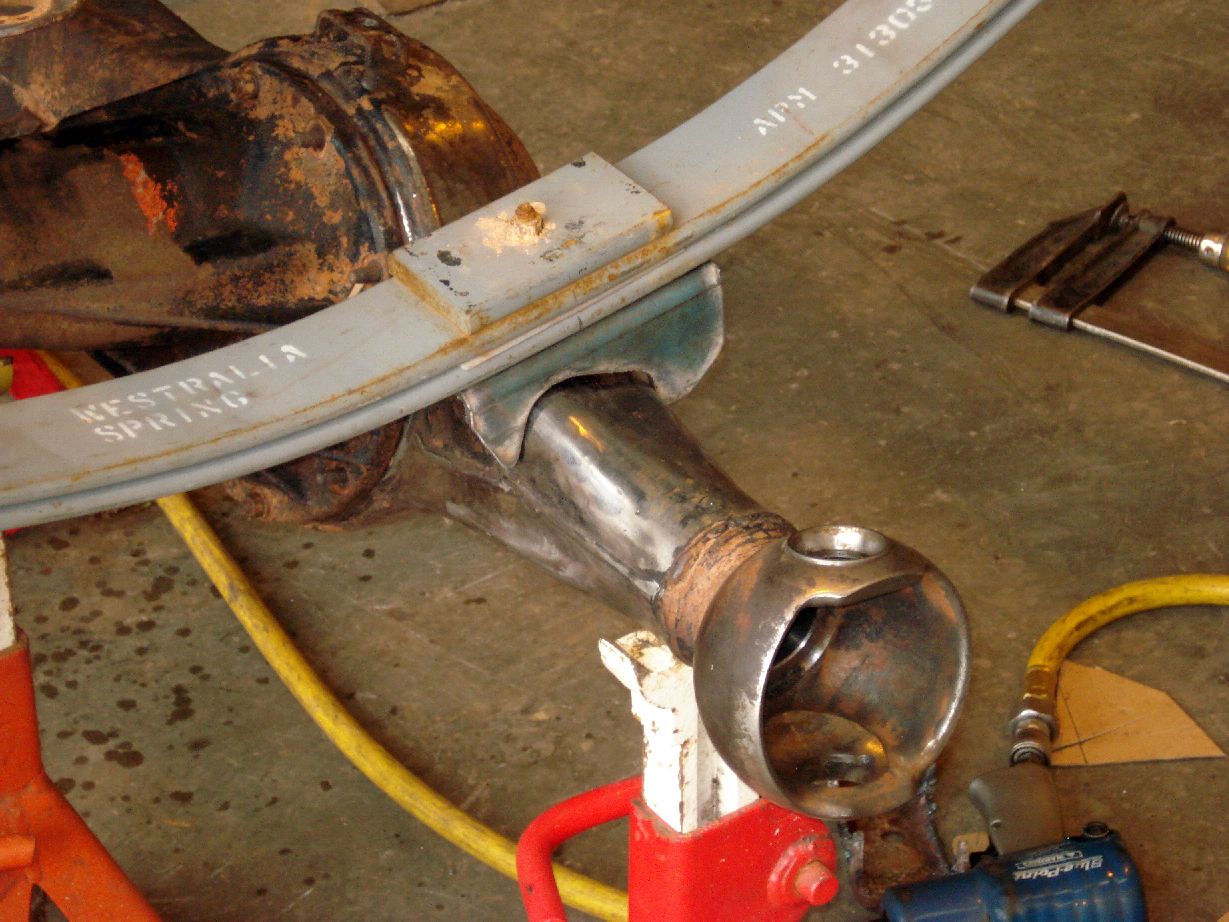
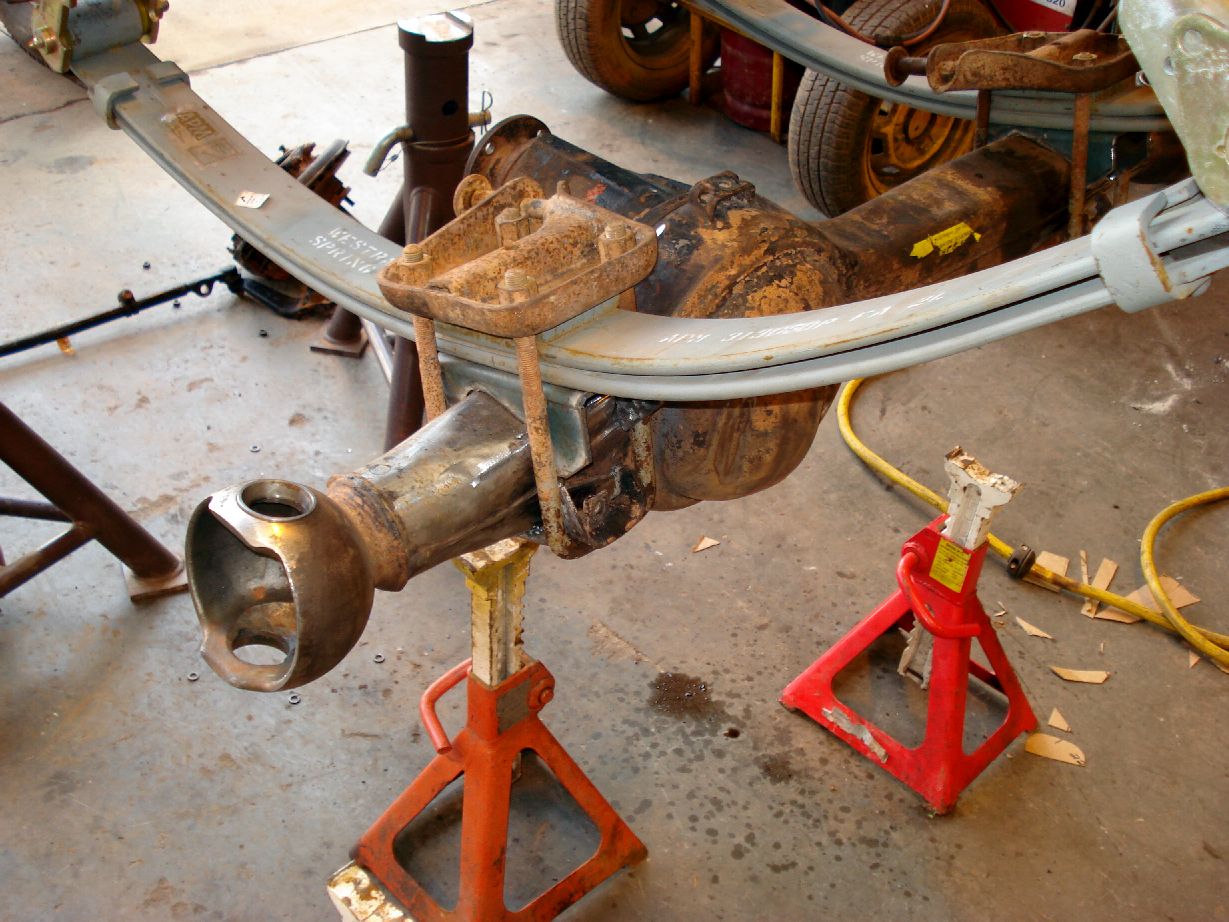
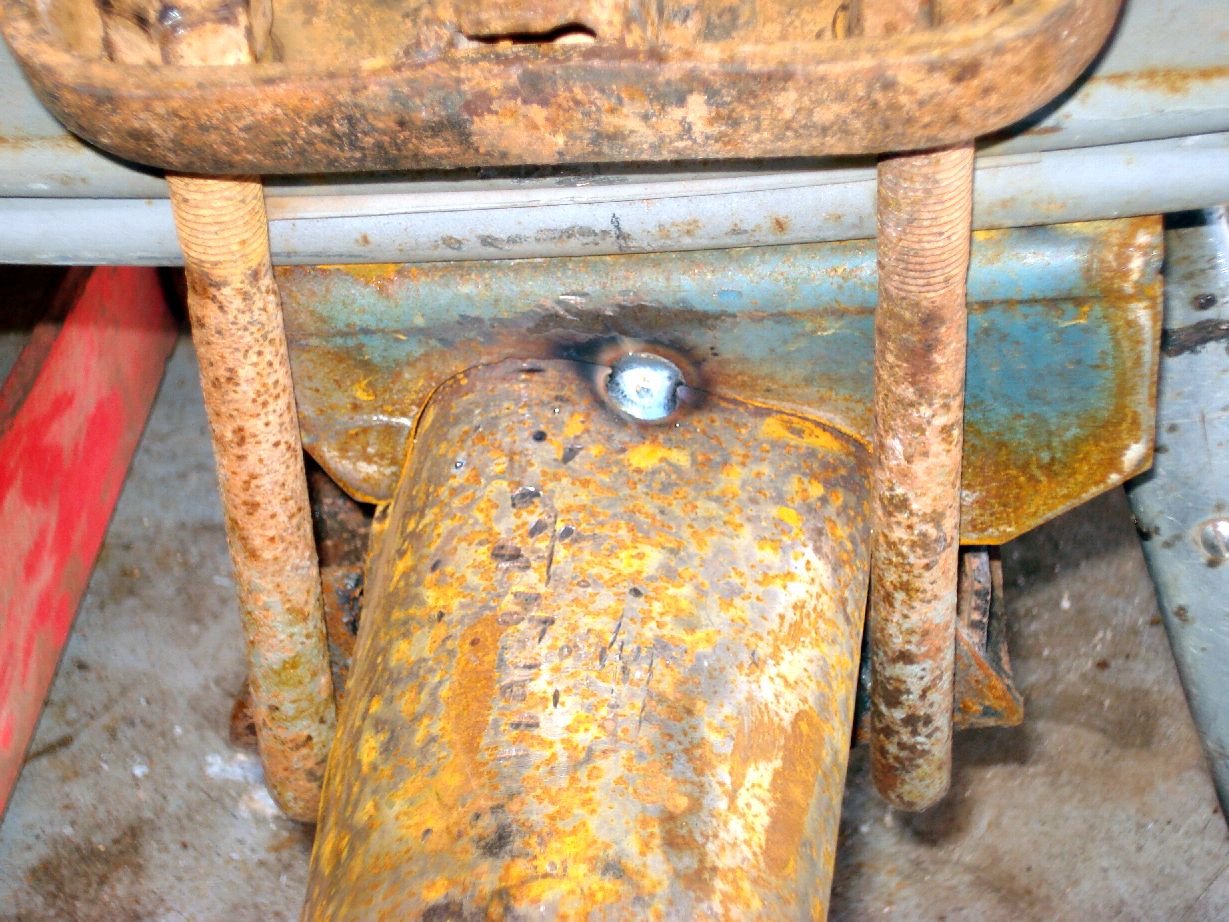
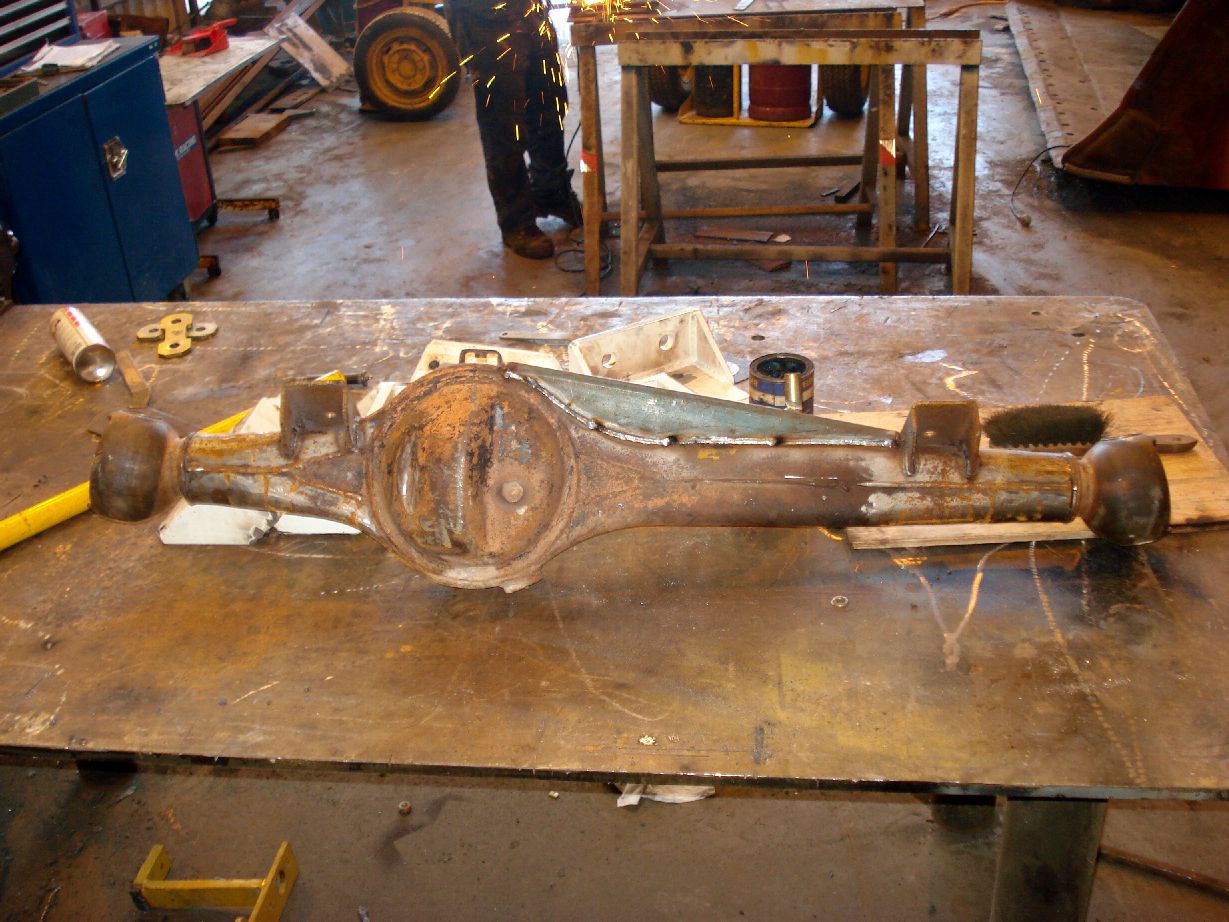
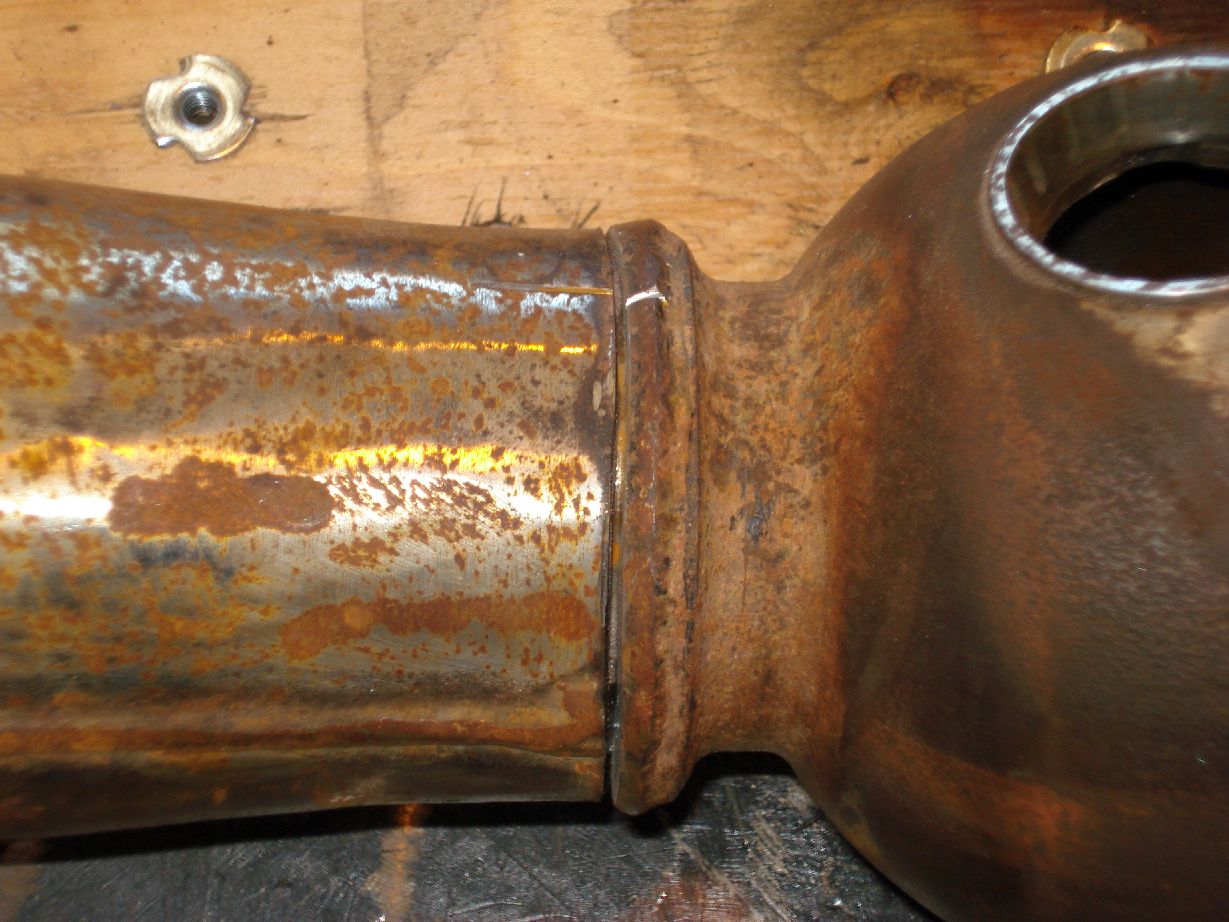
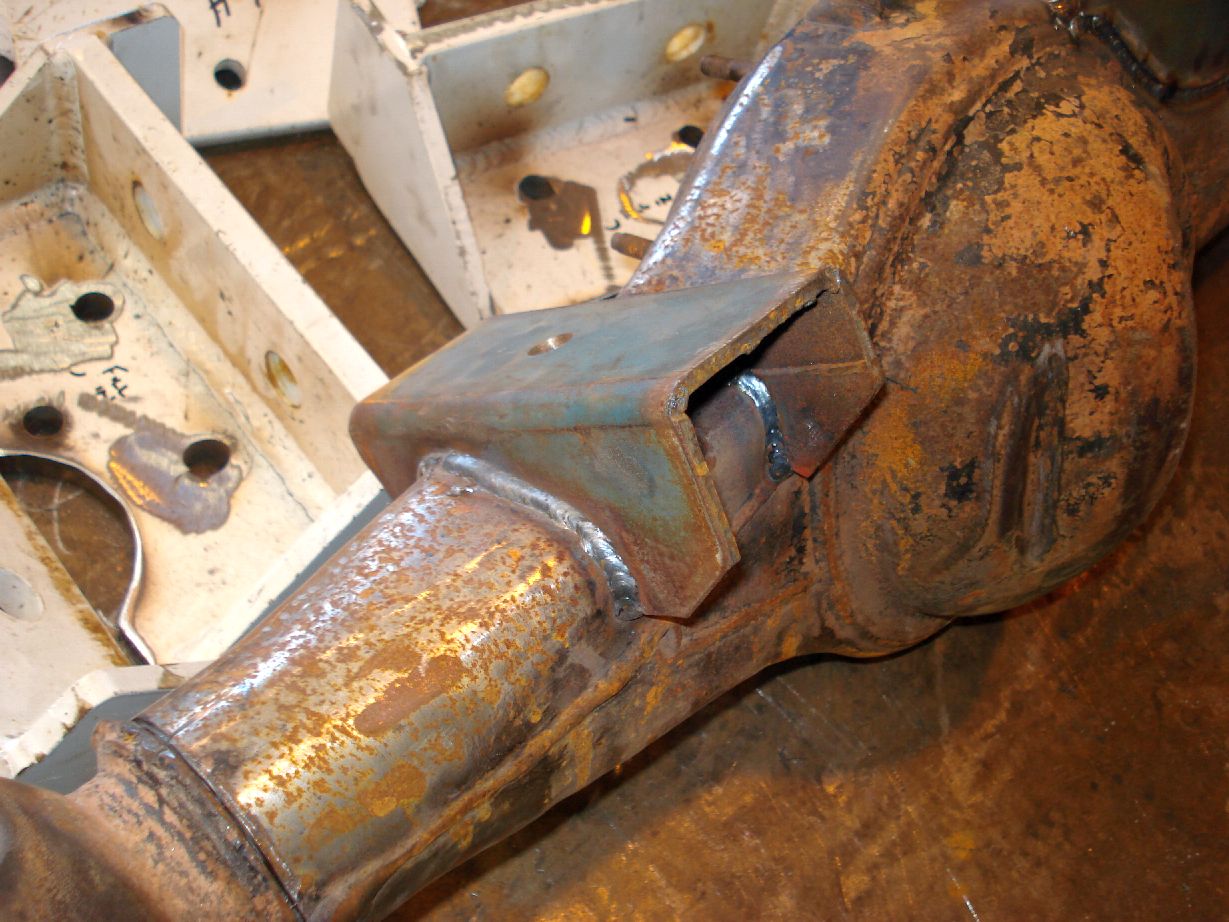
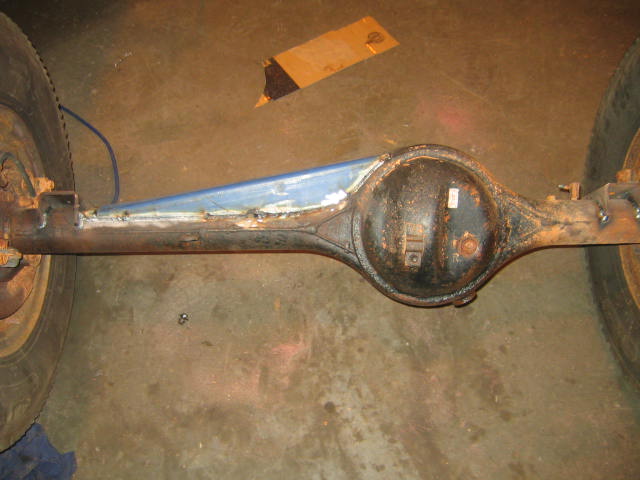
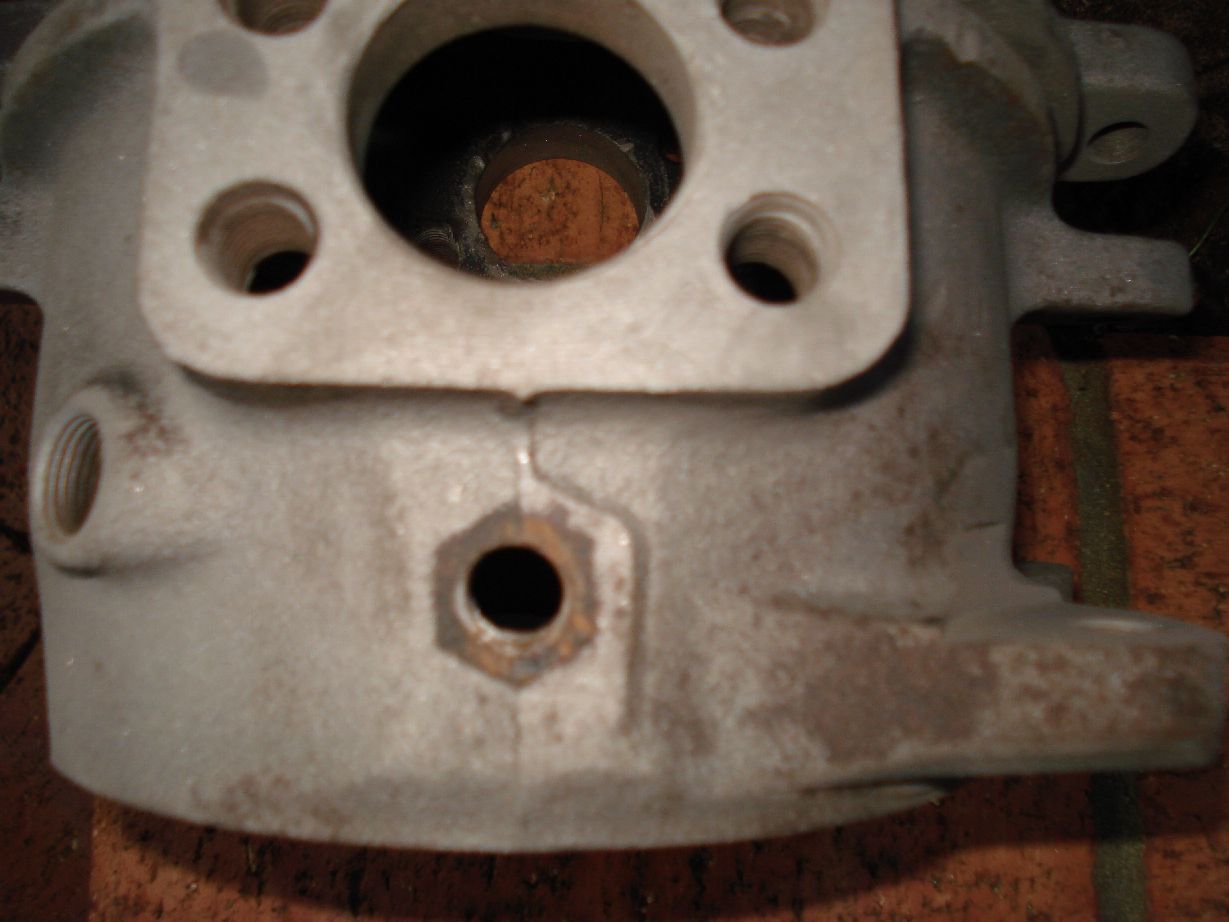
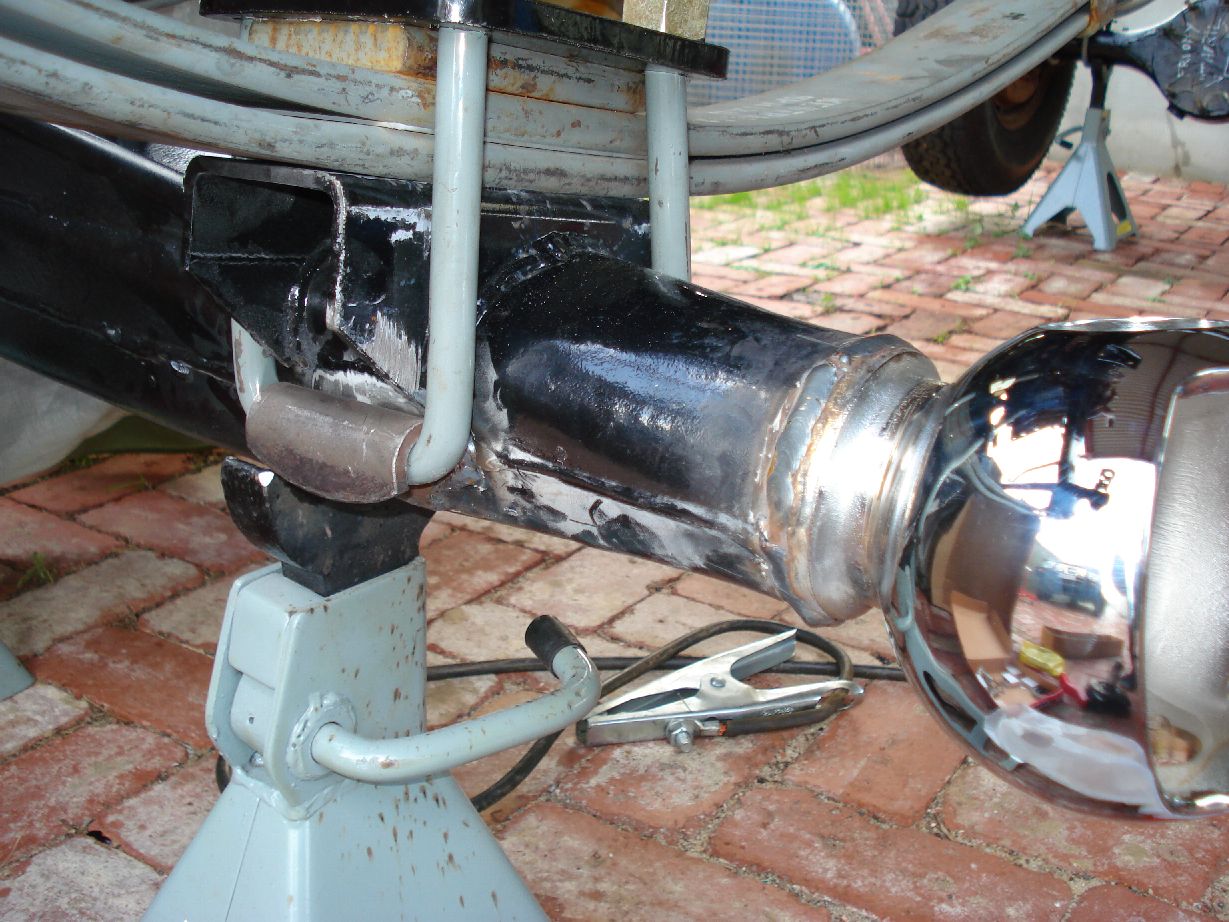
Ive just completed the hardest part of a spring over for a 75 series.
That bloody square banjo housing… it almost broke me, but i won in the end
Getting everything absolutely perfect to the mm and deg so i dont crab down the road.
not easy…
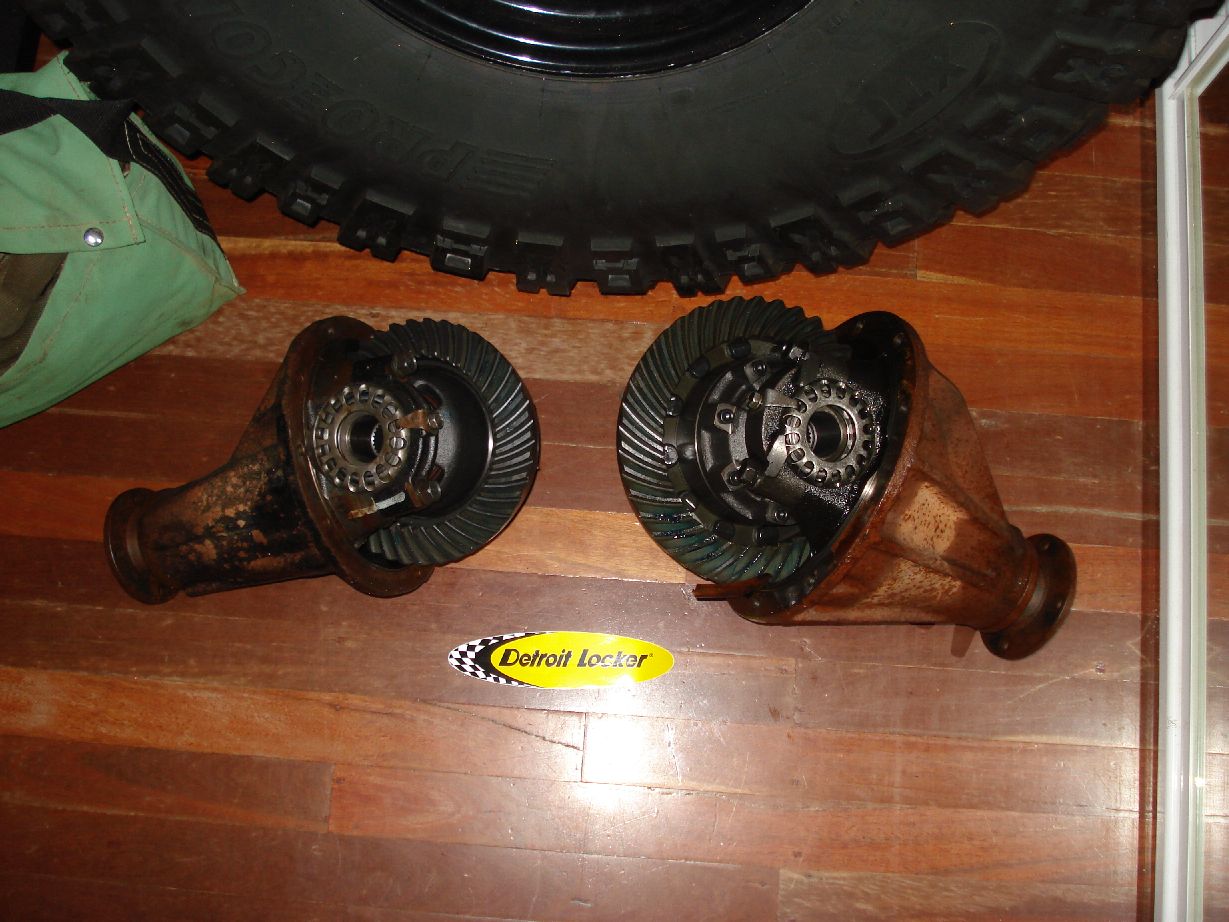
Not a big update but an update never the less…
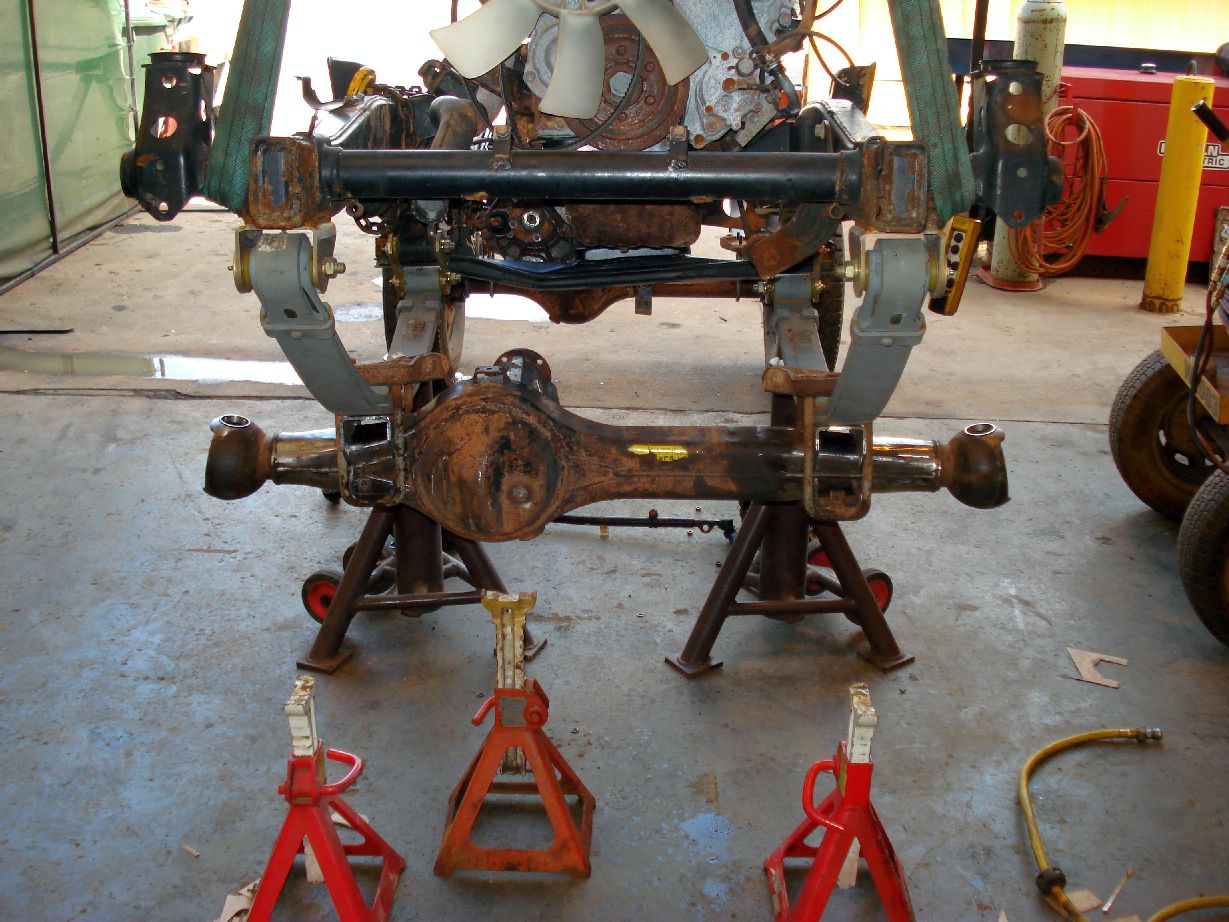
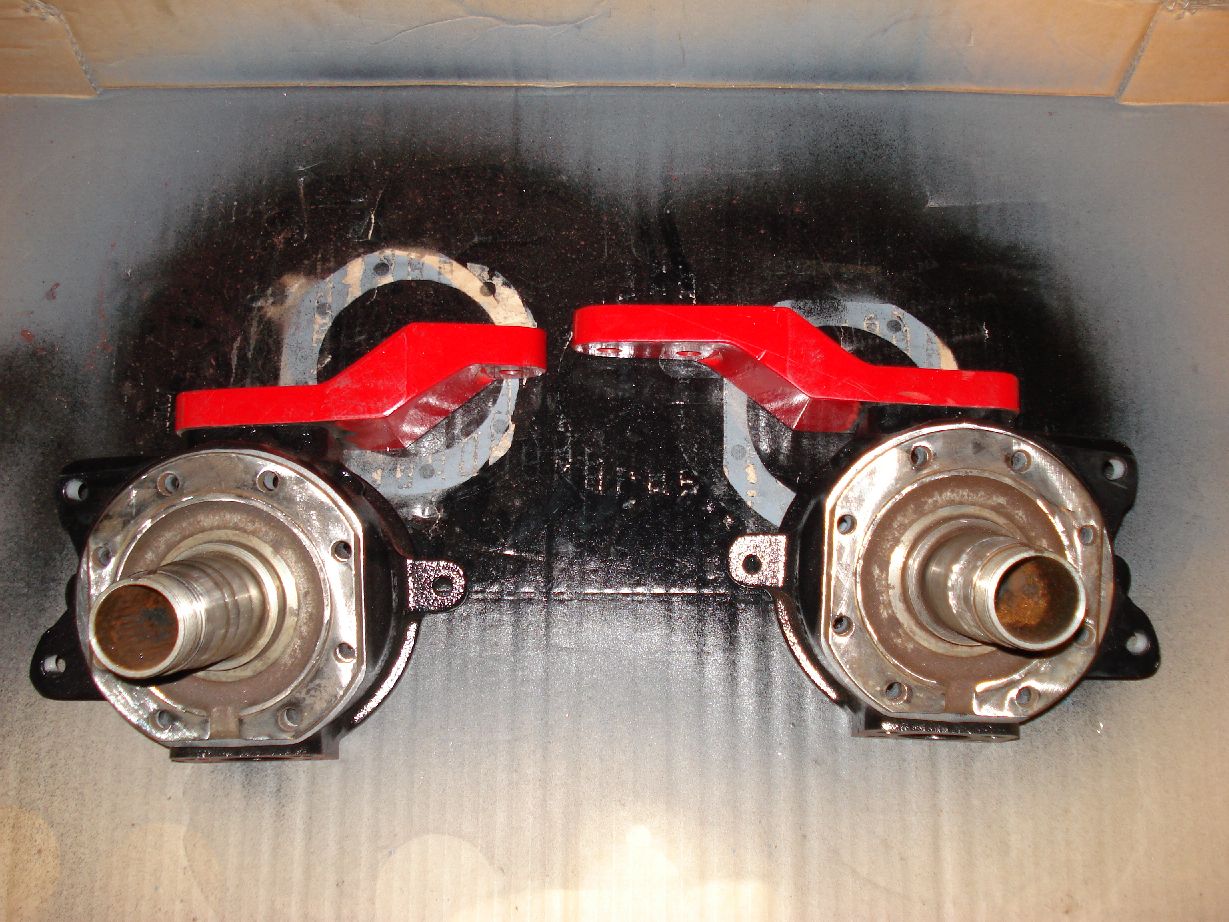
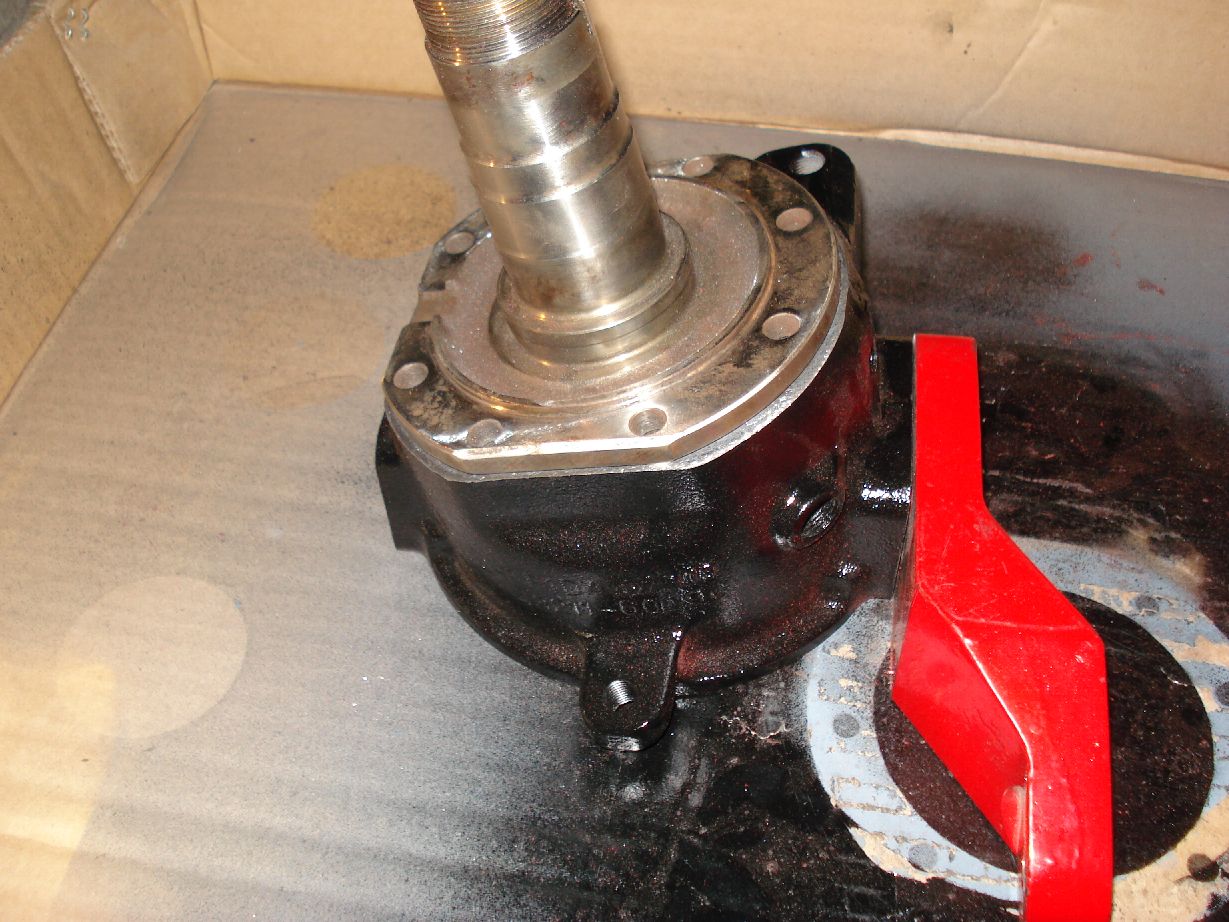
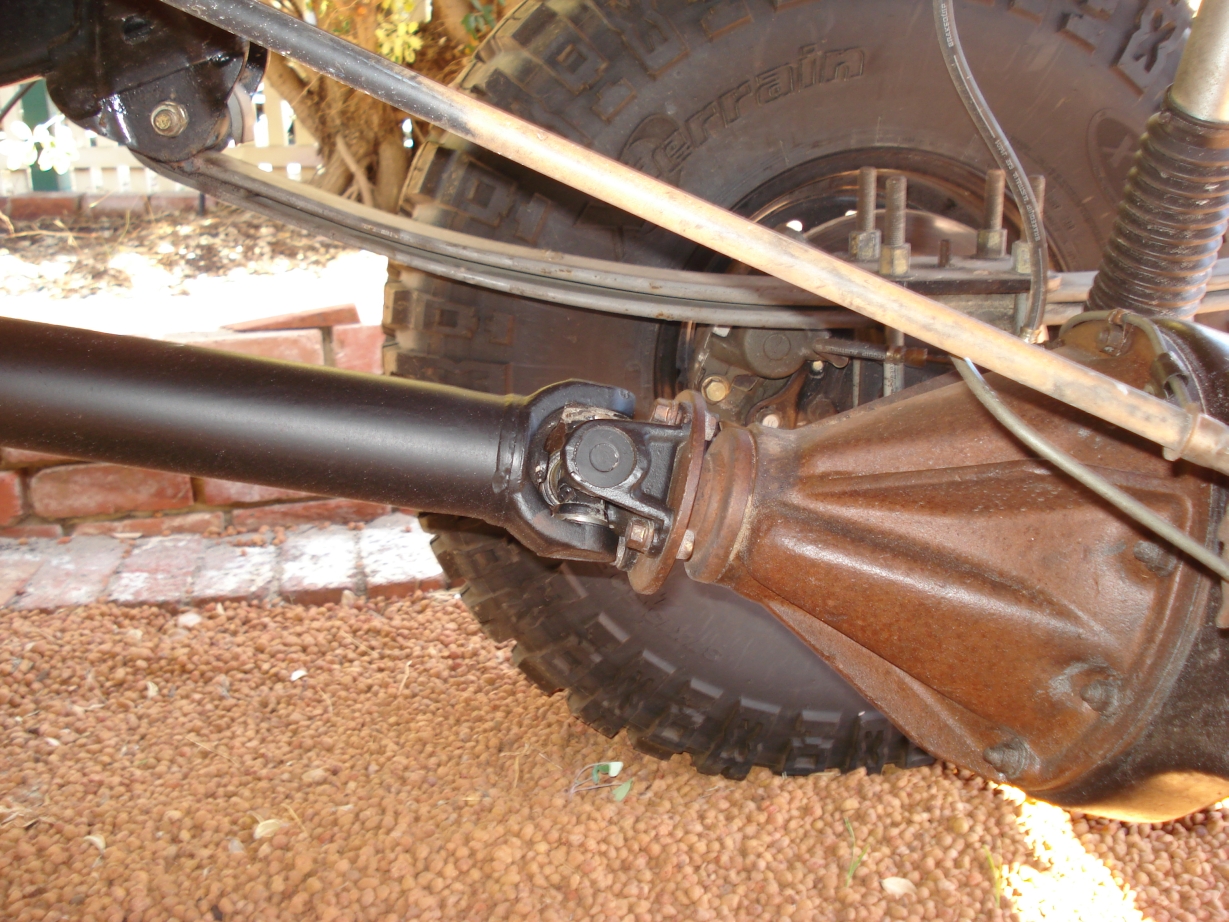
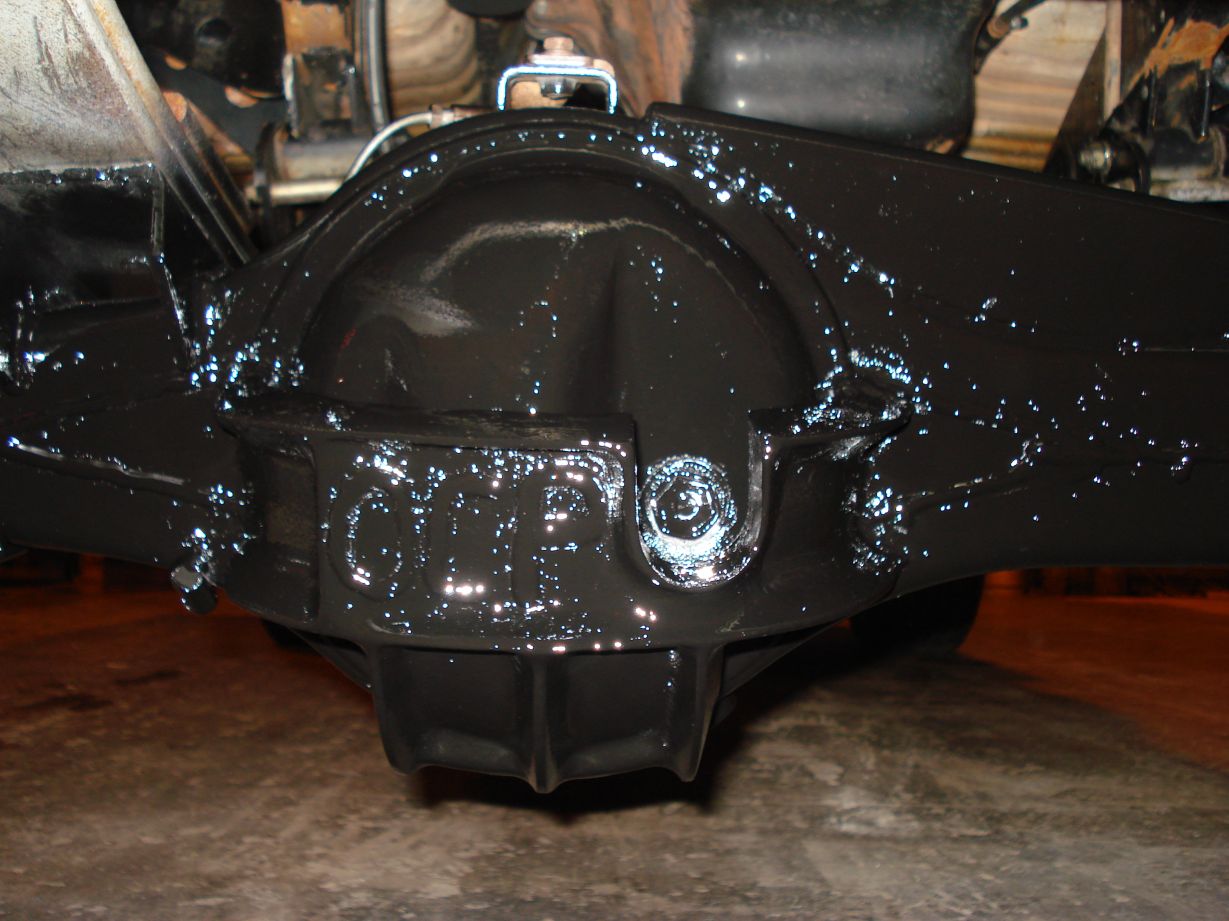
I got the Front and Rear diffs in their perfect positions.
Ive taken the centers out to be rebuilt with 4.88s and detroit lockers
Next i have to laminate and truss the housings, make new ubolt flip plates, try and sort out the front and rear shock positions, clean everything up for painting and then squirt some paint on her…
Im sure there is alot more i have forgotten to do but eh….
my new $10 shock hoops 
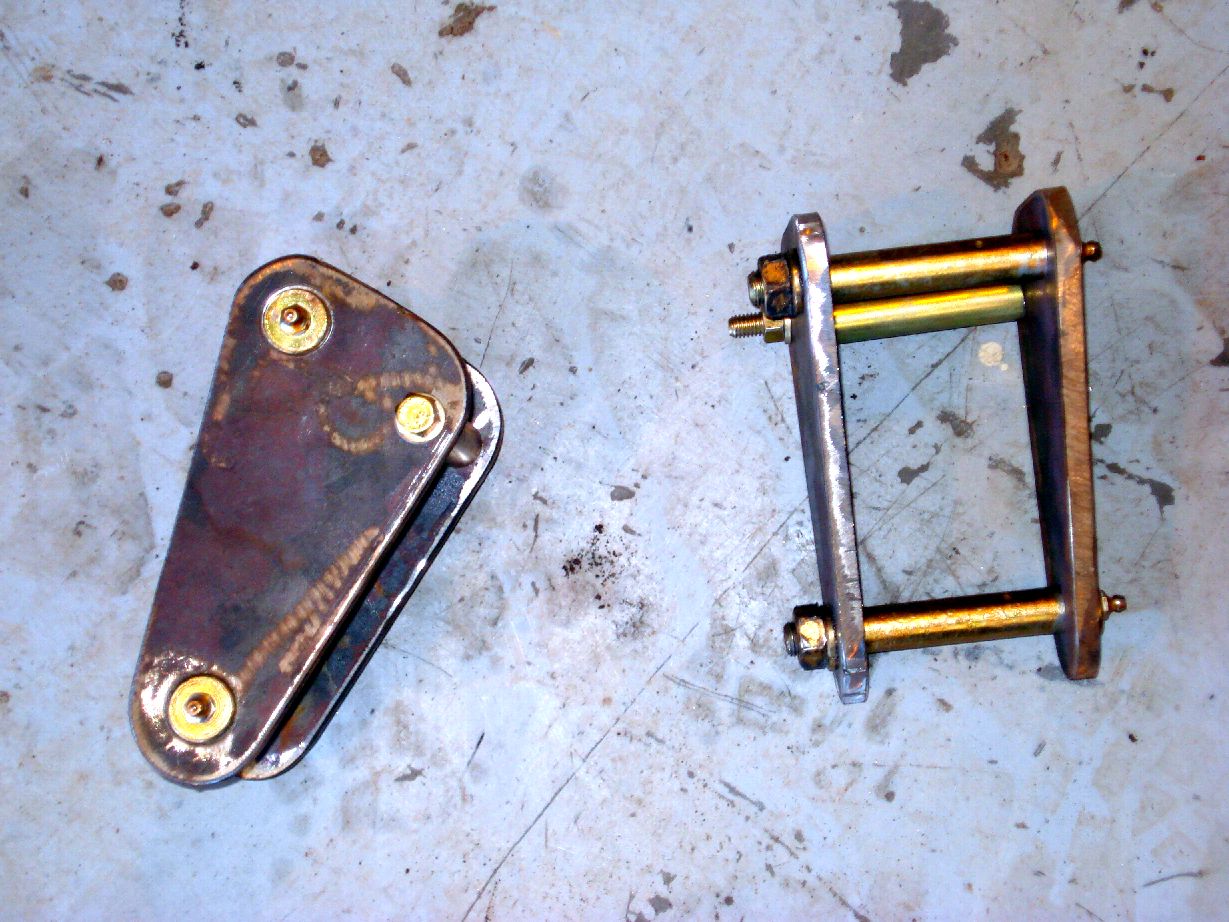
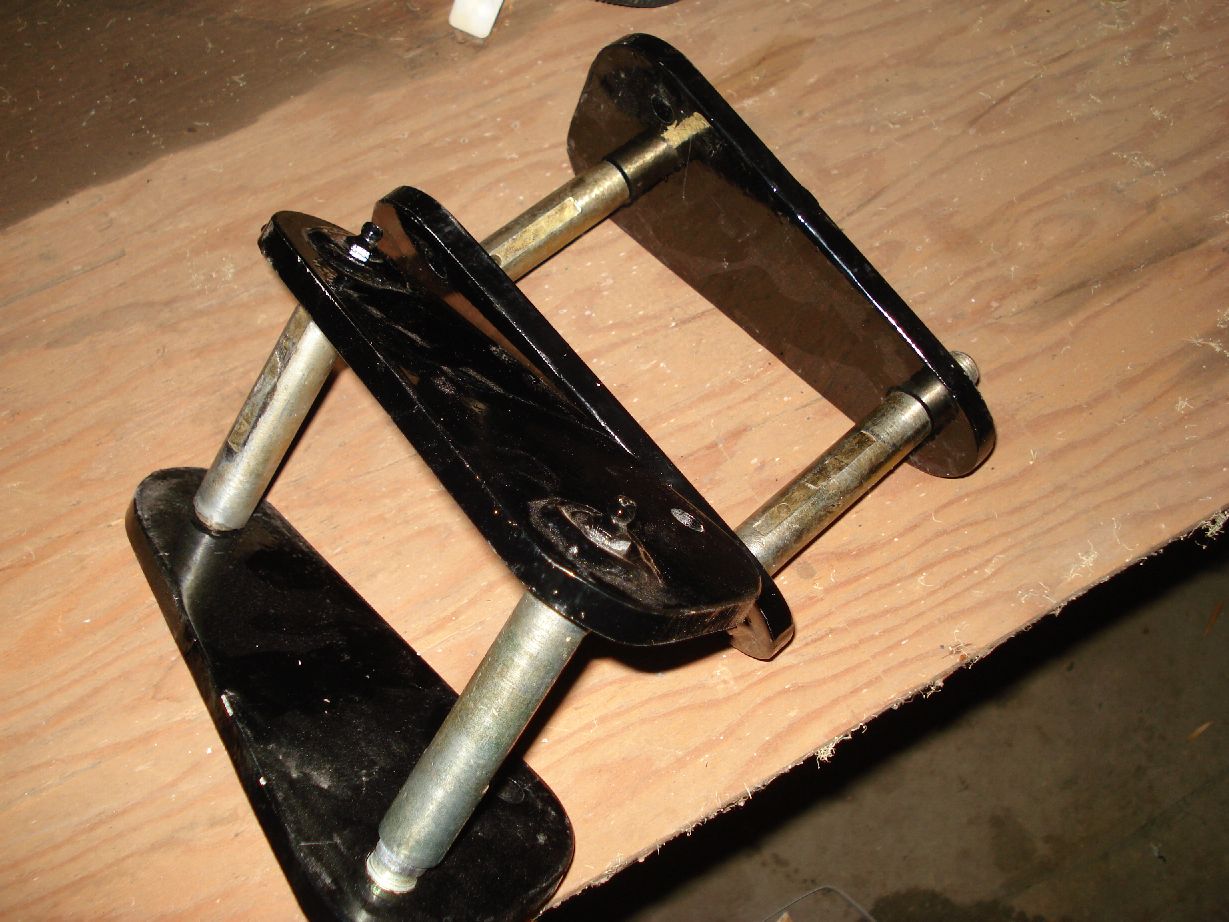
I’ve made some new longer anti inversion shackles, they look very similar to a certain superior shackle
Welded the perches on
I trussed the front diff and cut the knuckles for the C&T later on
Extended the breather through the truss (ill cut it flush and tap a fitting into it later)
Tested my departure angle (with small tires mind you…)
Removed the tranni and transfer and sent out for exchange.

Alrighty then another update.
I don’t have a Digital camera at the moment so i have no pix but this is what ive done.
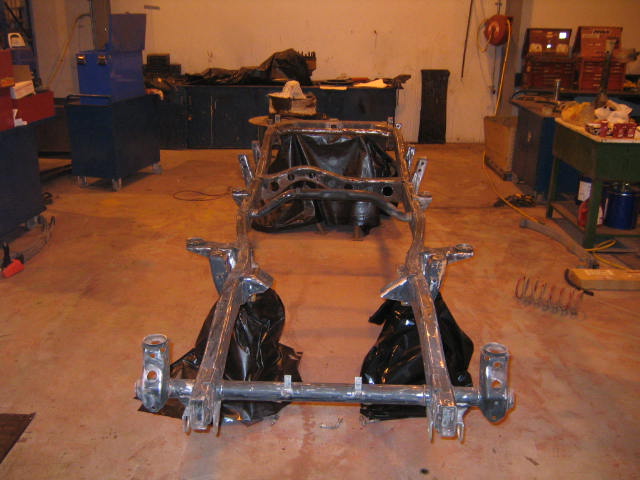
I stripped the chassis bare
Spent hours prepping to paint
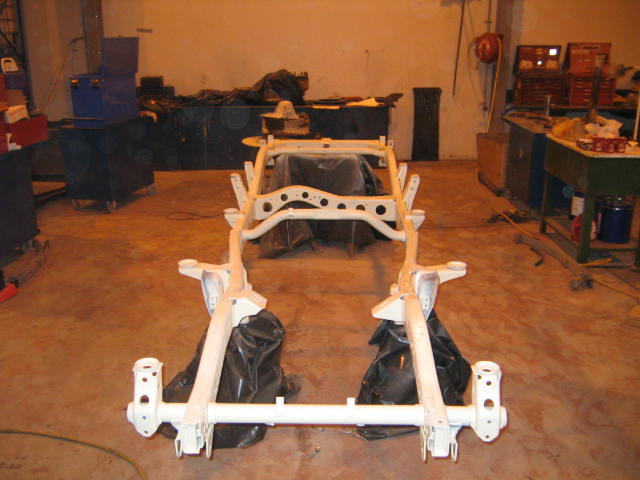
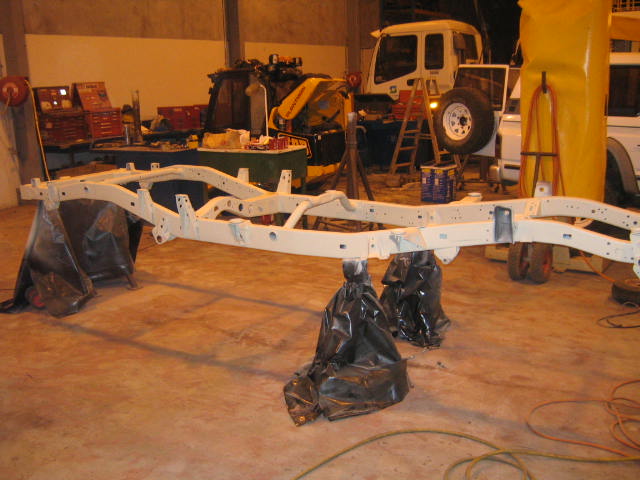
Painted 2 coats of 2 pack etching primer
Waited a day and painted 2 coats of High gloss 2 pack black
Painted all the odd bits like the shackles and fuel tank and brackets ive made.
Trussed the rear diff housing
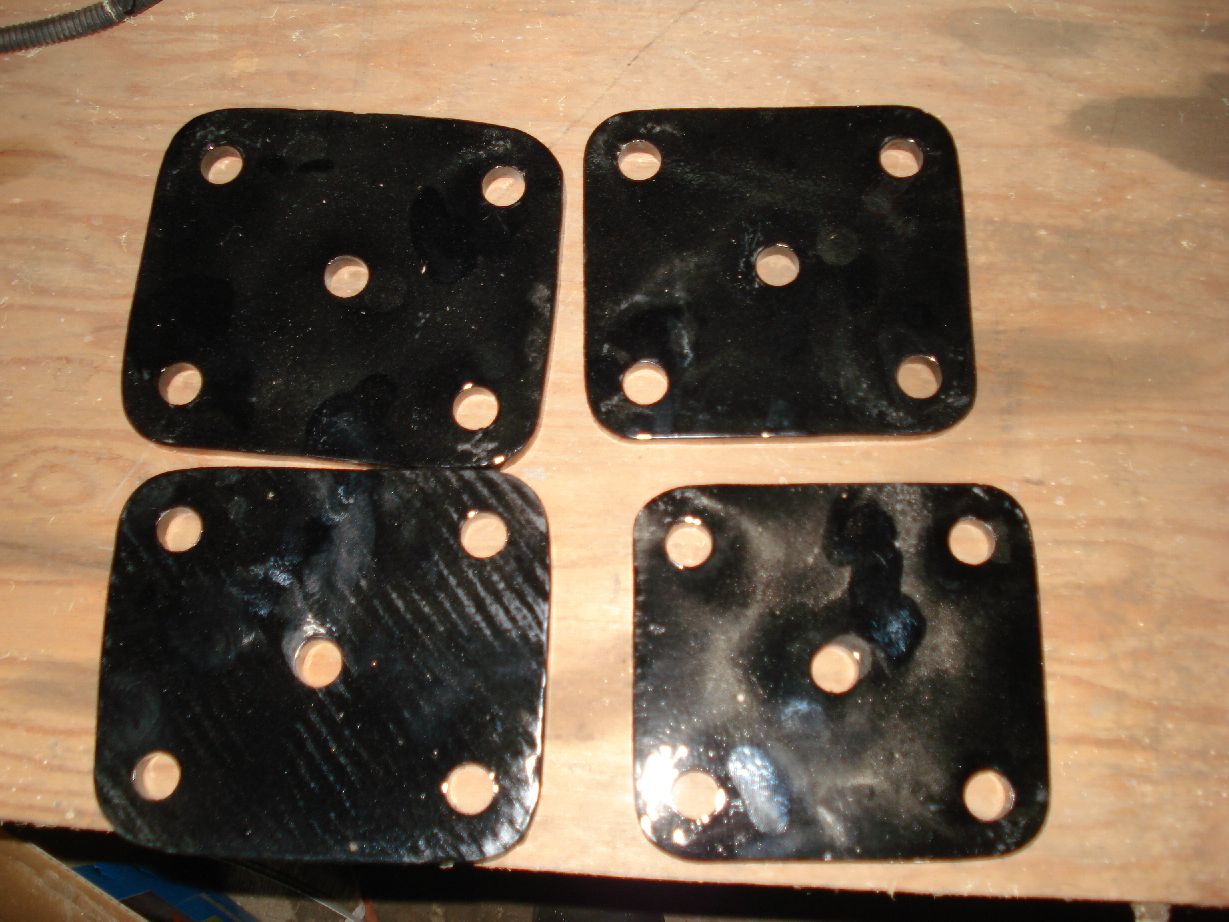
Made u bolt flip plates
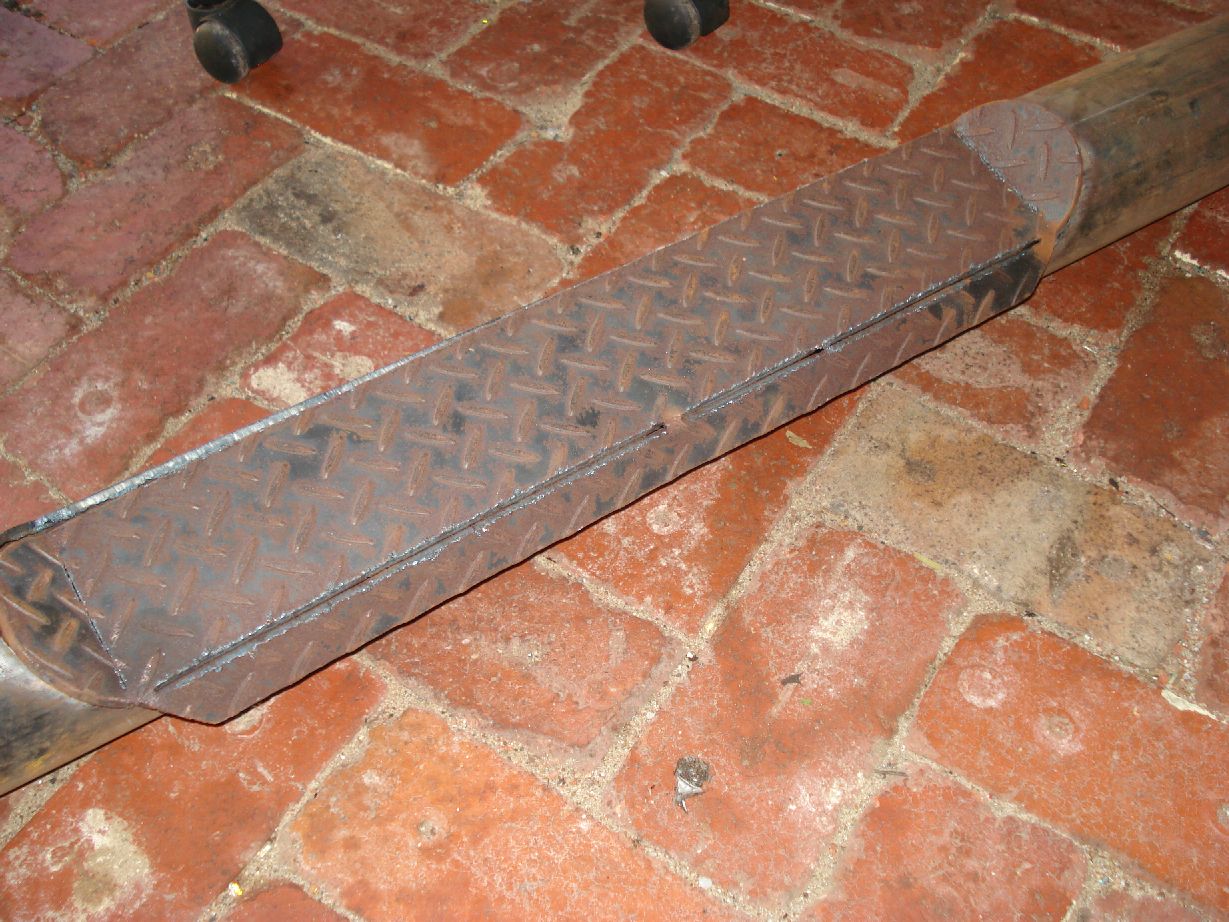
Started making sliders/sidesteps
Bought and picked up my new gearbox and transfer with chrome molly idler shafts
Somewhere in amongst all that i fitted a 2″ body lift and 3″ coil lift to my mates shorty patrol.
Hopefully get pix later this week
As Promised i have the pix…
It only shows the undercoat, i have no pix of the top coat

This is my rear diff truss and the start of my sliders
I just spent another $3500
I have
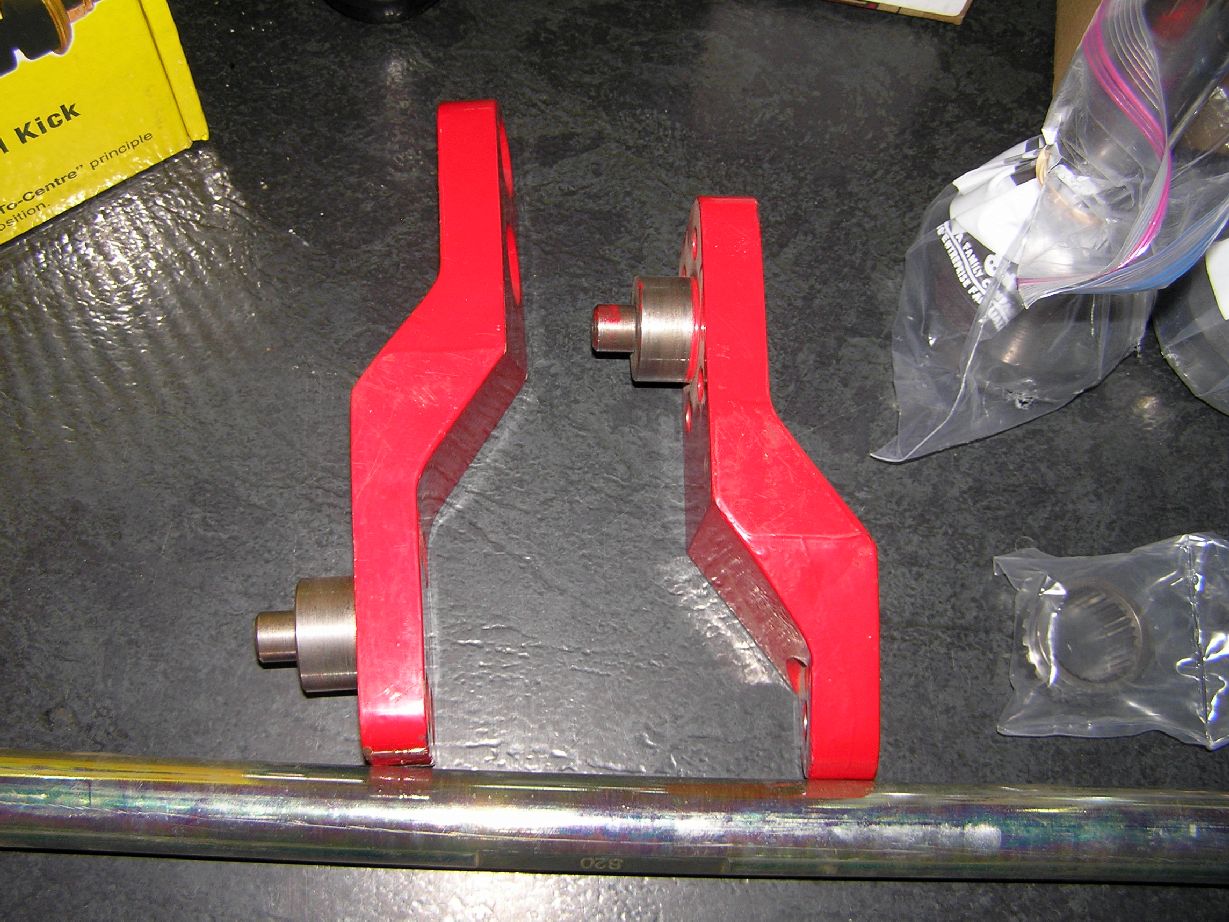
Histeer
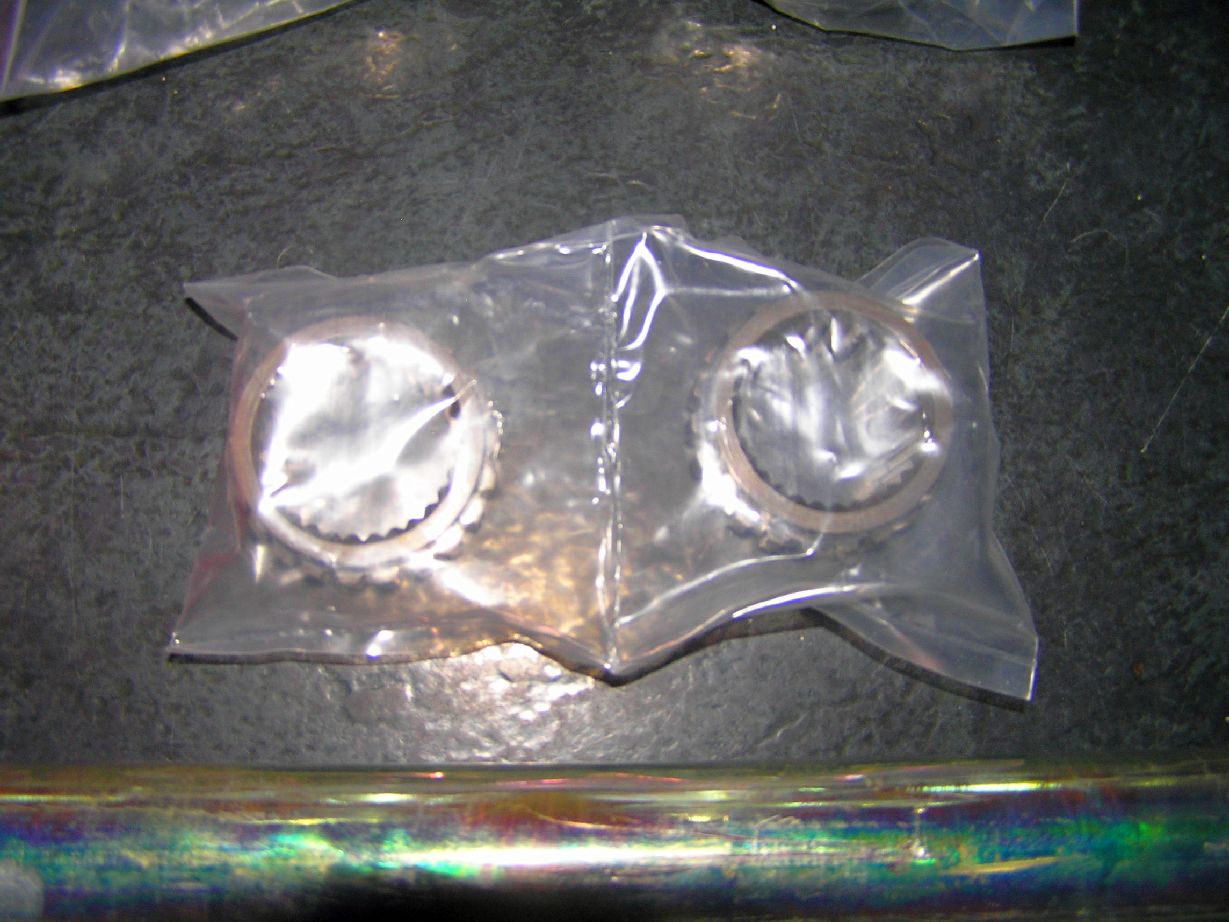
4140 cryo treated 30 spline lonfeilds
4140 cryo treated 30 spline hub gears
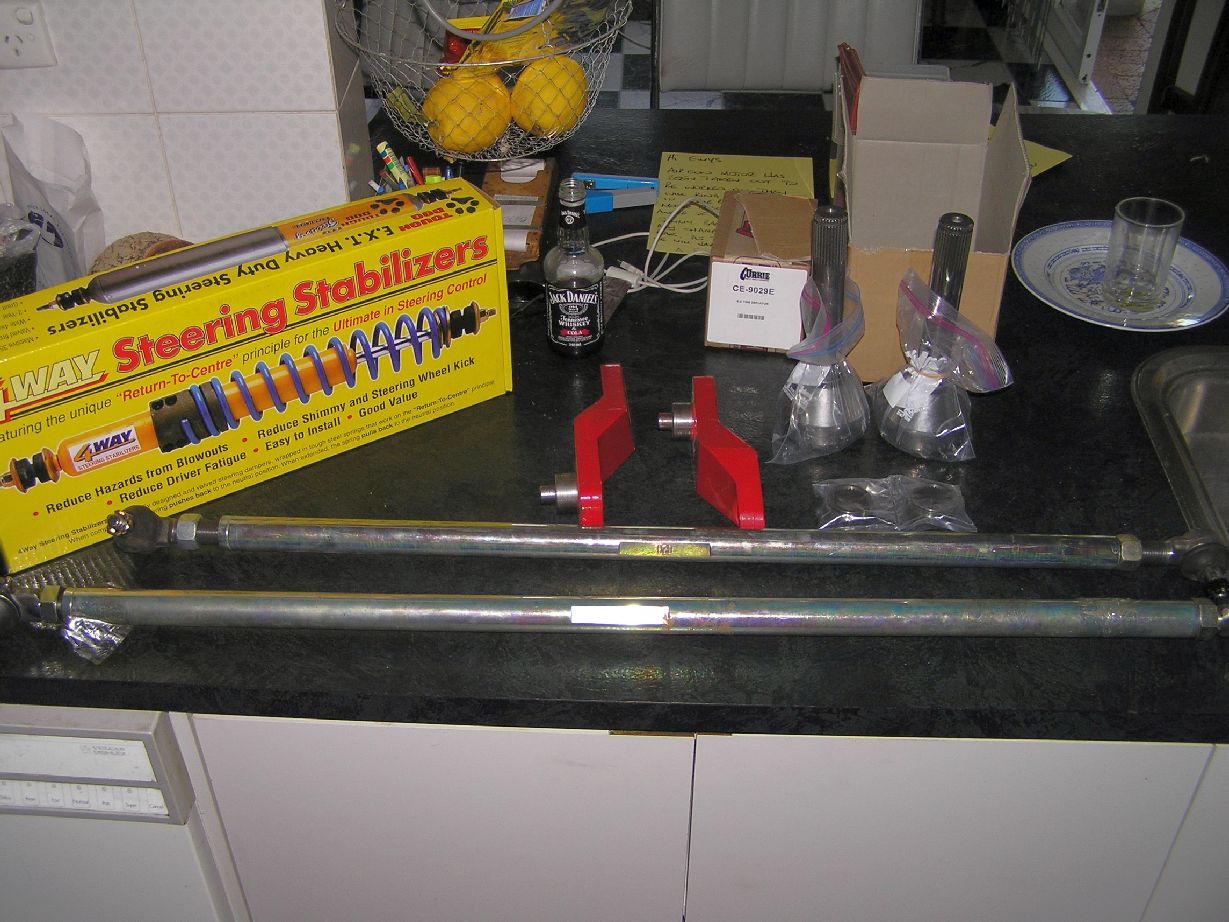
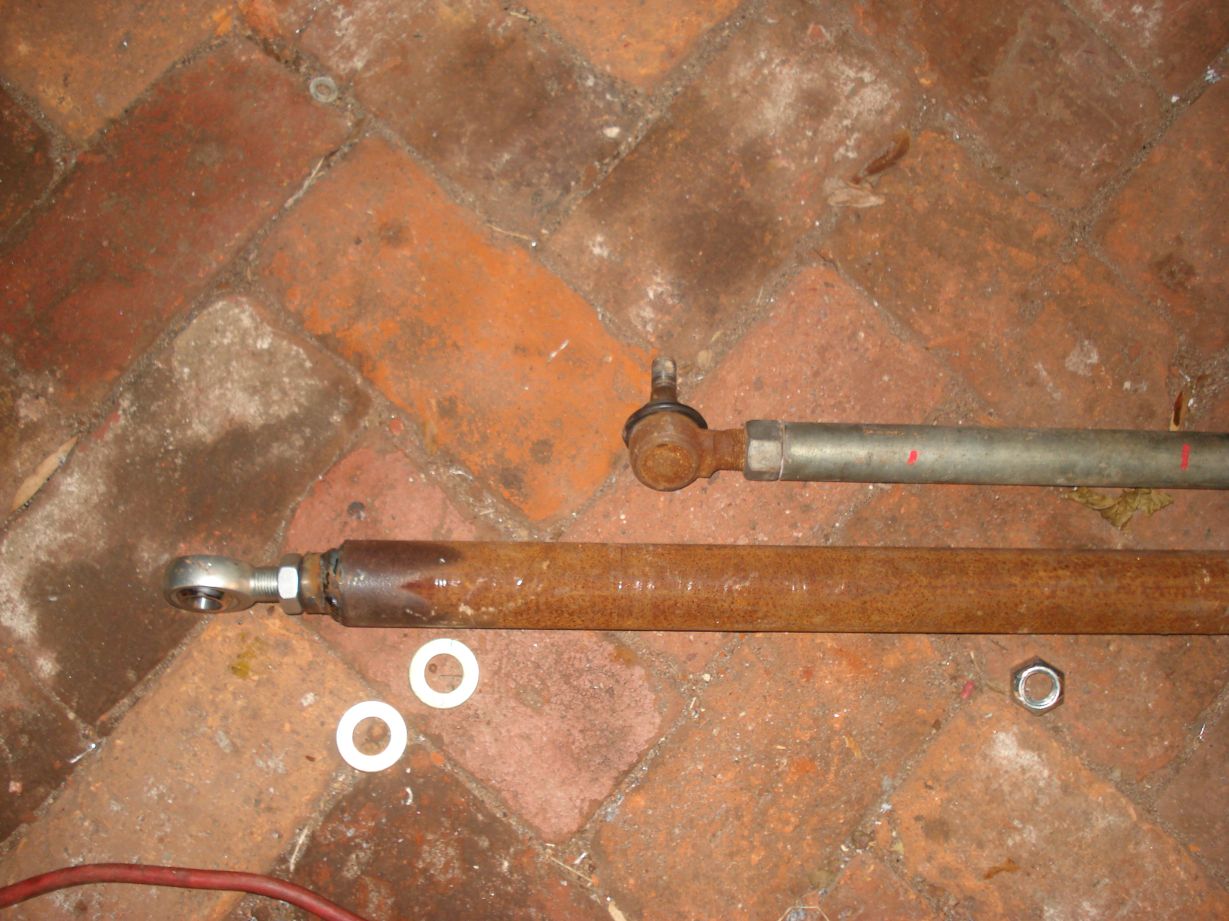
Solid Chrome molly drag link and tierod
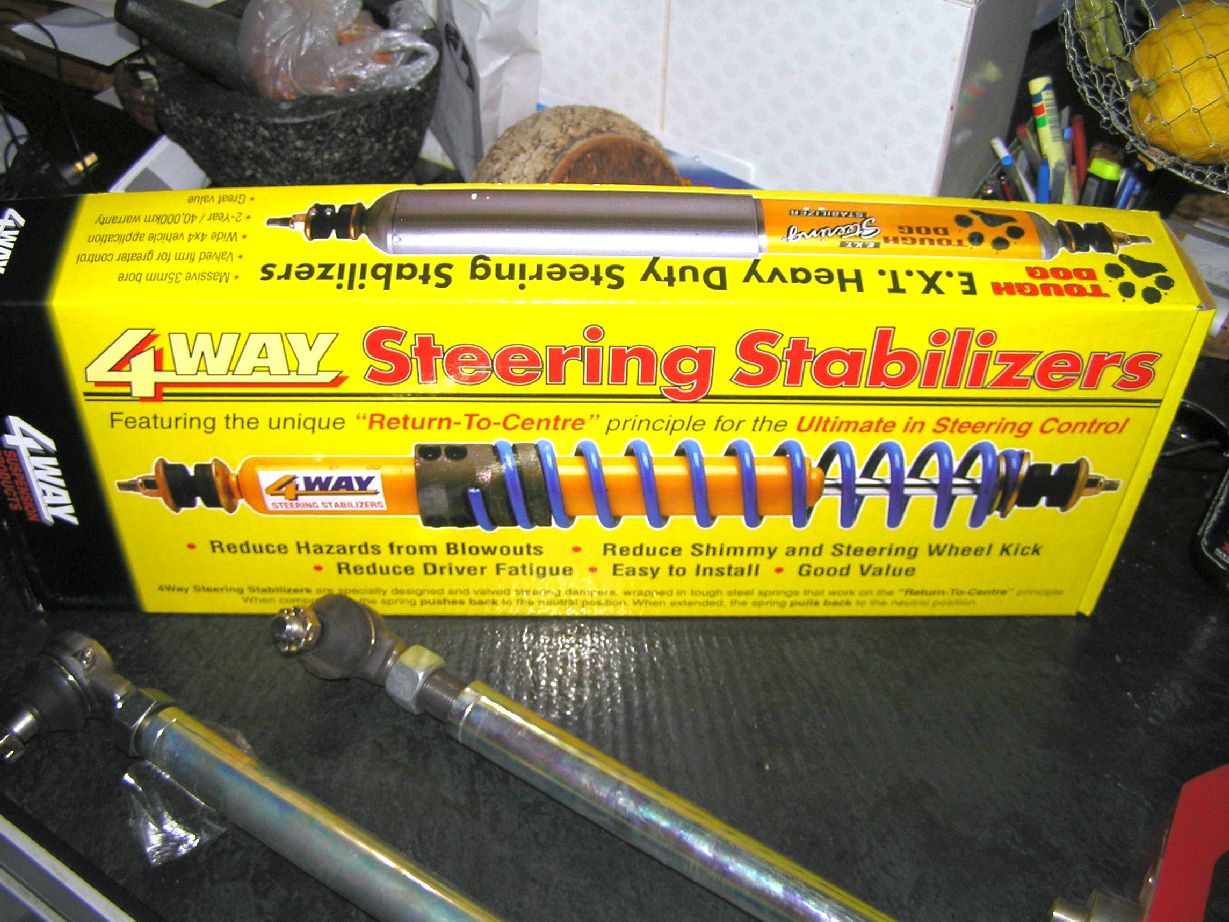
Heavy duty RTC
….
I also gots PIX!
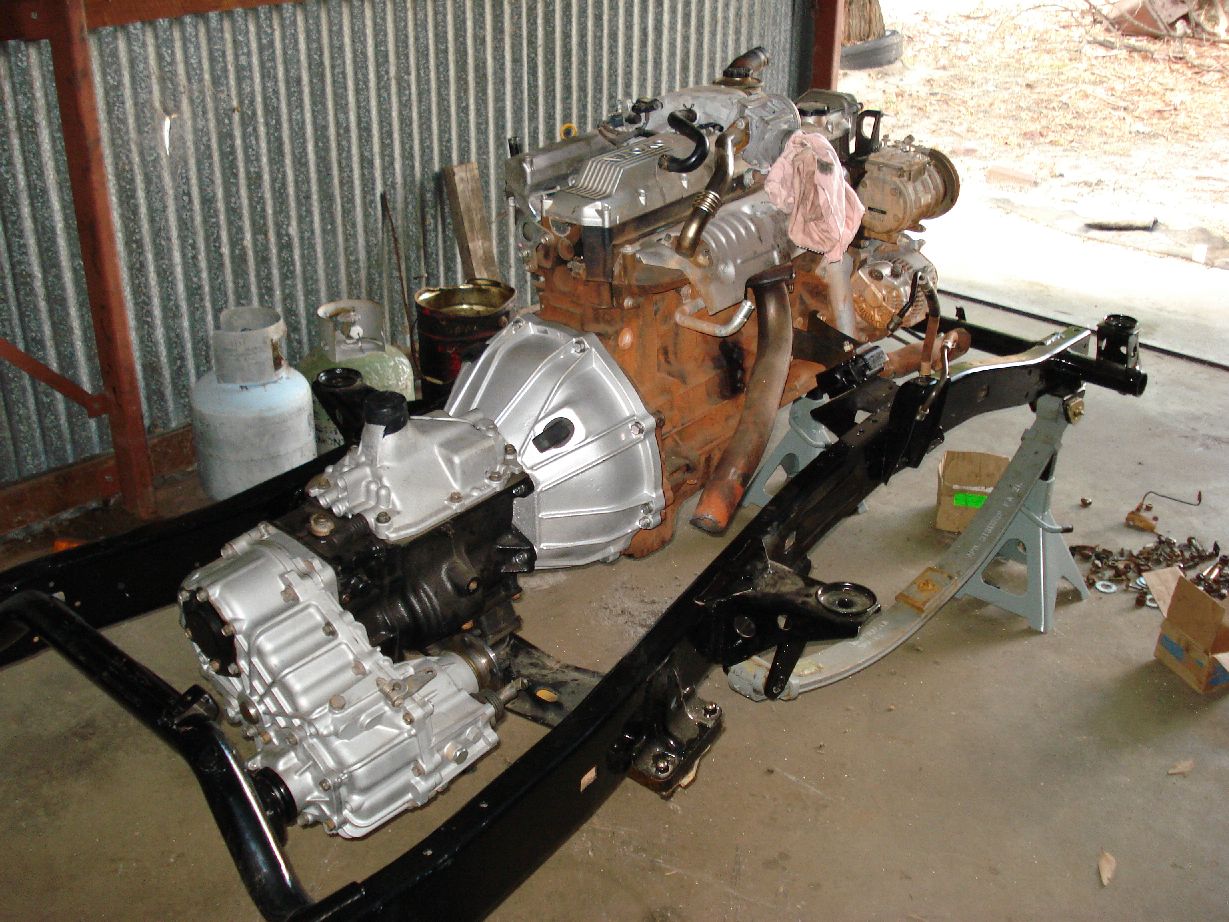
Let the pic bashing begin!
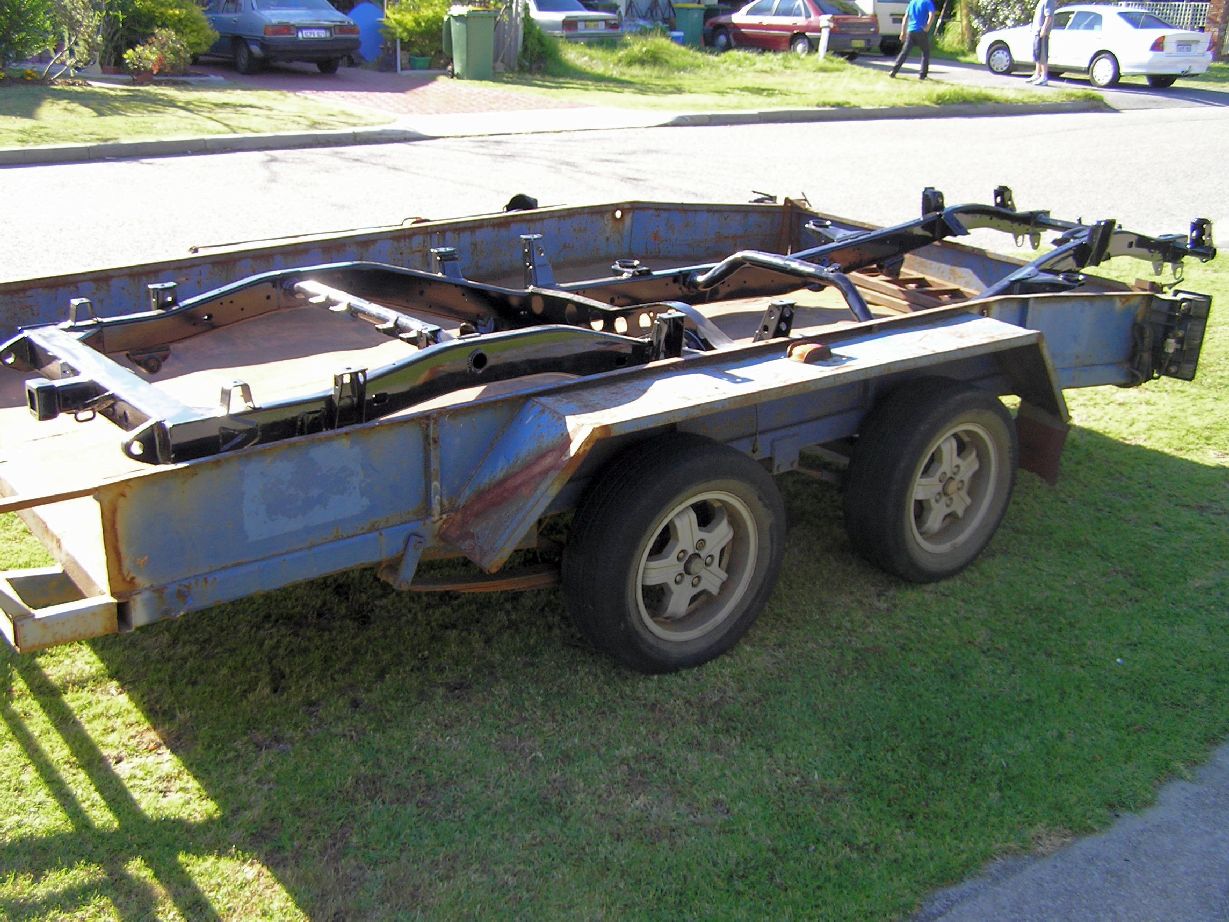
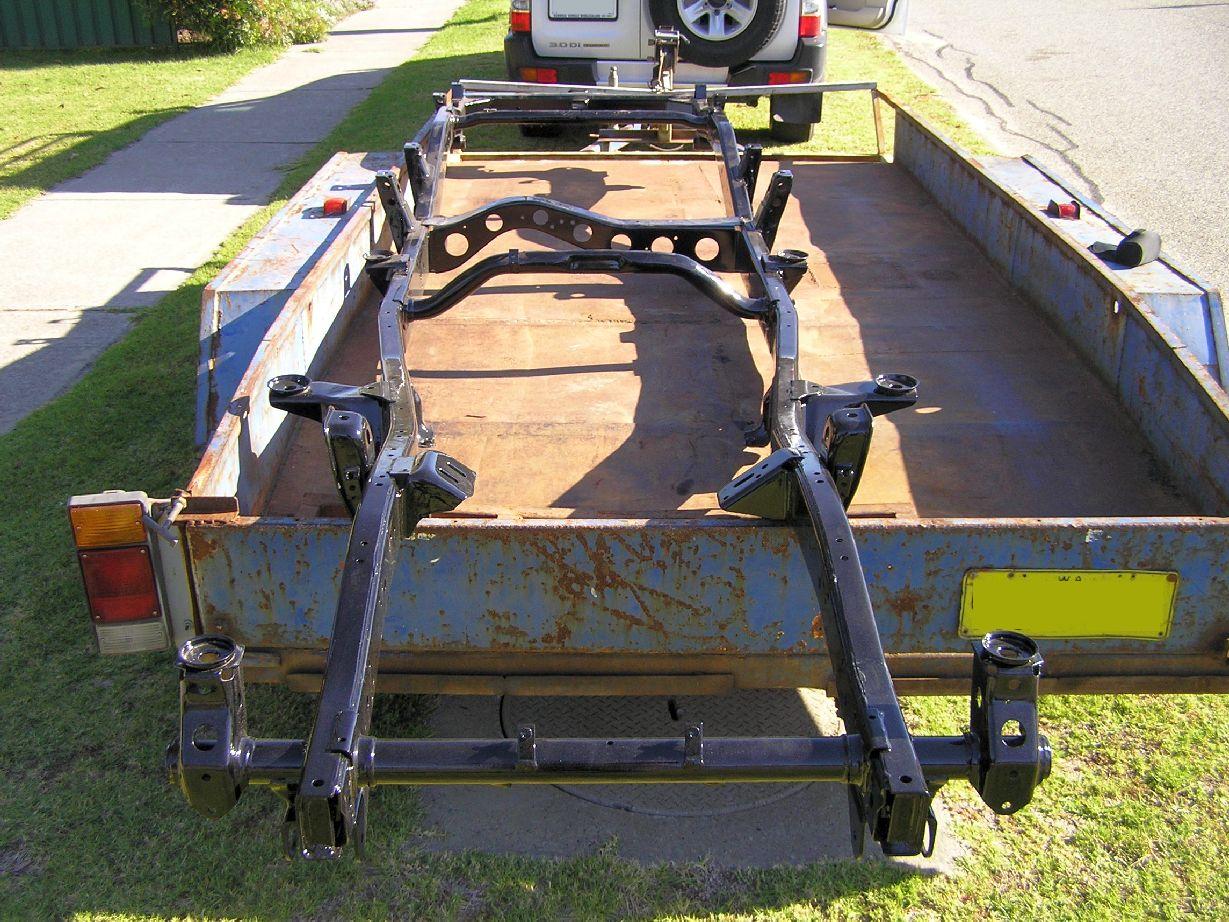
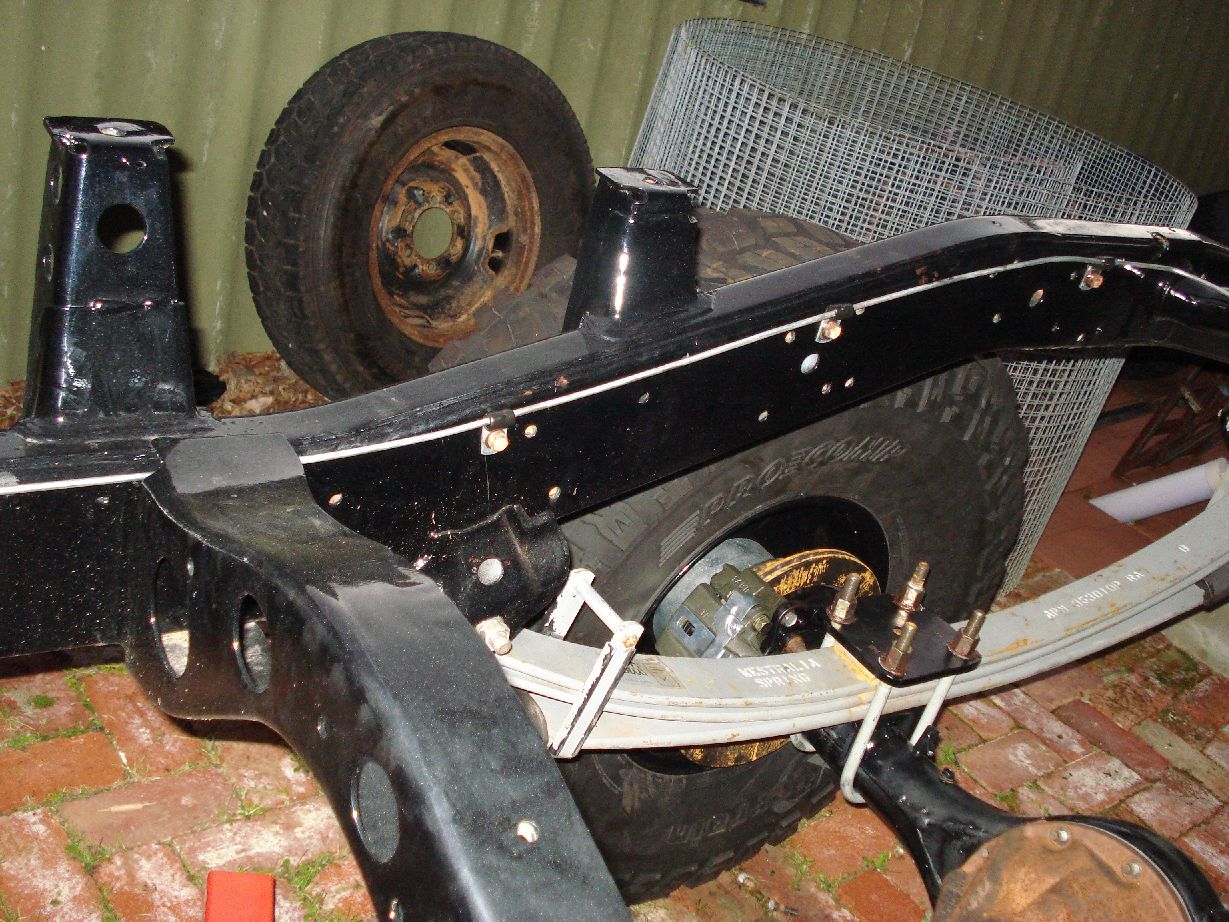
My new chassis
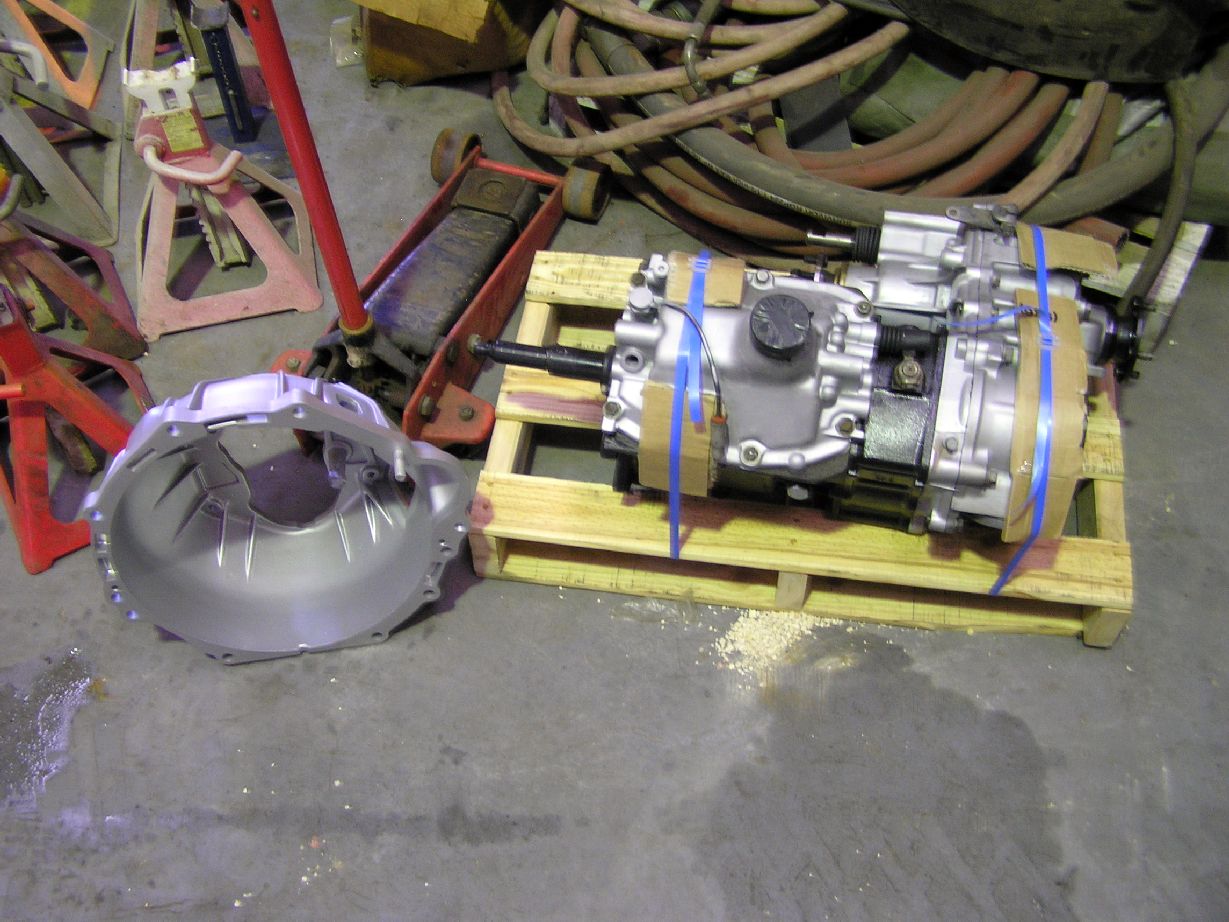
My new gearbox, transfer and bell housing
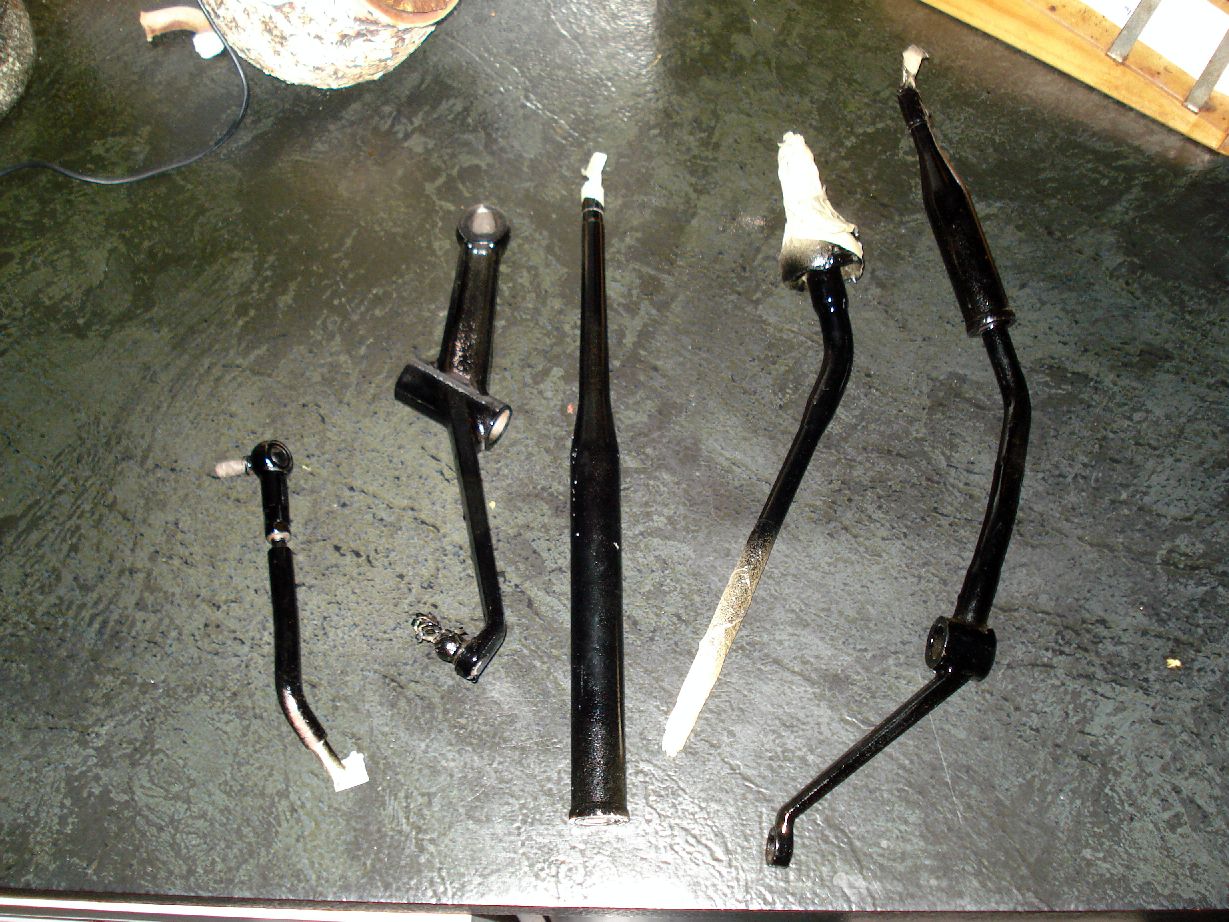
small update..
I got a new gearstick and low range stick with linkages from a wrecker coz mine were all bent when the old box nose dived off the pallet it was on.
I stripped them all down, sand blasted it all, got it all painted 2pack gloss black
Got new bushes pins and cups from Toyota (grand total of $14 for the lot)
Now shes gonna feel totally new!
I have finished my gearsticks though, they are lengthened and distorted to suit the 2″ body lift.
Small update:
I have my centers back complete with cryo 4.88 ratios, full cam’d Detroits with solid machined spacers and fully rebuilt with HD bearings and seals.
Dont ask how much…..
Got a few things done today, it got too hot so i stopped but i got a few things sorted out and on the chassis.
Springs and shackles

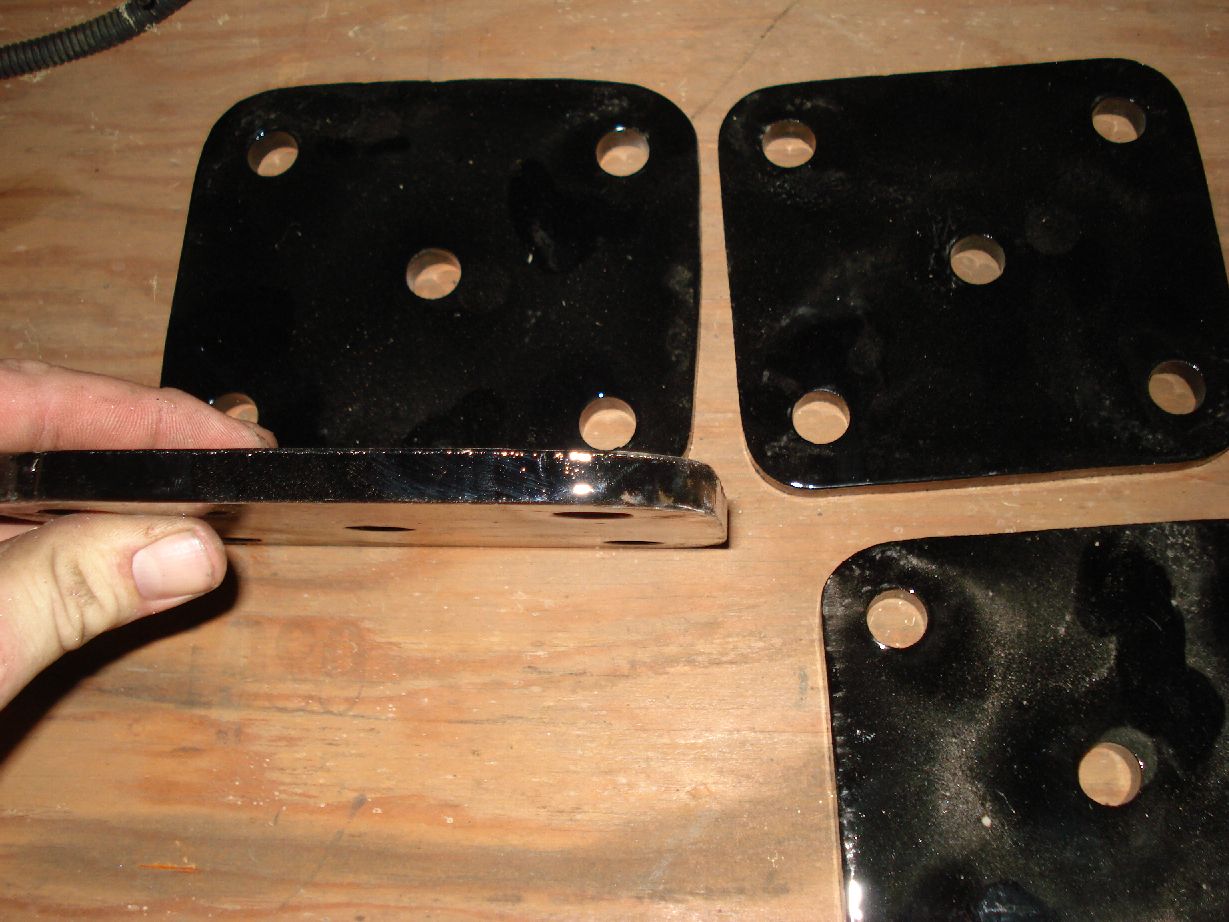
U bolt plates are done
made out of 10mm msteel
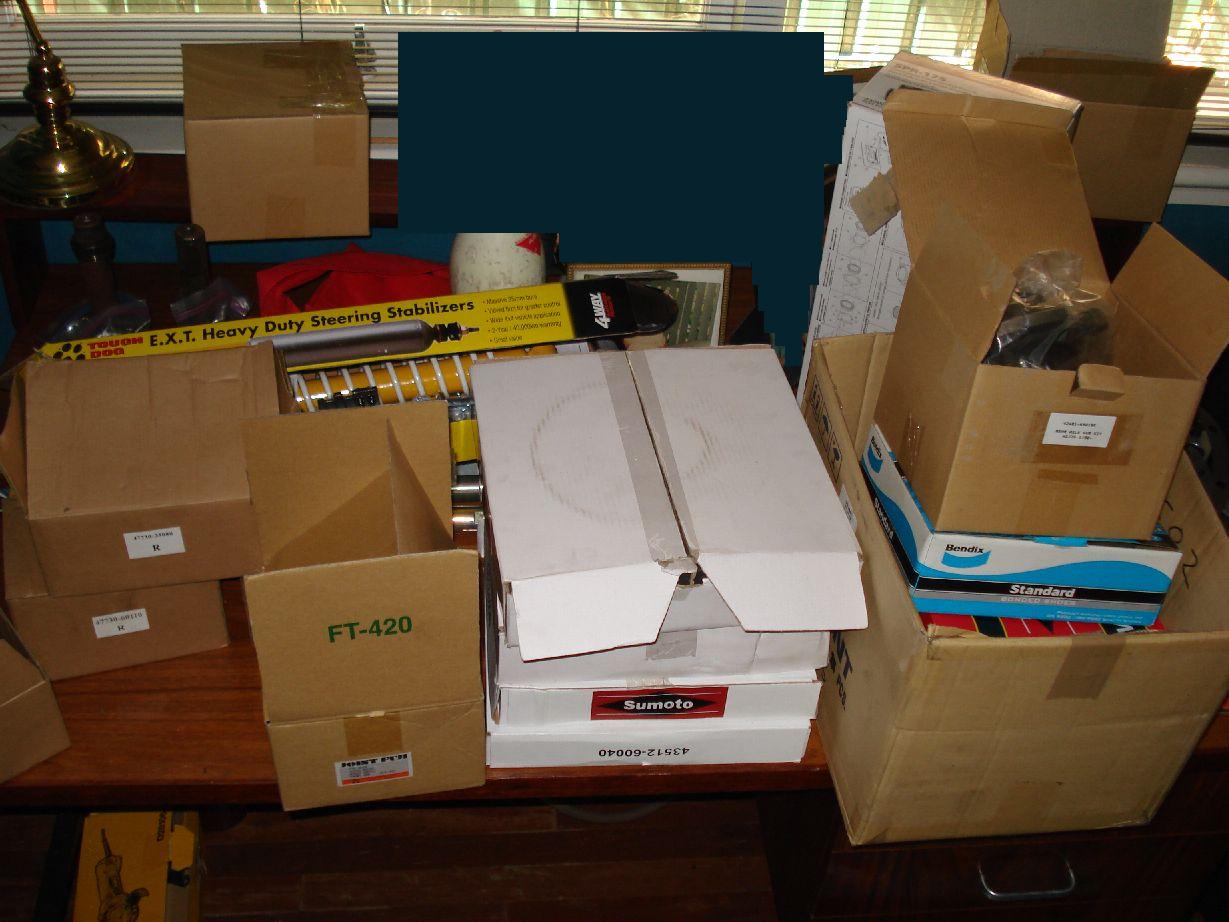
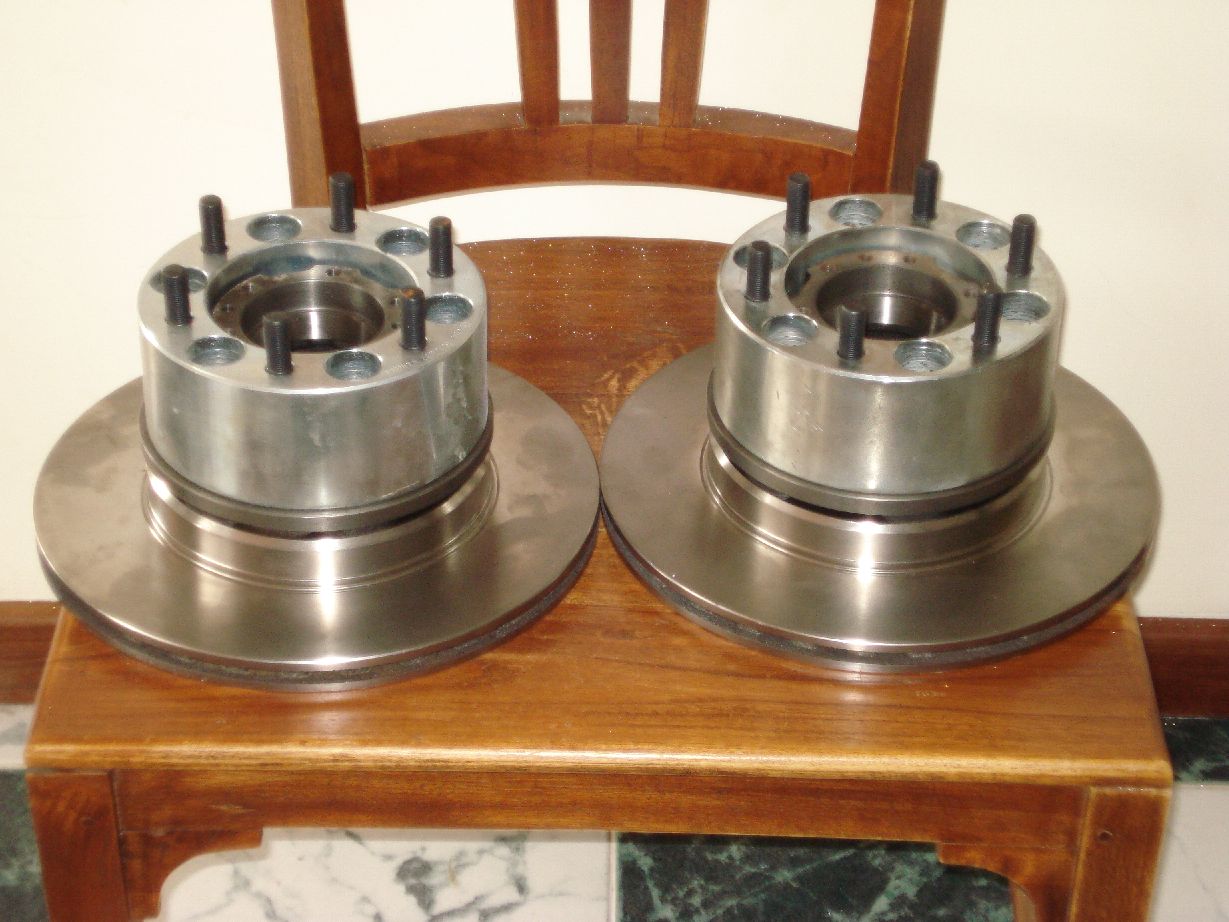
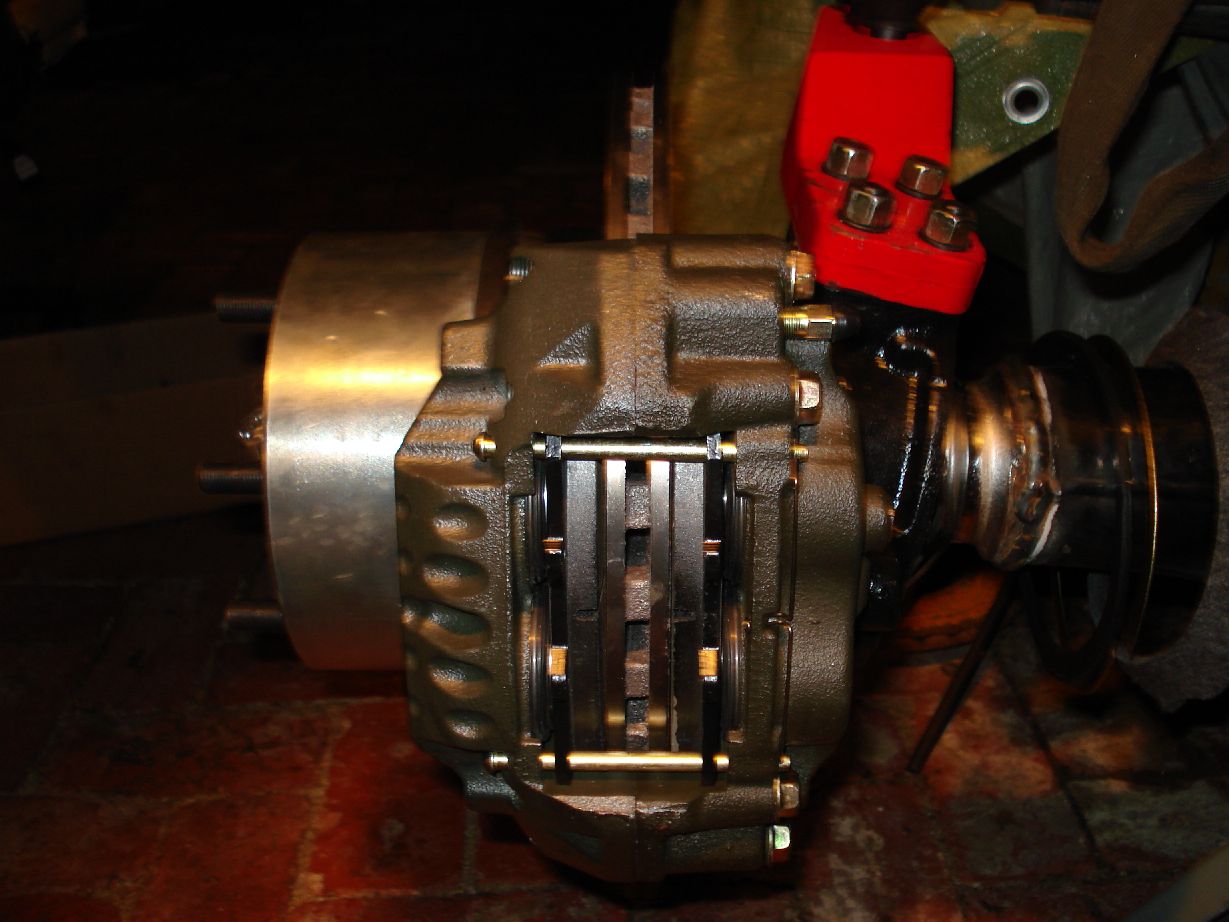
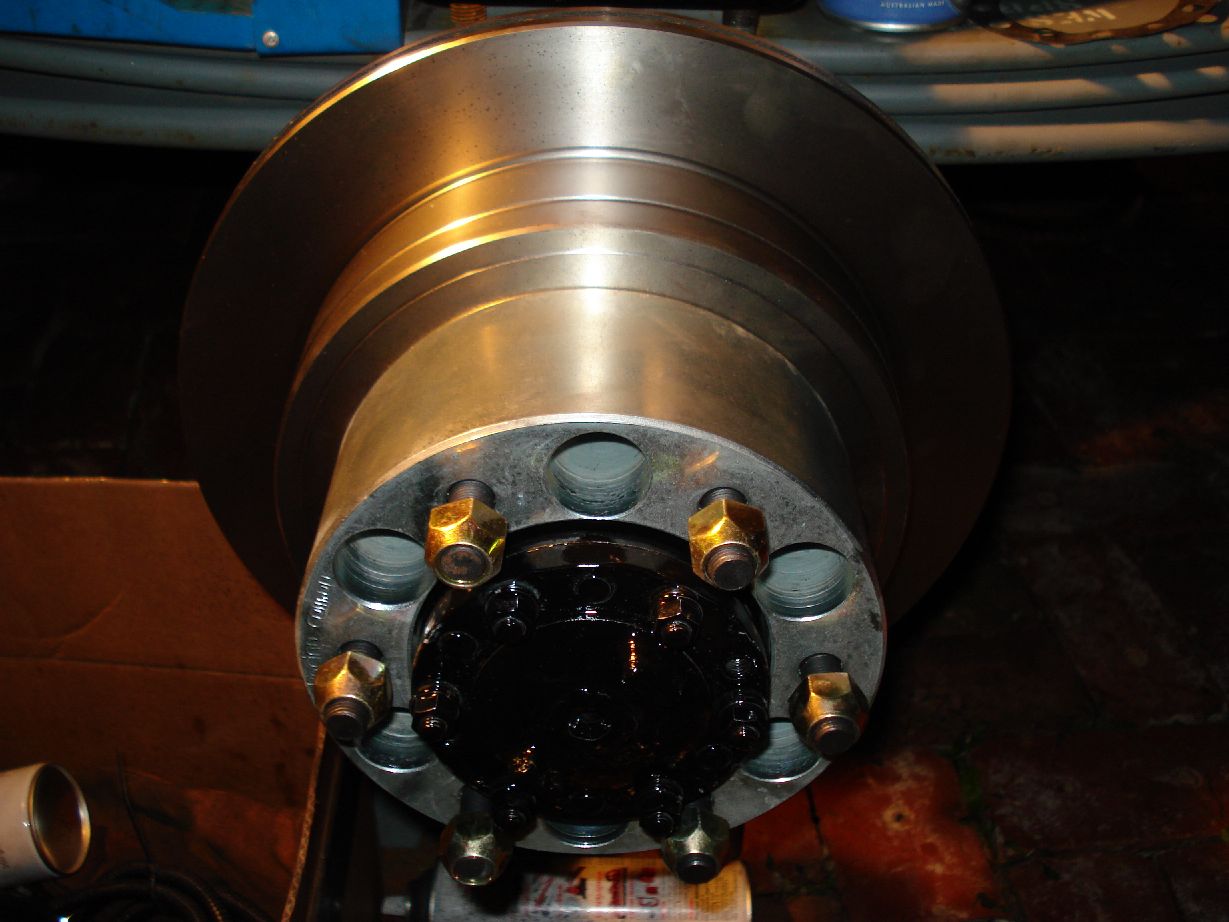
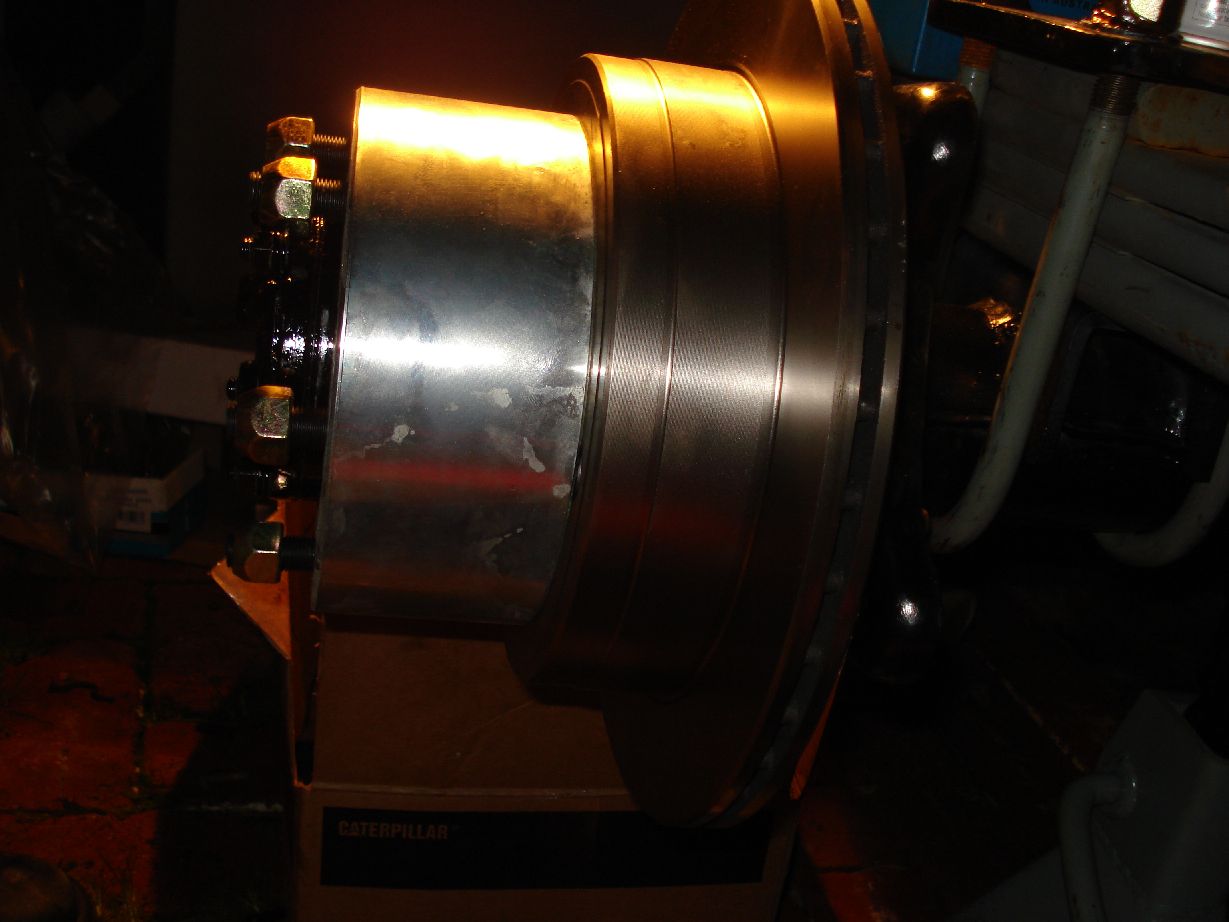
Here are all my new parts:
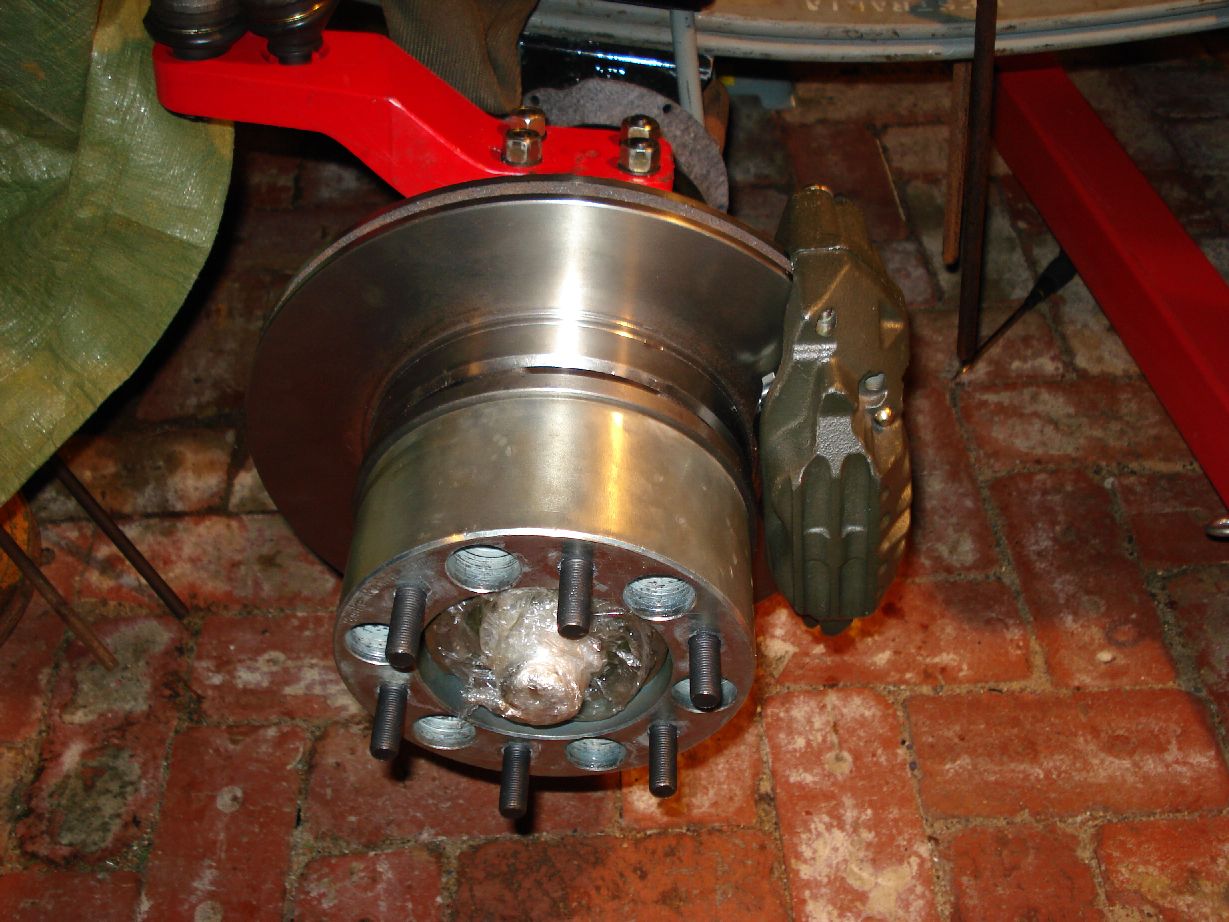
Front and rear hubs
Front and rear disks
Front and rear Callipers
Front and rear bearing rebuild kits
Front swivel rebuild kits
Bendix 4wd pads and drum breaks
Im getting the new rear hubs and axles machined to accept 100Series studs and pins.
Should be a good thing soon.
Update:
New box and transfer together, new thrust bearing, new bolts new everything.
spigot bearing was different for my new engine, so i had to get a h55f spigot bearing to suit.
Mounted box to back of engine and she sits sweet.
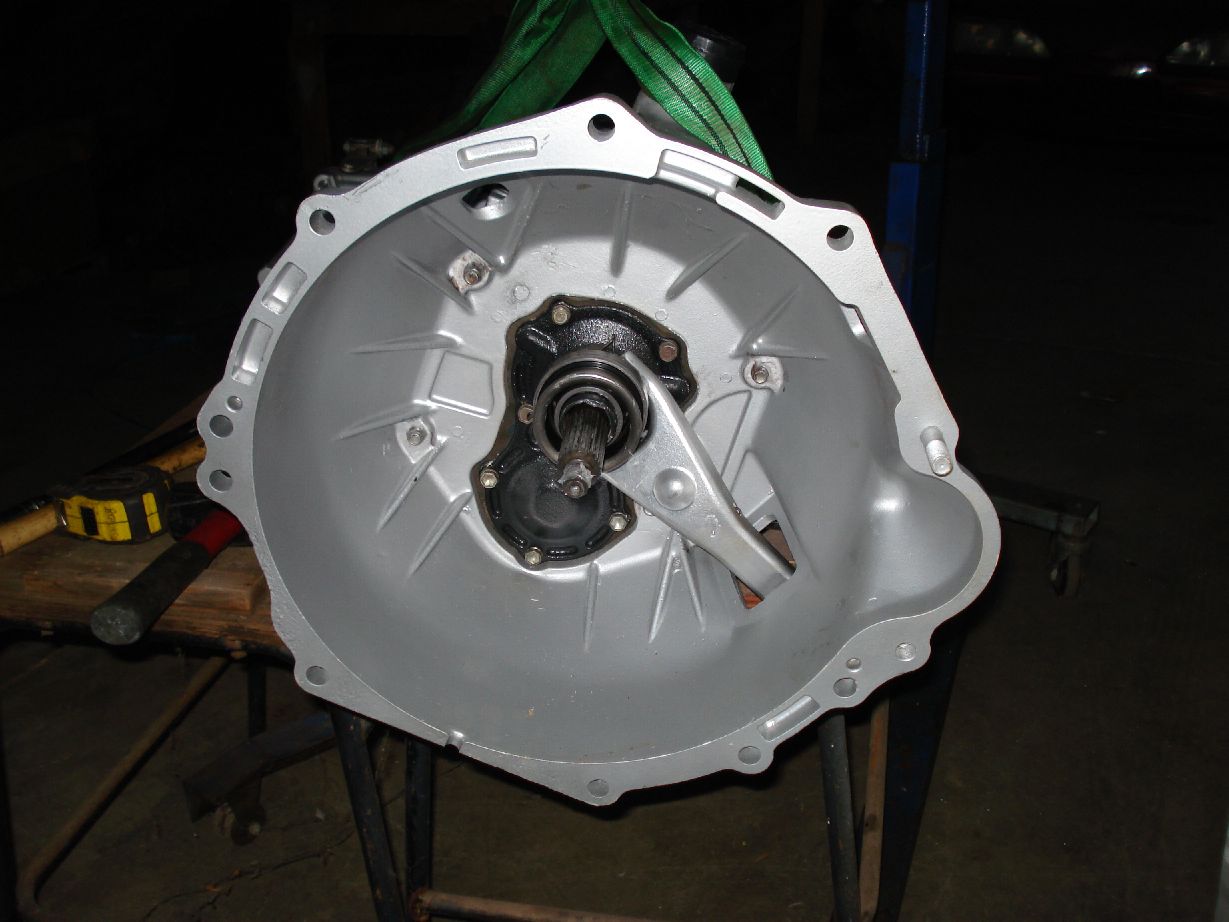
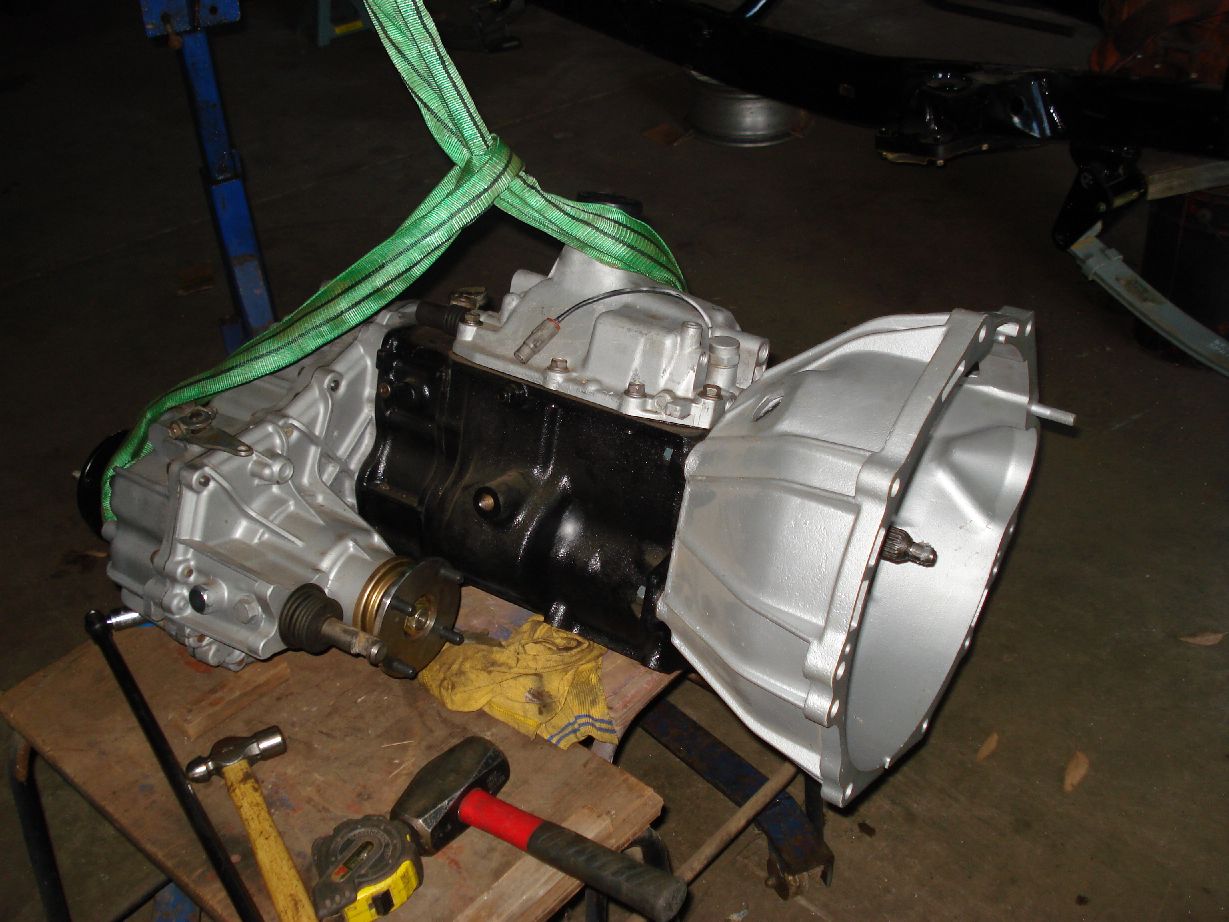
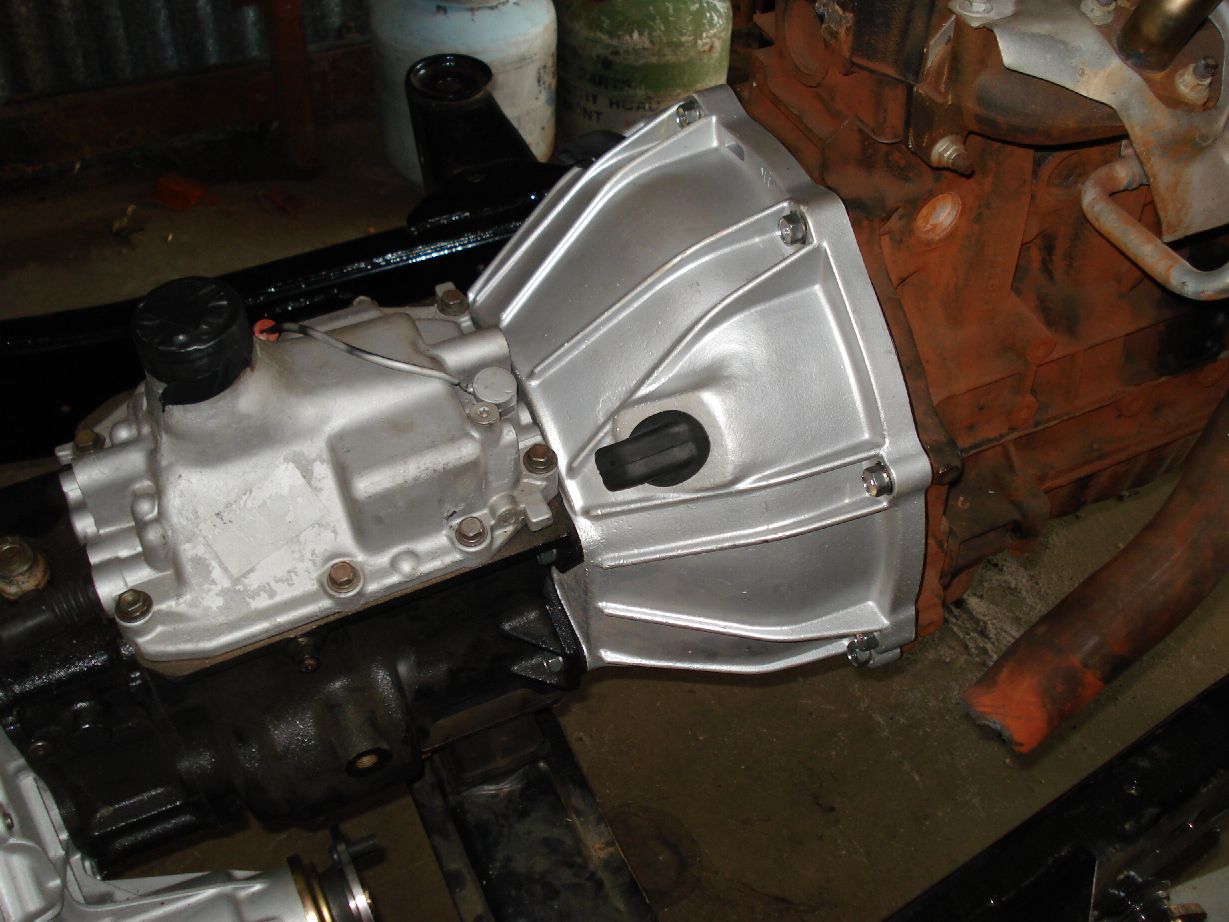
Lookie, shiny aye?
For now
Update:
DONE:
Diff knuckles are out gettin chromed.
Front hubs are stripped awaiting rebuild.
Rear RHS hub stripped awaiting rebuild.
Front swivel housings have been modded to accept 5th stud conversion.
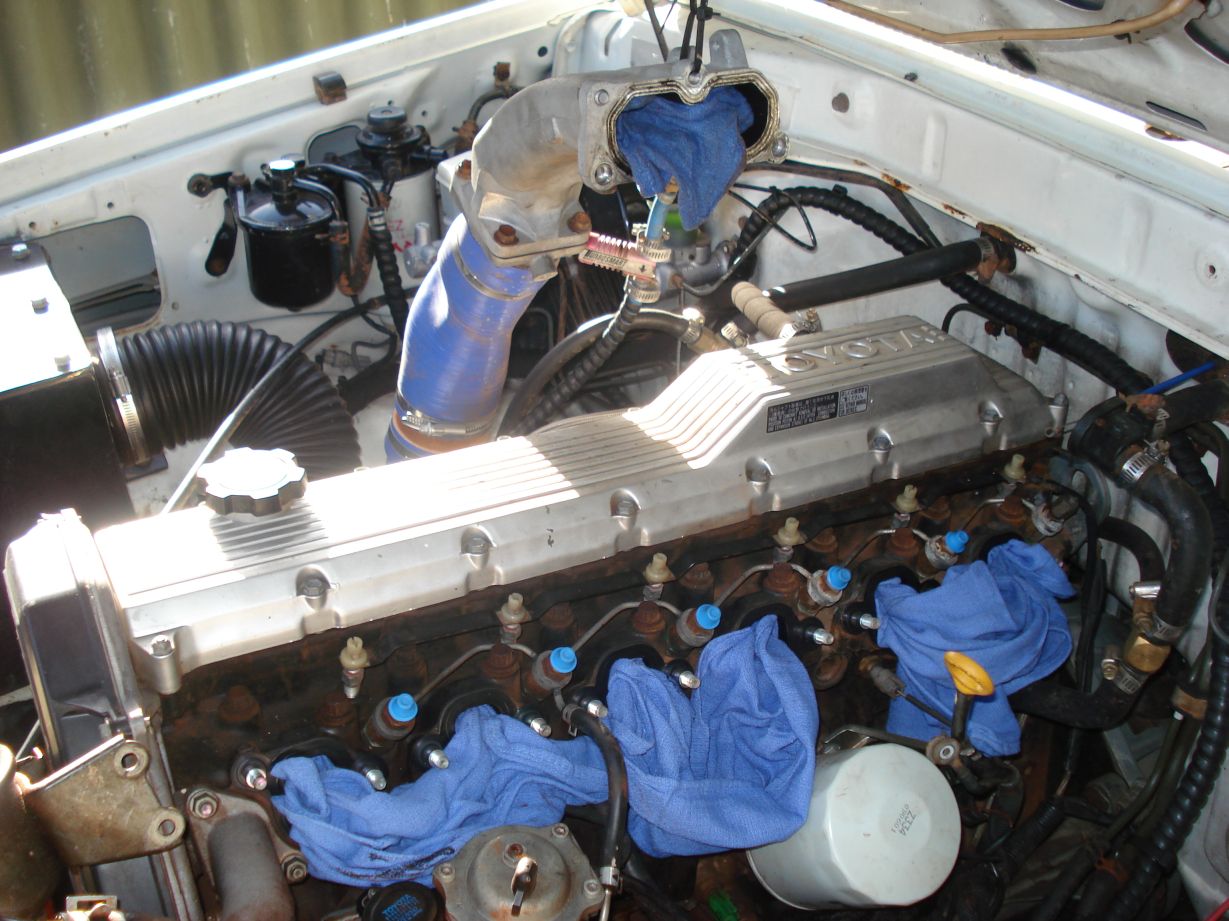
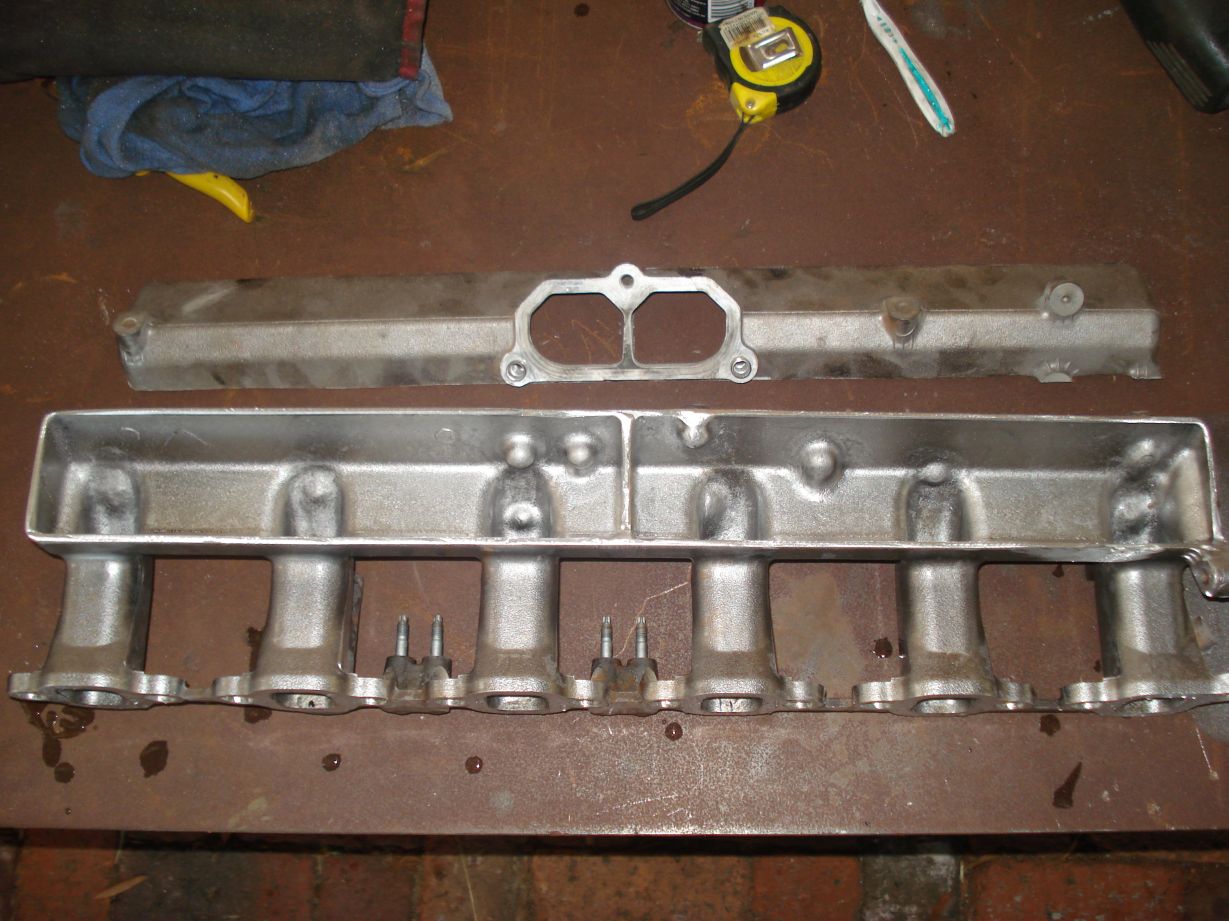
Taken intake manifold off to port it, then sending it out for a bling bling polish
SUNDAY:
Dismantle Rear LHS hub
Rebuild rear hubs
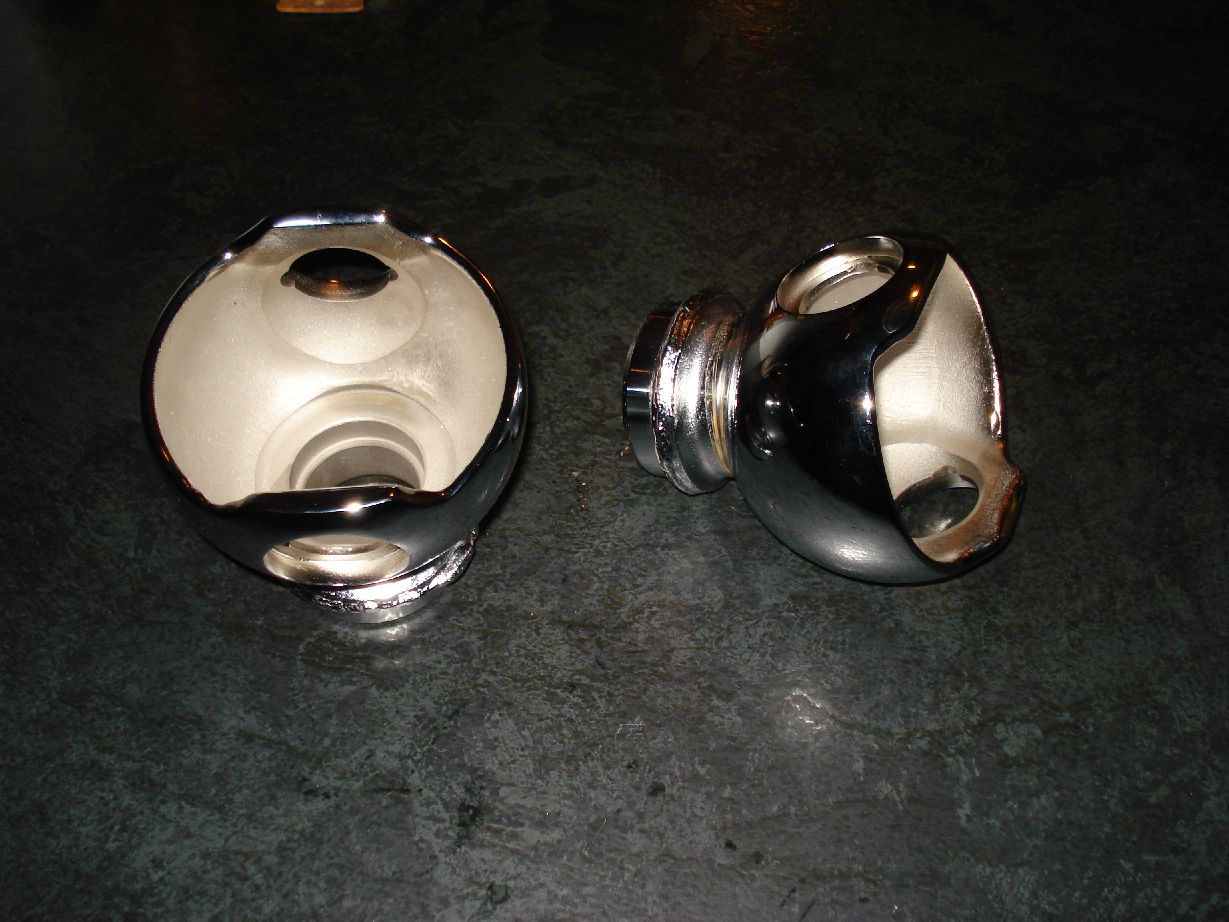
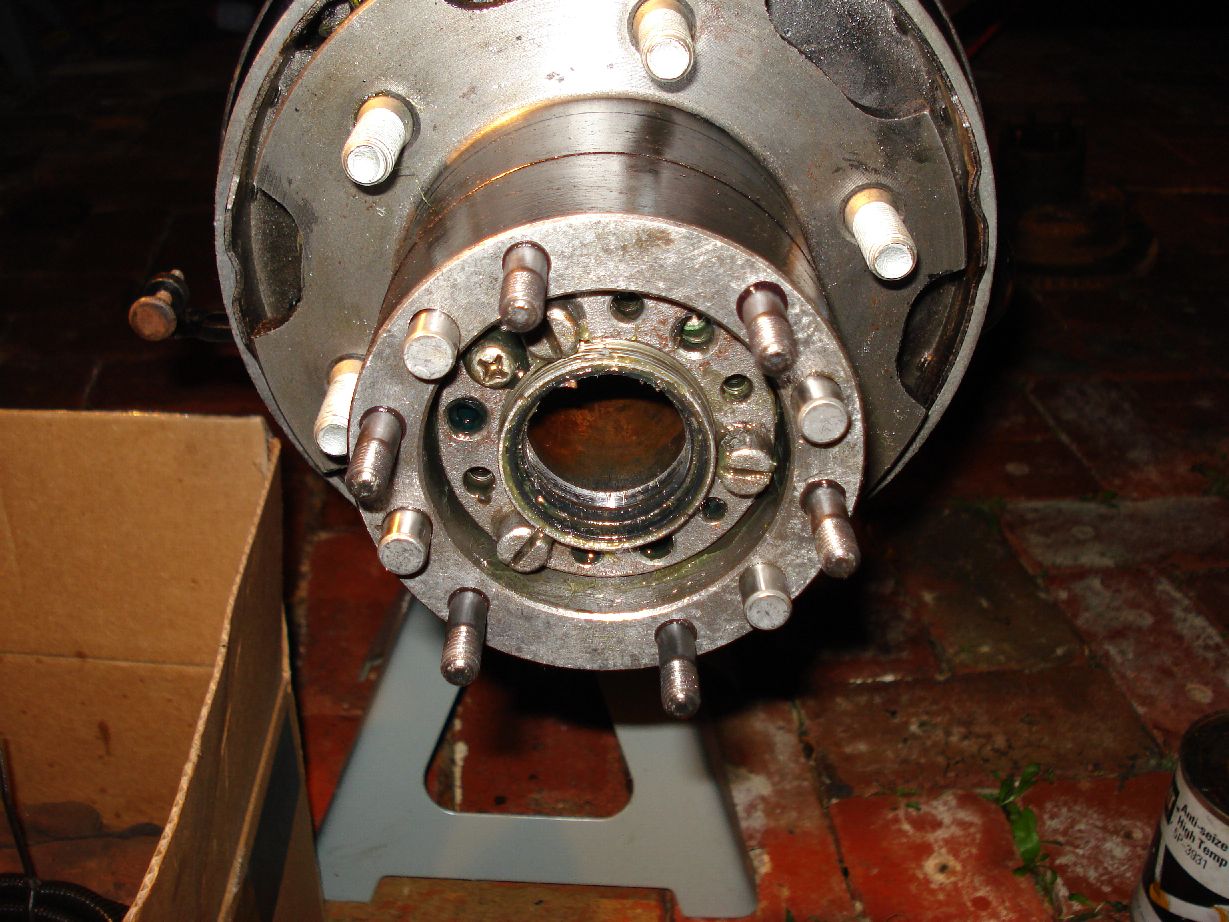
hey all, here is my 5th stud conversion…
Pritty basic but should give me some more strength.
If i break these ill buy a pair of 6shooters.
Heres my start to the front hub rebuild.
Spindles are ok, only minor wear on the seal area so i cleaned them up for reuse.
Hubs are painted and prepped.
Highsteer is prepped for install (buffed off the stoopid red paint on the mating surface…)
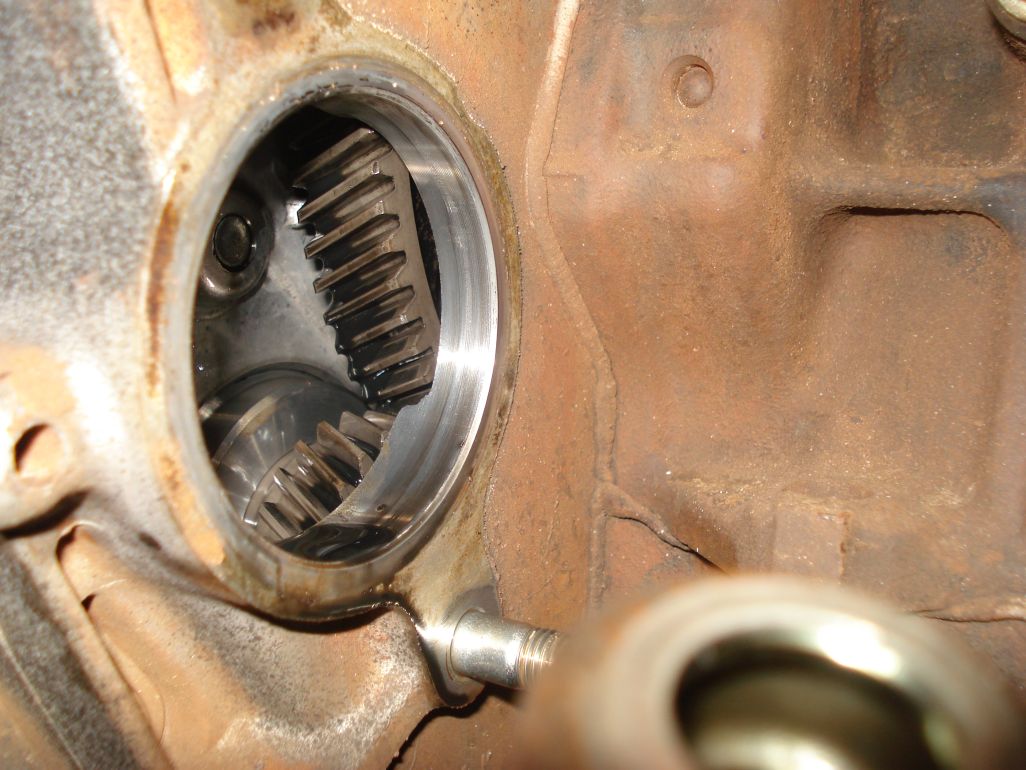
Hubs are almost together.
Ive got to buy some new thrust bushes for the inside of the spindle and possibly some new lower kingpins as the last people to work on this truck were realy rough and gouged into everything (as you can see from the above swivel housing pix)
Cheers fellas
My Max Width
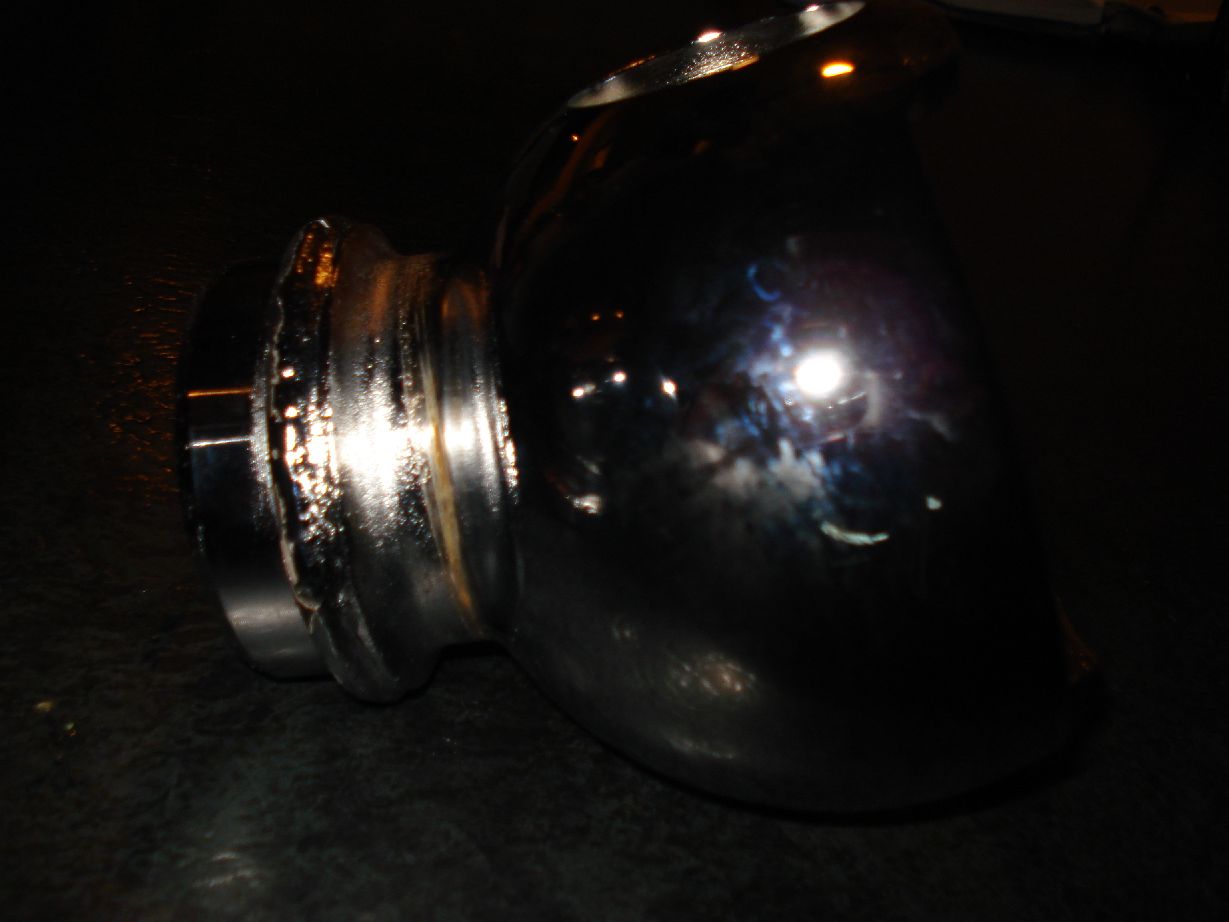
GOT BLING?
Update:
Had a prick of a day…Ive got a killer cold, im dodging rain all day and getting the wrong parts from Toyota… that i cant return as they have a non return policy… PRICKS…
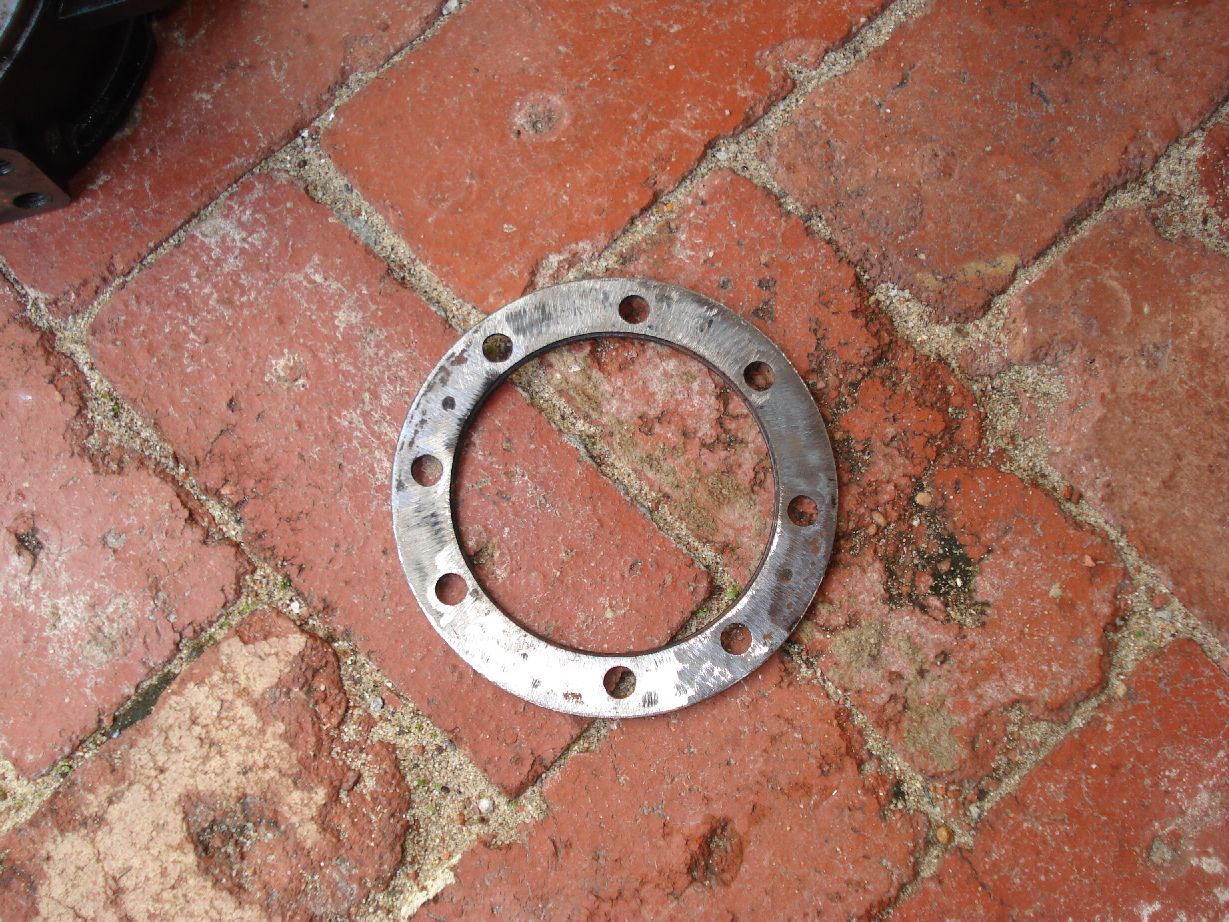
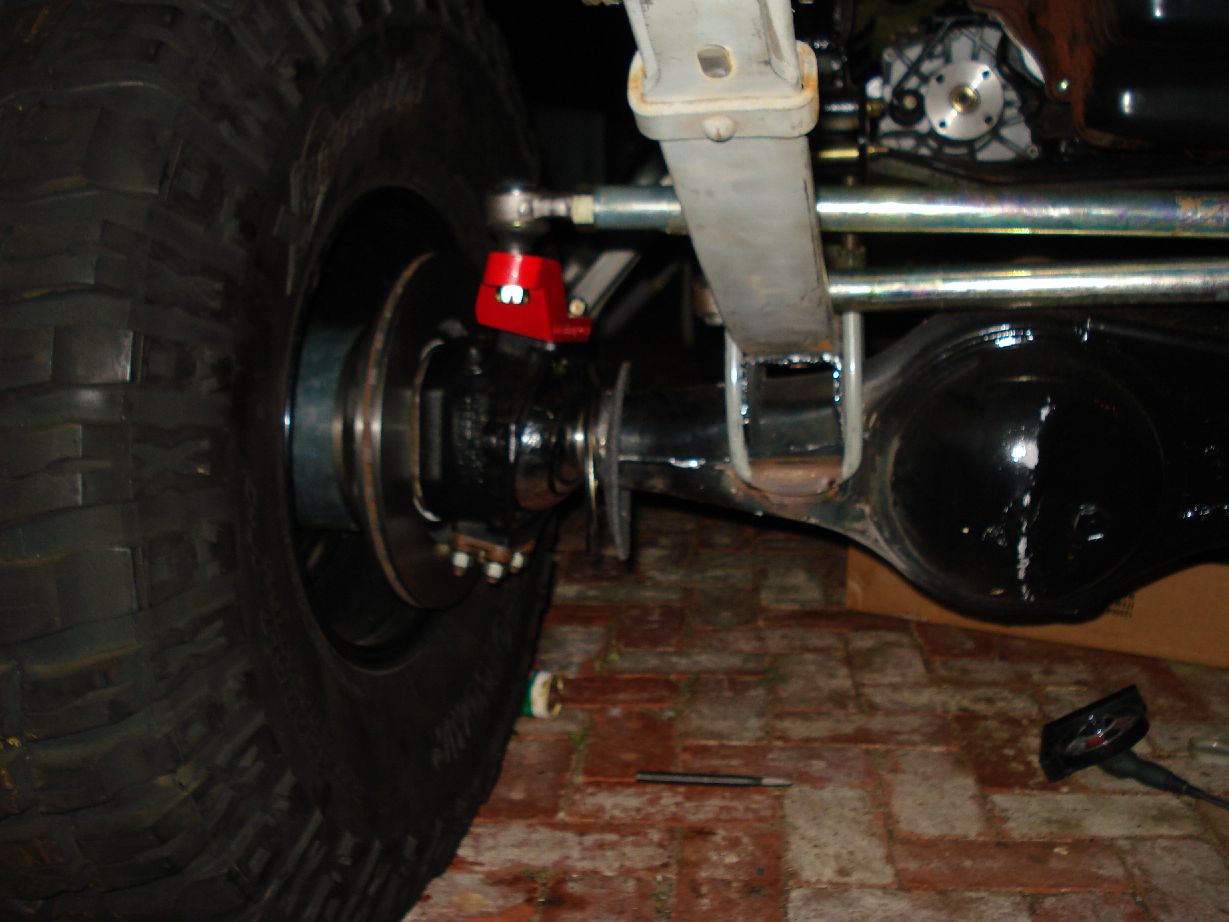
Anyhoo i managed to fit my knuckles back onto the housing with 5* of Castor, welded on my u bolt receivers (not yet finished) i put together the passenger side swivel housing and high steer, made a spacer ring out of the old backing plate so as to do away with the backing plates all together. I put the center in an did a few other things… I wet and cold… but happy as i have made some more progress…
Sneeky update:
Got the other side finished, got the highsteer in. Got a load more stuff from toyota to finish it.
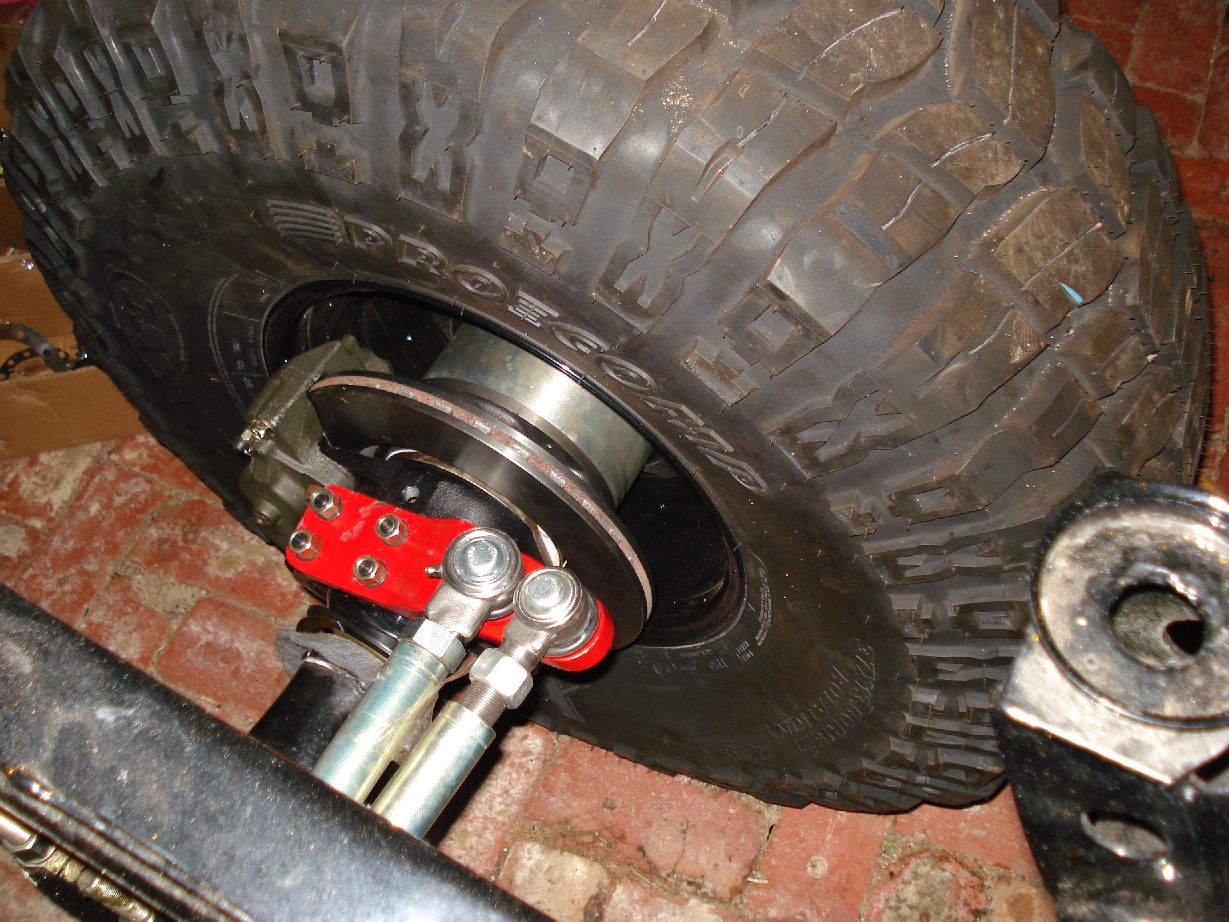
Tomorrows agenda:
Fit Longies and axles, fit hubs and put wheels on for a wank factor shot.
Get some bundy tube (break line and fuel line) from ABS in ozzie park here, run the new break lines and fuel lines.
Oh and some update pix

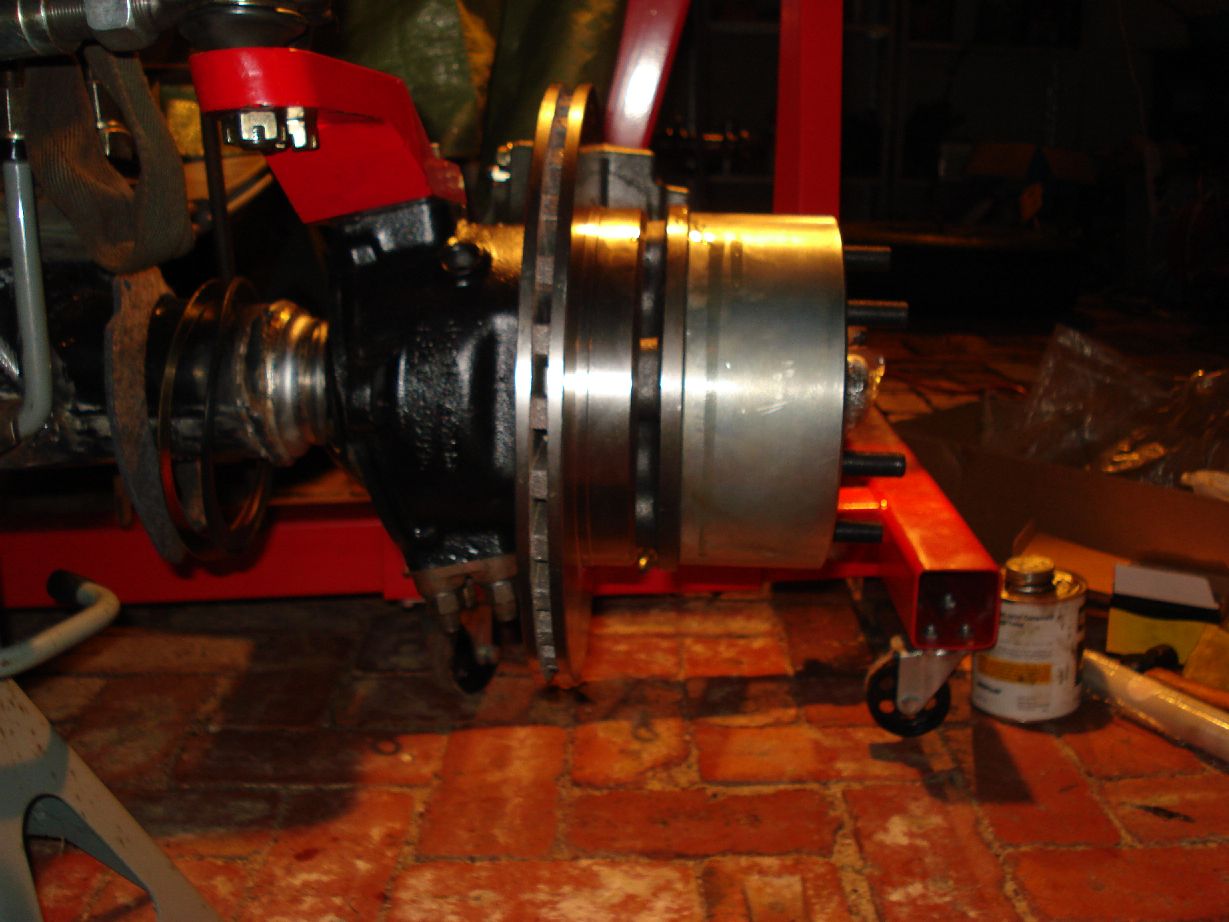
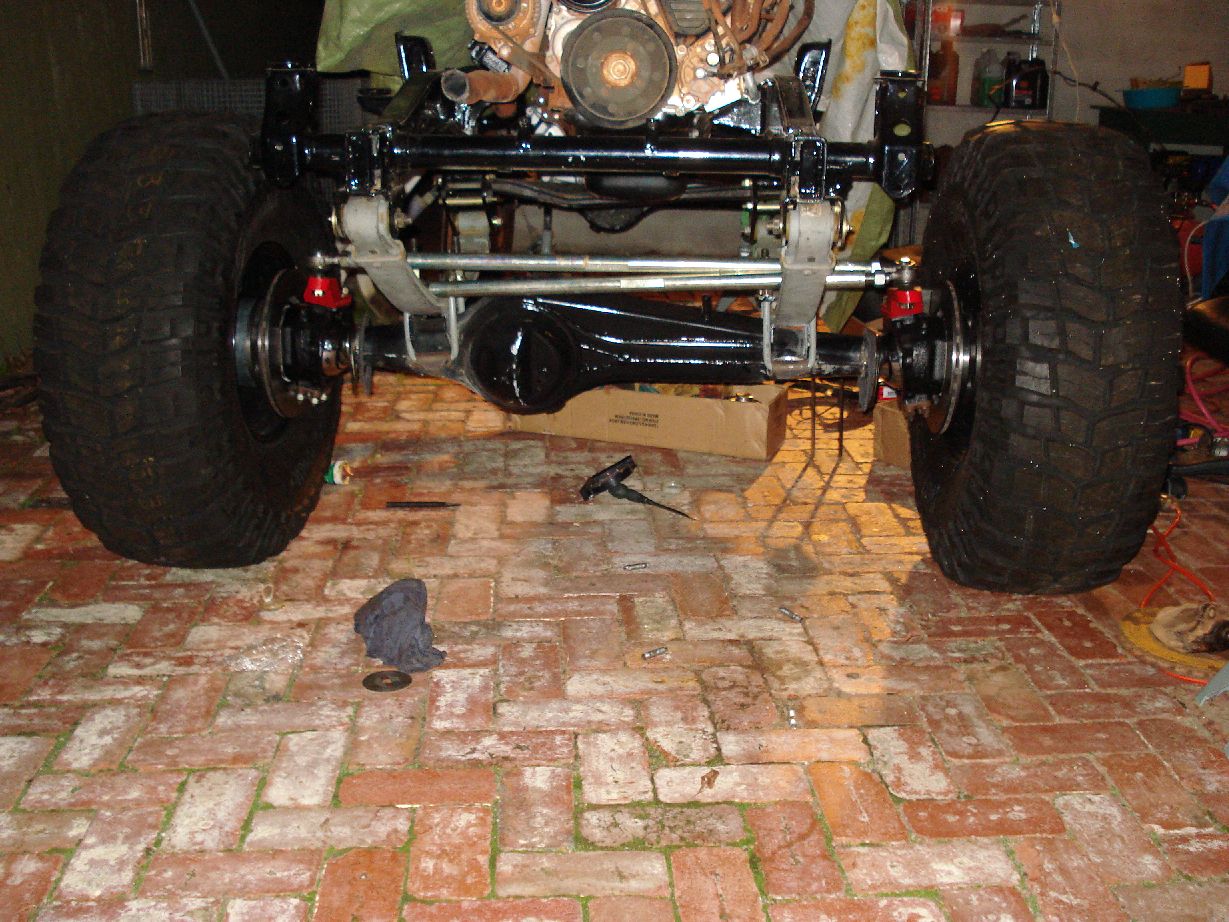
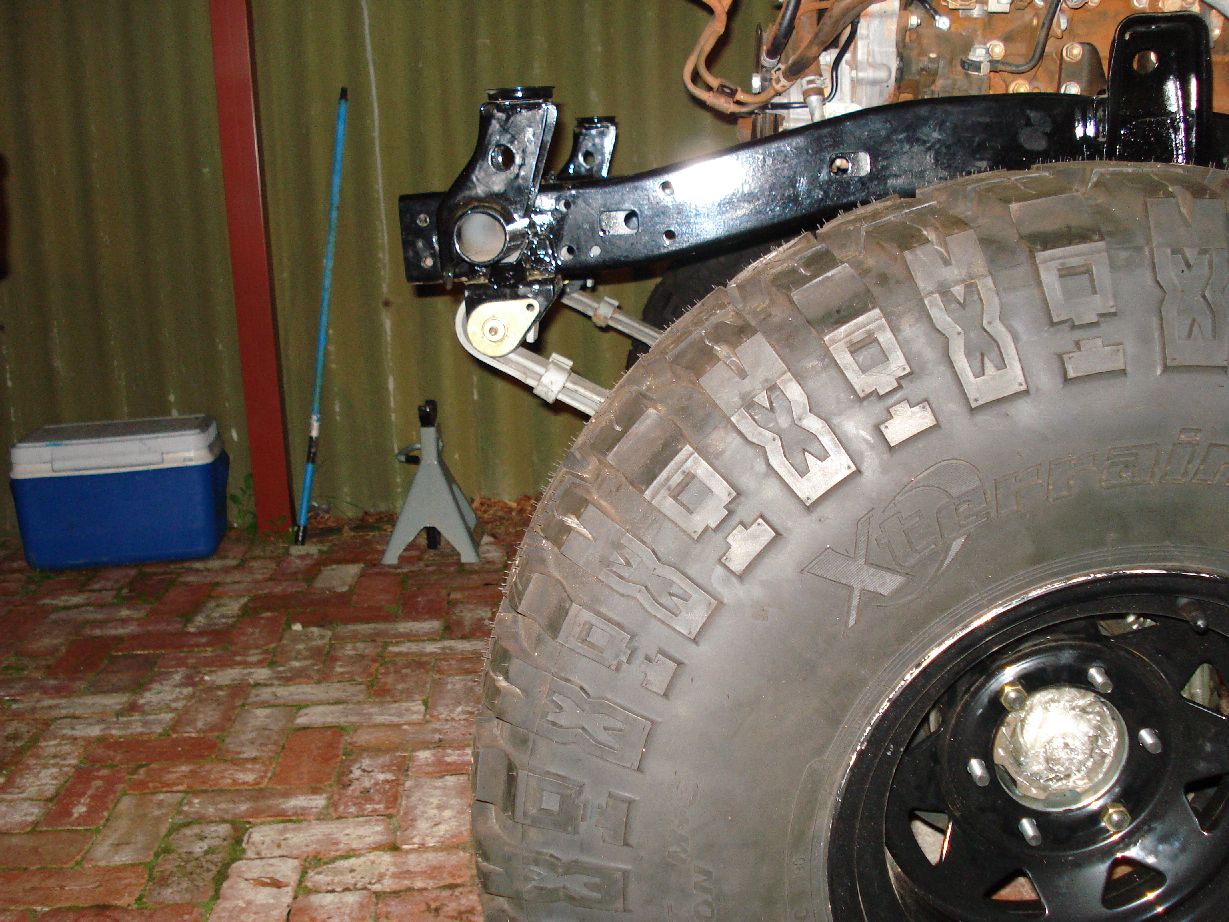
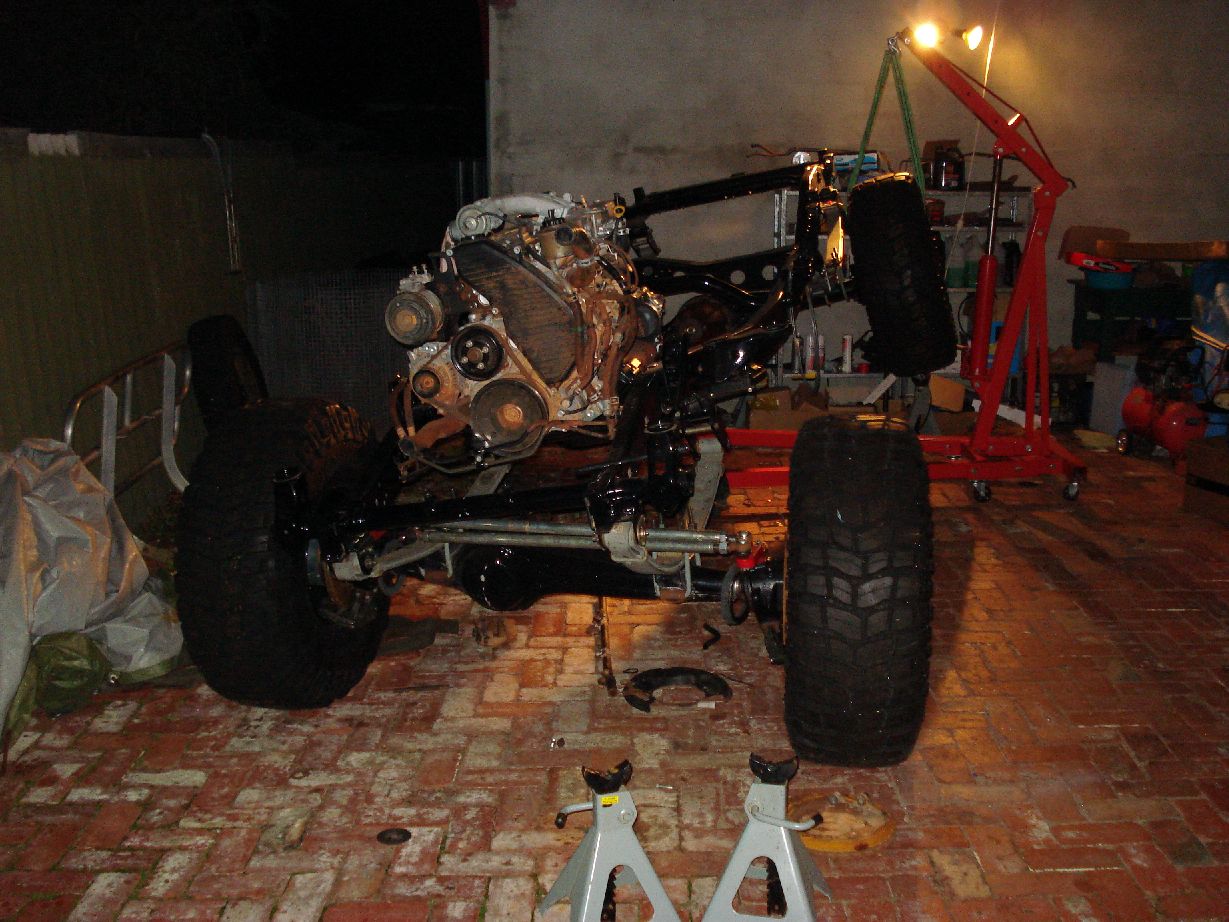
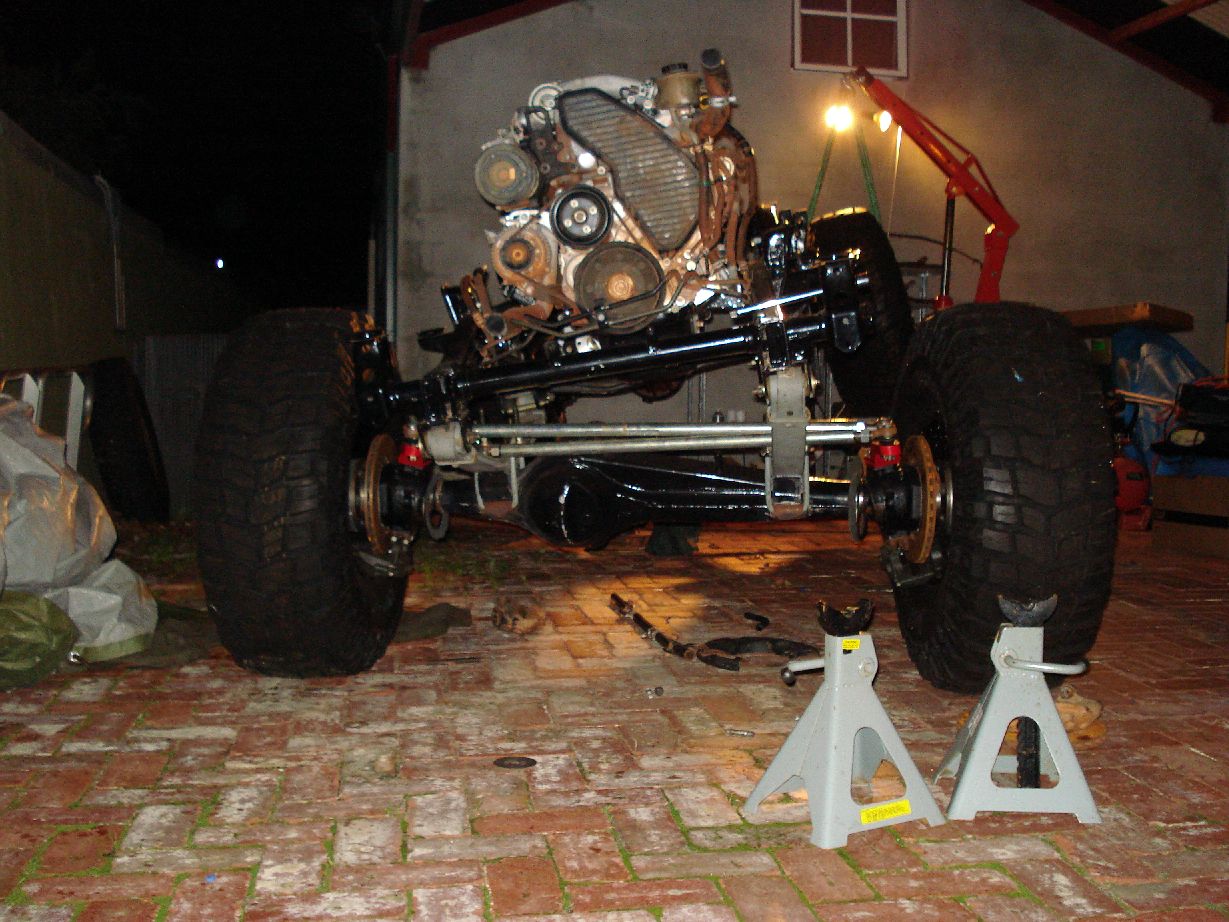
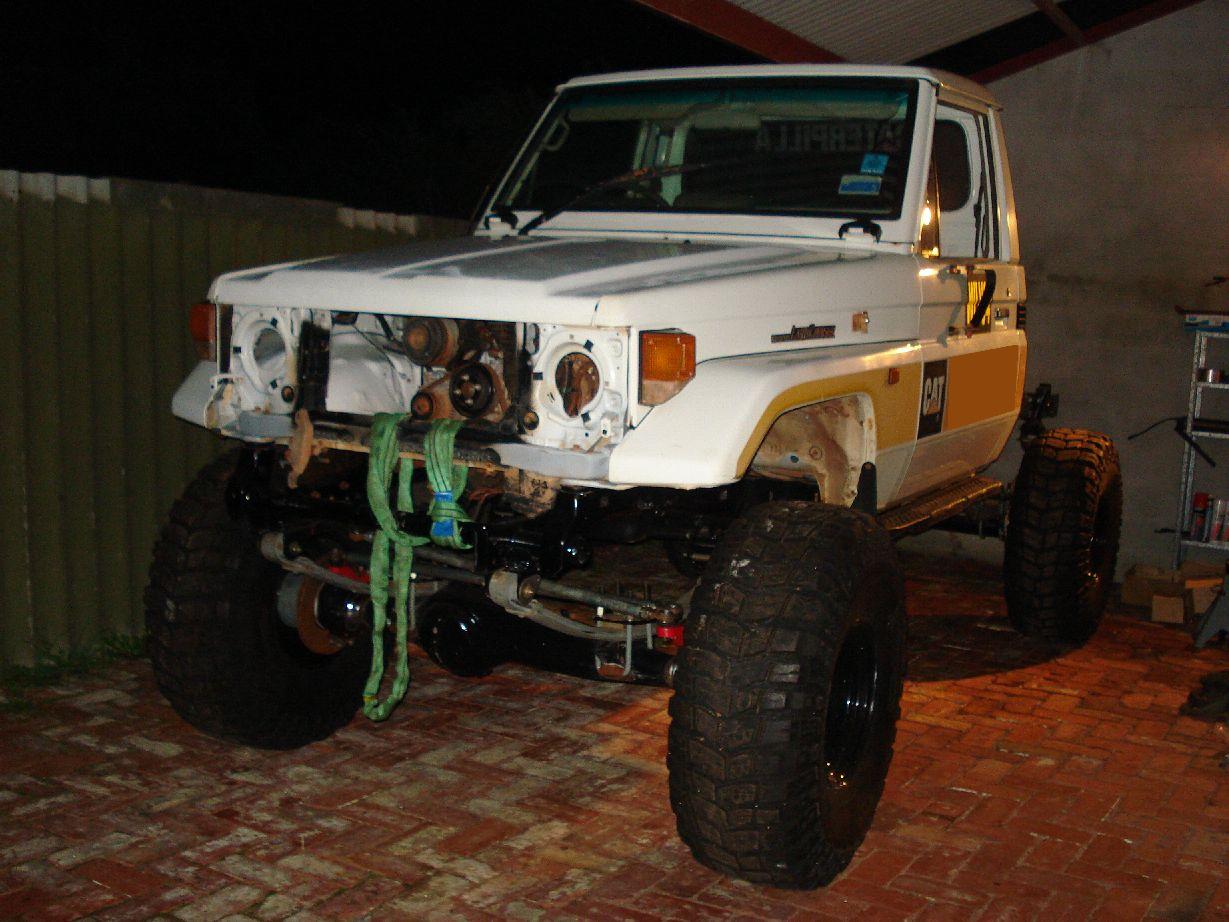
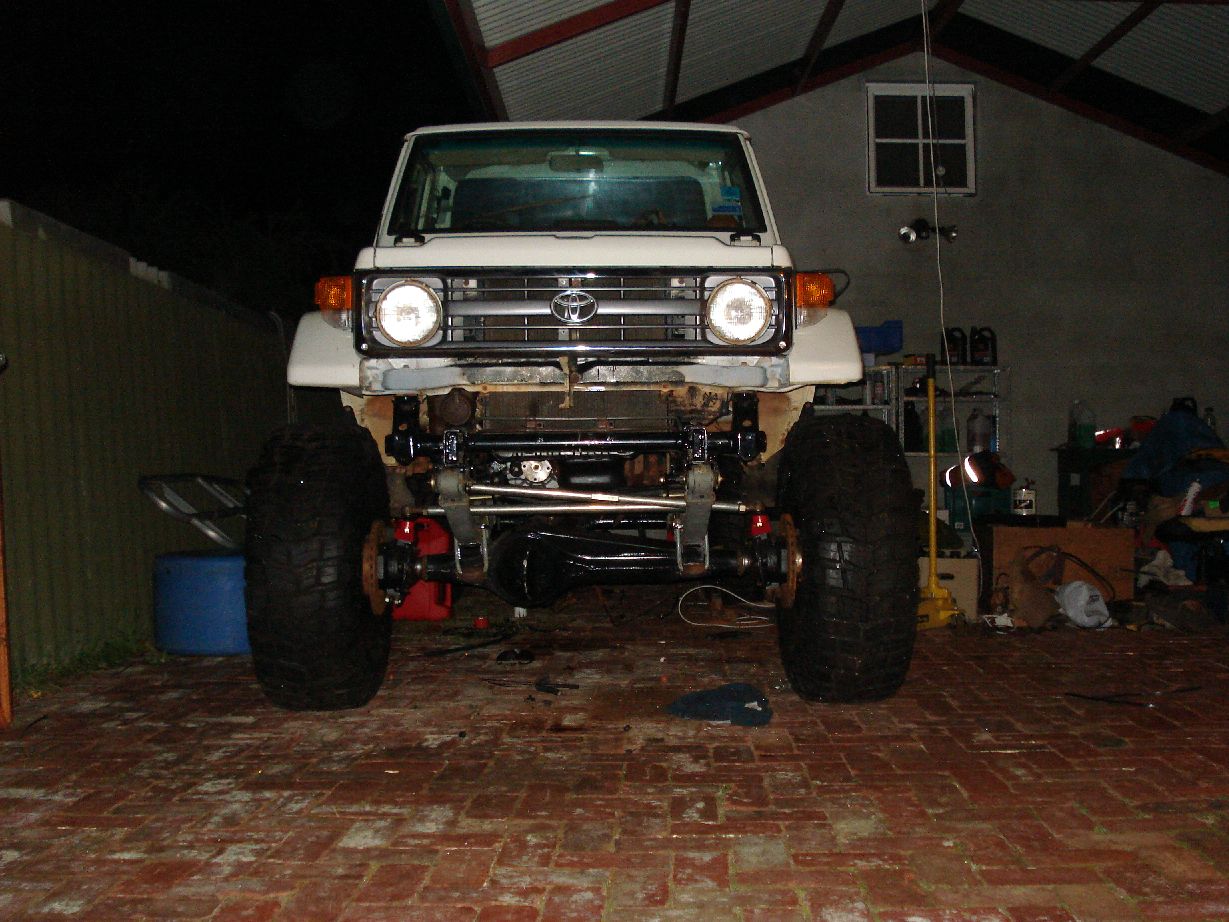
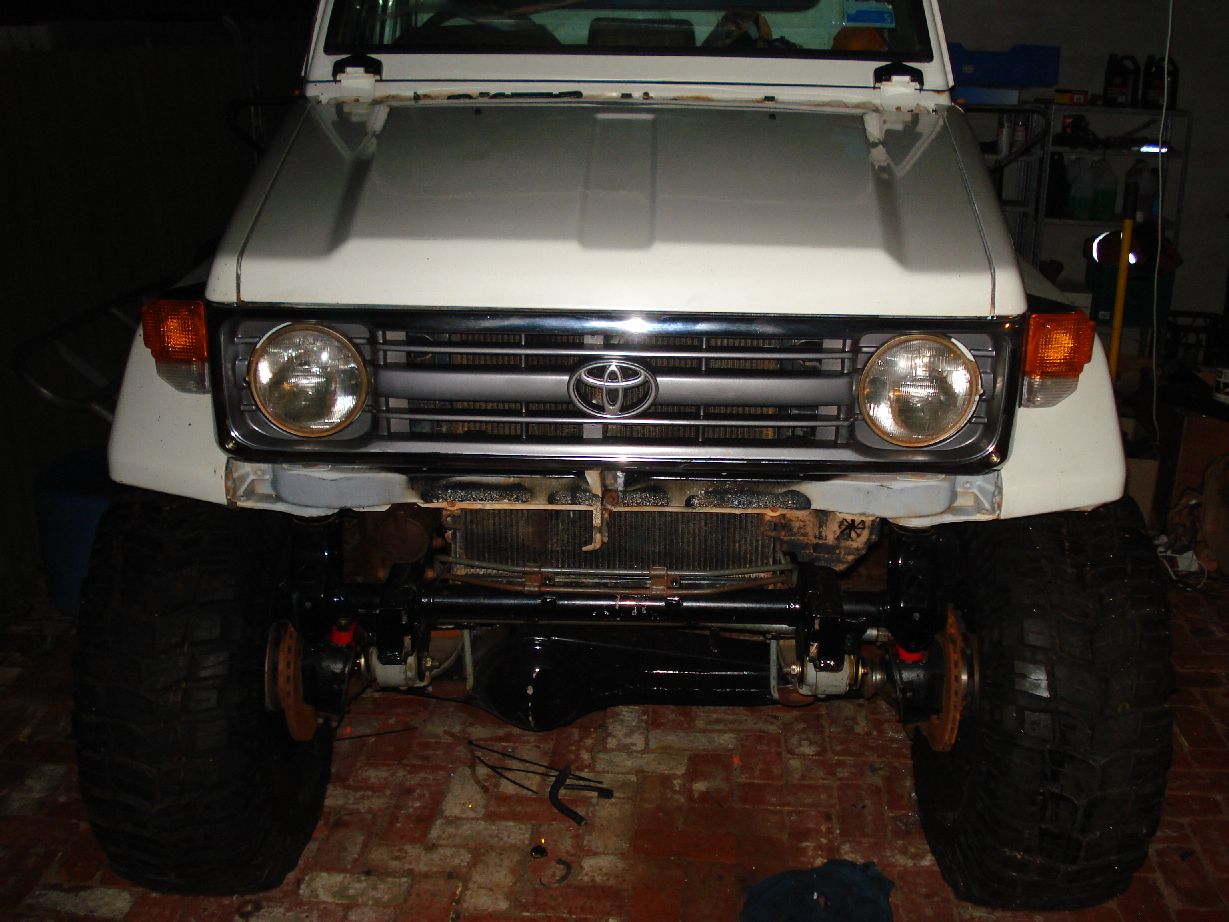
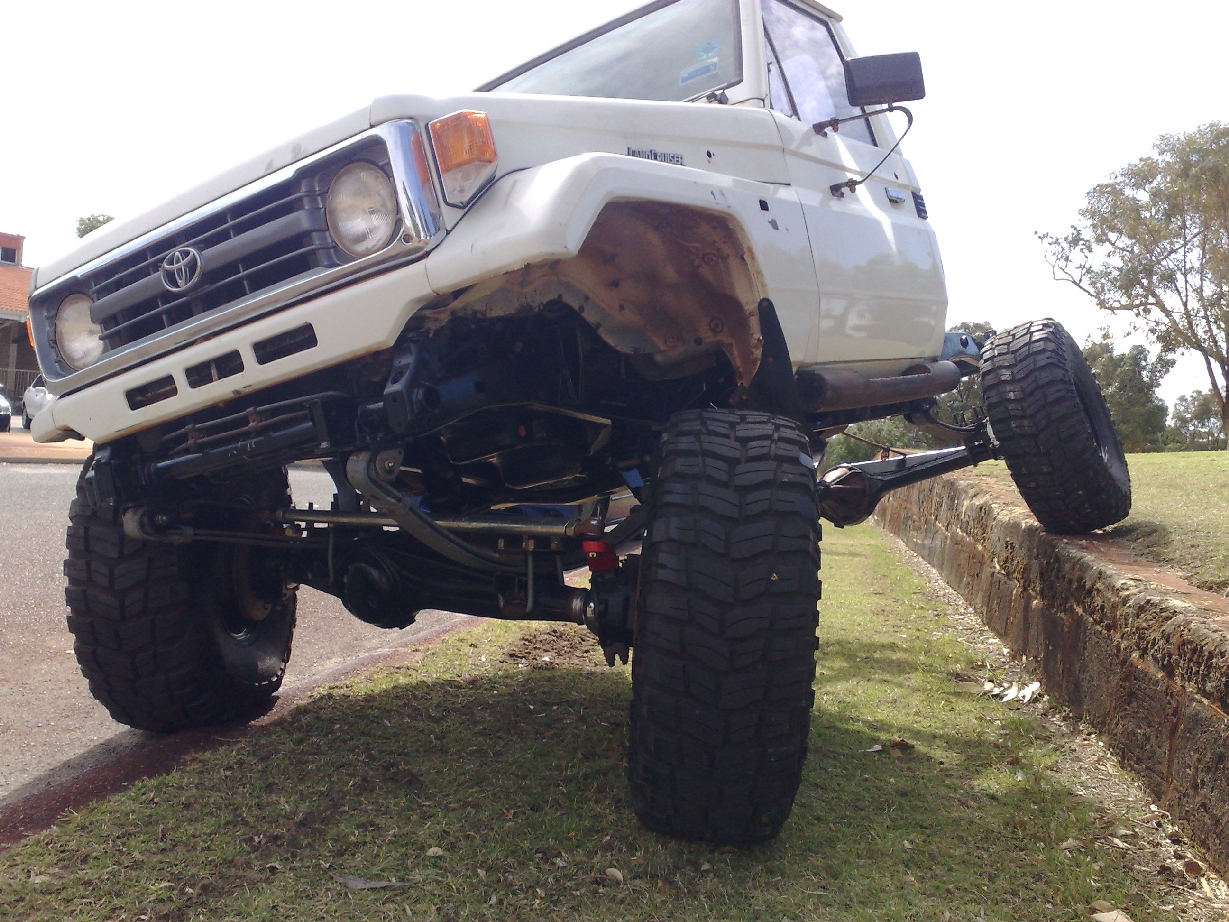
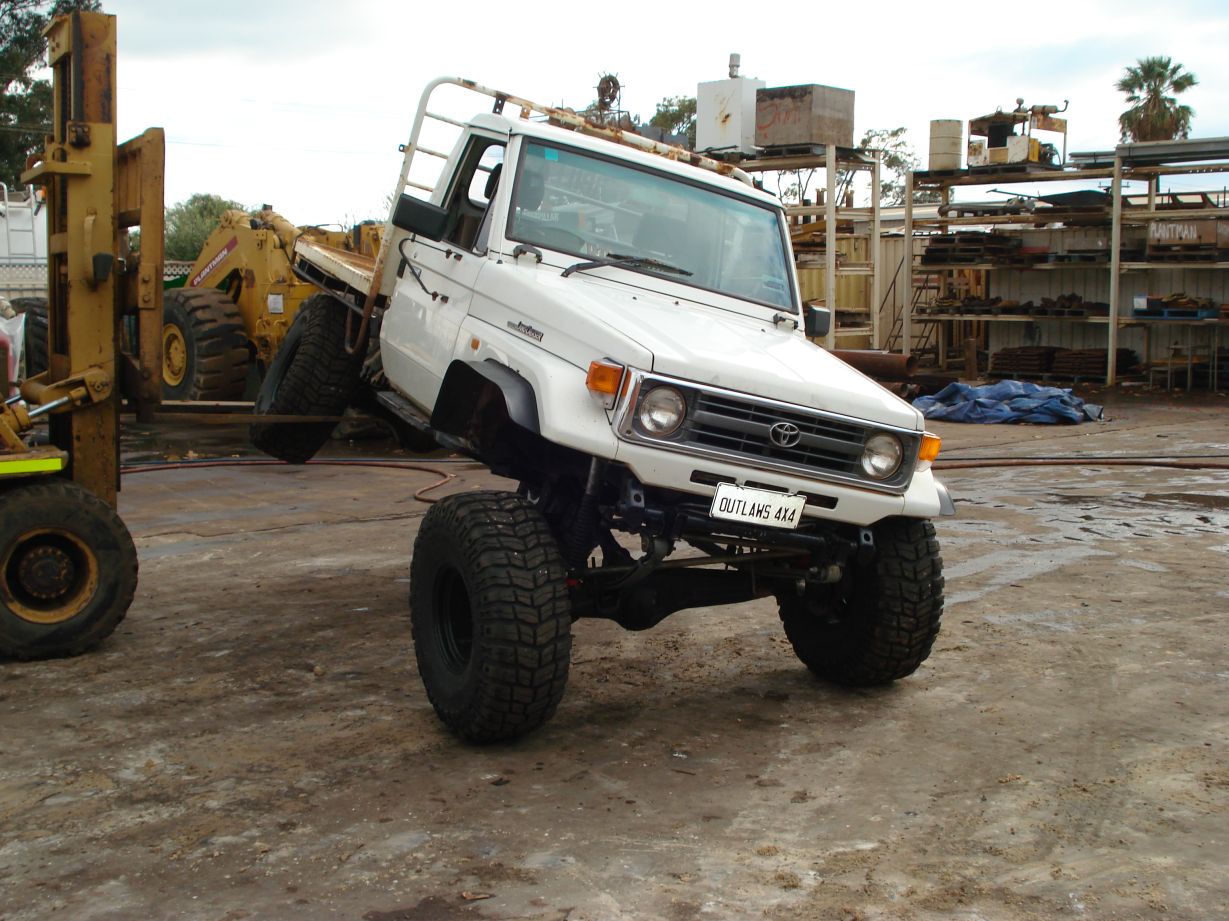
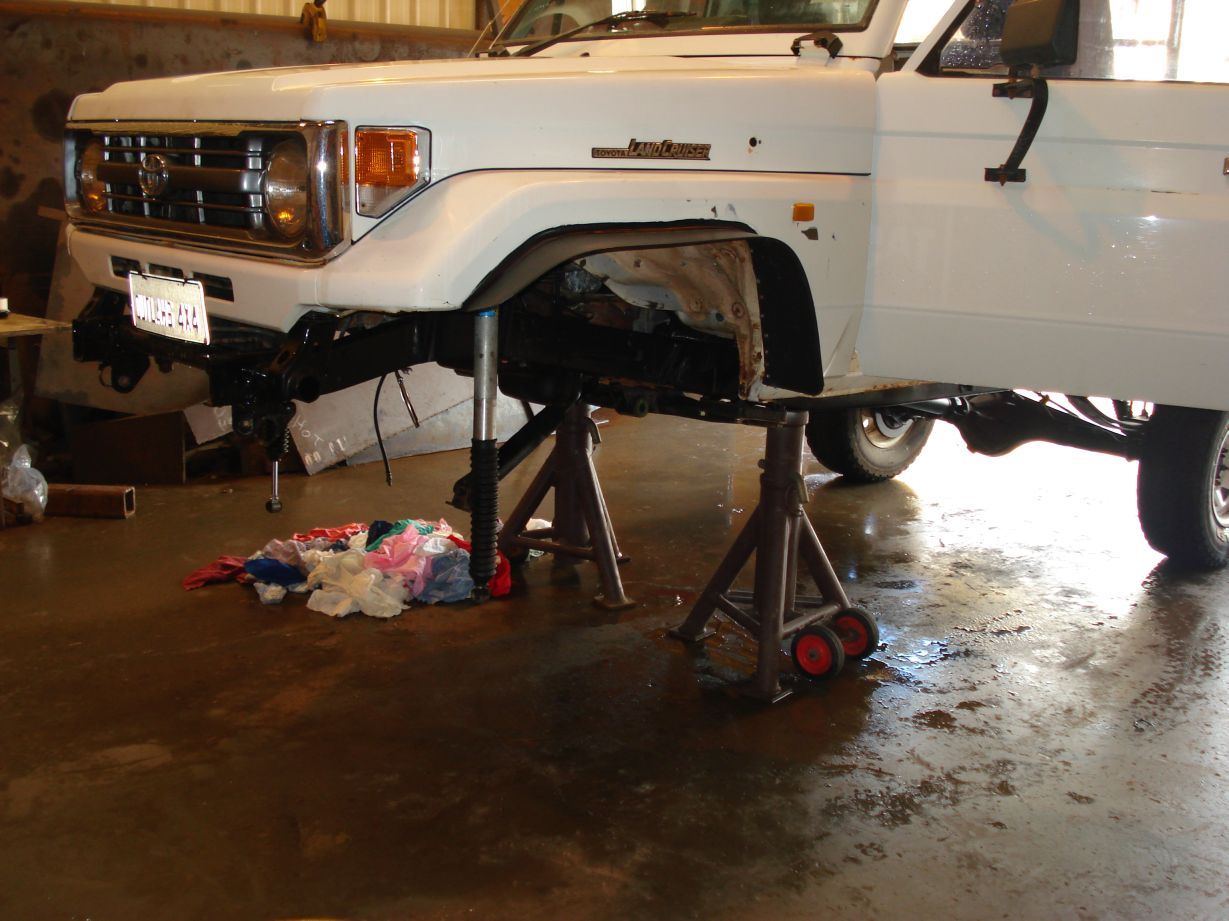
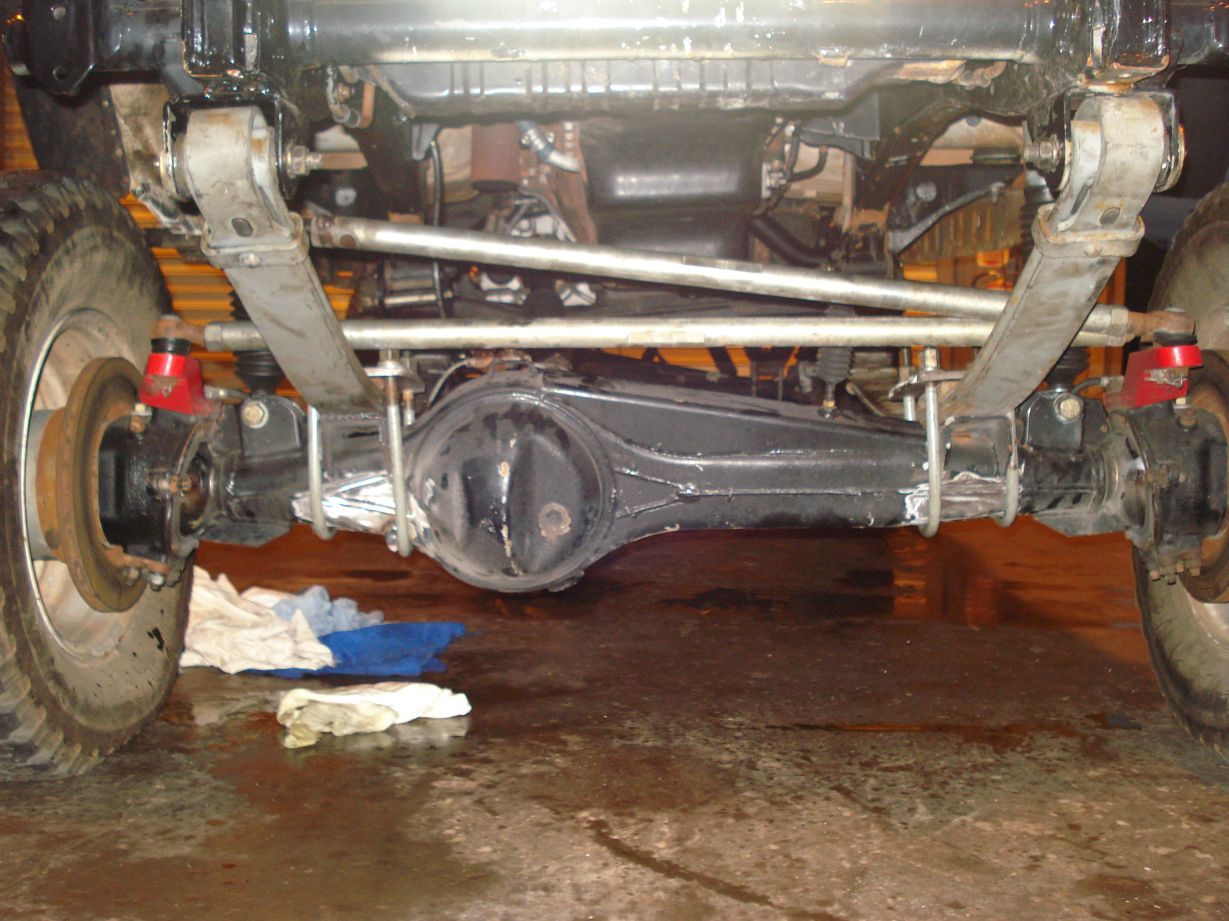
Well what do you know… She does hold her own weight!
For the first time in 2 years, she can hold herself up!
Check out that Approach angle
And the pix: Maby a sticker that says caution over width is needed?
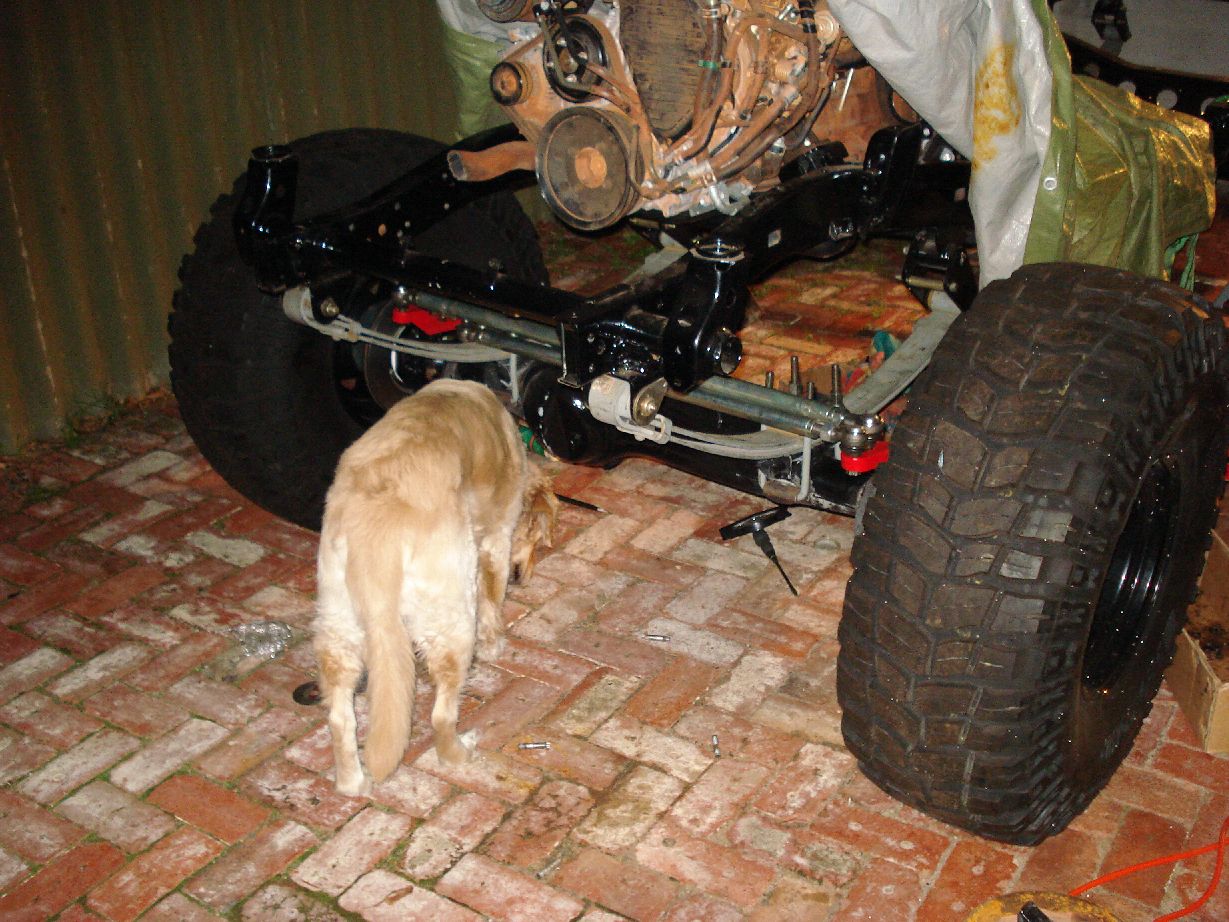
I got some good progress shots.
Almost time to put the cab back on!!!
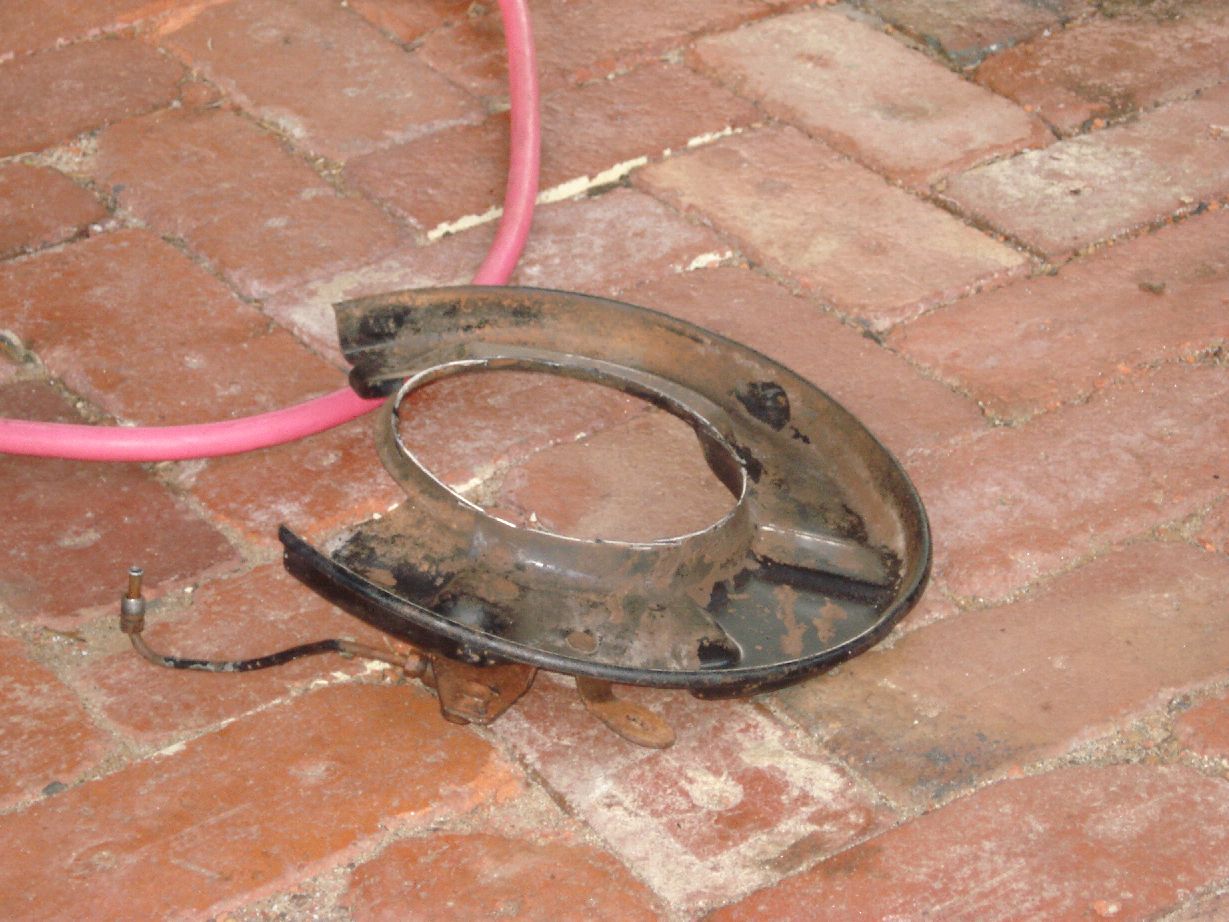
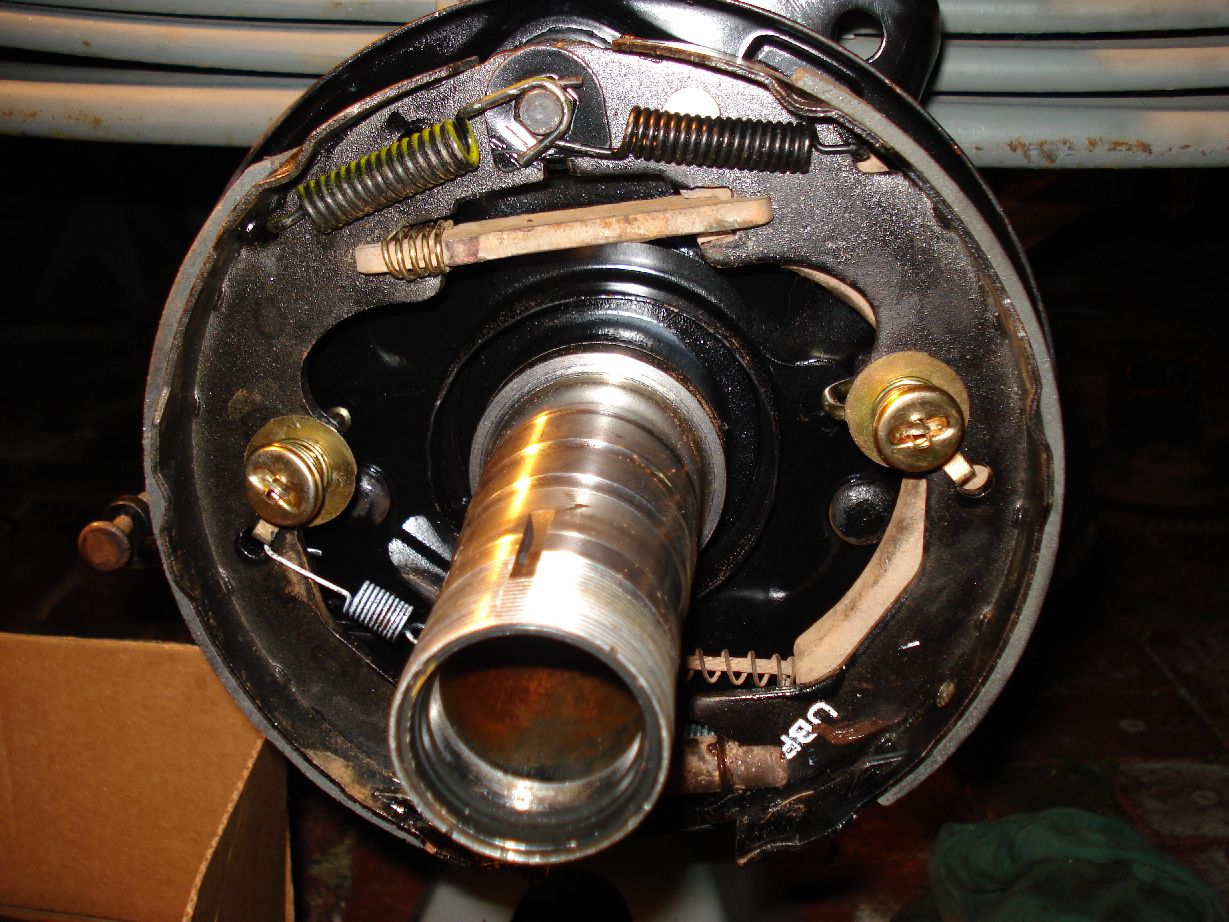
Removed the rear backing plates and cleaned/painted the hub assembly.
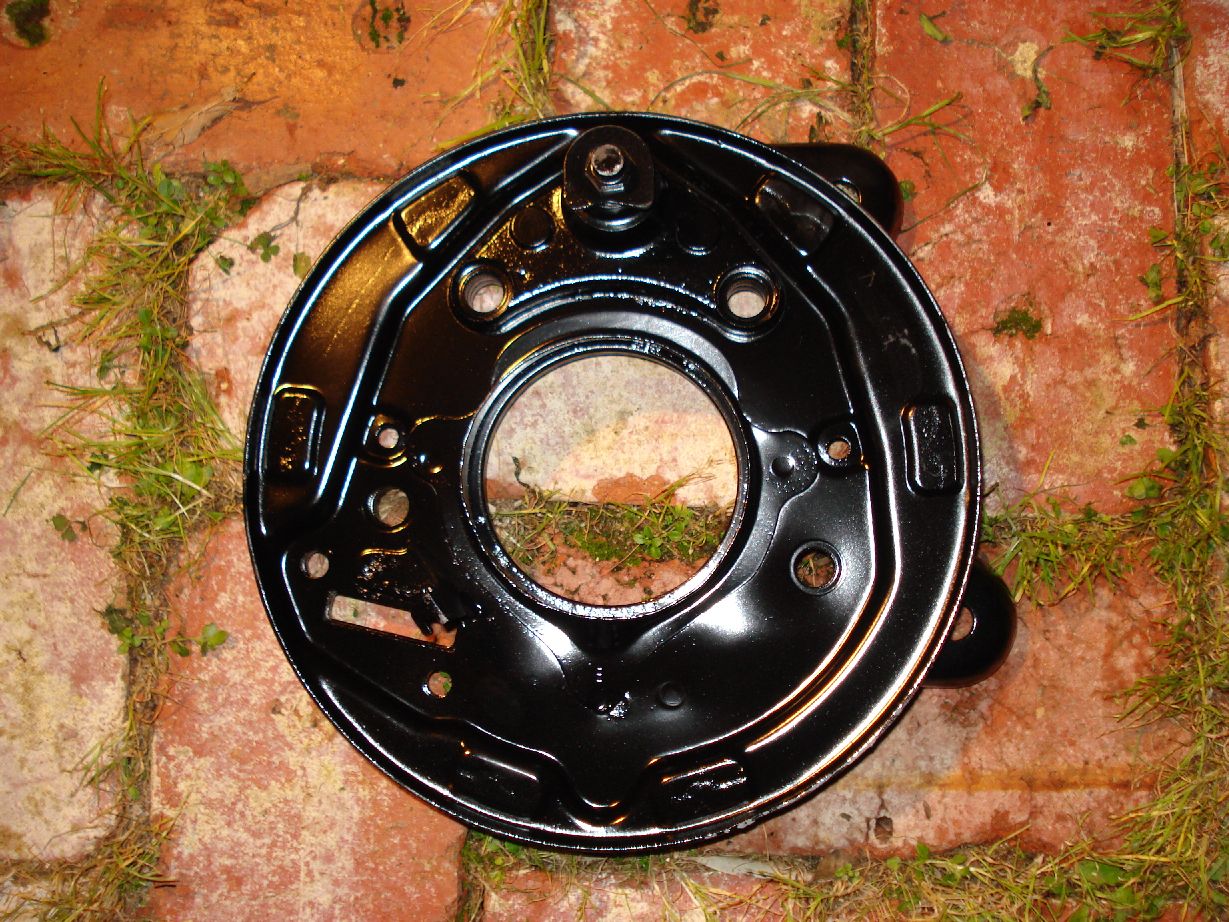
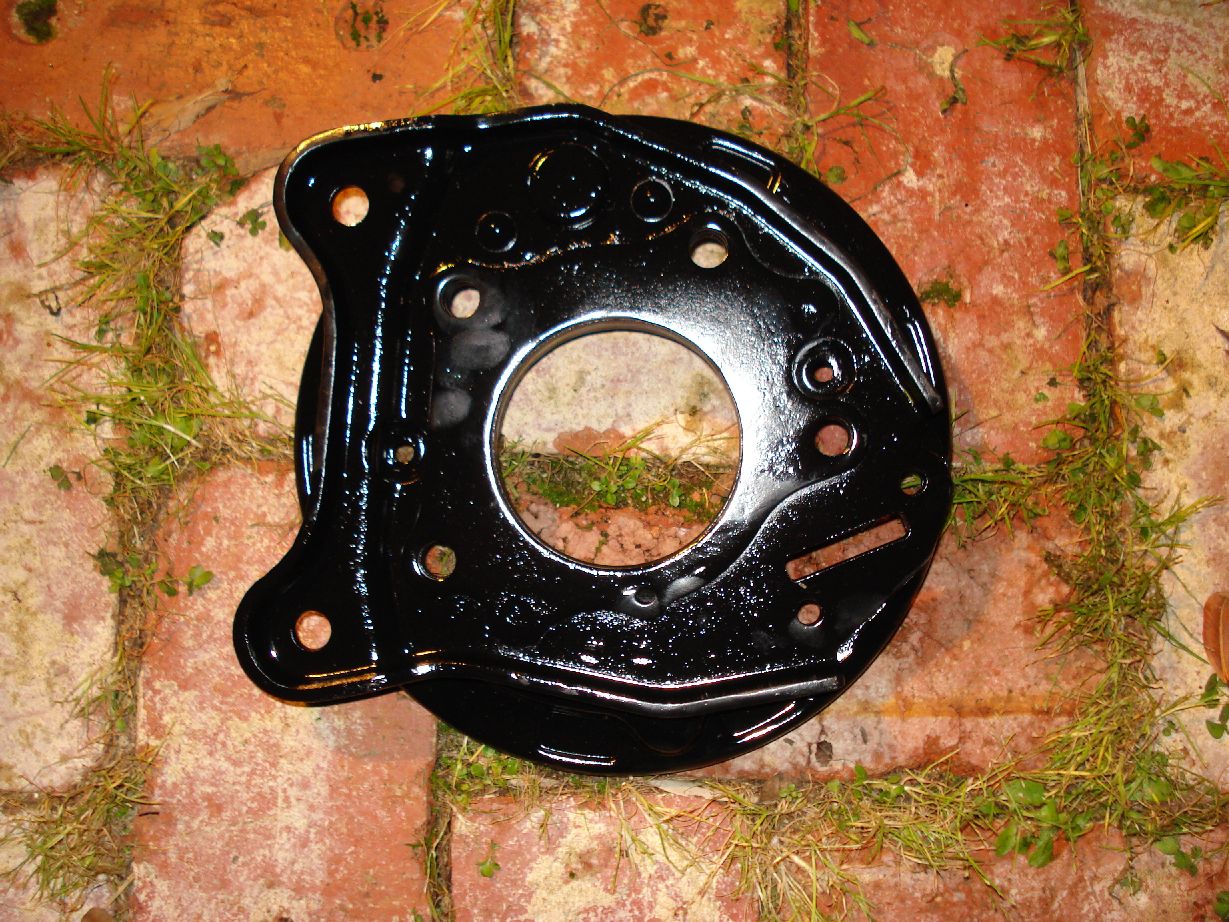
The 10mm x4 dowel conversion
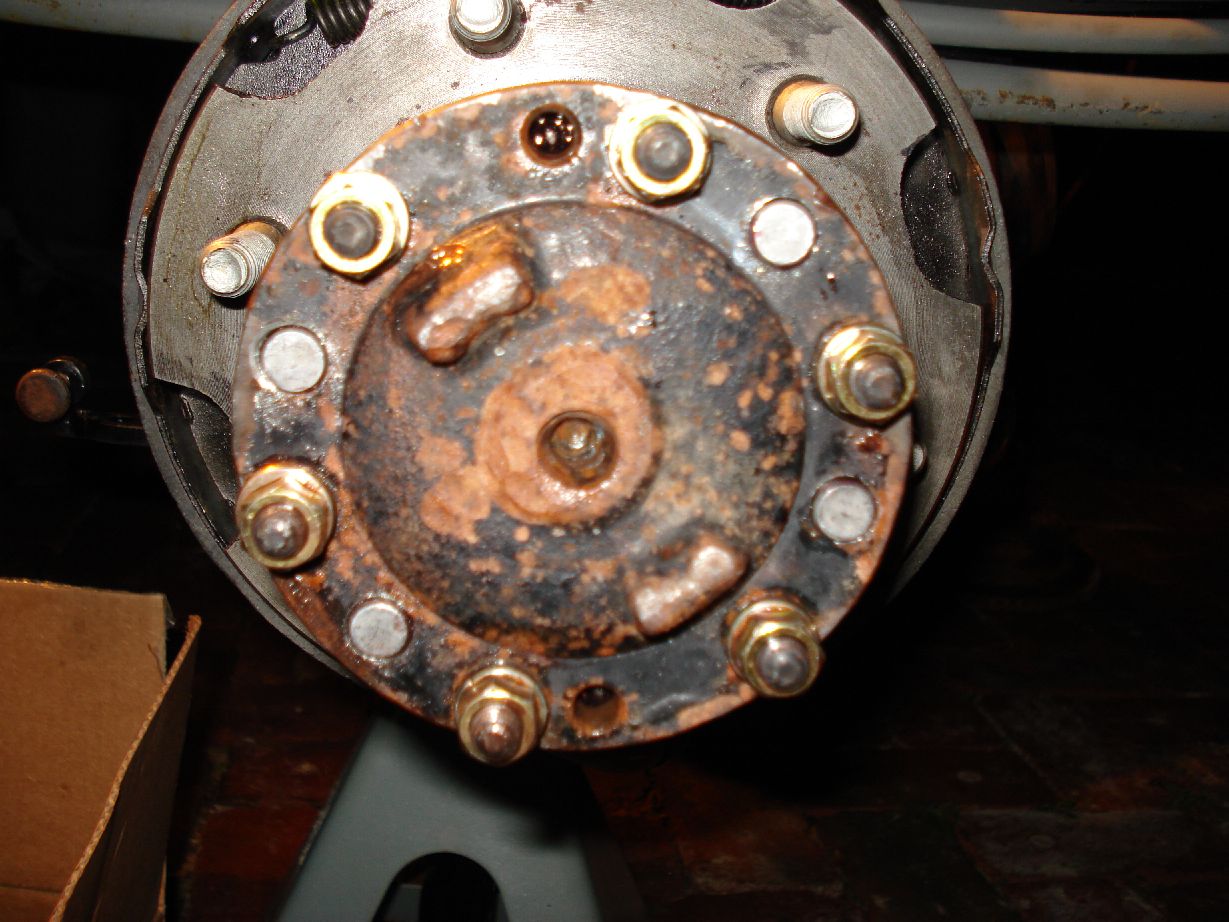
Completed Hubs
Fun Time lol
Small update so you all dont think im doing nothing.
- Ive made the new break lines front and rear to the difs
- Made some mounts and brackets to hold the join from steel lines to flexi on the front calipers.
- Just need to get some more bundy tube and make the lines that go along the difs.
Took a couple o pix too
Lookie lookie
so yall dont think im doing nothing…
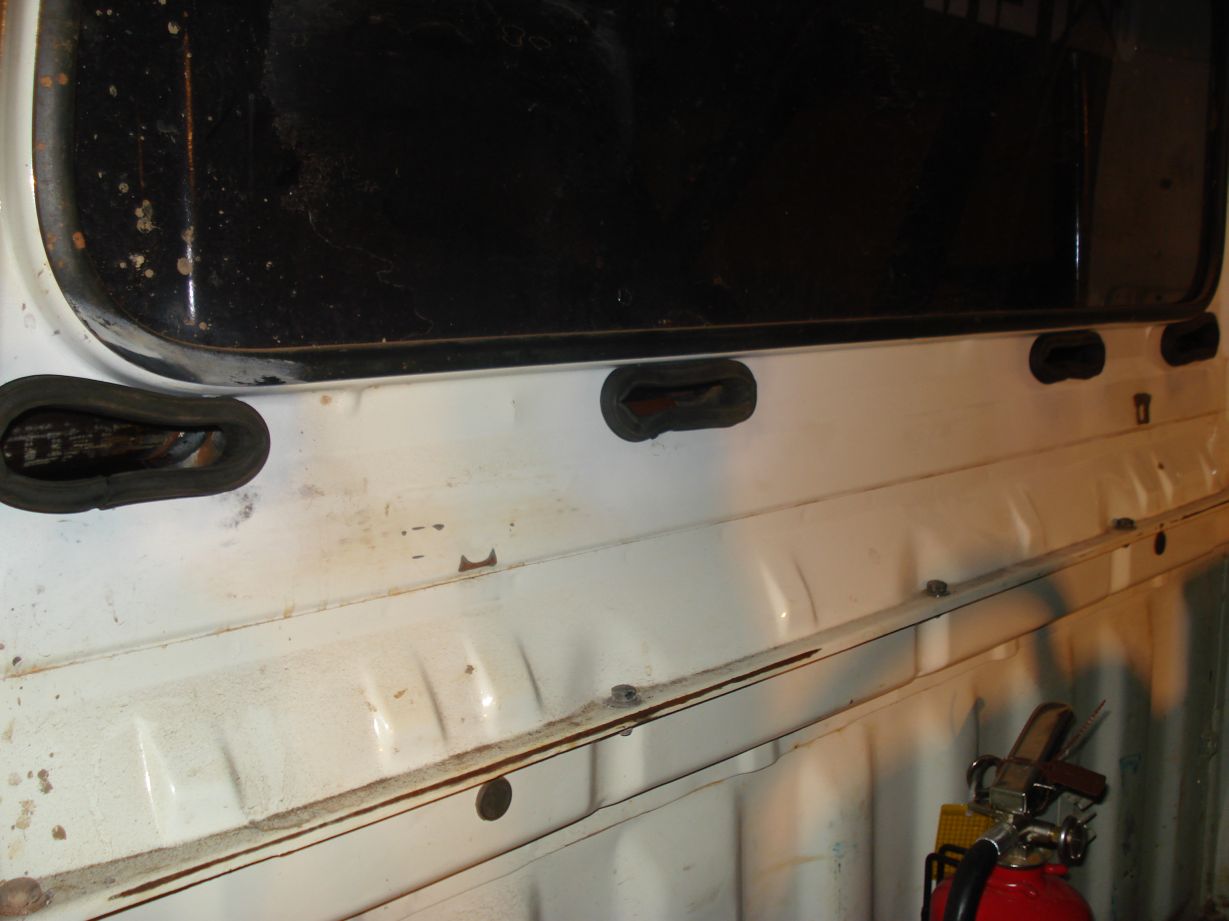
- Removed the stickers… F###N things didnt want to come off without some paint…
- Making everything as new and shiny again
- Almost ready to start it, all oils and fluids are done.
- Talking to COR about an alloy radiator
- Working on some sliders/sidesteps/air tanks
- Getting some custom front cradle style ubolts made up from trailer parts wa
- Interior stripped and cleaned, new panels and door lock mechanisms.
- Ali checker plate door skins with 6″ alpine R types in each
- Super basic flat ground flex test (just for wank factor) no where near max flex and i ran out of engine crane
- And BABY GOT BLING!
Its gettin so close, i can see a light at the end of the tunnel!
Minor Update:
Electrical – 90% done
Extra panels and guards – done
EGR and emission control crap removed – done
Clutch system – done
Break system – 50% done
Oil pressure and compression pressure checks – done
Temporary air induction system – done
Dif oils – to do
Drive shafts – to do
Rest of breaks – to do
Minor electrical work – to do
Interior panels – to do
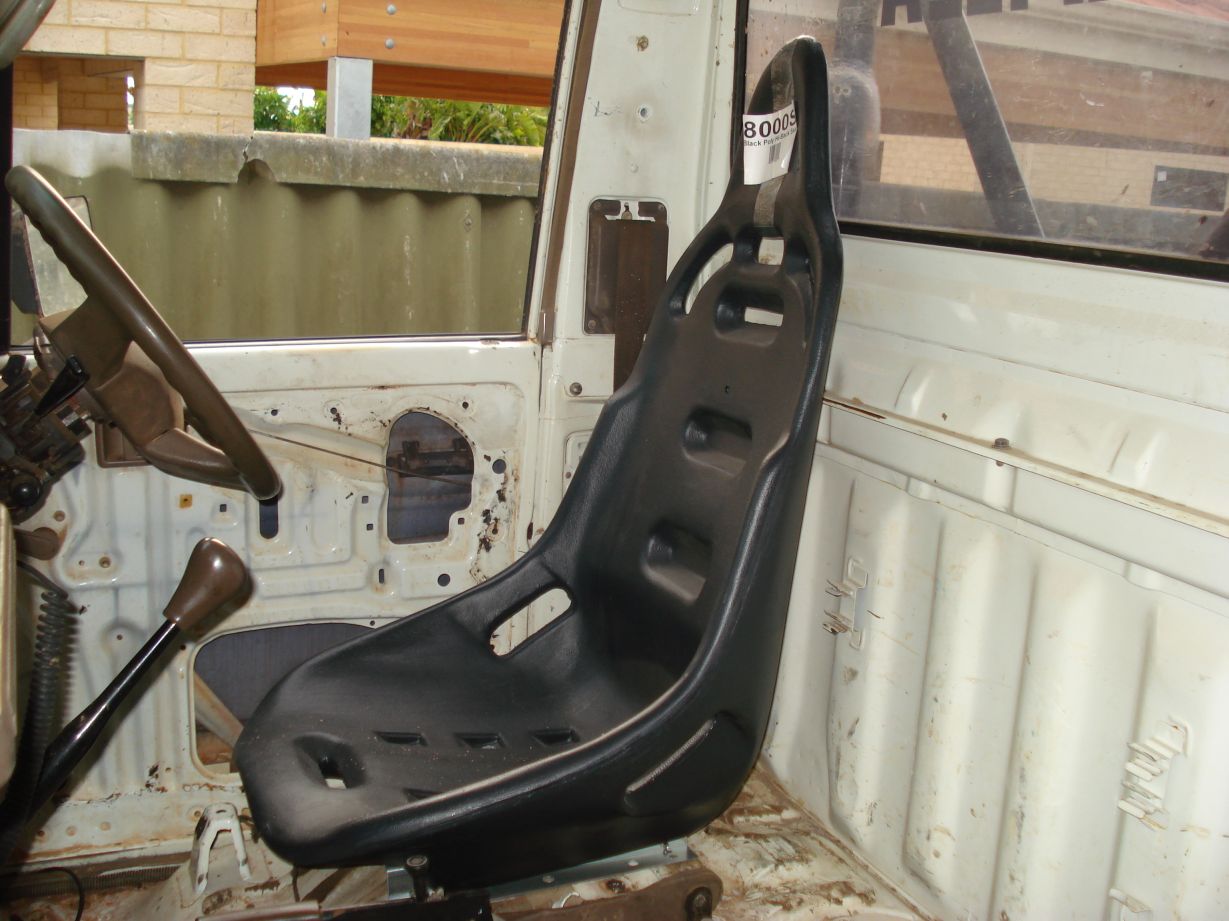
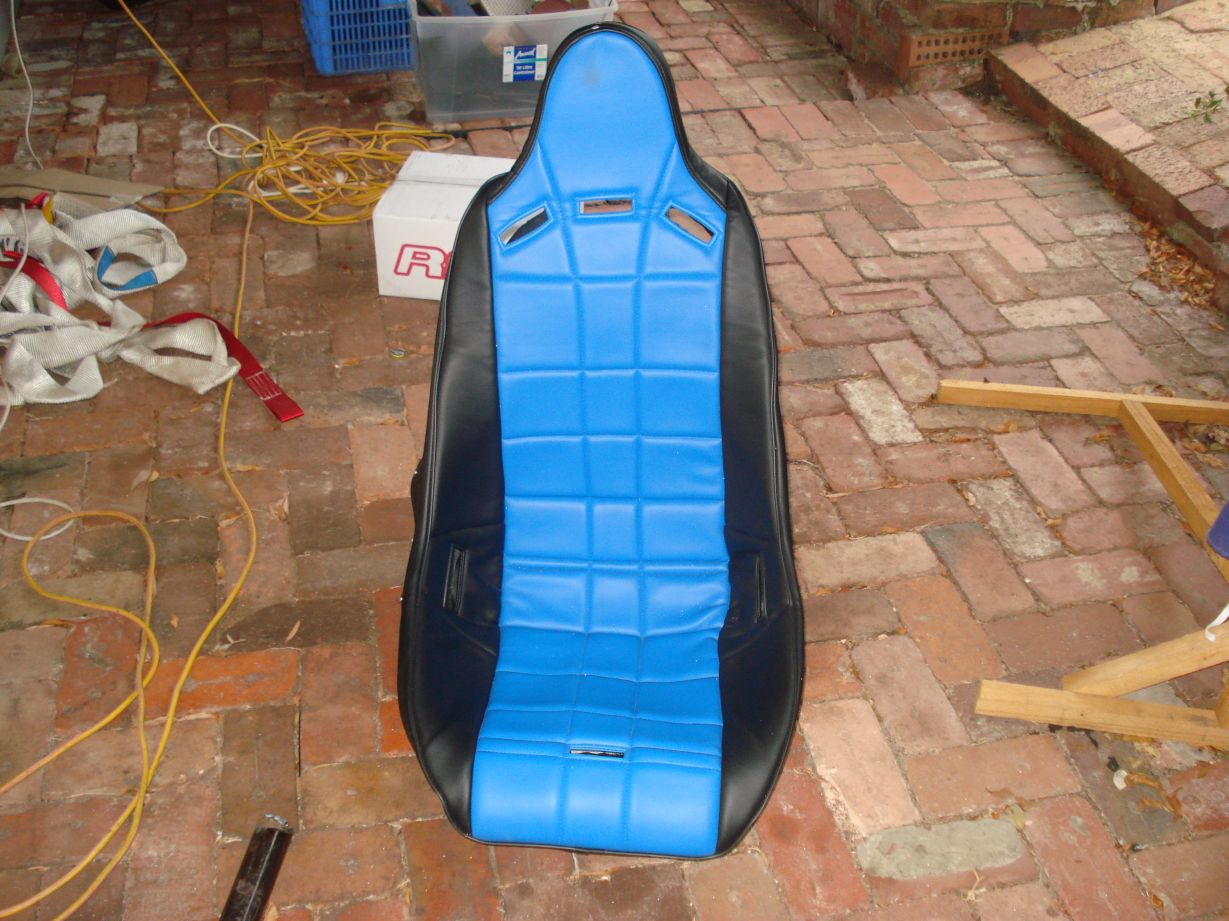
Seats – to do
Tray – to do
im nearly there…
Random pix from tonight
Look out
a few update pix for ya…
Still gotta fix those front u bolts….
Shox Done
Tempoary tray almost done, 2ft of overhang gone

Got bored not being able to do anything to it, so i thought id post some pix…
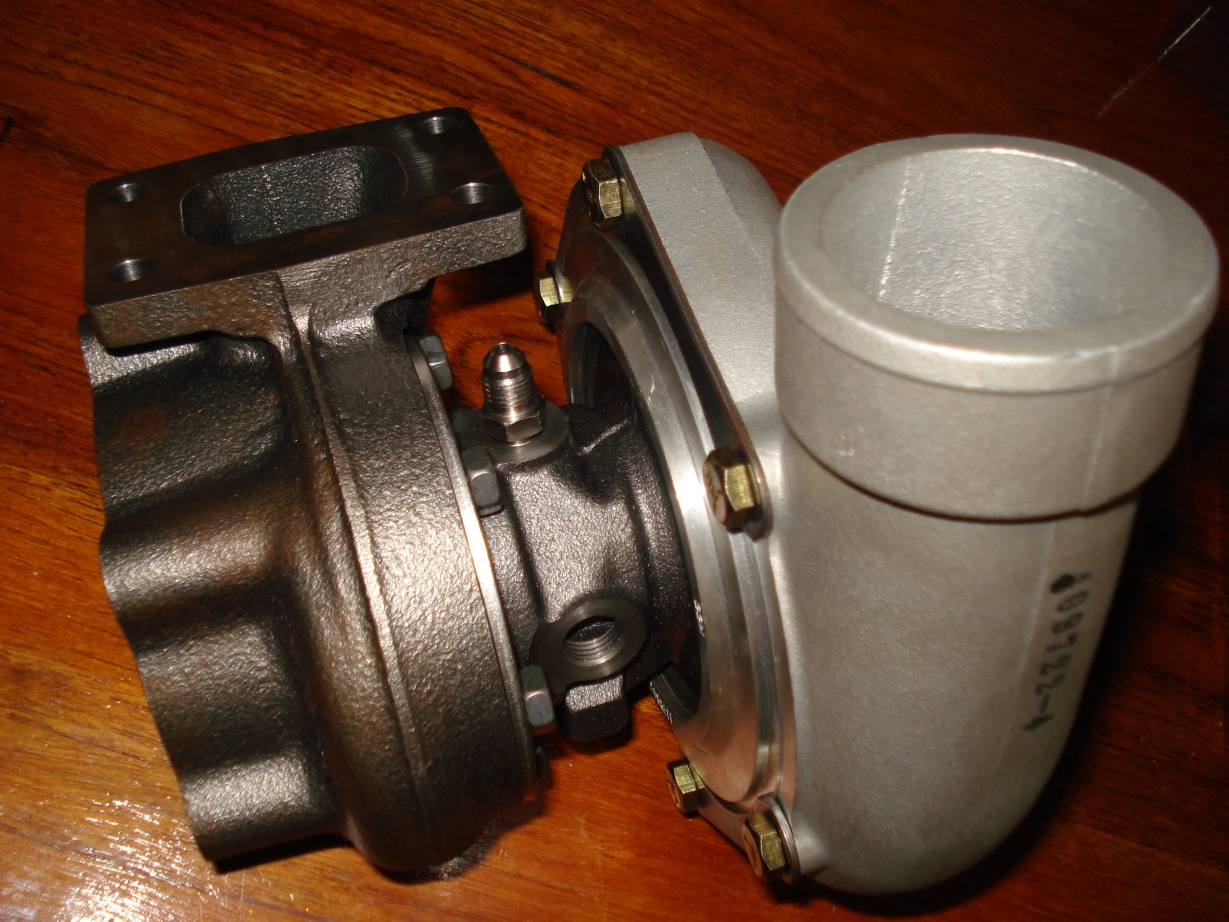
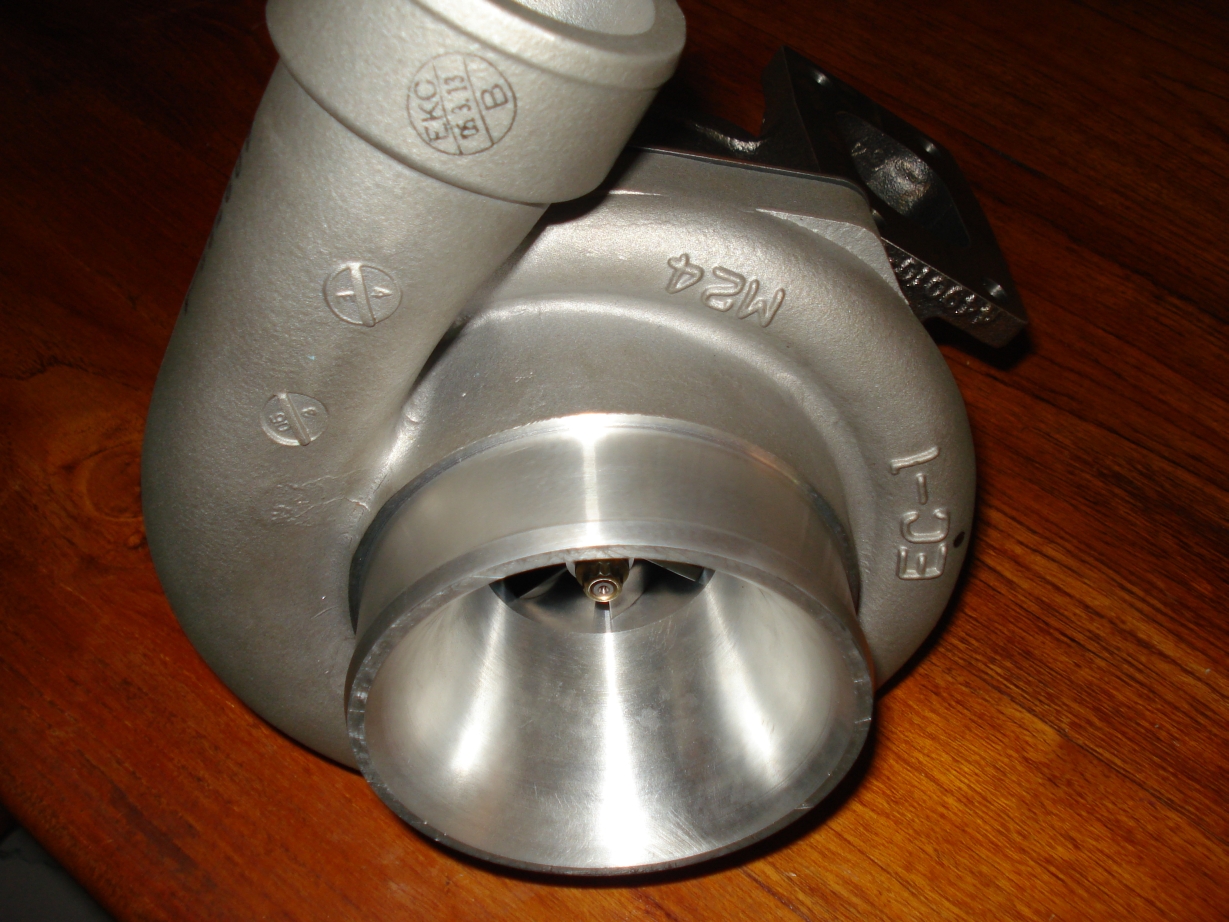
Well its time for some Forced Induction
Thanks to Matt Craig from United Fuel Injection for letting me pick his brain and thanks to Glenn Crofts at MTQ for having all the parts there and ready and just down the road.
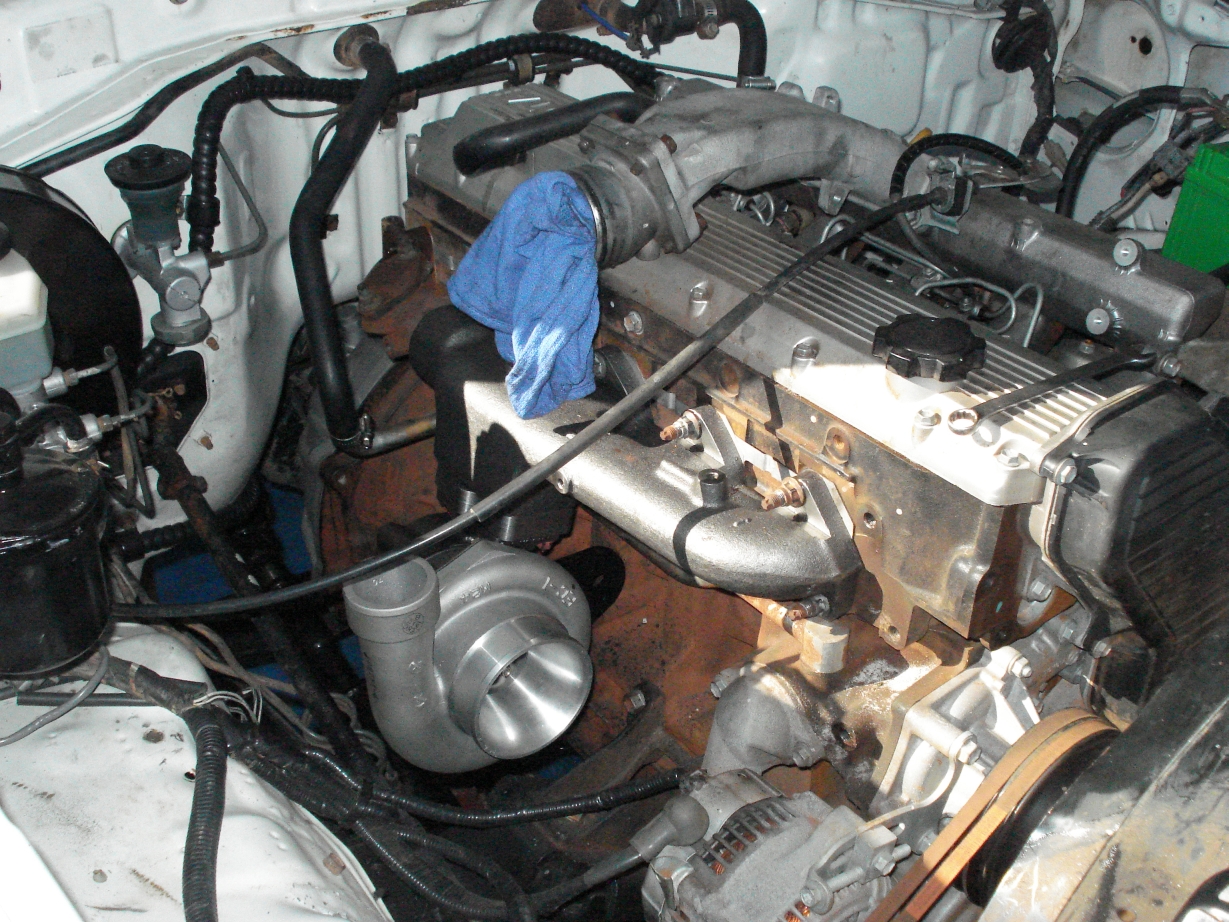
I ended up getting a Water cooled Garrett GT2876R BB turbo with a .64A/R, this will fit a little bit better within the ranges of the 1HZ compared to the GT2871R i was going to get. Its the same rear housing as the 71 but with a slightly larger front. It has a 4″ inlet and a 2.5″ outlet. Ill have to make a 3″ exhaust side dump (the T25 bolt pattern is going to be tough…)
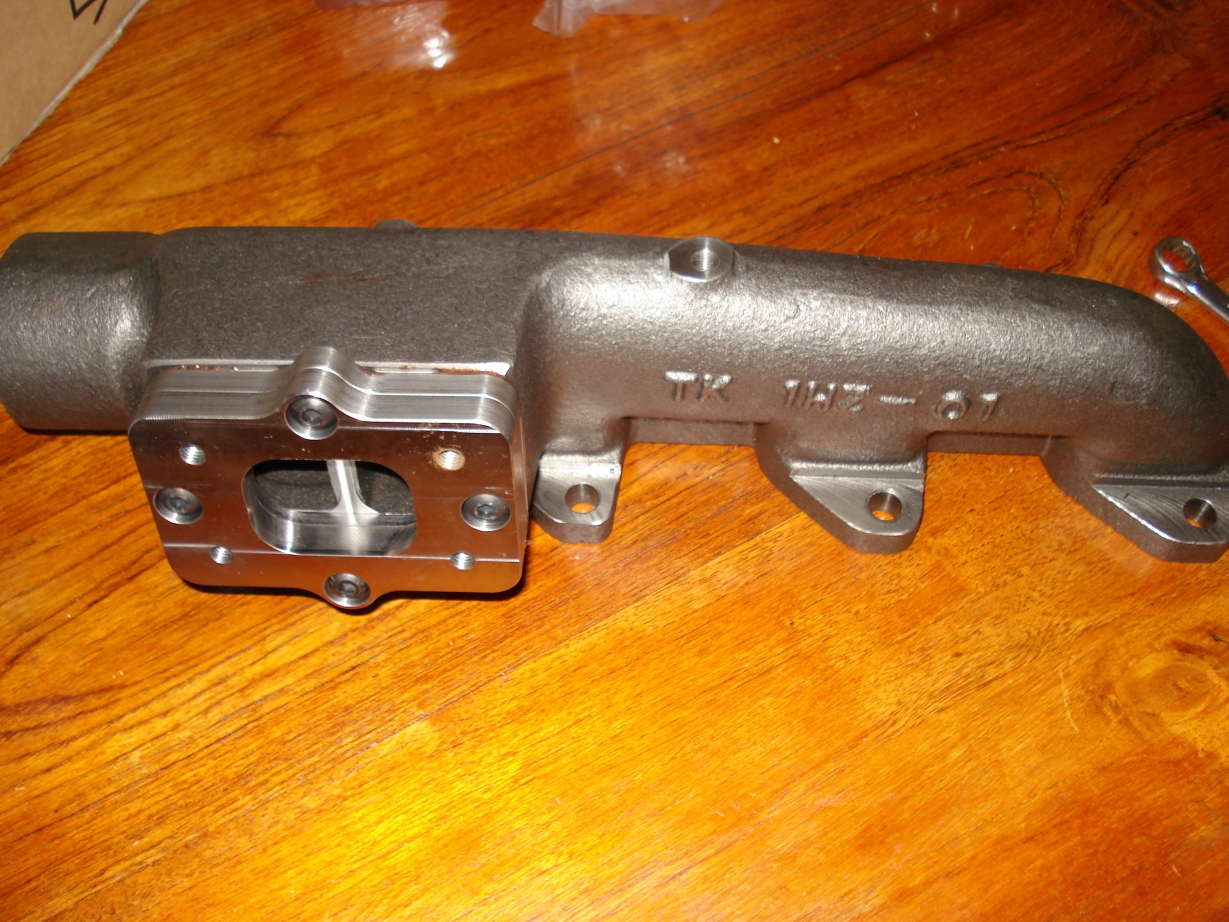
I got a DTS turbo manifold and a T3 – T25 adapter flange.
Ive got it 1/2 together i just need to get some new M8 bolts for the turbo mounting.
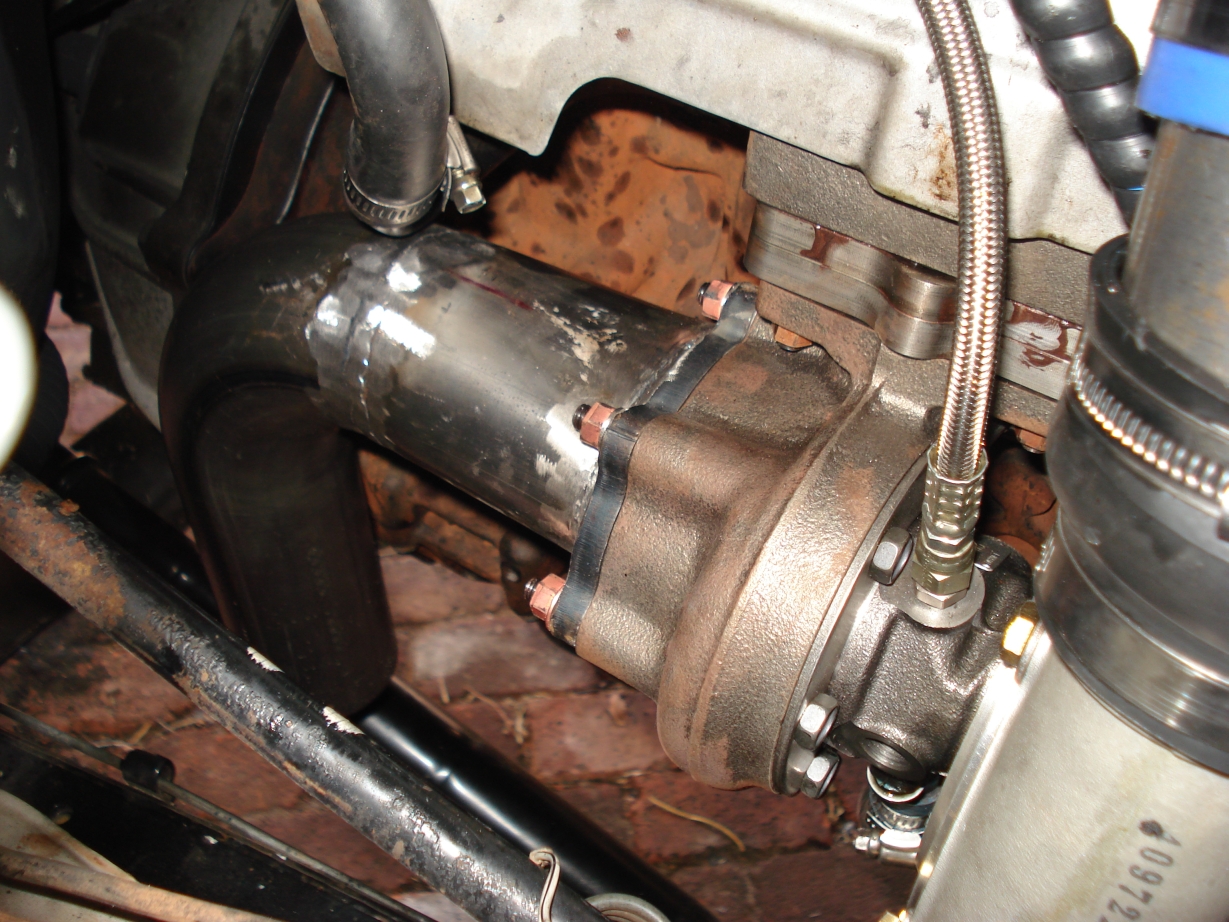
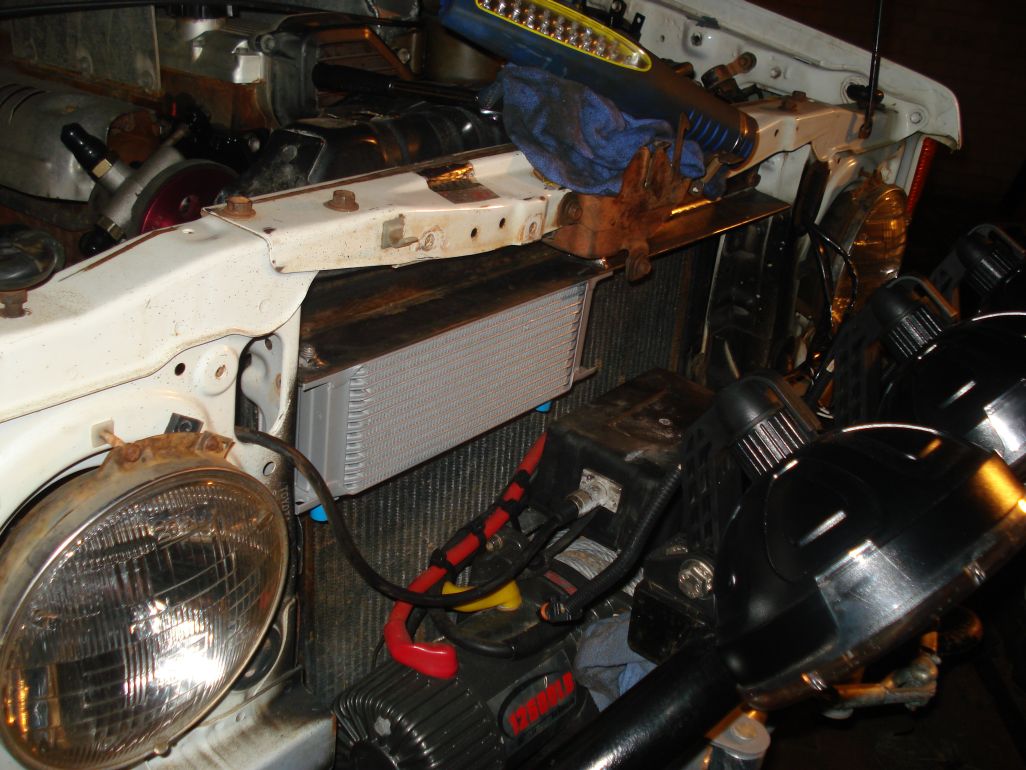
Well i know why people don’t put a turbo like this on their 1HZ charged Landcruisers very often… Its just not made for a snale this big… Very tight clearances…
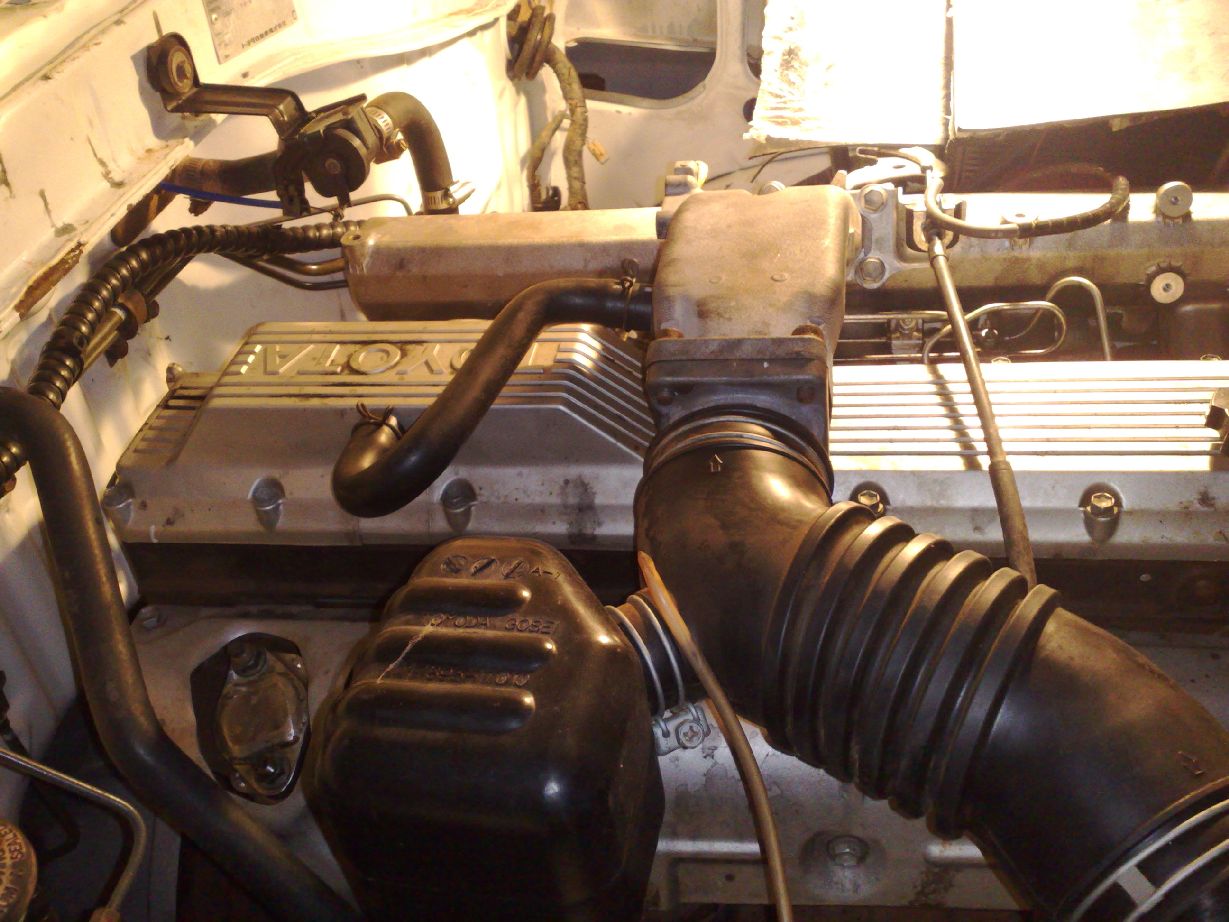
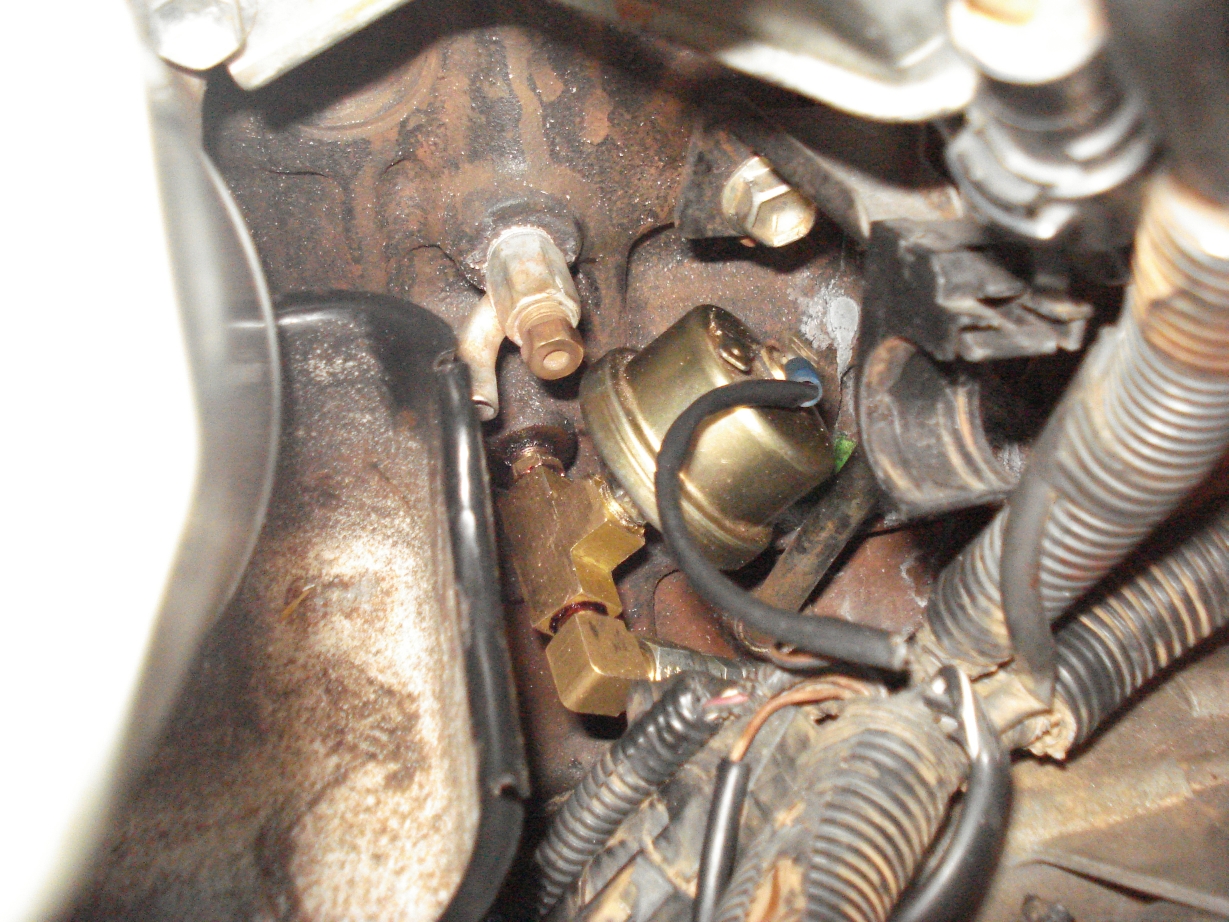
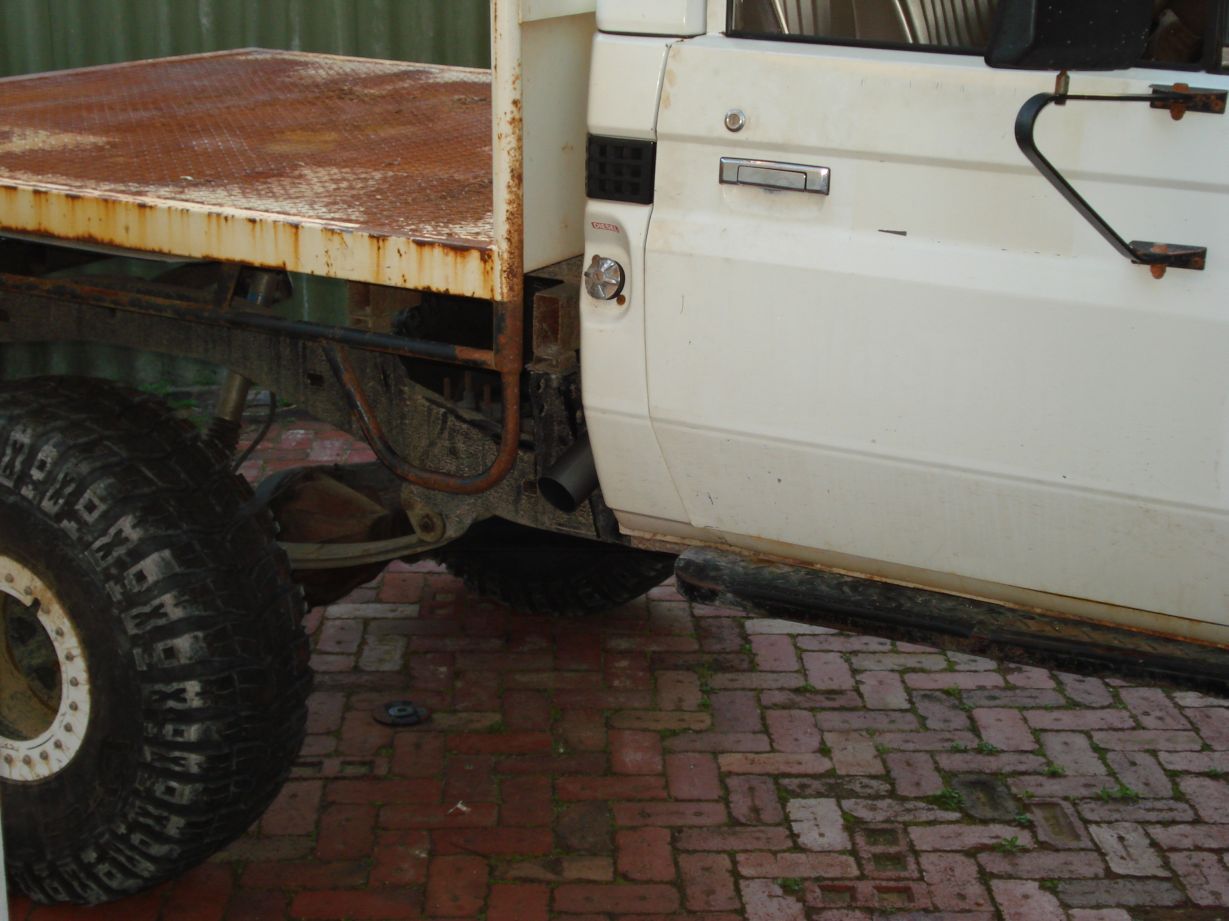
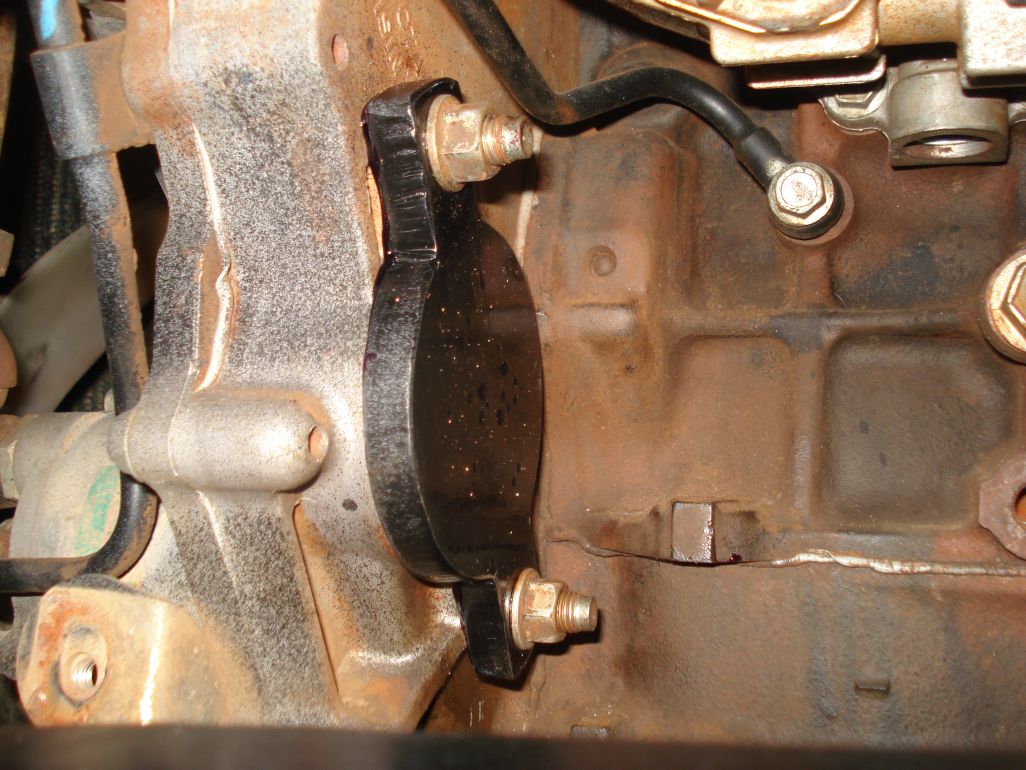
Anyhow, i ended up taking the sump off and putting in my own drain pipe.
The turbo sits very low in the engine bay, perfect for fitting in the cooler, pipework and dump but bad for the 4″ intake as its very close to the engine mount. The waste gate actuator is almost hard up against the side of the block too.
Enough of the blab i know u want to see some pix of a silly big turbo on a 1HZ
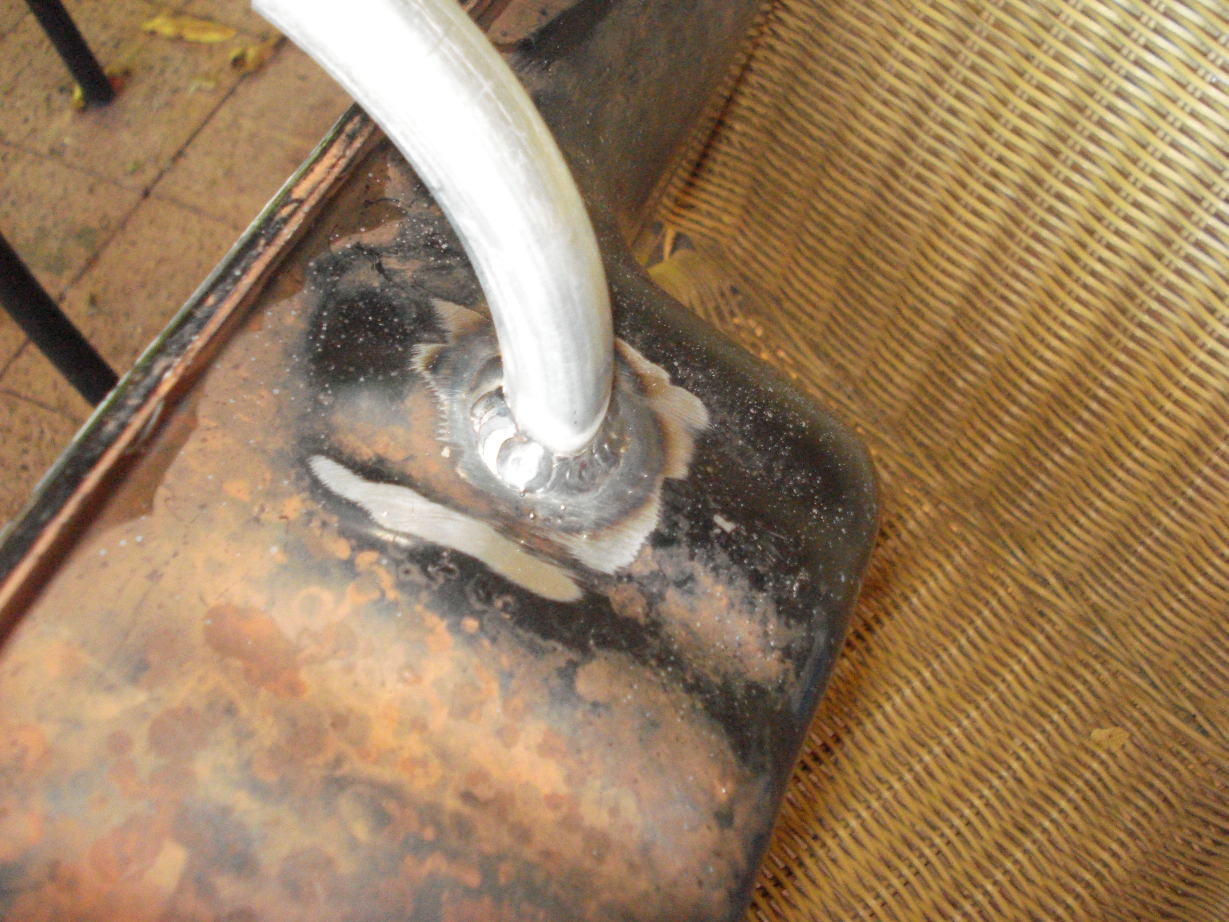
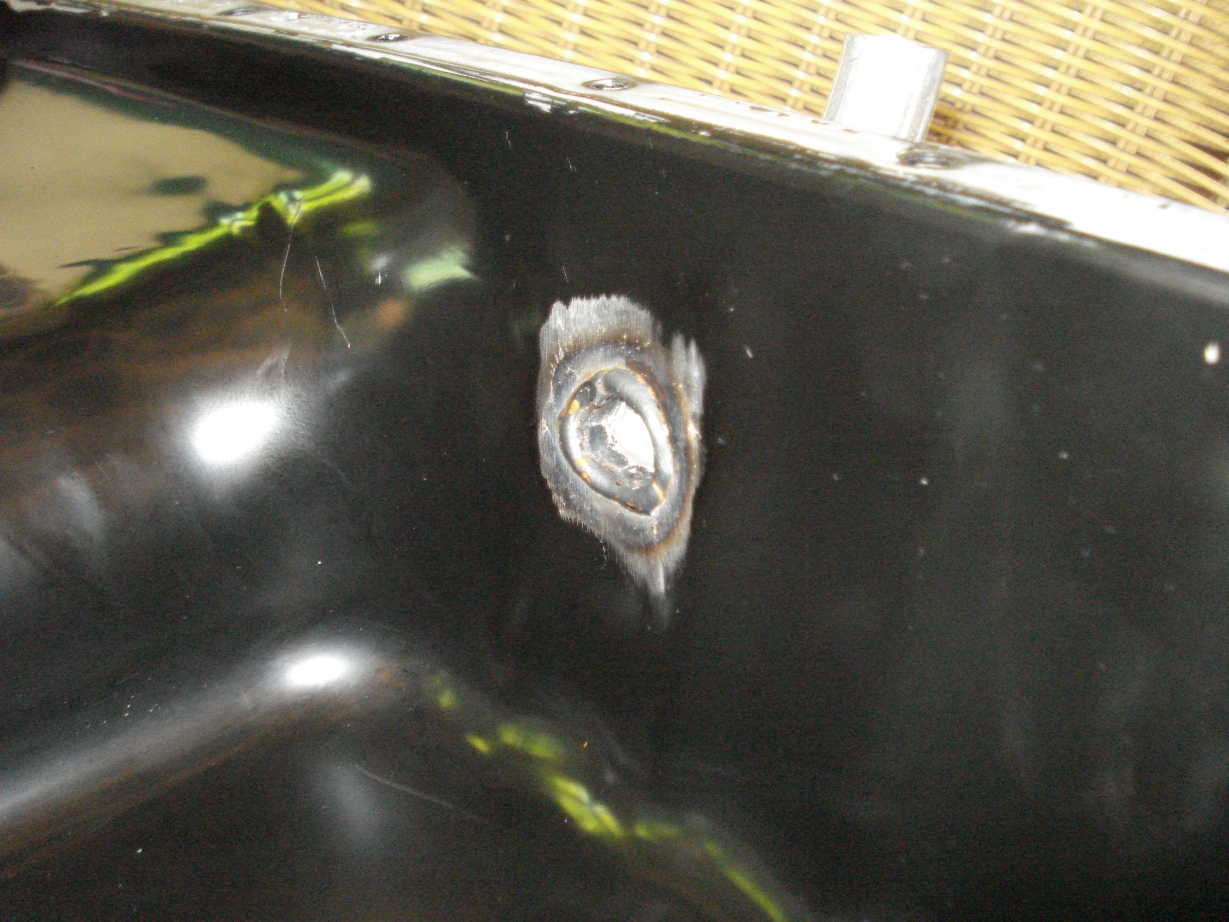
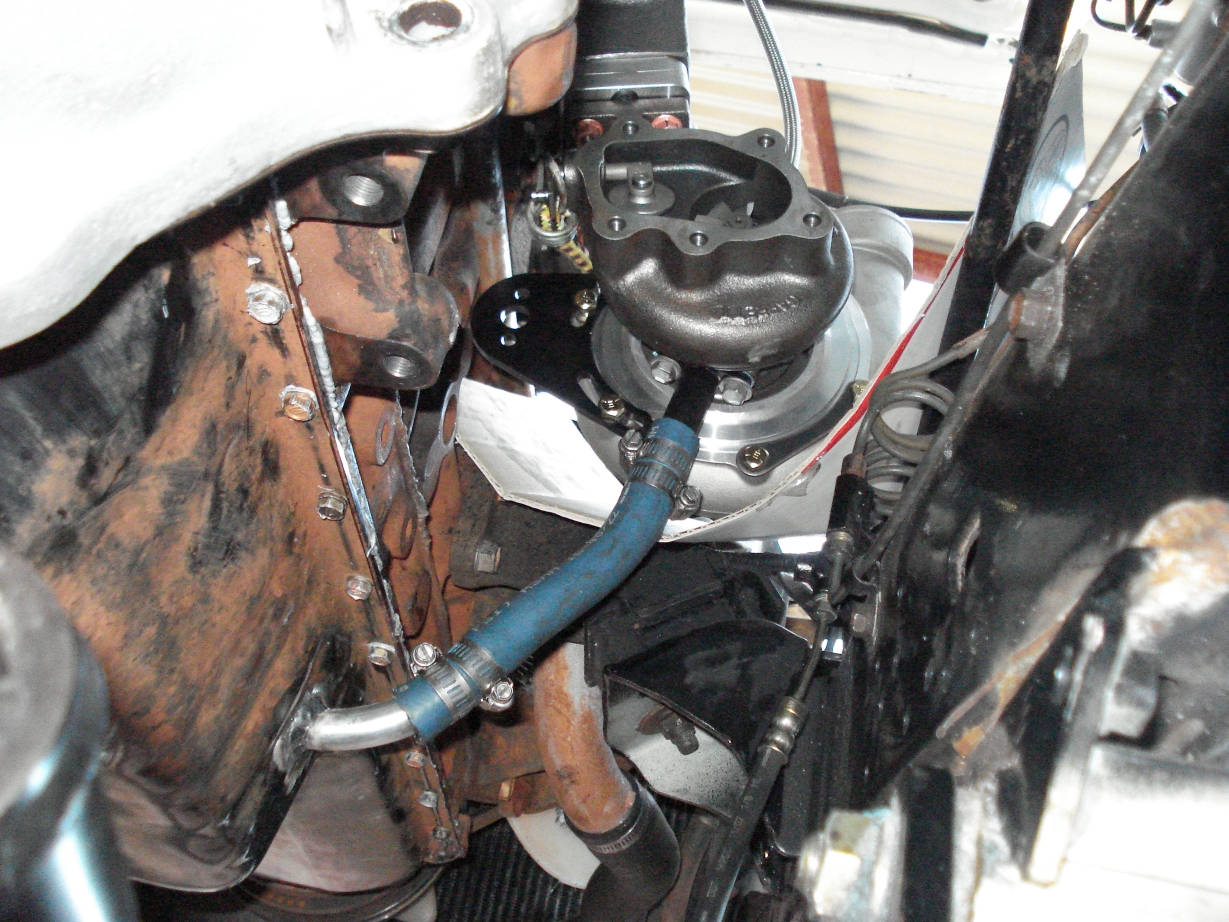

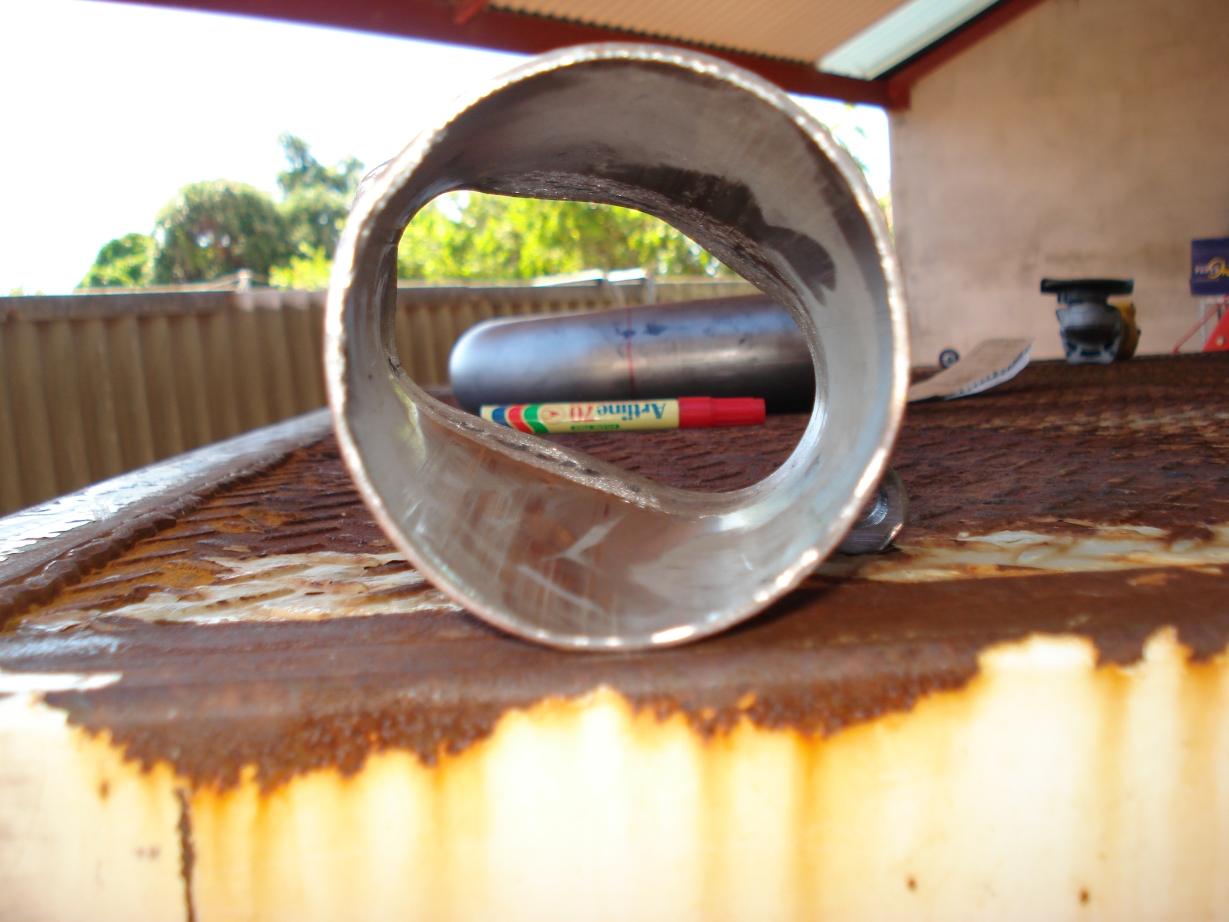
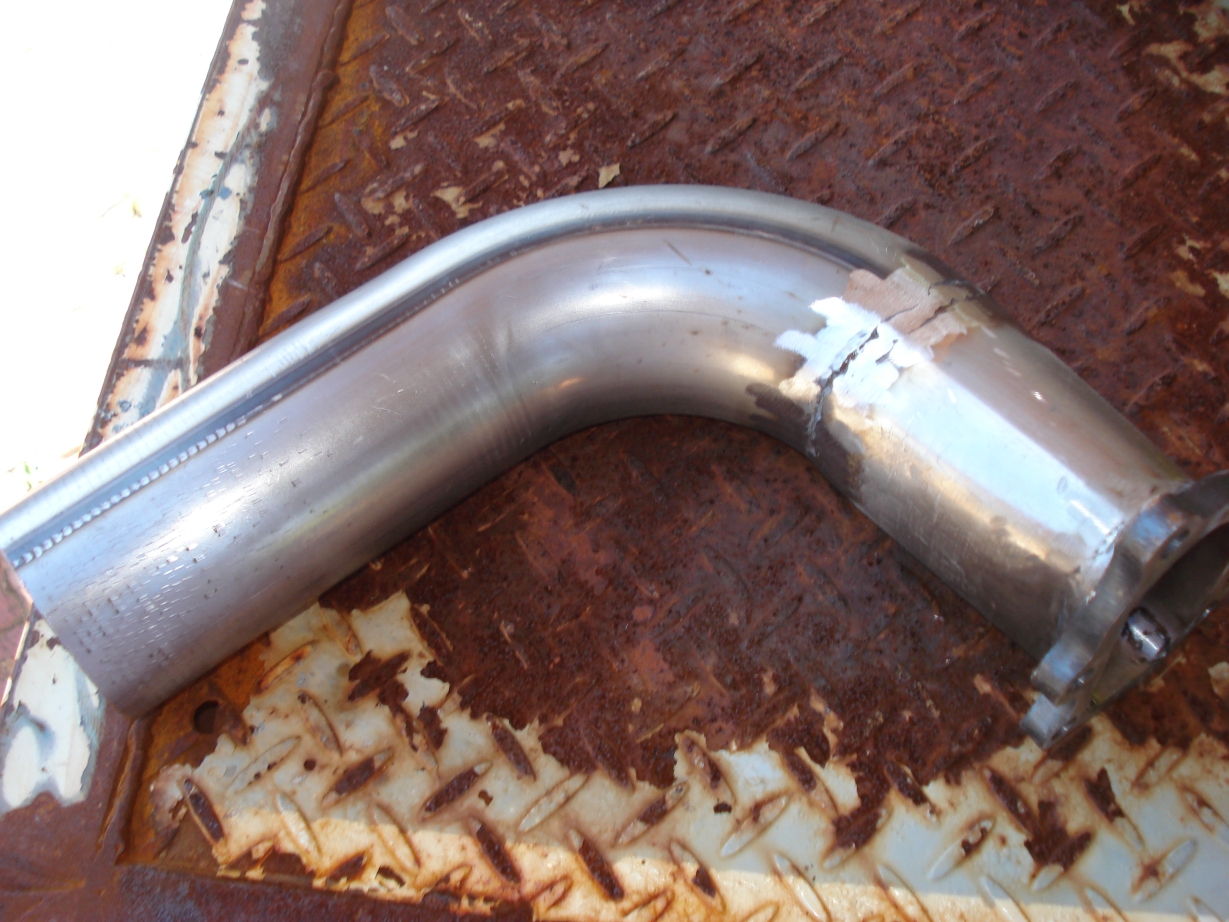
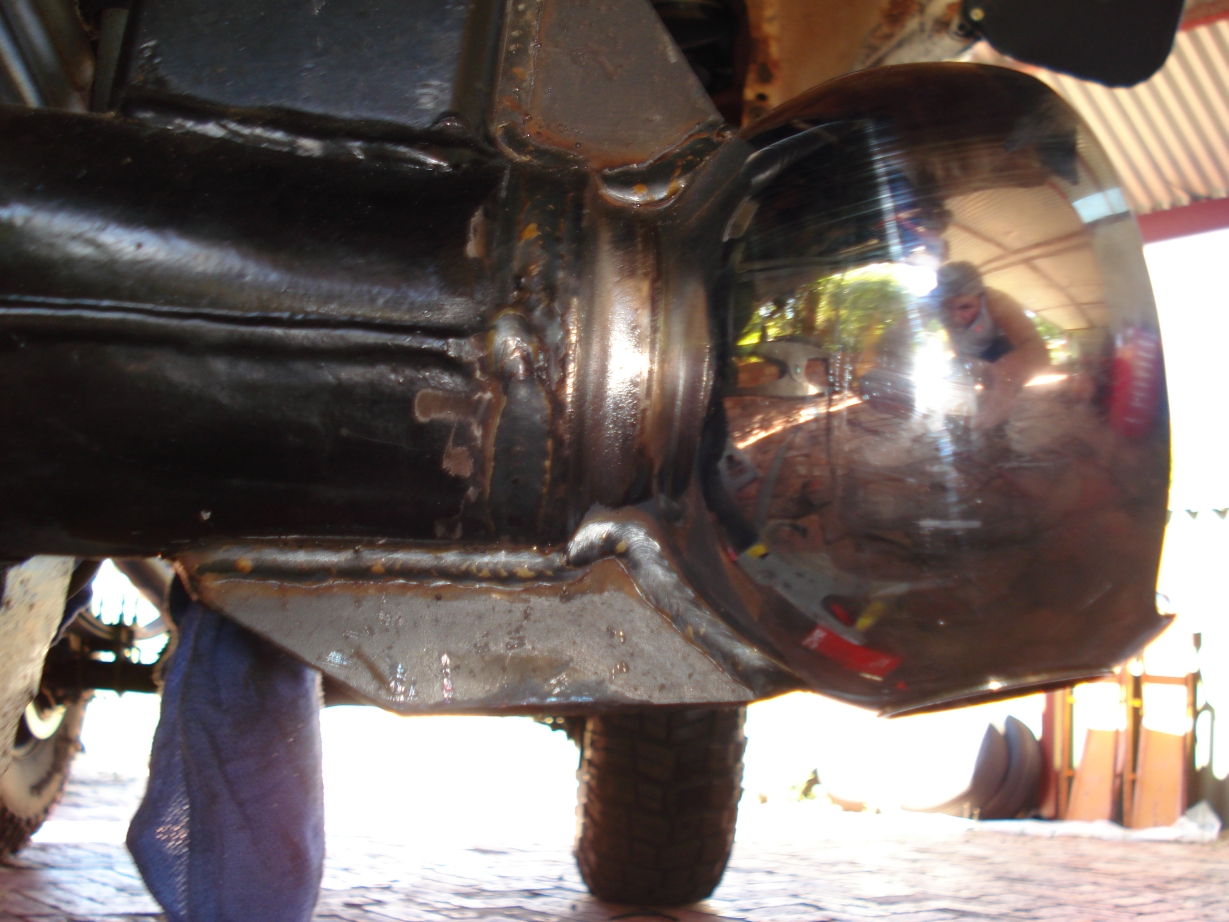
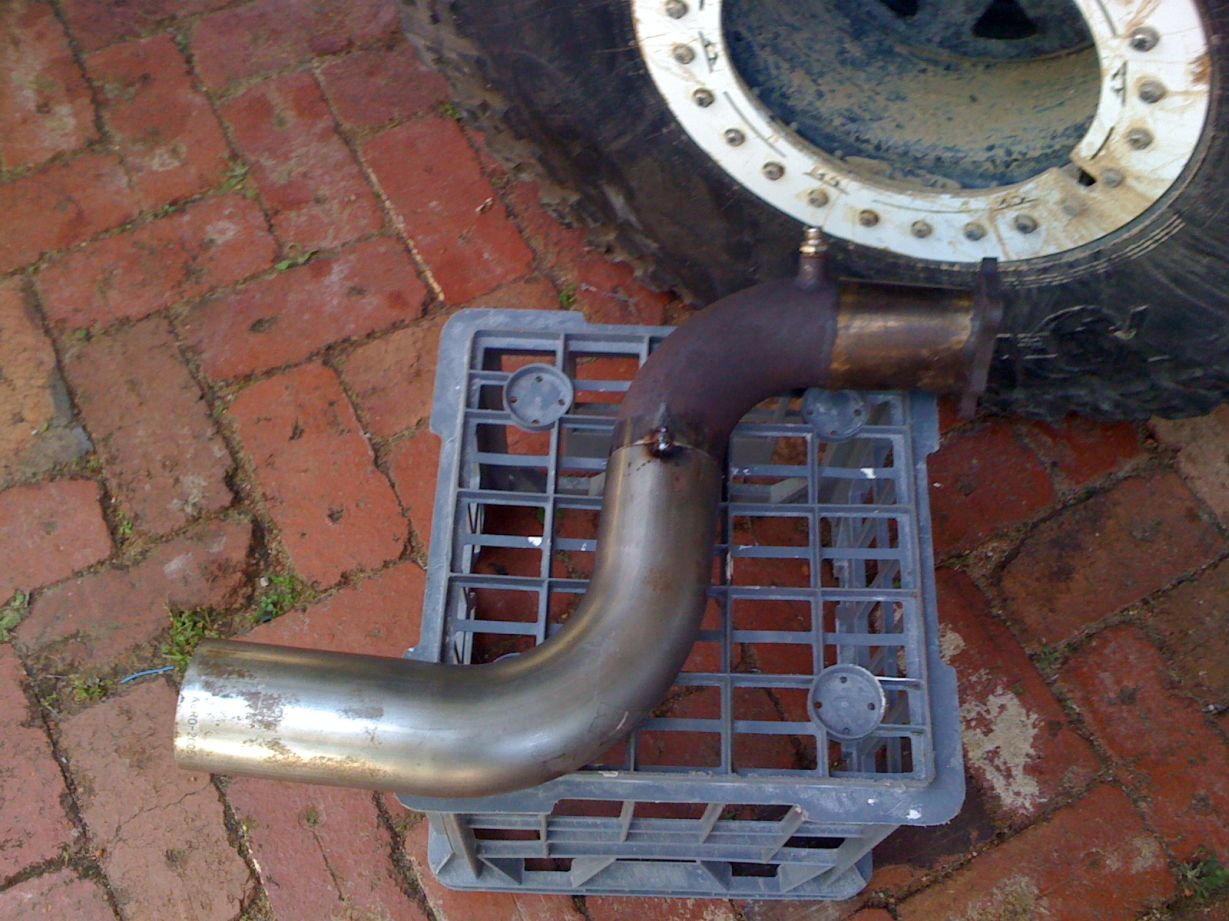
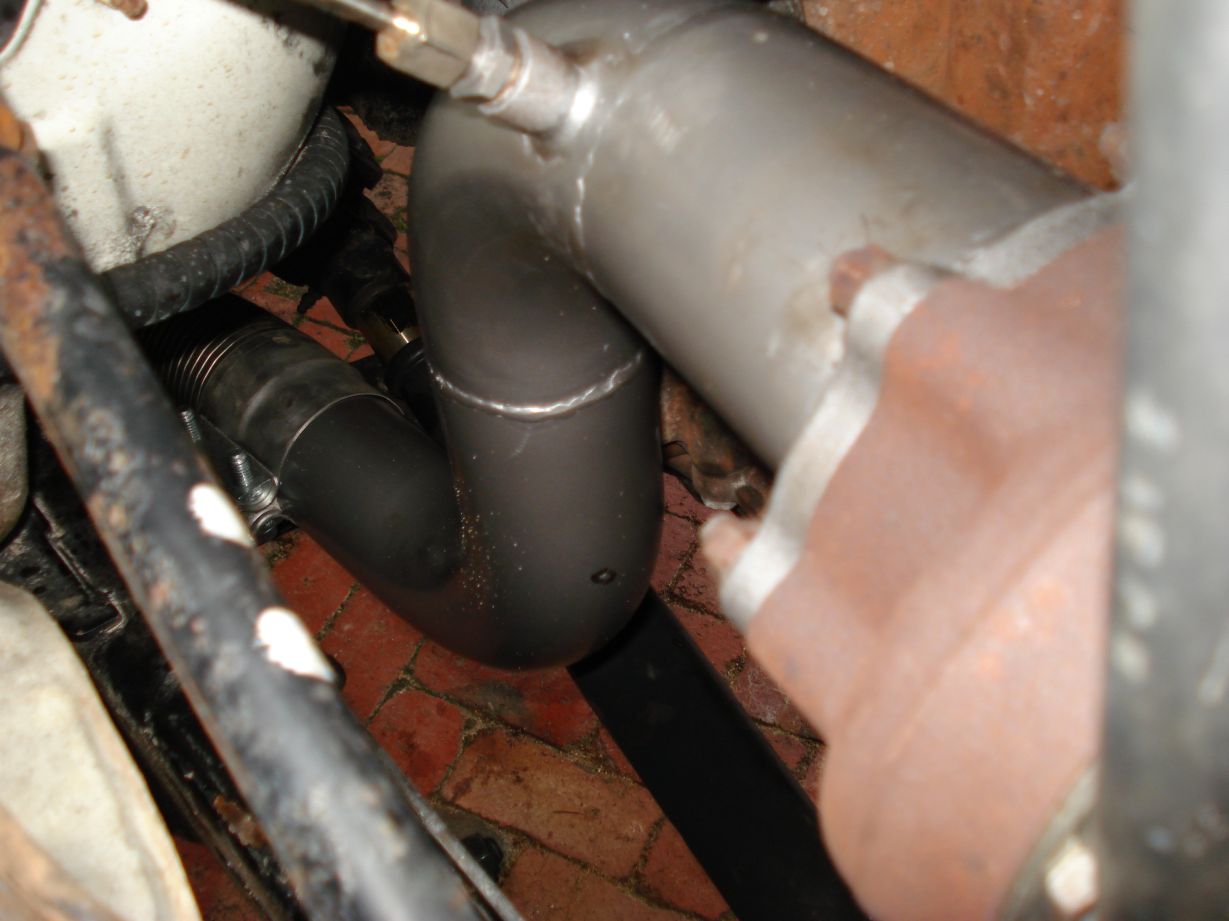
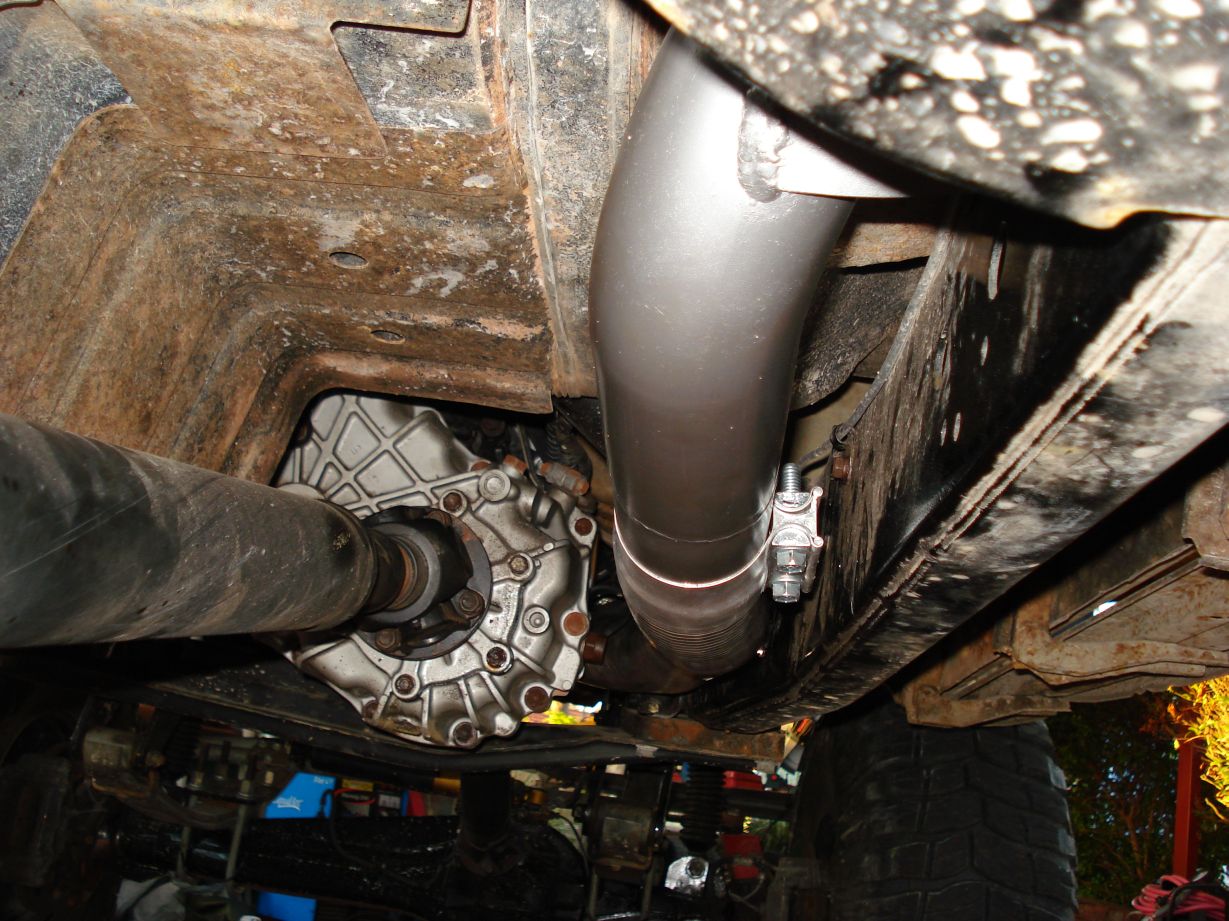
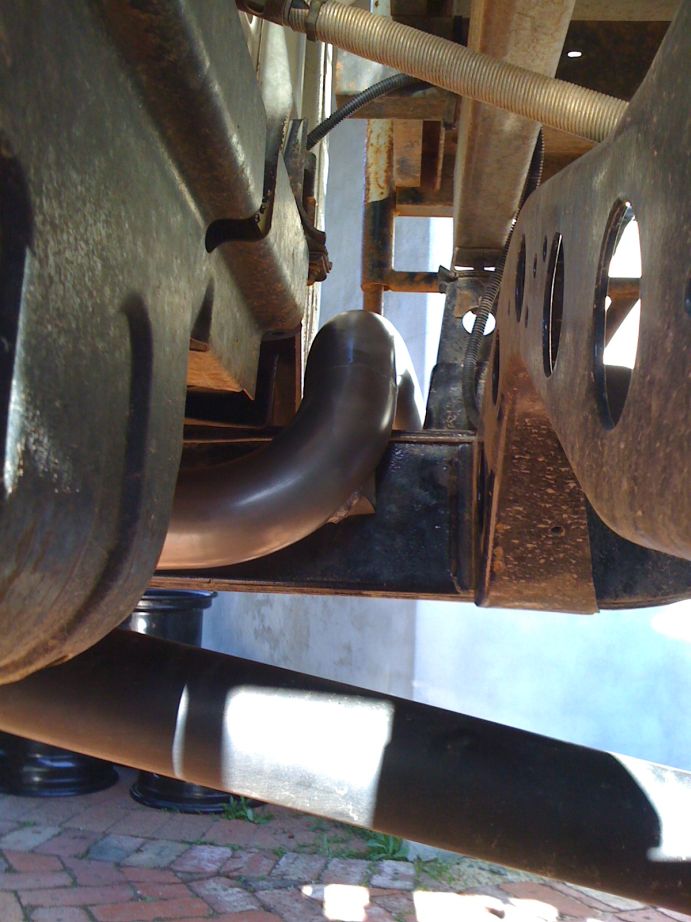
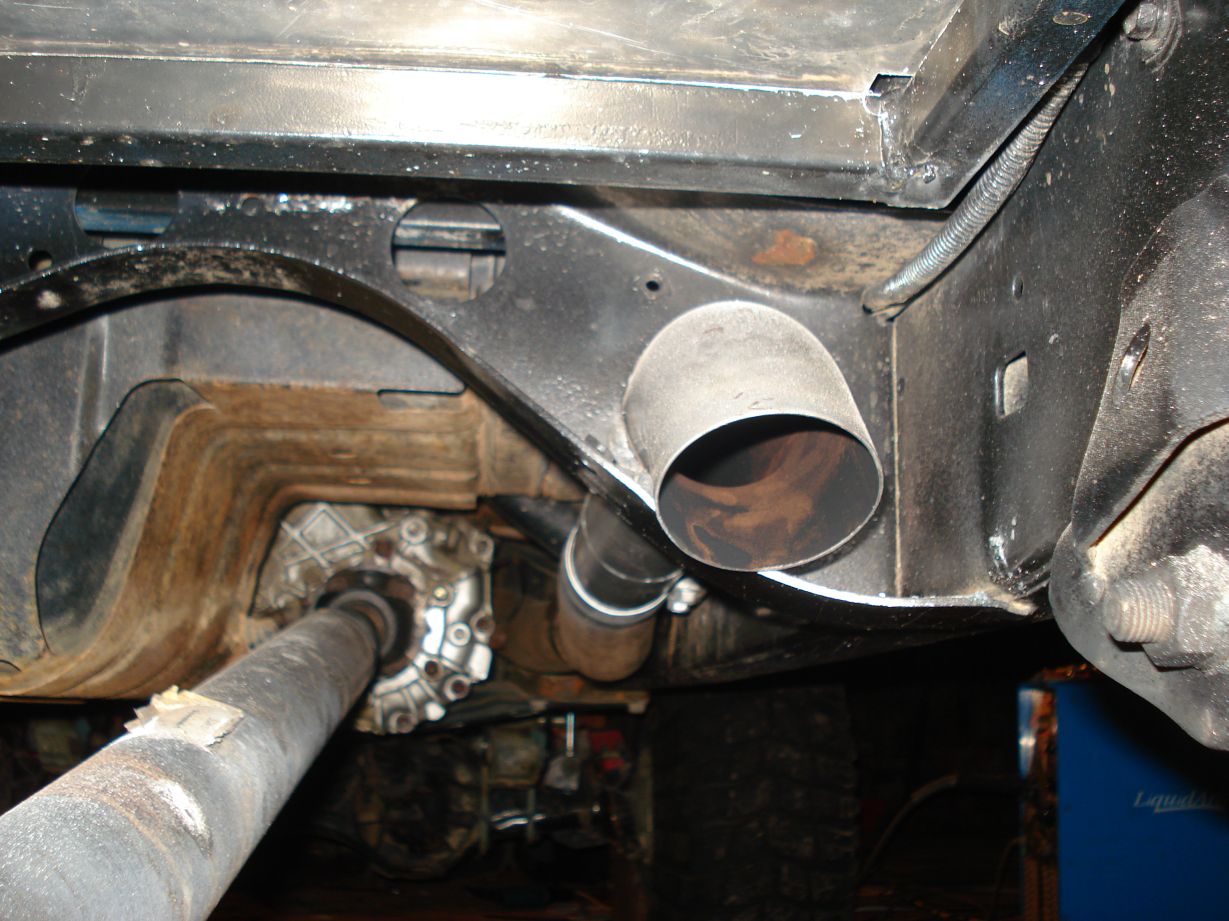
I made my dump pipe today, it was a hell of alot easier than i thought it was going to be, all i needed was a gimpy and a piece of 1″ solid rod oh and a bit of time.
I squashed the end of the 3″ tube piece down so it was the basic profile of the flange, then used the hammer and rod to go around and peen it out, tacking as i went. I then got a 3″ mandrel bend and welded that on for the drop.
Came up perfect, not bad for my 1st attempt.

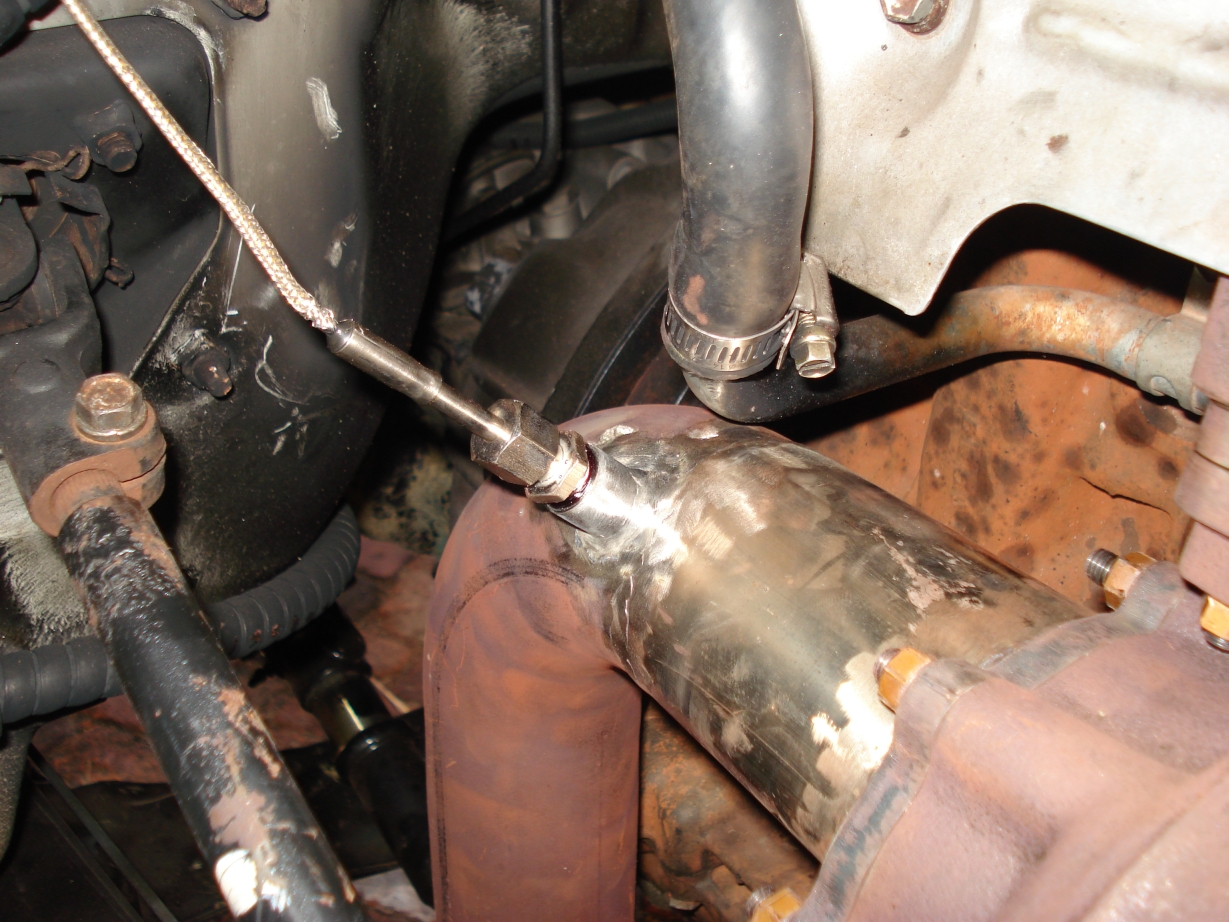
Castor corrected and braced, no bending these puppies
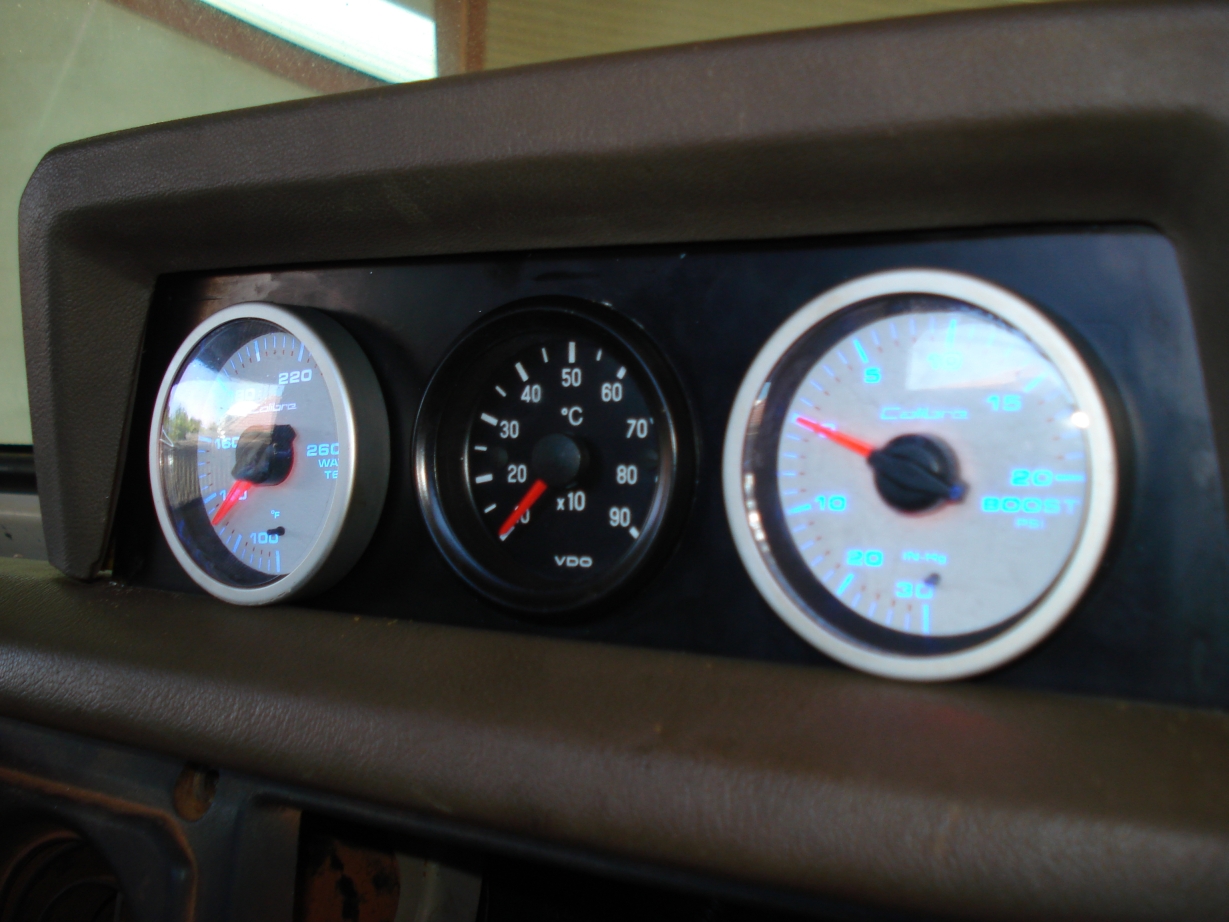
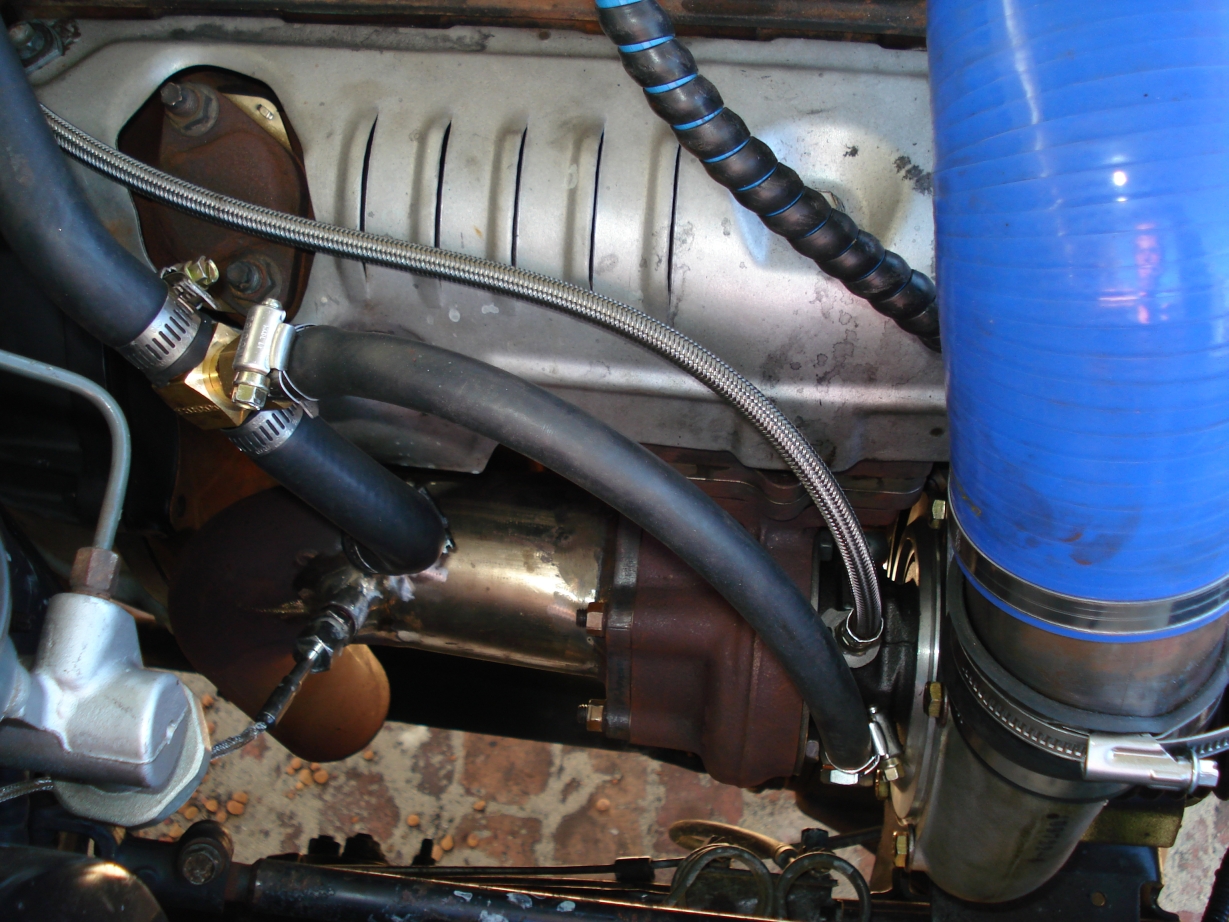
Work has been absolutely full on so i haven’t had much time to do anything, but i have installed my temp and Pyro gauges.. Enjoy

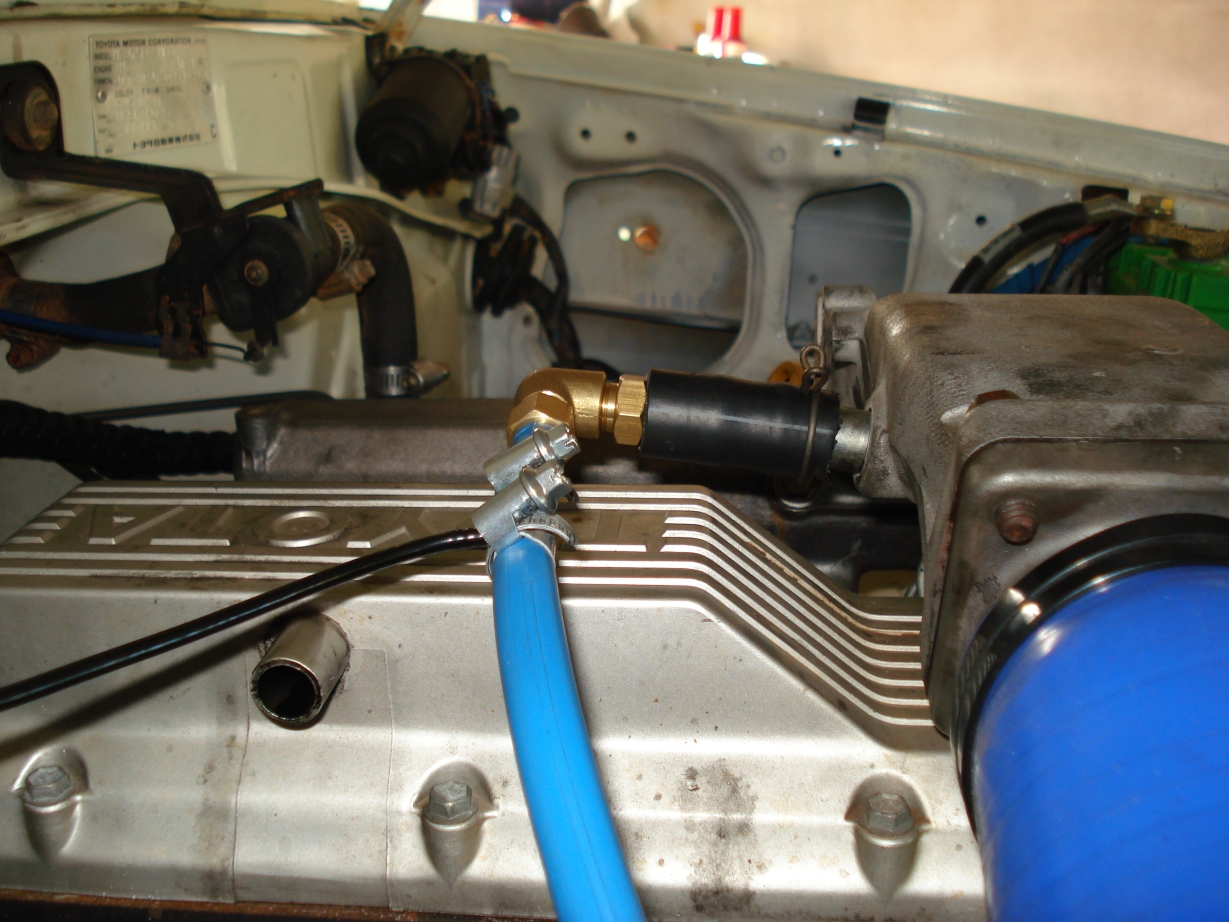
Water cooling (still needs some heat shielding on the hoses) and the extended intake. (Temporary!!!)
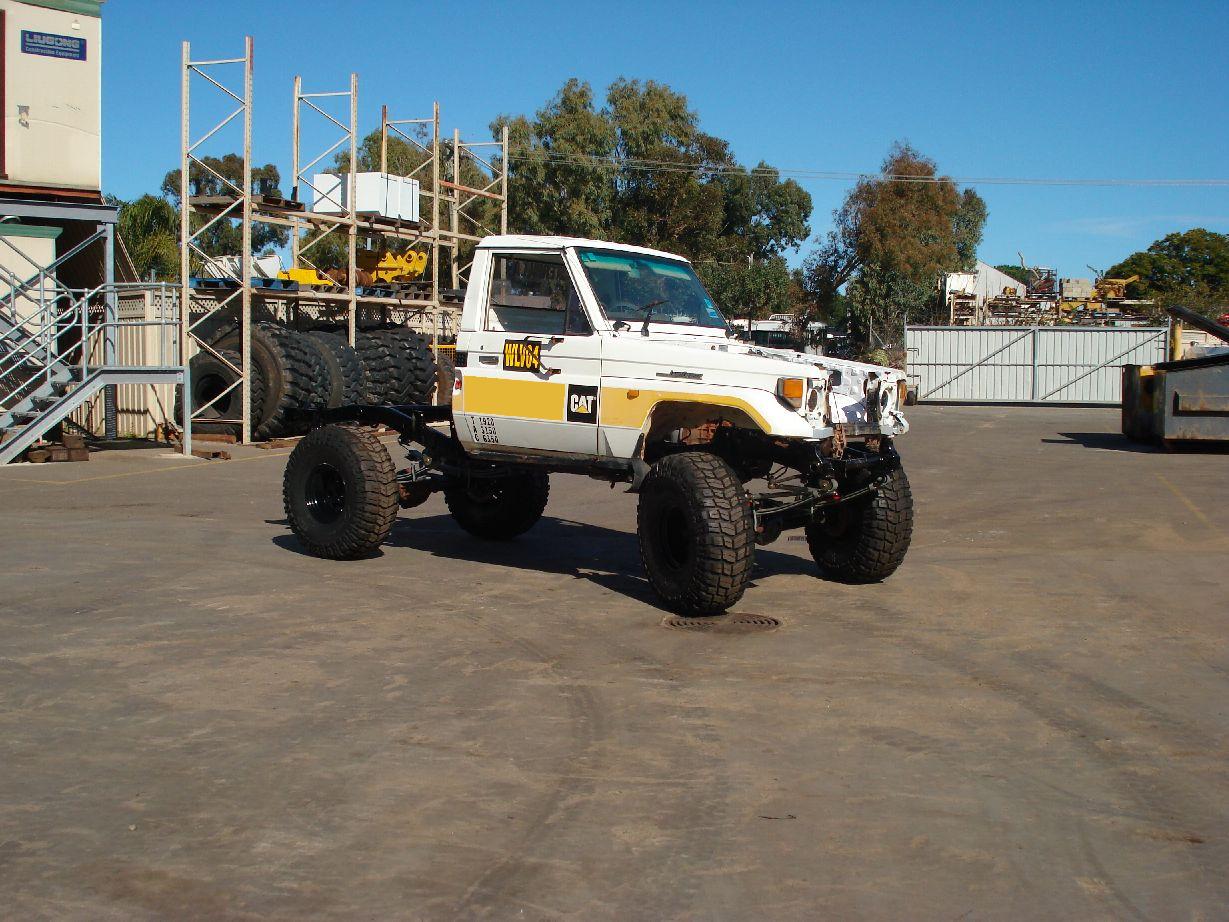
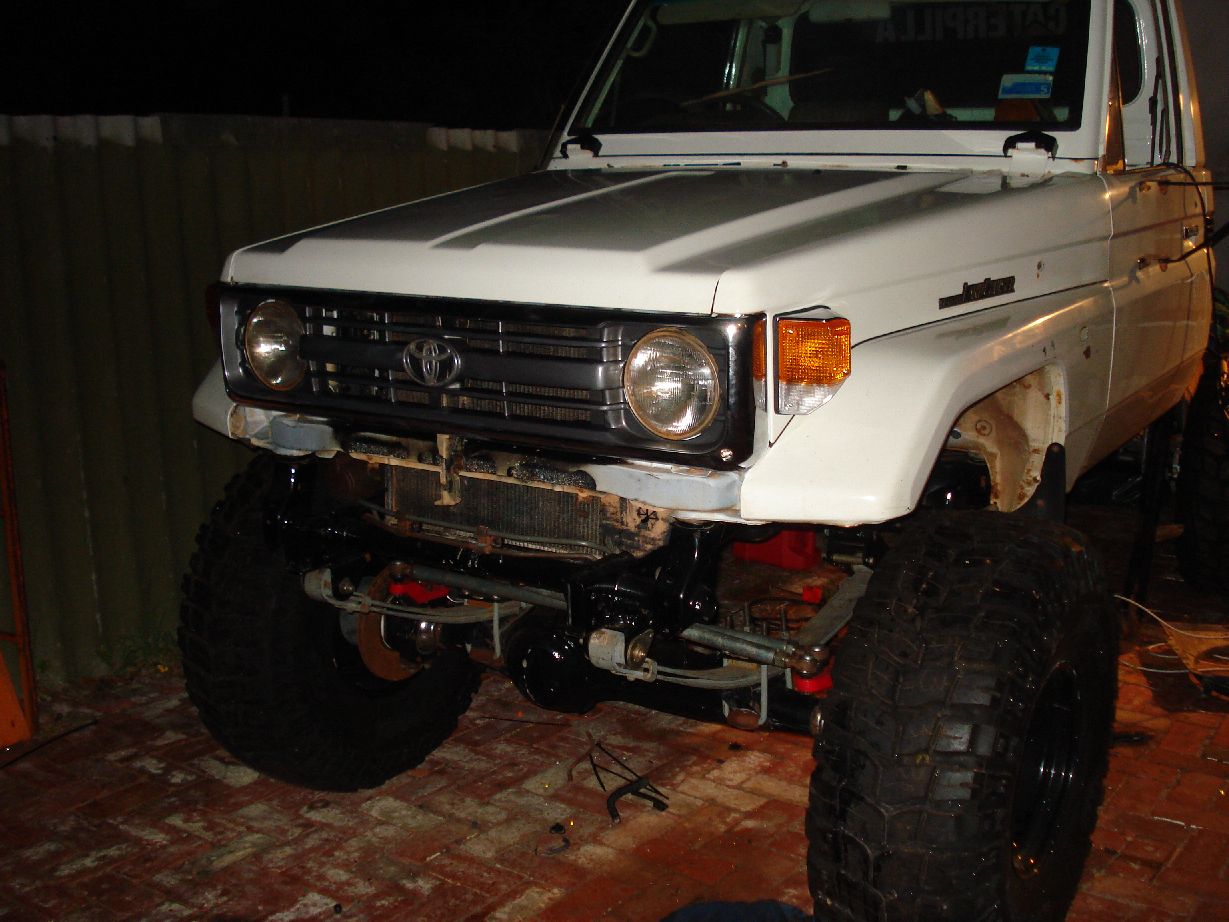
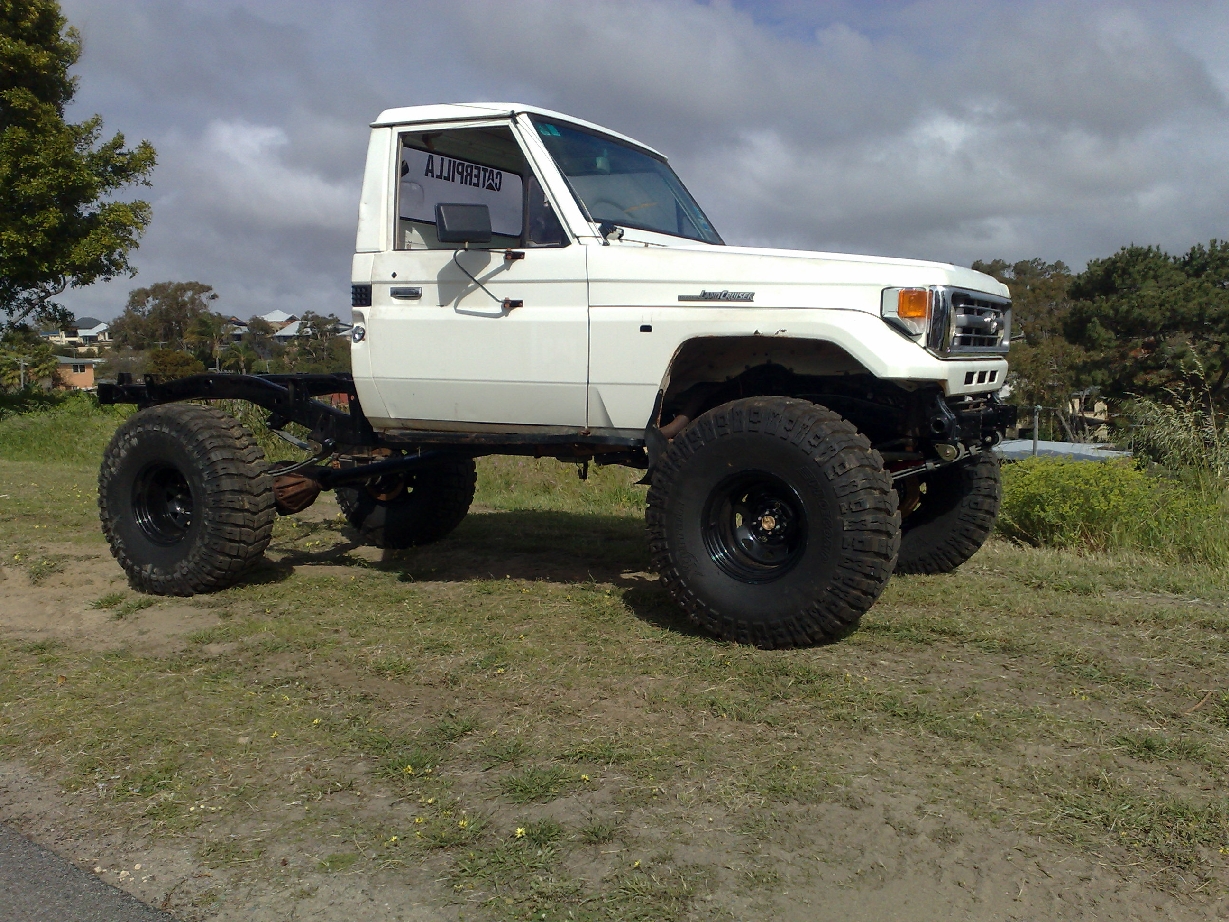
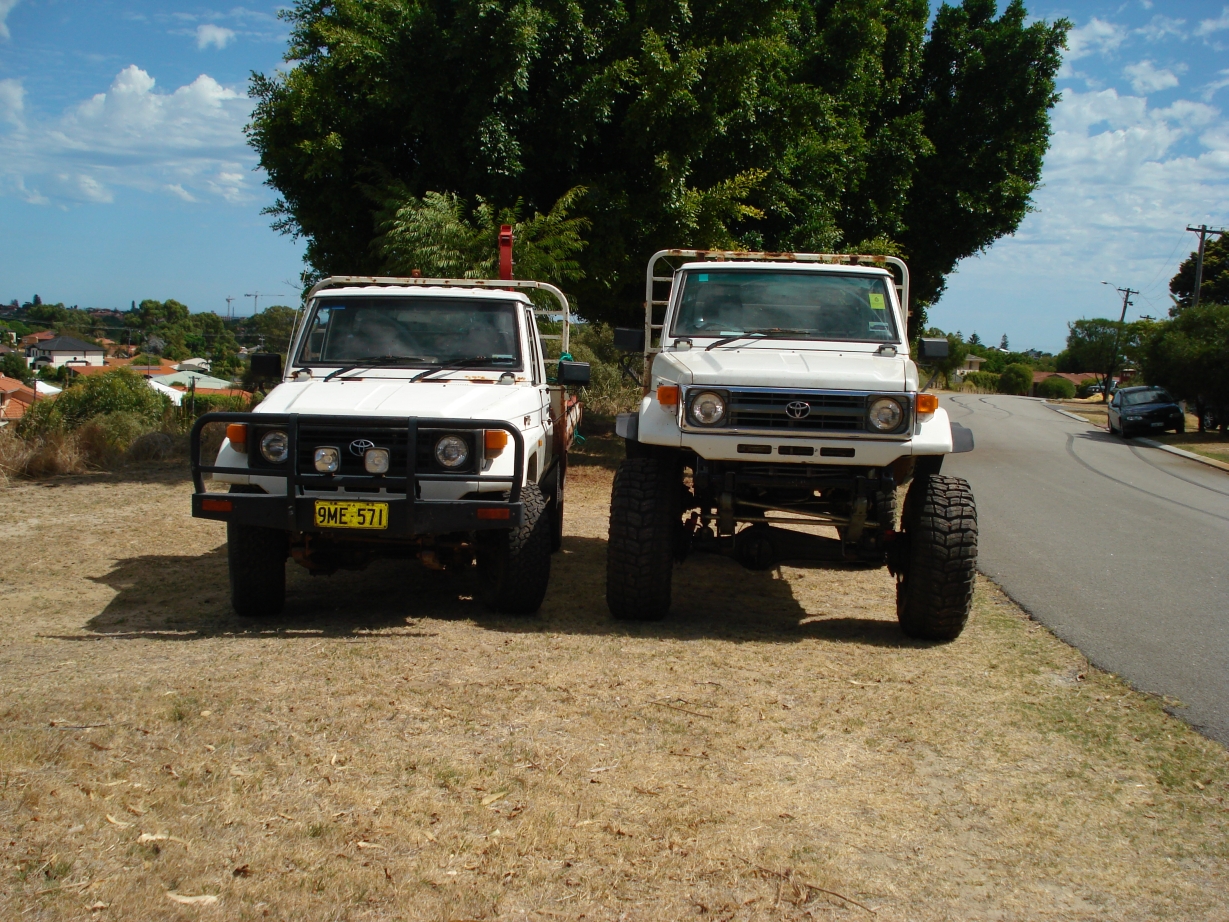
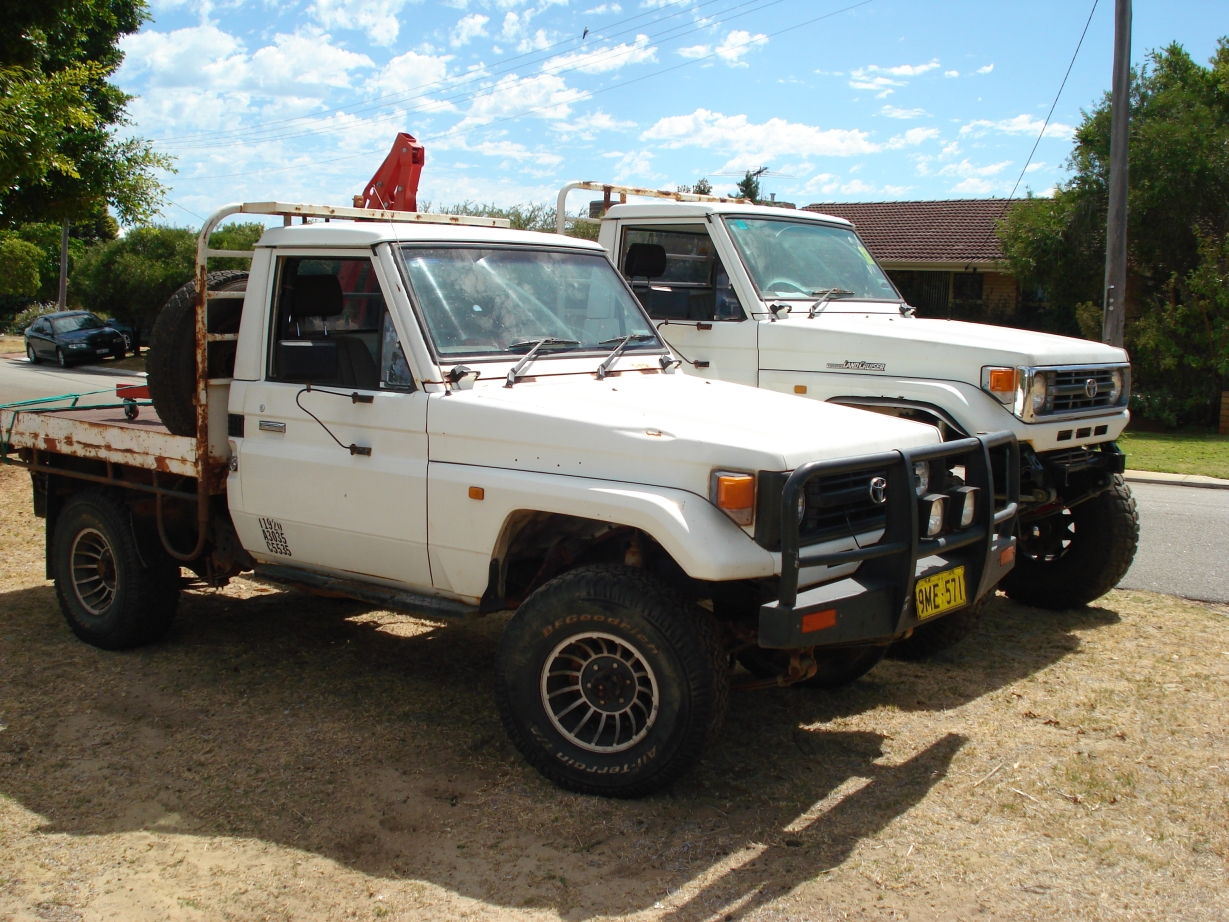
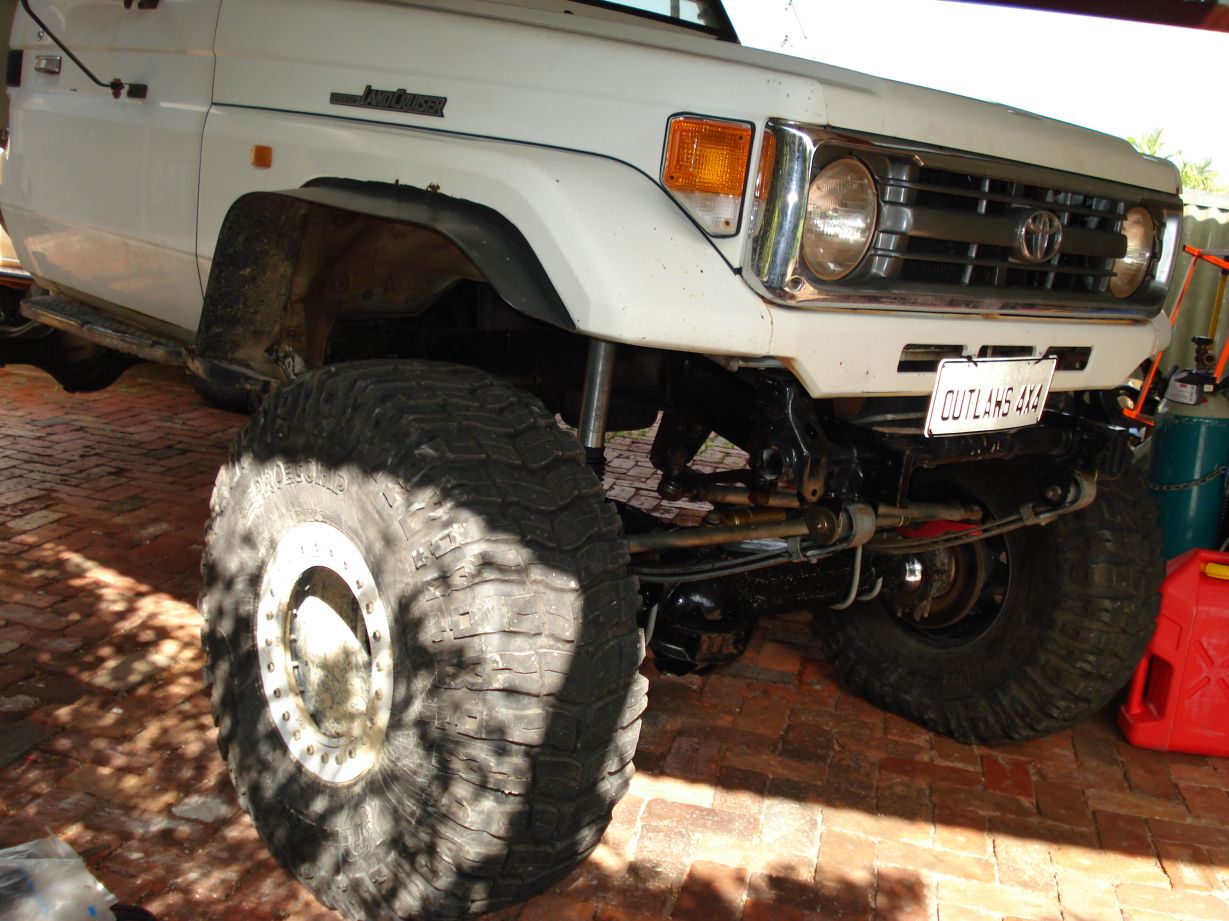
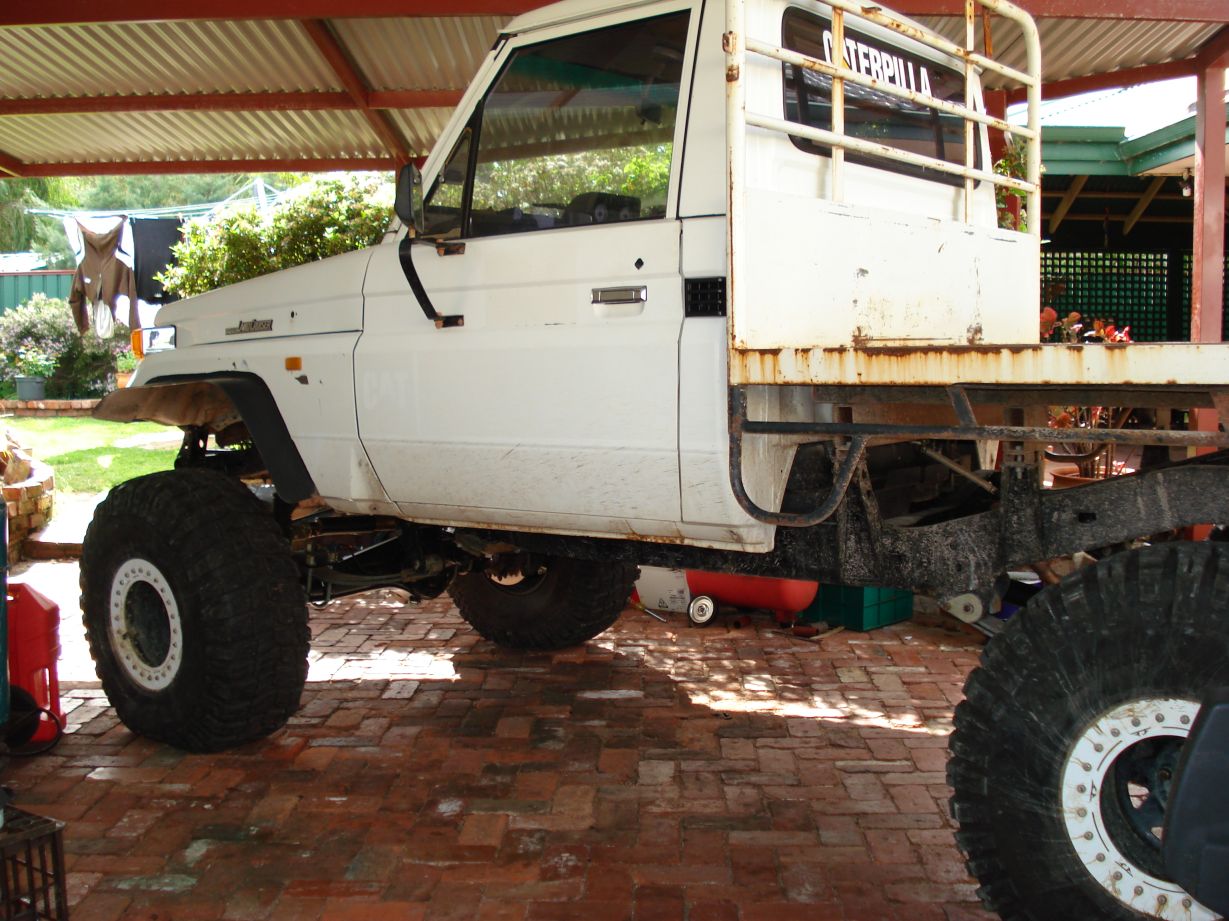
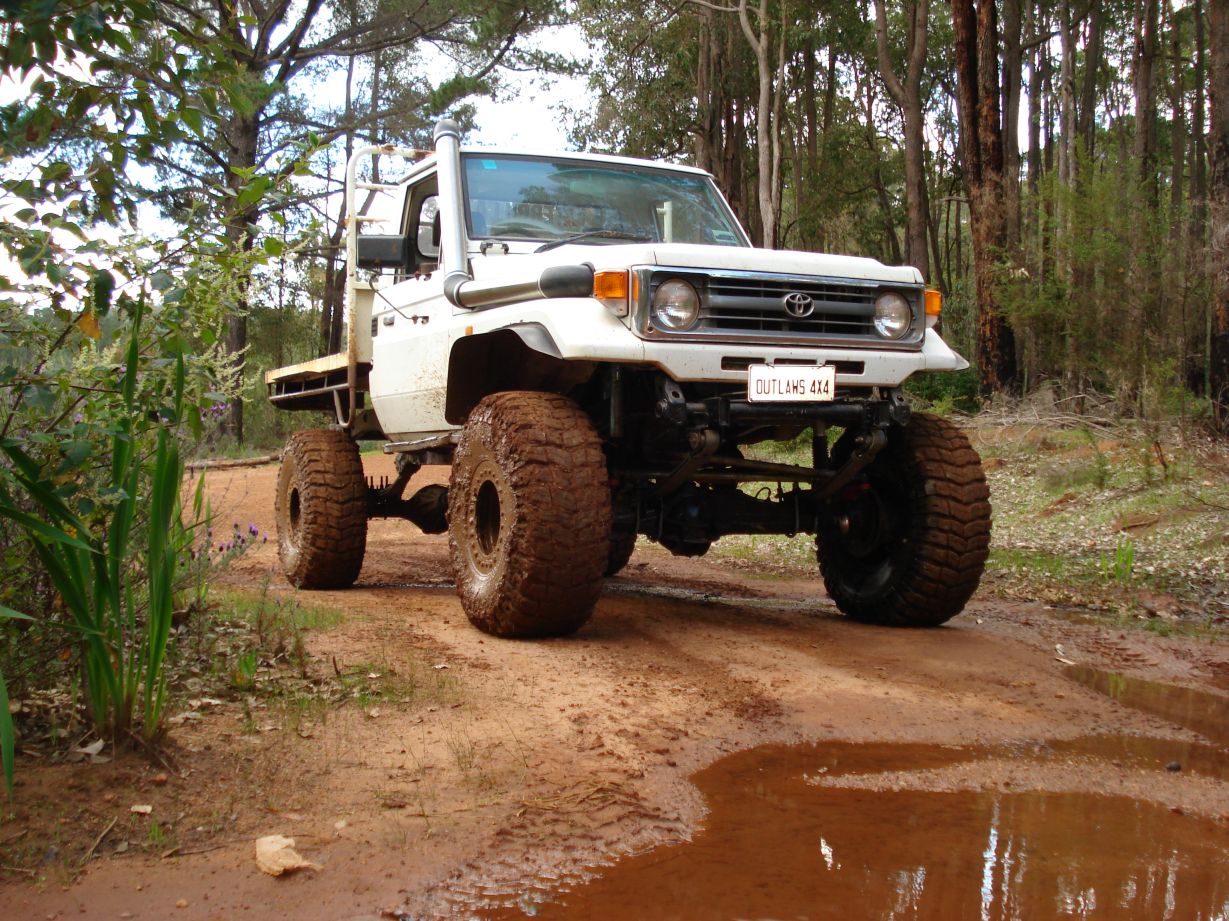
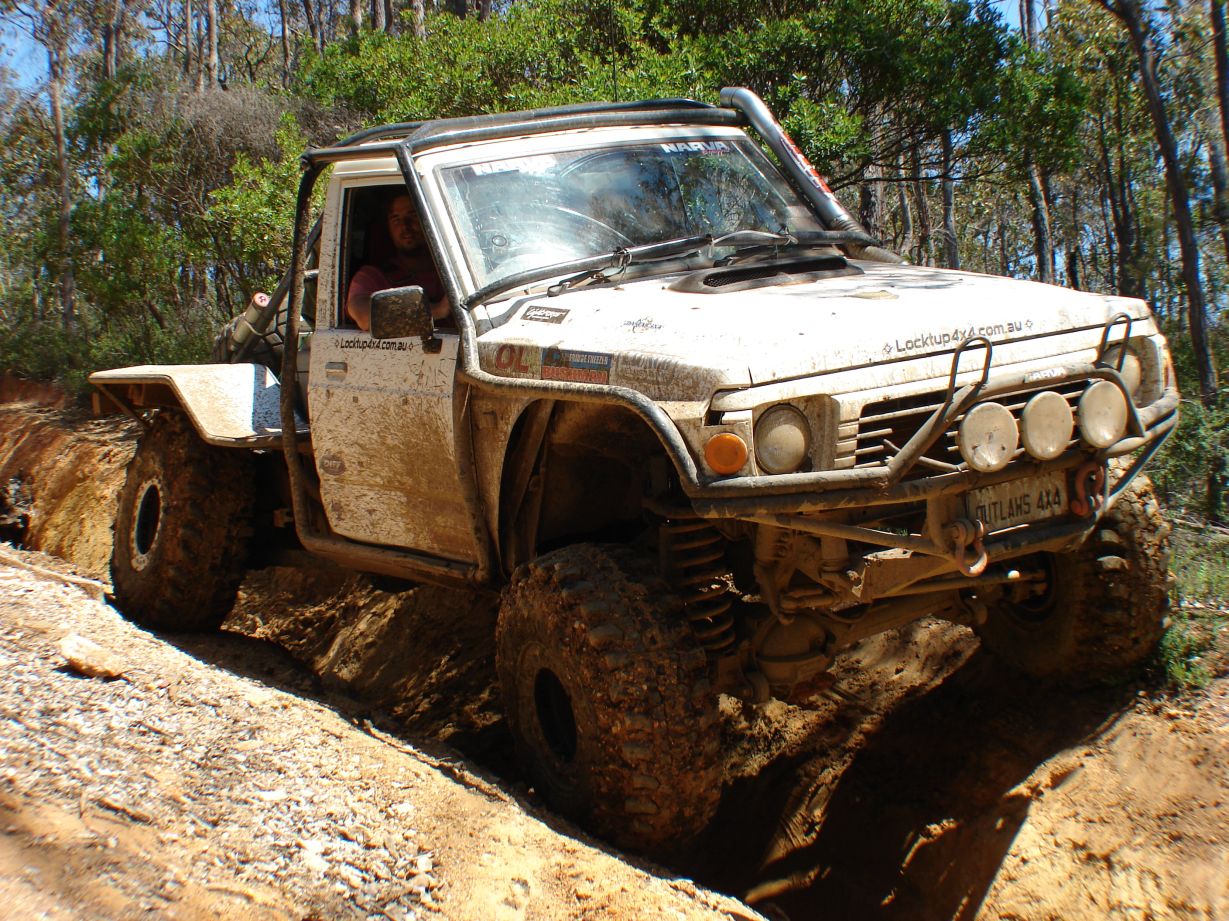
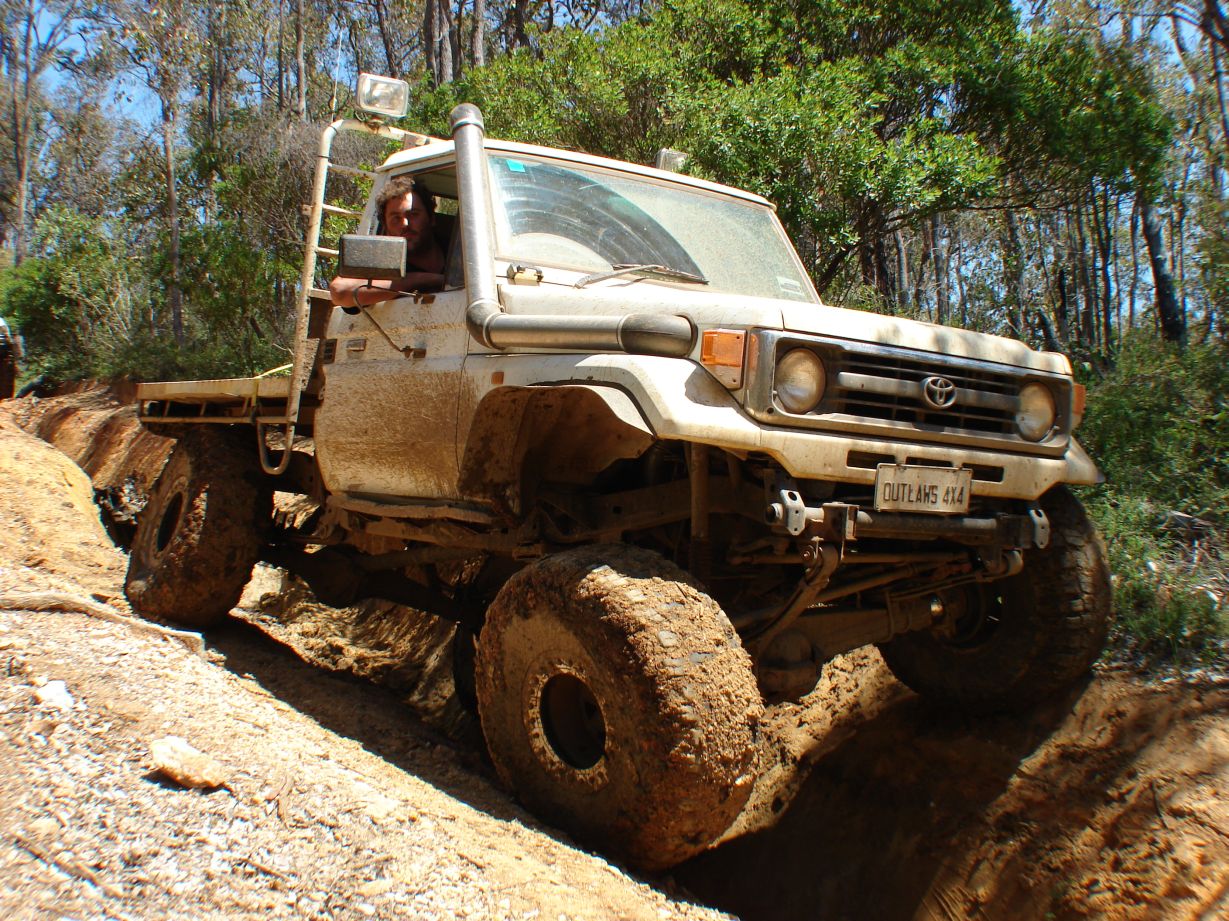
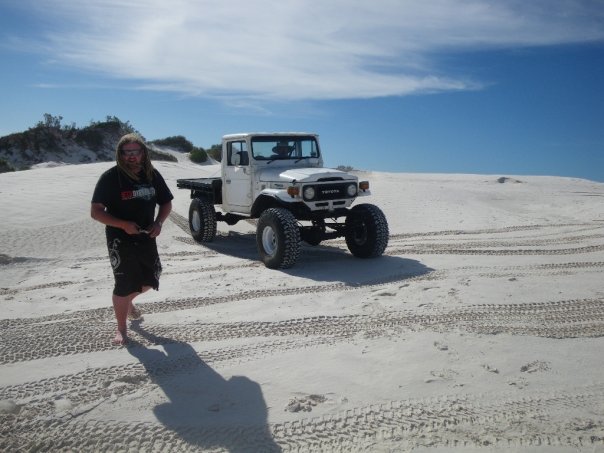
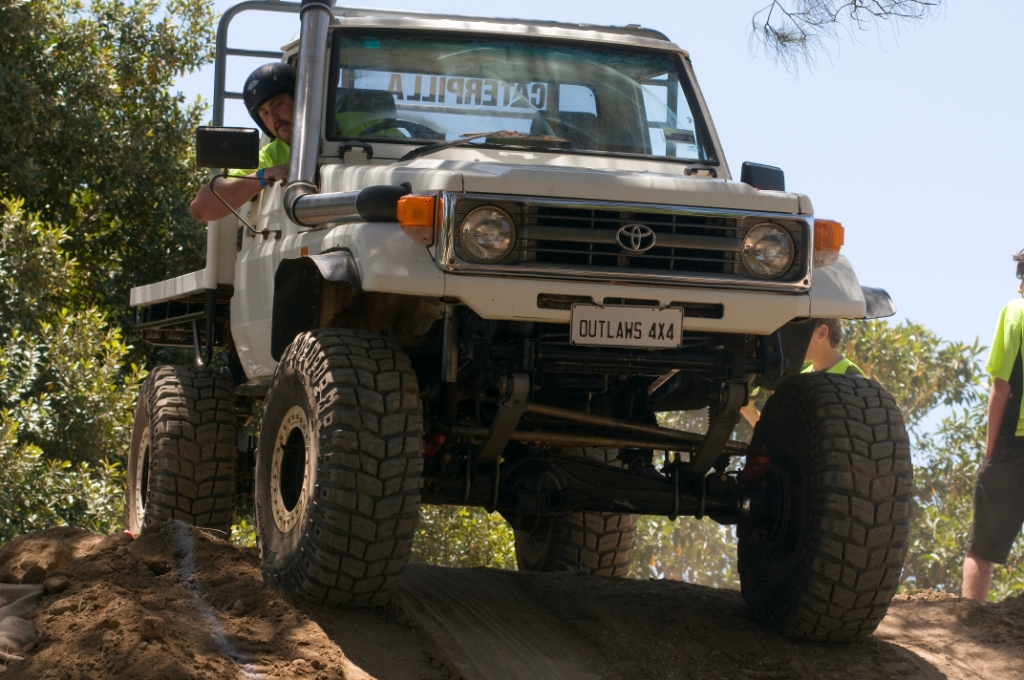
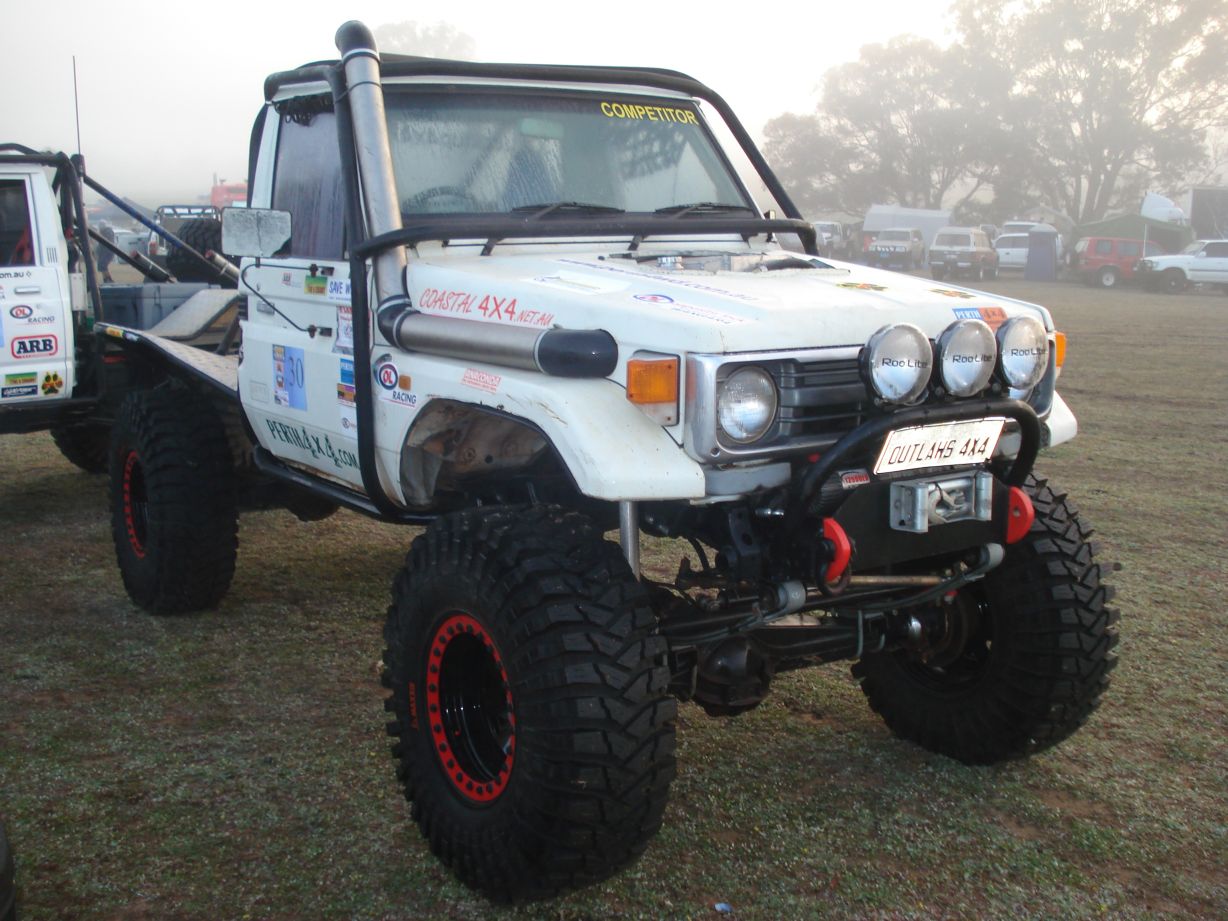
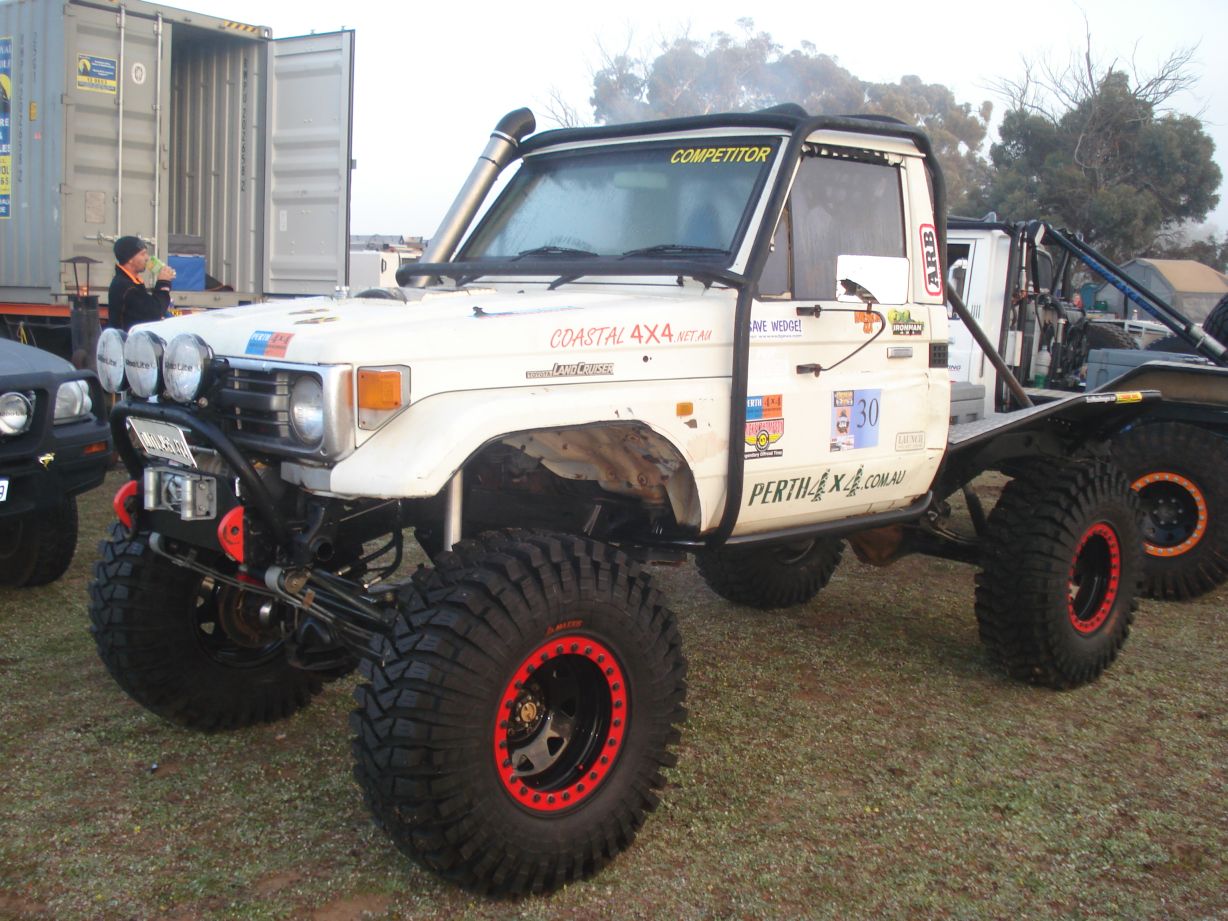
Here is a side by side shot for ya all.
Standard 75 on 32’s vs SOA 75 on 37’s
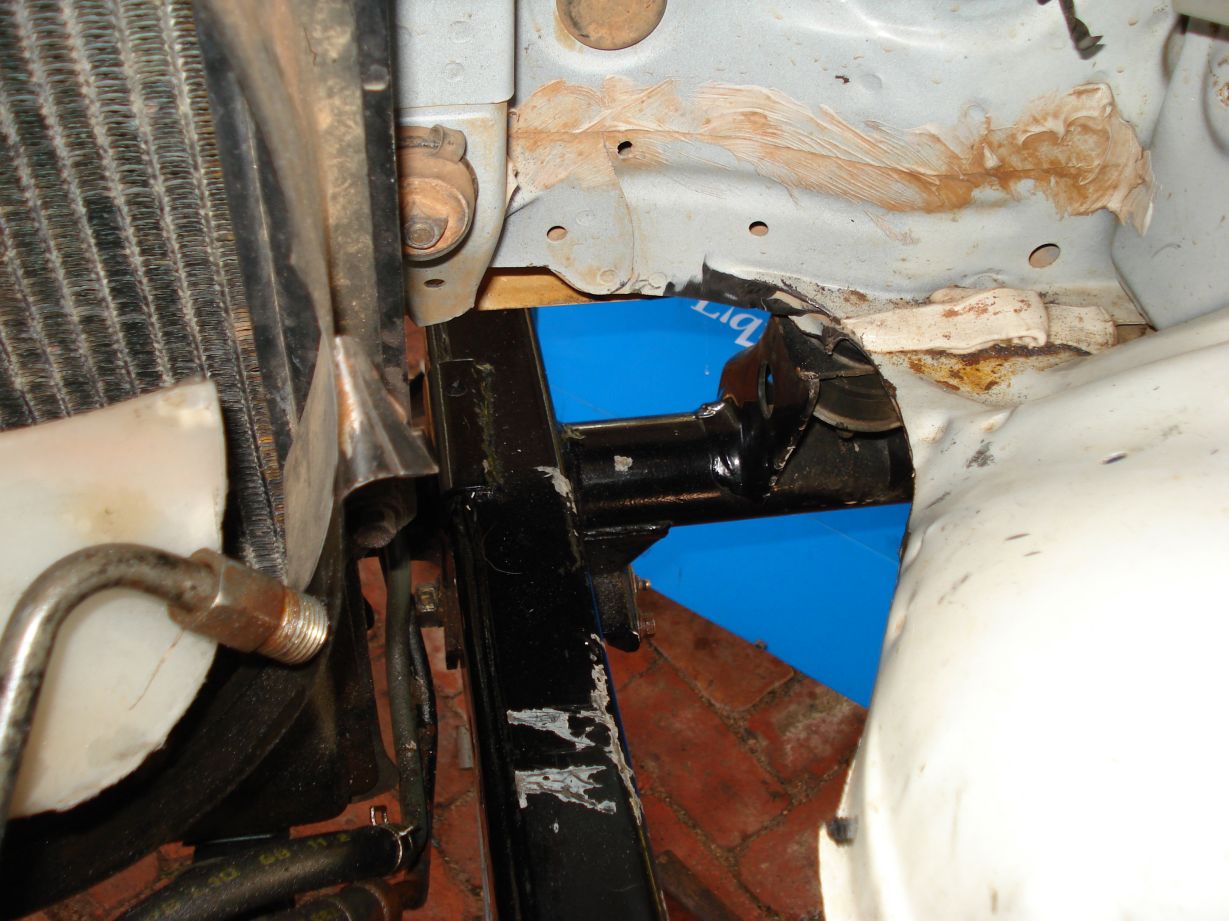
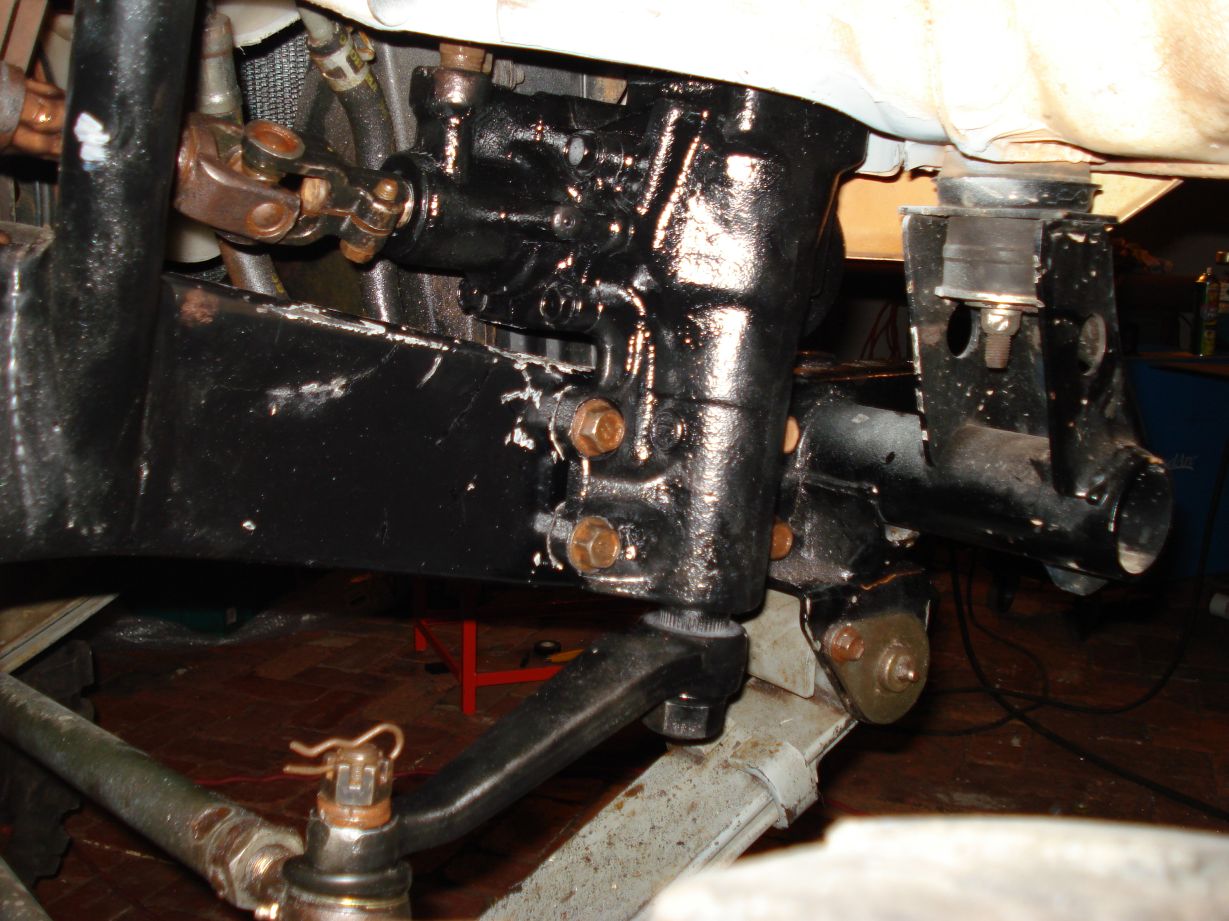
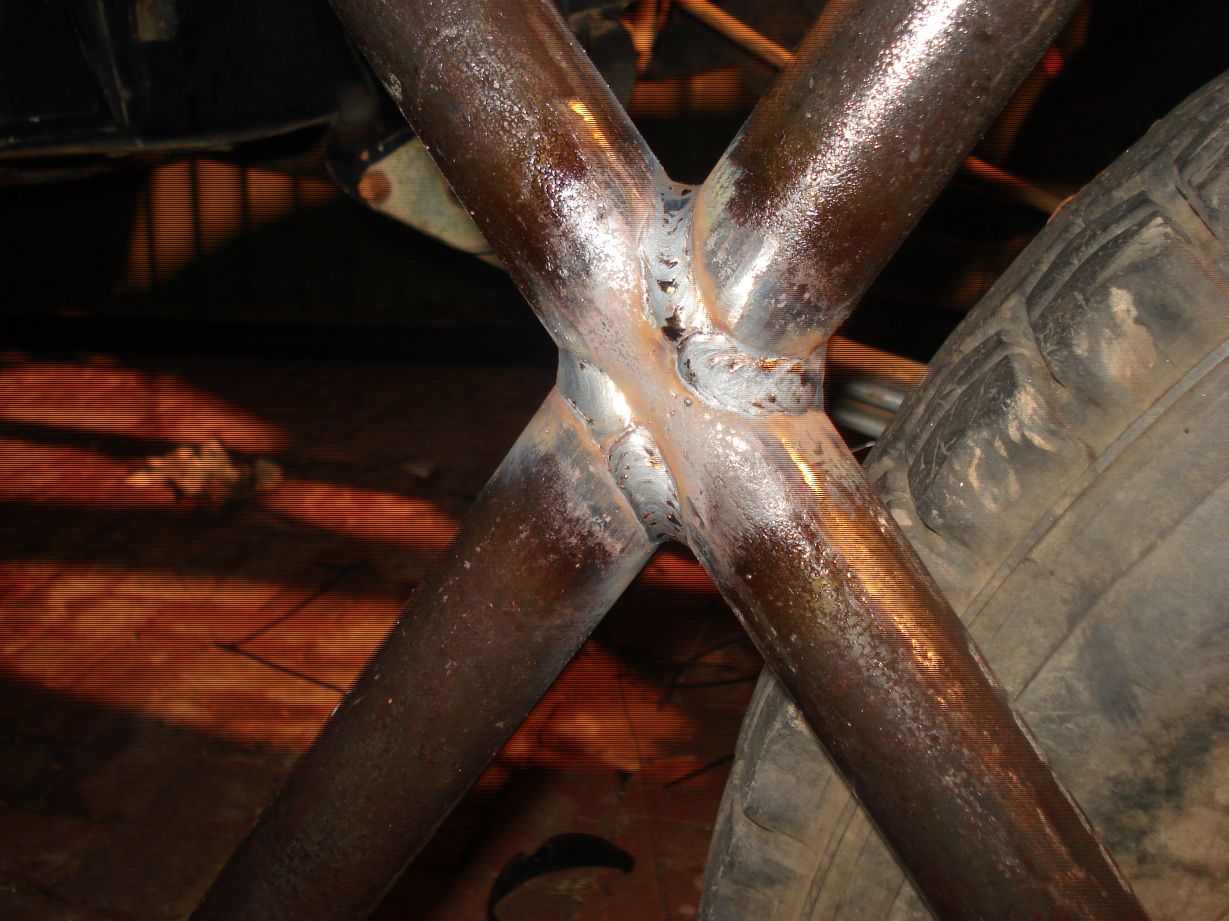
now that im finally back at work i managed to knock up some engine mounts out of 50mm 8mm wall pipe and some 75 series rear rubber shackle bushes. Then a 9/16 UNC bolt through the guts of it.
I doubt ill be able to break these…
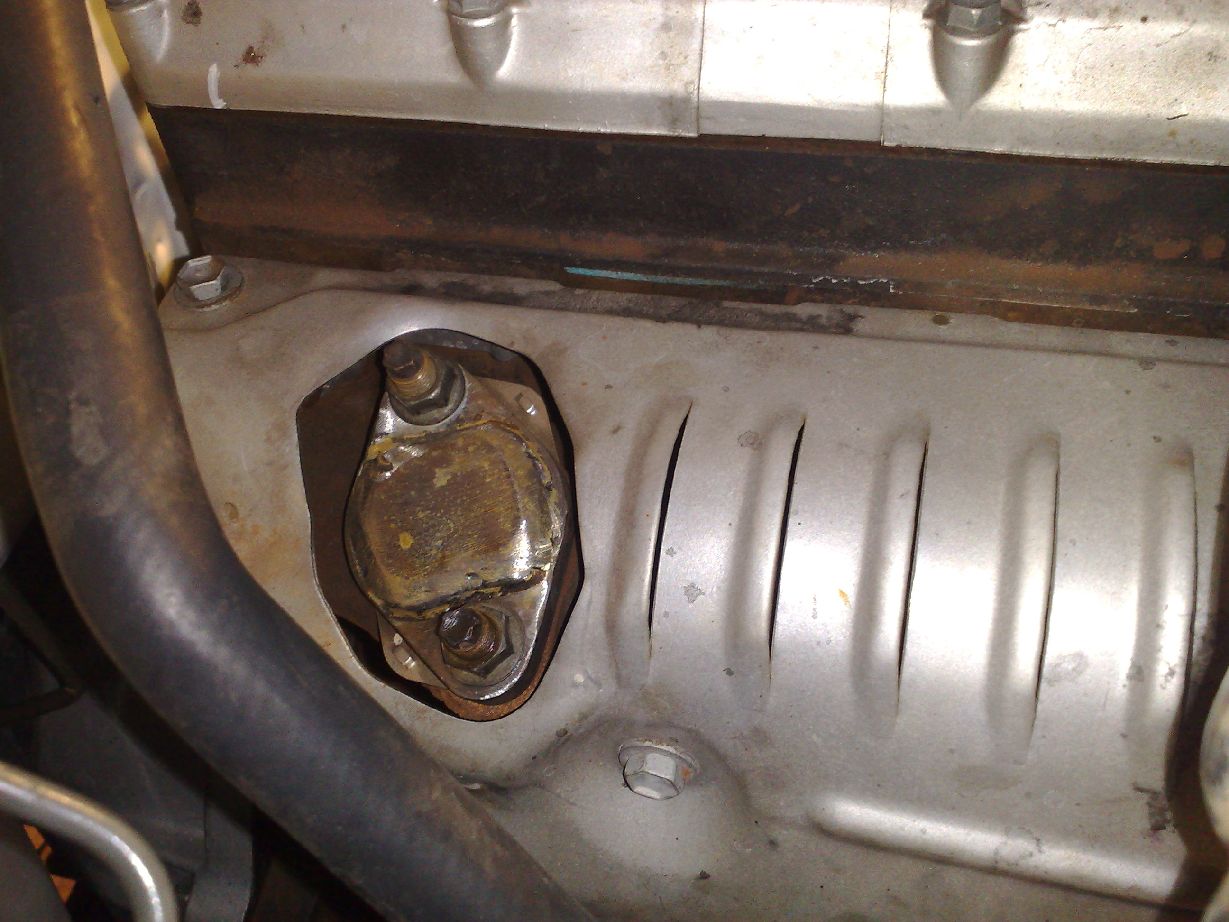
I started to install the mounts today… Damn is cast a bitch to weld or what…
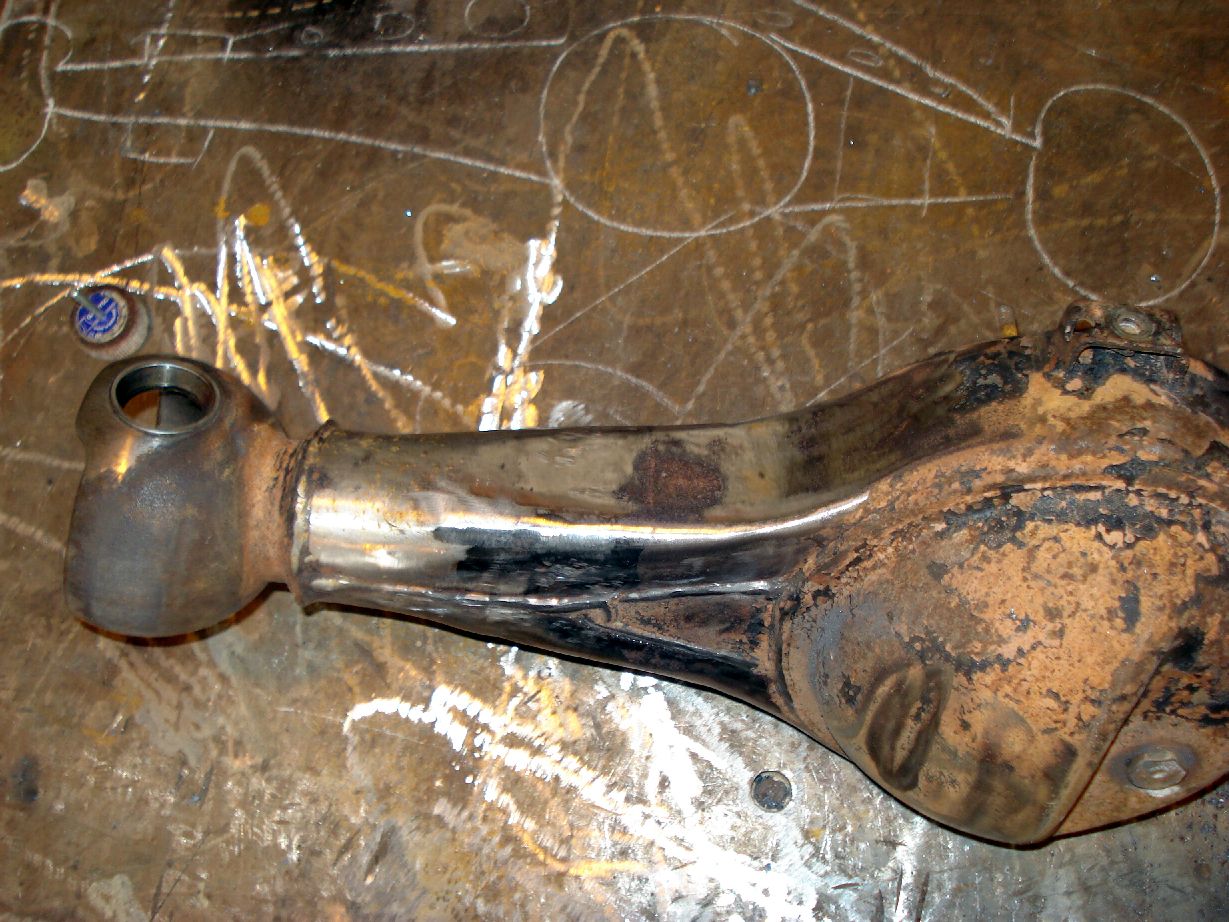
I sat the mount on the stove for 15 mins to preheat it, seems to have gone ok… this is high graphite cast steel so it will be interesting to see how long it lasts…
I just dont have the equipment to make new mounts from scratch at the moment…
This is the old mount i pulled out… alot of carnage for only 2 outings….

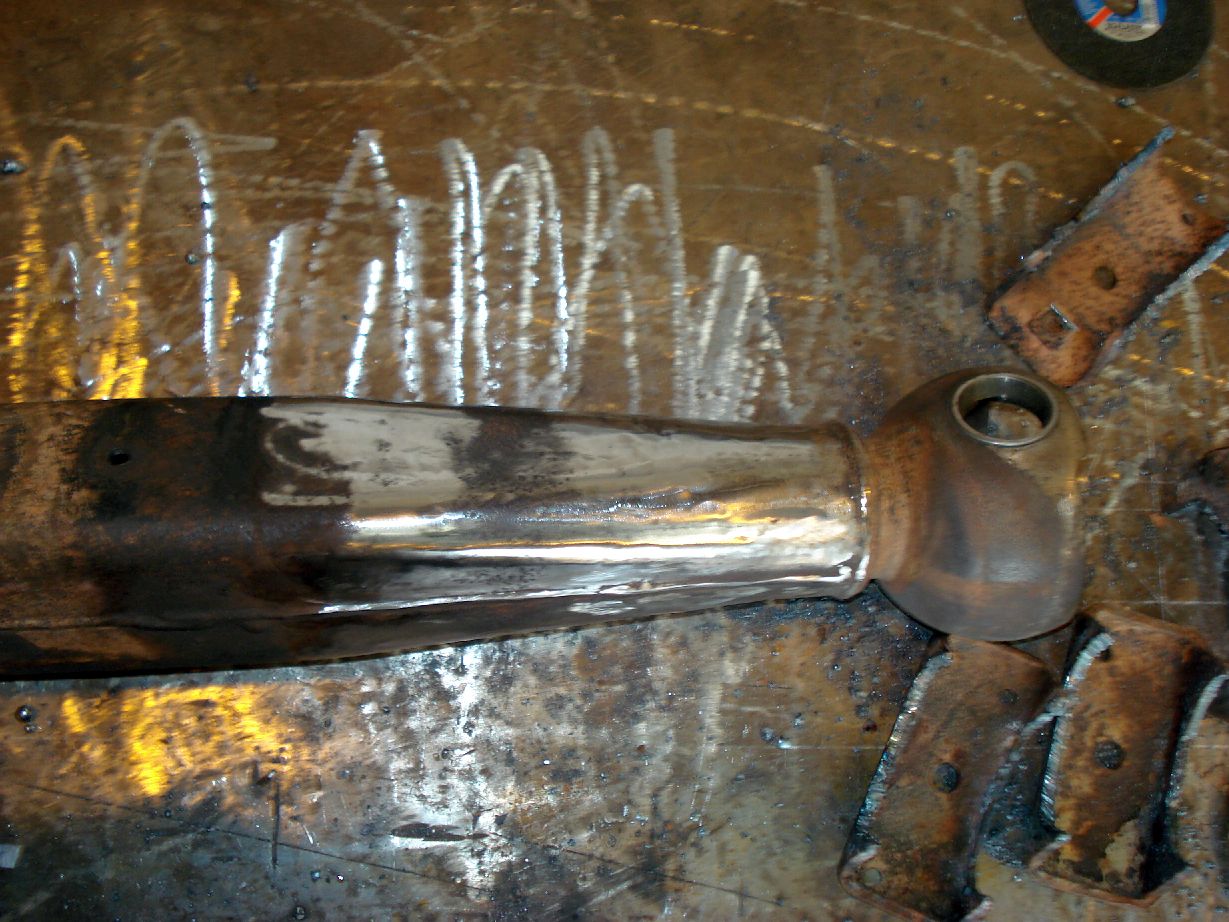
The finished product, cooling as we speak on the stove over low heat lol…

Oh and here is the completed engine mount and adapter bracket to the standard chassis mount.
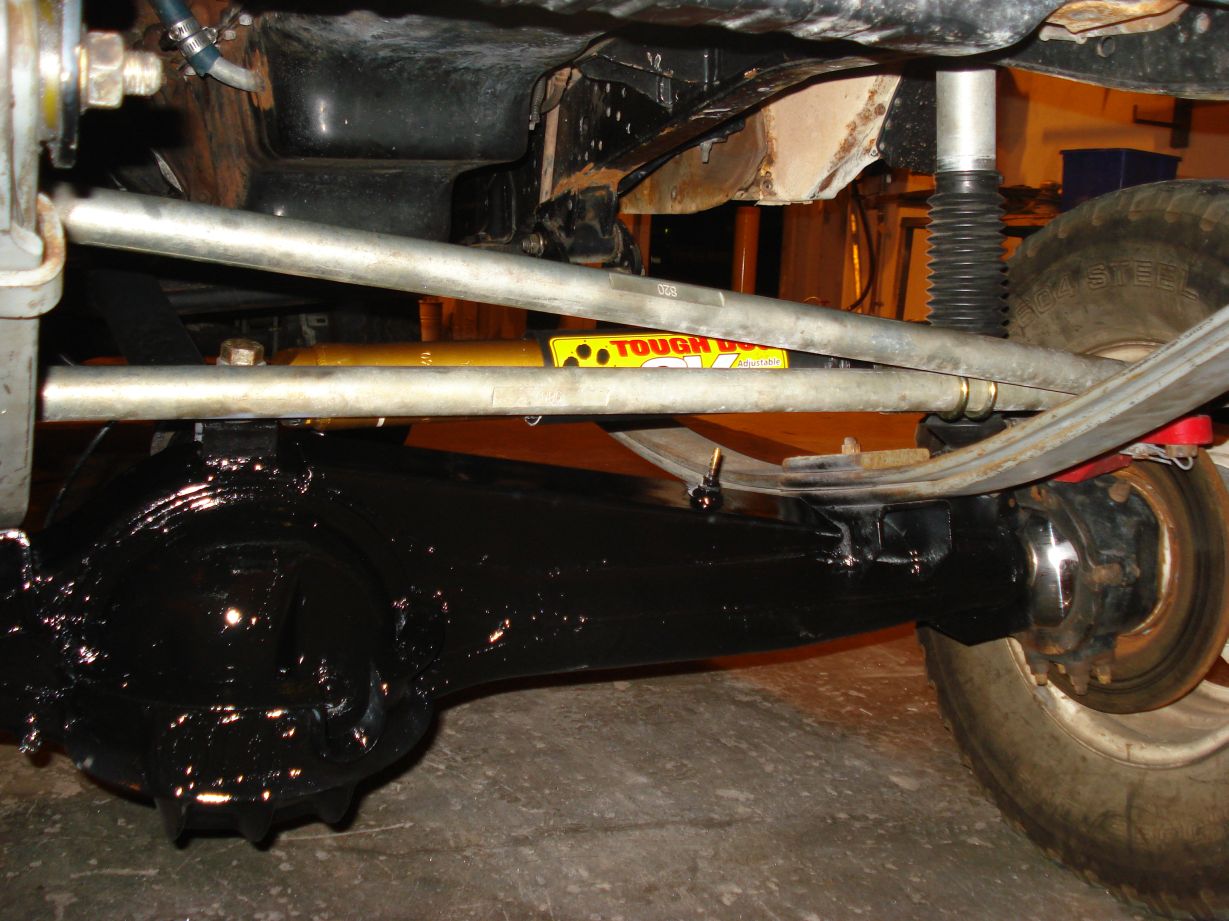
I have some flex!?
Rear could be better… but hey im happy
and some s bent parabolics lol
Its been months since my last update so here is a newie
New updates as of tonight.
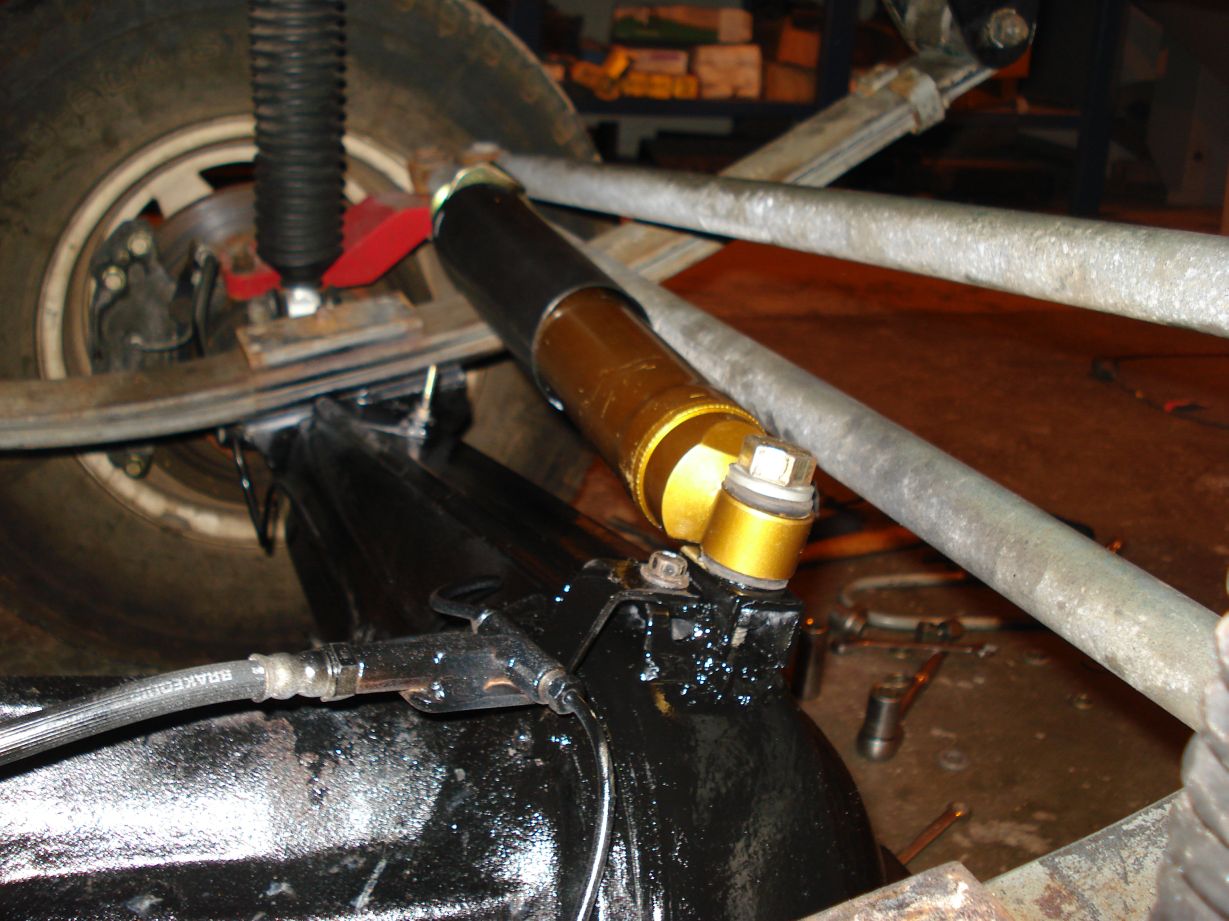
Diff guard and steering dampener.
It drives 100% better now!
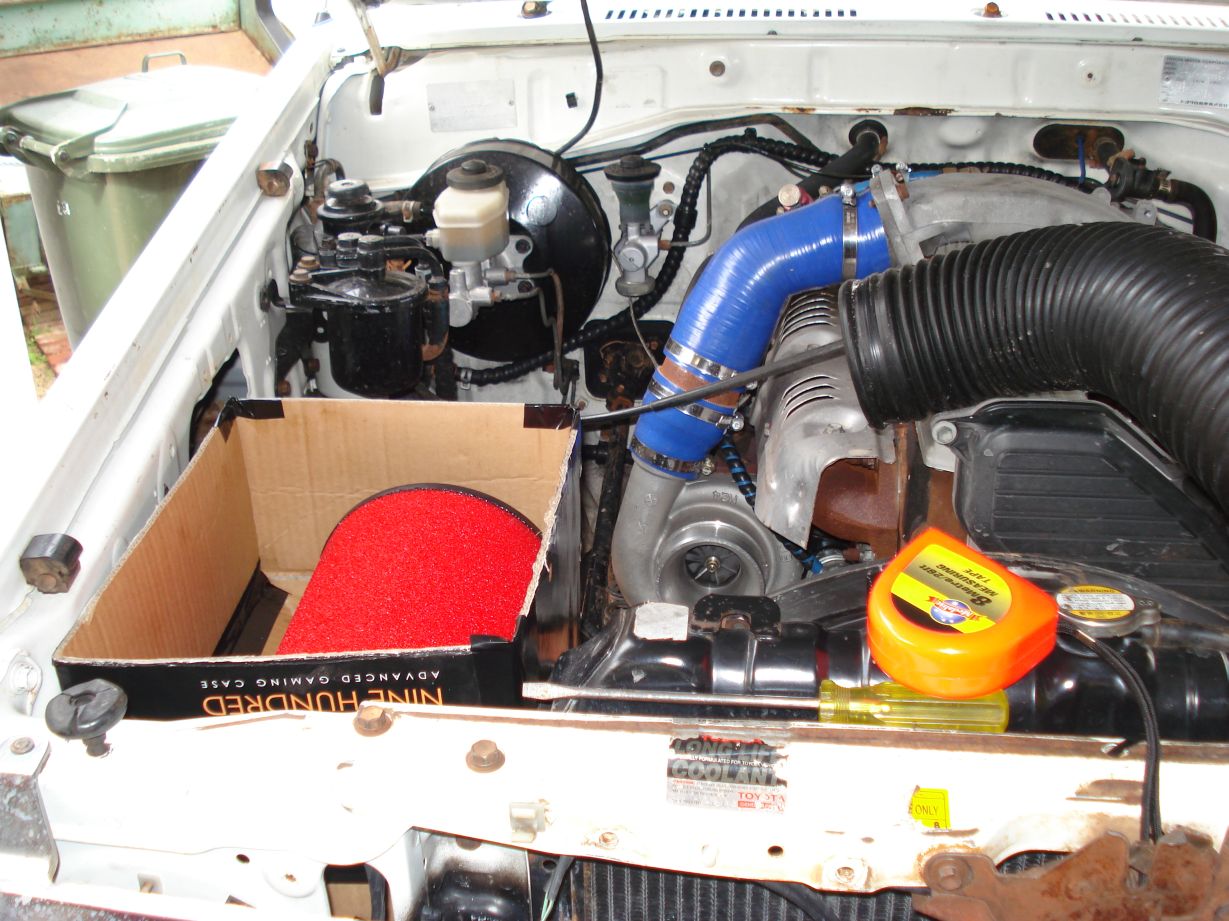
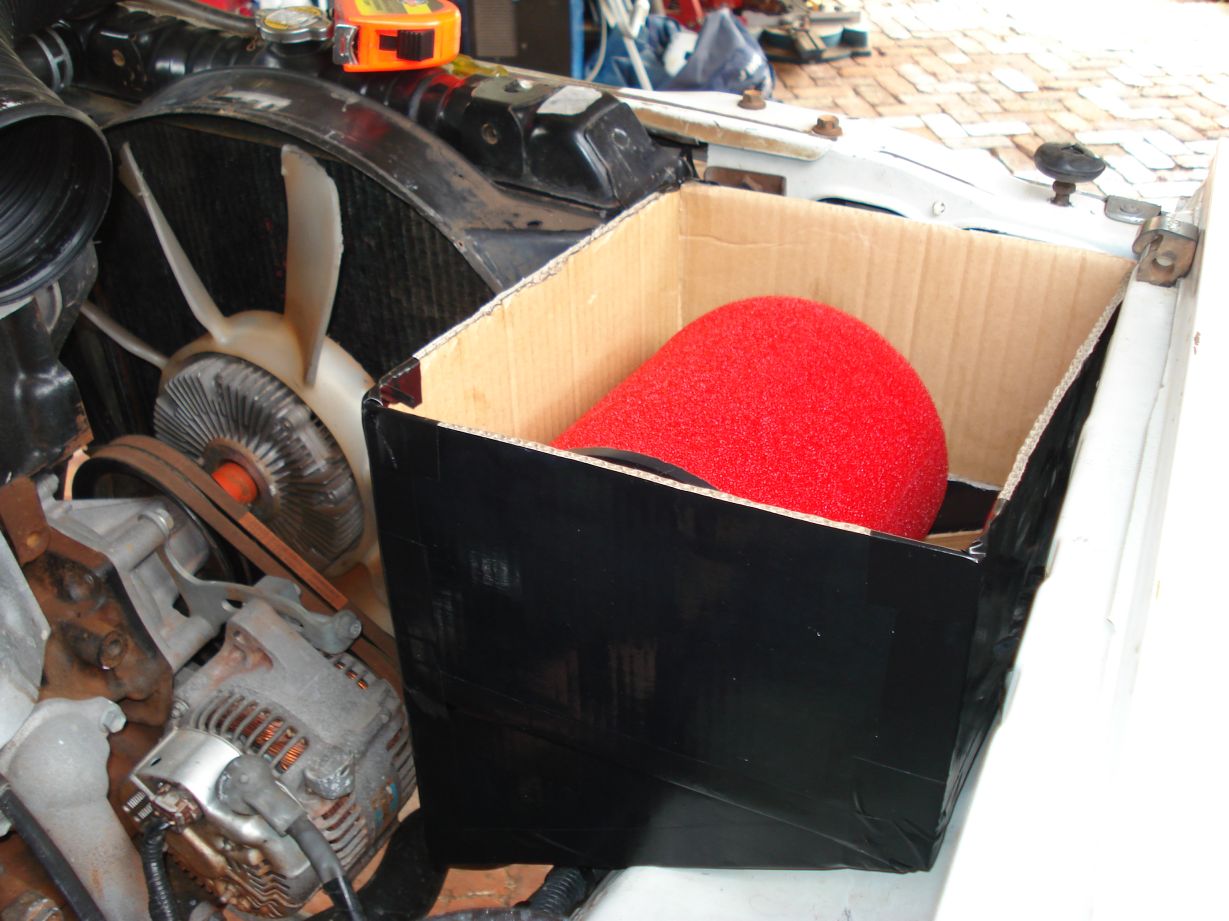
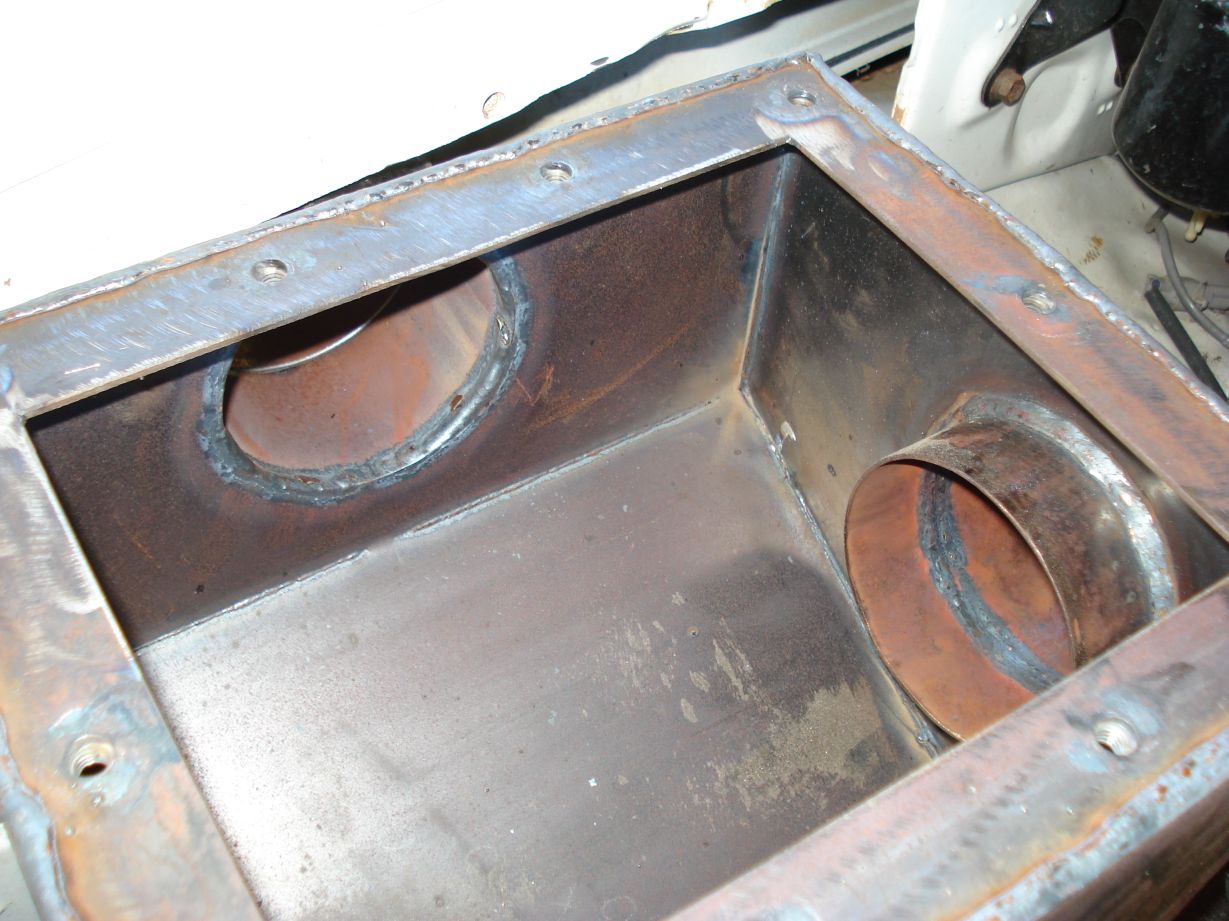
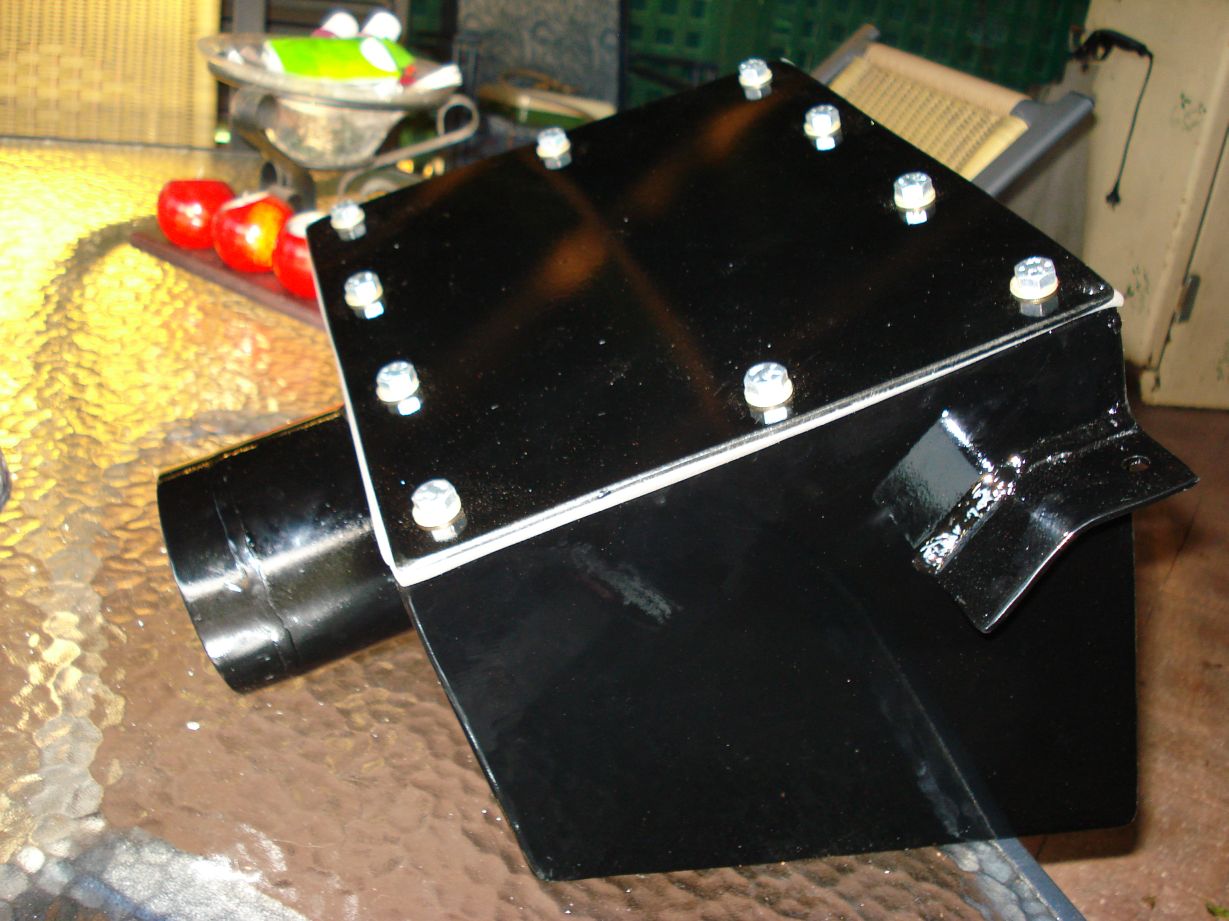
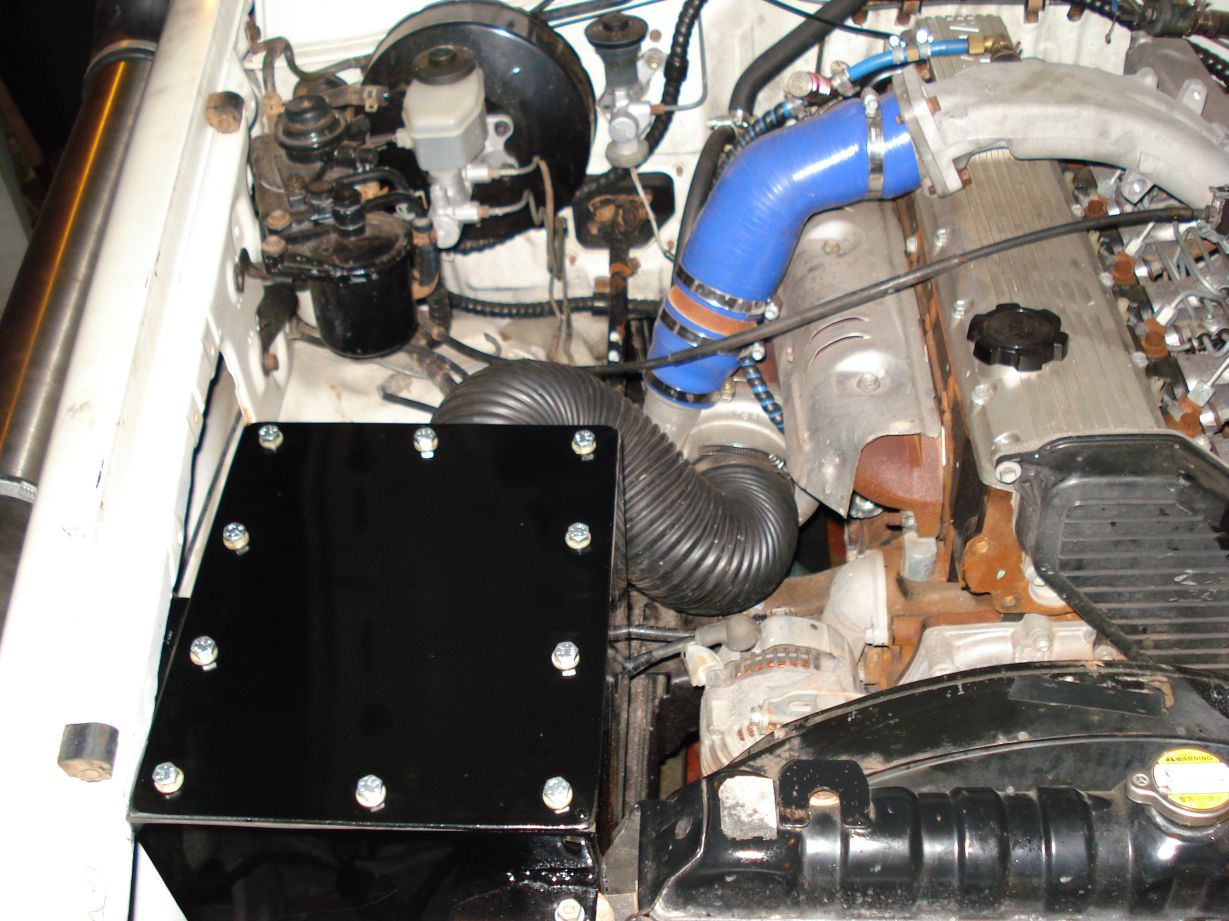
Got some custom uni filters made, 8″ long, 7″ wide and 4″ inlet.
Ill be running the K&N 4″ POD on the end of the snorkel as a bug catcher.
Just got to make a air box and 4″ snorkel now.
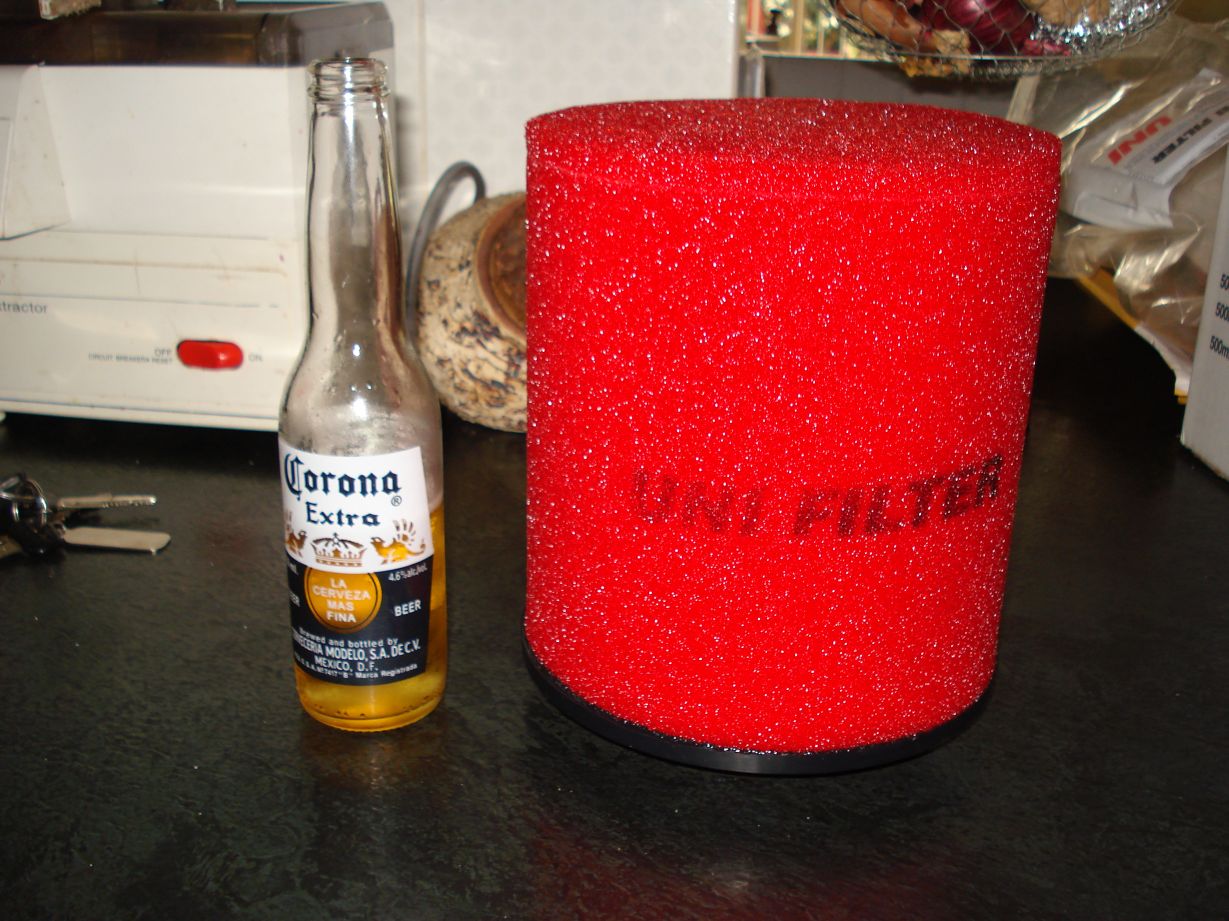
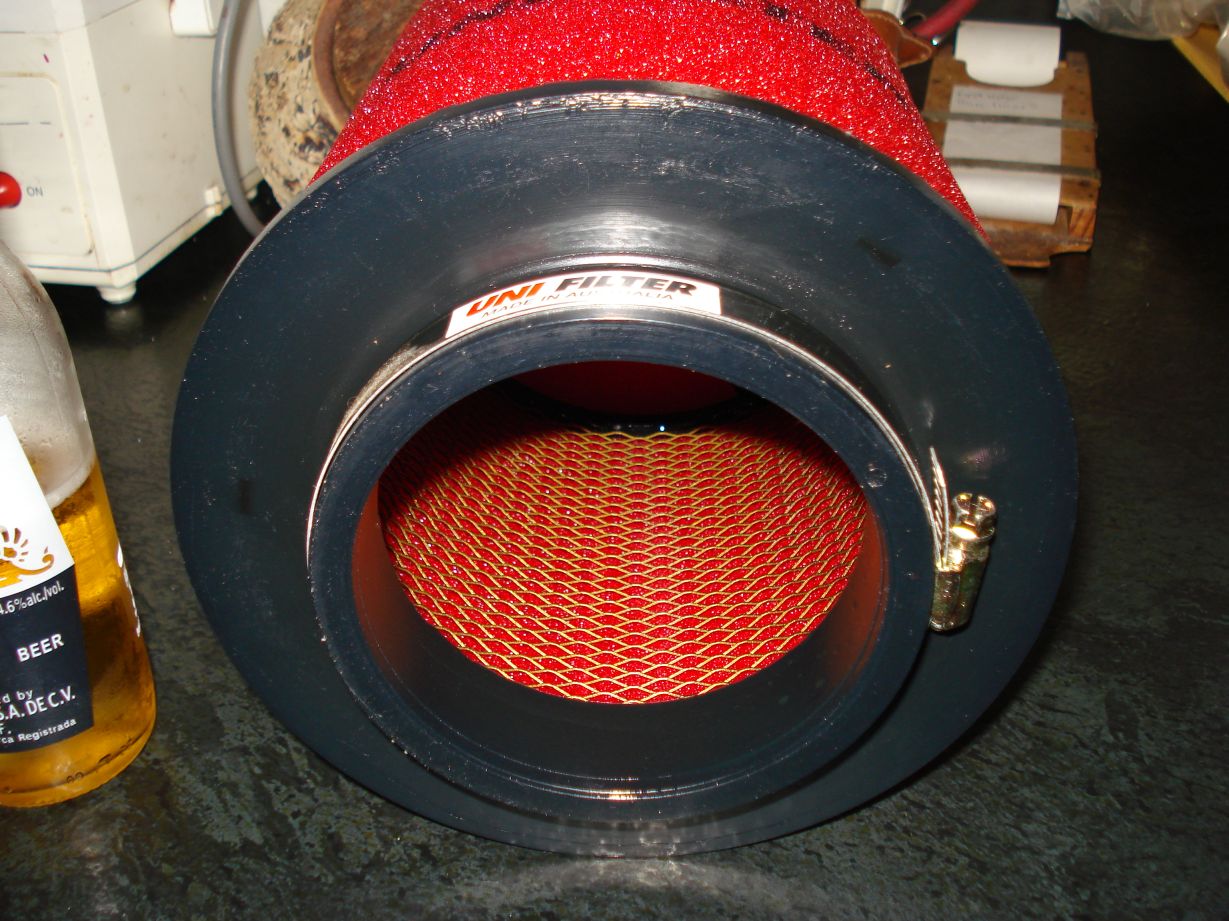
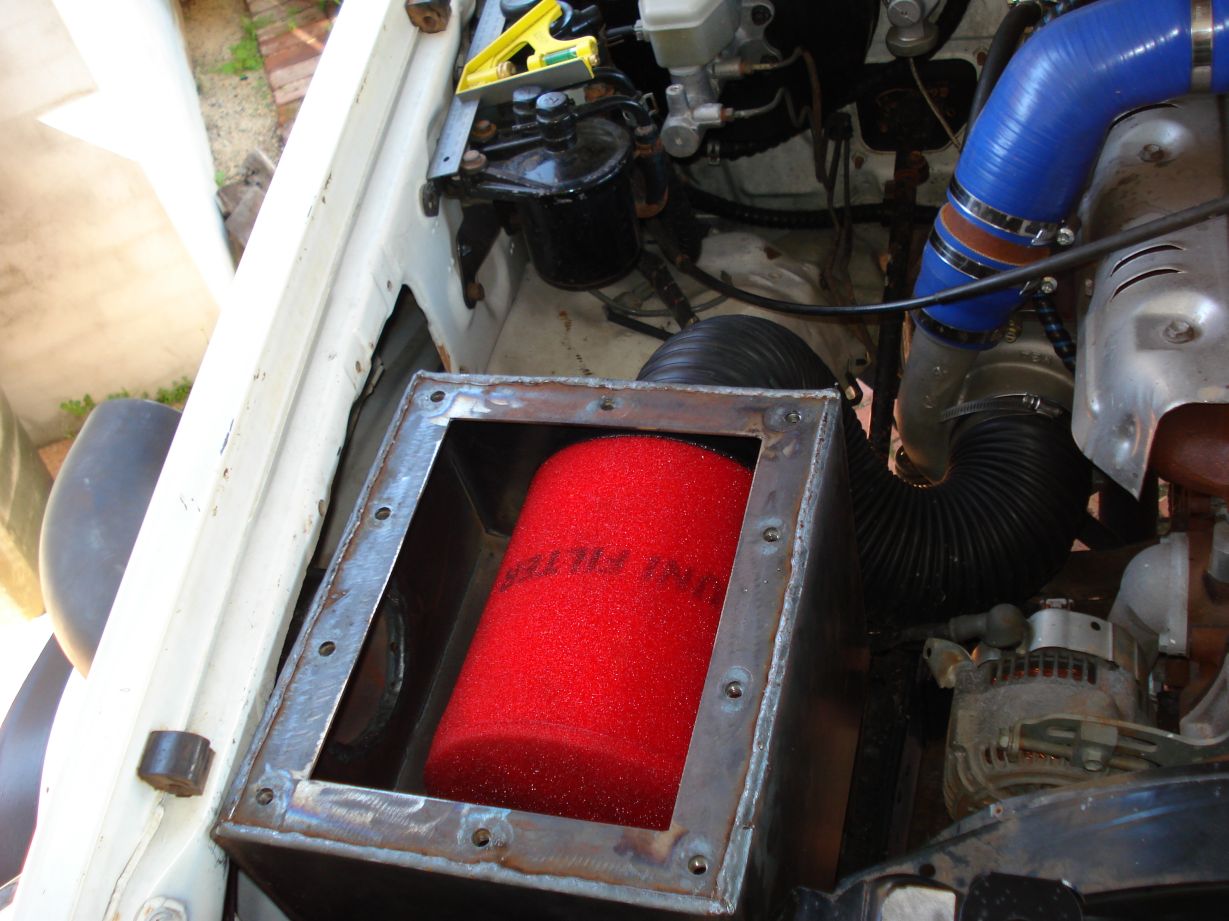
Started mocking up the airbox today.
I may have gotten carried away with the size of the air filter… its a tight fit even in my engine bay lol…
Few pix
Now that MGGR is over and im not spending every weekend in prep for that i managed to get a bit more done on the cruiser in between weather changes…
Mig welding in the wind blows… (no pun intended lol)
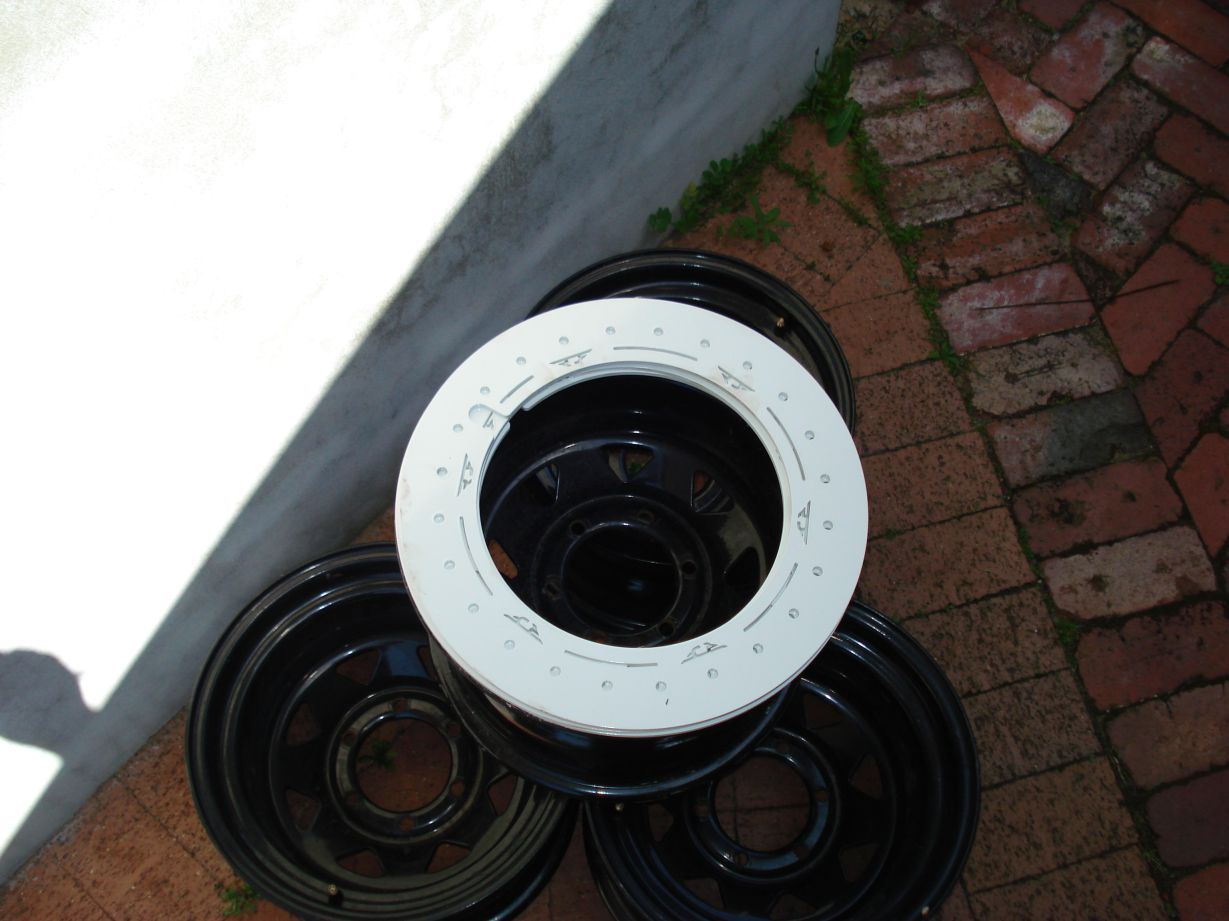
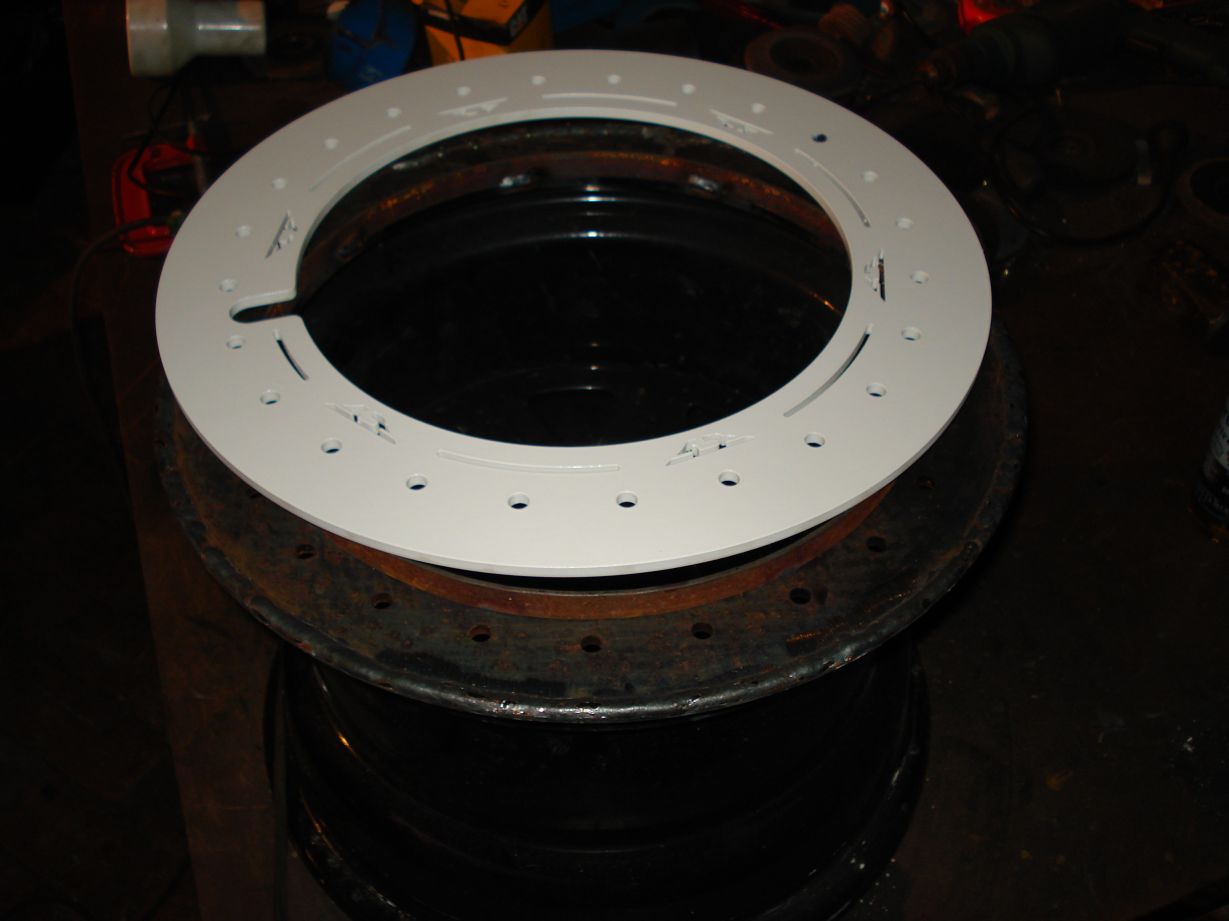
Put the beadlocks on, Looks horn!
Went for a quick spin around the block and its a total misconception that u cant run these onroad because of balancing problems… It drove perfectly!
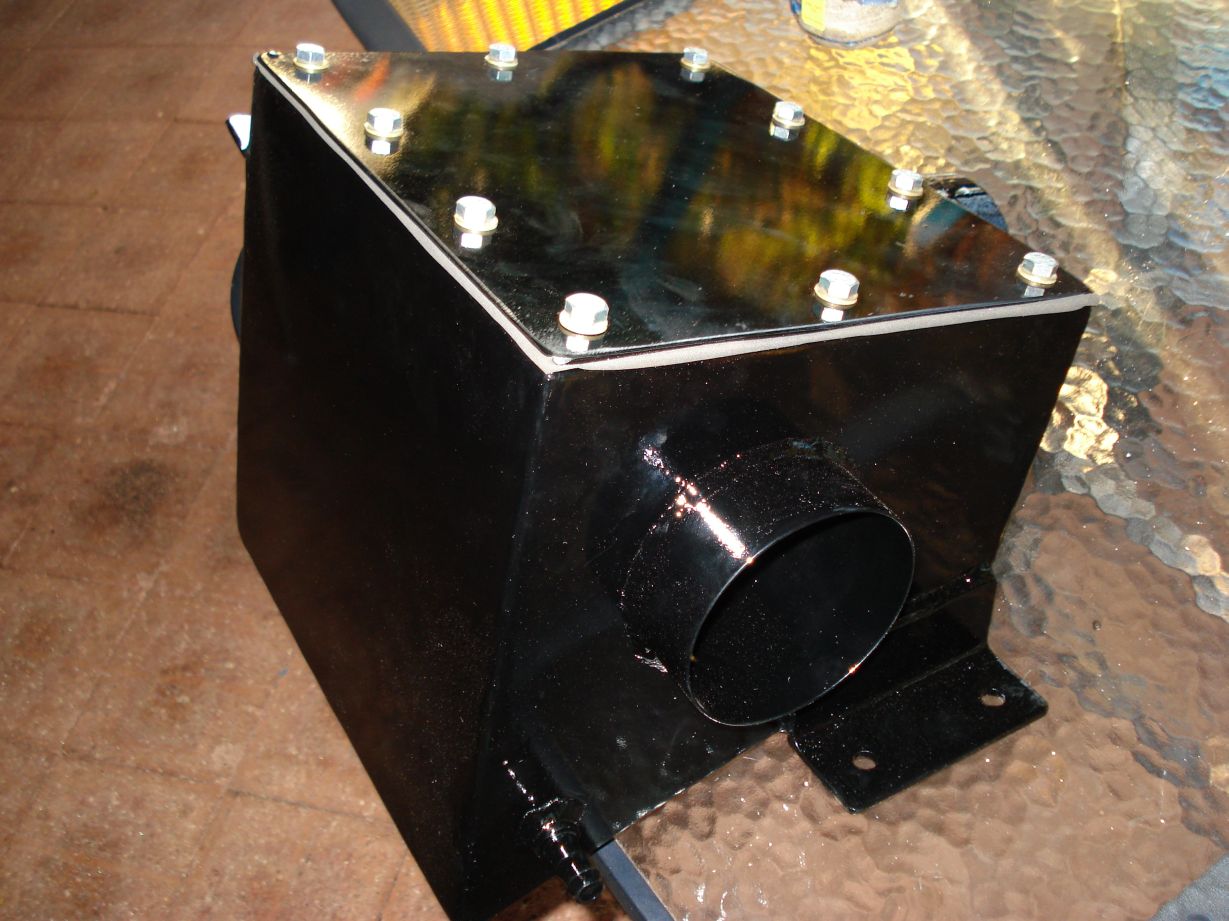
Got the airbox basically done, just got to run a 4″ hole saw through 2 sides of it and weld on a top lip for the lid to seal on.
Quick bit of tech for those who want to bend sheet steel like this, bending 2-3mm sheet is tough if the bend is over 100mm long. What you do is you mark out for bend lines, cut all but a few 10mm sections like i have (i only used 3 sections, but for a longer bend you can use the same method but just leave more sections)
When bent the sections give a perfect radius and weld prep. Just do a vertical down weld along the seam like this
And the final product after a bit of a quick grind.

Got a bit done b4 the grand final today
Intake and box done, just needs a quick grind and some paint.
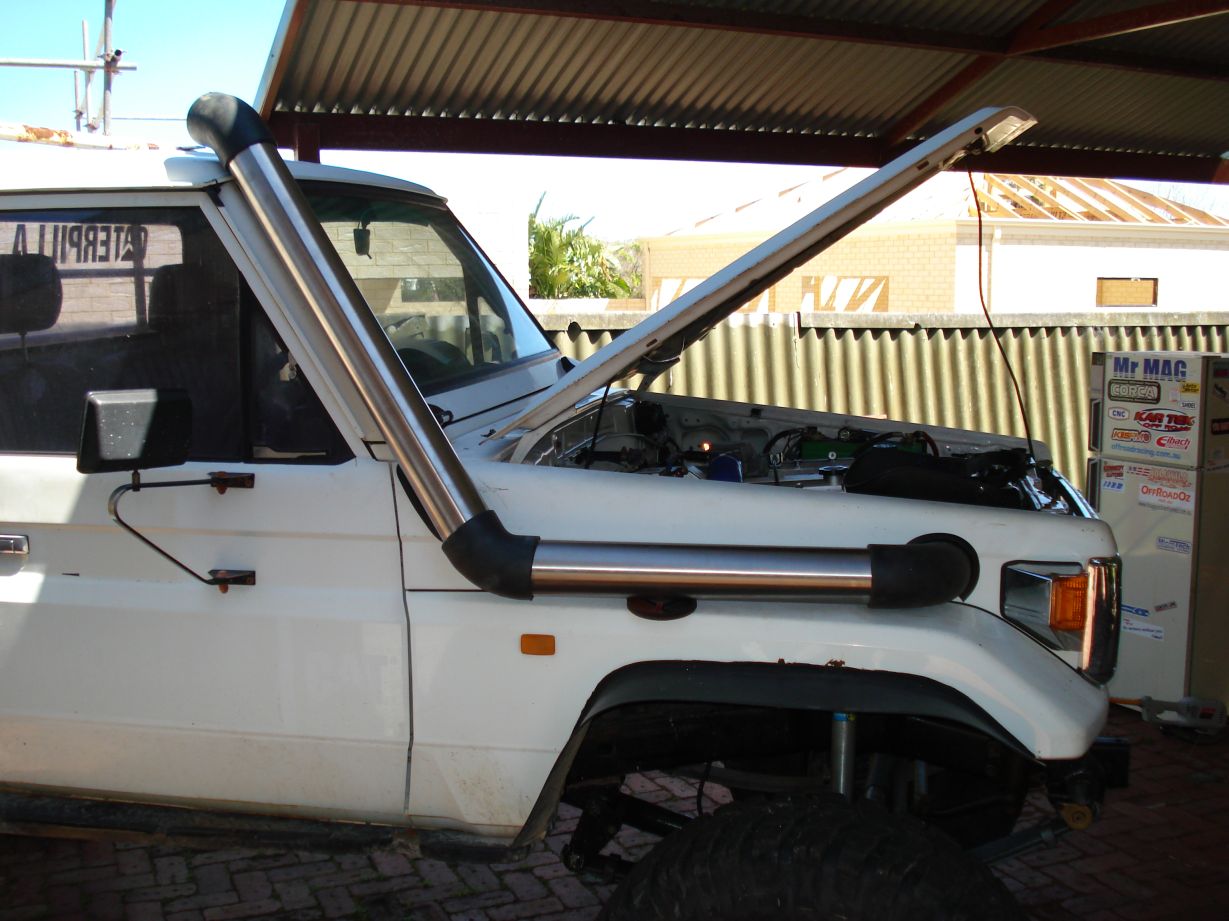
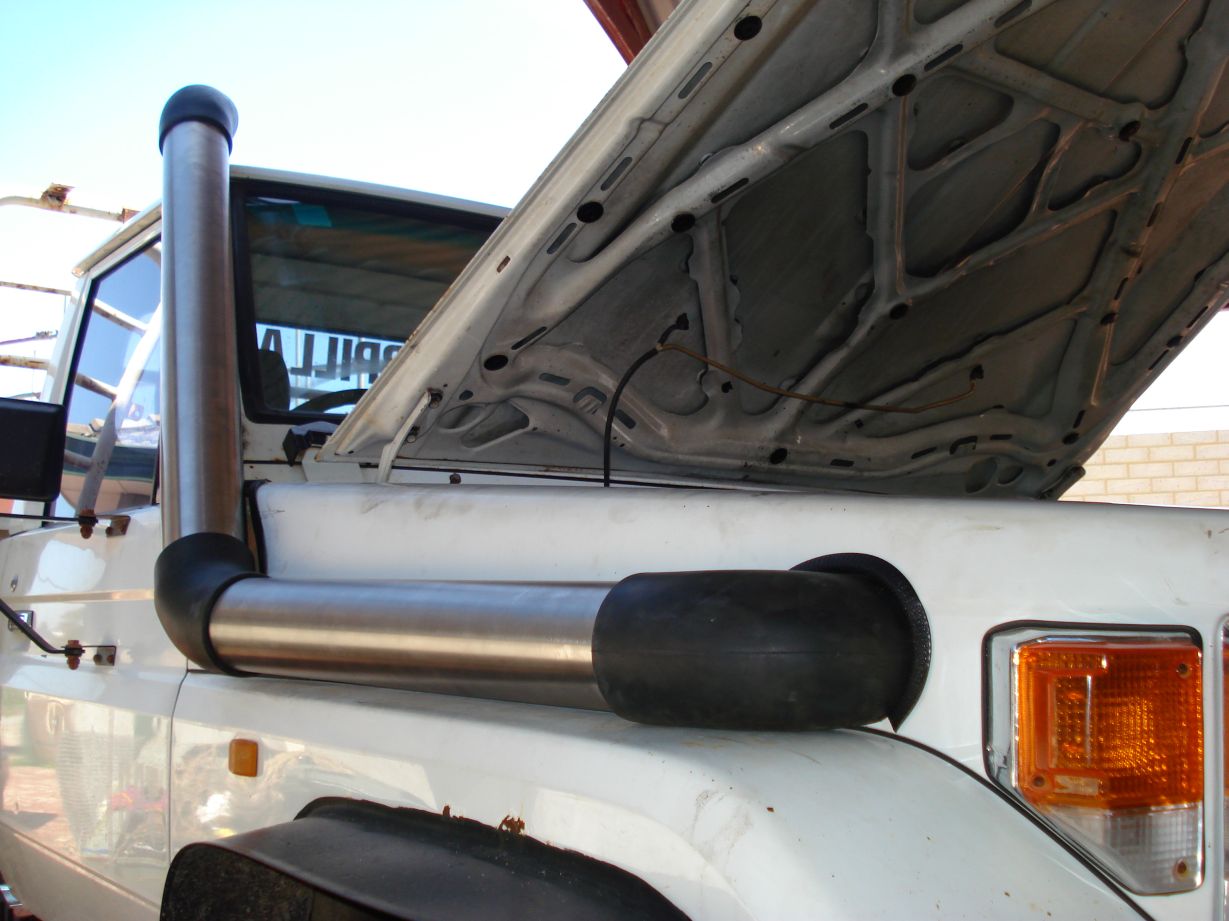
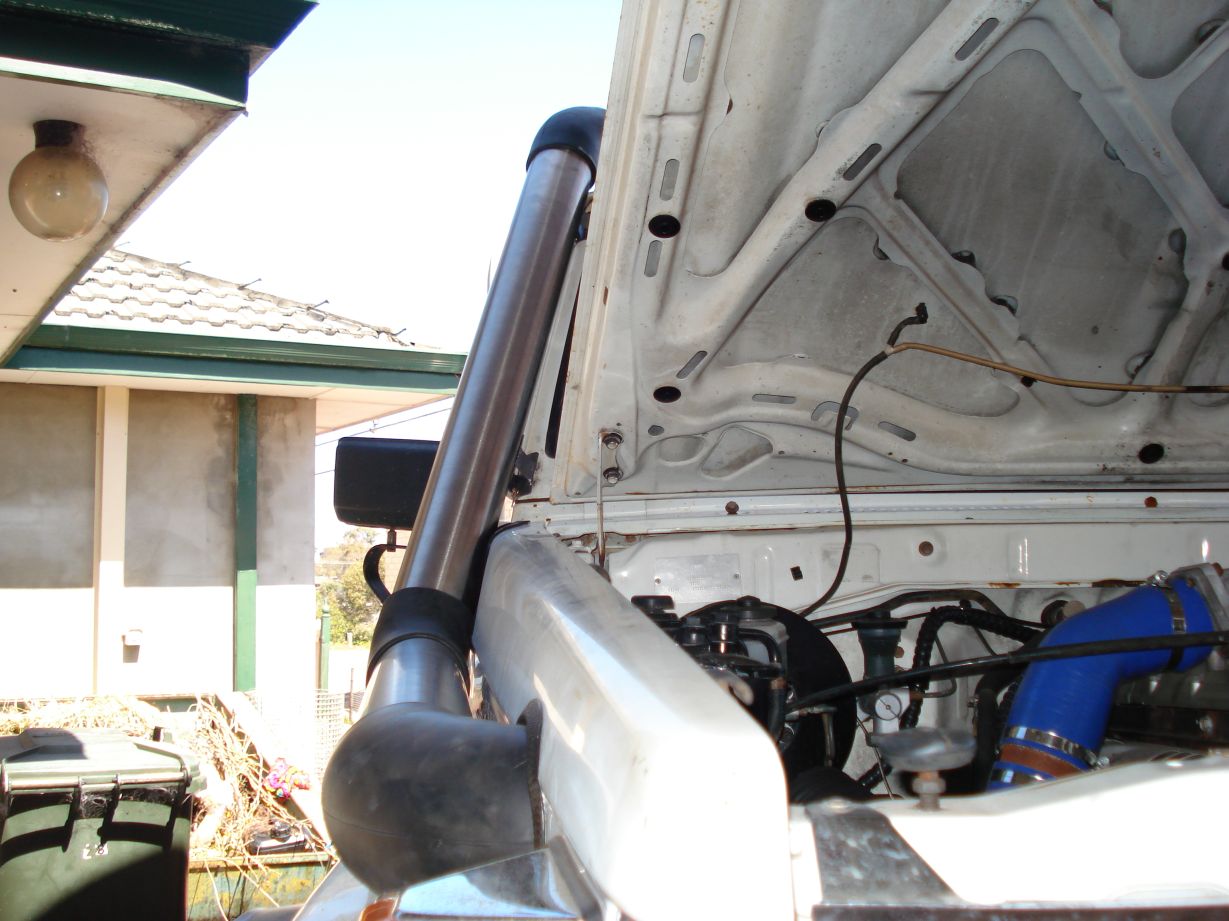
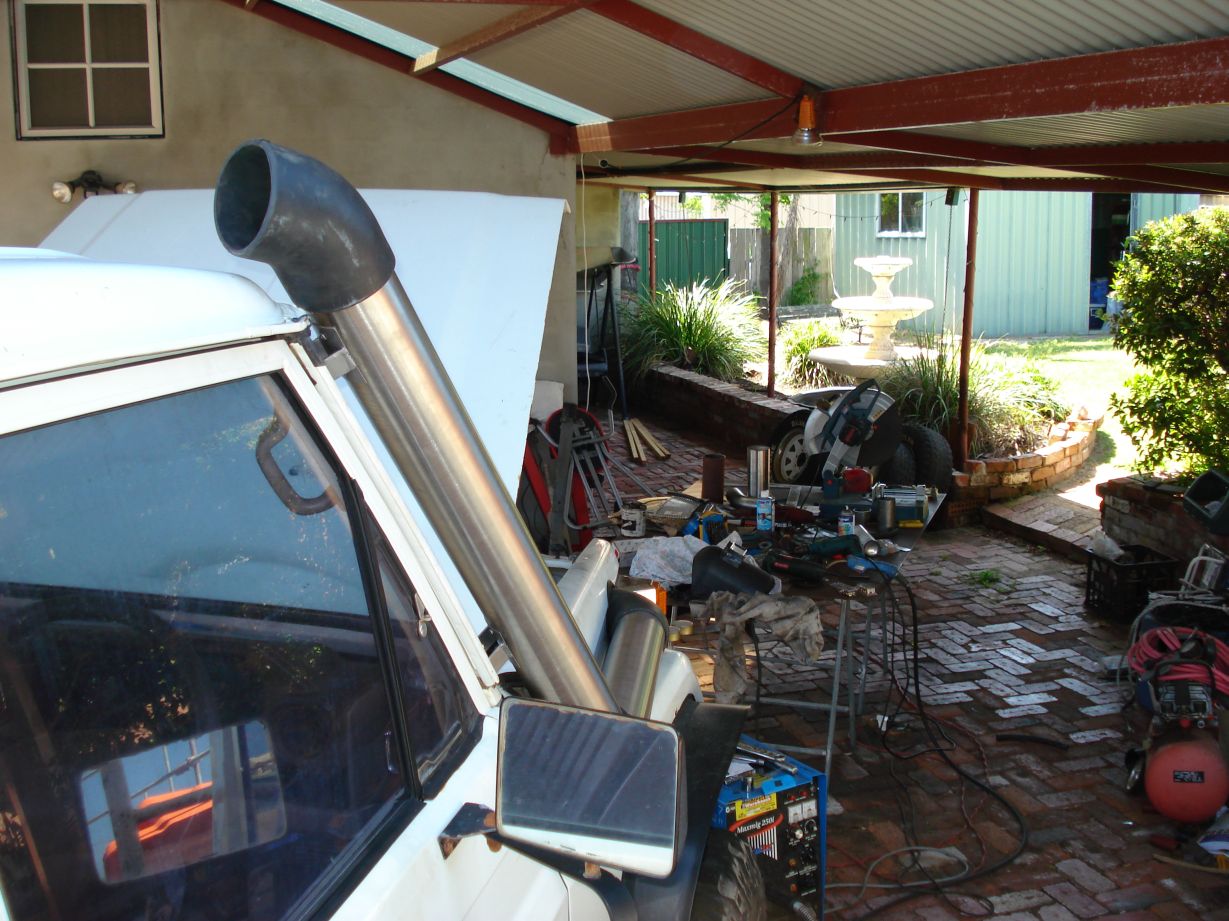
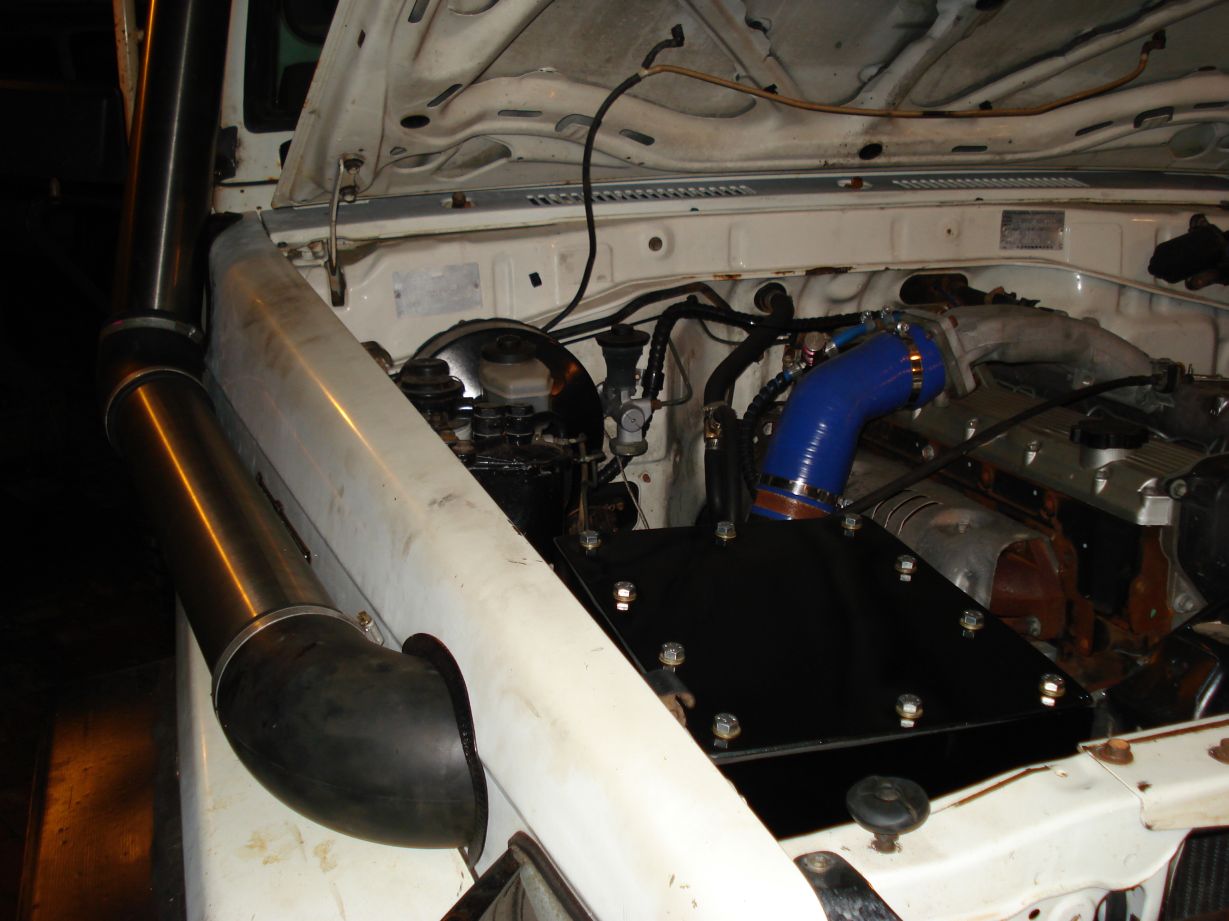
4″ ss Snorkel
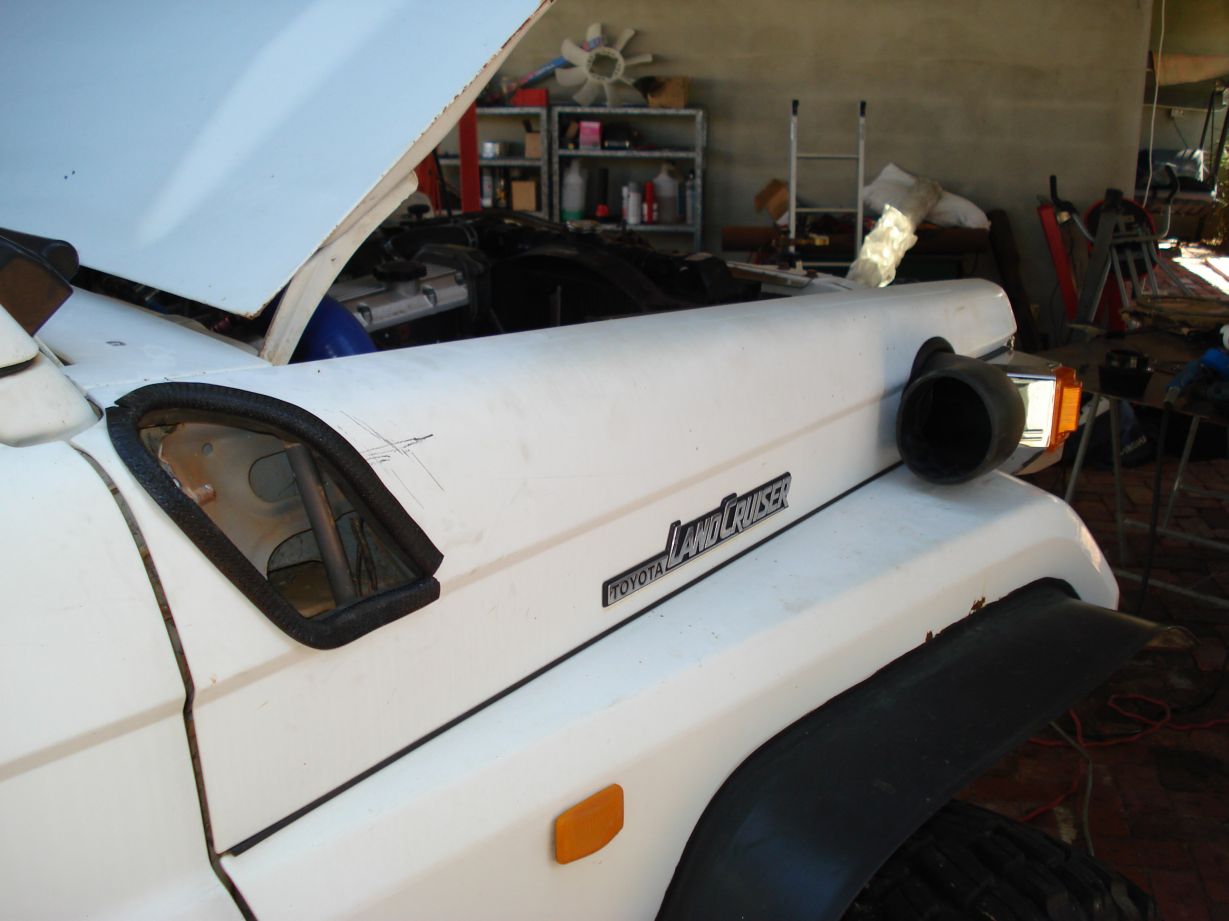

Still gotta fix the snorkel to the guard
Got all the parts together to finish the exhaust
Rebuild leaking steering box again…
Another set of beadlocks
Oh and my intercooler is coming together
Another thing to tick off the “to do list”
An exhaust!
Cheers to Cody for coming round and giving a hand.
a few bends, some SS flex tube and a few mounts.. too easy
Airbox is ready for reinstall.
Steering box is out ready for me to rebuild and tap for assist.
Getting close…
Snorkel mounted
Beadlocks almost done
Awaiting new steering box…(cut the body out a bit to allow easy removal of the steering box in future)
Got all of my beadlock rings welded on as well as the anti-coning rings. Taking them to work tomorrow to paint em.
Intake – Done
Snorkel – Done
Steering box – Done
Headlight wiring repairs – Done
Happy days
ARP knuckle studs (why oh why did i locktite the original ones in….)
Cleaned up and painted beadlocks
Sampling its first mudding
Gettin down and dirty
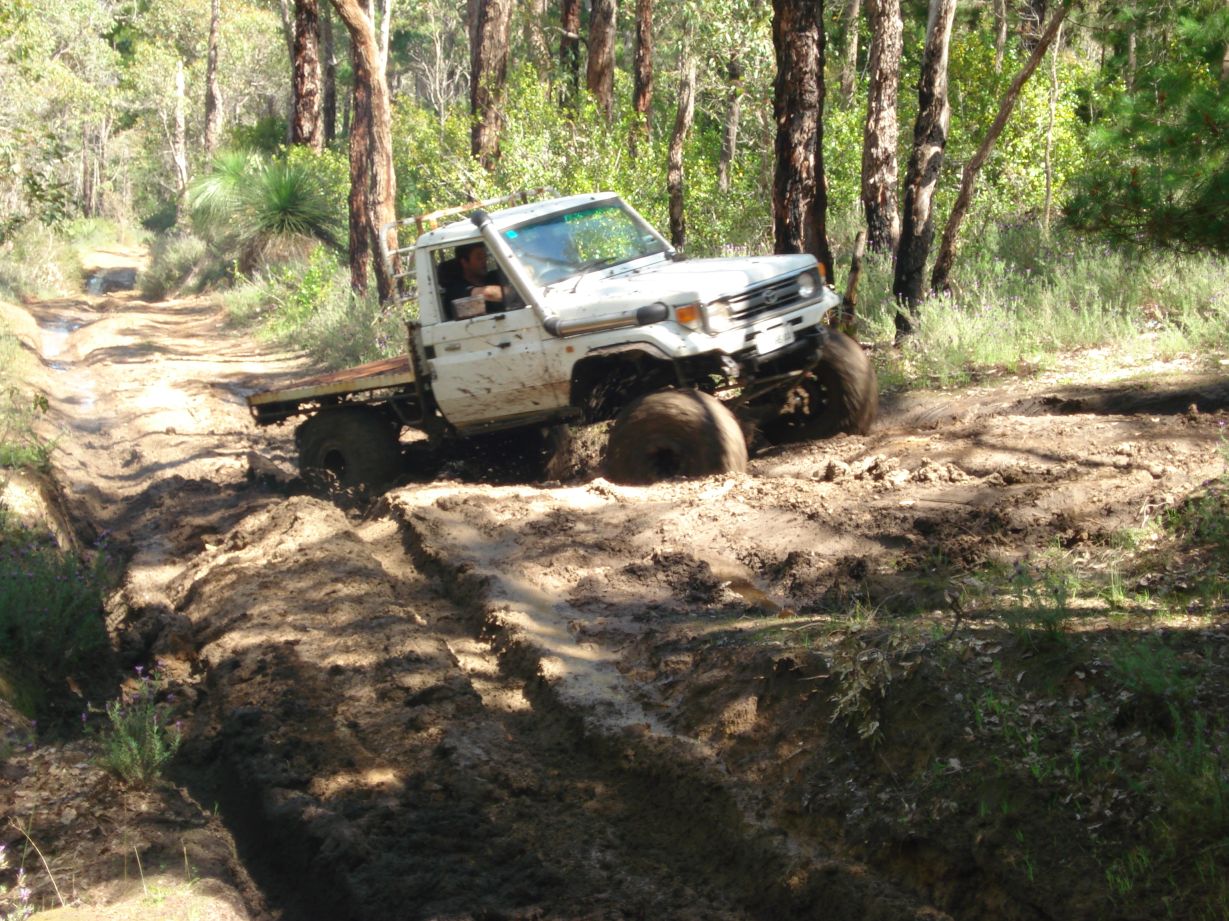
Quick clean
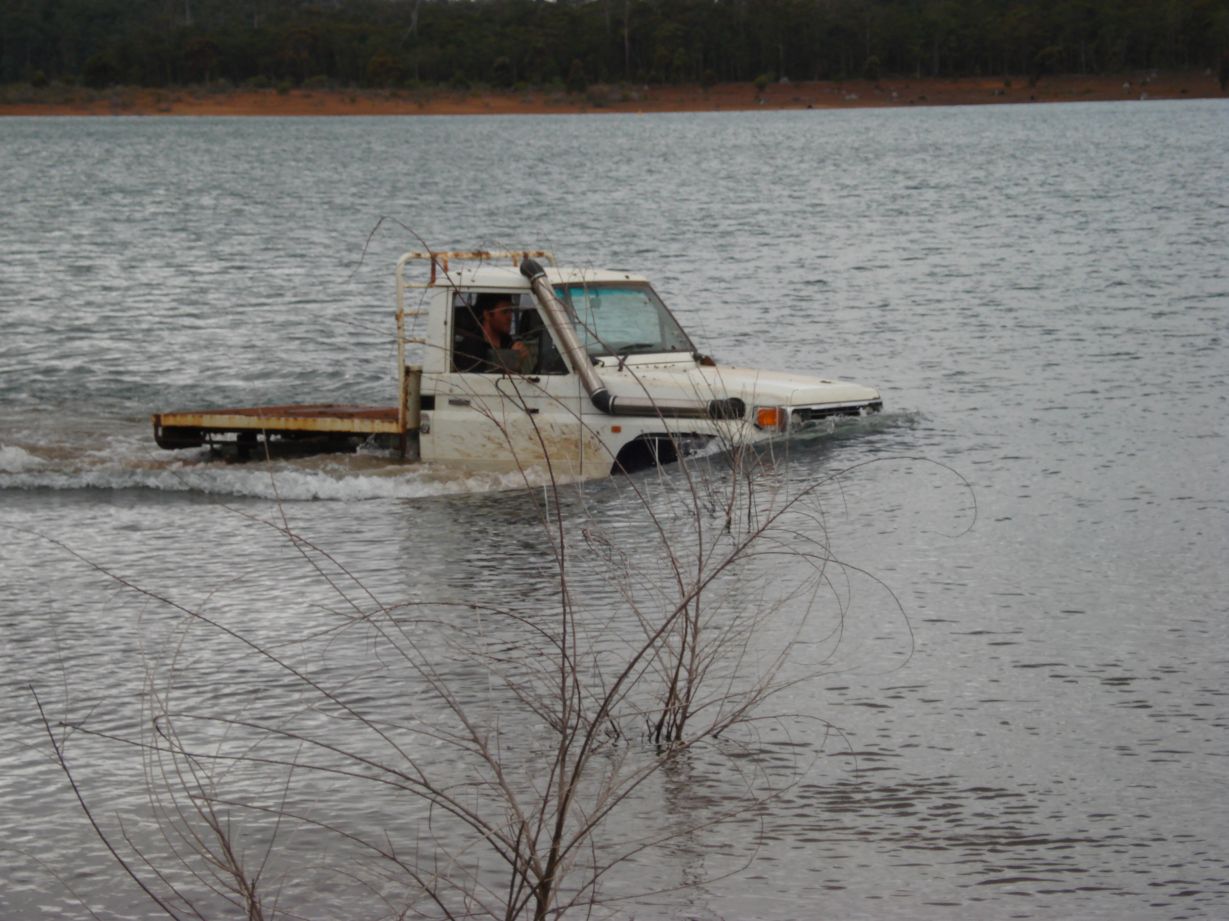
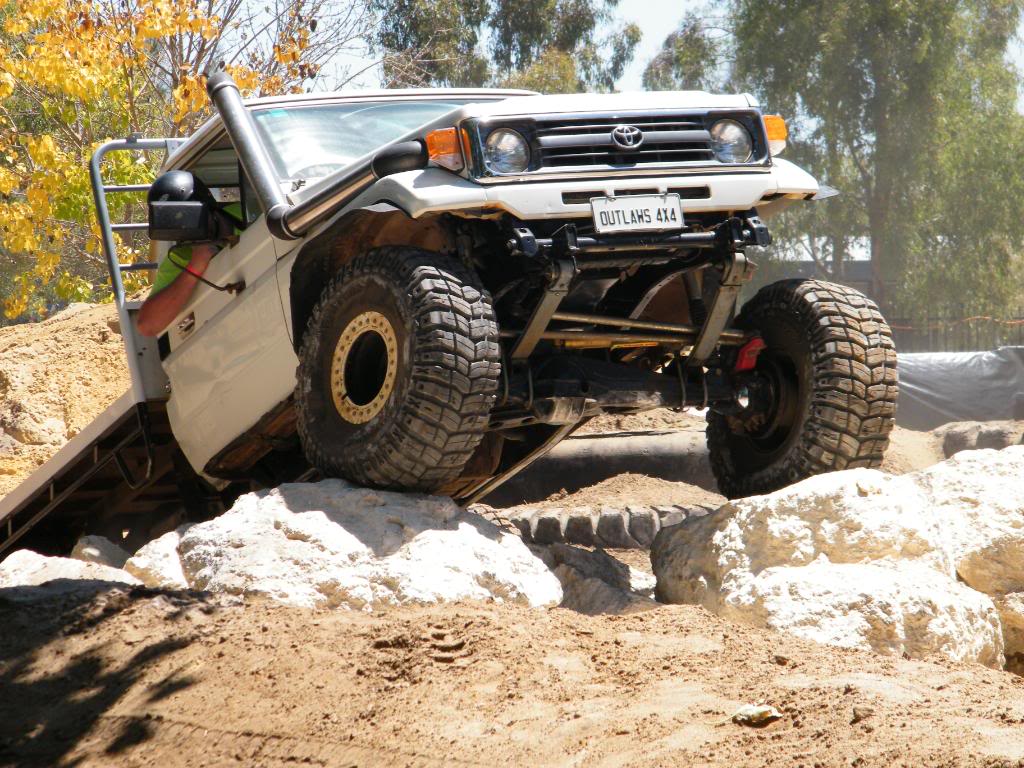
What an epic weekend…
Harvey tracks, collie and Brunswick tracks… it went off.
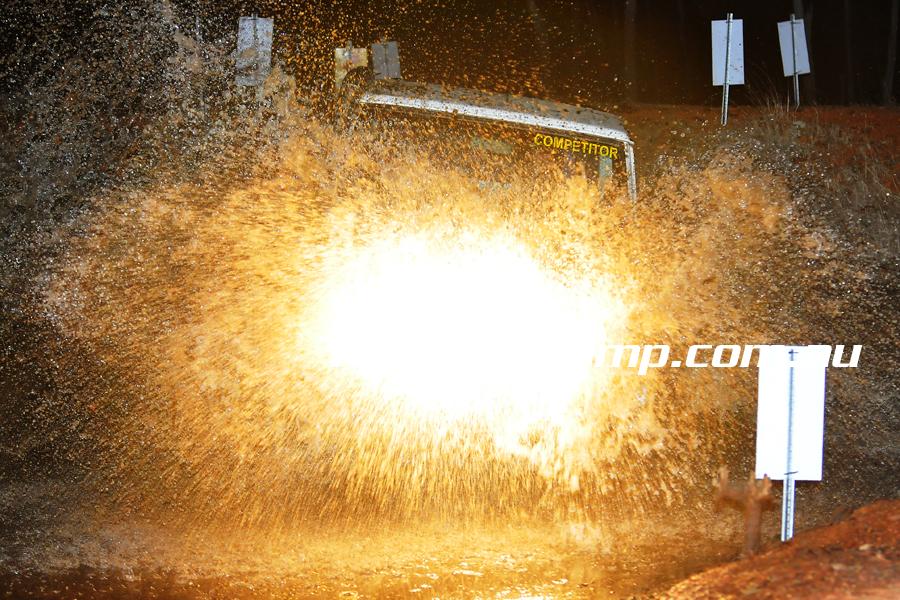
But i thought id start it all with a water crossing that ended up 3m deep.
The cruiser ended up totally under water with only the spot lights on the top of the roll bar out of the water….
Long story short, removed glow plugs cranked it and it was sweet.
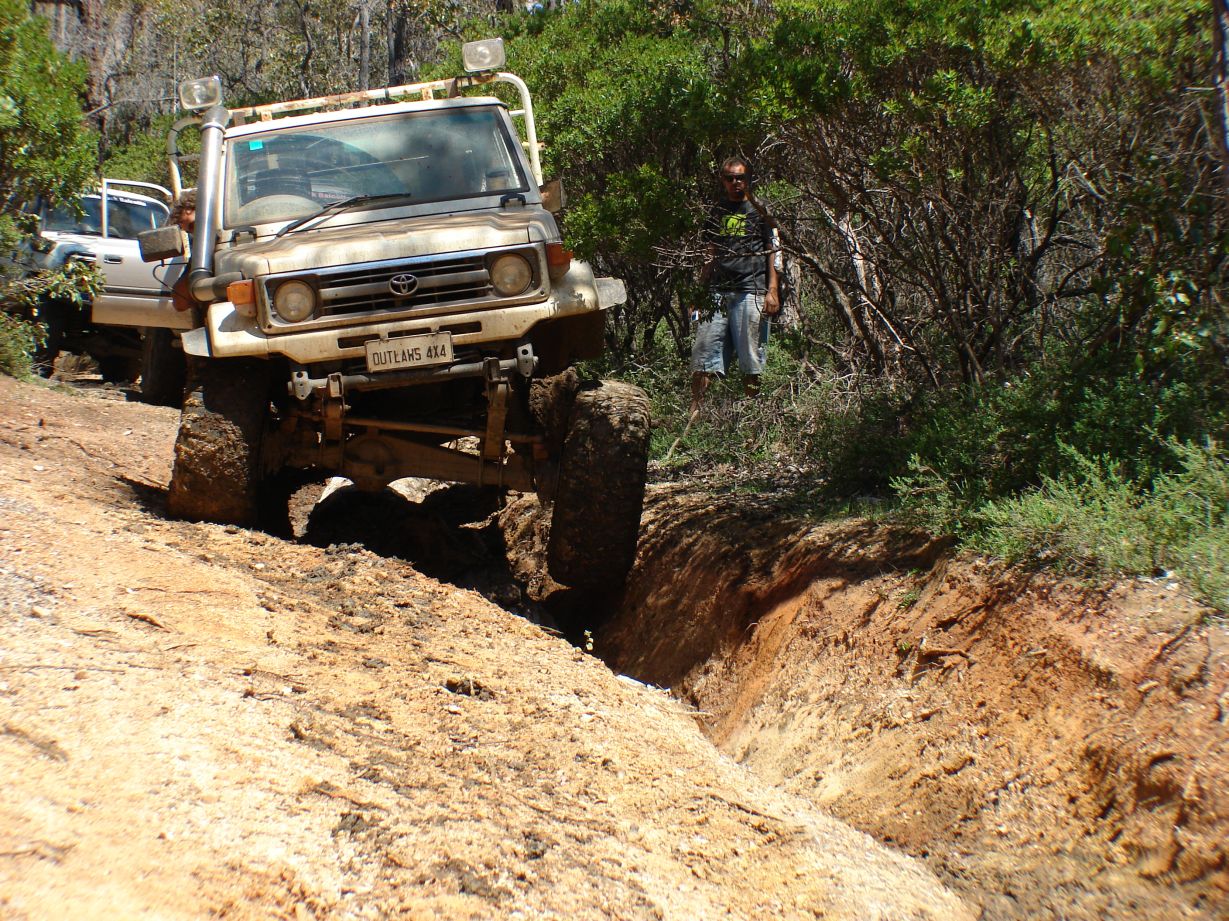
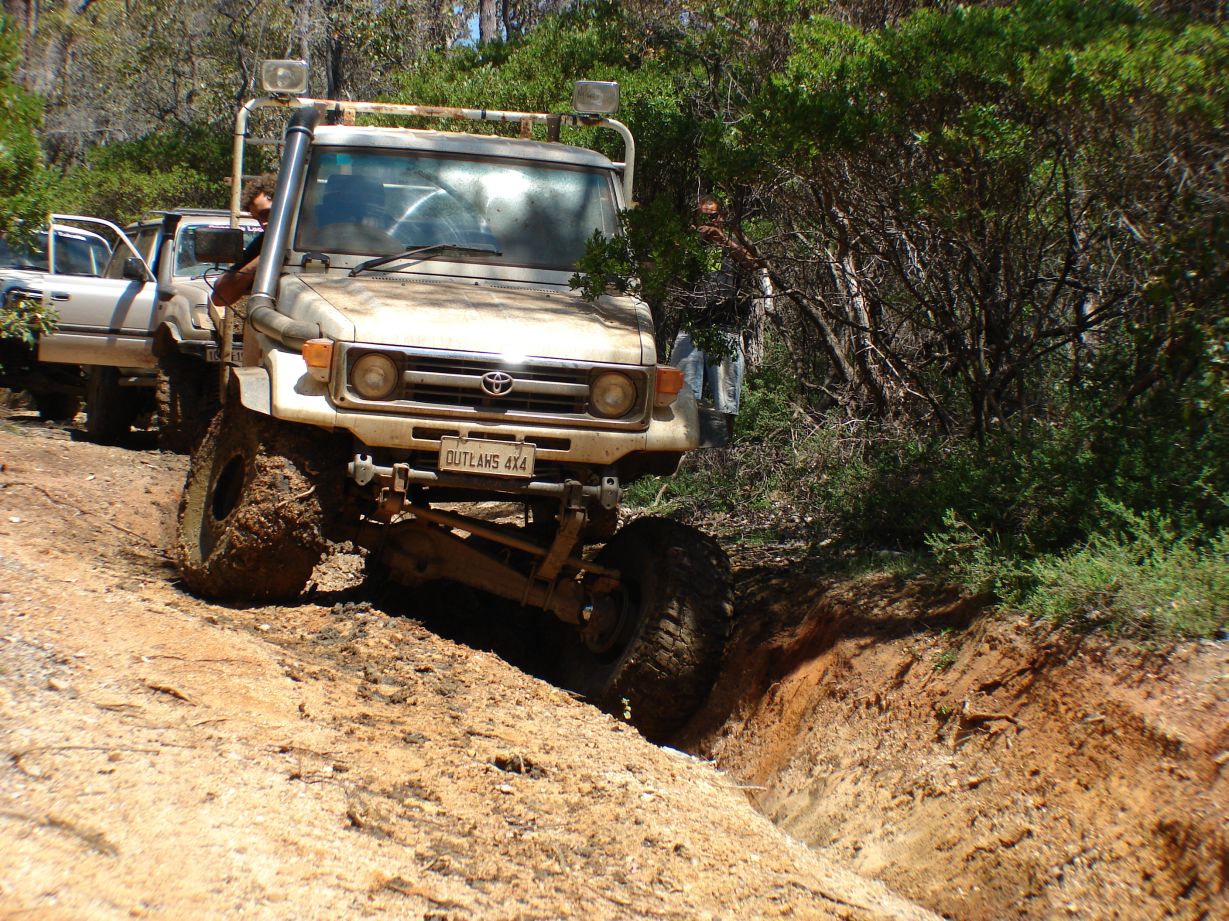
Tackled tracks in Harvey at night. Some totally Hard core tracks down there…
Did goat road sat arvo also…
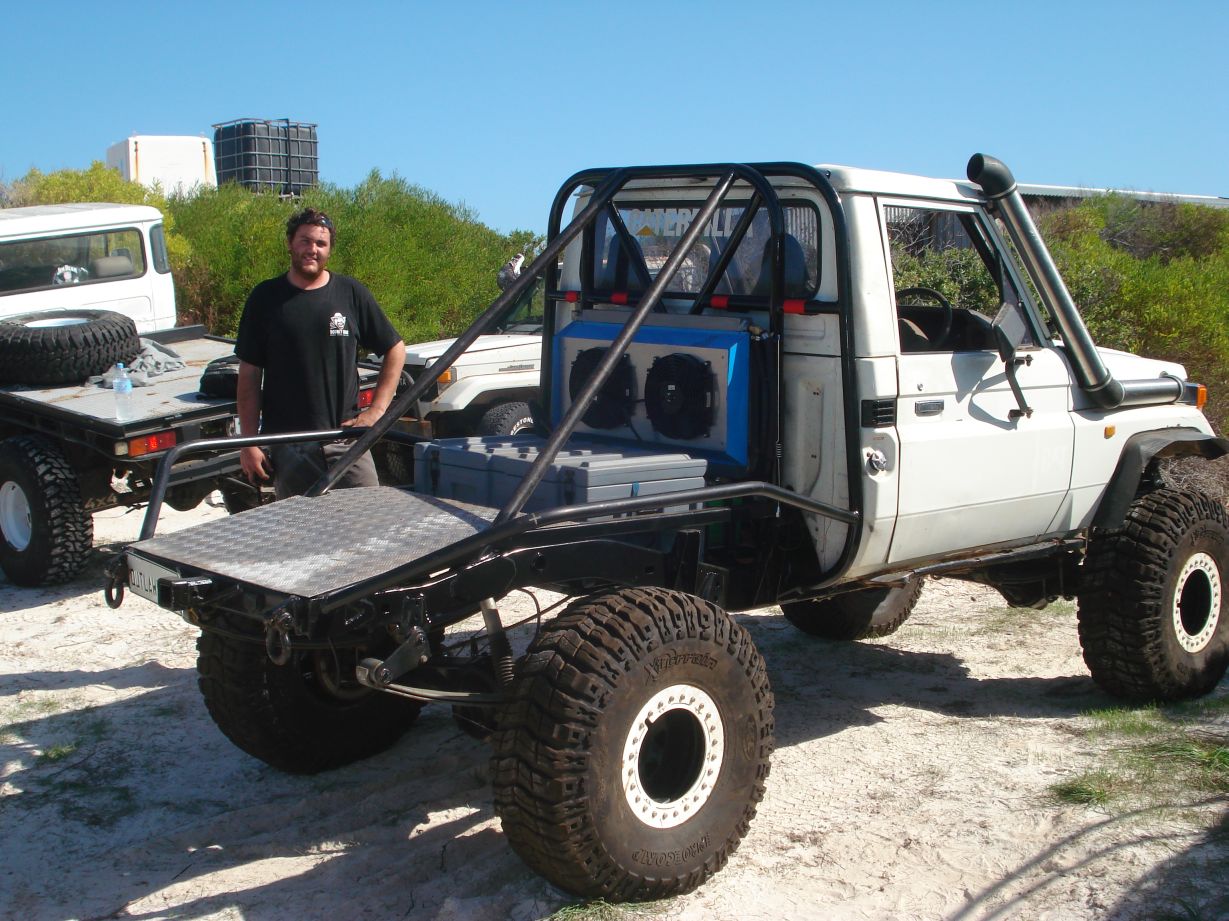
The 3 outlaws finally out and about together.
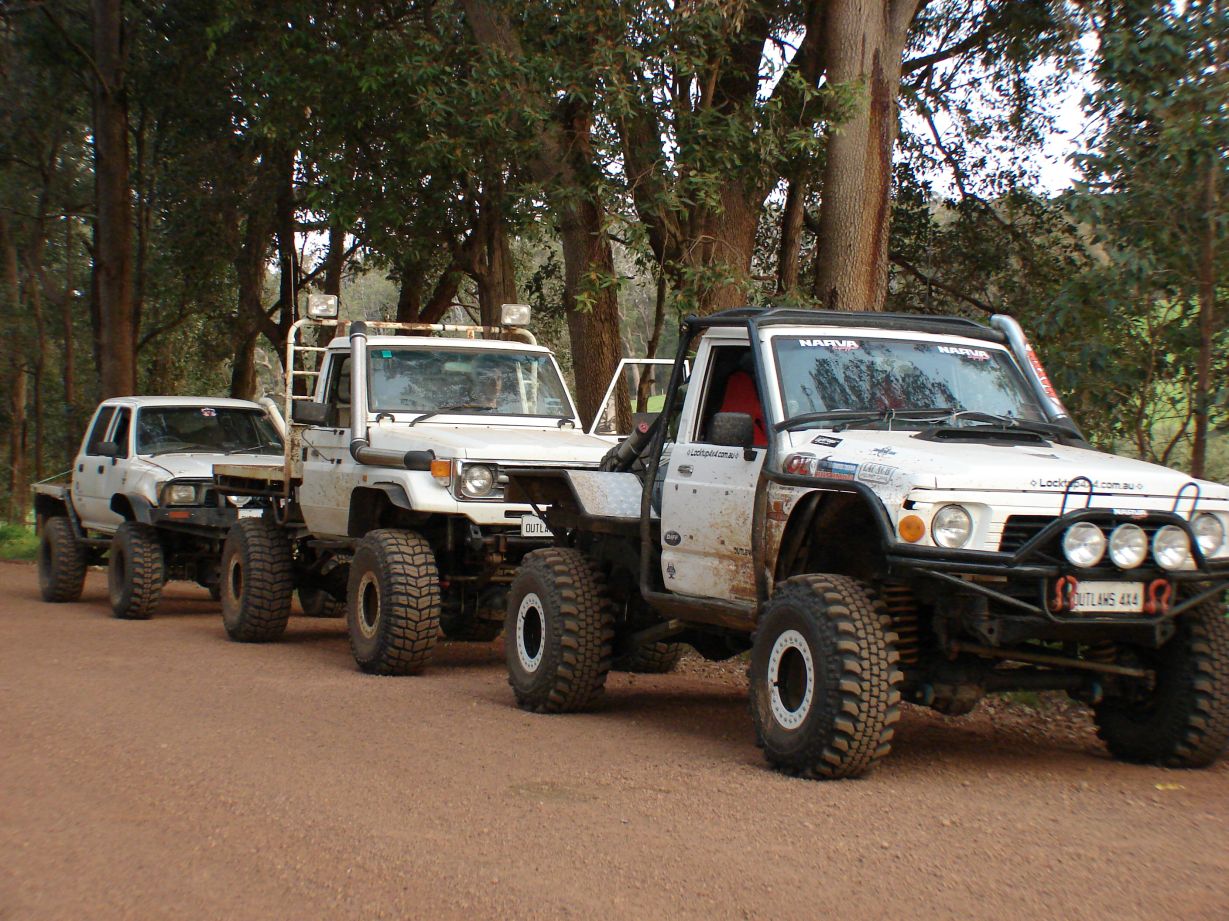
Goat road,
Very similar flex ash has a bit more on the rear but i have loads more on the front
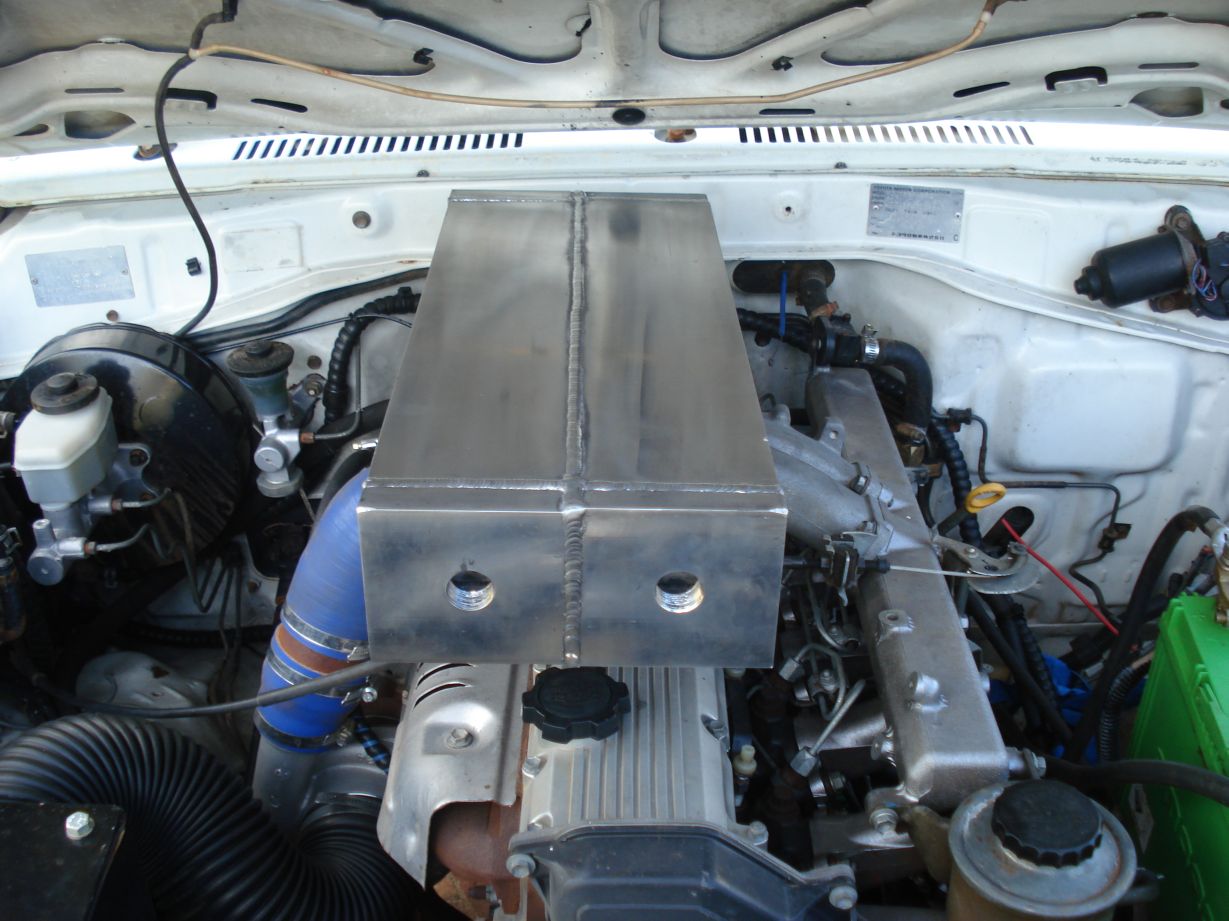
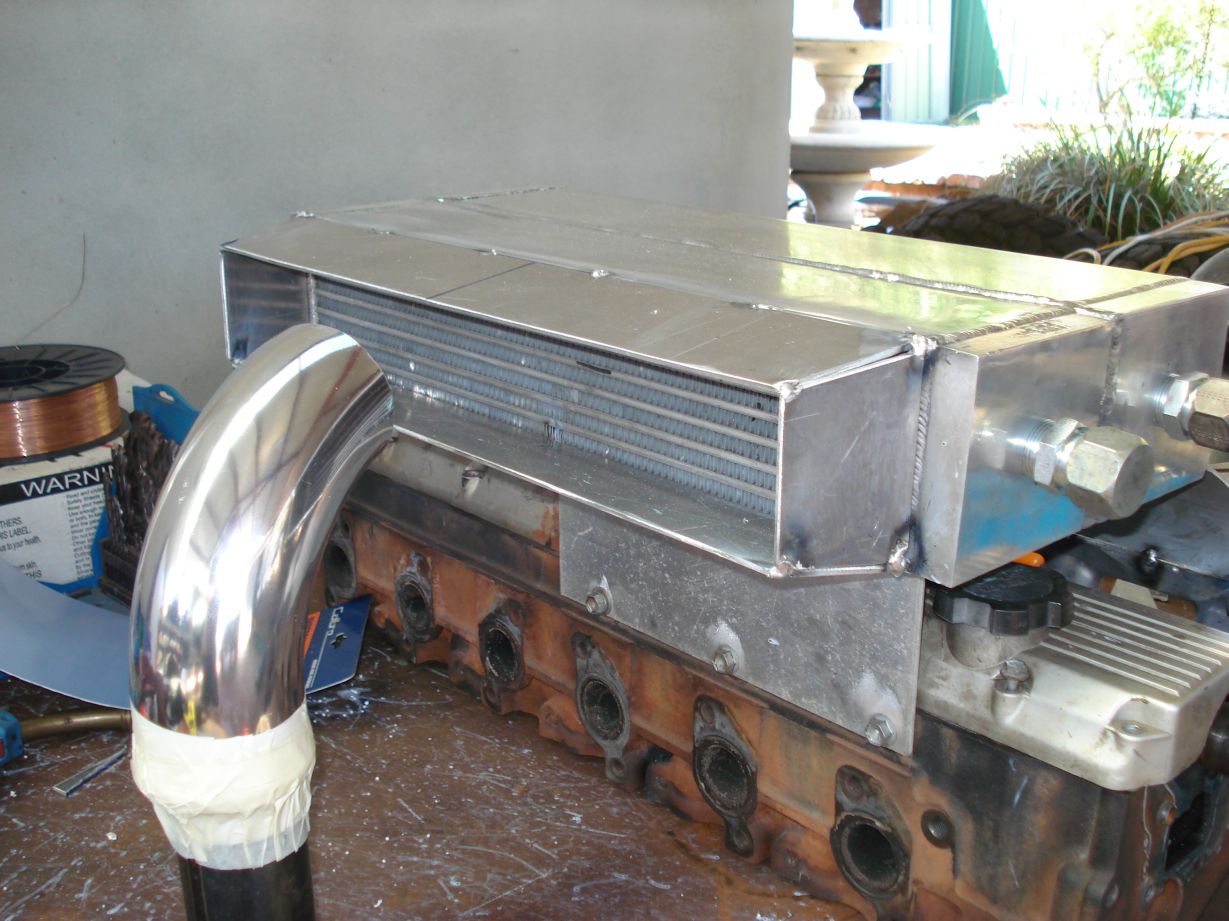
Well its almost time to unveil the 2nd stage in my turbo setup…
Water to air intercooler
Here are 2 spy pics 
Thought id make a post as its been weeks.
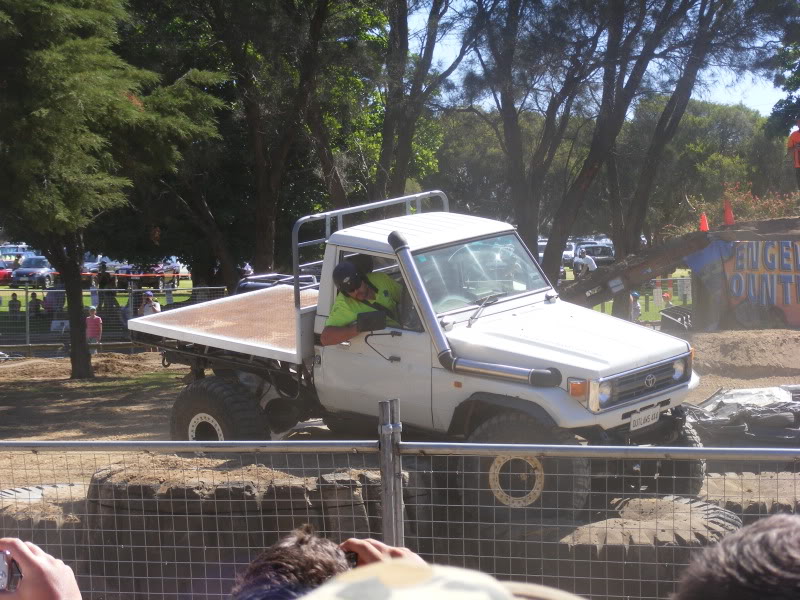
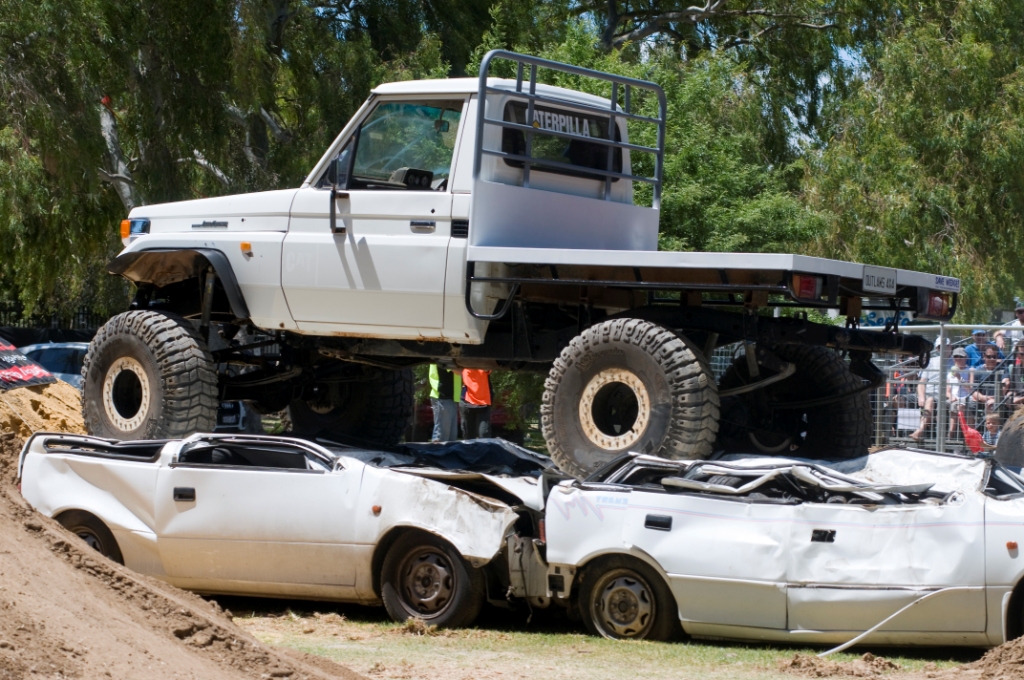
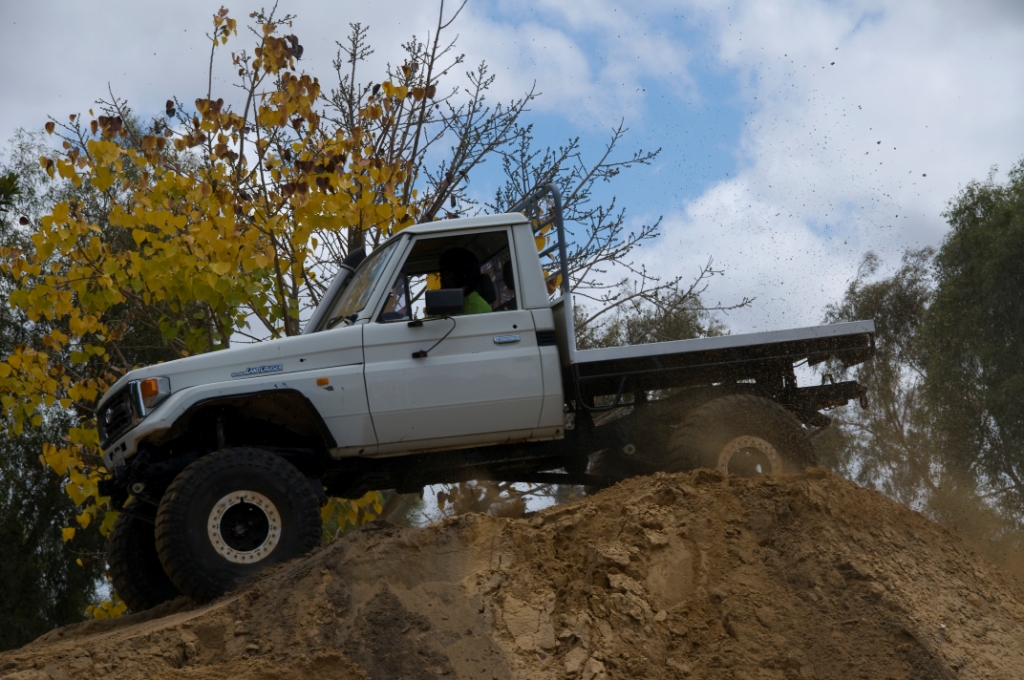
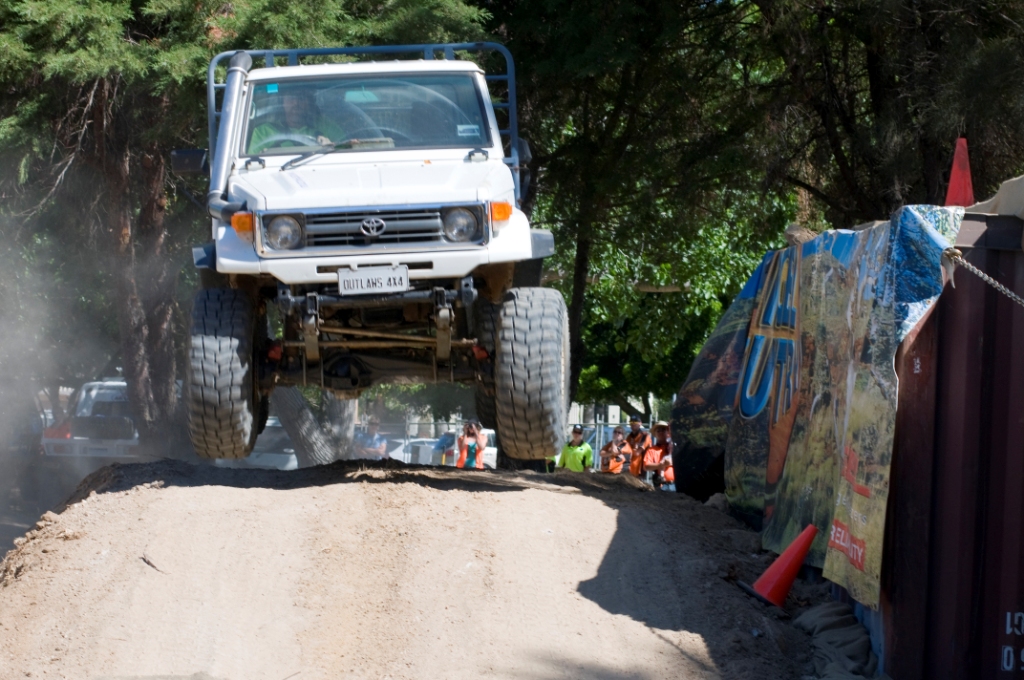
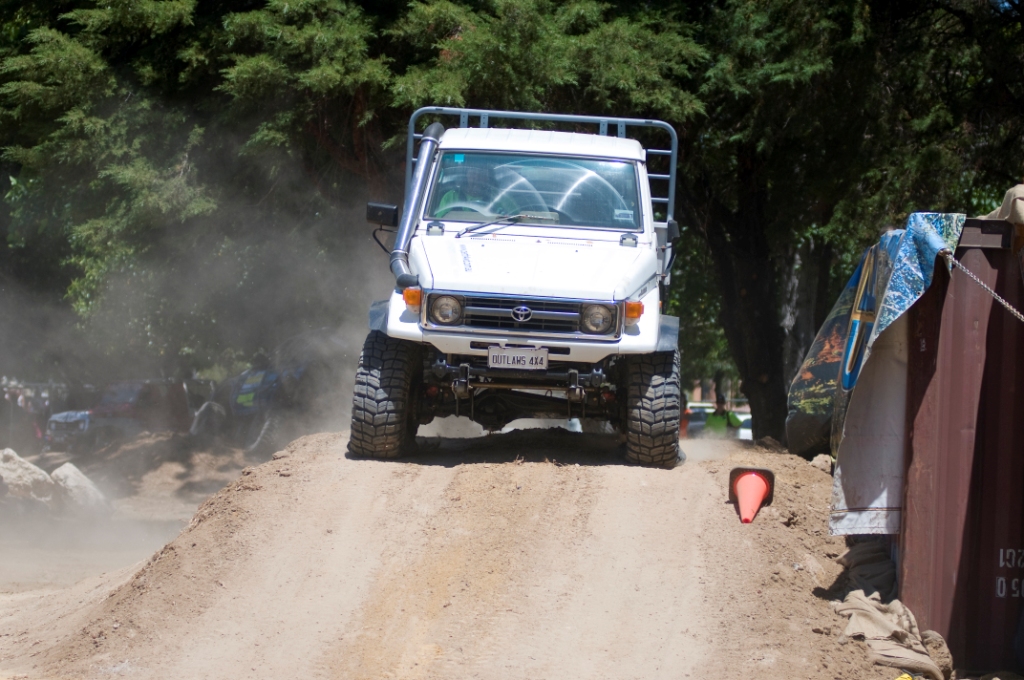
The cruiser was at the 4wd show the other weekend performing in the Extreme demonstration, i had a great time! Never got stuck never had any breakages and drove everything!
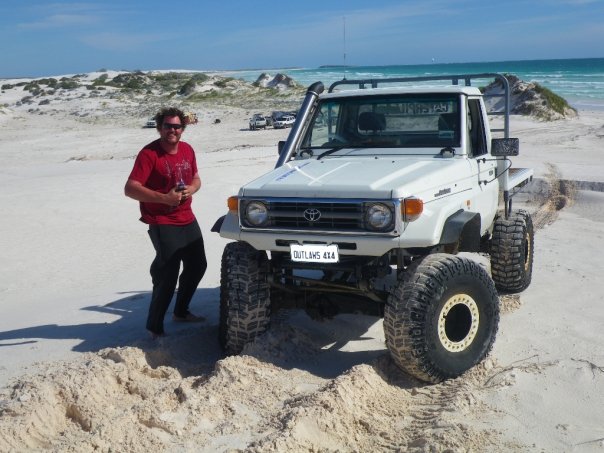
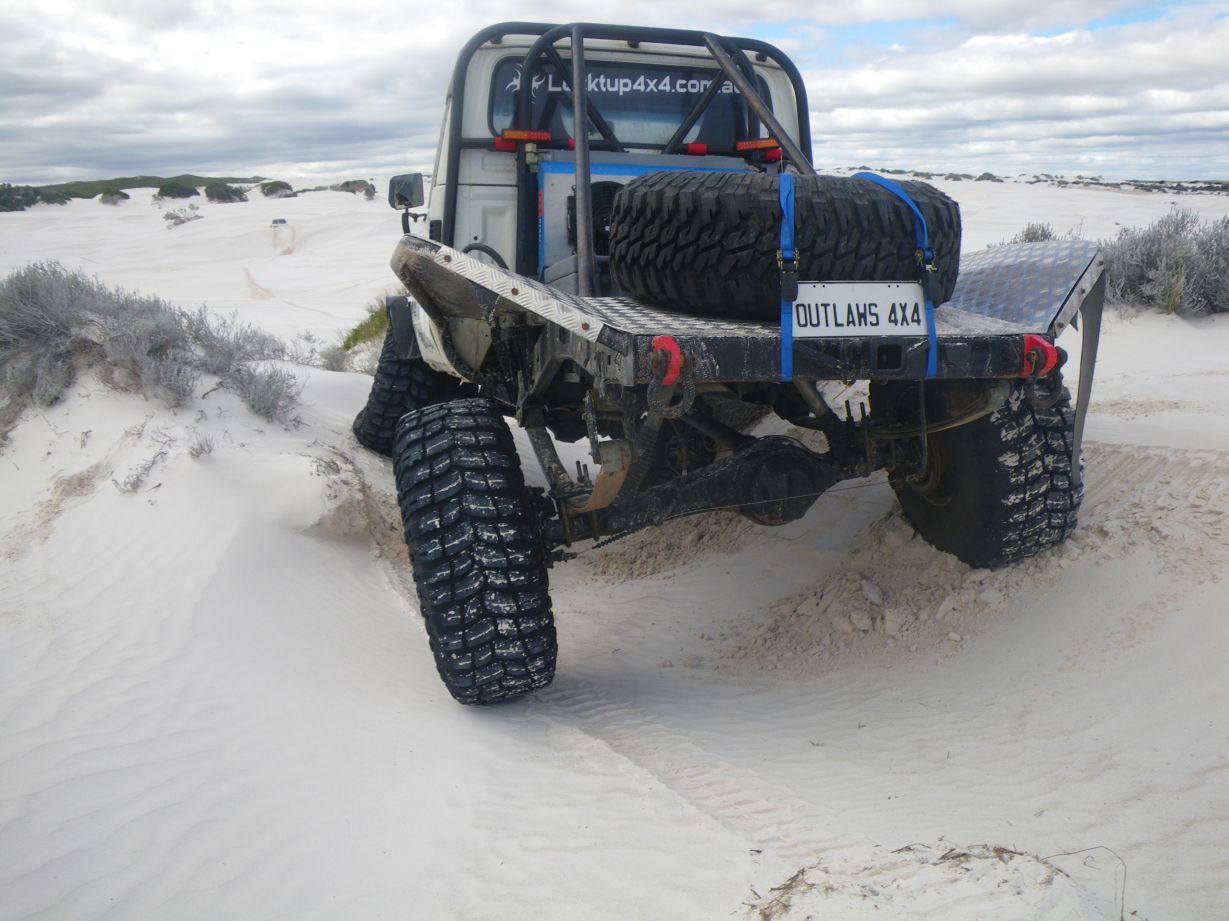
Last weekend we had a trip to wedge, went up friday morning early.
It was a great weekend even if it was windy as hell. Got some great 4wding done, broke a tie rod end that had been fractured at the show. Managed to source a new one in Lanno luckily. Both sprung over cruisers were up there too!

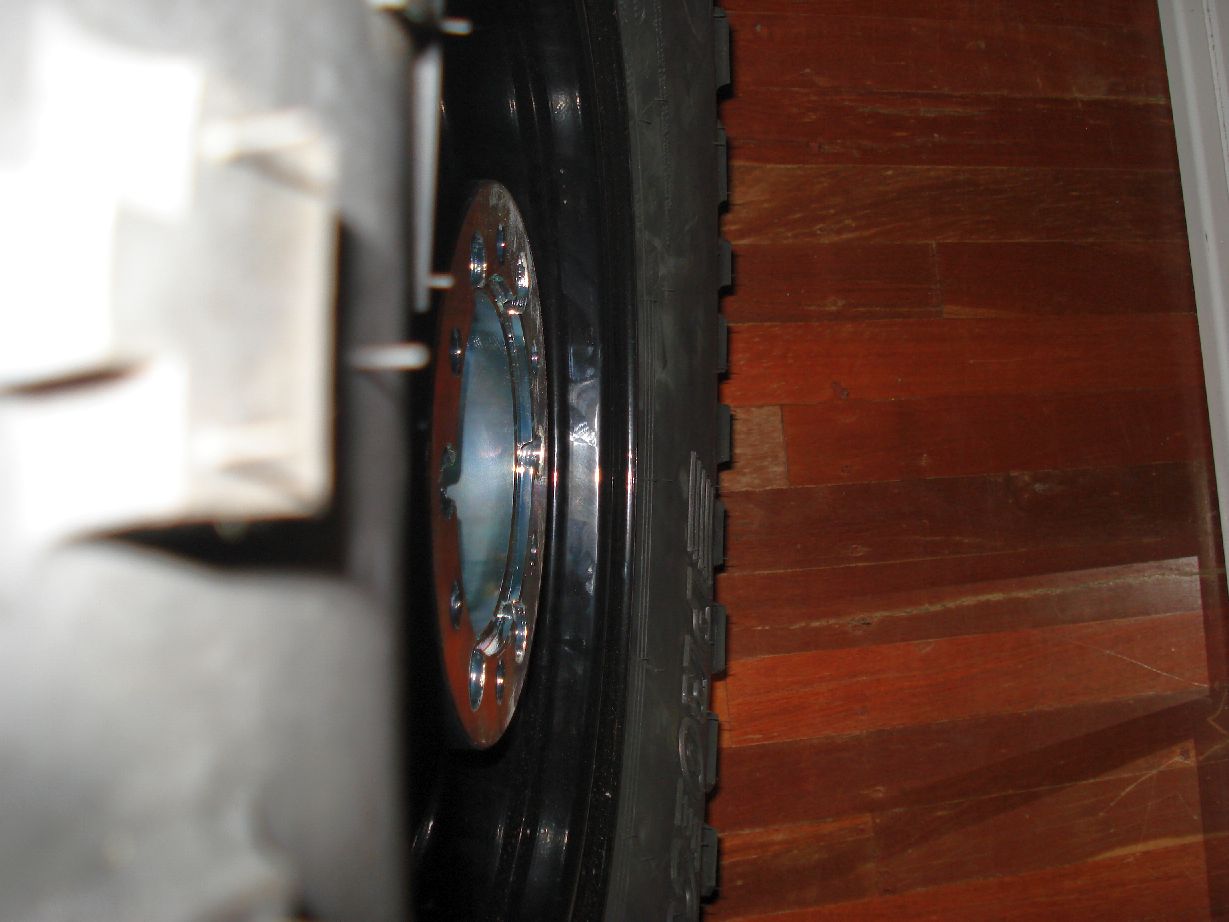
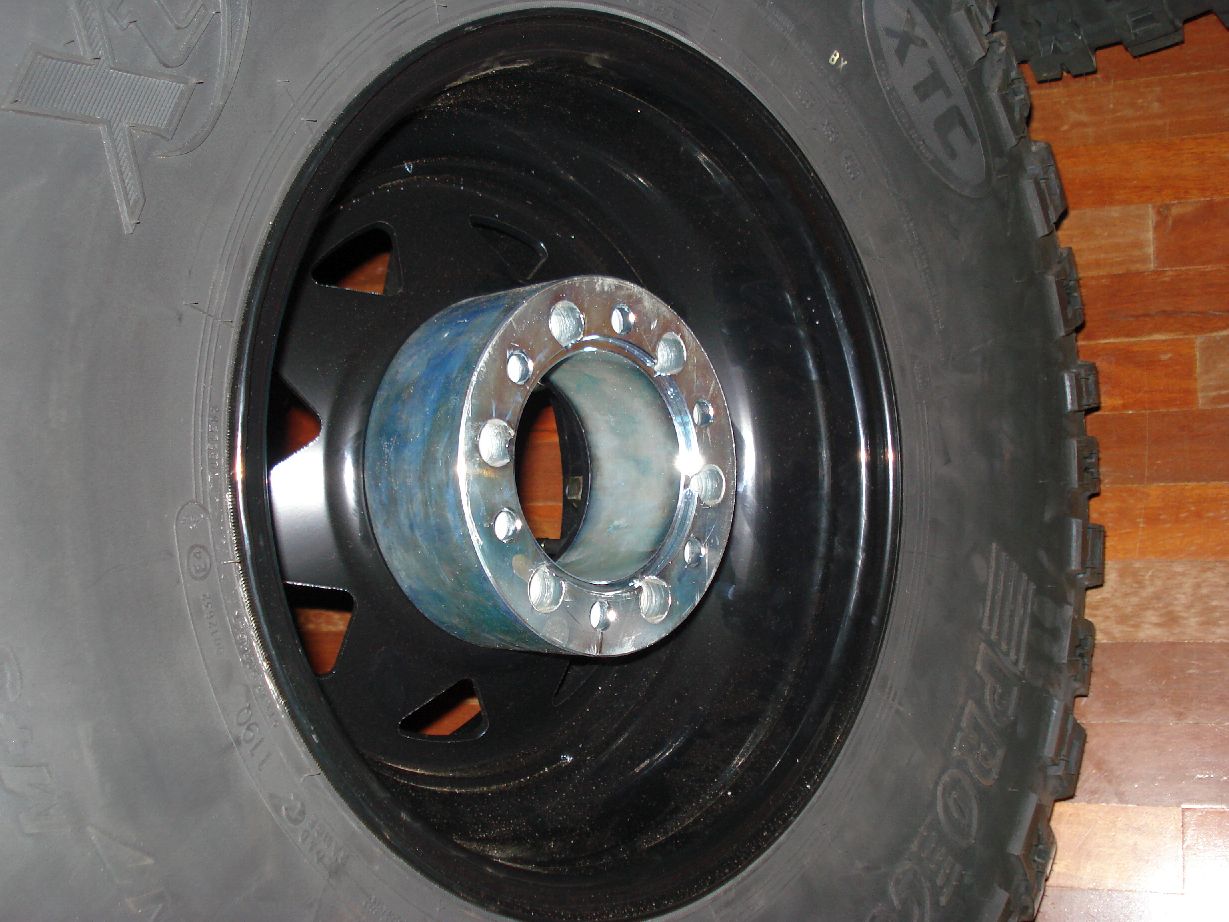
A common sight when running big spacers, big offset and big tyres.
And only after about 1000kms
A spy pic so you know im still moving on the intercooler idea
It has started…
No turning back now!
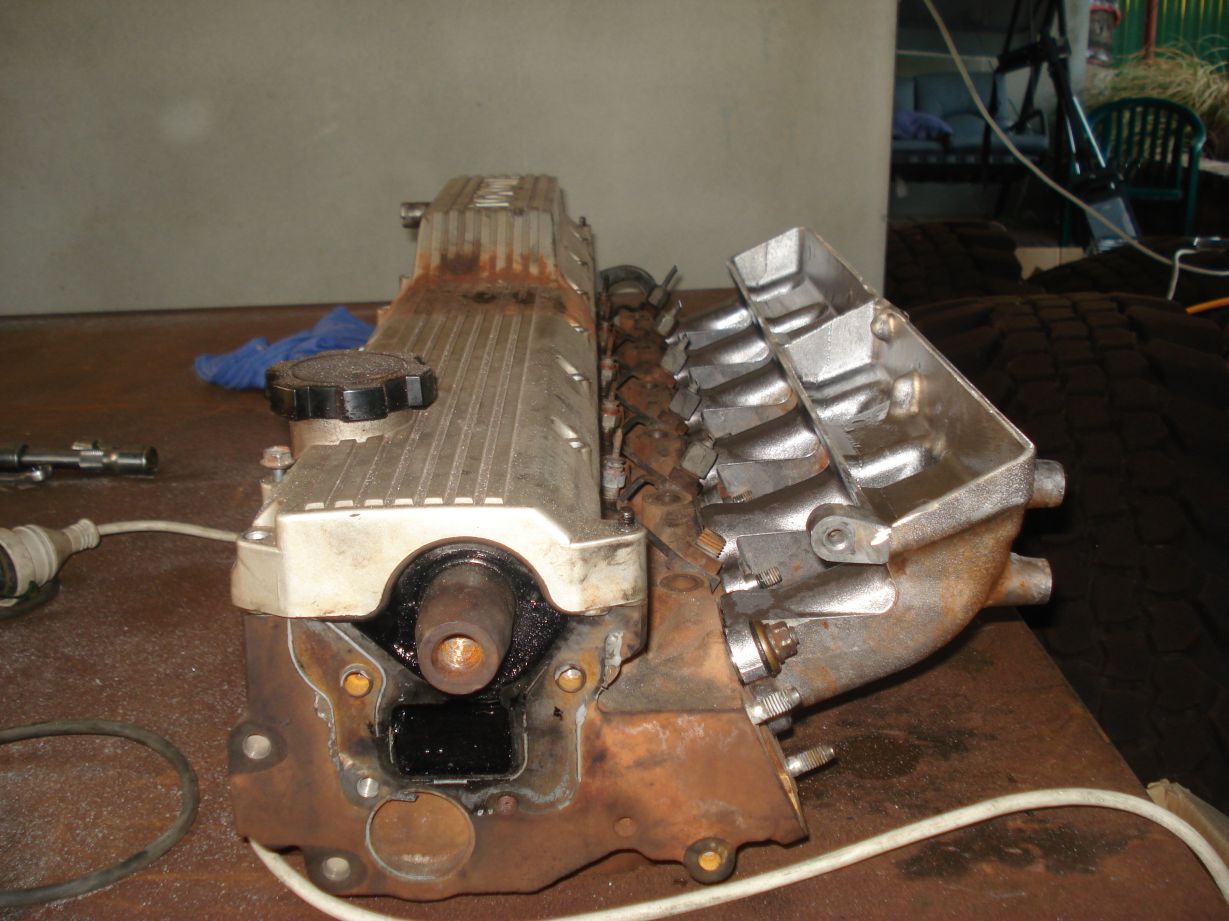
This should get me a lil more poke for WOZC… not that i really need it hahah!
Bit of an update,
Its mounted to the head nice and rigid, i have started to tack the parts together for the air tubes.
3mm high tensile ali sheet is impossible to bend by hand or even with decent tooling. Ive had to get it all rolled… ah well

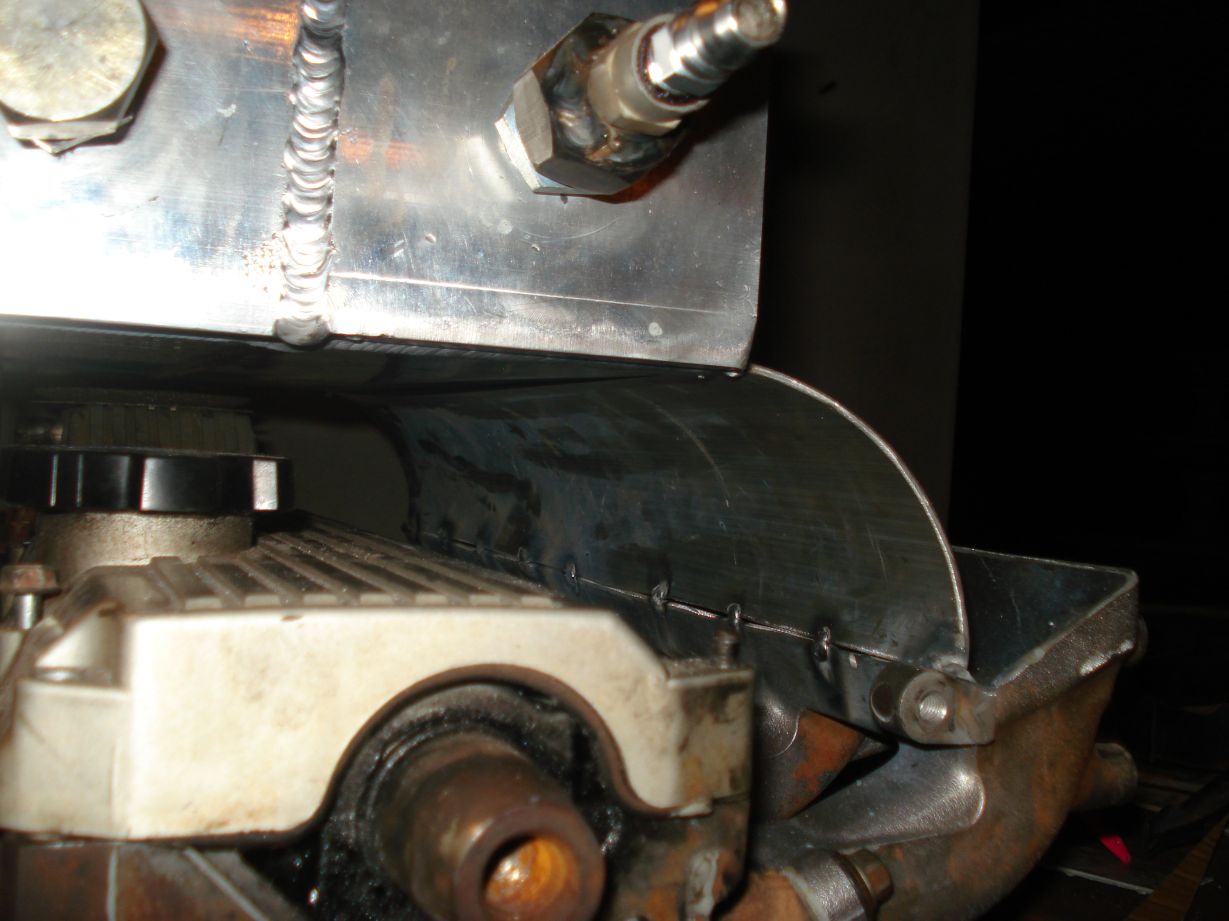
another update,
Started on the funnel side, i have to get the other piece rolled b4 i can finish the manifold side.
Its gonna take some specky pieces to go from the 3″ bend to the funnel.
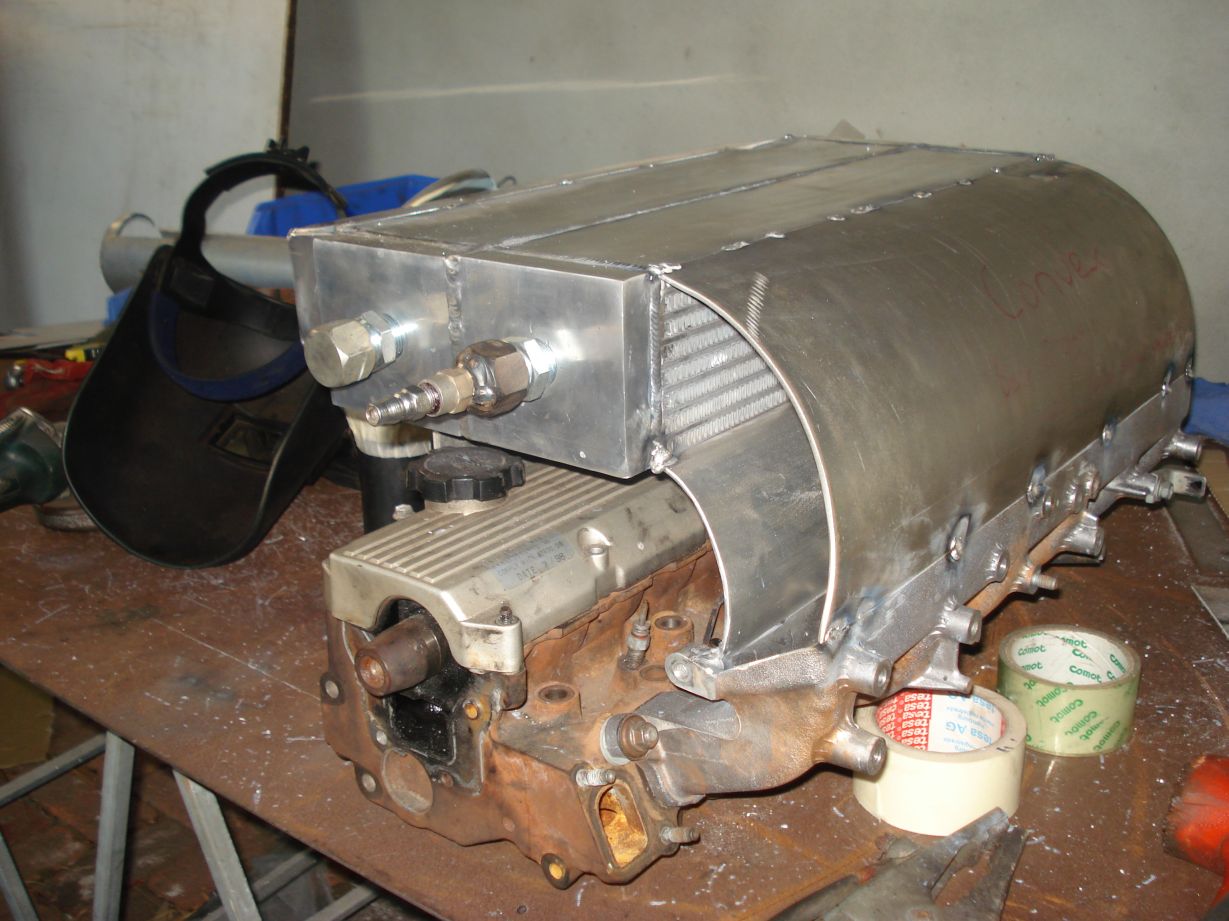
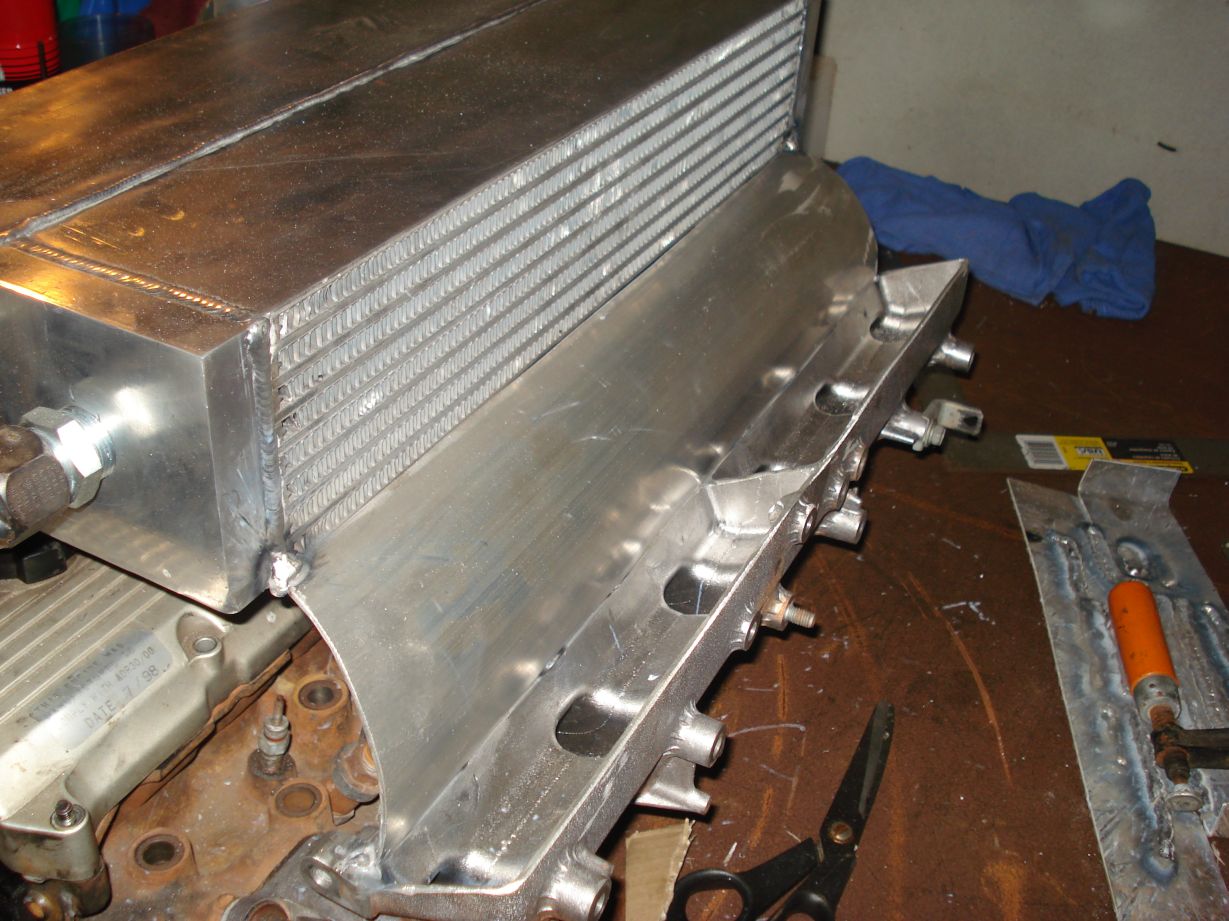
Cooler is gettin closer to completion, work is getting flat out so havnt had much time to work on this.
Got the funnel sorted atleast, just have to replace the top section with a single piece.

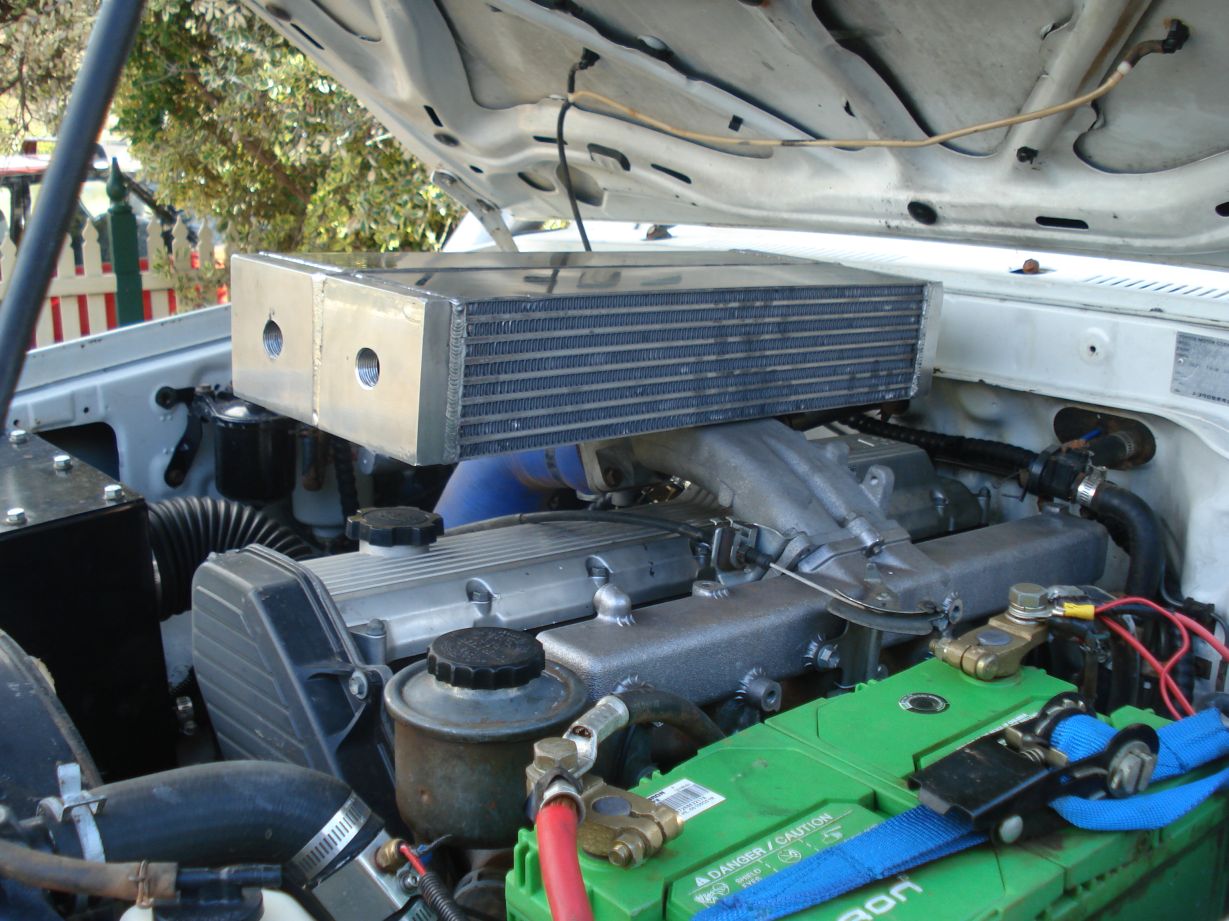
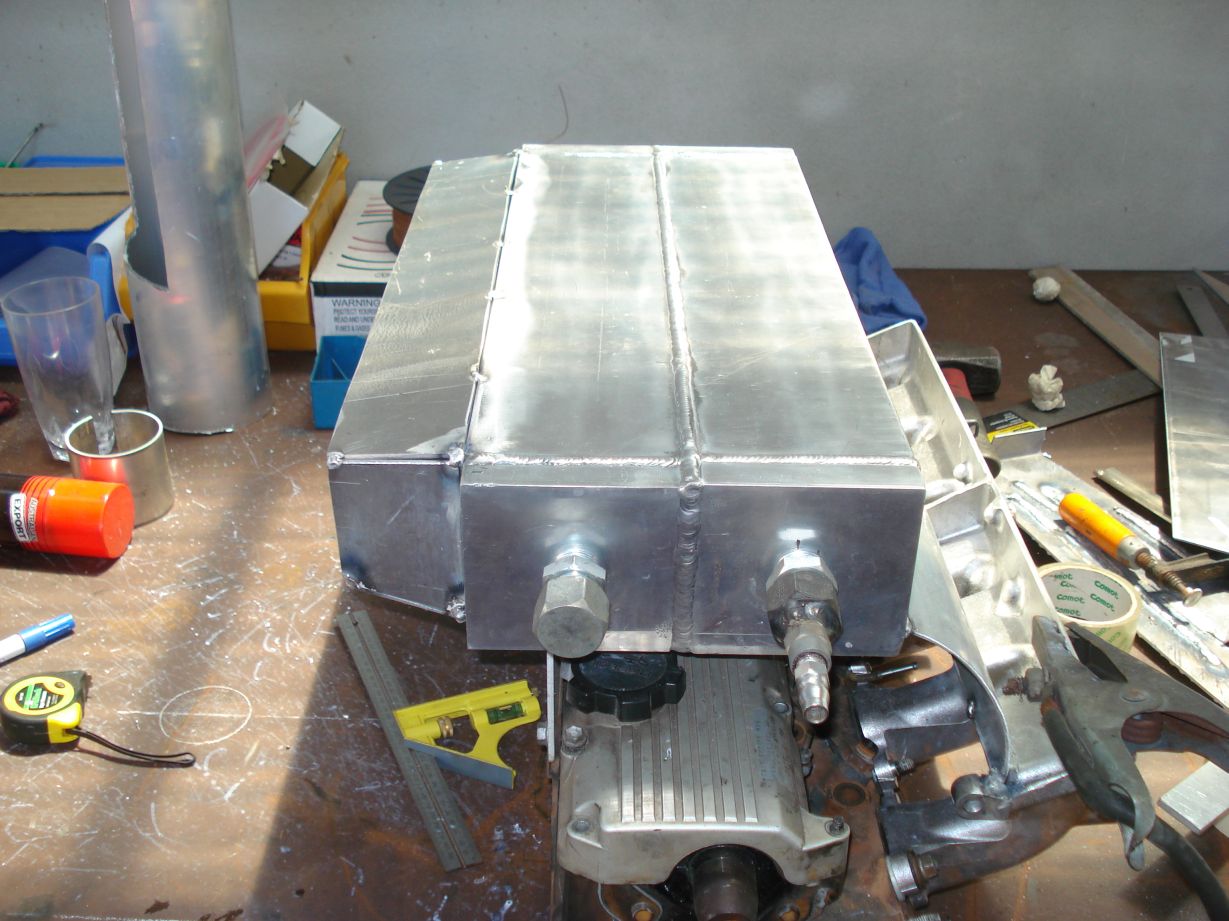
Now for some reason my bonnet wont close…
this must be why!
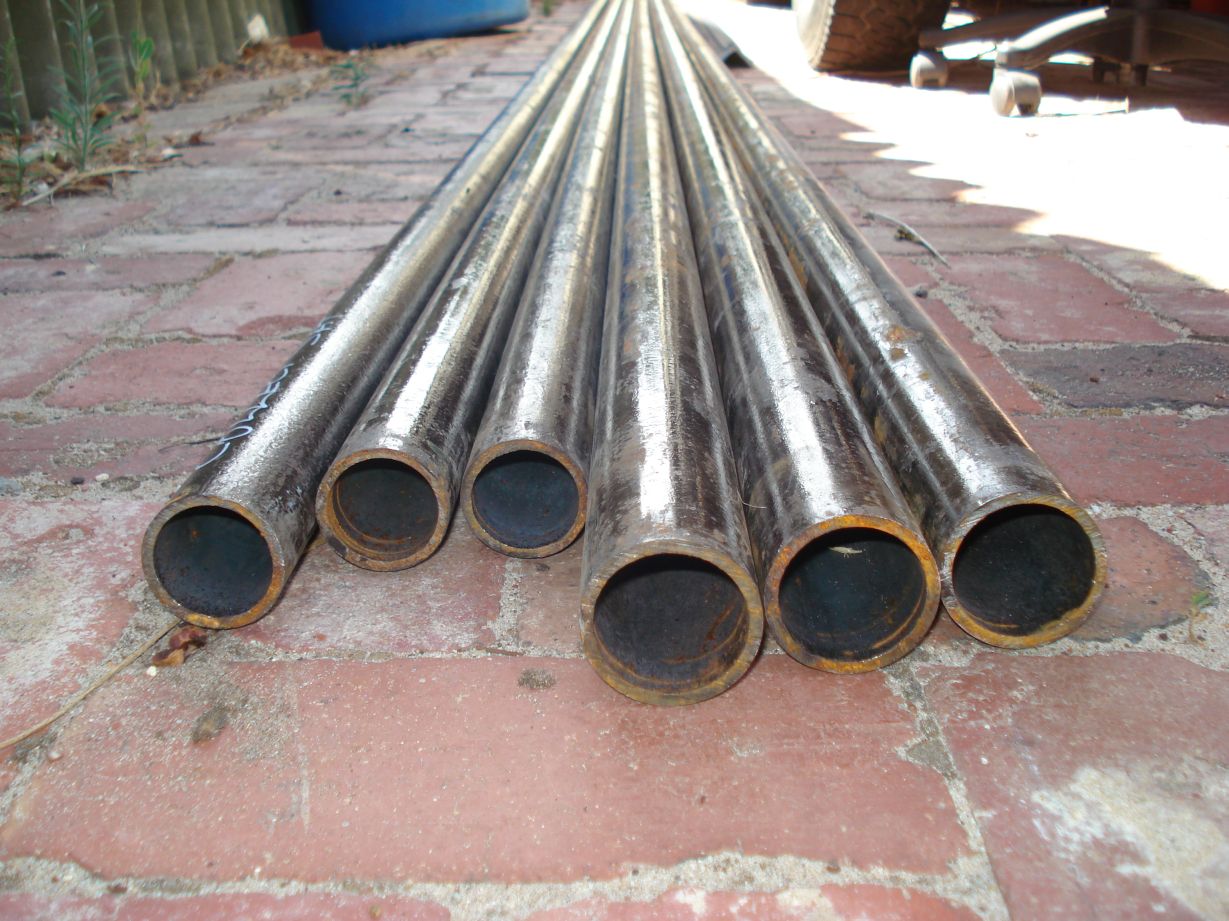
Picked up some more goodies on sat.
18m of NB40 Schedule 40 and 18m of NB32 Schedule 40. For the cage, tray and front bar.
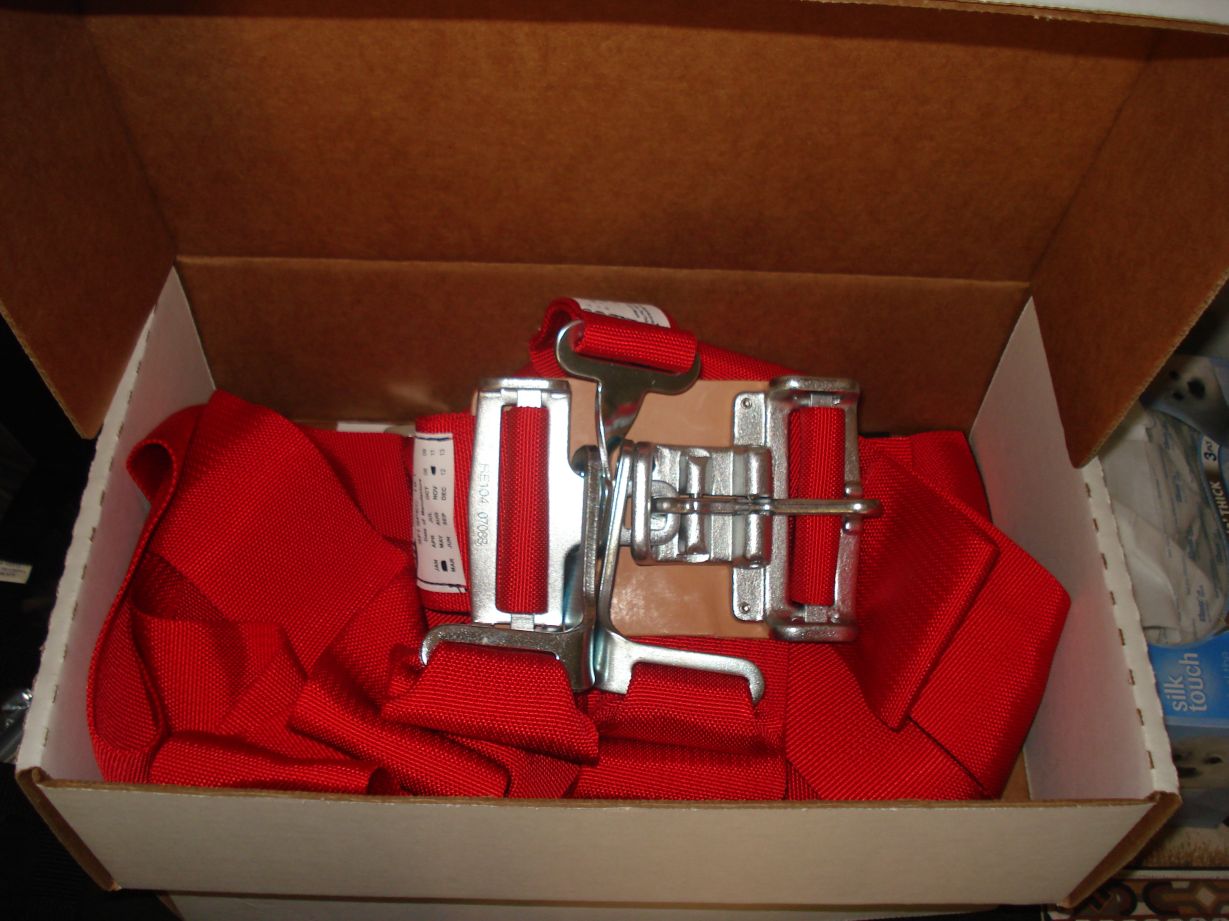
Window nets and 5 point 3″ harnesses

I got a hold of a few pics from the last outing for the WOZC teaser.
Found my limitations in driving stoopid lines .

Spent the day at ash’s place, made a deal… He tigs up my cooler and i strip down the GU engine.
Big thanks to ash for this one, although i think it worked out best for both of us. I didn’t want to mig the cooler for fear of wrecking it and ash didn’t want to strip down then GU engine for the umpteenth time.
Took a few photos of the hot shot in action…
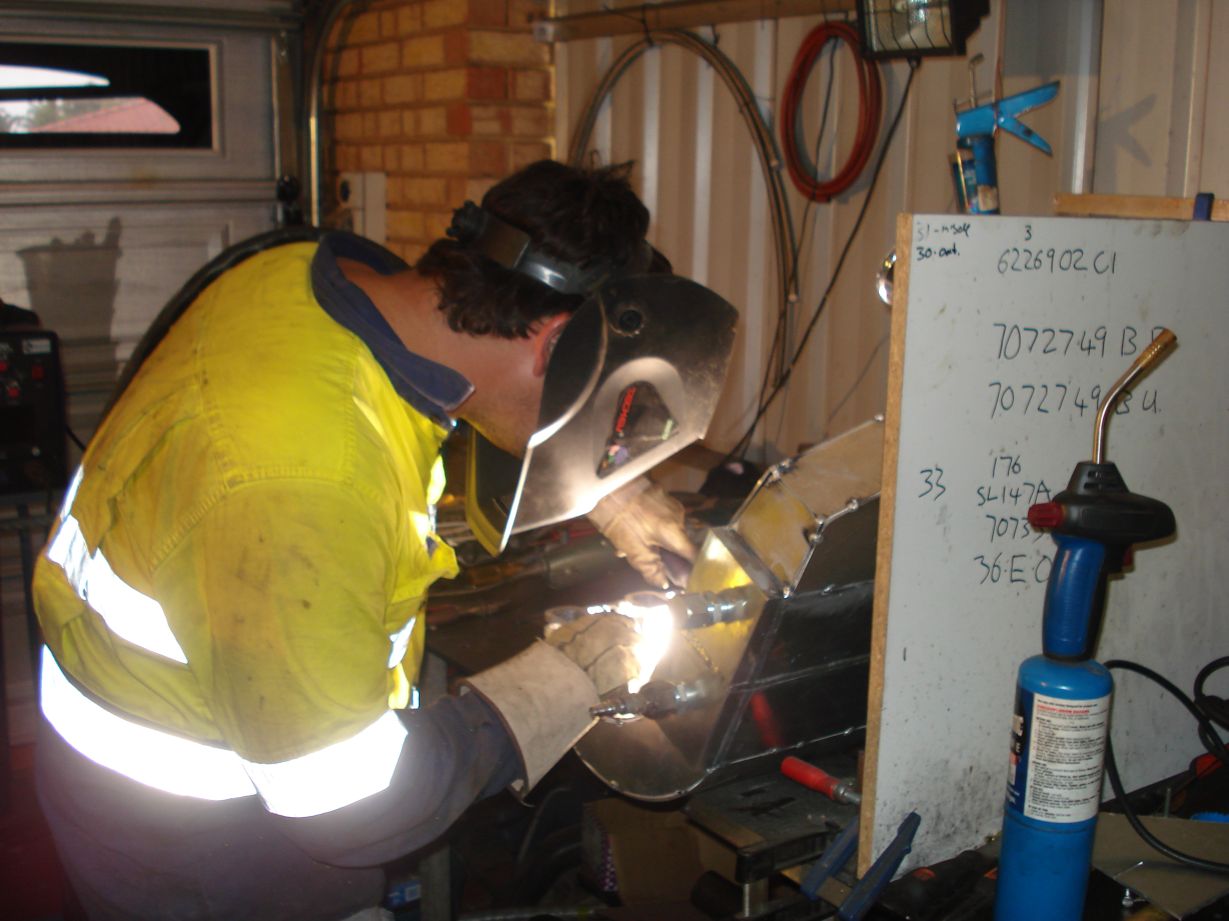
Now i just have to tap in some barbs in the back of it for waste gate, pump and gauge then clean it out and pressure test it.
Hey all, got a photo pack from the 4wd extreme show. Big thanks to Amanda and co. for putting on such a great do sat night. If there isnt anyone else who wants to go and show off at the show this year then count me in again!
Here are some of the pics

and this is how u bend a heavily braced front diff hehe
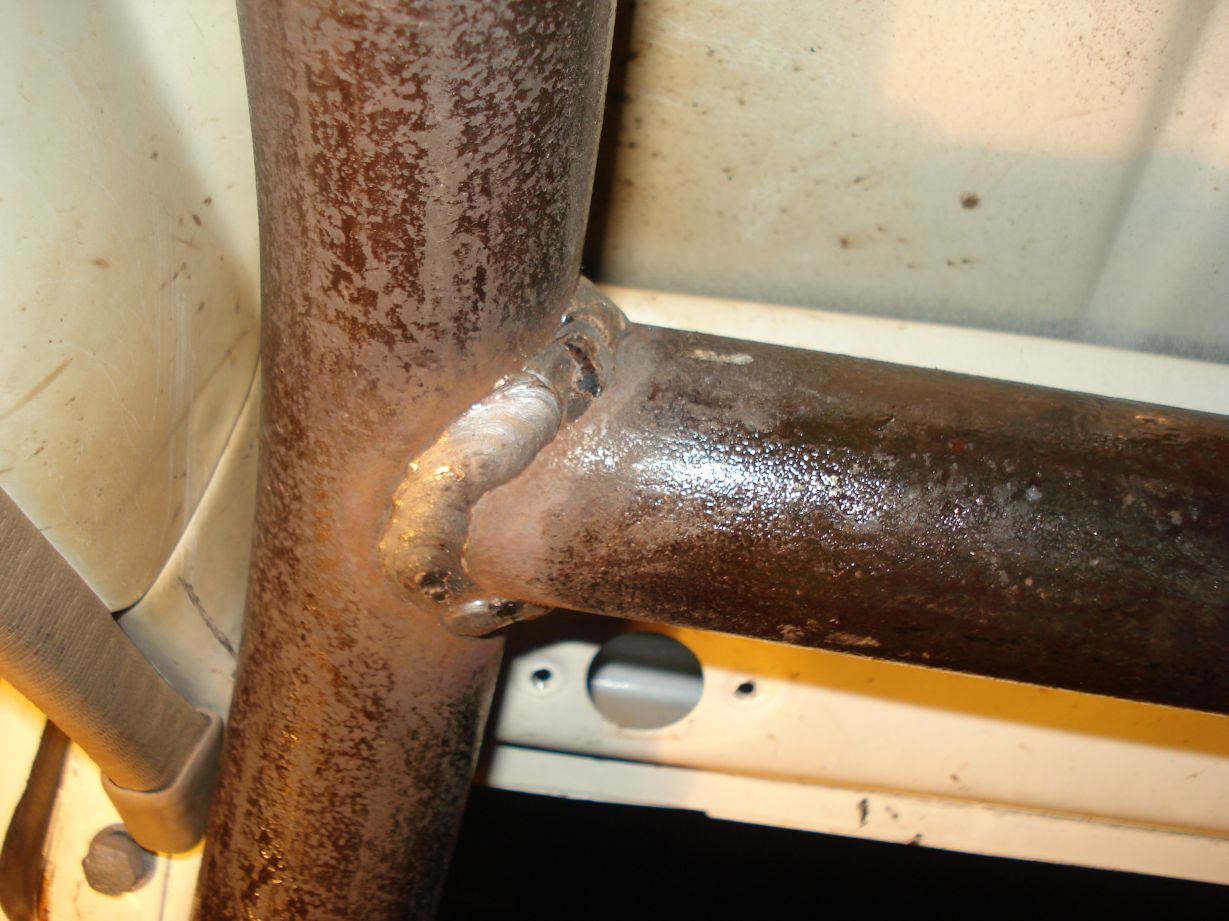
Started on the cage, im not so sure on it at the moment.. but it may turn out alright.
First i plated the rails with 6mm plate where the bars are to mount to.
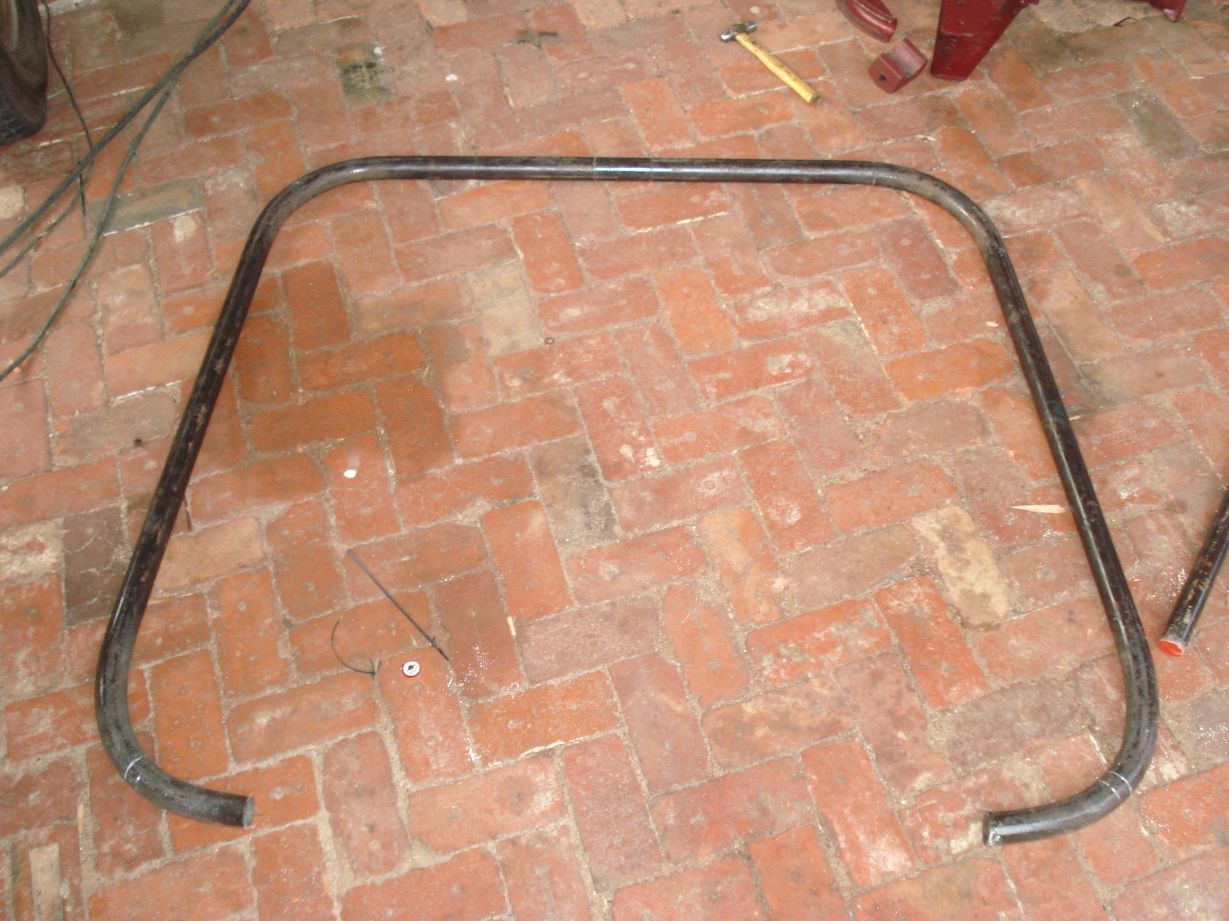
Then bent the main and secondary hoop.

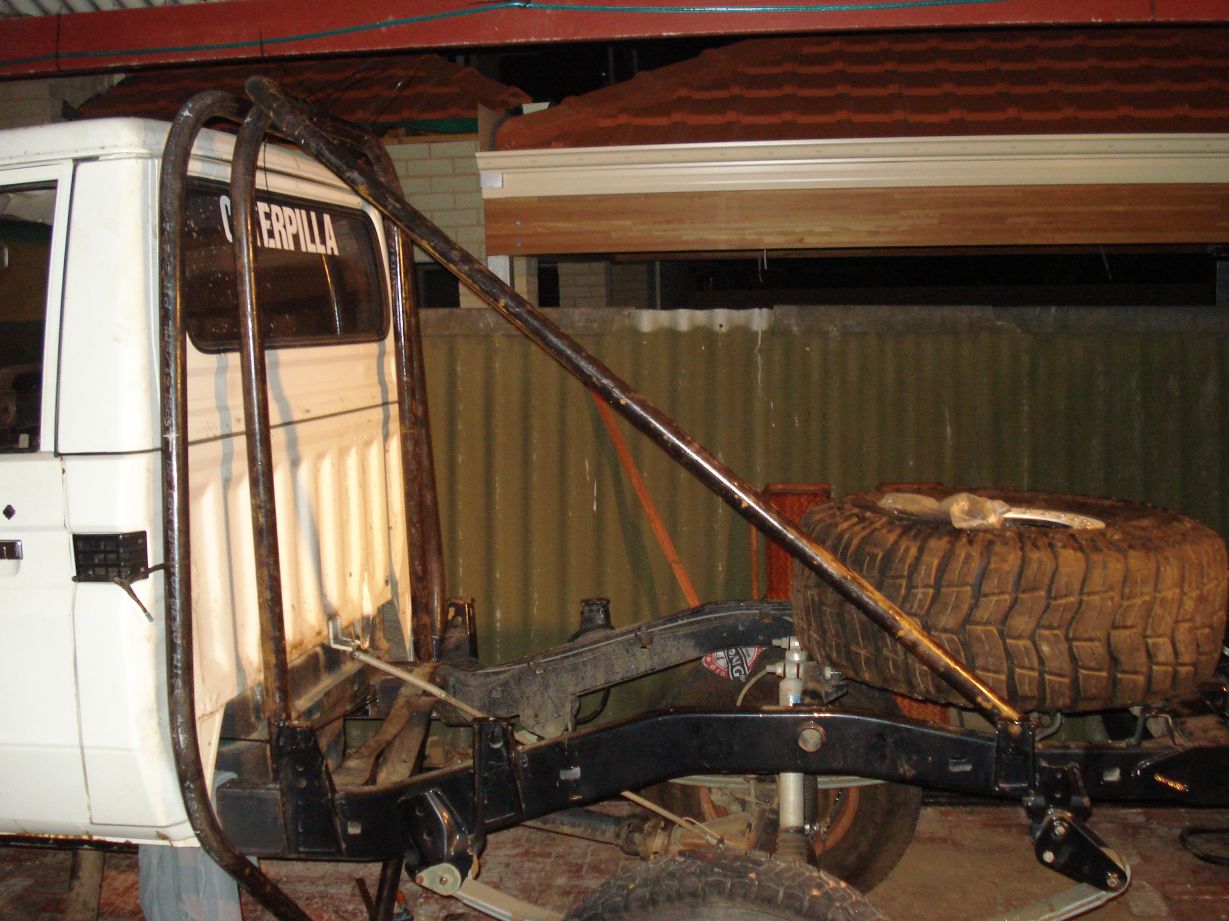
Im not sure if i should run the back stay to there or run it further back to the rear of the car. Remembering that im going to be cutting the chassis back some time next year for the change in rear suspension.
Obviously the back stay will be mounted to the back of the main hoop not like it is there ontop with cable ties
Hey all, quick update.
Main and secondary hoops done, just need to wait for some lack of wind to weld it all up.
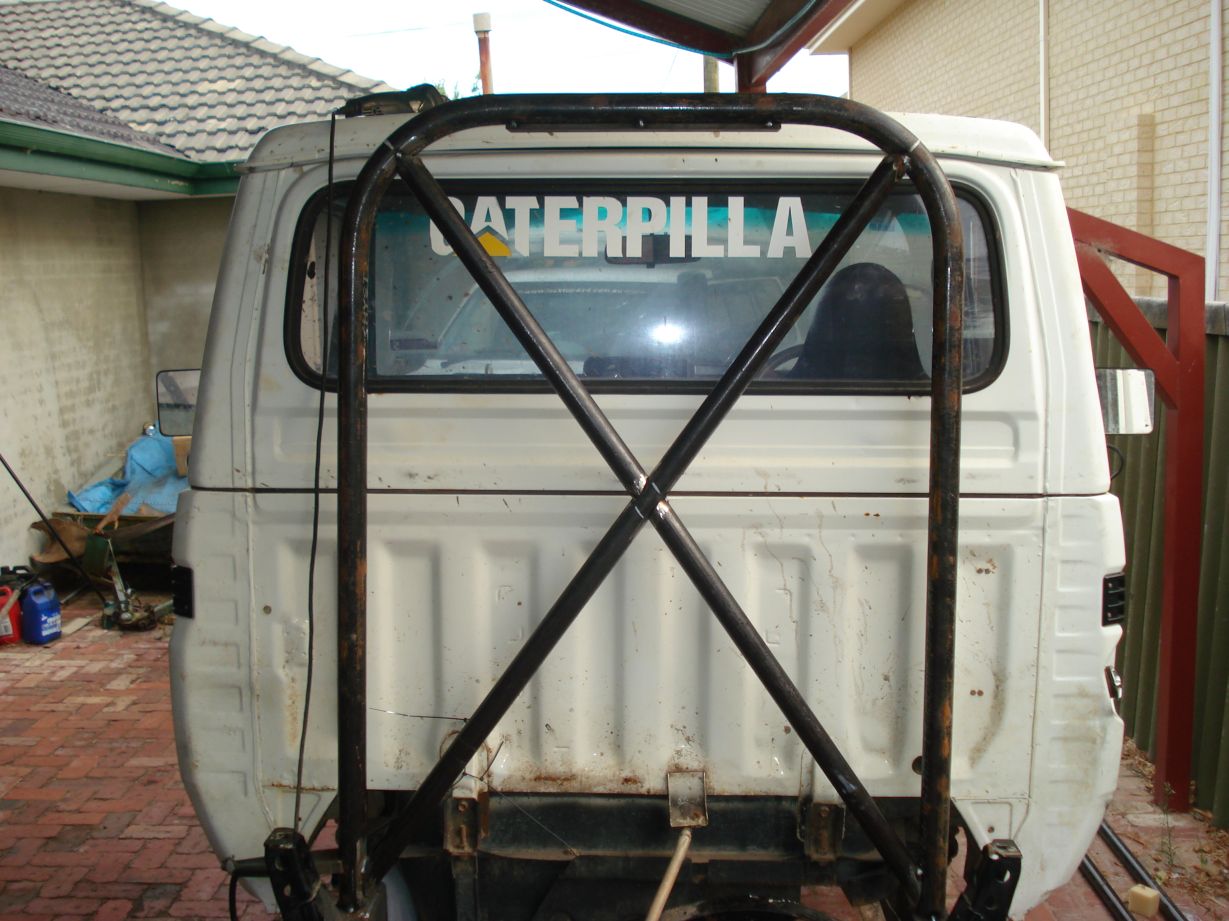
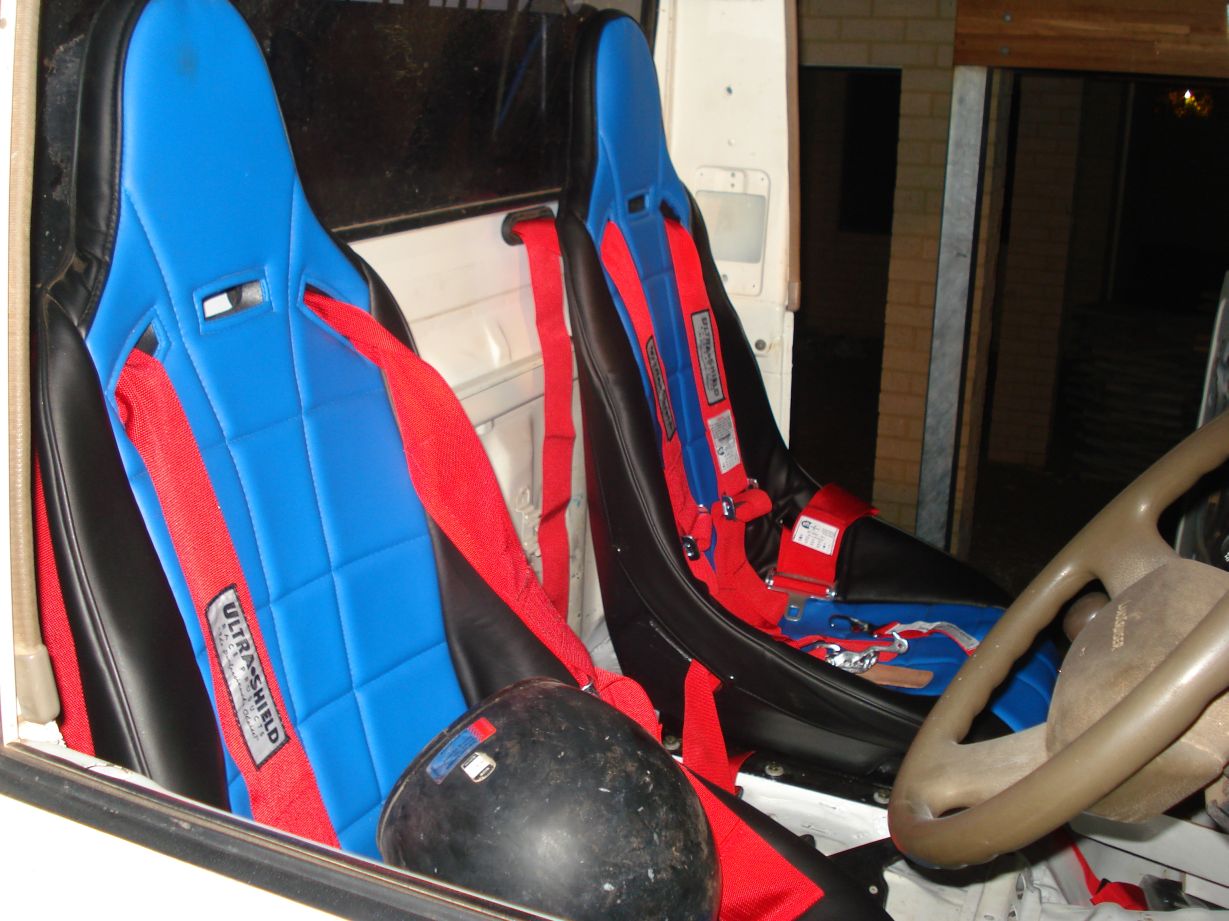
Also got some new seats, im going to have them a bit lower than the originals to give more head room when the internal bars go in.
Started on the internal part of the cage tonight, rekon i should run another bar from the main hoop down the middle of the roof aswell?
Spy pic
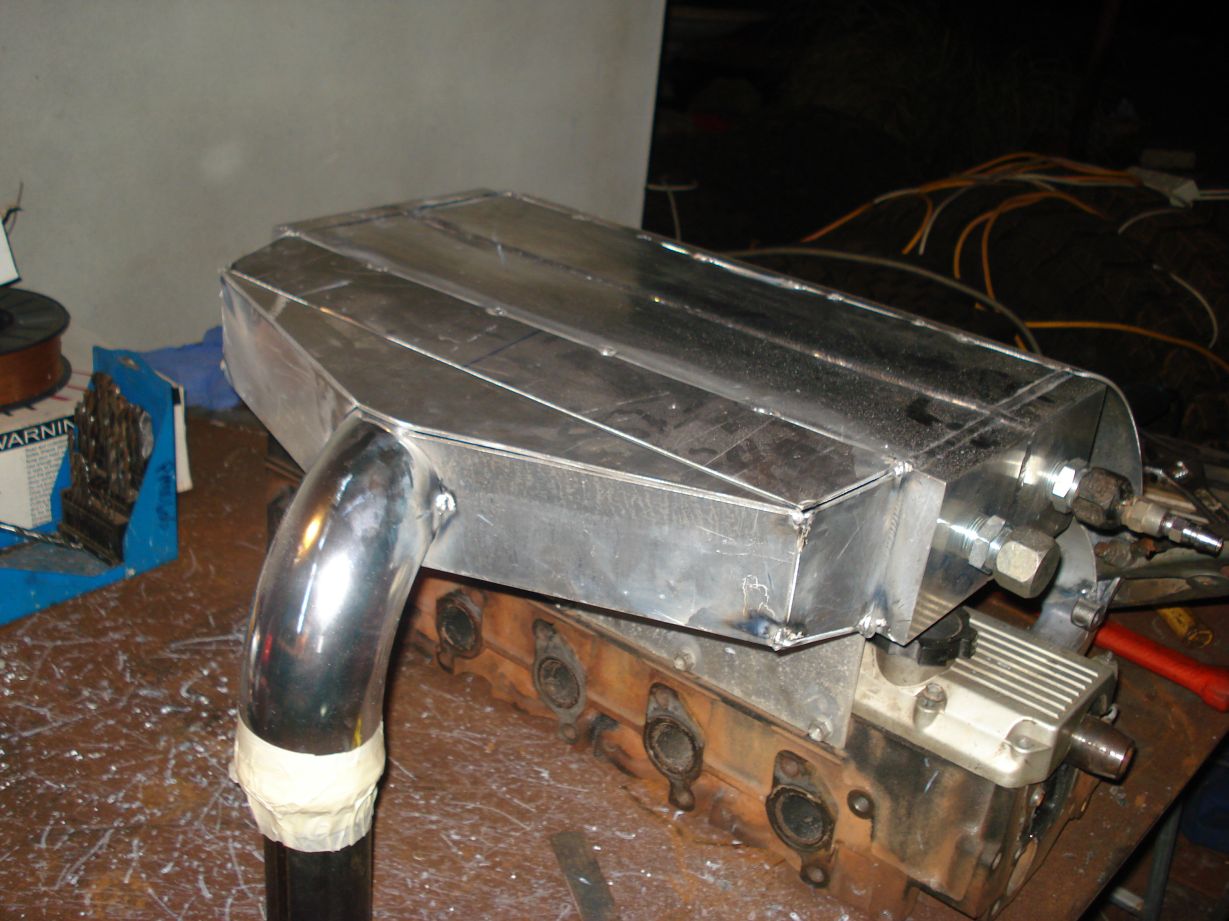
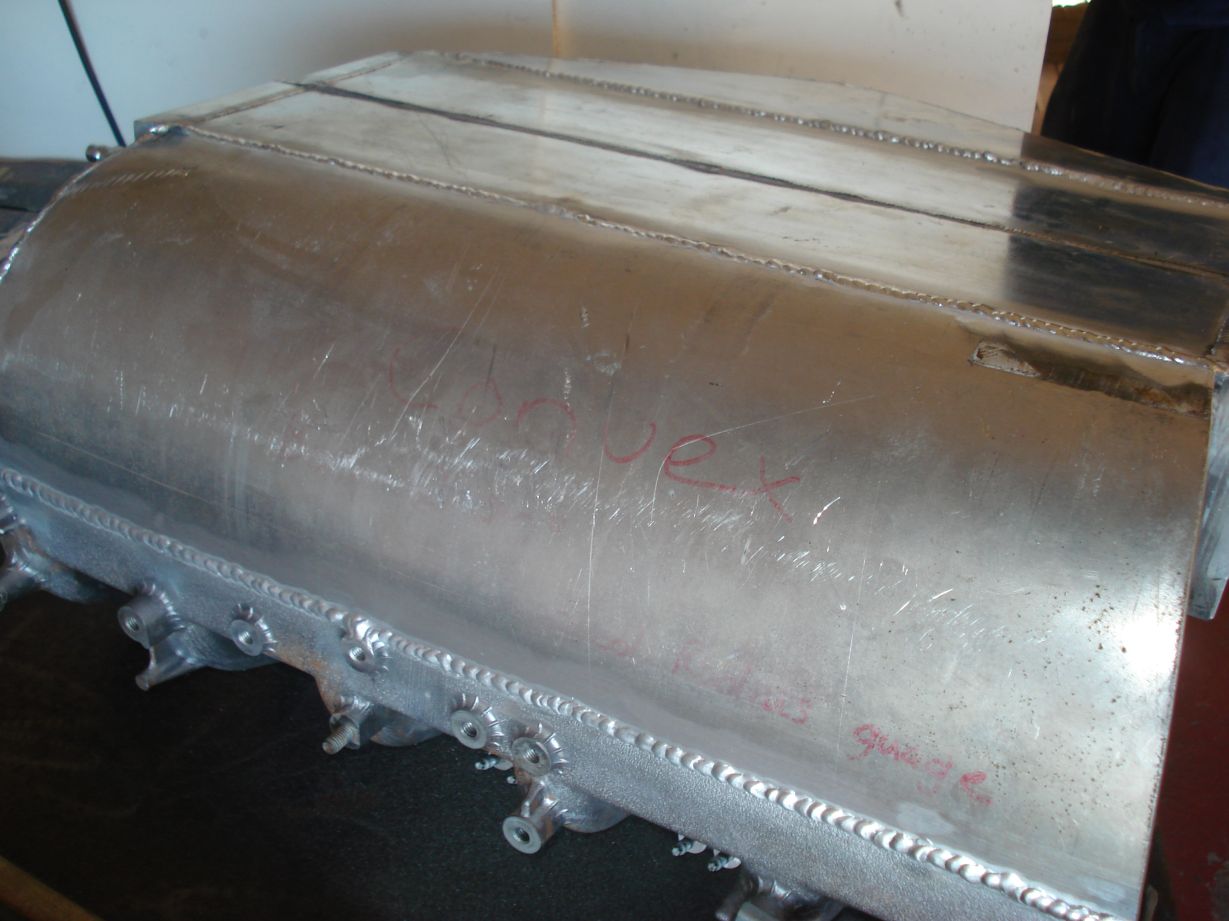
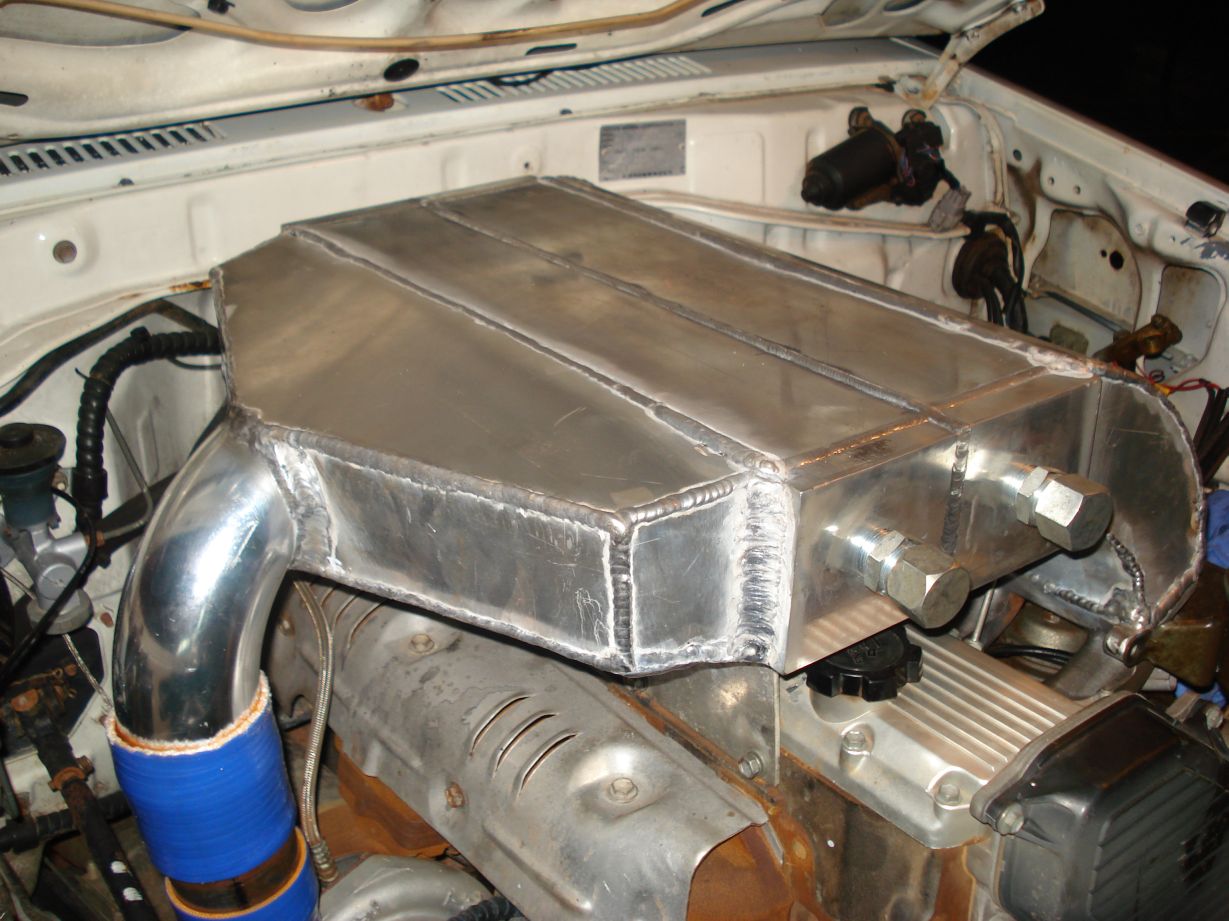
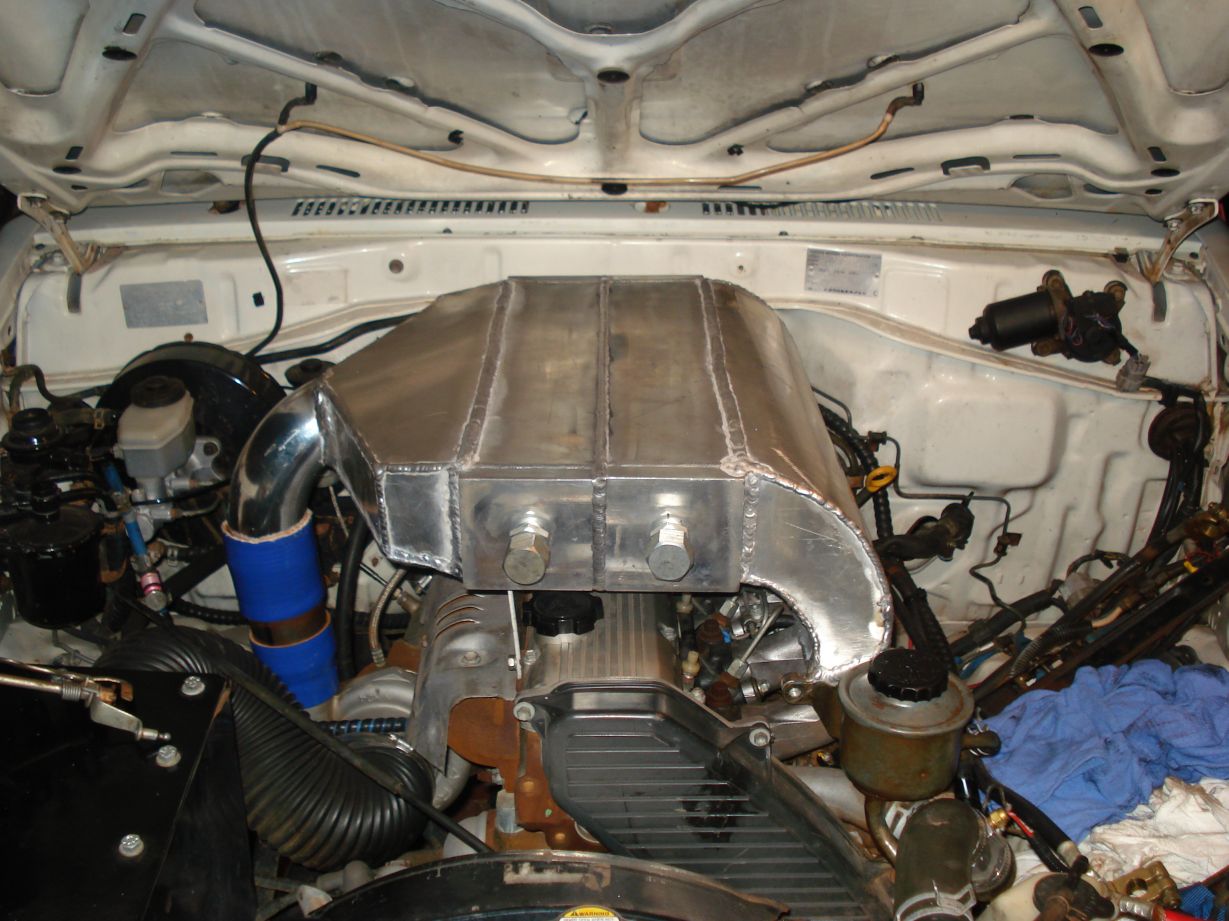
Well i pressure tested the cooler today to 40 psi and only found one small leak, so ill devcon that.
Its now mounted for the last time, air barbs are fitted and its all ready to modify little things to make it all work sweet.
Issues:
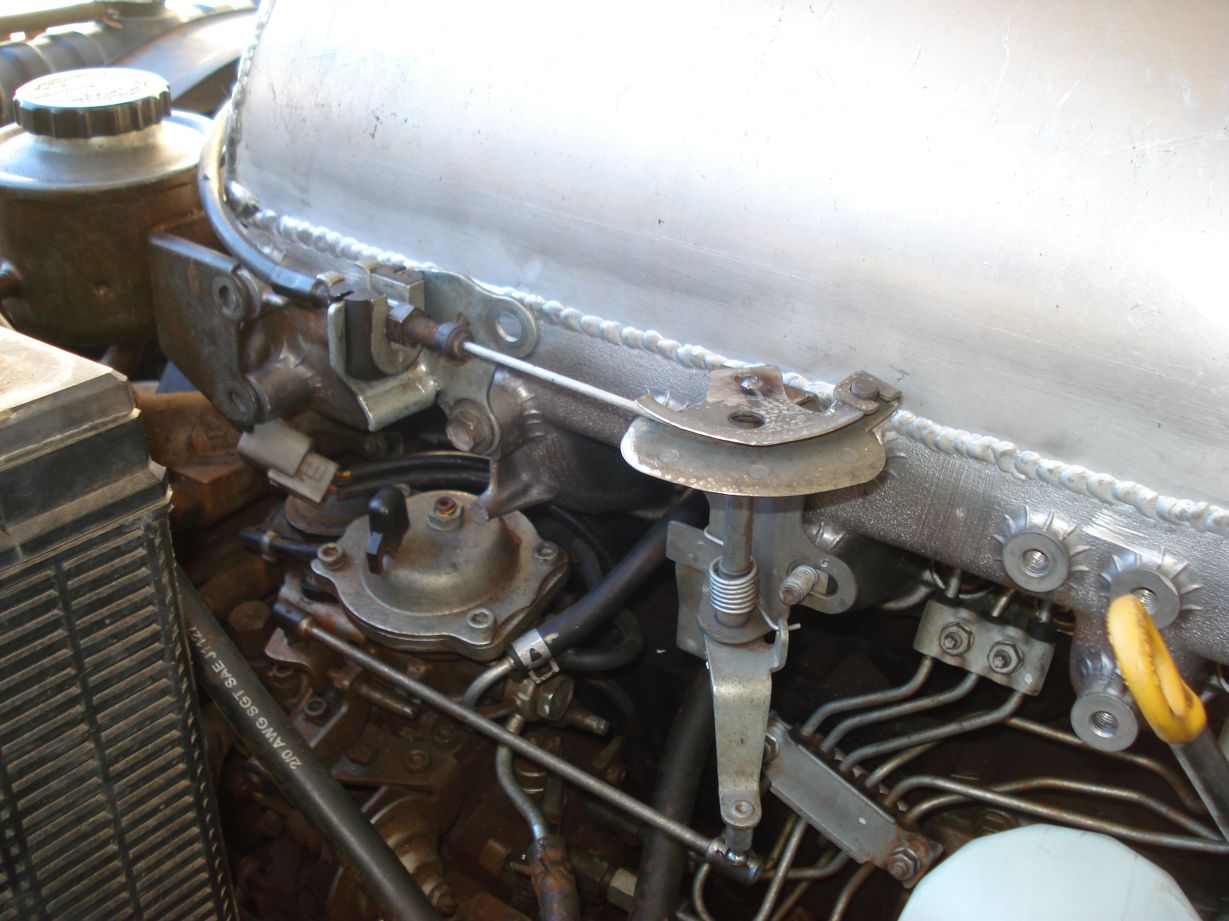
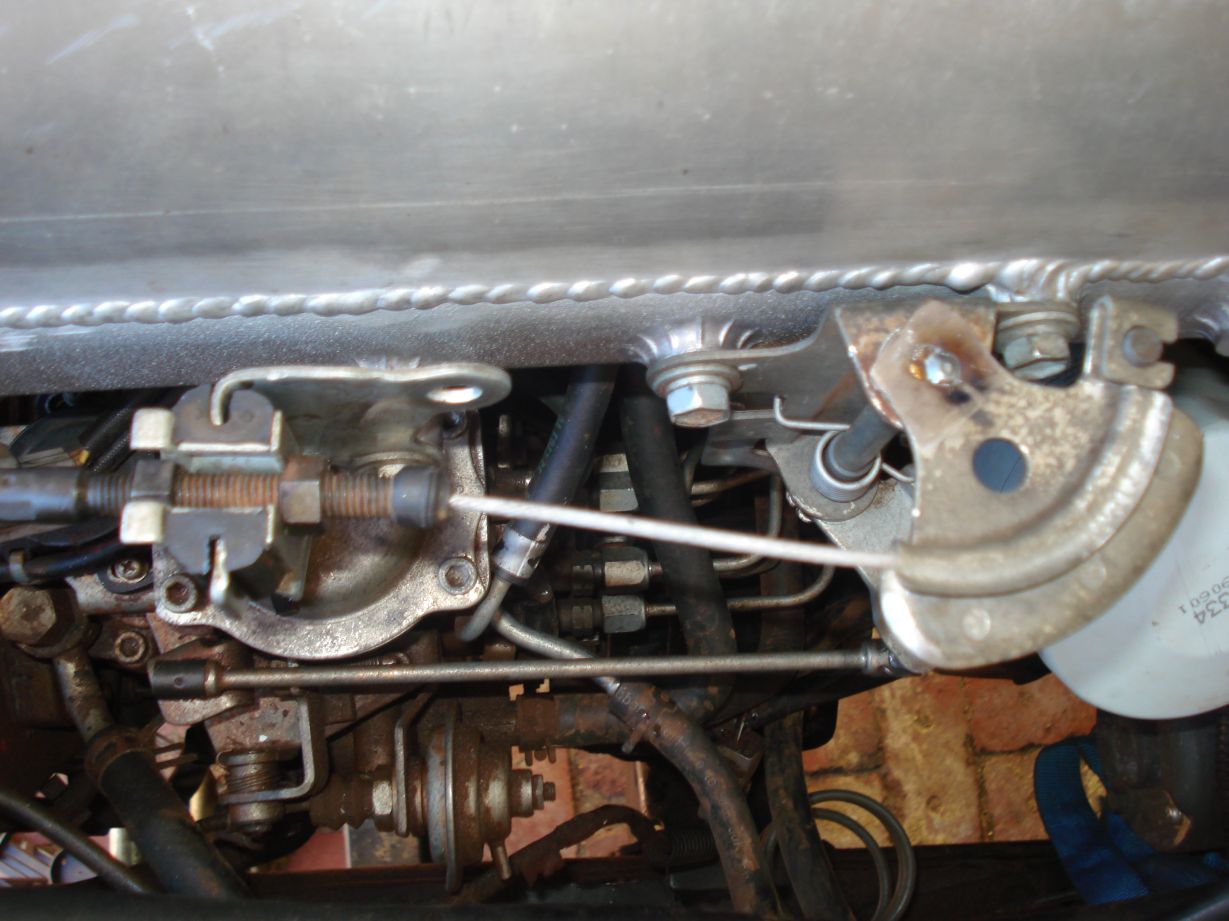
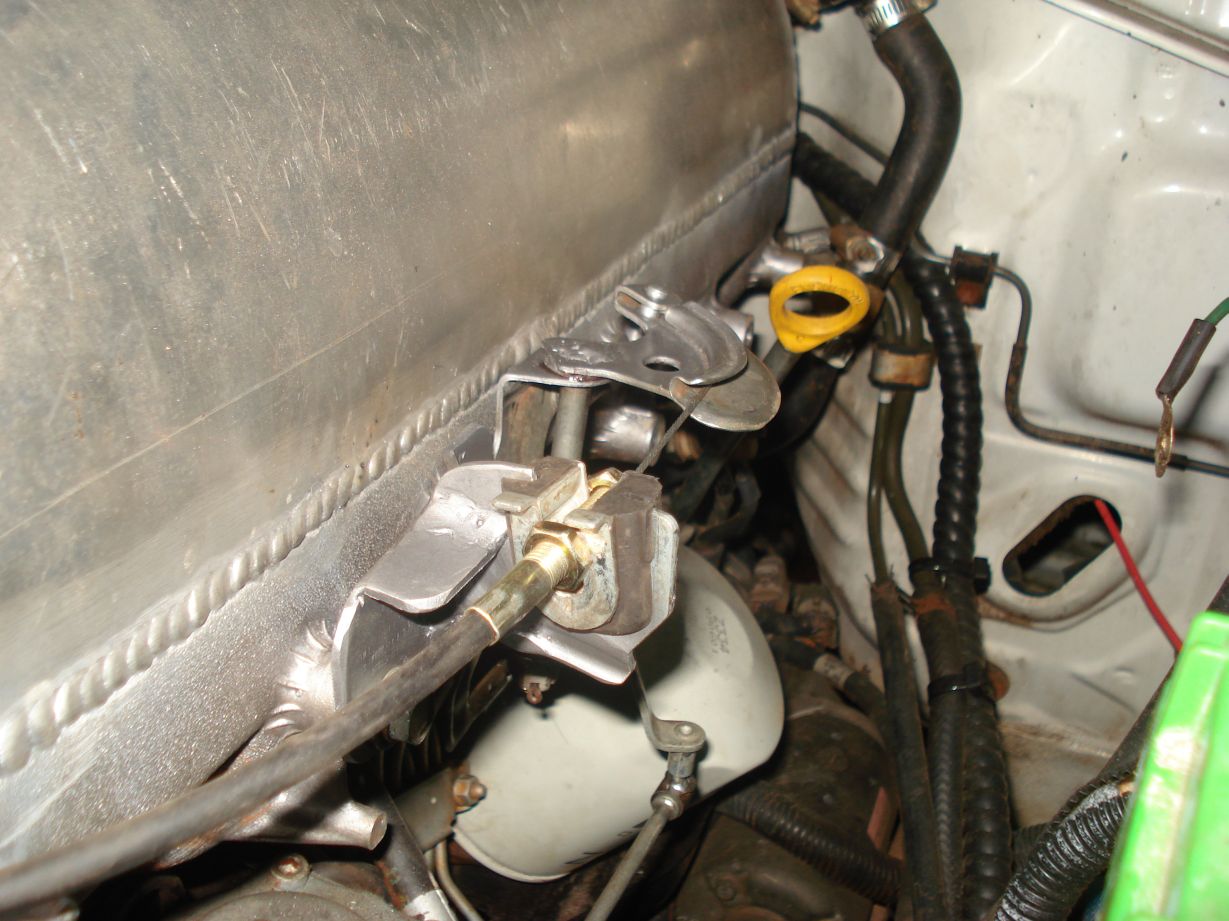
Accelerator cable – not long enough.
Accelerator belcrank to inj pump – modify to fit in stock position moving N/S not E/W.
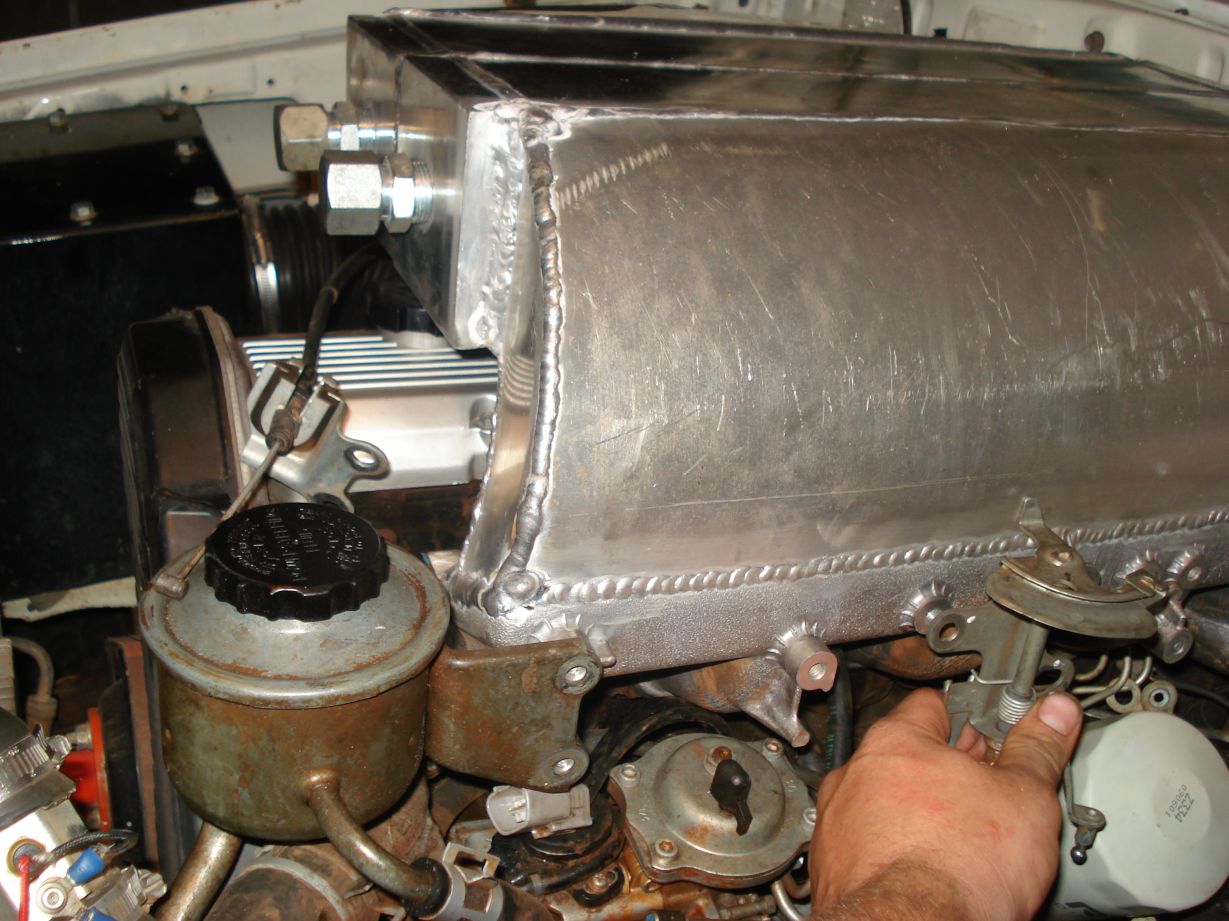
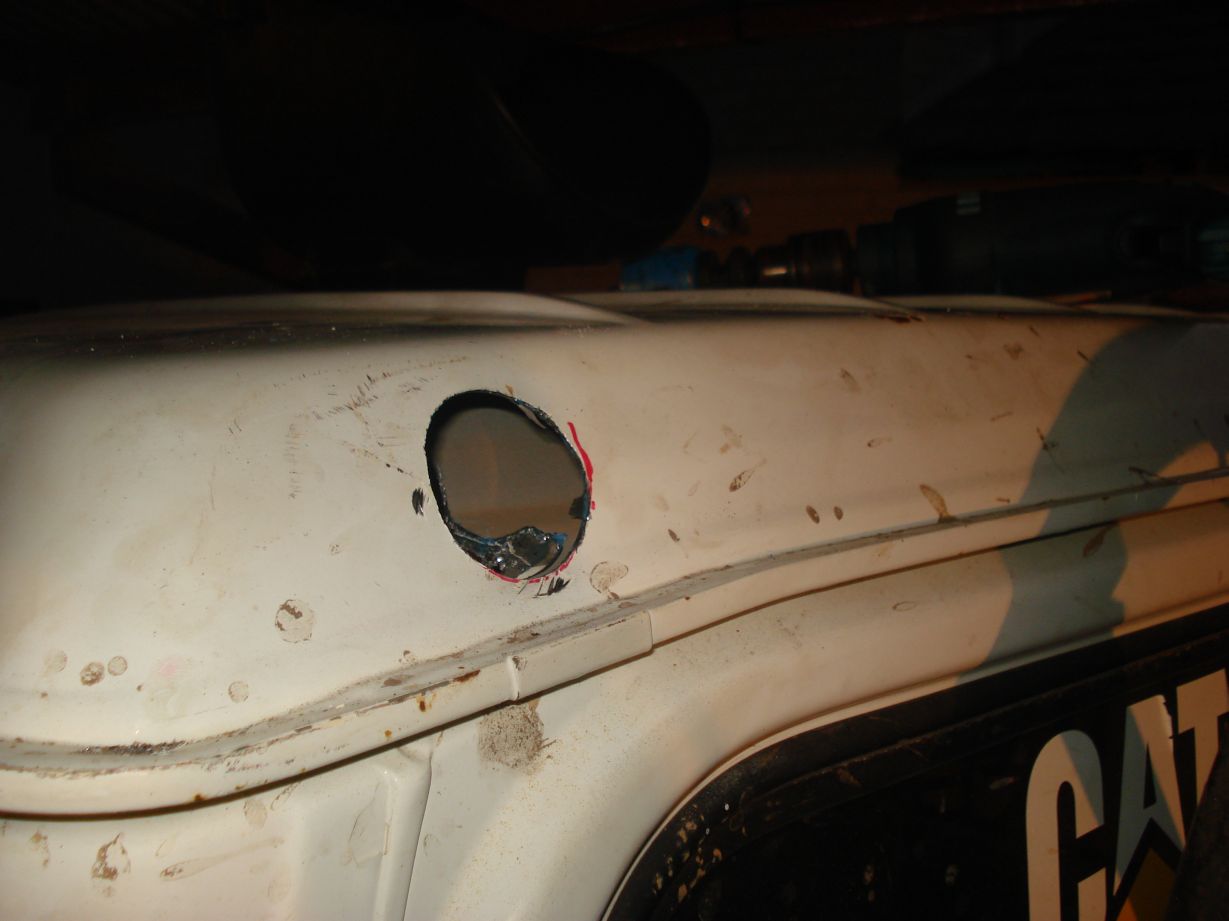
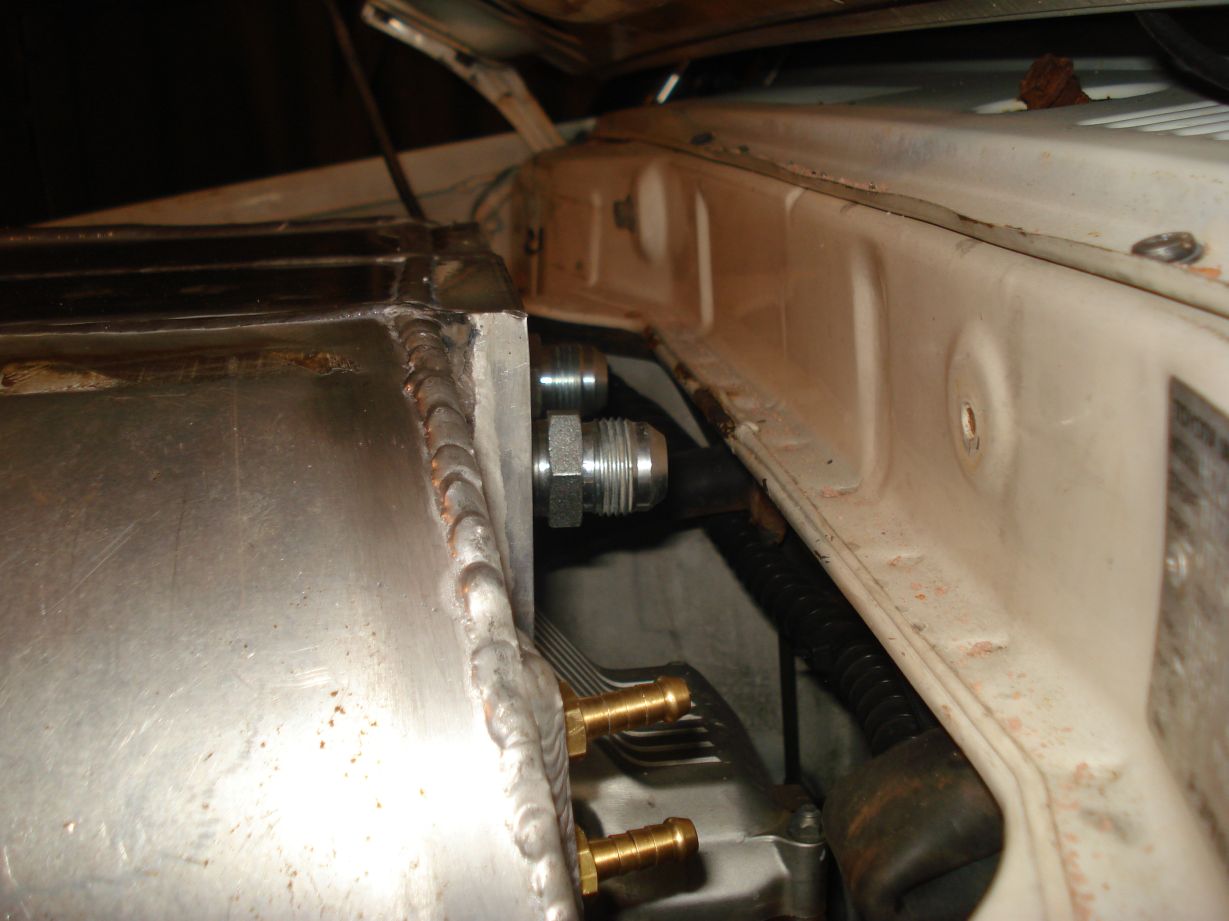
Rear water fittings – because i made this thing so freaking hoooge im going to have to cut the lip off the firewall or use some different compact fittings.
Modified the accelerator linkages, just need to get the cable lengthened. Anyone know where i can get that done?
Also my bonnet closes now
(pretty rough i know but its not going to stay like that)
Hey all finally got to work on the car again this arvo.
Bent the front hoops, made cross bar and plated the floor under the pillars.
Painted the external hoops so i can put them back on once these internals are cut to size.
Fully welded the cage in tonight.
Got 2 backstays to make now then the tray.
Thought id add some beef… in the 10mm variety.

What do you do with offcuts?
Add more beef thats what!
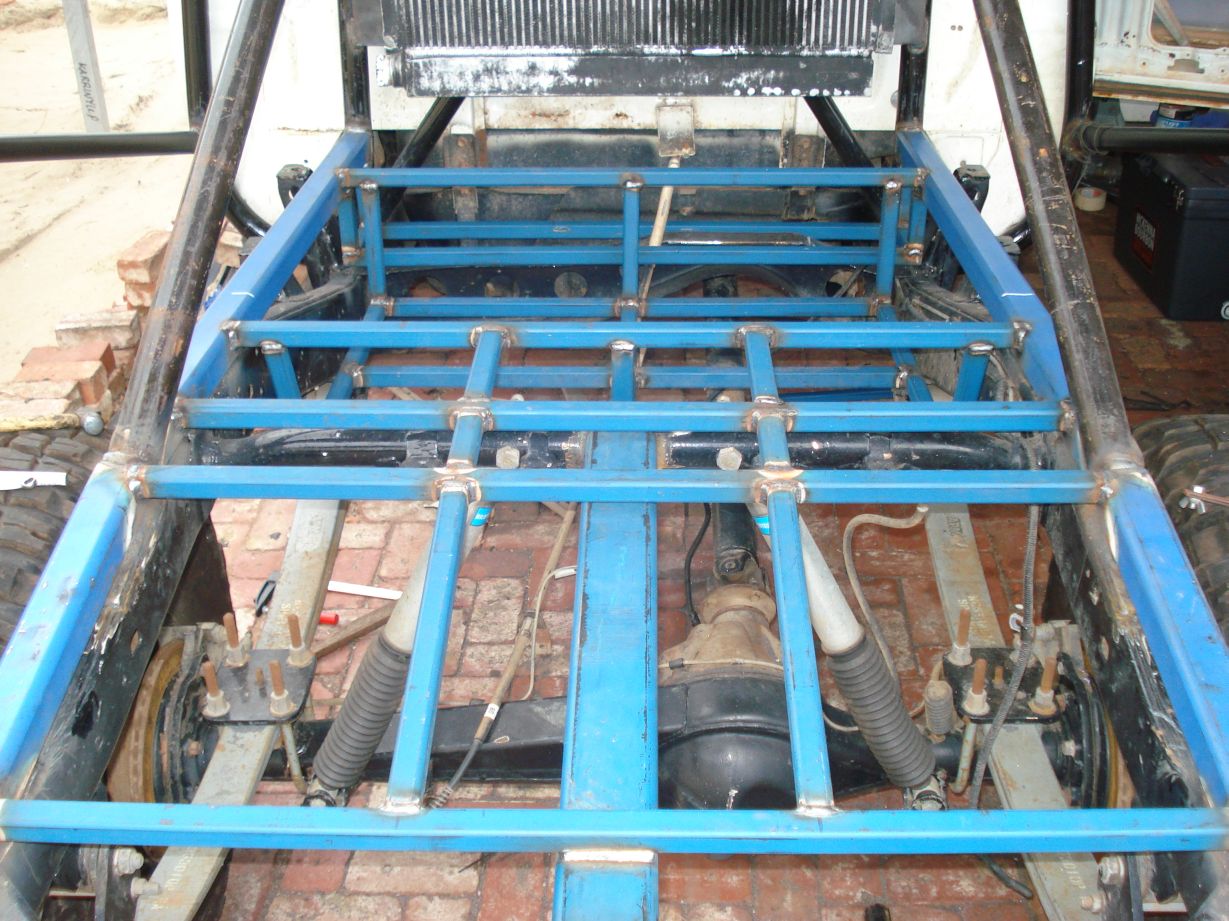
Teaser pic of the tray build
Here is the basic outline of the tray fellas, im still at a crossroads as to how im going to build the rest of it. But im sure it will come to me.
Here is a pic of the modified throttle linkage and new accelerator cable
Starts, runs and whines perfect. Good to finally hear it again.
Uhoh no more room for the grog esky 
Done a few bits and pieces this weekend. It was slow going, 50% of the time it was too windy to weld…
Backstays
Seats
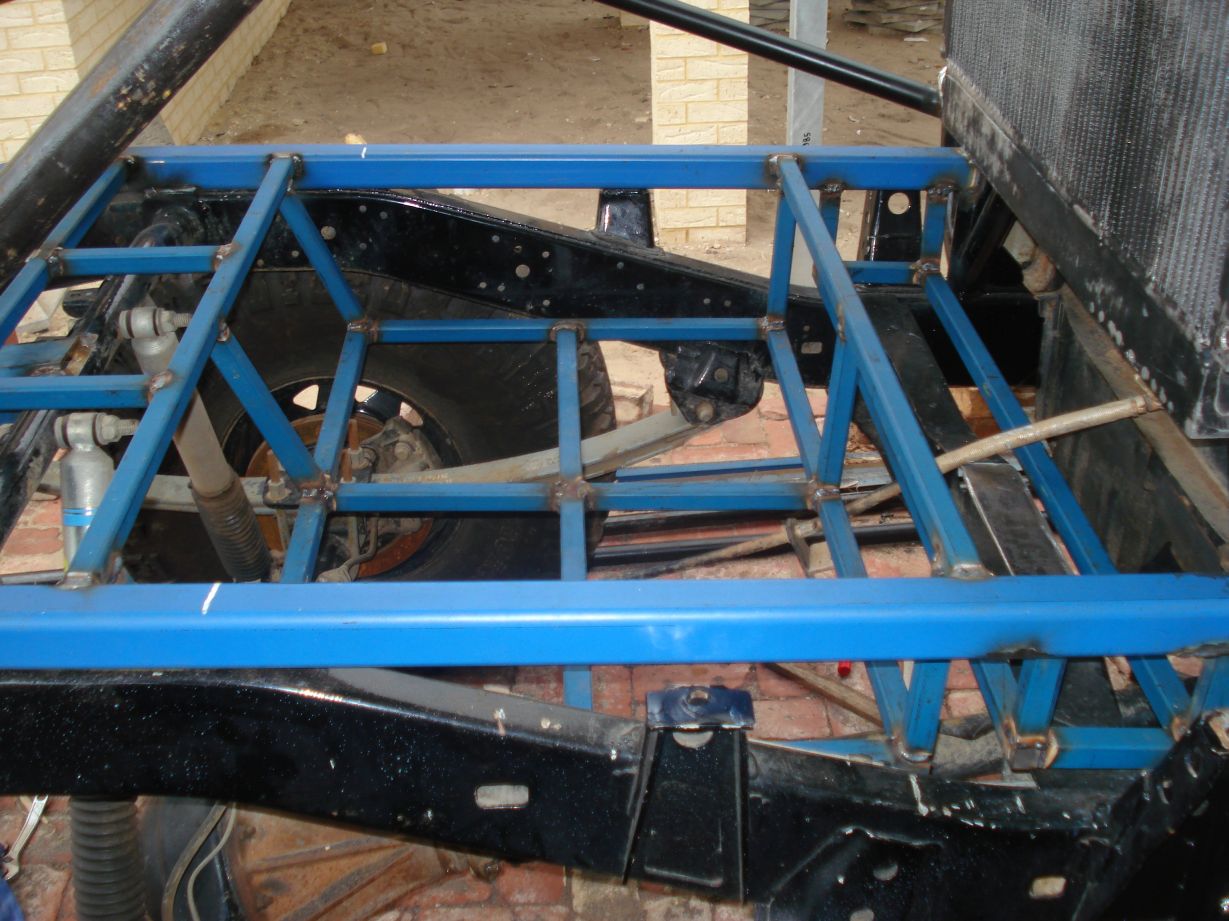
Started the tray
Took today and tomorrow off to get some more done on the ute.
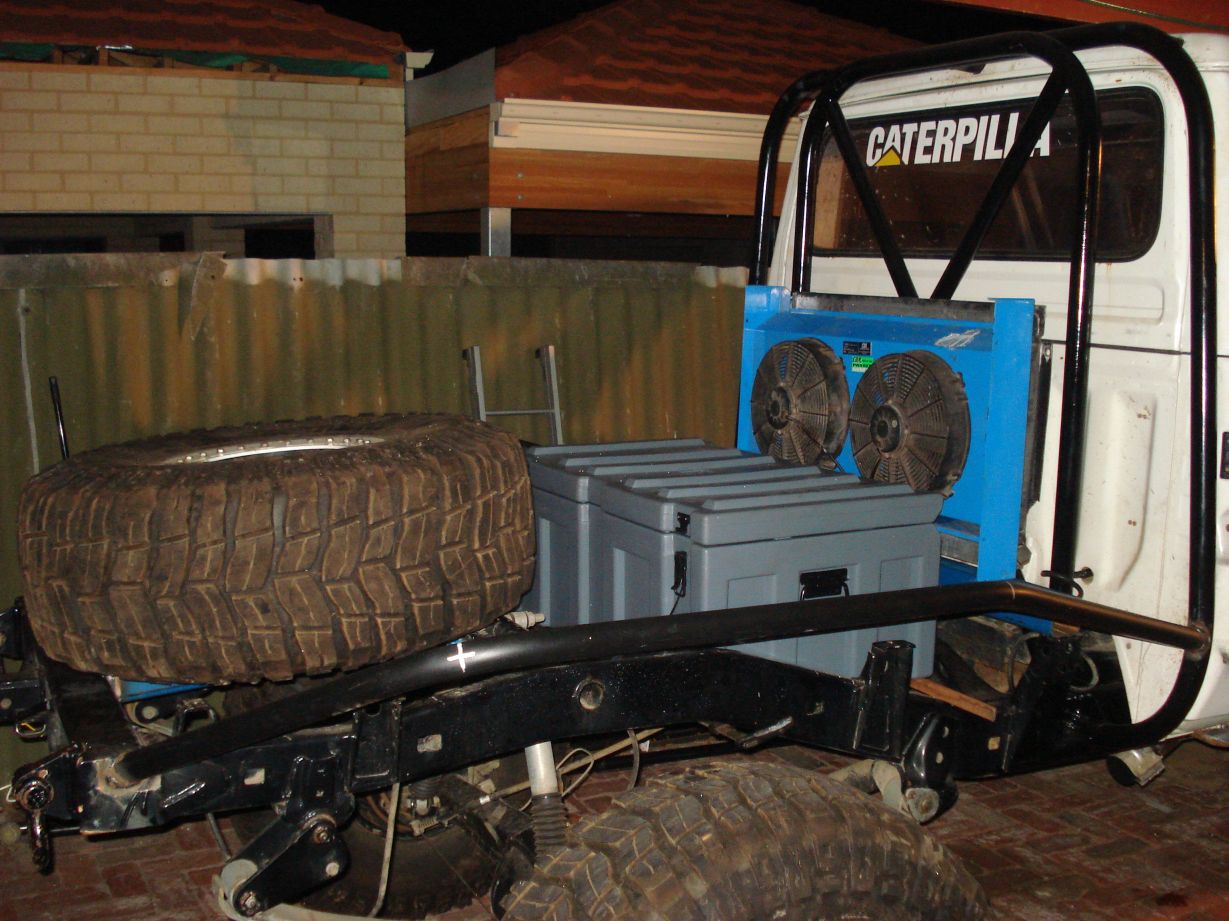
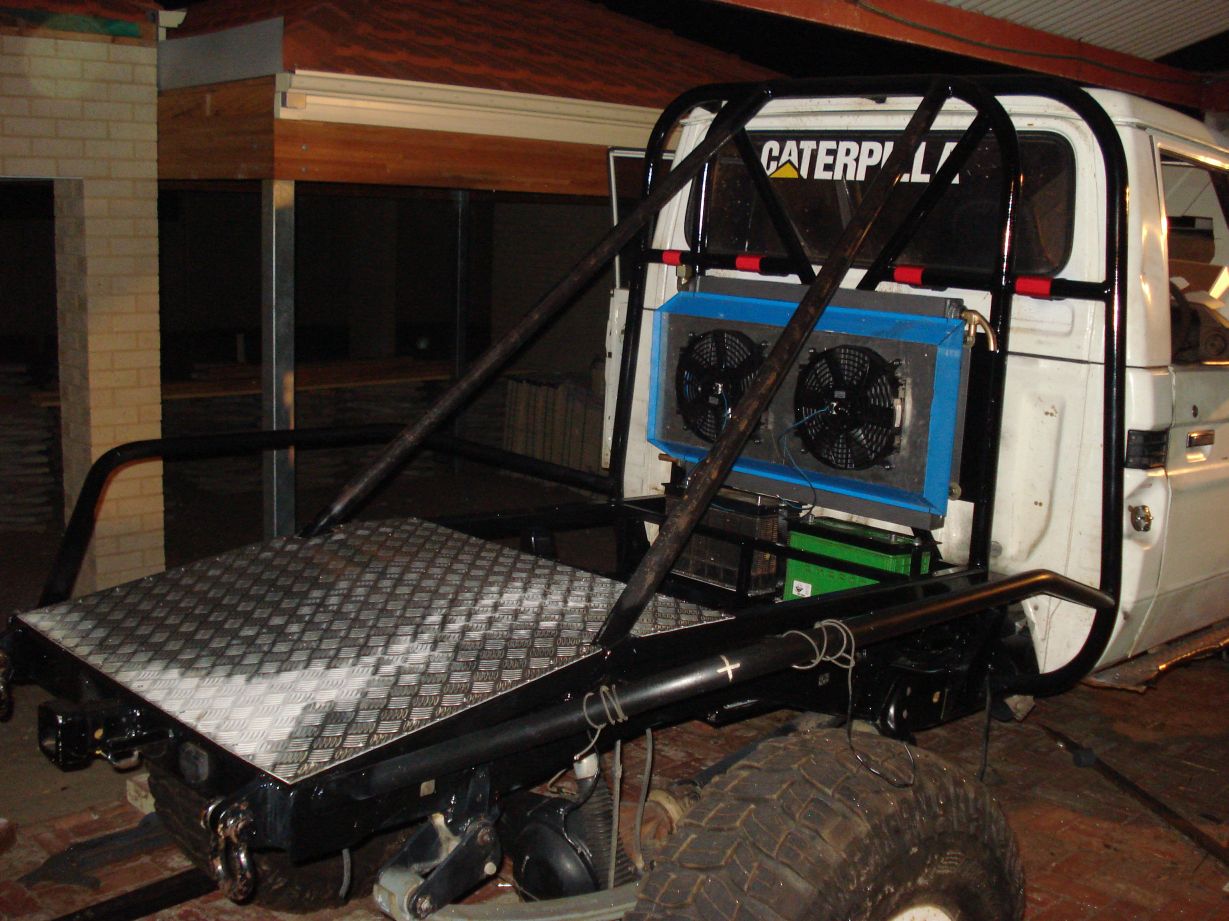
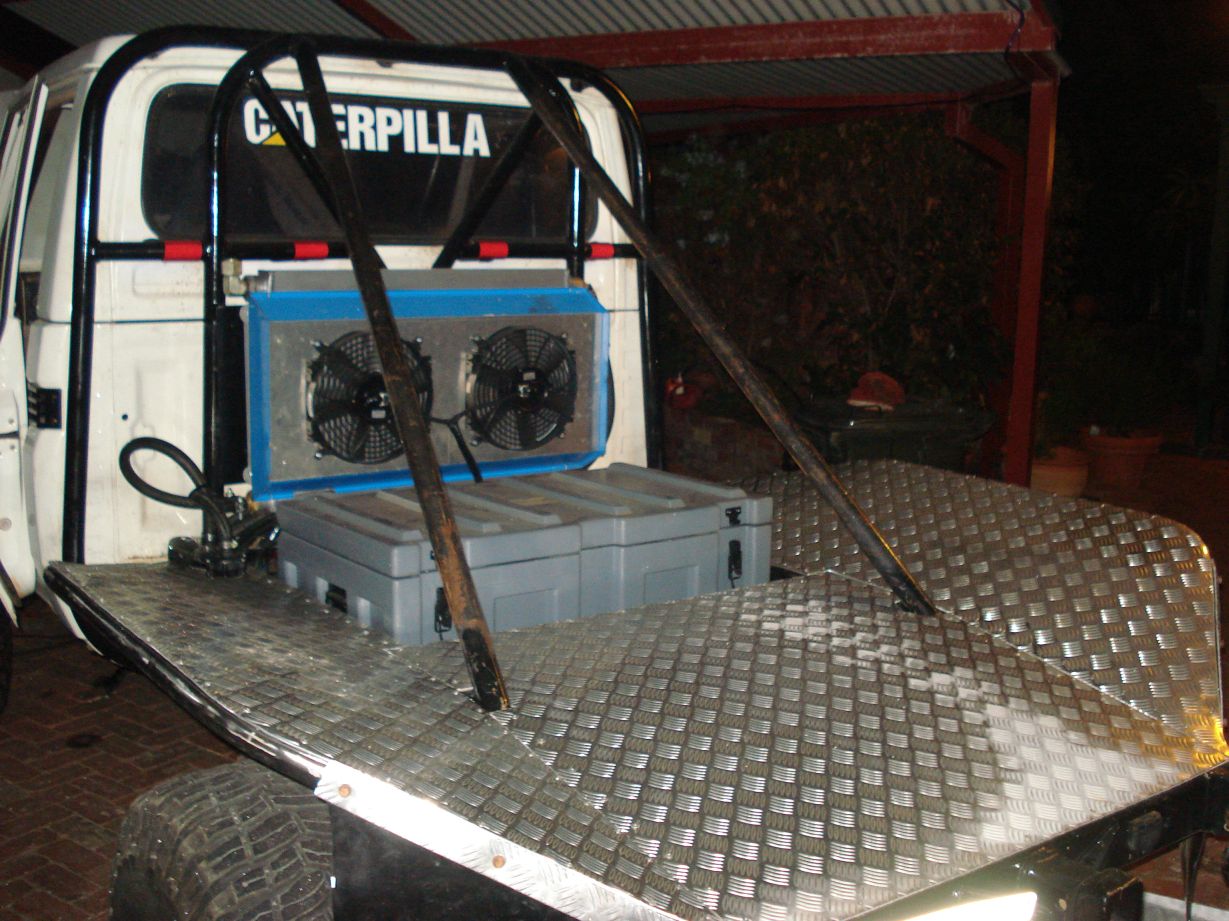
Ive built the rear part of the tray, Welded on the harness bars to the back of the cage, cut the holes for the harnesses and started to mount the cooler rad.
Im on track to have this mostly finished for an easter trip to wedge.

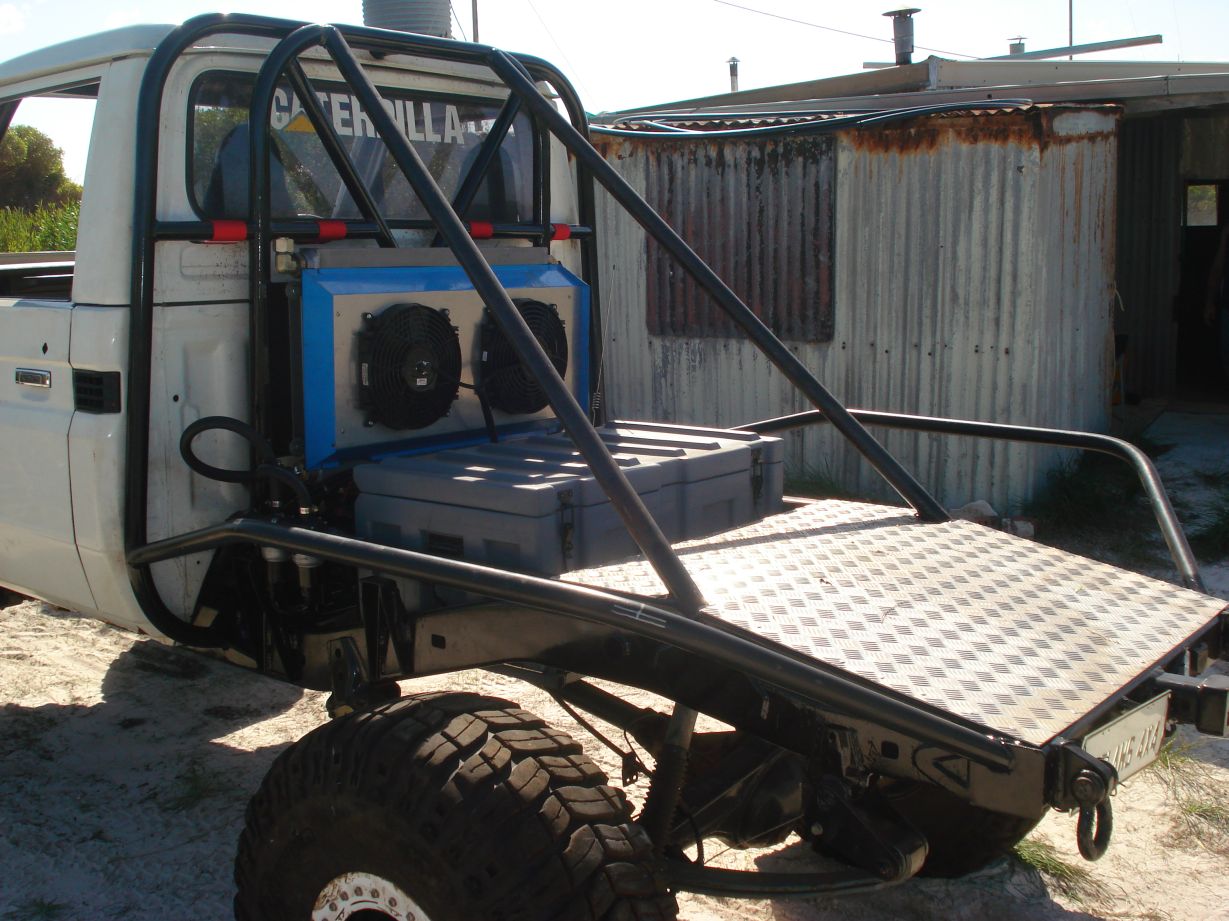
Alright well the tray is built, everything worked out sweet! Alot of welds lol…
Just have to grind some of it up, paint it and fit the Ali checker-plate.
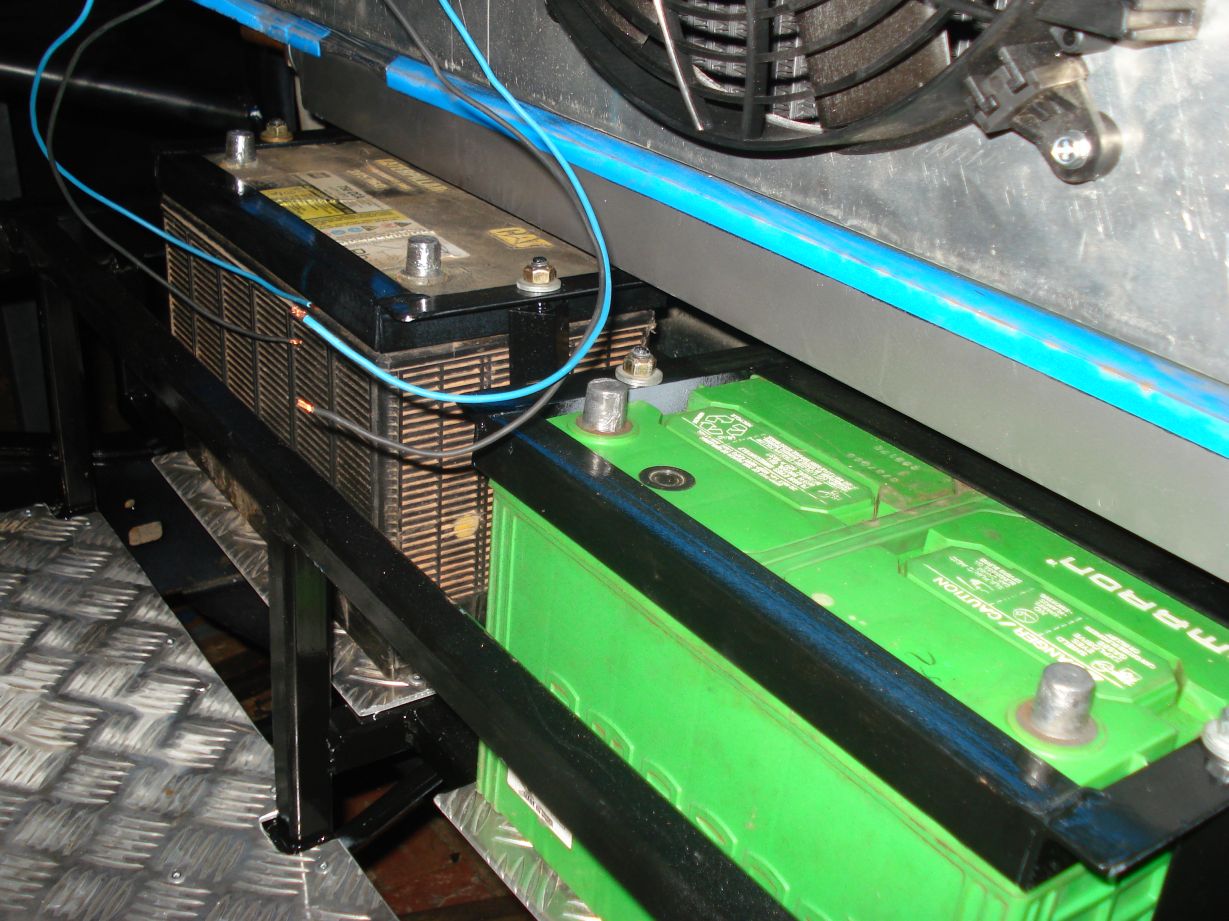
The main dropped section is for the big tool box and the part closest to the rear of the cab is the battery rack. I can fit 3x N70 sized batterys along here. I had to cut some out of the curved crossmember to get the tray low enough for the batterys to fit under the cooler. 6mm flat bar and welded in full.
I painted the interior a bit to stop it rusting, it will be painted properly and rhinolined after WOZC.
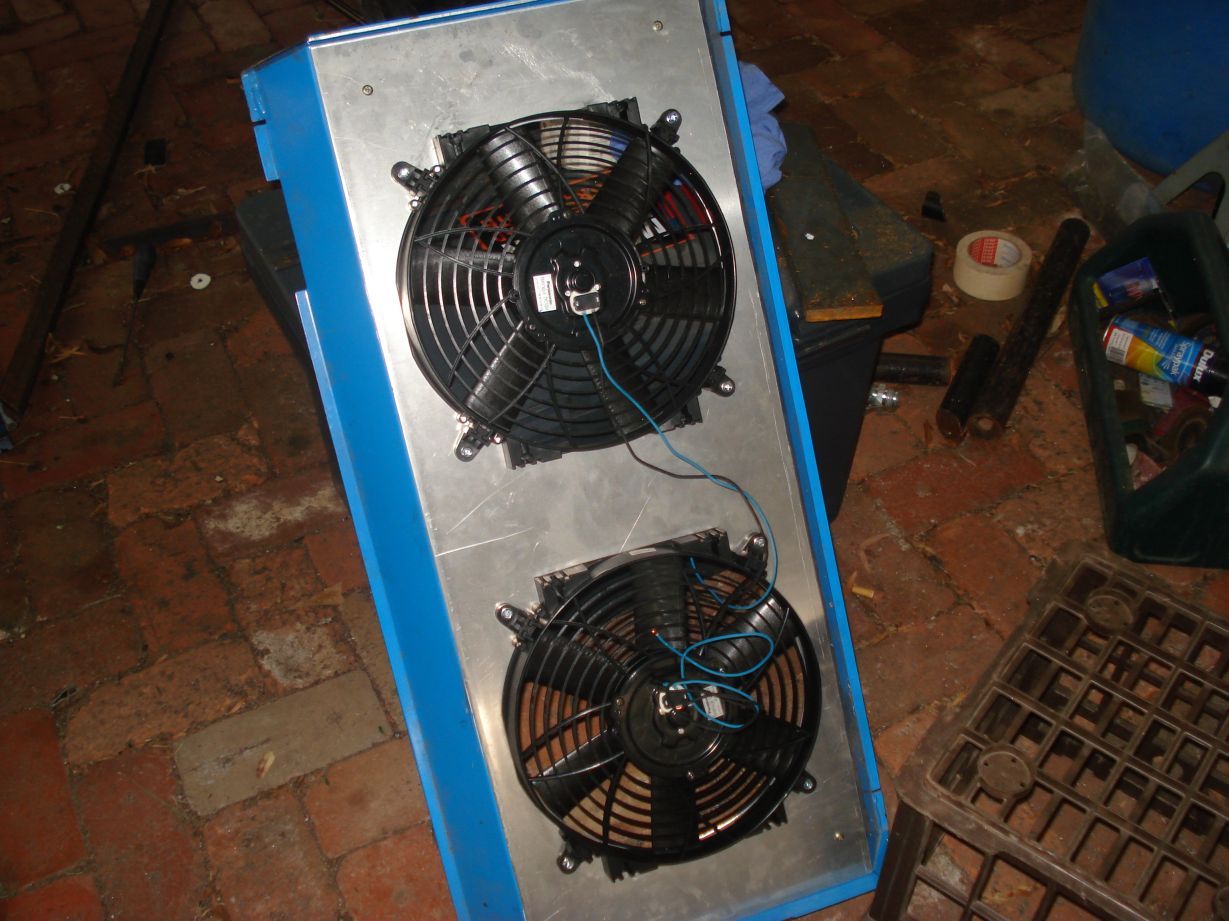
I also modified my radiator thermo shroud to fit some 12v fans (the 24V ones were larger and had a different mounting pattern..) Just some 3mm ali sikaflexed and screwed onto the front with new smaller holes cut in it.
shes gettin there…
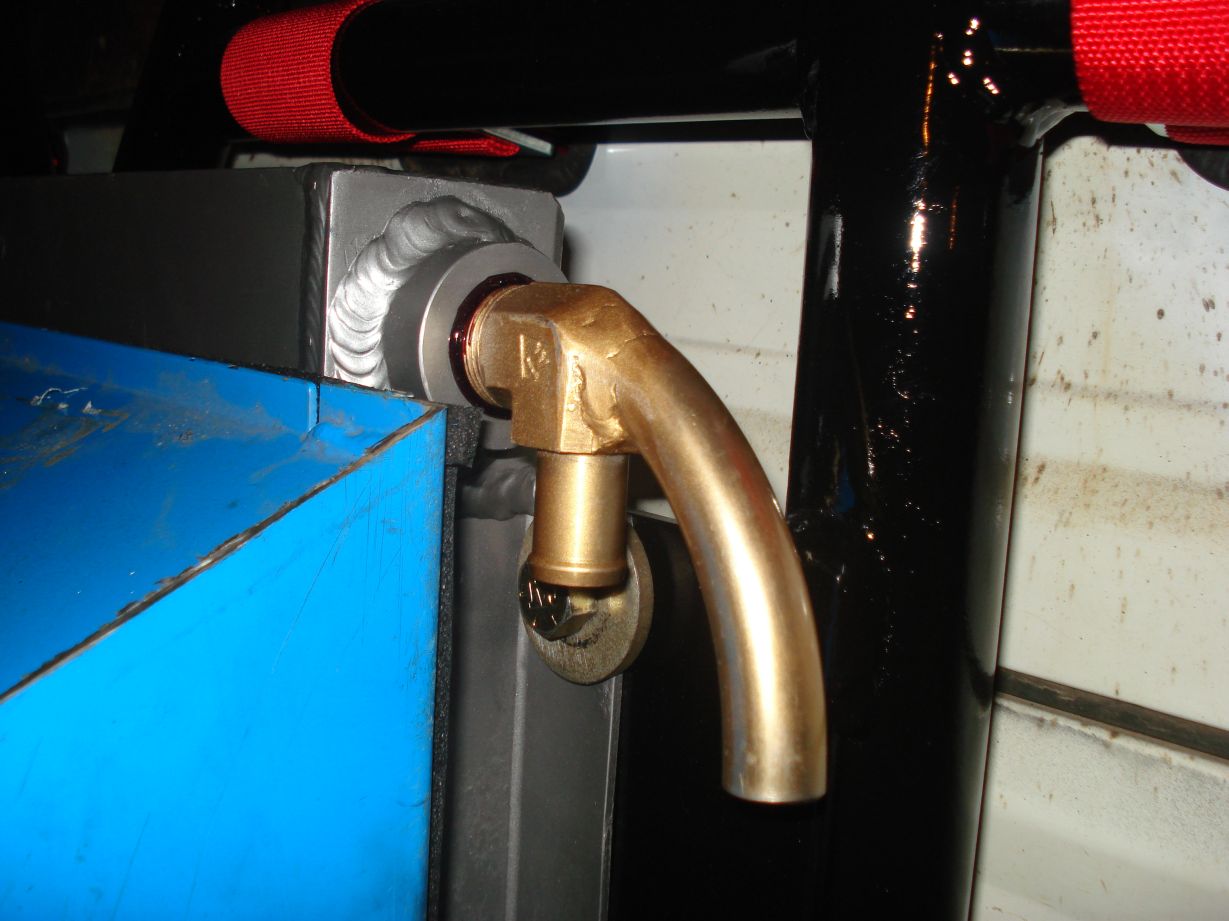
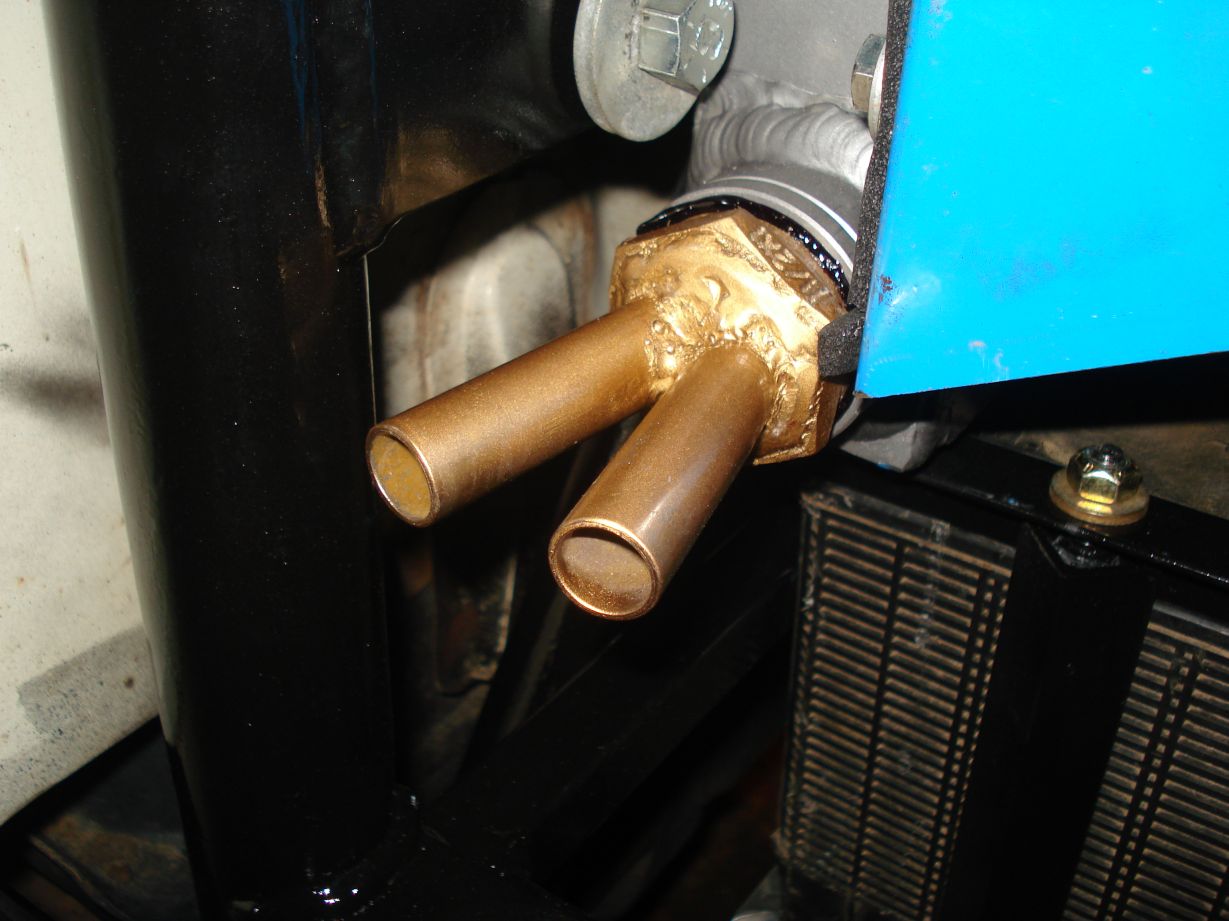
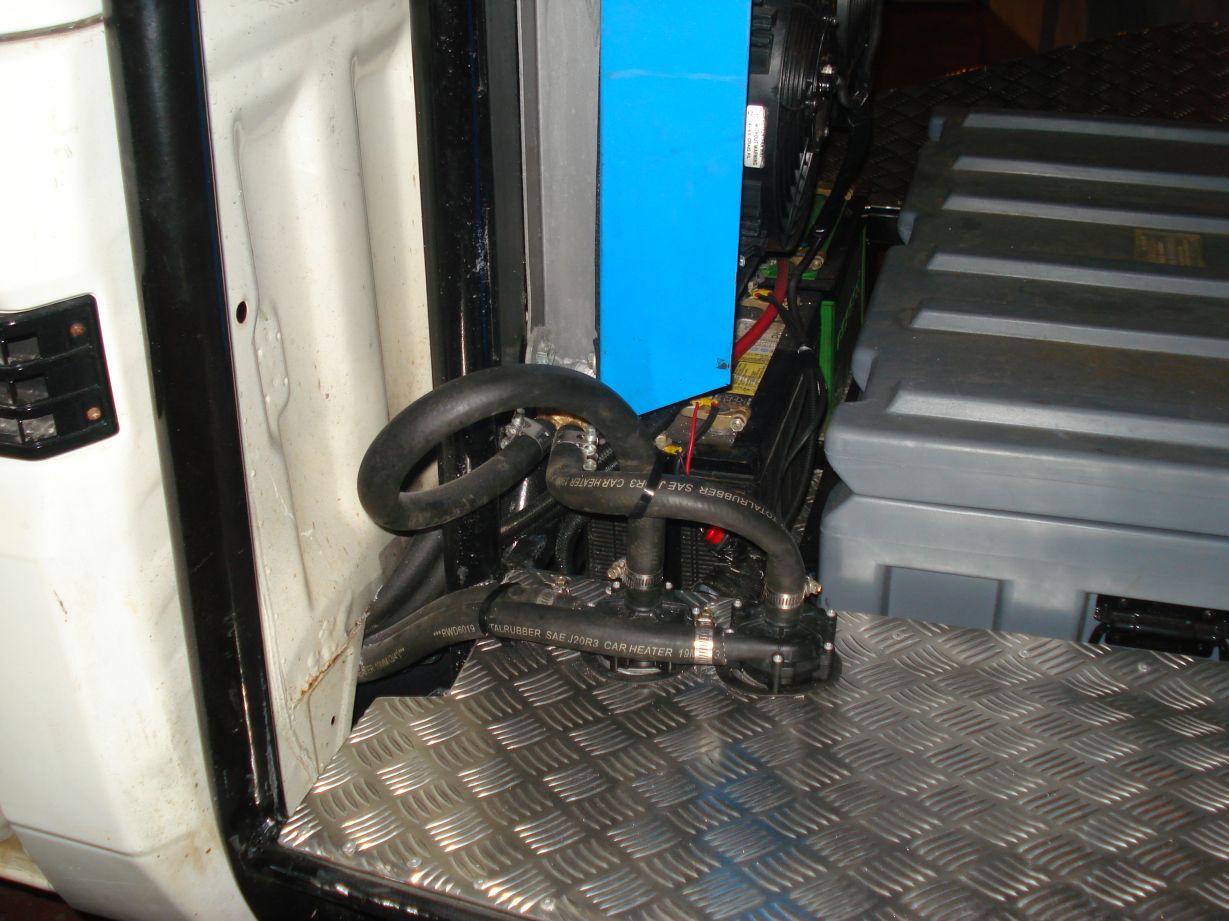
Made a few funky fittings for the cooler too,
Heres the only pics i took last weekend.
Hey all, ive been working like a mad man this weekend.
Re routed the exhaust, i had to move it from its original position when i put the cage and batterys in.
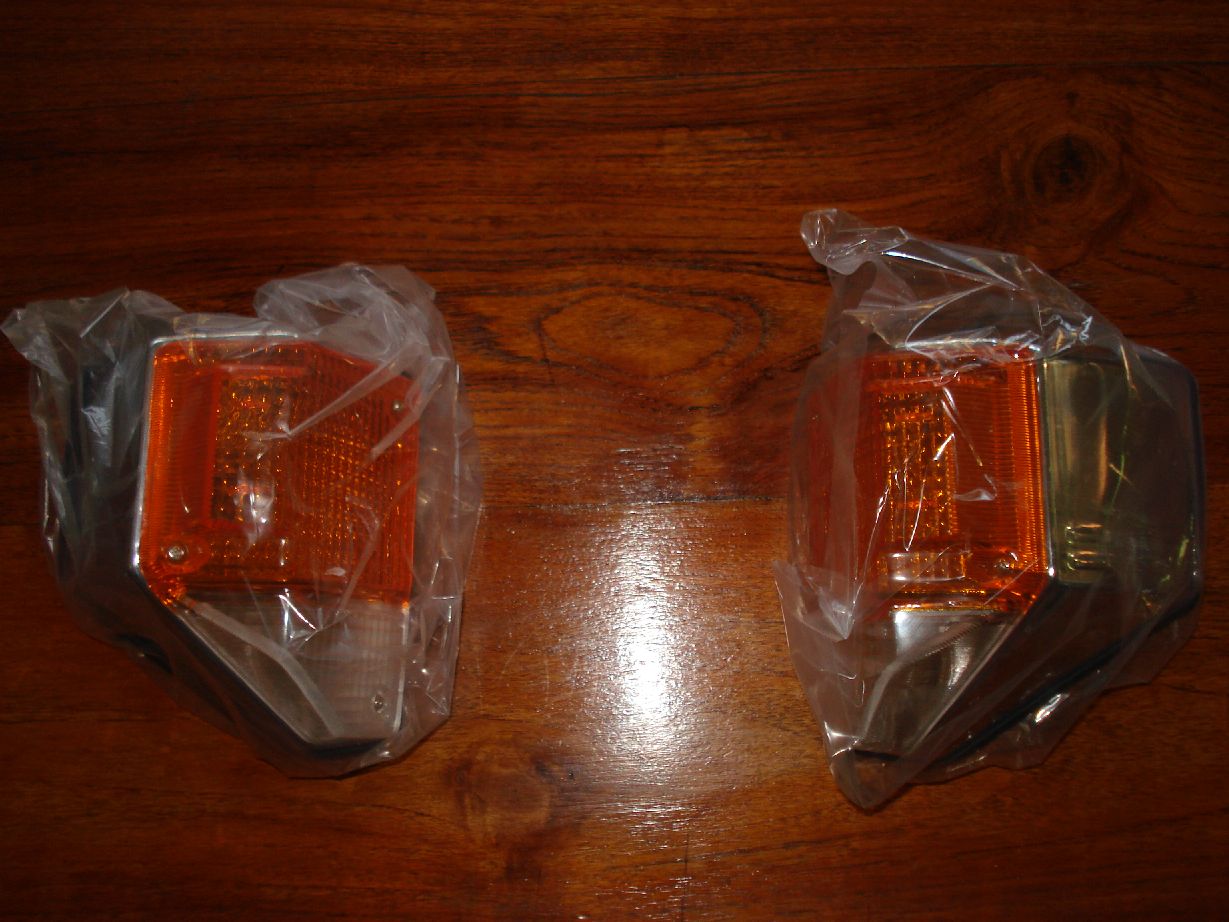
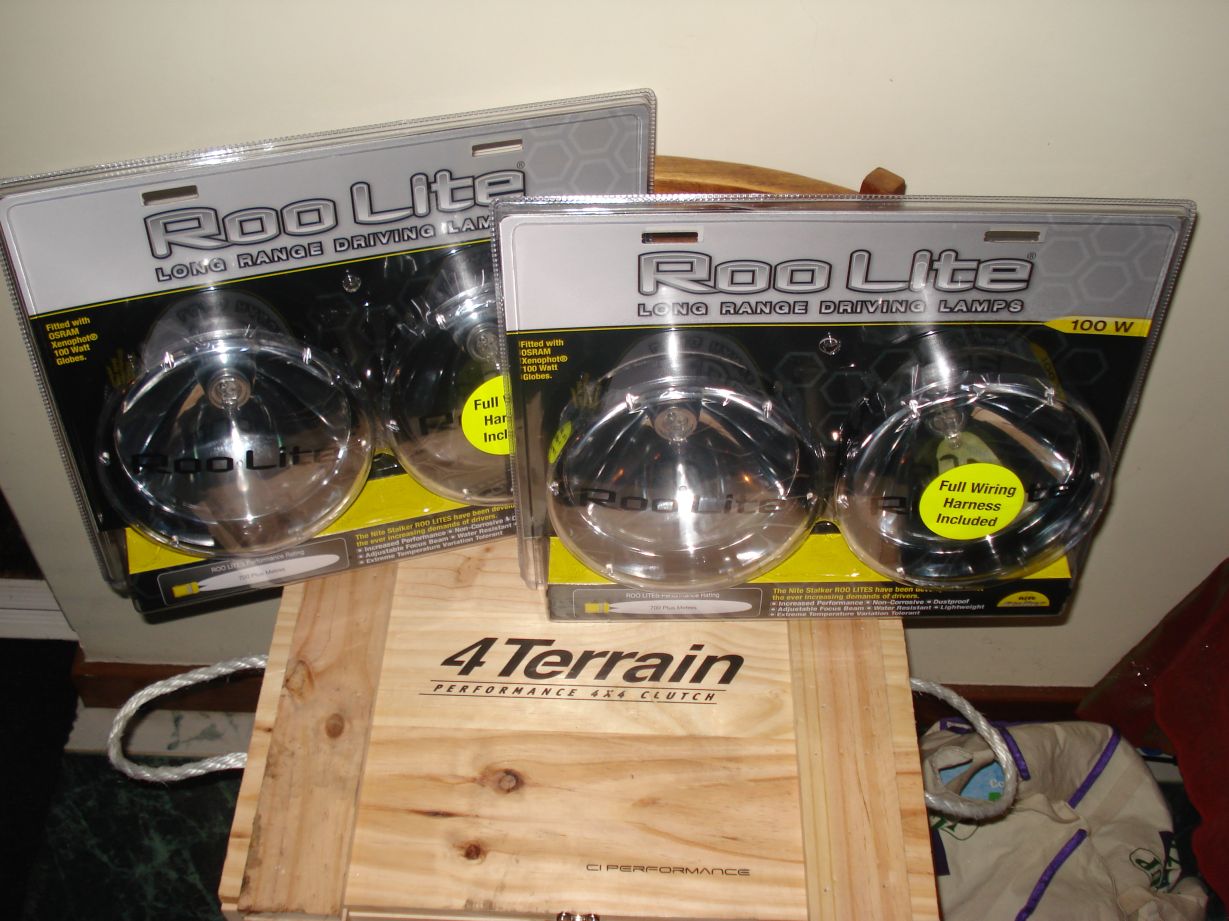
Picked up some lights, drive shaft spacer and a 4 terrain clutch from Ash and Russ at Perth 4×4. Big thanks to both Ash and Russ for organizing the parts i have needed over the last month and a bit. Big thanks for the recovery kit also!
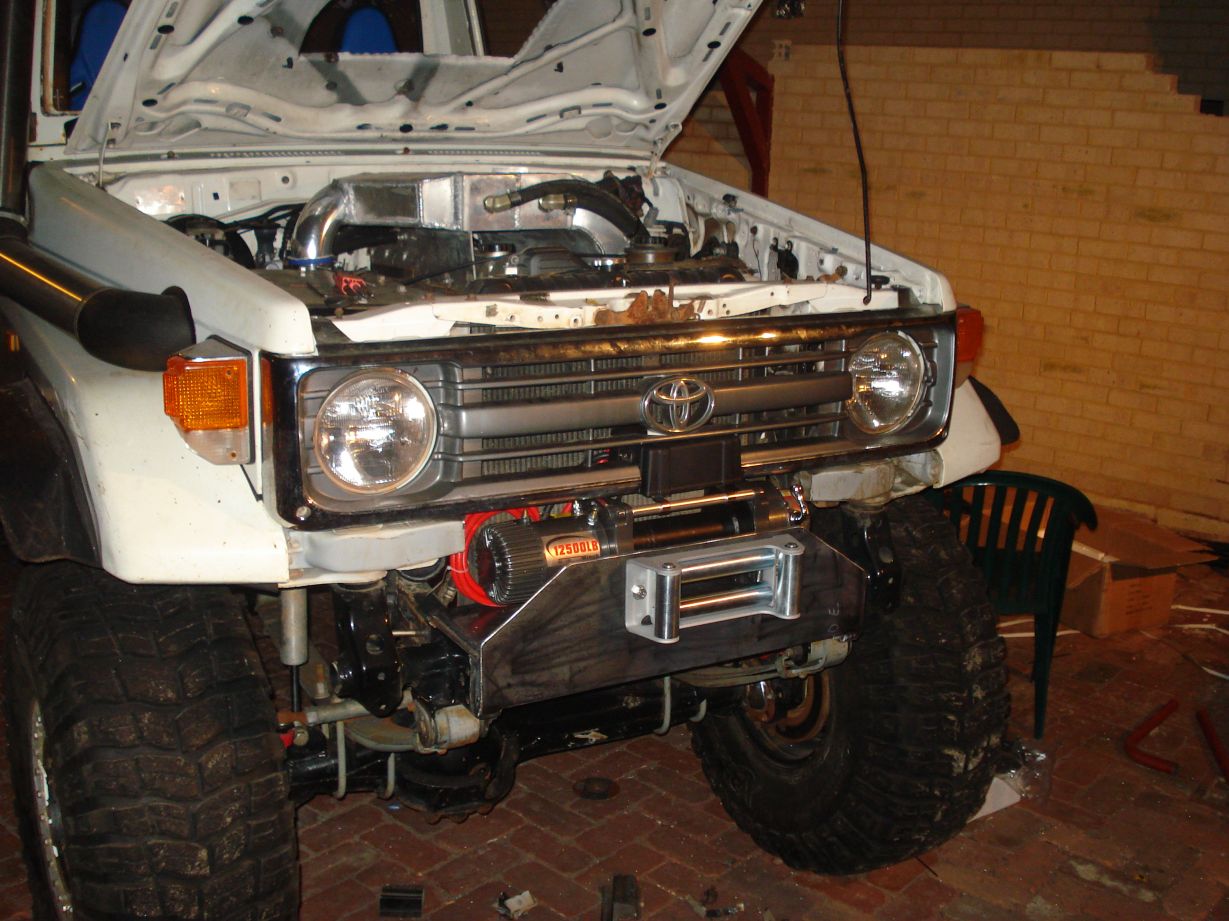
Received my winch, Big thanks to Chris at Locktup for this! Its actually a very good winch, i pulled it down today to check it out and add more grease and its basically a perfect clone of a warn. All going well next weekend, if this winch performs well they could be purchased from Locktup.
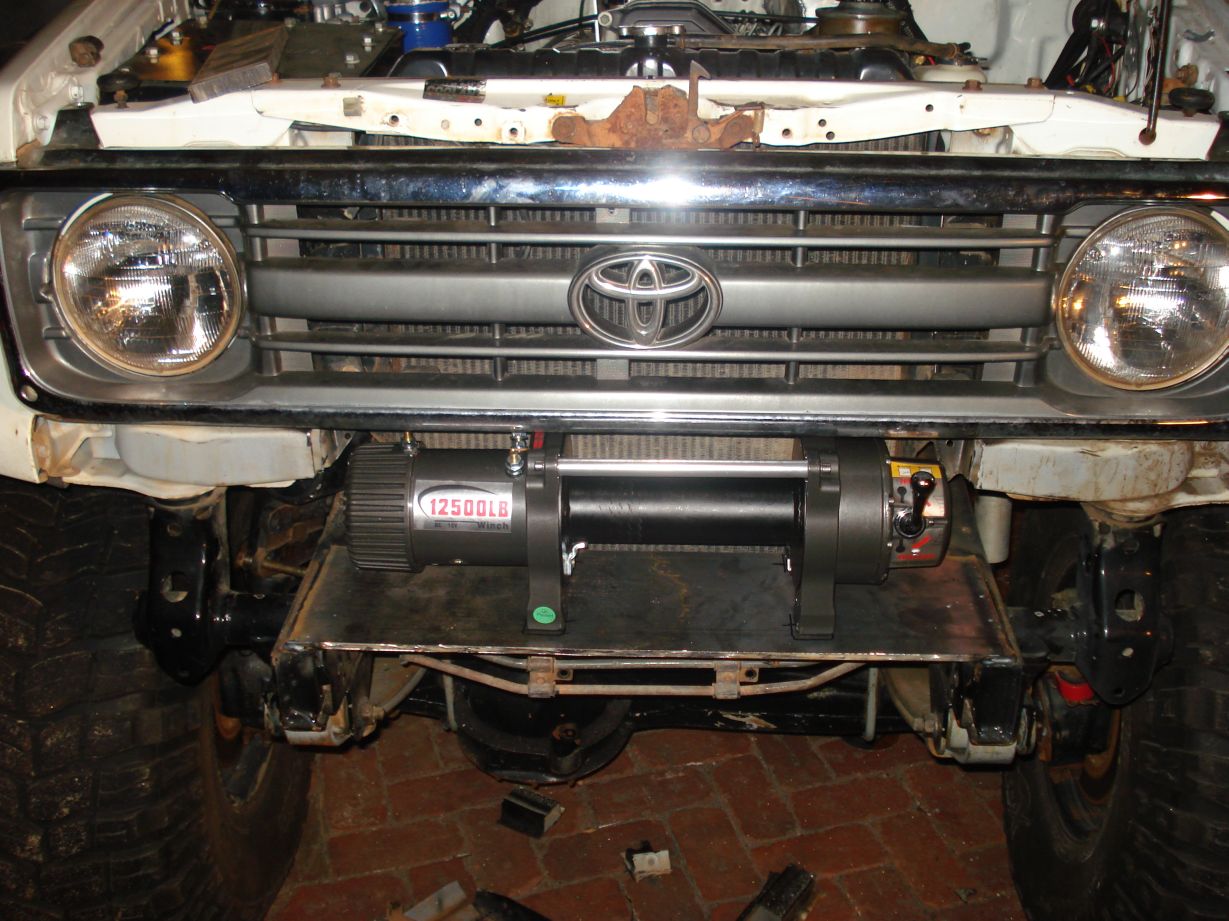
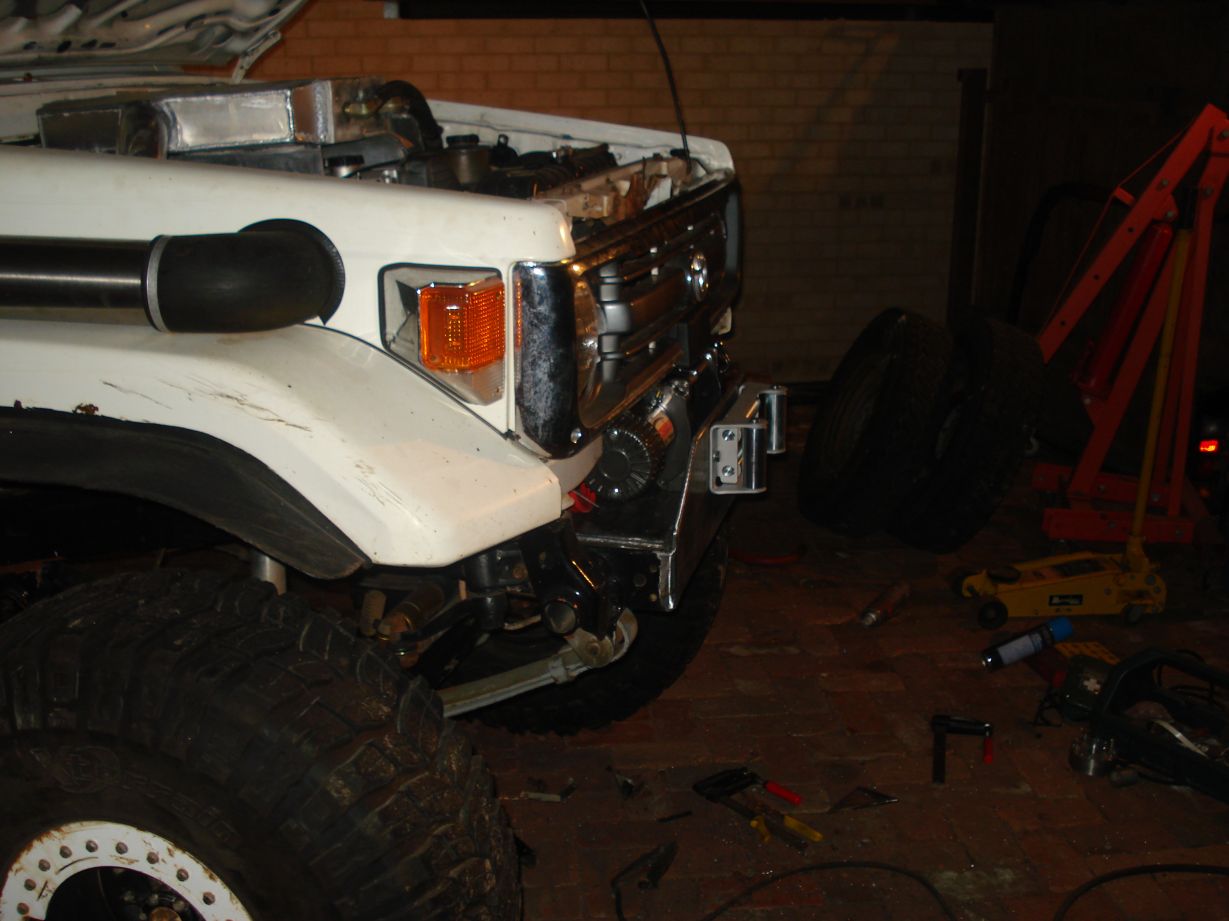
Mounted it as far back into the front of the car as possible
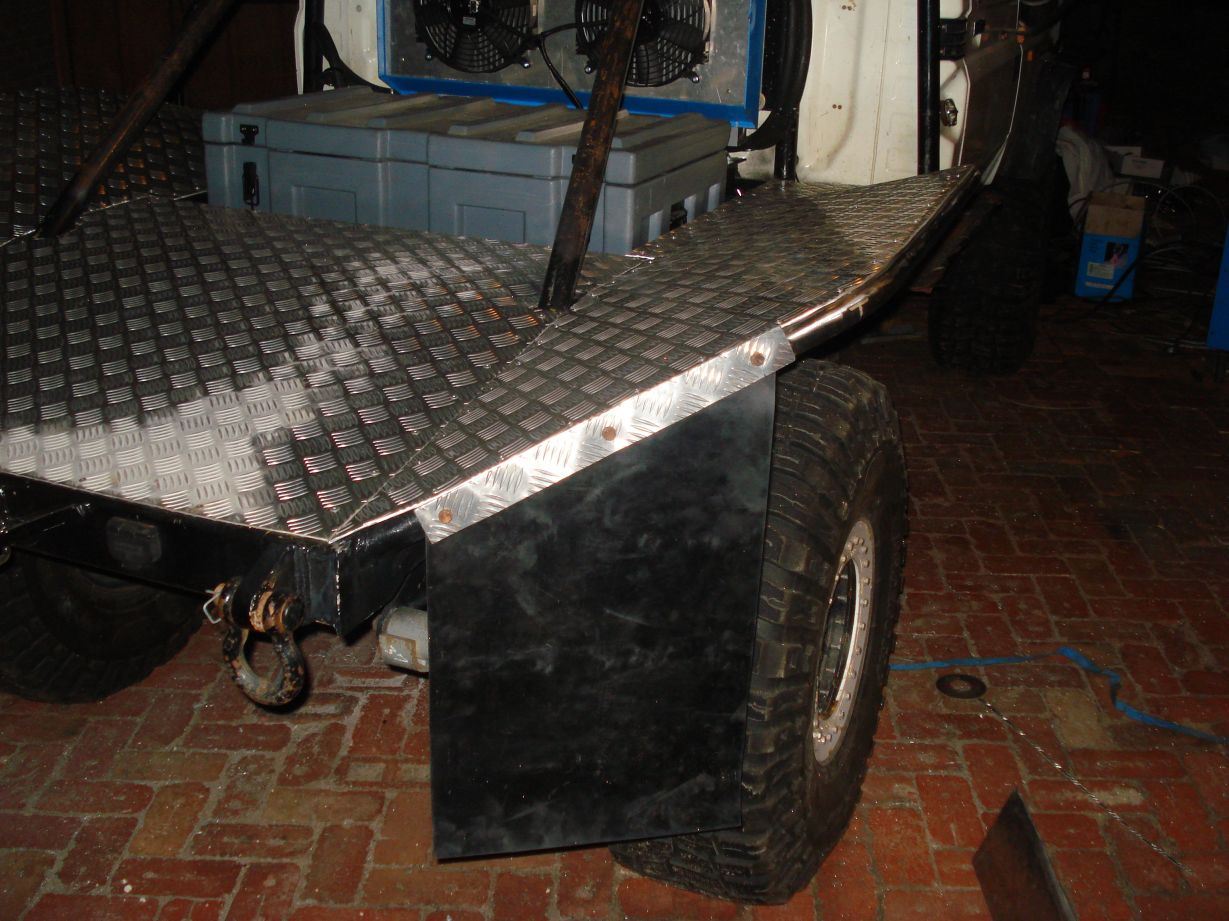
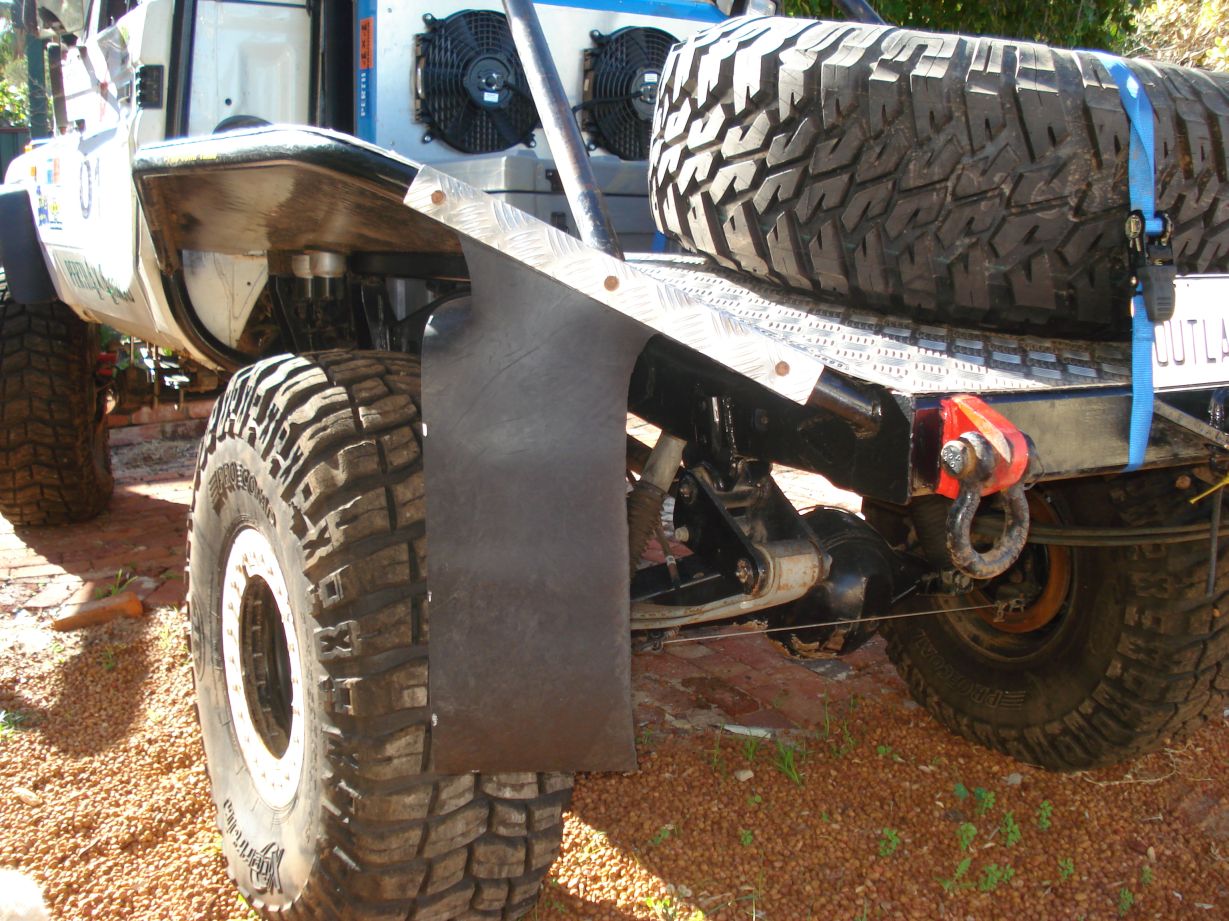
Basically finished the tray, mounted the mudflaps and fitted the pumps into the tray. Ran the wiring for some rear LED lights too.

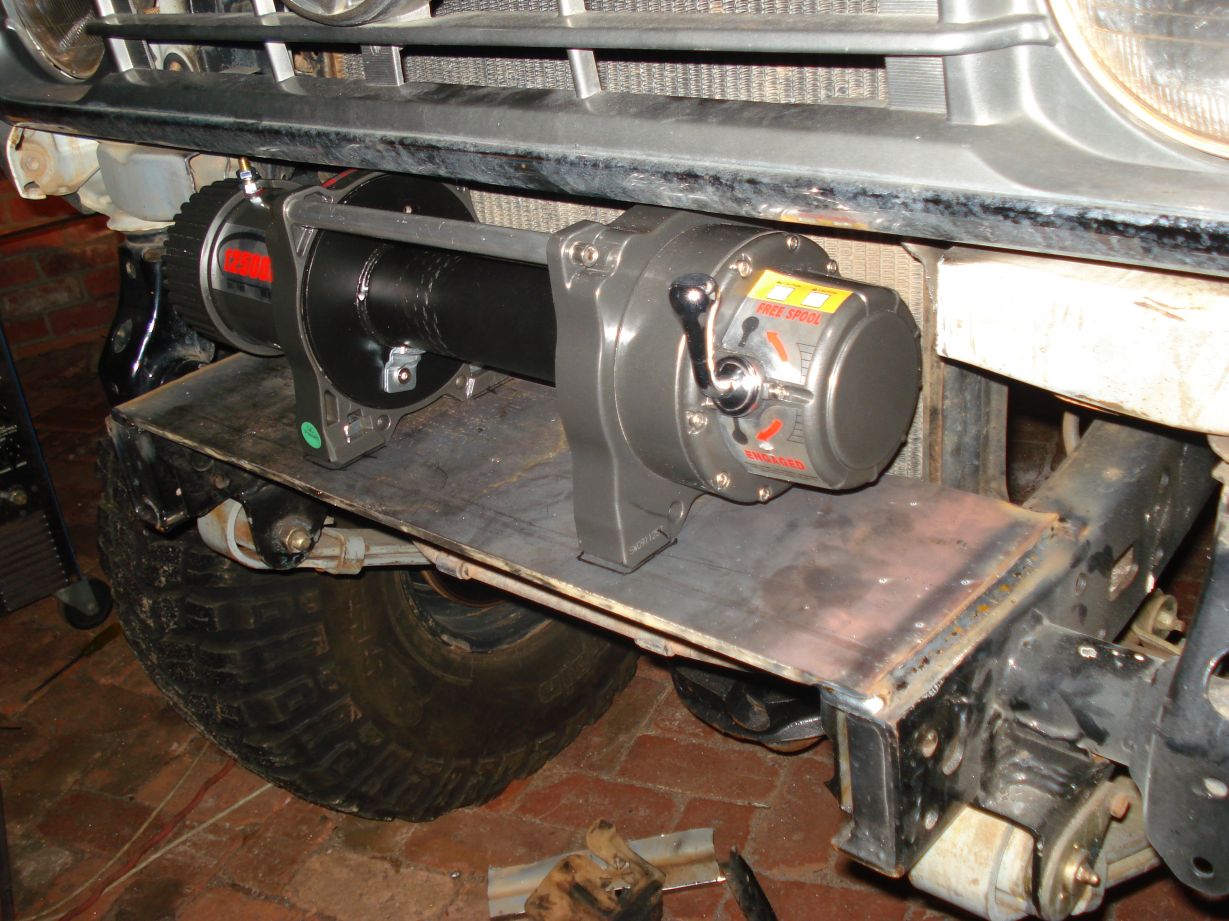
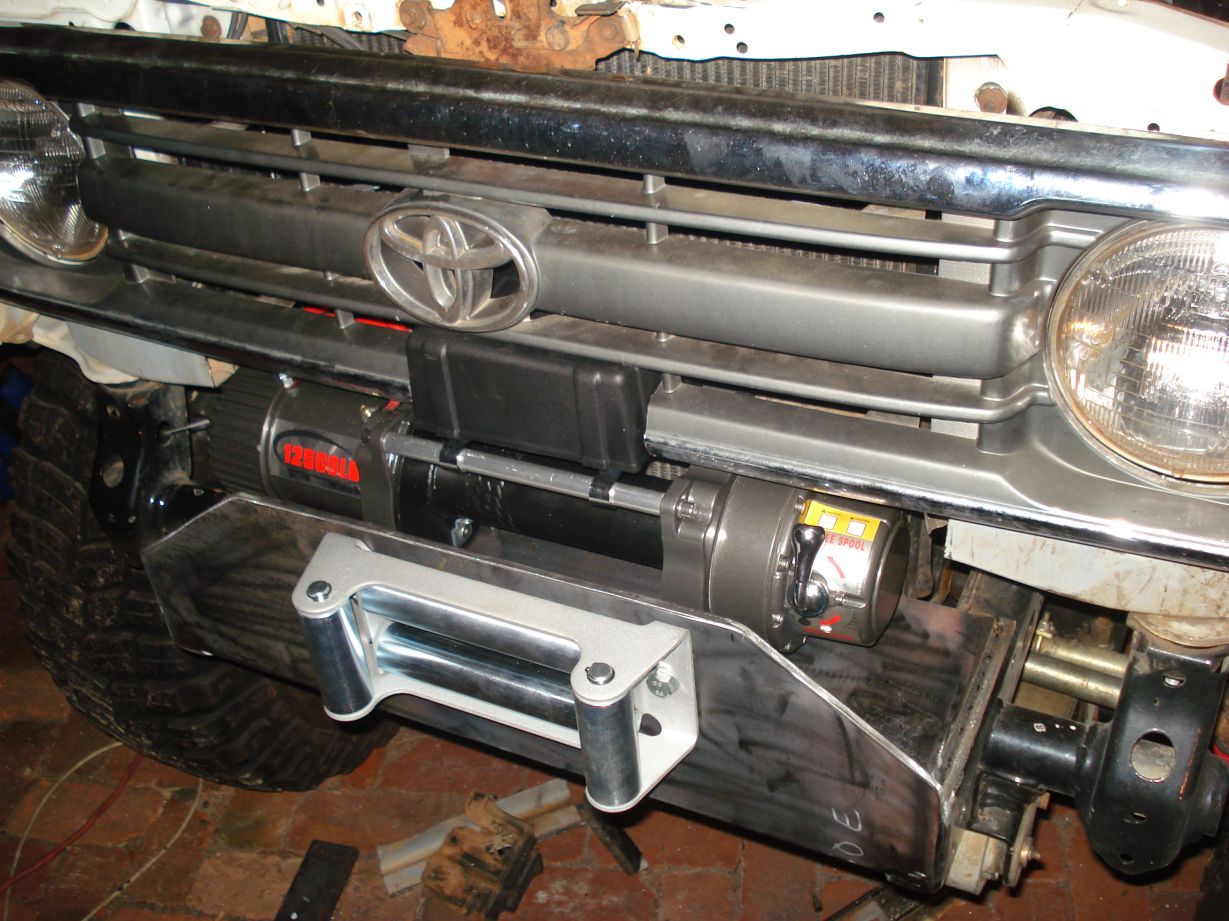
Finished the winch cradle tonight after work, still dont know what to do for light mounting. The rest of the bar work will go on after the comp.
Im real happy with how it fit for such a huge winch, the only thing that sticks out is the roller fairlead which wont be so bad once i fit rope and run the non roller fairlead.
All i have to do now is wire it up, fit some rear lights and a rear spotlight to illuminate the toolbox and when reversing.
Pad the inside of the cage a bit, and maby change the clutch!
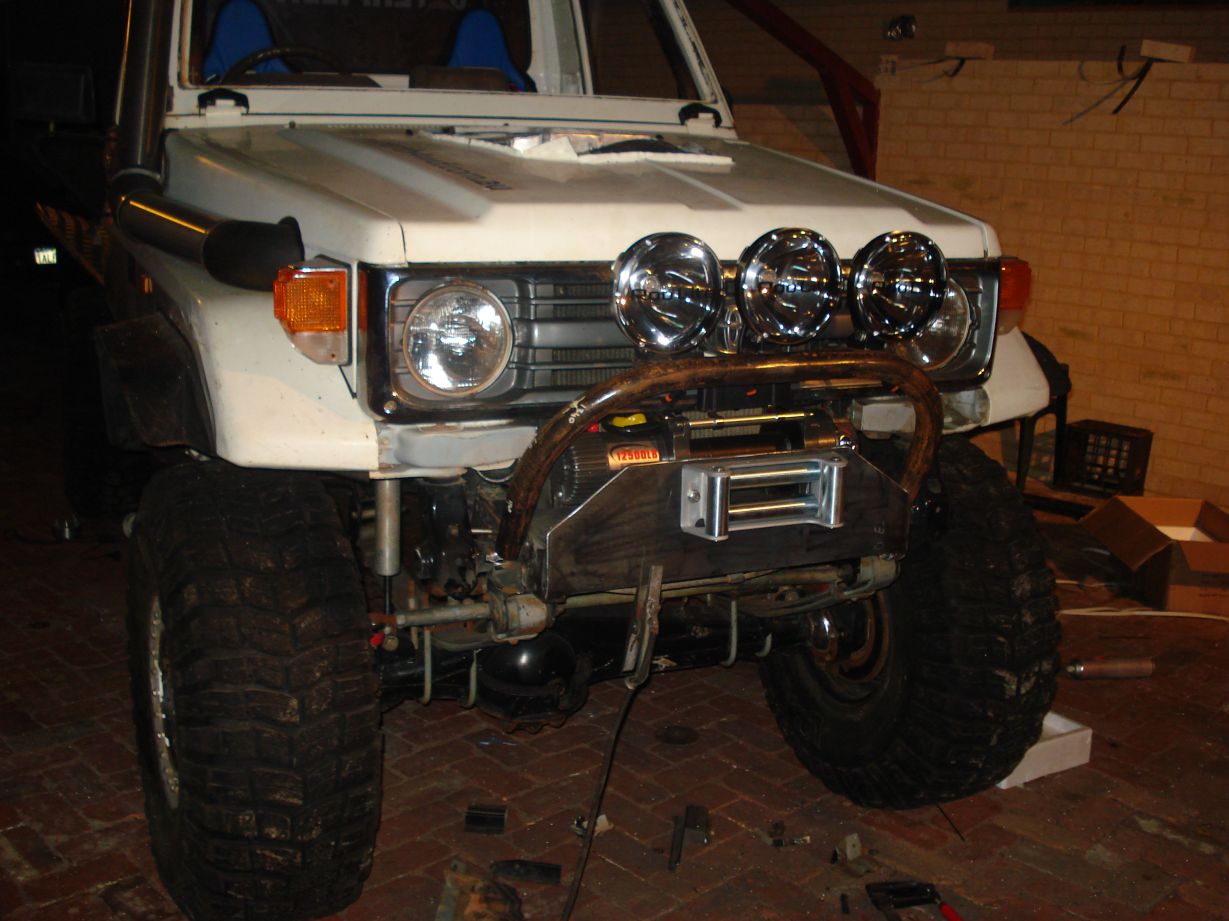
heres a few pics…
Lights up the darkness!
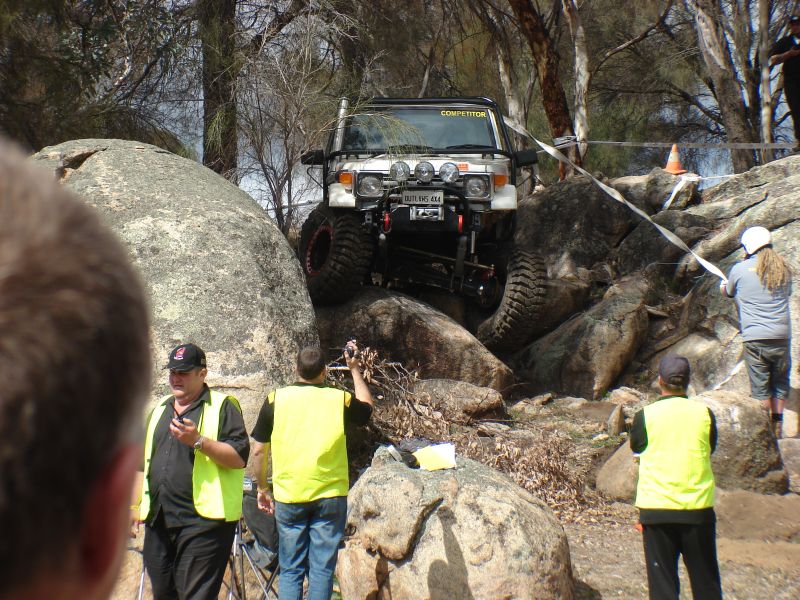
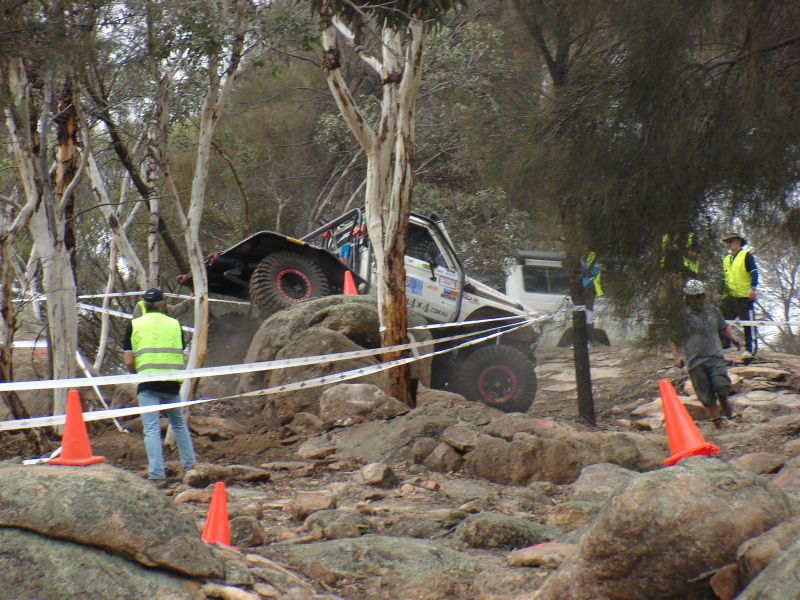
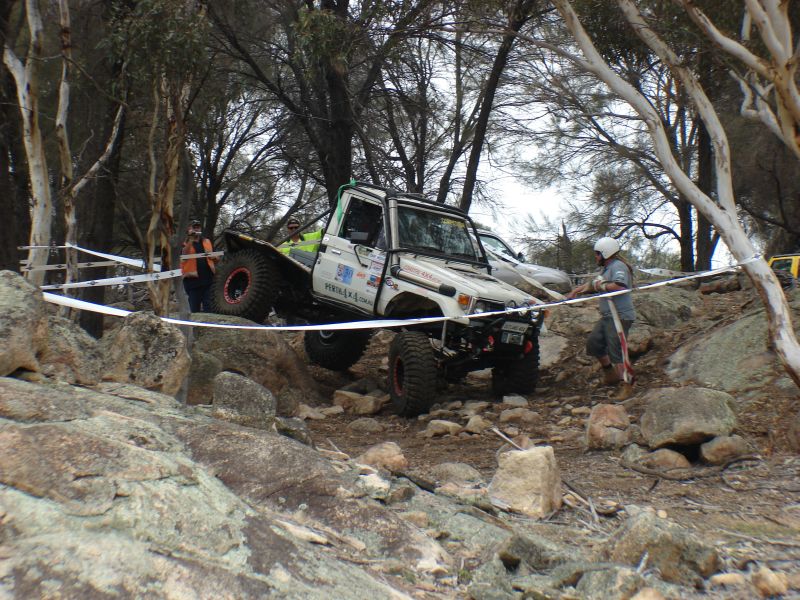
Competed in my first comp last weekend, here are some movies
[youtube]http://www.youtube.com/watch?v=xHoTIAyhyUw[/youtube]
[youtube]http://www.youtube.com/watch?v=2nk0ShWktQg[/youtube]
[youtube]http://www.youtube.com/watch?v=2jQ97yEEZUA[/youtube]
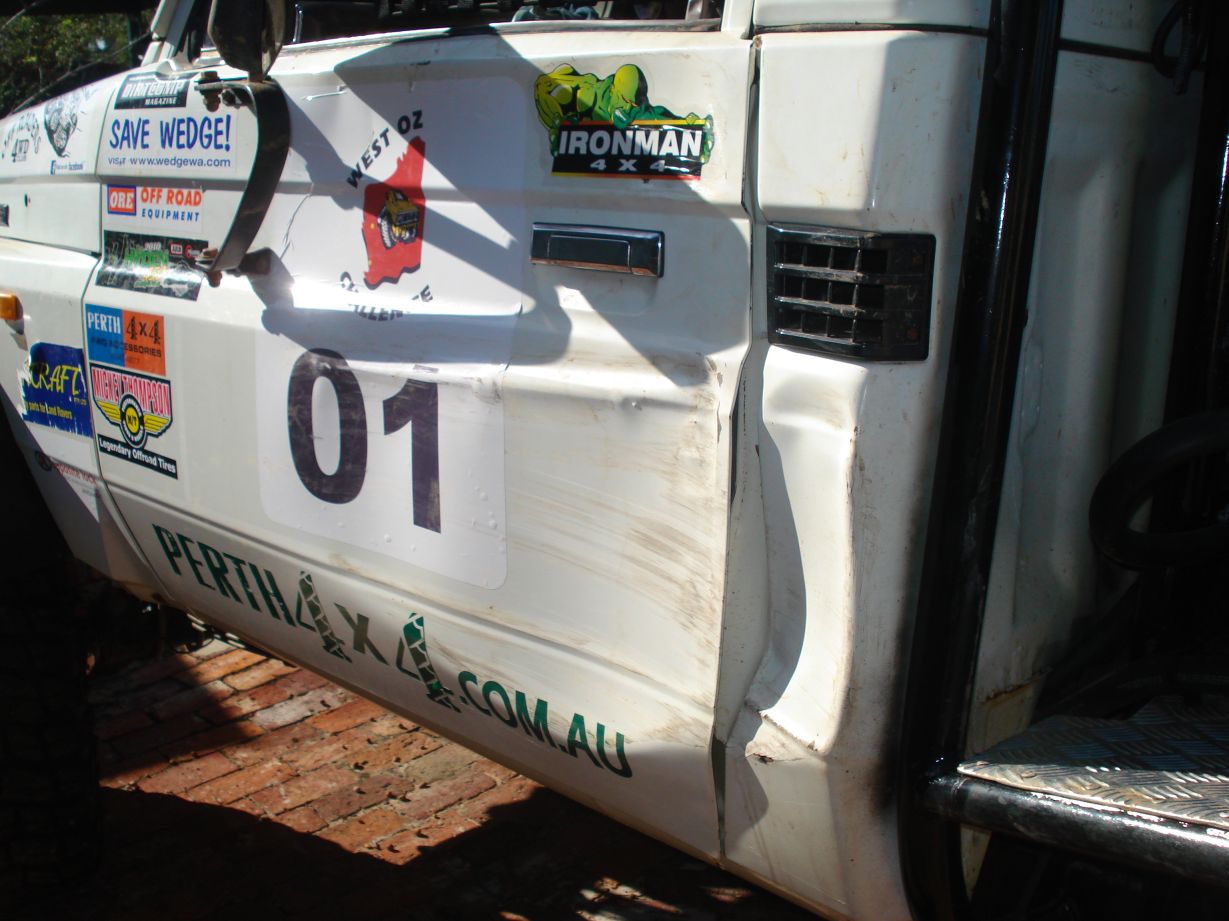
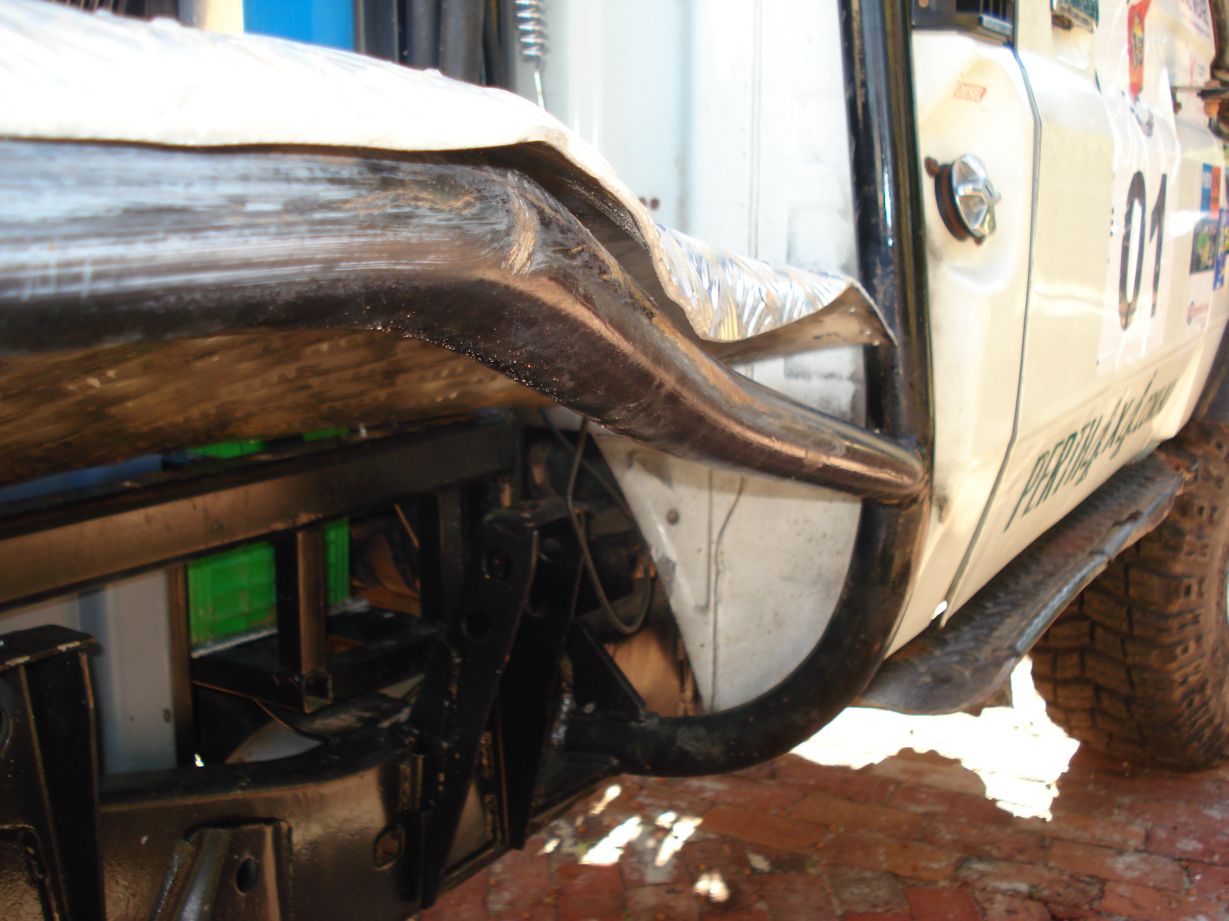
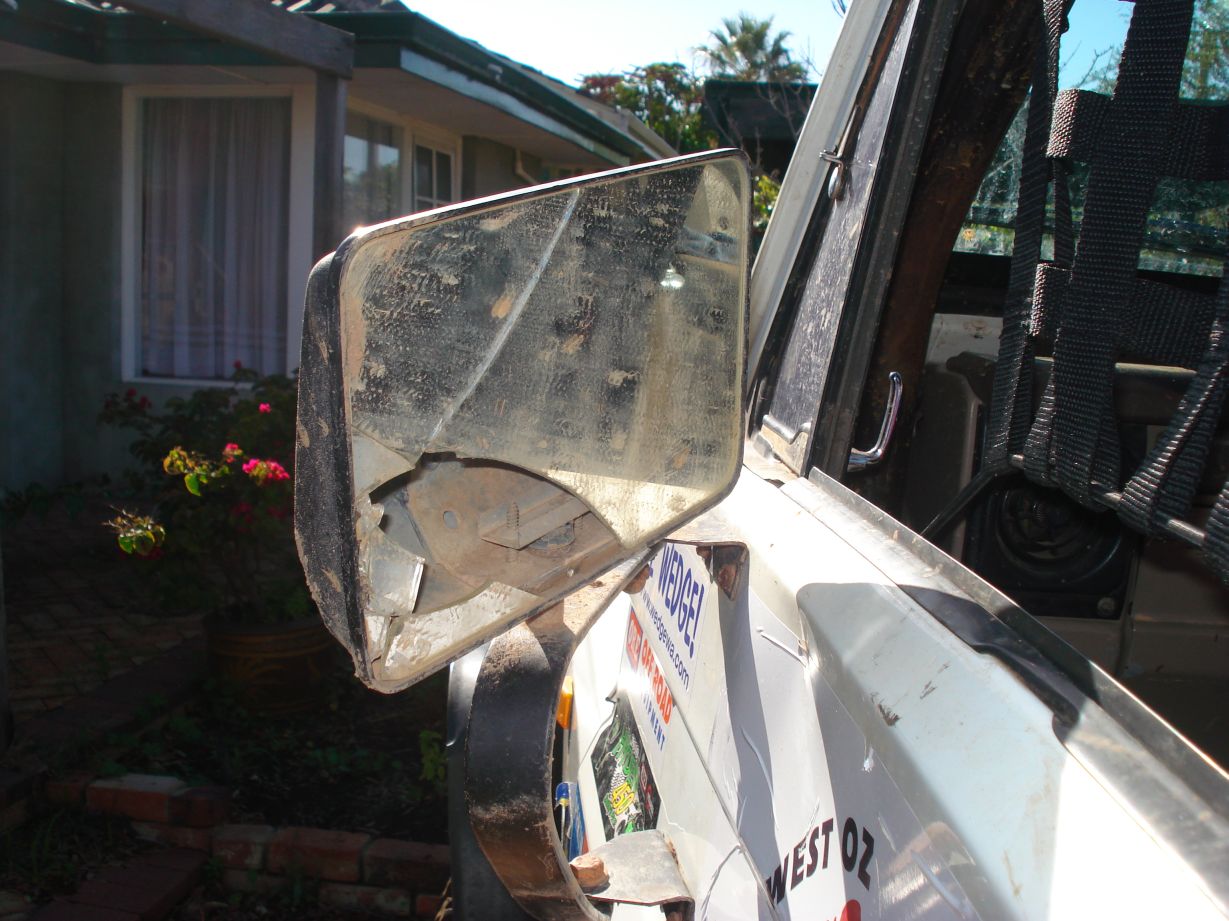
Alright well i have my damage report here,
Passenger door and pillar are both totally rooted
Drivers side tray rail is bent in and the checker plate has distorted… i didn’t get enough time to brace it like i wanted..
Both side mirrors and mudflaps are broken
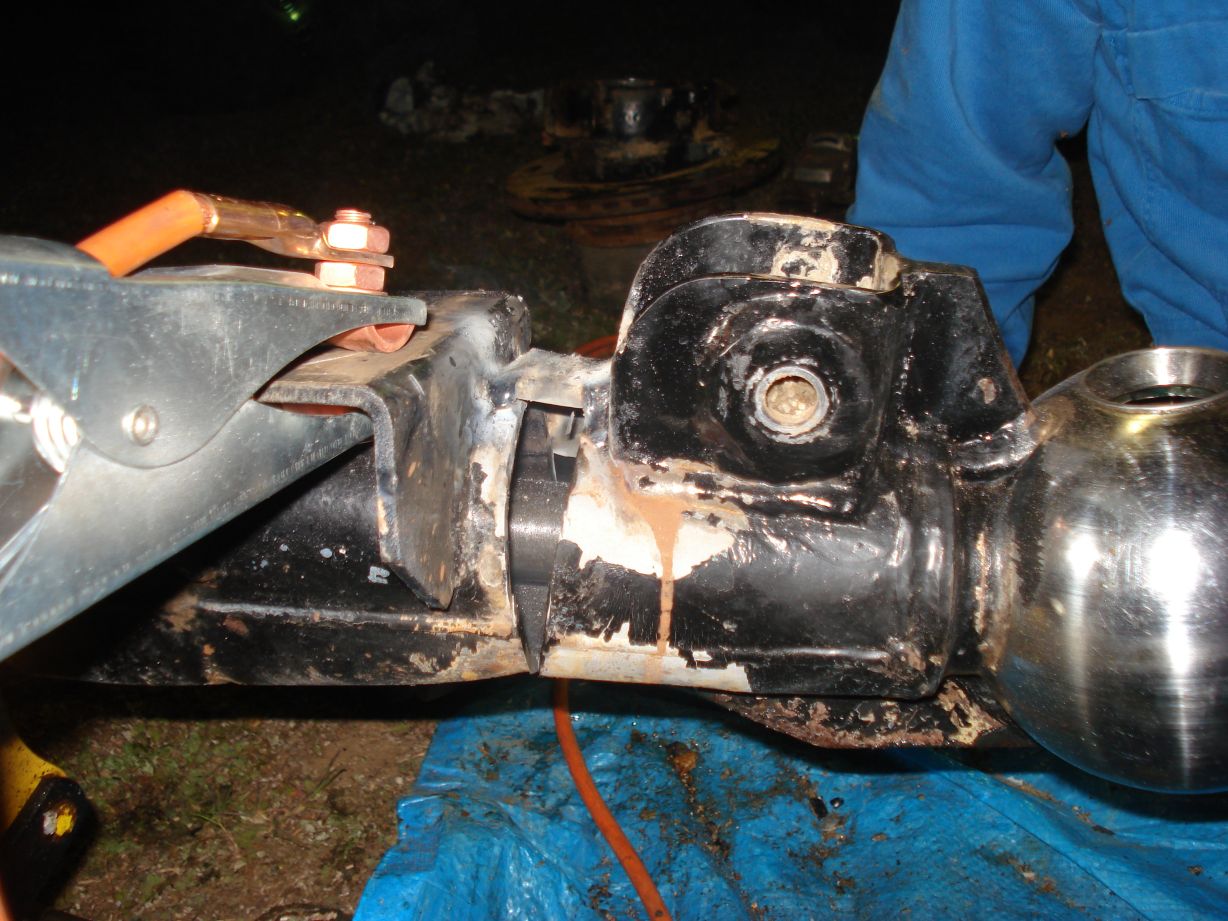
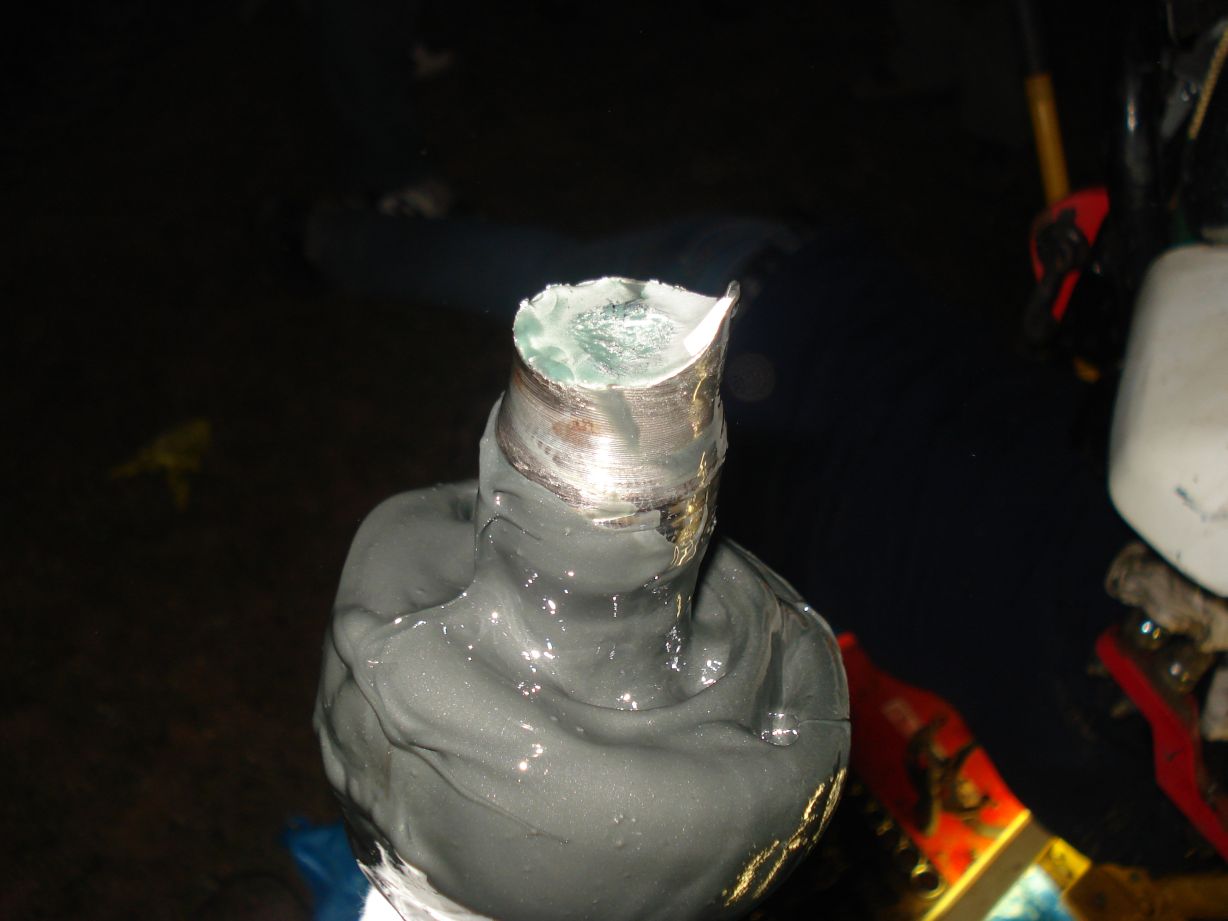
Here is the square driveshaft that uncle duncy made for me, aswell as some carnage to the sump.
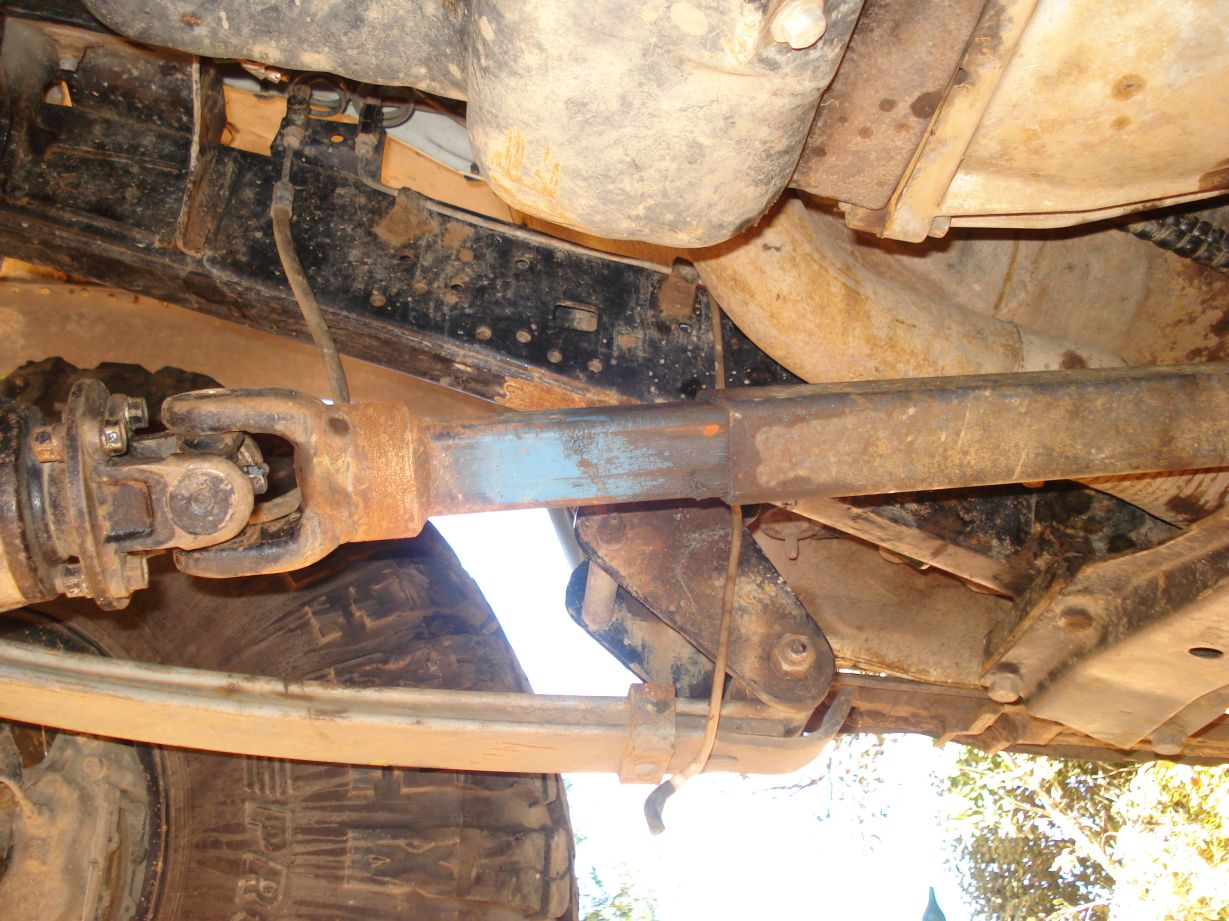
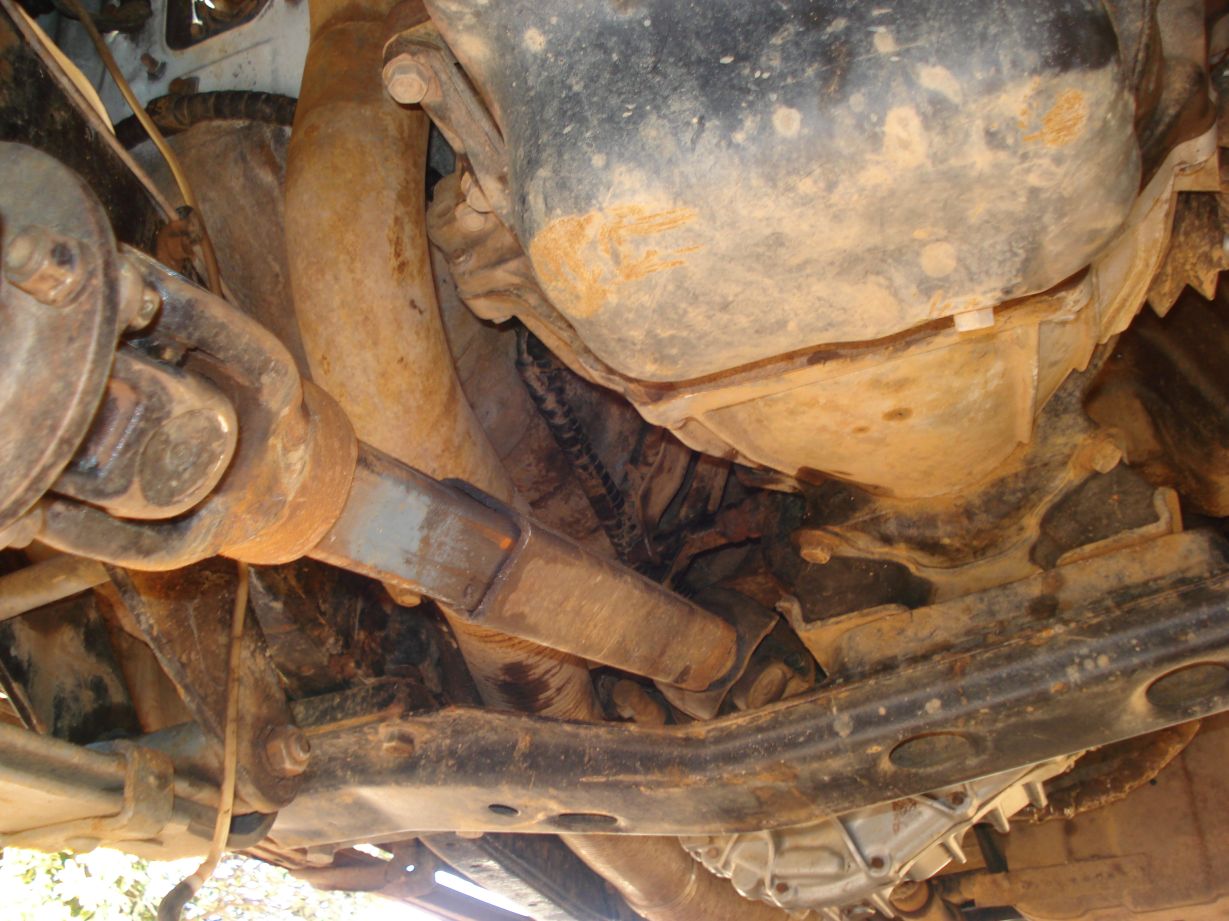
FUN FUN!!
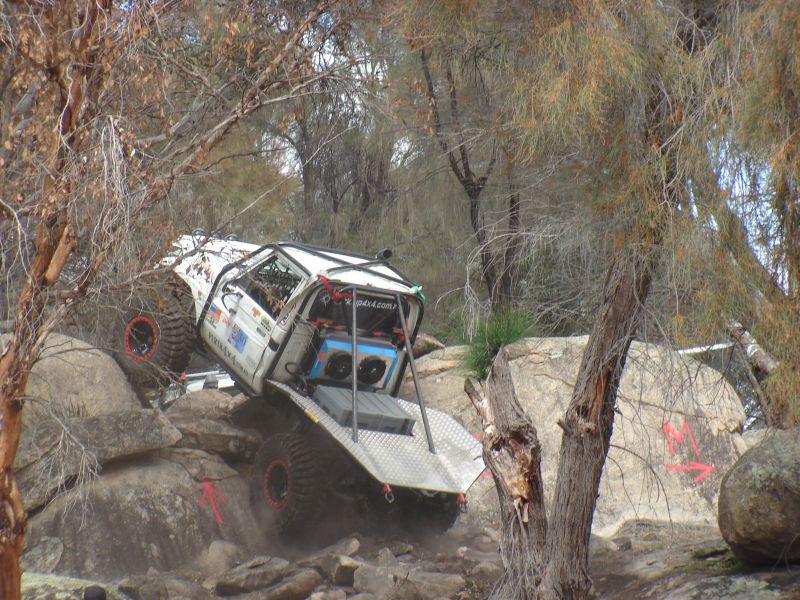
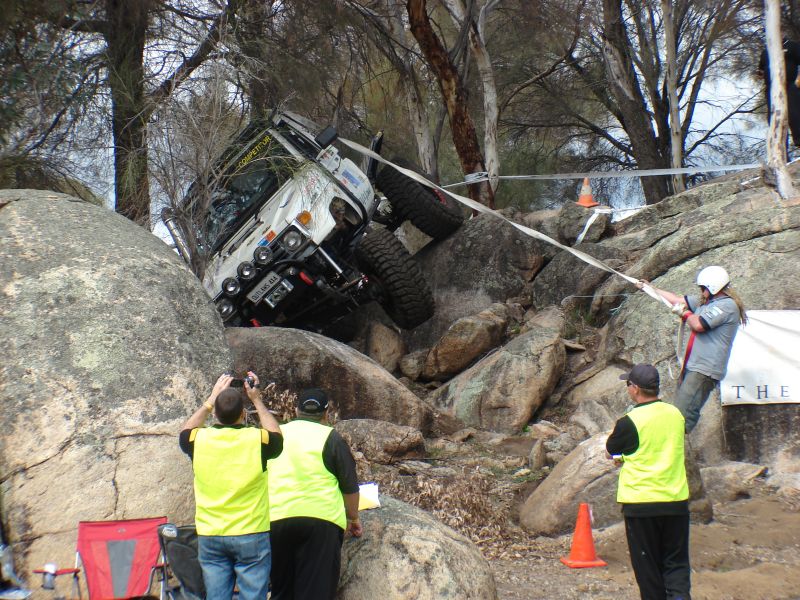
Found these pics but, Cheers to Randall from Dirtcomp Magazine for these. Now i know why i couldnt see nothing haha!
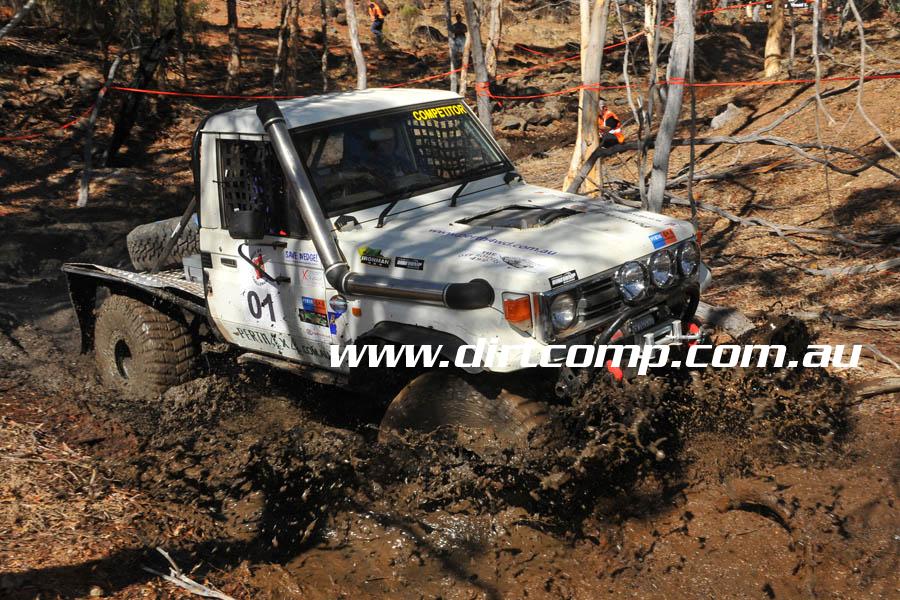
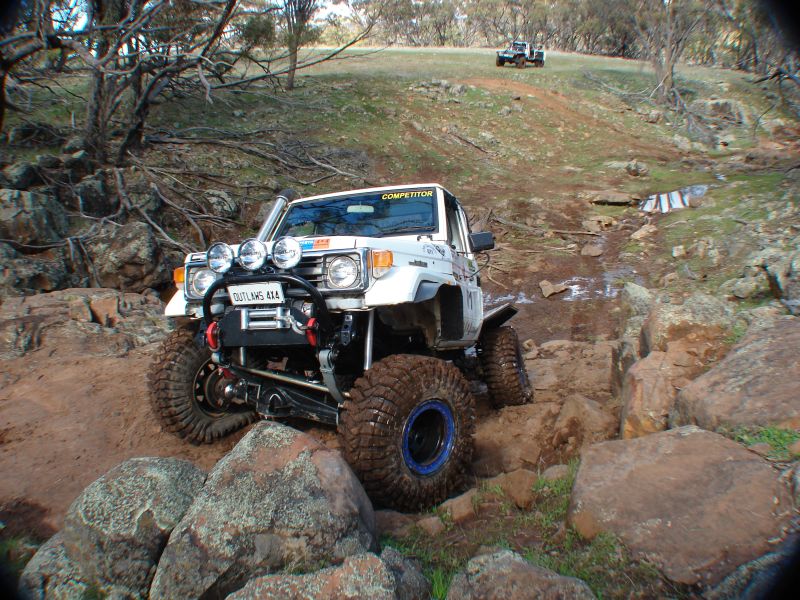
Here is a poser shot in a section about 15mins nth of wedge
Got alot of my parts together to ready the rig for Coastal Rocks.
A big thanks to Chris @ Locktup for getting all this for me, your a champ!
Hydro assist
Rock assault pump
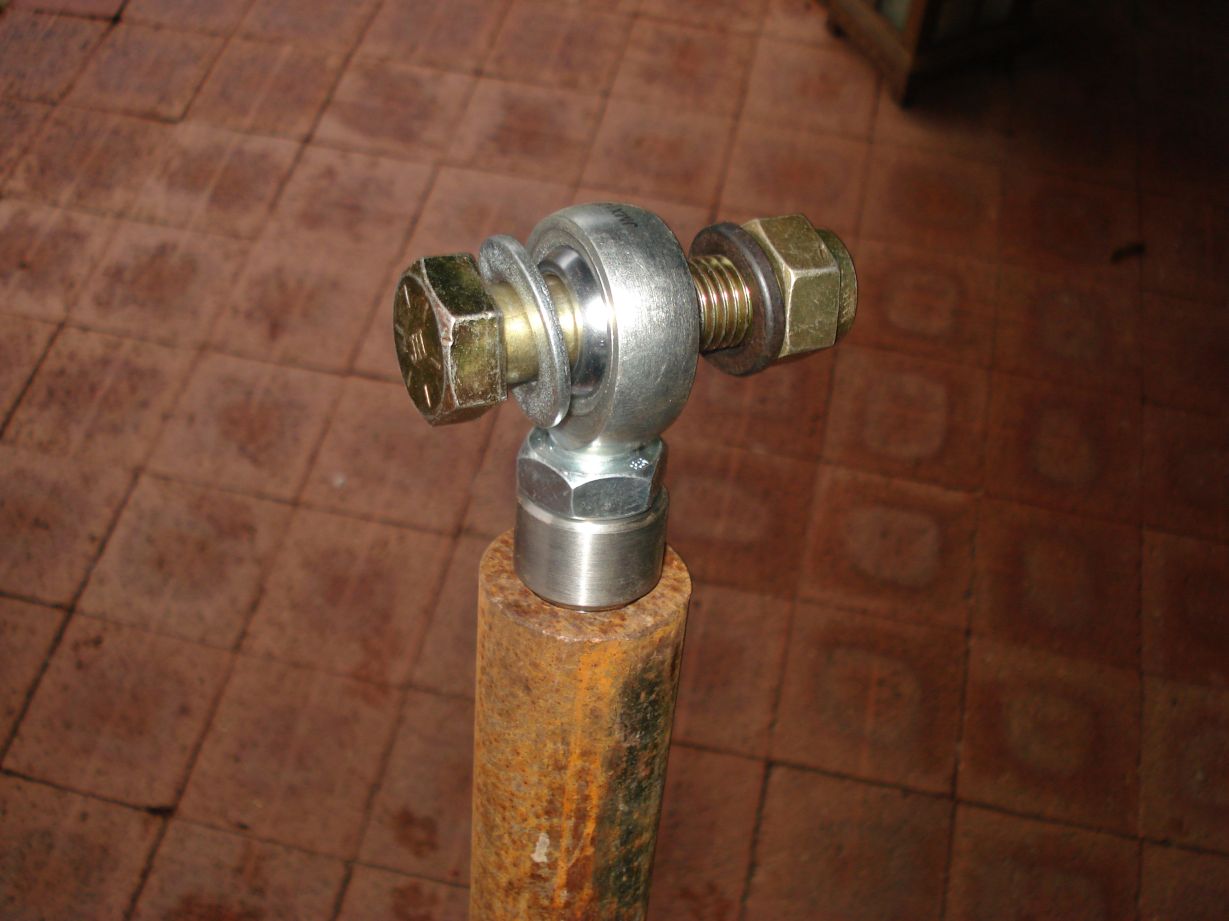
Chromo heims to replace my forever breaking tie rod ends
Chromo heims for a trac bar
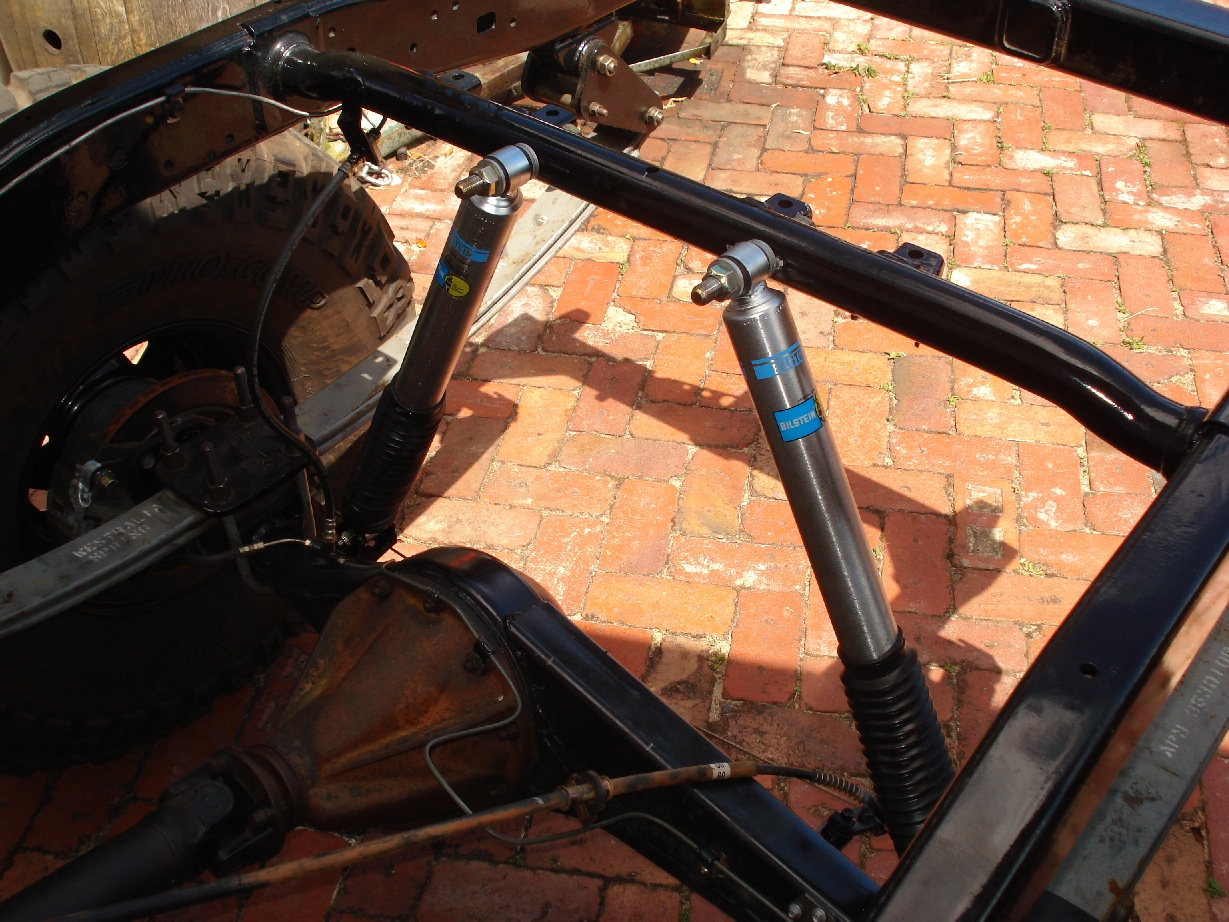
12″ Redback combo shocks
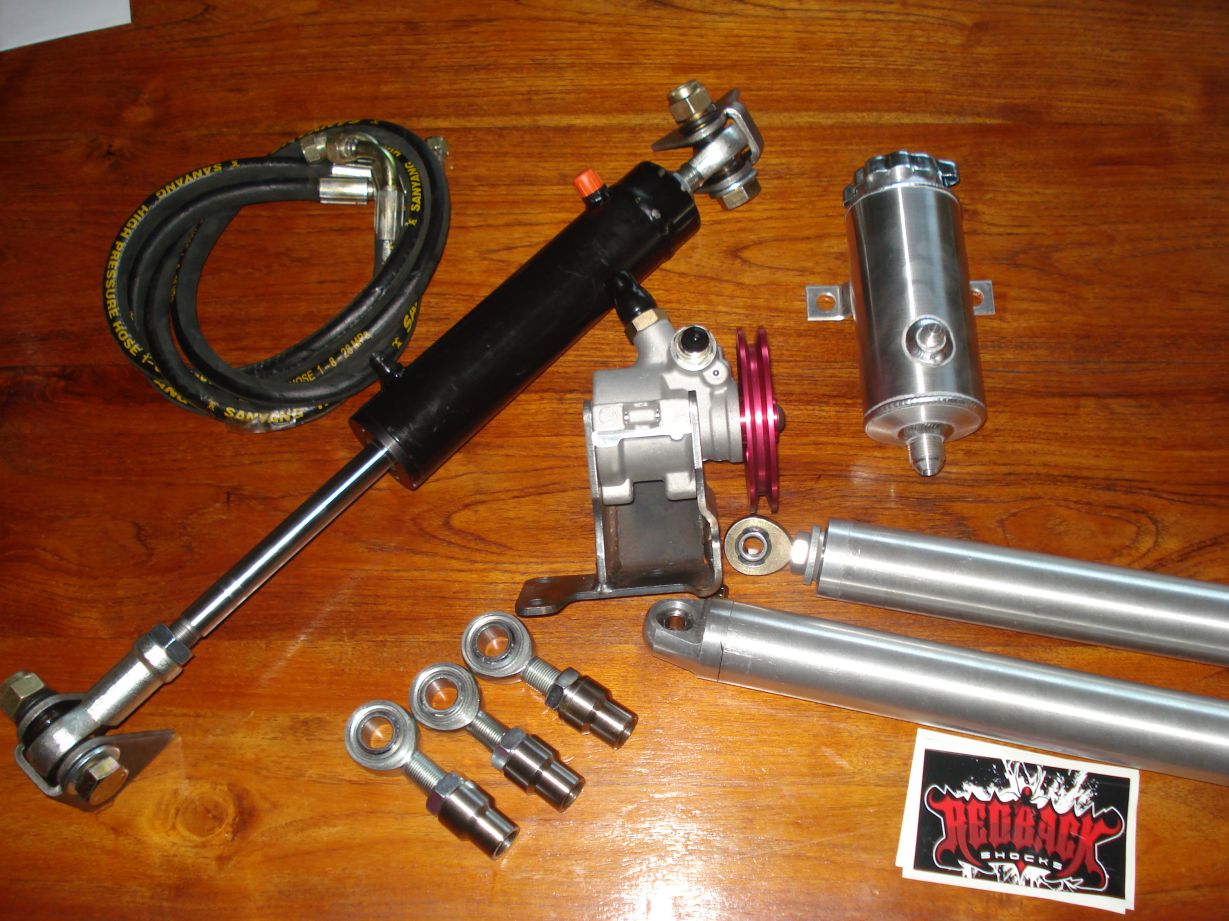
I also picked up a length of 45/25 HT hollow-bar to make a tie rod with…. wont break that one!
Still got to:
Build an exo
Fit some kind of reduction system, gears/twins/atlas/custom
Tweak the suspension a little to make it a bit flexier
Lastly some undercarriage armor and rear diff armor… ive already almost punched the rear pumpkin to the crown wheel…
At least my lists are getting shorter nowadays.
Here’s a quick update…
Been working alot more lately so not alot has been done to the ute…
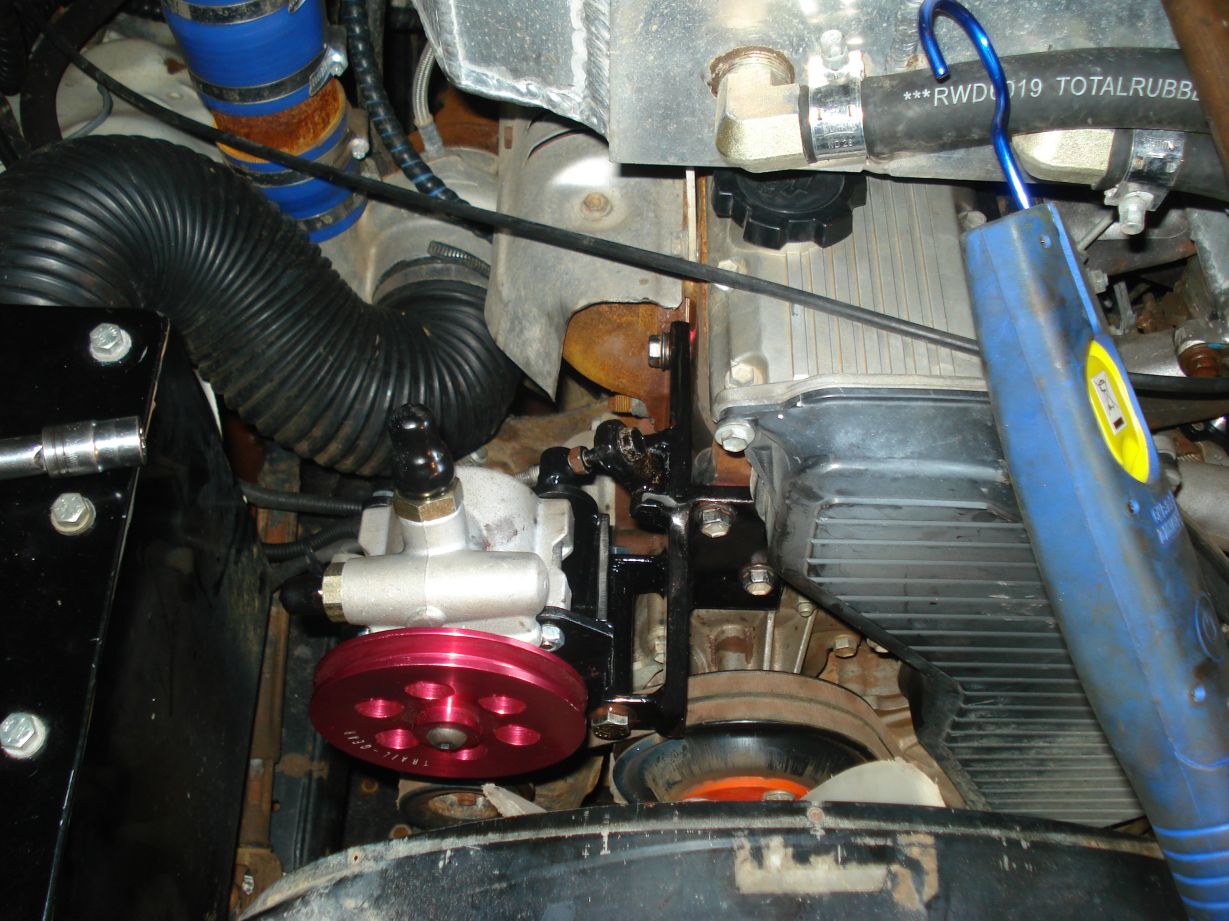
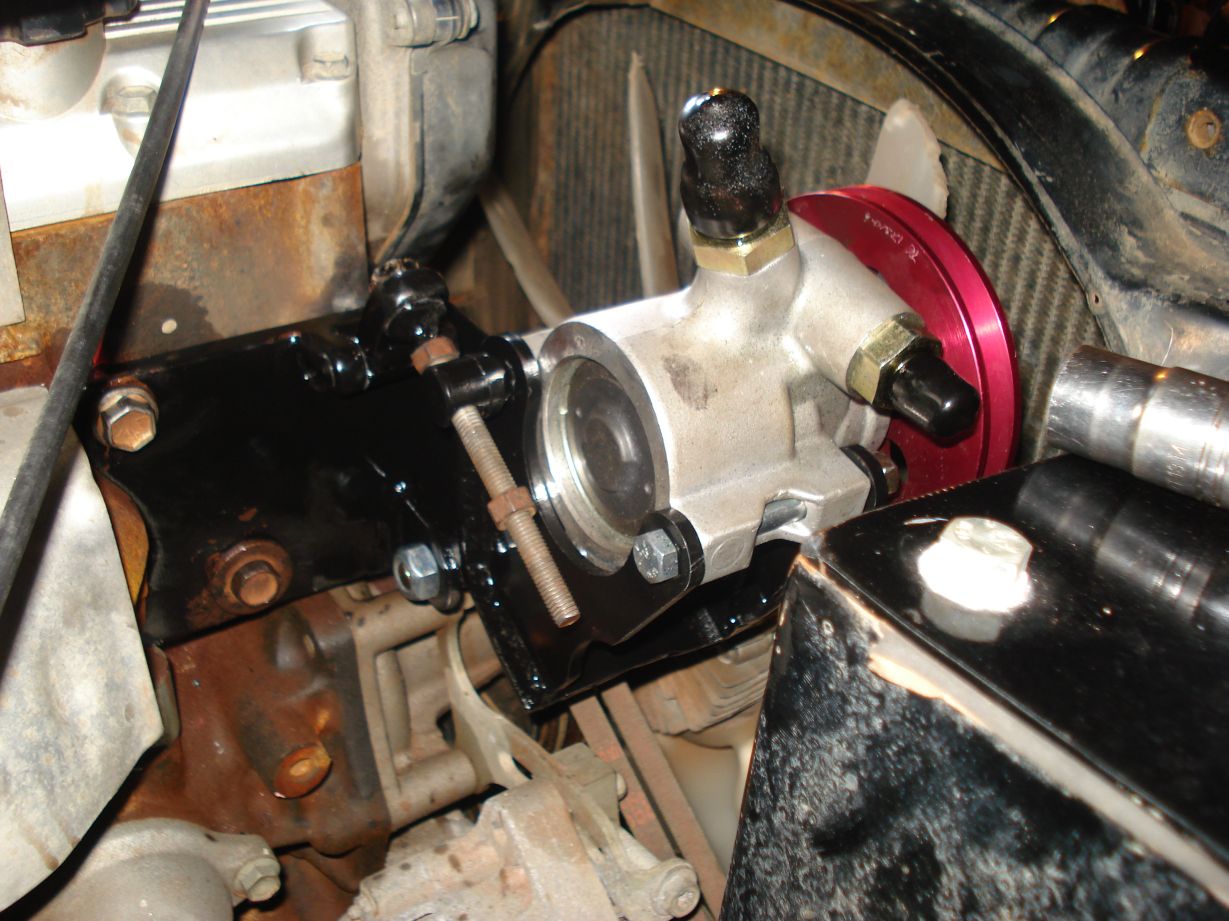
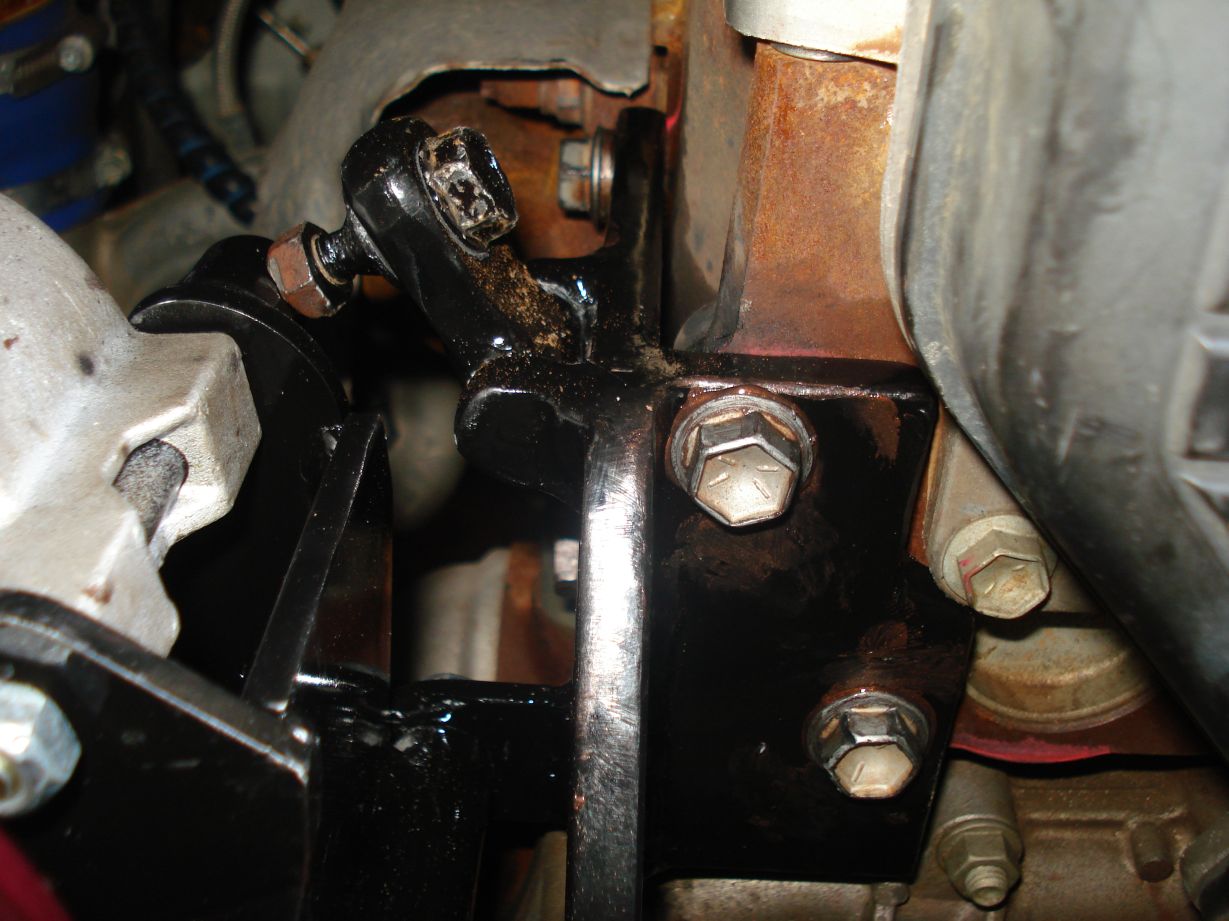
Power steer pump bracket made and pump mounted.
New tie rod
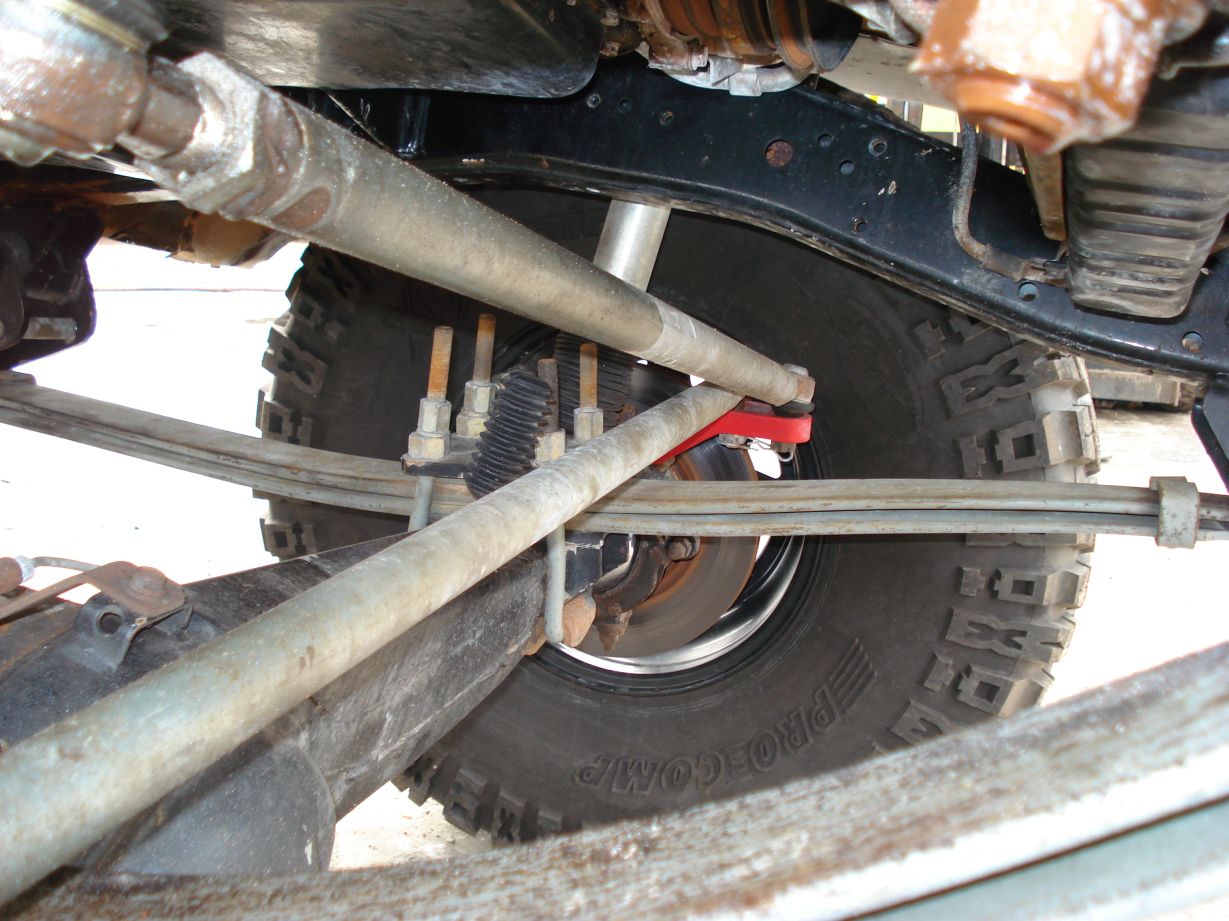
Straightened and strengthened the tray rails and moved my shackle hangers back.
Here u can see my improved shackle angle
Ive got to pull my longfeilds out now coz ive spread the bell on one of them and its almost totally bound up.
Pull the steering box out and drill/tap
Zap the hydro ram on
Fit a new rear hub and axle
Fit the new shocks
Exo!! if i have time haha
I worked today so didn’t get much done… Yet again
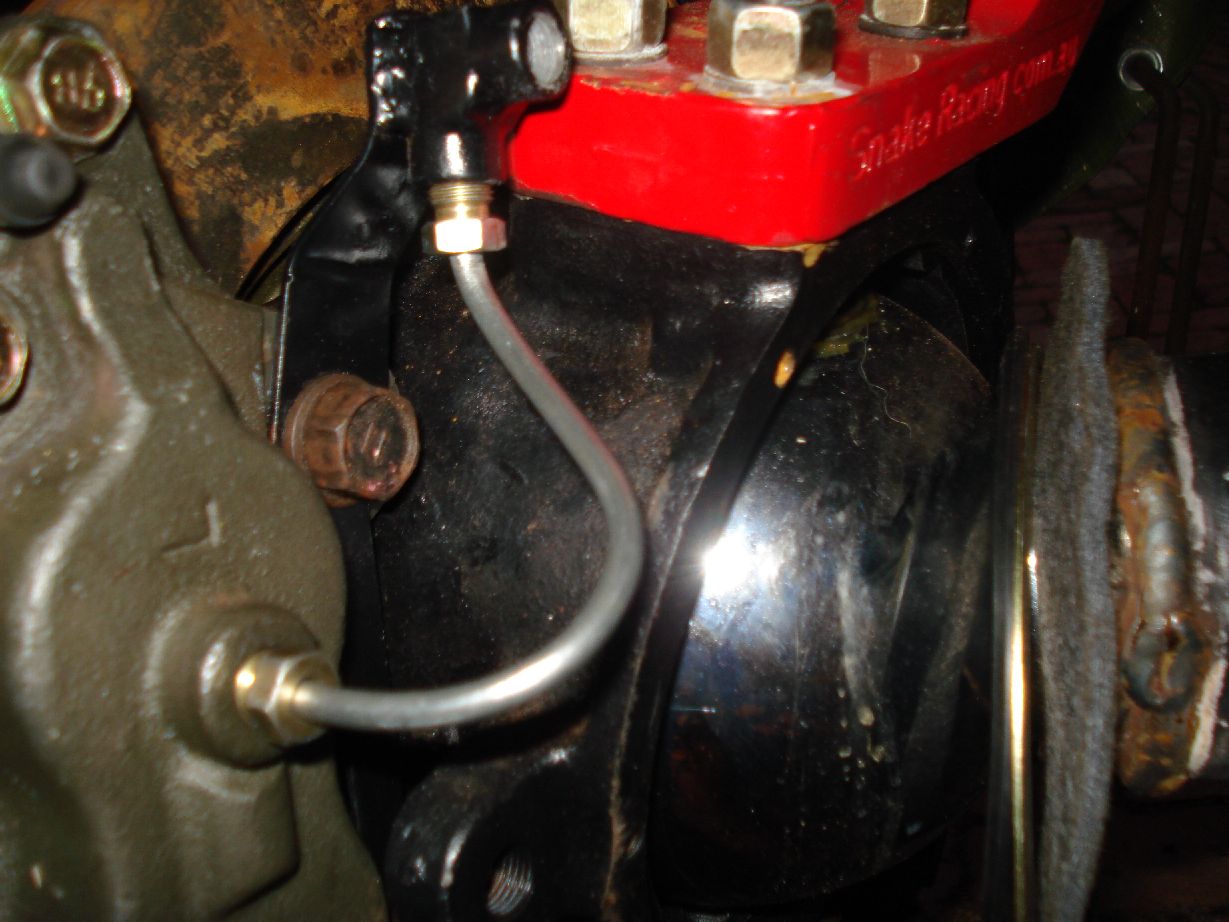
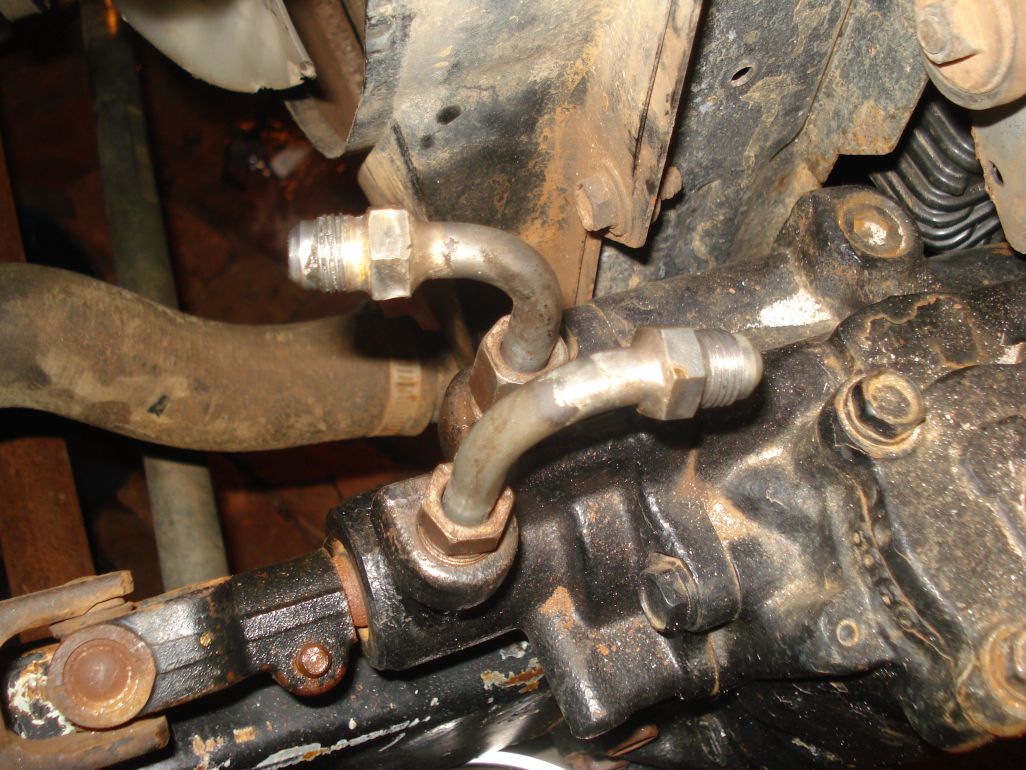
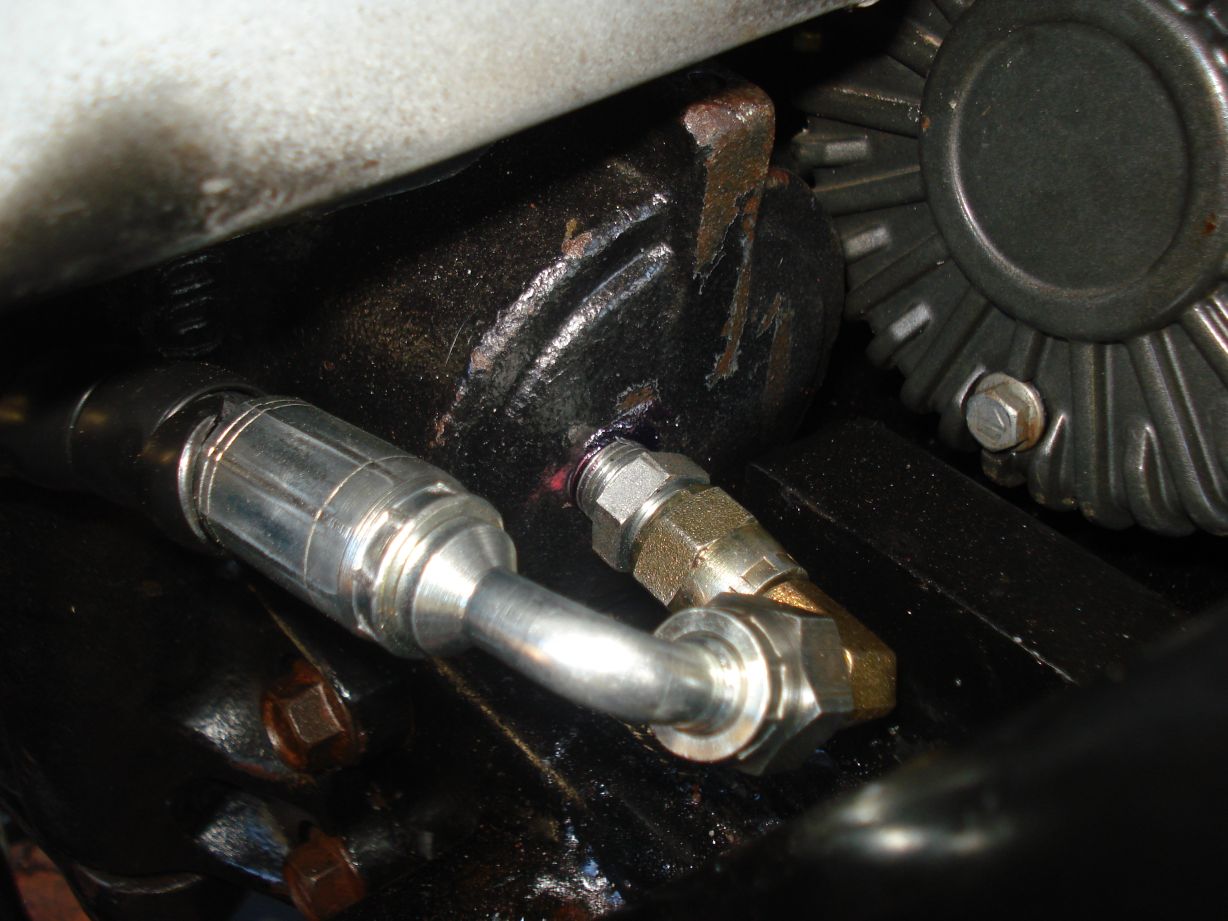
Made these fittings, you pretty much cant buy metric flare to -6 Jic nipples, so these will have to do the job. -6 plugs drilled out and counter-bored to suit the steel tube then Silver soldered.
Got this cooler for the power steering, 300x100x50mm 13 row with -6 fittings. Made a pretty simple mounting bracket for it too. The front of the rad it getting pretty cluttered ill have to keep a close eye on engine temps.
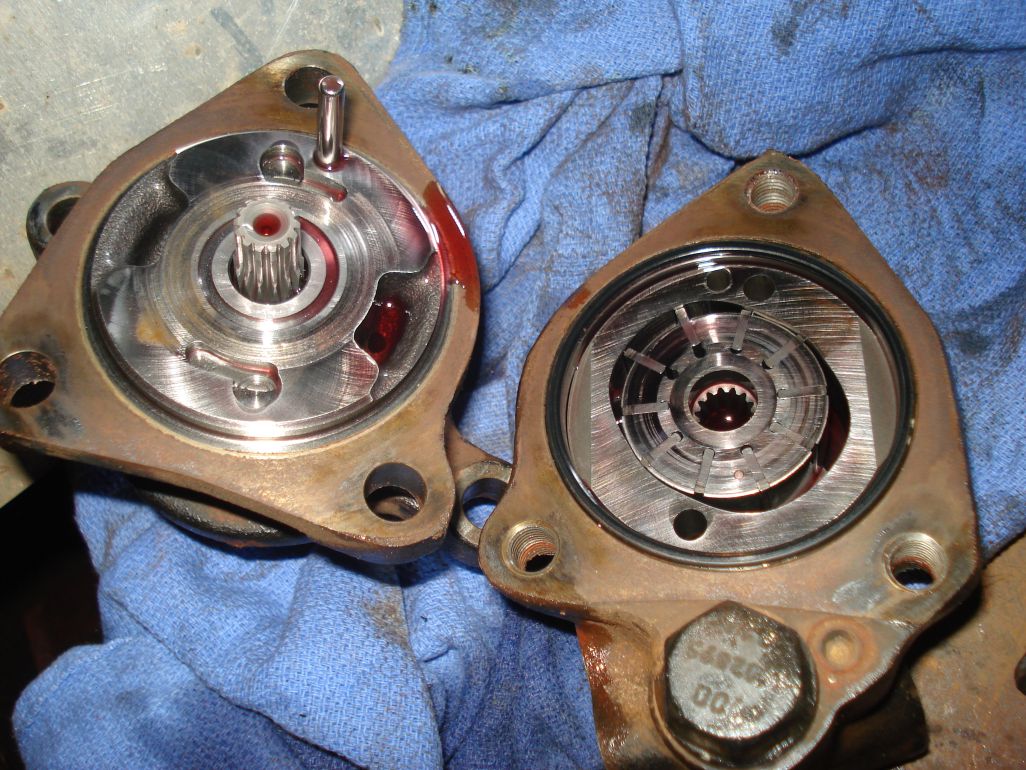
Pulled the standard power steer pump out had a look at it, its fried… the sides of the vein rotor are all scored and the inside of the cam ring isnt in good shape either. Bad news for a near new pump. Then i made a blanking flange for it. 10mm plate and some 515 sealant.
Pulled my longs, they are in pretty bad shape… I have re greased these numerous times over the years with good grease too. They have been getting progressively worse but now they are too far gone and locking up.
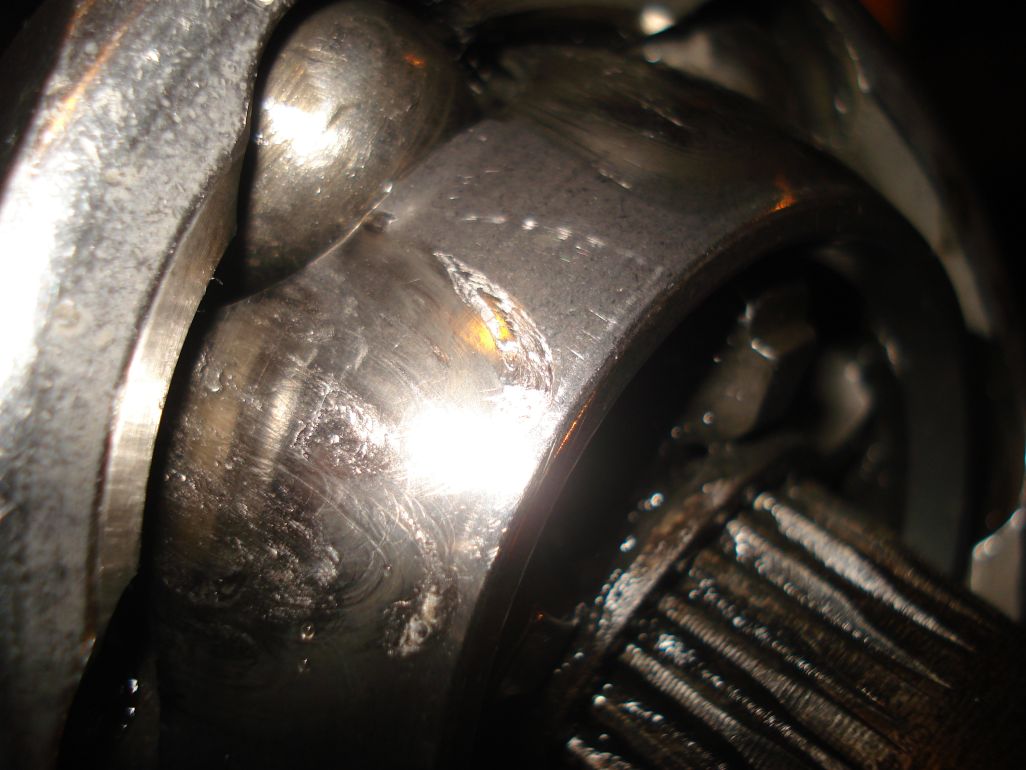
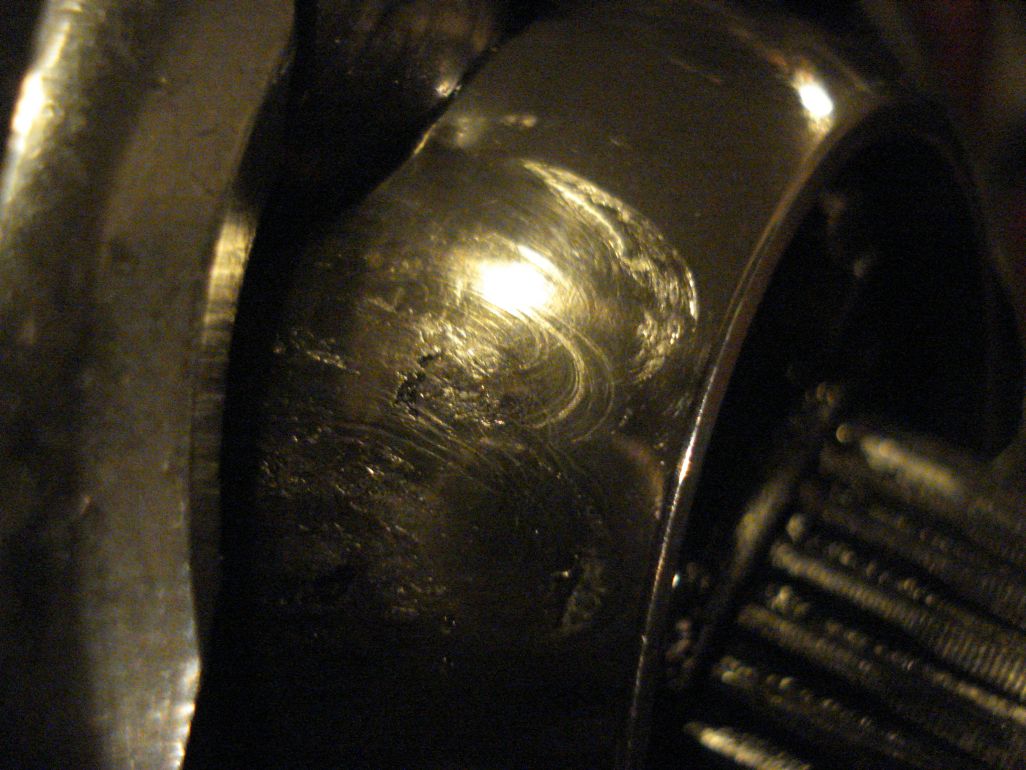
Tomorrow ill be swapping out my front springs for some new ones then mounting my hydro ram.
Quick update on the Hydro assist
I used 1/4Bsp to -6Jic nipples in the steering box. Alot of people use 1/8th and tap into the veins, don’t know why they would be a big flow restriction in comparison.
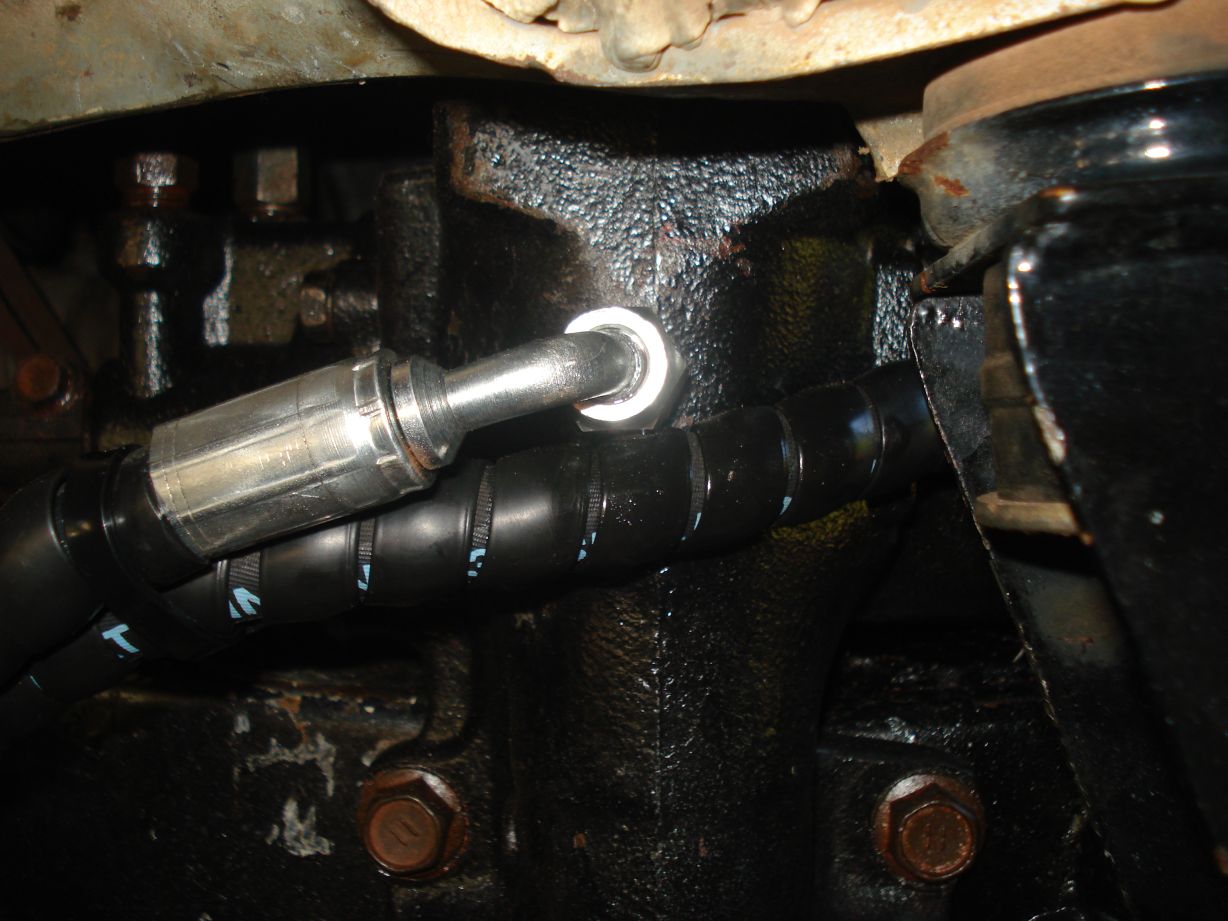
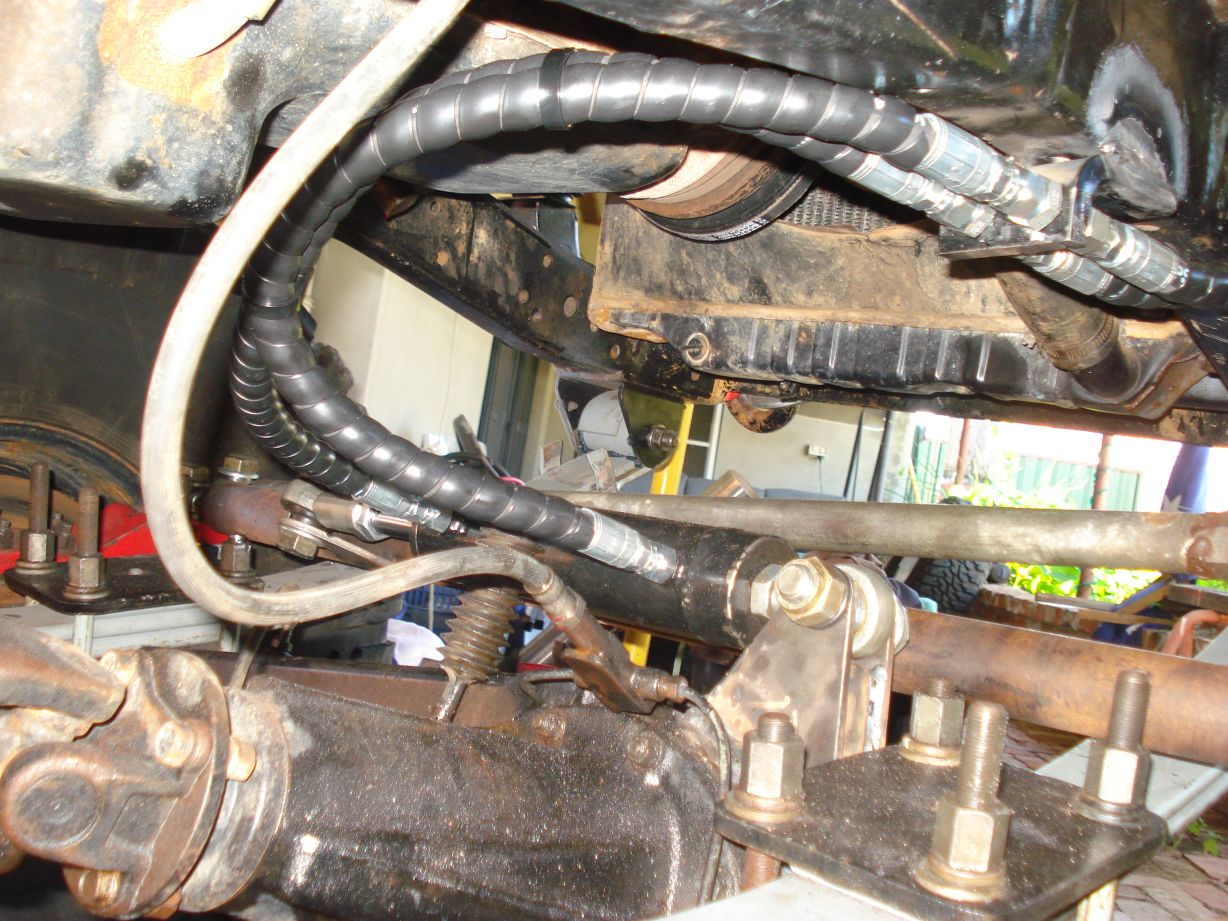
I ran the lines to a bulkhead behind the shocks then to the ram.
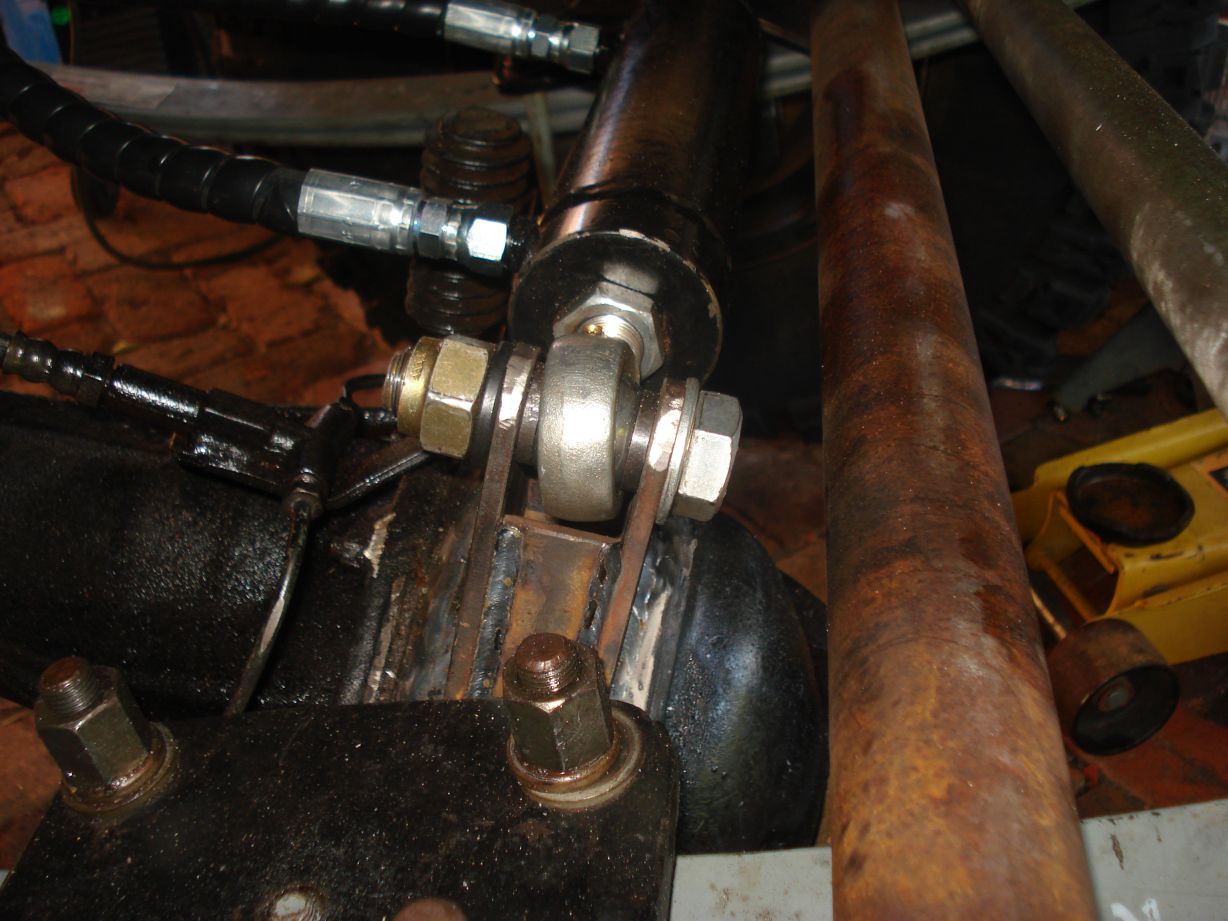
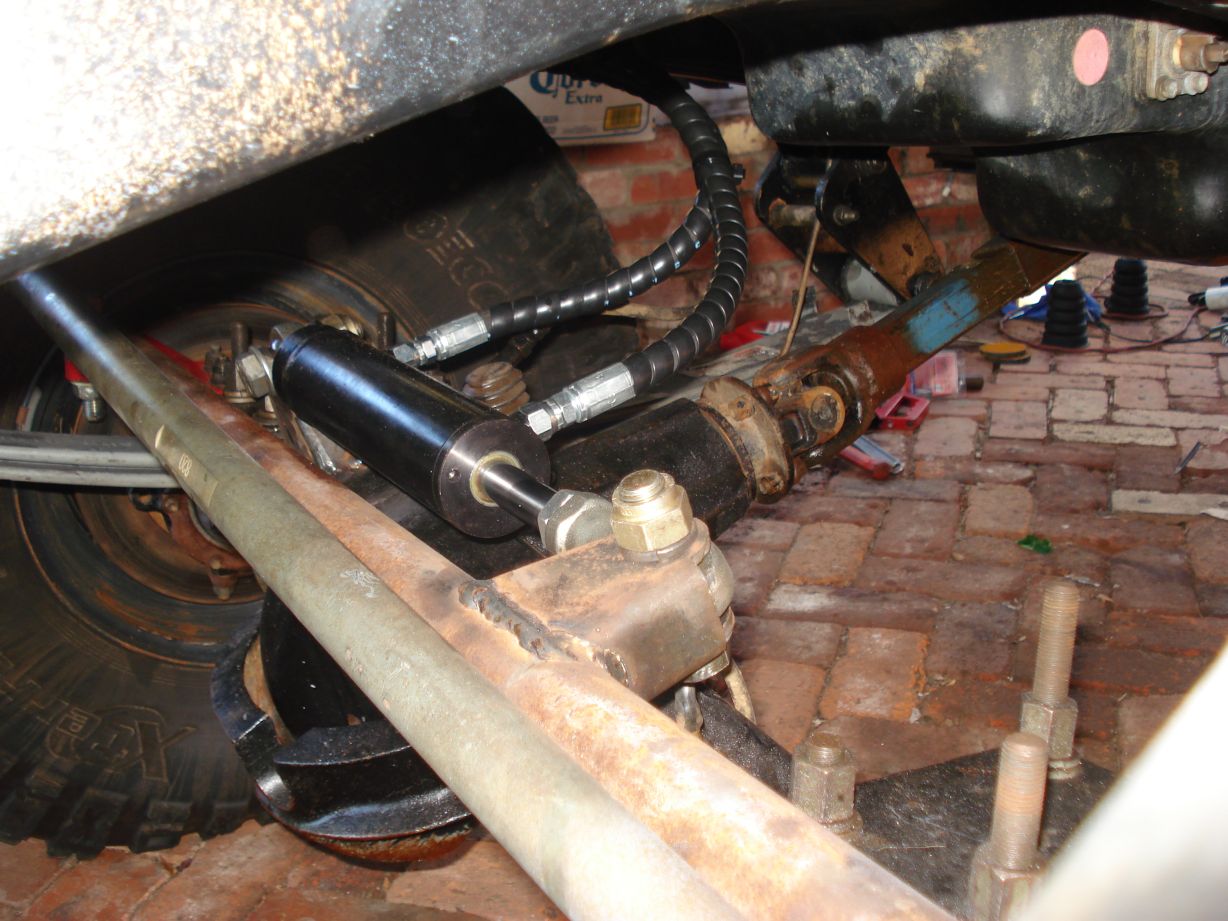
I had to have to ram so high above the diff because of the ubolts.
Hey all, i thought id make a quick update b4 rock comp.
* Ive finished the hydro install and tested it – works absolutely great, just have to make that belt stay on!
* Modified my low range stick so i cant hit it into neutral anymore
* Tried a different set of tyres for more traction – Sticky treps are awesome!
* Fitted my air shocks, made the front a bit stiffer than the rear so now the flex front to back is about even.
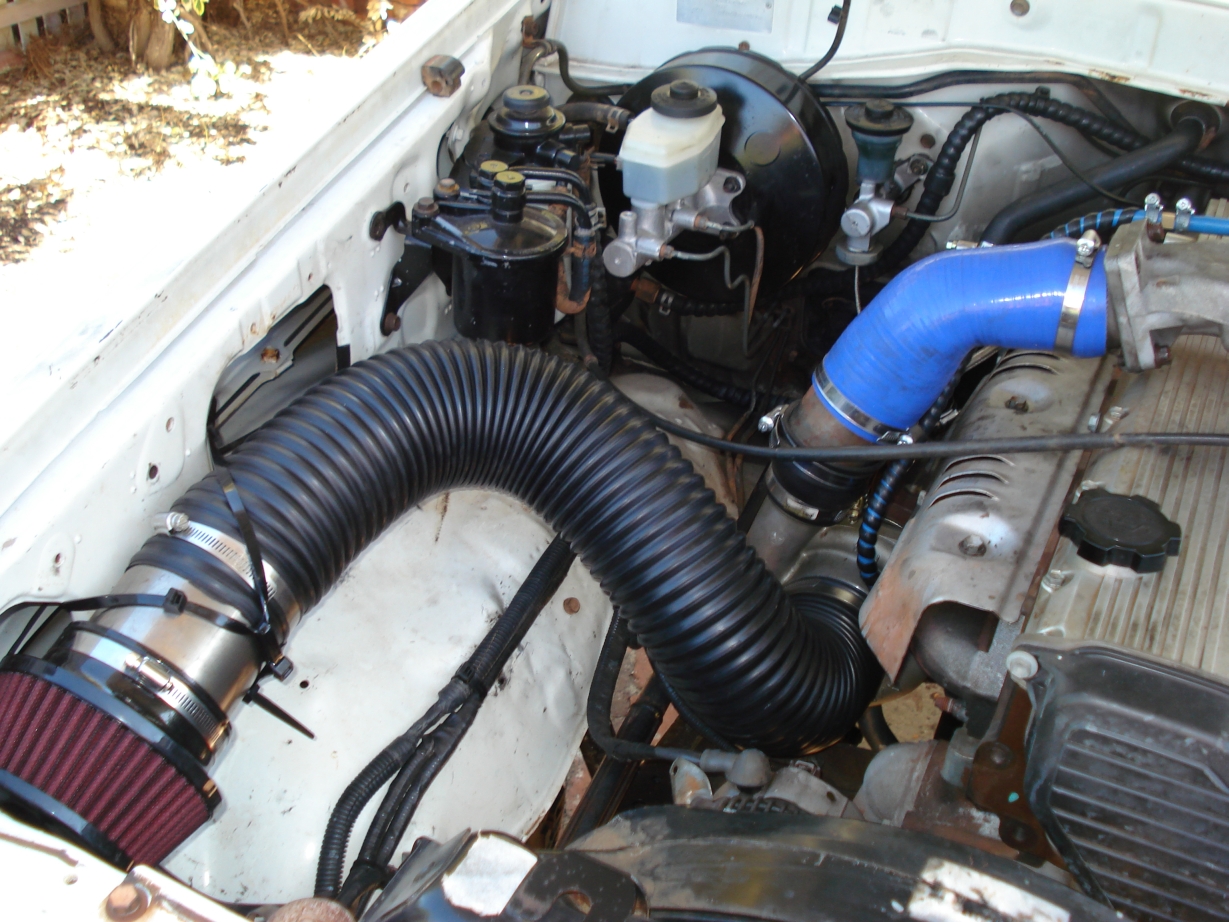
* Replaced my intake pipework (the old crappy corrugated flexi hose) with 4″ silicone bends.
All thats left to do is change my cvs and make a bit of an exo cage.
Cheers
Done a lil bit on the ute today, cut the guards and started making the sliders.
Took about 5″ out of the rear of the guard for tyre clearance and to sneak the front mount of the sliders around it to the chassis.
Ive still got to put a few bars between them and to the rail. Then sheet it back to the rail with 3mm plate.
I took the pulley off the TG pwr steer pump to machine it out to a 13A belt size.
I think im on track to have her ready for rock comp with time to spare to organise spares!
Time for an update
Well over the last few weeks ive been getting the car ready for Coastal Rocks the Paddock, its been some late nights.
The car came up like this with:
40″ sticky treps on beadlocked rims
Guard chop
Exo
Front redback airshocks
Sliders
Hydro assist steering
The car still had some issues with spitting power steering belts and was still running clicking longfeild cvs.
The fist day saw us starting from stage 8 and finishing on 2, we aced stage 8 for the full 100 points in the fastest time. 9 we were penalised for 3 or 4 reverses. 10 we had a hard time in as it was very tight we didnt finish it in the allowed time but still got a decent score. 1 we totally screwed up and got 0 on, couldnt get up the first stepup :S. 2 we again aced for the 100 points.
That night we had the mud run, i wanted to make up for the screw ups during the day so i went for it… Launching at high speed off a 2m drop off into mud took its toll. I bent my front diff housing on the LSH up and back at a 30deg angle, snapped the axle and took the Schroeder valve off my airshock with the tyre. Still finished it with the fastest time in 3wd! Cleaned it down and set to work fixing it.
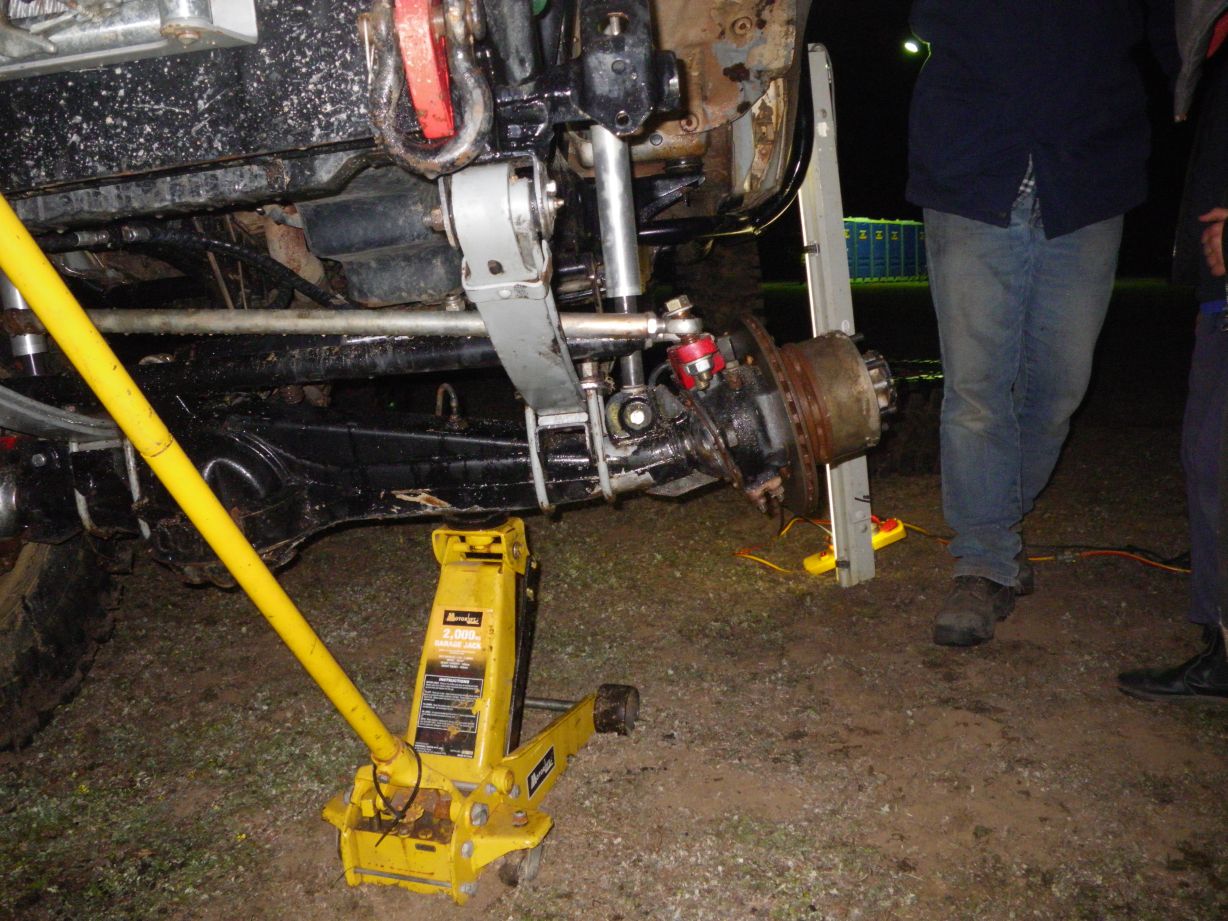
Massive thanks to Duncan for all his work!!!
A late night/early morning saw us back on the tracks for almost the whole of sunday.
Stage 3 saw us get just shy of the 100 point mark, got high sided on a rock not 1m from the finish. 4 and 5 we nailed for just shy of 100 points each also. Stage 6 which no one had finished saw me get just shy of the 80 point mark, i sheered all my kingpin bolts on the LSH, mashed my longfeild cv on the LHS and sheered my locking hub on the RHS.
We took her back to the pits with the help of the tractor once again pulled it down and put a new swivel hub on it. Time ran out and we had to miss out on stage 7.
The car is battered and bruised, the sliders are all bent, sump got hit, front shackle pins are broken, both air shocks have blown out and my snorkel is crushed…
It was all worth it though!!! I came away with 3rd in extreme class!
Now its time to rebuild everything again!!! yay


Wow my build looks awful long when viewed like that!!
BTW its a 1997 landcruiser ute its model is HZJ75 🙂
Cheers for the featured article too mate 😀
hey mate
love your cruiser! wish I could build one th
I’d just like to know how much you bought the standard landcruiser for and where abouts?
if you could let me know by emailing me that’s be great thanks mate
absoloutey amazing cruiser mate, I envy you! just a quick question. why did you stick with leafs, and not convert to coils or put the body and tray on a 80 series chassis? and you need to send a few photos into the 4wd action boys, they would love seing a done up 75 cruiser. not very often do ya see one this neat and good!!
Beast of a Landy, Nice pics & Nice work done it..
Did you toughen the leafs ?
Nice truck big fella,looks like heaps of fun.
How do you find the parabolics?
Got a 75 series myself and heard mixed responses, obviously get good flex but how r they in between the rough stuff and getting too and from?