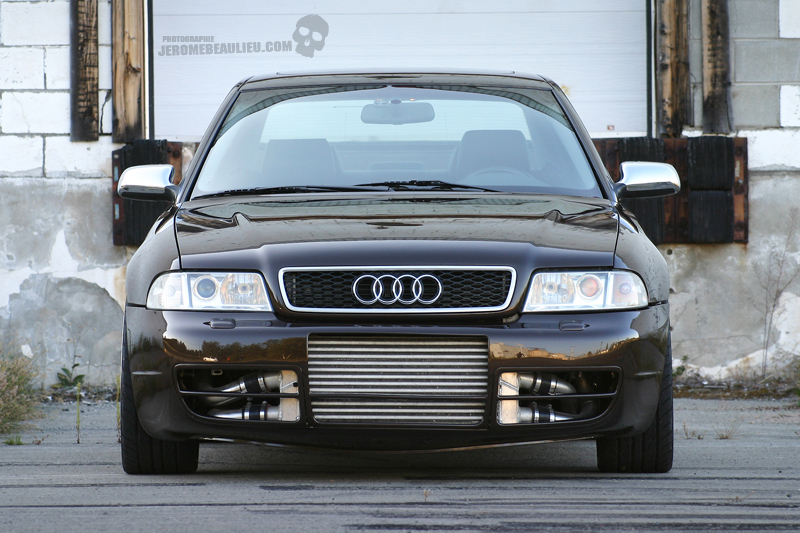
Gearhead1186′s Audi S4 Tial 605->770 Build EPL
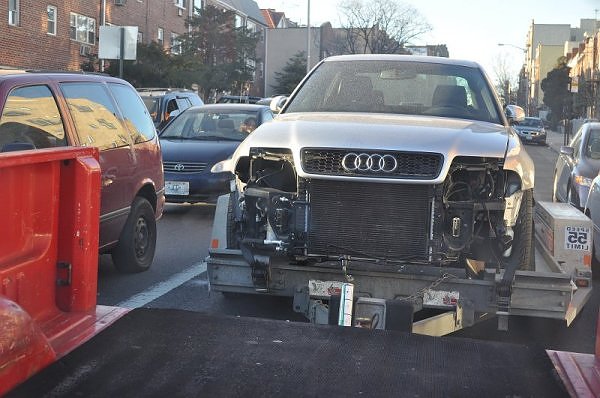
Passenger side headlight went out after hitting a small pothole.
Figured might a well put in some ecodes and a DDM HID kit while im at it.
Figured might as well put in a snub mount while I got the bumper off.
Power steering pump was squealing so figured might as well fix that while im in there.
Even though im only at 52k I figured I might as well do the timing belt kit since Im halfway there.
Saw some oil in my intercooler hoses–> BOOM now is the time to do it.
K04s only lasted about 1 day in my head before I changed plans to rs6s. Then the big “tial 605” thread and “which way to 500whp” thread convinced me to go with the tial 605s.
Here is the parts list:
Engine size: 2.7L
Rods: Integrated Engineering
Pistons: Stock
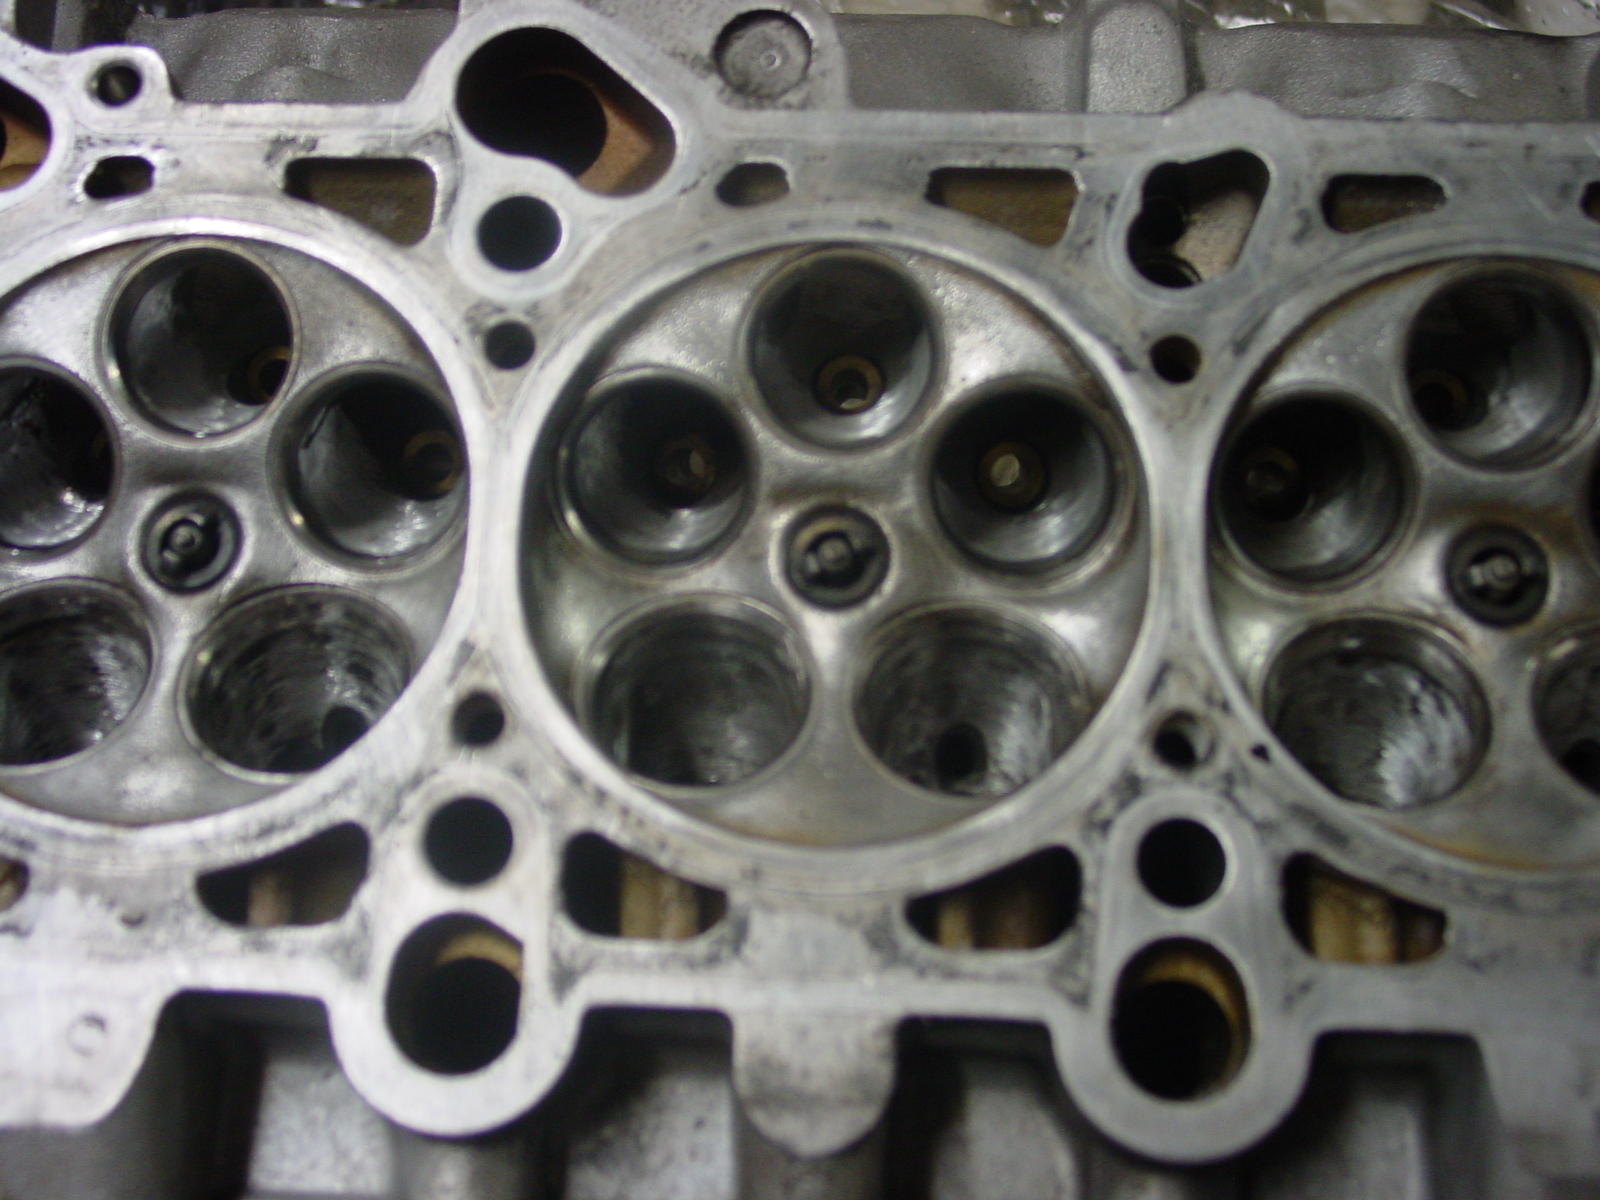
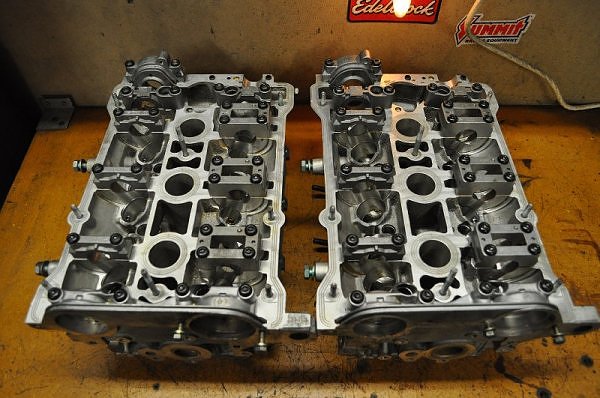
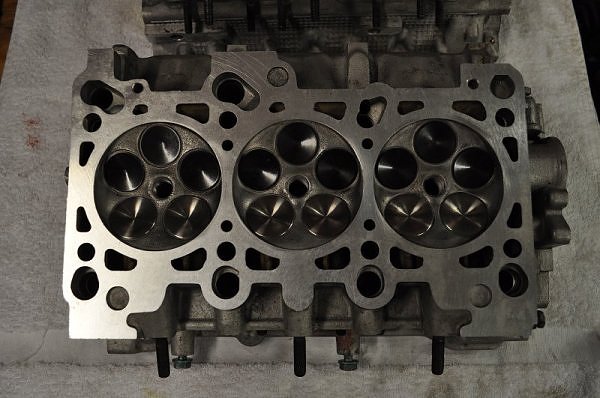
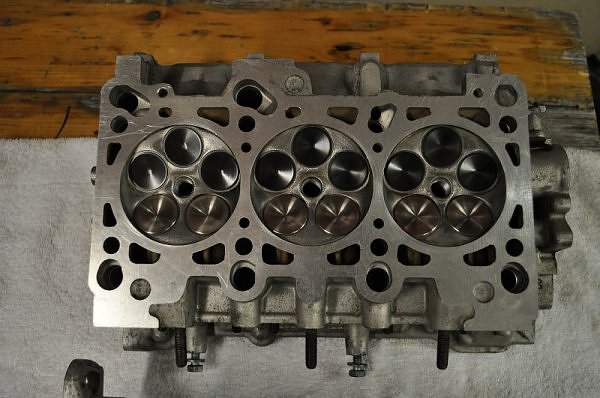
Heads: 2.8 (Slight Port & Polished)
Cams: 2.8
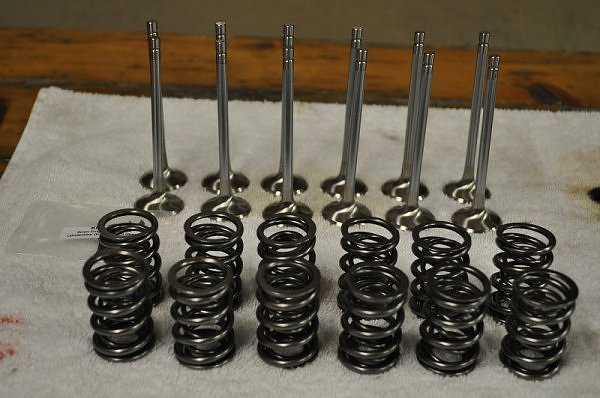
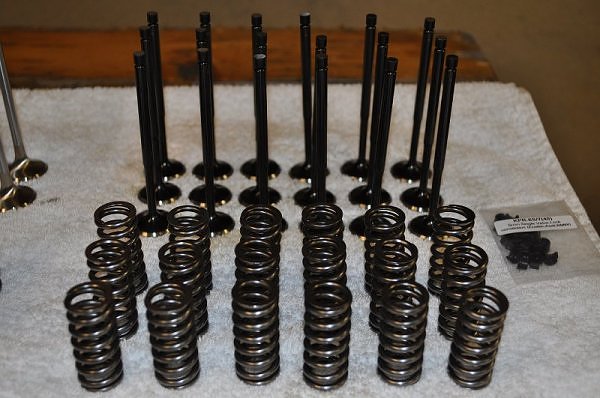
Valvetrain: Supertech
Intake Valves: Supertech Stainless Steel Black Nitrided
Exhaust Valves: Supertech Inconel
Head Gaksets: 034 Compression Dropping ~8.8
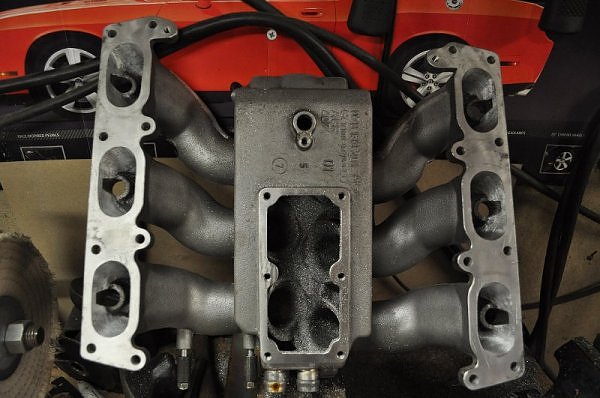
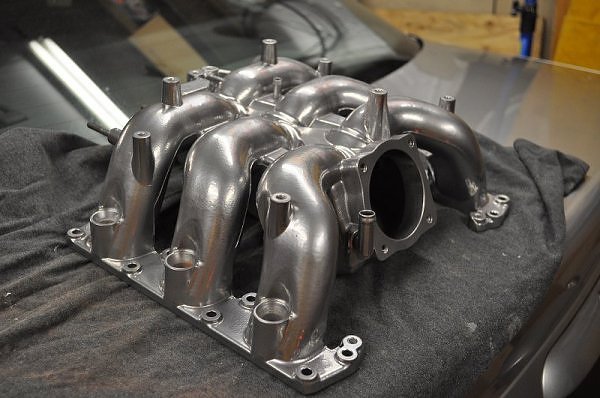
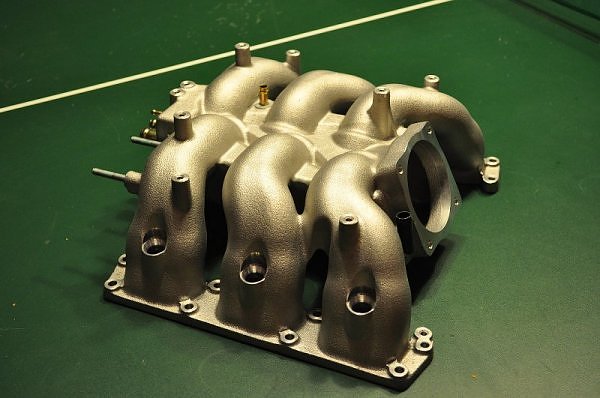
Intake Manifold: Port Matched Stock with Phenolic Spacers
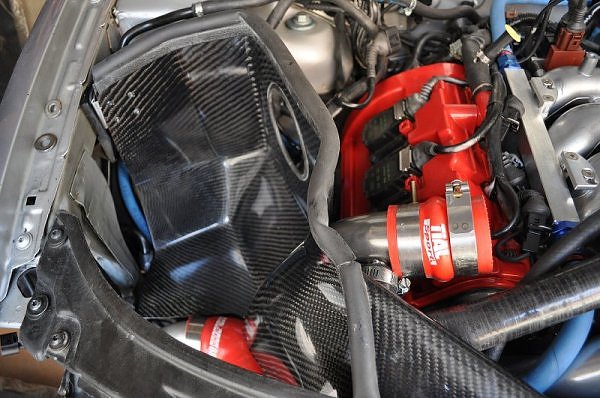
Intake: X-1 w/ CF Shield
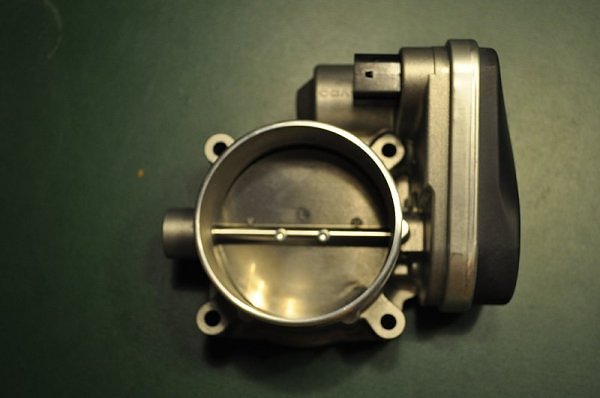
Throttle Body: Stock
Diverter Valves: HyberBoost Core
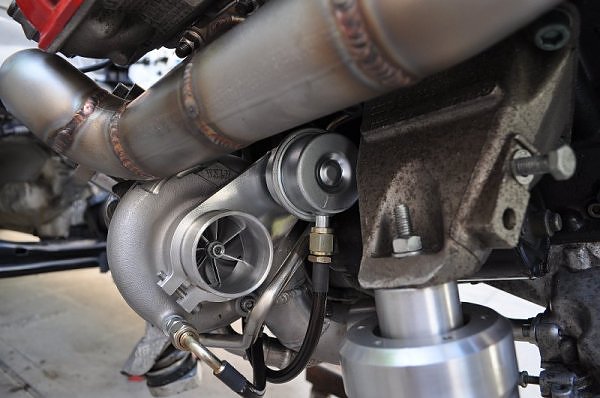
Turbo kit: TiaL R770
MAF: EPL 85 mm
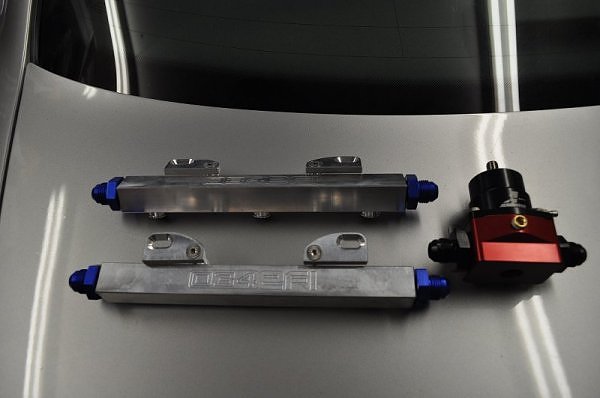
Fuel Rails: 034 Motorsport Fuel Rails
Injectors: Bosch ev14 83 lb
Fuel Pump: Bosch 044
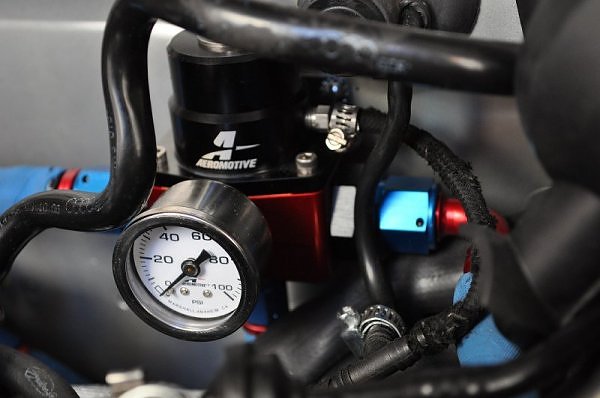
Fuel Pressure Regulator: Aeromotive A1000 FPR (13101)
Tune: EPL
Water/Meth Injection: Aquamist HFS-3
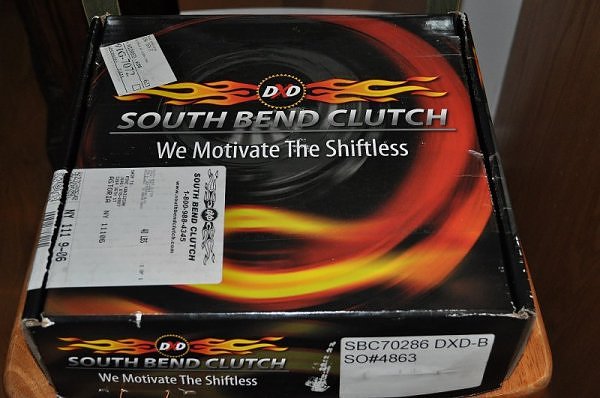
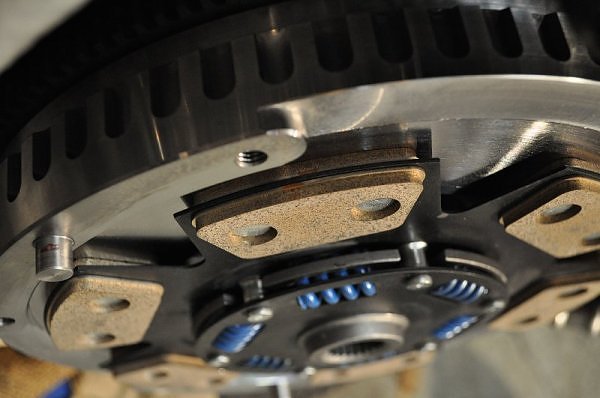
Clutch: Southbend Stage 5 Ceramic 6 Puck
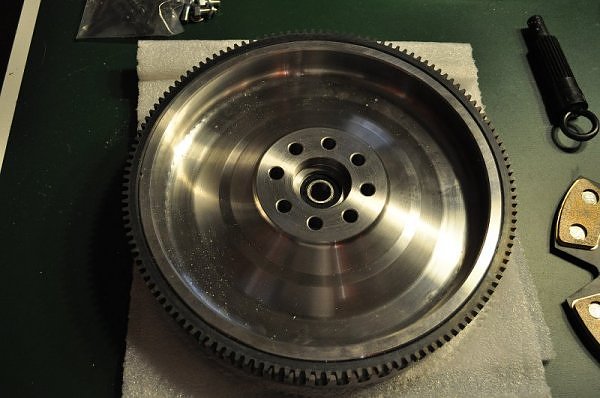
Flywheel: SouthBend “Fast Revving” Steel
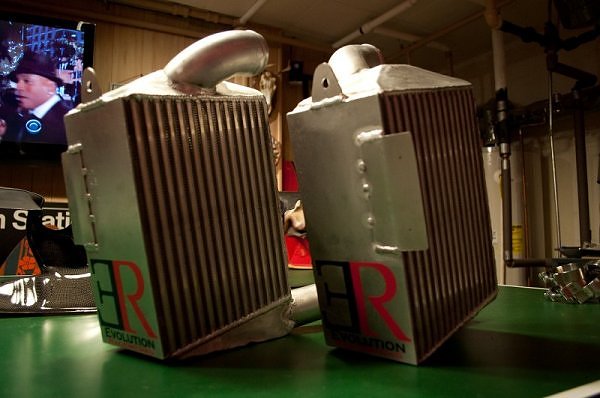
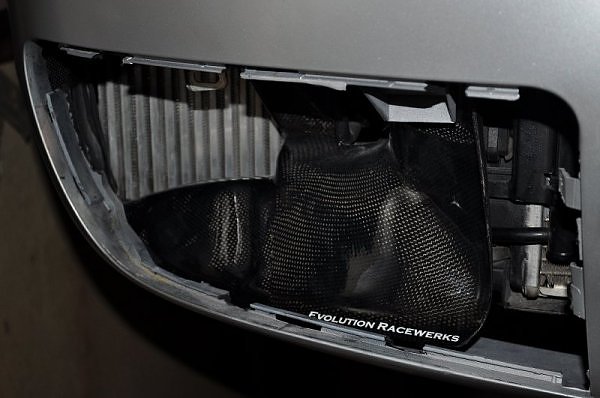
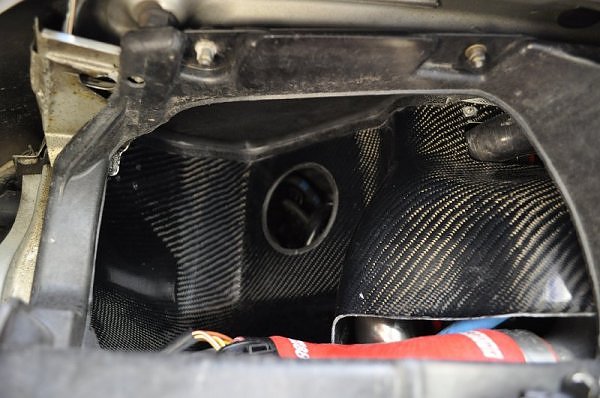
Intercooler(s): ERs w/ Carbon Fiber shrouds
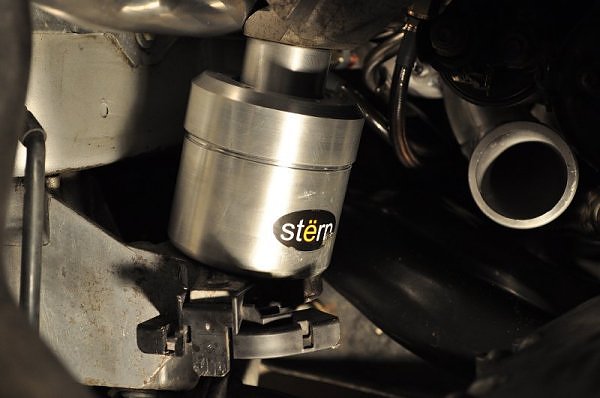
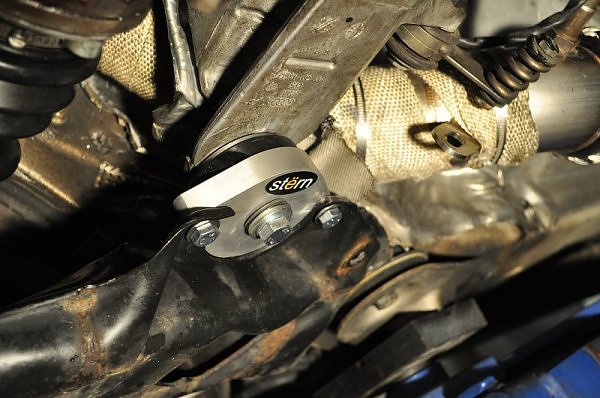
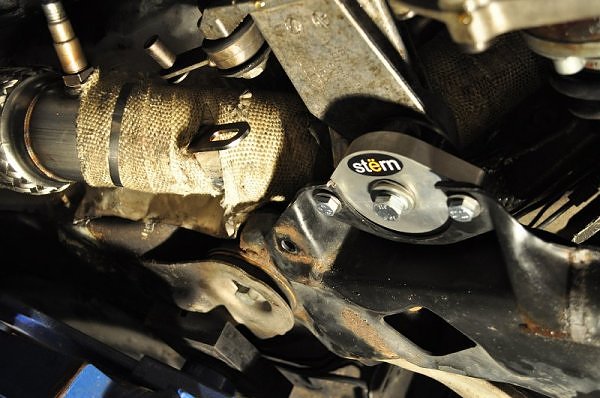
Mounts: Stern
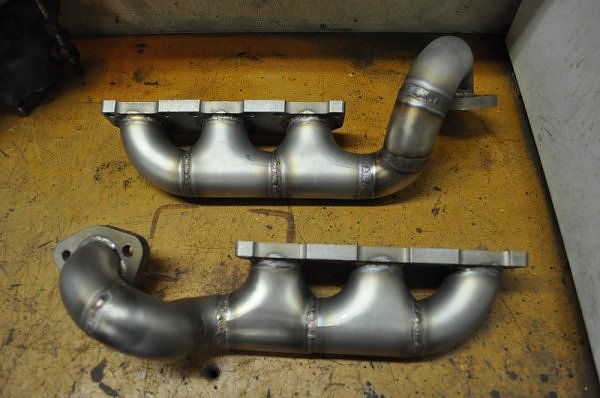
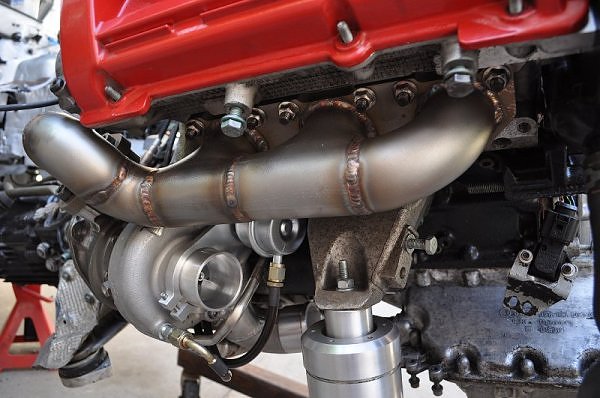
Exhaust Manifolds: VAST Fabricated Log Style Manifolds
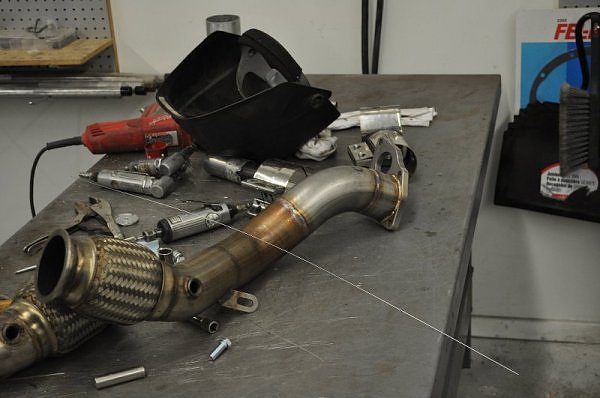
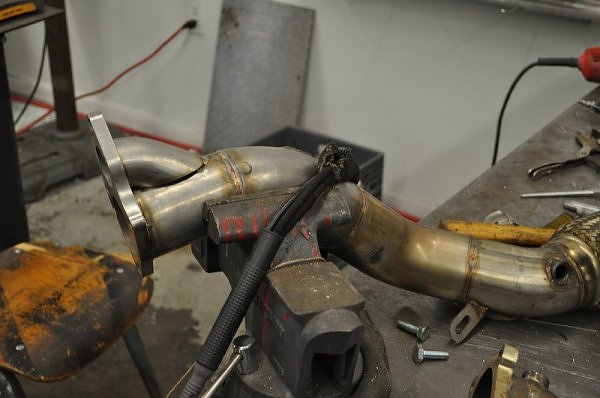
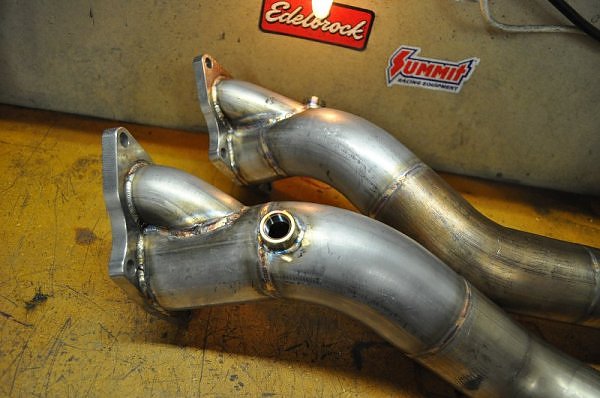
Downpipes: 034 3″ downpipes modified by 666 Fabrication for DSM Flange.
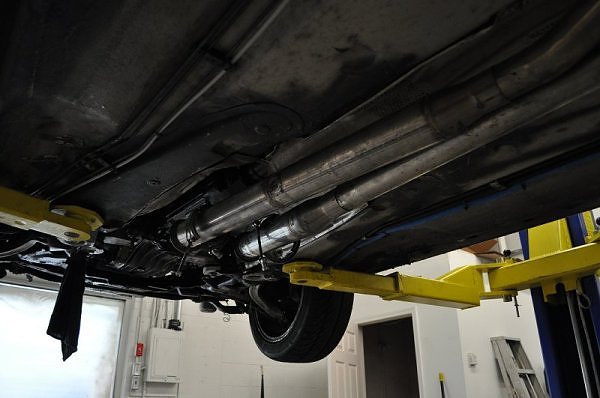
Exhaust: AWE Twin 1
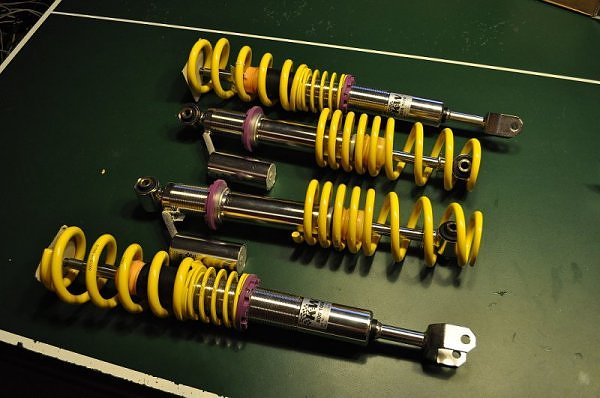
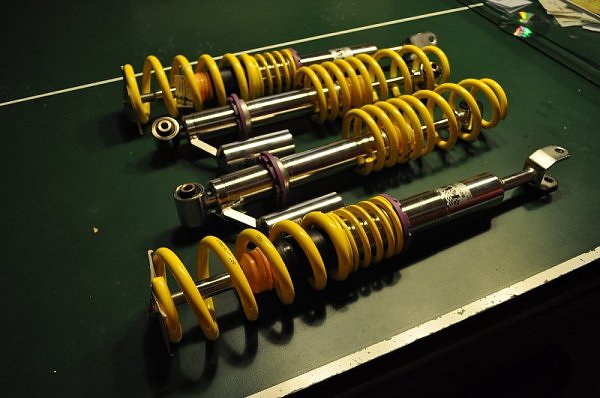
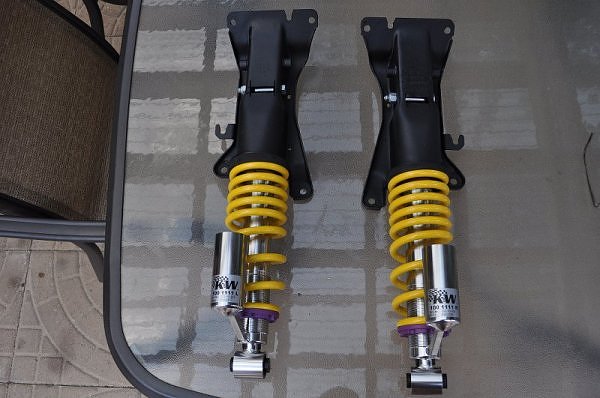
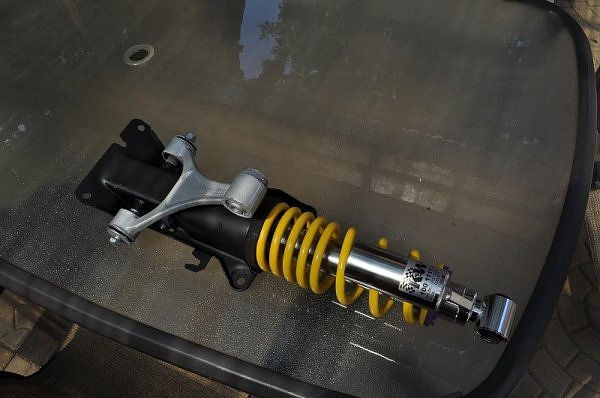
Coil-overs: KW V3
Miscellaneous: 4:1 Center Diff, ARD BiPipes, Custom Oil Cooler, Custom Power Steering Cooler, Custom PCV/Oil Catch Can, JHM DTS, Apikol Rear Diff Mount
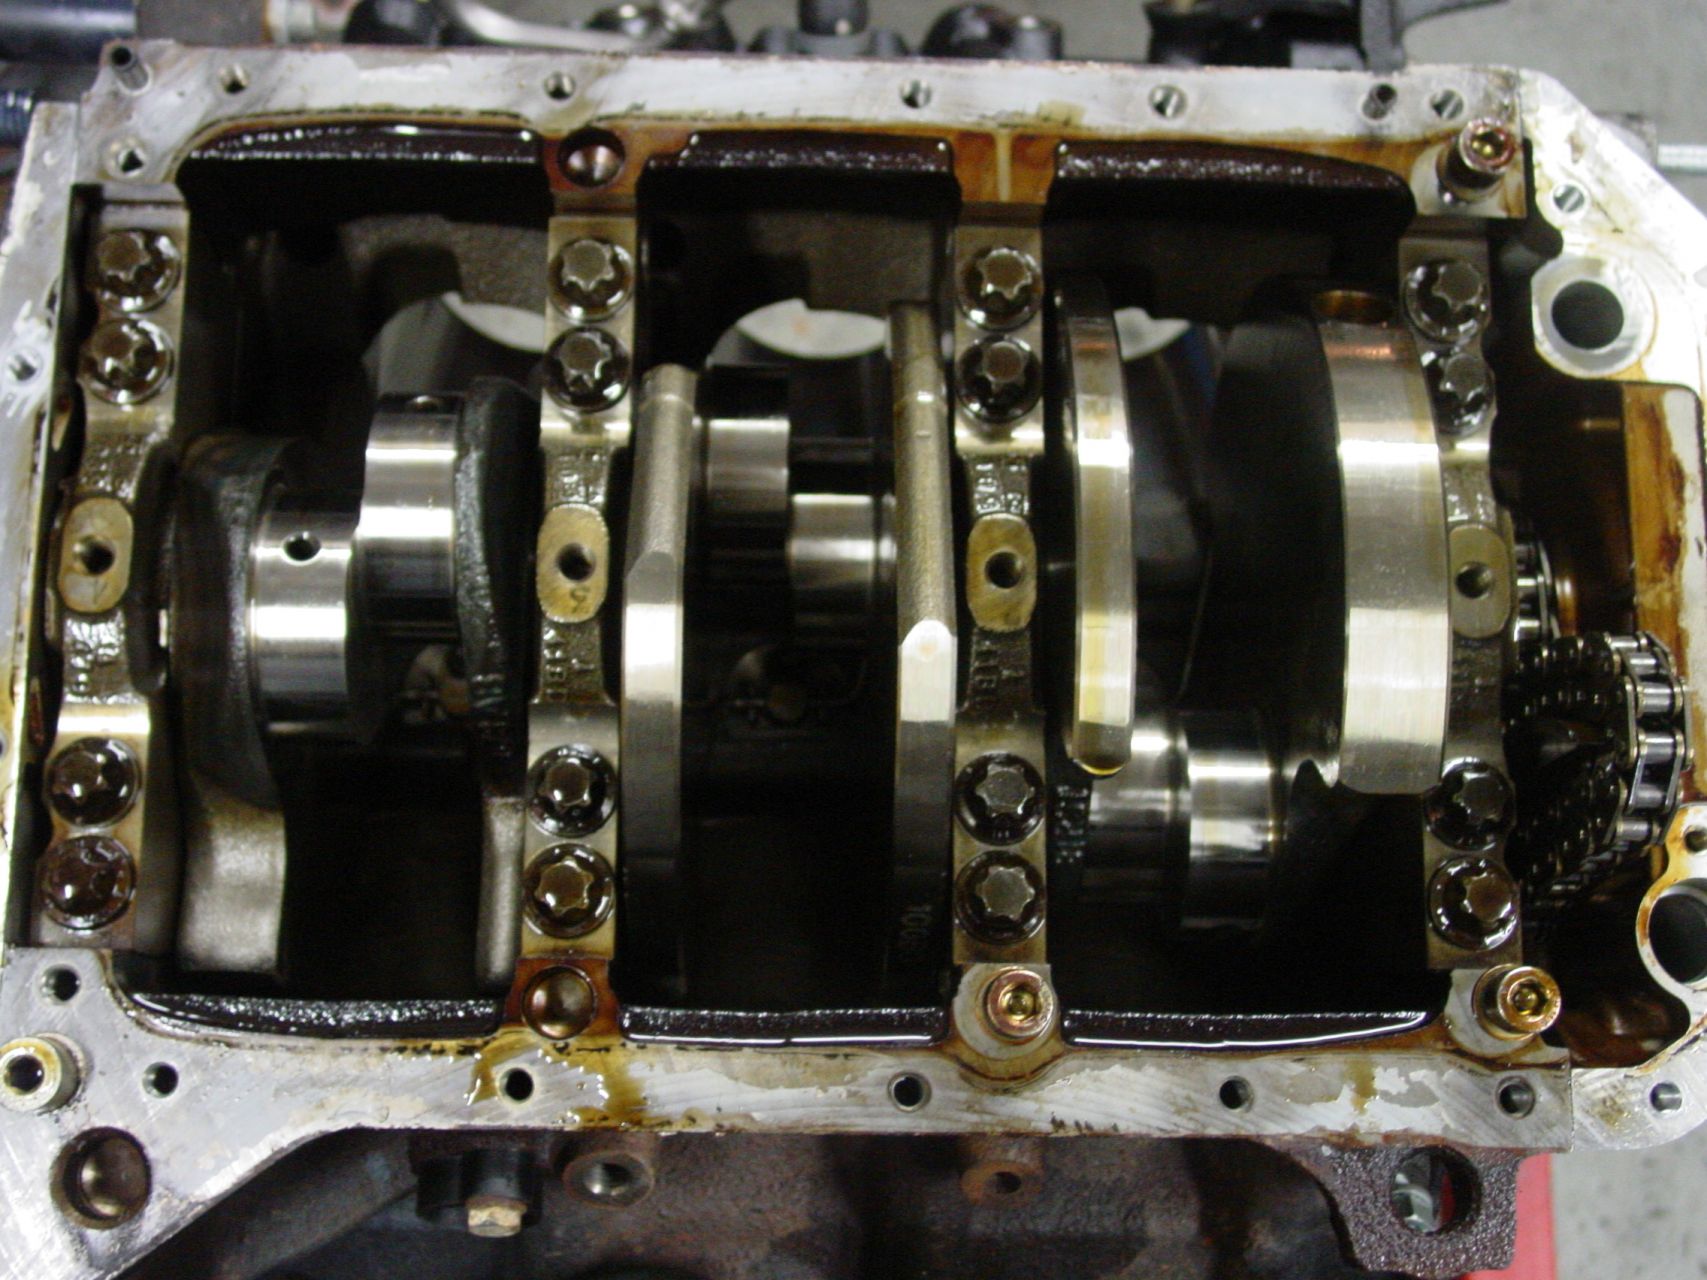
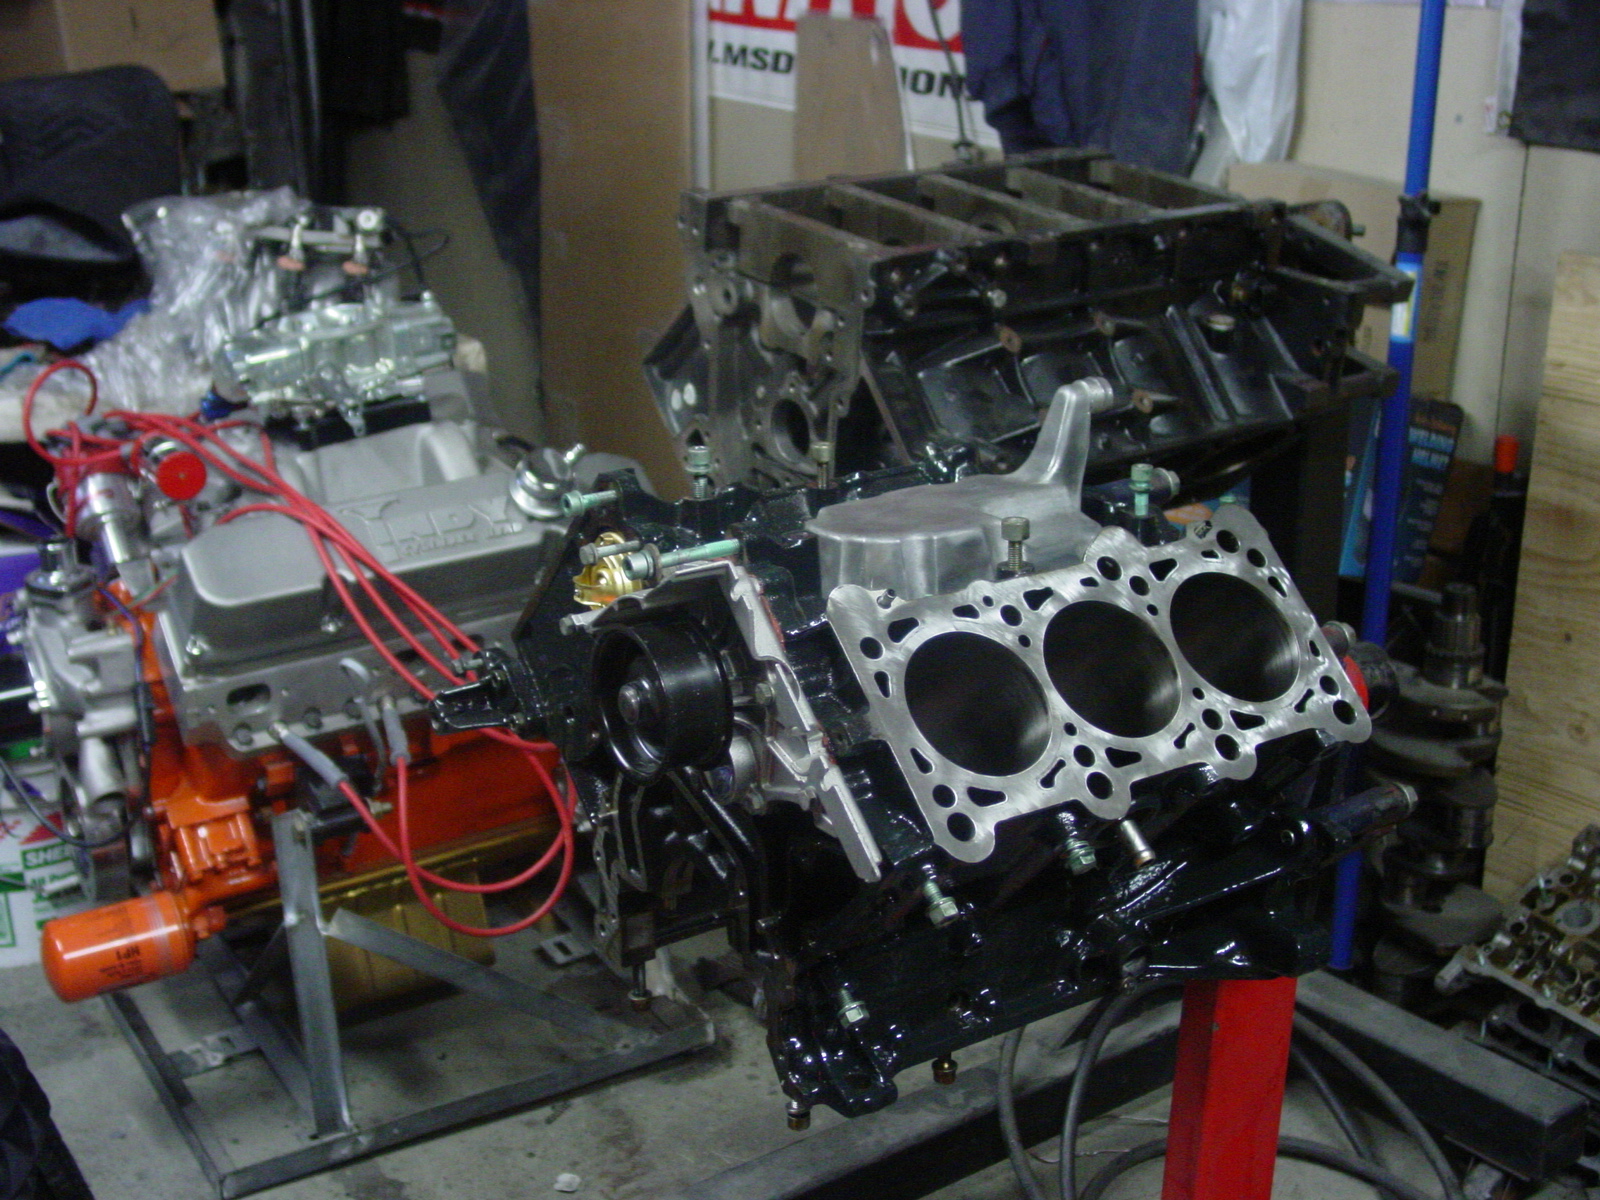
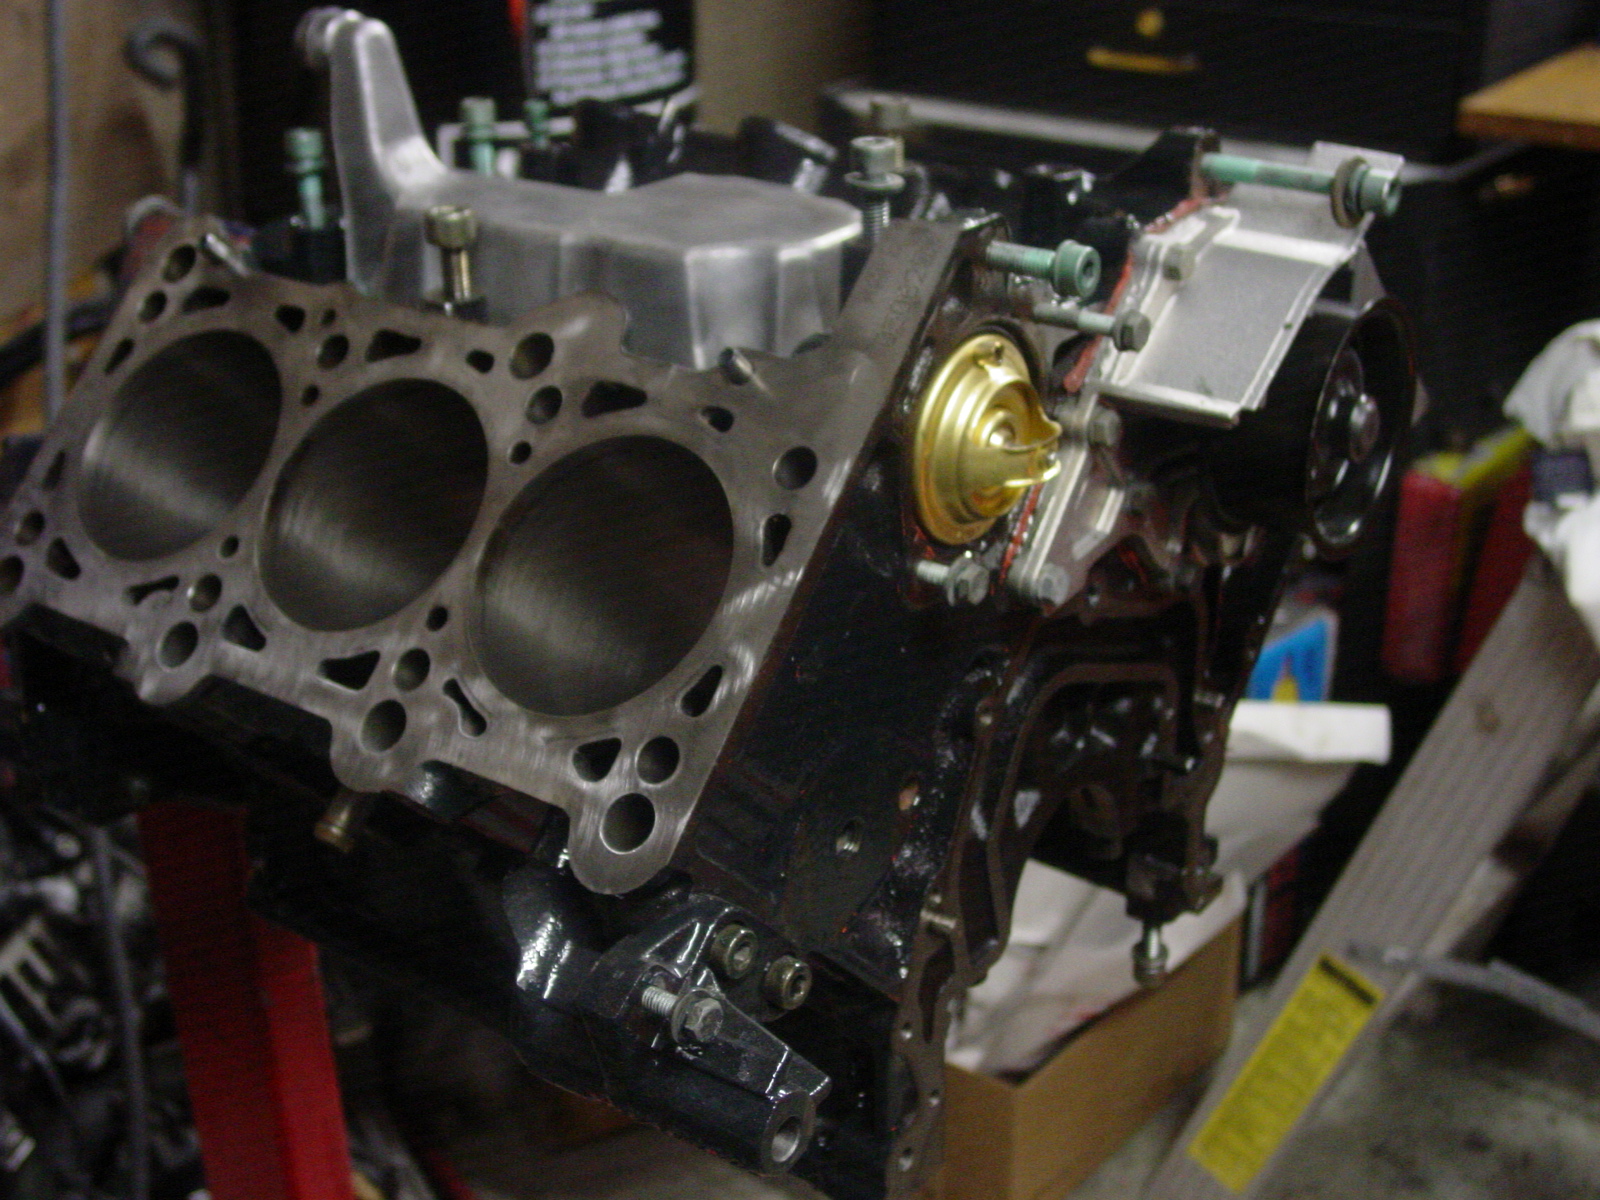
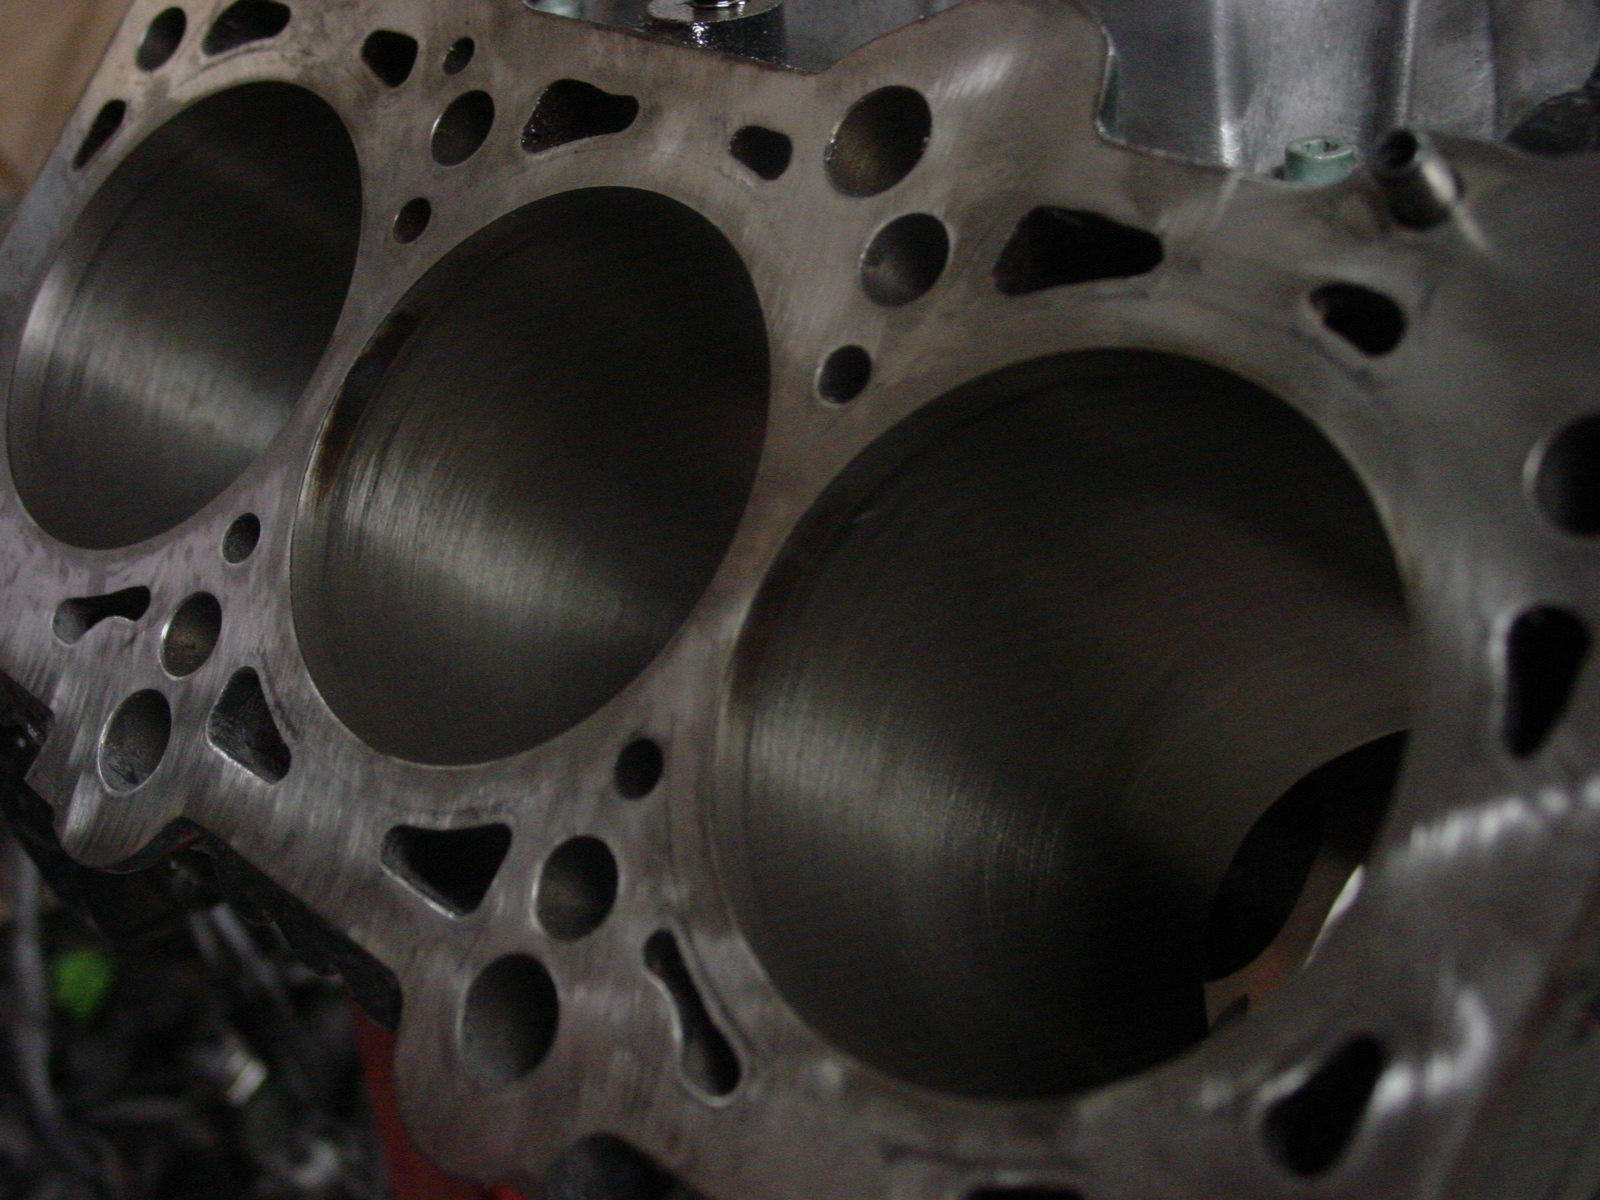
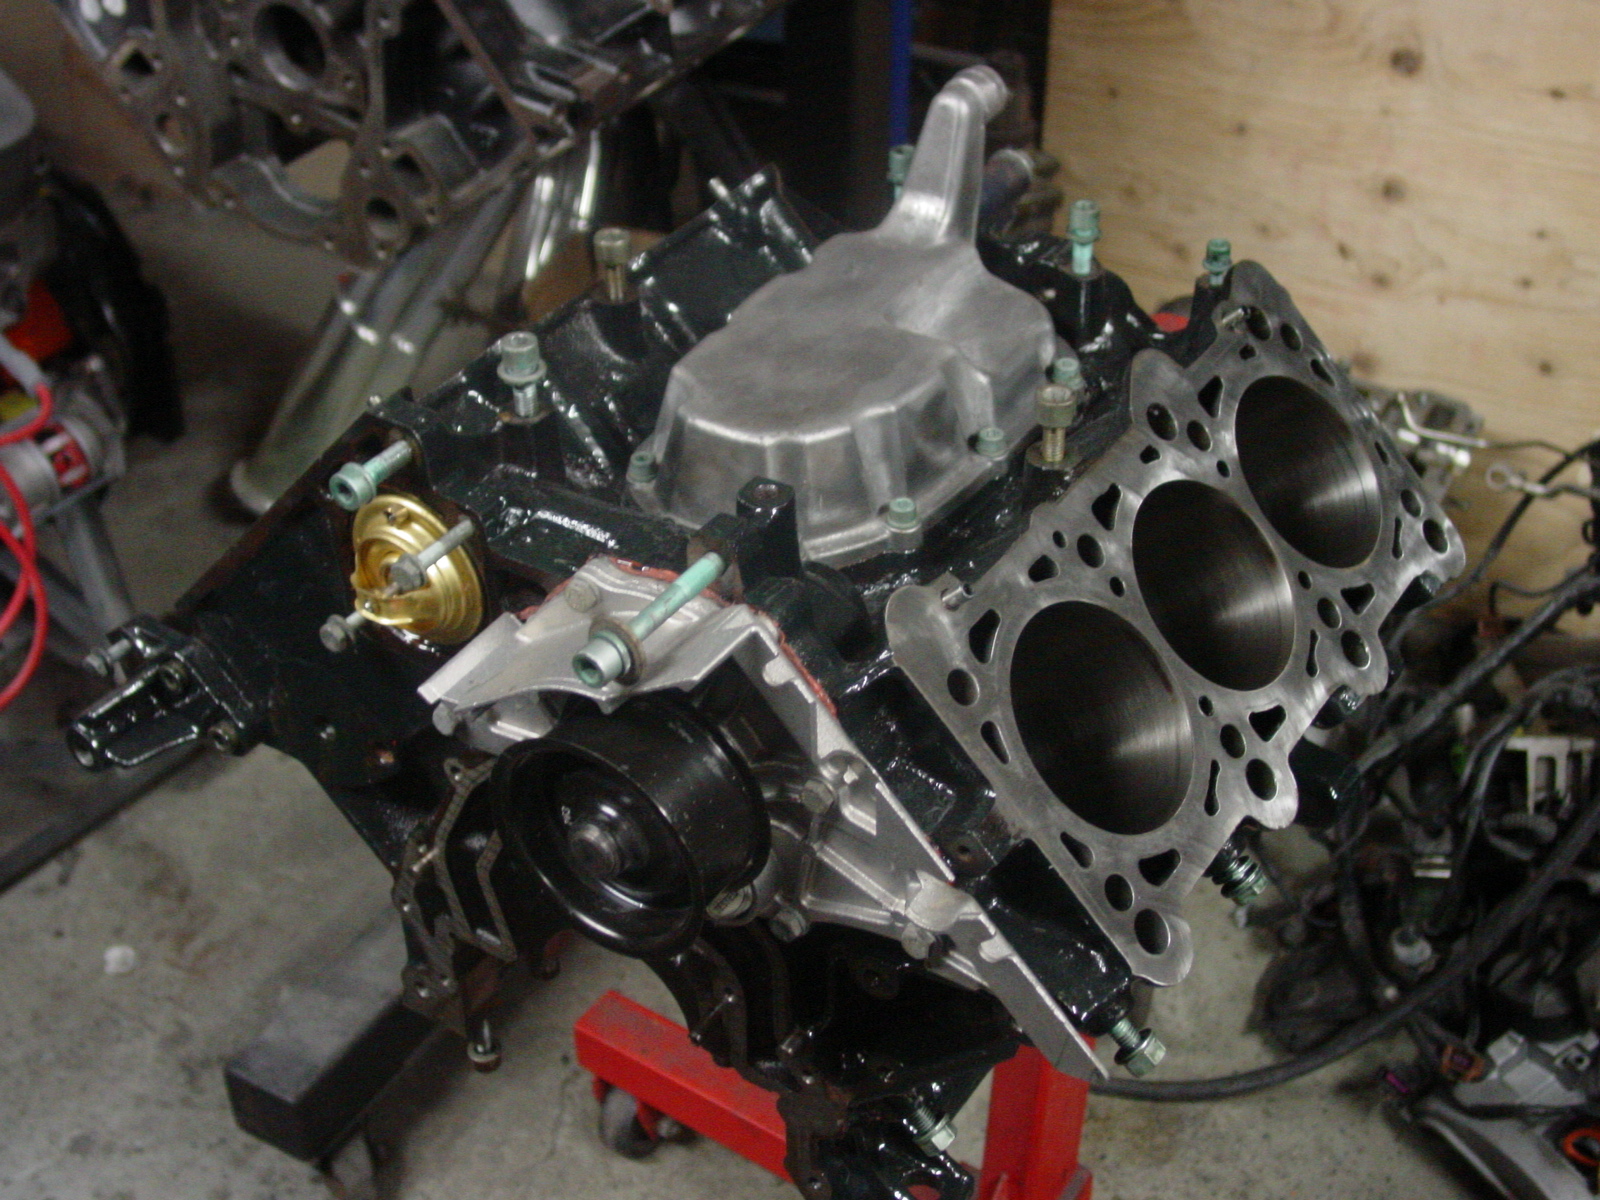
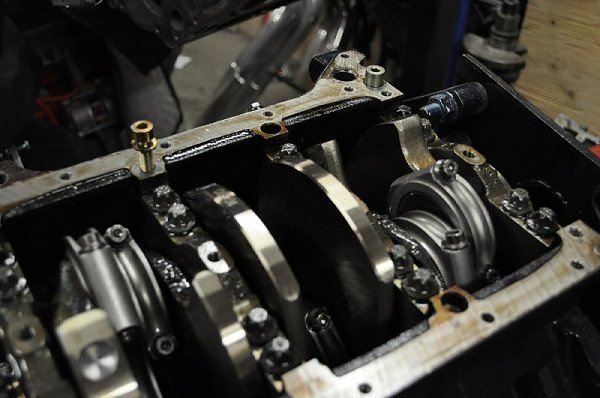
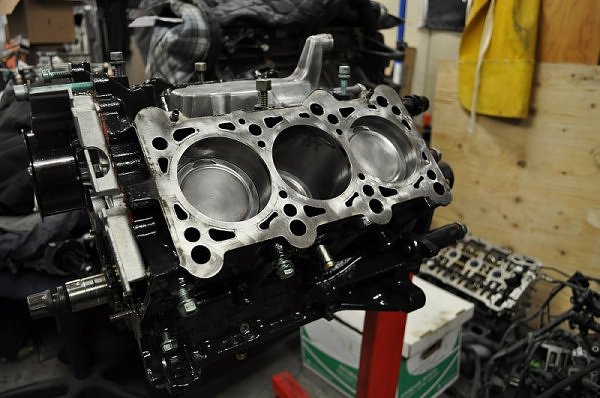
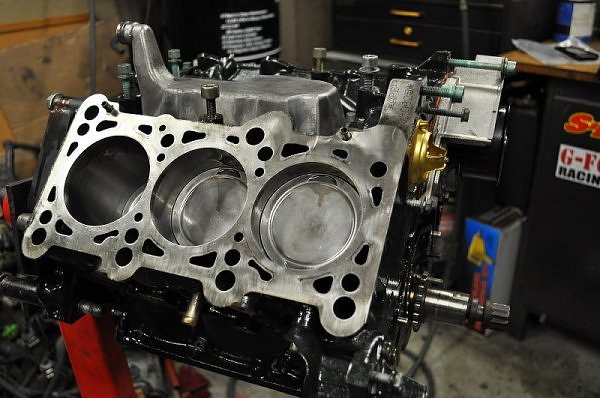
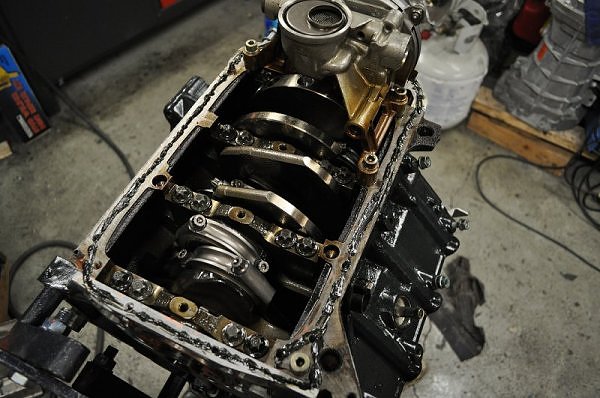
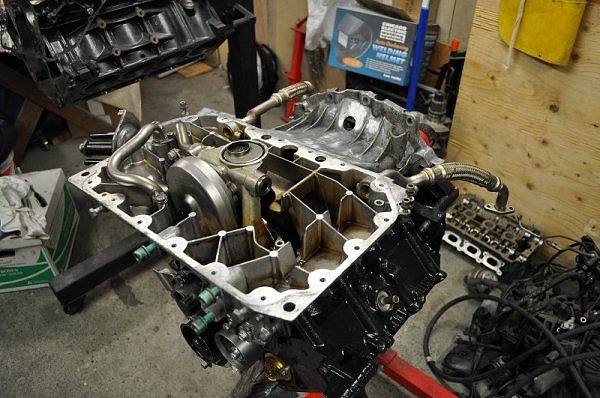
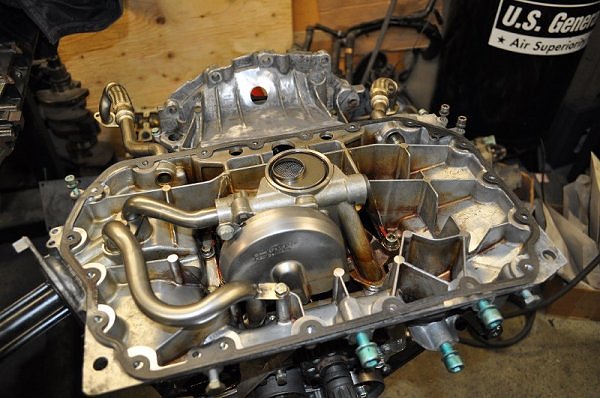
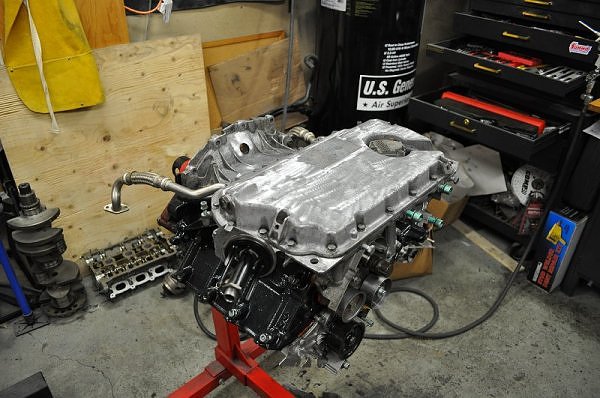
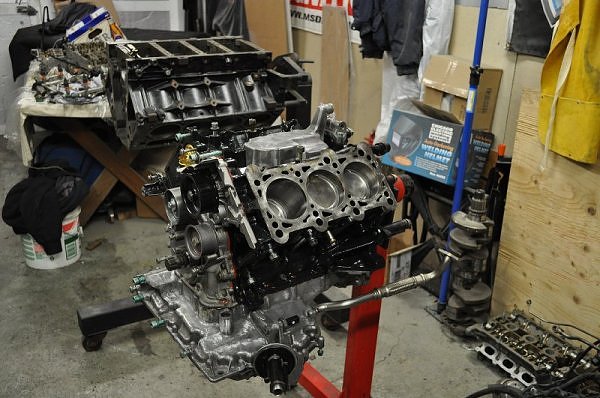
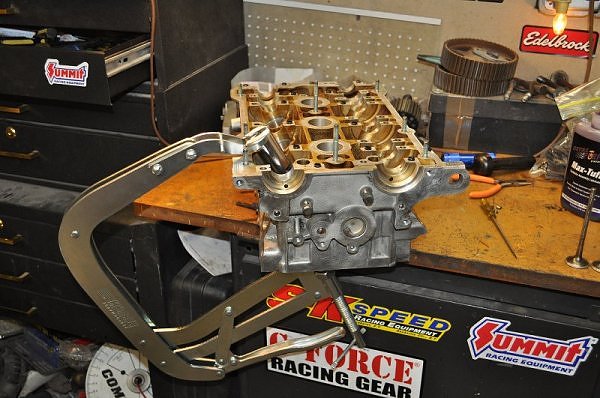
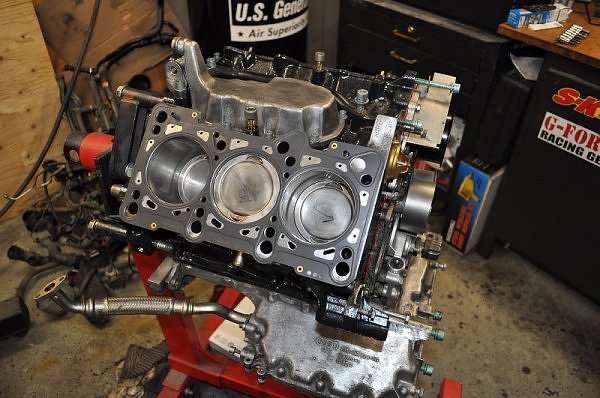
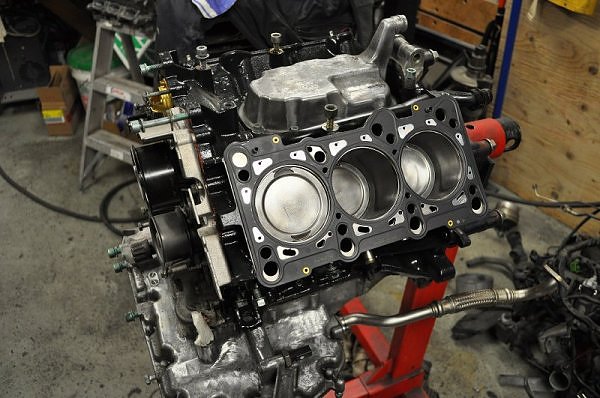
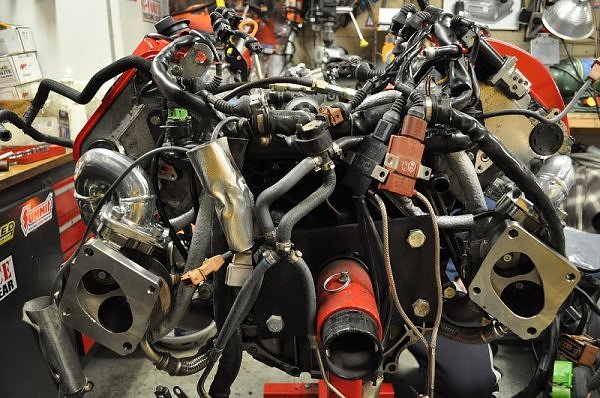
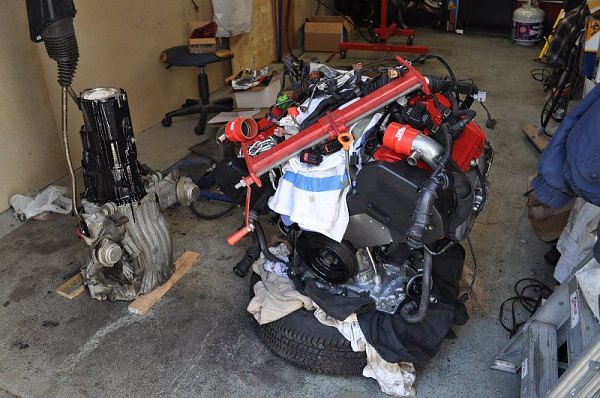
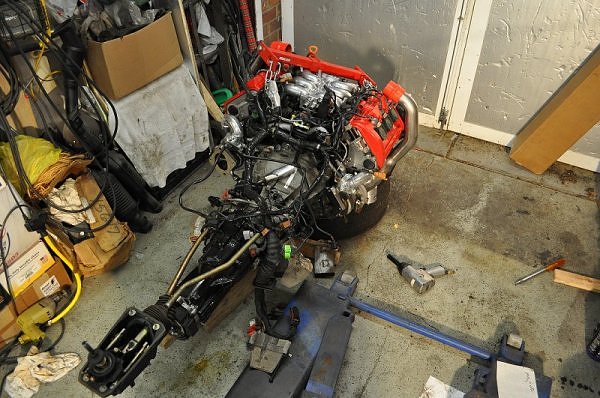
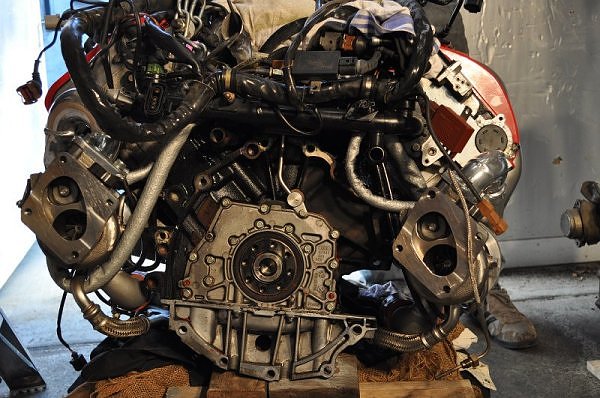
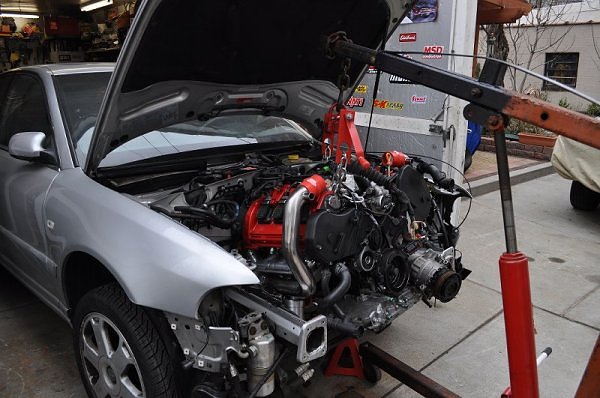
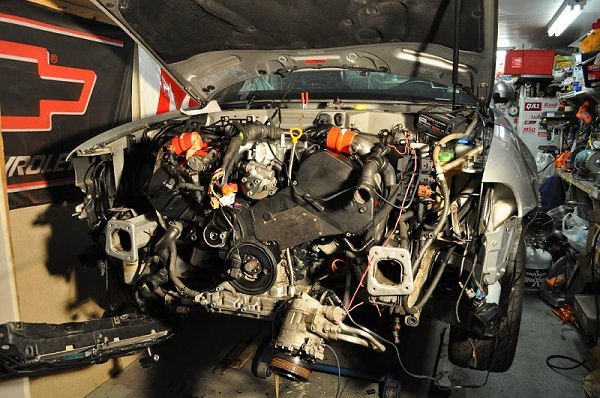
Here are a couple pics of the shortblock before disassembly…
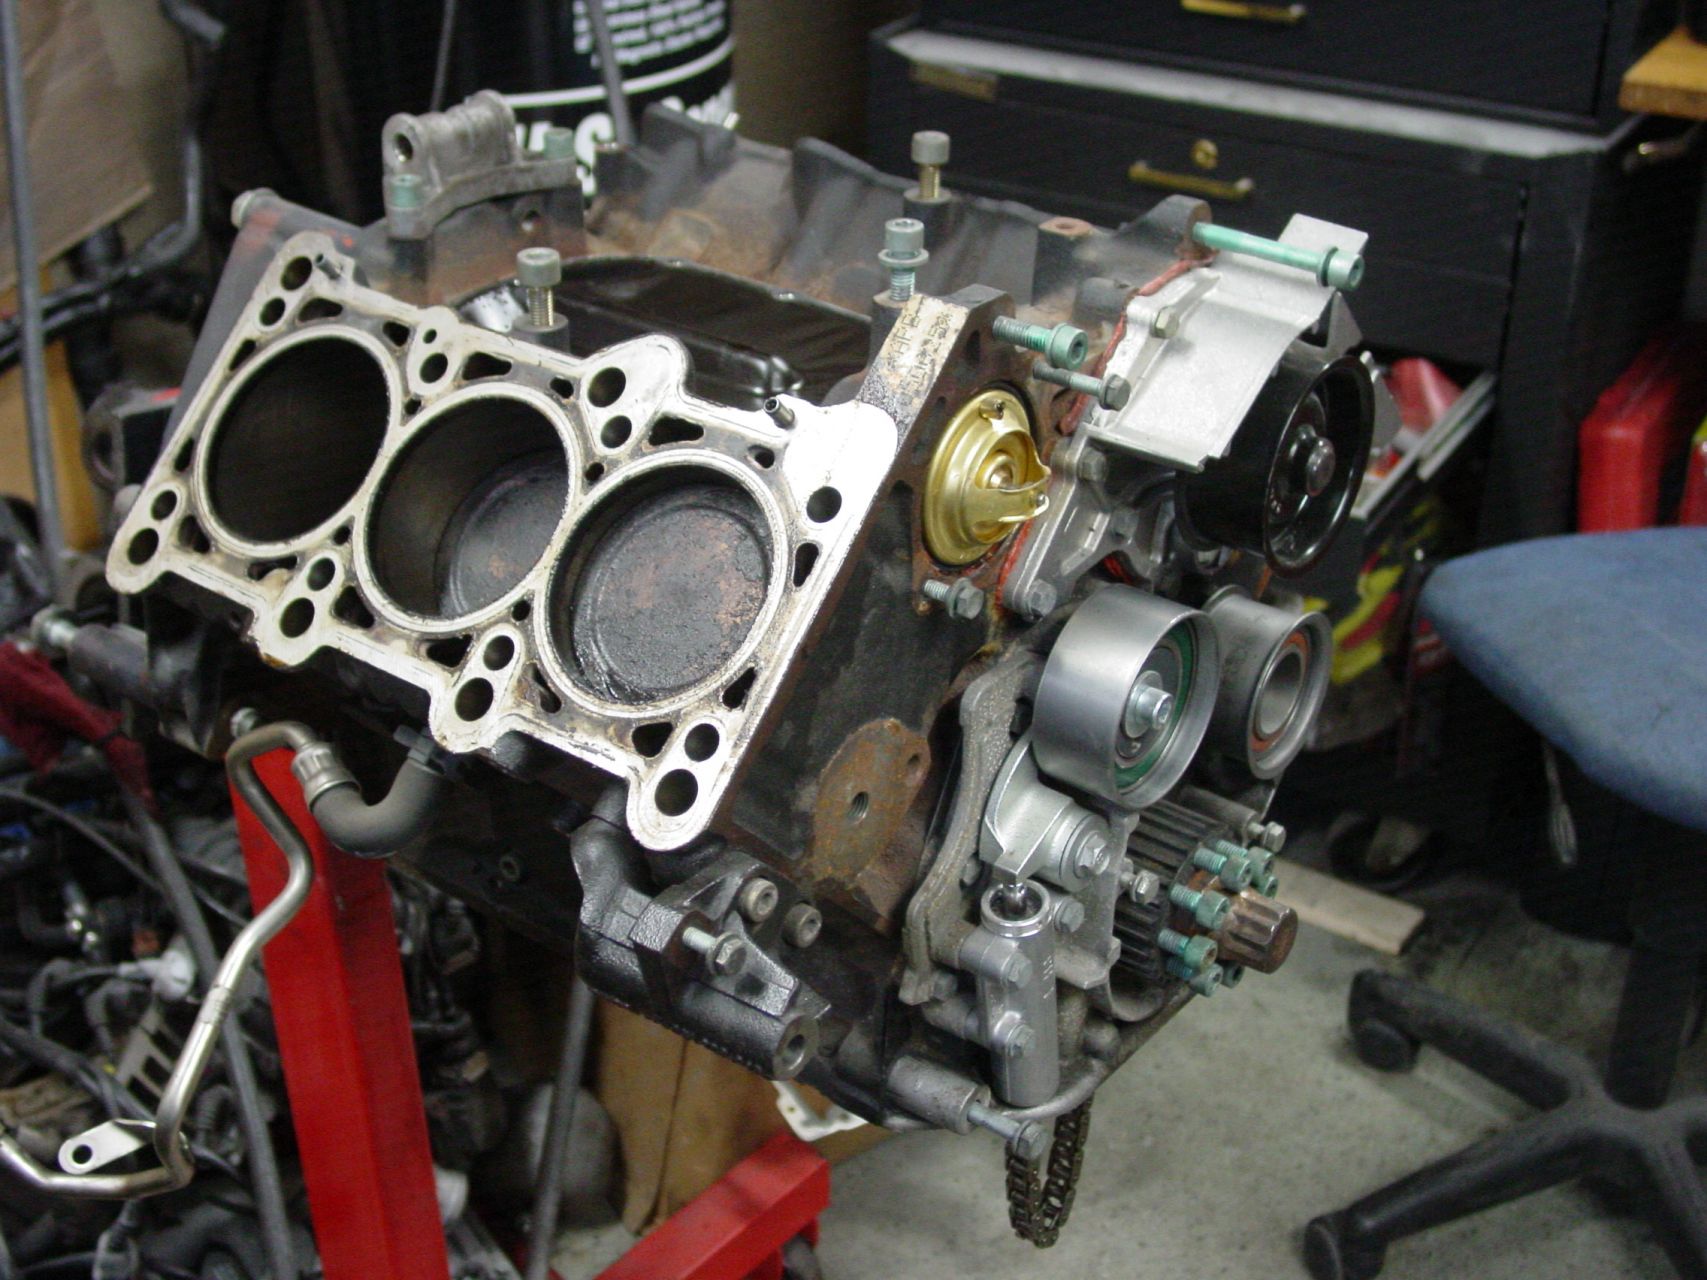
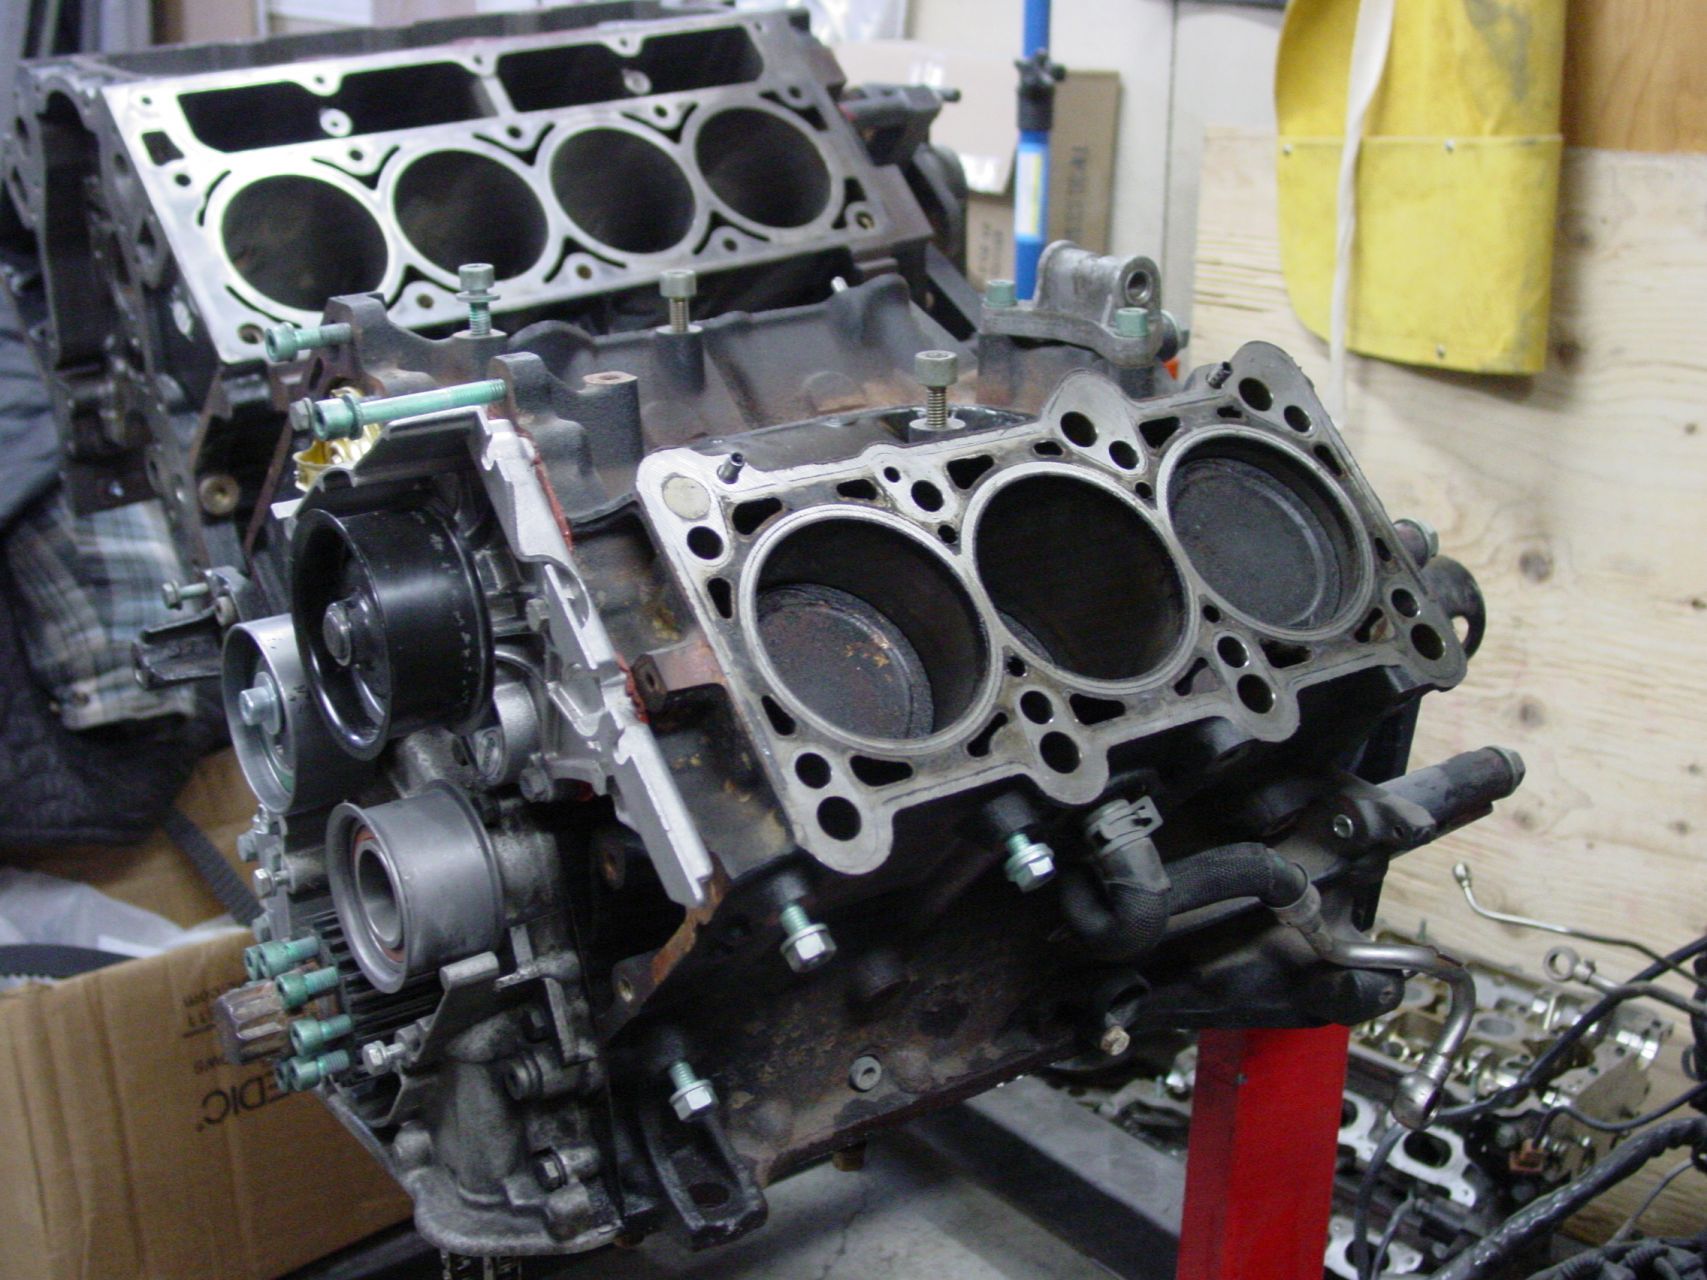
thats an lq4(an iron version of the ls2) in the background.. going to be a temporary motor in my 69 camaro until I get money to build something more serious.
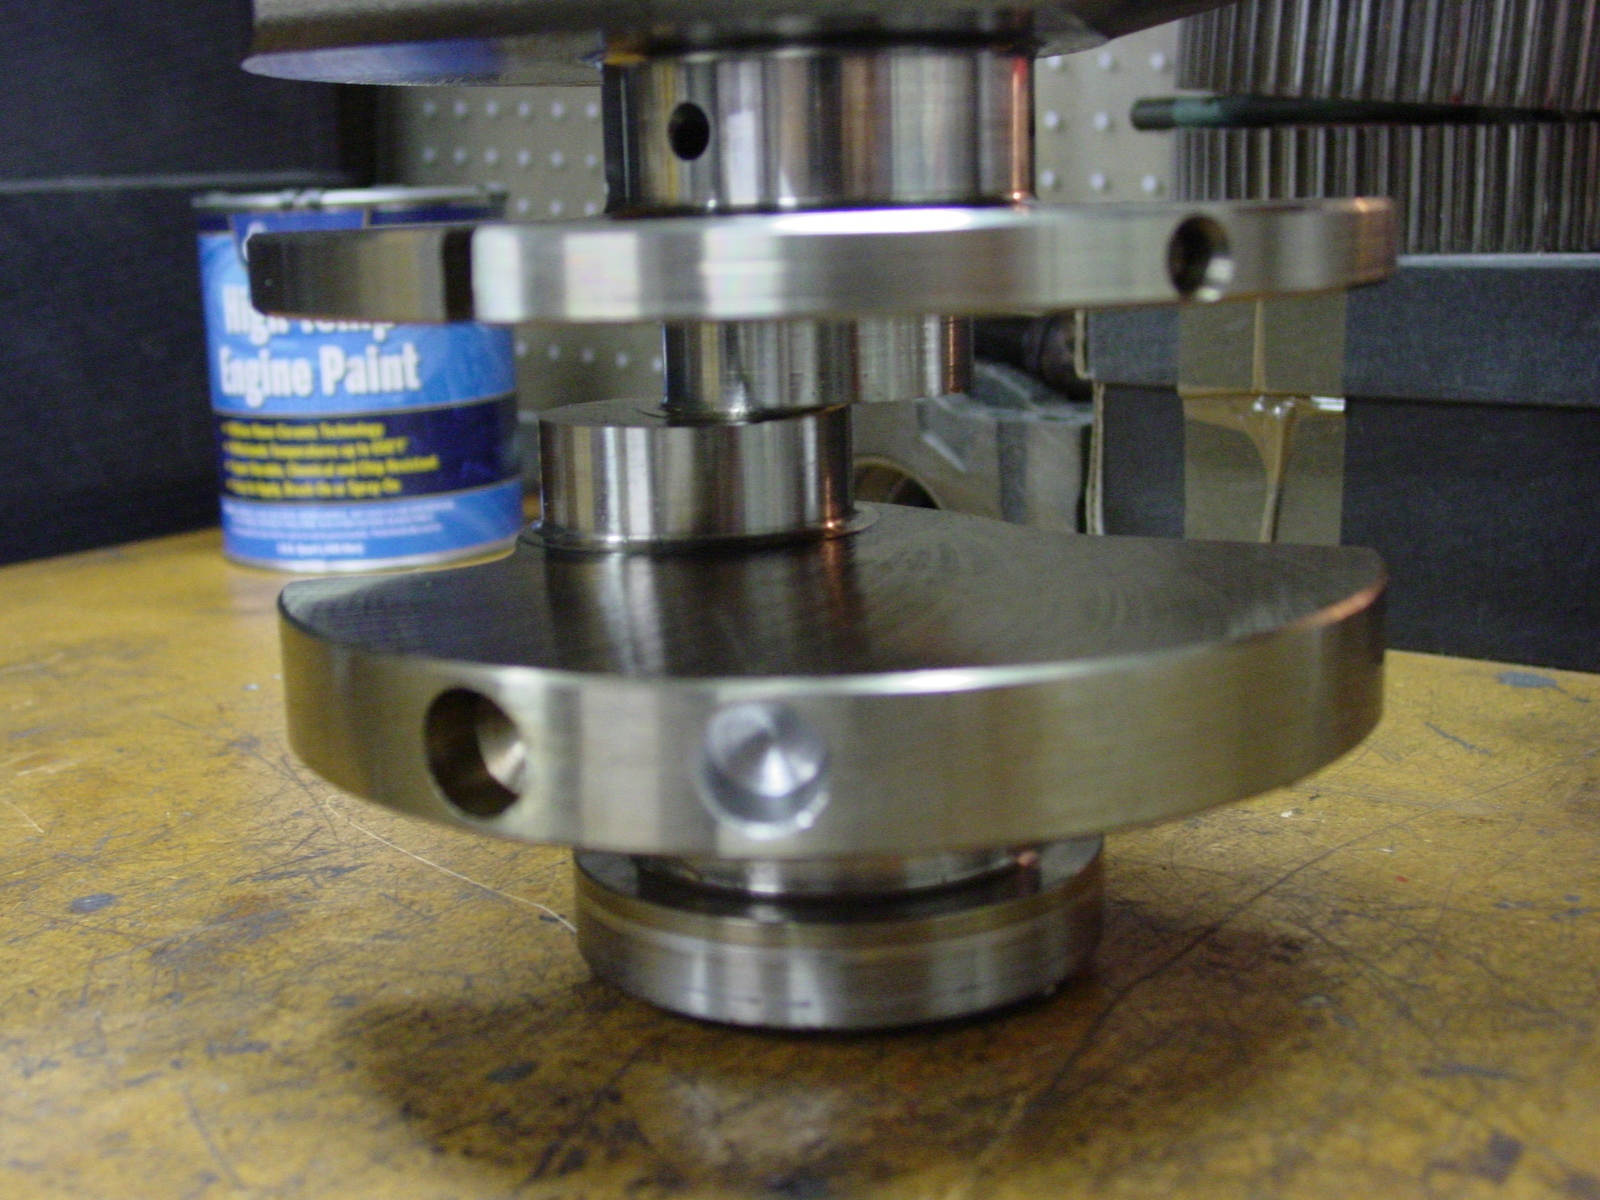
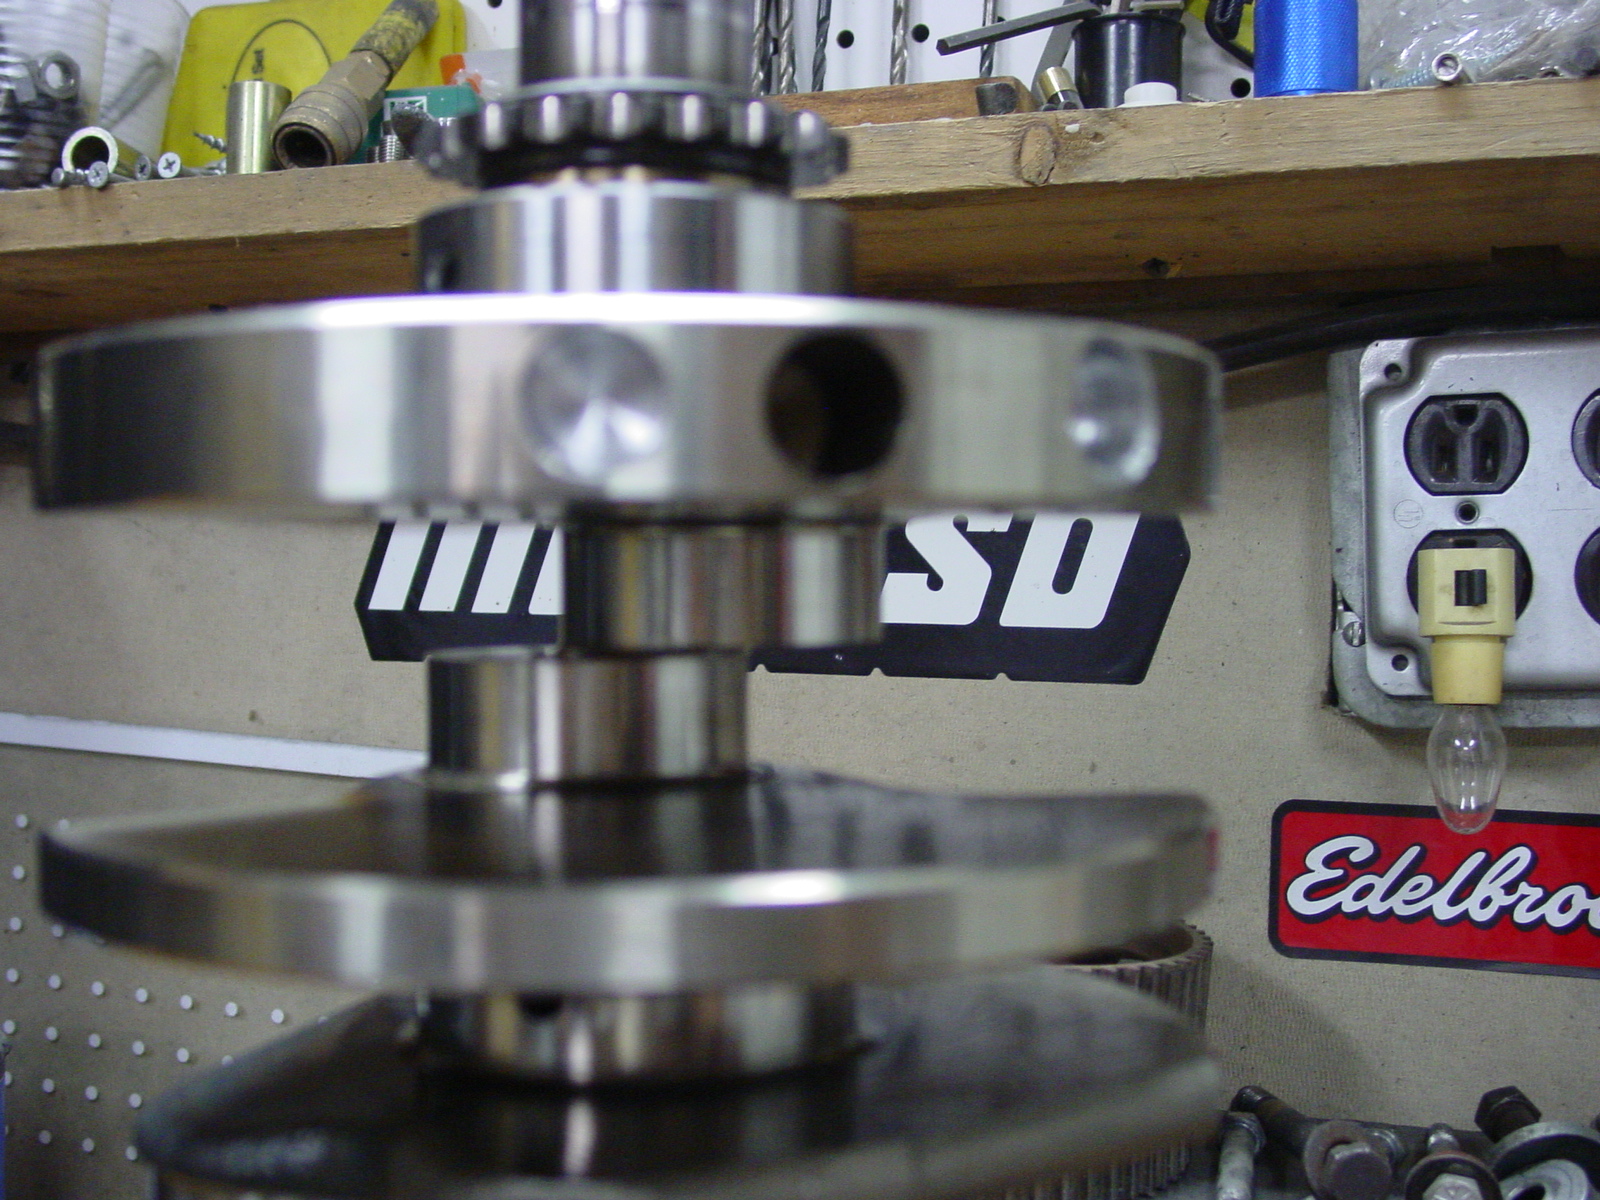
Here are pictures of the drilling that was done to balance the crank with the IE pistons..
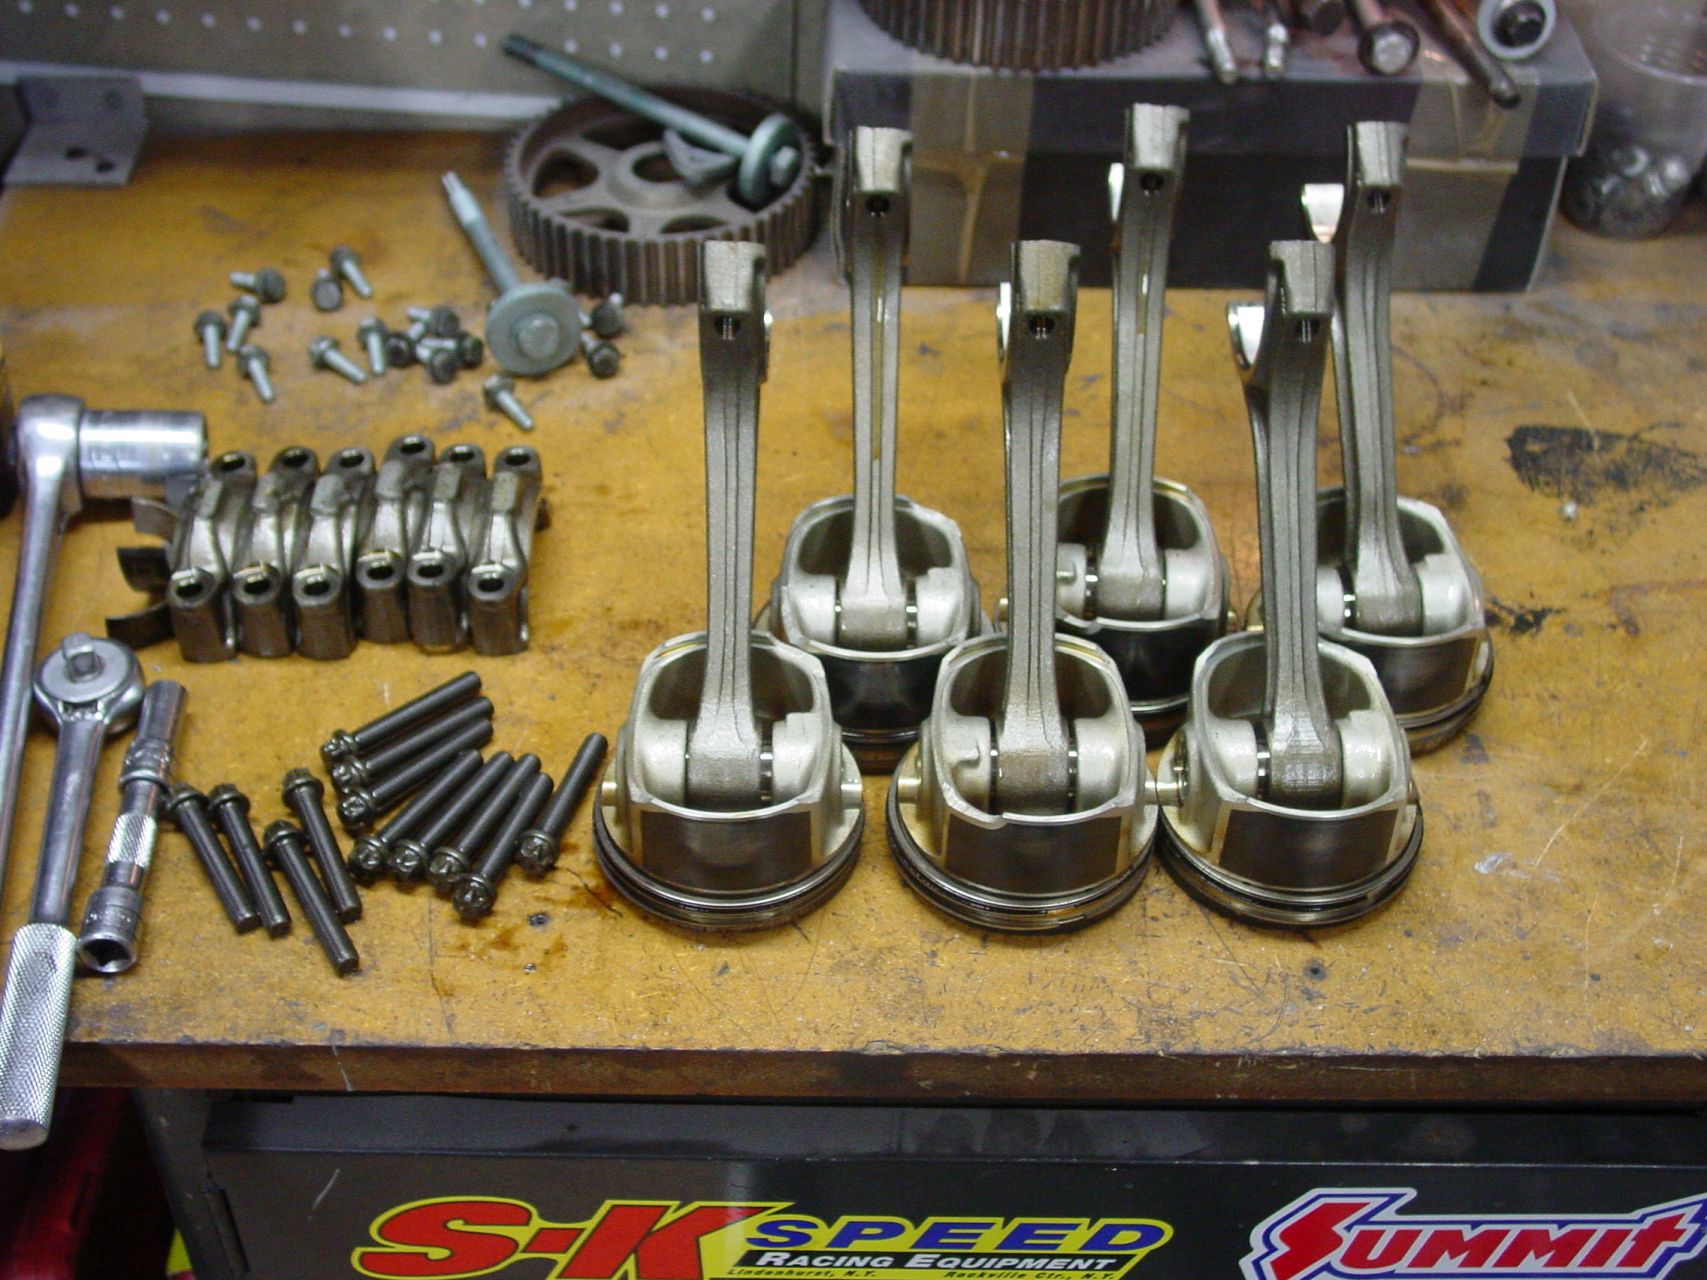
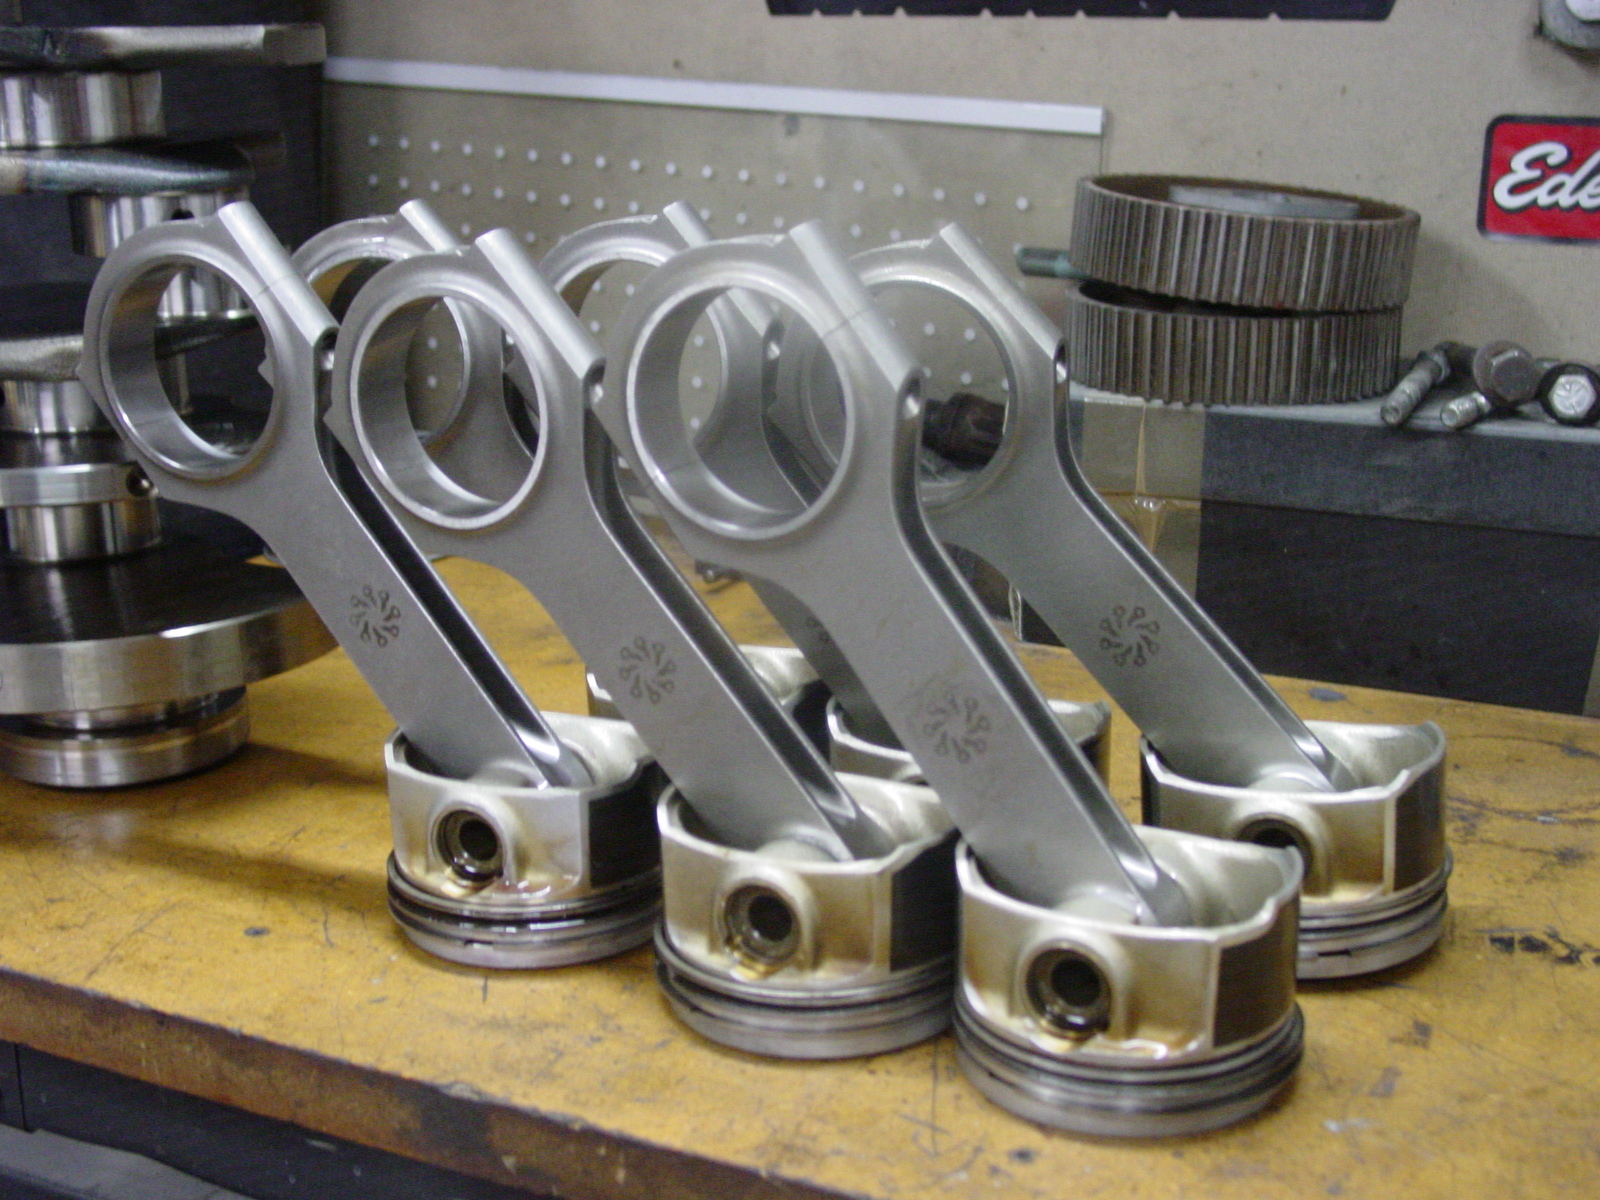
rods and pistons assembled…

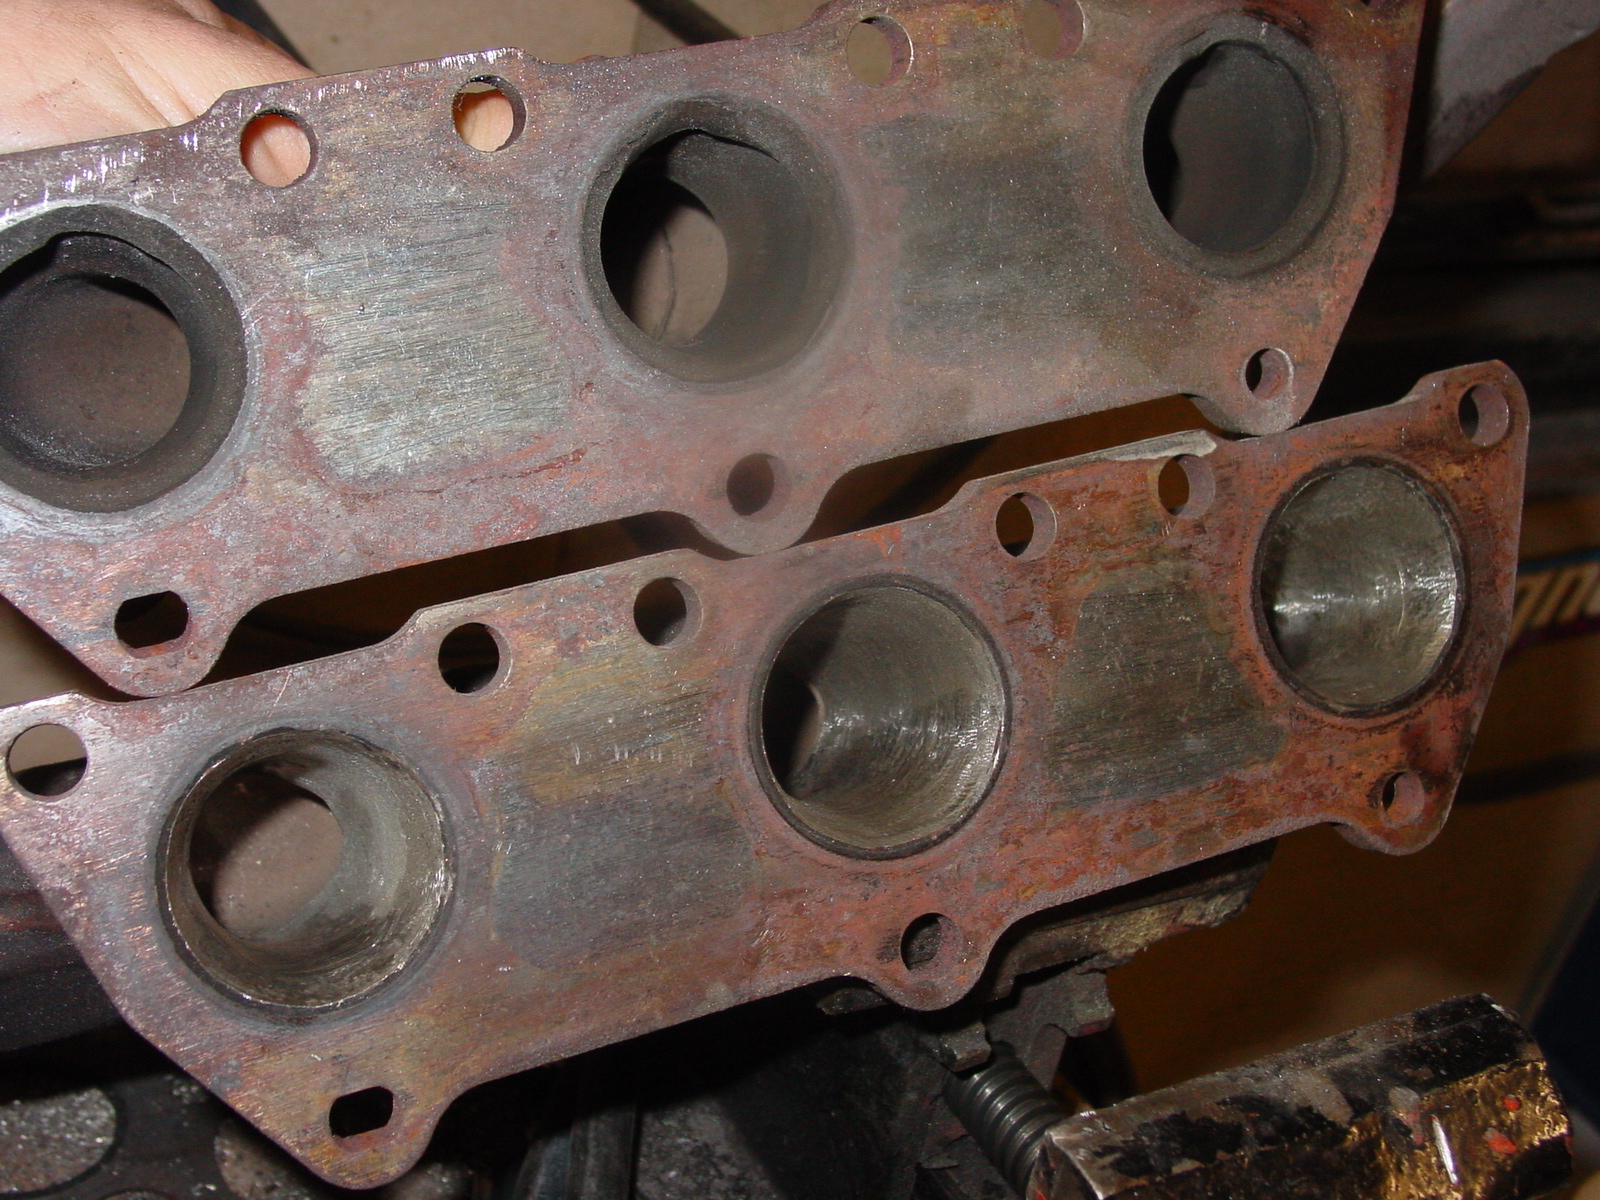
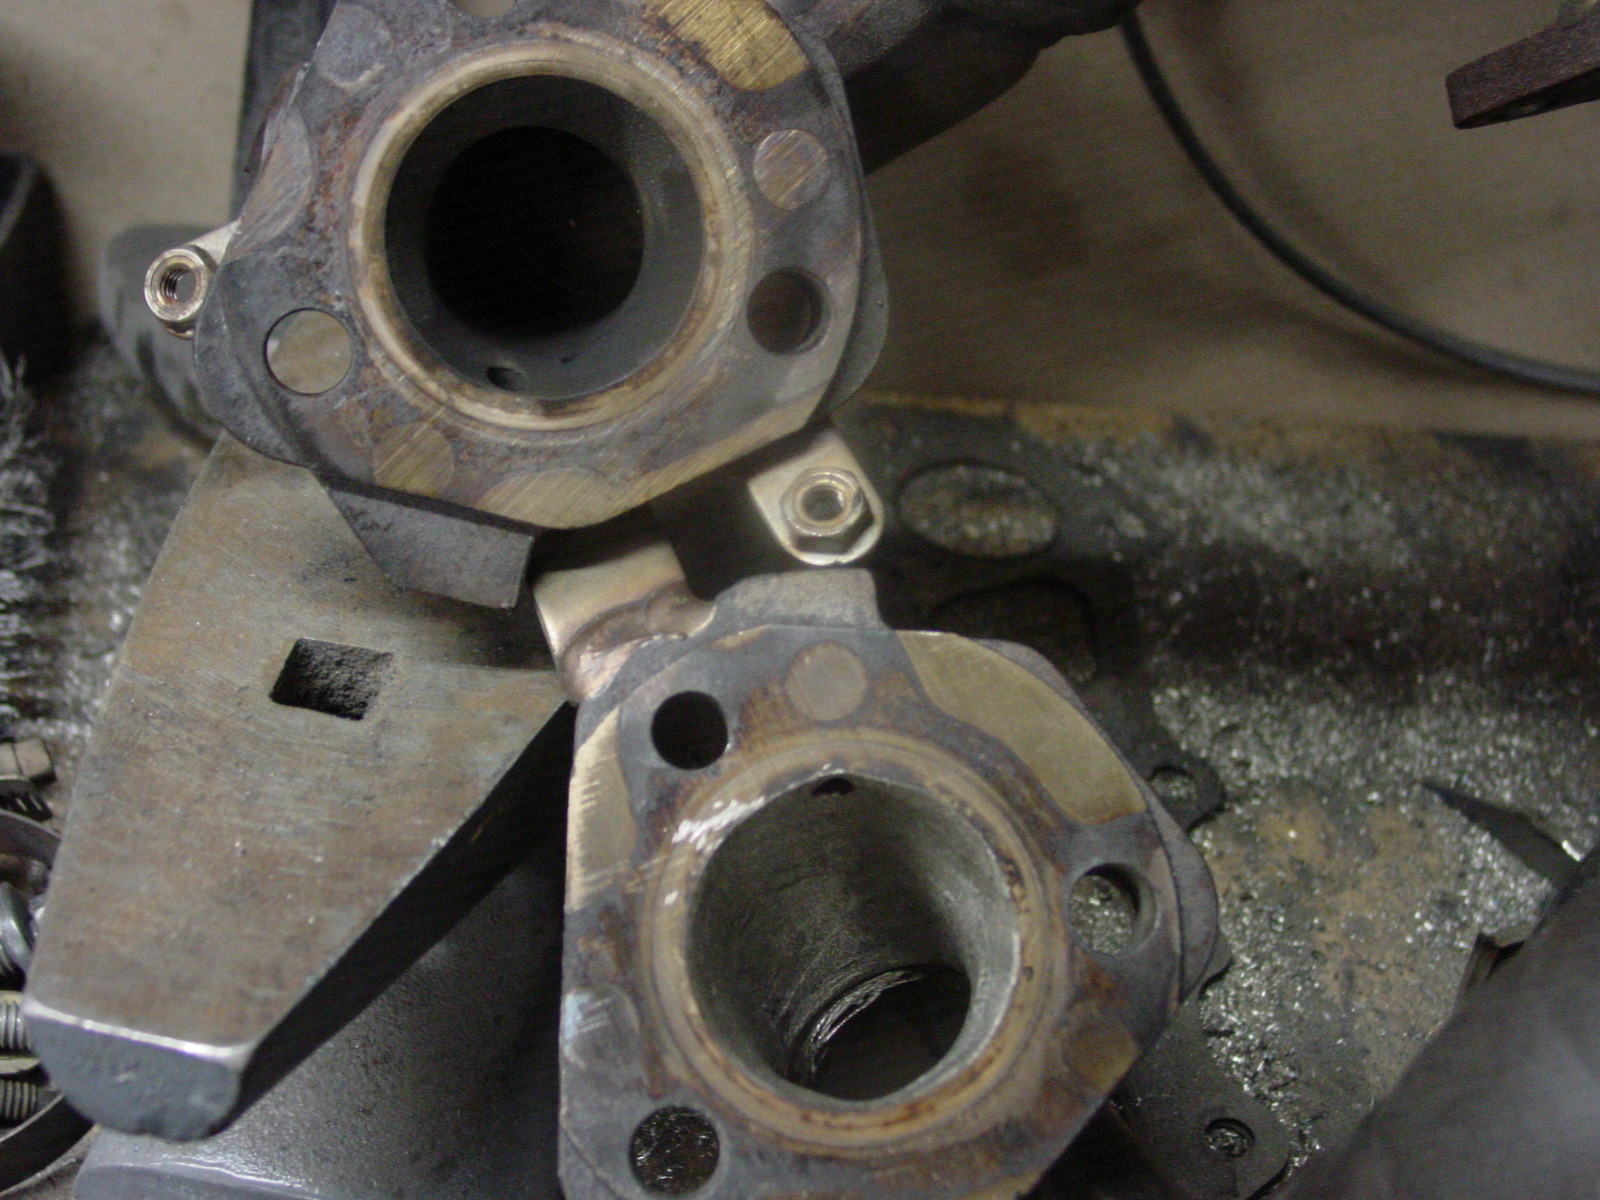
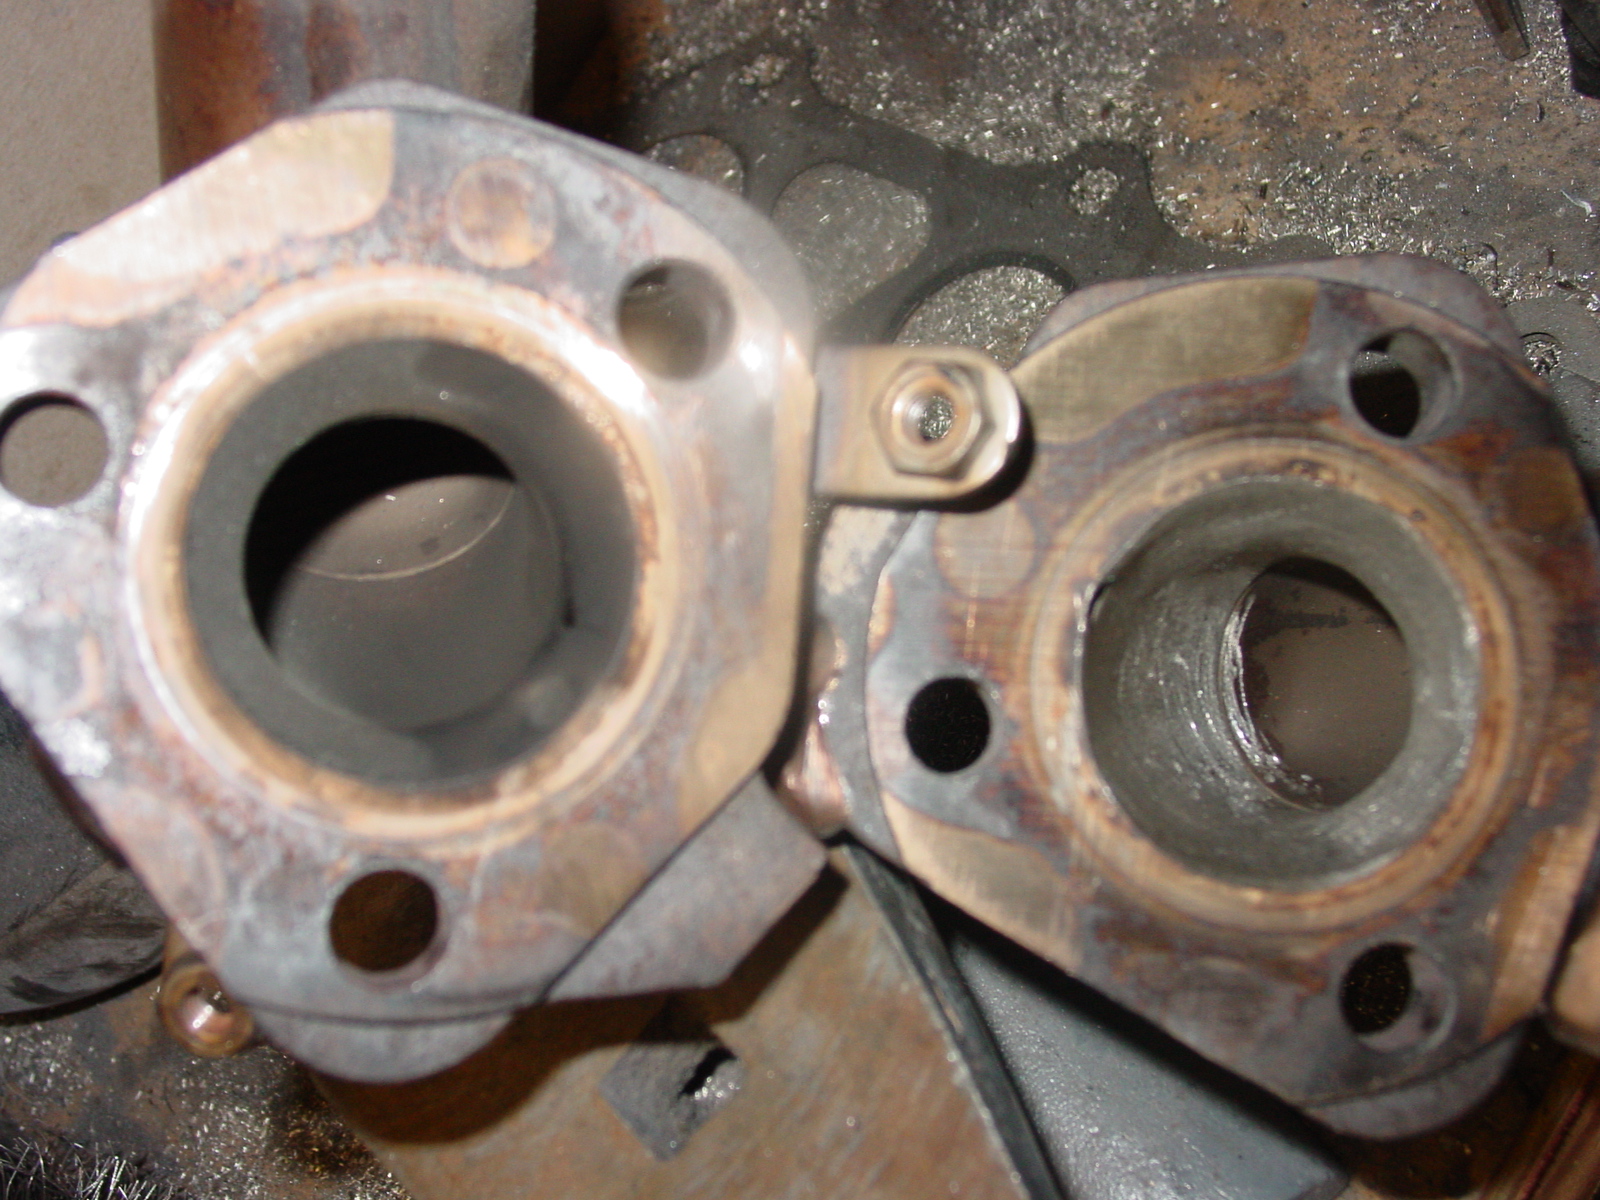
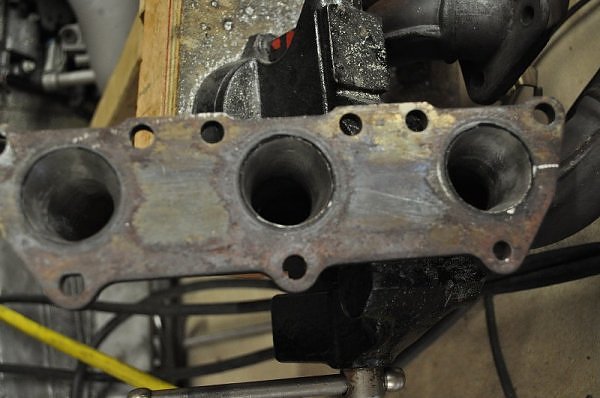
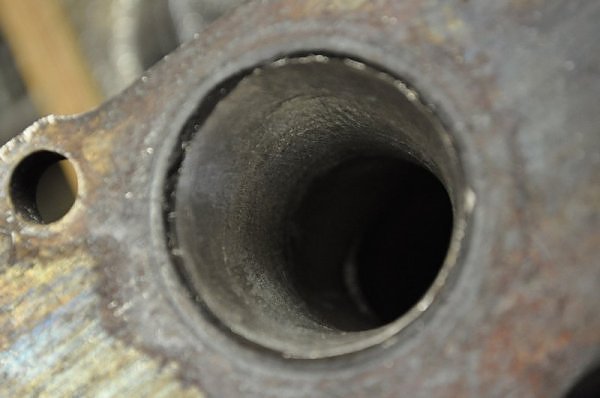
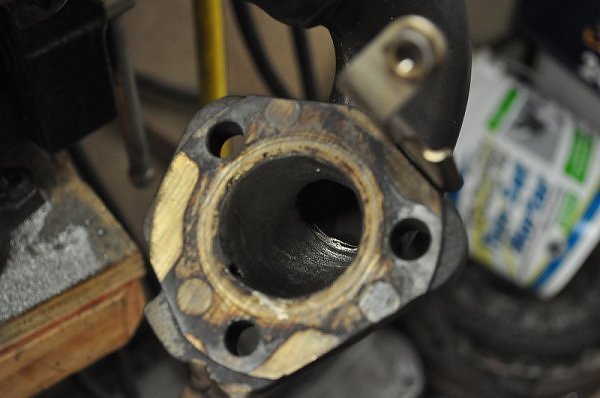
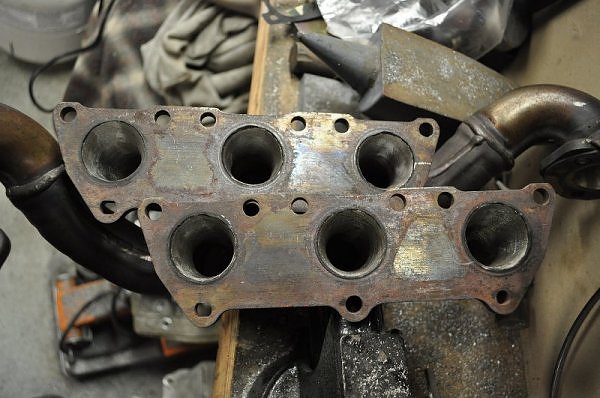
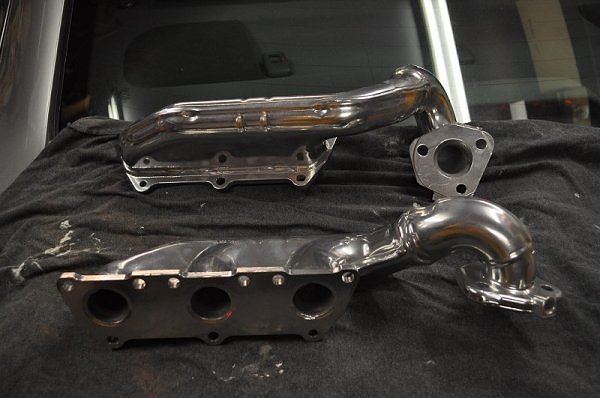
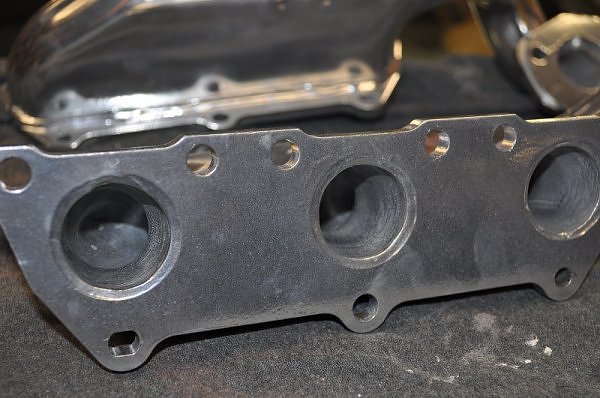
ported exhaust manifolds..
Usually I use VHT or Duplicolor on my american v8s but Ive heard good things about Eastwoods Hi Temp Engine paint.

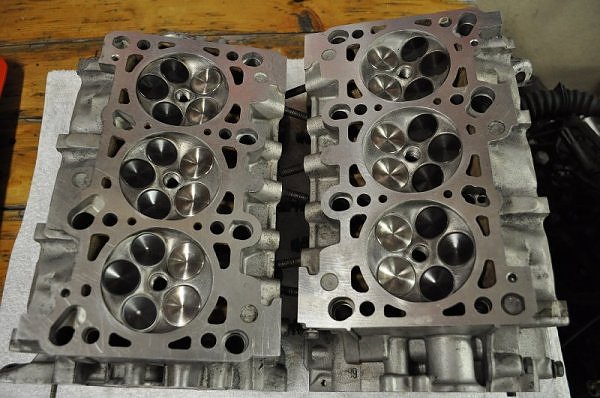
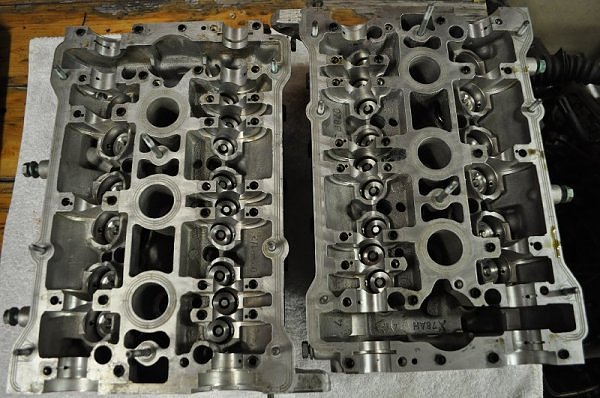
Here are some more for your viewing pleasure..
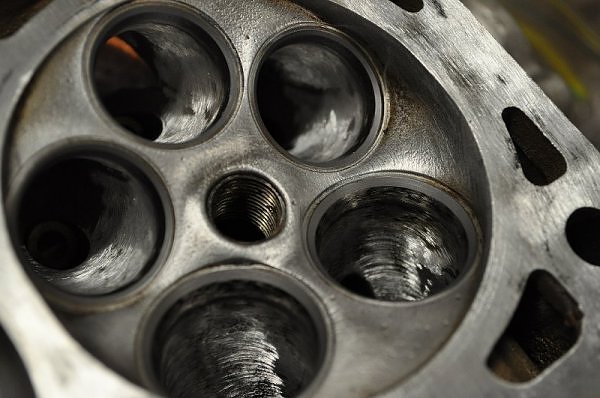
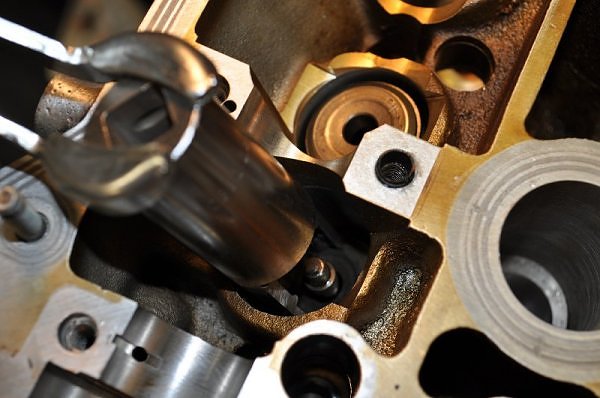
I did some minor polishing on the intake and exhaust runners on the 2.8 heads. Just cleaned up the rough sand casting effect.
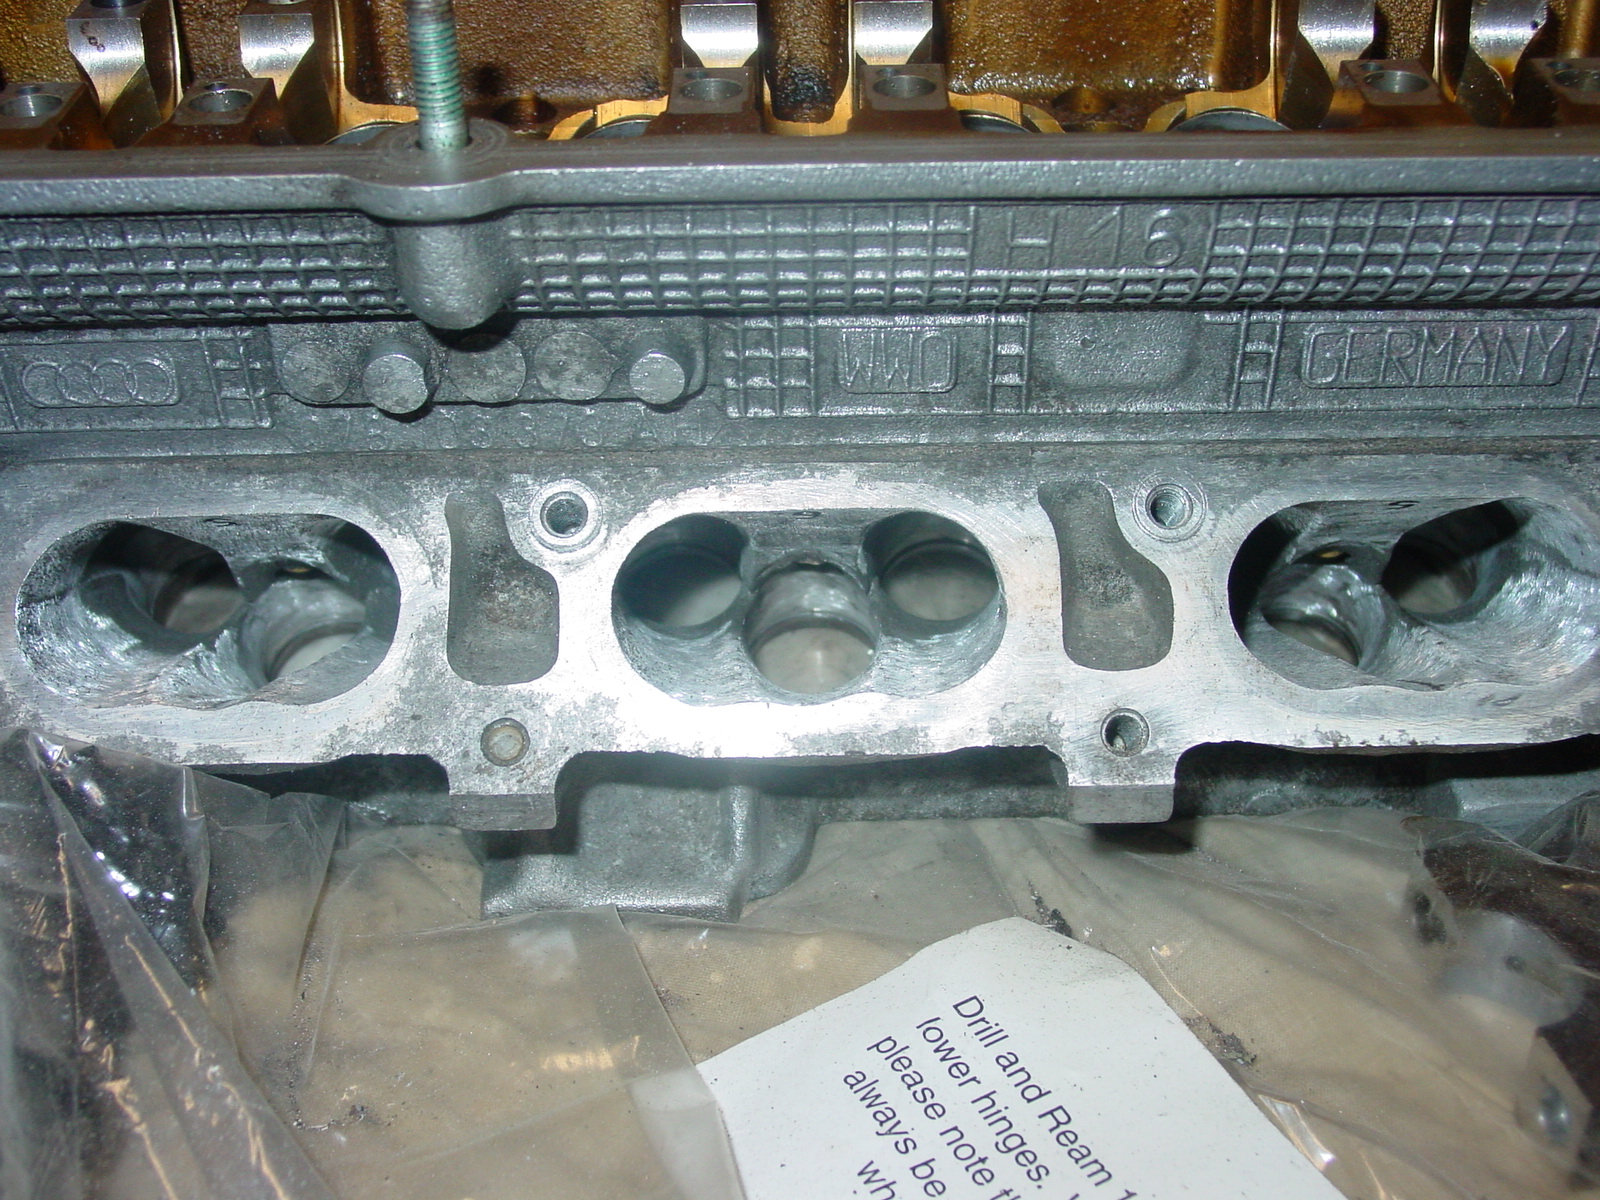

I did a light porting job on the intake and exhaust ports. I got rid of the ridge right before the valve seats.
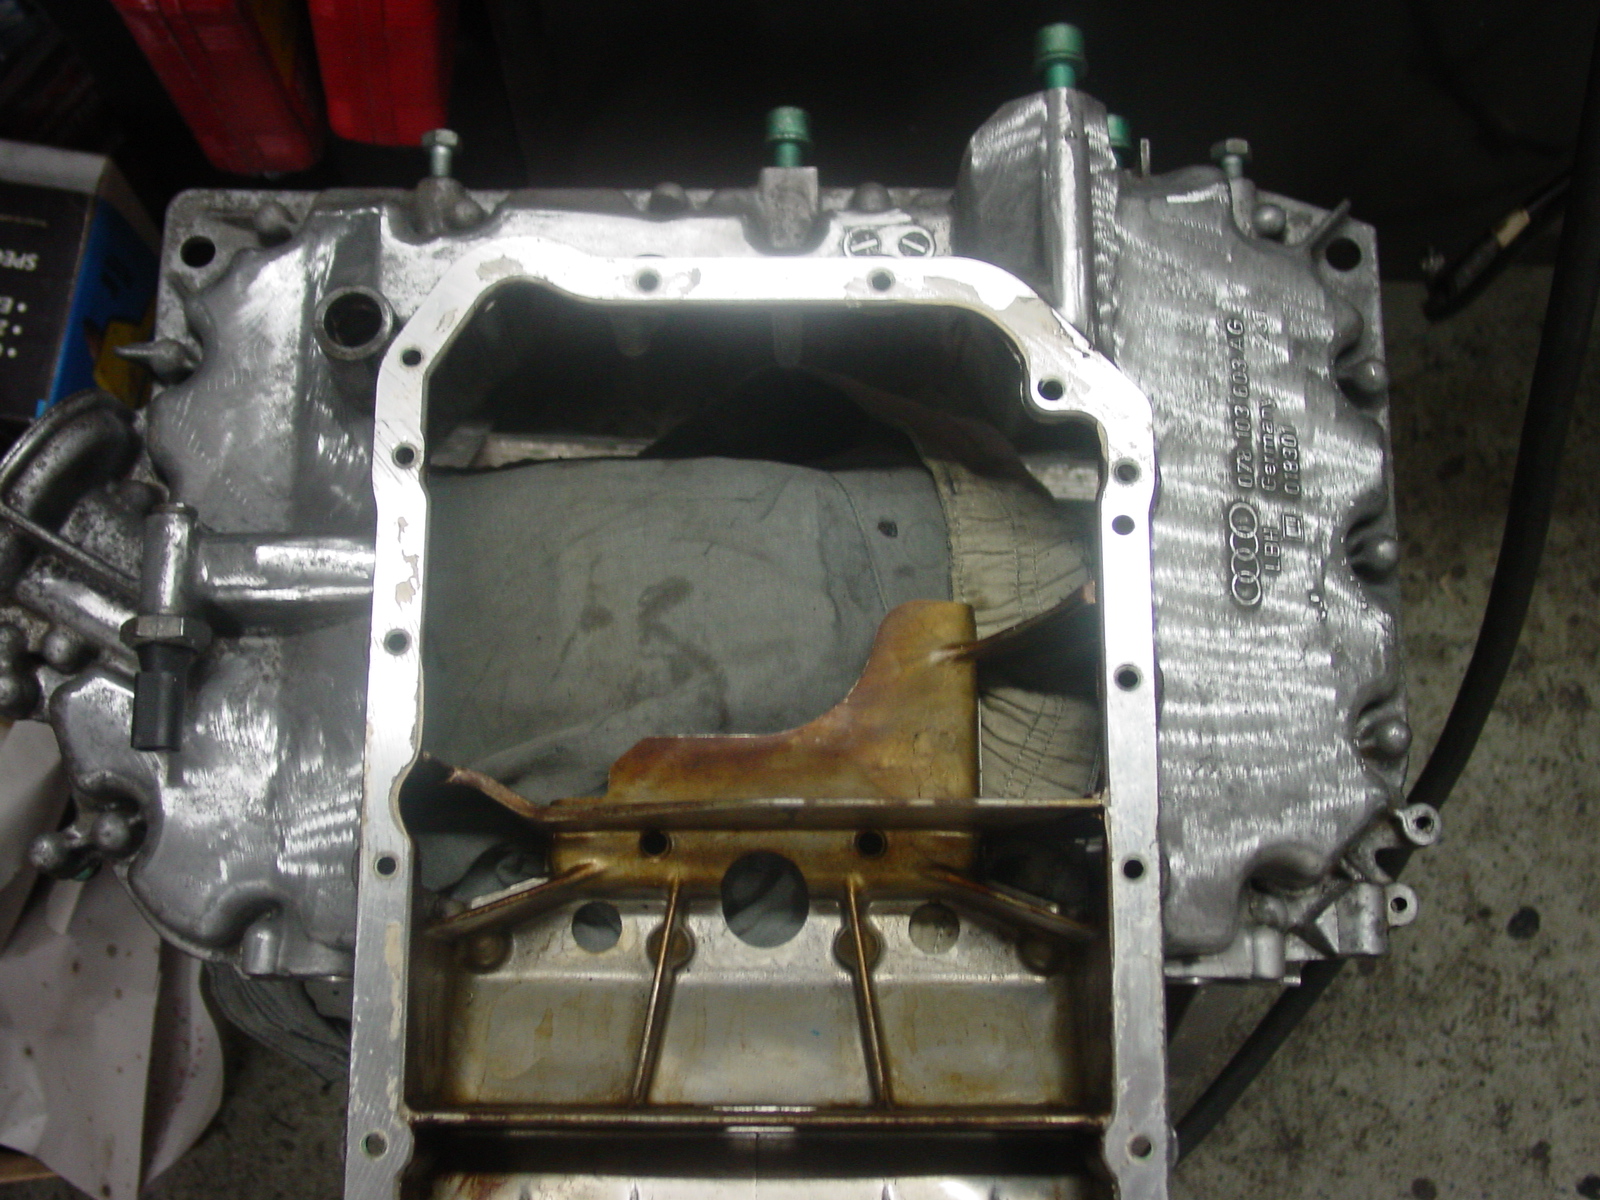
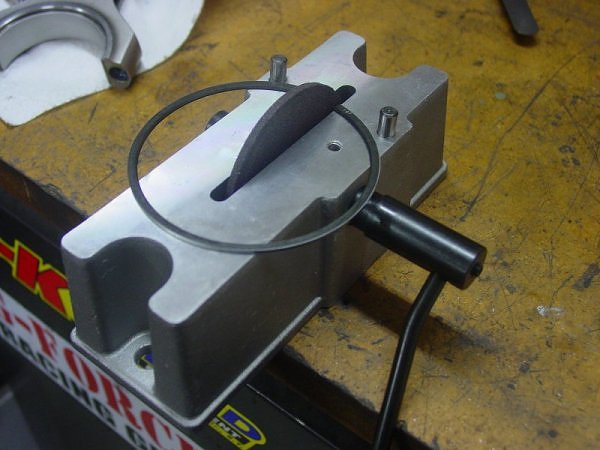
Im waiting on main bearings and rings so I figured I could clean up my oil pan in the time being..
BEFORE:
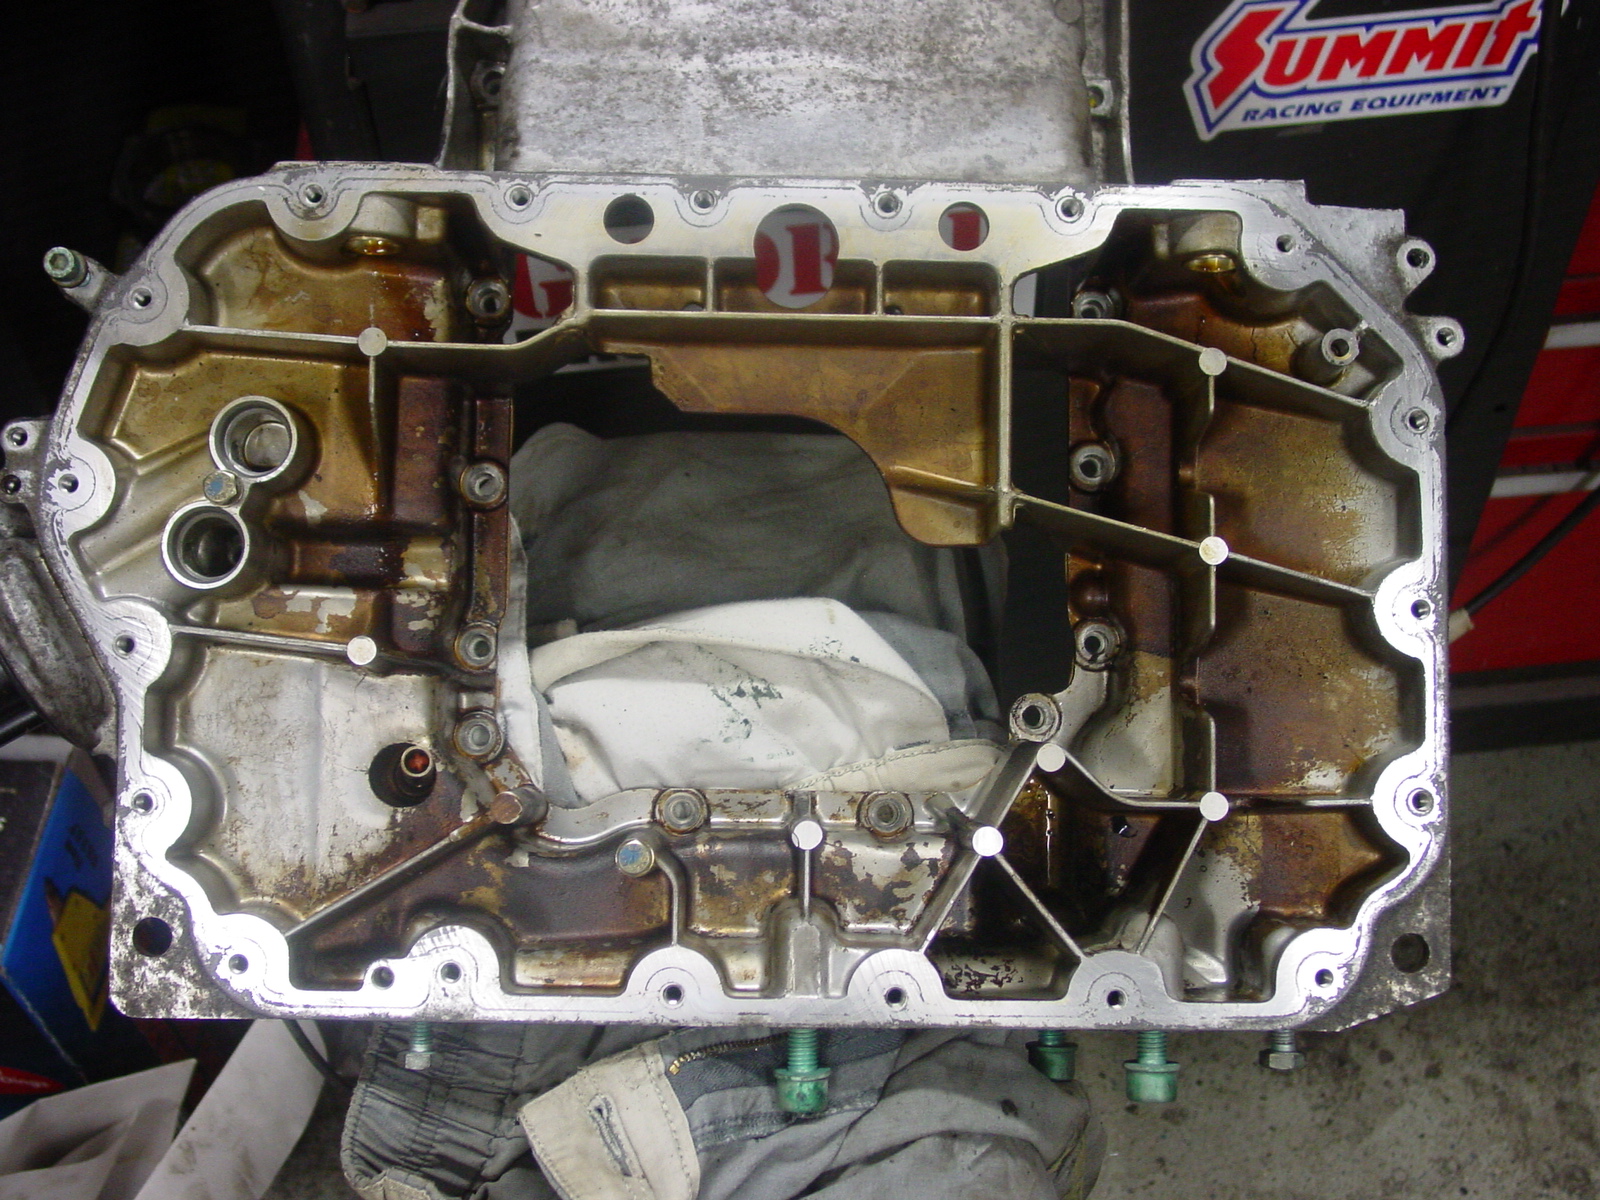
AFTER:
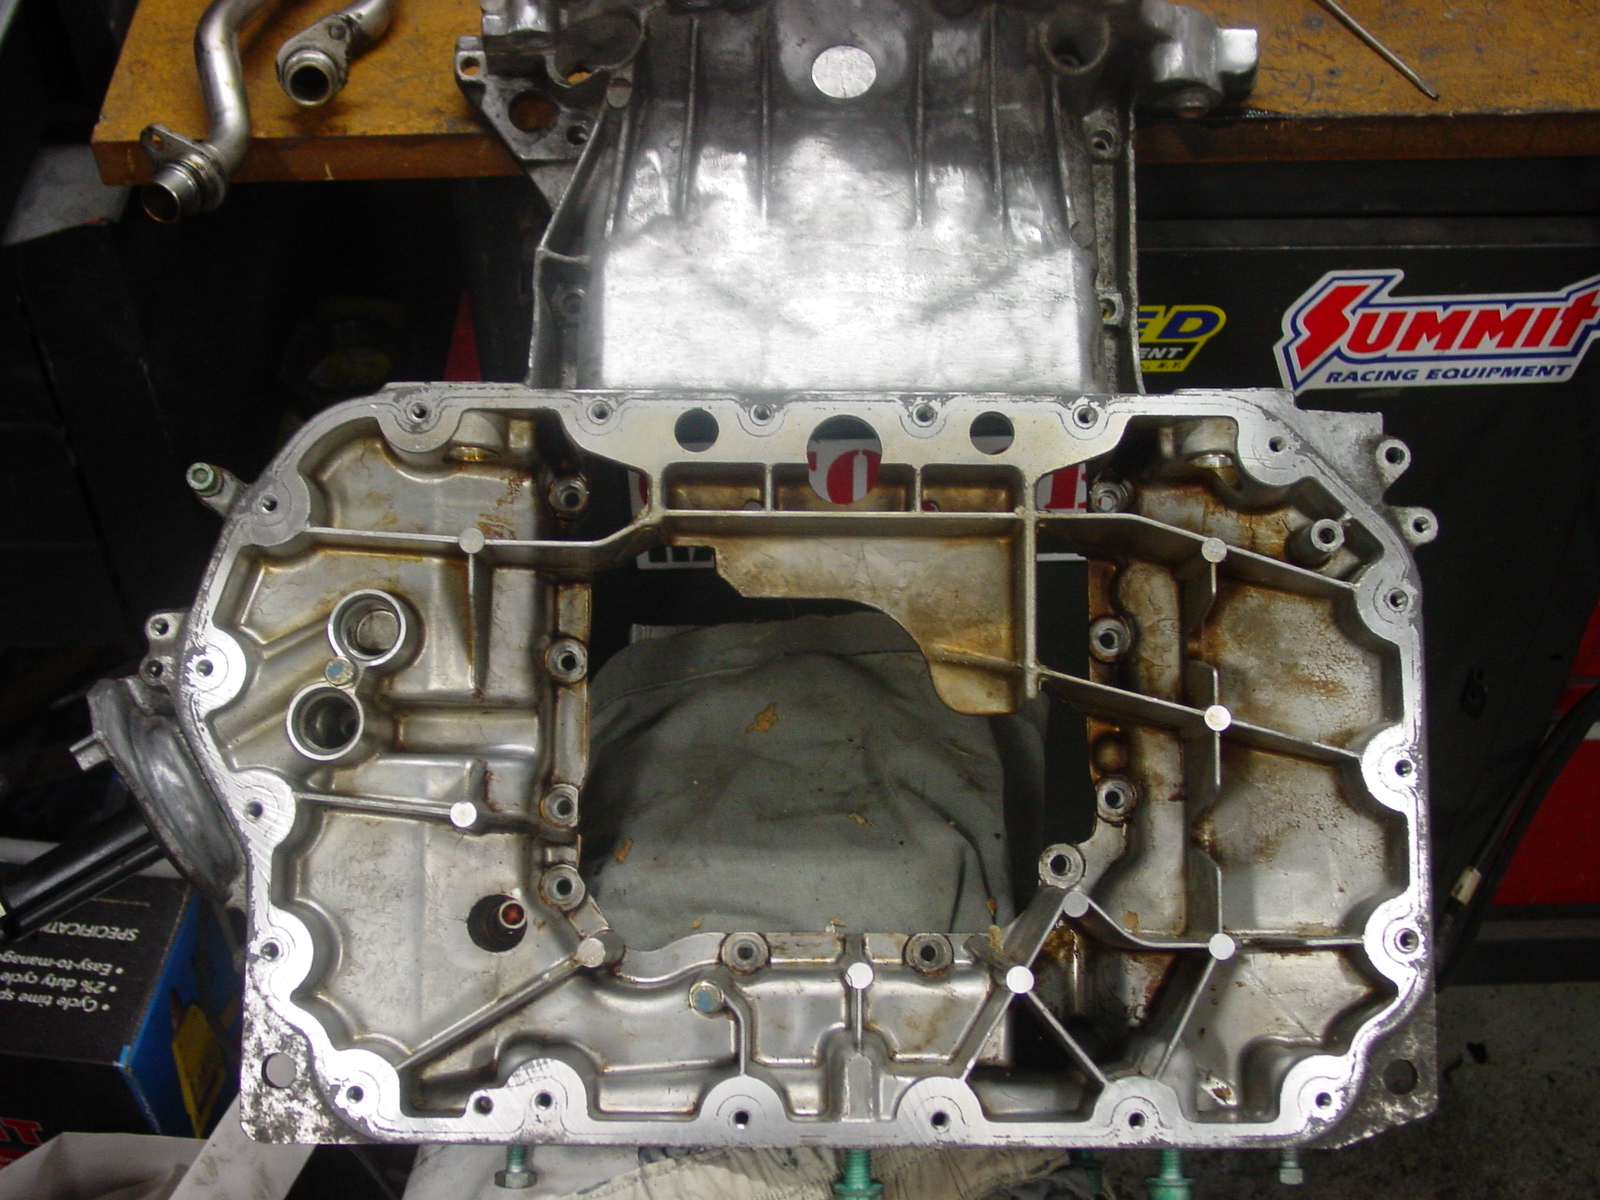
Same for the other side…
BEFORE
AFTER:
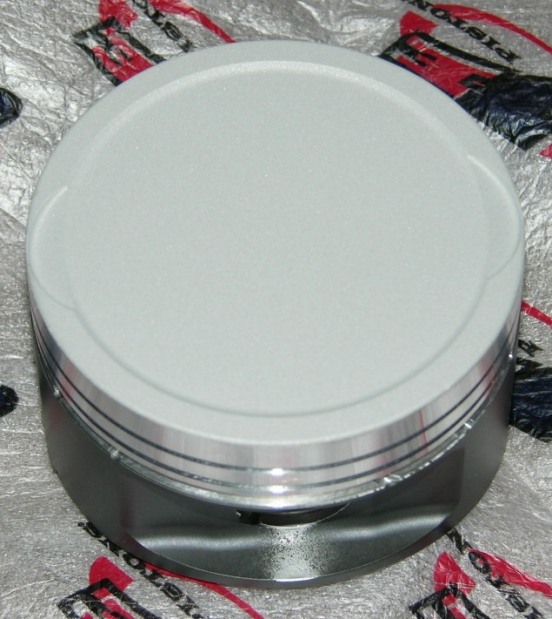
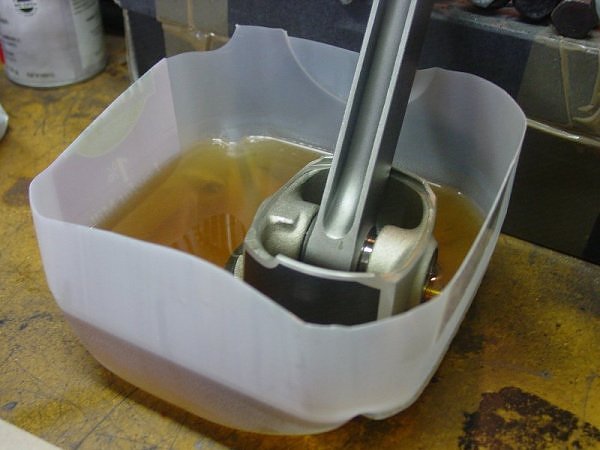
I had my new JE pistons coated by calico coatings for $39/ea.:)
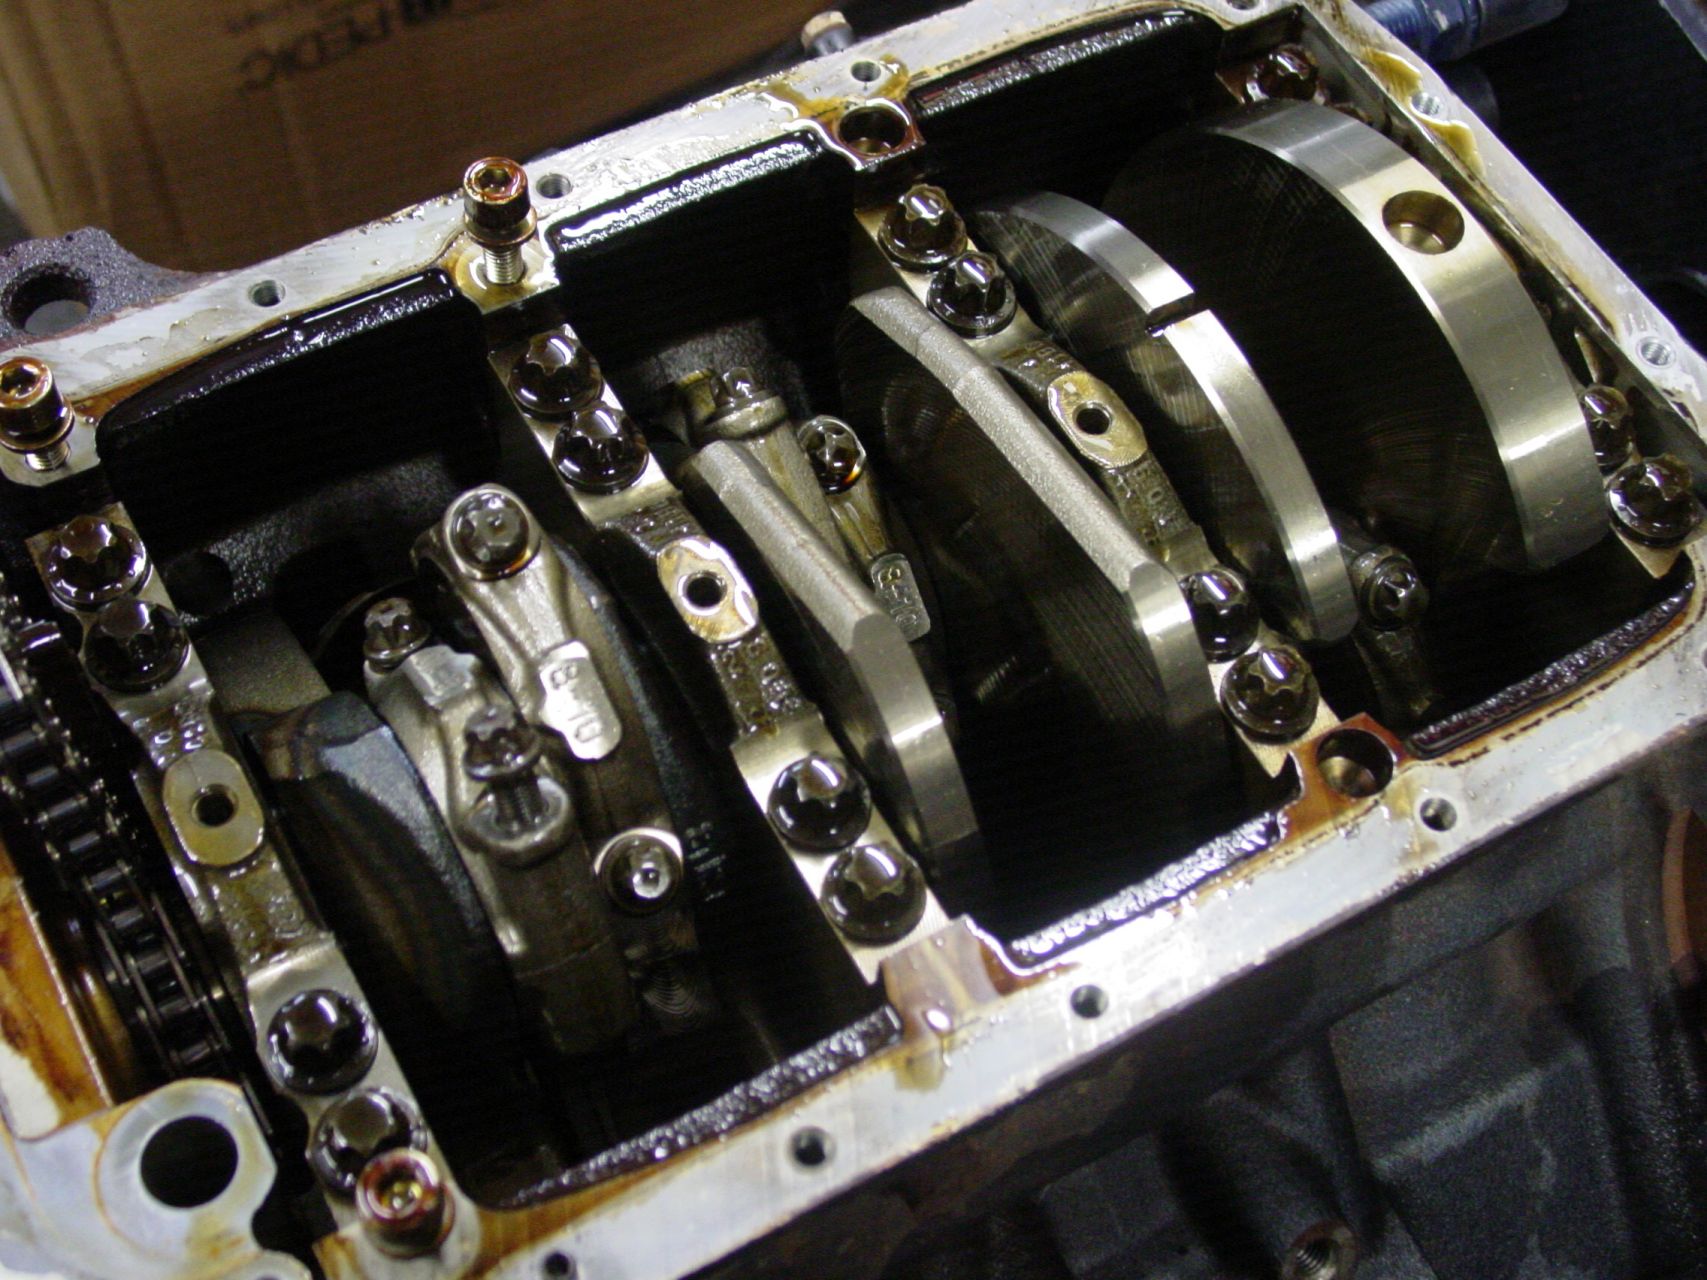
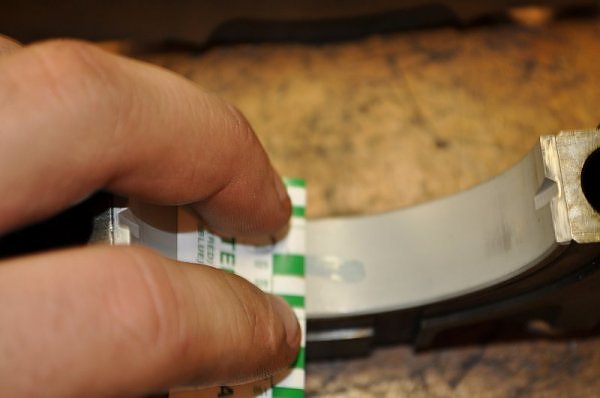
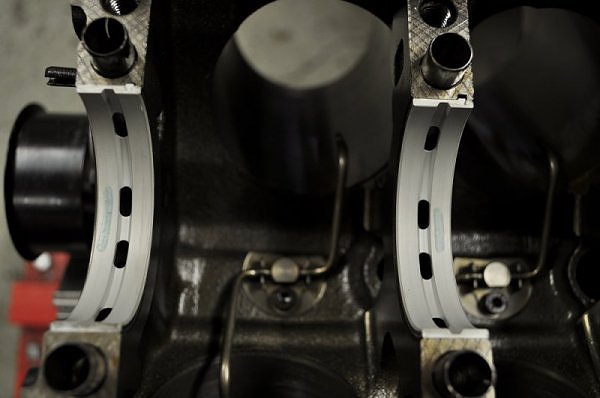
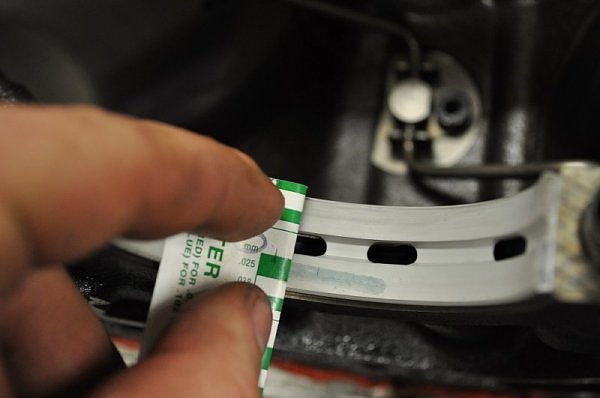
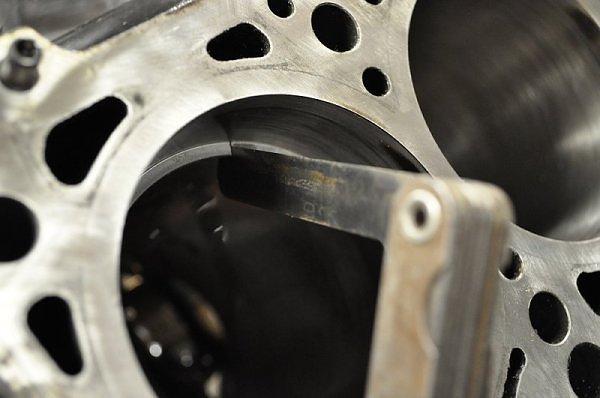
I threw some plastigauge on all the main bearings to make sure everything was gravy..
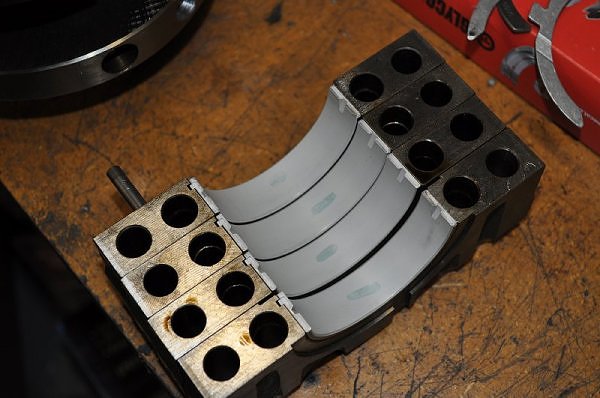
Sorry its out of focus. Here is the main cap.. came in a right at .025 which is perfect.
Here are the mains in the block..
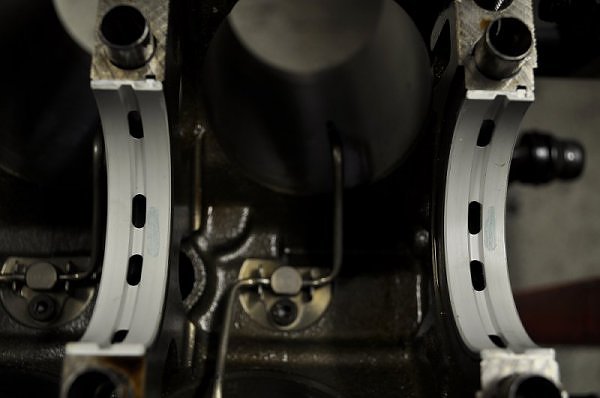
Came in right at .025
I like purple..
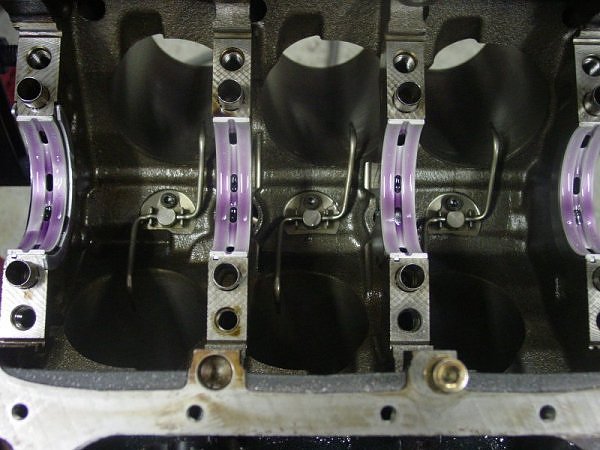
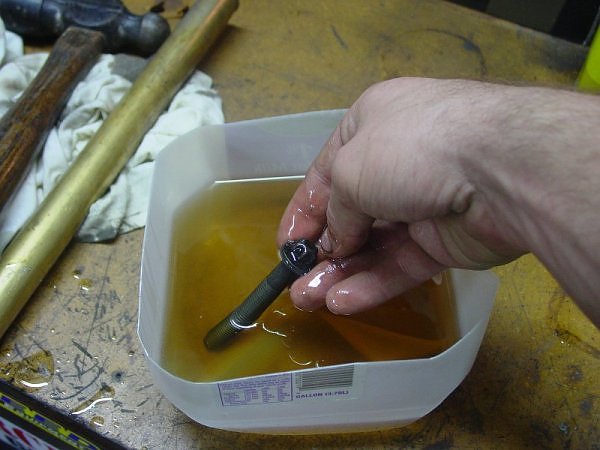
dipping the main cap bolts in oil so I get an accurate torque reading..
ready to torque down..
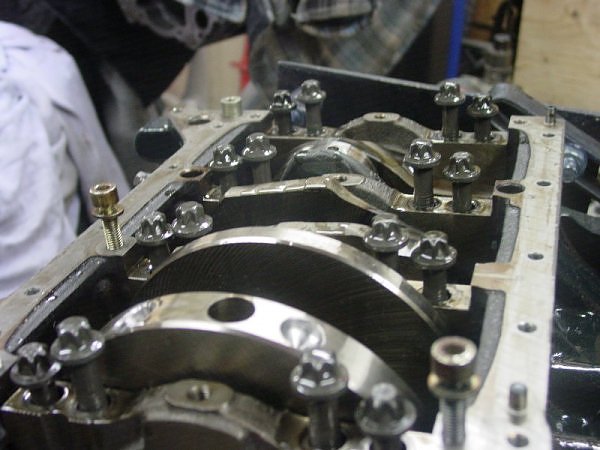
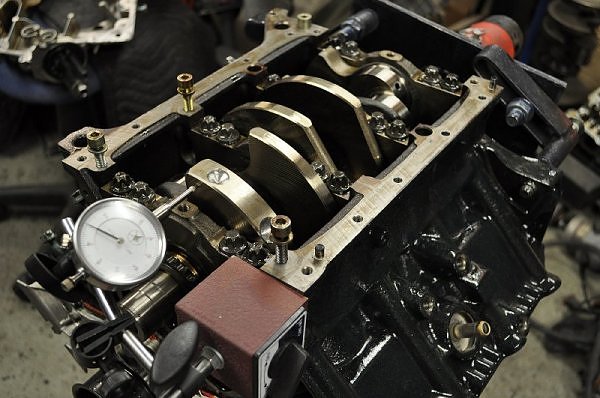
checking for crank endplay.. it was right at .003-.004 inches which is right on the money.. nice and tight.
measuring ring gaps.. this is the top ring.. it was also right on. I checked all the other rings but didnt take pictures. use some imagination.
Here are some out of place pictures from when I was fitting my piston rings..
Prelubing the rings so I dont scratch up the cylinder walls while the piston goes in or while I turn the crank.
IE rods in…
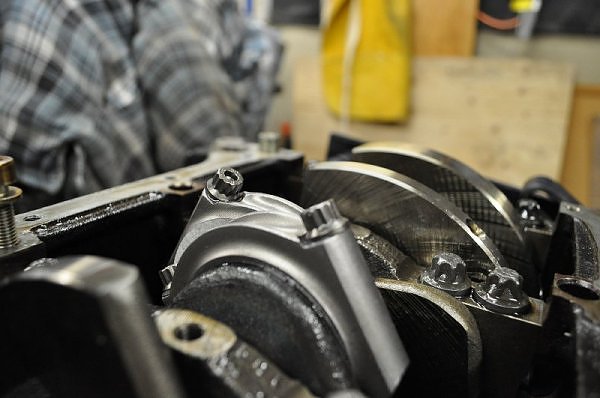
shortblock complete..

carefully bent the piston squirters so they wouldnt hit the crank or the rods. its really tight with the IE rods but doable.
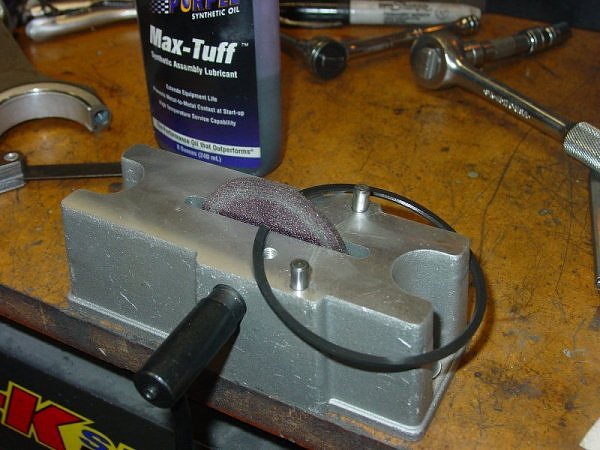
cleaned up the oil pump and bolted it on…

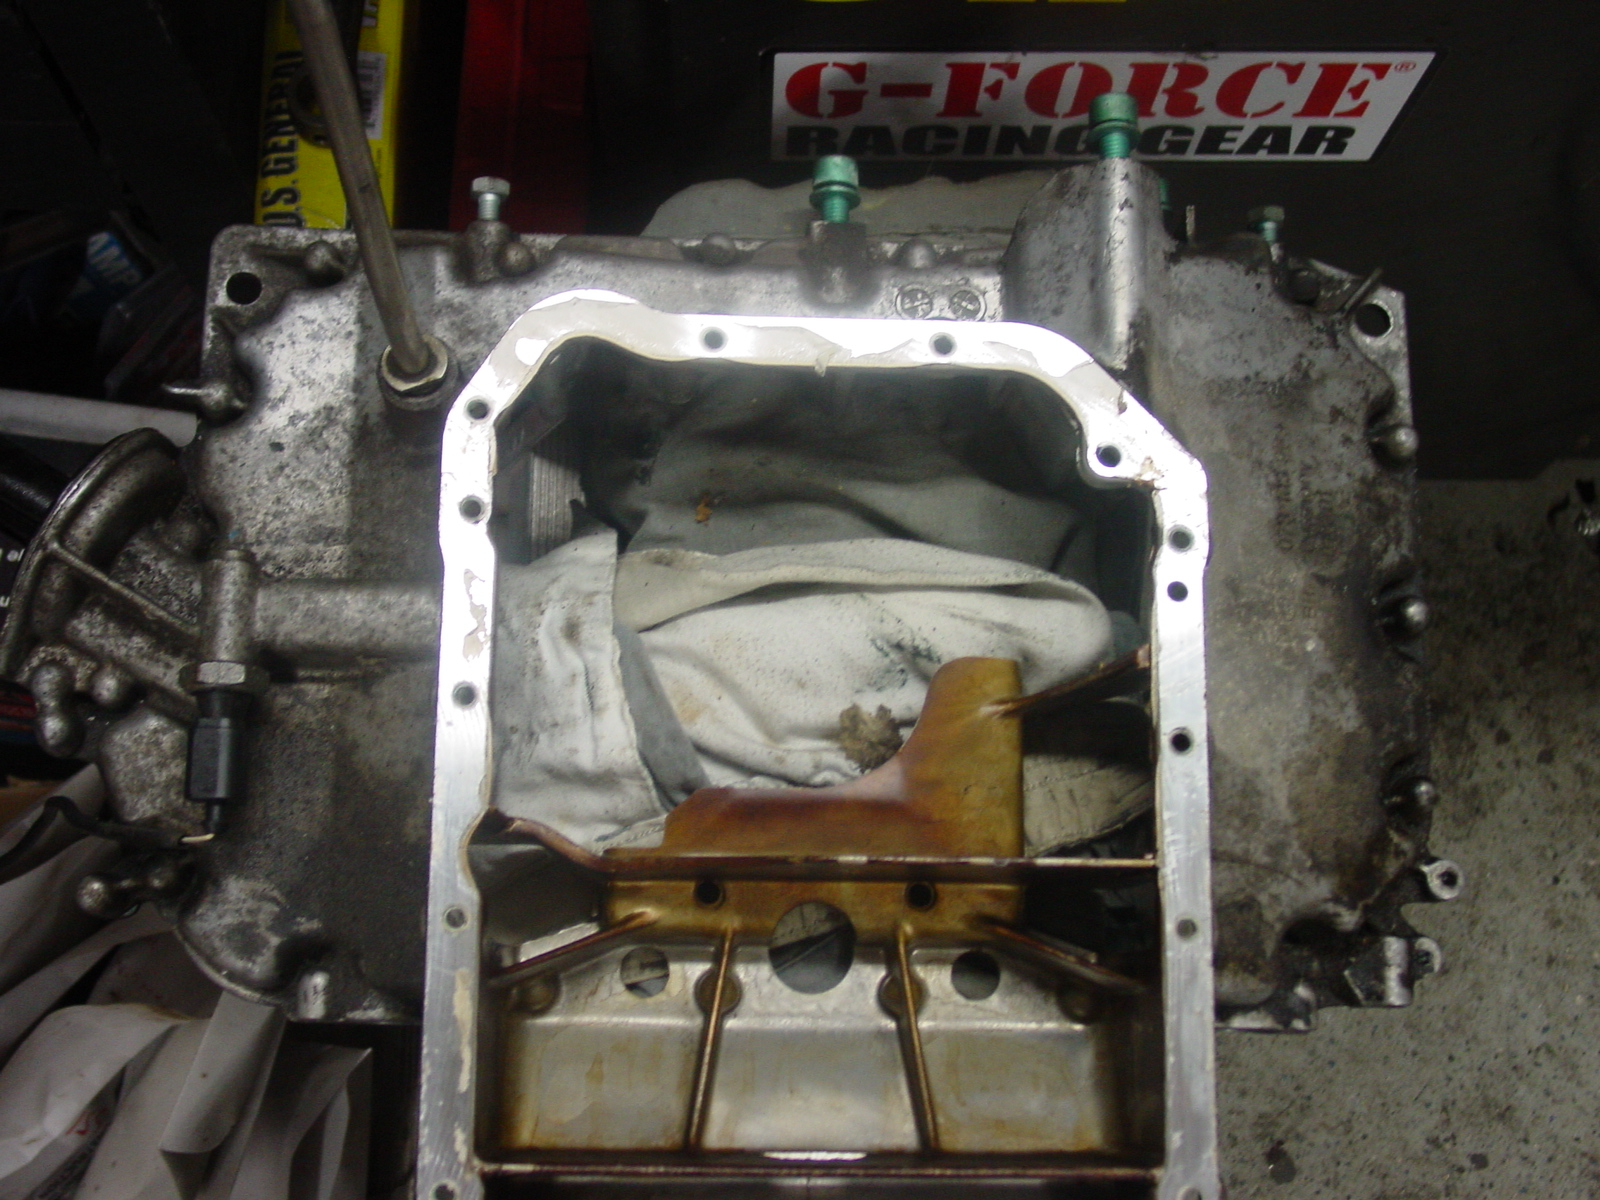
put on a tad of pliable sealant ready for the lower oil pan. it looks like a put a lot but its because its smeared flat..
upper oil pan…
lower oil pan…
all done!!

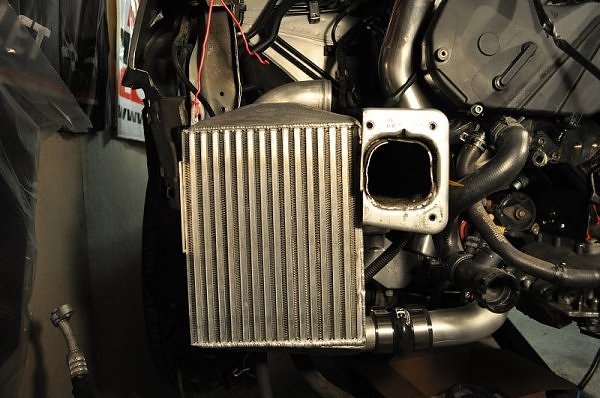
ERs just came in…
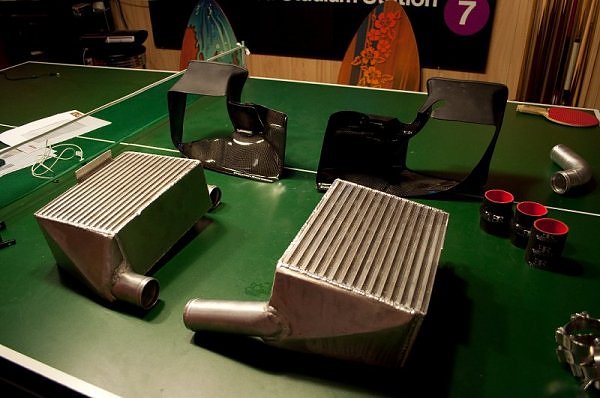
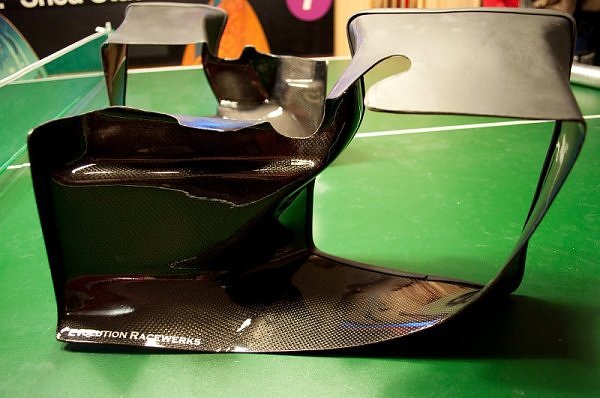
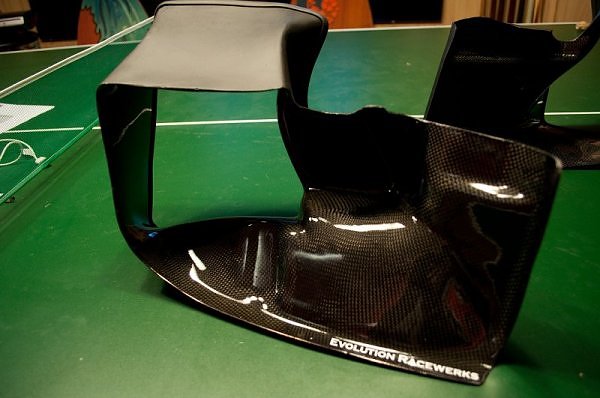
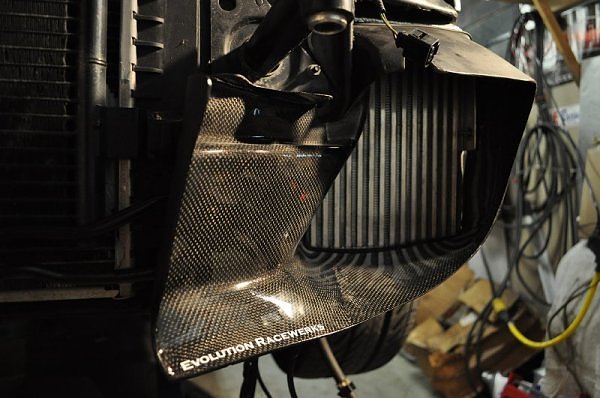
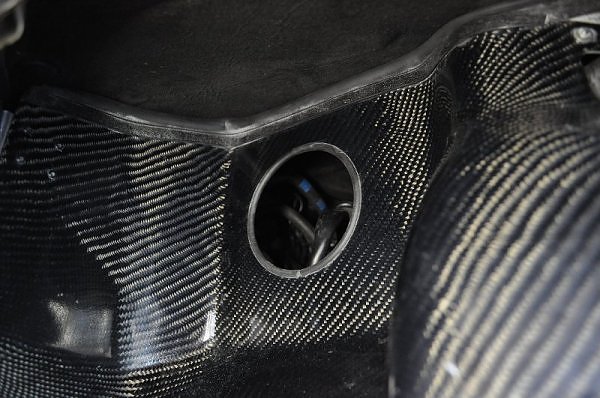
carbon fiber shrouds…
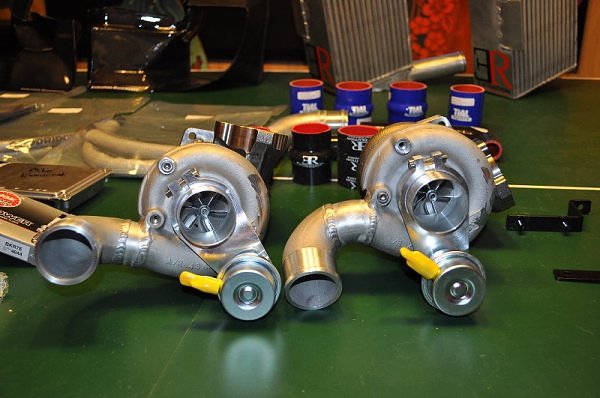
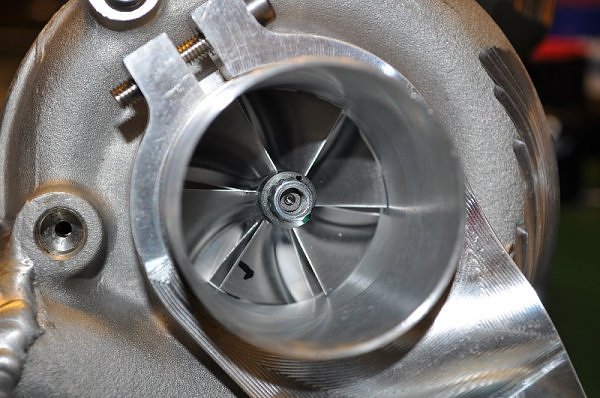
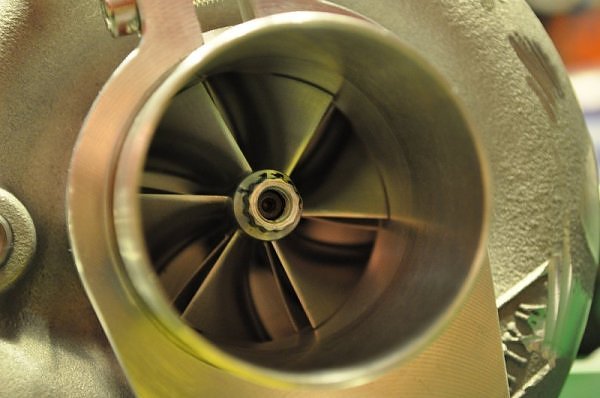
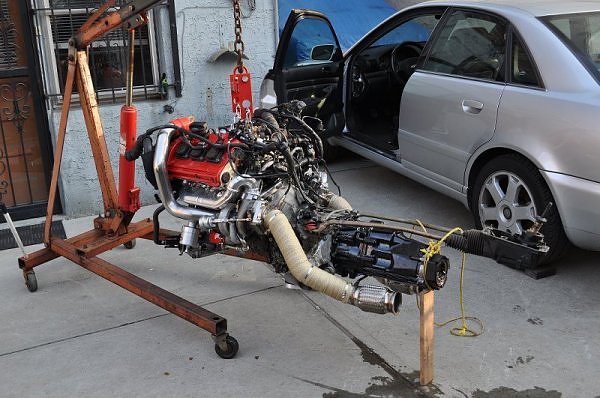
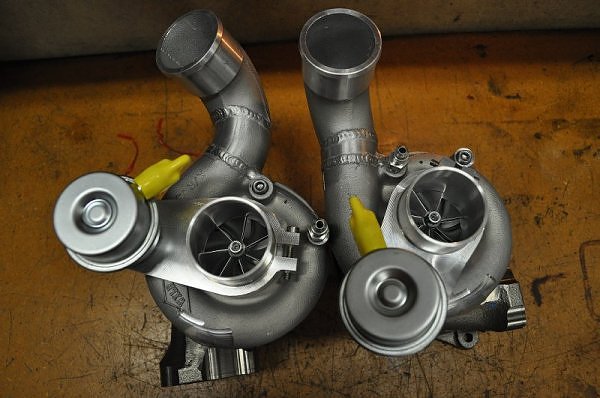
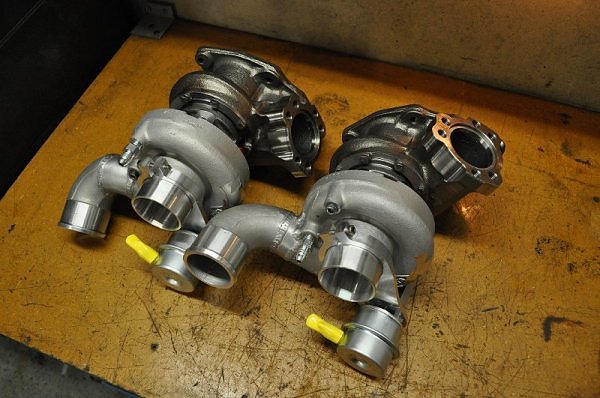
long awaited TiaL 605 kit w/ fueling.
got the new Bosch ev14 71 lb injectors. thats at stock 4 bar.

I got the first set of “gen 2” inlet pipes. they have more of a polished finish in comparison to the “gen 1” inlets.

here we go….
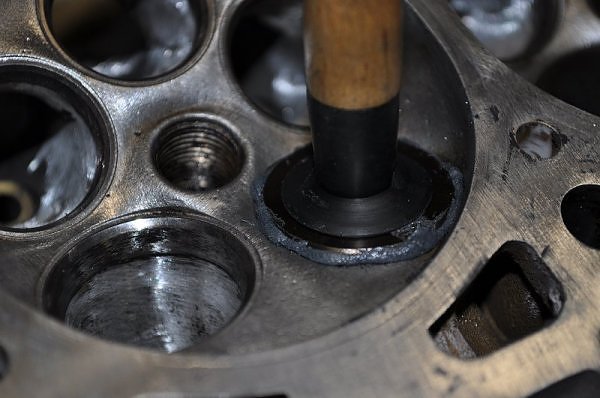
basic stuff needed to lap in/set the valves.
-lapping compound you can get on ebay. you get a coarse and fine grit.
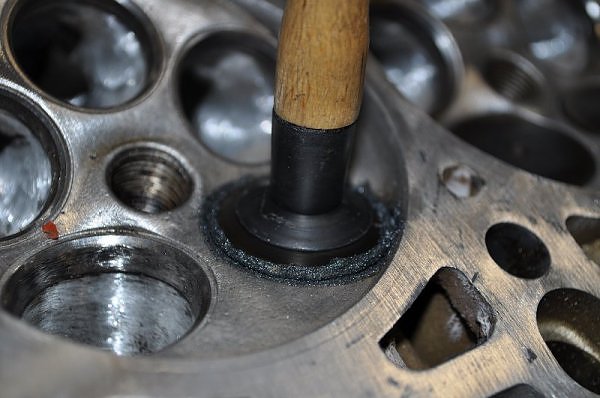
-suction tool which allows you to grab onto the valve and lap it to the seat.
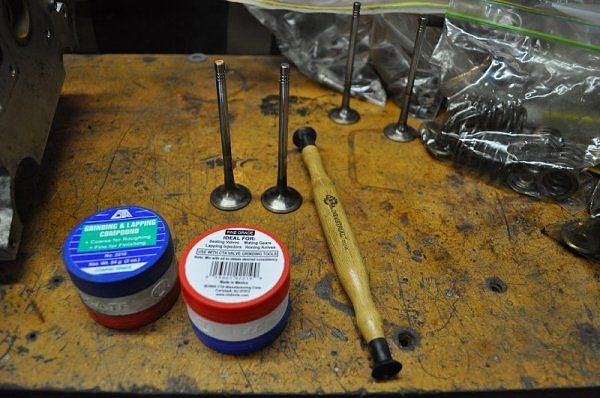
obviously you start with the coarse grit compound.

spread it around the area where the valve contacts the seat.
go at it.. after putting pressure on the valve and spinning the tool between your palms for a couple seconds, you will hear a change in tone..
after 2 rounds of the coarse grit..
fine grit is up next…

same as before.. spread it around..
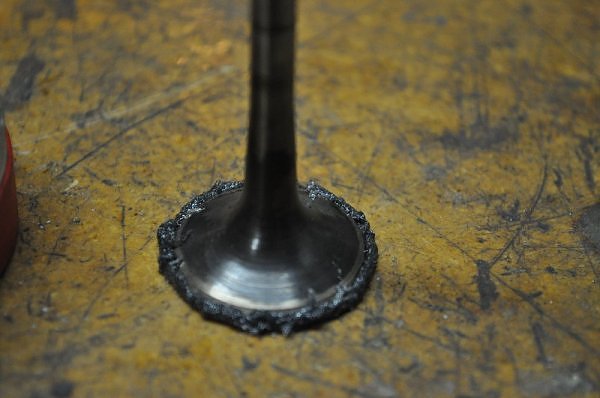
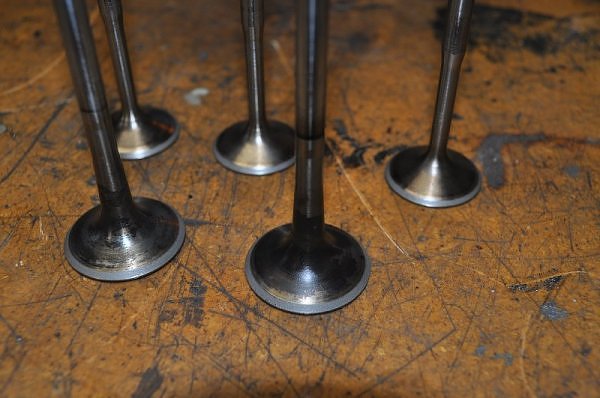
comparison of two exhaust valves… one after two rounds of coarse and two rounds of fine vs one untouched…
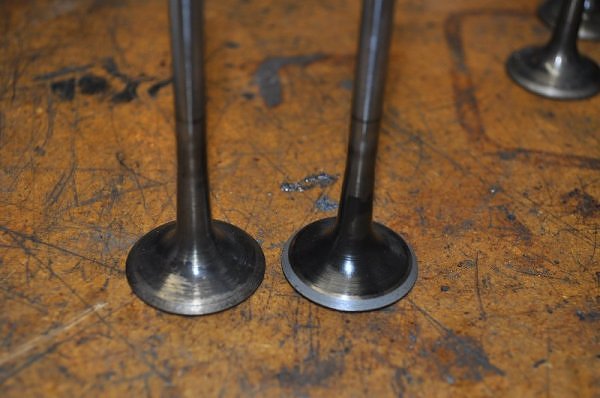
same treatment on the seat obviously… 4 rounds of compound total..
comparison of two exhaust valves… one after two rounds of coarse and two rounds of fine vs one untouched…
same treatment on the seat obviously… 4 rounds of compound total..
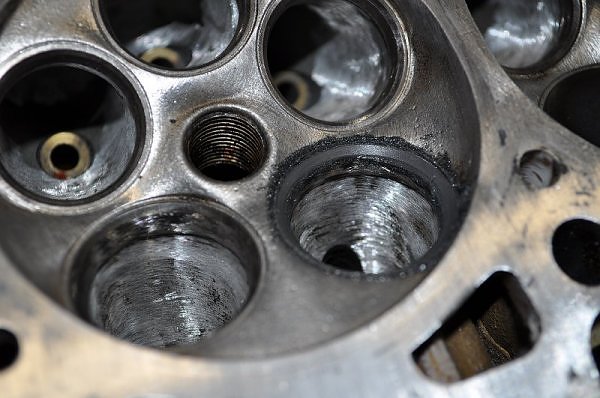
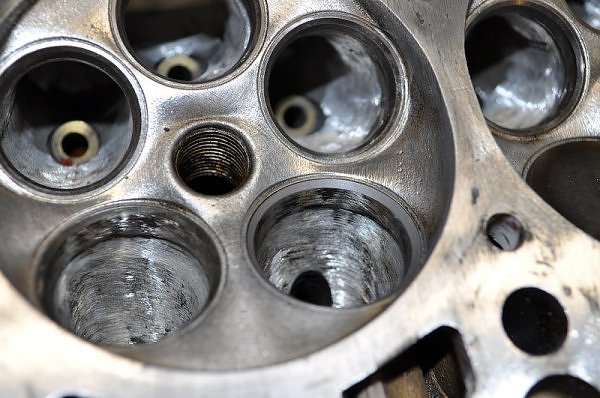
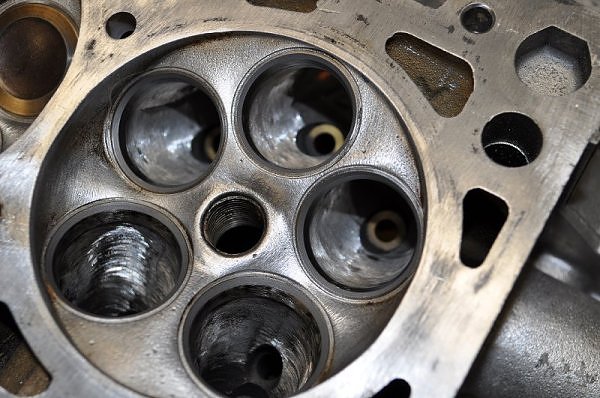
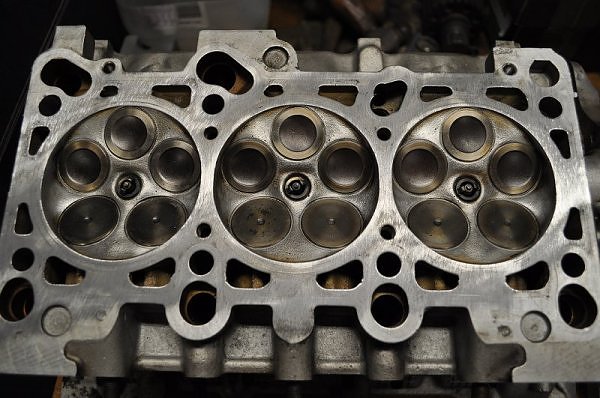
all the seats after love..
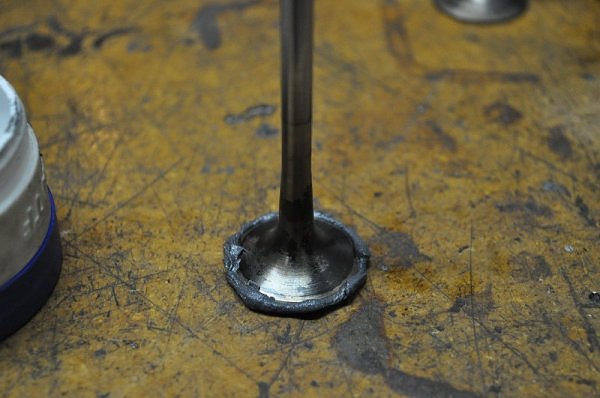
valves post loving..
ready for assembly..
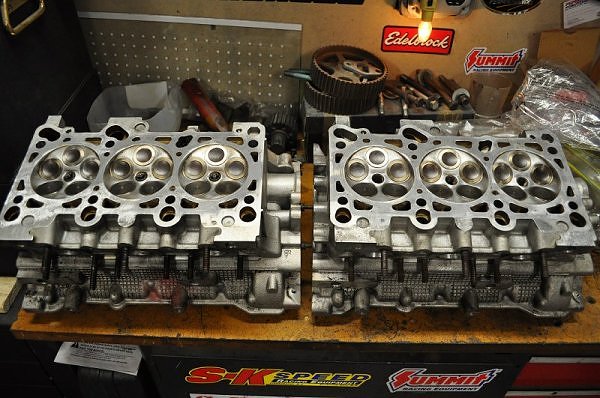
got some more work done…
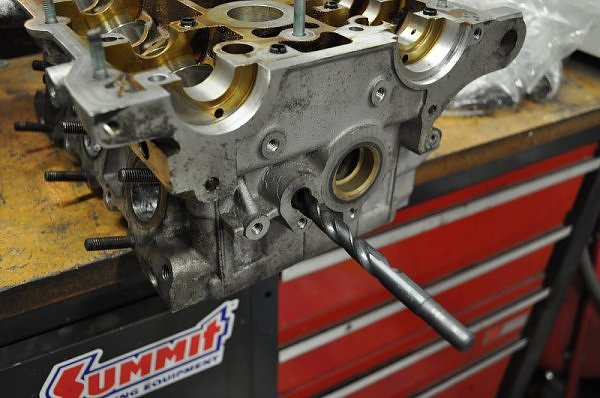
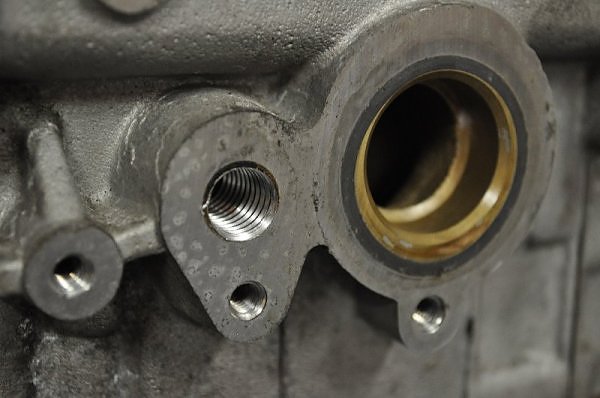
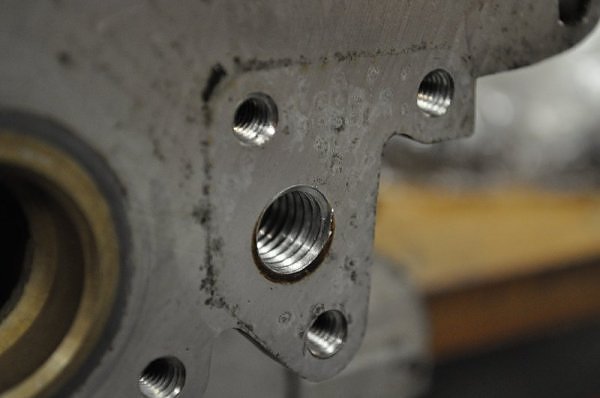
decided to tap the extra coolant hole in the 2.8 AHA heads so I can plug it. used a 27/64 bit to clean out whatever junk was in the hole..
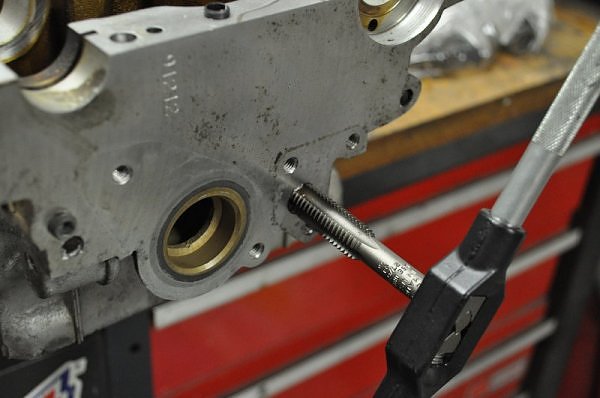
then I taped the hole with a 1/2-13 tapping tool.
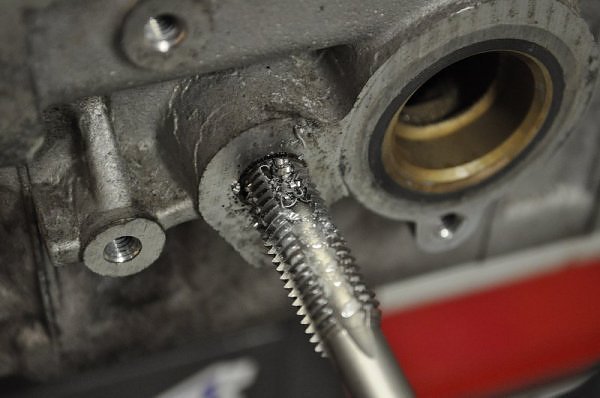
results.. plug is coming on tuesday…
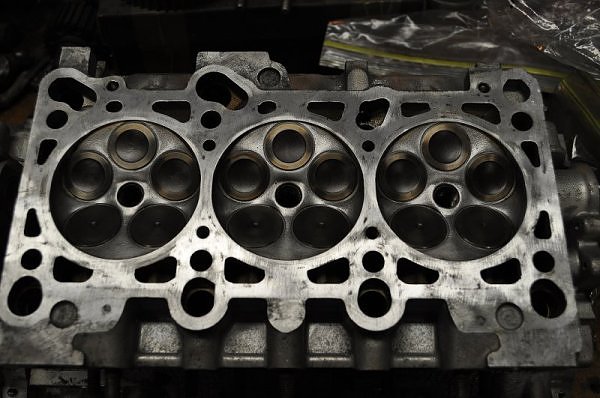
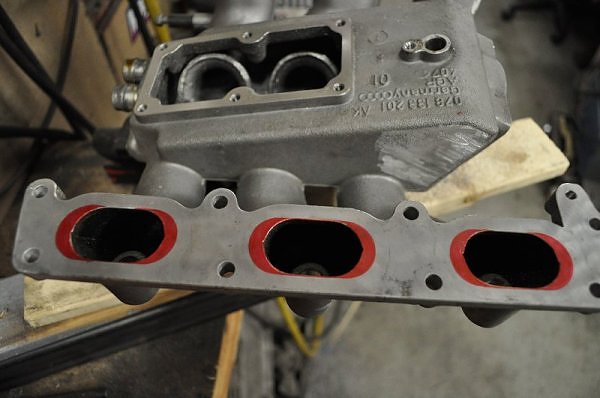
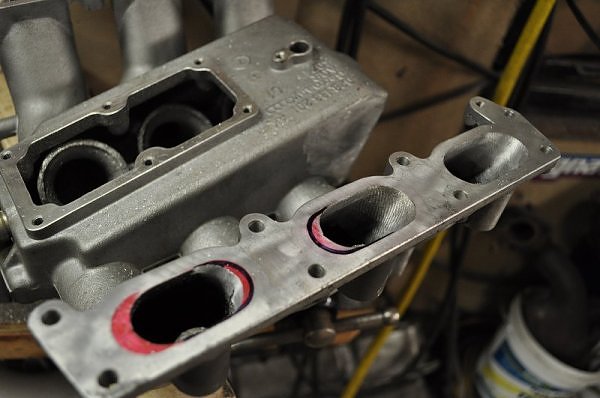
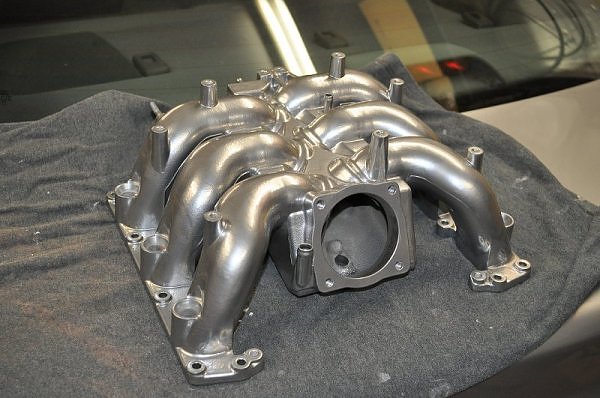
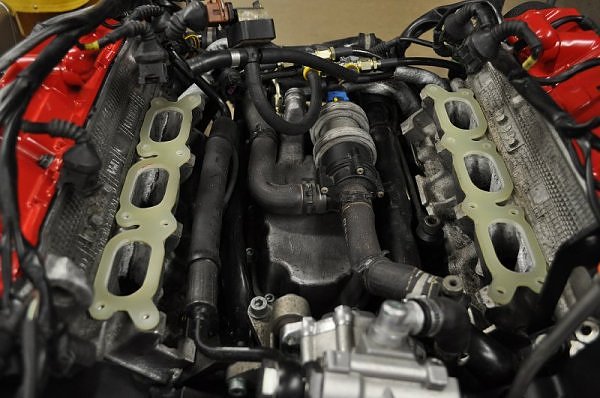
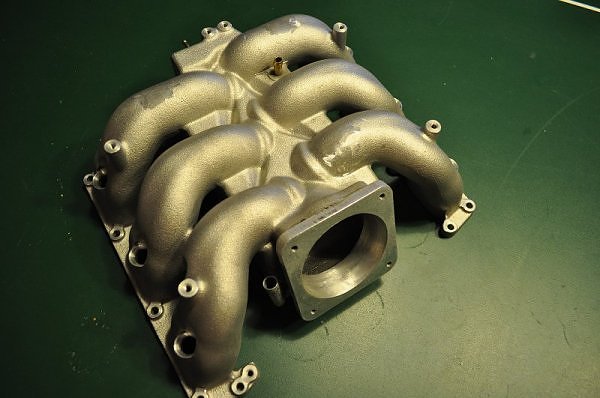
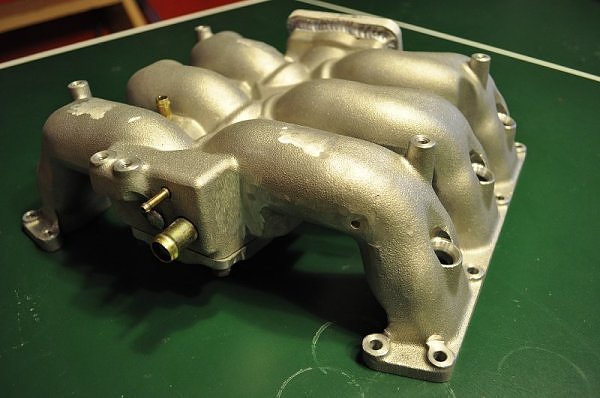
finished porting my intake manifold to match the AHA heads.
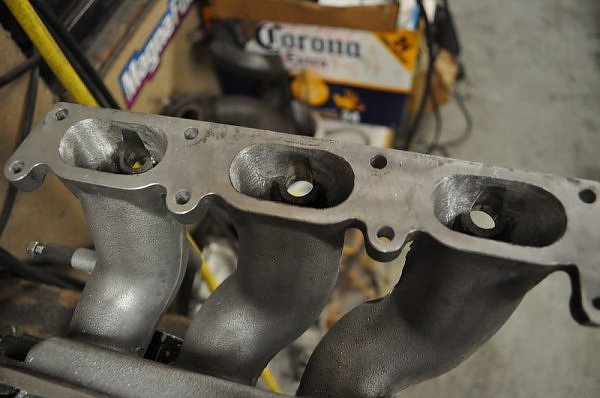
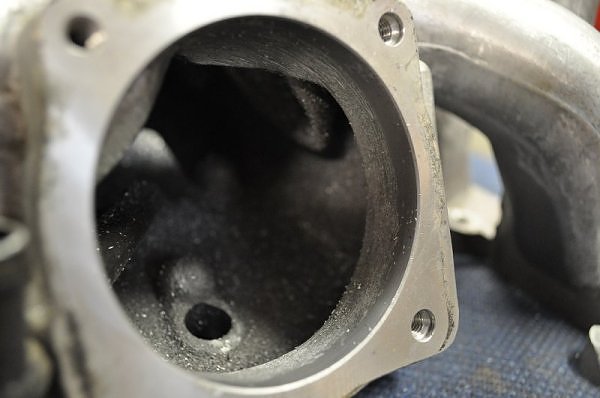
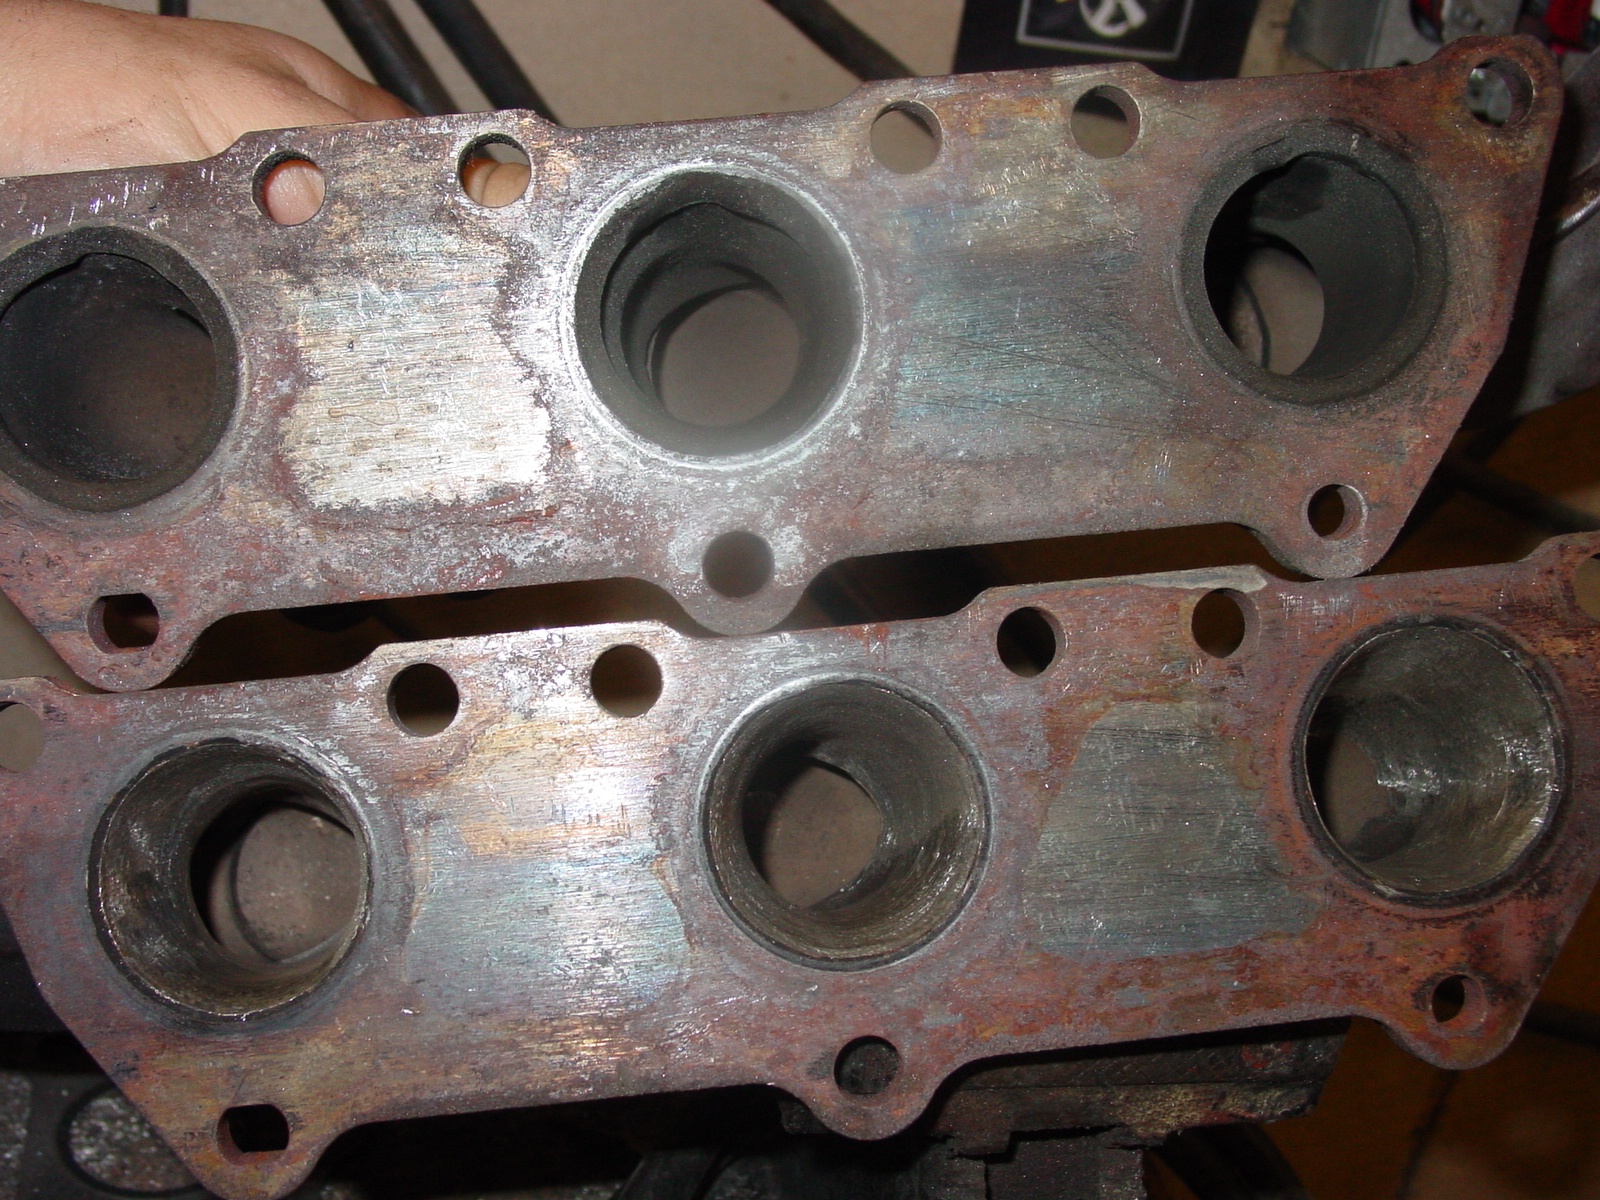
ported stock exhaust manifolds..
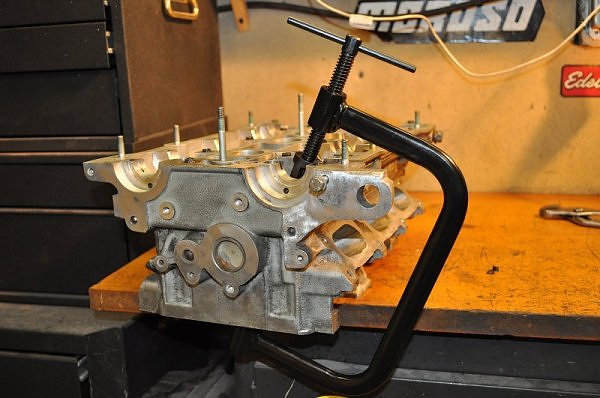
 The most feared part of the build.. putting the springs, retainers and locks back in.. turned out it wasnt that bad at all.
The first two intake valves were a pain.. wanted to rip out my eyes. after i developed a routine, I banged out both heads pretty fast
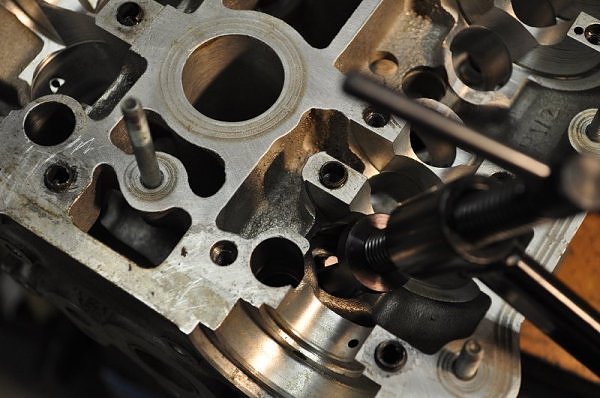
.. first off I magnetized a small screwdriver to hang onto the keepers.
More importantly, I put assembly lube on the top of the valves, where the locks would be. this helps keep the locks on the valve stem.
What i would do it put one lock on the easily accessible side of the valve stem, then spin the lock to the backside of the valve stem
and then put the second lock on the easily accessible side again. I banged out both heads in about 2 hrs.
alright after a long drought…here goes..
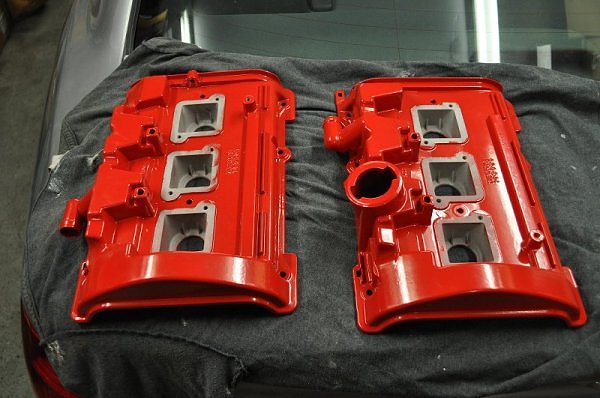
got the valve covers and intake back from powder coating..
VAST ported/polish and ceramic coated manifolds..
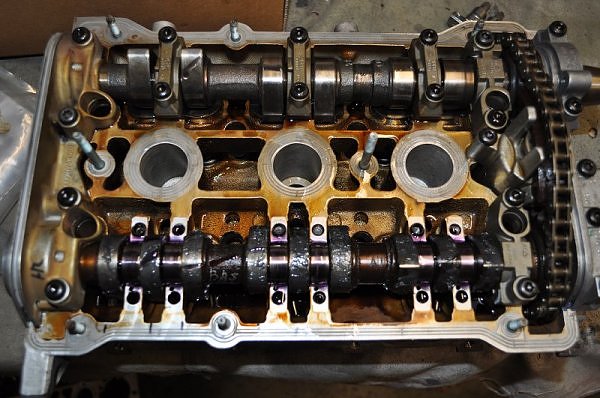
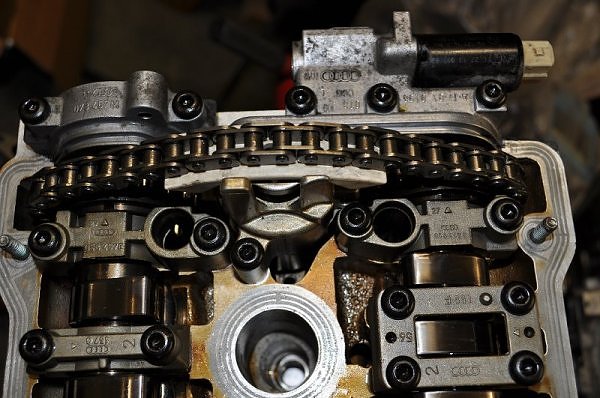
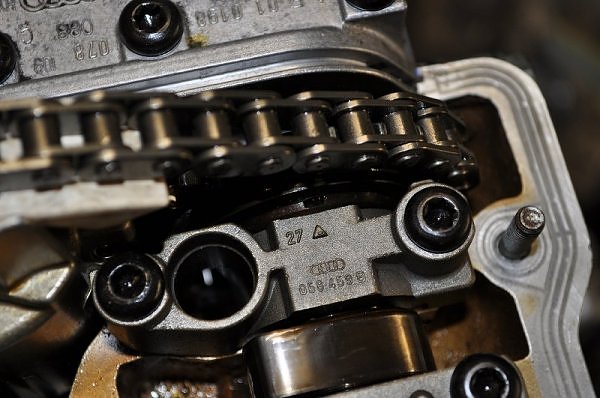
lining the cams up to TDC so I can put the timing belt on…
see how the “holes” in the camshaft line up with the arrows on the caps…

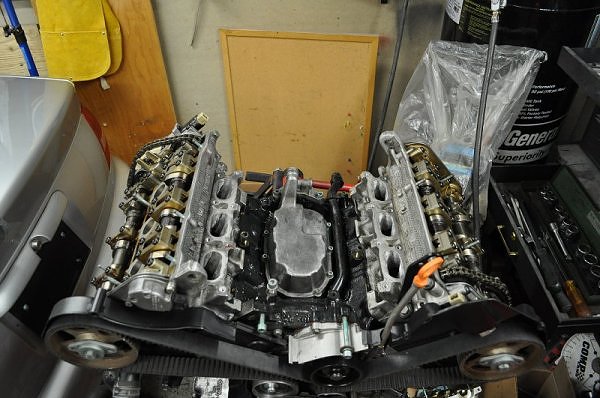
all buttoned up…
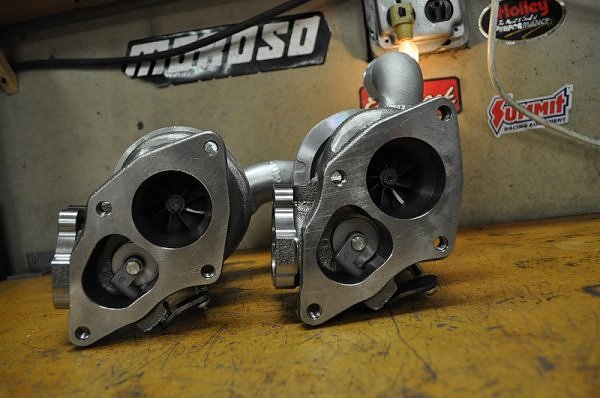
finally time to work on the turbos..
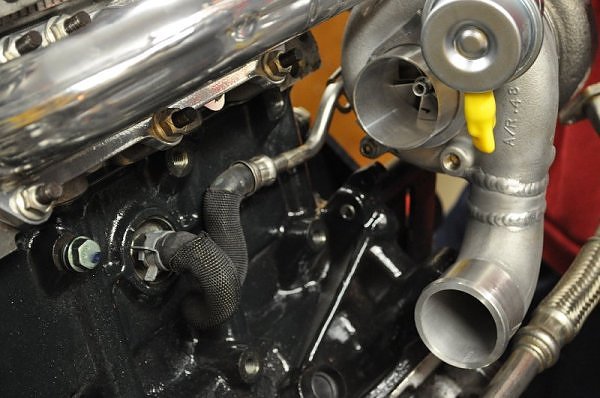
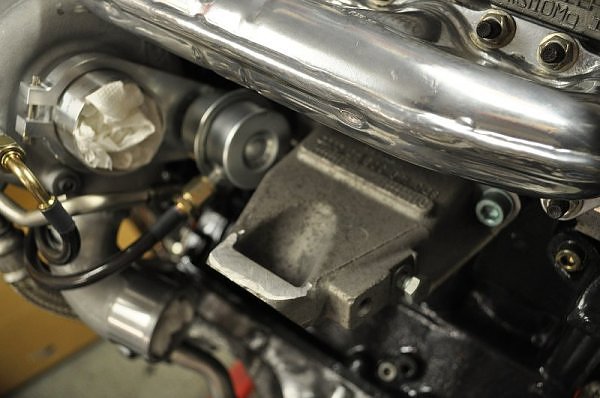
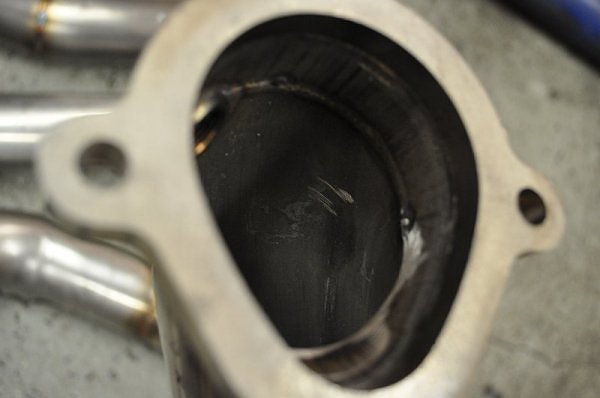
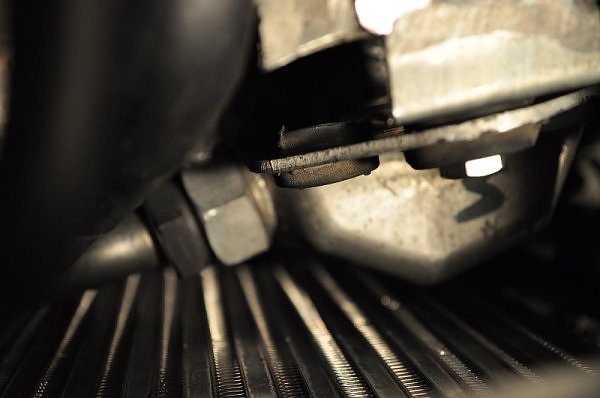
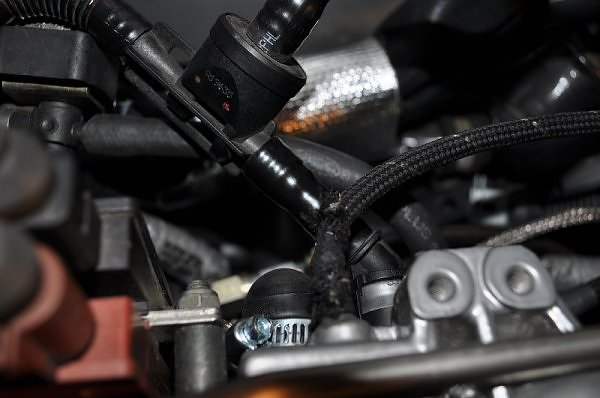
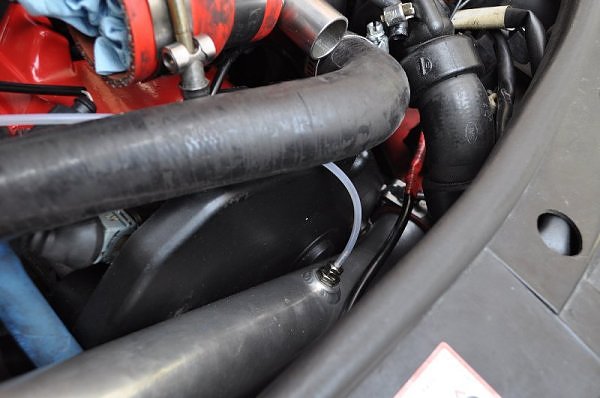
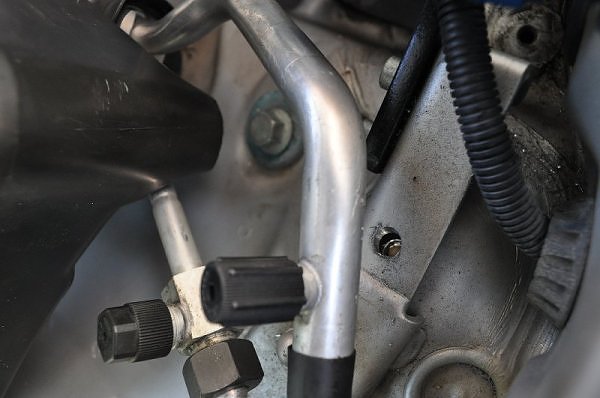
passenger side coolant supply line needs the tab cut off.
before modification..
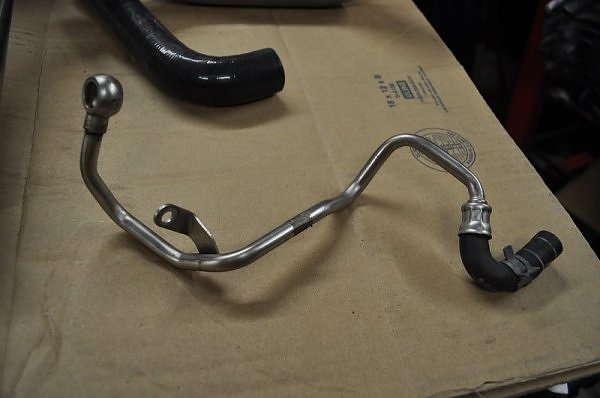
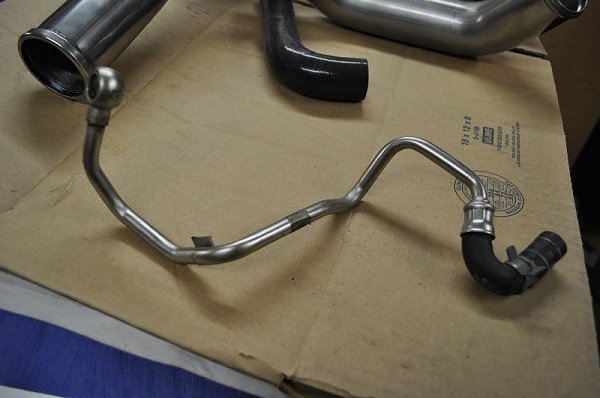
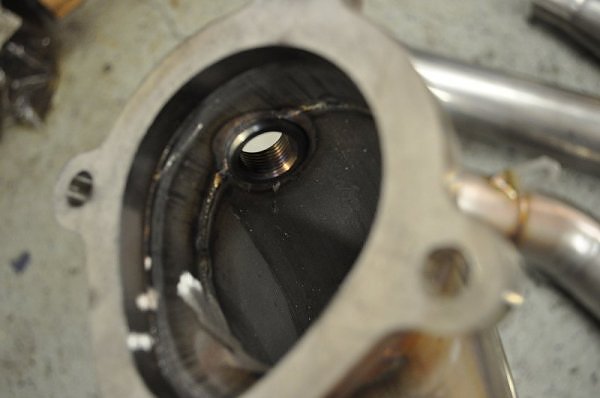
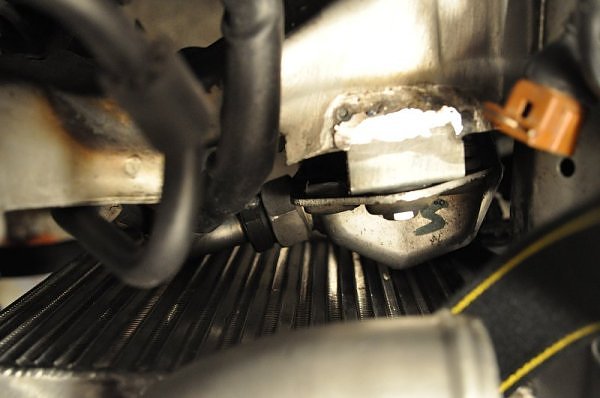
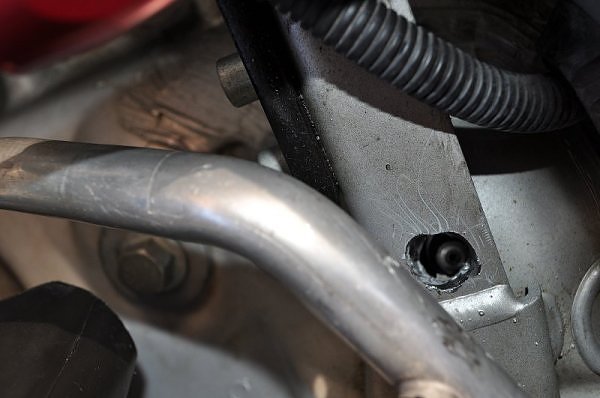
after modification..
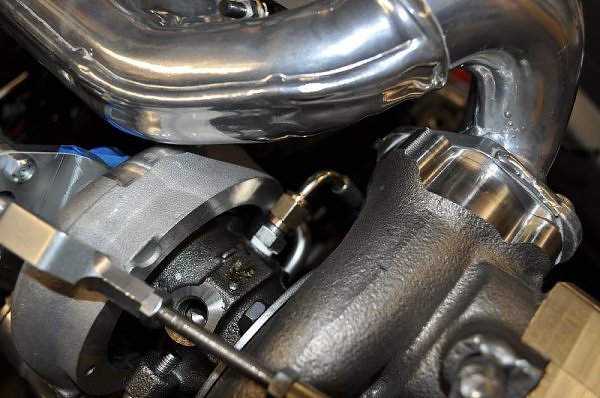
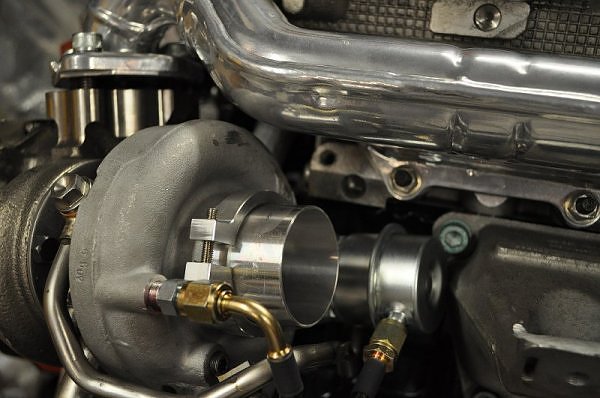
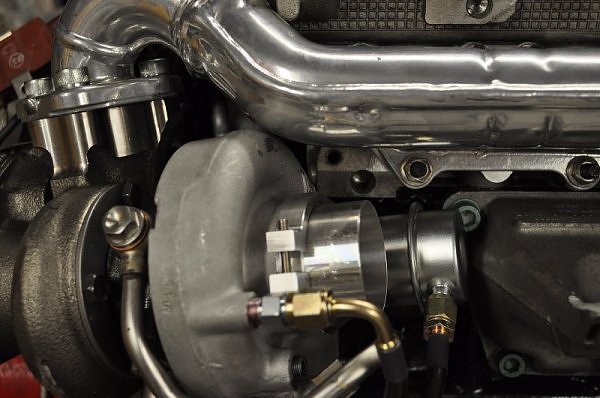
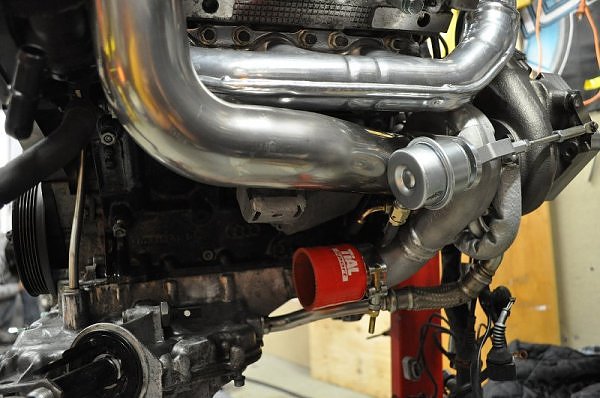
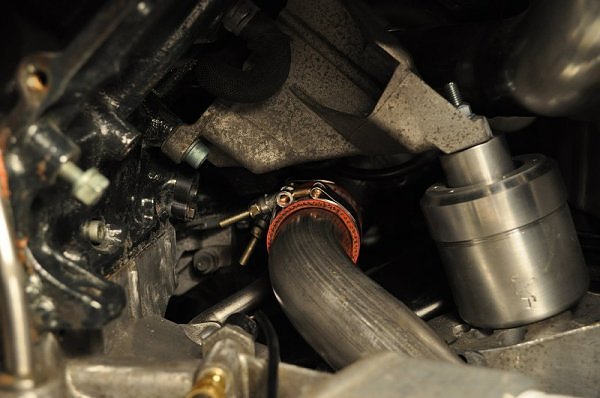
passenger side turbo with coolant supply line connected..
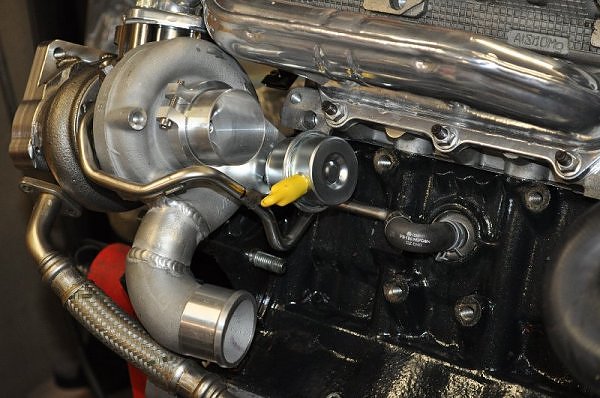
location of coolant connection.
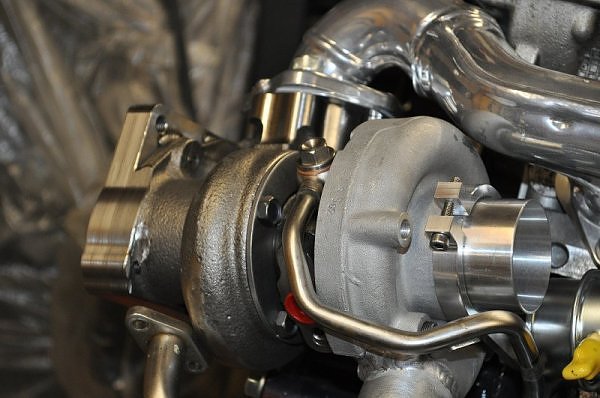
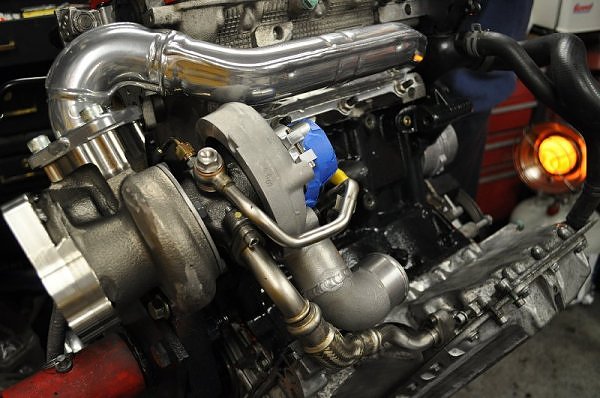
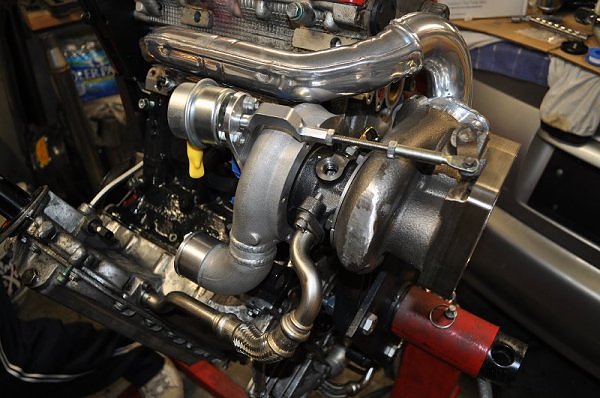
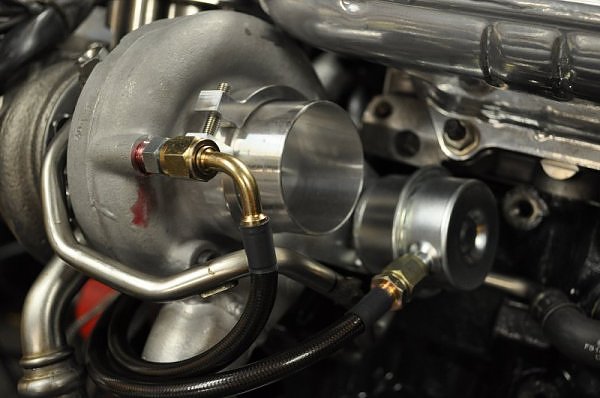
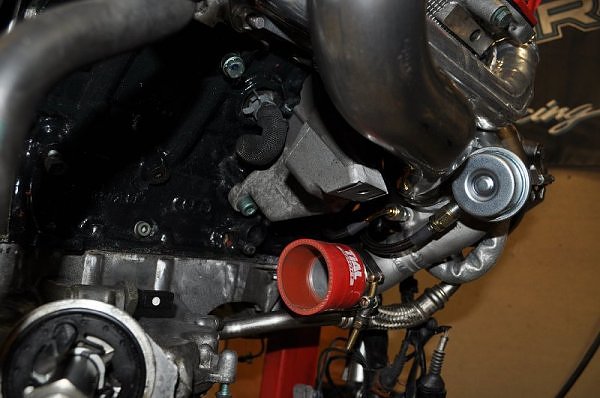
drivers side turbo with coolant supply line connected..
location of connection..
Here we goo….
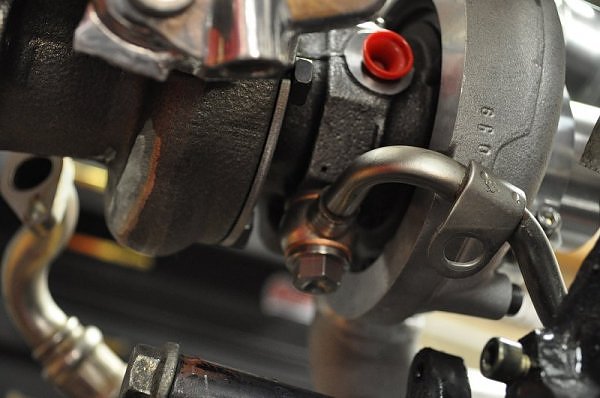
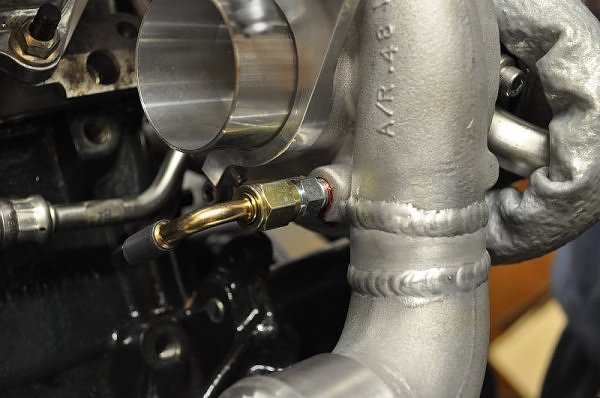
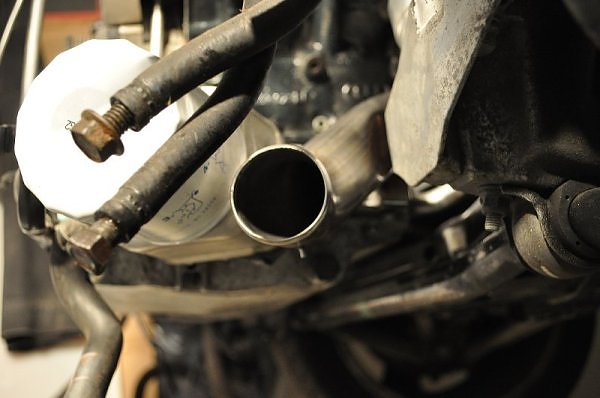
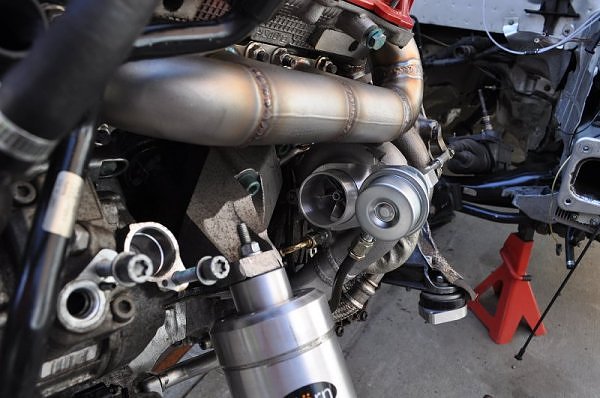
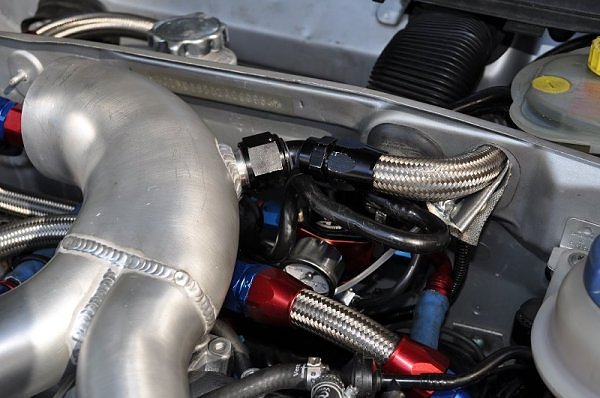
Passenger side oil feed.
oil feed, oil return and coolant feed.
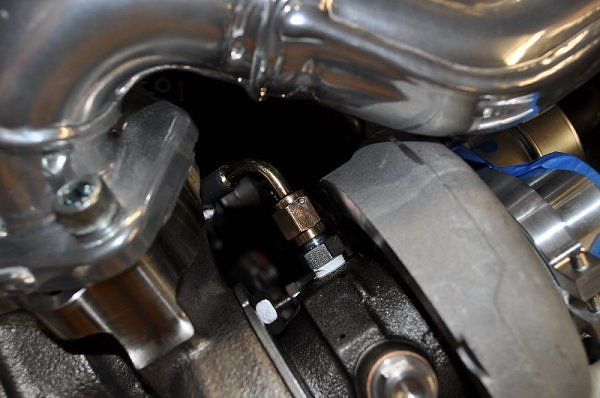
Drivers side oil feed.
oil feed and return
oil feed with new banjo fittings. have to use the original banjo bolts. you also have to supply your own 10mm AL crush washers.
I ran to a VW dealer and picked up 4 for like .77 cents a piece.
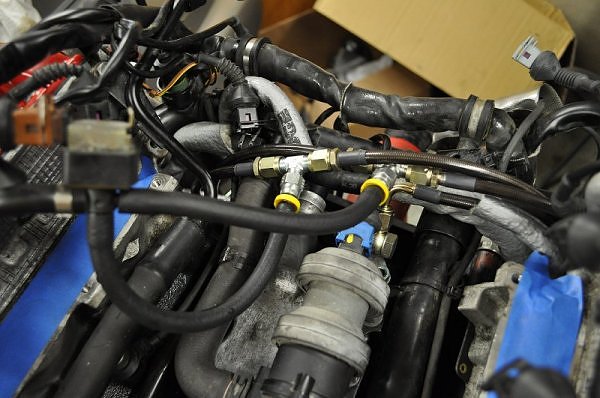
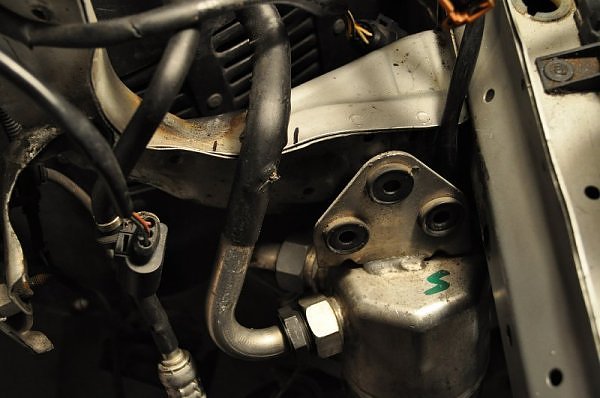
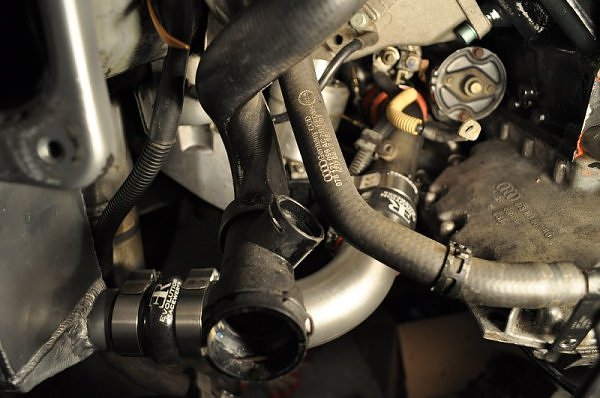
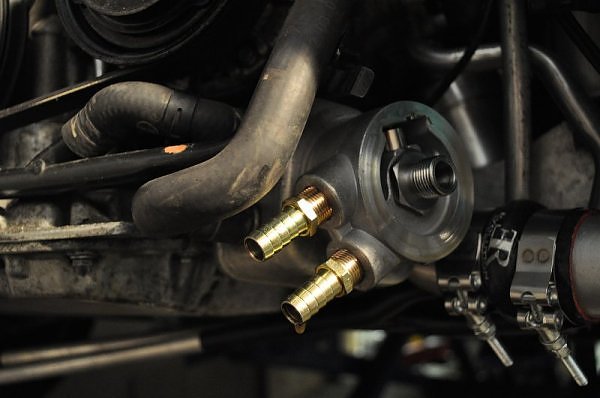
old coolant return “T” fitting.

old coolant return lines.
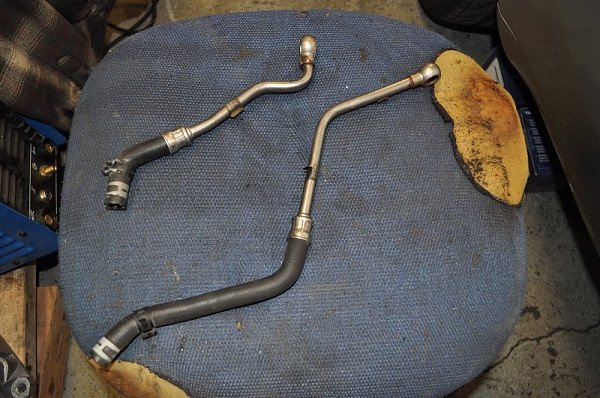
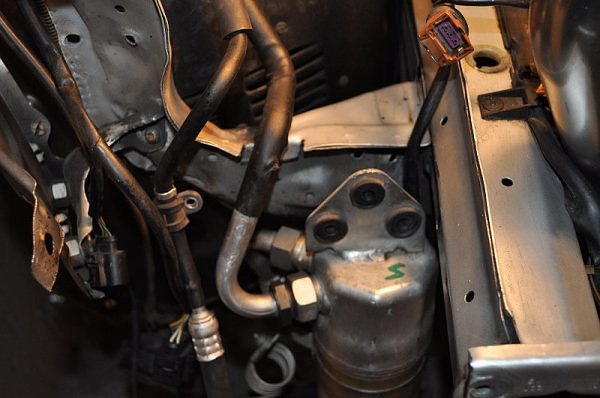
coolant “T” fitting with old lines removed.
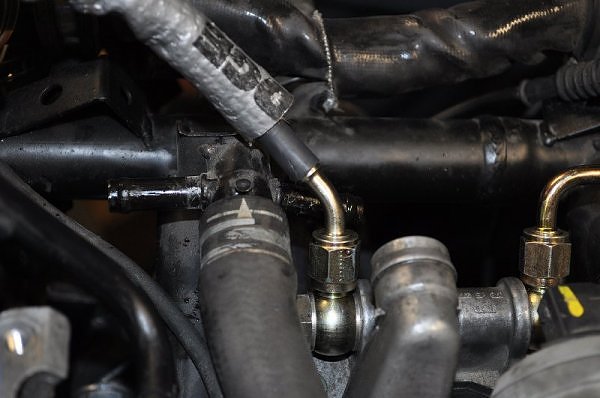
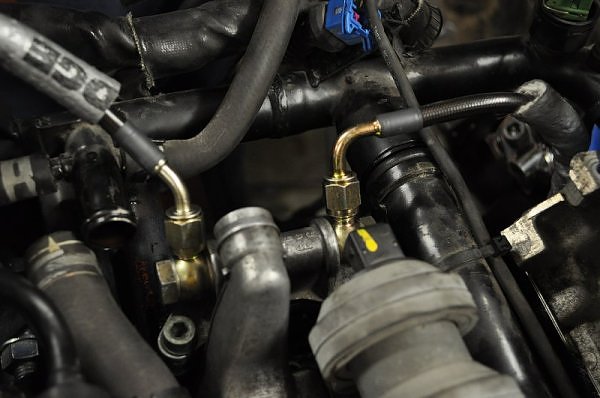
drivers side coolant return line. (looking from the bottom)
passengers side coolant return line

new coolant return lines connected to old coolant “T” fitting
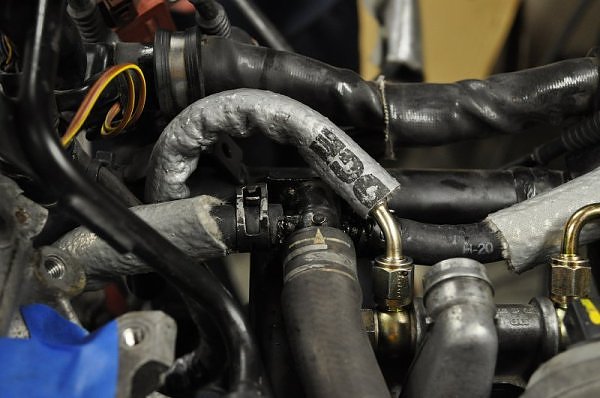
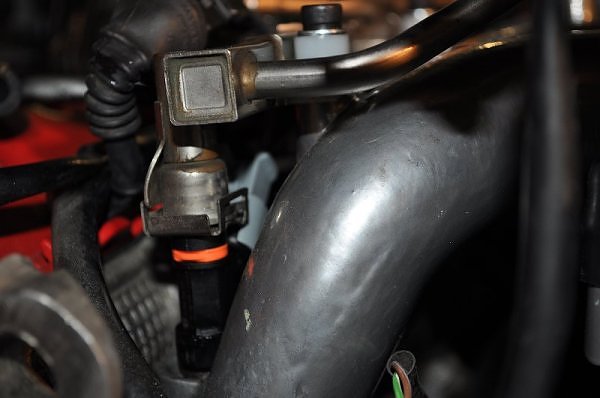
drivers side signal line.
drivers side wastegate actuator line
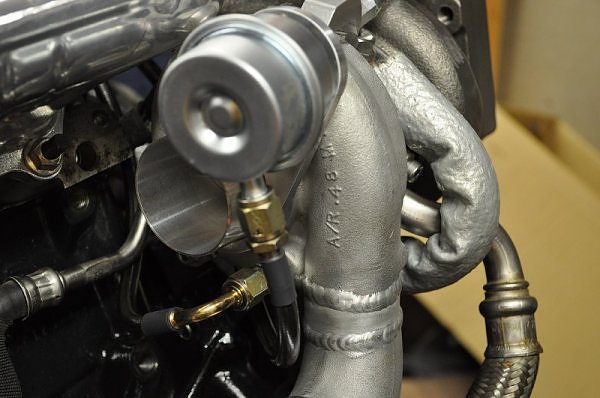
passengers side signal and wastegate line
signal and wastegate lines connected to the provided T fittings
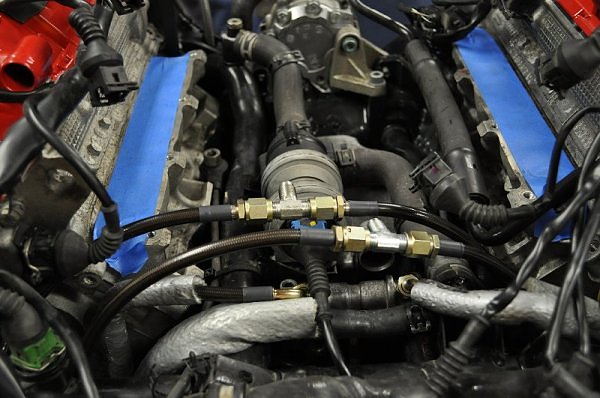
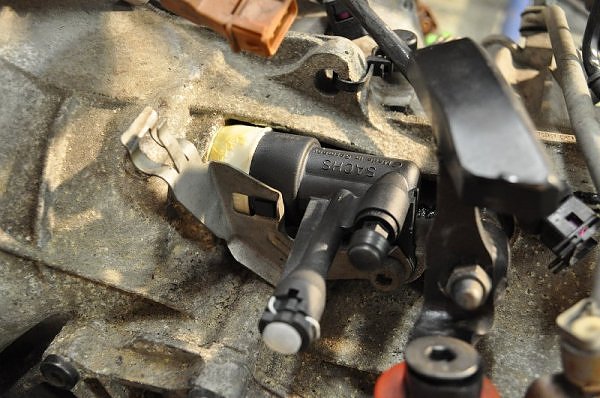
signal and wastegate lines attached to the N75 valve.
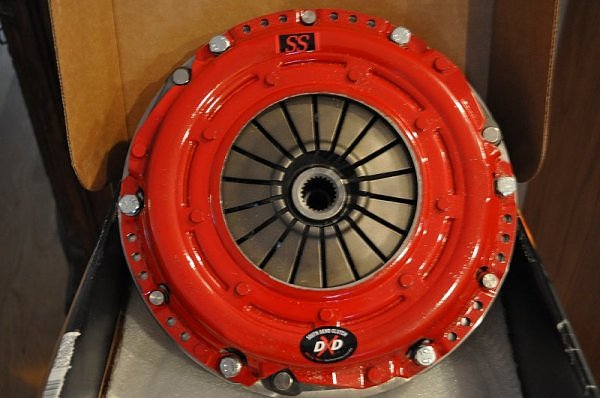
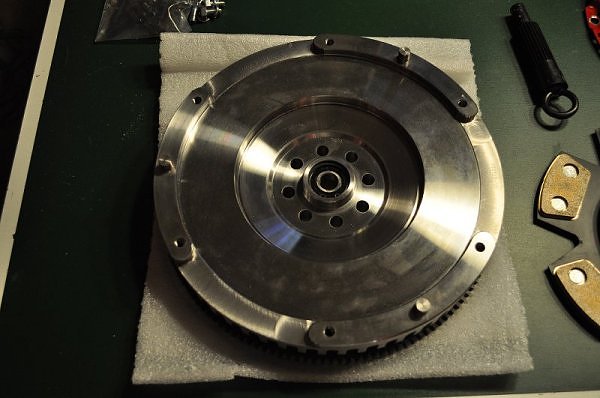
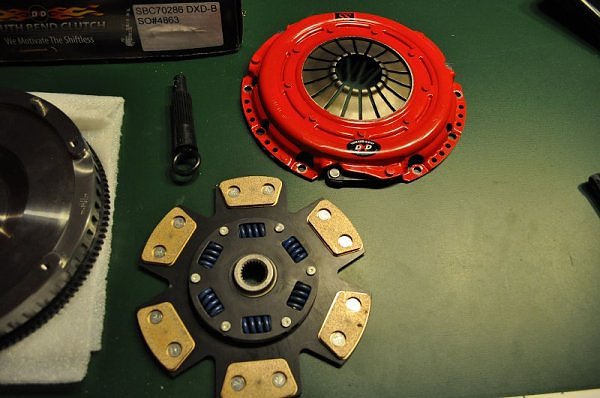
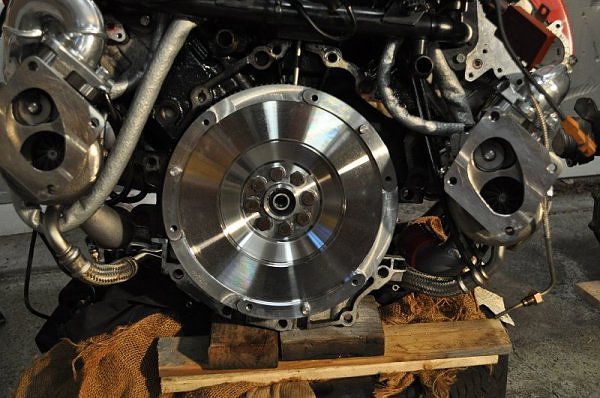
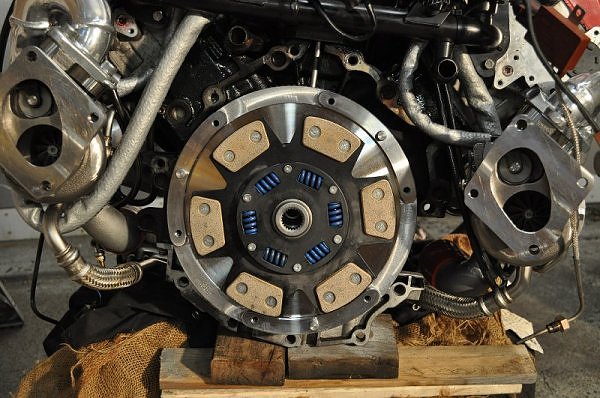
Here she is. Southbend Stage 5 DXD-B with their steel lightweight flywheel.

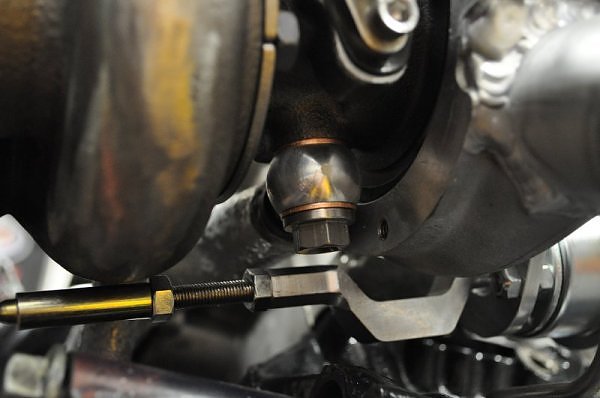
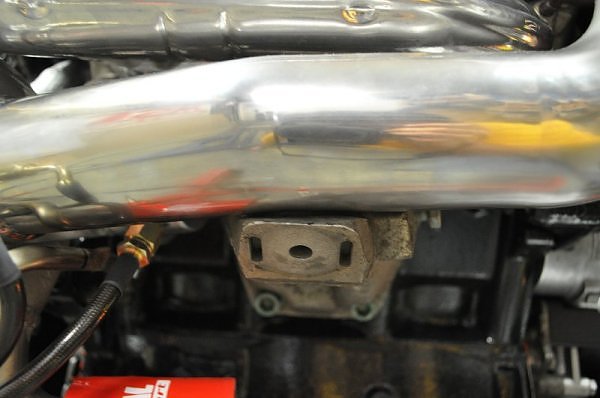
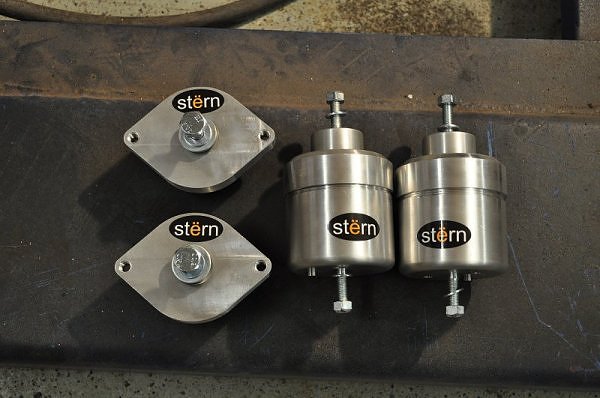
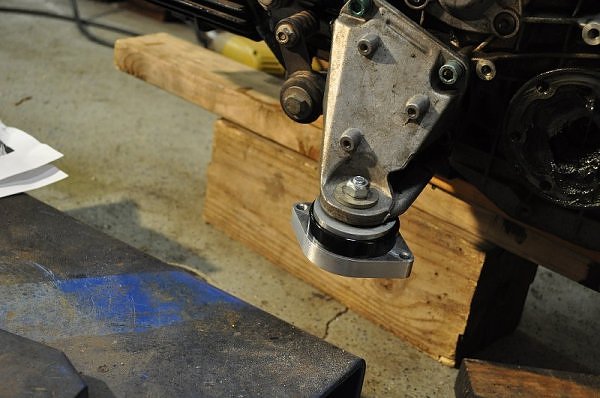
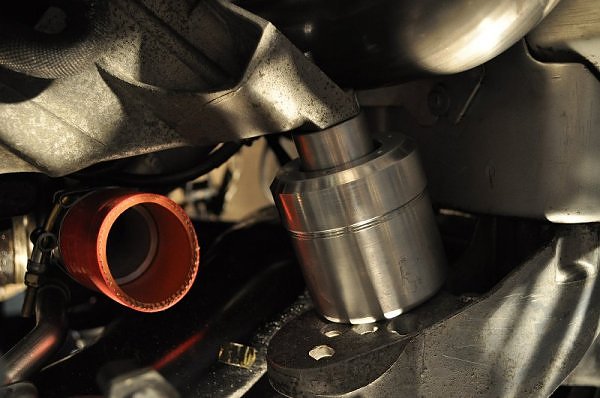
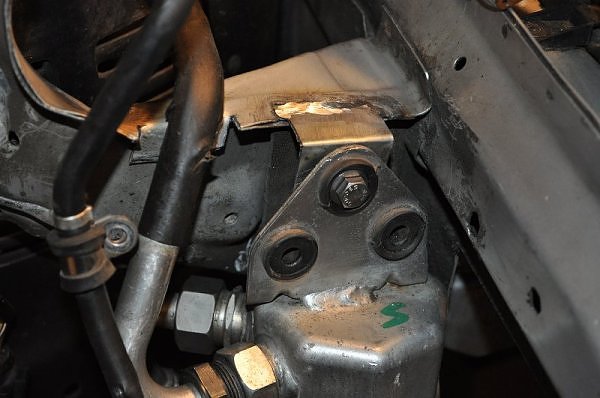
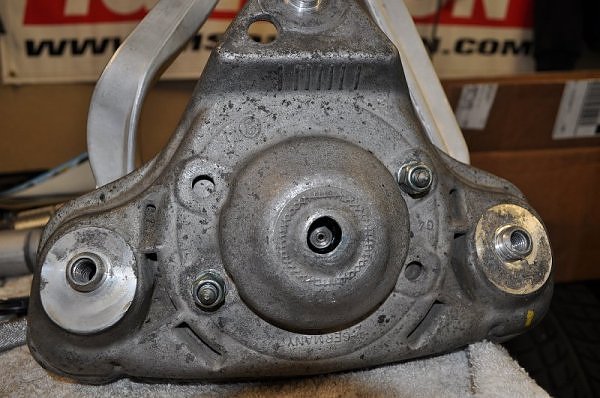
Passengers side motor mount…
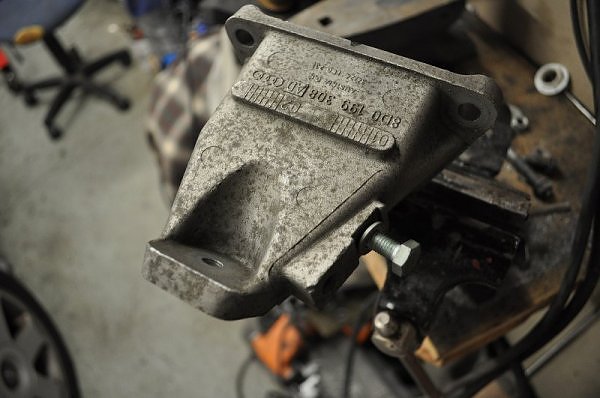
after a massage..
had to drop the turbo a bit to get to the top left bracket mount.
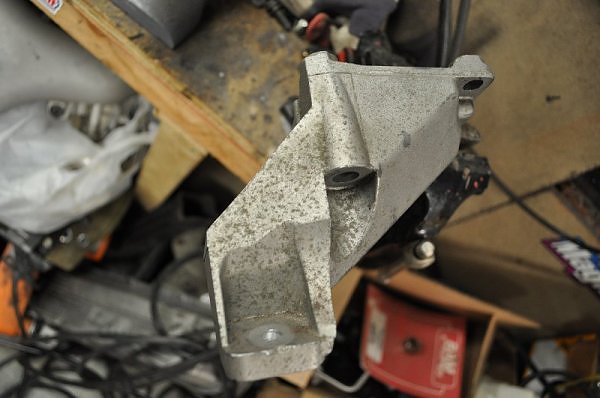
passenger side inlet and modified motor mount bracket.
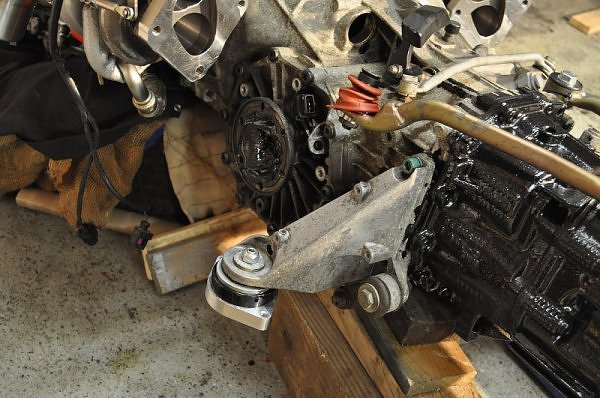
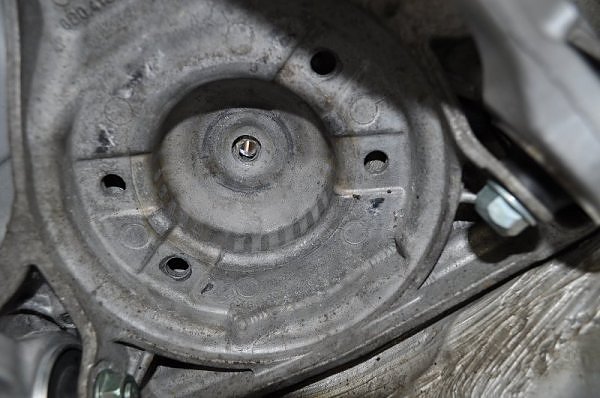
drivers motor mount
after modification… with inlet.. barely any had to be taken at all.. i must have been tired or hung over when I was workin on this motor mount bracket..
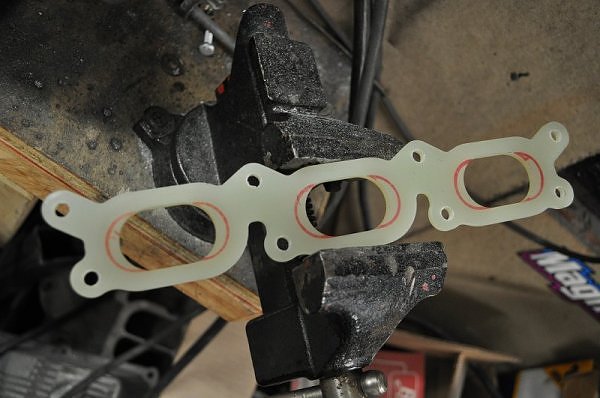
phenolic spacers had to be opened to match the bigger ports..
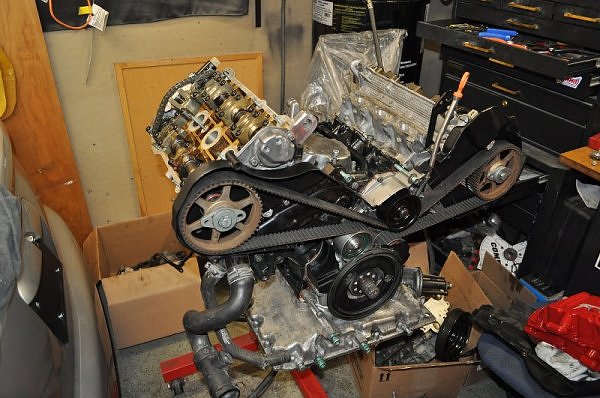
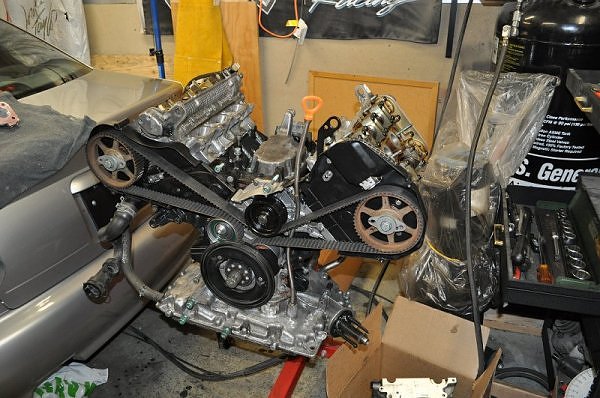
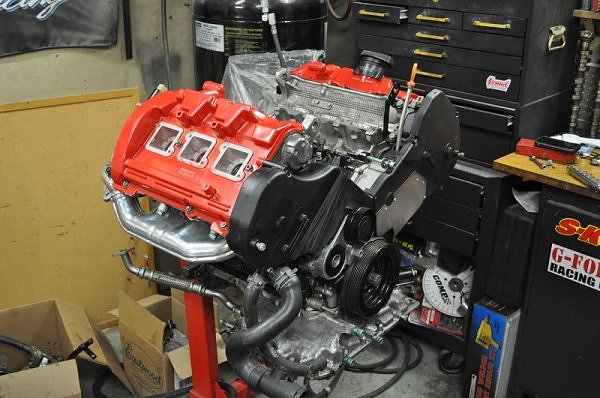
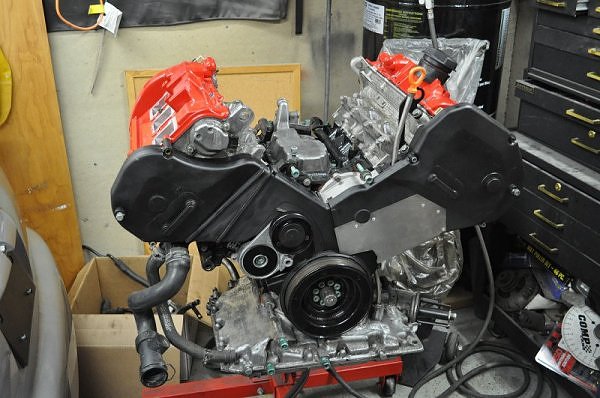
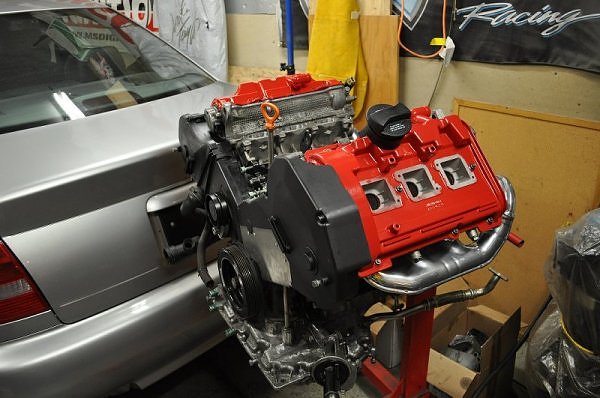
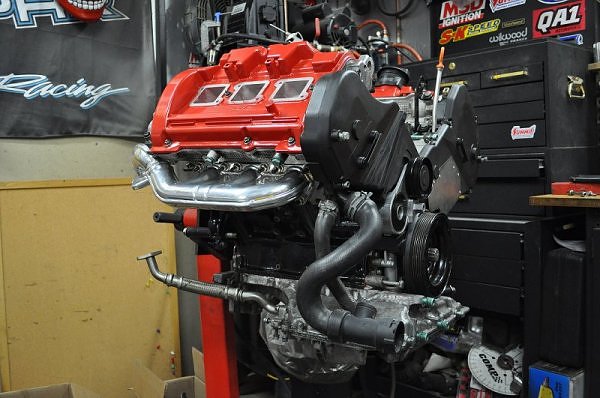
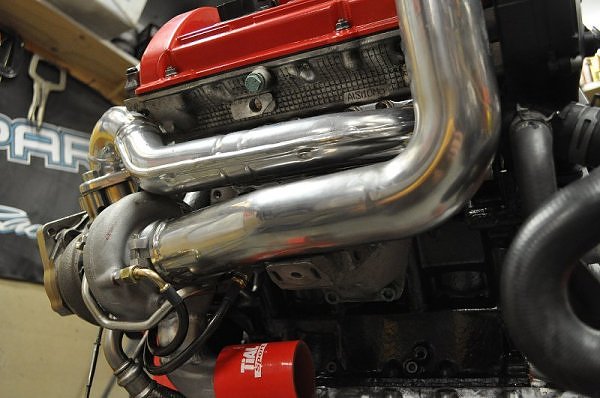
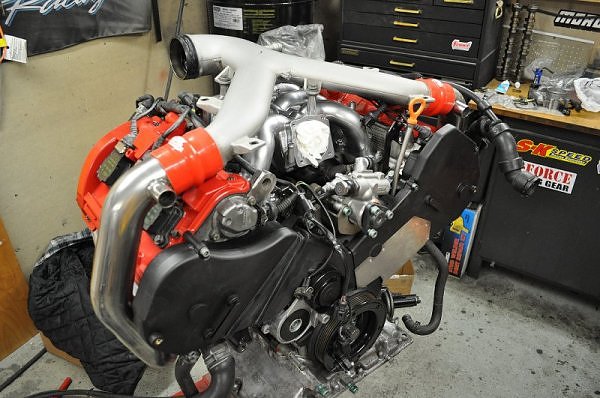
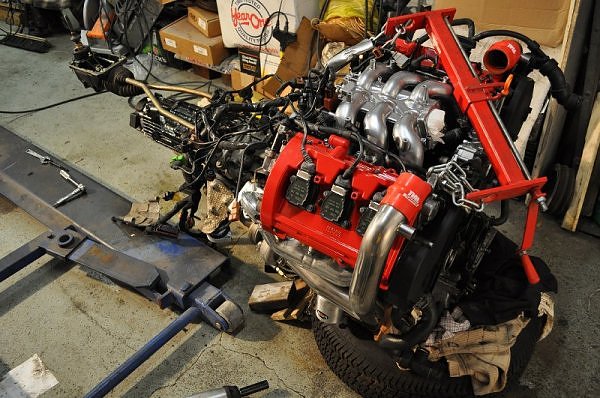
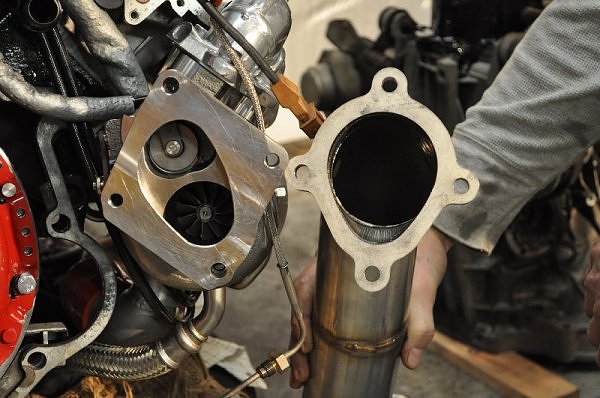
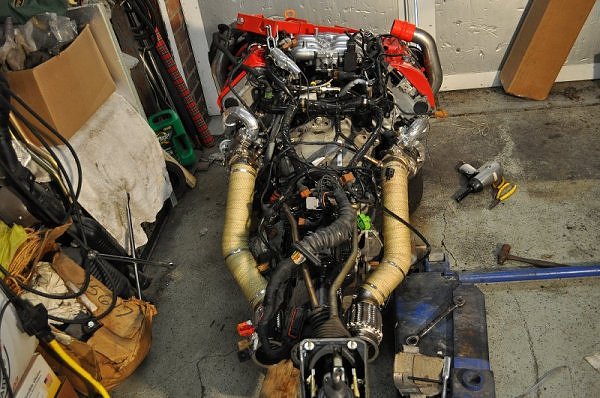
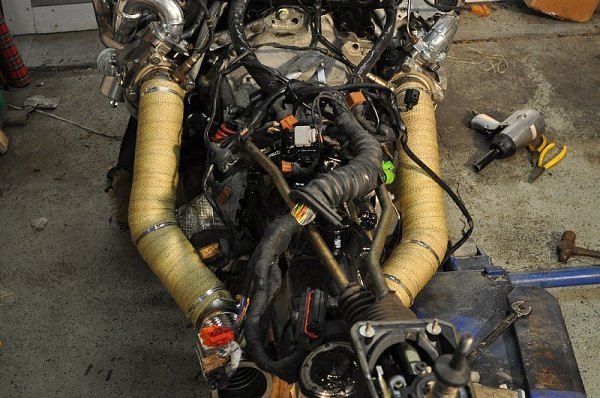
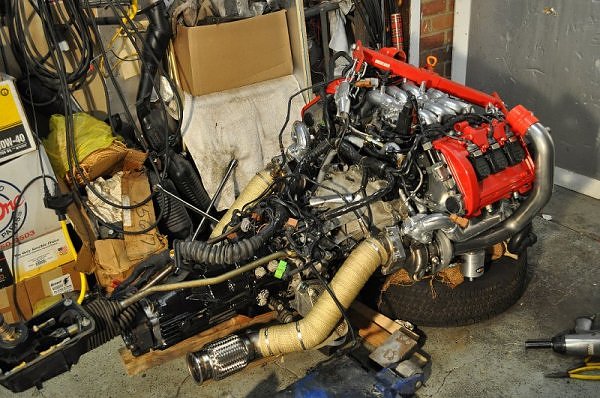
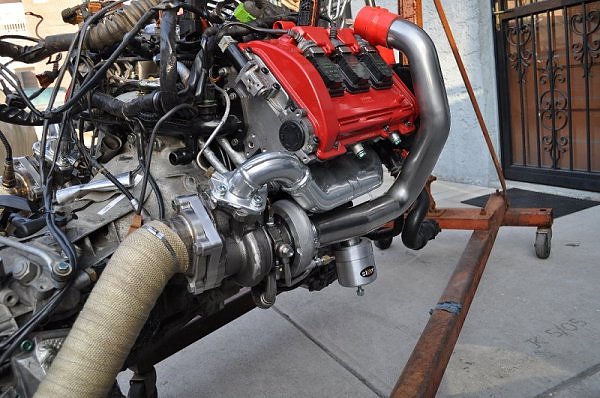
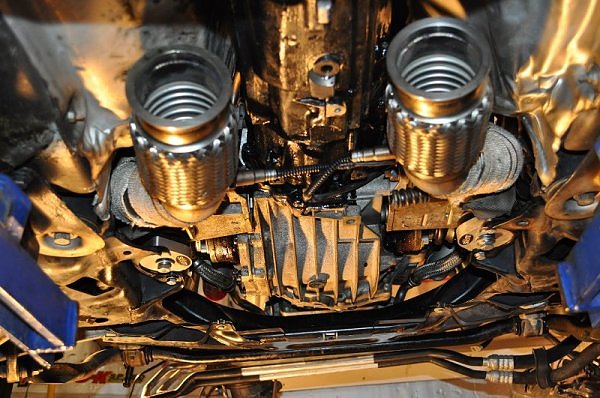
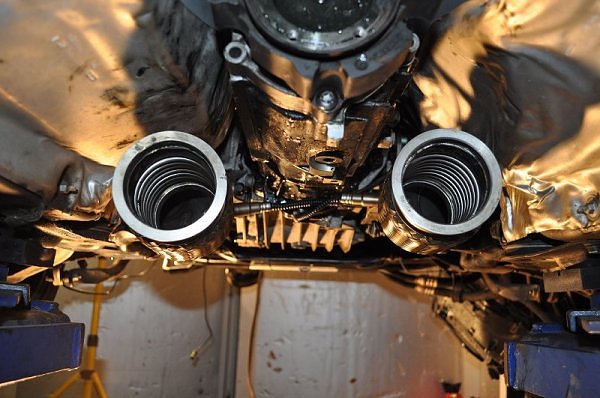
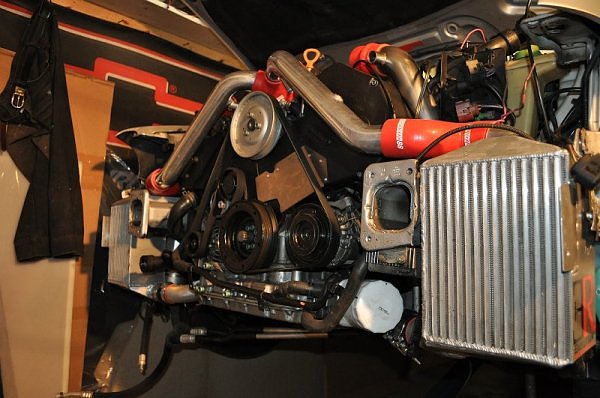
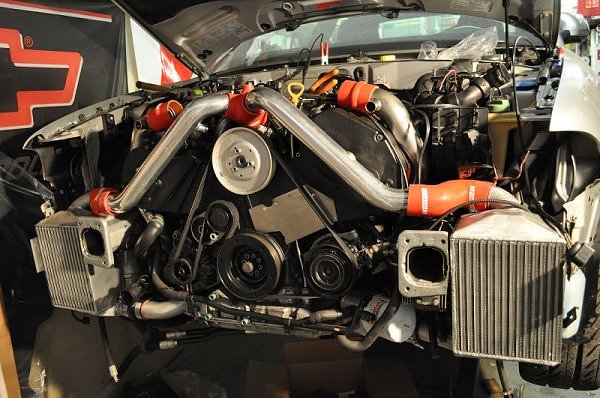
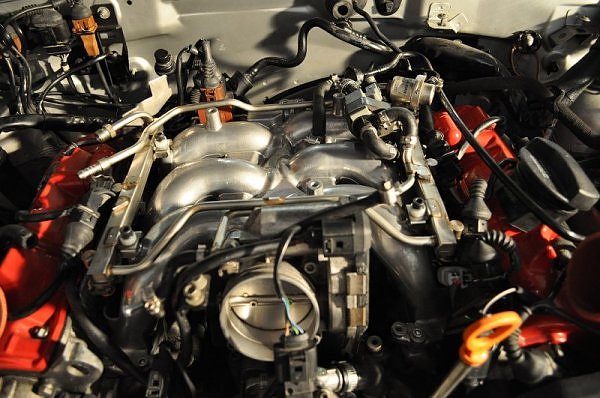
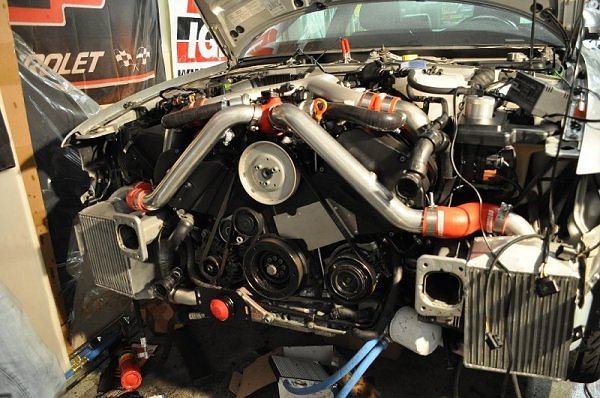
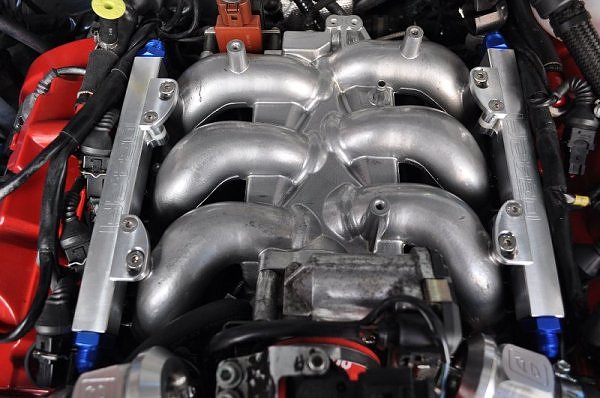
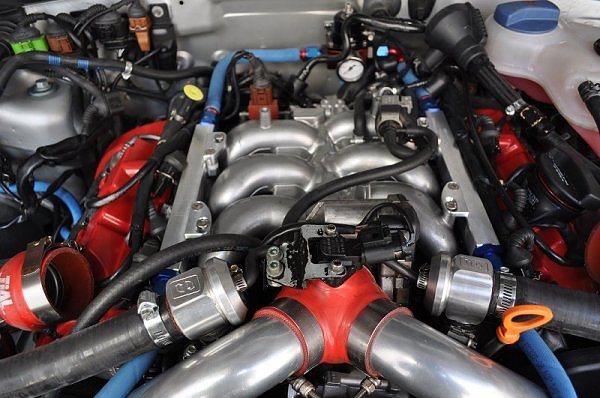
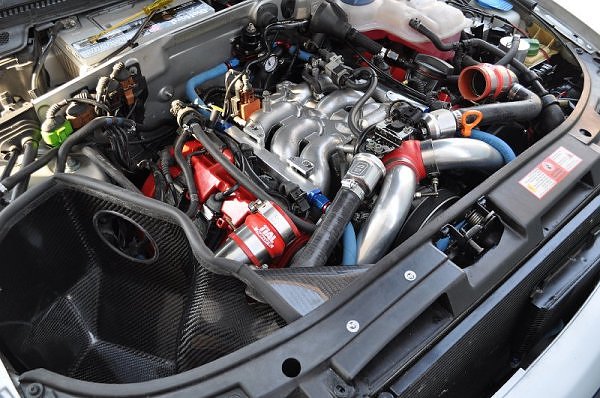
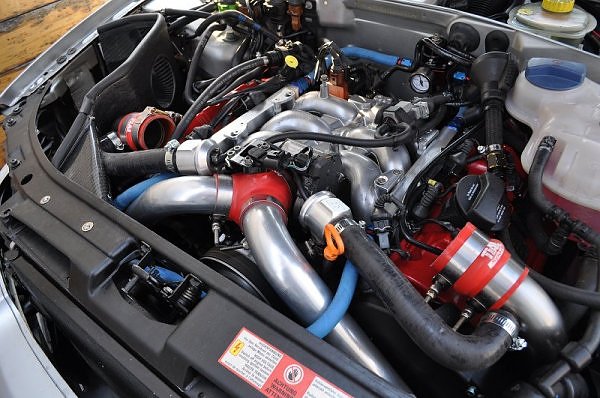
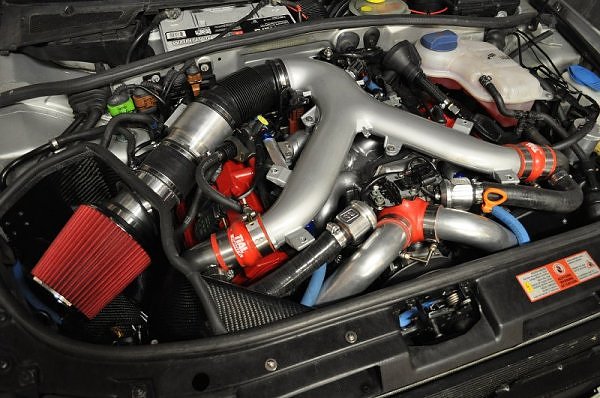
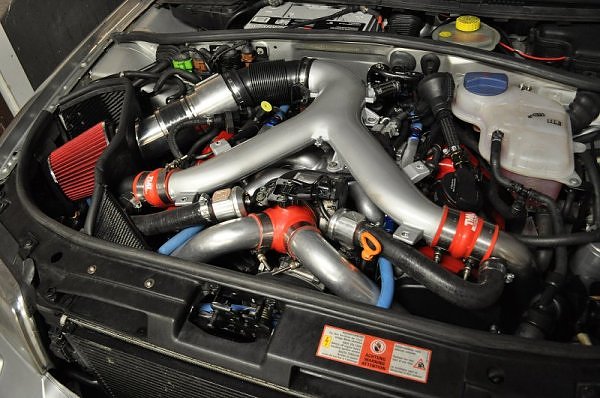
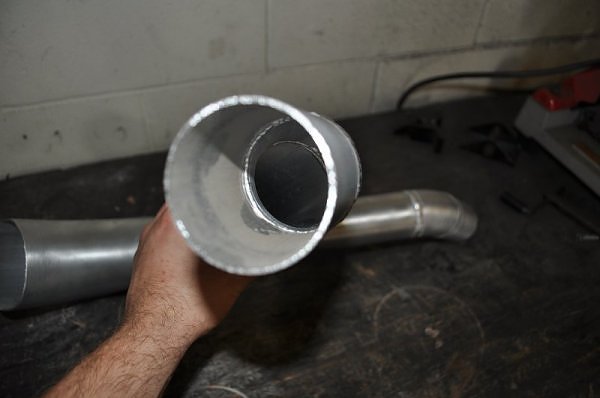
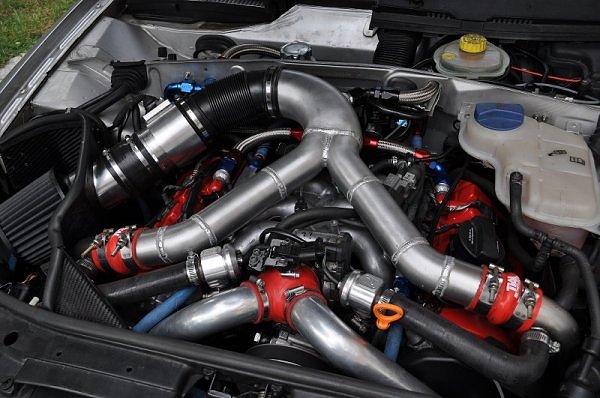
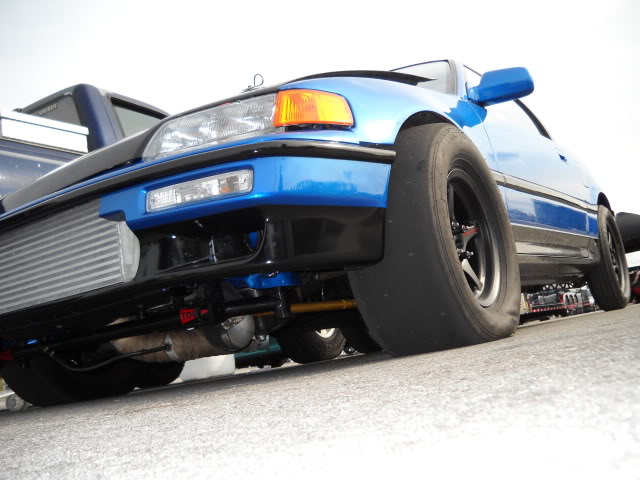
the money shots.
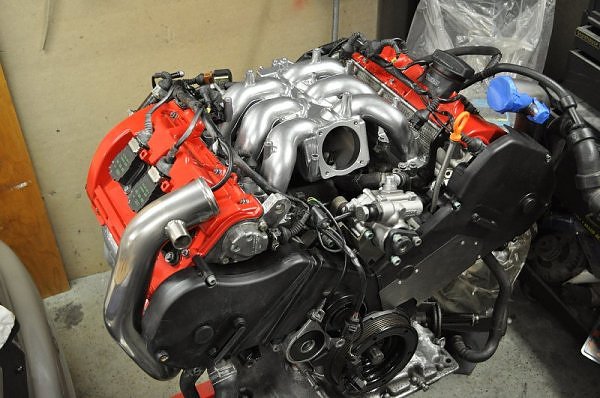
im going to paint the Y pipe. its just on for fitment now.
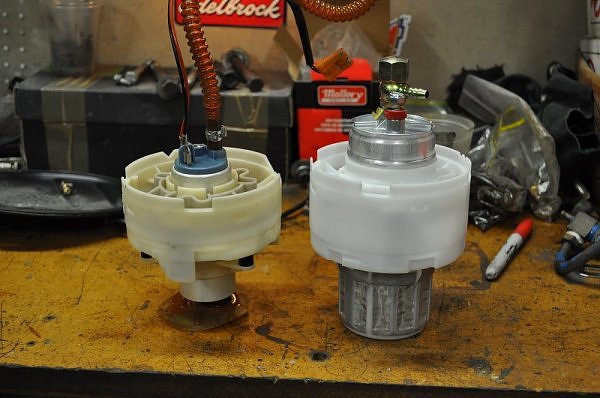
bosch 044 drop in pump next to the stocker.
steel lwfw from SB..
SB DXD-B Ceramic 6 puck
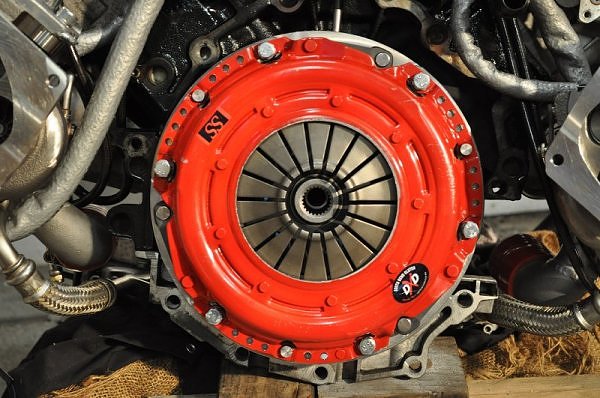
sachs pp.
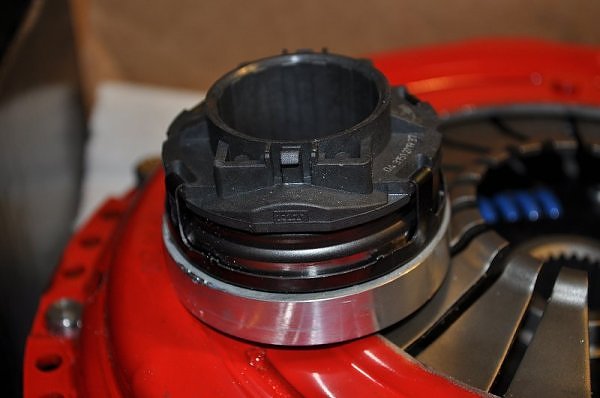
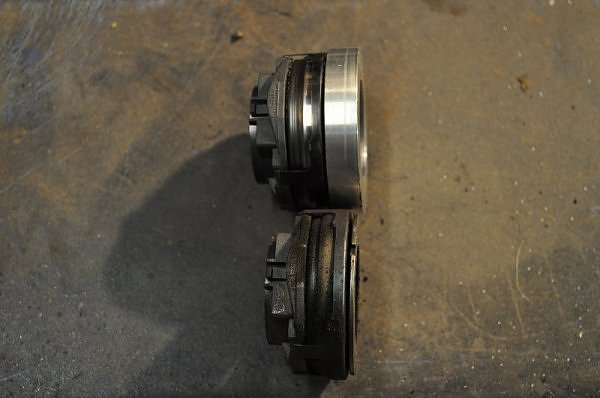
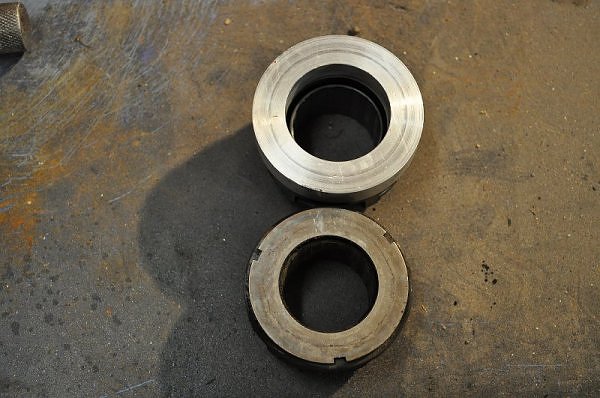
new TOB vs stocker
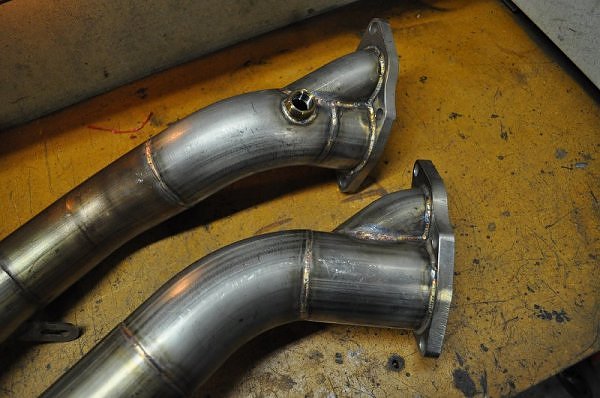
034 3″ downpipes..

stern firm motor and tranny mounts..
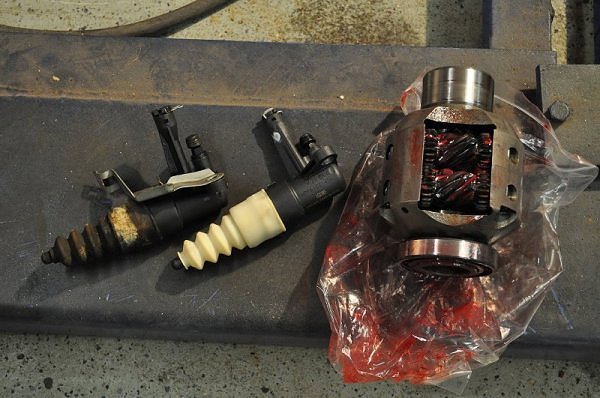
slave cylinder and 4:1 center diff from JHM
downpipes are swung out so I could wrap them easily.


mr clean would be proud…
Got the shifter box attached to the car and the shifter readjusted. Id be lying if I said my junk didnt move while I was rowing through the gears.. thanks to JHMs full solid shifter and linkage upgrade.  One of the best mods hands down. Should feel even better when the weighted shift knob comes in.
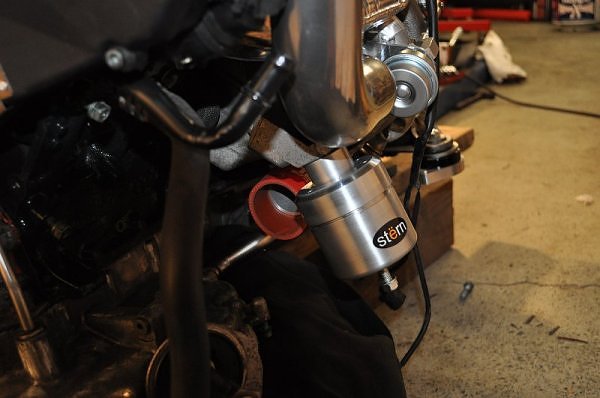
Stern “Firm” all the way around
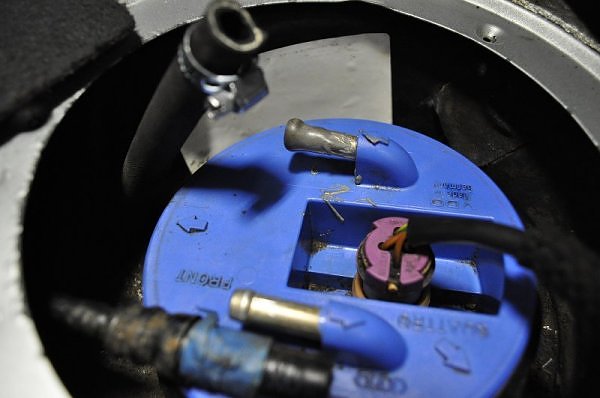
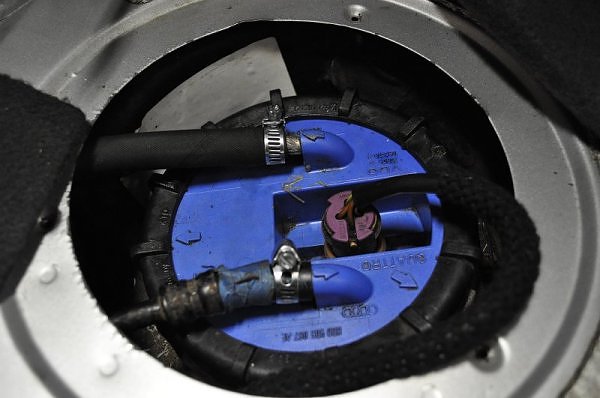
UPDATE…
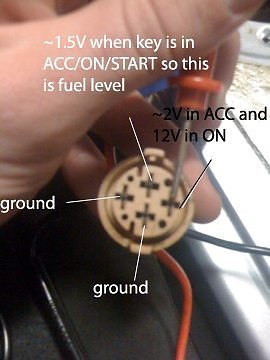
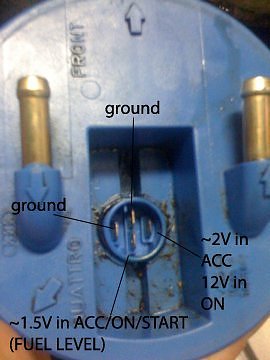
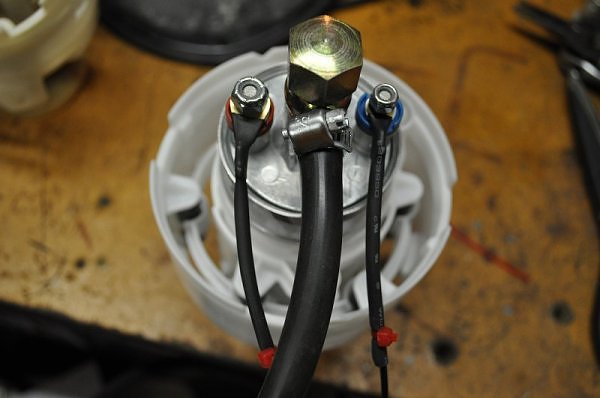
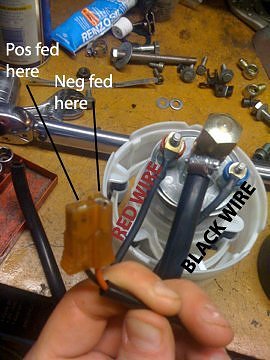
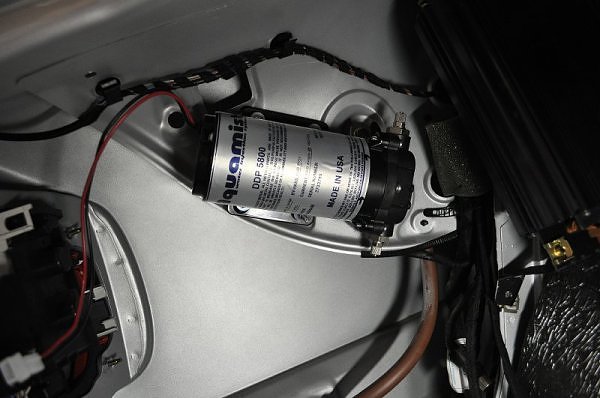
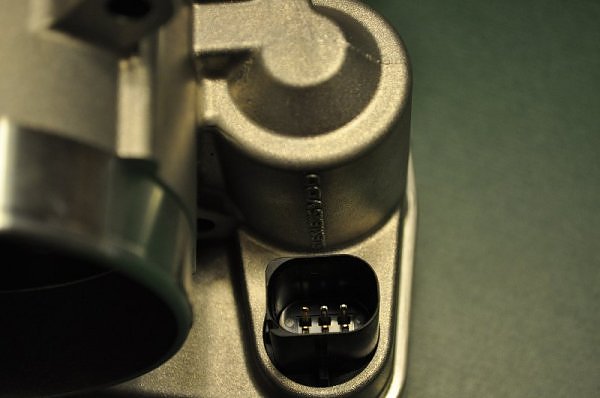
As you can see below, the only way to make it work correctly is to attach the red/brown wire to the negative terminal on the pump and black wire to the positive terminal. Feels weird but is this the solution?
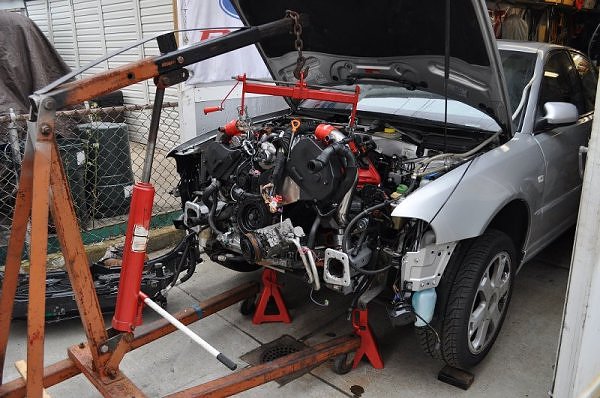
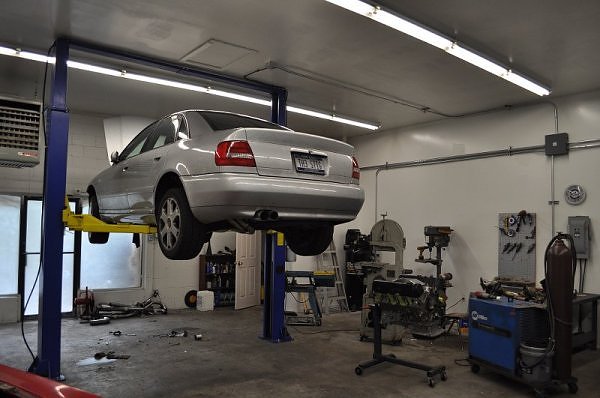
on the way to EPL last Thursday..
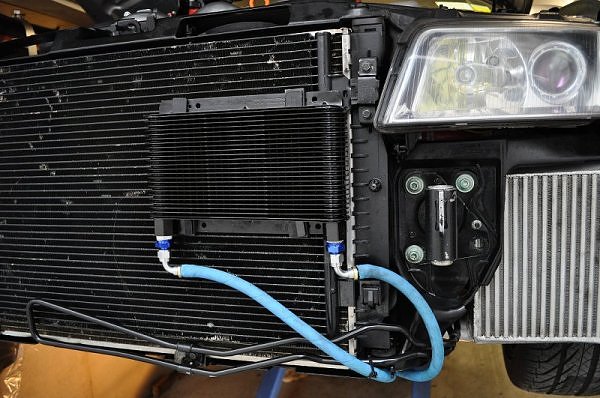
ER install..
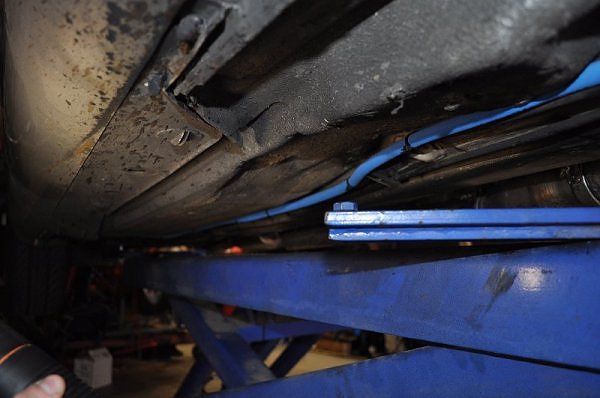
cutting needed to the drivers side frame flange..
driver’s side charge pipe trimming due to the tial 605s.
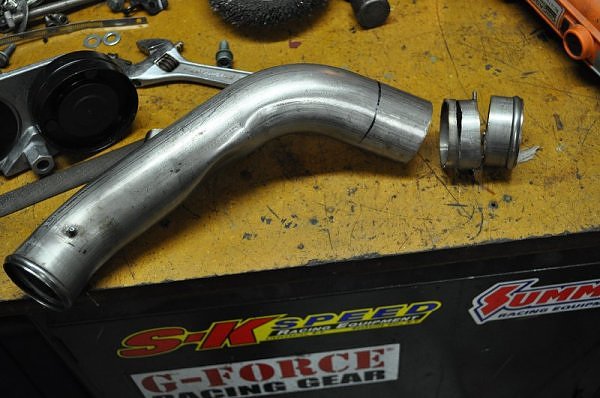
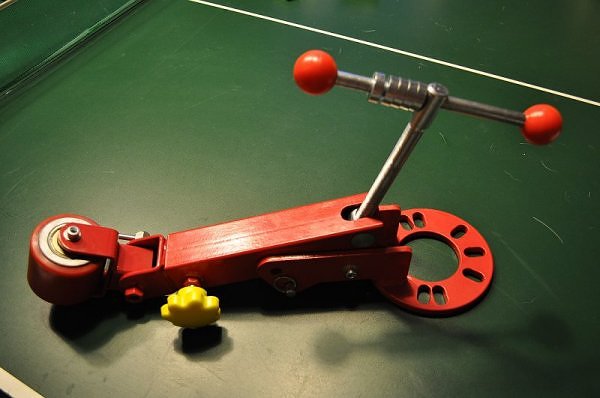
tool i rigged to re-bead the pipe..
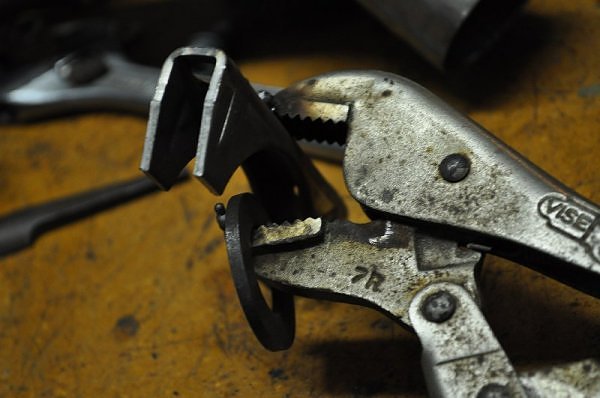
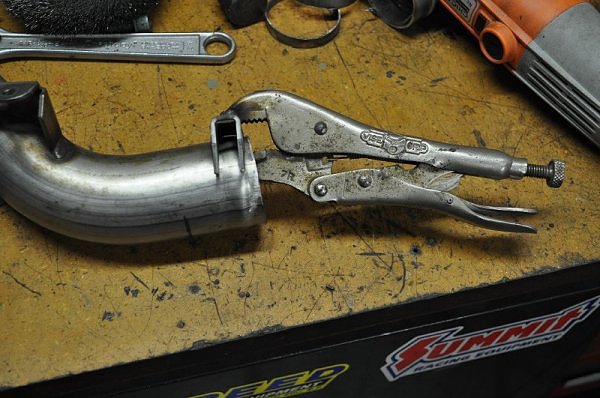
after one round..
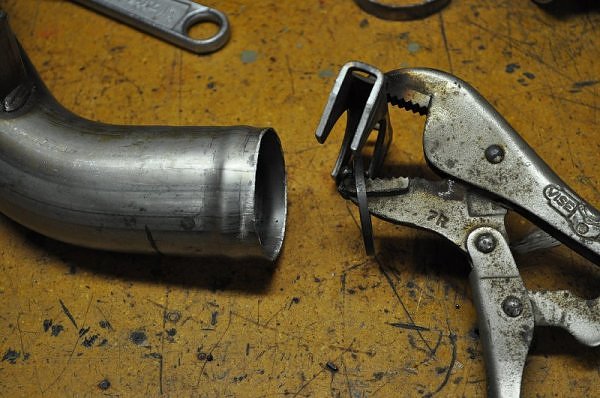
final result..
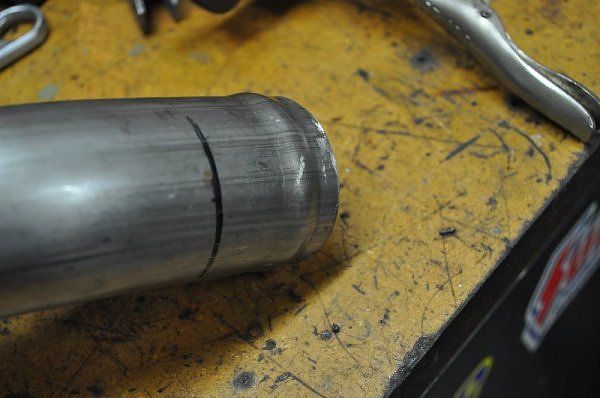
drivers charge pipe.
passengers side frame flange modification.
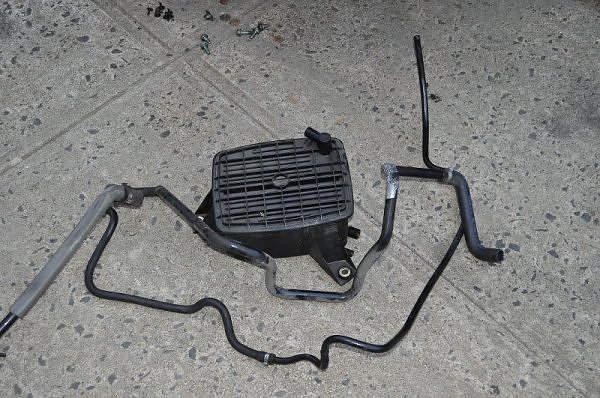
i had no idea how the supplied A/C relocation bracket would solve any problems so I took it upon myself to make my own solution. I removed the entire factory intercooler bracket and moved the A/C canister as far to the right as possible and marked where I needed to notch the material on the frame.
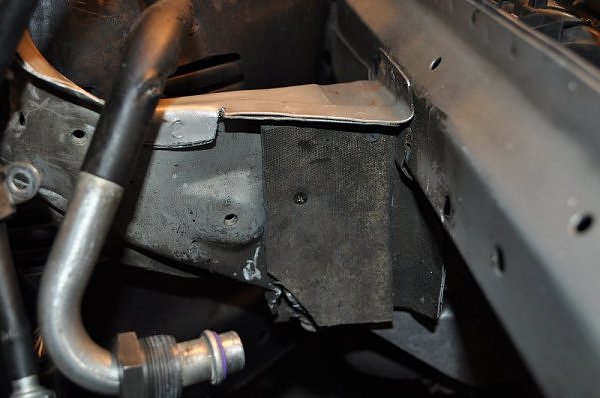
i wanted to get the A/C canister as tight to the frame as possible so I attached a piece of rubber matting to the frame to make sure the canister wouldnt hit it during driving and cause a rattling.
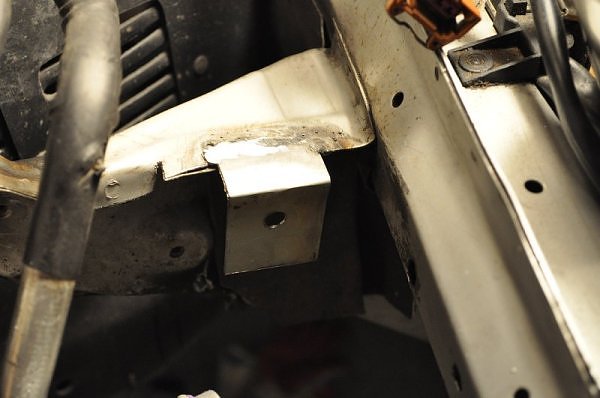
im not just a pretty face, i can make brackets and weld too..
plenty of room between the canister and the intercooler.
passenger side charge pipe with supplied extension from ER.
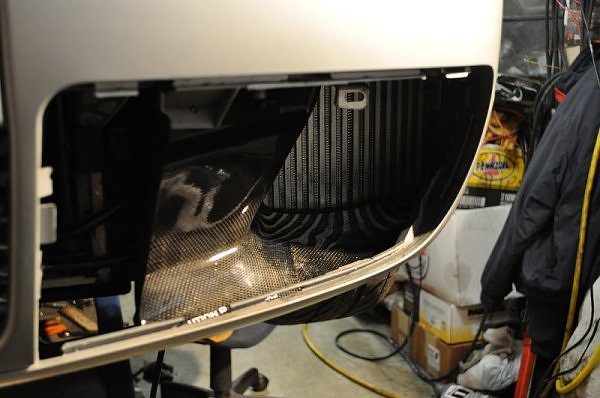
put up the core support temporarily so I can trim for the shrouds..
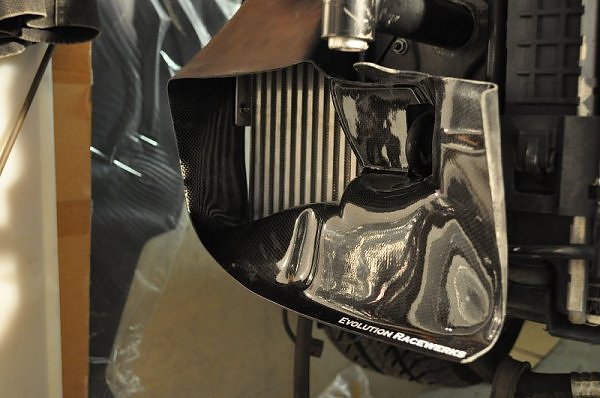
notice the cutout needed for the tow hook.
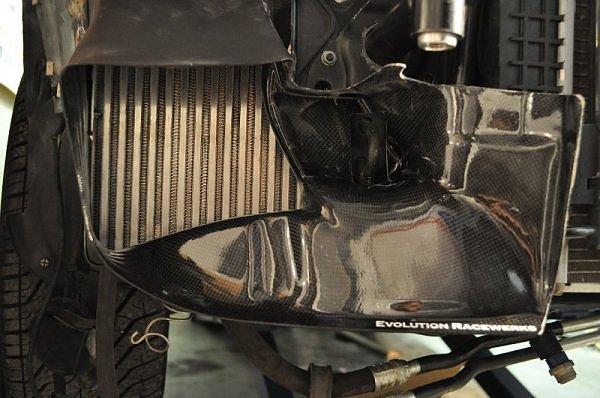
piping mocked up..
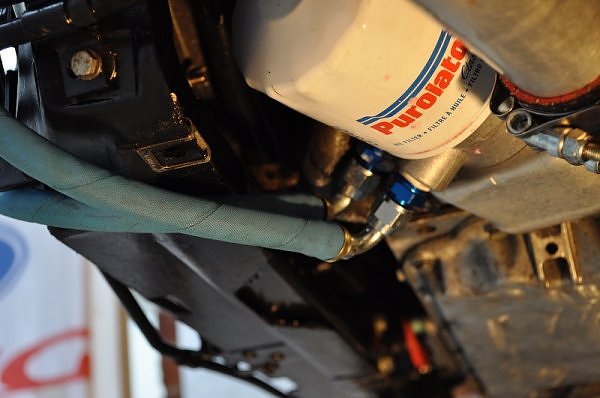
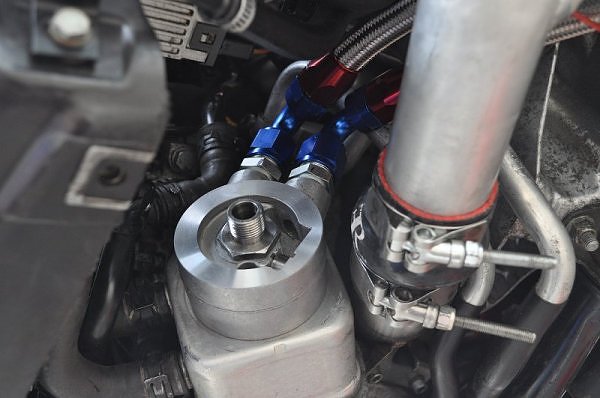
sandwich adapter for oil cooler.
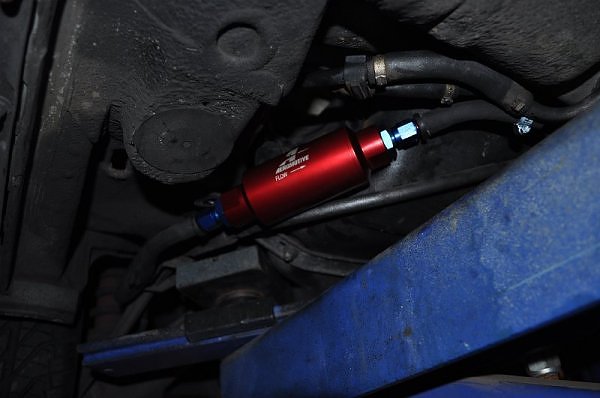
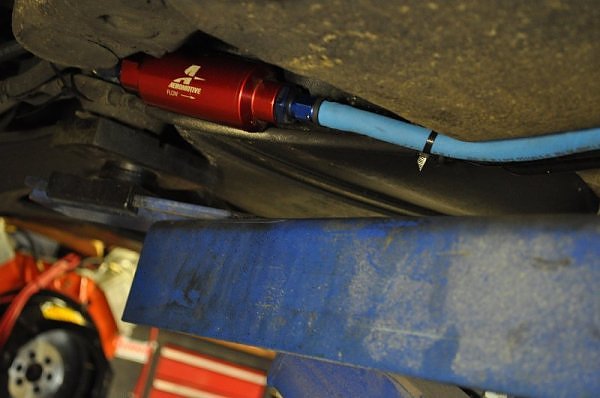
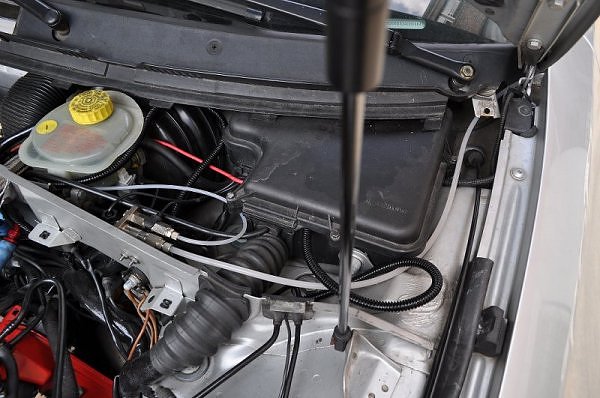
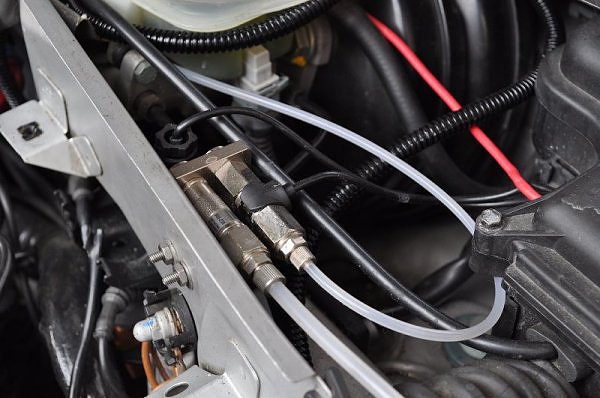
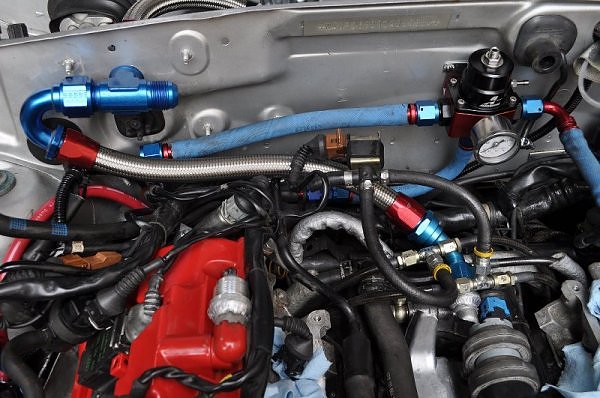
i pulled my out my fuel filter and decided I never wanted to go through that again. also the rubber lines immediately before and after the filter were really dry so I decided to run an aftermarket inline filter instead. I picked up an Aeromotive 12301 which is an -AN style 10 micron filter. Flows enough for 3 times the power Im making. The stock lines are between a -4 and -6 AN so I flared the hard line after the filter and used some JB Weld to make the outlet on the fuel pump housing bigger.
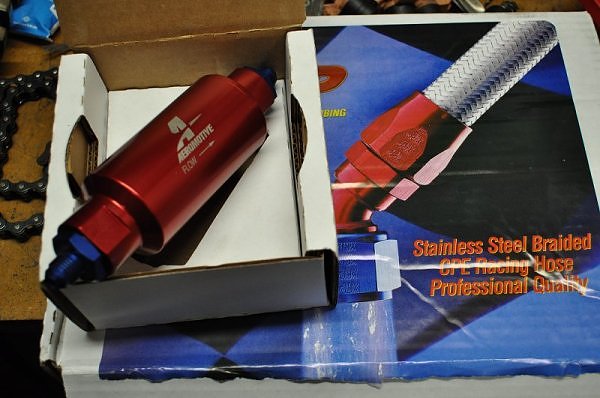
jb weld FTW

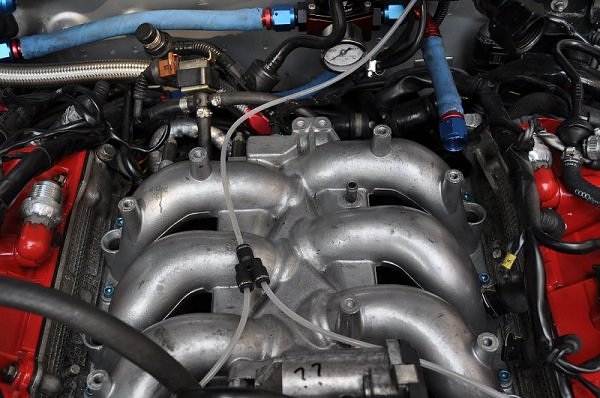
72lb ev14 injectors.. temporarily on the stock fuel rail until I get my 034 rails..
notice the lack of the vac lines/check valves/evap on the fuel rail.
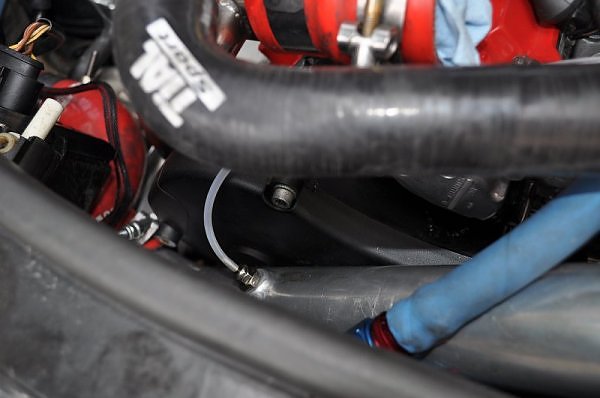
plugged the end going to the intake manifold
plugged source of the evap line.
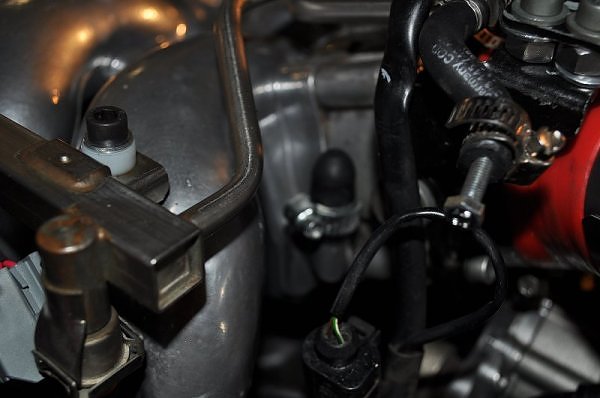
intake manifold port capped off
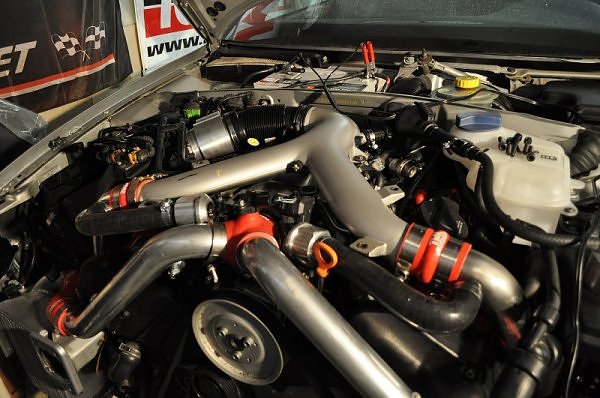
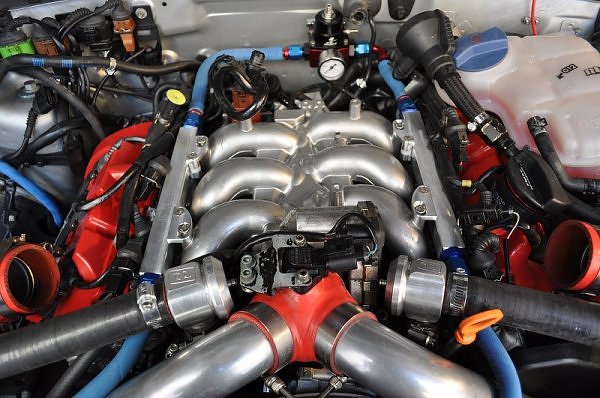
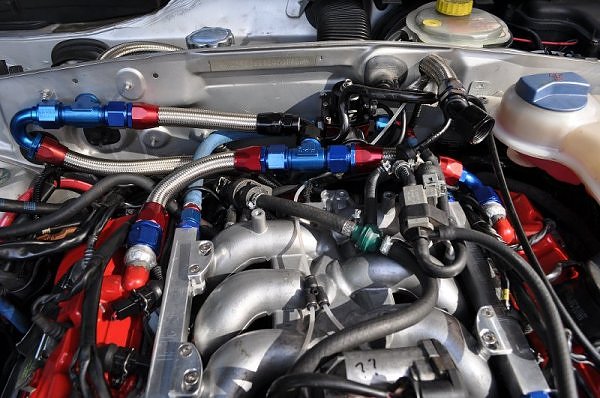
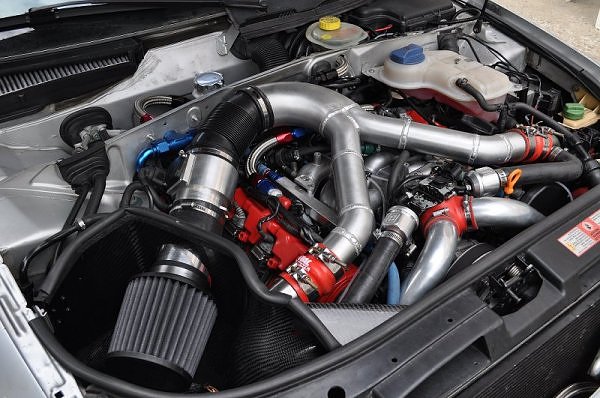
iping wrapped up.. Y pipe and intake on..
just some pictures that have been sitting on my camera..
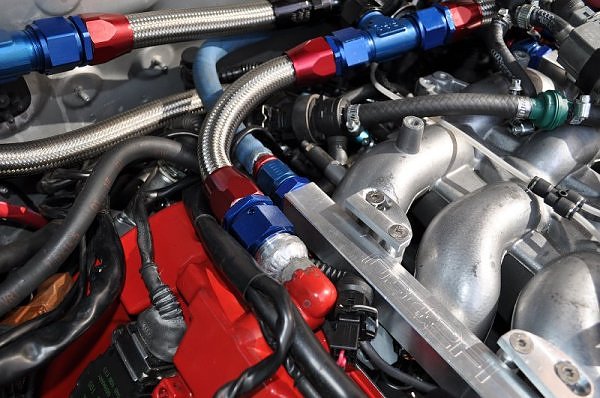
034 rails…
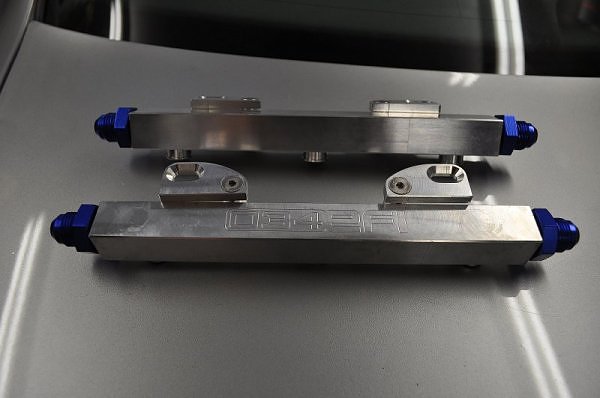
w/ ev14 72lbs injectors.
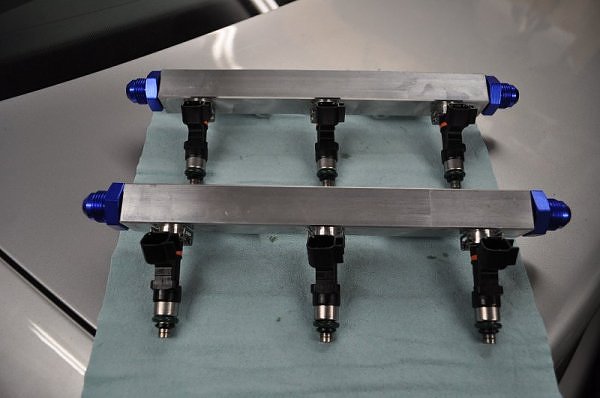
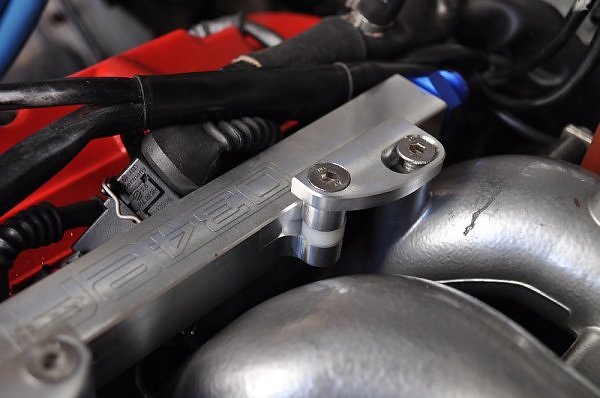
needed to use spacers to get the rails/injectors to seat correctly.

w/ n249
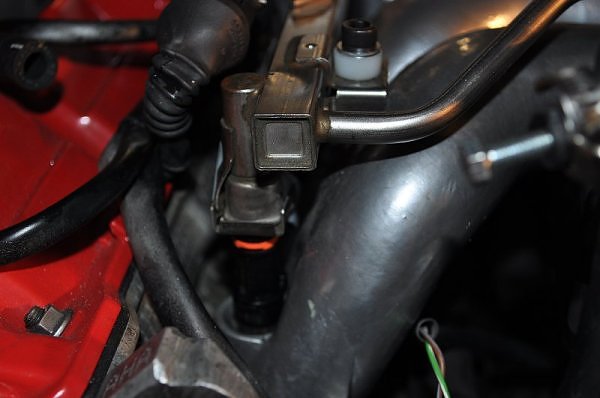
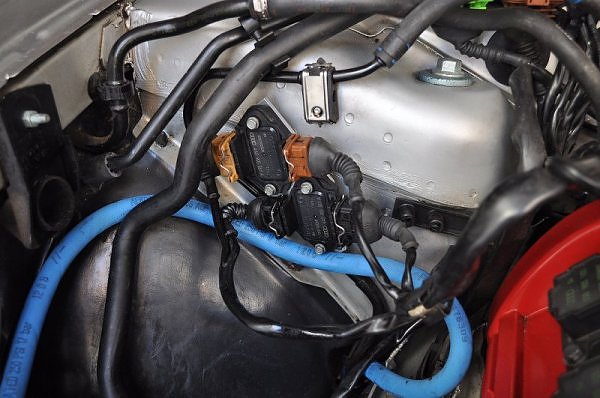
ICM relocation.
cheap filter for now until i get the dryflo
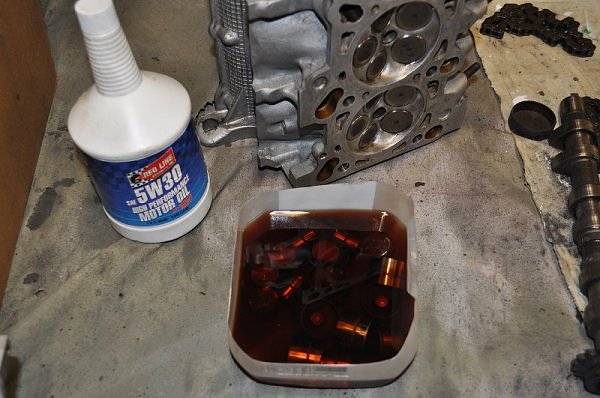
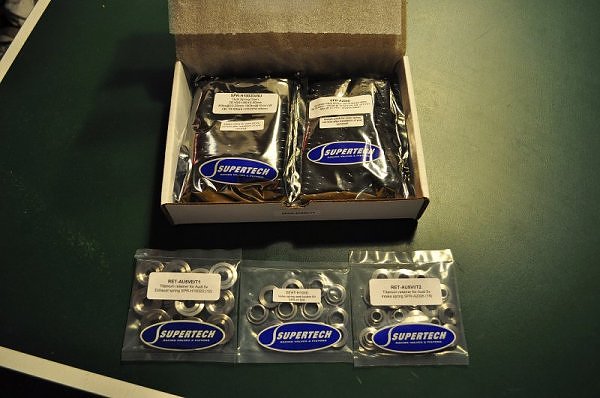
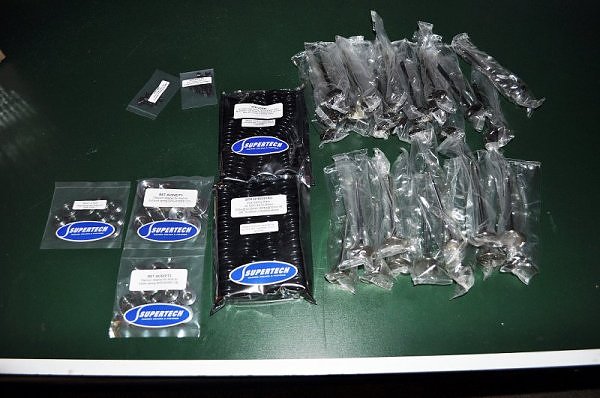
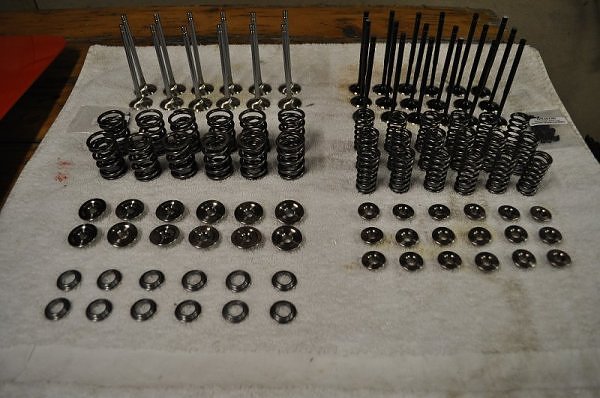
supertech valve-train came in.. thanks to IPG (Innes Performance Group)
got the valve-spring and retainer kit as well as the inconel exhaust valves and stainless steel black nitrided intake valves.
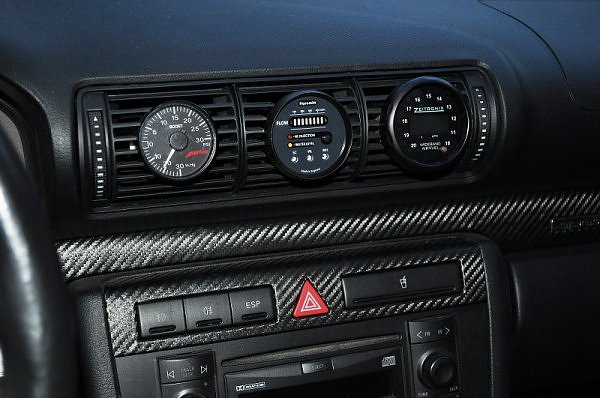
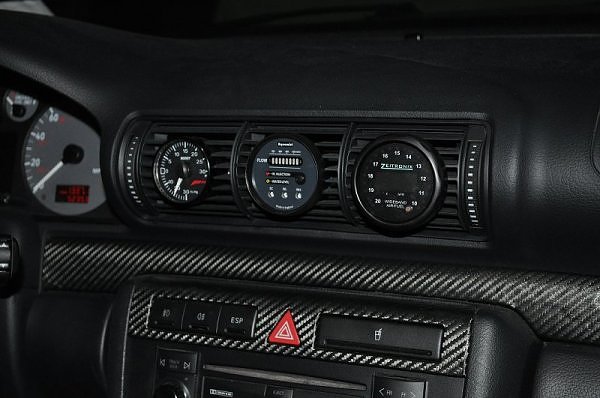
was gonna install all the valve-train today but ive been so caught up in the big parts that I forgot to order new valve seals.. in the meantime I finally installed my HFS3 gauge and i started on the Zeitronix install by putting the gauge in the vent as well.. im not really a fan of the A-pillar stuff.. too boy racer for me… atleast in an audi.
pictures!!
new valve spring compressor made the job easier..
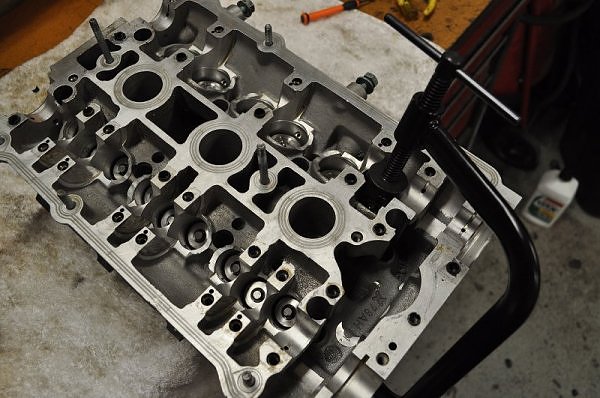
all done..
Just got my 770s in..thanks to Johnny Bravo.. always goes out of his way to help me out. 


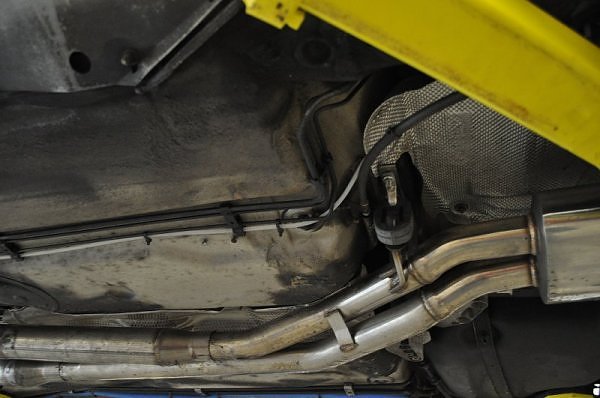
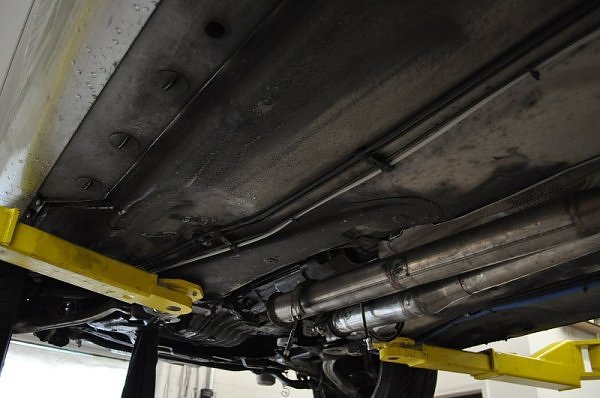
ditched the clamps holding the test pipes in.. had it welded instead.
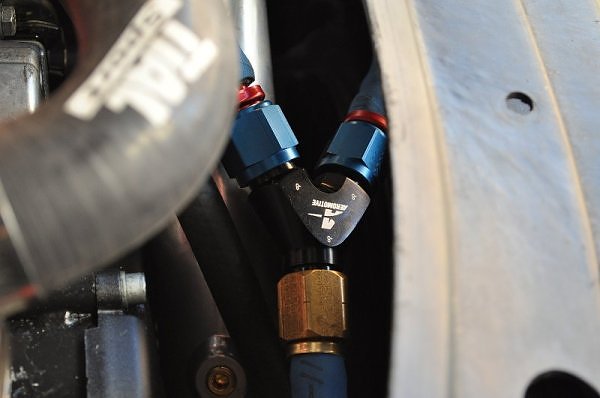
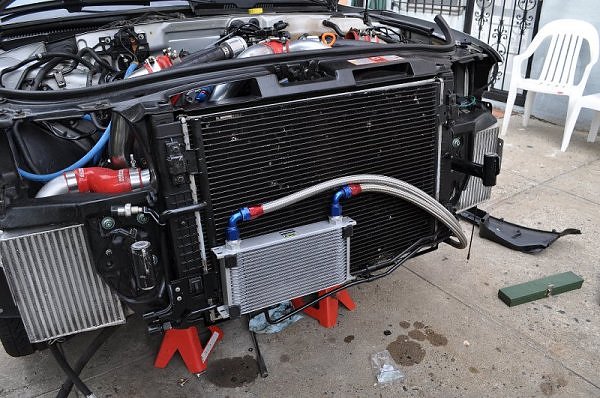
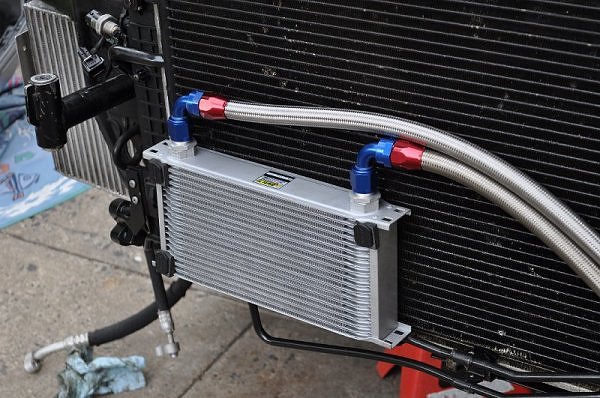
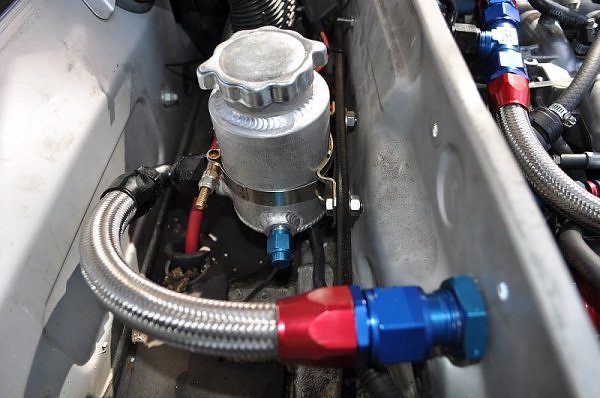
decided to get with a bigger oil cooler and lines. oil cooler comes with male -10AN ends so I used -10 hose now instead of the -6 i was using before.
shes alive..
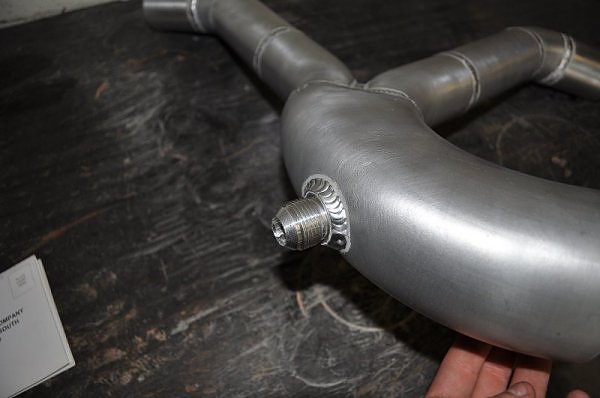
progress on the Y pipe…

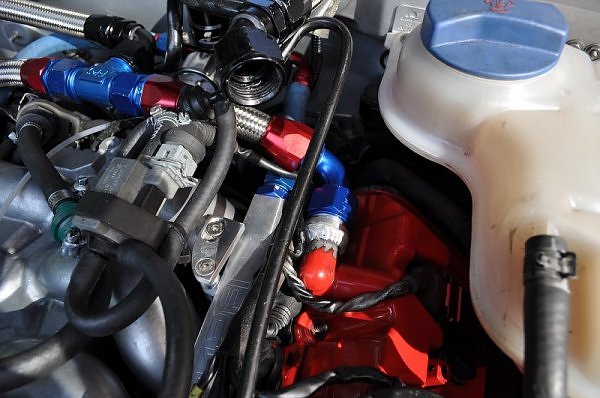
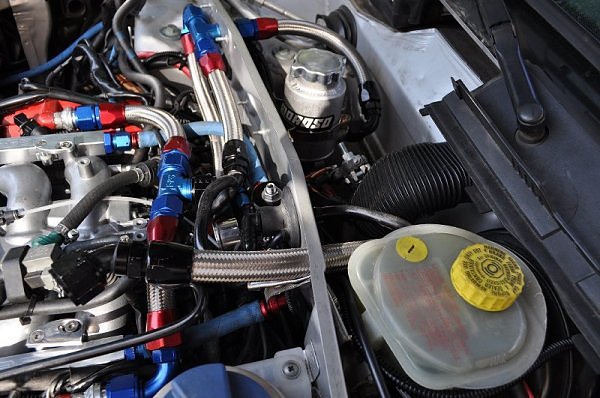
couldnt finish up the PCV system today.. i was one fitting short. anyways I forgot to post up pics of my aquamist hsf-3 system so here goes..
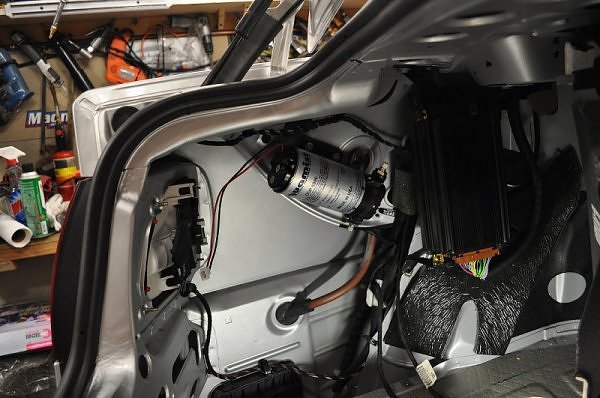
5qt for now but I think Ill get a bigger tank sometime down the road.
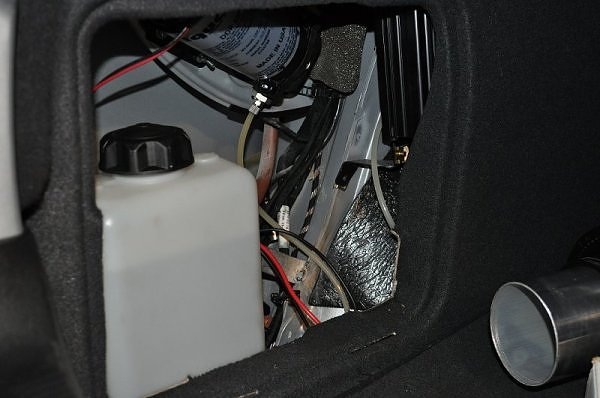
running the line to the fast acting valve…
inal PCV setup…
if you cant tell by the pictures, what I did was run both valve covers to a T and then ran that T and the crankcase breather to a bulkhead T which connects to the catch can. connected to the bottom of the catch can is the vac source which runs through the firewall and taps into the Y pipe.

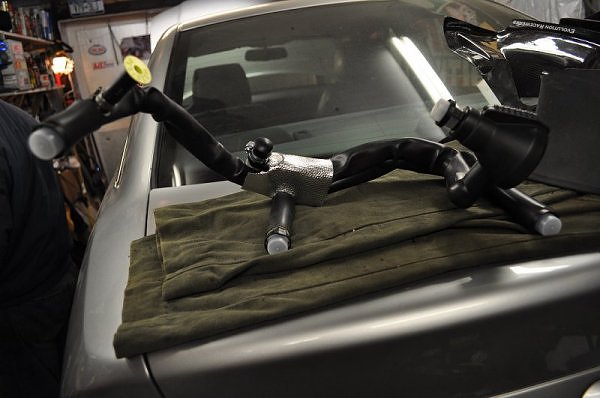
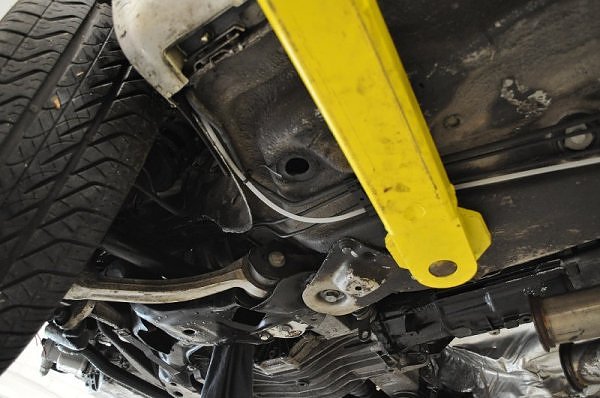
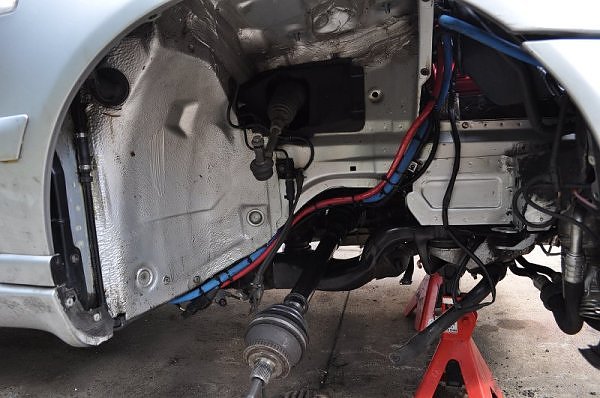
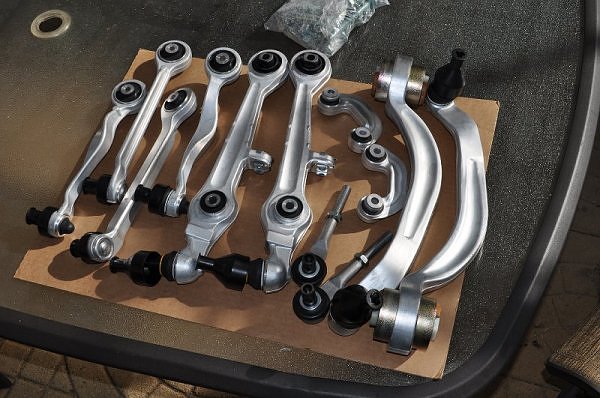
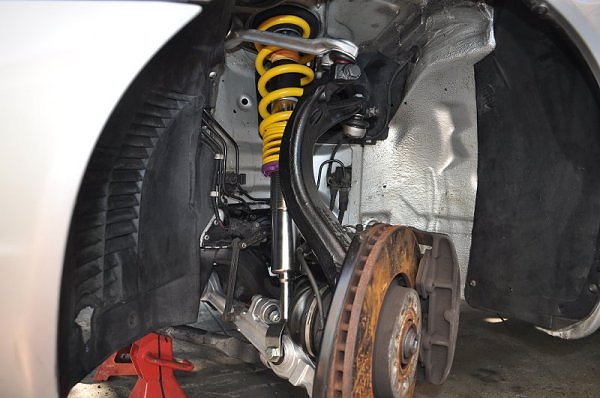
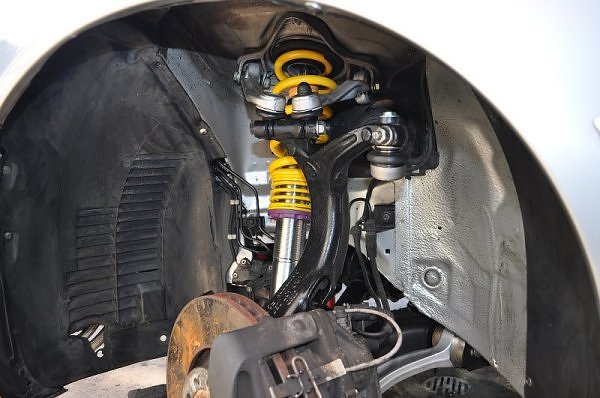
started my v3 and control arm install…

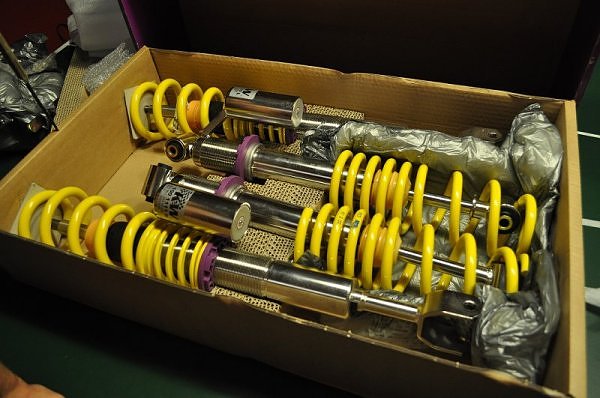
who said you cant adjust kw’s on the car?
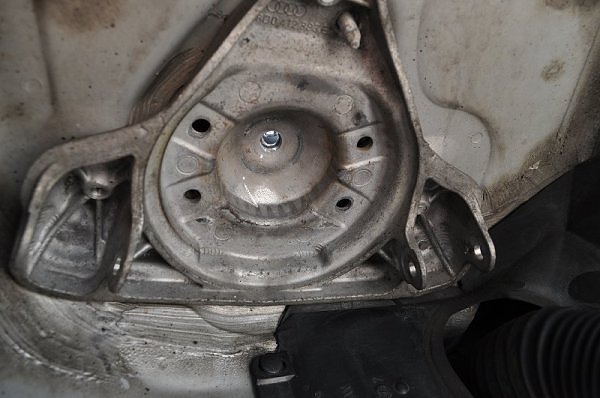

rinse and repeat.
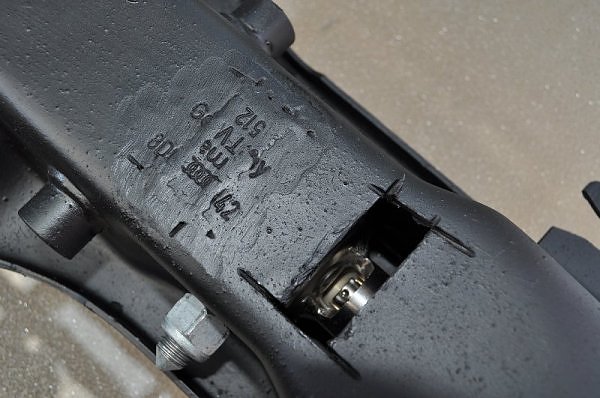
I drilled at too much of an angle on the pass side so I had to go in with a die grinder and open it up some more.
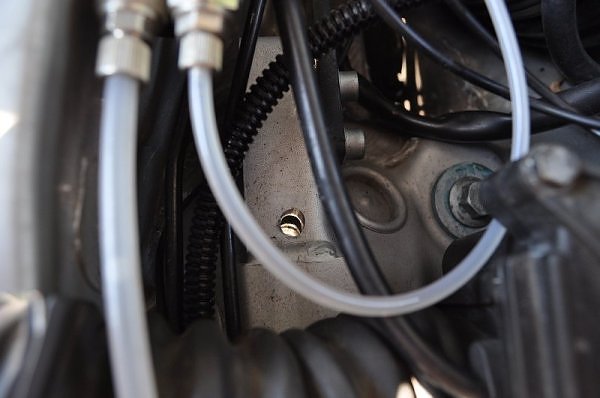
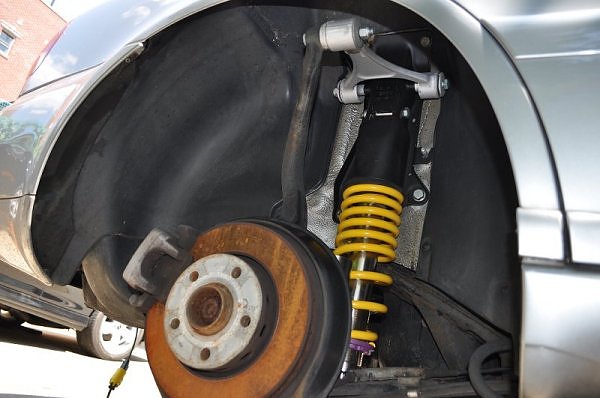
new nuts and bolts came in for the rear so I finally got the coil-overs in. cut a hole in the coil-over housing so I can adjust the rebound.
excuse the sloppiness. i was out of small cut off wheels.

I WILL make 255s fit..
alright back to business..
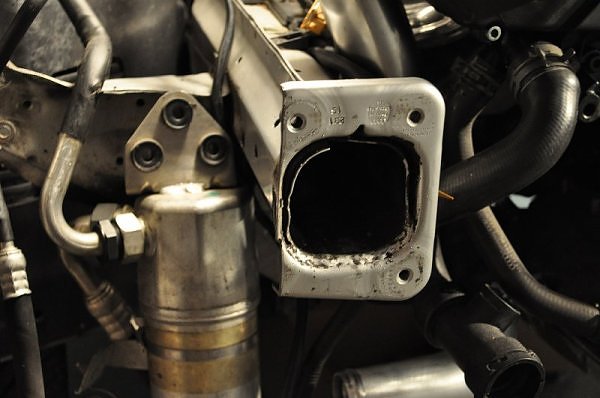
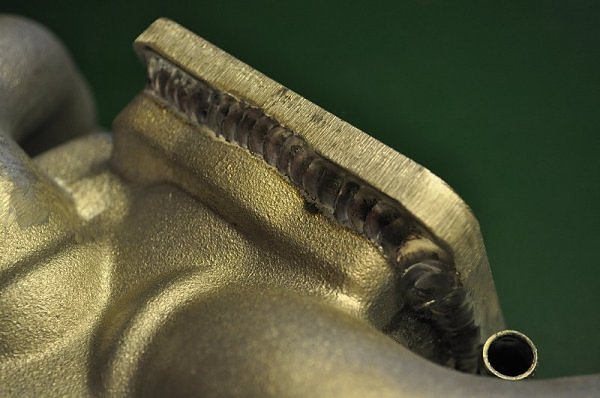
Adapter flange welded on and port matched to the 80mm TB.
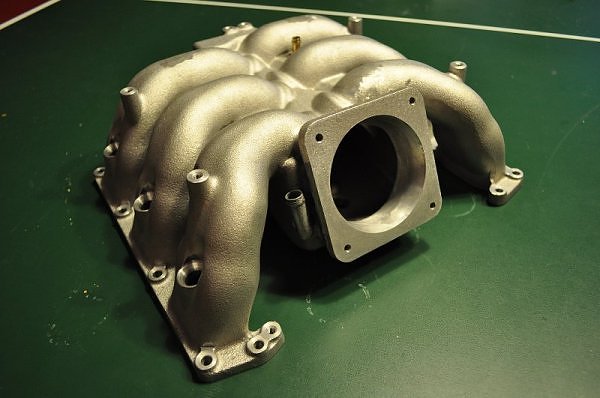
Ground down the factory Y-pipe mounts and the EGT mounts.
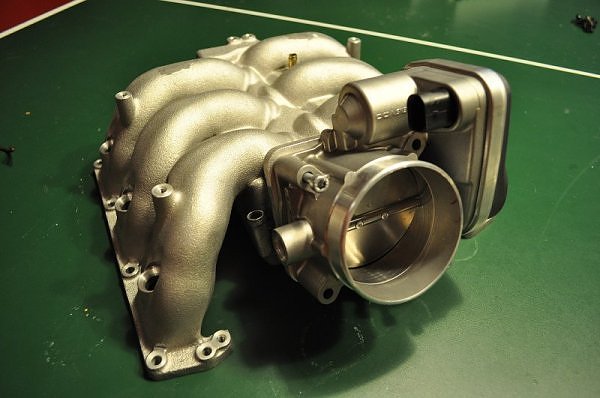
Going to get the intake coated and then it goes back on the motor.
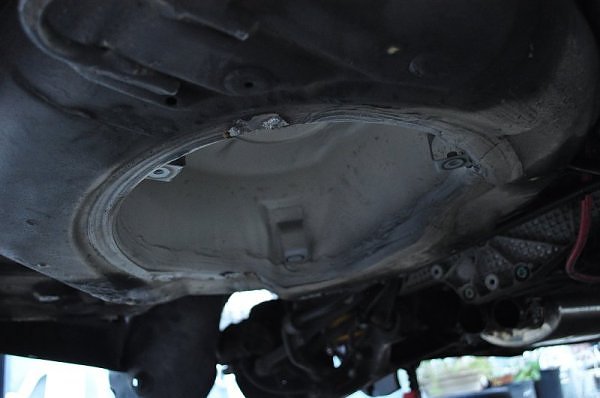
so much for the environment… need room for twin 044s and a surge tank.
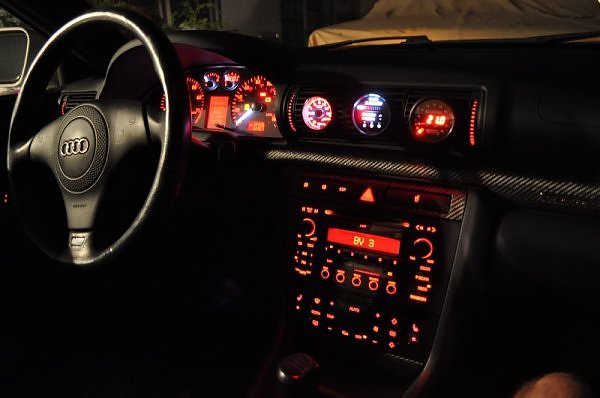
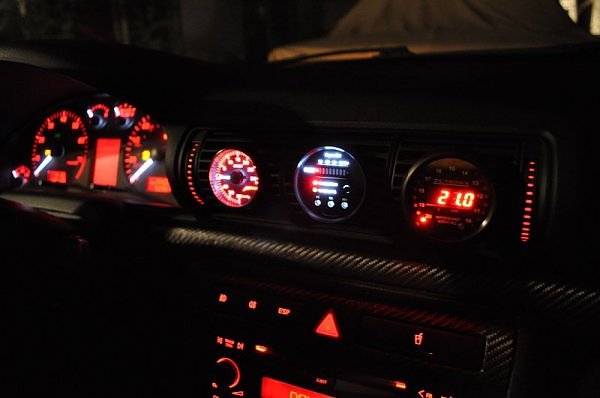
new boost gauge.. awe gauge wasnt very accurate at higher boost levels and only went to 30psi.
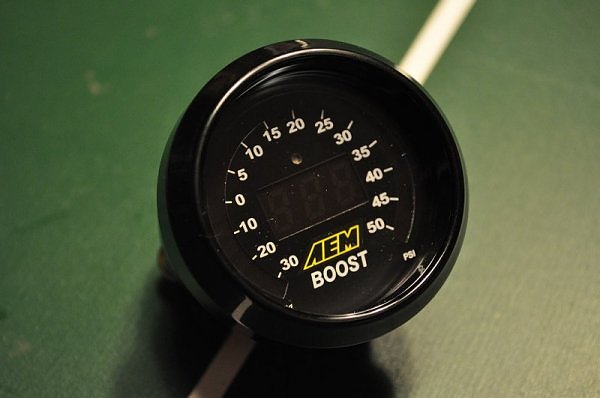
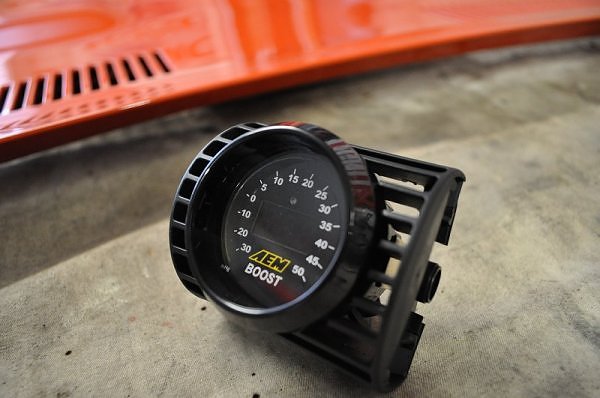
got the gauge in the vent. ill have it powered up and in the car tomorrow.


Nice post,Thanks admin.
Incredible, that’s exactly what I was hunting for! You just spared me alot of work
wanna sell the 605 kit?
605 kit has been sold a while back.
see for update on the build
the 605 kit has been sold a while ago.
see for update on the build.
ya i figured. dude your car is my dream hahah. im working on a 2.7t with 2.8 heads right now. i just have to have new valves and springs then port the intake mani and bolt it all together right?
Beautiful work i wish i had enough money and time to do all that. I am going with the 605s most likely for my S4. Not sure what all parts we’re putting in but i do know that EPL will be tuning it. Any advice?
Hi, NICE!!. how did the log style vast manifold work for you performance wise, better than stock? or did it not make any difference as the tial770 was made for the stock manifold?