Nissan 350Z NA 323 WHP Build
 ‘Prologue
Hey all – as some guys here know, I’ve been doing an NA build on my own car for quite some time. It started about 2 years ago when I acquired a spare set of heads, and some Tomei cams. After much time spent with the flow bench, and a variety of other tools by my machinist, as well as assistance from some Japanese shops (notably MCR (Matchless Crowd Racing), and one of our suppliers in Japan, we had a set of heads completed. The original goal was to put those onto my stock block with a set of DC Sport headers that had been given to me, and see what could be done. Unfortunately, time was not something we had alot of, and the project got side tracked. While I did have some bolt ons done (netting 268 whp back in December 2005 when I did my UTEC install), I never quite got around to doing the headswap.
Fast forward to Fall 2006. A customer called us from Michigan and told me a story of his 2004 Z that had been totalled at an event. We ended up working out a deal for his longblock, in exchange for parts he wanted for his new Z. Now that I had a spare block…the “What the hell” factor took over, and I decided to build a block to go with my yet-unused heads .
The goal on this car has always been a setup that can run in all 4 seasons, is not built or tuned to the ragged edge, but rather, a more reliable approach. I have other cars, and while the Z is a toy of sorts, it gets used quite alot (50k miles since getting it Fall 2003). In the spring, summer and fall, its basically my daily driver so long as the weather is nice.
Ok, so what did it make and what does it have?
Here are the details on the build. I think it encompasses what a good, NA build should…every detail that needs addressing was addressed. Yes, there are things I can change to net even more power, and some of those will be explored going forward. My goal from the outset was to break 300 whp, to give me a good platform with which to really learn the black art secrets of NA power on the VQ.
So what does the motor build consist of:
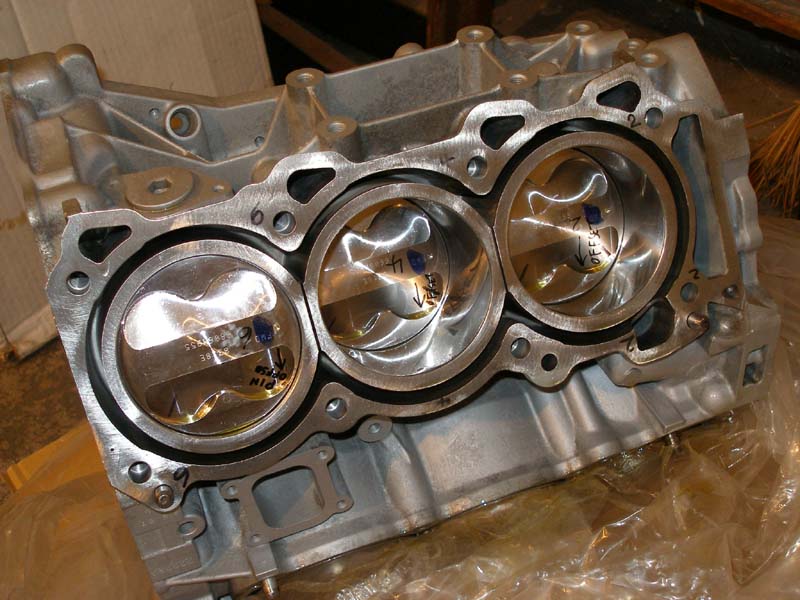
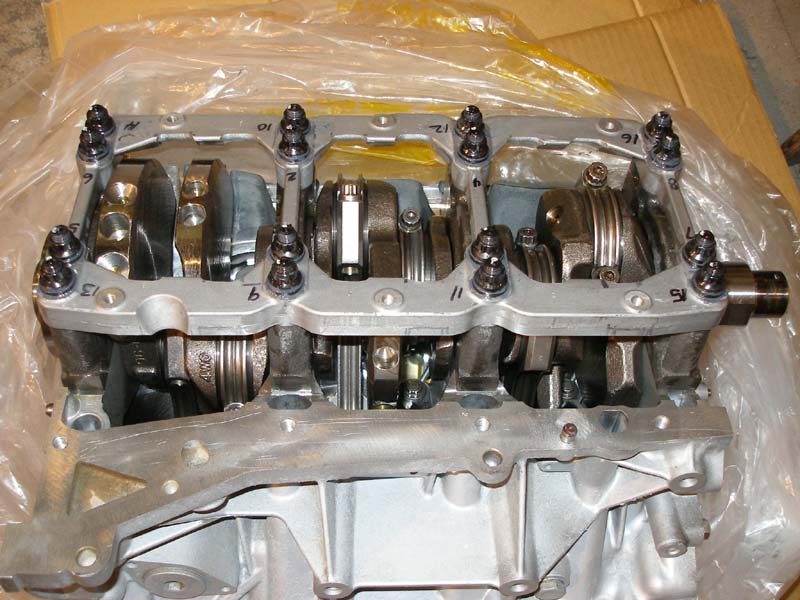
Internals:
Weisco Pistons (.020 over stock)
Eagle rods
ARP rod bolts
Fully balanced and blueprinted – not only balanced as individual components, but also balanced as a rotating assembly
OE Nissan bearings
Full Ported and polished heads
5 angle valve job (stock Nissan valves)
Tomei 268 cams (268 duration, 10.5mm lift)
NISMO valvesprings
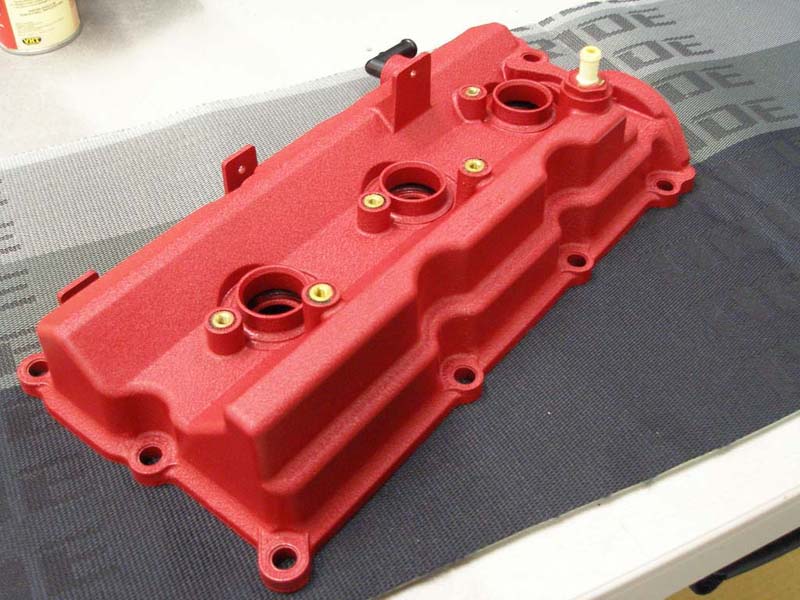
NISMO headgaskets
Lots of time spent porting stock, non rev up lower plenum -we logged over 100 hours between the heads and plenum, going off recommendations from MCR Japan, as well as things we found on our own.
Motordyne 1/4 inch spacer
ATI crank pulley
New: water pump, rev up oil pump, idler pullies (OEM)
Final Compression checked in at 11.3:1
Misc Power Stuff:
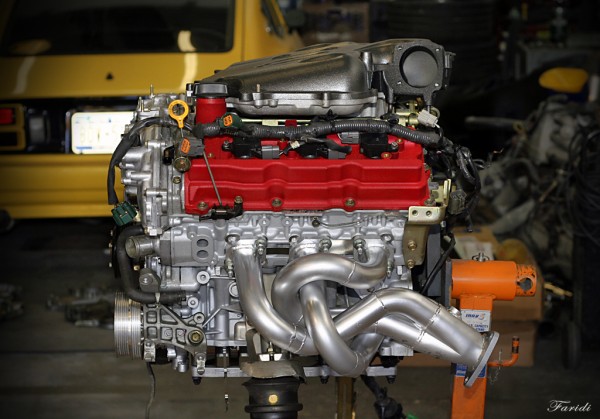
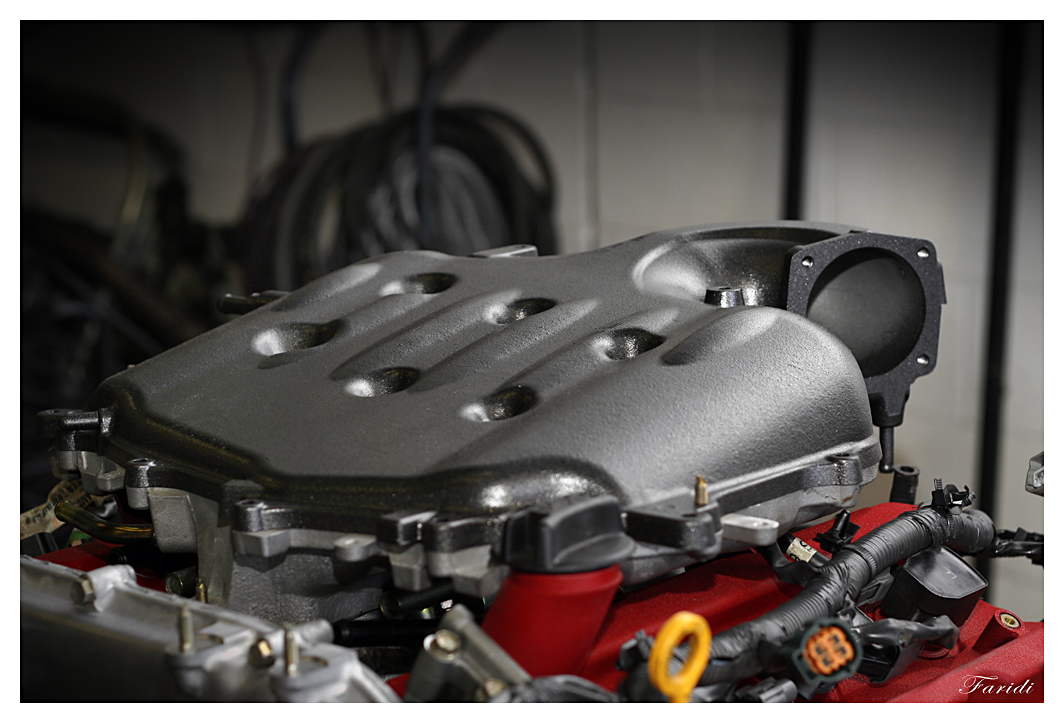
Gruppe-M Carbon intake
3 inch MAF housing
Crawford headers
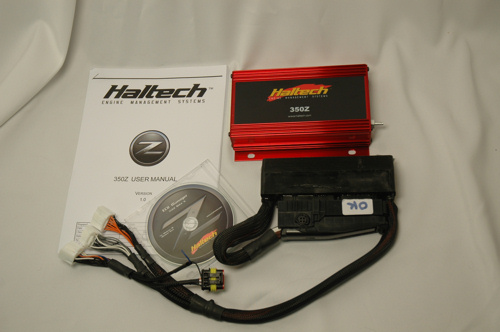
HKS DLI II
NGK Iridium Plugs (LFR6AIX-11_
Sun Hyper Ground
Fujitsubo Y pipe
Fujitsubo Legalis R Titanium exhaust
Resonated test pipes
Drivetrain:
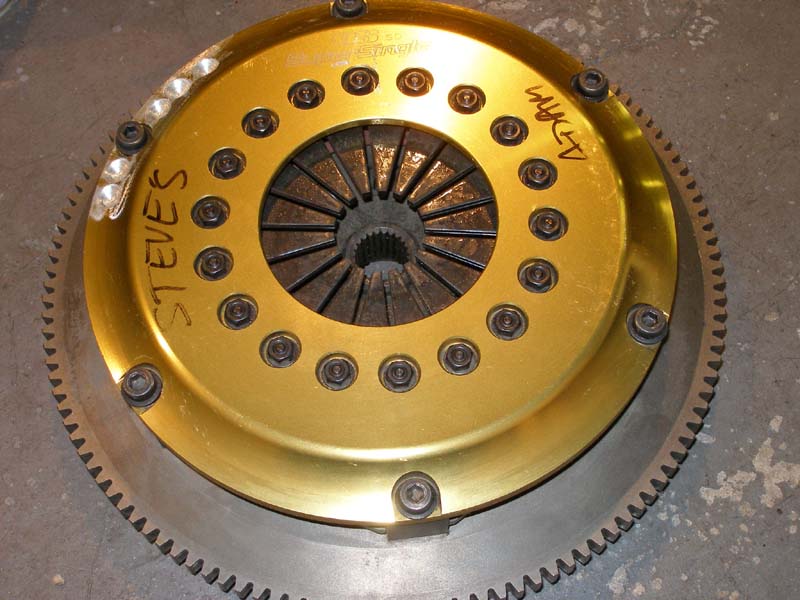
OS Giken Super Single Clutch/Flywheel with Aluminum cover
3.9 final drive
Cusco RS LSD
NISMO finned diff cover
I think that covers it mod wise (engine related)
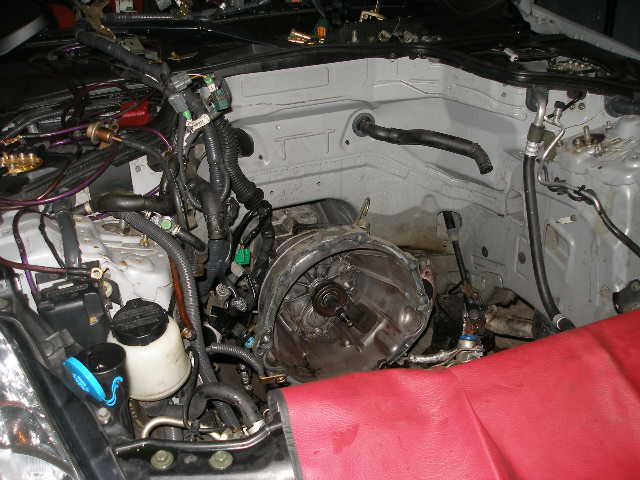
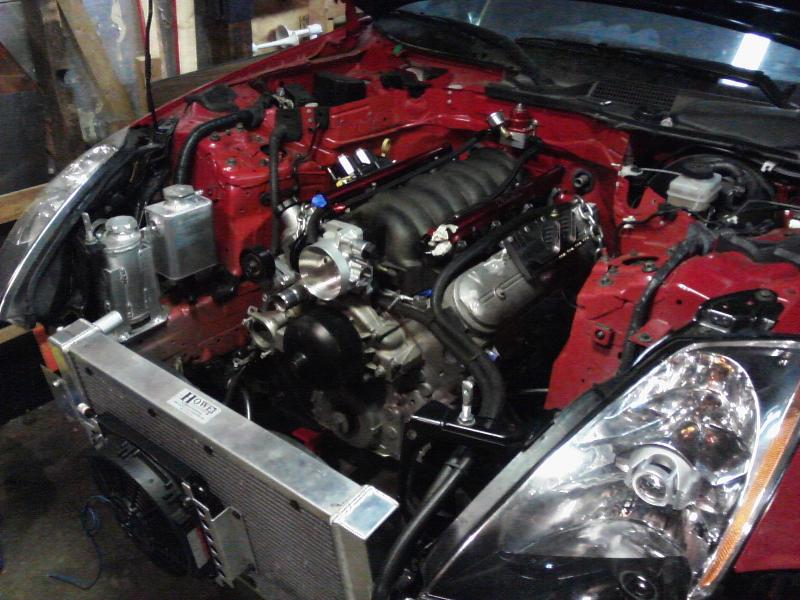
some pics of the motor:
Pics of the clutch (yes we balanced the clutch, and even the pulley, to 10k rpm)!
My old motor out of the car
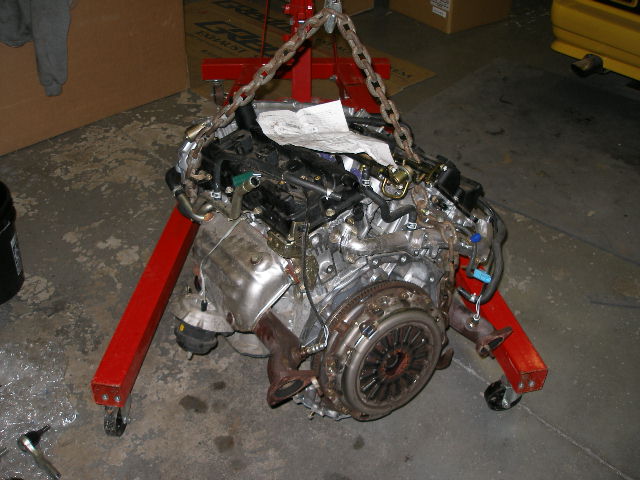
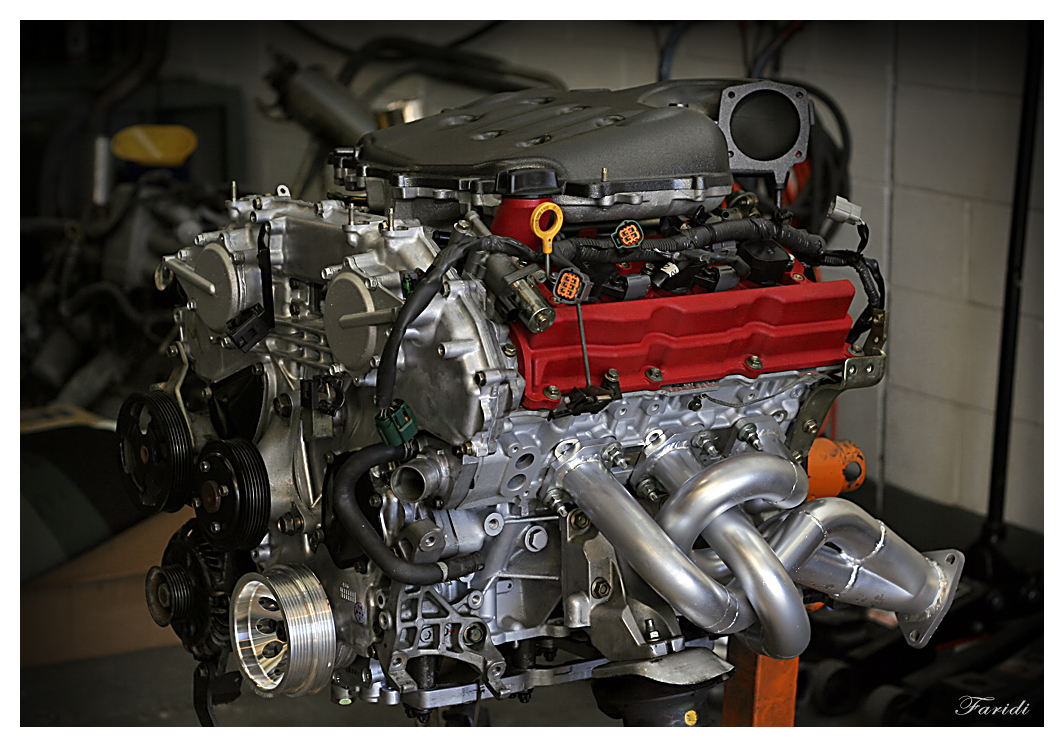
Some pics of the assembled Motor (my favs…it looked so pretty on the stand)
Ok ok ok…so what did it make?
Dyno Sheet:
This is on pump gas, done yesterday in Norwalk, CT. I’ve known the owner of “The Shop” for years, and he was good enough to fit us in on short notice right after the holiday. For those who don’t know this place…you might remember a certain black 911 TT that duked it out with Turbo Tito (white 911 TT) back in the earlier days of import drag at E Town? The car is owned by the owner of “The Shop”…..they do some insane builds there. Tuning was done by another good friend, Junior Barrios, whom I’ve also known for a long time. One of the best tuners I know, listens to exactly what you wants, and does it right. I have recommend a ton of our local NA and FI customers to him, and all have walked away with terrific results.
Anyway, here is the sheet:
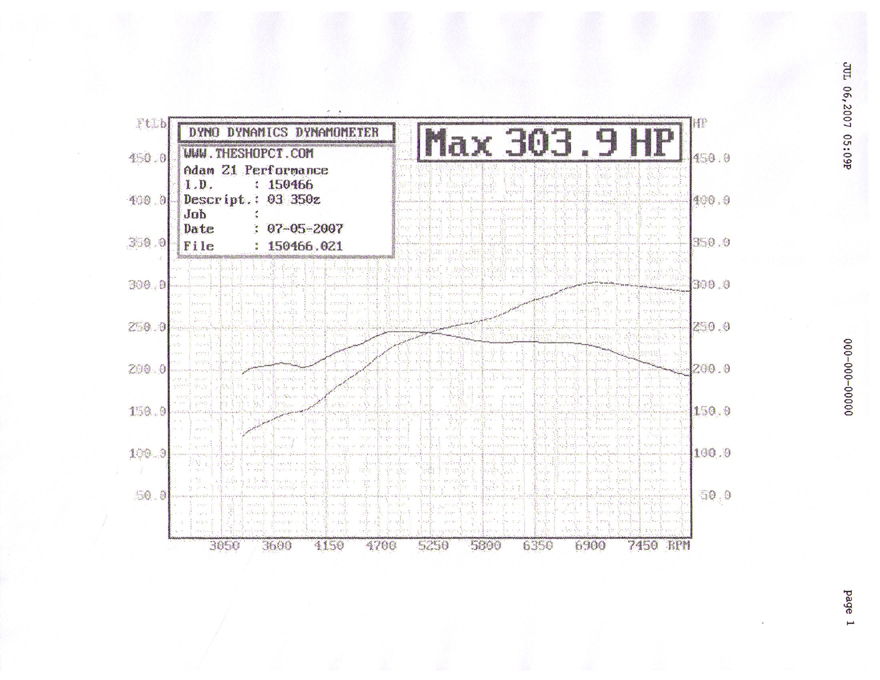
As you can see from the sheet, it pulls very, very nicely, from about 3500 to redline, which is currently set at 8,000. The tune was done on pump gas. It also was insanely humid yesterday too, so I am looking forward to going back as we test more parts for the car, and hopefully get a bit cooler of a day with lower humidity, just to see the results
What does it feel like? Compared to where it was before (268 whp), it’s a completely different animal! It pulls with reckless abandon to redline, and just loves to be rev’d out. Power is also very very linear…it just keeps pulling. The combination of the lightened internals, the lighter clutch (saved about 25 lbs there alone), the lighter pulley, and the 3.9 gears is an absolute BLAST!
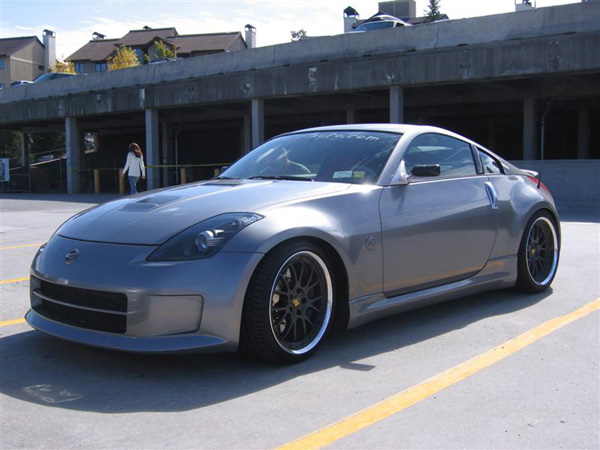
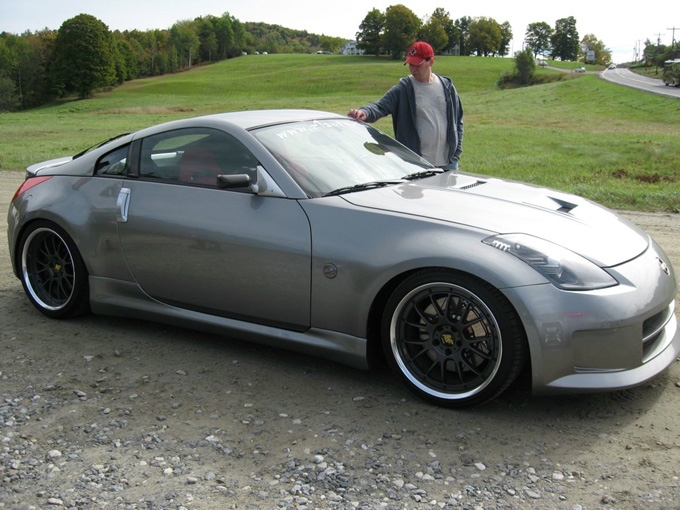
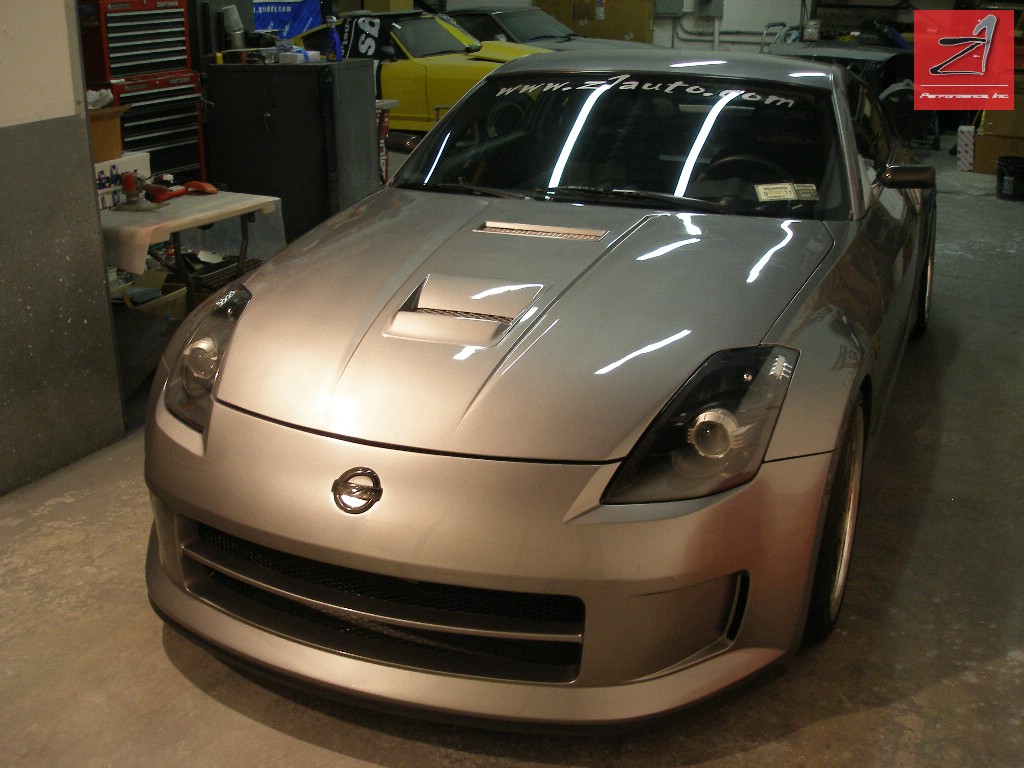
Anyway, that’s what I have to report so far. In the upcoming weeks I plan on testing a new throttle body, and I am very much looking forward to putting the Cosworth intake manifold through it’s paces. I’m now determined to see what can really be unlocked from the motor having met the goal for round 1. My overal “cause” won’t change…I want an absolutely streetable car, that runs on pump gas, with good driveability characteristics, but with a substantial increase in power. The NA game is very time consuming, as it takes alot more research, and sometimes alot more work than going FI, but I welcome the challenge, and hopefully, what we find will benefit the community as a whole. In addition to what you see above, the car has undergone a complete remodelling, with new wheels, new brakes, new body kit, and I’ll be showing pics once the paintwork is complete (we’re starting prep work this weekend with any luck). I am hopeful you guys will like the final result…as I picture it in my head, I think you will! Right now, I’m going to wash her down and take her for a ride.
Got the pulley in today, so all the parts are here now, ready to go in
crank pulley outer section

crank pulley inner sleeve/accessory pulley – you can see the keyway. All steel pulley = this thing should be strong 

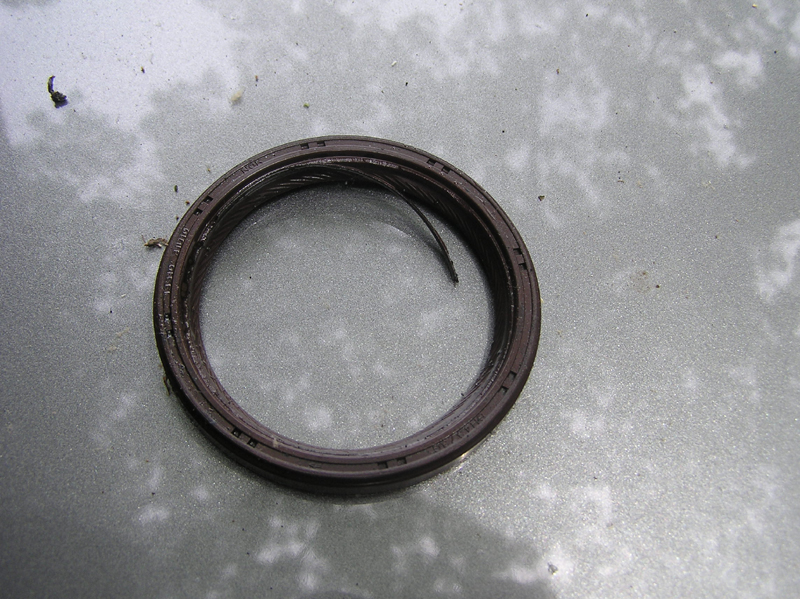
shown with the miscellaneous BS stuff I had to get new – new keyway, new timing chain sprocket, new bolt for pulley, new crank seal, and a bunch of o rings for the front cover

The way it works is basically you press the smaller diameter “inner” section onto the crank, and then bolt the larger, outer diameter to it. Secure with the crank bolt, and viola.
Stock crank pulley measured 5 lbs, the new ATI measures 5.4 lbs, so nothing noteworthy there. The outer section of the ATI (with the logos on it) is aluminum, the inner section that rides on the crank is steel. According to my math, the crank section is underdriven by 30% (4.5″ diameter for ATI vs 6.5″ diameter for stock), and the alternator is overdriven by about 13%. So I should even get a bit more headroom out of my stereo now…nice . Might even pick up a few hp at the top end too !
I’ll post up the belt sizes I end up with once its on the car
Hopefully this all solves it
Oh – here is a pic of the timing chain sprocket…you can see where this would sorta be a problem. I’m amazed the car even started! Notice how much wider the keyway gap is as a result of it bobbling around. Of course all this also means the front main seal was trashed too…hence all the oil. Nothing some brake cleaner and a rag won’t take care of quickly though
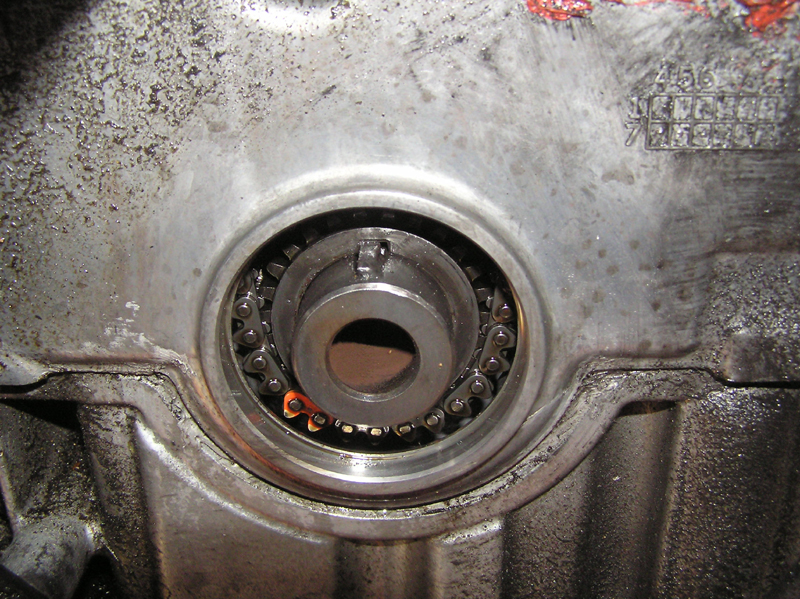
Again, thank god the crank is so strong…no burs on it at all, no damage to the snout, and the keyway is still in place. I think I can safely say I avoided disaster!
well, winter is in full affect here, so it’s time to get cracking on the car again
Next up on the list of to do’s:
Kirk Roll bar (still trying to figure out which padding)
4.3 final drive – this has turned out to be a total clusterf*ck, but rest assured, I WILL have it operational in my car. At this point I don’t hold out much hope towards making it a kit that we’ll sell, as there is quite alot involved. But, I’m into it for so much time and money at this point, I have no choice but to see it through
Long tube headers
But next up on the block – this is what is going in:
Not sure who will tune it yet – I really don’t have much time nor interest in doing it myself to be honest. I used to really like doing the ecu side of things, but as I’ve gotten older, I’ve come to find it the most boring, tedious, and uninteresting part. I do enjoy the assembly of new parts but for the tuning side, I just want the final results
also going to be fitting this:

The cluster will be used in place of the OEM cluster
since I can’t seem to leave well enough alone – here goes!
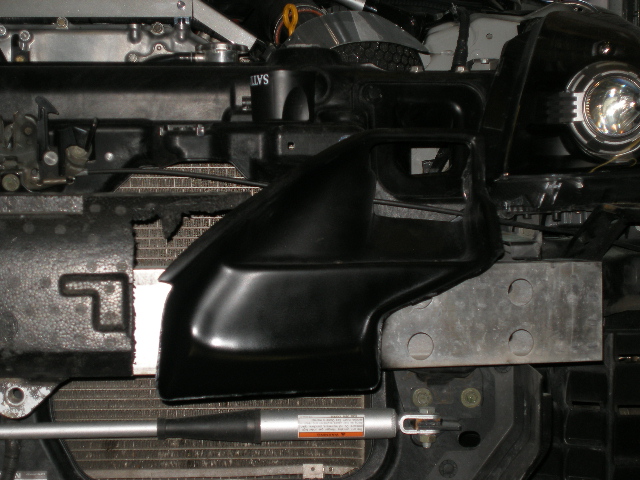
I would have been all set to basically get the ITB setup tuned, but I decided before we did, it would be a good time to do all those “little” things I had thought about. To me it’s forward thinking, to others, it’s alot of work for nothing. Either way, it’s being done. So, in preparation for possible ducting or even some sort of airbox at some point in the future (nothing is even remotely on the burner right now), I decided to swap to the 07 + radiator support. Pretty straightforward overall, though it does require you to either totally hack up the passenger side headlight bracket assembly, or, get one from an 07 + car. Mine should arrive here Monday, then we can at least get that part done.
Right now, you can just see the mess of parts scattered all over. I hate when it’s like this, but it’s the easiest way to do it and not loose your place when you’re going to be back on it in a couple days. Thank god I’ve got a shop I can do this at!


I’m also going to somehow get rid of that ugly front coolant hose that runs in front of the engine. I’m on the fence right now if I want to totally eliminate it, or, if I want to simply reroute it to make it prettier. I know alot of guys take this opportunity to get rid of all sorts of stuff, like the water cooled filter housing, etc. I really don’t want to tear the whole wrap around coolant line apart to do that, so I’m going to take a less hardcore approach to hopefully make it cleaner looking. If anyone’s got any ideas, let me know, as I’ve only just started thinking about it. I want to get that part done next week.
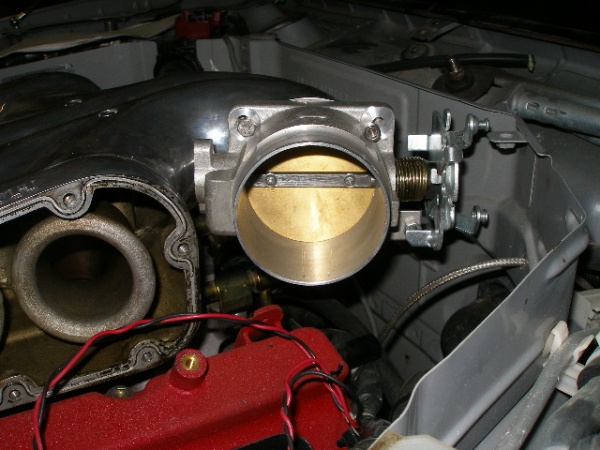
The ITB setup will be tuned soon I promise, and I’ll post the results here. To speed things up and get the car running asap, I decided to go with the cable throttle for right now. The DBW was totally workable, but it was going to take too long to make it all in a small enough package, since space is a premium in the engine bay. Gives me something I can toy around with next winter – can’t do everything on day 1, or else nothing tends to get done at all! The cool thing is we ended up fabbing a nice little bracket to handle the conversion to the cable, and the whole throttle cable is maybe 1.5 feet long total, from the bodies to the pedal. Throttle response is going to be insanely fast now, I can’t wait to try it!
making our own intake pipe to match. Not sure what filter I am doing yet. I’ll cross that bridge when I have to. I think I will probably have the Cosworth, the lower collector and the intake pipe all ceramic coated, just to give it all a uniform appearance, and help insulate against heat at the same time.
Interior wise, I hope to get the Rackpak cluster back in my hands soon. I am really looking forward to seeing how it turns out. In my head, it looks amazing, and with the quality of work our interior/stereo guru turns out, I am sure it will meet my expectations. I have not seen anyone fully replace the factory cluster yet with such a piece, except on full out race cars, so it will be cool to see how everything integrates. Thankfully the guy doing the tuning on my car also has alot of experience with these type of dash systems, so I think I’ll be in good hands getting it all setup.
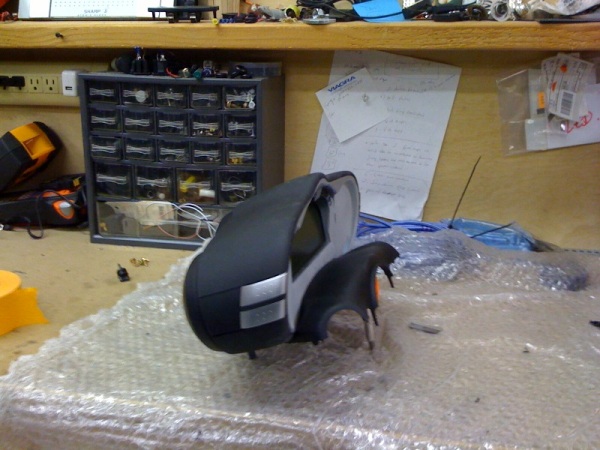
Edit – well, just got some pics of the dash
he rear! The 4.3 rear is finally coming together, and I hope to have it back here in the not-too-distant-future. Definitely a bastard child of a setup, as it’s a mix match of parts that were never designed to go together in the first place. I don’t see it being viable to “sell” as a setup, because the amount of labor is just insane, and you would really need a pretty high rpm engine to make it worthwhile. But, I’ll try to share some pics of the guts and post them on our blog so people can see what is involved in making it all come together. I’m going to be using a Quaife LSD on this setup, and the gears are being micropolished, and cryo’d, all near bearings/hardware throughout. Everything is also blueprinted as well. Should be a pretty trick setup I think.
new pic of the cluster progress…factory trim ring installed

the rear is finally almost done! I cannot wait to try this thing out .
I hopefully will have it in the car by next weekend
balancing session #1 result:

balancing session #2 result (all completed!)

The amount of work this requires is insane…I just hope it is worth it
For those curious about the inner workings of a Quaife LSD

Intake is all fabbed up – took all of about 20 mins to be honest, nothing special . This week I’ll get the plenum cleaned up and off to get coated, along with the intake pipe and lower collector. Then we can install it all back together, and finally get her tuned!
the cluster is in the car finally!!!

The hood is finally back on the car now. I am very happy with how it turned out, after alot of time spent doing it. Just need to do some final polishing and finish adjusting the hood stops and respray the mesh black. This picture sucks, but it was late last night and I didn’t feel like finding the perfect exposure
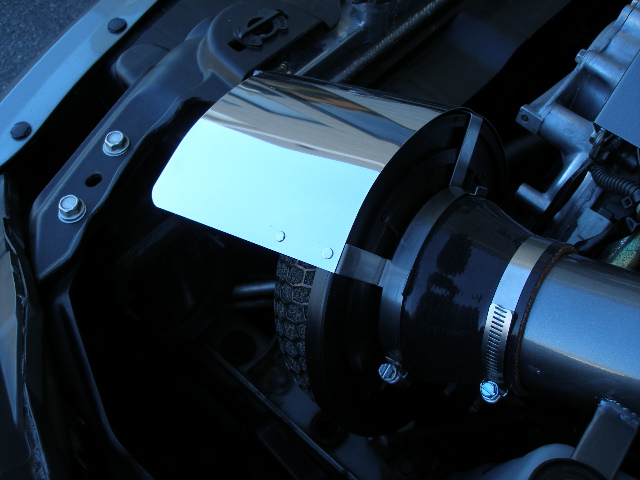
V2 duct
HKS 200mm filter
some metal heatshield thing I found on ebay for $20


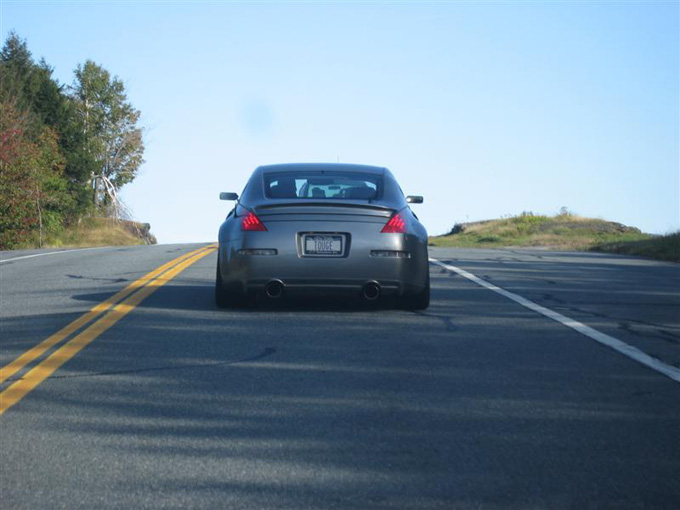
I So Love This Car!!!! I Would Kill For This Car!
Hey, I really like your setup. I’ve been wanting to do a NA setup on my z for some time now. I finally have the funding to do it! I was curious though… How much did the project cost? None of the aesthetics, just performance and suspension-wise. I have always liked to be a sleeper cell type of driver, hehe. If you have an estimate it would be great. Thanks again!