Authentic RHD Honda Prelude Build
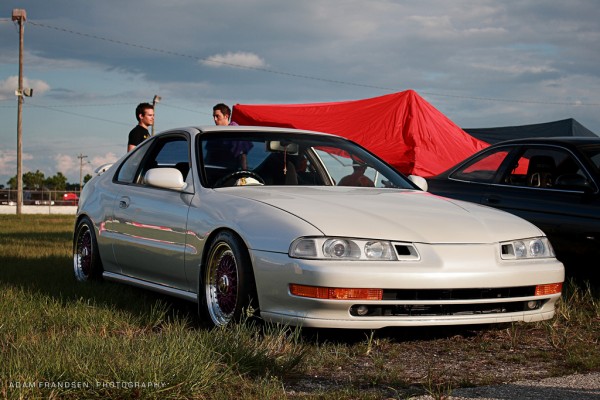
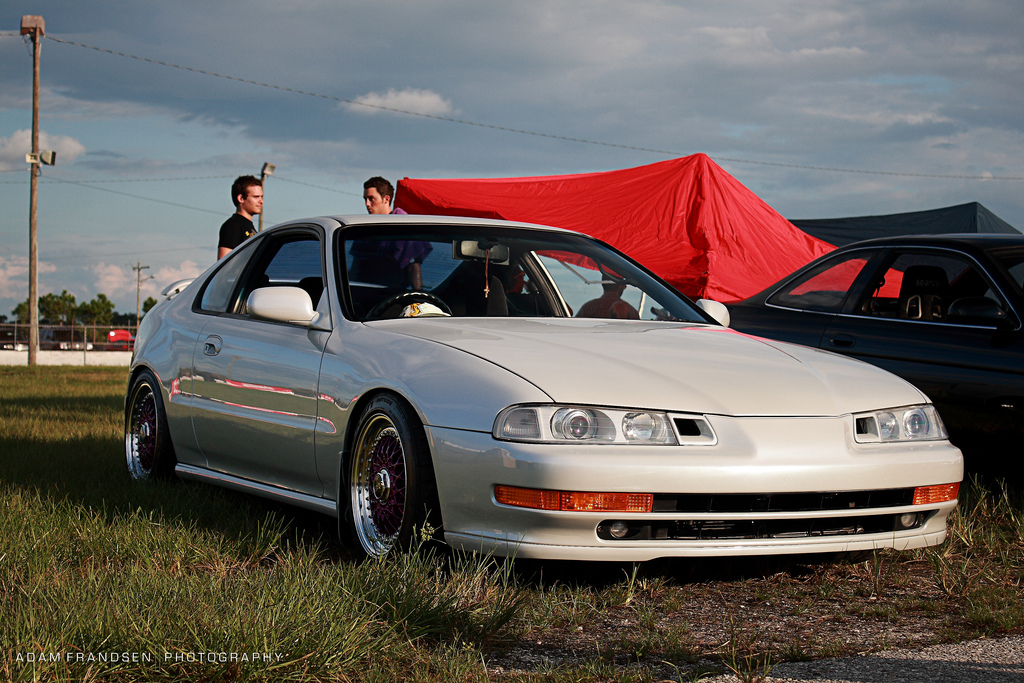
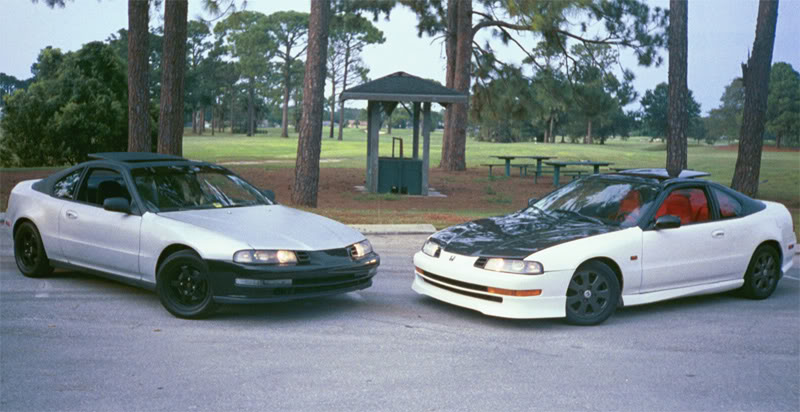
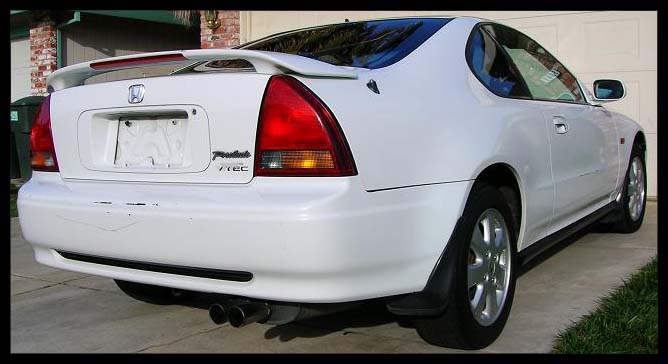
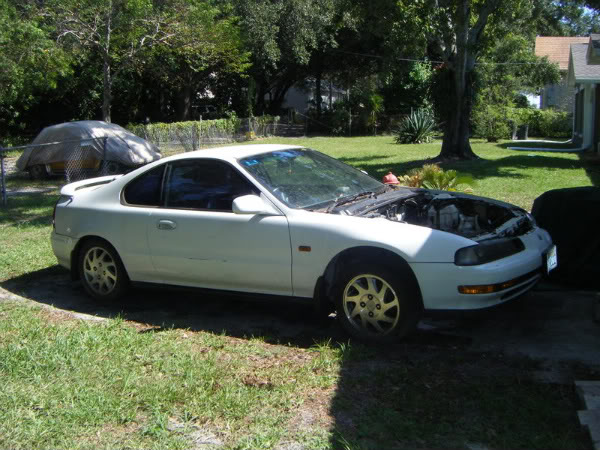
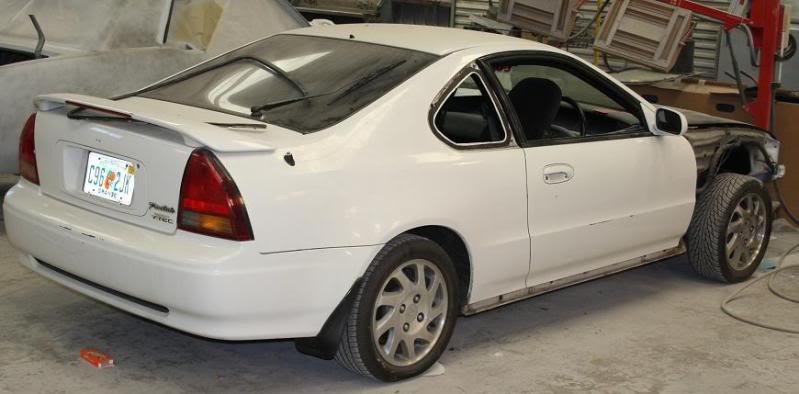
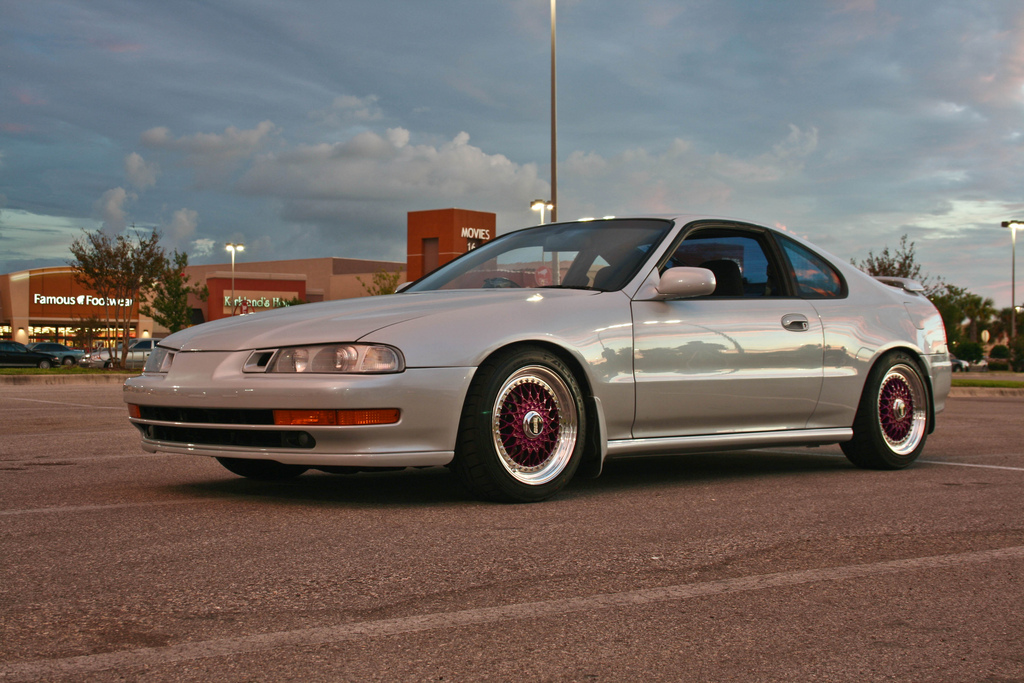
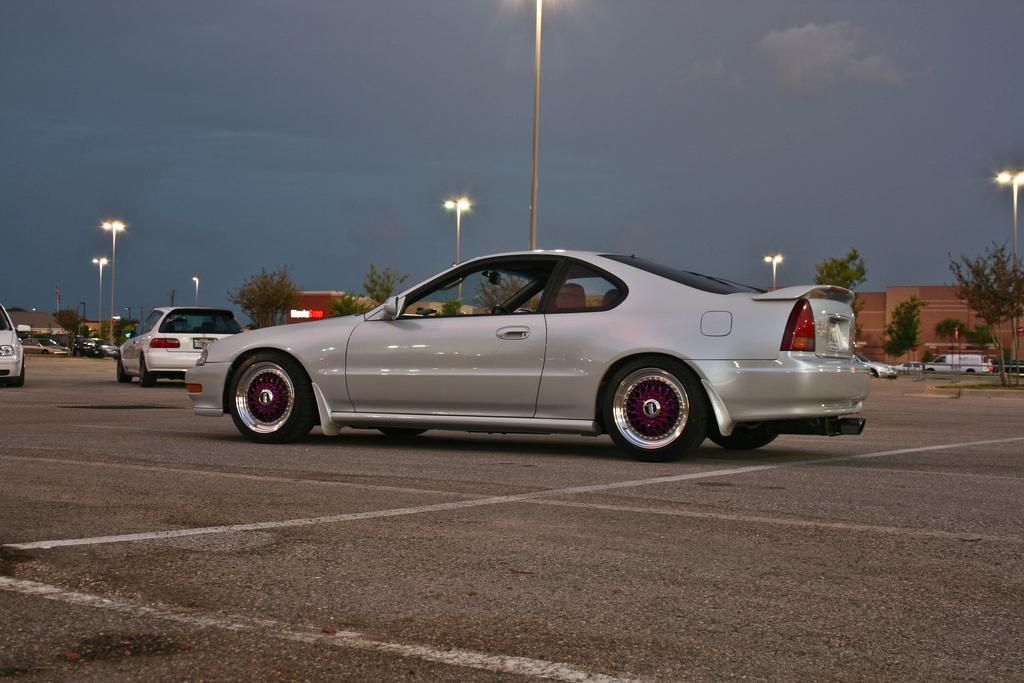
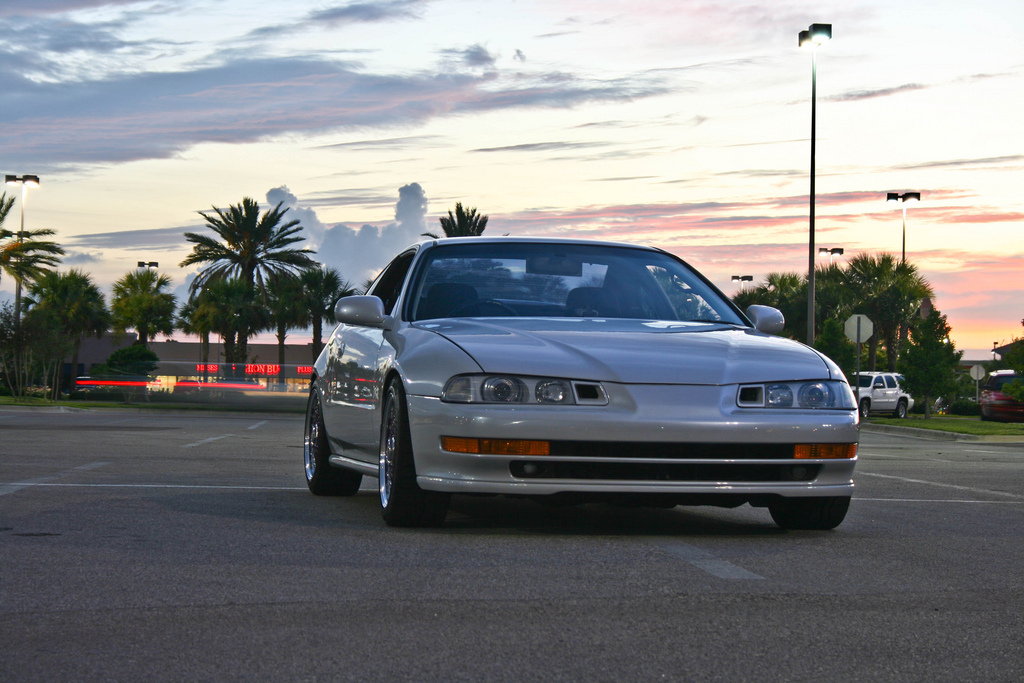
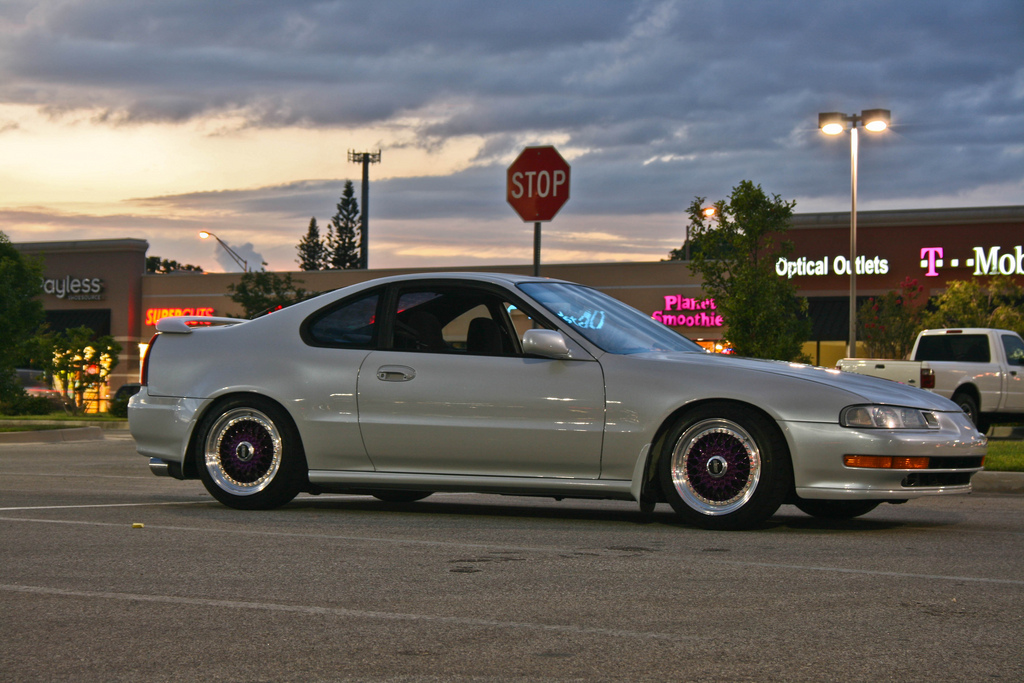
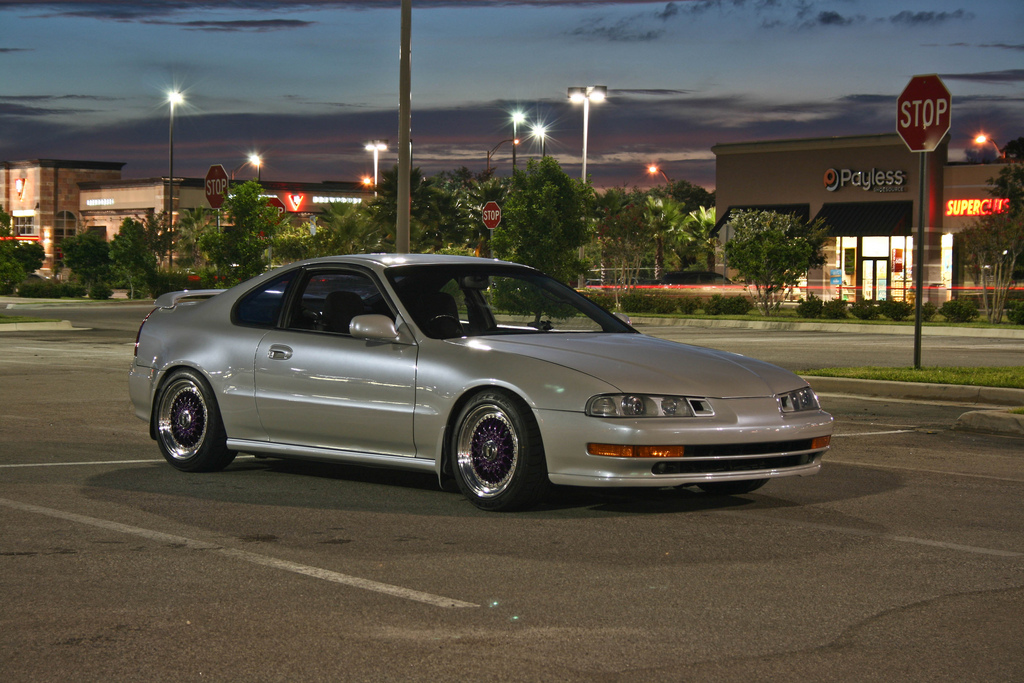
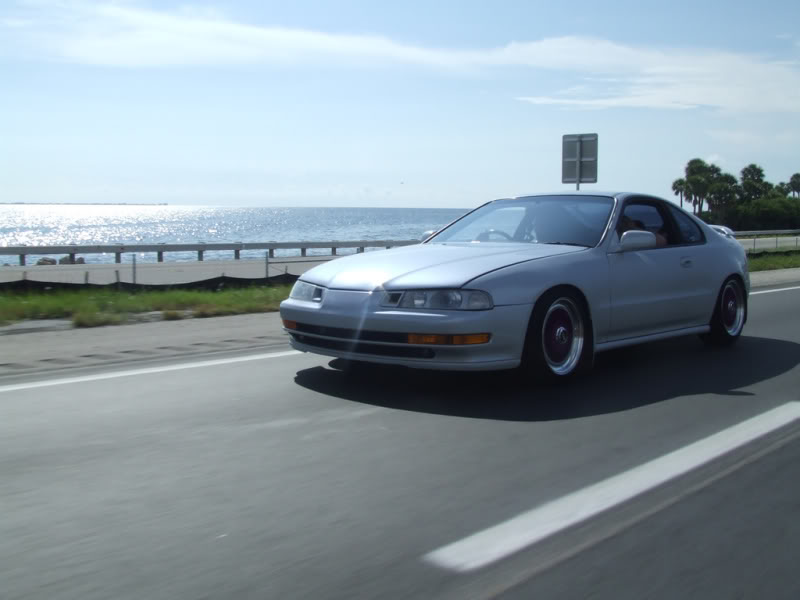
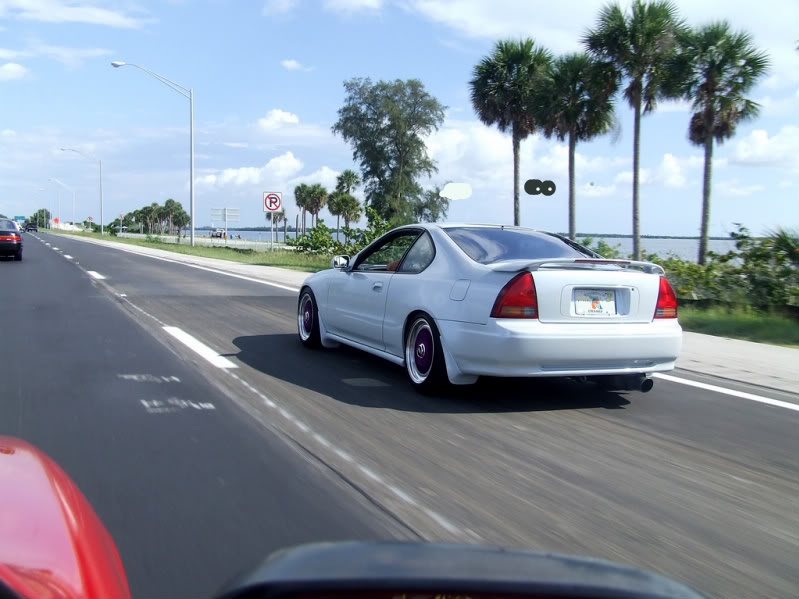
I started off with a 93 prelude s model (the silver one, that is how it looked after i sold it to my friend)… got a mugen bumper and side skirts along with a few other minor mods and then ran it into a concrete barricade. a buddy of mine bought it from me for cheap in college and i picked up another 93 prelude s (the white one). i moved to california from florida and sold it before the move.
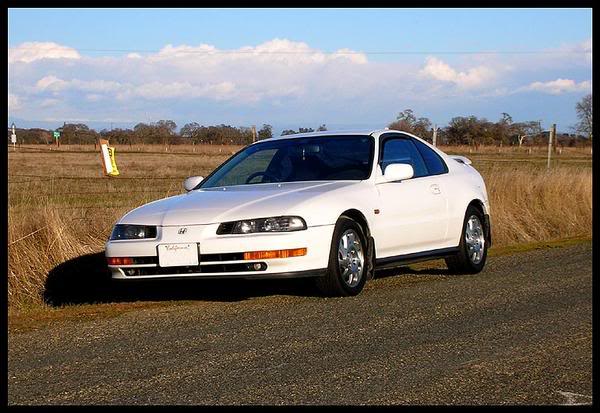
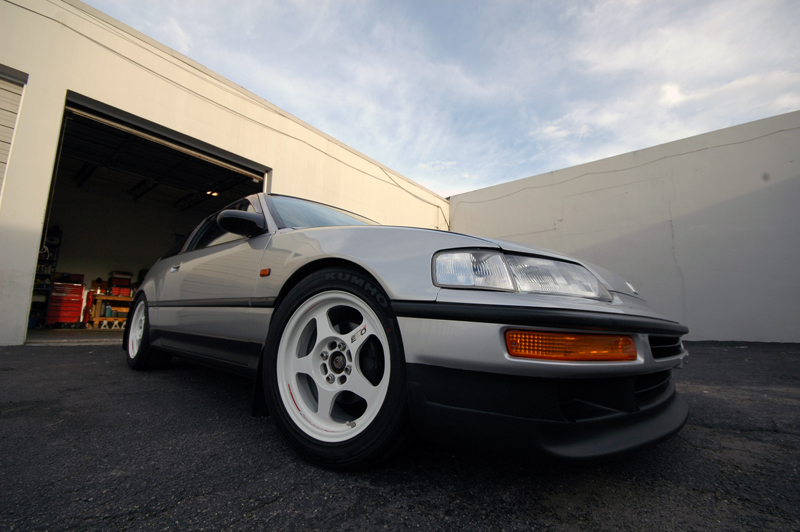
moving on…. while in california i was fortunate to find and purchase a 1994 honda prelude rhd imported from japan. i spent 8 months legalizing it in the state of california and then a few months later moved back to florida with it.
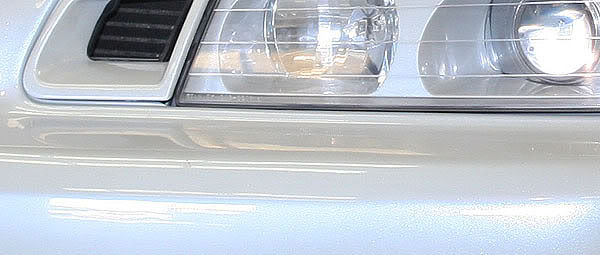
how it looked when i bought it (it was 100% stock besides a red top):

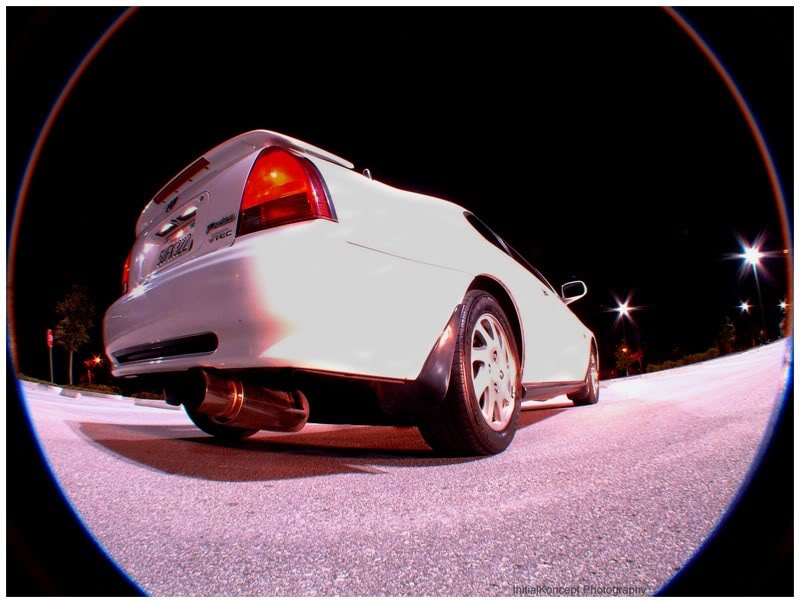
i did a few basic mods while in california (shocks and springs, black housings, amber corners, deck and components, alarm, aem cai, apex’i n1 cat back, magnaflow highflow):
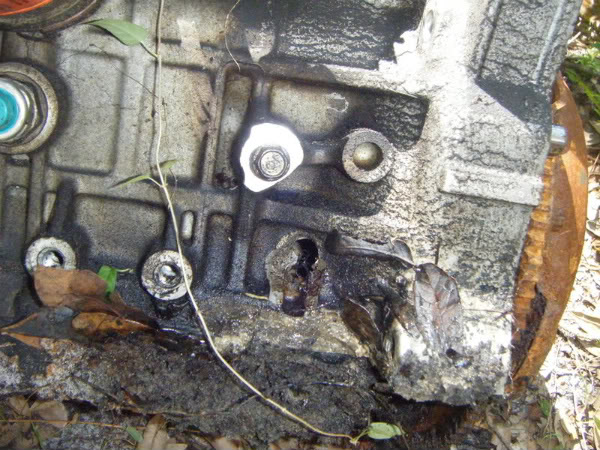
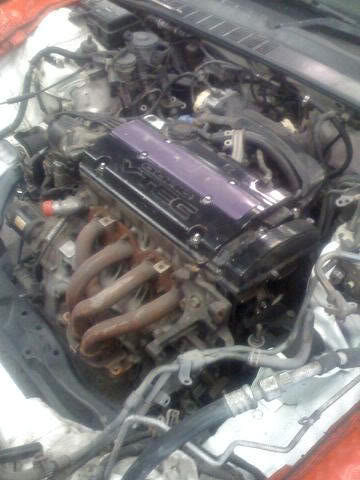
i get back to florida and 6 months later crank walk gets the best of my h22 and 2 quarter sized holes are knocked out of my block:
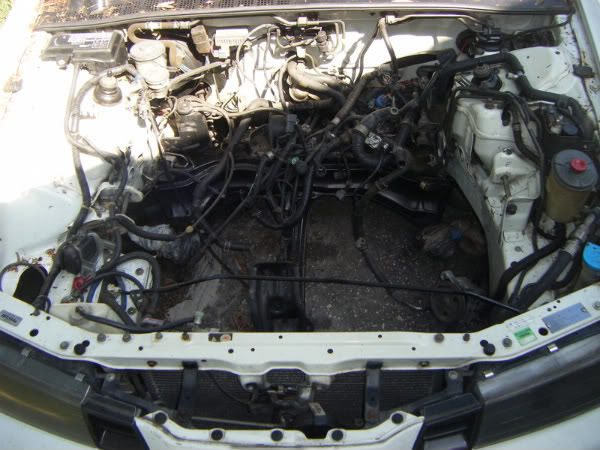
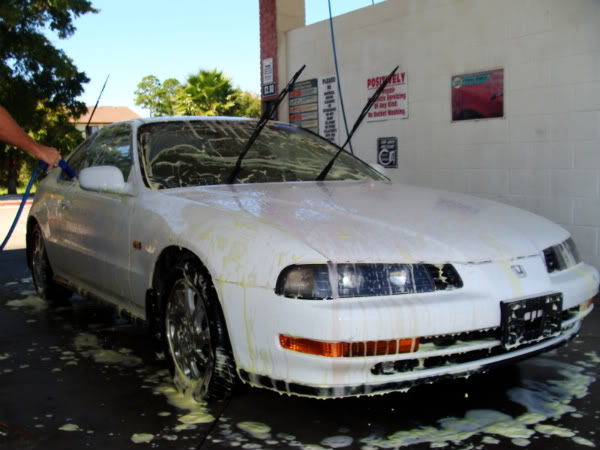
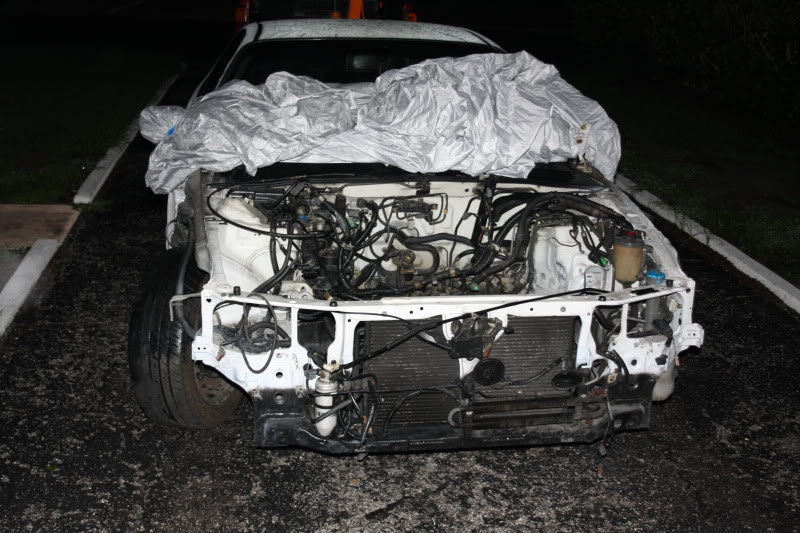
so i get another h22 from hmotors that was rebuilt by a buddy of mine and have it dropped in. i clean my car for 6 hours to get it ready for the JDM UPS meet in tampa and on my way there a guy cuts across 3 lanes of traffic and the lady in front of me slams on her brakes causing me to rear end her 
from this:
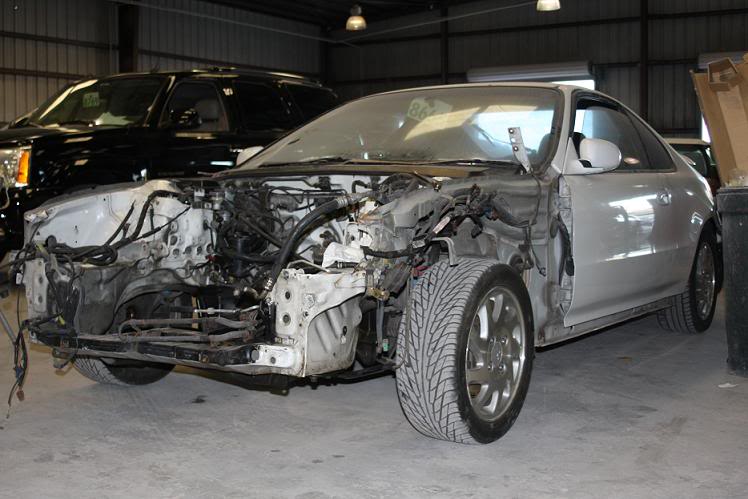
to this:
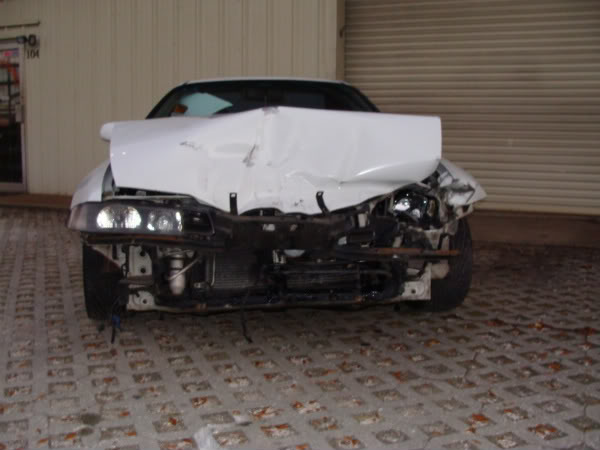
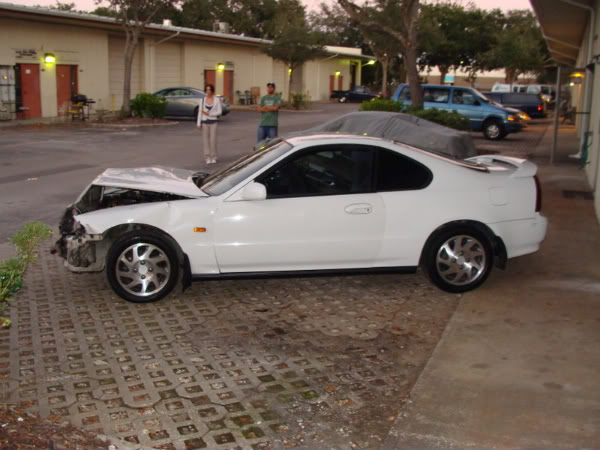
so after dealing with insurance and what not…. i managed to come out on top.
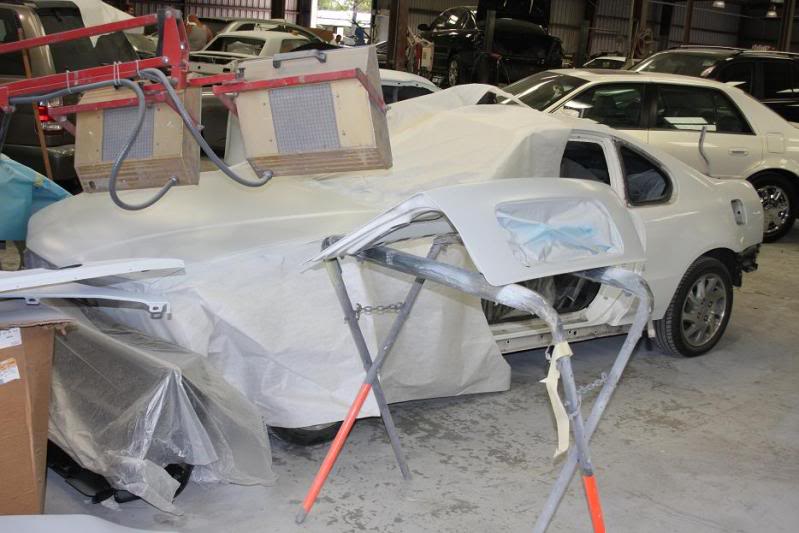
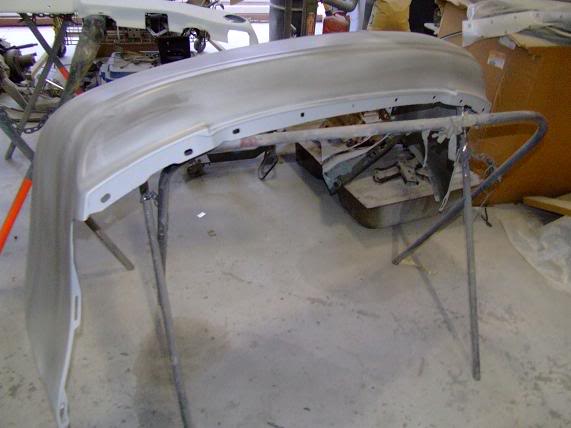
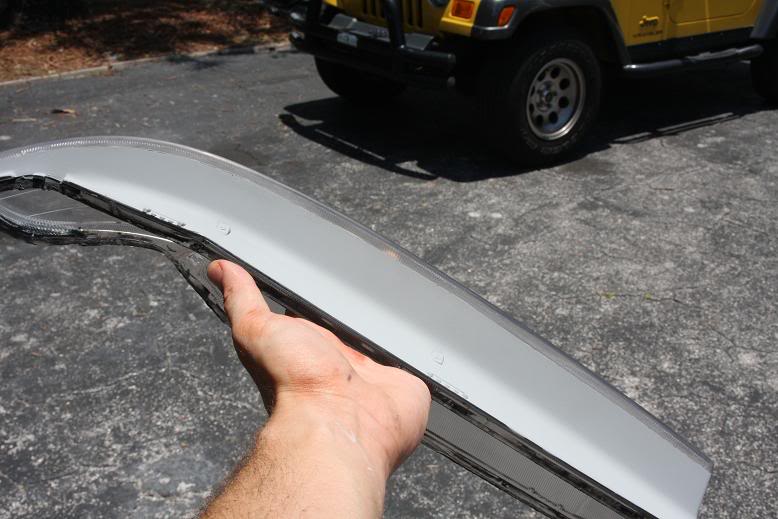
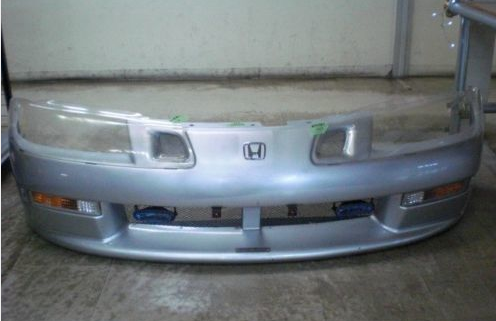
the car is getting fully repaired, new paint, and a bunch of new parts…i bought a front clip from the ****ers at royaljapanesemotors.com (dont EVER buy anything from them, they are horrible)!
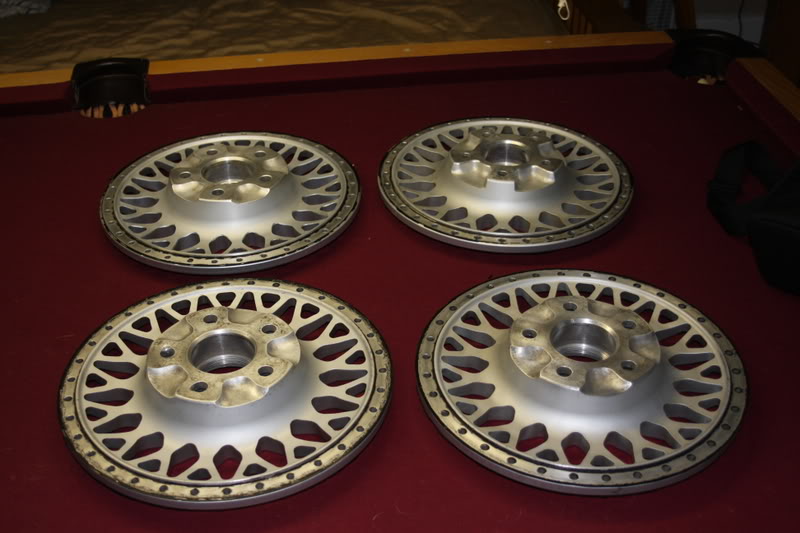
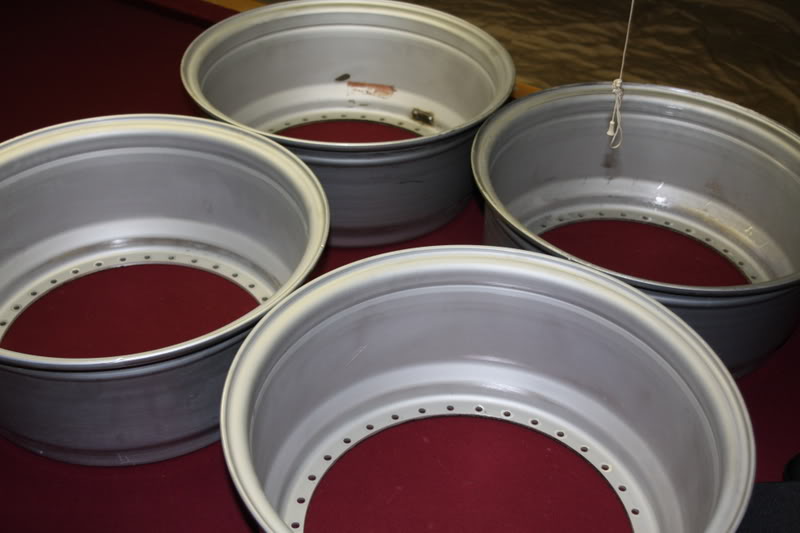
thanks to RB Motoring!
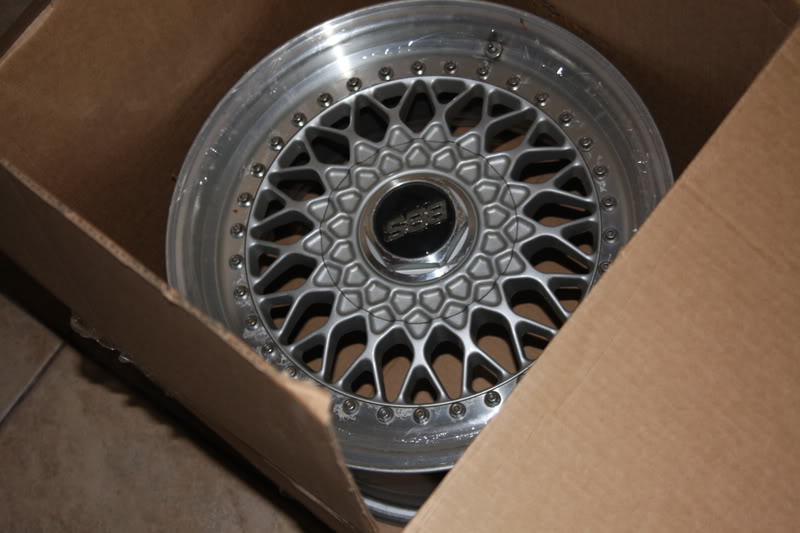
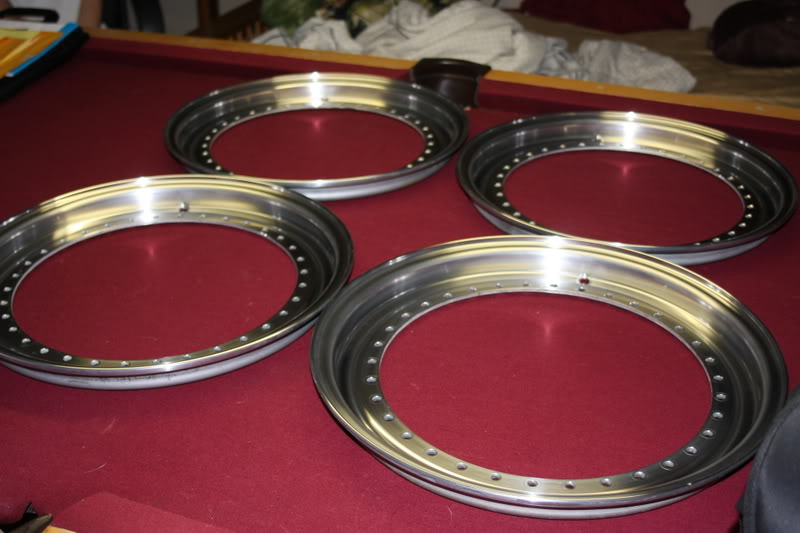
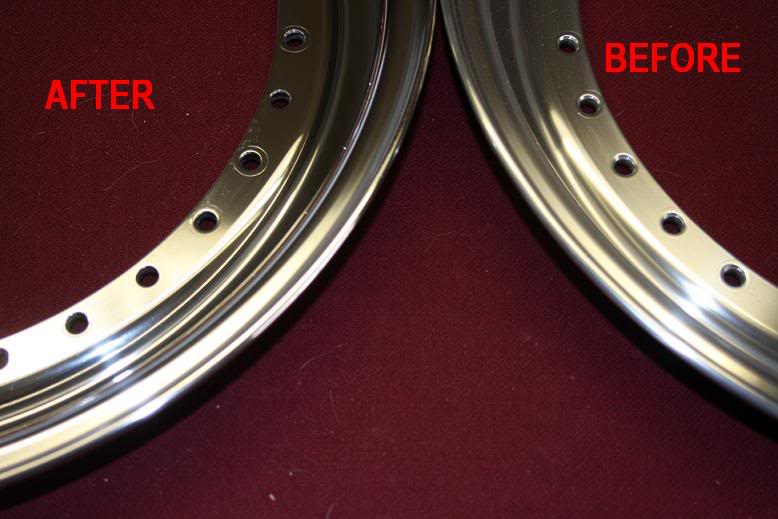
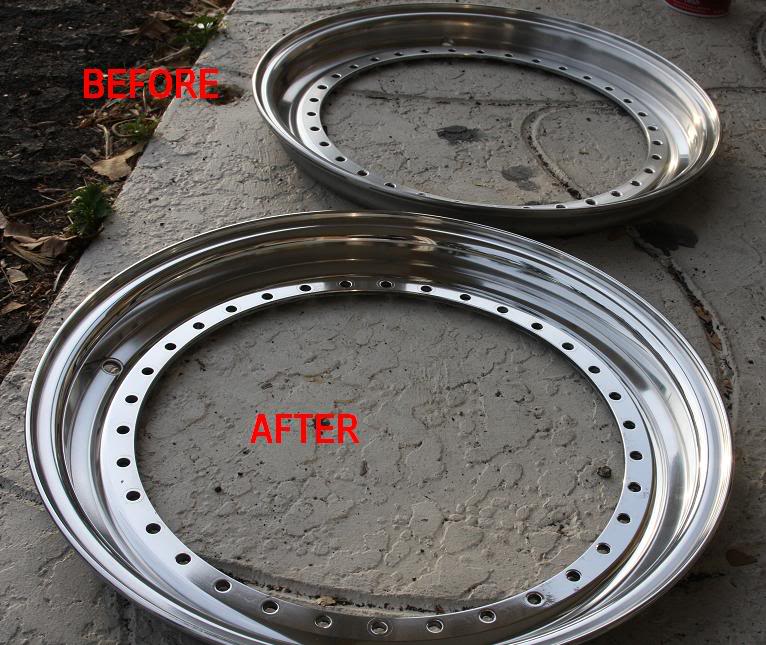
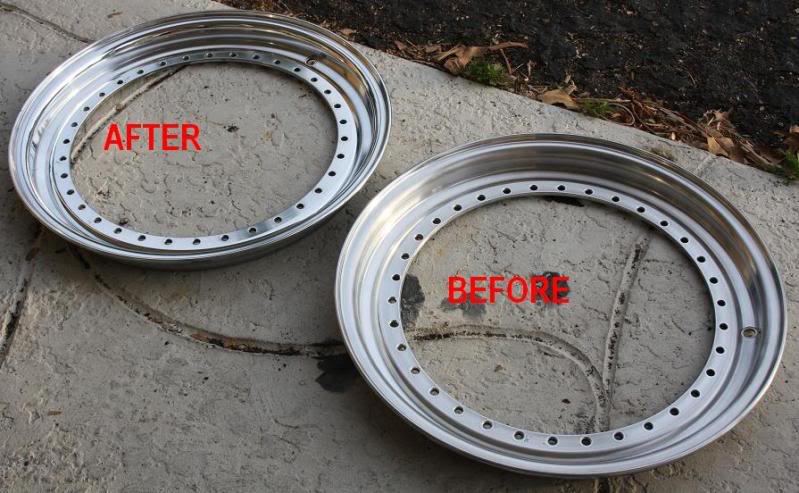
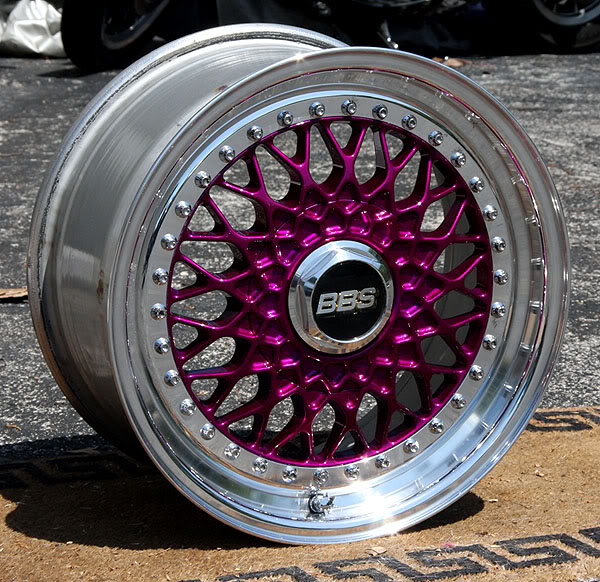
as you can see though they need a little bit of work, as expected.
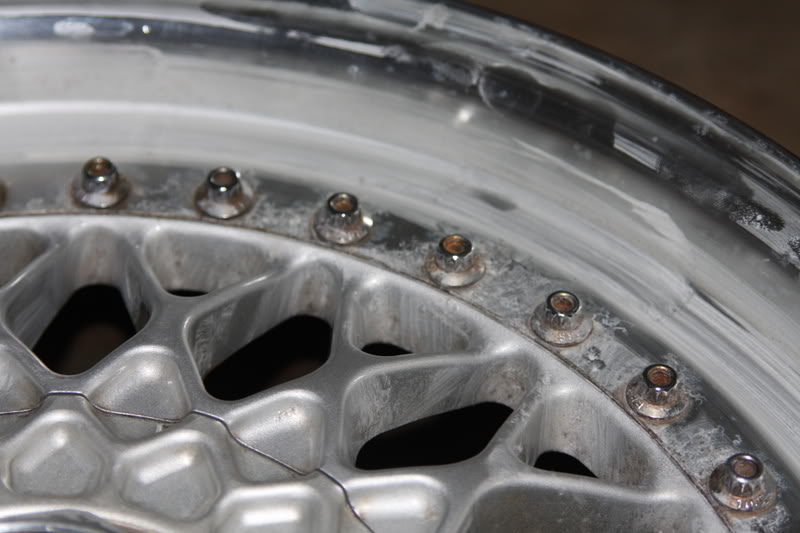
so i am refinishing them (taking them apart, refinishing the lips, powder coating, cleaning, etc…)
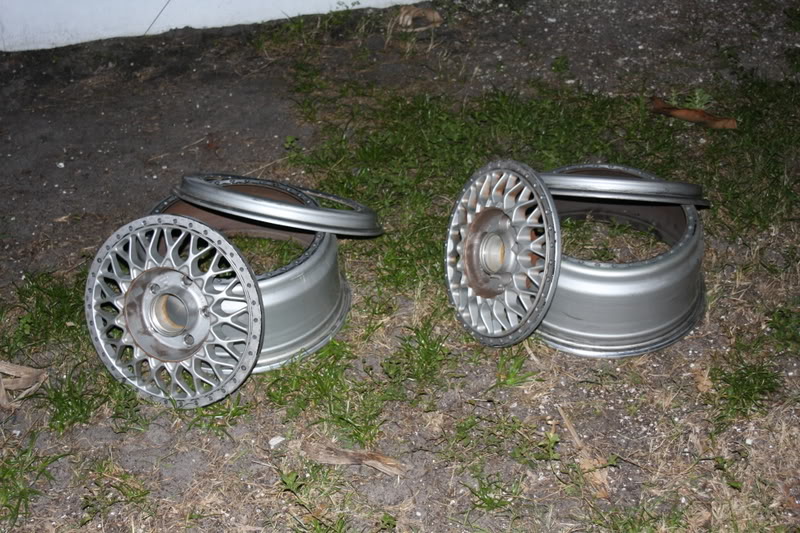
PS. i hate 3 piece wheels, they are a bitch.
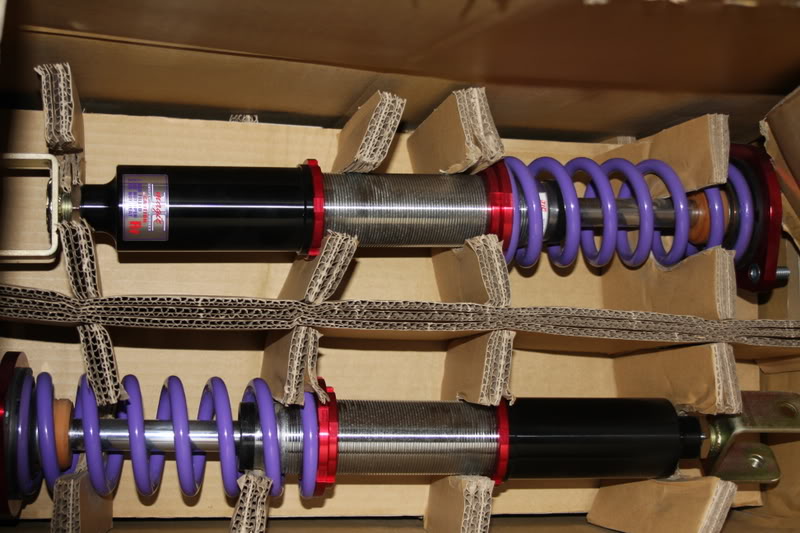
JIC Magics…
retrofit in progress.
this will look much better once its painted and in place of my destroyed stock hood
so my rims will fit on the car.
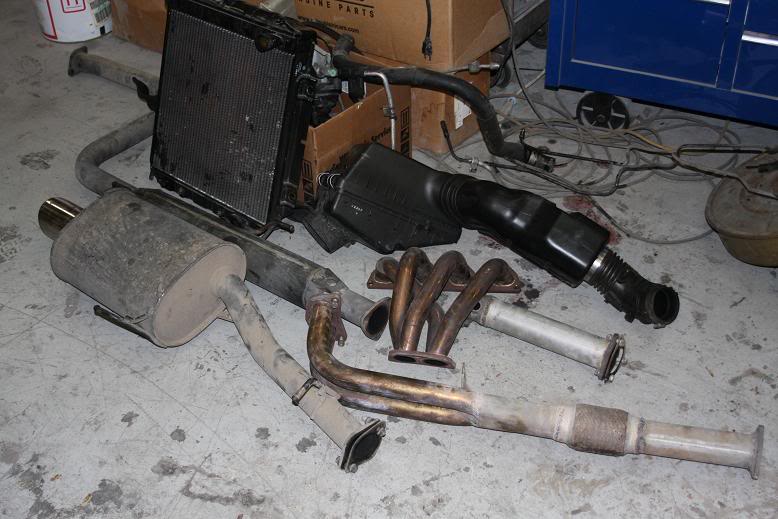
rsr ex mag, dc header w/ 2.5″ collector, test pipe, type s intake w/ k&n filter, 5 lug conversion
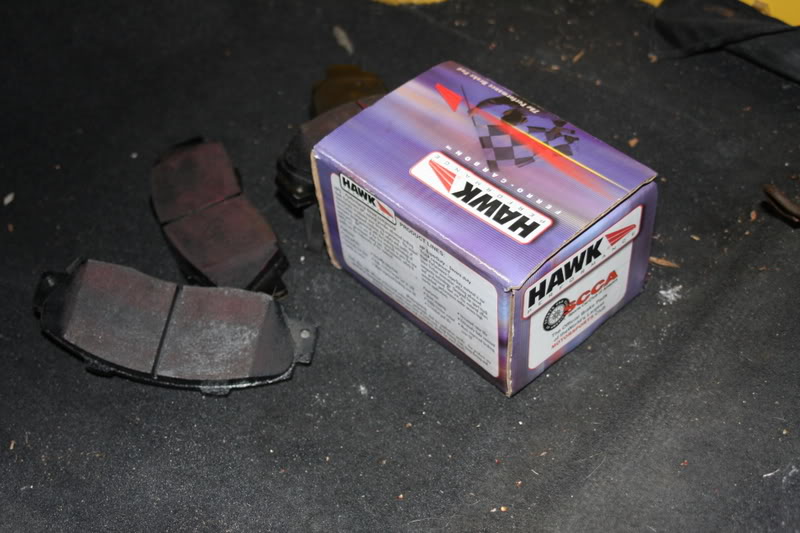
hawk pads.. the rest of the brake parts will be here soon (stainless steel lines and oem replacement rotors)
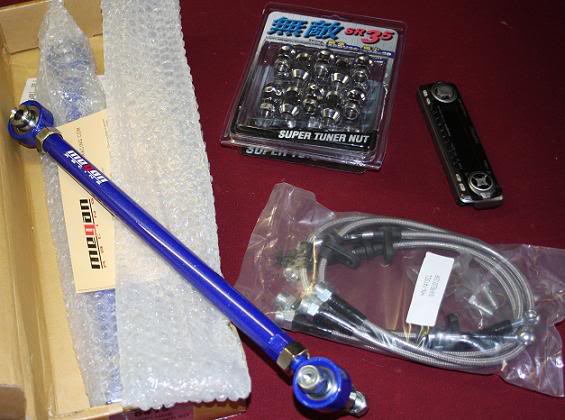
…. i have a few other random parts scattered around.
more parts to come (some are already shipped), including:
-extended studs
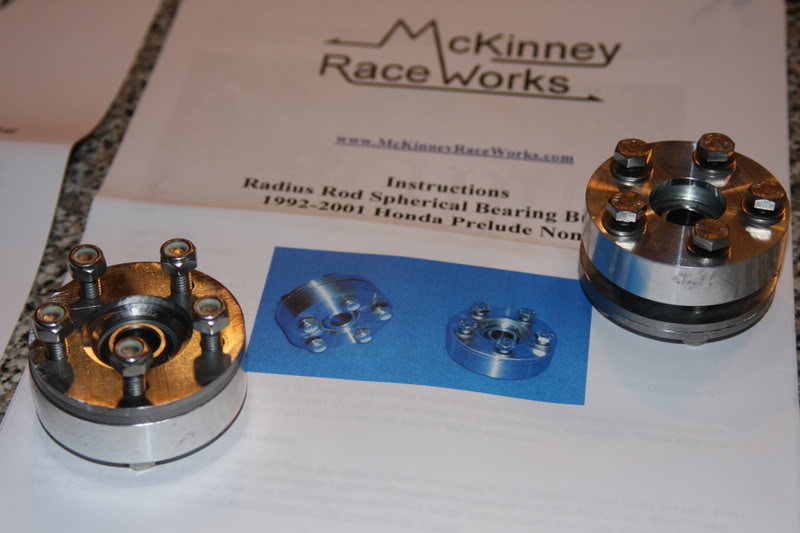
-race works radius rod spherical bearing bushing kit
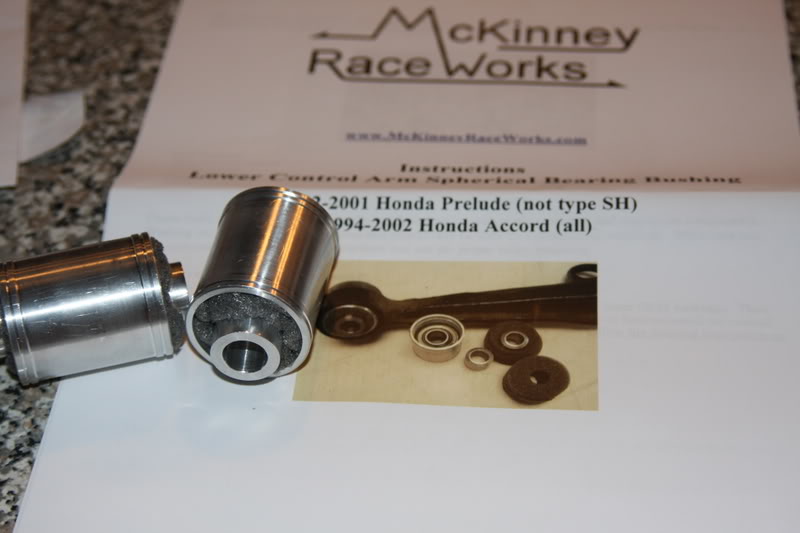
-race works LCA spherical bearing bushing kit
-lug nuts
-megan toe rods
-shrouds for retrofit
-Falken Azenis RT-615 (225-50-16)
-oem replacement rotors
-stainless steel f+r brake lines
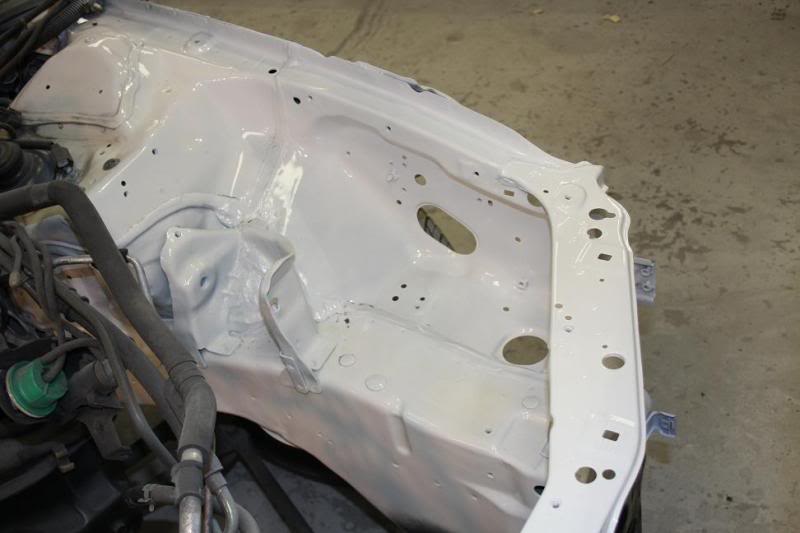
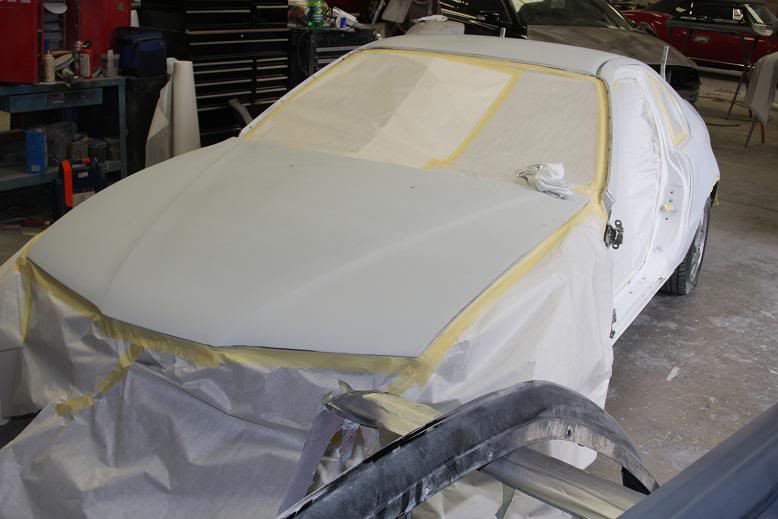
the car is in the shop now getting the new front end put on and a fresh coat of Lexus Glacier Frost Mica.
heading out to deals gap in June and before then i should have:
-Recaro seats
-harnesses
-OMP steering wheel
-NRG hub/quick release
-half cage
-roof rack (for bike and kayak)
ill post some pics after it gets out of the shop and as im installing all the new additions.
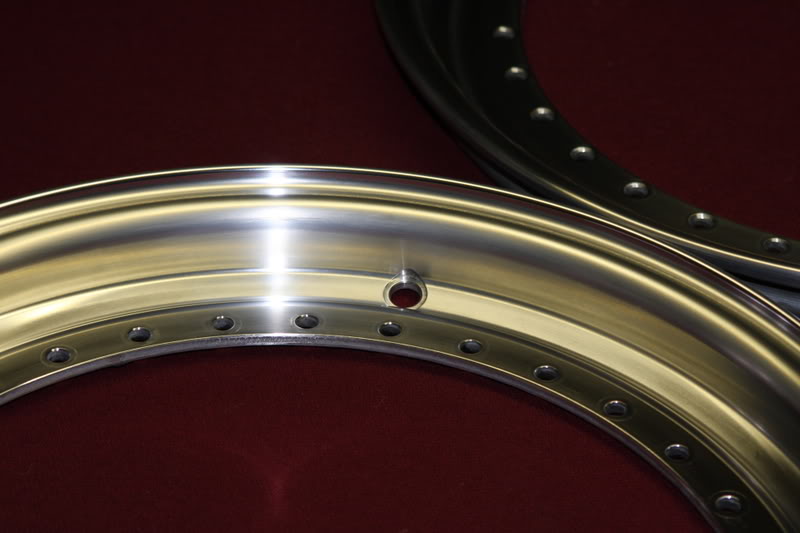
just got done stripping, sanding, and polishing the lips late last night!!!
LCA Spherical bushing kit:
and
Radius Rod spherical bushing kit:
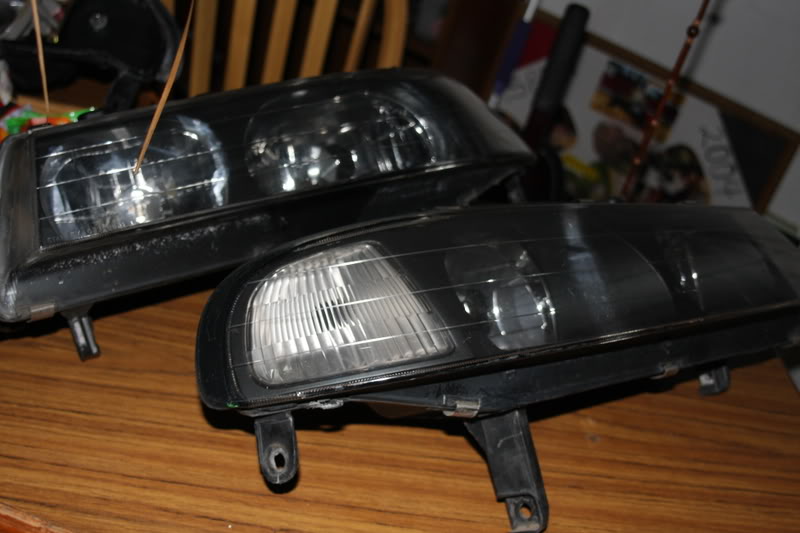
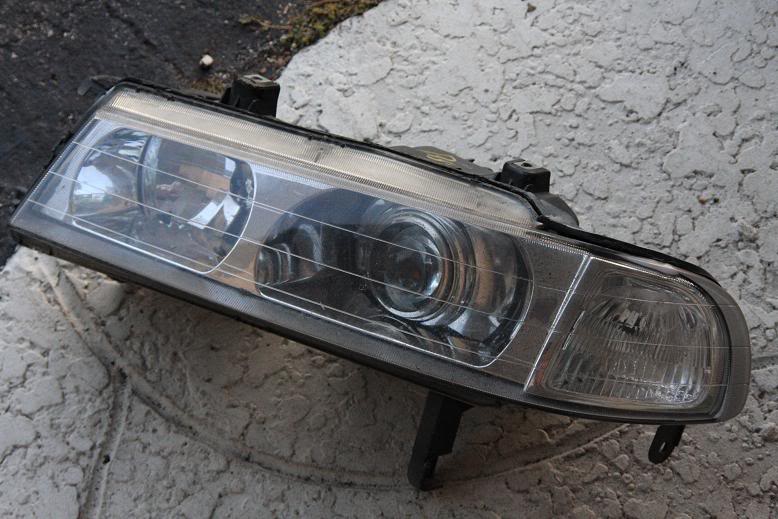
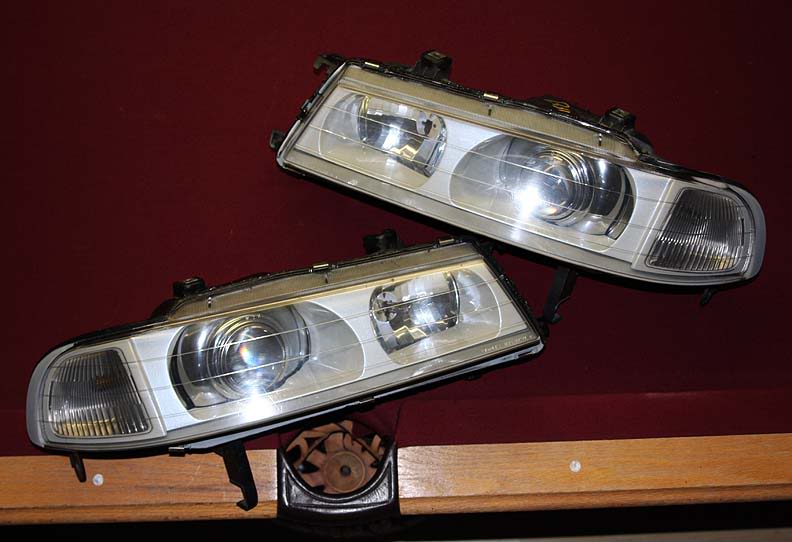
and i picked up another set of jdm black housing one pieces so i can finish my retro fit before i get my car back from the shop:
alright so i have an update:
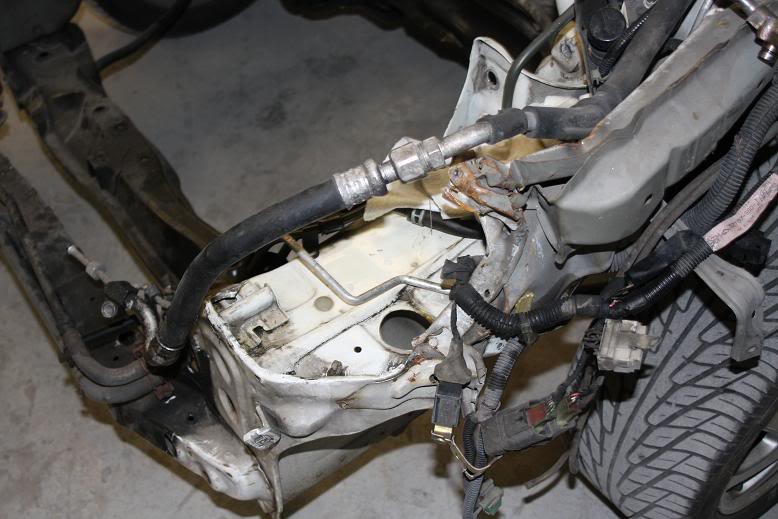
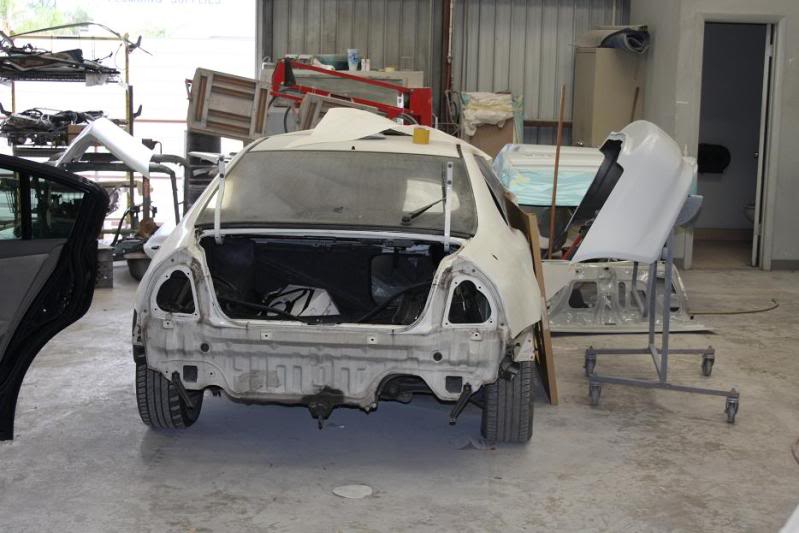
stopped by the shop and they have the front end apart and the motor out. the frame work and body work started this week.
the passenger side motor mount as pushed into the shock tower a bit.
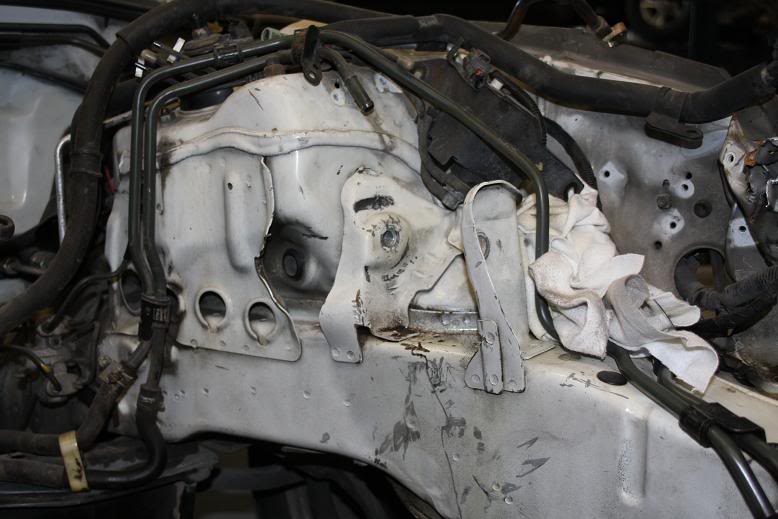
and the front corner and core support will be replaced
and i dropped off my new exhaust and intake
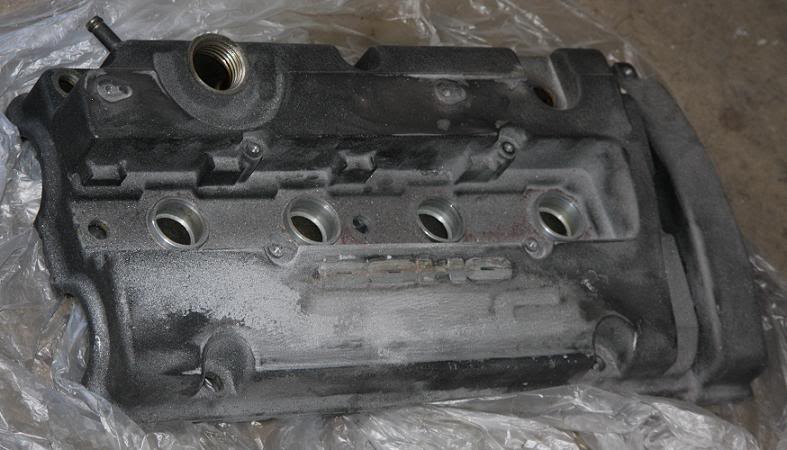
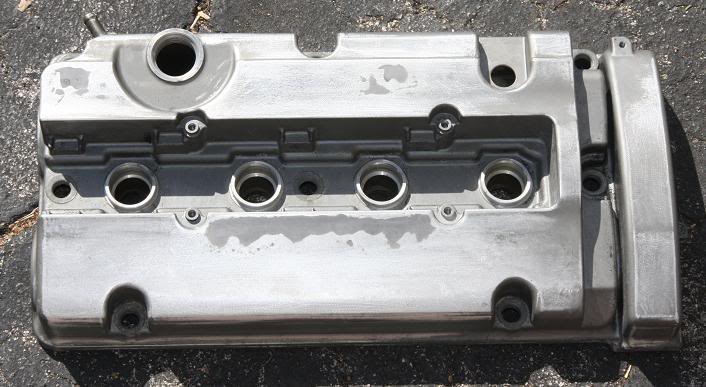
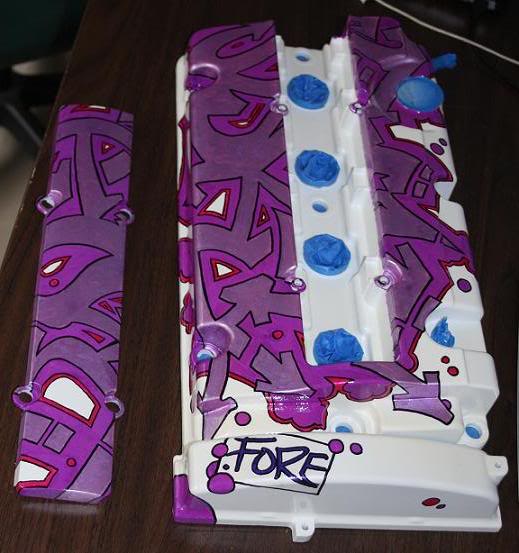
alright so to keep myself occupied i started on my valve cover.
started by shaving the raised “DOHC VTEC” and the raised bolt holes.
i stripped it down and put some JB weld to smooth a part out and fill the 2 bolt holes.
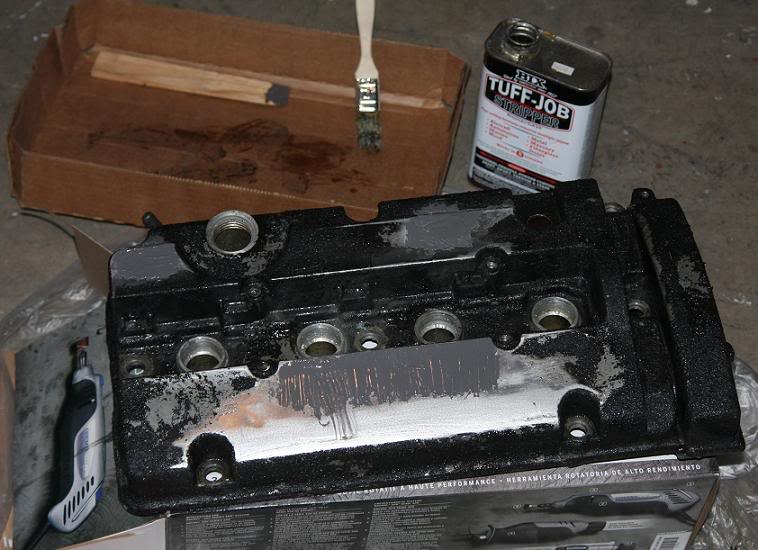
after the JB Weld was sanded and the VC was washed.
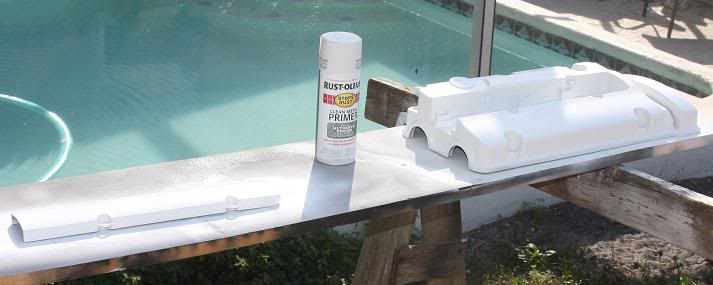
sanded off the H and honda writting on the wire cover

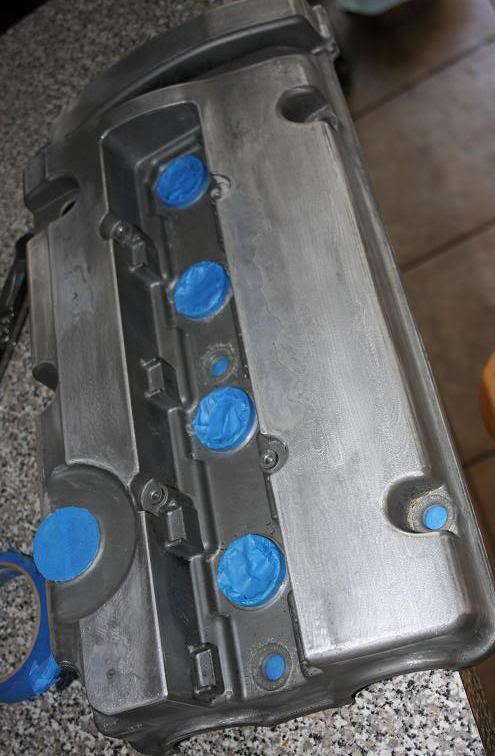
taped off
primed..
base and clear..
alright soooooo…….. i got a few goodies in the mail:
-my muteki chrome lug nuts
-megan rear toe arms
-pioneer deh-p6300
-stainless brakelines
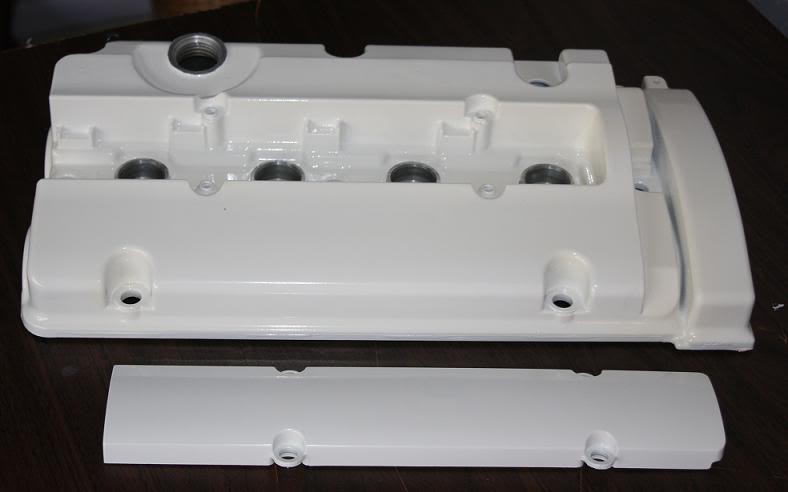
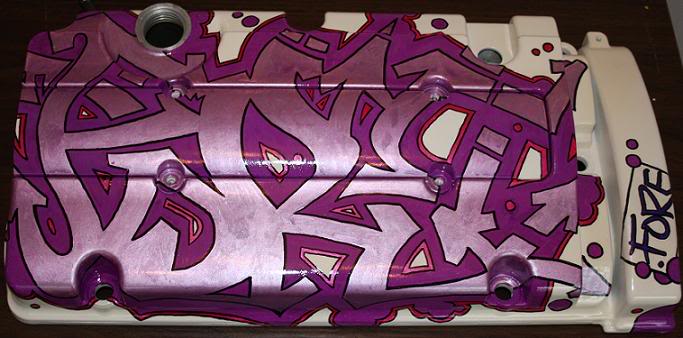
aaaaaaaannnnnd! i finished my valve cover. =]
before clear coat, just taped everything off
finished product:
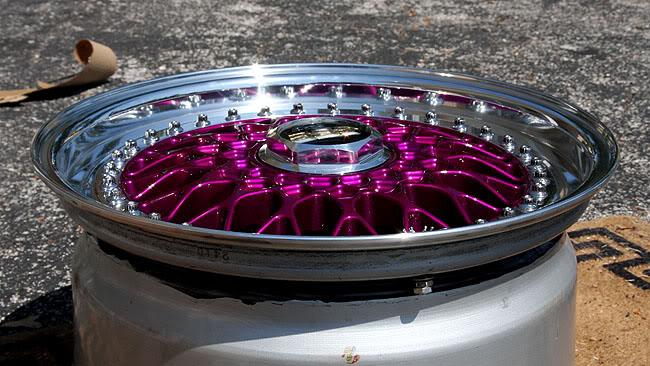
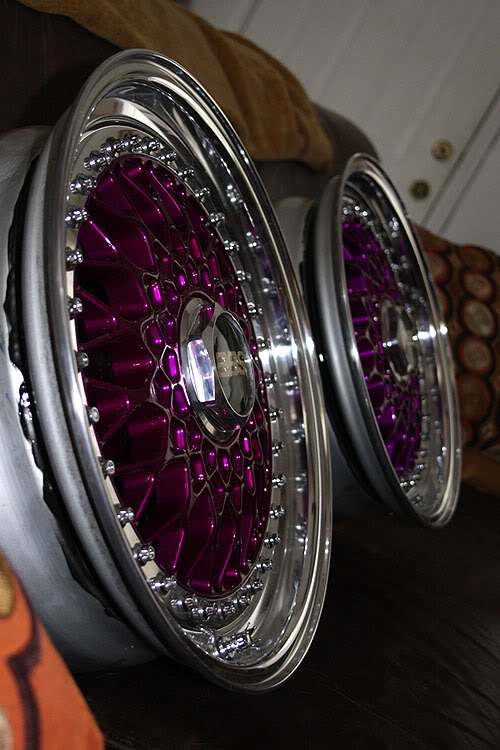
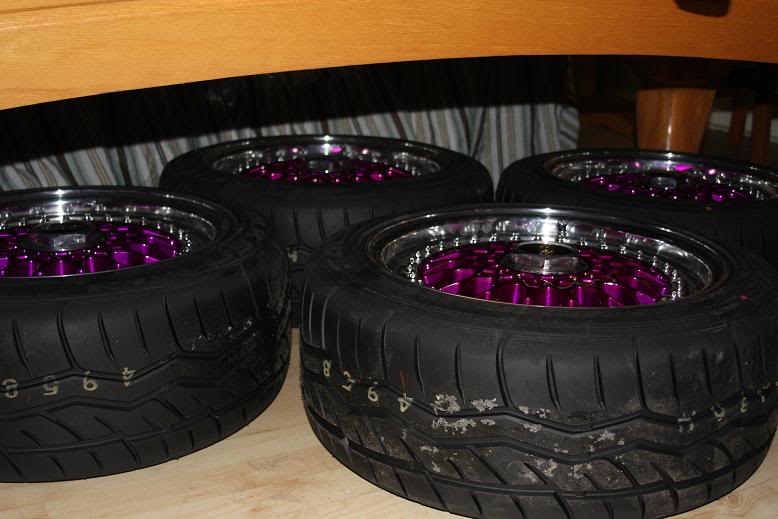
so i got a polishing bit for my dremel, a mothers polishing cone for my drill and some q-tips for the hard to reach spots and i went to town on my lips and bolts for my wheels.
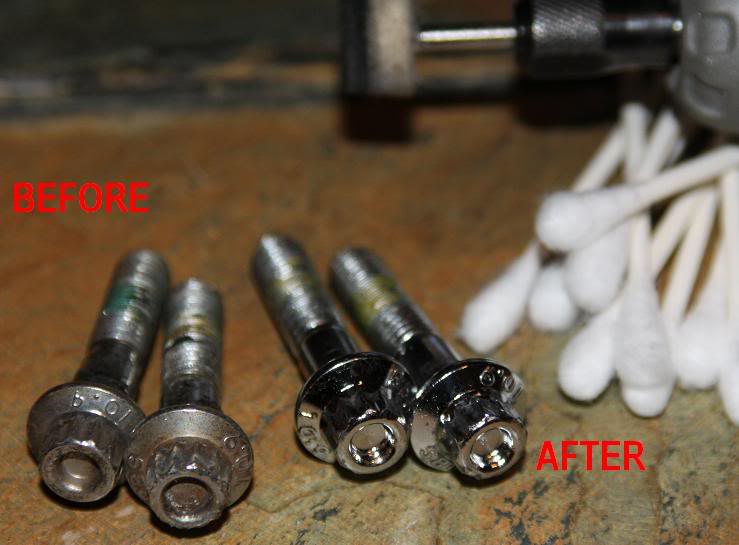
i finished 2 lips and 22 bolts.
only 2 lips, 114 bolts, and 4 center caps to go…. i hate polishing!!!!!!!!
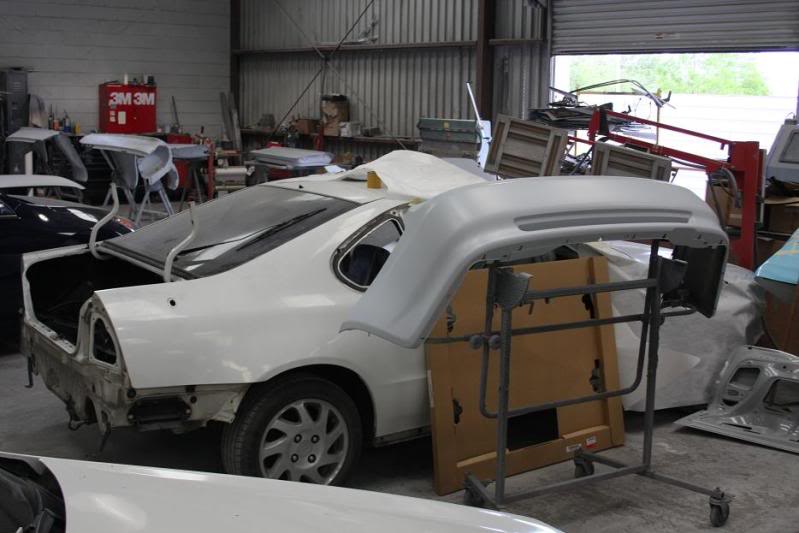
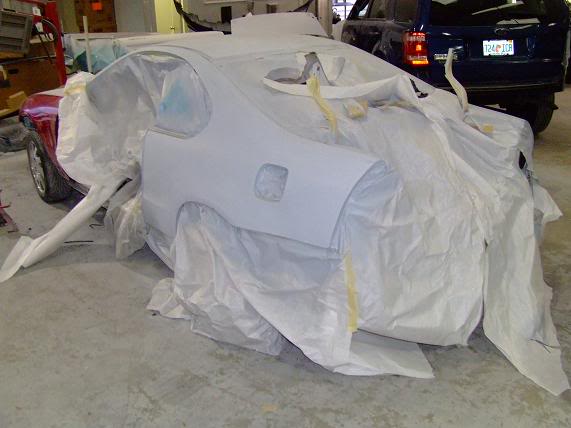
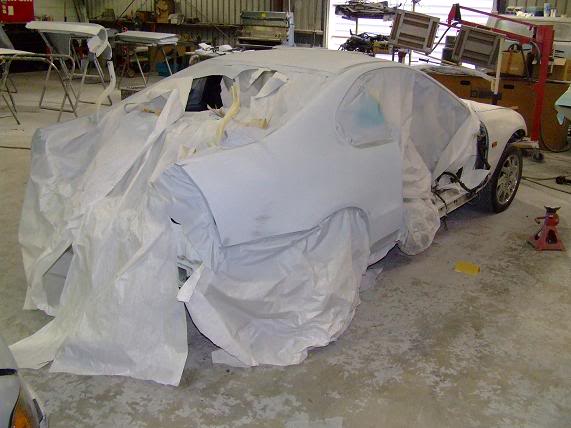
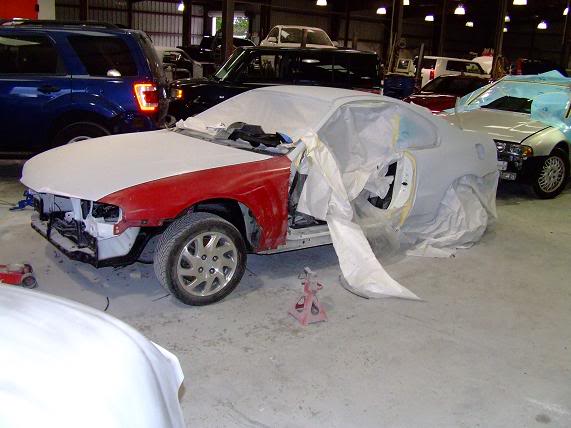
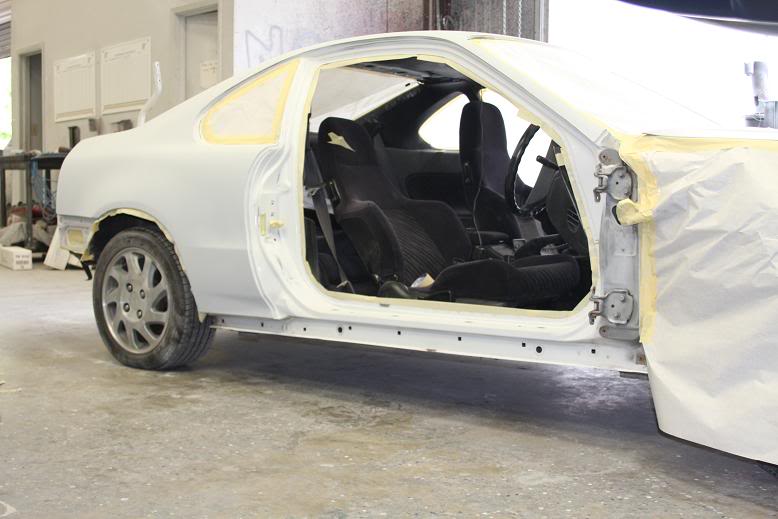
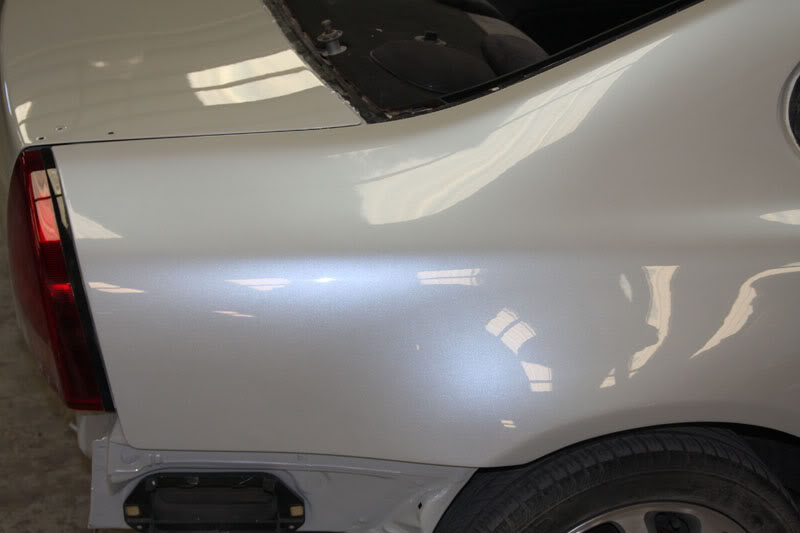
so these pics are frmo a little over a week ago. the car is being stripped down for paint work..
damage fixed 
good as new
more updates after i finish putting the wheels together this weekend and next week with more paint prep and body work.
alright so here are the updates from the shop today when i dropped off the last of the parts:
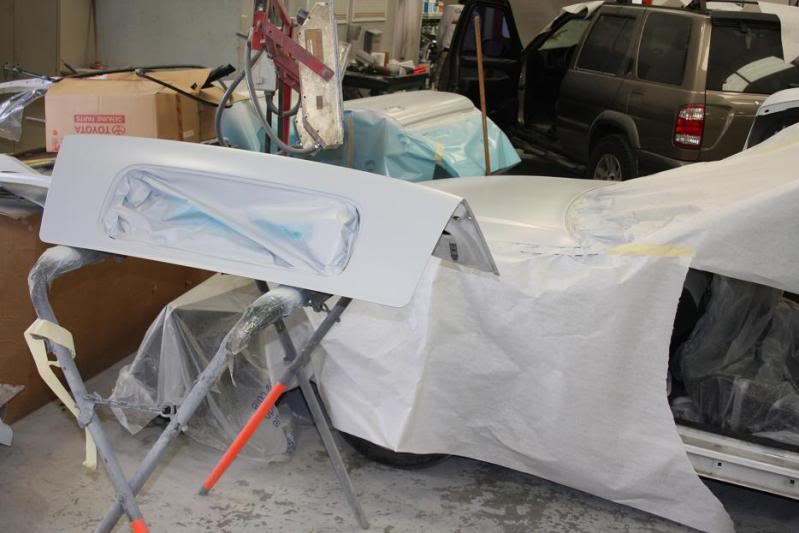
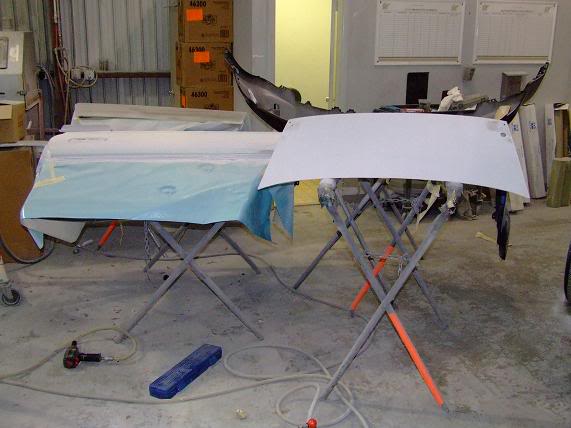
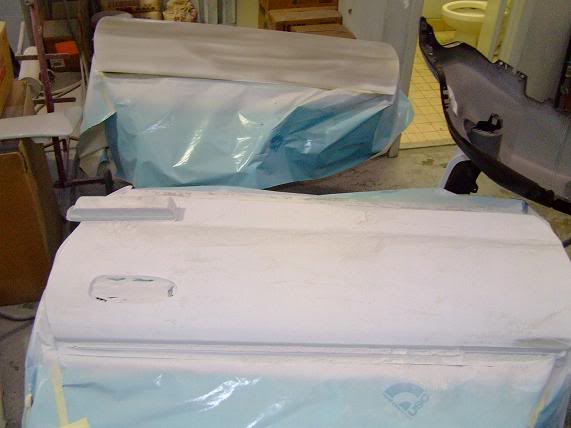
door are about 90% ready for paint… dents and scratches removed and a few coats of primer are on.
rear bumper is almost there too.
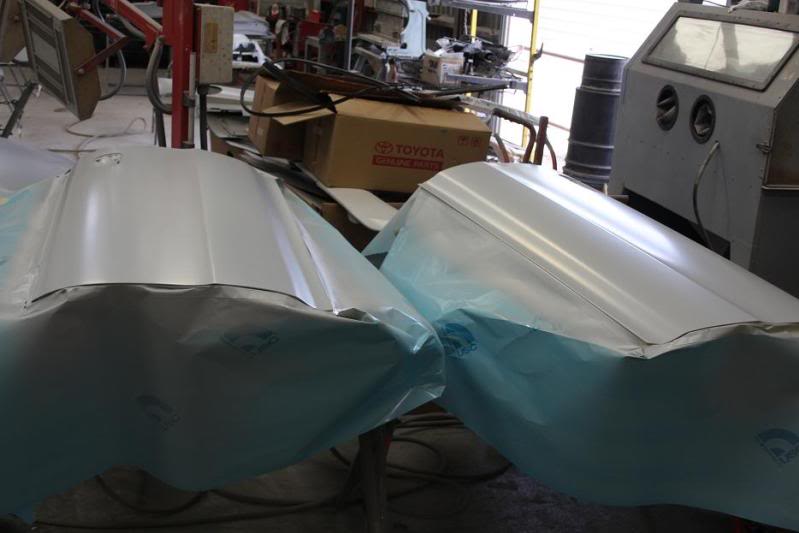
trunk and spoiler are prepped. just needing final sanding.
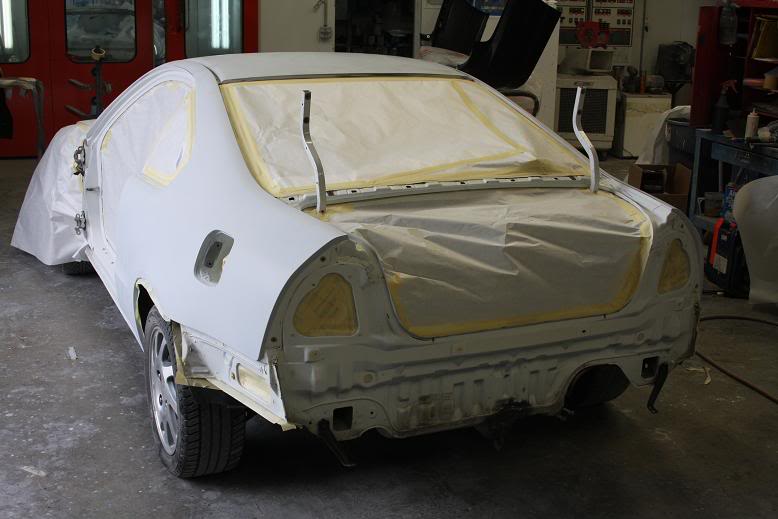
rear quarter panels and roof are next in line

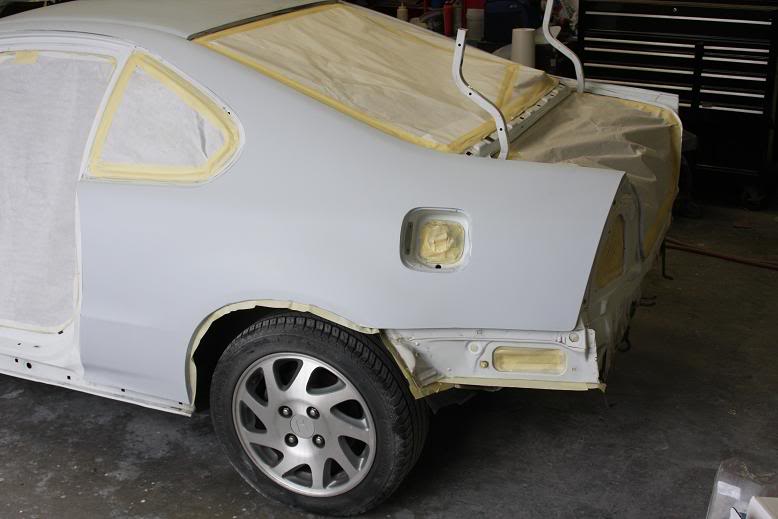
but here is a preview of the rolled rear quarters
carbon hood is ready for final sand before paint.
everything has been stripped.
alright so im still waiting on the shop to call me up to come roll the front fenders. i talked to the owner he said everything but the fenders are ready for paint.
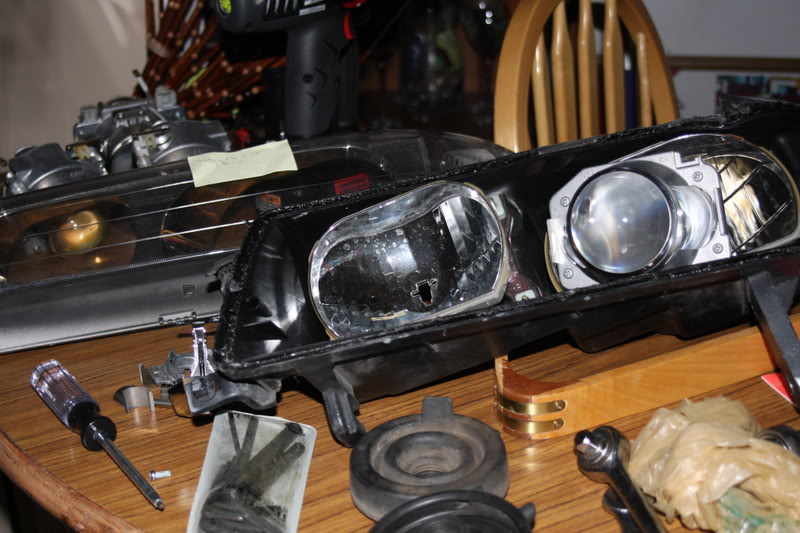
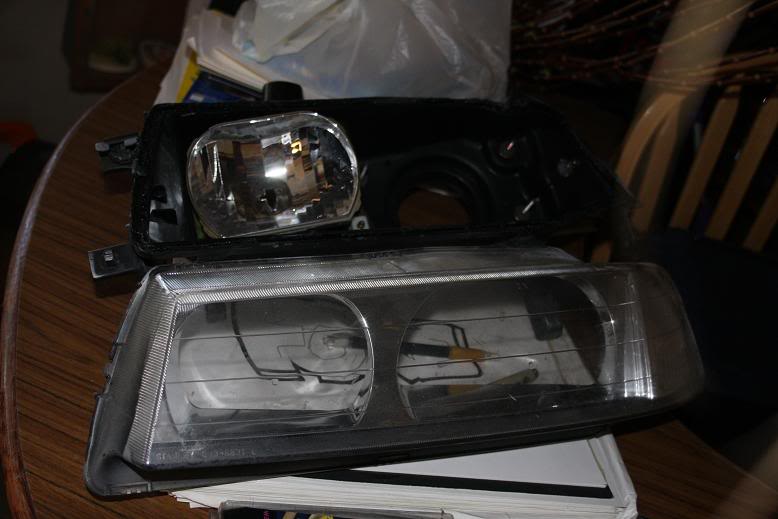
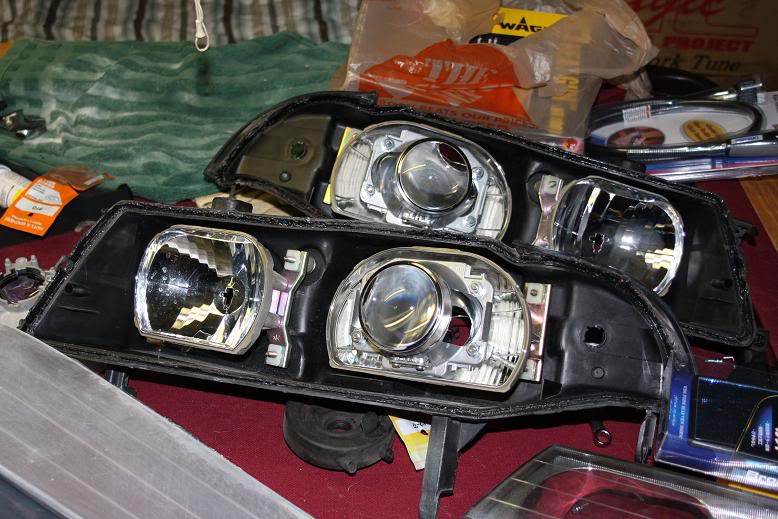
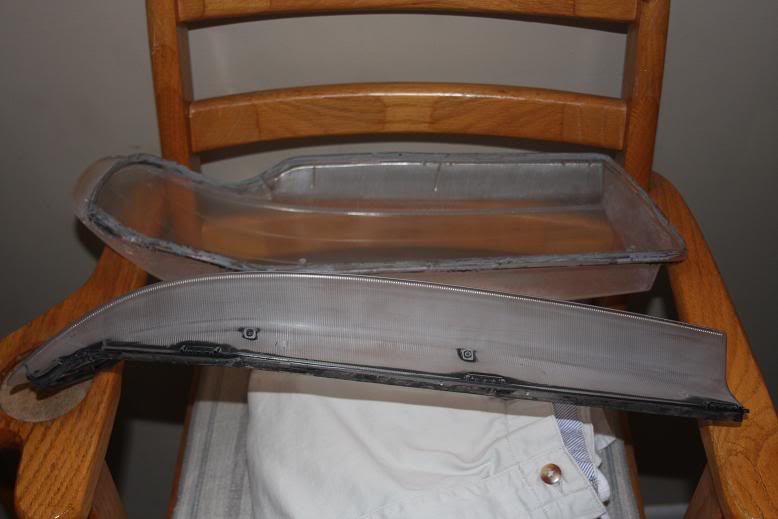
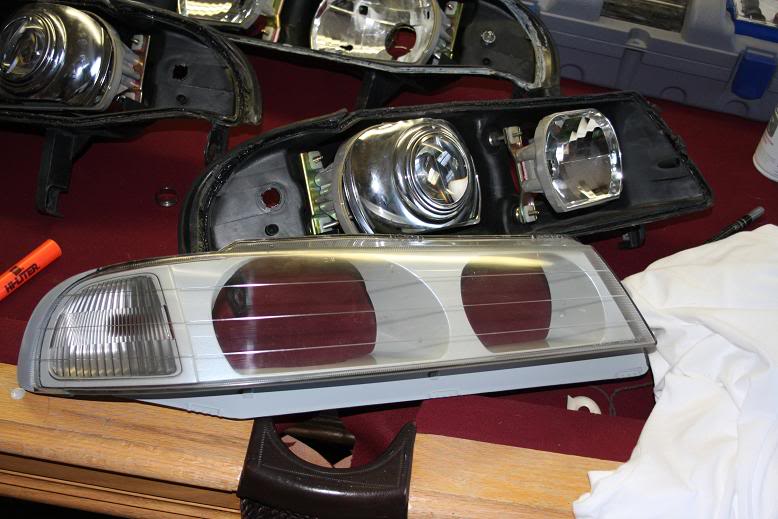
so to keep this thread alive a little i have been working on my retrofit a little bit. i am doing all of this to a spare jdm one piece headlight i have since its my first time… just in case i **** up.
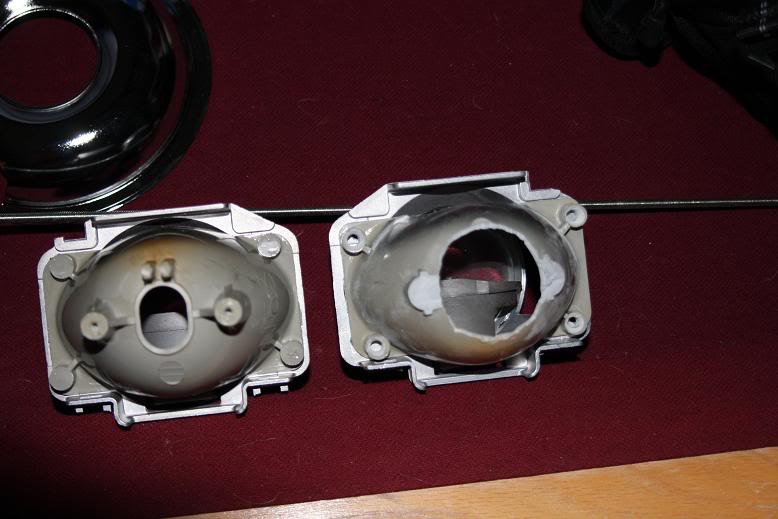
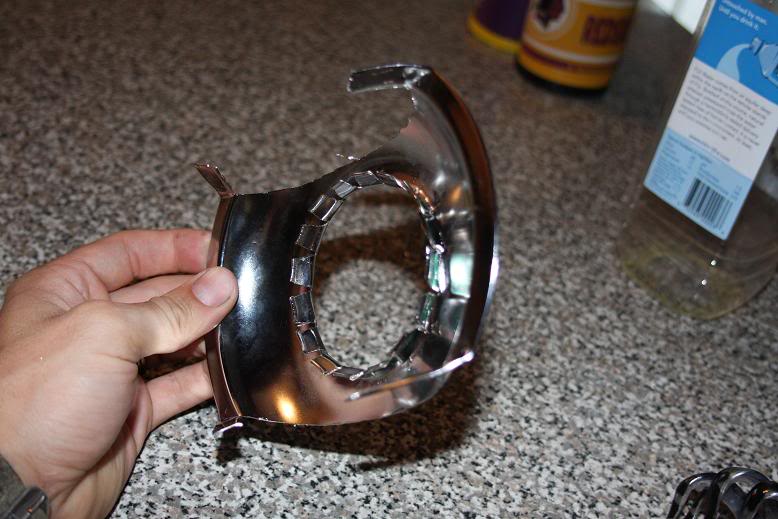
so i go tthe headlight all apart and i took out the low beam reflector bowl so i can mount the projector to it which will allow me to use the oem adjusters to adjust the beam once its all together.
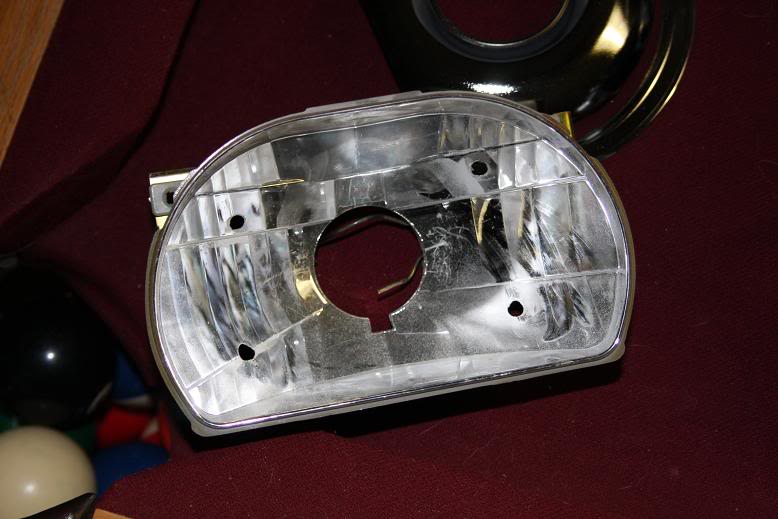
here is the reflector bowl… i drilled out 4 holes i measures to mount the projector to it.
here is a before and after of the back of the projectors. i cut out the packs to allow the bulb to fit with no problem. i trimmed off the stock mounting points for clearance issues. and then i drilled out 4 holes where the 2 halves of the projector meet. i got a long threaded pole from home depot to use to mount them to the reflector bowls.
so i cut the threaded pole and used some washers, nuts and thread lock to hold the 2 halves of the projector together. i was then able to push the projector into place with the cut threaded poles going through the holes i previously cut in the reflector bowl in order to use locking nuts from the back of the bowl to hold the projector in place.
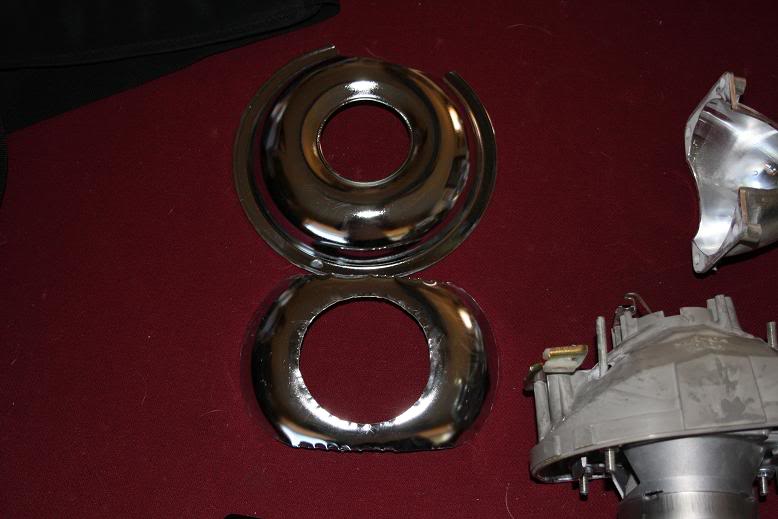
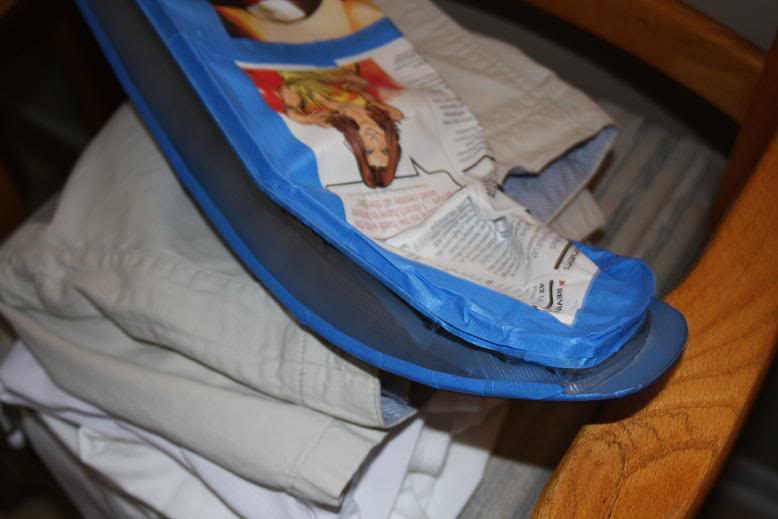
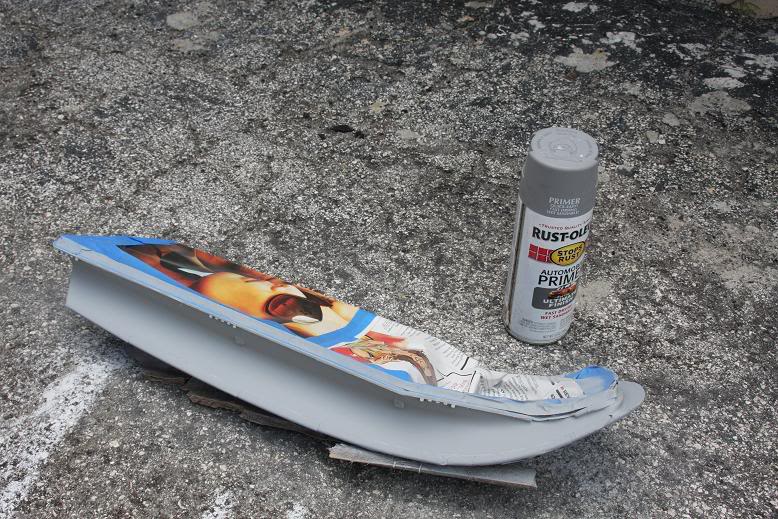
here is a practice cut for a home made shroud made from a stove top drop bowl. a flange of sorts will be used on top of this to clean it up a little bit. i got this idea from lilboi on bayareaprelude.com
so the roof and quarter panels have been primed and block…
antenna has been shaved
trunk, doors, and rear bumper have been final blocked.
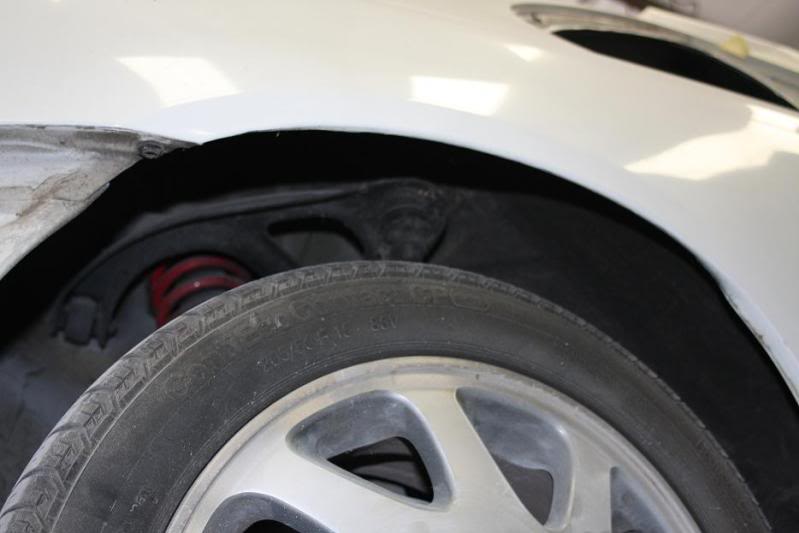
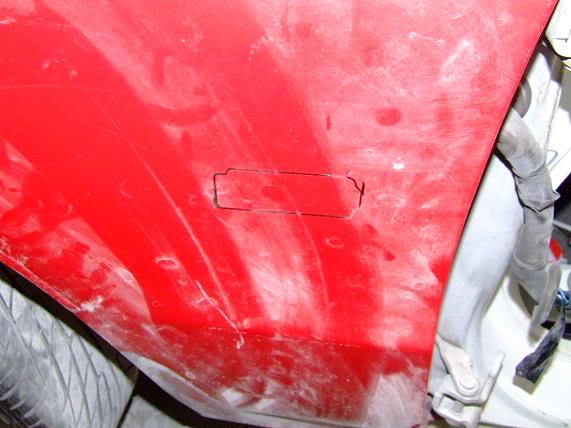
rolled the fenders.
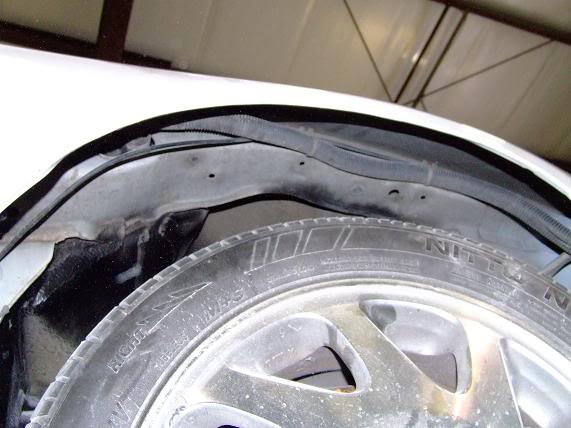
they had marked where the side marker goes but i elected to have them shave the side marker from my jdm fender. i figure it will look a lot cleaner without the side markers.
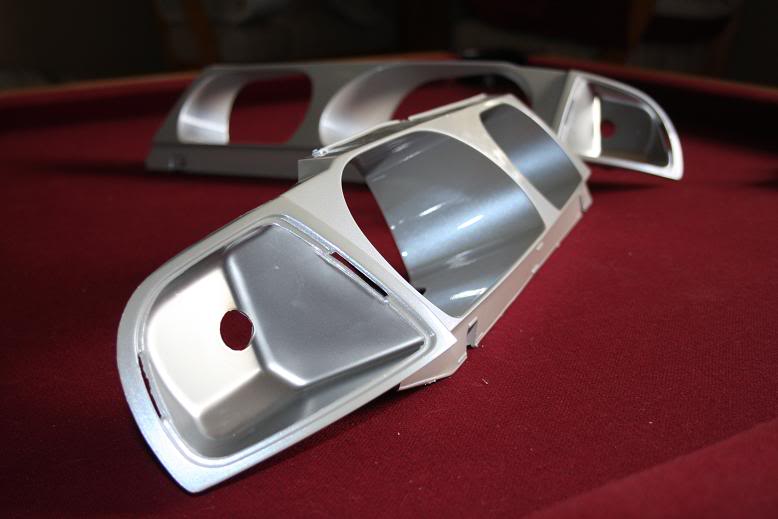
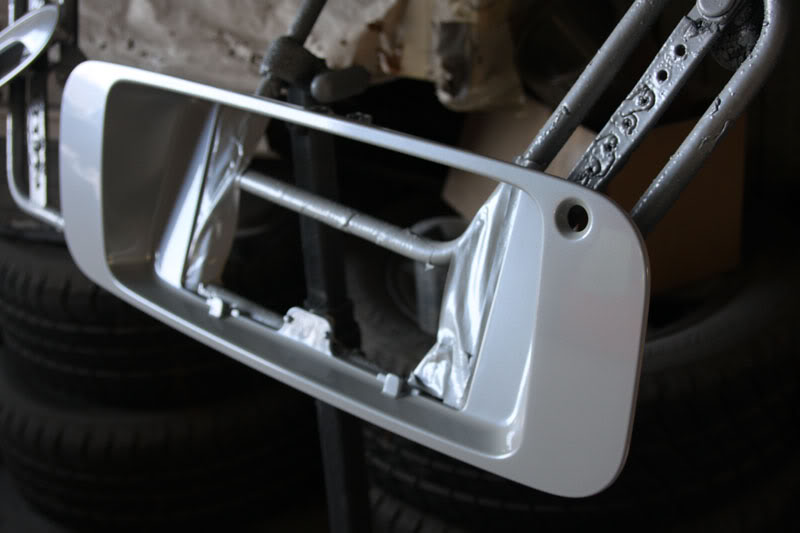
so i took out the housings of my spare black housing headlights and taped off the part for the parking light. i am having the housings painted the same color as the car (glacier frost mica). ive never seen this done on a prelude so i figured i would try it. if i dont like it i have my other set of black housings so not to worry. i am currently wetsanding and buffing the lenses and i am finishing up the retro fit. ill post pics of the progress later.
i also cut out the centers of the grills, filled and sanded them.

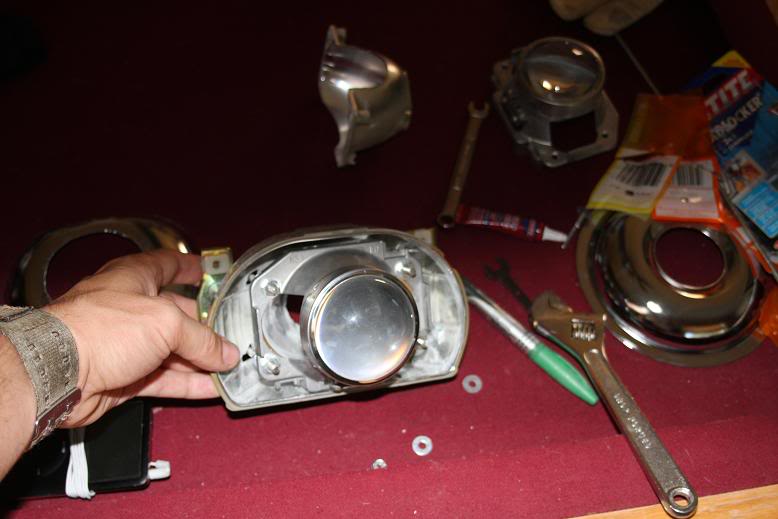
here is an update on the retro fit. while the inside covers are in the paint booth i am getting the rest of the headlight ready for assembly as soon as i get them back painted.
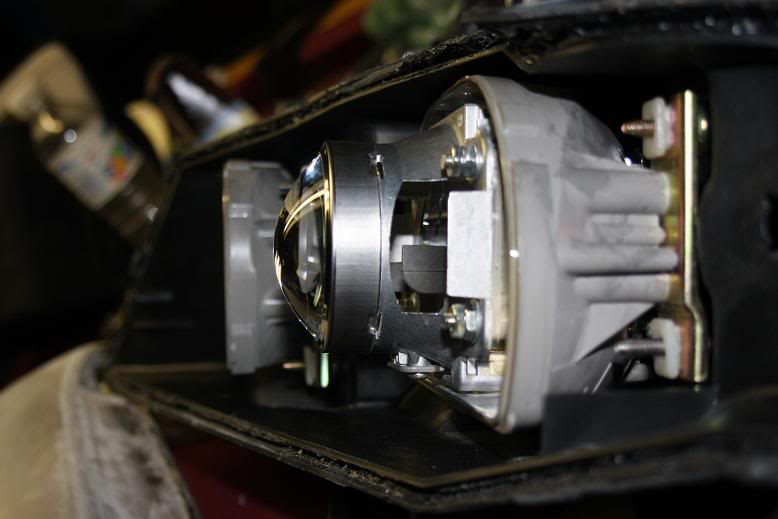
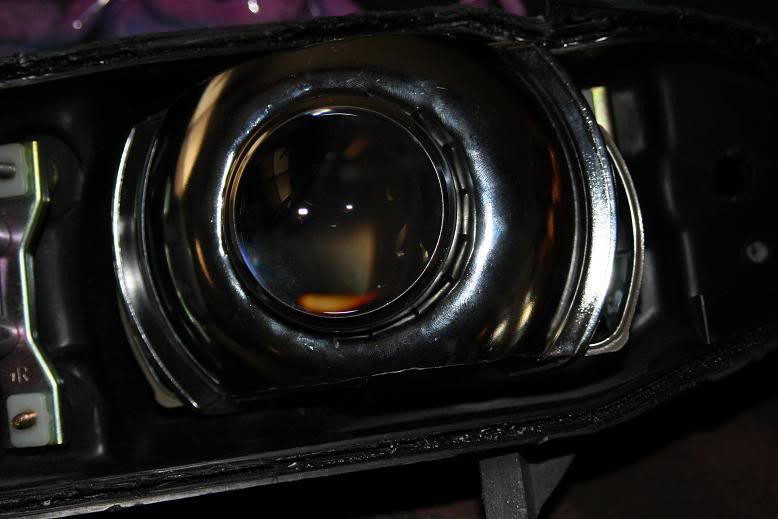
i have finished putting together the mounts for the projectors. i mounted them to the reflector dish and reinstalled them in the housing to the oem points to retain the beam adjustability.
these projectors fit perfectly inside the dish with very little modification allowing me to retain all the oem qualities of the outside of the headlight. the only thing done to the original parts of the headlight are the 4 holes drilled in the back of the dish in order to mount the projectors.
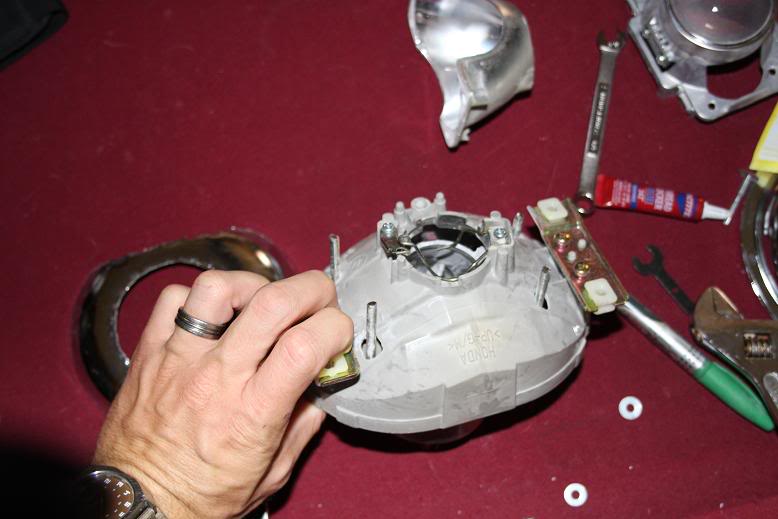
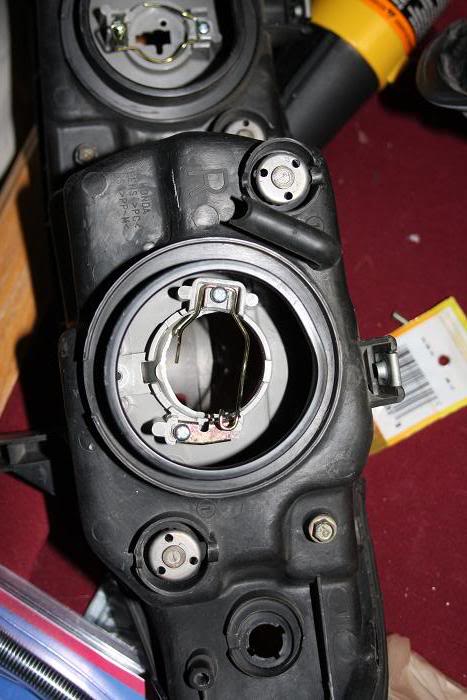
as you can see… the back of the headlight looks exactly like it did when i got it. when you look where the headlight bulb clips in you can see that the reflector dish to the projector is almost flush with the opening of the original reflector dish that the headlight came with. this should allow the bulb to go in just as if this came factory.
i began wetsanding one of the headlight covers.. hopefully i will finish with these this weekend and they should be crystal clear and good as new.

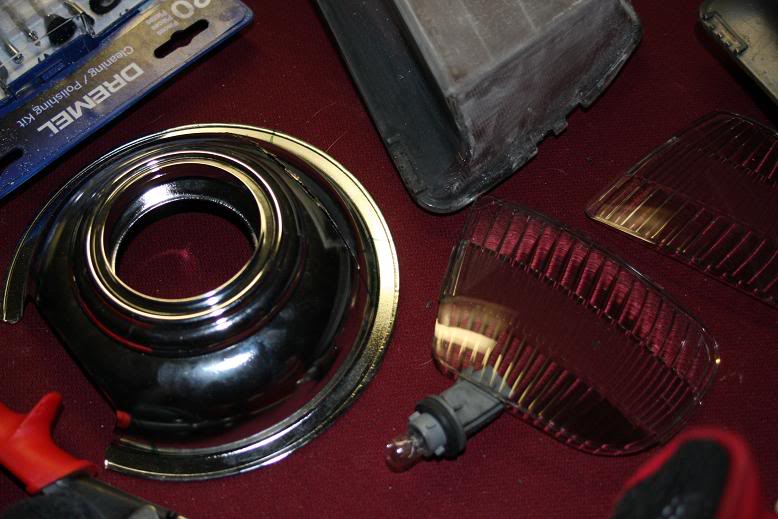
i am still in the process of making my own shrouds. i have a bit more cutting and test fitting to do.
and i just got this other little goodie in the mail the other day
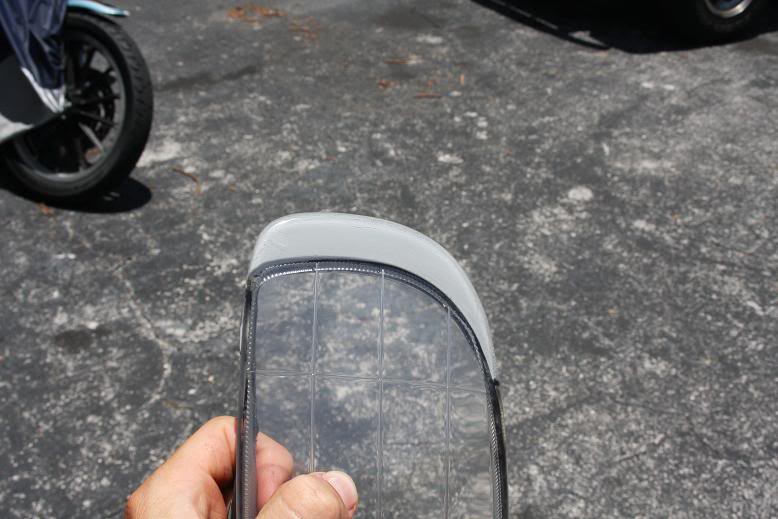
so i cut the inside of the drop pan and pushed it in so that when i pushed it over the projector housing it holds itself in place.
then i trimmed down the bathroom faucet trim that i picked up from home depot so that it would fit around the 3″ projector and on top of the drop pan. i set everything up in the practice headlight.

that is basically what the finished product will be except the housings will be glacier frost mica to match the rest of the car.
the drop pan and the outter trim have been jb welded in place and arent going anywhere. now im just waiting for the housings to come back from the paint booth.
lright so i stopped by the shop yesterday for an update.
all of the metal panels are being painted today and all the plastic parts should be painted over the weekend.
everything is pretty much taped off..
except the driverside door frame..
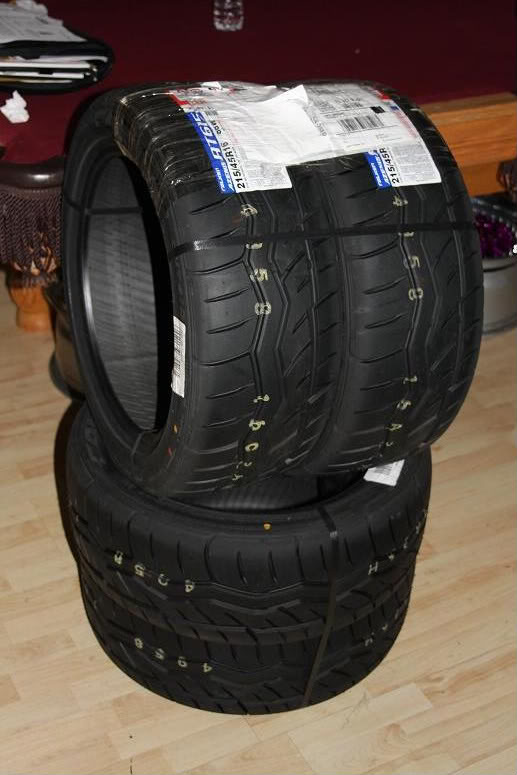
i got my tires in (i sent my 225-50-16s back for 215-45-16s)
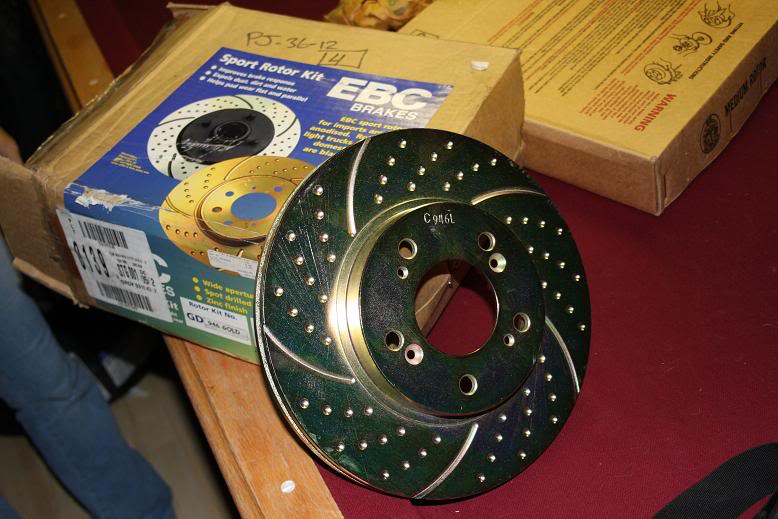
i picked up some brand new slotted EBC rotors for $50 yesterday
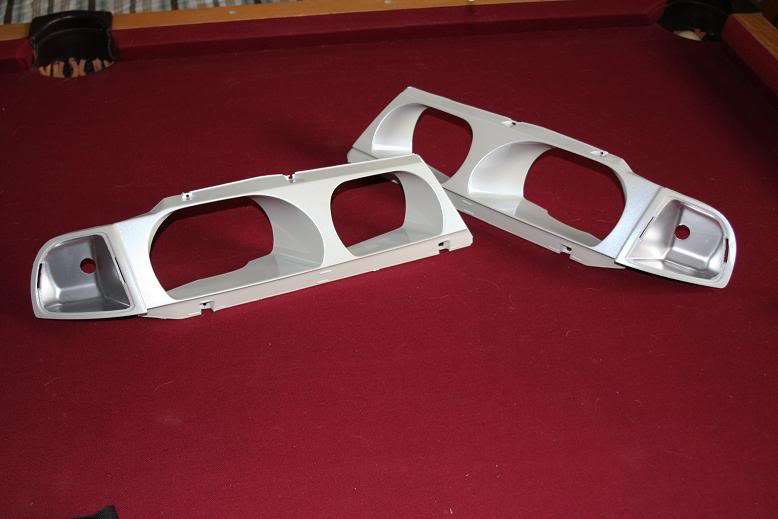
and i picked up the painted headlight housings so i can put the retrofitted headlights back together this weekend once im done wet sanding, buffing and sealing the headlight lenses.
I started by finishing off the sanding and buffing of the lenses.
as you can see i removed the black on the bottom of the headlight and the black on the edge of the headlight.
then i taped off the lense so i could paint the portions grey that used to be black. this will flow better with the color matched inserts. i used a grey primer that matched pretty decent.
here is how it came out:
i started putting everything back together
for some reason getting the lense back on to the housing has been a bitch because of a slight distortion in the housing from oven baking them. but after some clamps and some wait time it seems to be holding up.
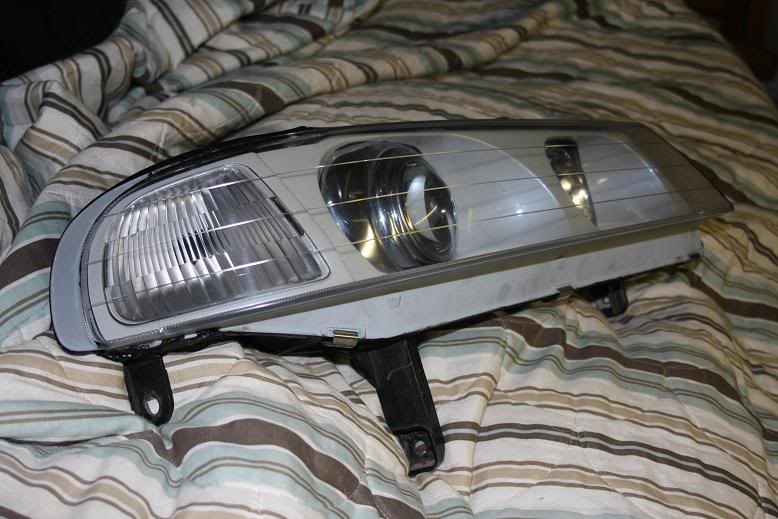
FINAL PRODUCT
and tires are all mounted, balanced, and the wheels are ready to be slapped on the car.
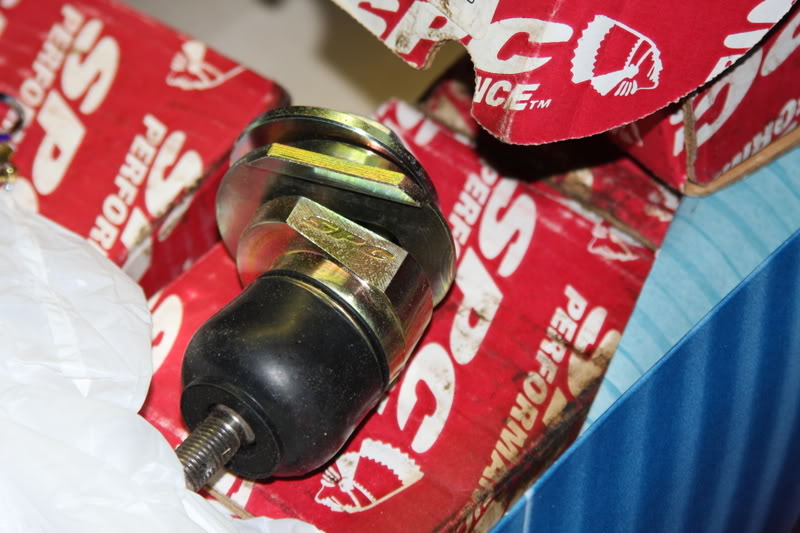
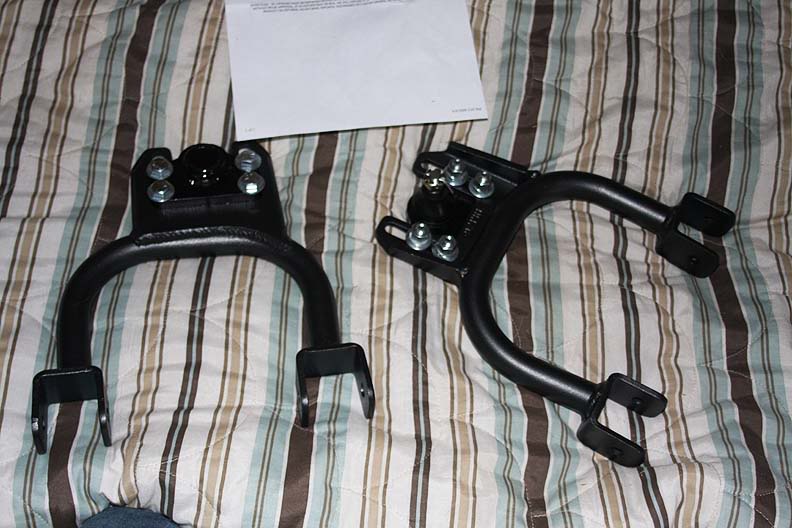
Here is the last thing that i am going to buy for it for a little while. i stumbled upon these accidentally. i knew they were just recently available for the 5th gen lude but i just found out at the end of last week they make them for the 4th gen.H
so i just got them in today .
The only adjustable upper control arms available for the ludes that i am aware of. i believe is has -2.5 to +2.5 degrees of camber adjustment with the camber plate.
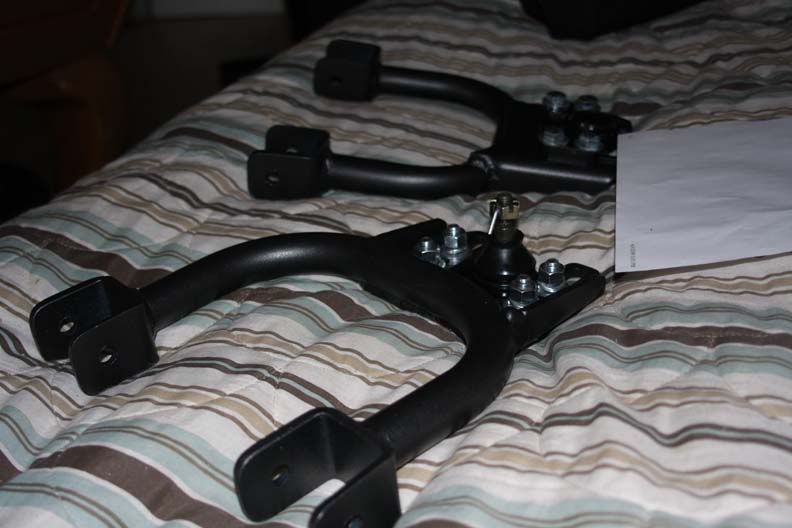
and they come with new balljoints
and…ummm….. a little teaser
Well the one headlight i finished ended up not fitting as good as i wanted it and there was a spec of white plastic stuck on the inside of the lense that was bugging the shit out of me so i took the headlight apart again and shaved down the housing a little more so that it would fit properly.
then i wetsanded and buffed the other lense and put the other headlight together.
so now they are both finished and ready to be dropped off at the body shop…
There are some small imperfections and some little things i would change if i do another one but i am really happy with the final product.
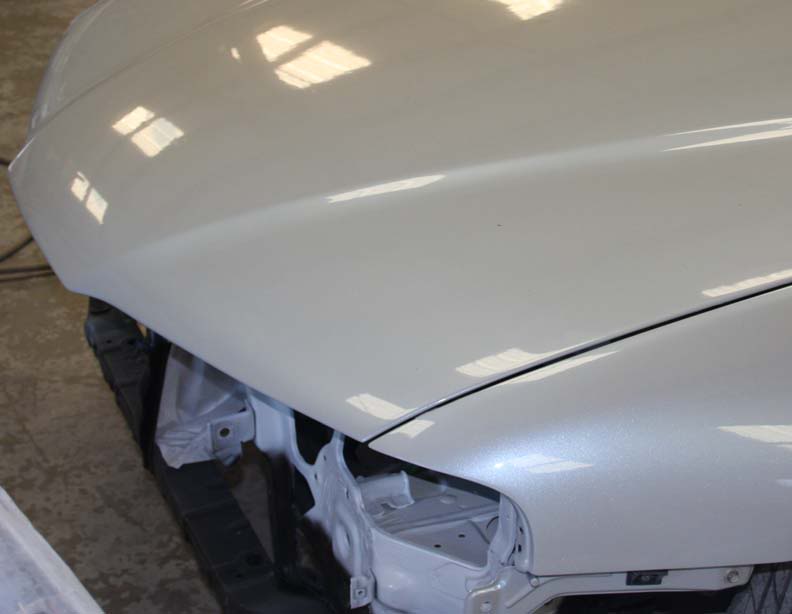
since this is taking longer than expected i went to the shop this past thursday and snapped a few shots.
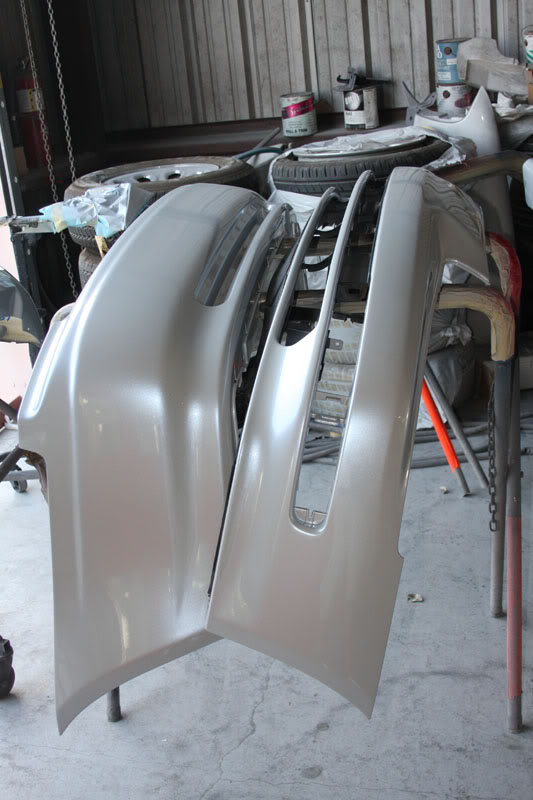
The paint is crazy. it looks gloss white from one angle, gloss grey from another, silver from another, then it shimmers with variations of a blue-ish purple.
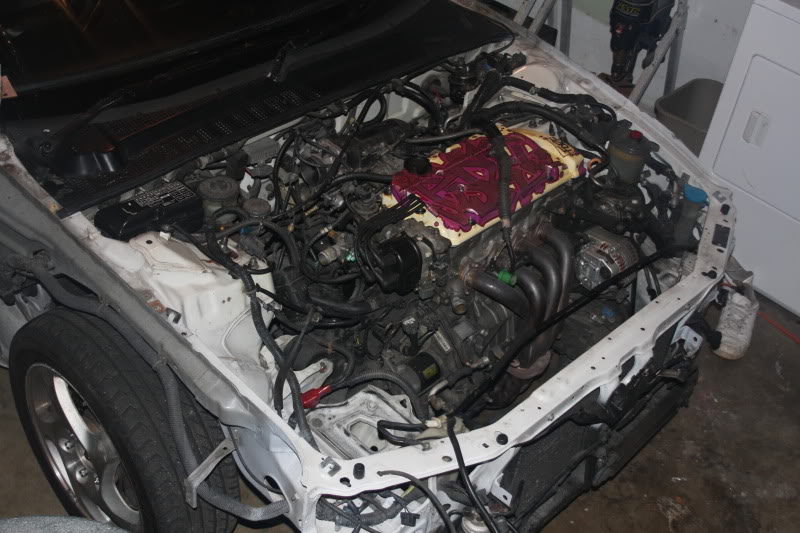
Engine is back in the car. it is being wired up and should be running by monday. then they are putting the front end back on and finally they will be waxing and detailing the entire car. i will probably set up pick up for this coming friday.
valve cover, header, and cleaning will be done before new bay pics are posted.
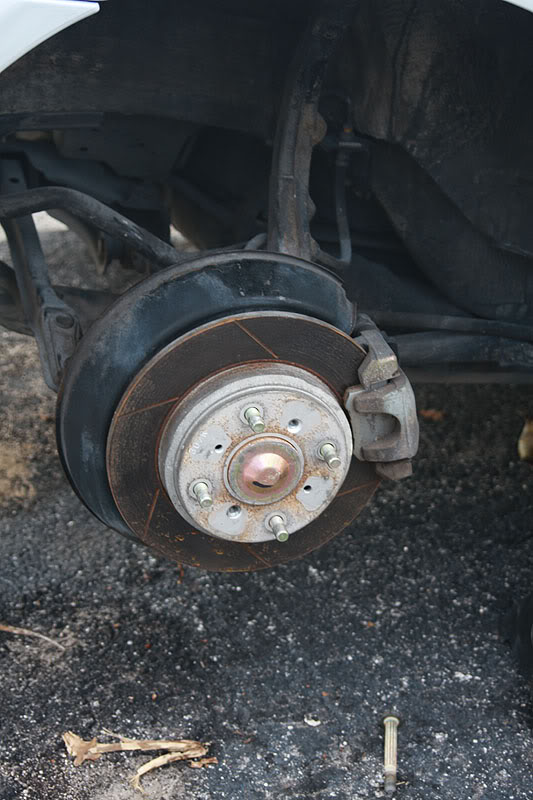
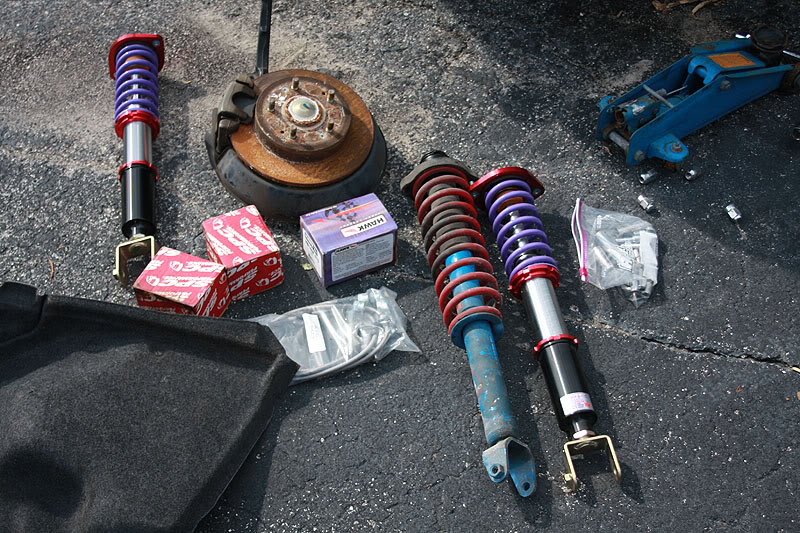
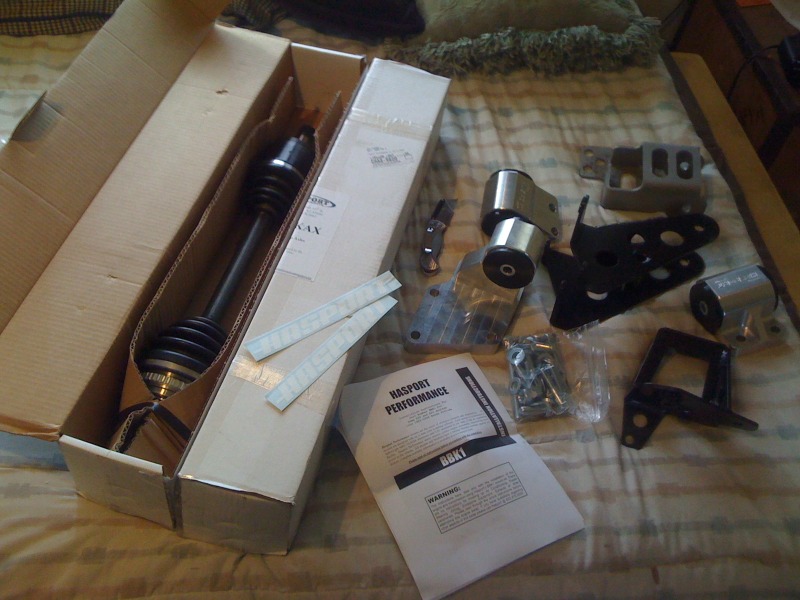
On to the beginning of the installation of all of my parts…
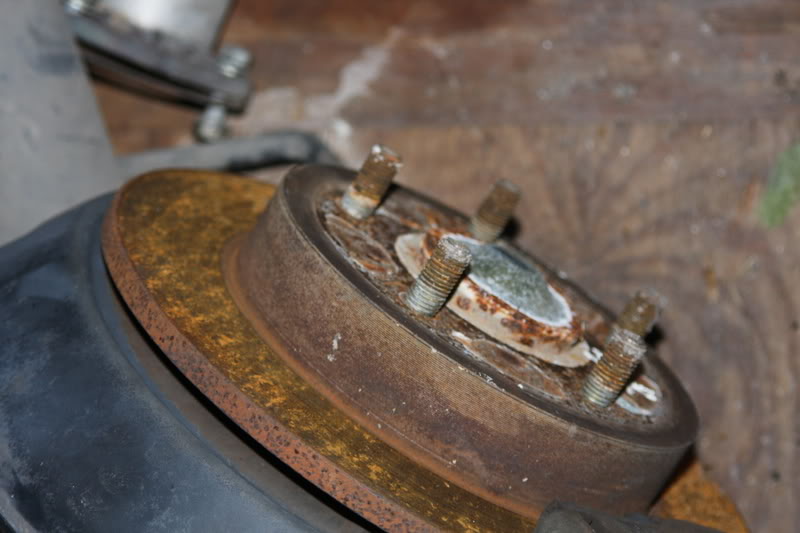
i am doing each corner individually, i started today with the back right corner. 5lug conversion, coilover, and hawk pads. i will do the ss lines and the spc camber kit tomorrow hopefully and then i will move to the next corner.
OUT WITH THE OLD…
IN WITH THE NEW!
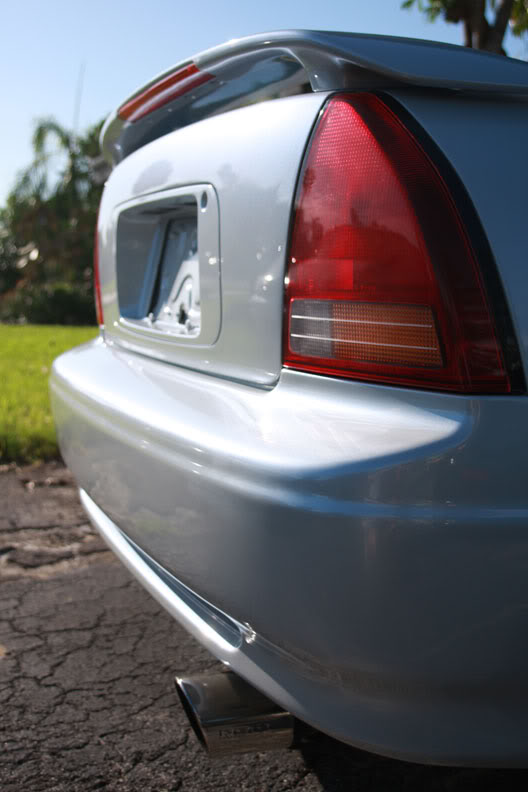
and a lovely picture of her ass. i am incredibly happy with the paint job.
here are the pictures… another photoshoot coming soon once i work out some bugs…

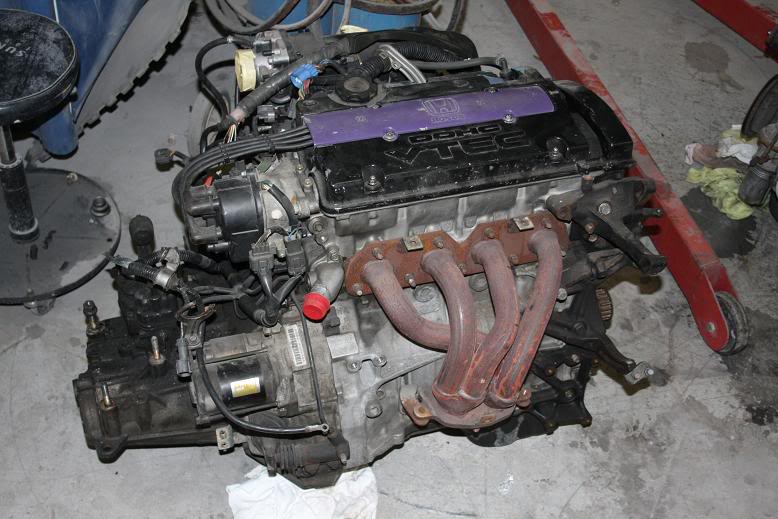
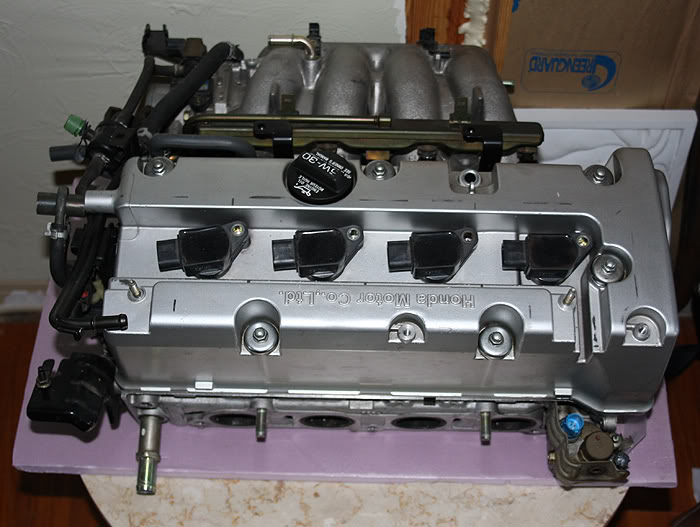
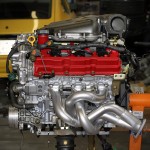
k20a2 complete head
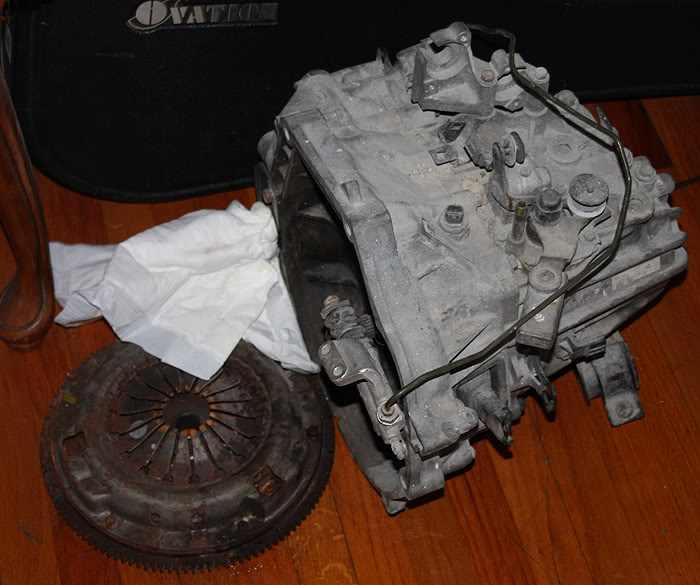
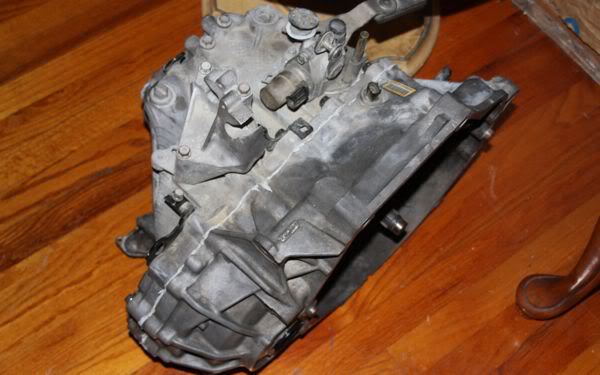
k24a2 tsx 6 speed tranny
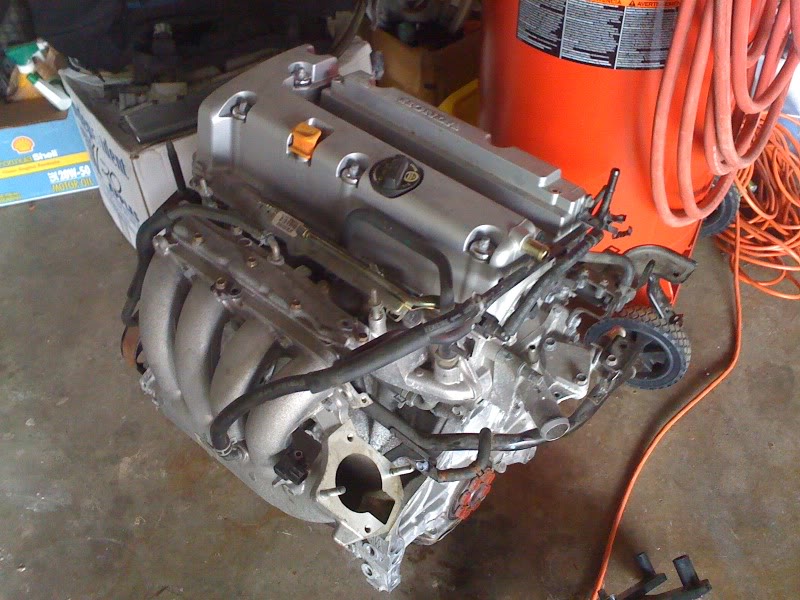
oh yes… this is happening
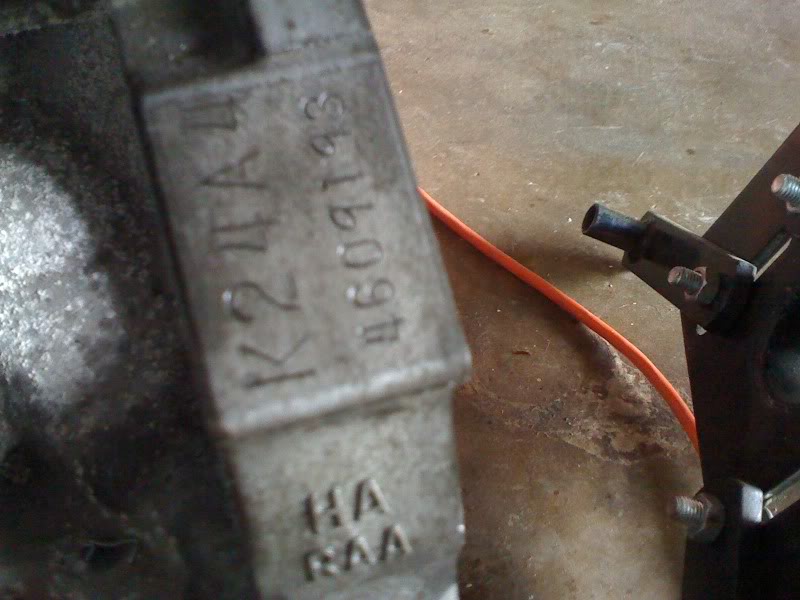
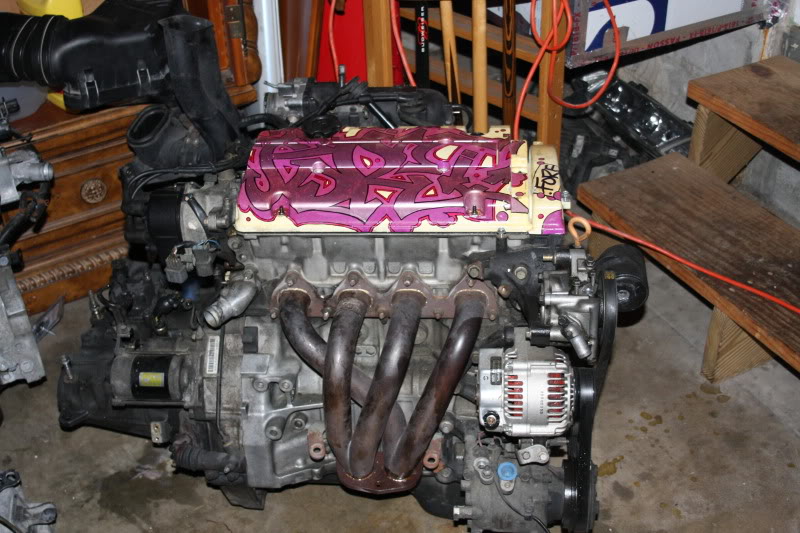
well here is the k24a4 (i thought it was an a3 but i guess not, either way).. i dont have any tranny bolts so i cant get it on the engine stand yet unfortunately but soon!
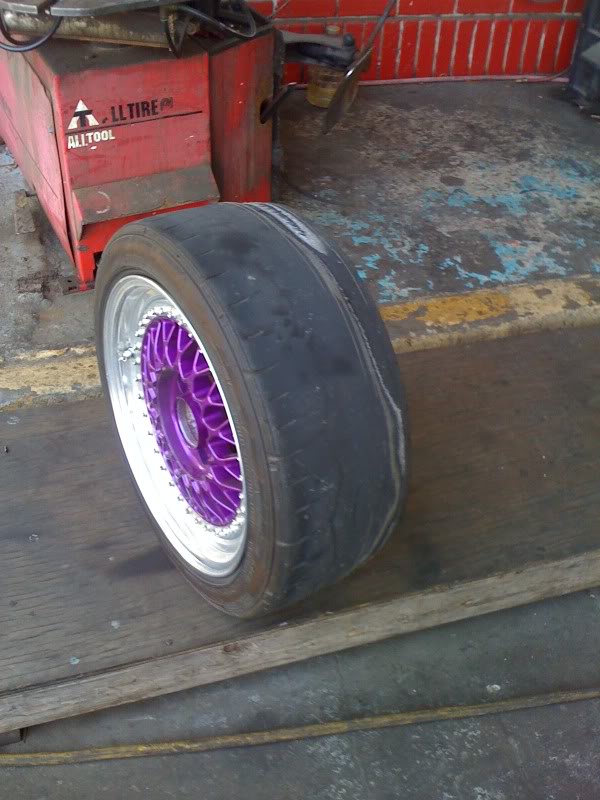
i took the rims in to have the old tires taken off and 2 tires put on the stock rims yesterday after work. i found out the bastard sold me 3 left wheels and 1 right wheel and now wont answer his phone… cool.
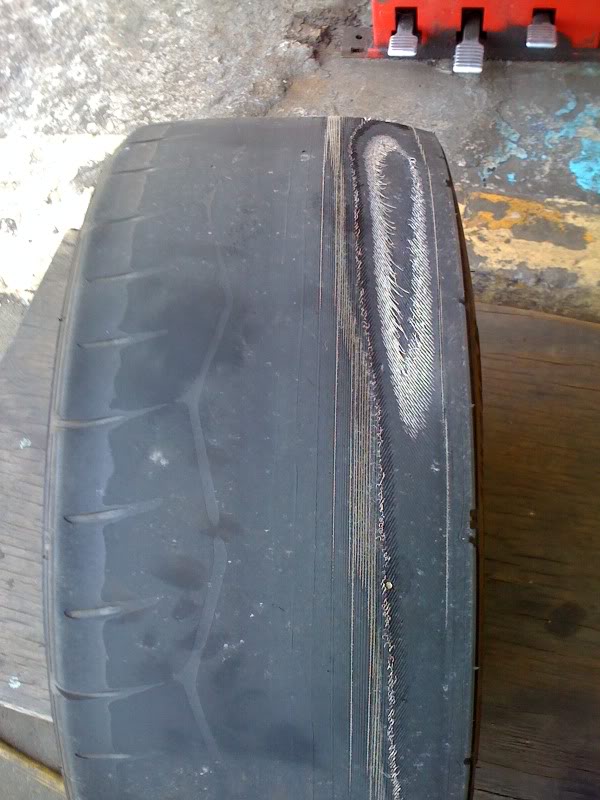
anyways, 2 days ago i was filling my tires with air (i have to put a little air in them daily before i leave in the morning due to the small leak that was in 3 of the rims). my pressure gauge screwed up and i ended up putting 80lbs in the tire when the gauge said 45lbs. i stand back after i hear air trying to escape the wheel and then POP! it definitely woke me up considering it was 7am. the tires were gone anyways. i was trying to stick with just back and forth to work considering i only work about 2 miles away from my house.
this is where it blew out.
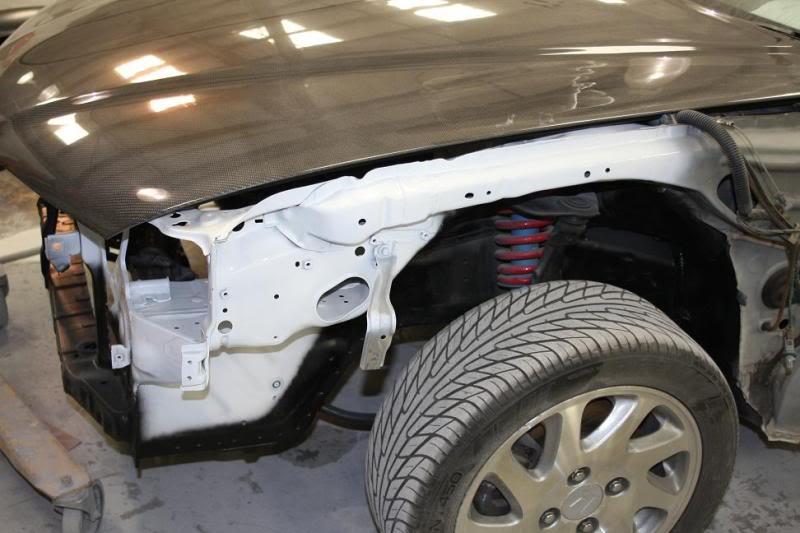
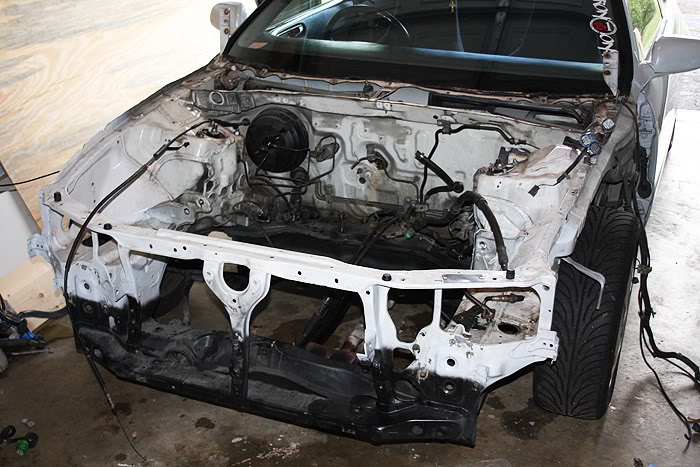
I have been able to take my prelude off the road and begin the new portion of the build thread.
this portion will include: shave, tuck, k24/k20 build, completed kswap, and hopefully a few exterior and interior goodies.
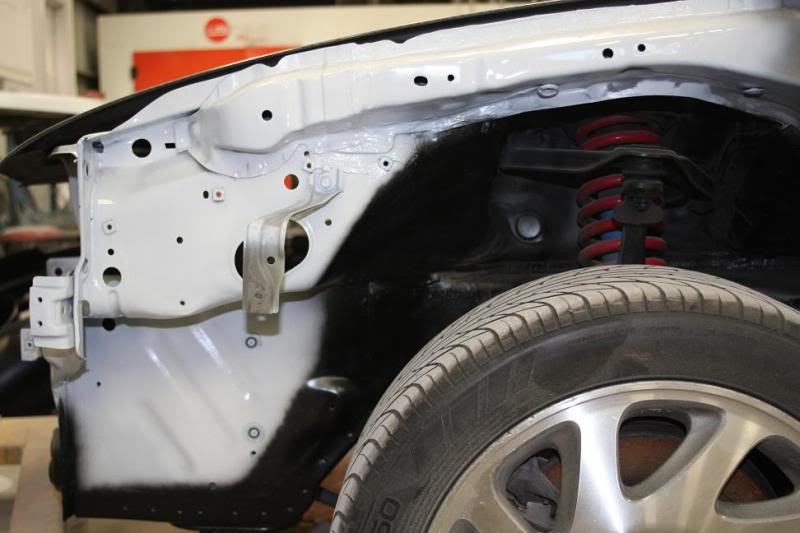
so i was fortunate enough to have a paid half day at work this past friday so i took apart the front end of the lude… sideskirts, fenders, headlights, bumper, hood, intake, radiator, and battery were all removed. i also disconnected most of the harness and most of the hoses from the motor.
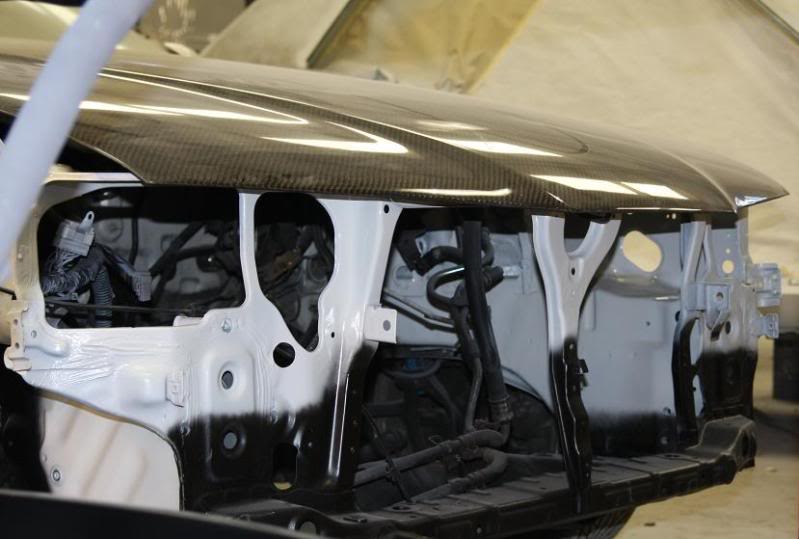
then i was fortunate enough again to have monday off as a 4th of july recoop paid holiday lol.
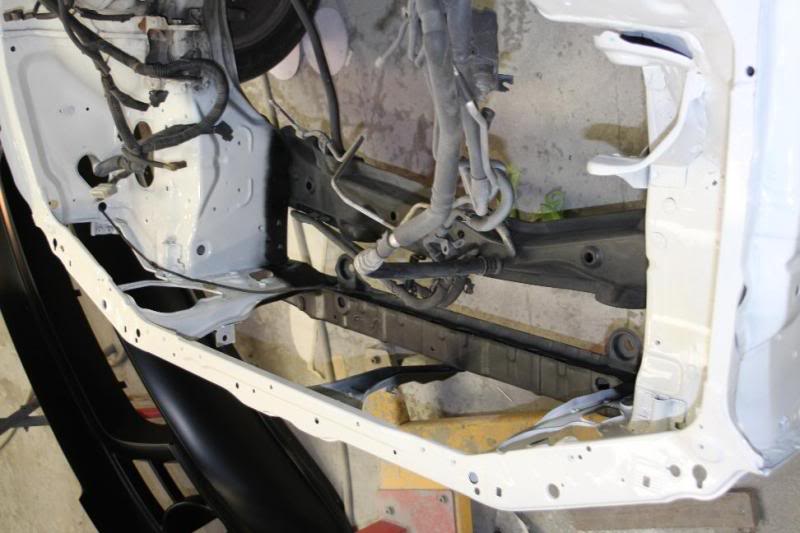
so i went to work…got everything set up just outside of my garage because it looked like a beautiful day and then 30 min later all hell broke loose and it rained hella hard from 5 until 930. so i went out and finished pulling the motor and finished around 1145.
the wonderful ups truck gave me:
-wiseco k24 w/k20 head 12.5:1 comp pistons
-blueprint i-beam rods
-acl race bearings (throw, main, rod)
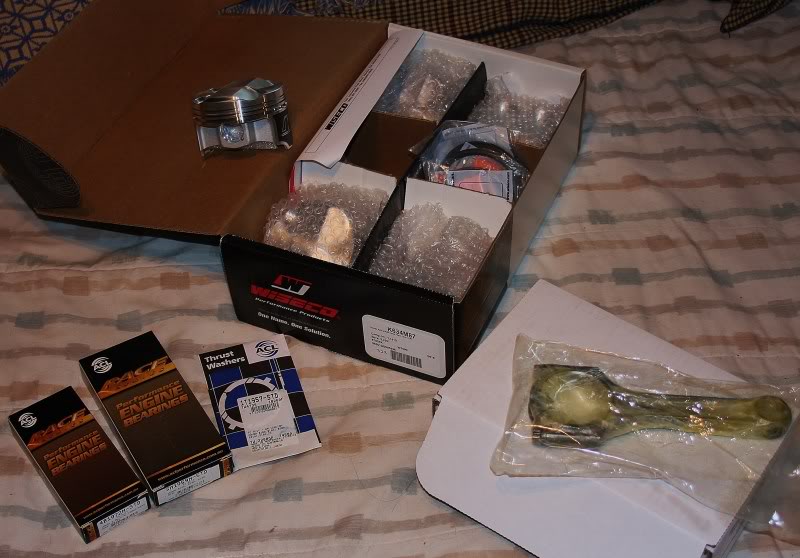
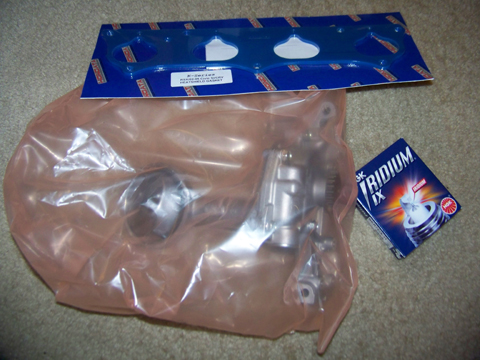
I am still waiting on my hondata intake manifold gasket, ngk spark plugs, and oem rsx-s k20a2 oil pump.
Update
Received the k20a2 oil pump, ngk iridium spark plugs, and hondata intake manifold gasket this morning
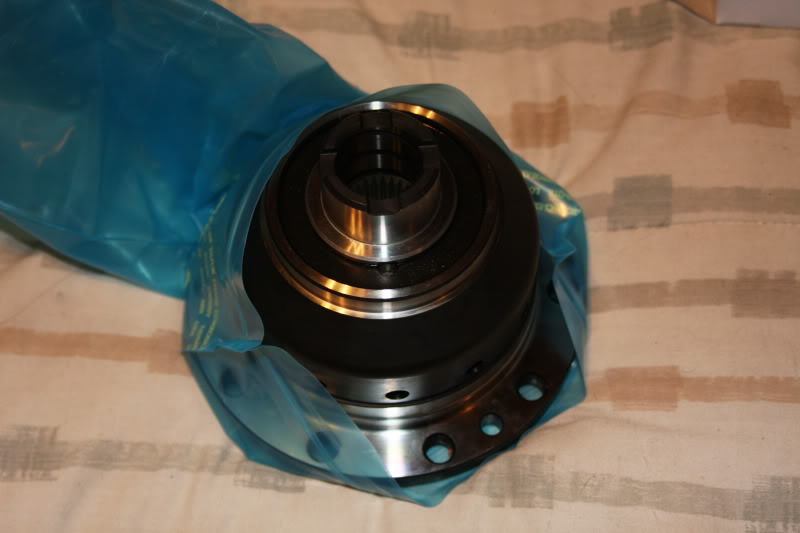
Got my Wavetrac LSD
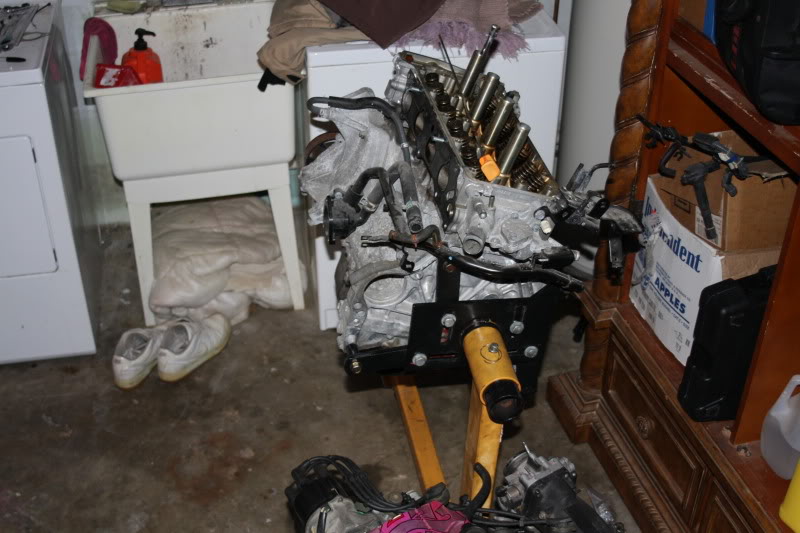
finally got the k24 long block up onto the engine stand. lifting this engine and getting it onto the stand by myself was a bitch.
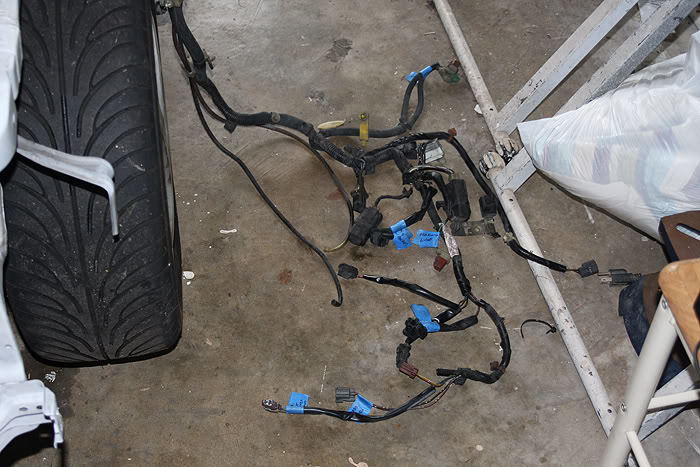
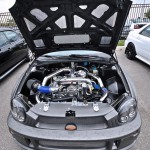
and yesterday i got the engine harness out along with a bunch of other crap. i cleared off the right side of the bay.
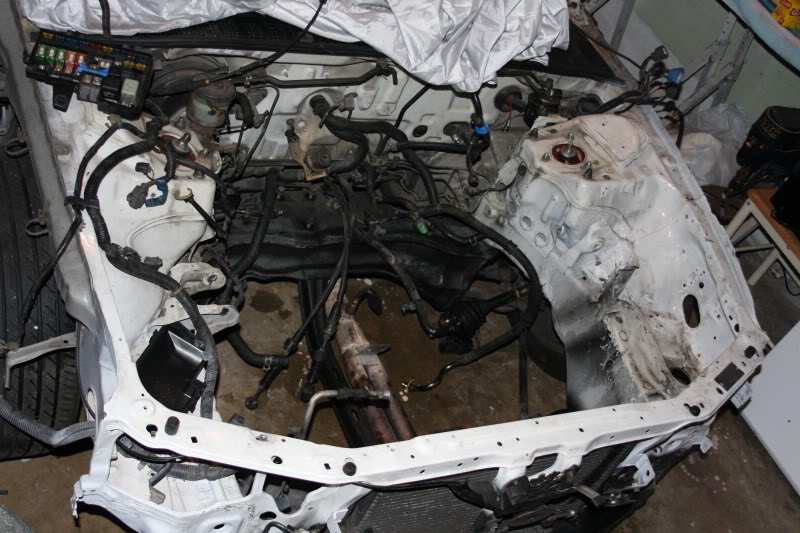
update time:
yesterday i got a chance to work more on the bay.
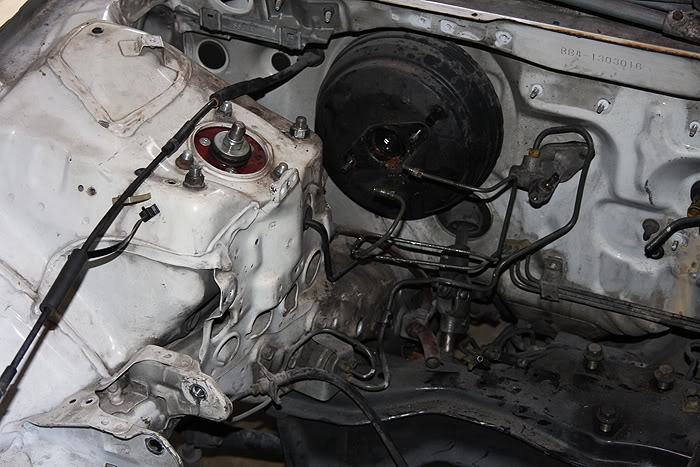
i cleared out a bunch of stuff out of the bay… its getting close to being ready for me to start the shaving process.
i still have to pull the brake lines, the booster, a couple power steering lines and fuel lines.
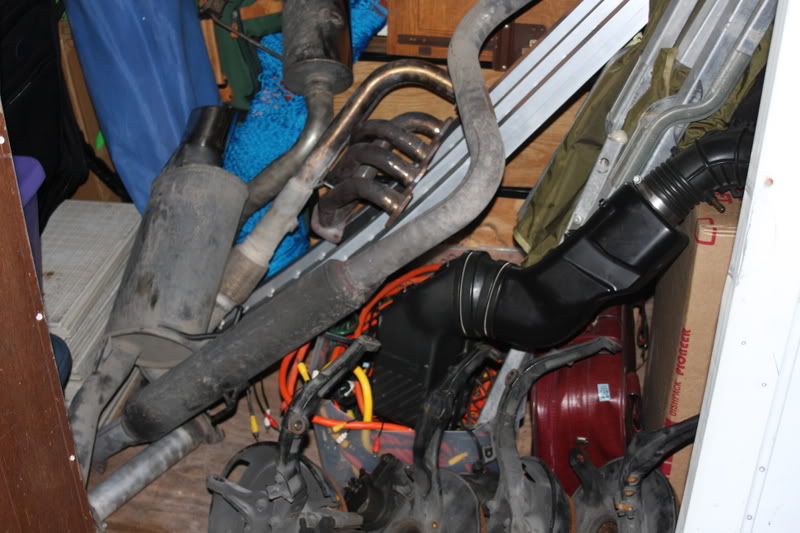
pile of removed parts…
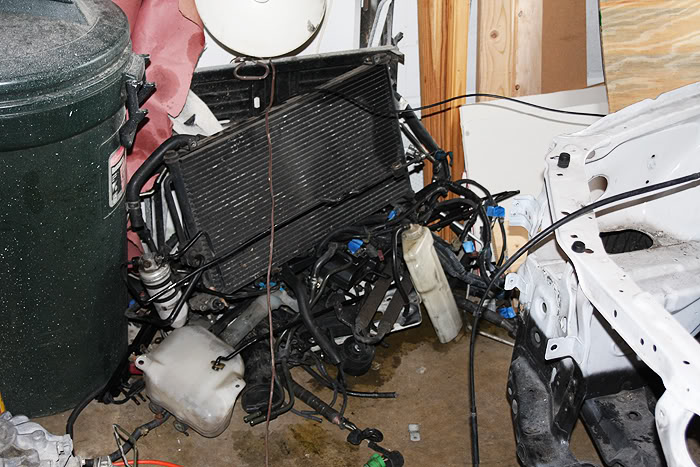
closer up pics to get an idea of what is left to remove:

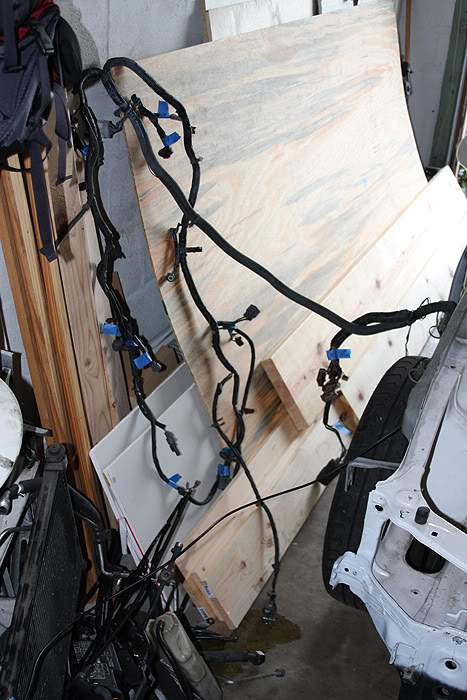
labeled some of the clips to help remember what goes where when the harnesses are redone.
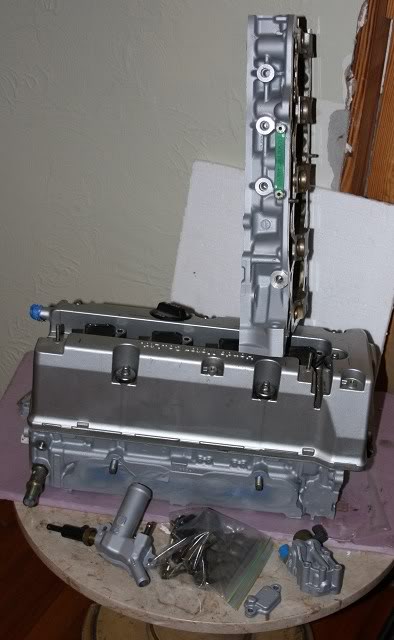
Well my pops was able to get out into my garage with me and help me take apart the motor.
removed the head and stripped the block of everything except the water pump housing and the oil filter.
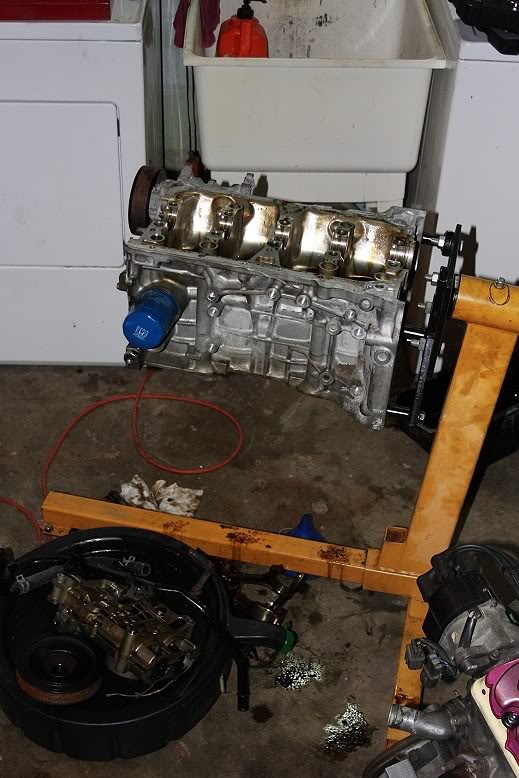
Here is where all of the labeled in bags are so i can keep track of all the nuts and bolts.
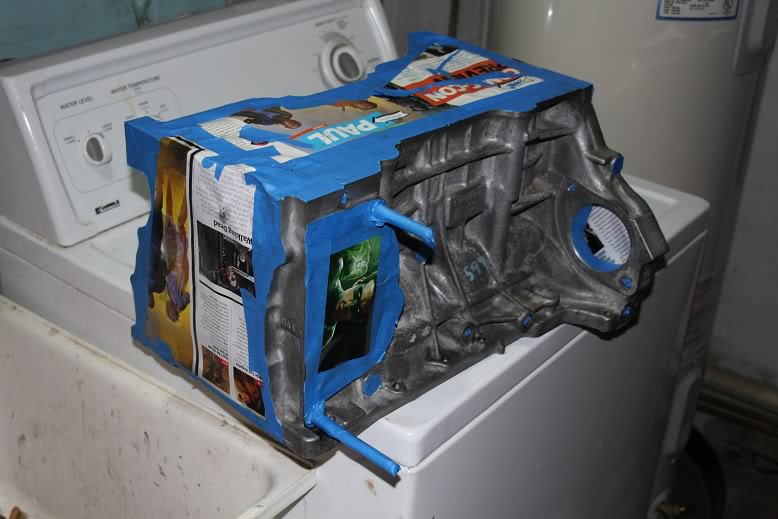
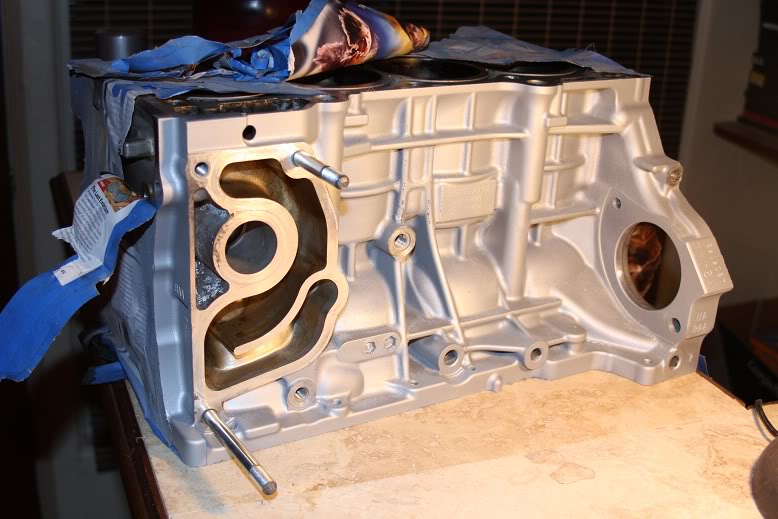
Cleaned the block and got it ready for some paint (hopefully picking up some eastwood alumablast cast aluminum spray paint tomorrow from american icon). everything is taped up and ready to go.
the block has been restored:
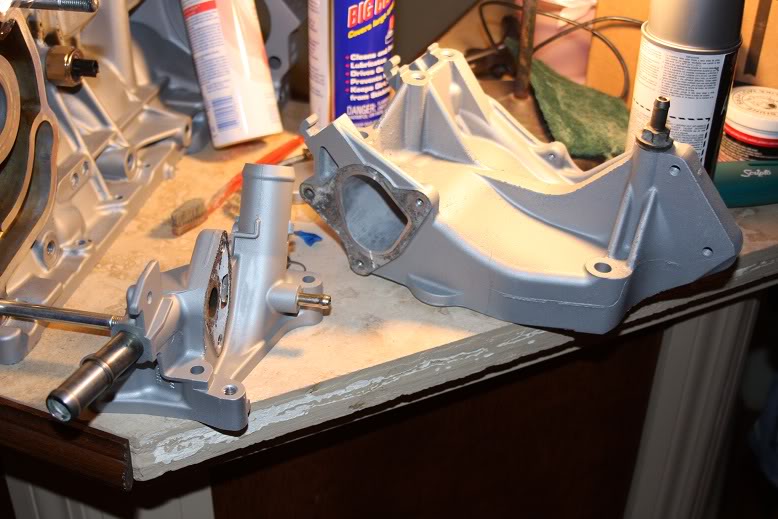
along with a few additional pieces (no befores but these looked worse then the block did):
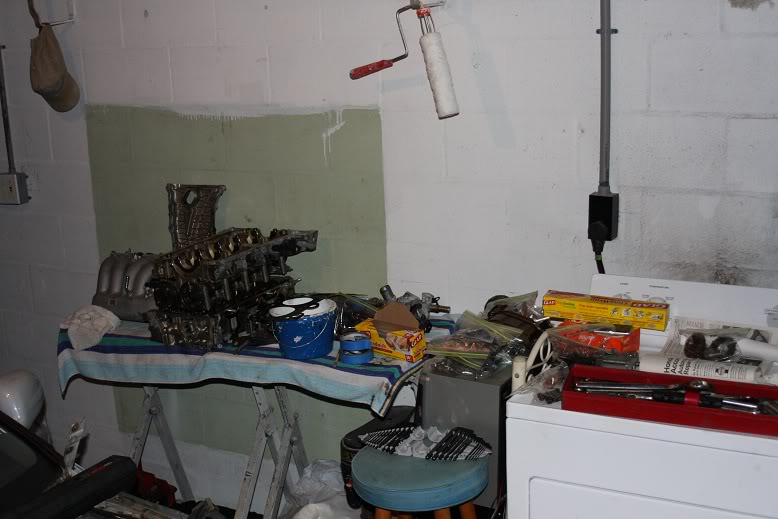
I also removed the intake manifold off of the k20a2 head along with all of the other misc bolts and pieces, cleaned it up and began taping it off for a touch up spray. more pics should be up tomorrow.
Update: Cleaned the bottom portion of the block a few days ago,taped off some random pieces, the bottom portion of the block, and the head today.
Before pic(all of the marks on it wont come out no matter how much i scrub..):
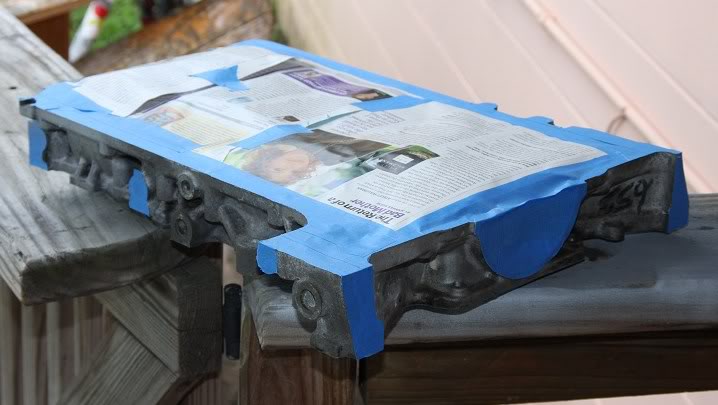
all of it after being cleaned, taped, and painted.
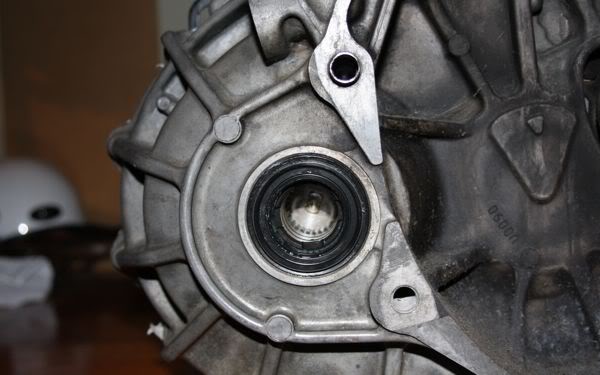
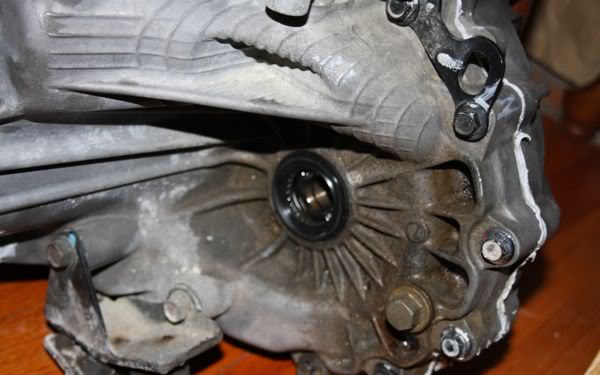
Will be cleaning, taping off, and painting the tranny like i did the rest of the motor. but for now here it is:
for those that can tell there is an lsd in there.
And this should be on its way in the mail to me soon. i paid for it last night so i hope i get it this week or next at the latest.

Hey man I love what u have done to your lude. I have a 93 si-vtec. It’s a work in progress. Your build looks like it was a long process of fix this fix that.. I just can’t believe everything u have done to it. I would really like it if you could send me the instructions on the headlights, what kind of wheel hub u went with (hard to find tires for stock rims) need a change. I really like the open air vents, how did u do that? I plan on rebuilding an H22a4 (if i can get my hands on one) with an f22 lsd tranny. I want to keep the body stock looking, with a more aggressive lip, and some 17″ tires hoping i could get at least a 235 width on there, not going to lower it (fear of speed bumps and gravel roads) keep stock springs but aggressive shocks. aftermarket spoiler that just extends out on the trunk. i’ve only had it a year and a half. don’t have a whole lot of money to dump in my everyday car. u can e-mail me at vanmangonefurious@yahoo.com