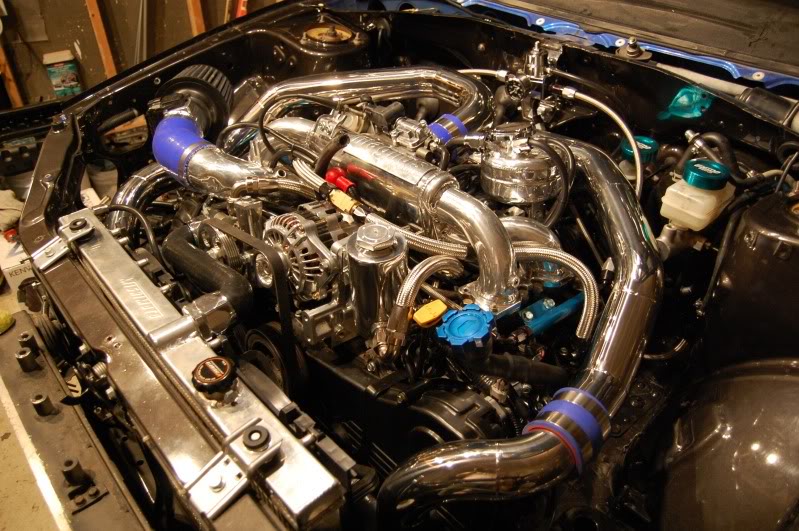
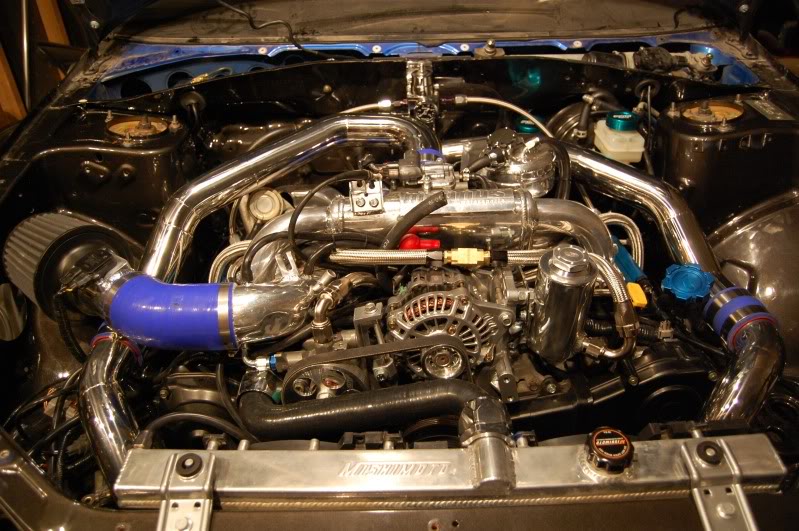
Subaru WRX Batmobile goes under the knife… Project Hybrid Build begins!!!

 So this year’s project is about to get underway. The idea of the build is to really show an upgrade path for us Hybrid builders and to do so using some of the newer vendors and products on the block.
Like most guys who ended up with a hybrid motor (2.0L WRX heads mated to a STi Shortblock) I had been modding my 2.0L engine. I had just performed a TD05-16G upgrade, with STi pinks and low and behold, the main bearing went on the engine.
When we took the engine apart we had found that the oil pan had been taken off the car before. So the previous owner had to have done “some kind” of work on the engine before I purchased the car. The car was one of the first cobb Stage II packages ever sold and installed on a WRX in Canada and was one of the testing beds for the packages.
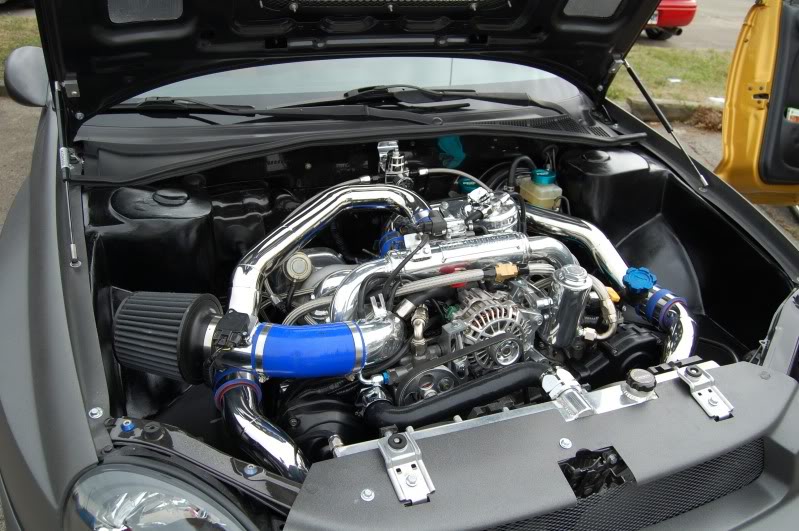
So that is where the hybrid road began. In went the 2.5L STi shortblock mated to my WRX heads and I added on a FMIC for good measure. Like most of us guys who have done the hybrid thing, you soon find out that the turbo you chose before doesn’t really match your new goals and engine setup. Also the heads and flow characteristics aren’t what you want either.
So this spring I began talking to a bunch of vendors and compaines with new, or newer, products out there to piece together a build for a nice street setup. The idea was that I wanted to do a build that would be relatable to a lot of Hybrid builders out there.
And I wanted to do it with companies that were not the “big” and “usual” names that you hear. Giving the newer guys an opportunity to show that their products can stack up with the best of them and get some real world coverage of a build that would showcase their products and show the gains that were achieved.
Most people doing progressive upgrades have parts from multiple vendors and there really isn’t a lot of good information on how they work together. Typically you get one company showing the gains of using all of their products together. Understandably because they are selling their products.
First I started talking to Derek at Group-A performance who I have known through the Toronto Subaru Club and they were happy to get involved when they heard what I was wanting to do. They have an ever expanding product line that is being picked up by many of the different vendors out there. These guys have some great products that I will be using in the build.
– Front/Rear endlinks
– Pitch Mount
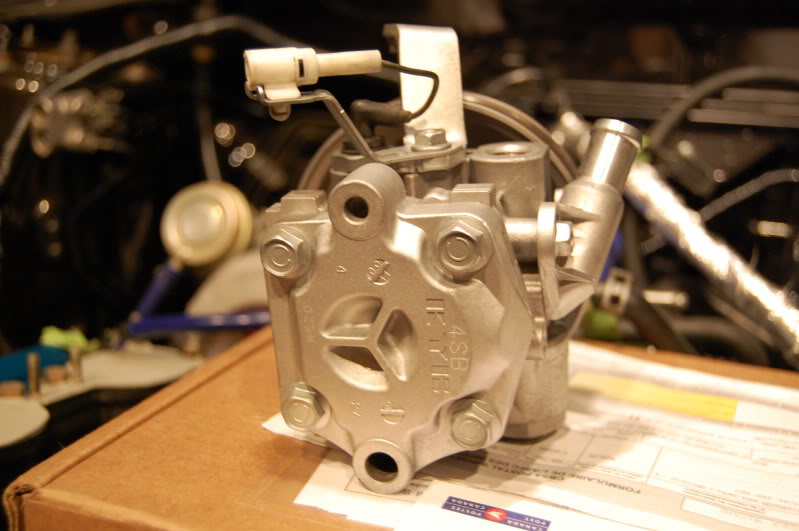
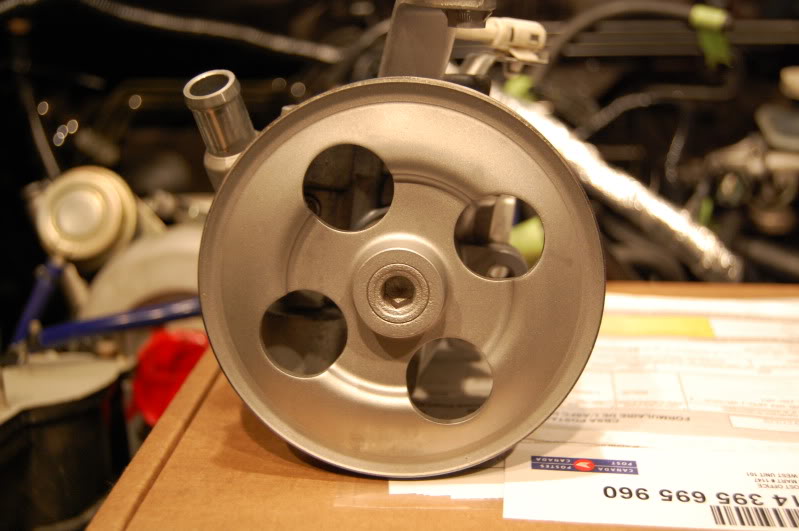
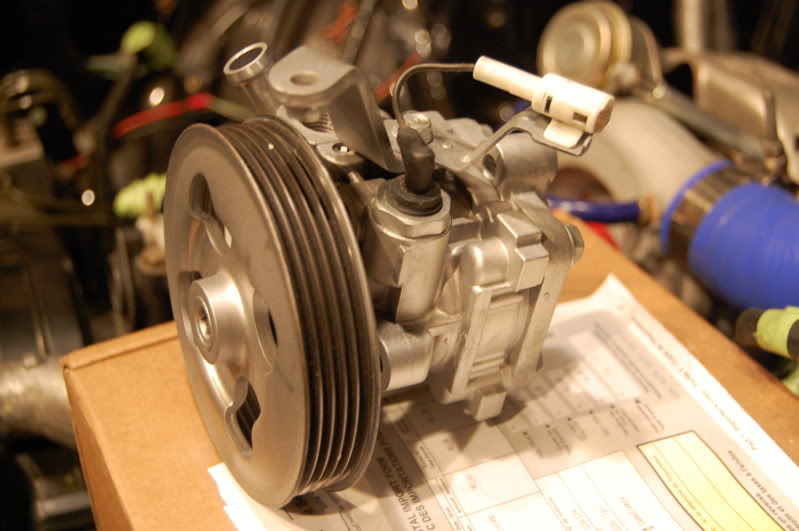
– Alternator, Power Steering, Crank Pulleys
– Subframe locking kit
Next I started talking to Brian Crower about his 2.0L valvetrain kit and decided that it was the route that I wanted to take for my heads. For the street performance I am looking for with the car, I didn’t feel the extra expense of porting work was going to be worth the cost. So I am going with a drop in valvetrain upgrade:
– Brian Crower 272 cams
– Brian Crower Spring/Retainer kit
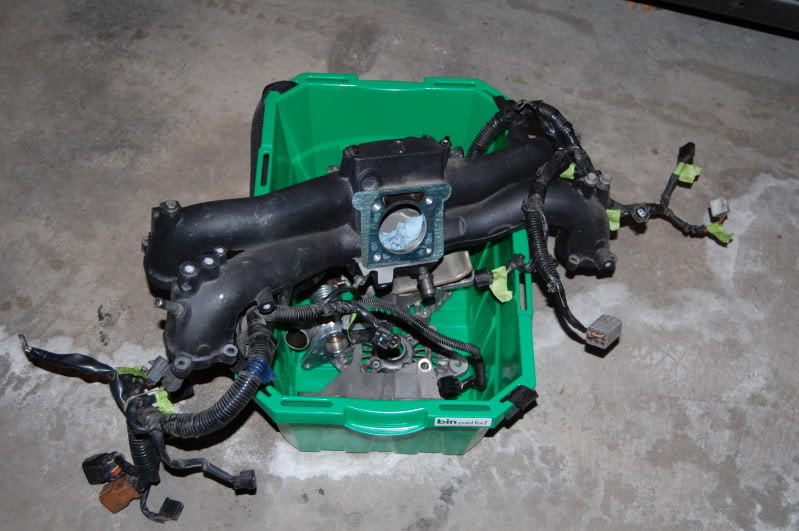
Next I was wanting to do more work around the flow restrictions of the stock 02 WRX parts. So I started doing some research and got in contact with Justin and the guys at Grimmspeed . They have been doing some great work with their porting and coating of OEM parts to give them that extra performance while retaining the OEM quality. So the following Grimmspeed products will be finding their way into the Batmobile.
– Ported/Coated Intake Manifold
– Ported/Coated TGV deletes
– Ported/Coated Headers & Cross-pipe
– Phenolic Spacers
At this point I still don’t think I will be going EWG but we will see.. For emissions and other reasons I’m still on the fence here.
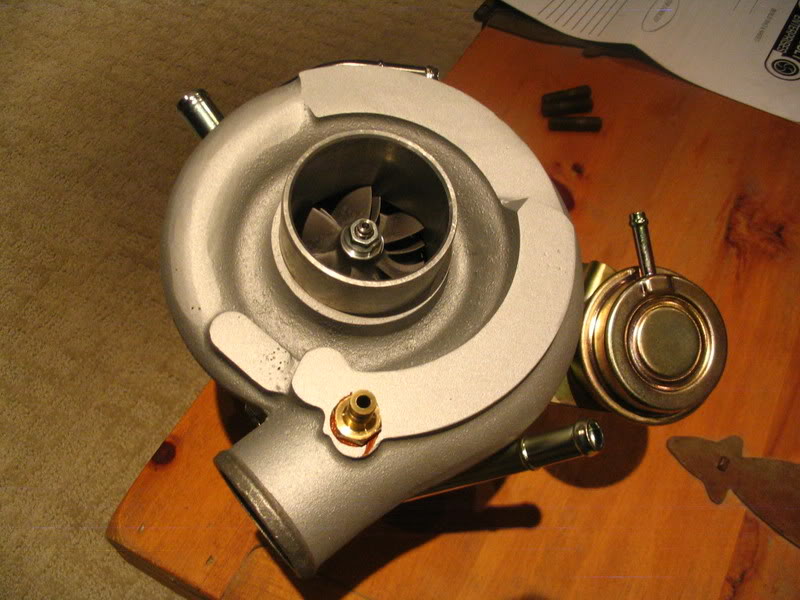
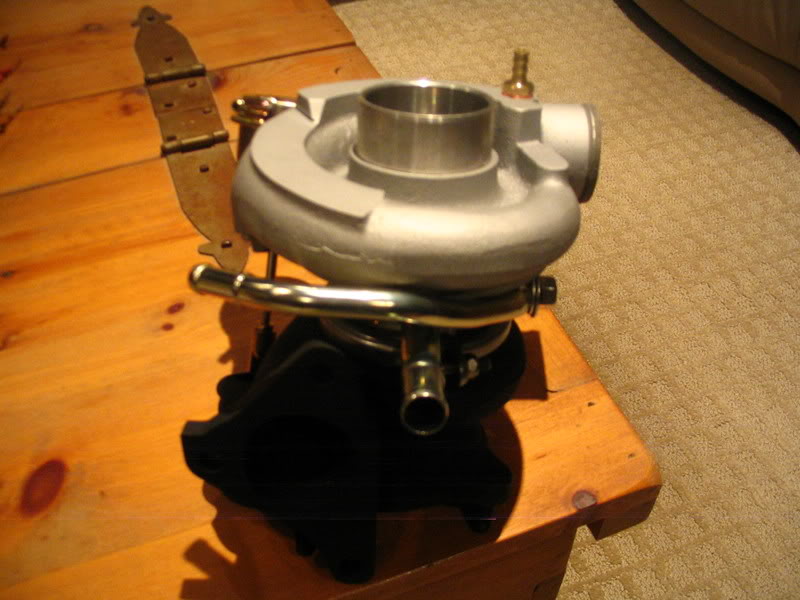
So far the flow parts have been taken care of, so I needed to do something about the little snail that I have on there. Right now the fact that I am running the stock STi shortblock and still running my 02 WRX tranny, made it so that I didn’t want to go with a huge turbo, but wanted to go with something that would be a fun street turbo. This is where I started to talk with Jerry back at Deadbolt. These were the guys that I originally bought my 16G from and have had great respect for. Jerry and I talked and it looks like the 16G will be going back to get massaged into a TD06-20G. This will also be paired up with a nice set of Power Enterprise 800cc injectors.
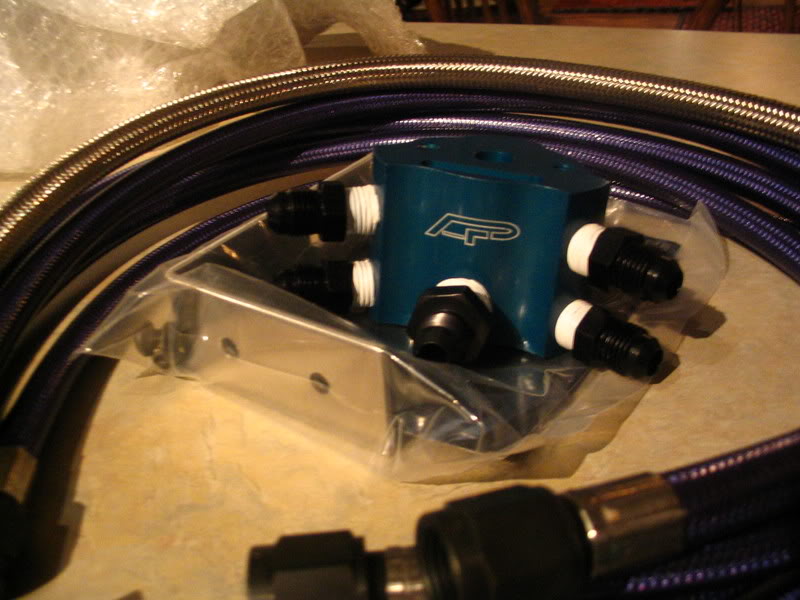
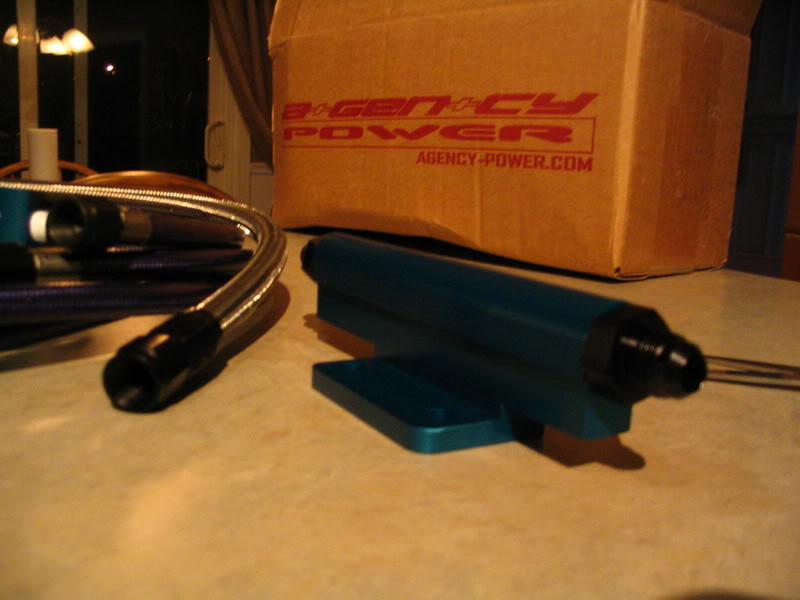
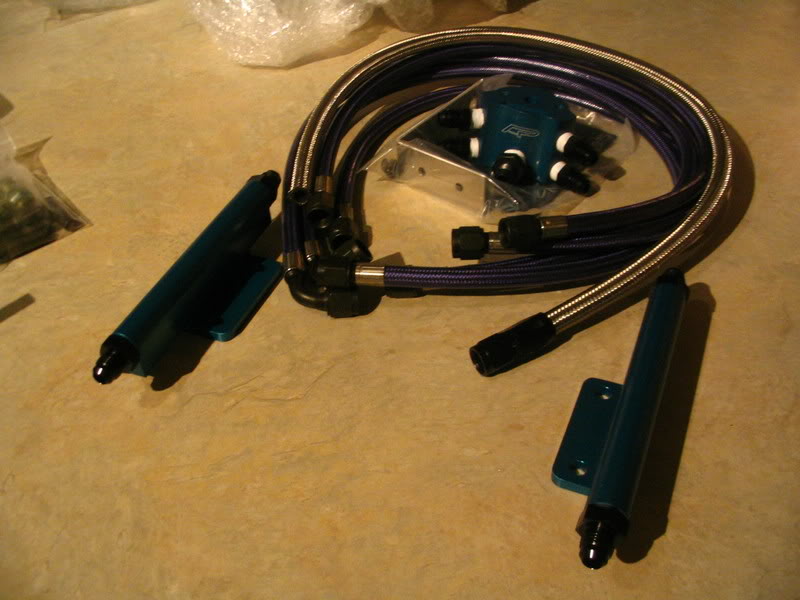
Now that I will have everything off of the car, I wanted to address the crazy Raw Fuel Smell TSB that Subaru won’t do anything about other than charge you crazy amounts of money to change out a $13 part. So I started looking around and had heard good things about Agency Power Fuel rails. So I reached out to one of my local vendors, Joe at First Force Performance . Joe is running the Agency Power fuel rails on his 2000 RS that has a swapped JDM WRX engine with lots of other goodies including a nice rotated mount turbo setup. He has been quite happy with the fuel rails in his setup and has been able to source me a nice set of these fuel rails.
Ok.. now I have the Injectors, Rails, Turbo, Heads, Pullies, Porting, and Coating taken care of, I needed some more fresh air coming into the turbo. This is where I started talking to Matt at KS Technology about their 73mm MegaMAF short ram intake. This is a great product and probably one of the only alternatives out there to the Perrin product. Matt has been great and assured me that their quality is second to none and I will not be dissapointed. This BigMAF addition should make sure that we can provide the right amount of air to the new turbo.
So what is the last piece of the puzzle…. TUNING!!! This is where Andy and Paul at Neetronics have stepped up and are taking care of me. Neetronics just installed their second Dyno. So now they have their existing load based dyno for tuning and simulating load and driving scenarios and then also their new DynoJet dyno for providing consistant reliable numbers to be able to accurately measure your gains. Paul pretty much can tune anything that that drives!!!
The car will be at Neetronics for their Dyno Day Meet on July 5th so that I can get the baseline on the car done so we have some starting numbers to be able to compare against after the work has been completed.
So these are the players/products involved and I will be updating the thread as the products arrive and the build moves forward with pictures as well as installation and product impressions.
Lastly, I’ve been having some exciting conversations with Peter Tarach at Modified Magazine as I’ve been piecing the build and the concept together. Peter is quite interested to see how it all turns out. As the project draws to a conclusion it is possible that the build showcasing these great products and vendors will find its way into the magazine.
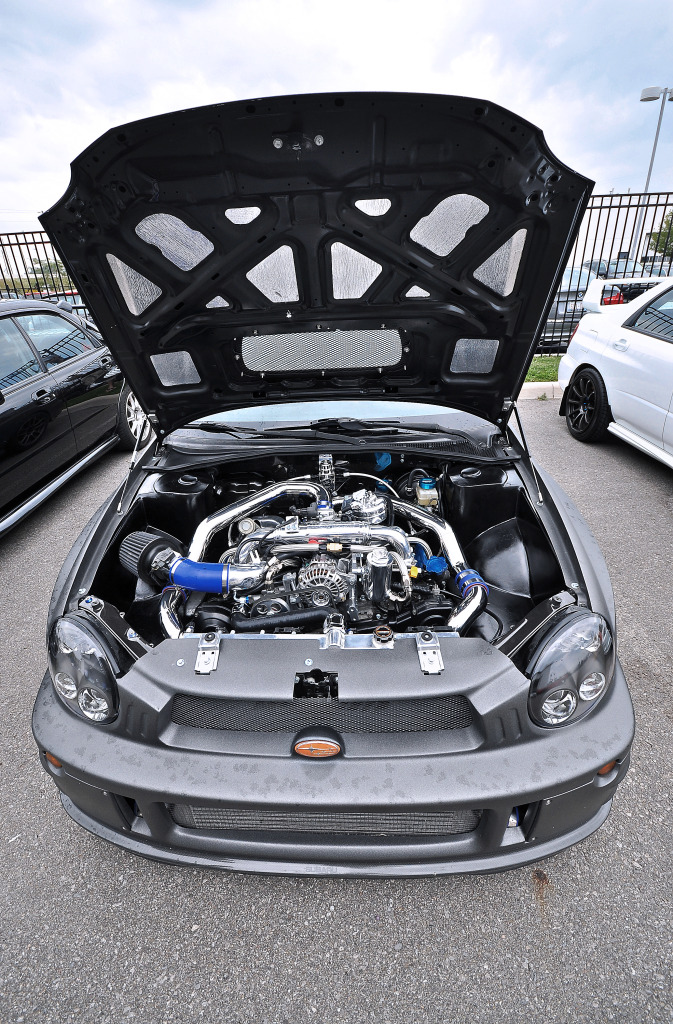
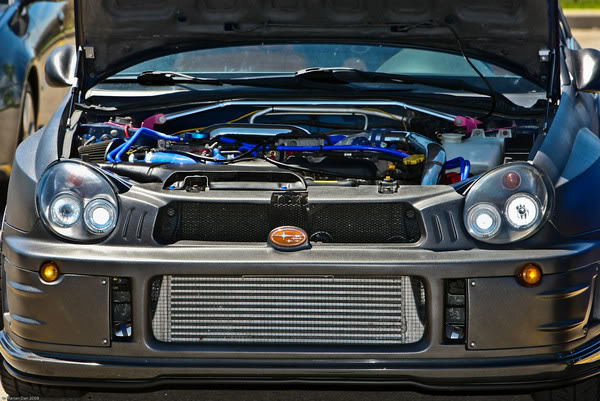
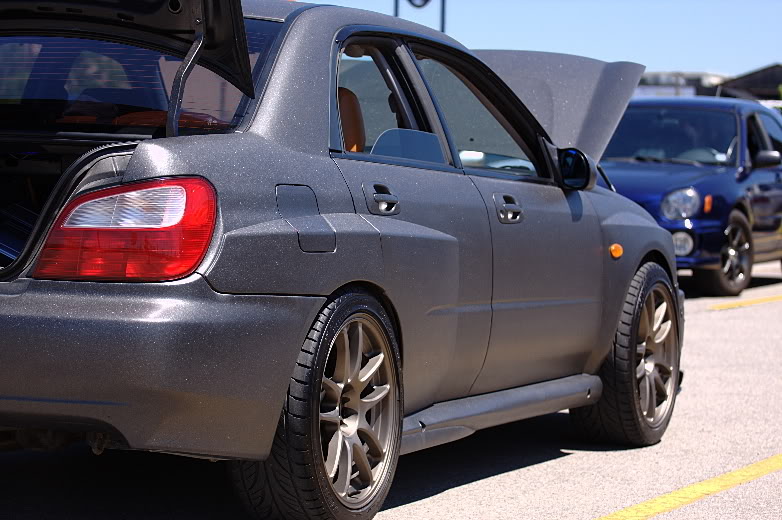
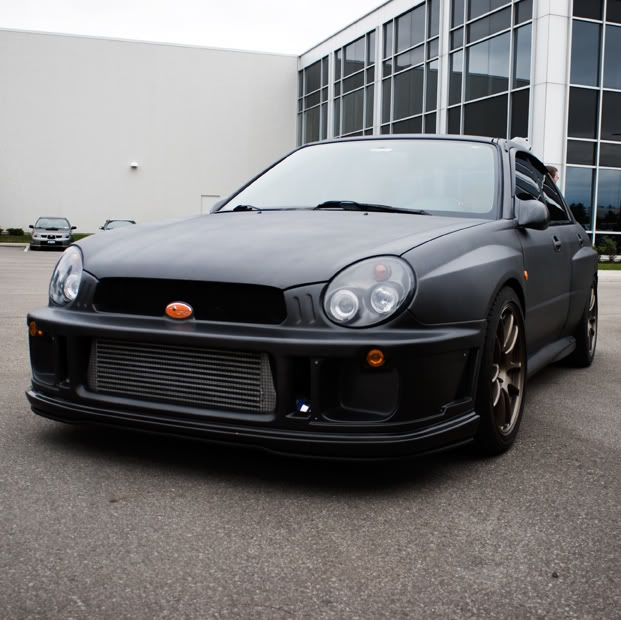
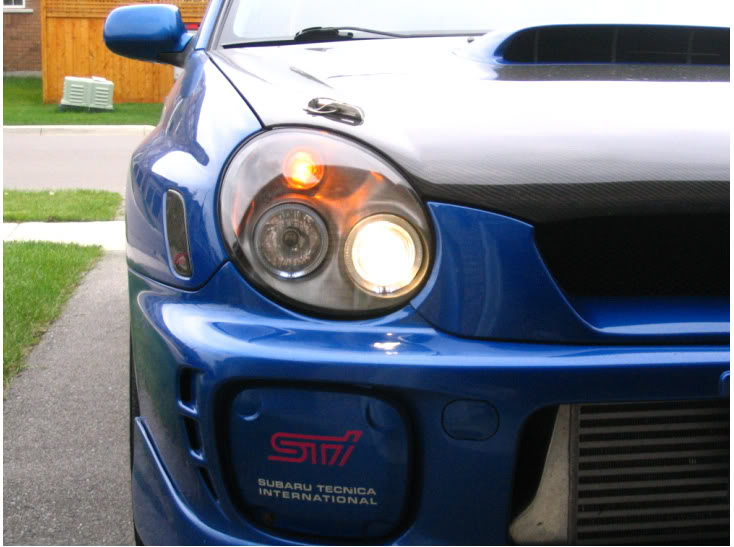
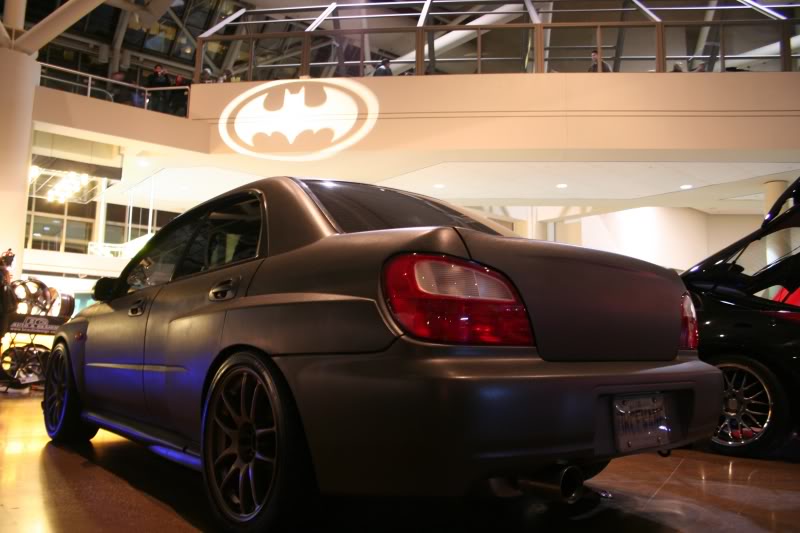
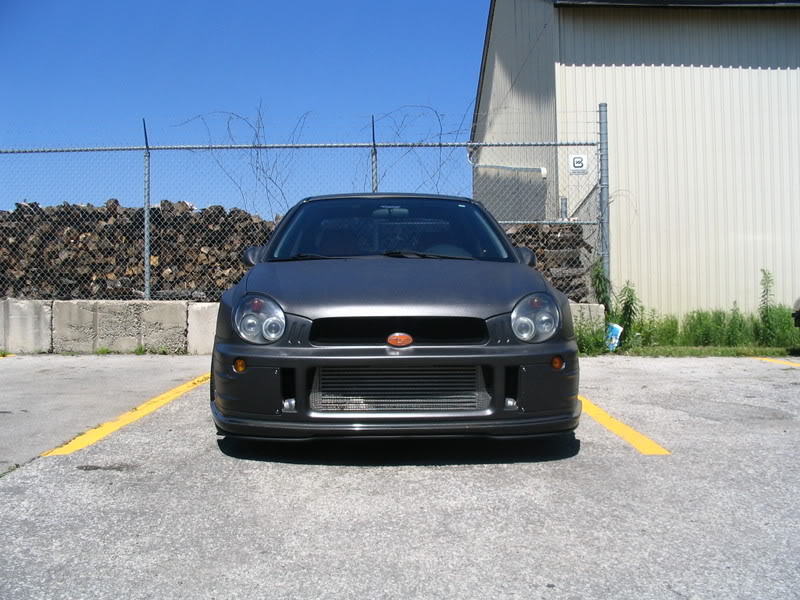
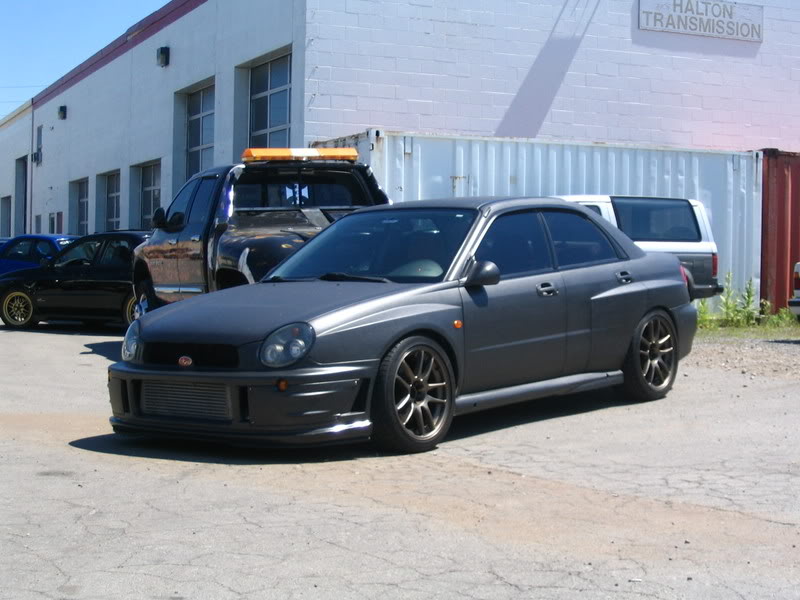
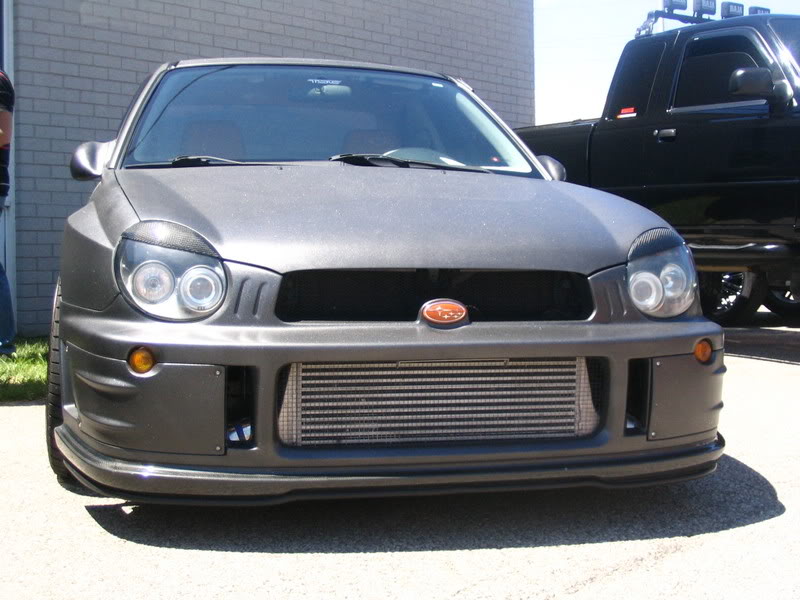
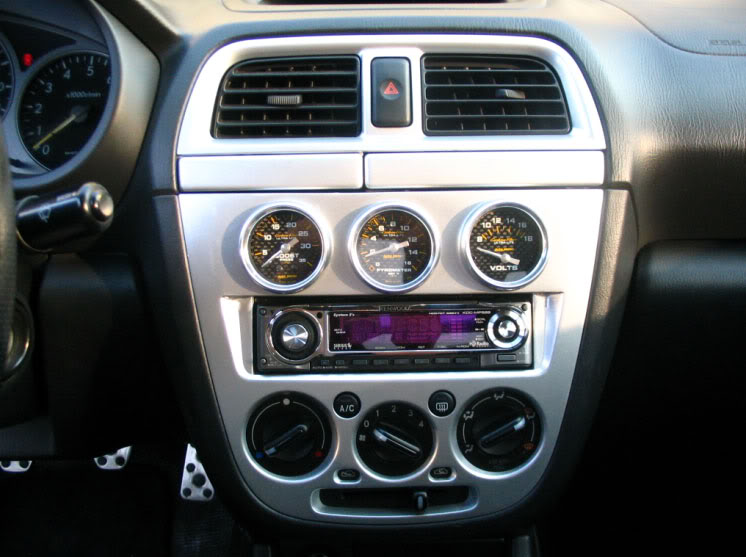
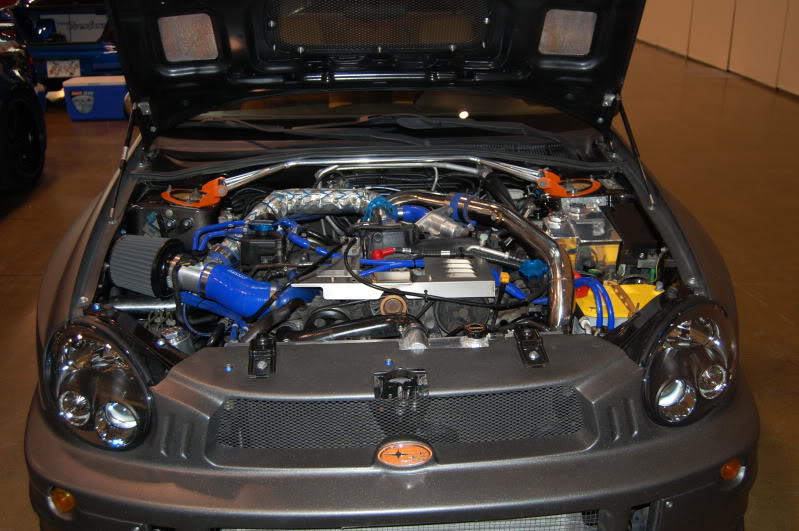
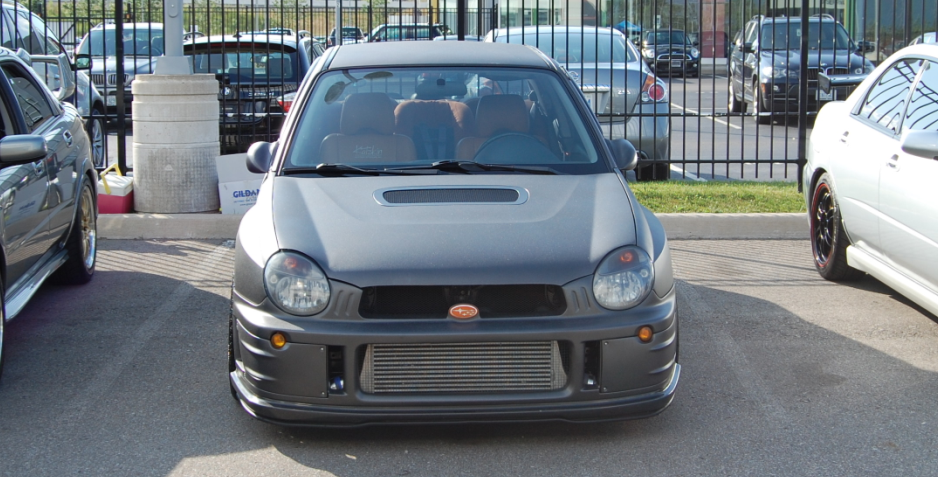
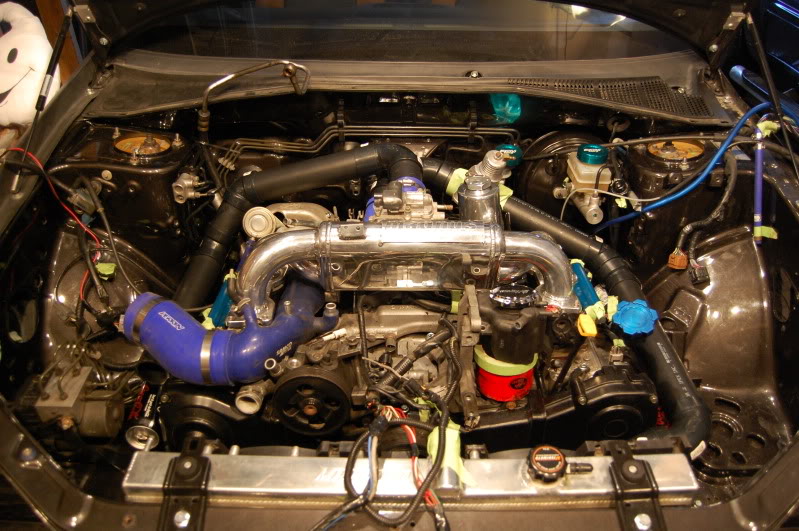
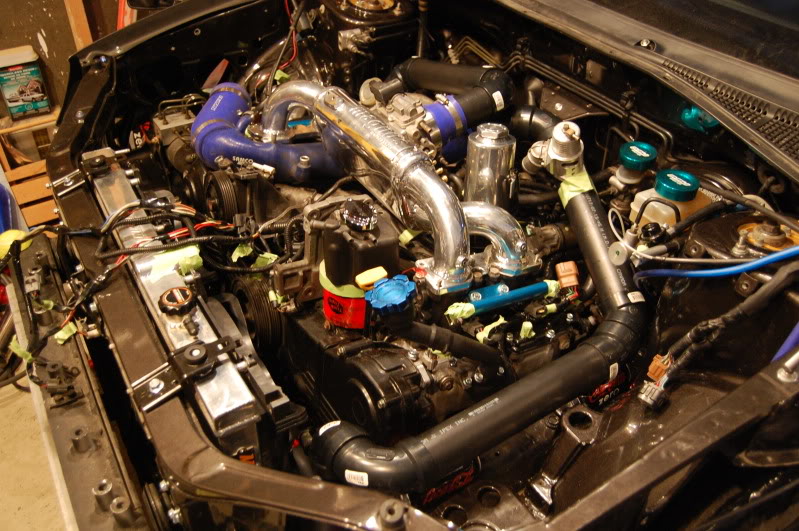
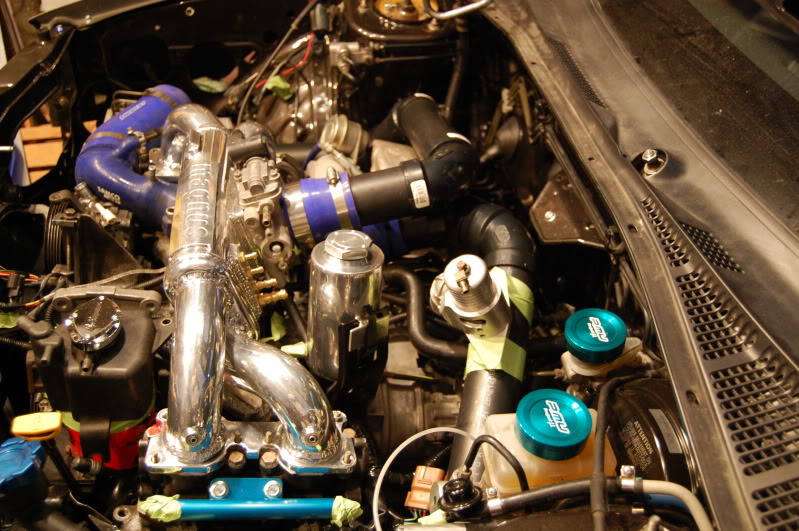
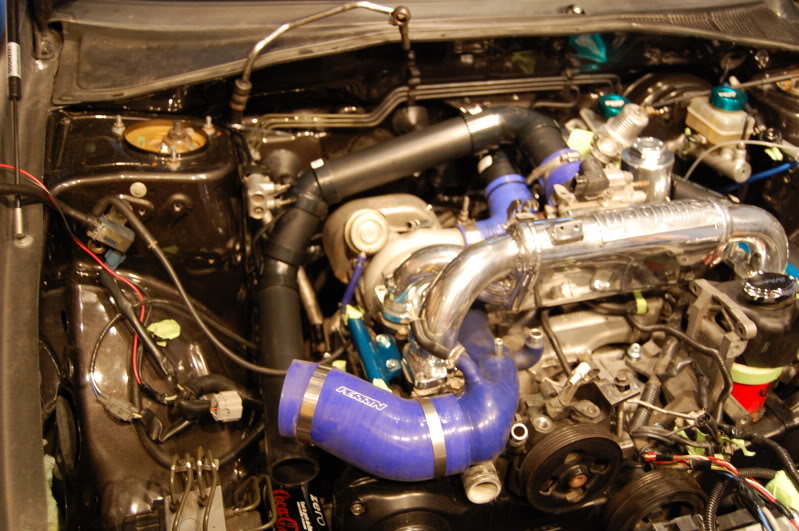
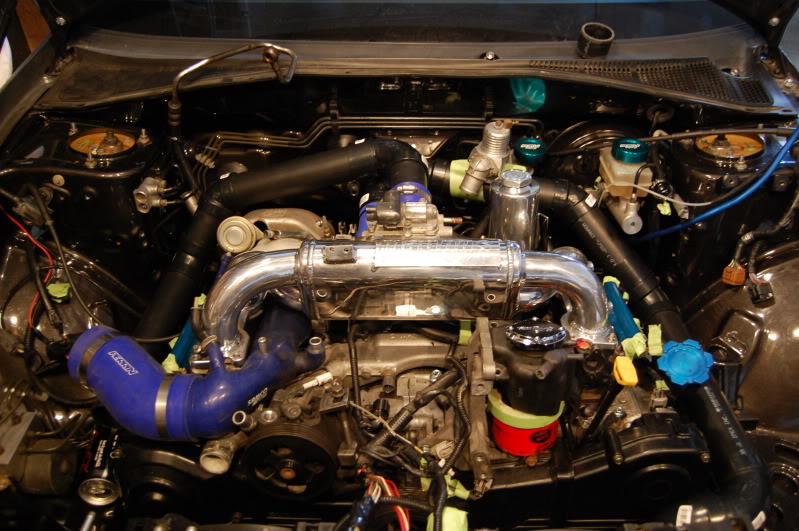
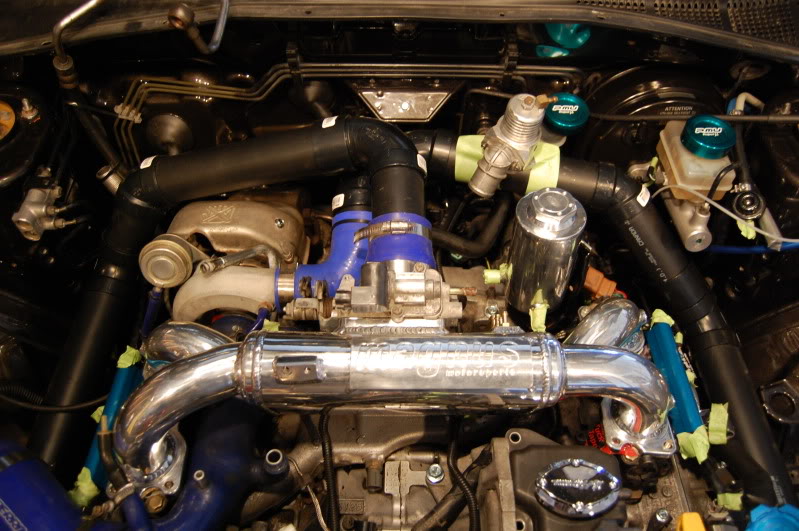
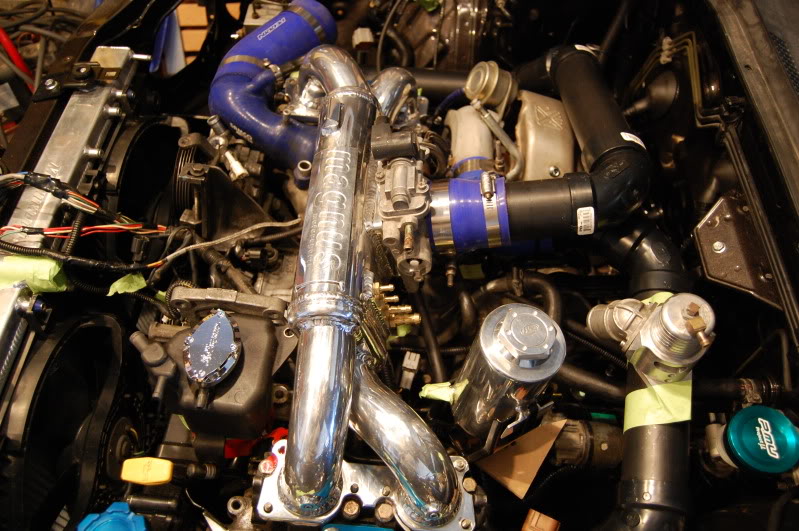
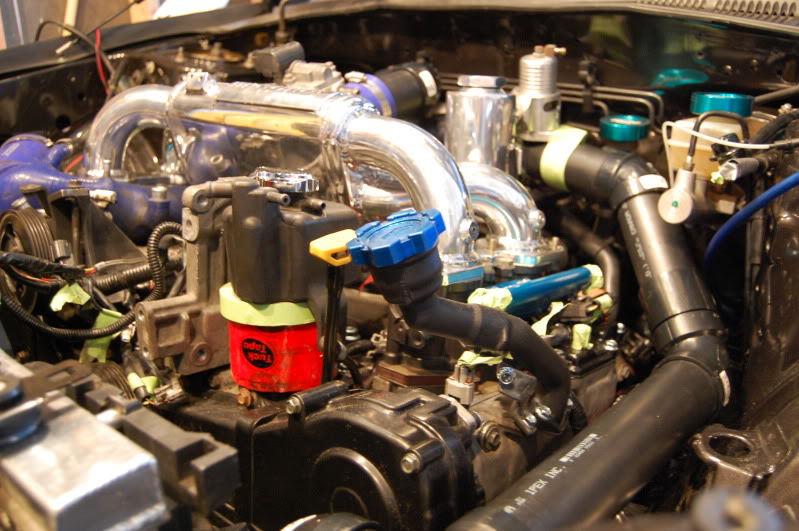
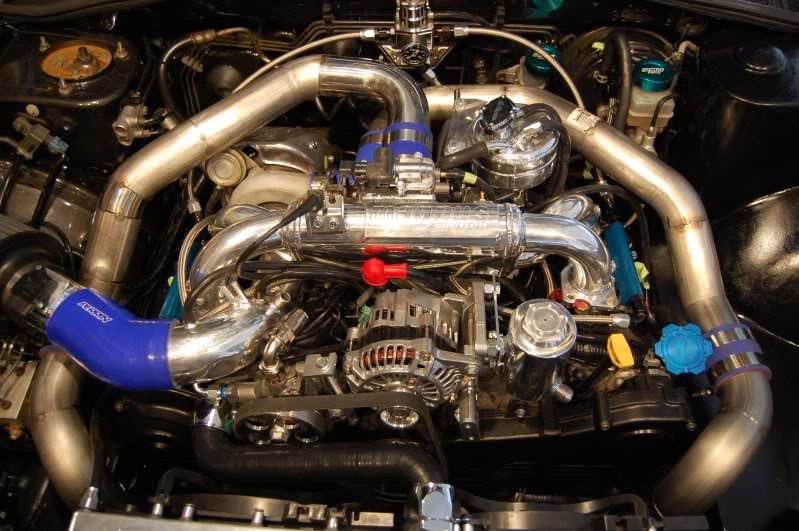
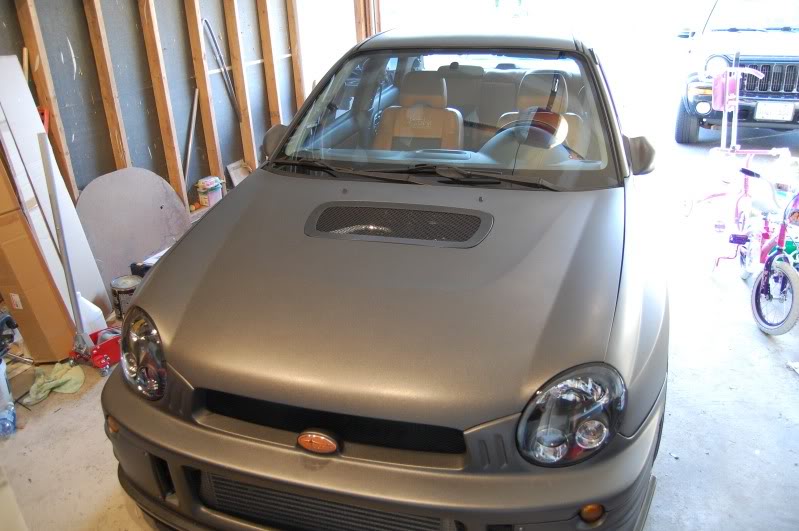
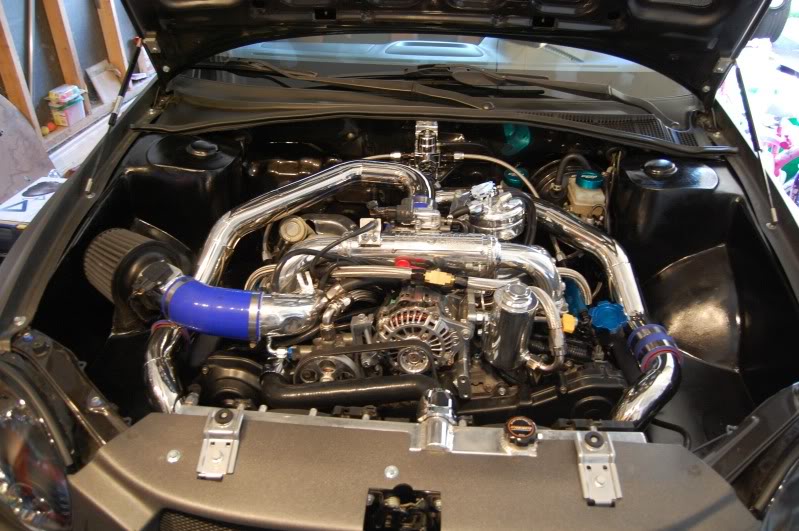
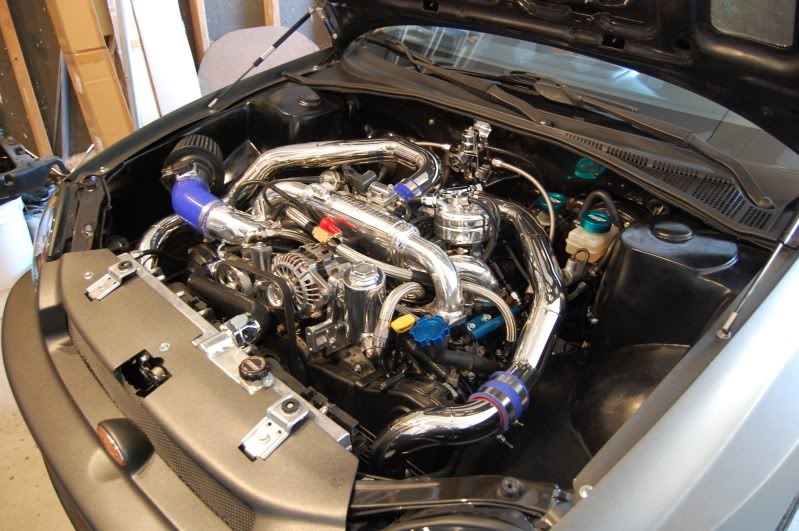
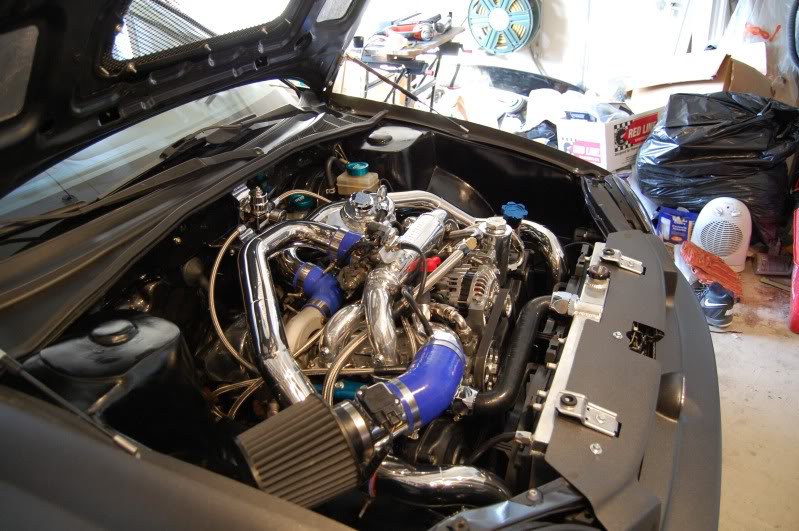
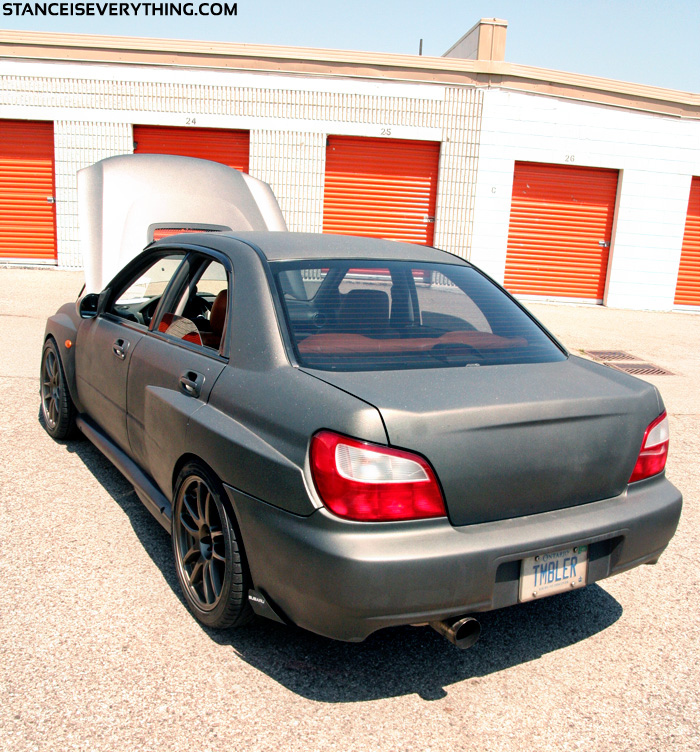
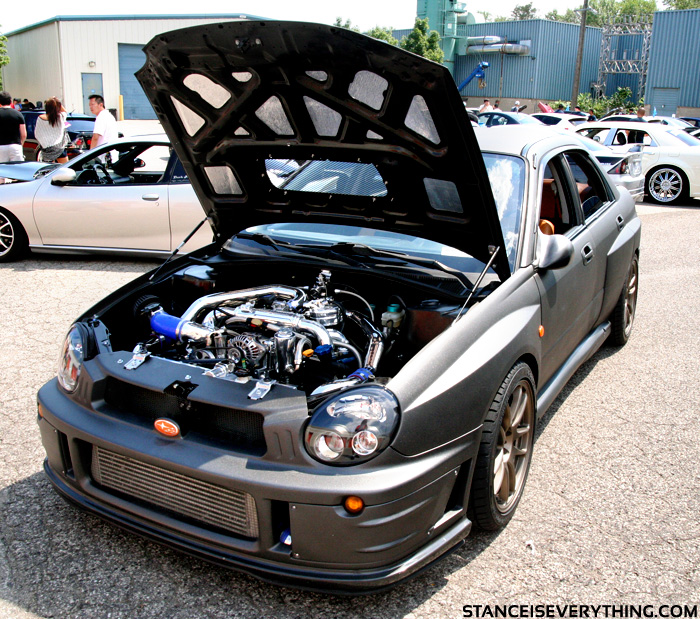
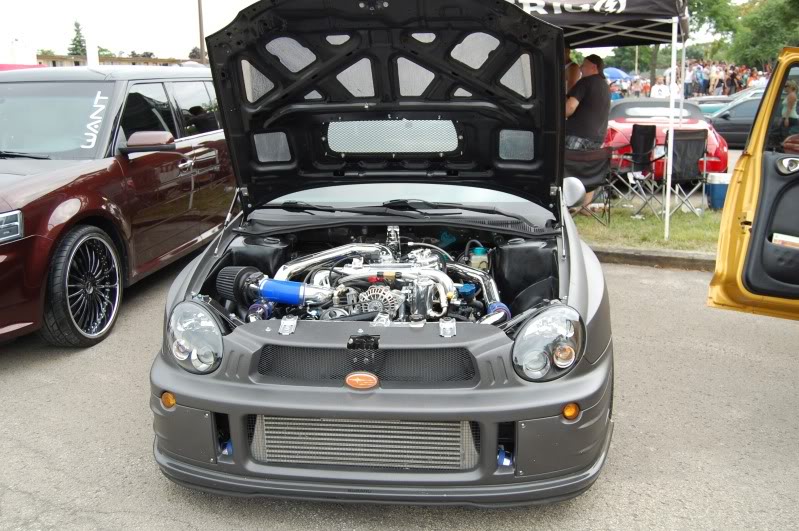
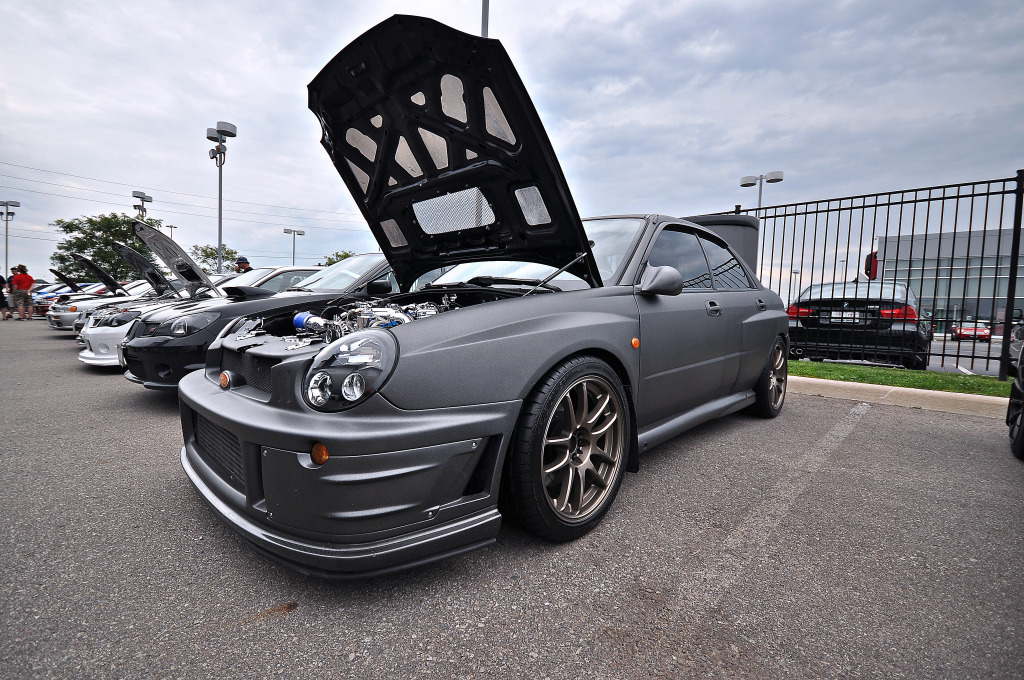
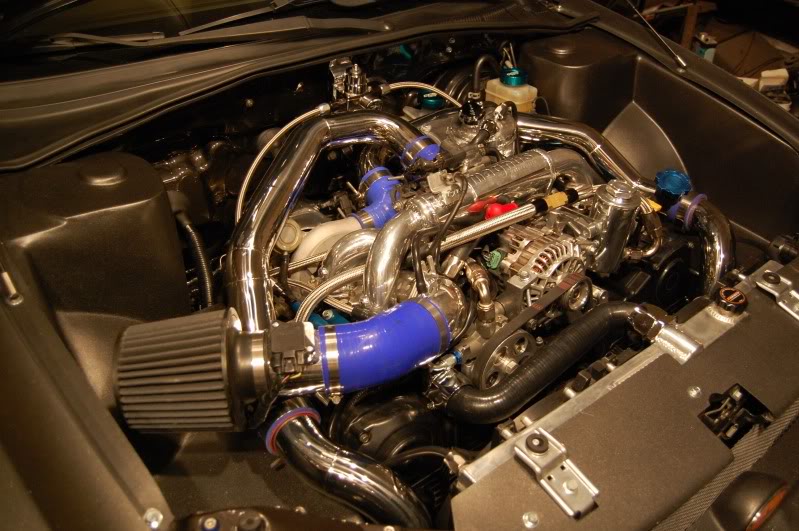
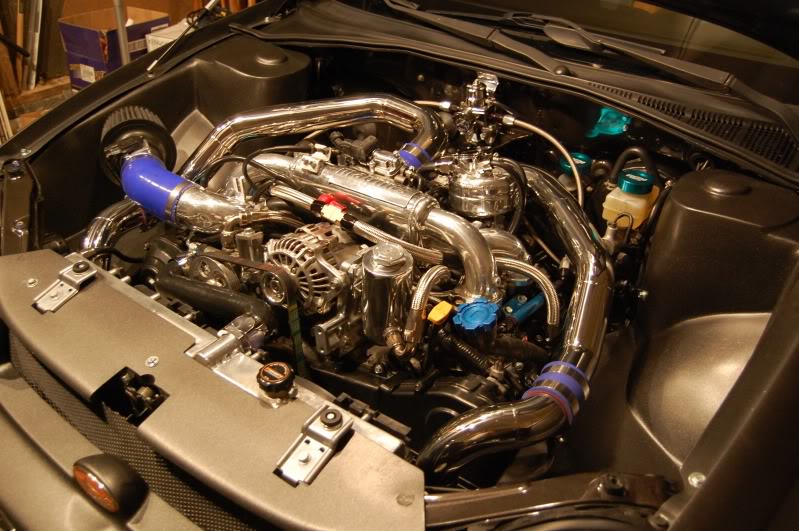
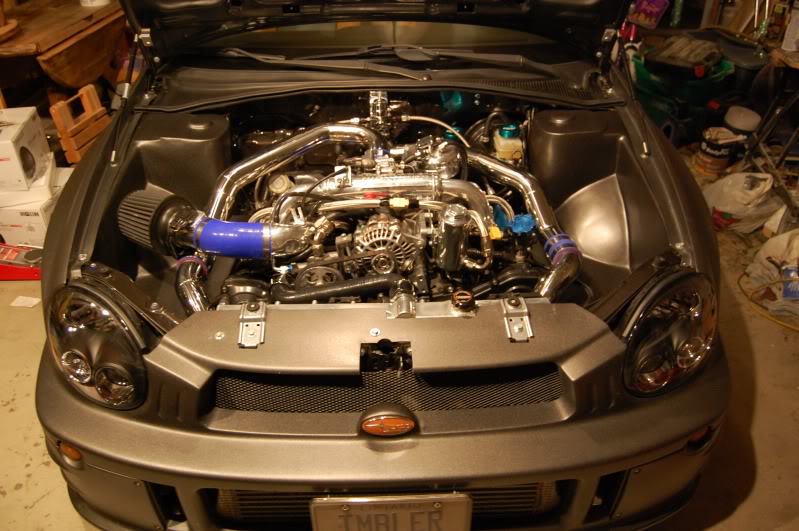
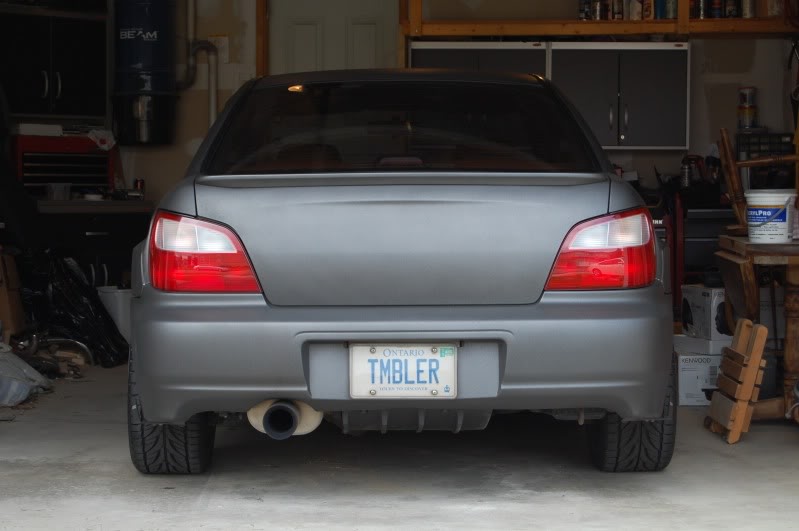
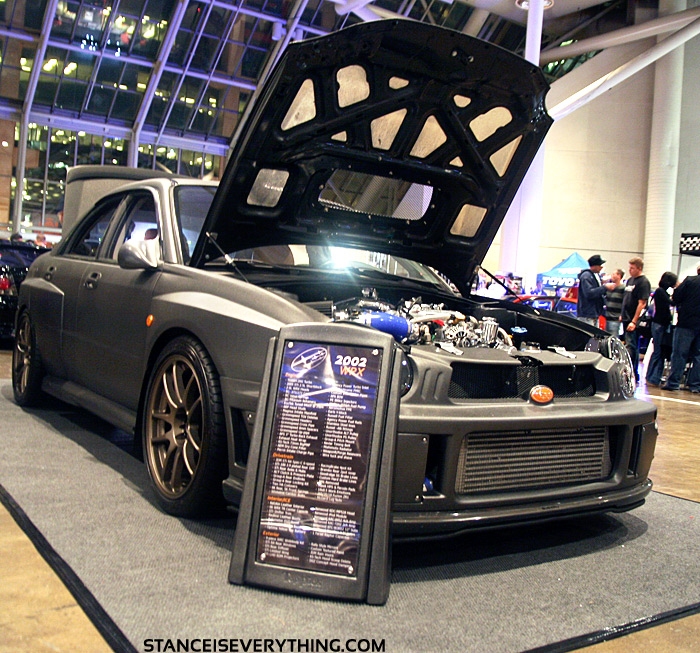
For those who are not familiar with my some of my build threads and my car here are some pics of Batman’s Tumbler…
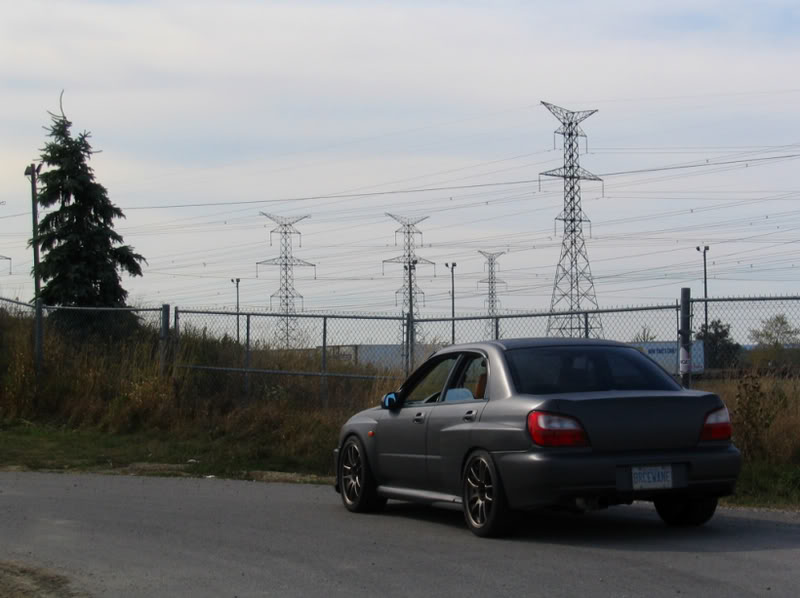
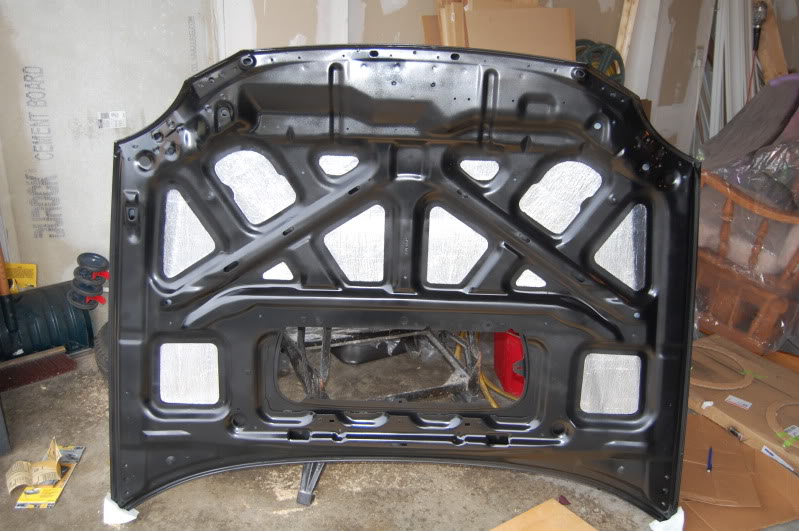
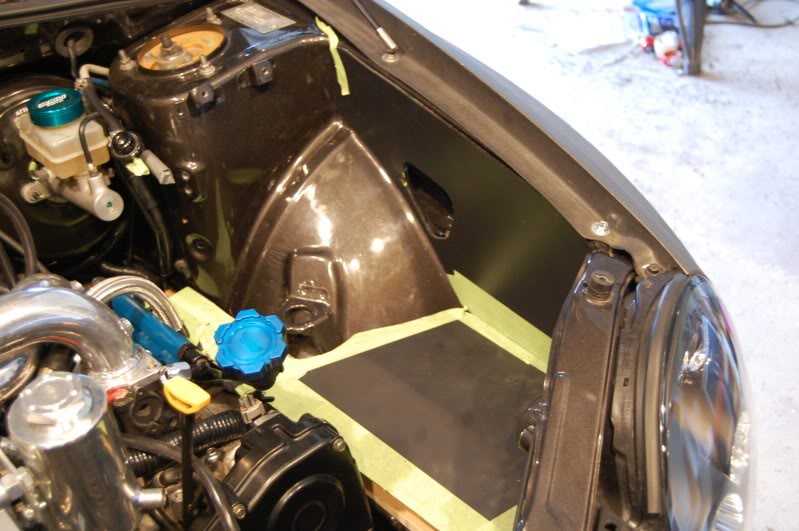
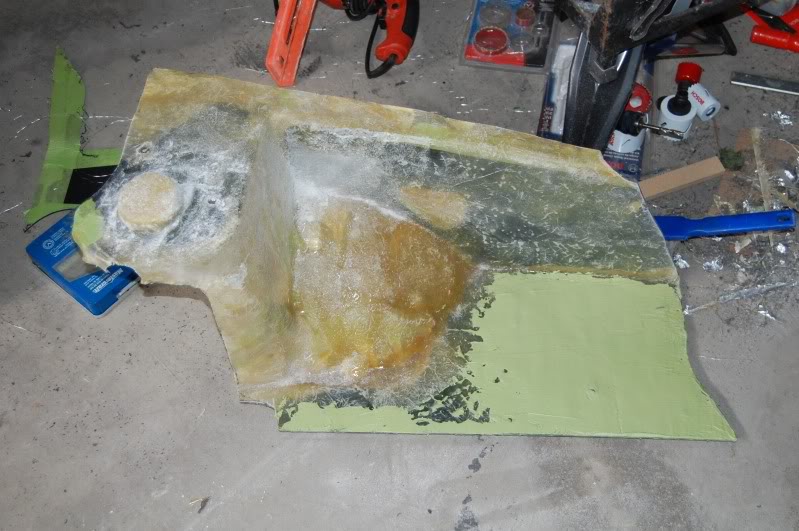
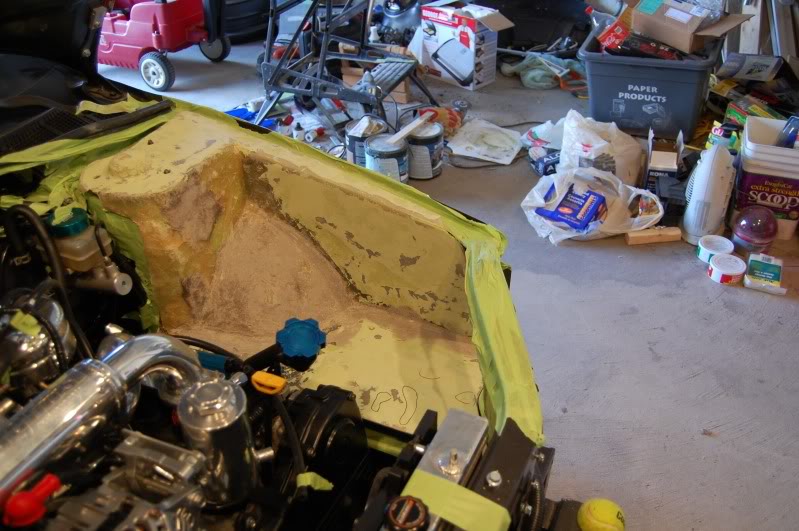
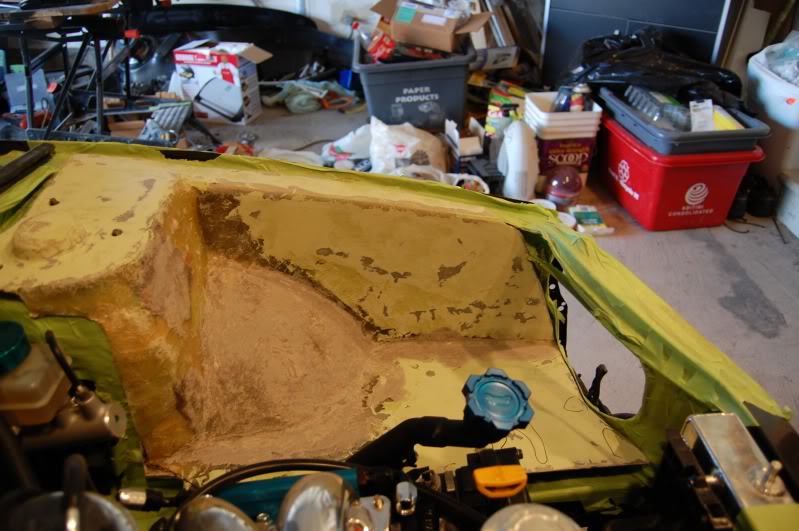
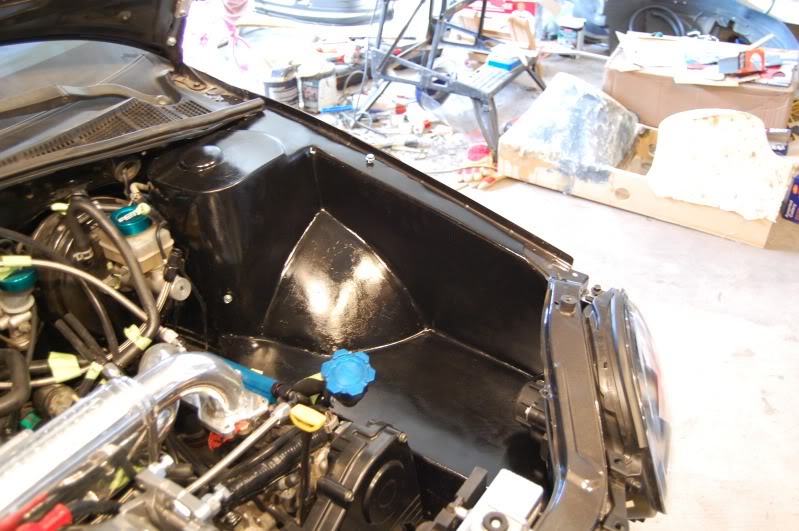
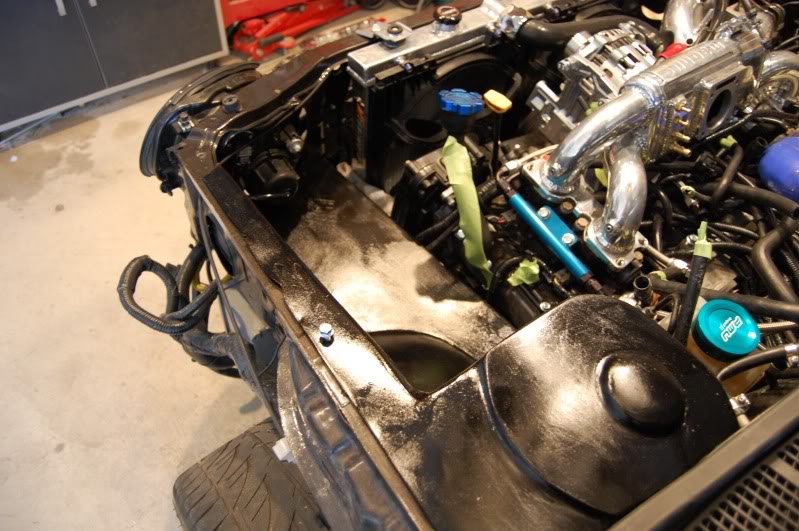
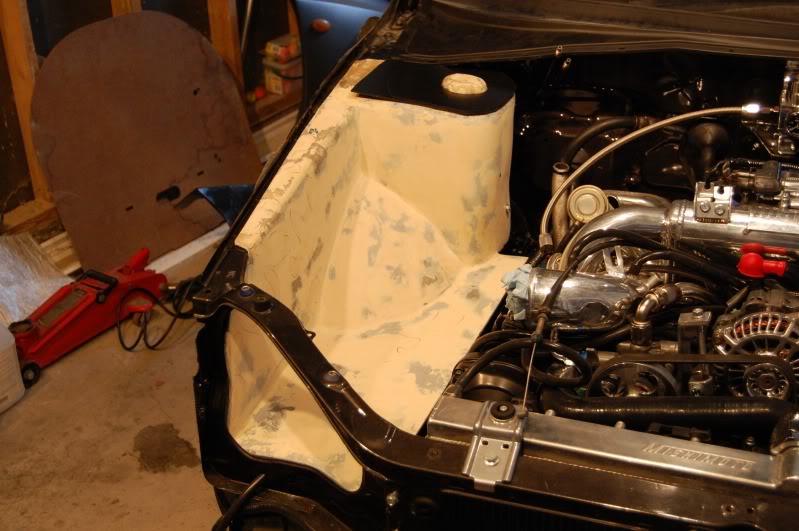
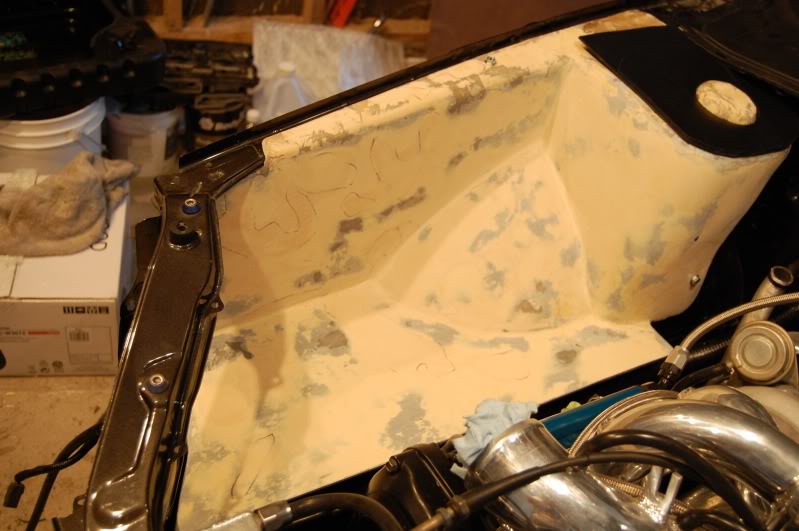
So when I have the engine out of the car, I’ll be taking off the fenders, hood, and front bumper and doing a little bit of tidying up. I’ll be taping off everything and painting the engine bay black.
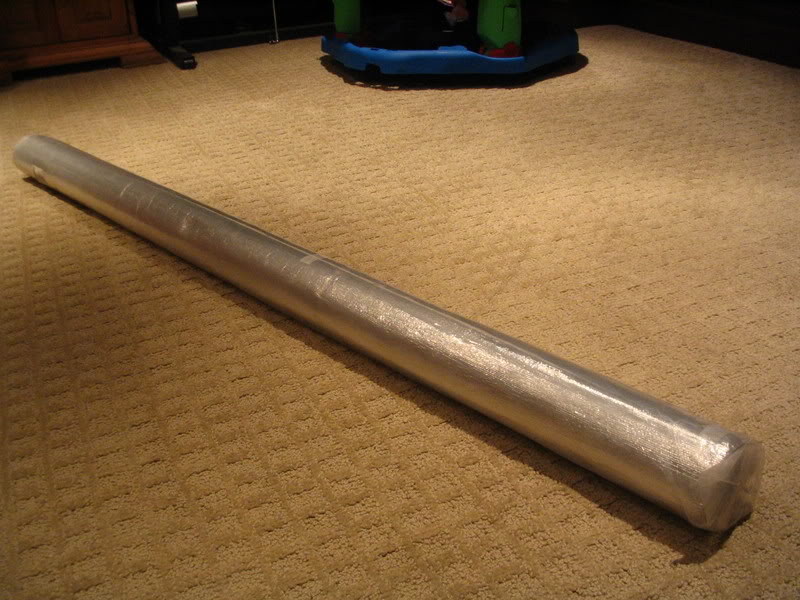
As well the firewall will be getting a treatment of adhesive heat sheild that arrived just the other day. This material will also be finding its way into my cold air box that I will be building.
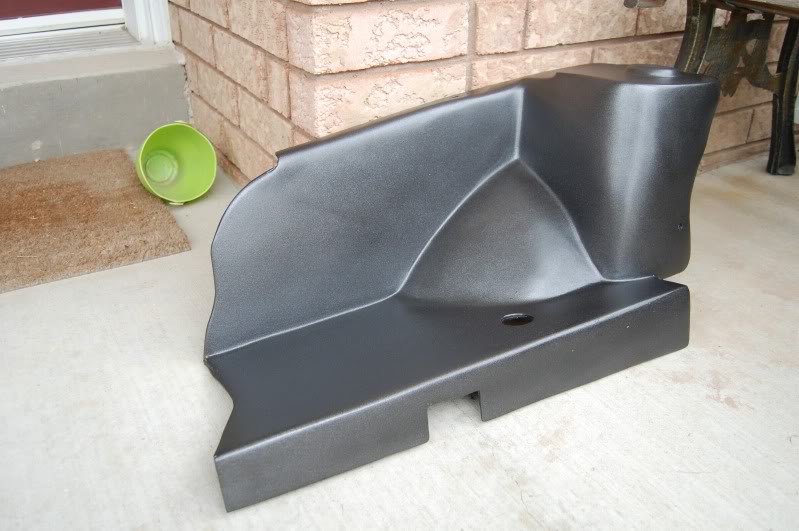
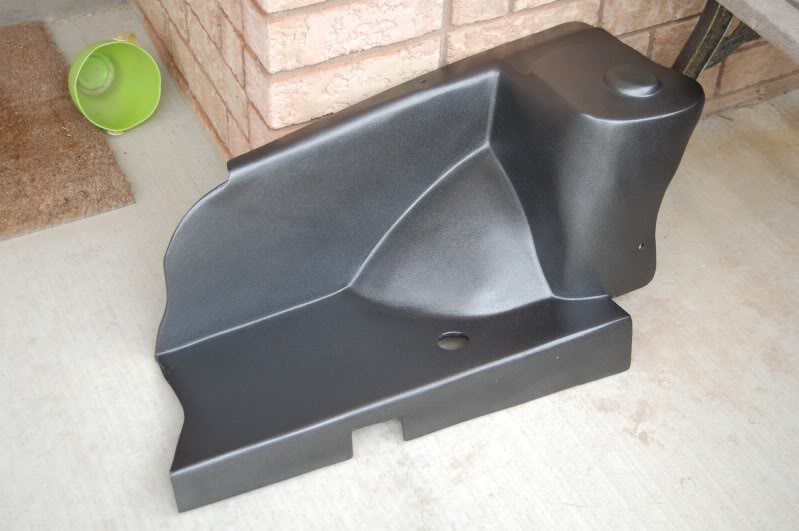
The cold air box will be part of some new engine bay covers that I have up my sleave 
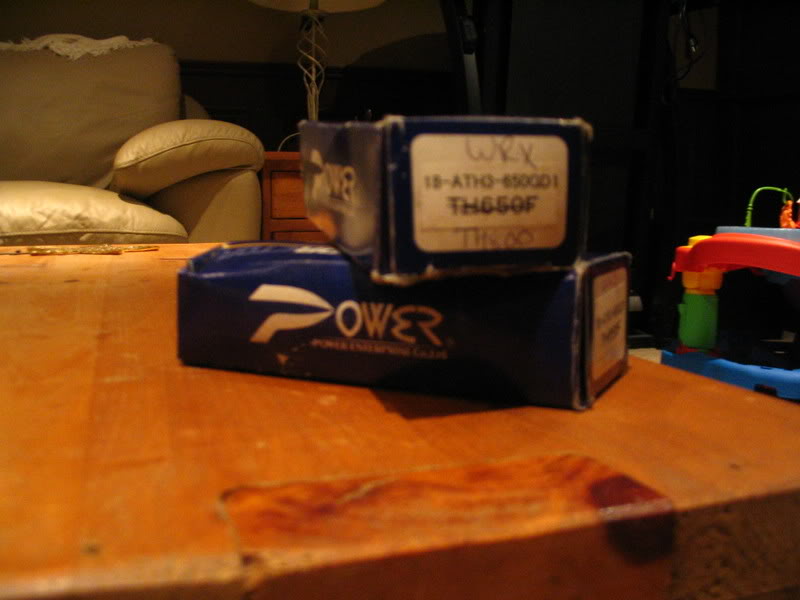
I was also able to pick up a set of Power Enterprise 800cc injectors from a member of the Toronto Subaru Club that was no longer in need of them
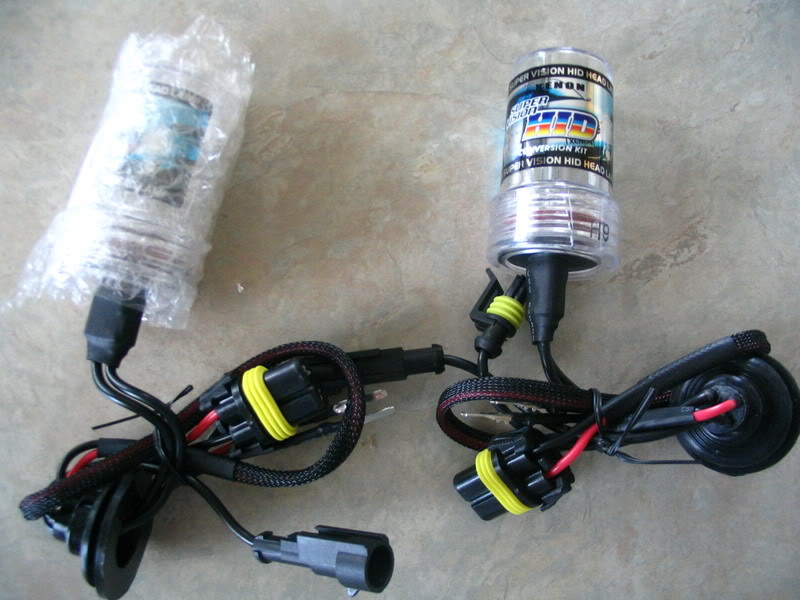
Also, I figured I would do a little bit of an upgrade to my custom headlights that I made…
So this nice 6K HID kit with Relay wiring harness…
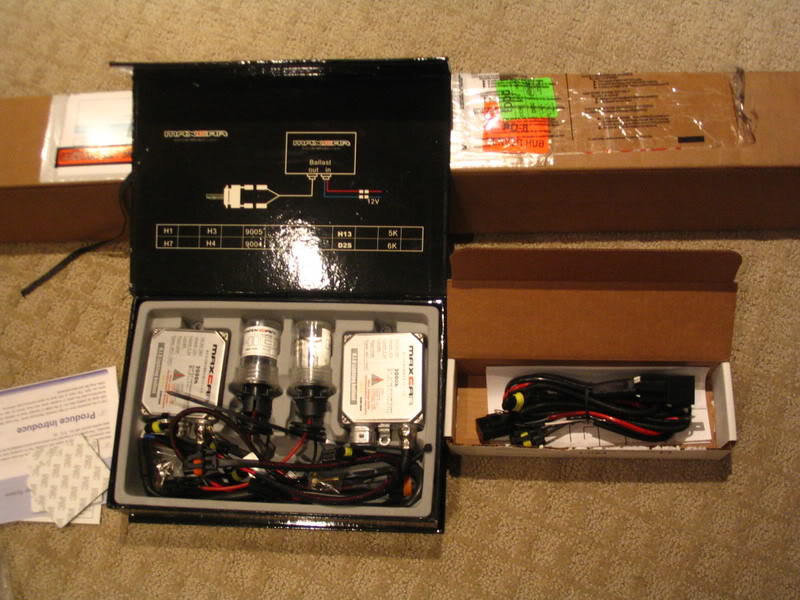
and these Hella 90mm projector modules..
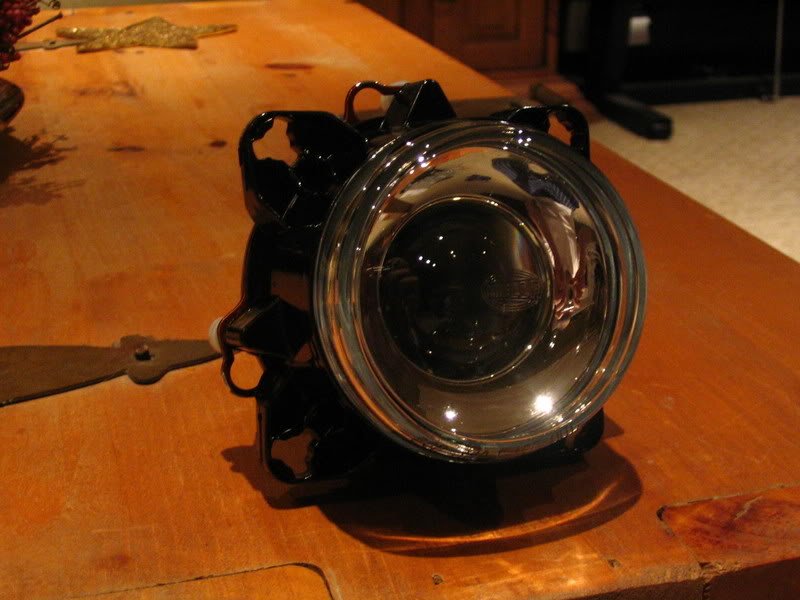
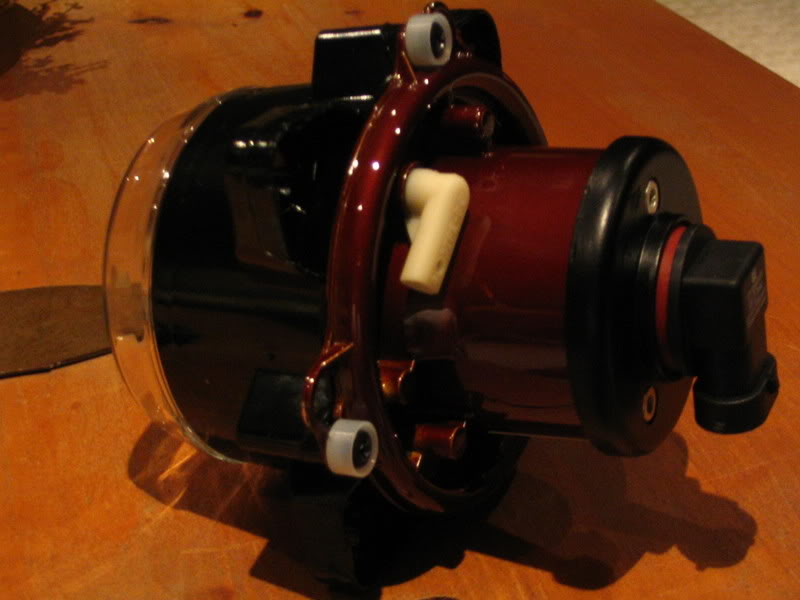
Will be finding their way into these:
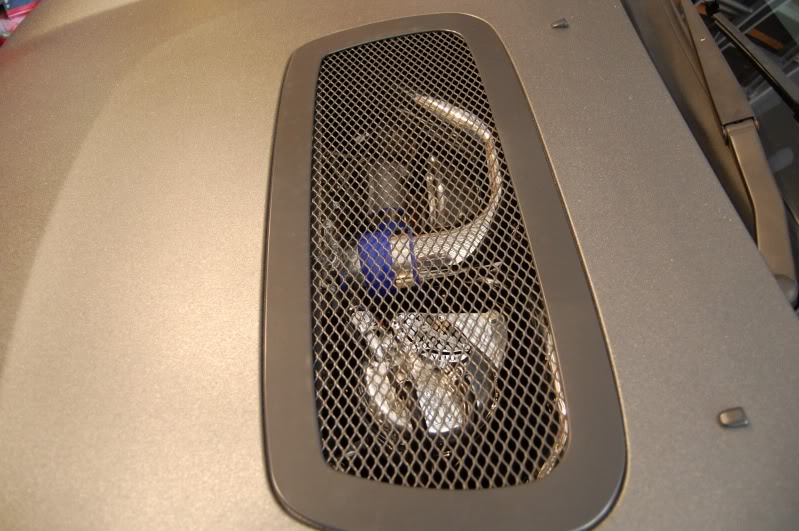
Here is the bat symbol…
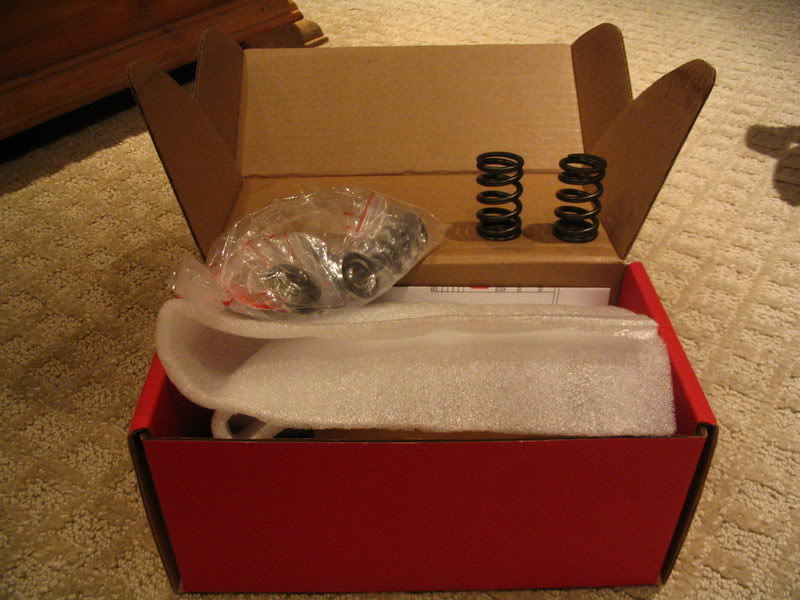
Some nice Brian Crower Springs and Titanium retainers
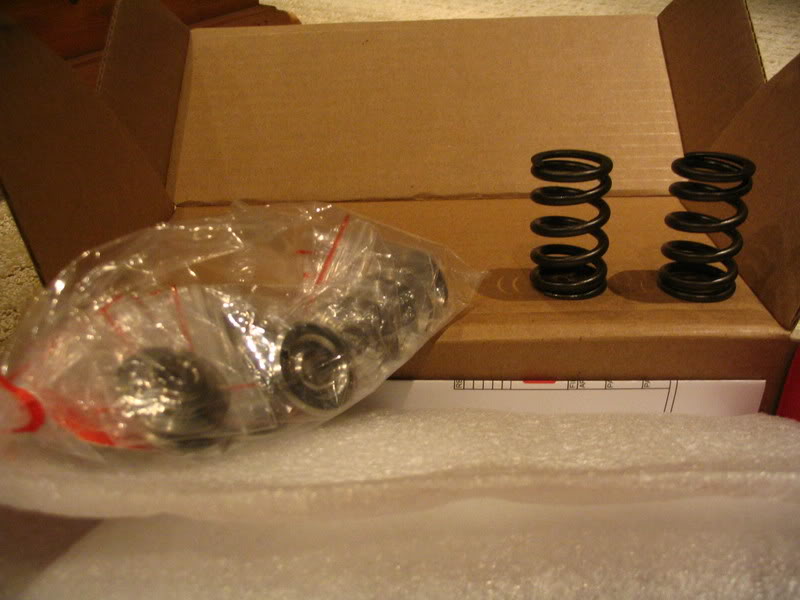
To save on some shipping costs I also picked up some 1mm oversized valves for next years porting and built bottom end project 
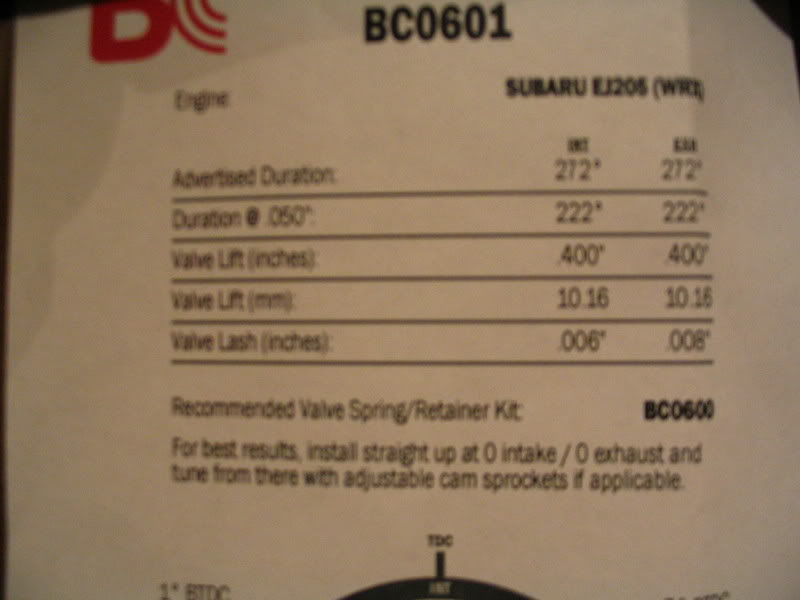
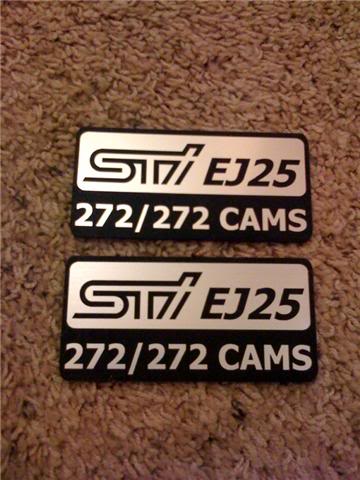
And then… my favorite… 272 CAMS!!!
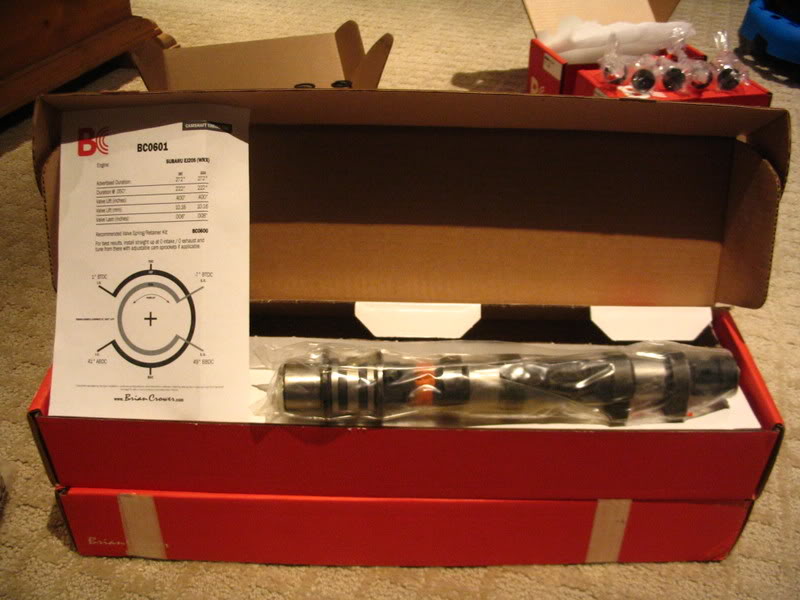
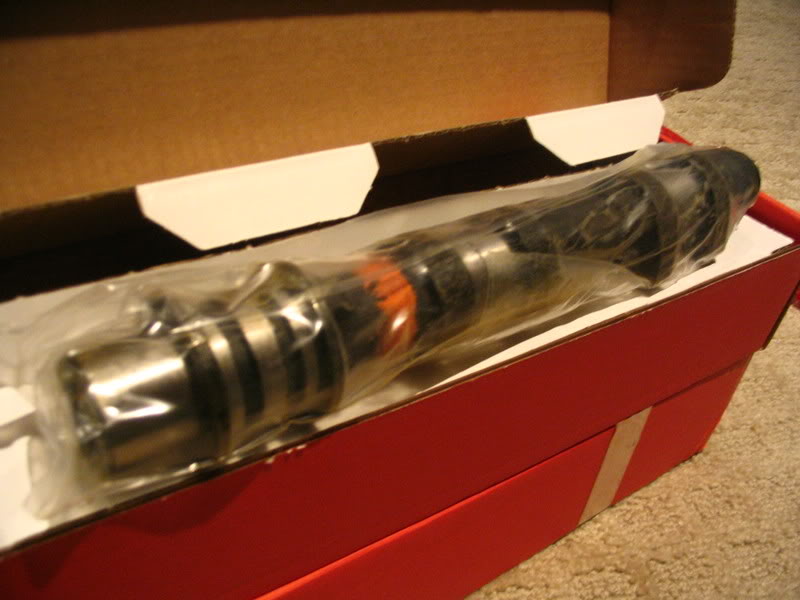
Sorry about the blurry picture (cheap camera), but here is the spec sheet..
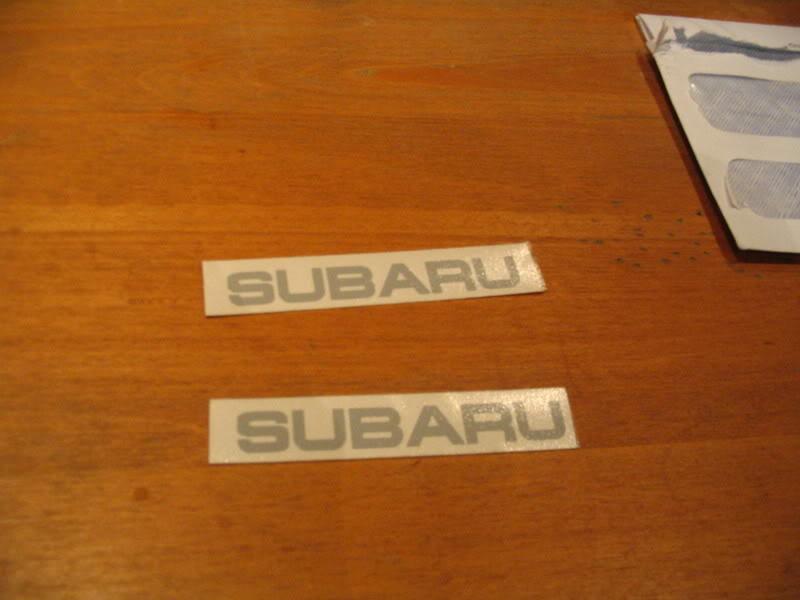
Also, these showed up from RallyDecals.com… they will be finding a place on the car as well in another little side project 
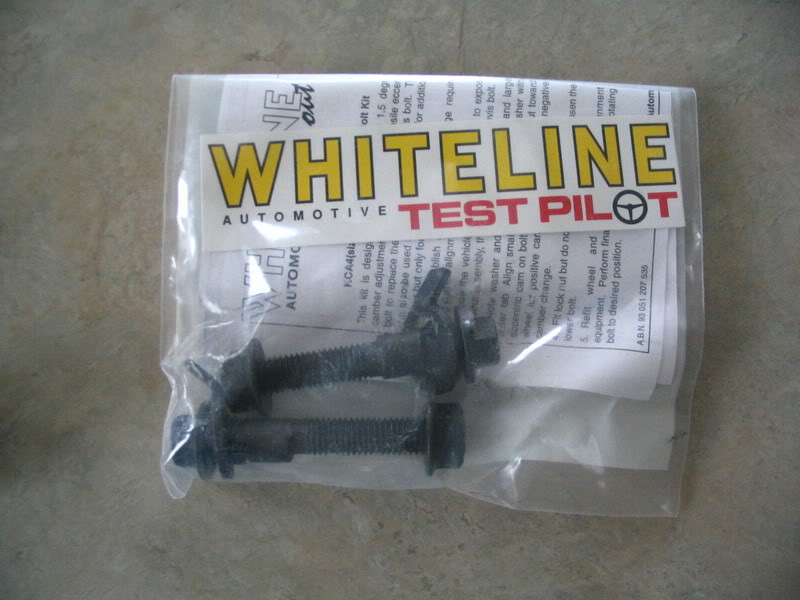
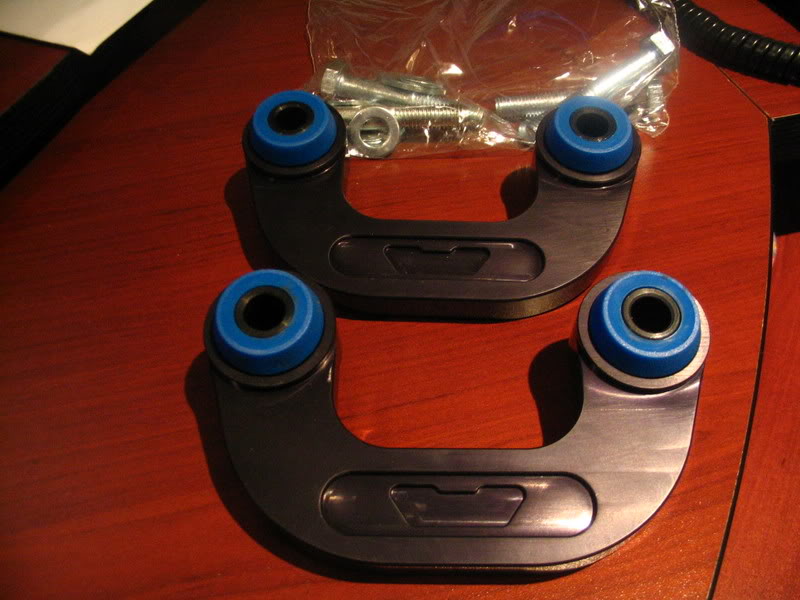
More good stuff just arrived… First to correct the little bit of rubbing that I have in the rear:
And then the new H9 6K HID bulbs for my Hella Modules…
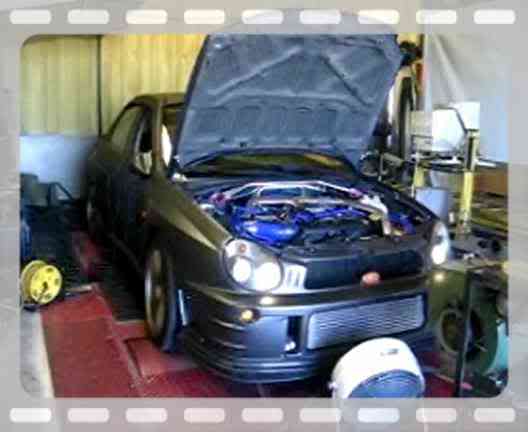
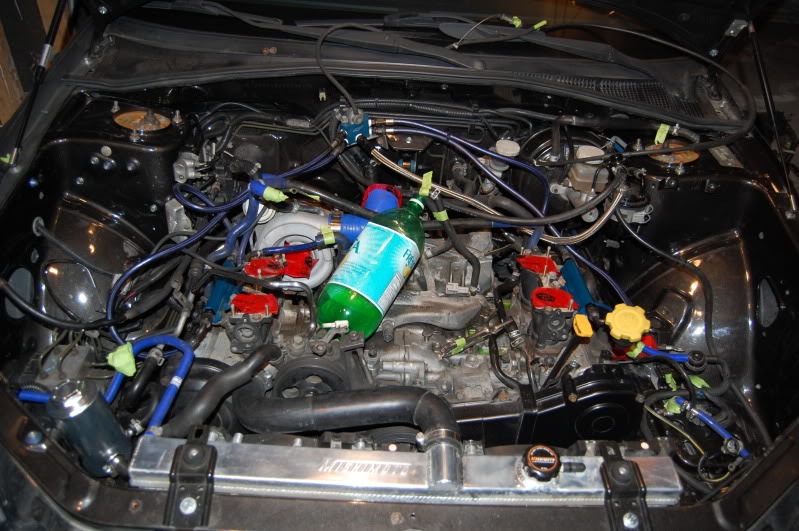
So it was time to pop the Batmobile up on the rollers to get an idea of where I am starting from before the build… I showed up just before noon and ended up with my name last on the list Which was okay because it meant I could stick around and talk to those I know and also meet new people.
We had a couple of issues with the car. One was that I knew that I had a boost leak. Derek from Group-A was quick to track it down to the gasket between my BOV flange and the BOV itself.. lots of air rushing out of there. In the dyno vid link below you can hear it squealing like a stuck pig. Made a big difference when we got that fixed with a new gasket.
The second was that I knew I had a CEL for a low voltage on the front O2 sensor. I knew it would have an effect but as you can see from the Dyno chart below, and in the video, the car was constantly correcting itself, pulling timing and trying to figure out what the heck was going on. What a roller coaster looking curve!!!
New O2 sensor should smooth that out for me. Also at the very end, Andy at Neetronics started to ease off her a bit because it was really starting to run lean from that damn sensor.
Overall not bad numbers for a regular 16G, Pinks, WRX heads and STi Shortblock.
First the video:
And the Dyno chart:

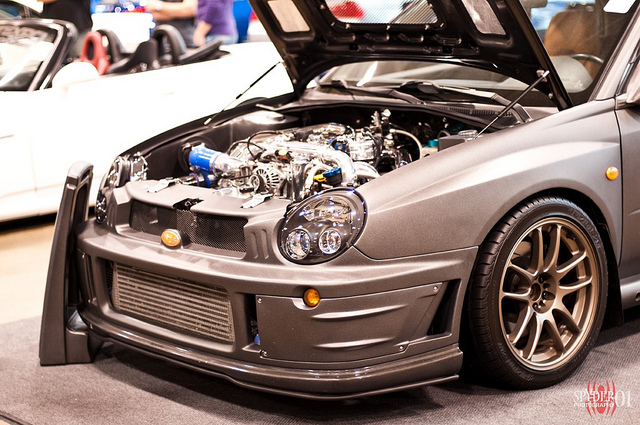
And I snapped a couple more pics of the car since I don’t have hardly any with the fog covers on there:
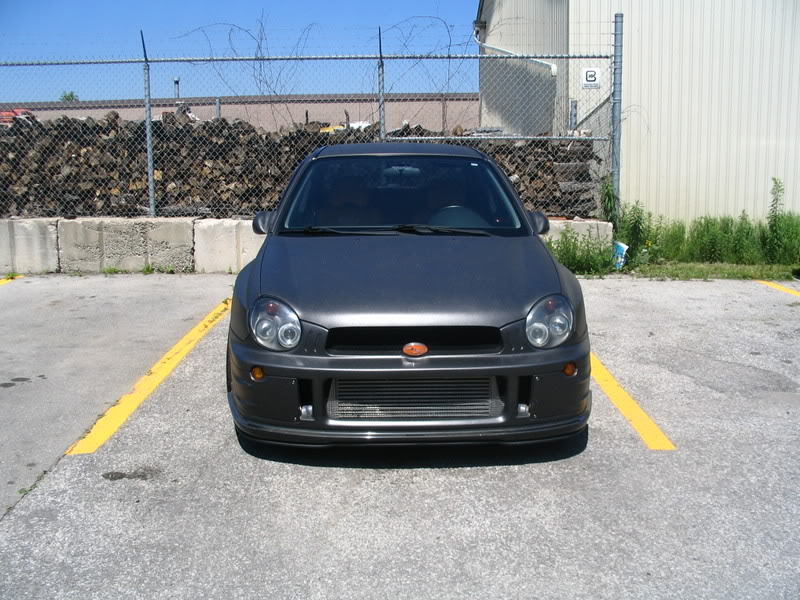
SHAZAM!!!
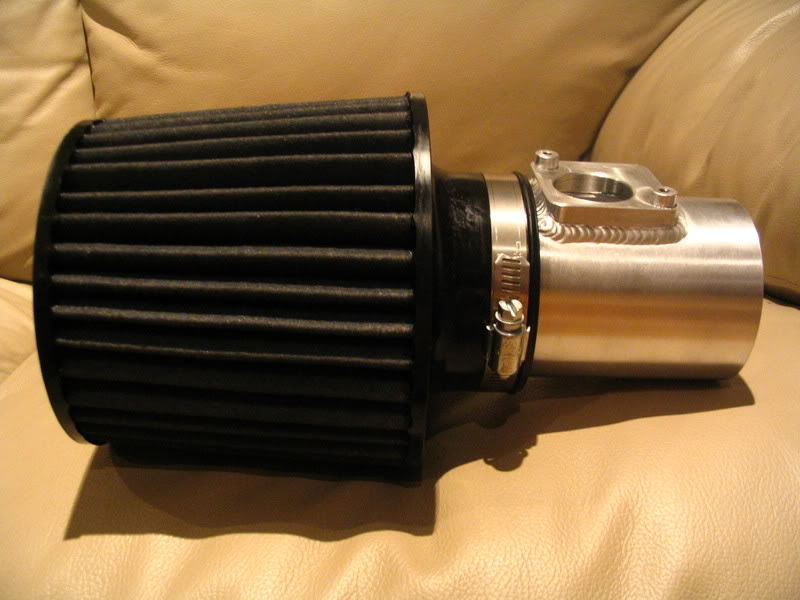
Matt from KS Technology just hooked me up with their Short Ram 73mm MegaMAF Big MAF… Click Me for ShortRam
DAMN, this thing is nice. They have also just released a series of Cold Air MegaMAF Intakes as well that will work with various different models of FMIC’s. Click Me for CAI
All these are in both 73mm and 83mm. It can come with either a K&N cone filter or an AEM DryFlow. I opted for the DryFlow for my setup to reduce the chance of oil messing up the MAF.
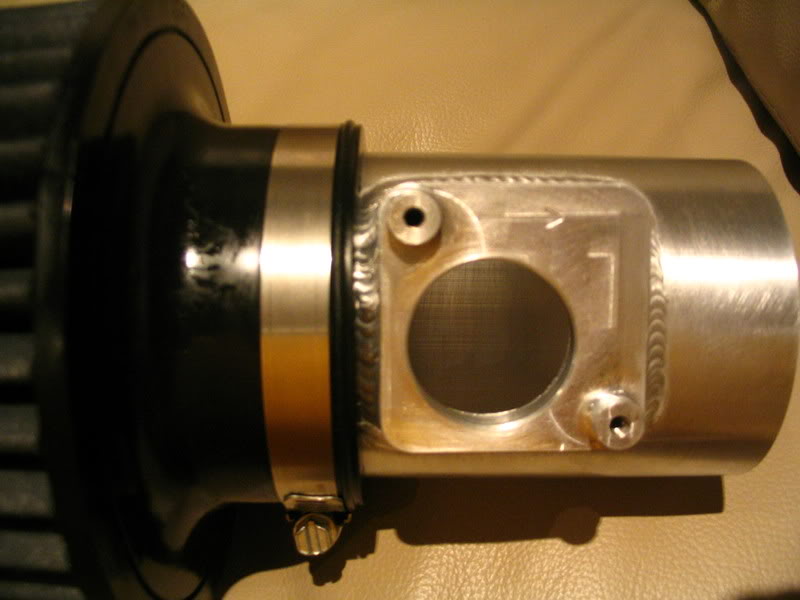
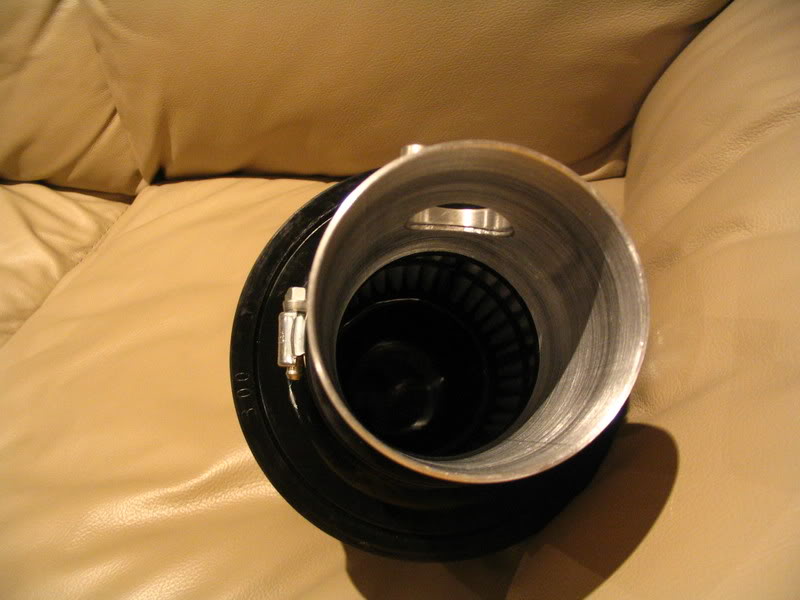
Here are some pictures so you can really see the quality of this piece. What a great alternative to the Perrin Big MAF. Look at those nice welds  Even had the foresight to mark air flow direction
The Batmobile was out at the JRP T.A.S.R. show today (Tuners Against Street Racing).
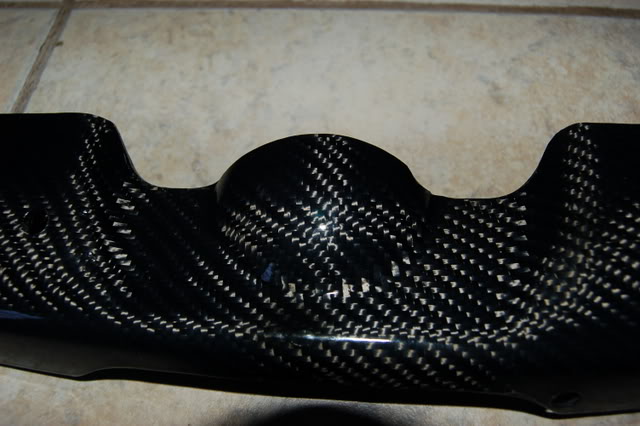
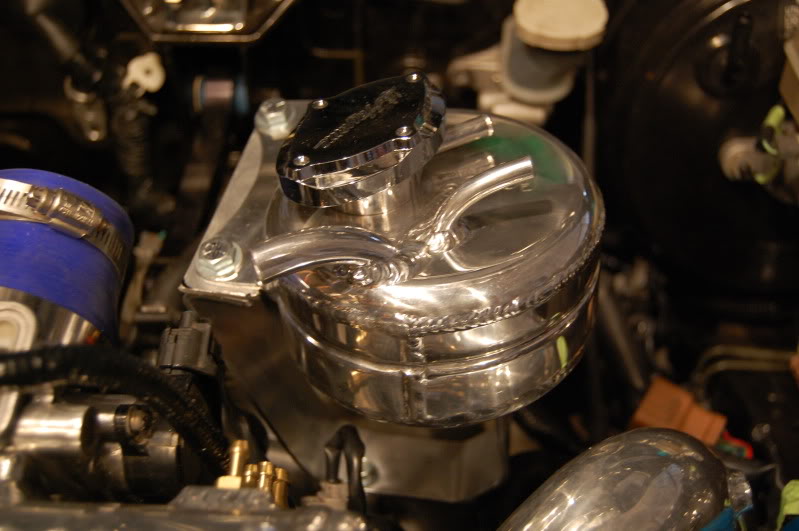
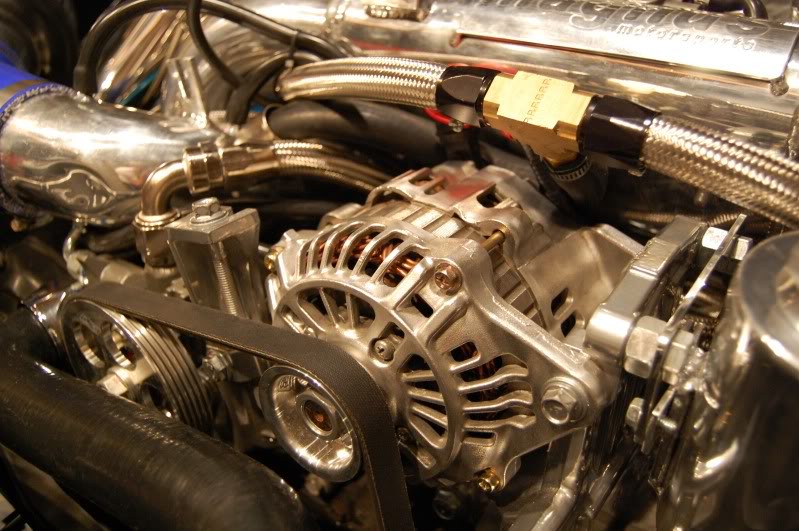
Vince from VK Innovation & Development was nice enough to drop by yesterday with some of their Carbon Fiber items to put on the car for the show. I still have to upload the pictures from the show of the solenoid cover and alternator cover but here is a pictue of the JUN style Carbon Fiber eyelids.
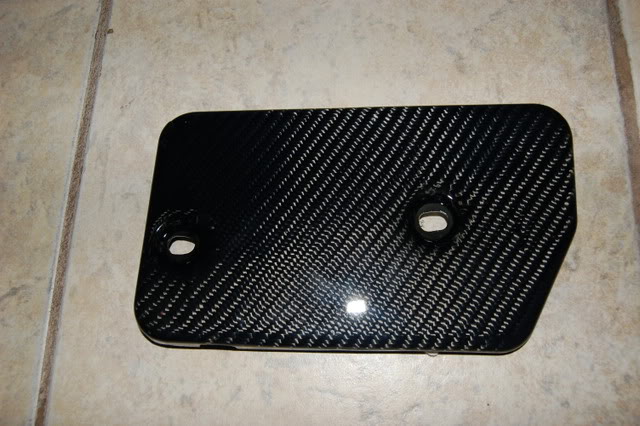
Here are a couple of Vince’s photos of the alternator cover:
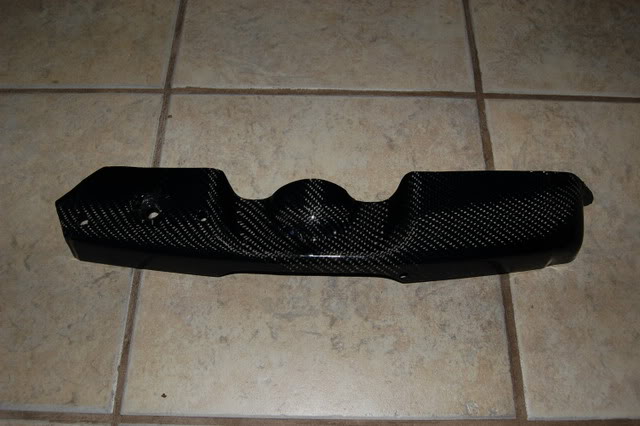
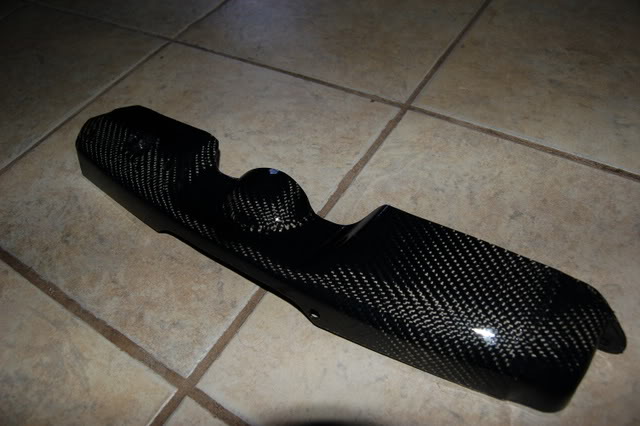
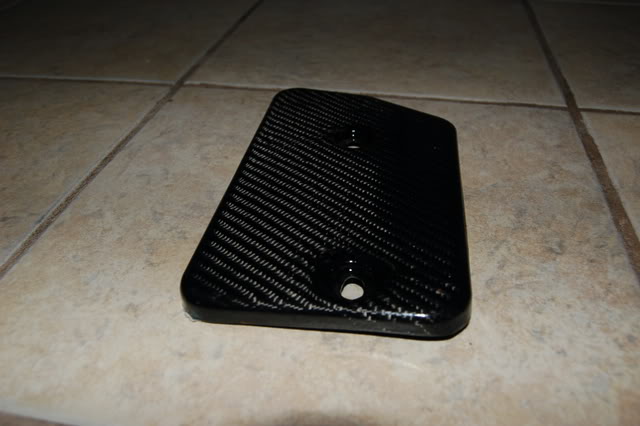
And some of the Solenoid cover:
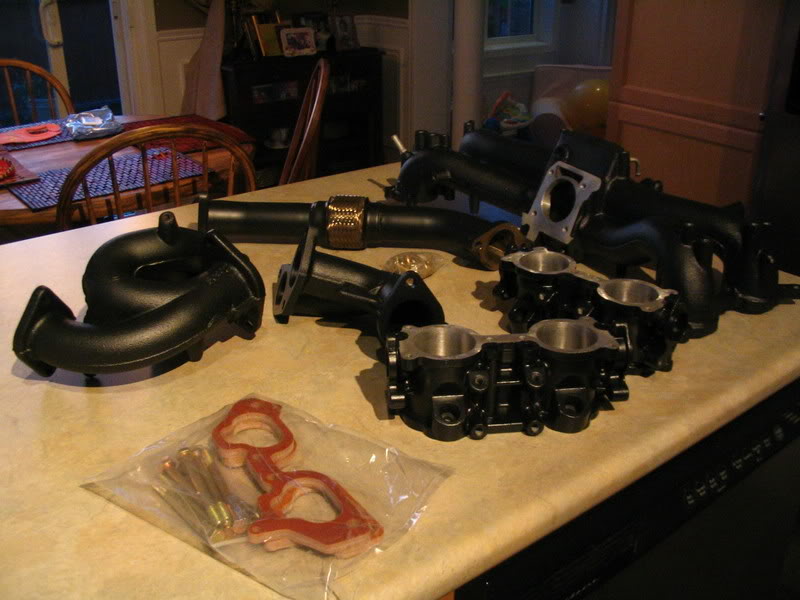
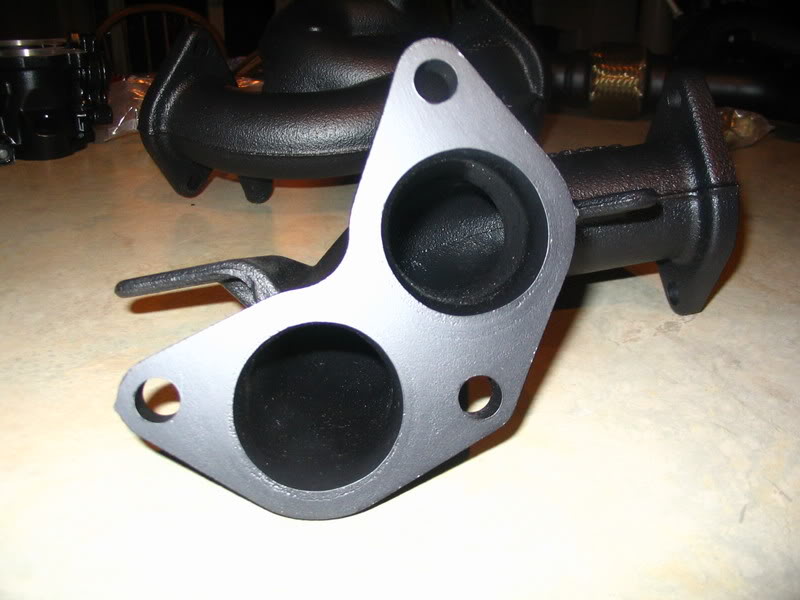
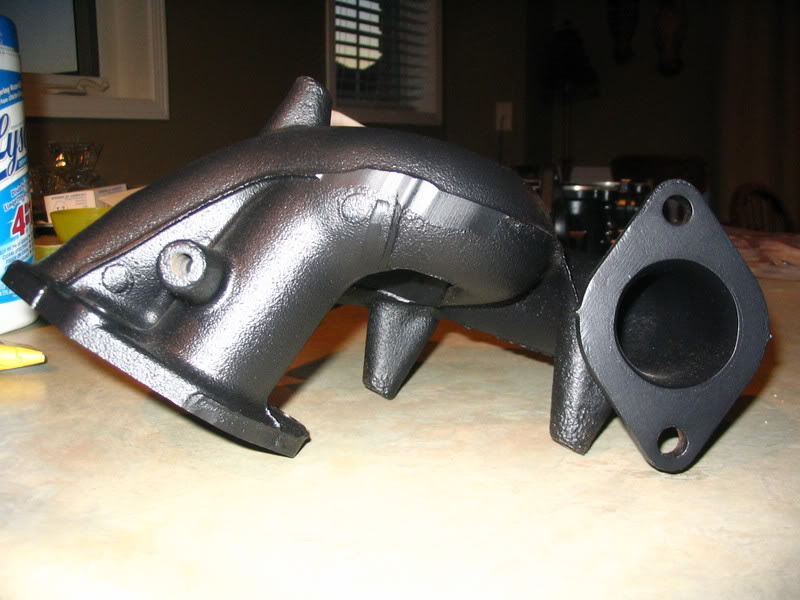
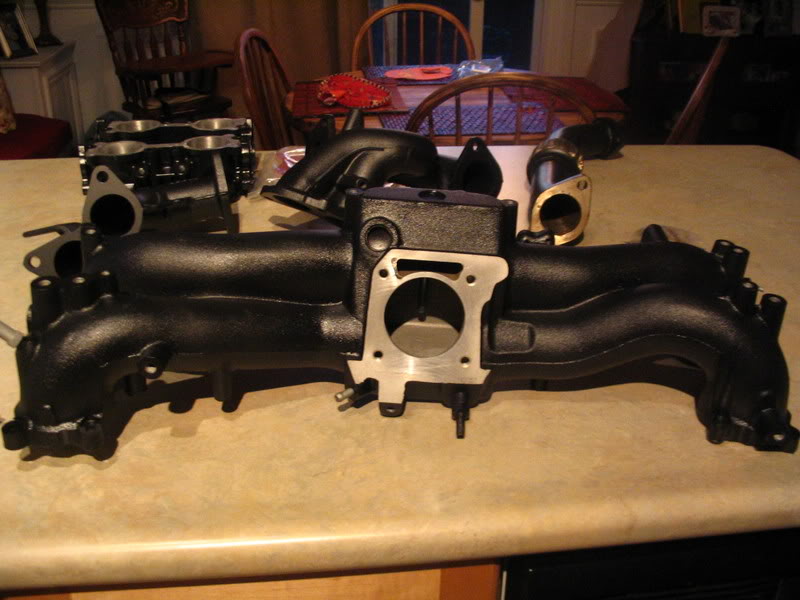
WOW… the package from Justin and Rich from Grimmspeed just arrived in the mail. Now these are some quality pieces! The quality of the porting work and the finish of the thermal coating is second to none..
Pictures are worth a 1000 words but these will leave you speechless. I took some with the flash and others without so you can see the details of the porting and the look of the finish.
All the needed hardware for installation was also provided.
Group Shot:
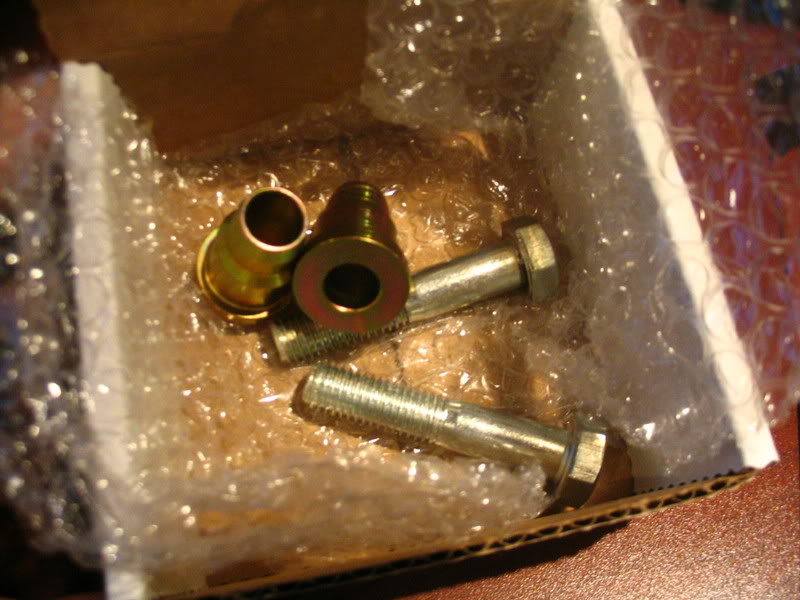
And the 8mm Phenolic spacers with extended bolts.
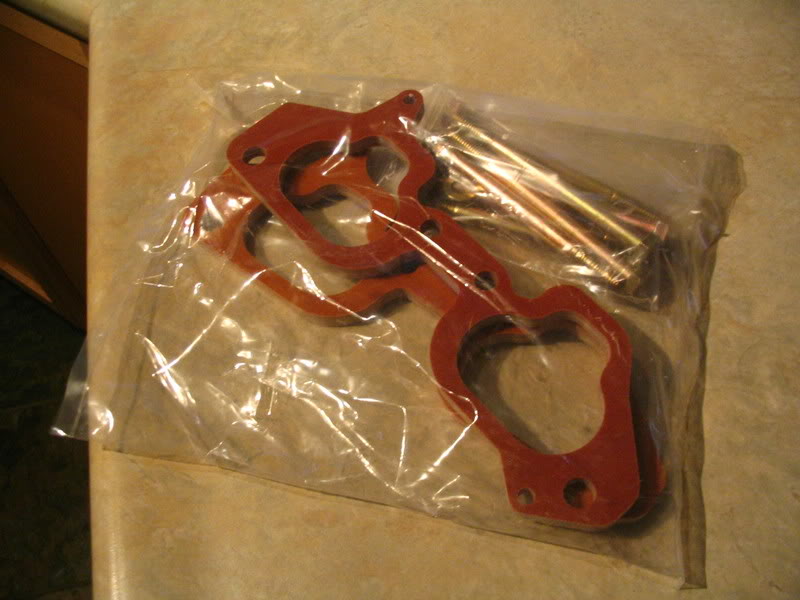
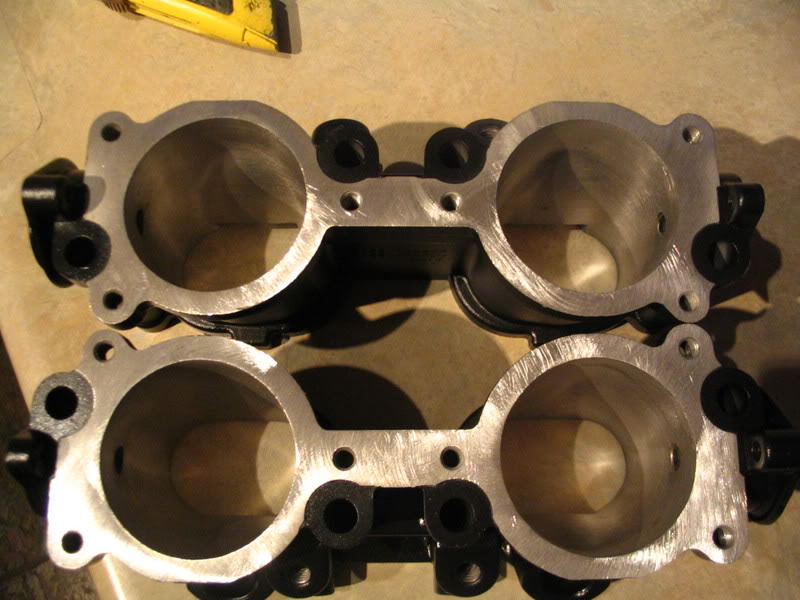
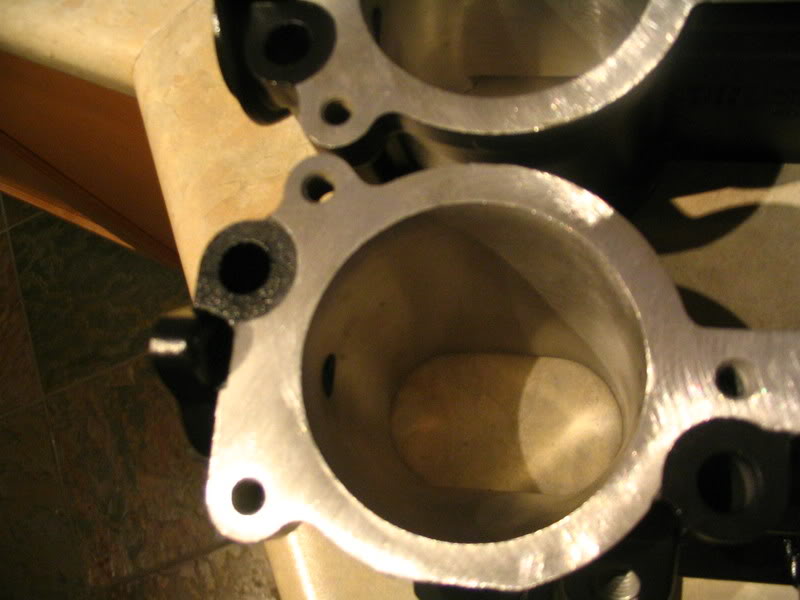
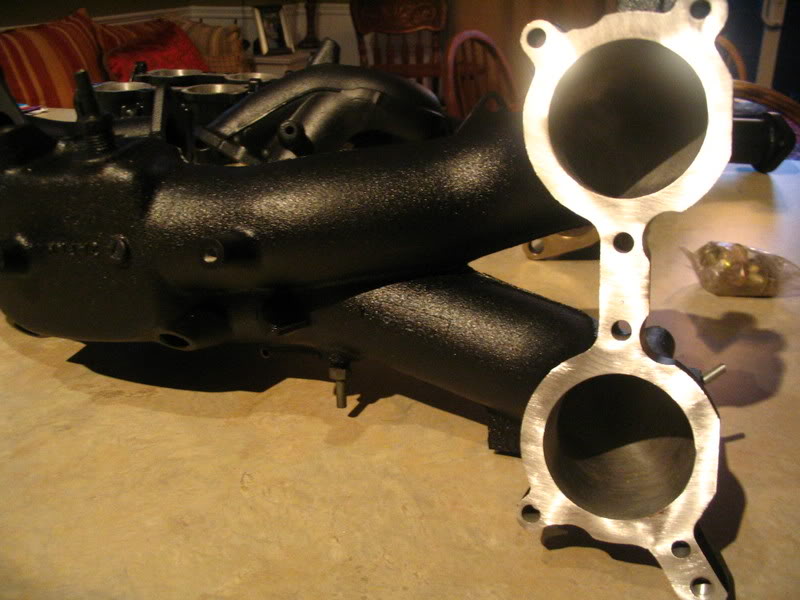
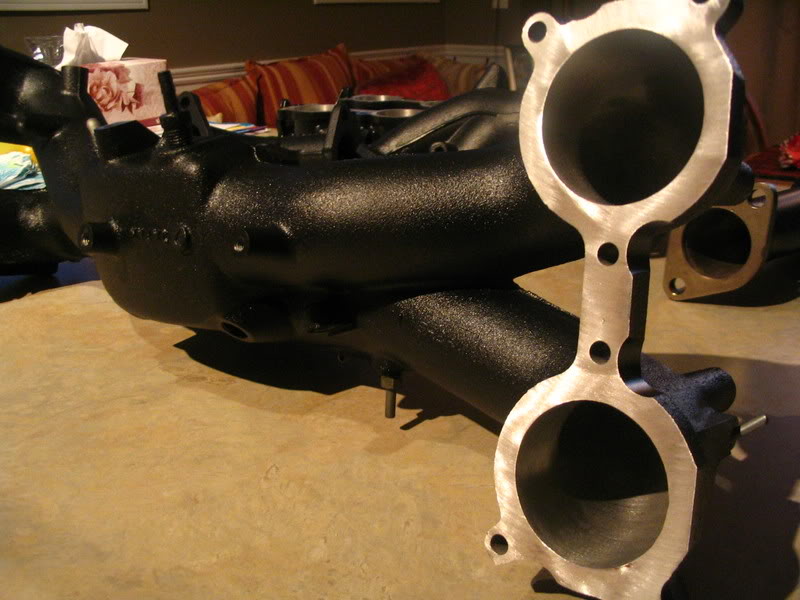
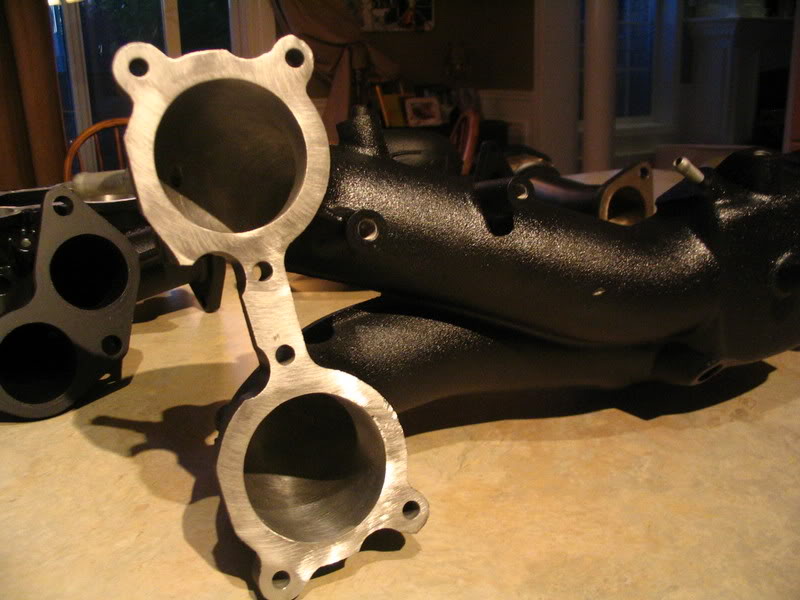
And here are the TGV Deletes. I’m loving these guys. Such nice porting work and I really can’t get over how outstanding a finish the thermal coating creates. Everything was really well packed to ensure that there was going to be no damage on the parts during shipping.
Side shot to see that thermal coating..
Now check out the porting:
First there are the ported and coated collectors for the headers…
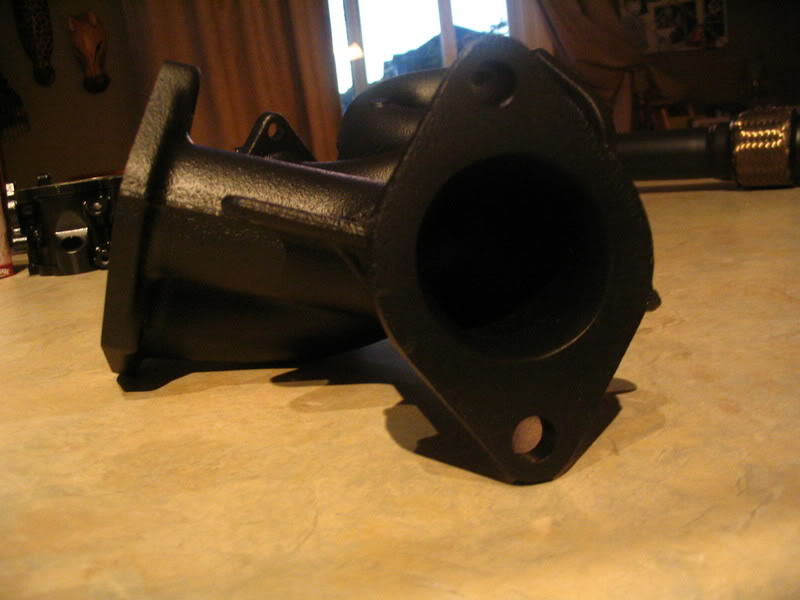
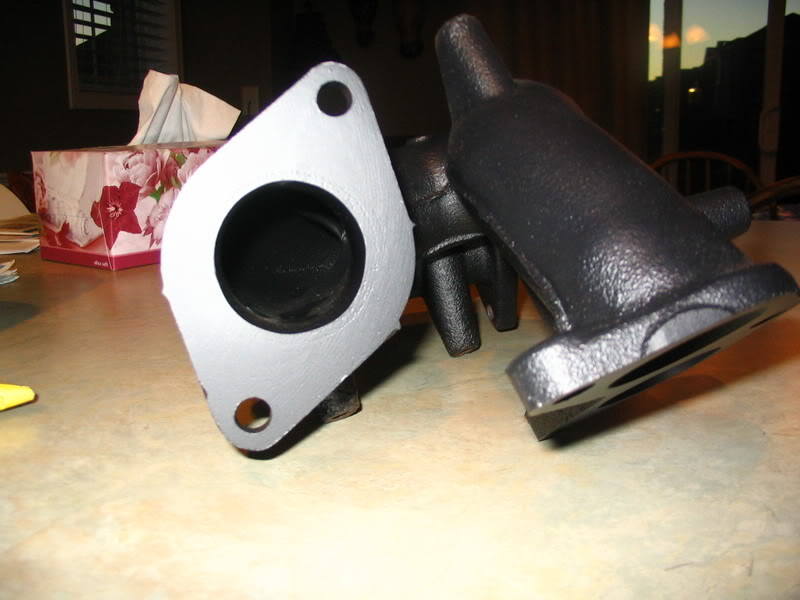
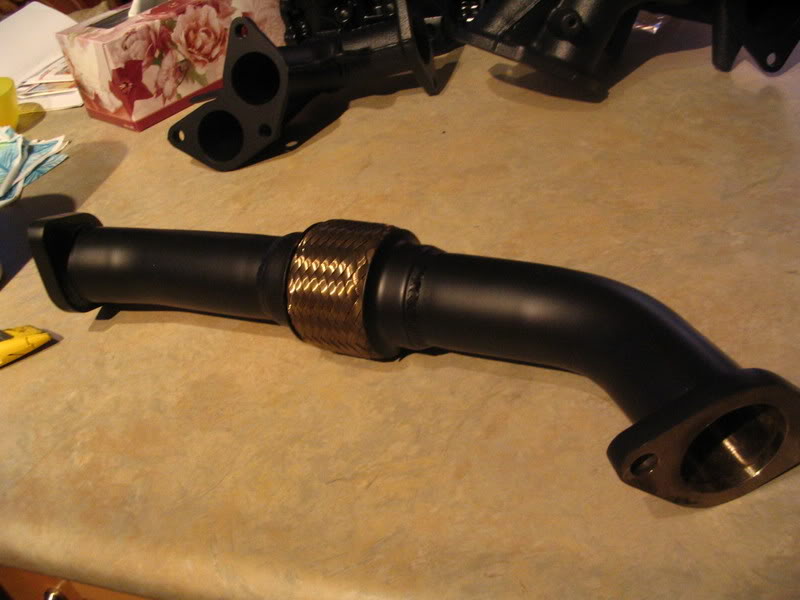
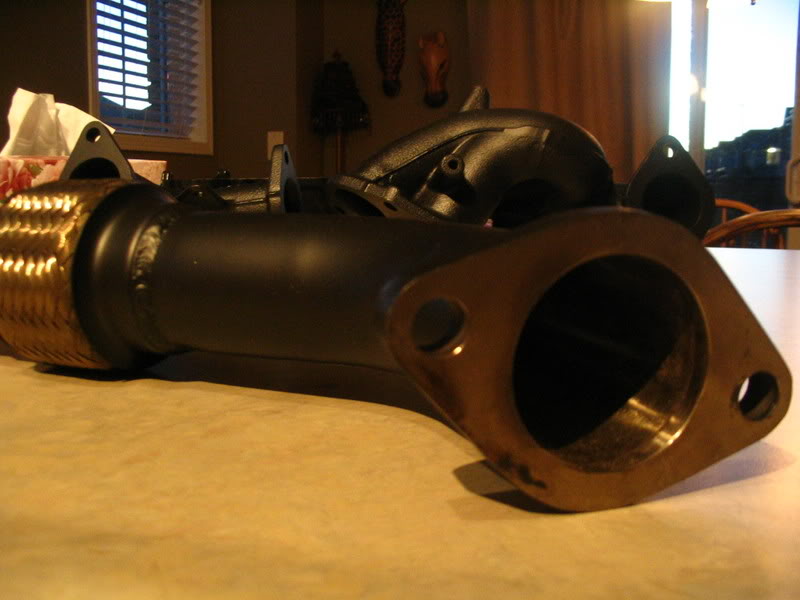
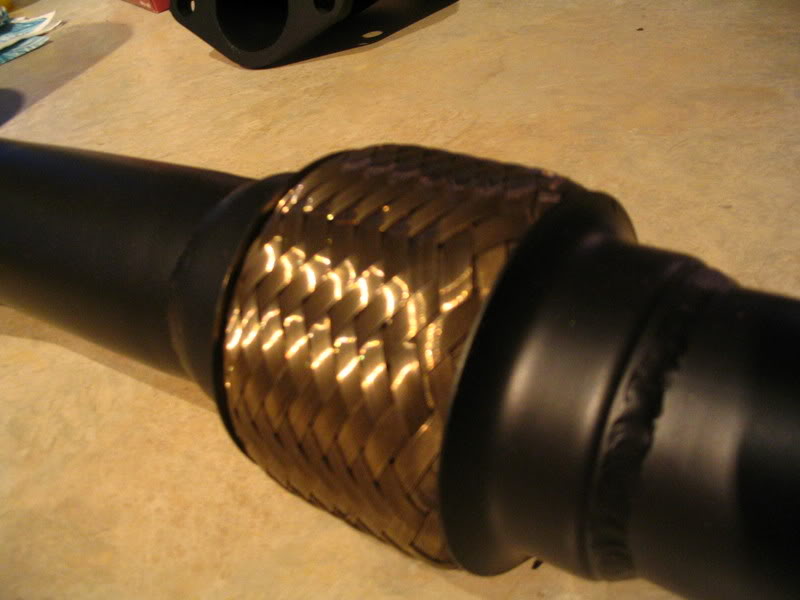
And now the high flow cross pipe that replaces the OEM one.. this thing is freaking huge compared to the stock one.. The nice flex piece will help to make sure both sides are nicely sealed. Again all the hardware to use this piece is included
And last but certainly not least is the ported and coated intake manifold. I can’t wait to get all of this on the car… It is going to flow and look GREAT!!
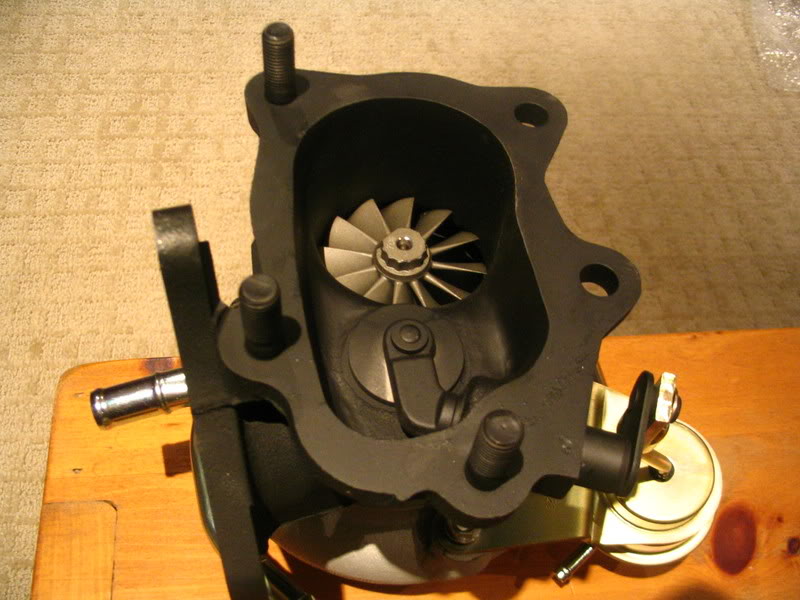
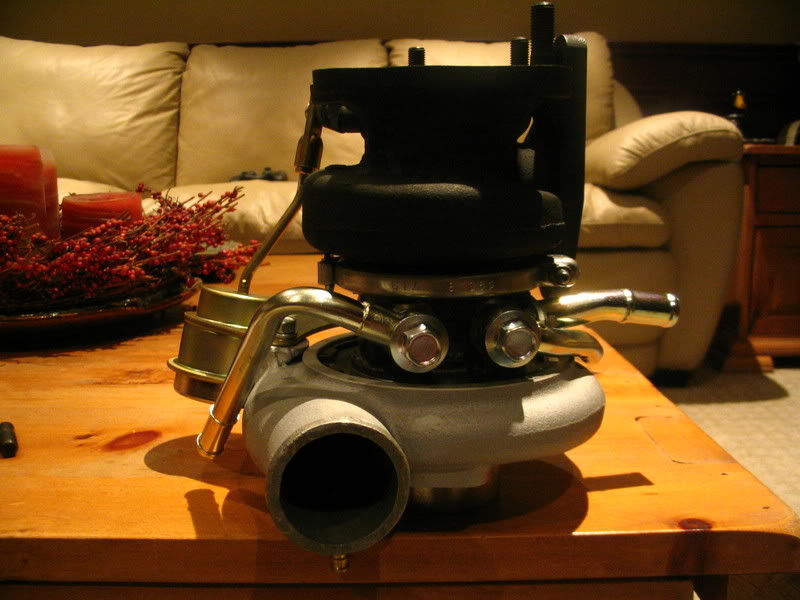
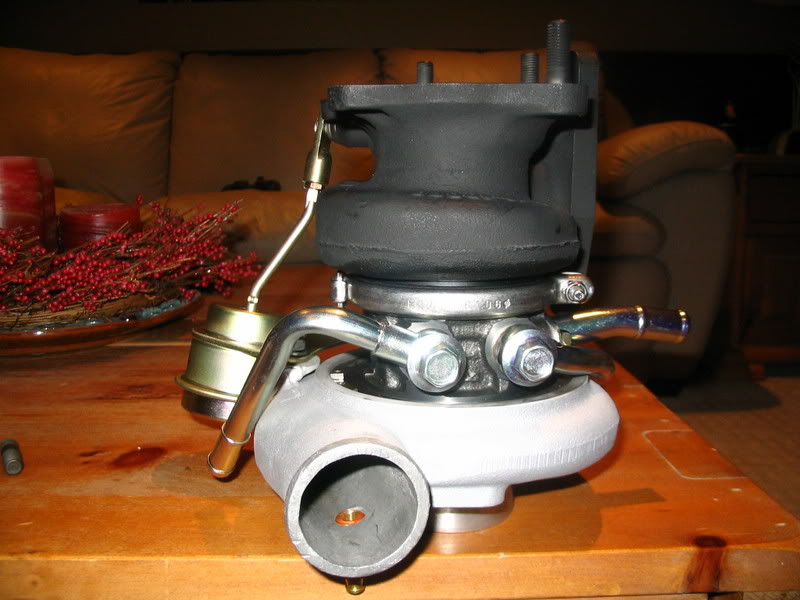
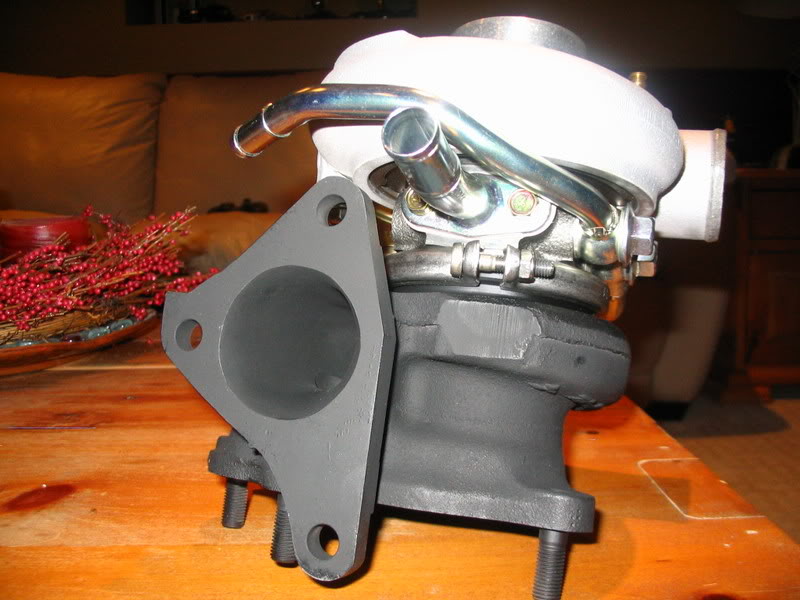
And the DHL delivery lady is my best friend today. Talk about service! Jerry at Deadbolt was having some problems with UPS so he arranged a next day delivery via DHL to make sure my turbo was here in time for my build on Tuesday of next week.
Thanks a MILLION Jerry for going over and above expectations to make a customer happy
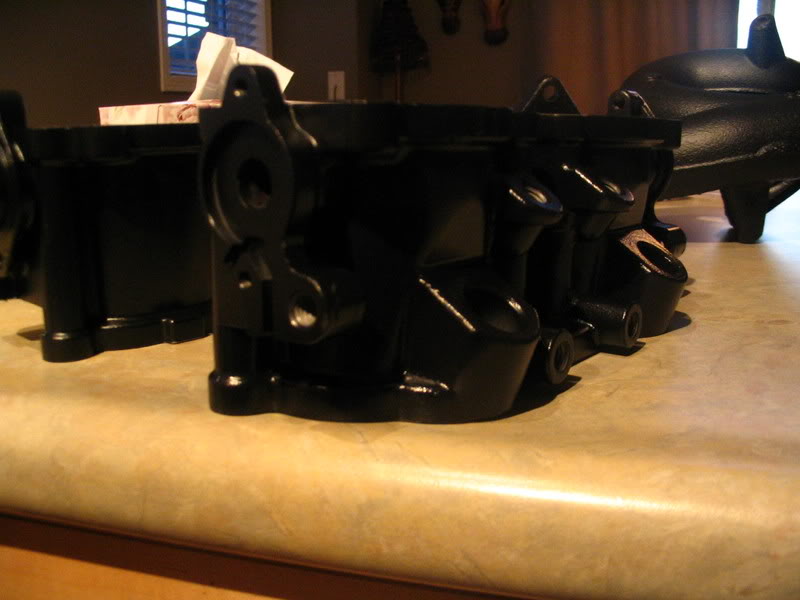
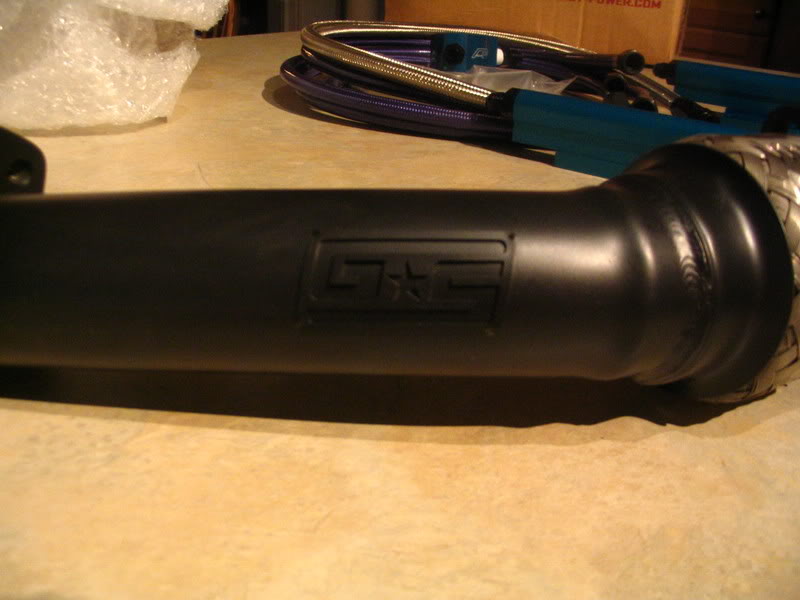
Now for the photos… I’m digging the porting and black extreme coating on this bad boy
I took some pictures with a flash and others without so you can see the porting work. Since it is all black coated it is a bit hard to see without the flash.
I was able to drop by and see Derek and picked up my Group-A goodness. So I’ve got the majority of the things I need to be able to go and get the work done on Tues-Wed of next week.
The one last thing that I am missing are the fuel rails.. it is taking some time to get the rails from Agency Power.. they went out for anodizing last week and are still on their way. So we will be going ahead with the build on Tuesday with the stock rails for now. Once the new ones come in we’ll pop them on there.
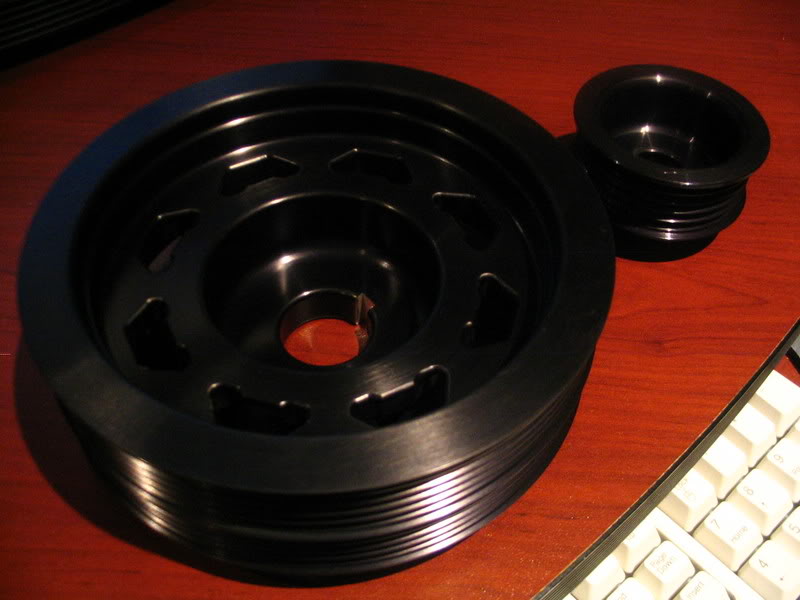
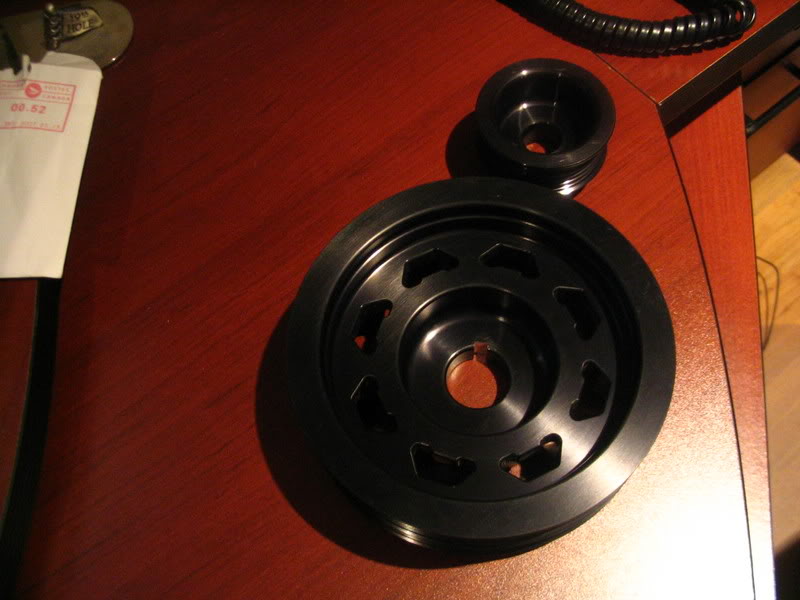
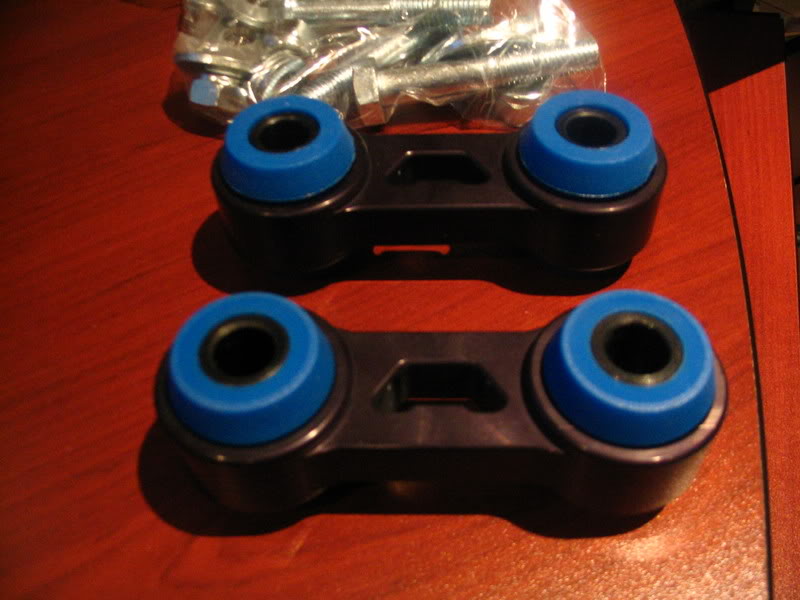
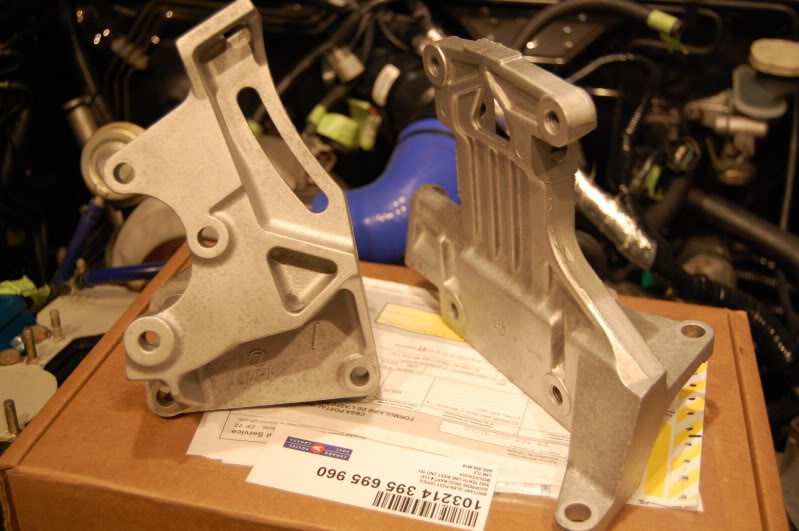
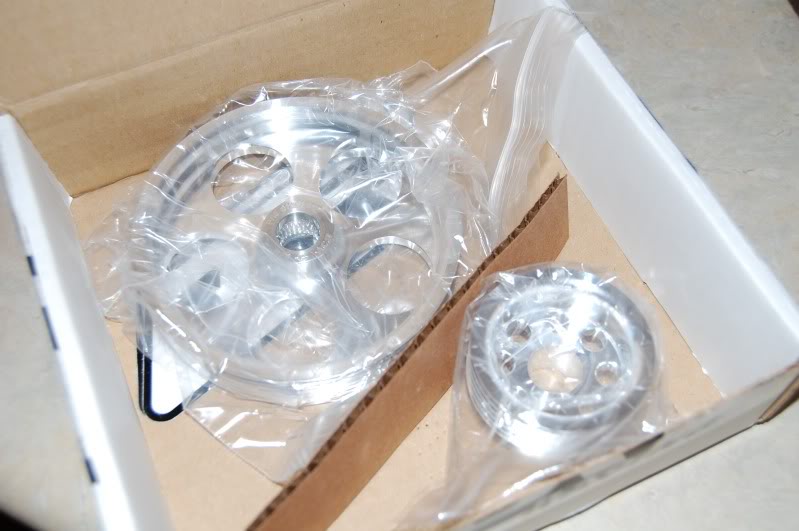
I’ve seen the pictures on the Group-A website and looked at the plain and straight forward packaging for their products but man was I surprised when I opened up the boxes and started looking at their stuff. Holy crap this is nice stuff. You can really tell they put a lot of time and effort in their work. Hopefully the quality of the finish and the overall impression comes across with some of my photos because these things almost look too good to put on the car. Not trying to do a sales pitch here, but I was genuinely impressed with these parts. I’ve seen some of the other stuff out there and a lot of it basically looks like a hunk of aluminum with some bushings on them.
Pulleys: When we looked at my car, my power steering pulley is a pressed on style so we are just leaving that one on there, but I did pick up the Alternator and Crank Pulley
Pitch Stop Mount:
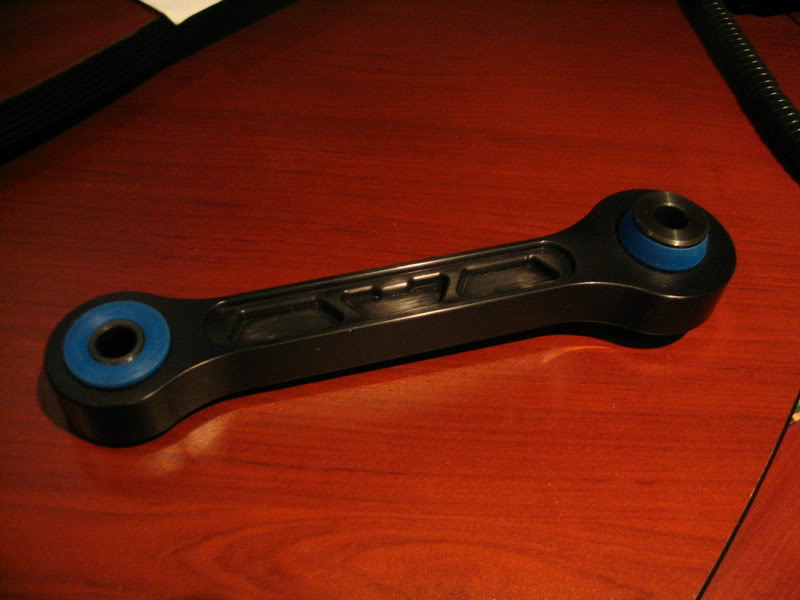
Short I end link
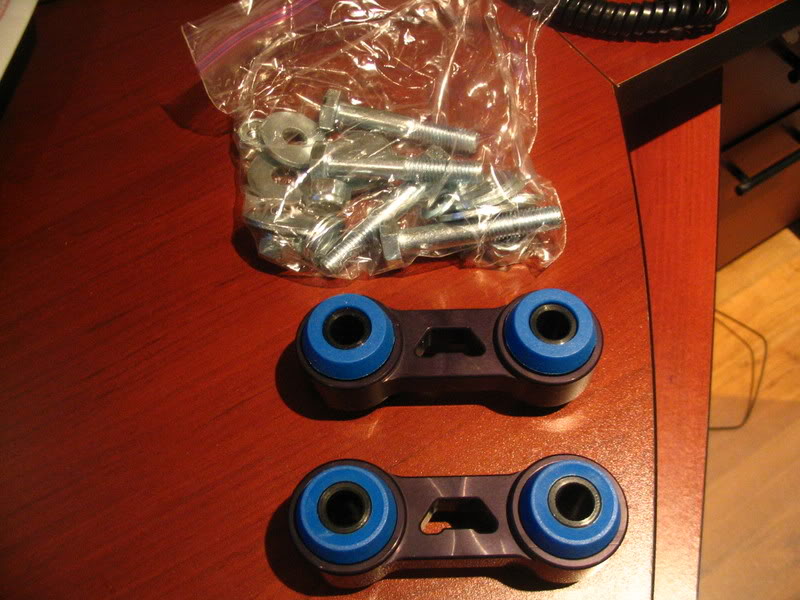
Rear Sub Frame Locking Kit
C end Link
Build Day
I’m hoping the weather is good for the Tuesday because I want to do the engine bay clean-up when the engine is out of there. I’ll try and take as many pictures as I can during this process as well.
***** UPDATE ********
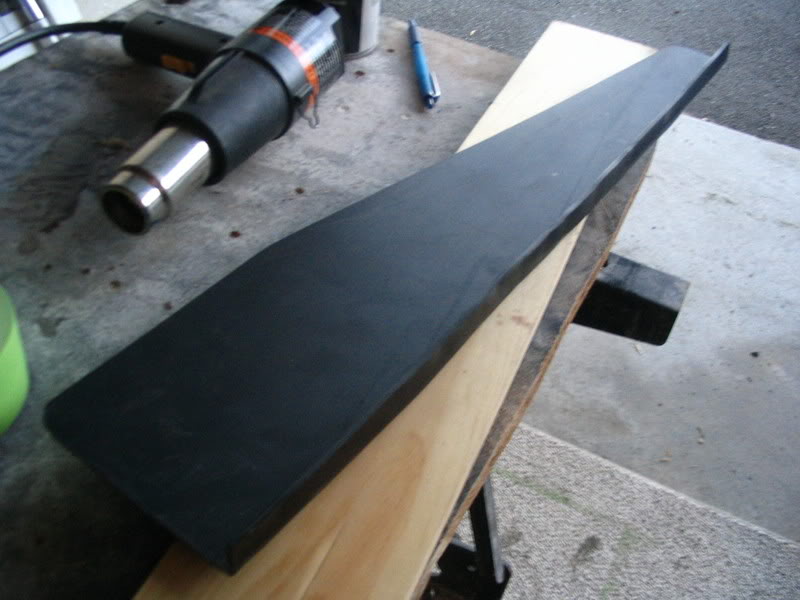
Played around with some more stuff that may find its way onto the vehicle.. These are some canards that would be going on the rear bumper right behind the wheels. They were originally gloss black with an Aerospeed logo on them, so I sanded them down and hit them up with some matt black and then finished them off with a light grey subaru sticker
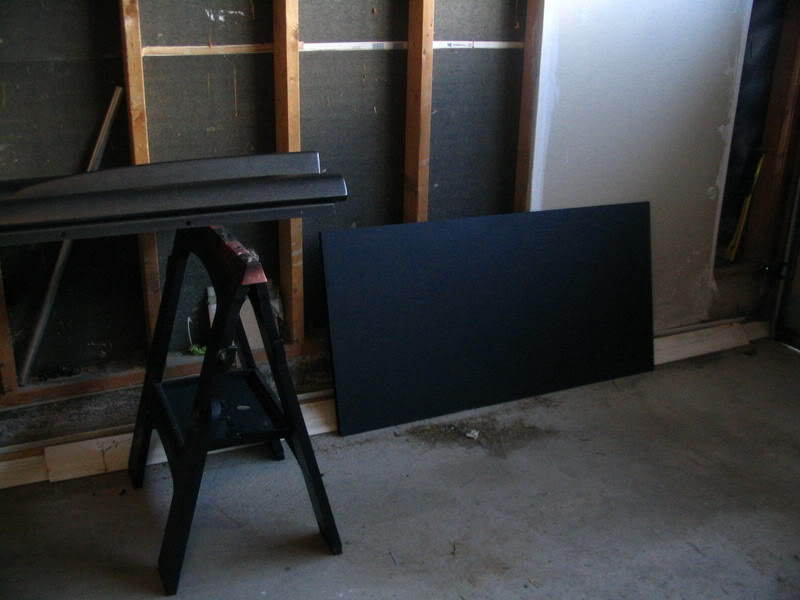
I also picked up my 1/8 inch plastic for some under the hood applications. Picked up a 4×8 sheet and had them cut it into 24″x48″ sheets. This stuff willl also likely be used for the case I am making for my carputer. Hopefully I’ll get some time this weekend to start making some templates for my under the hood stuff.
********* UPDATE ***********
So since I didn’t have the car back to do some of my cold air box and engine cover fabrication… I decided to start some work on my other projects..
First I started off with my recessed gauge clock pod. This won’t be like the OEM one that sticks up, but instead is recessed with the hood over it. I still need the car back to check for clearances but I am hopefull that the pod won’t stick up too much at all while still giving me the visibility that I want. This will house three 52mm gauges..
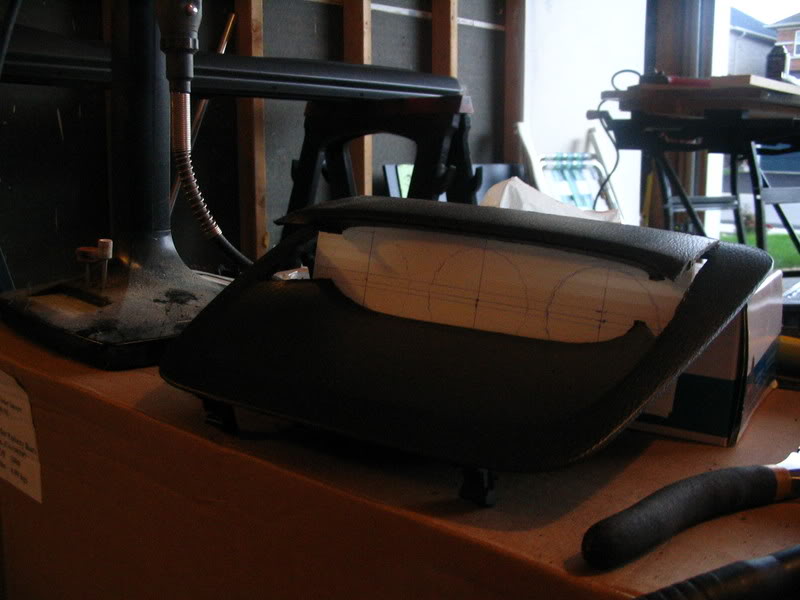
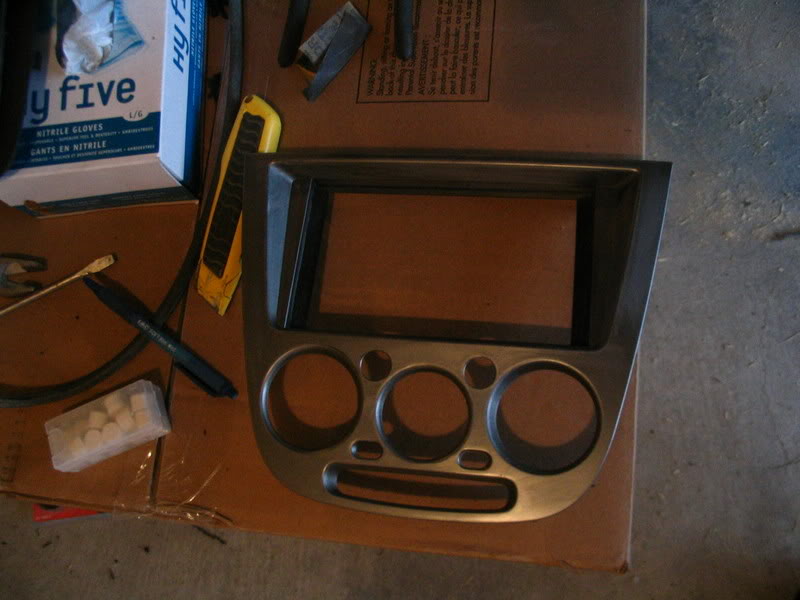
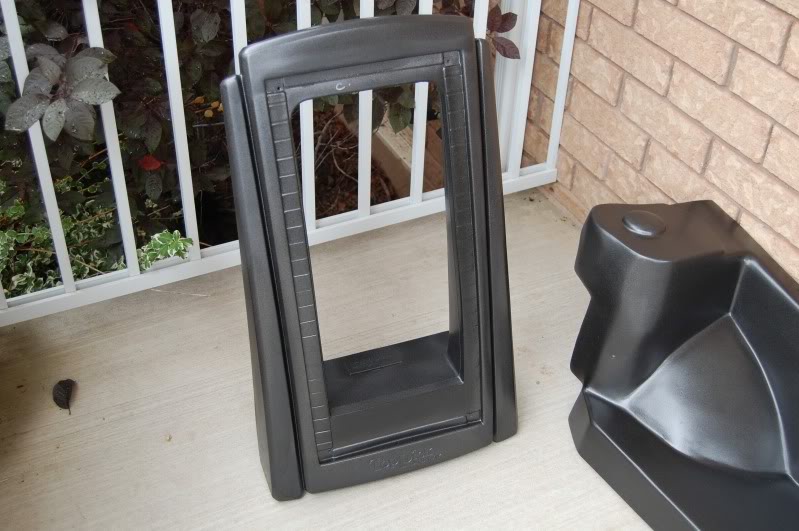
The reason I will be putting the gauges up into the clock pod area is because I will be swapping this:
With this housing for my 7″ touch screen… I had to trim the screen housing and then epoxy it to the OEM trim… Just waiting for it to fully dry before priming and wet sanding.
Then I got looking at my plastic that I have for my engine bay covers and cold air box and got thinking.. I’ll have lots left over so I figured I would maybe experiment with something like this I think you can get the idea of what it would be used for… it would be one of 4 that would “diffuse” the air
*********** UPDATE *****************
I’ve had some of the final pieces to the puzzle here for a while so I thought I would take the opportunity to snap some pictures of the items before they go on the car on Wednesday. The guys down at Budd’s Subaru are helping me out to get these on the car in time for the Dyno Day meet at Neetronics this Saturday.
So I should have some dyno charts by the end of the day Saturday to show what the car is now putting down. There will still be some tweaking after this Dyno day, but it should give an overall good impression of the gains.
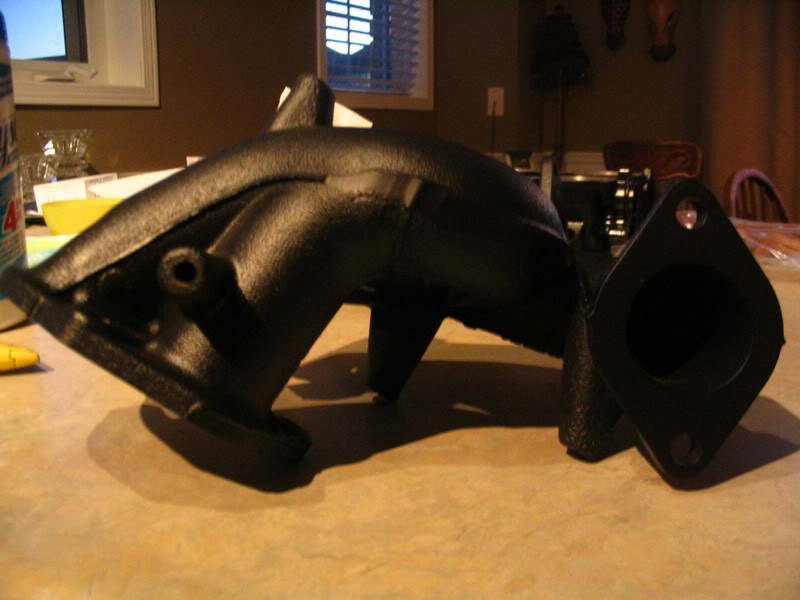
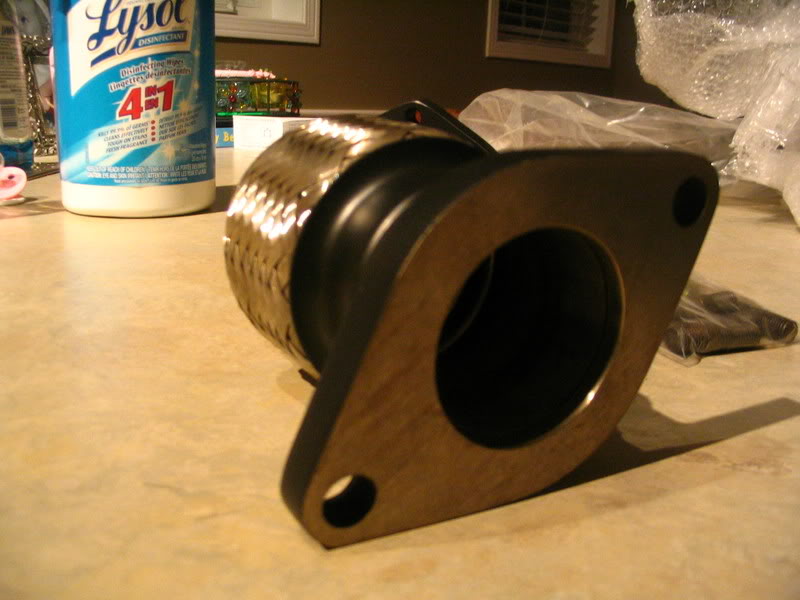
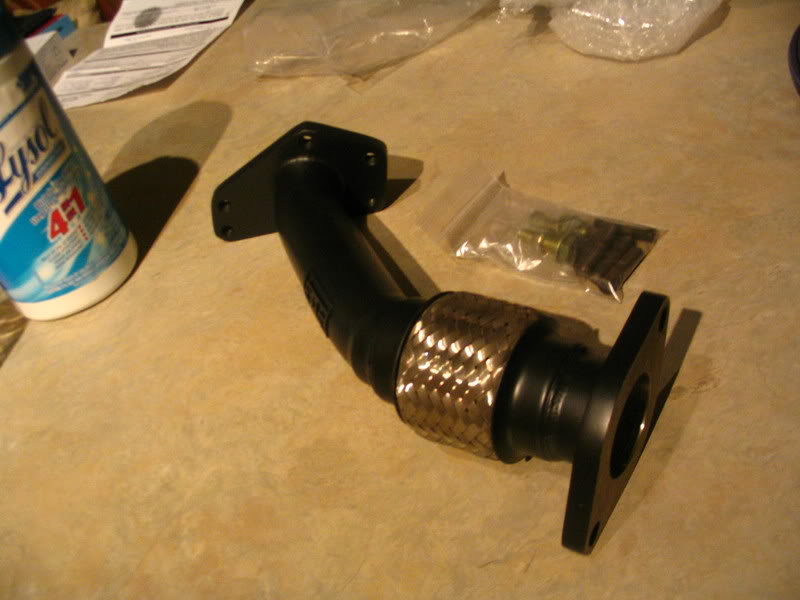
Here are some shots of the Grimmspeed up-pipe.. I can’t wait to get that old one off the car and this new one in place. As usual the quality of the work on this up-pipe is second to none. To make it the same as the rest of my Grimmspeed stuff, it was given the black thermal coating treatment.
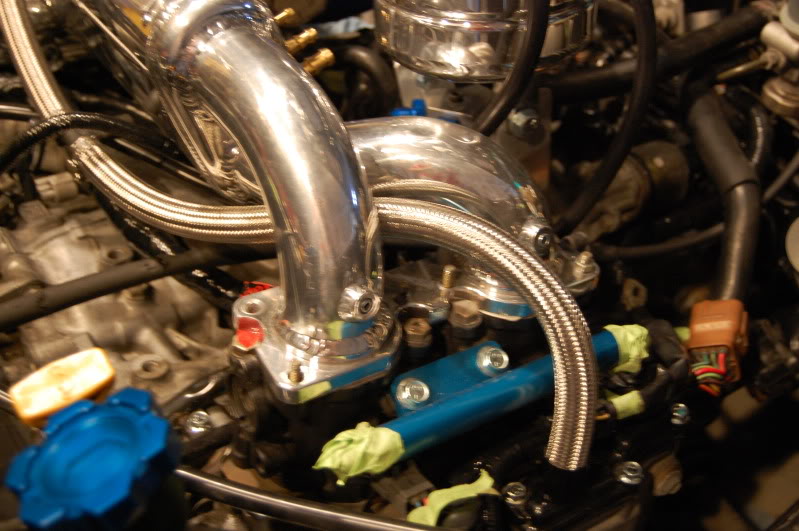
And the Agency Power fuel rails finally came in. Joe at First Force Performance was great in keeping me up to date with the latest status news from Agency Power for these guys. They took a long time for Agency Power to ship out to Joe, but Joe was there to ensure things went smoothly.
I ended up getting some brand spanking new EDM LHD Projectors.
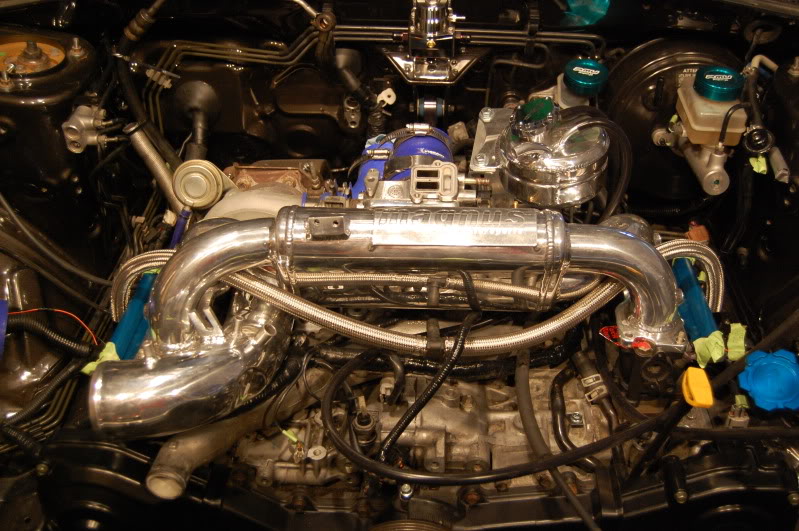
Here is what everything ended up looking like installed in the engine and the projectors
Also during this summer I ended up doing the following:
– JDM RA Spec-C 6-speed swap (non-DCCD)
– 180 rear diff
– Sti rear axles/hubs/knuckles
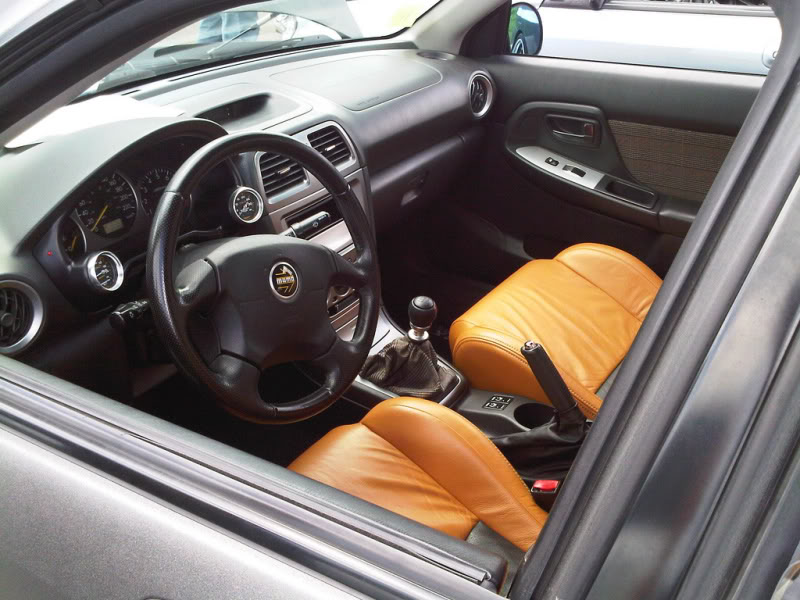
– 05 WRX TR center console swap
– New door cards
– 06 STi rear diffuser
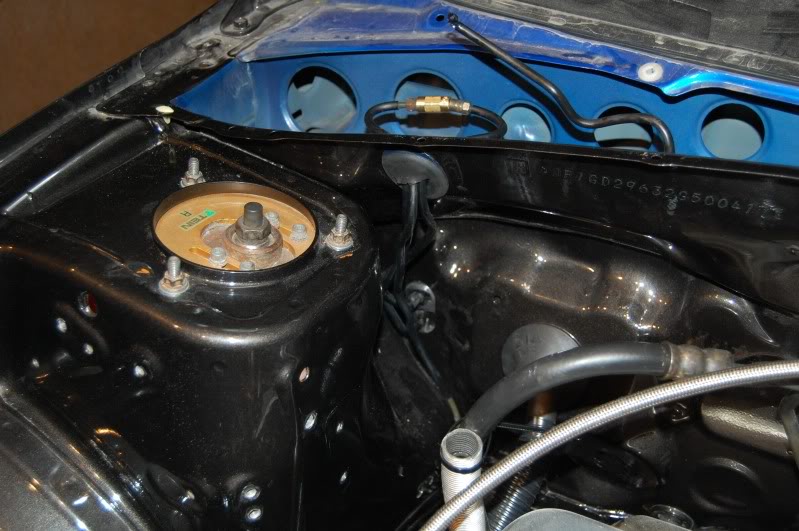
– Painted the engine bay gloss color to match flat exterior color
– Mishimoto Aluminum Radiator
– Subframe locking kit
– Moved gauges to Autometer steering bezel
Here is a shot of the interior with the center console swap and new door cards:
I was running the RS hood but under hood temps were getting crazy so I ended up going back to a WRX hood with some heat shielding and the KS-Tech hood scoop delete:
Notice the custom upholstered baby seat for my daughter to match the interior
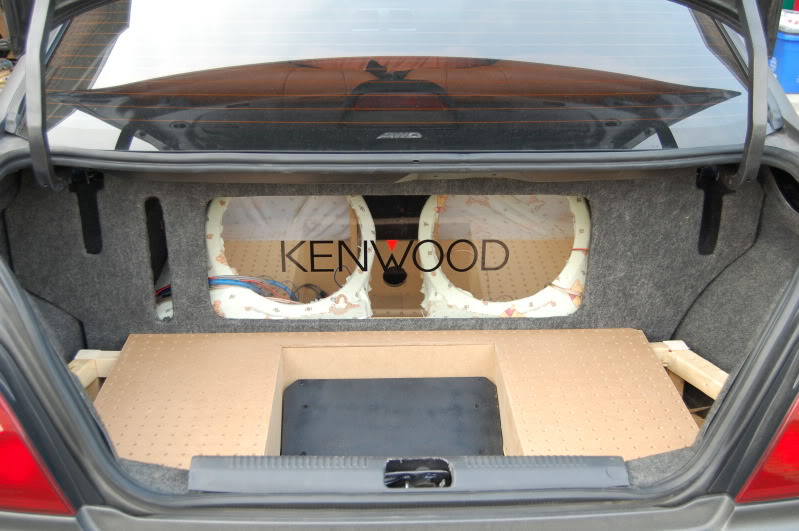
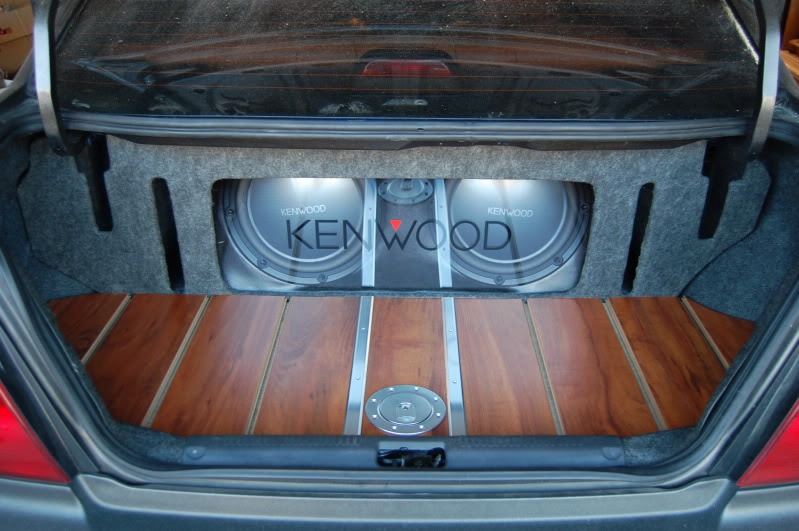
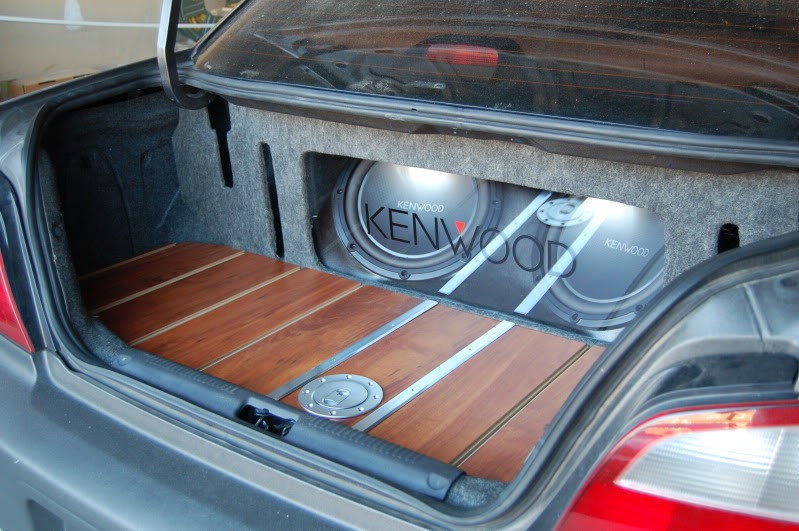
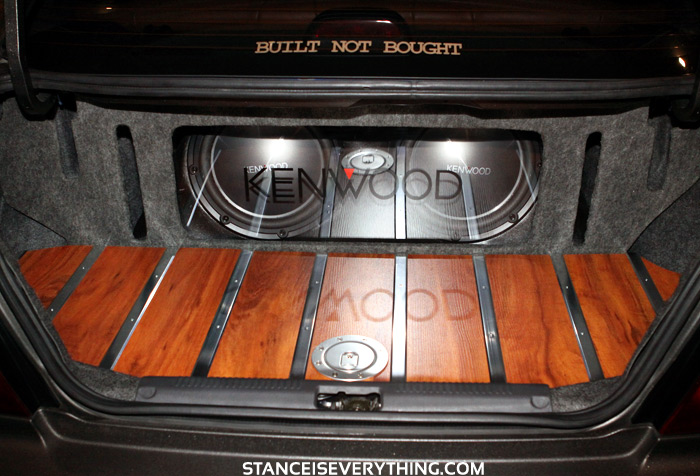
I also started on some stereo upgrades but didn’t get them finished before the car went away for the winter. There will be some floating AMPS in the spare tire well with a false floor:
– Kenwood Excellon 6.5″ front component speakers
– Kaption rear components
– Added another Kenwood 4 channel amp
– replaced the 10’s with 12’s
– 1 farad cap
Here is a quick pick on where I left off:
Working through the winter and into the summer the plans are the following:
– Finish up stereo
– Relocate battery to trunk
– Fuse box in fender
– AC removal
– ABS removal
– Install my Magnus intake manifold
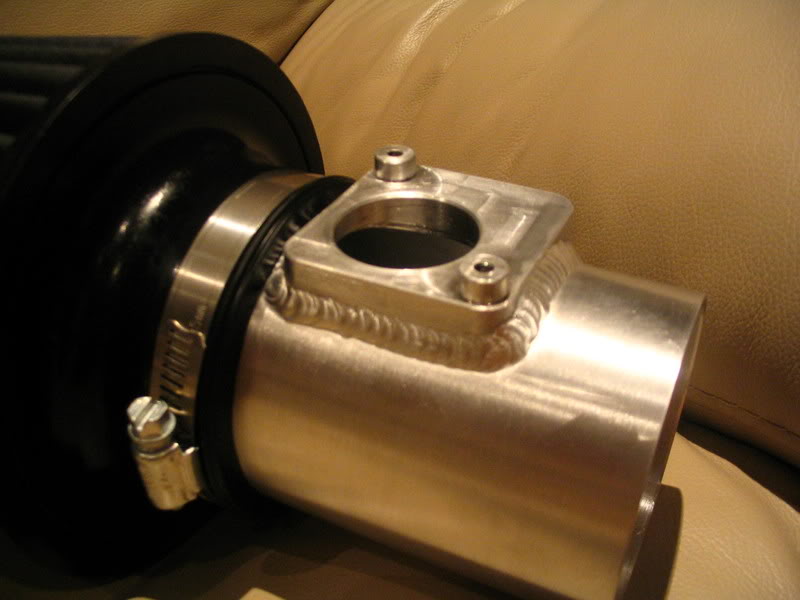
– Weld on the bung to better fit my APS BOV
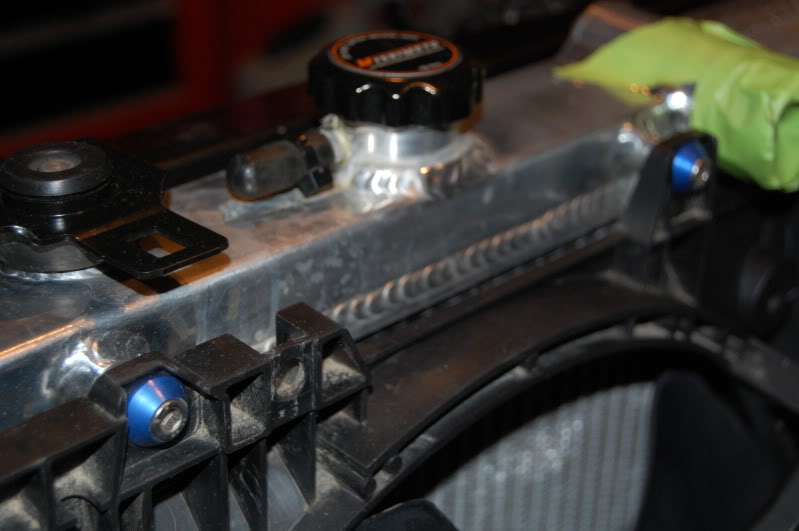
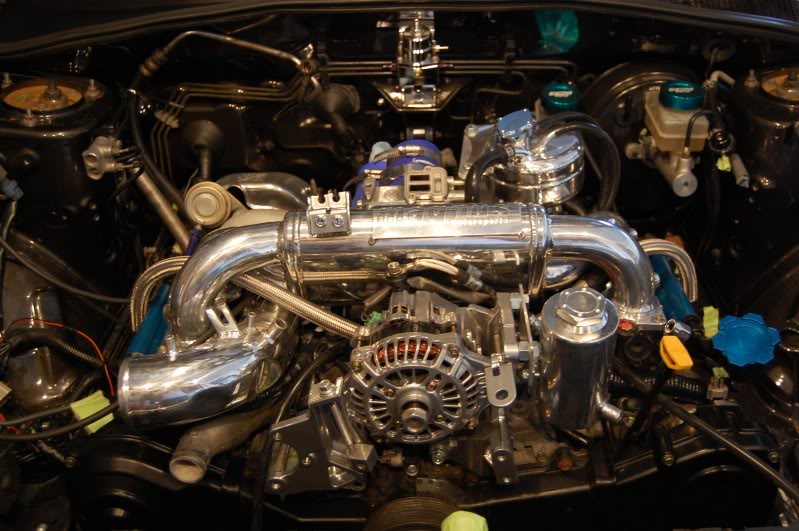
– Move power steering reservoir to allow for some re-routed intercooler piping
– Passenger side intercooler piping won’t go through fender any more
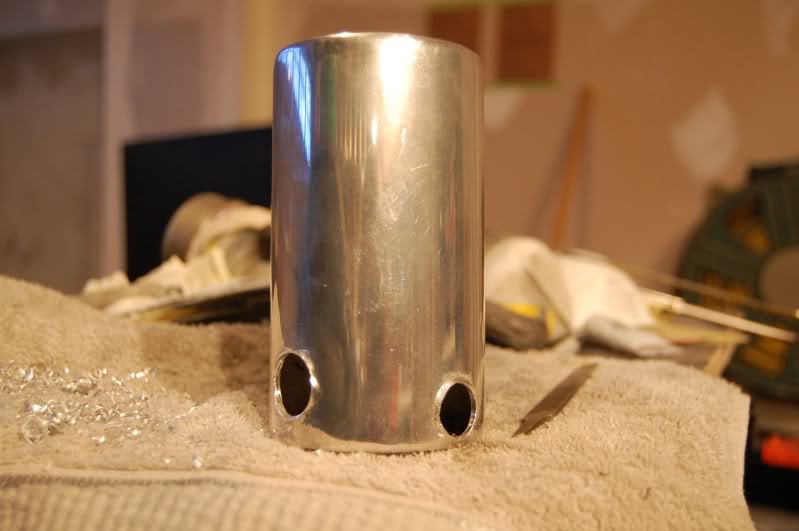
– Polished steel turbo inlet
– Inline fuel filter
– Clean-up/strip firewall of wires/hoses etc
– Relocate alternator to AC location
– Move coolant reservoir to Alternator location
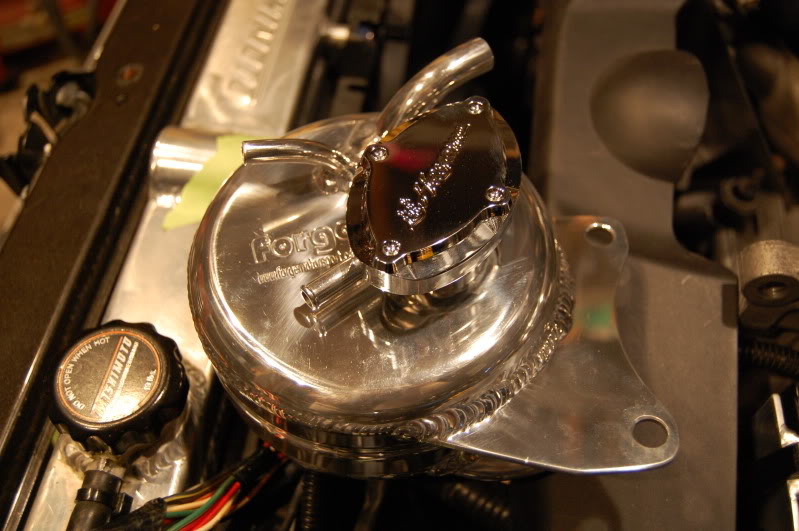
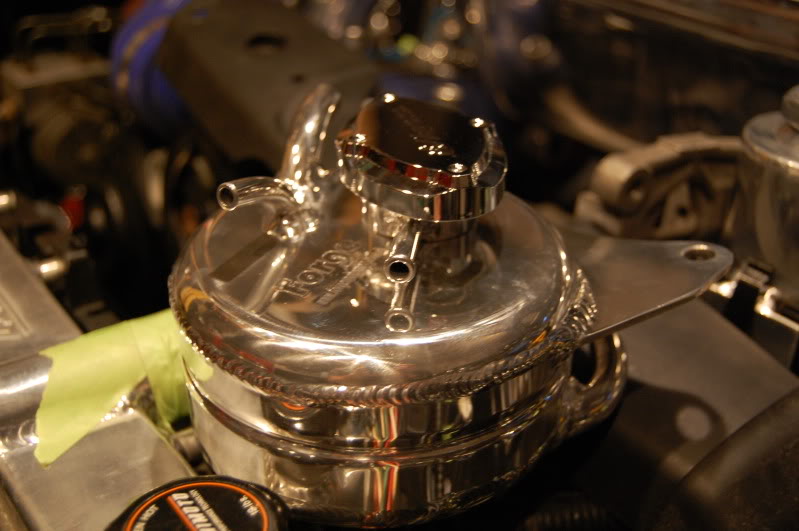
– New Forge coolant reservoir
– Polish, Polish, Polish
I think the engine bay color scheme will be:
– polished, blue, black & carbon fiber
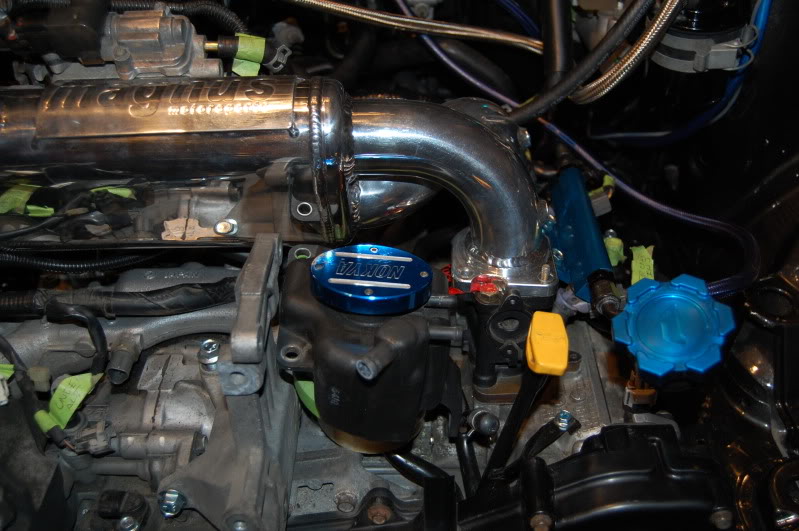
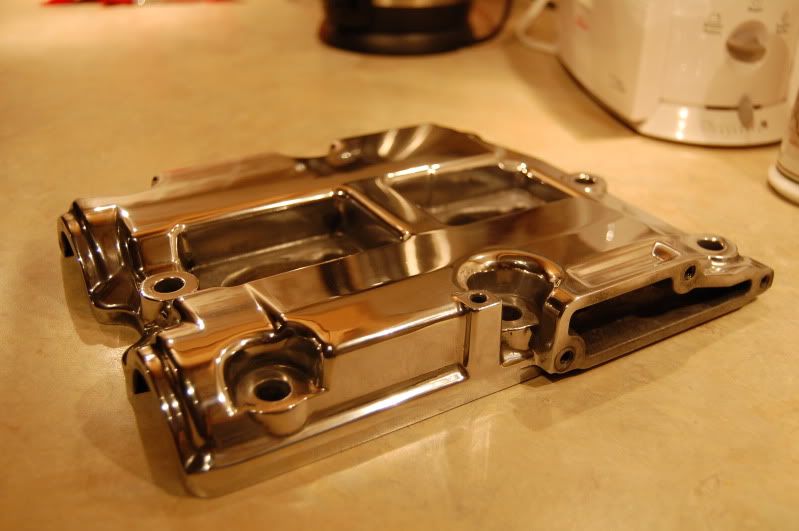
The magnus manifold should be the center piece
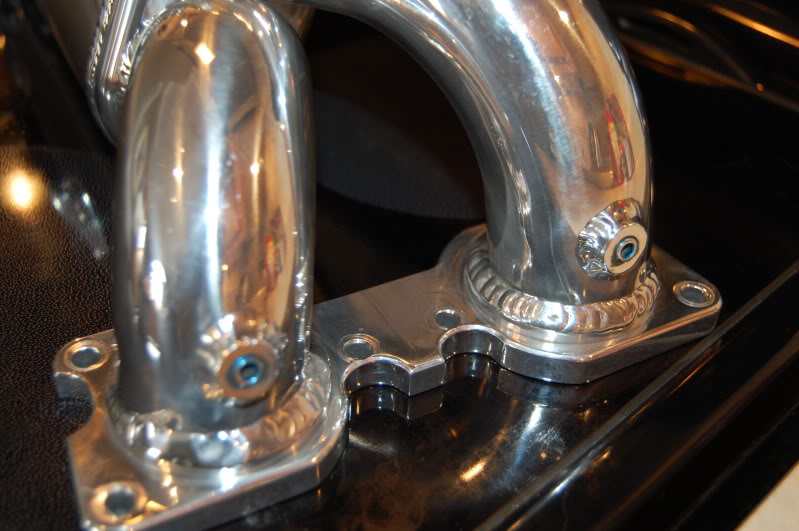
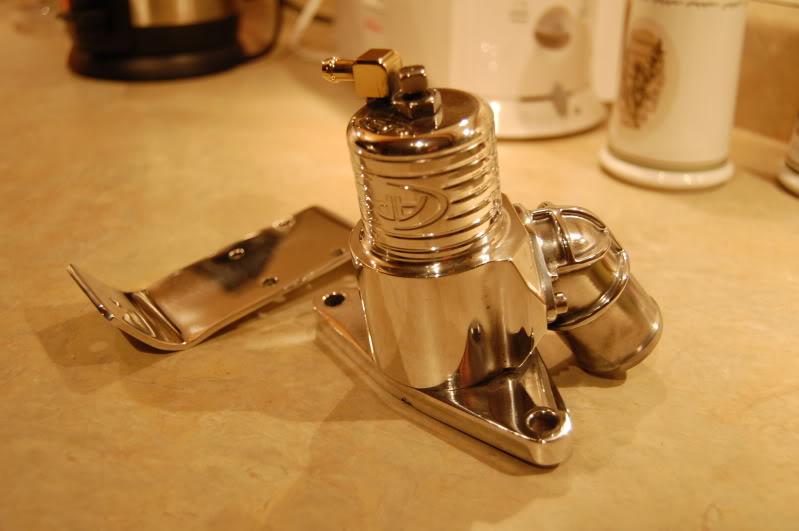
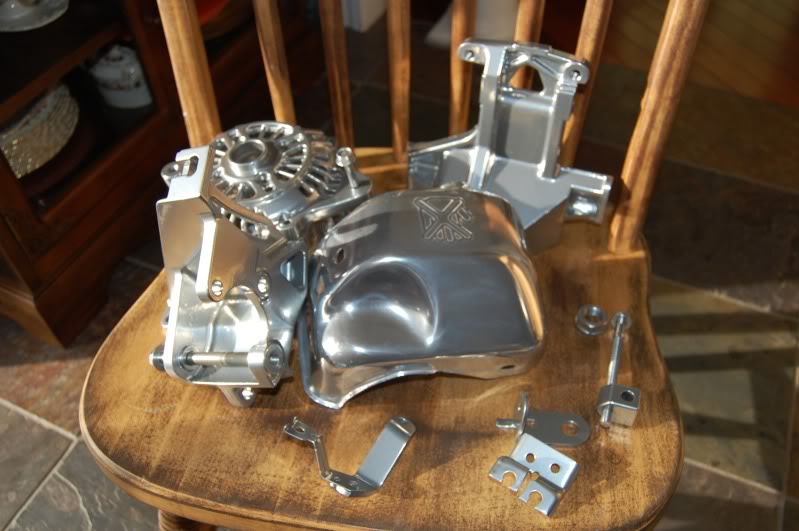
I went out to get some brass fittings for the manifold so I decided to spit shine it and take some snaps
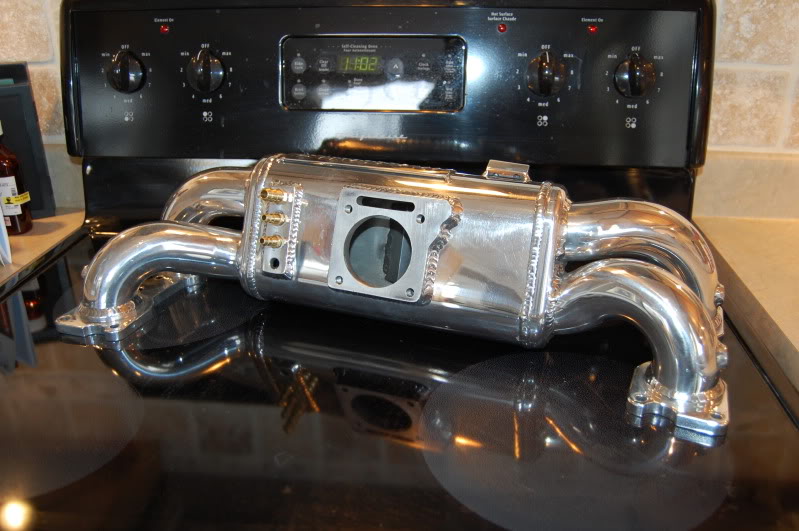
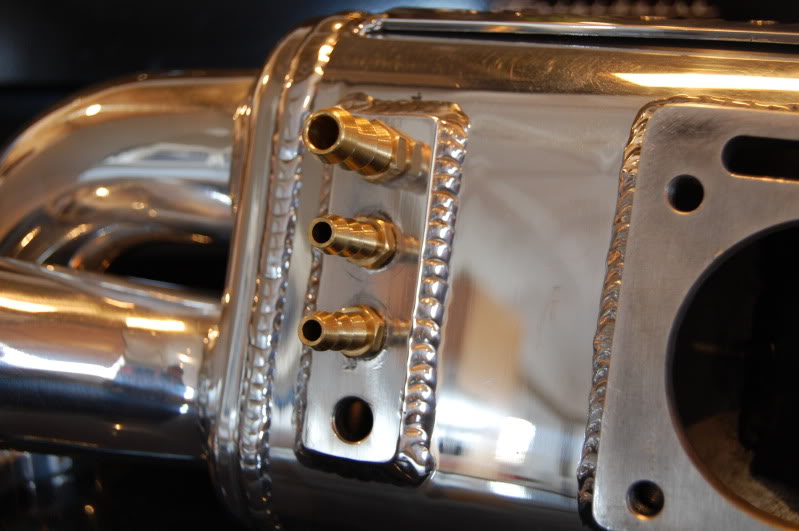
You can see here that it is tapped for nitrous or meth if I decide to run it
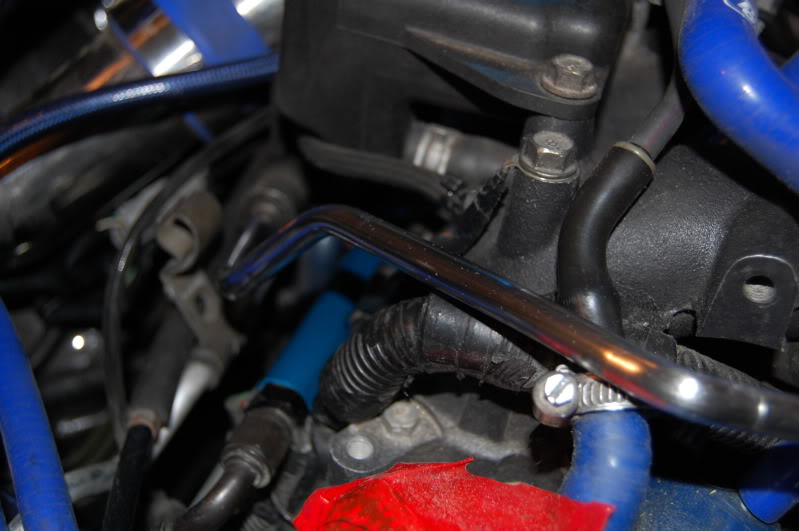
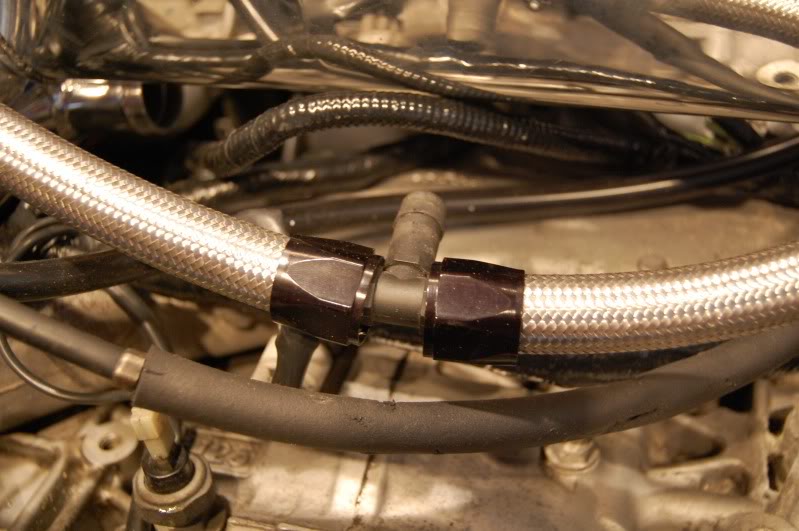
I also tried my hand at polishing the power steering lines… they came out not too bad:
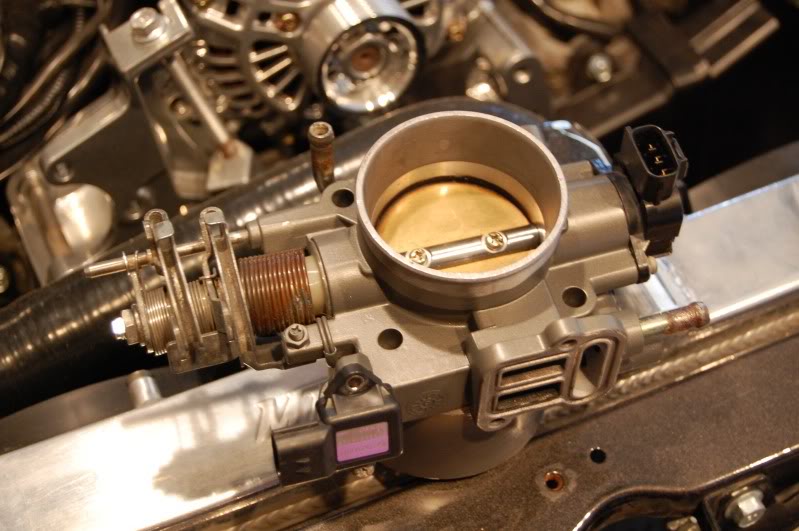
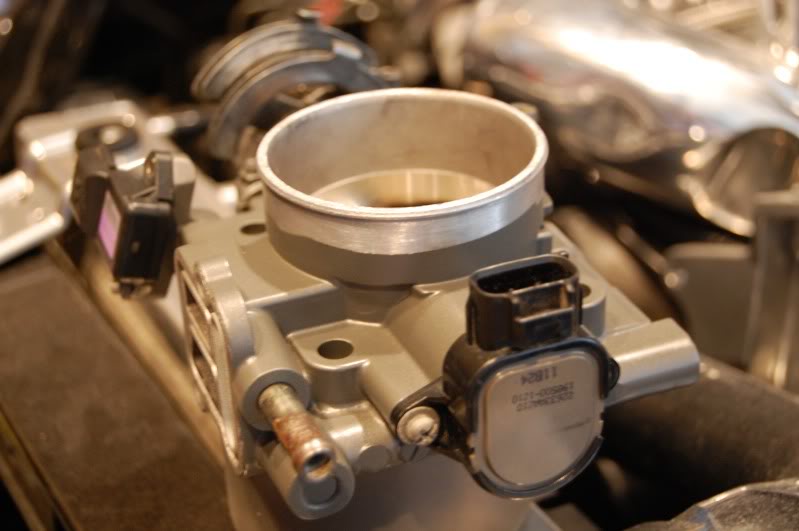
I cleaned up the throttle cable bracket as well. The throttle cable bracket, the alternator and the throttle body will be black when I am done with them.
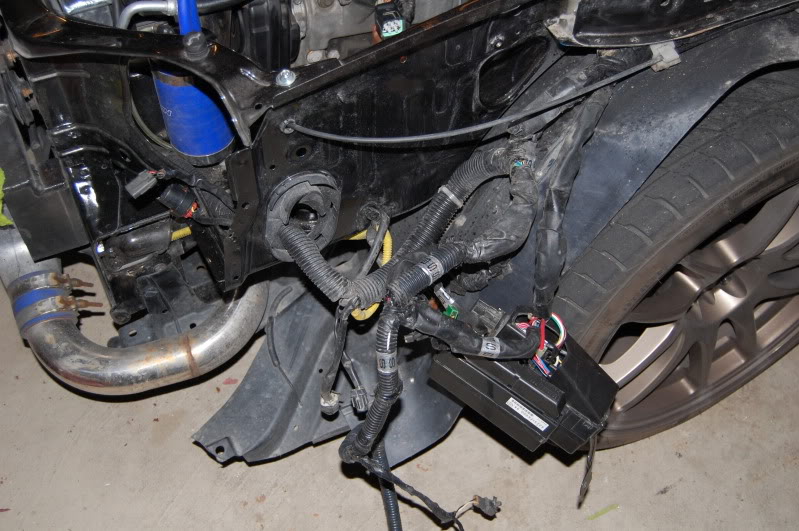
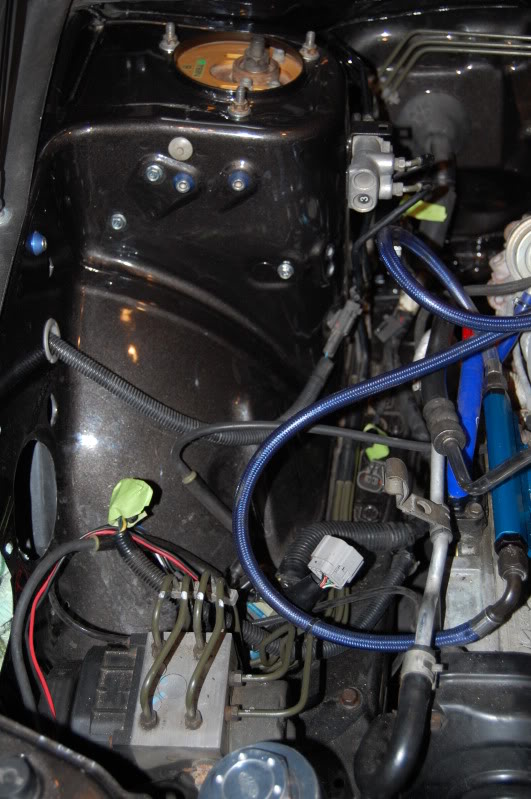
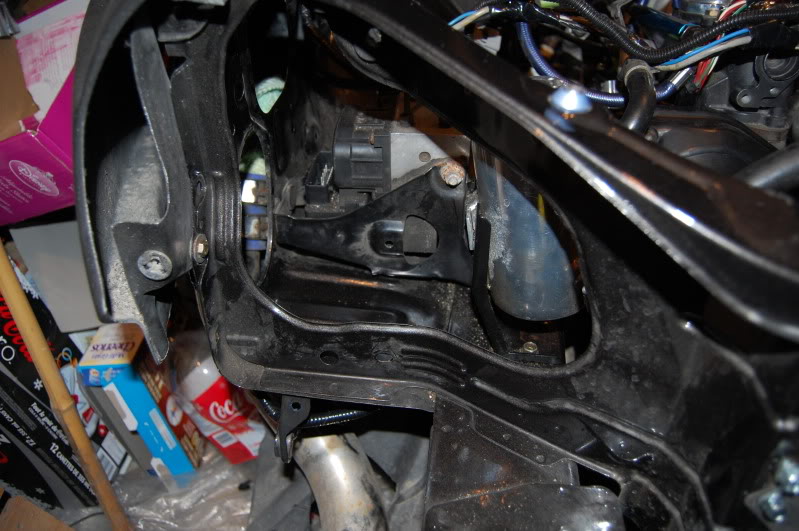
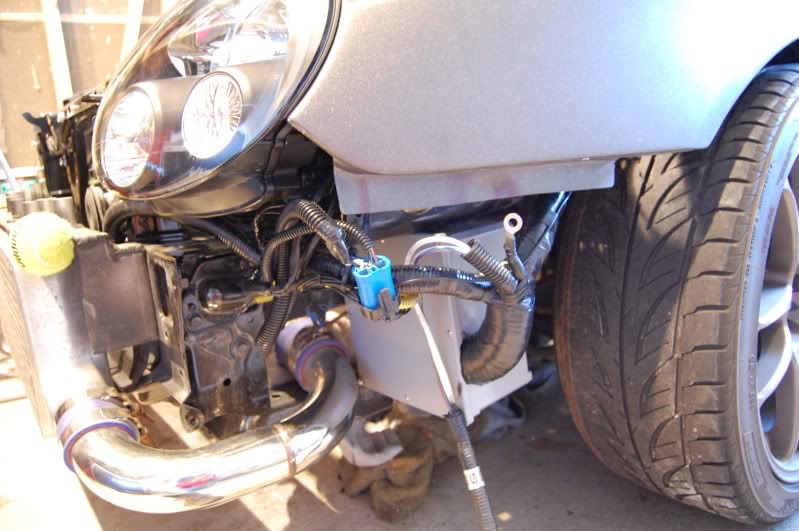
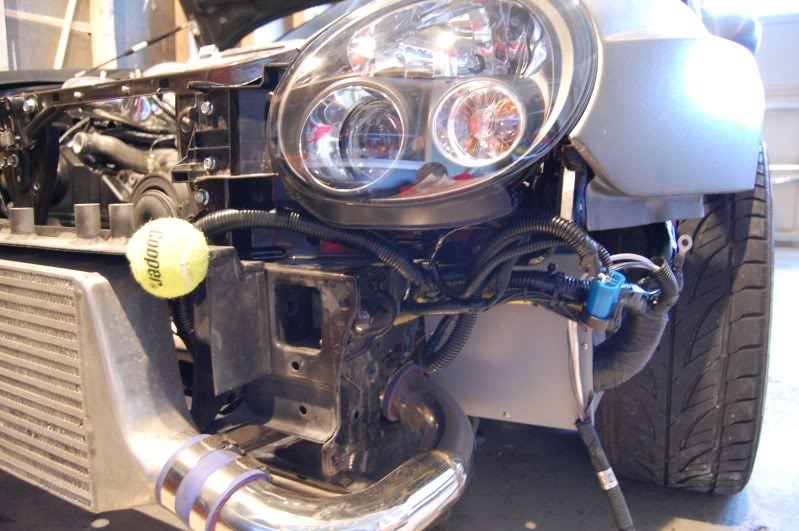
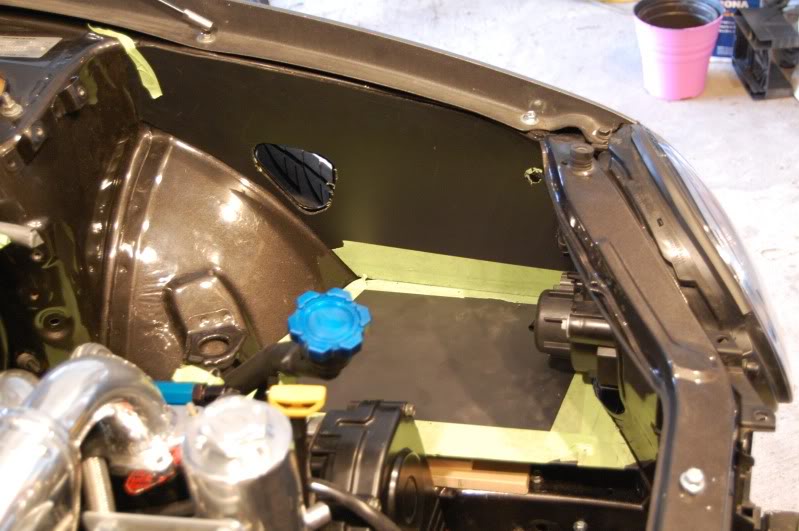
Did some more work this morning.. Damn that was cold in the garage!! Here is the before picture:
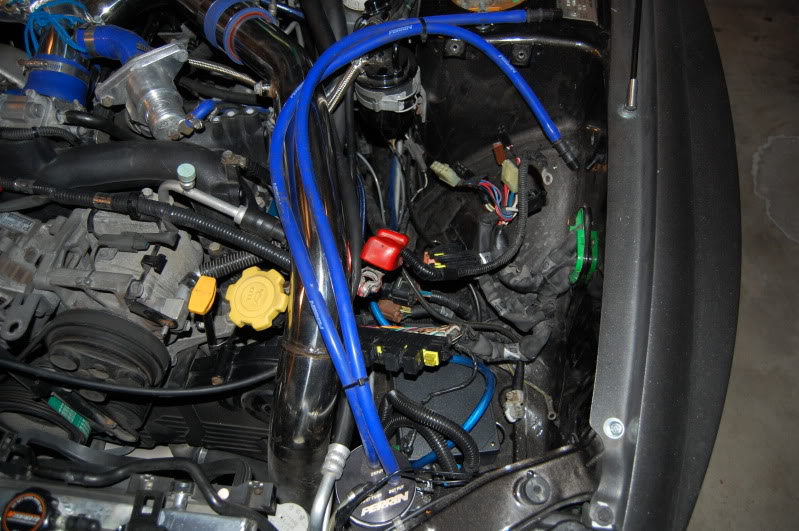
Then I took the fender off and pulled all the wires out… You can also see a little ABS plastic box that I am thinking about using to hide some connections. I’m not sure if I will need it or not. I will likely create a plastic cover cut to shape for the battery tray to clean it up.
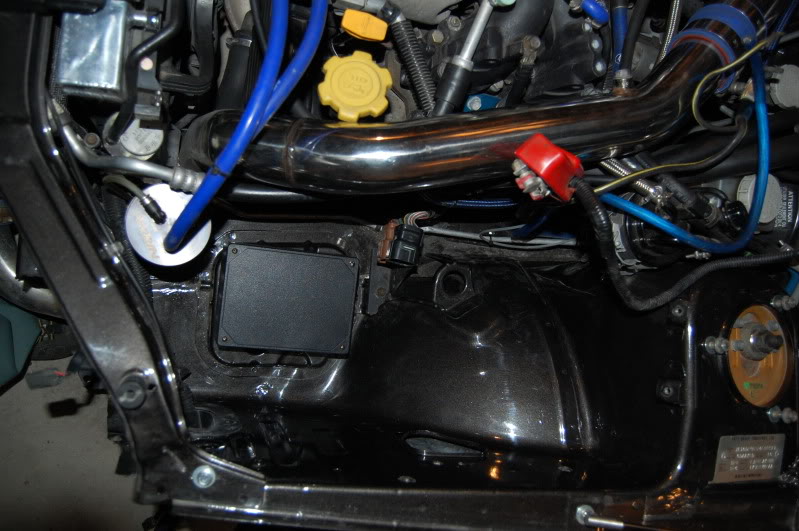
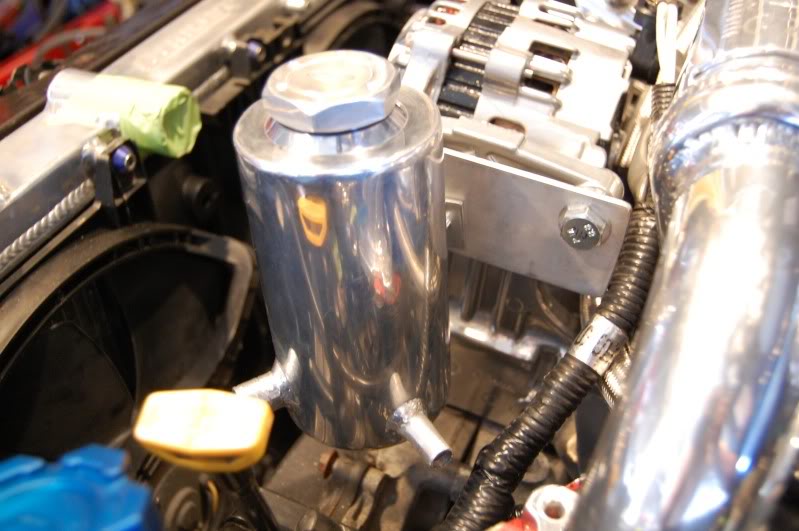
I then pulled the catch can out of there… the current plans are for the catch can and the coolant reservoir to go where the AC compressor currently sits.
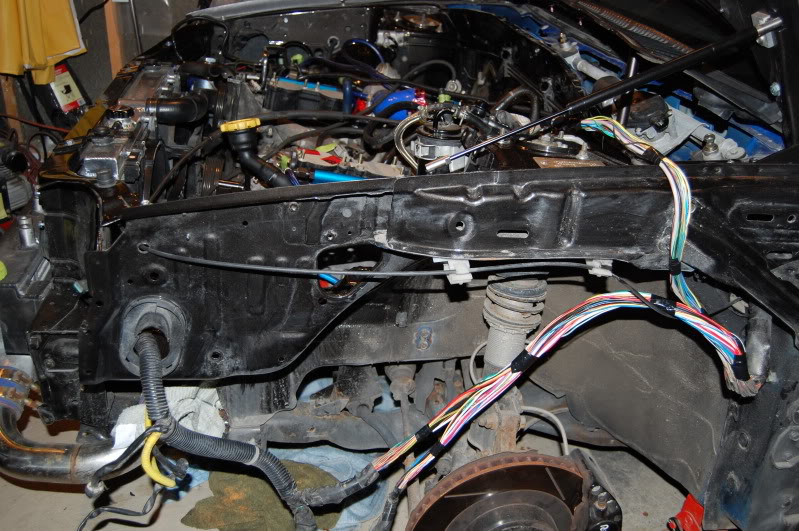
And where-O-where did the wires and fuse box go?
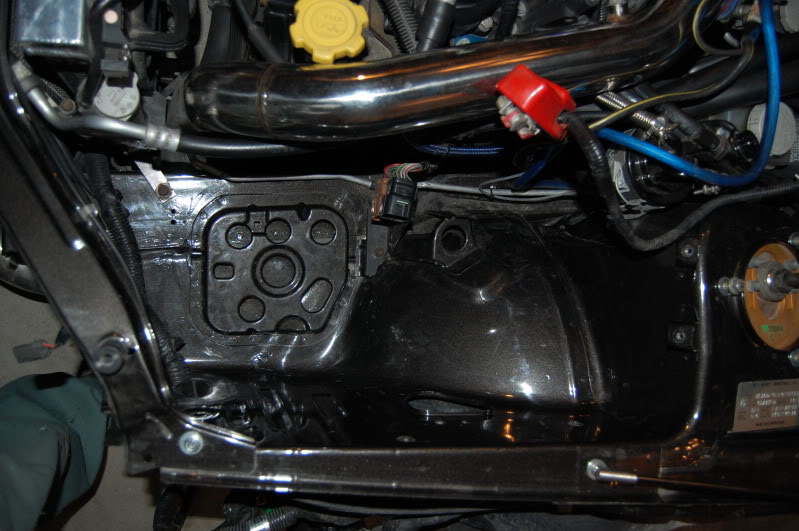
They are dangling there for now. I had to go back inside and get warmed up. I was checking out the wiring harness in the fender and there is a ton of slack that is all bunched up near the drivers side door. I’ll be cutting those zip ties and pulling that wiring harness out to its length so that I will have some slack for re-positioning the fuse box.
I think for now I will likely leave the two main harness plugs for the engine where they are until I pull the AC and do the Intake manifold swap. That way I will have more access to the wiring harness once the manifold is pulled.
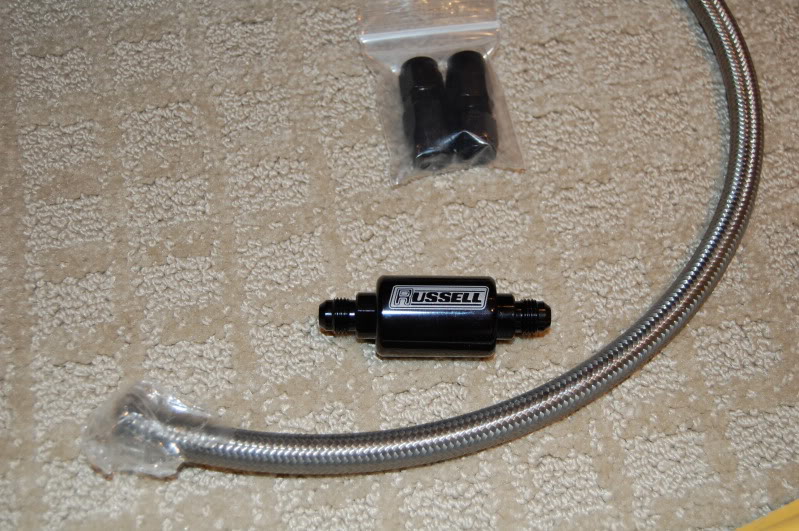
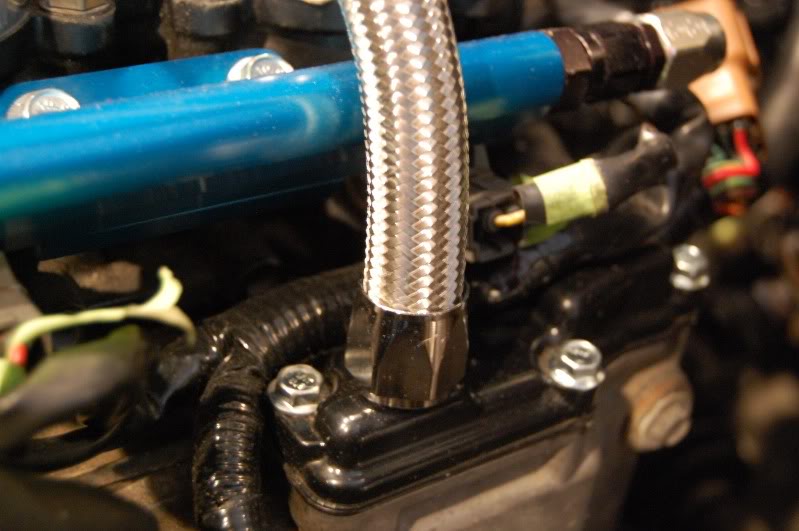
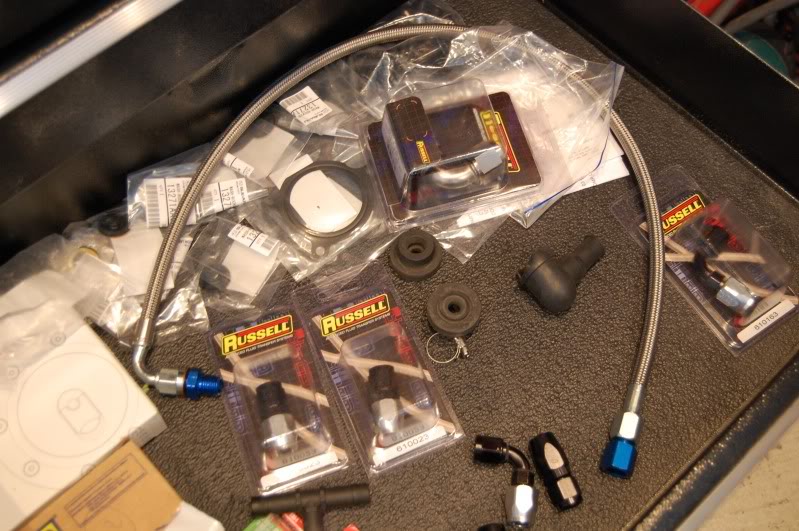
The fuel filter /lines/an fittings came in.. Man that fuel filter is small
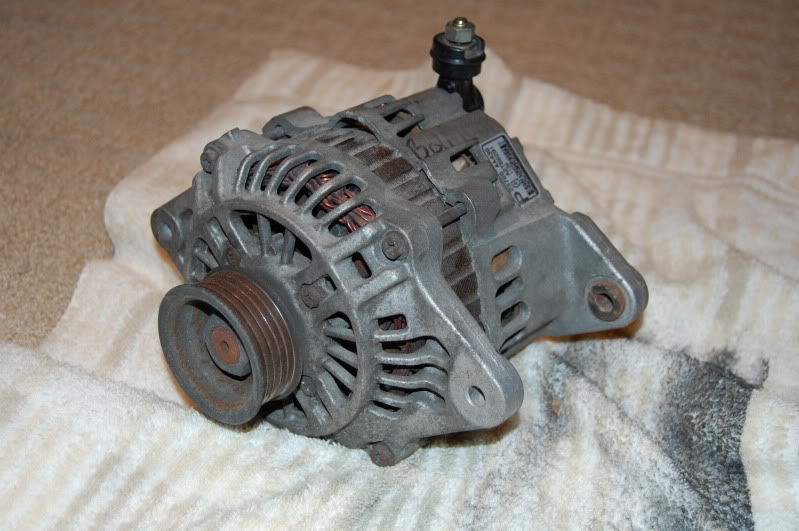
Then I decided to take apart the spare alternator so that I could paint up the casing. I’m glad I had this one as a spare because I destroyed it LOL.. everything was seized so I ended up drilling out some of the screws. It took me all afternoon to get this thing apart. I had the freaking impact gun on the pulley nut for what seemed like forever.. I also hammered out the bushing that is used for the AC compressor to connect to it.
I think I will be taking my existing alternator to an alternator build shop and have them switch the casing once I have it painted so that I don’t screw it up
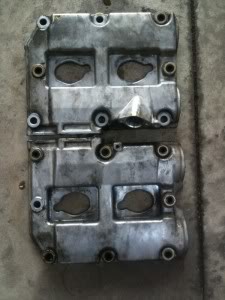
Started with this…
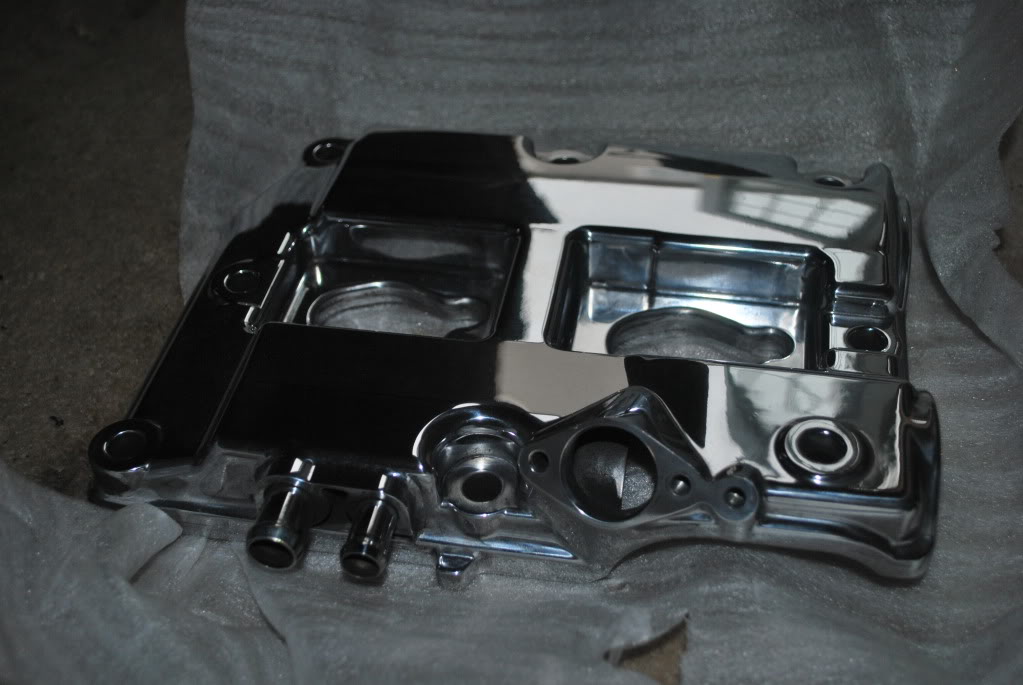
Ended up with this:
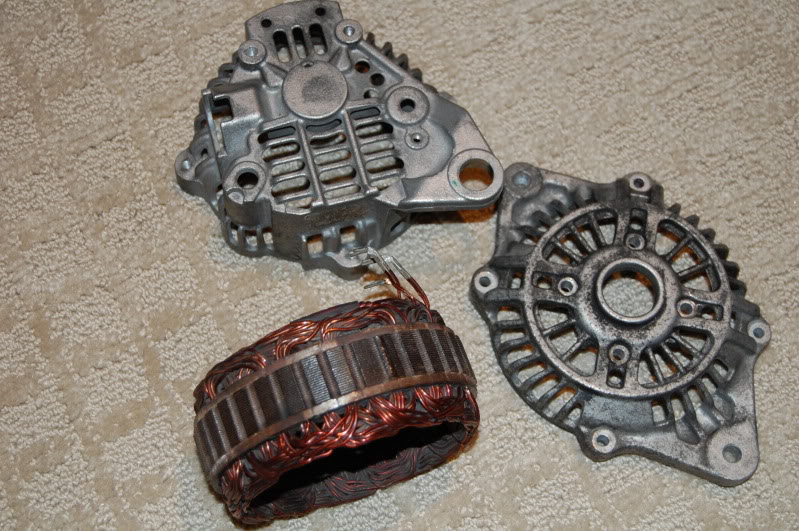
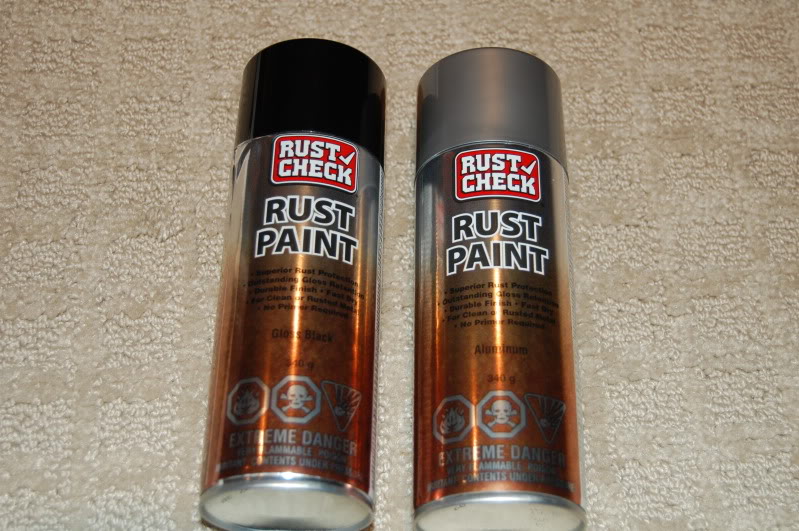
And will be painting the casing with gloss silver and the band on the outside of the wrapped wires with the black. Much like Neil did with his build.
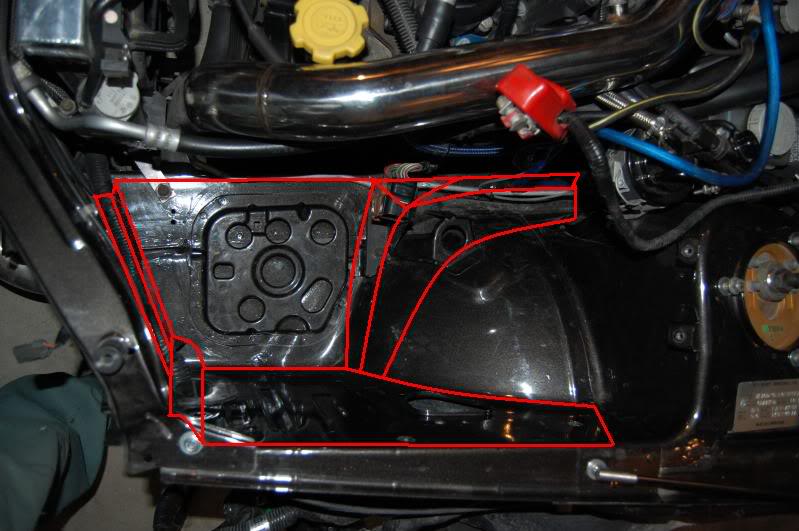
This is what they look like polished. They are going to look sick on your car with the magnus! I’m really anxious to see our panels!Hopefully I can start to mock-up the panels in cardboard tonight.. I have attempted to draw the lines in a somewhat perspective view. I needed to get the AC lines out of the way so that I could start to make my templates. Now that I ripped them out yesterday, we should be good to go
The idea is providing panels that will look smooth and cover up the nastiness of the battery tray, the holes etc. While also providing “channels” for hiding the wiring harness with the least amount of wire extension and tucking. This should keep the margin of error of a wiring mishap down but still clean up the engine bay. The goal is to have each side of the engine bay have a one piece panel that will cover both the bottom and side for a cleaner look that two panels for each side.
The idea is that the bolts for securing it to the fender wall will be counter sunk and covered over. They will use existing holes in the fender and then washers and bolts will be attached from the outside.
I am going to be using that little plastic box for a distribution block of the Positive battery terminal where it will connect to the 4gauge wire going back to the battery in the trunk. It will all be hidden under the panels. it will pop up into the plastic box through the circle in the battery tray.
Keeping the panels up on top of the battery tray should provide clearance for wiring to run underneath it.
At least, that is the plan
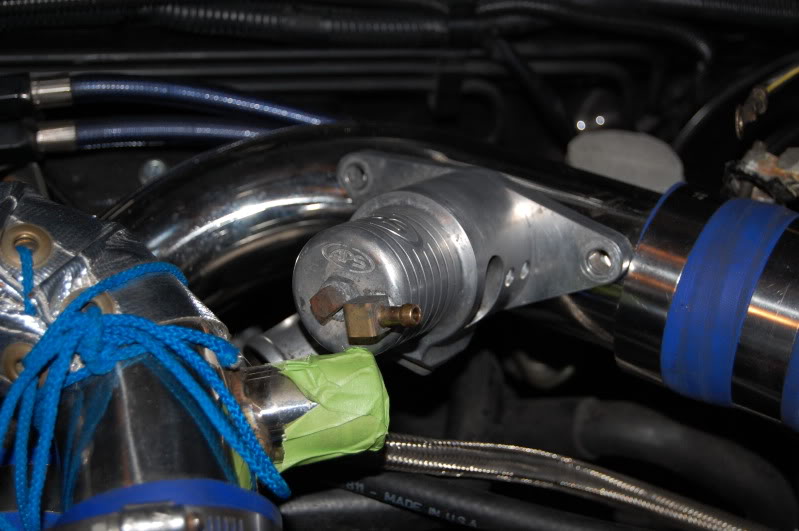
I’m thinking about having a new mount fabricated for the BOV and get a new pipe bent for where the old BOV outlet is. It just looks really weird mounted to the spot where the existing flange is and I would like to move it to the new spot. The idea would be a flange with some bolts welded into it so I could just secure it with a couple of nuts.
Wanting to have it all done in stainless steel.
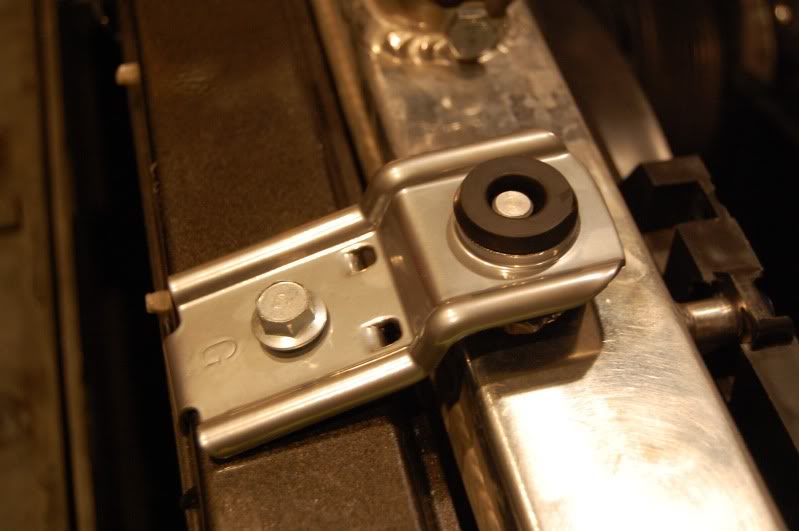
Firewall is already starting to look better with all that AC crap gone off of there. Now that those hoses are gone there is room for me to mount the fuel distribution block up on top of the pitch mount bracket.

I also temporarily stuck the emblem where it will be going. I’ll make a nice little surround covered in Carbon fiber to mount to this spot. I figured I would stick it there to see what it looked like.
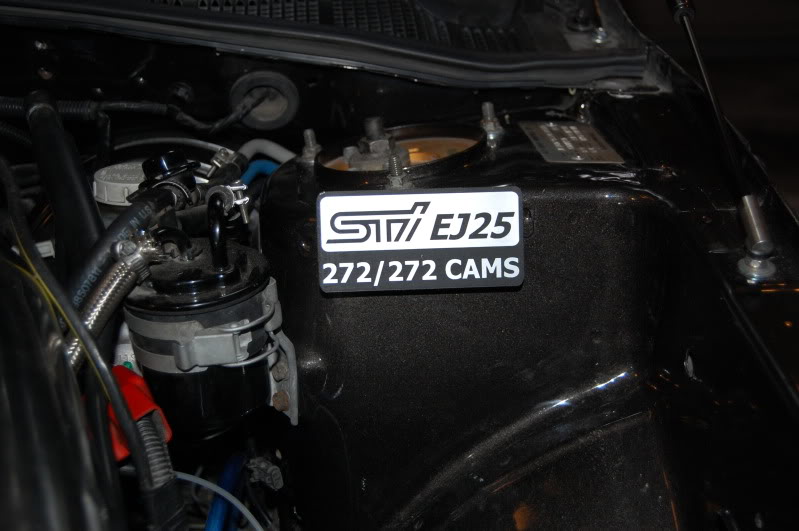
I’m hoping to have a bunch of time this weekend to try and get some more done.
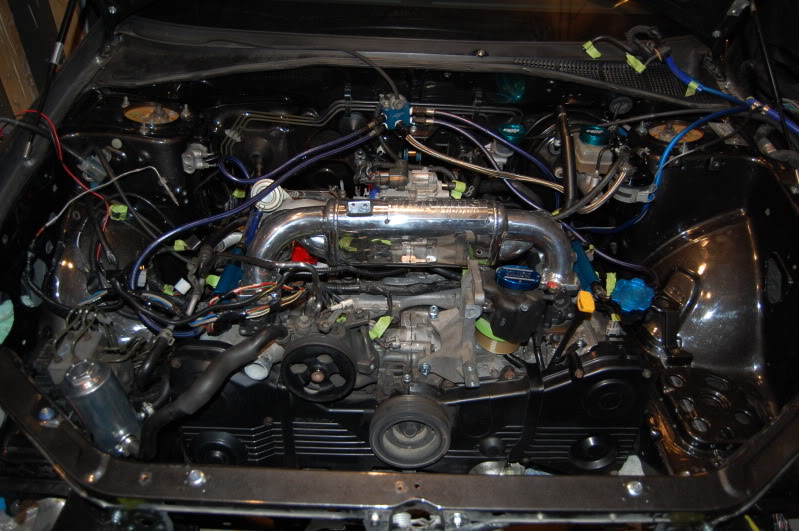
The carnage continues
Man there is a lot of crap attached to that intake manifold!! Since I am going to be putting the coolant reservoir where the AC compressor was before, I took out the hard line going over to that area… Crappy thing was that when I removed it the coolant system decided to create a siphon and tried to purge itself!!
So I had to clamp off the hose with a vice grip.. it was like a scene from ER where I had a bleeder and I was looking for a clamp and suction
Today I’m going to drain the coolant system so that I can remove the fans. I’ll be matching up my mishimoto rad with their slimline fans and shroud. Lots of gazing at the engine bay right now devising my plan of how to simplify the mess of hoses and wires
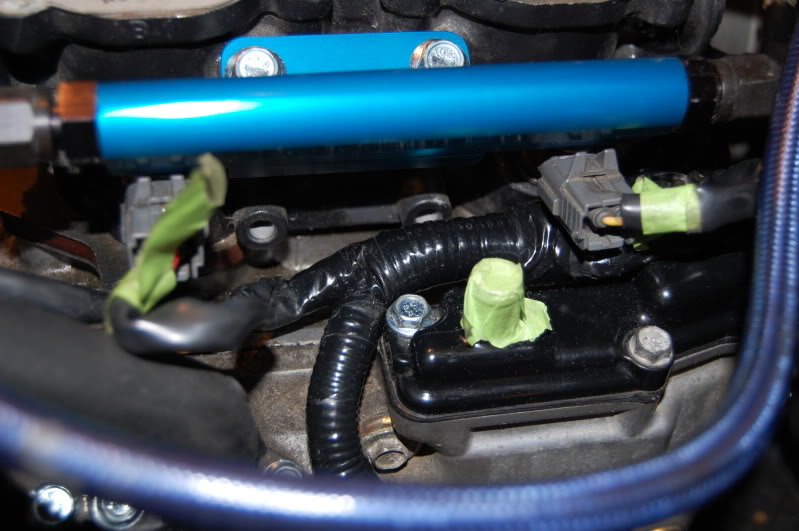
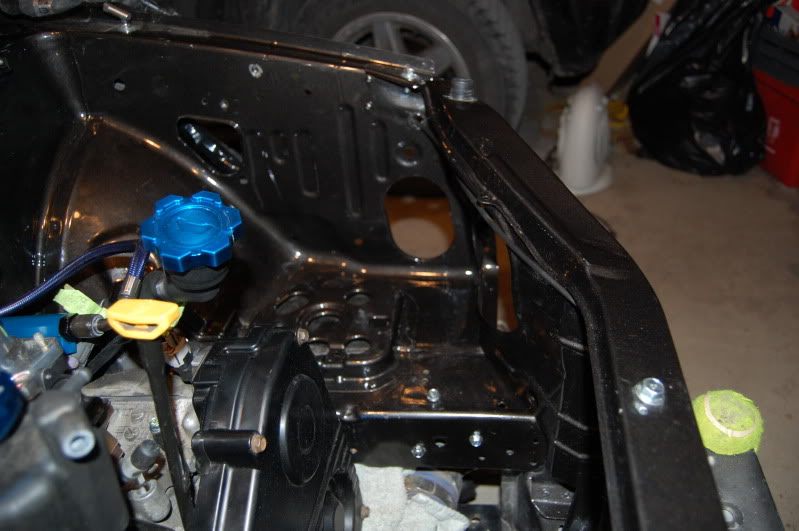
Another half day’s work and the firewall is starting to look much better. I can’t wait to get rid of the Antilock Brakes and re-route the brake lines hopefully up in the wiper area. I didn’t get the coolant drained today since I didn’t stop by the store to pick up a drain pan. You’ll see my nice TGV cardboard gaskets to cover the intake
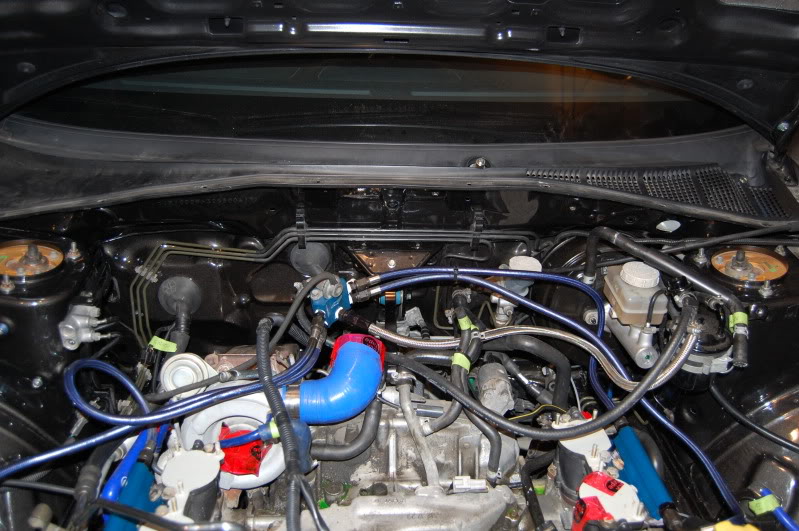
Removed the cruise control unit and daytime running lights module. makes that section much less cluttered.
Starting to get an idea of what I am going to do for wiring on the passenger side.. I think I have some tricks up my sleeve that should work out I also have some cool ideas for the strut towers. I also love the wiring that comes in from the fender only to exit out into the fender again.
Wires… Wires… and more Wires
Started to pull some of the wiring harness apart. The idea is that I am taking the wires that go to the engine harness (the one attached to the intake manifold) and run them up through the windshield wiper area. I’ll drill a couple of holes and pop some grommets in there. The wires will be tucked away at the bottom of the firewall and hook up to the harness at the back of the engine block.
That way there will be no wire connections on the drivers side of the engine bay. The extra slack that was in the wiring harness should do the trick for the fuse box relocation.
I’m also going to run the positive terminal off of the starter back through the same way where it connects to the fuse box. The wires that go from the fuse box to the Alternator will be lengthened and re-routed this way too.
Hopefully all the wires will then be tucked under the intake manifold so you can’t see them.
I was able to get a little bit more done on the car today. Picked up some more zinc plated flange bolts to replace the rusty crappy ones on the car. Still have a few more to do
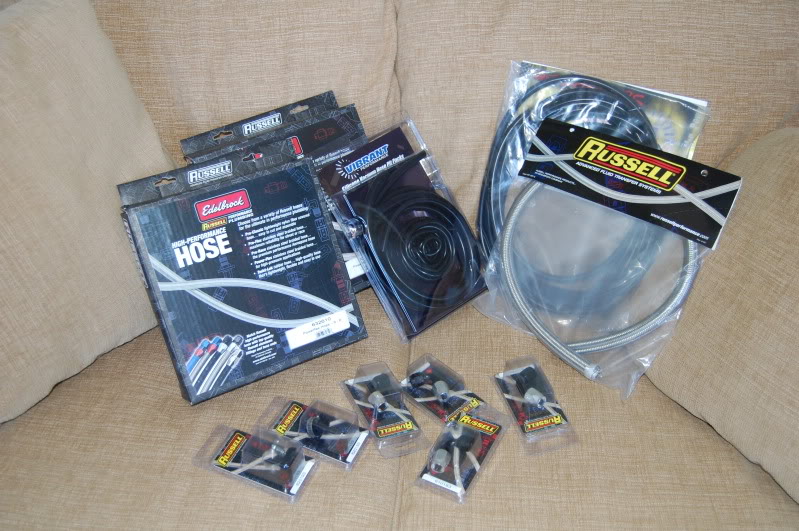
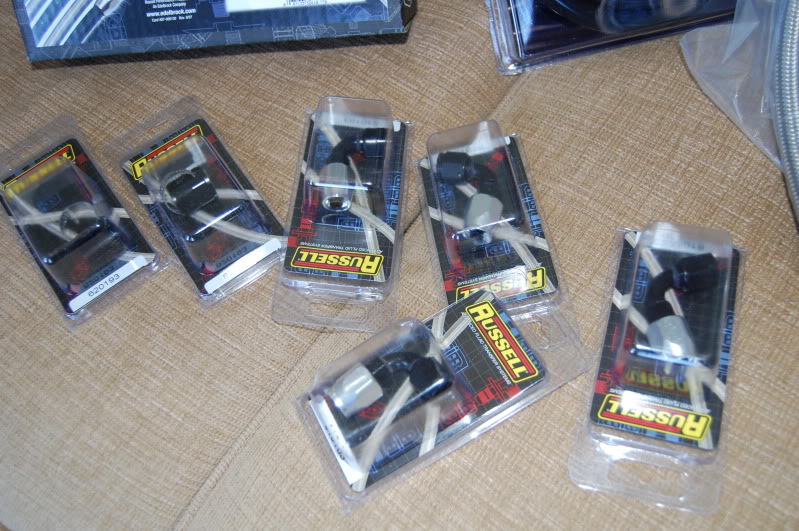
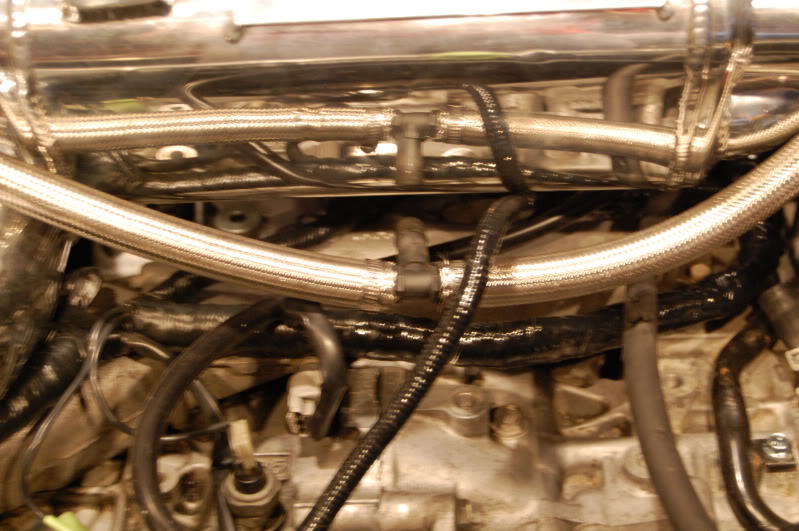
I ordered some -10an braided hose to go from valve cover to valve cover. I also ordered some black Russell hose ends/clamps to give a nice AN finished look where the new braided hose connects to the valve breathers. For most of the other hoses I will be going with a gloss black silicone instead of braided lines so that they will kind of disappear. I think with the amount of hoses that are visible on my car it would look like stainless spaghetti if I went braided
I want focus to be on the polished pieces on the engine instead of the braided hoses.
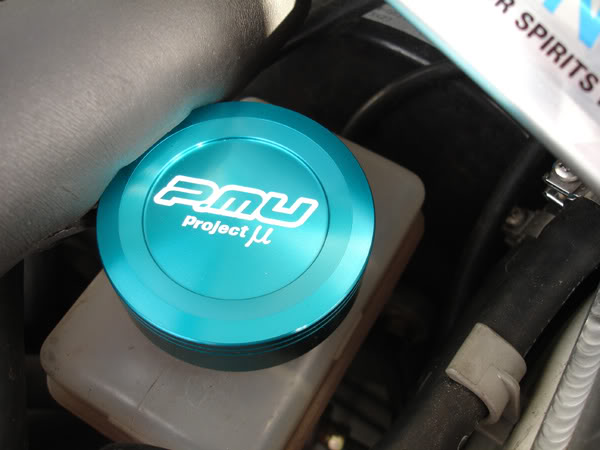
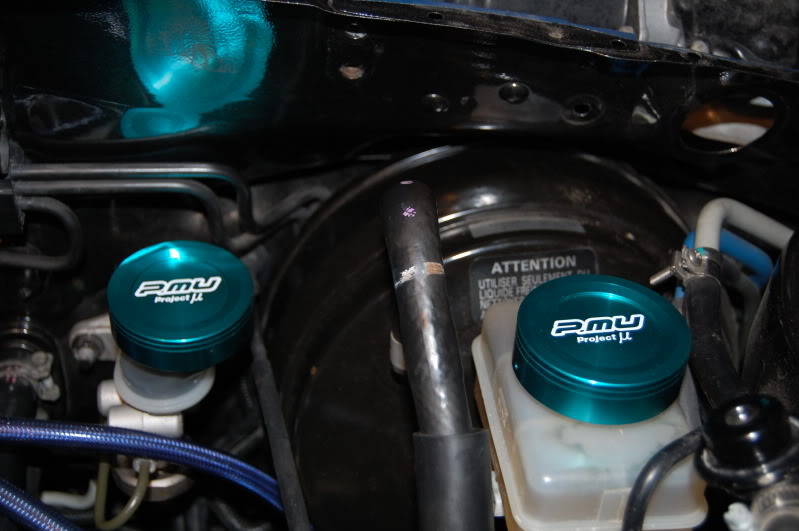
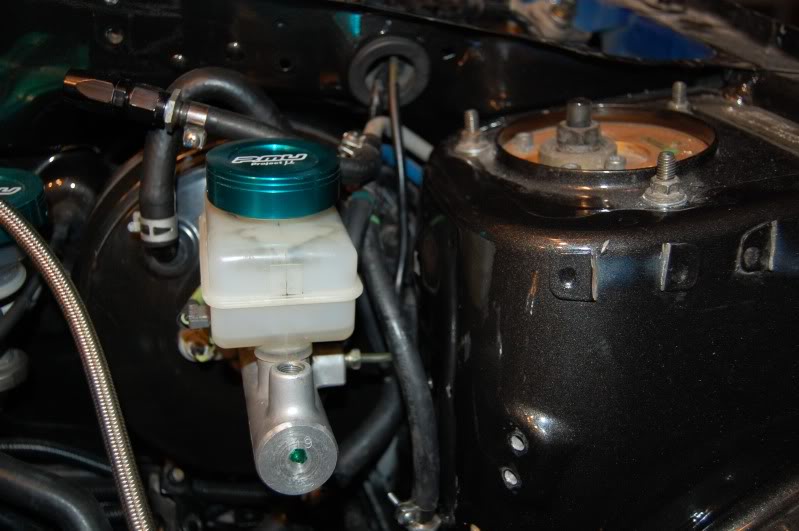
My Project mu reservoir caps also showed up. Thanks to D Money for the hook up on these
I took the existing engine wiring harness and cracked it open to re-route the wires. I then re-wrapped it all nice and fresh. I’ve made it so that the only wires that hang down on the side of the valve covers are the wires going to the coil packs. Can’t really tuck those!!
When I re-wrapped the harness I made sure that the wires were routed so that the harness plug would be at the back of the engine. This will meet up with the wires that I showed in the previous picture that I will route through the wiper area. All the wires “should” reach without me having to lengthen anything. I’m planning on routing the front fuel rail lines under the manifold as well so that the sides of the engine are much cleaner looking. That blue braided fuel line just gets in the way.
And the grounding point that used to connect to the top of the manifold will end up going to the main engine grounding point instead.
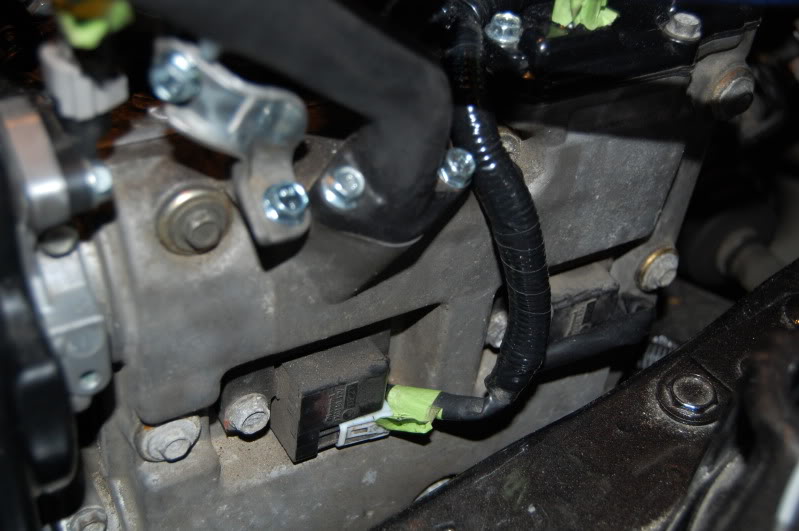
I started in on the passenger side but didn’t get too far on it. On both sides I removed the TGV plugs, since I have TGV deletes, which helps clean things up. Hopefully tomorrow I’ll get some more done on the passenger side. I’ll snap some pictures to show how I will be routing the wiring harness over to where it plugs into the passenger side harness. It should all be hidden by my intake… or at least that is the plan
I still have to figure out what I want to do with the harness going across the top of the engine block. On the OEM manifold it is suspended in the air on a tray bolted to the manifold. I’m not sure if I would have any problems if I just let the wrapped harness lay on top of the engine or not. I don’t think it would melt the wire loom..
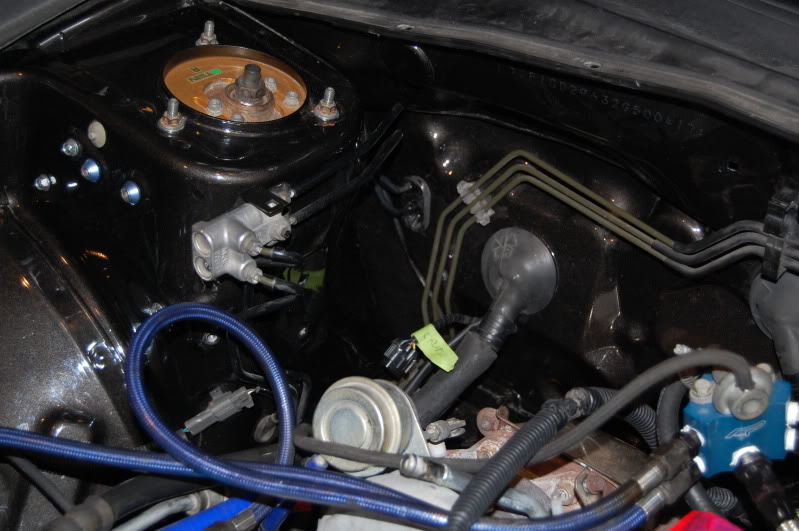
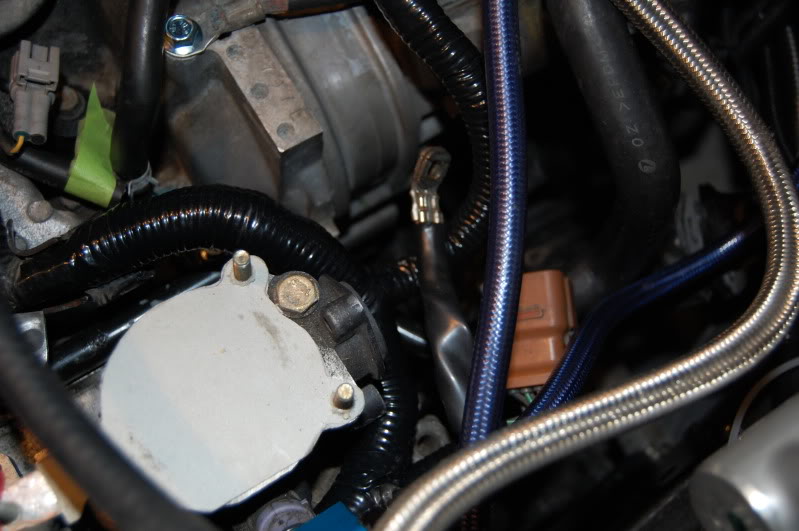
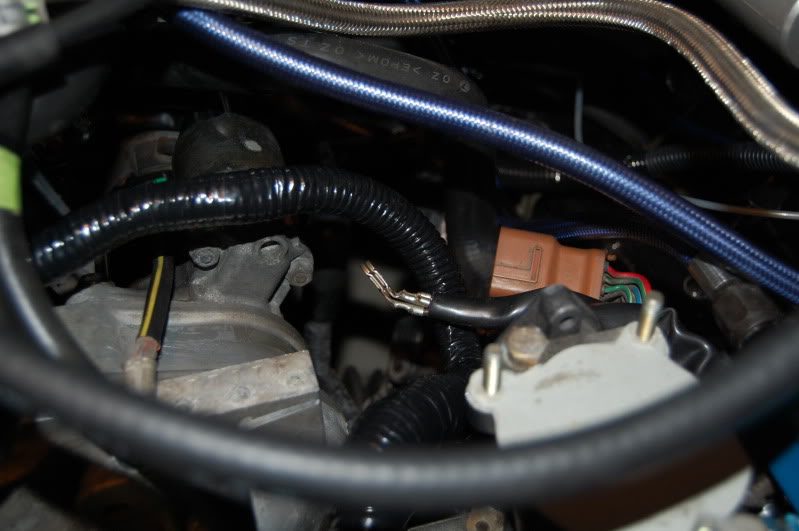
I’m starting to make some more progress. I finally have the harness from the front of the car that goes behind the headlights and under the rad taken care of. The ABS plug has been deleted as well. It’s taking crazy amounts of time just standing there staring at the engine bay looking for routes and trying to be smart about how it all goes. My fingers are numb from peeling away old harness wrapping
I apologize in advance for the lighting of the pictures.. that is what I am working with in the garage.
It still looks like chaos, but you can start to see some of it taking shape
All the wiring is now gone from around the ABS unit. Man there is a crap load of wires that go into that thing. Now the unit is all set to just get lifted out of the car and have the lines re-routed.
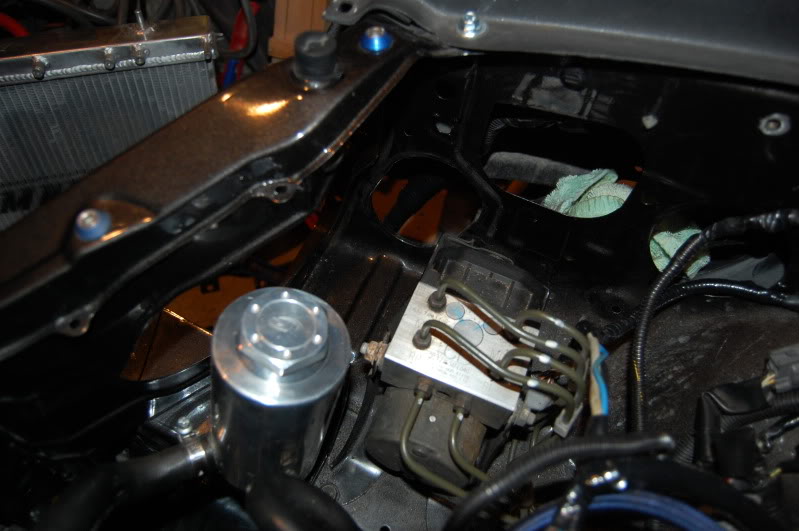
Wiring is now all gone from the drivers side headlight as well. I’m likely going to re-route the hood latch cable to. I just haven’t gotten around to that yet.
You can also see where I am going to be mounting the Forge coolant tank, but I’m using my stock one for a mock-up for now. I’m likely going to have some AN fittings welded to the coolant tank so that I can run AN lines to the rad, overflow bottle and turbo.
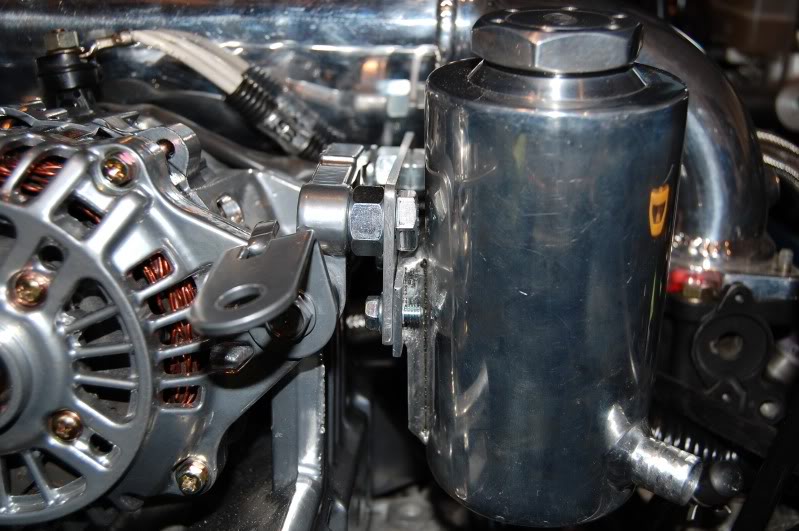
I have a crazy idea on where I’ll be mounting my power steering reservoir. I’m going to mount it on top of the engine. It will be sitting on the firewall side of the intake manifold on the drivers side. I’m going to have to fabricate up a bracket for it to sit in there, but I think it will fit. I’ll be welding on an AN fitting to the power steering pump for the feed line with a 90 degree bend so that the line will run back to the reservoir. It should match nicely with the high pressure braided line going to the steering rack.
I don’t want anything at all on the sides of the engine other than the intercooler piping that I will be having done.
I made some more progress this morning. The girls went out shopping so I was able to dig in. I was able to do the following:
– Depressurize the fuel system
– Get rid of the stock fuel filter and bracket
– Re-route the drivers side fuel rail hose to go under the manifold
– Disconnect the power steering reservoir
– Disconnect the power steering pump and tie back the lines so they are out of the way
– Got loopy off of fuel fumes
I was able to find some aluminum that I will be using to make a bracket for my fuel distribution block on top of the pitch mount. It looks like it will do the trick quite nicely.
I’ve also been playing around more with the Power Steering reservoir bracket to see how I will be able to mount it where I want. I think I’ll have to tap some of the holes that are on the block and re-use some of the existing threaded areas.
I’m not that familiar with how those Power Steering lines connect into the rack but I’ll have to get the car up on jack stands before I tackle that job. First step is getting the reservoir mounted so that I know how many feet of braided line I’ll need.
I REALLY NEED BETTER LIGHTING FOR PICTURES
I’ll try and pick up another work light to hang above where I’m working. You can never have too much light
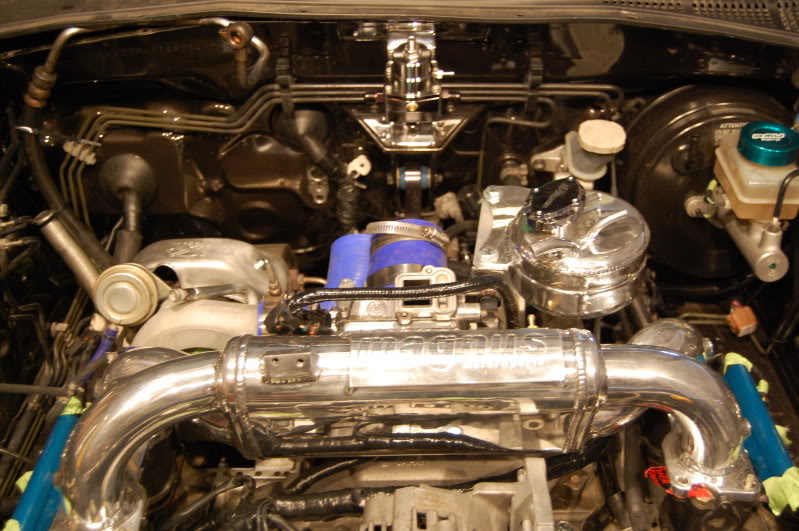
Full engine bay shot.. you can see my ghost friend that helps me.
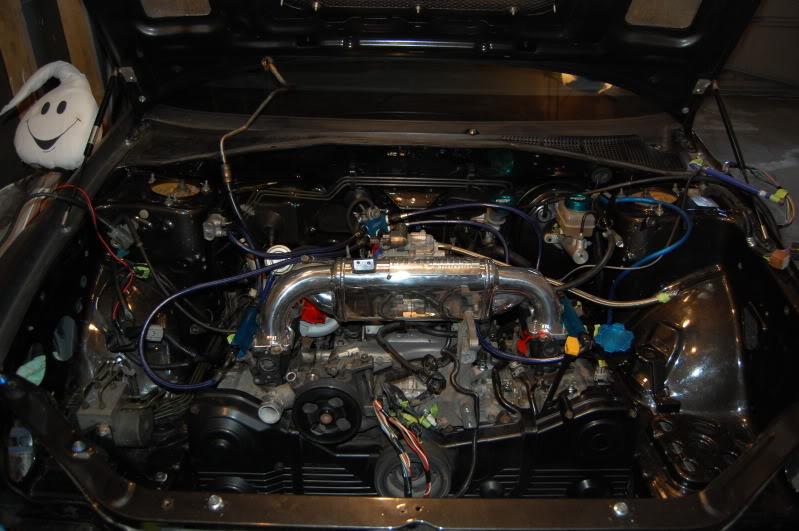
Tucked the fuel line under the manifold.. I’ll end up doing the same on the passenger side:
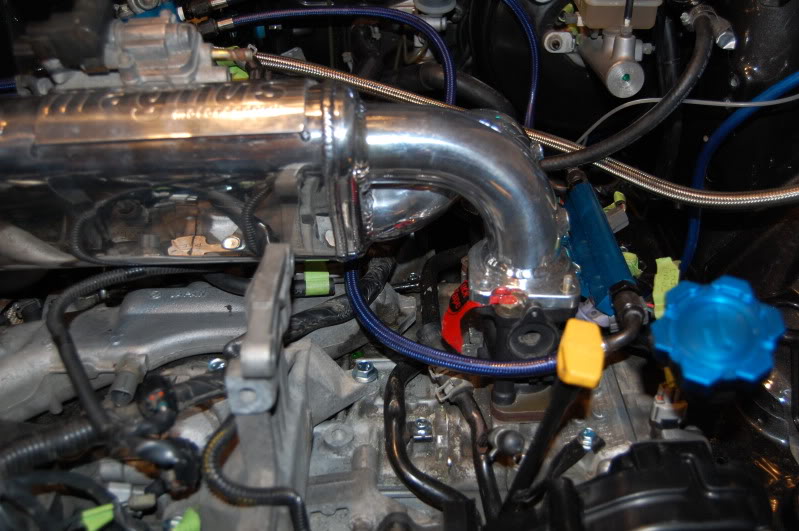
Bye Bye big ugly fuel filter:
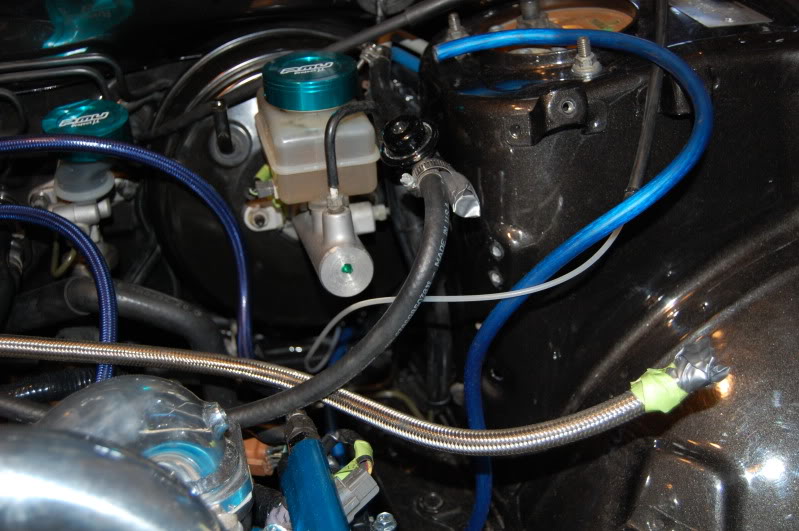
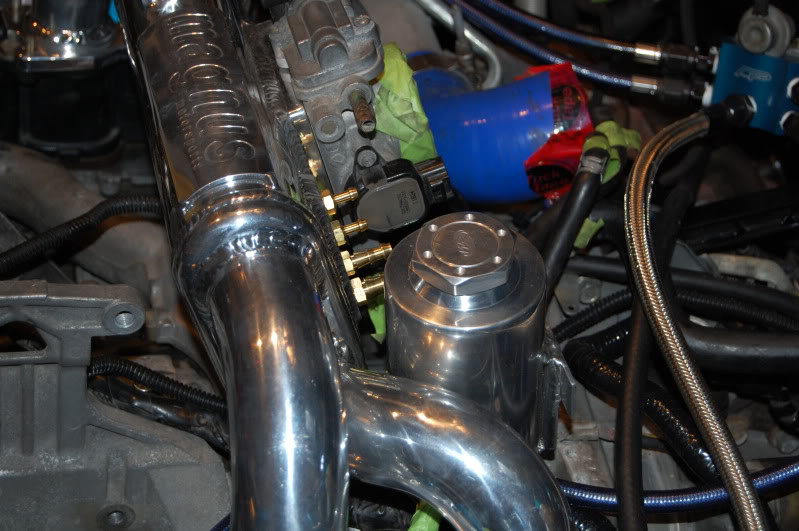
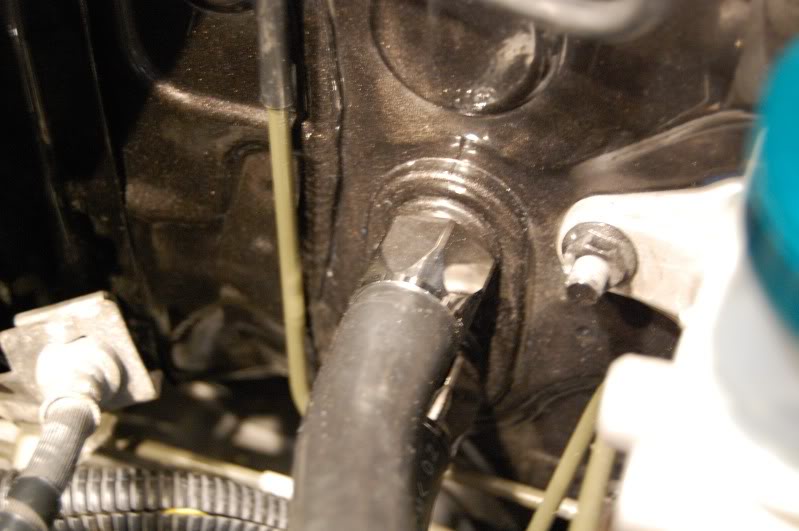
This is where the power steering reservoir will be going:
I’m thinking that after I get everything in place and all the intercooler piping the way that I want it, I’ll likely get some new fuel lines made up. The lines I have now are just way too long!!
I definitely will be making up some new braided lines with AN fittings for the fuel system. The lines I have now are just way too long and aren’t going to route the way I want them to. I’ll need to make some up after I get all the intercooler piping figured out. So I ripped out the fuel distribution block and lines this morning. Man.. does that ever give me a bunch more room to work around in there. Those damn lines were always getting in the way.
Now that I have the fuel distribution block disconnected, I can start looking at creating my aluminum mounting bracket for it to sit up on the pitch mount
I also was able to rotate and trim the coolant lines going to the firewall this morning. That way they will be tucked down more for where I intend to run the intercooler piping.
After talking with my local race shop, I’ve also decided to stick with the OEM fans instead of going with the Mishimoto shroud and fans. Frank warned me against getting some after market ones because the OEM ones are so good and reliable. I’m guaranteed not to have any cooling issues no matter how or where I drive the car with the OEM ones.
So I decided to give the OEM fans a little flare where they attach to the rad (see below)
I’ll end up taking the fans back off again and give them a good scrubbing before I fully re-assemble. I just wanted to see if the fasteners that I had would work.
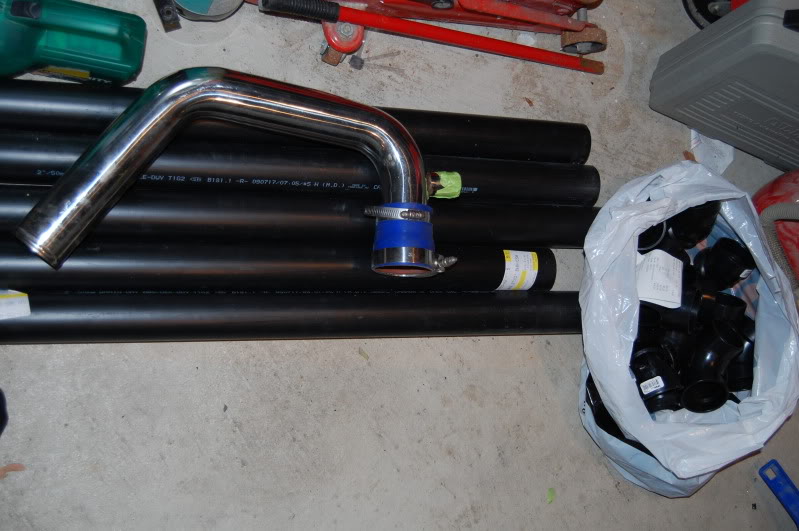
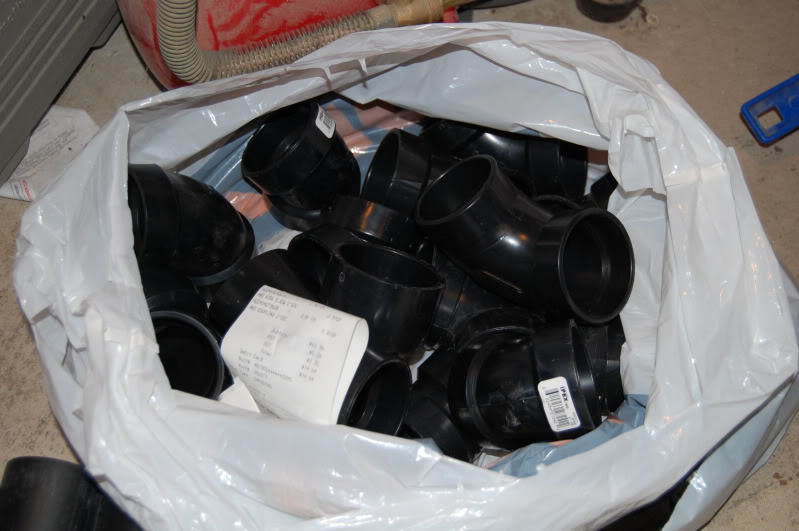
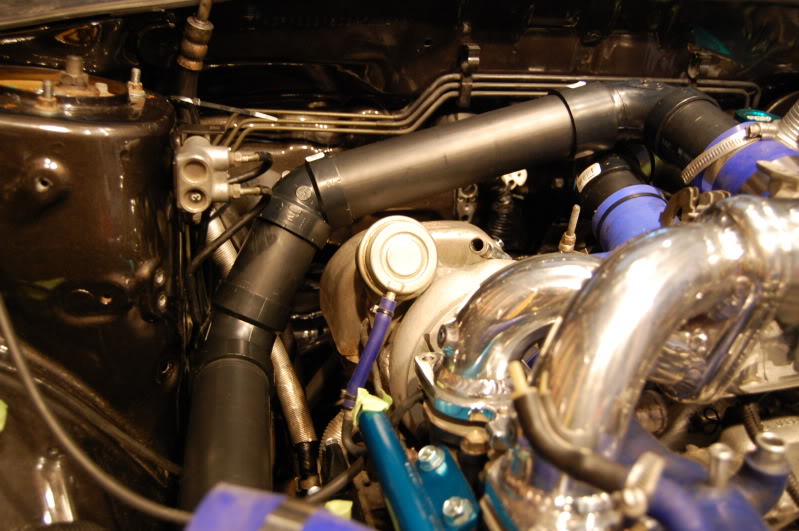
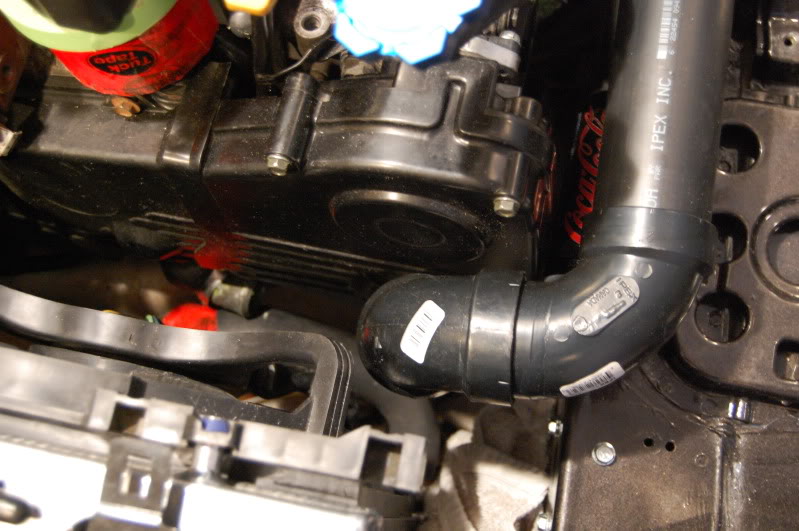
Say hello to my Home Depot intercooler piping mock-up kit!!! A sack full of 45/60/90 degree bends and a bunch of 2 inch PVC piping. The outer diameter of the PVC piping is only 1/8 inch smaller than the 2.5 inch stainless pipes. So it should make for a pretty accurate representation.
I’ll be able to cut and piece the piping sections together like LEGO. I’ll then use some PVC pipe glue to hold them together and then take them to a shop to make me some stainless pipes with the same bends… or at least that is the plan
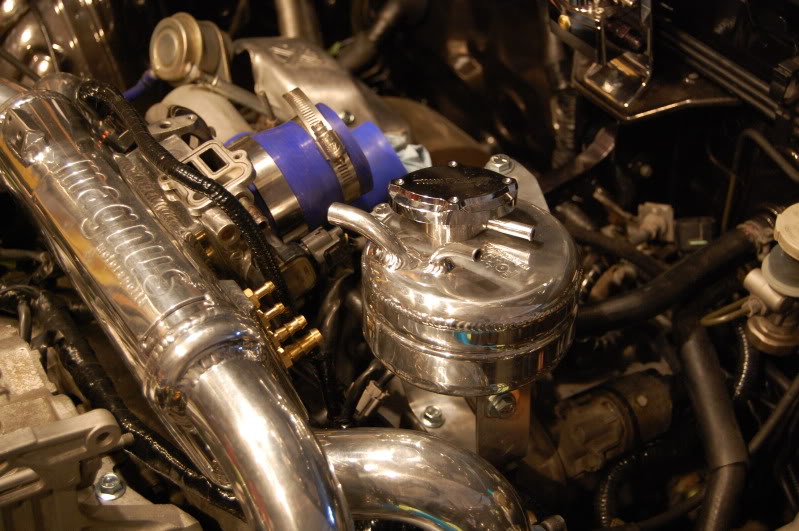
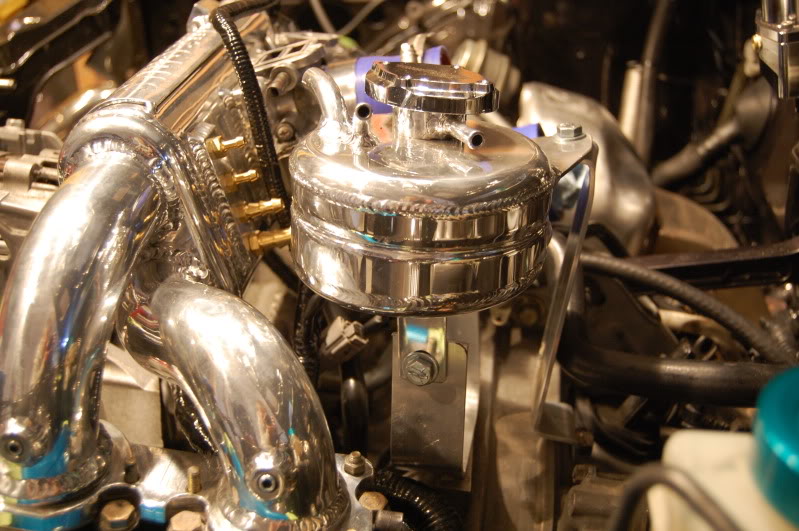
After getting back from one week in Barcelona for work, I found a little bit of engine bay accessory bling
It should go well with the Forge reservoir tank that is on the way. It fits right over top of the OEM cap and secures with a set screw. Just like the Project Mu caps I have.


Since I’m back from good old Spain, I was able to pick up a bunch of new bolts, washers and gaskets from Robbie and started mocking up my new intercooler piping. I wasn’t able to finish the passenger side because of that damn ABS unit that will have to be removed before I can finish
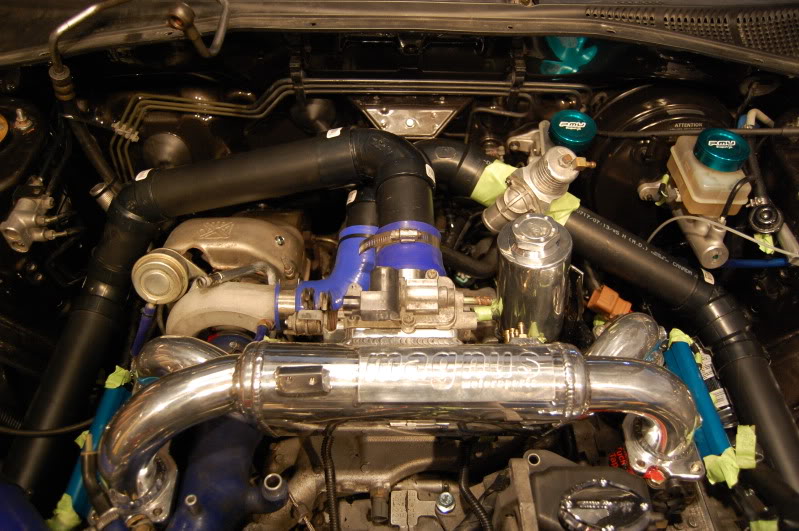
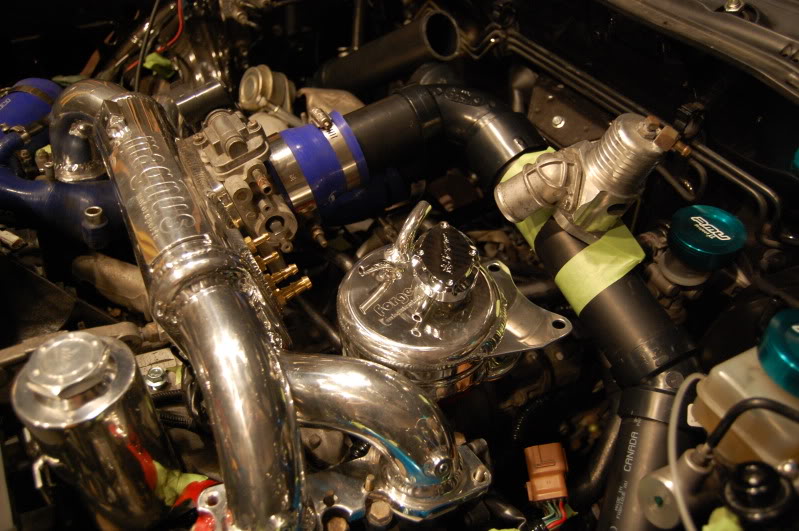
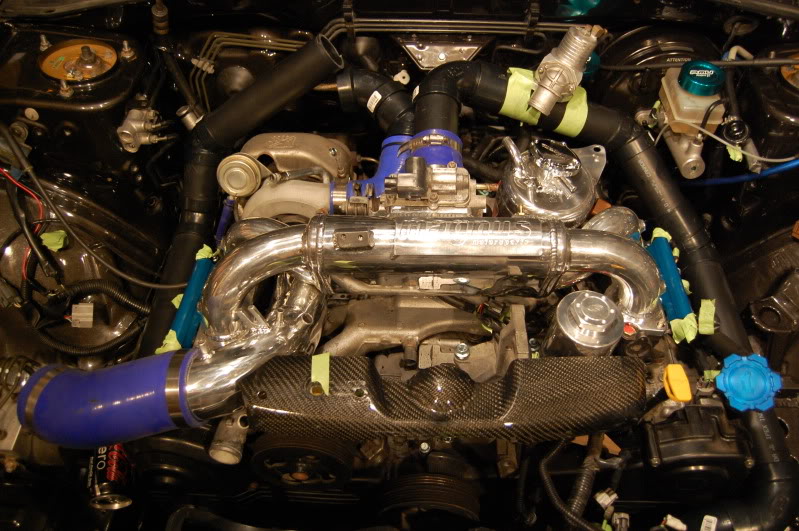
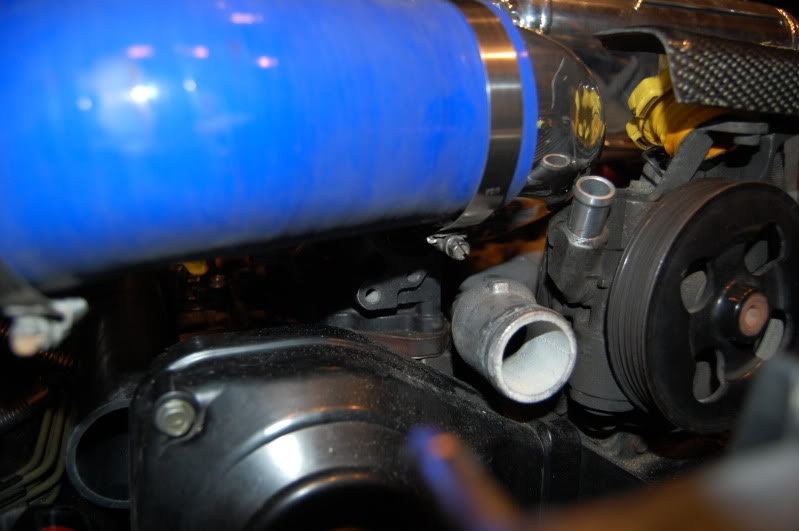
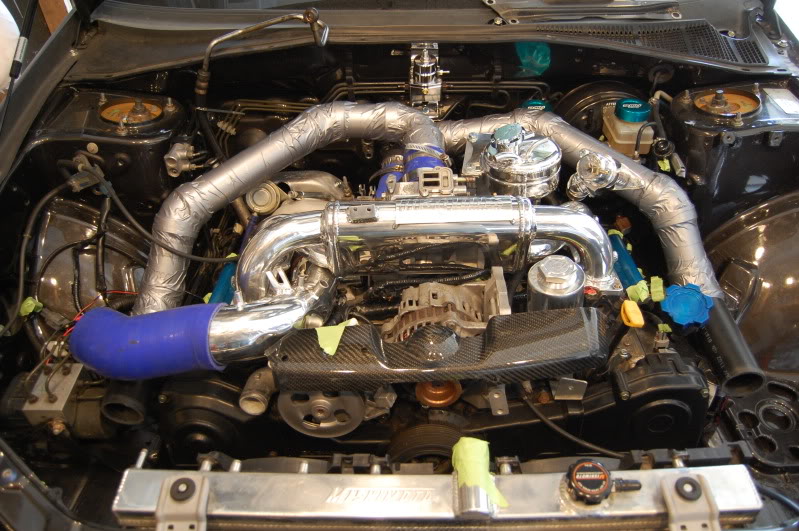
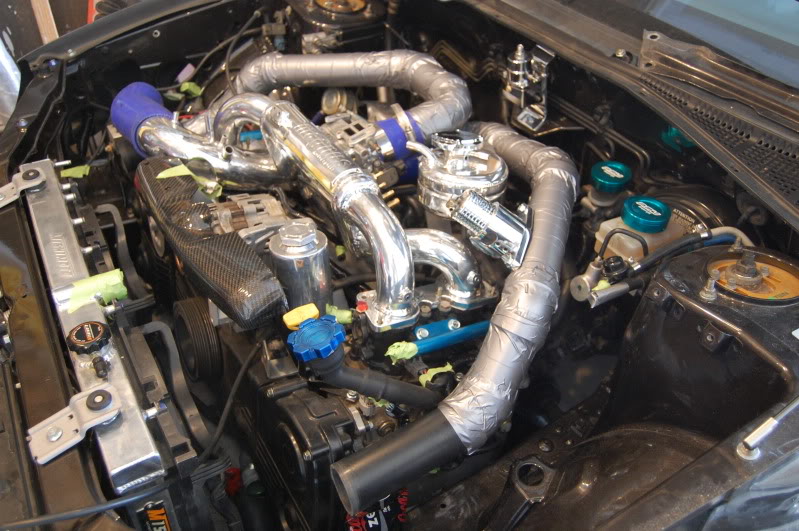
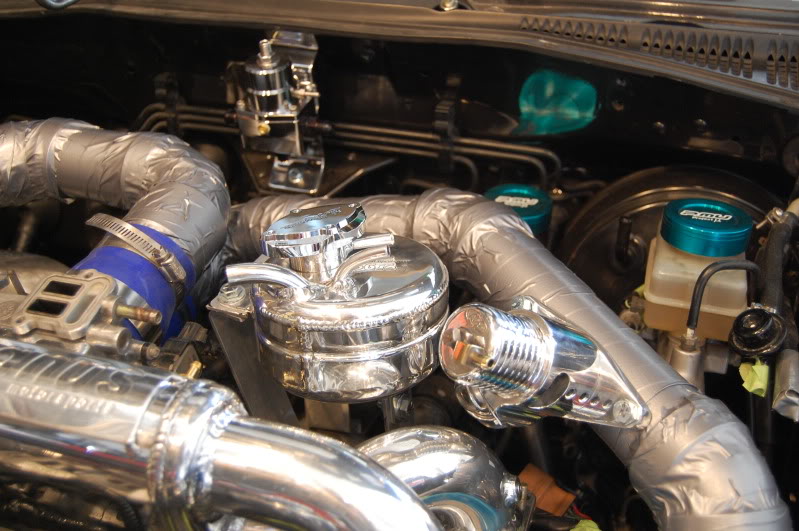
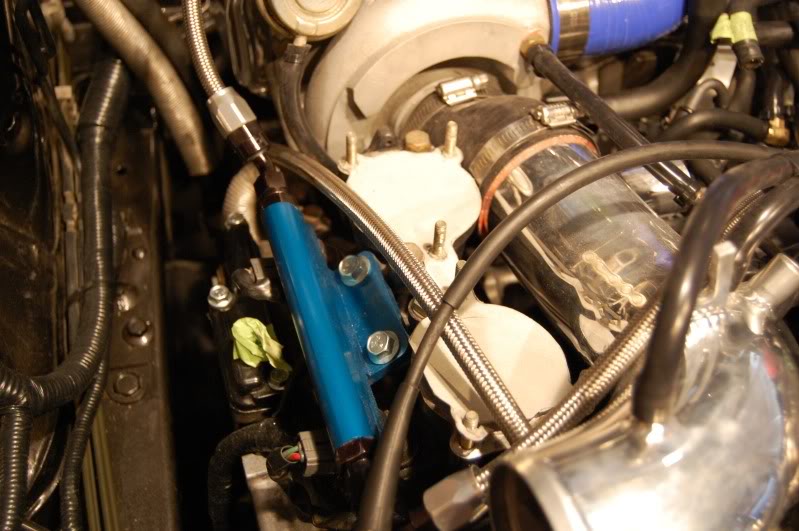
I also mocked up where the power steering reservoir, BOV and coolant reservoir go so that I could get a look at how it will all come together. My polished turbo inlet and forge coolant reservoir have finally cleared Canadian customs so they should be here any day now.
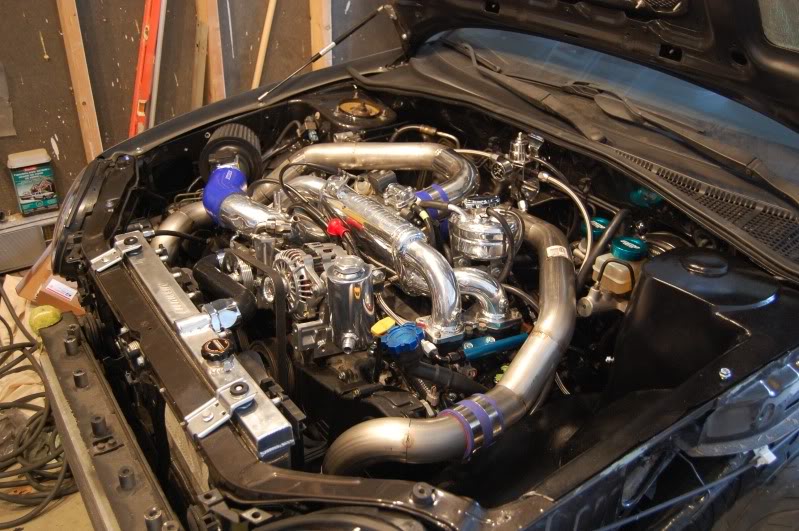
And now for the pictures.. Picture the 2.5″ pipes all nice and polished
So some new parts arrived today. The Forge coolant tank and the Agency Power turbo inlet pipe. Which first created a sense of panic because I was like WTF!! this intake pipe doesn’t fit. Then I took a look at the APS turbo inlet pipe installation instructions and popped on the old intake manifold to see that it actually attaches to the OEM intake manifold. I was trying to figure out how to make it fit between the TGVs and the power steering pump.
Turns out it isn’t supposed to fit in there, instead rest on top of the power steering pump and hang from the intake manifold. So I put it in place and put the Magnus intake manifold back on there and it actually pins it in place so that it sits nice and solid in there. So I was feeling much better
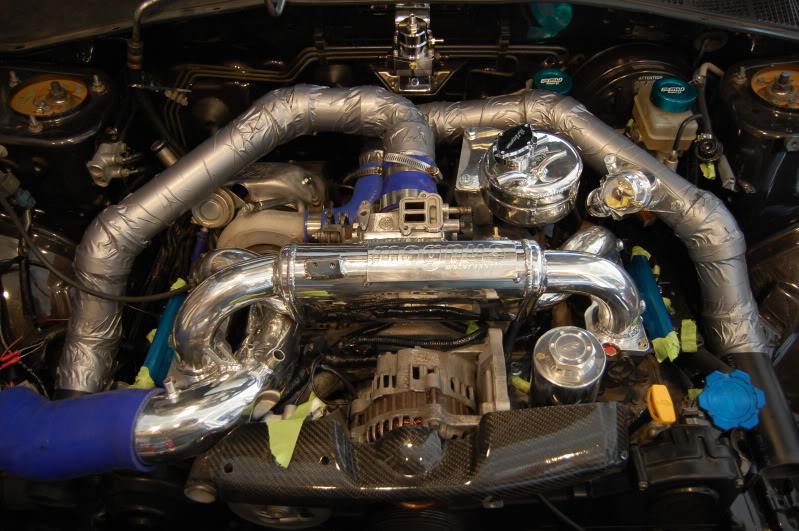
I also reversed the flow of the intercooler piping. You can now see that the cold side comes in from the drivers side and the hot side goes over the turbo. I still have a bit more to do on the passenger side piping but it looks like it will work.
I also am now going to put the power steering reservoir where the AC compressor used to be, and the coolant reservoir over where the BOV is.
When you look at the pictures below just picture a nice polished alternator, turbo heat shield, BOV and intercooler piping.
One of the added benefits of the way that the hard turbo inlet pipe installs is that it leaves a nice gap under it and where the radiator hose attaches to the engine. This will give me a great little tunnel to tuck my wiring. I was worried about having to run the wiring over top of the intake.
I made a quick trip down to JRP to pick up some various braided and silicone hoses along with some AN fittings that came in.
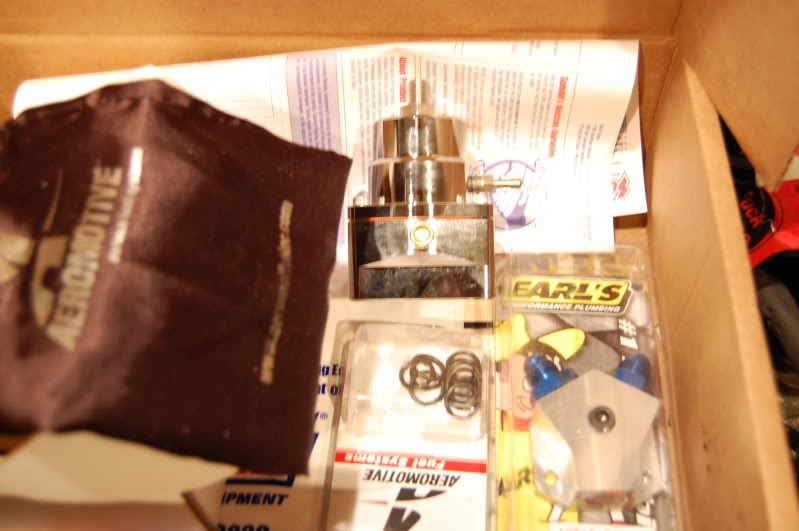
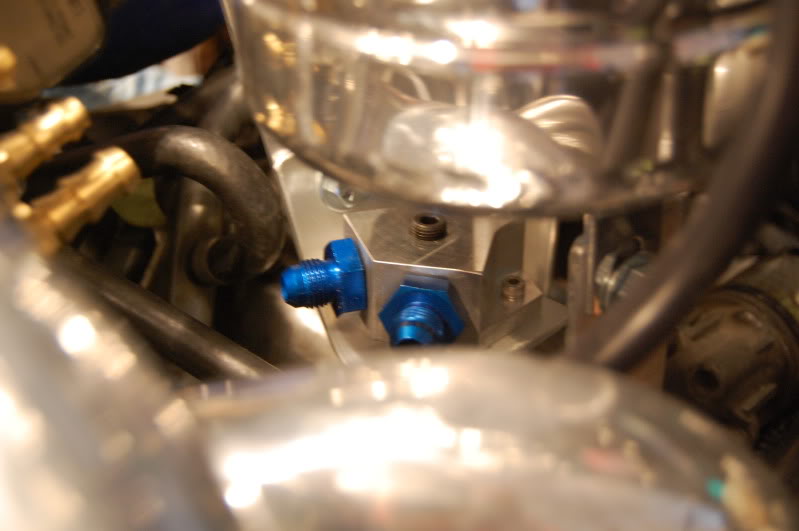
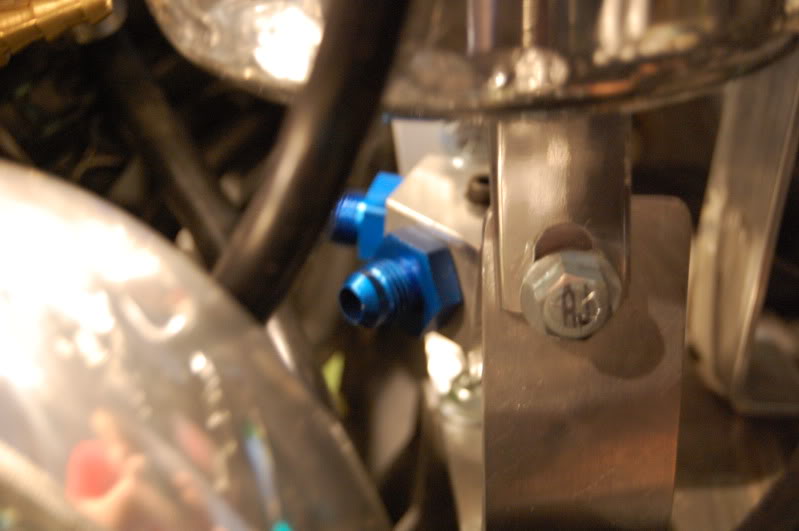
I also was able to pick up the FPR, distribution block and o-rings today from the good old post office.
I’m hoping to get some time this weekend to start putting a few things together.
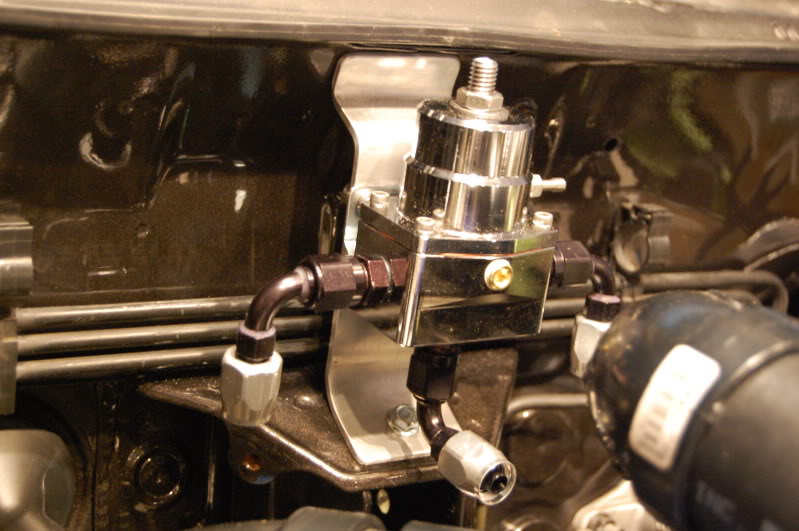
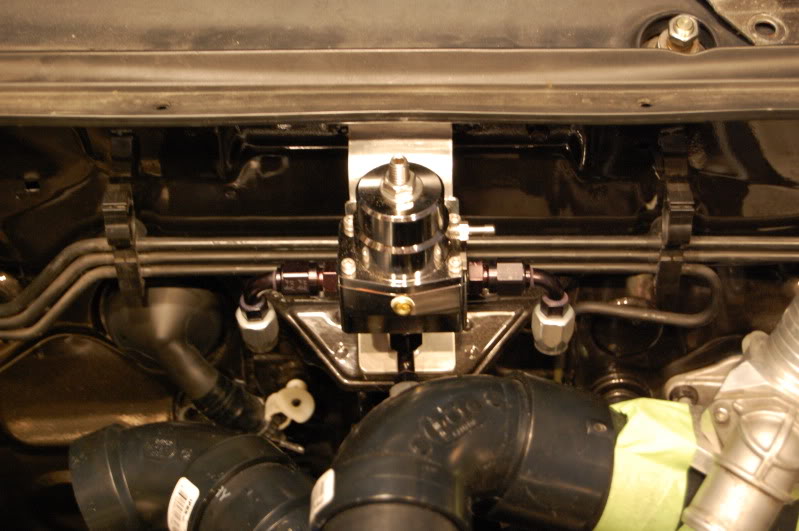
First order was to create a mounting bracket for my fuel pressure regulator. I had some stock aluminum kicking around so I started to work with it. The idea was to make a bracket that would hold the FPR above the pitch mount.
I had to trim some of the FPR bracket to get it to fit with what I wanted to do, but in general it turned out pretty damn good. I just have one more hole to drill to put a bolt at the top of the bracket going into the wiper area.
I’ll end up getting the bracket polished to a mirror shine with the rest of my stuff. 
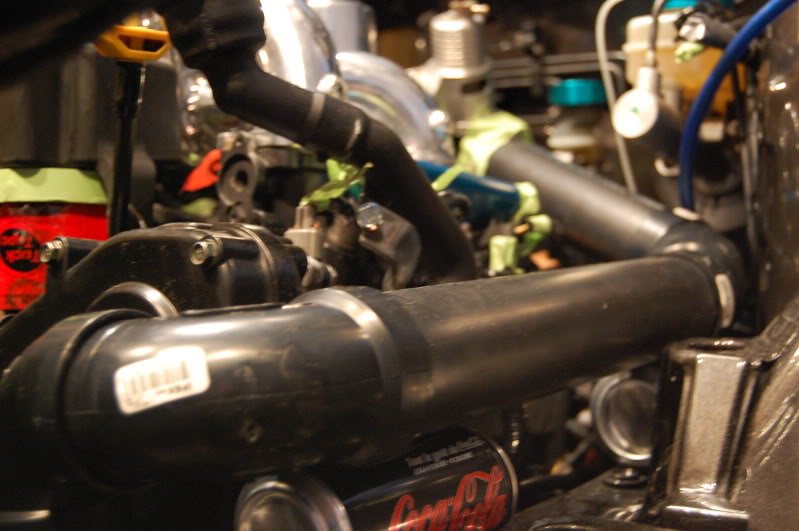
I then set my sights on finishing up the intercooler piping mock-ups. I finished up the pipe that goes over the turbo and then PVC glued everything together. Damn that glue set fast!!! Like 3 seconds fast!!
I also cut both sides so that the silicone coupler would be connecting in the same spot on both the passenger and drivers side. This connection, and the one to the U connections going to the intercooler, should give enough relief for any engine vibration.
I also found a new place for the BOV that cleans up the tops of the intercooler piping and also gives some more balance to the drivers side of the engine bay. It also gives some more freedom on how I can position the coolant reservoir.
I’m hoping to take the pipes to the exhaust bending shop on Monday to see what they can do for me.
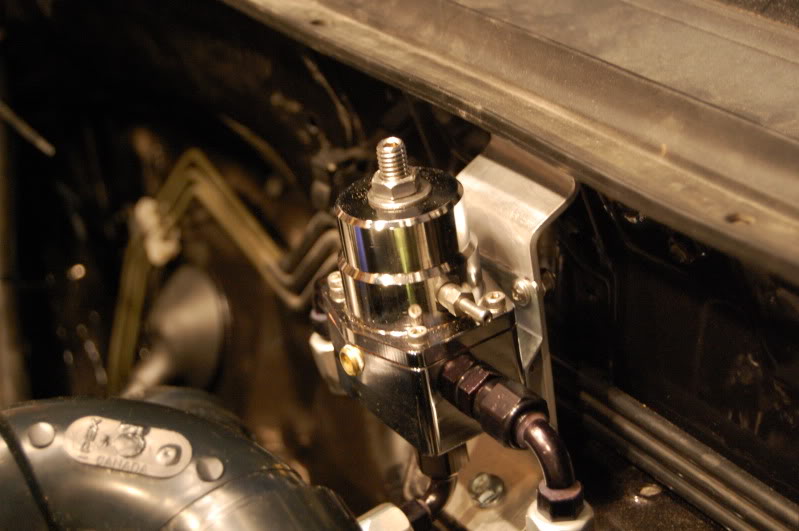
I also picked up my FPR bracket, BOV and valve covers from the polishing shop at lunch today. ba.. ba.. ba.. BLING
I started out the day working with many different intercooler piping variations.. switched up the hot side and cold side.. moved them back.. tried various different routes.
Basically I’m trying to figure out a way where I can pretty much get away with 90’s and 45’s in the pipe. It will just make it that much easier for fabrication.
I was continually thinking about :
– will I have enough clearance for the coolant tank
– will I have enough clearance for the intake
– will I have enough clearance for the BOV
– bla.. bla.. bla
Then I realized I was doing it all bass-ackwards. I figured out that I should mount all my obstacles and then make up my intercooler piping to go around them.
So this afternoon I made my aluminum mounts for the forge coolant reservoir. I fabricated them out of two pieces of stock Aluminum to provide both vertical and horizontal support. It becomes kind of a “U” with support by bolting it to two spots on the block. I’ll also be able to send the mounts out to my polishing guy to get them as shiny as the tank.
Here are some pics of the tank mounted. I still have a bit of clean-up work to do around the corners of the mounts to make them smooth.
 I have run these damn pipes every which way under the sun. Now I have settled on what I want to do. Running the pipes this way gives me symmetry and also allows me to run the ABS unit in there (but the ABS is still getting ripped out). This is important to me because I’m not ripping out the ABS myself, my speed shop is. So I need to be able to get the car to the speed shop without having to have two sets of intercooler pipes.
Drivers side and Passenger side both have:
– 1 x 90 degree bend
– 3 x 45 degree bends
I know that the cold side runs over the turbo, but it was like that before I started this project so I am no worse off
I wrapped the pipes with duct tape so I could better see what it will look like.
You can also see where I’ll have a mounting plate welded on for the BOV in the pictures below:
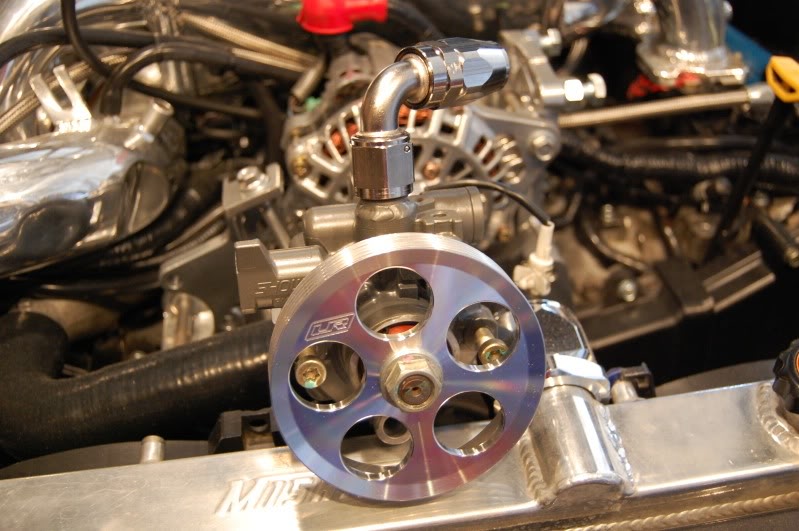
I think this week I’ll start talking to some powder coaters on getting the rest of my stuff finished. I’m also leaning towards getting a new Power Steering pump that doesn’t have a press on pulley so that I can run Unorthodox polished pulleys for my Alternator and Power Steering.
I figure if I already have it tore apart, I might as well do it up right.
I finished the Y-block mount for the fuel return. I managed to mount it under the coolant tank and the bracket will get the same polish treatment as the other brackets.
I was also able to get the braided breather hose done. I tried a bunch of different ways of routing it, but I think the below pictures show what I have settled on. The tricky part will be making it not rub on the intake manifold.
I’ve also ordered some chrome ends for the hose. So there will be black hose ends where it meets the “T” and chrome ends on the hoses where they meet the breathers. That way there will be a contrast between the hose end and the black breather.
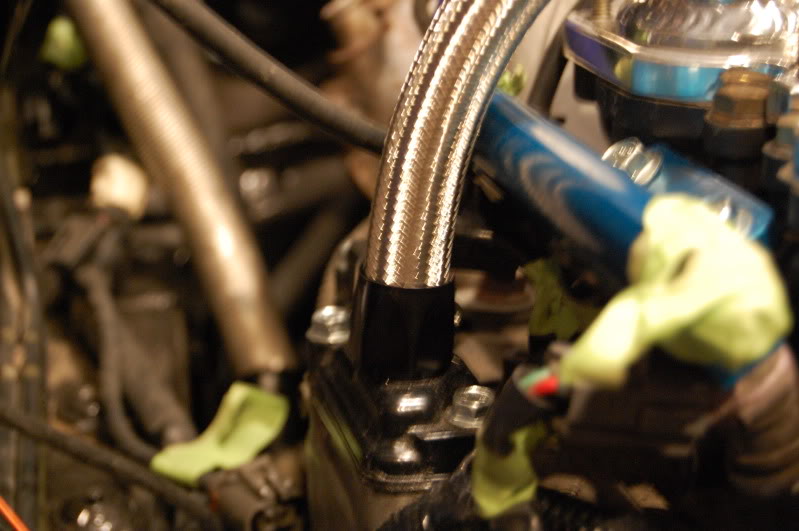
Part of my order was some more -10AN and -12AN easy seal fittings in chrome finish. I was able to get these on my valve breathers, the “T” where they meet and both of my coolant lines going to the passenger compartment. I was also able to put on some rubber guarding for where the braided line snake through the intake manifold.
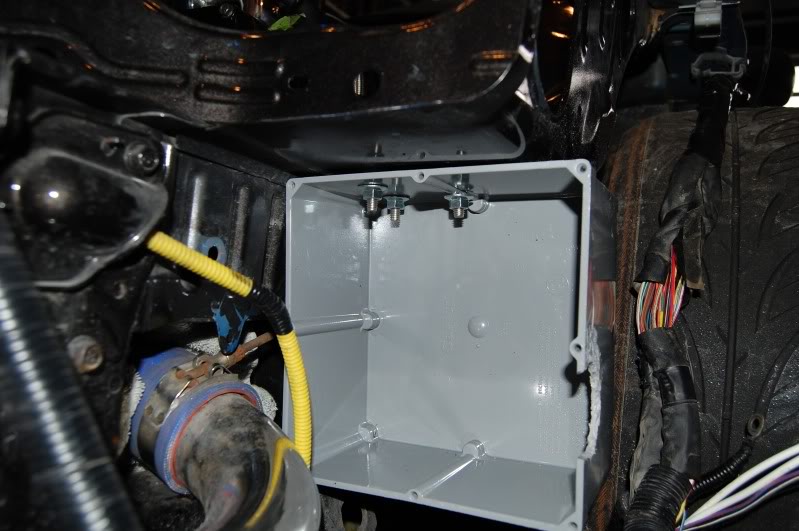
I was able to pick up a sealed ABS electrical junction box that I bolted to the sheet metal under the battery tray. Here is what it looked like before the carnage of the wiring and fuse box:
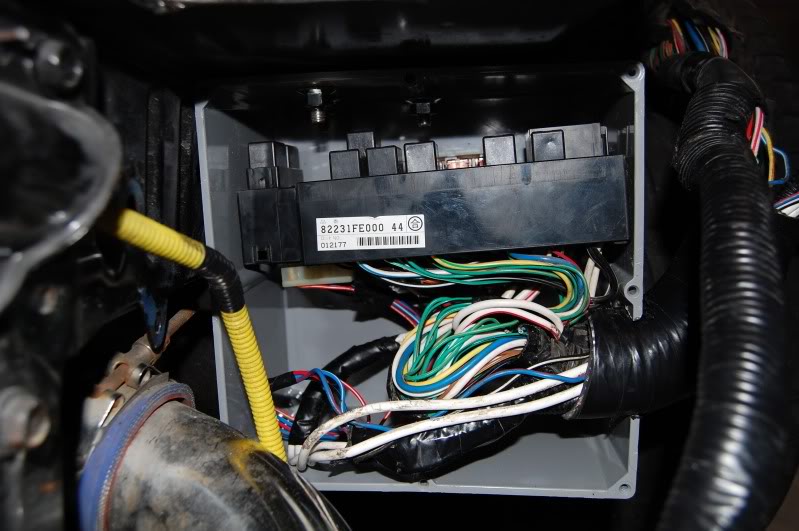
Then I had to do a little bit of trimming on the fuse box but it fit in there just fine. I used an old radiator hose to act as a conduit and grommet all in one to bring the wiring into the box. I’ll end up running a bead of silicone around the hose entrance to ensure a water tight seal. The lid of the box has a rubber seal that goes around the entire box.
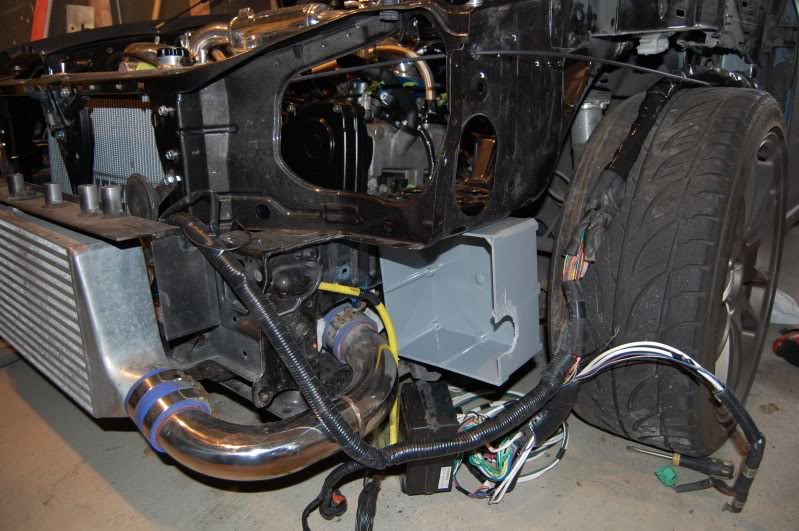
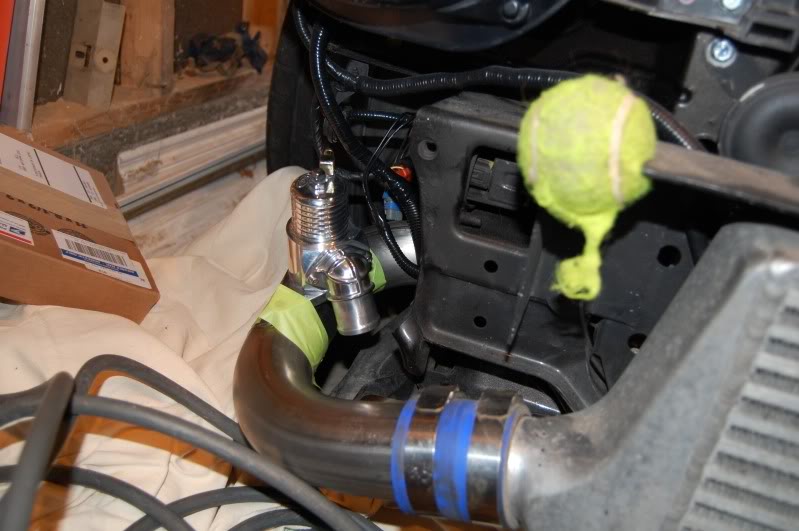
Here’s what it looks like all sealed up. Lots of room for the fender, bumper and inner splash guard of the wheel well. The tennis ball prevents me from cracking my knee off of the sharp corner of the bumper beam
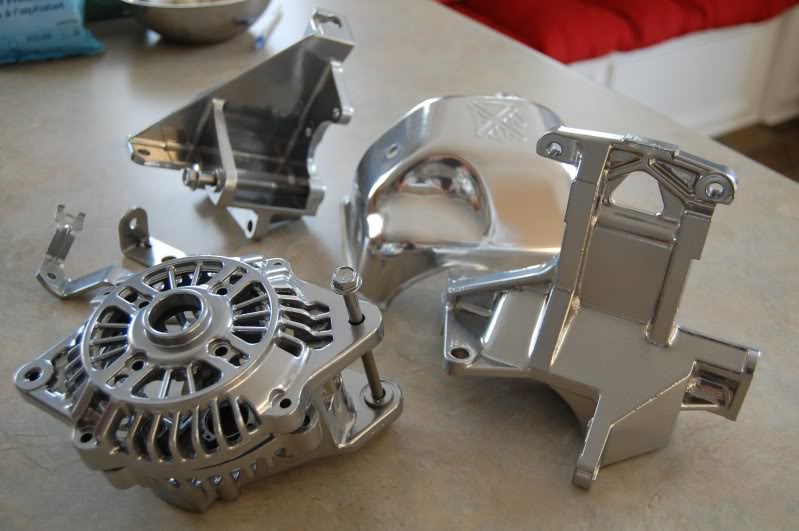
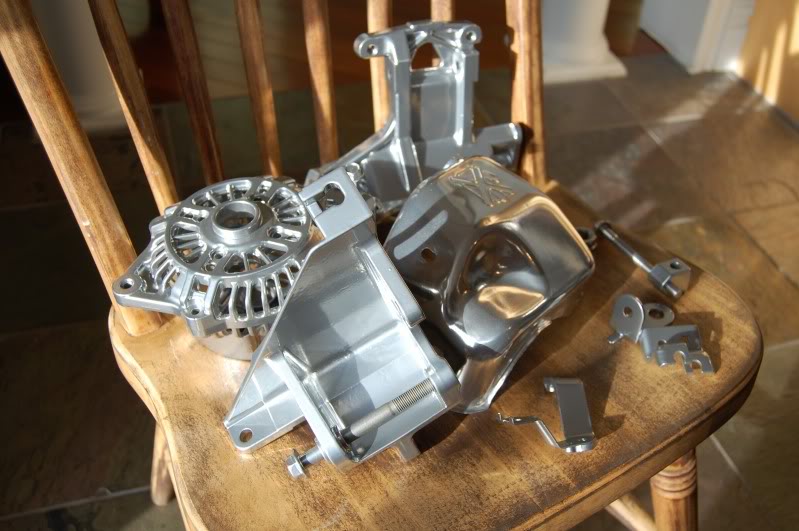
I should be picking up my chrome powder coated parts in the next couple of days so I hope to get the alternator, brackets and other fun stuff put back together shortly.
I’ve also picked up my supplies to mount my battery in the trunk. Battery tray, some bracket steel etc. I also picked up a power steering pump from an 06 WRX that will get an -AN fitting welded onto it for the feed. I also bought this pump so that I can run the Unorthodox Power Steering pulley
P&L Power Steering line is on the way as well. Things are starting to come together!
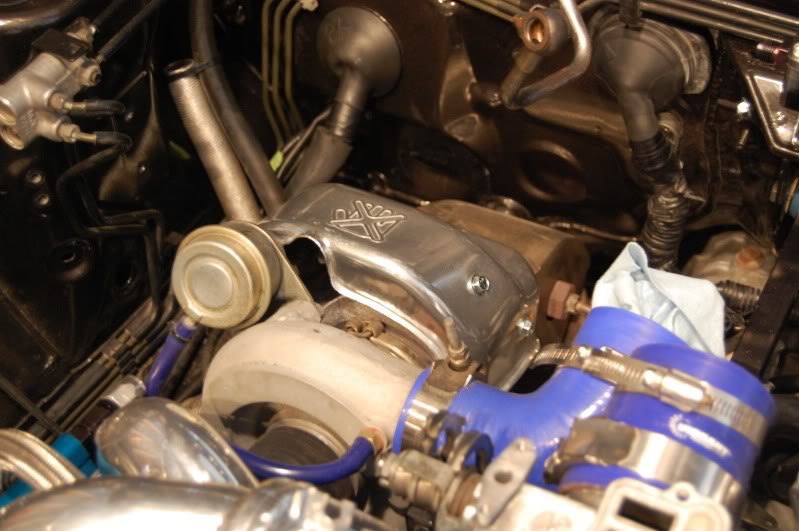
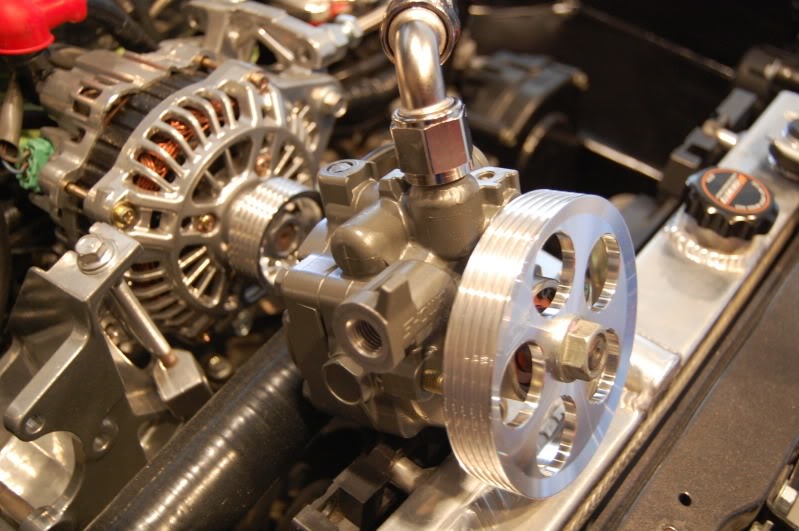
They are powder coated with a chrome finish and the heat shield is finished in a polished ceramic coat. Hopefully tomorrow I can do some re-assembly.
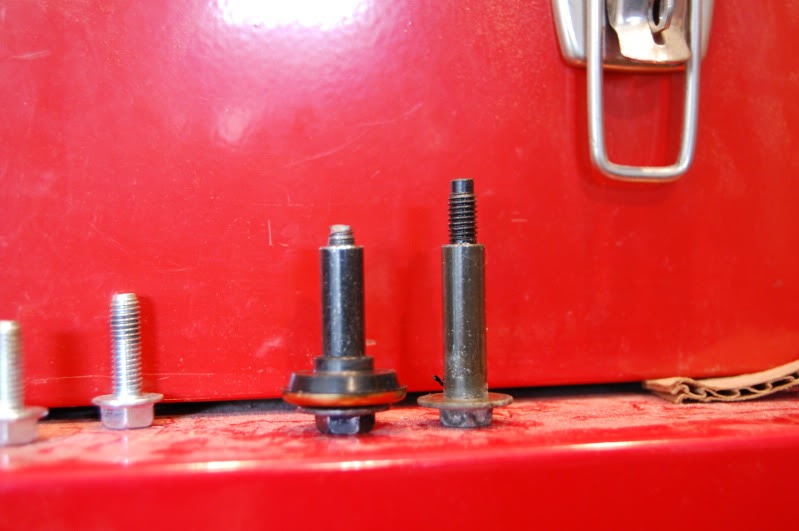
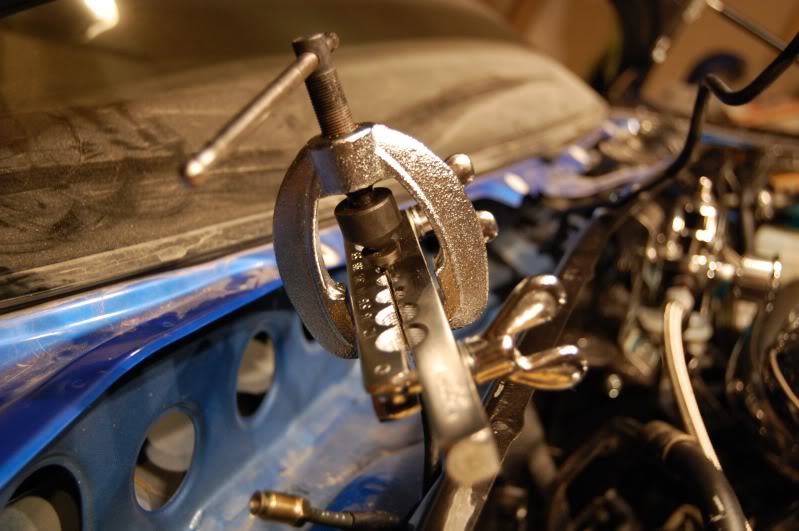
 I ended up grinding out the front housing so that it wasn’t as tight of a fit. After I had everything back together and that bad boy spinning freely, I realized that I messed up the threads on the shaft for the pulley nut
 ")
Good thing I had a bunch of spare parts, because after about 1 hour of trying to correct the threads, I pulled it all apart again and replaced the shaft with one from my other alternator.
Oh.. and it took forever to realize that there was a pin-hole on the back housing that is used to hold the contacts back out of the way so that you can get the shaft in. Let’s just say there were some choice words being used in the garage 
And another fun fact. I realized yesterday that the bracket that holds the 06 power steering pump is different than the 02.. Not just the pump is different. So the new 06 bracket is going to have to go off for powder coating.
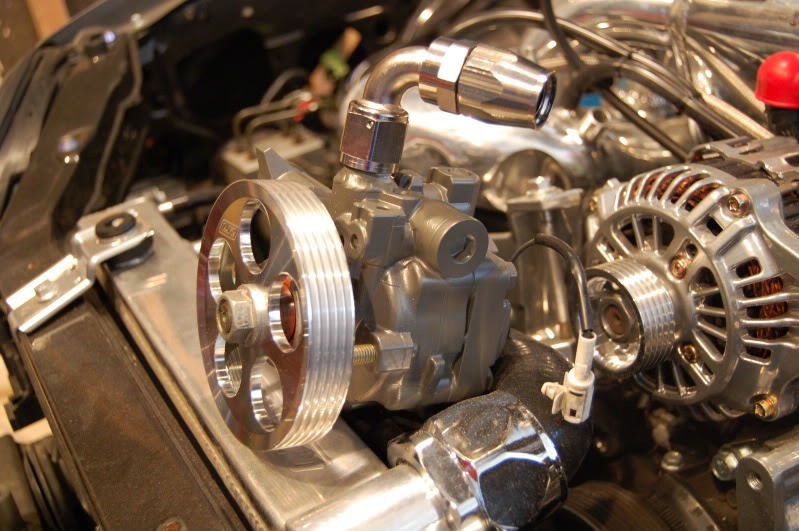
Here are a couple of shots of it all installed in the car with all new OEM bolts/screws.

And one of the heat shield:
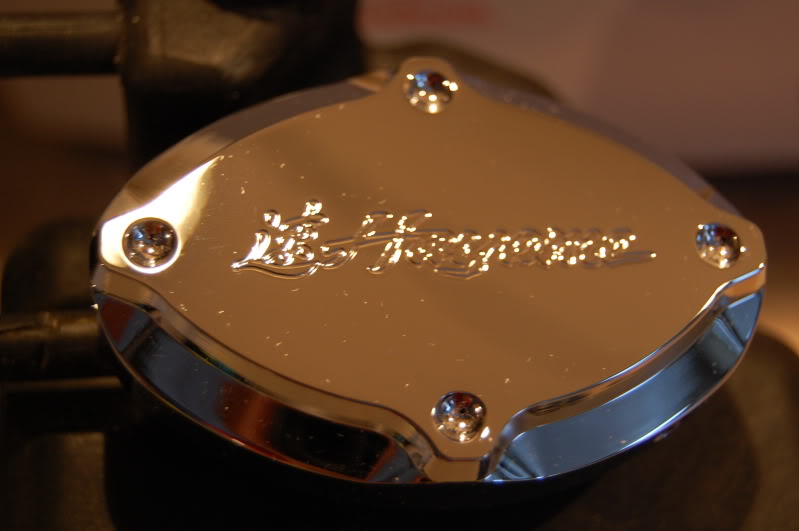
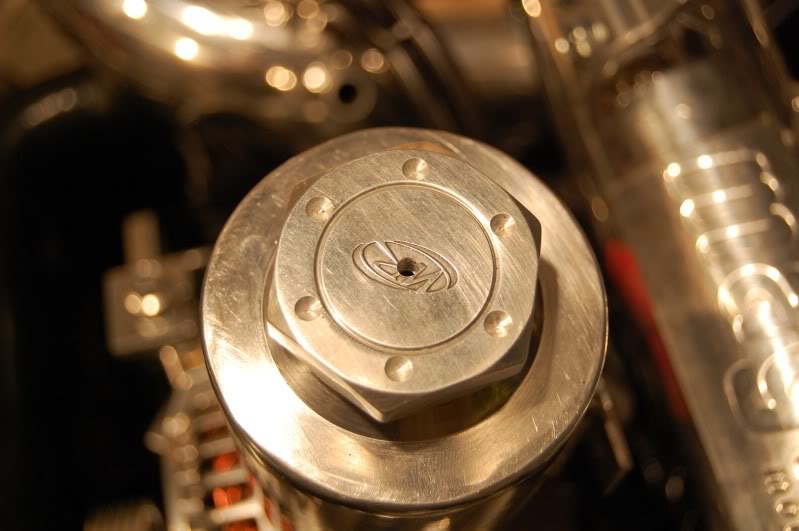
I have some plans for some junk in my trunk, but you will have to wait and see The fuel filler cap is a bit of a teaser. BTW, I have 3 more of those caps if anyone is looking for some.

I was also able to finish up my power steering tank mount as well as my wiring for the alternator and the lead coming off of the starter to the fuse box. I’ll end up having the bracket polished and some -AN fittings welded onto the tank
I drilled and tapped the PS tank tabs so that I can just fasten it onto the bracket without a nut.
I was also able to put a new barbed fitting on the turbo for the coolant line and picked up some more coolant lines for under the intake manifold. I managed to order some new black silicone rad hoses today too.
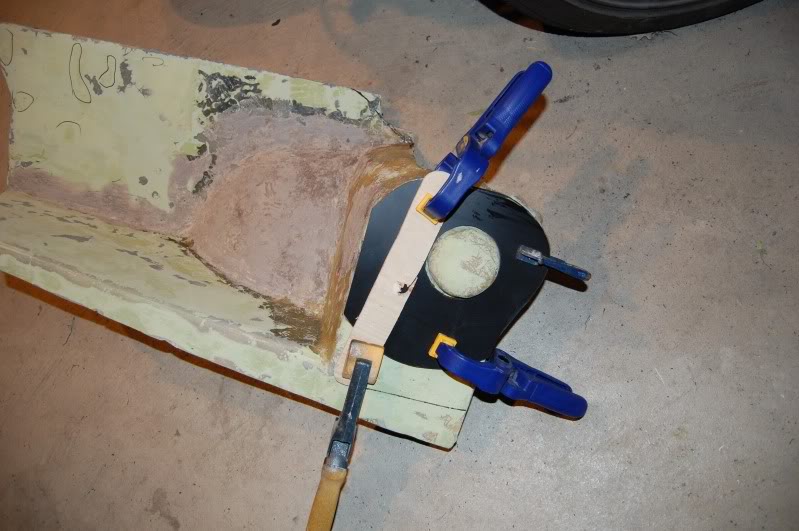
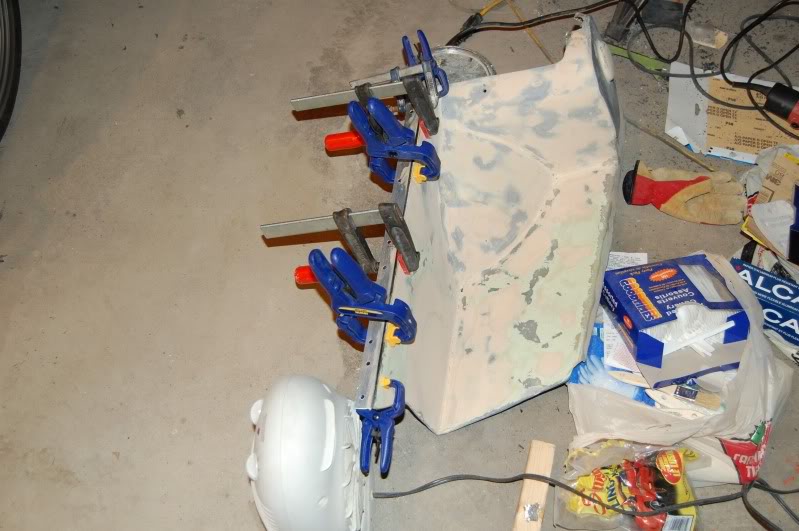
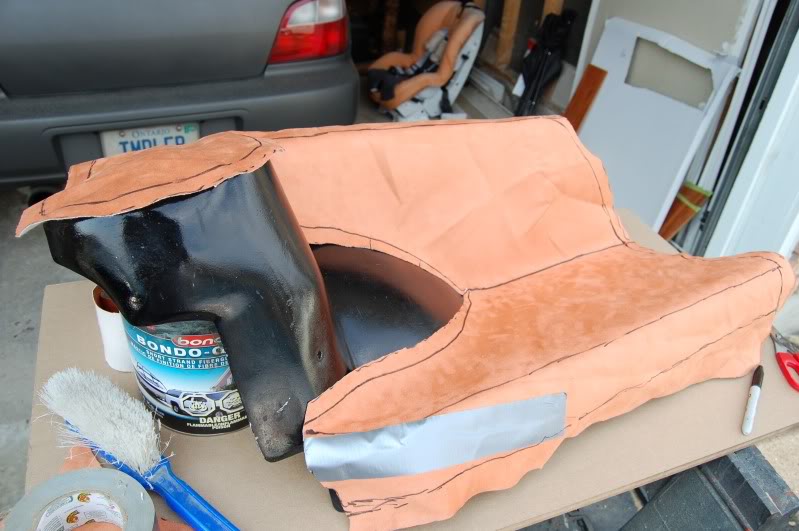
Once I have them all fiberglassed I’ll be paying a visit to Vince to have them covered in carbon fiber. The hole in the pictures below that is on the side simply needed to be cut out to make the piece sit flush on the side. It will be fiberglassed over top of so that there will be no holes on the sides.
I’ll also be able to use the same templates and plastic for the passenger side. We made sure that there was going to be enough room under the panels to tuck away some of the nasty passenger side wiring, boost control solenoid etc. so that both sides will be symmetrical.
On the drivers side I’ll also be cutting away the washer bottle holder brace on the wheel arch and the two mounting points on the strut tower. These will all be covered in CF.
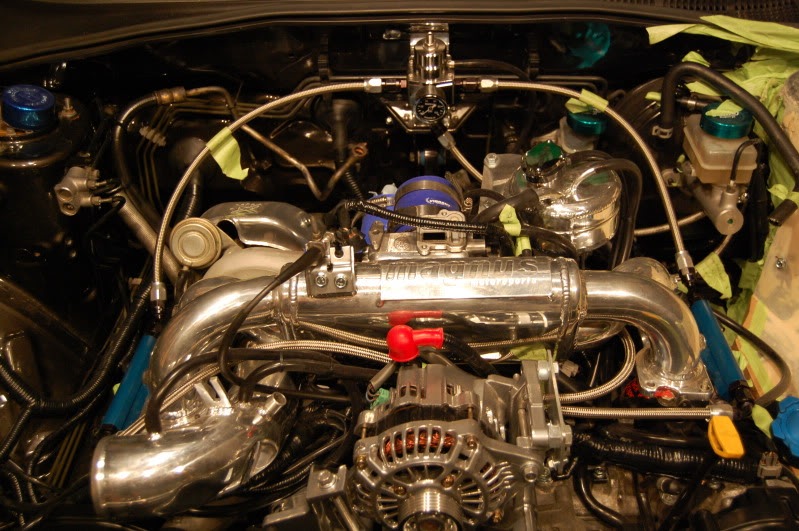
Now enough gabbing and a couple pics to get a glimpse of what it will end up looking like
It fits up nice and flush to where the headlights come in. I’m using some Styrene plastic to use as a stable flat base for the areas that need to be flat.
Unorthodox Pulleys came in and they look great… the not so great thing was the UPS $53 brokerage fee plus $23 in taxes to bring them into Canada
On Friday I pick up the remaining powder coated items. Frank has ordered the intercooler piping and hopefully will get started on that fab work soon.
I found my 2″ grommet for the firewall, brass fittings to connect all the hoses, and all my remaining fuel fittings. Power steering components are all ordered and on the way.
Alternator wiring, fuse box to starter wire, EGT wiring and fuel line measurements are all complete.
I’ll be dropping off the power steering pump and throttle body for media blasting to clean them up tomorrow morning.
Things are starting to come together
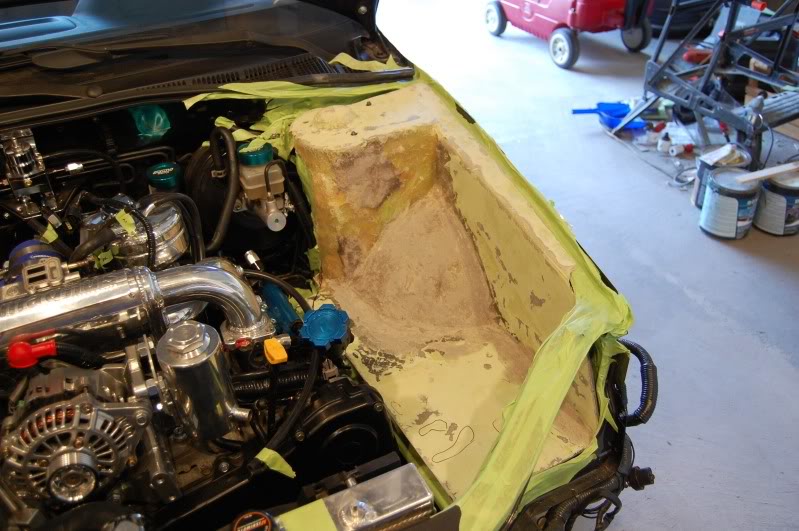
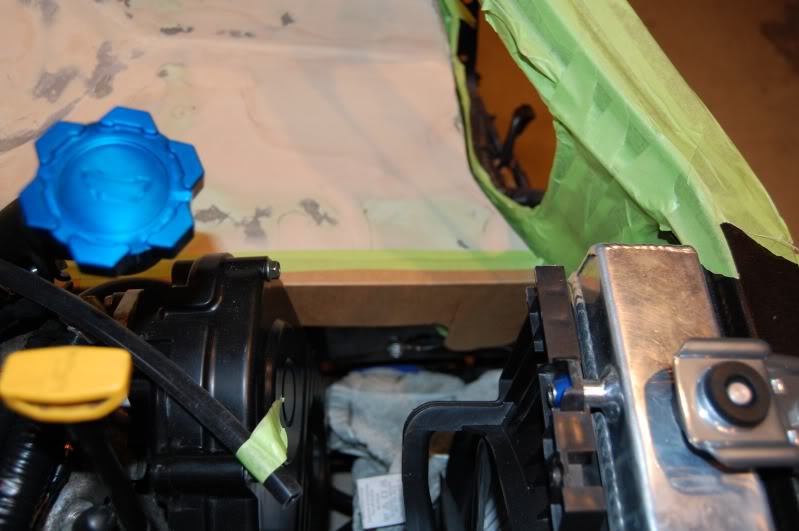
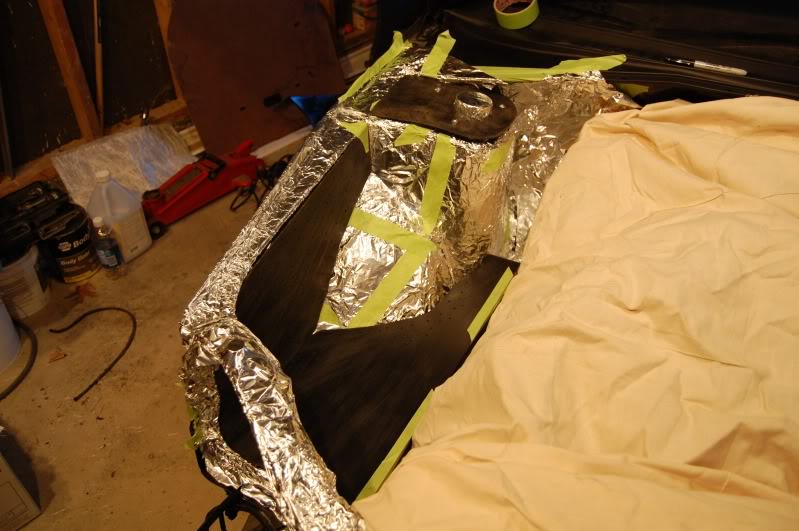
Hmm… what the heck is going on here
Well there’s lots of tin foil.. maybe it’s a BBQ 
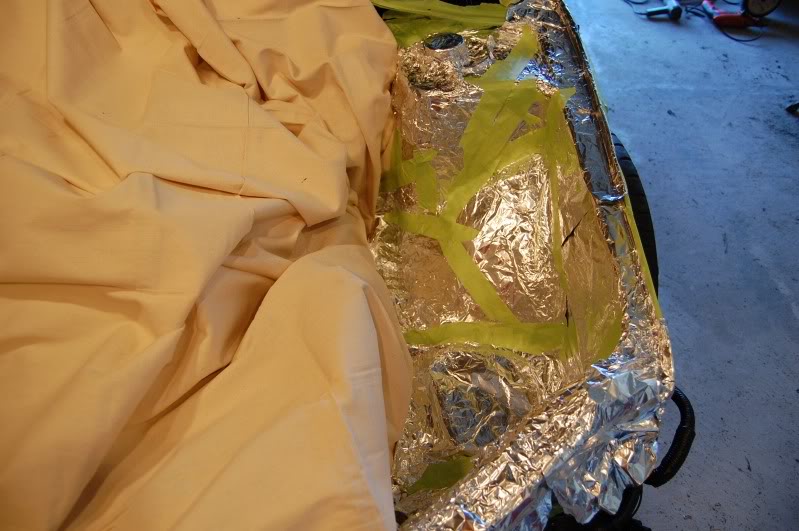
Ohhh.. Now I see…. Here come those templates again with lots of holes drilled in them to make something stick!
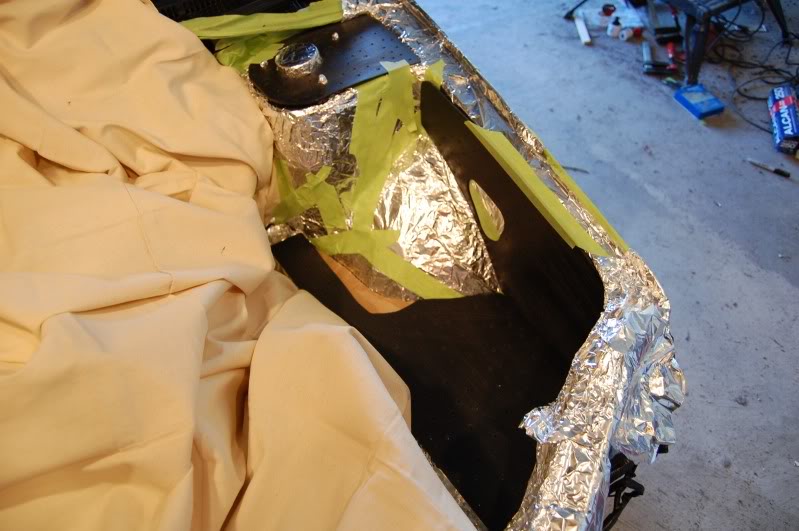
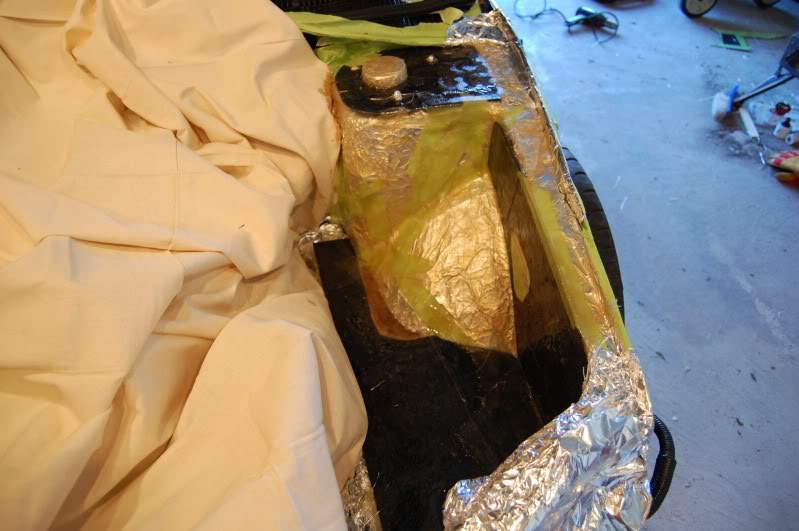
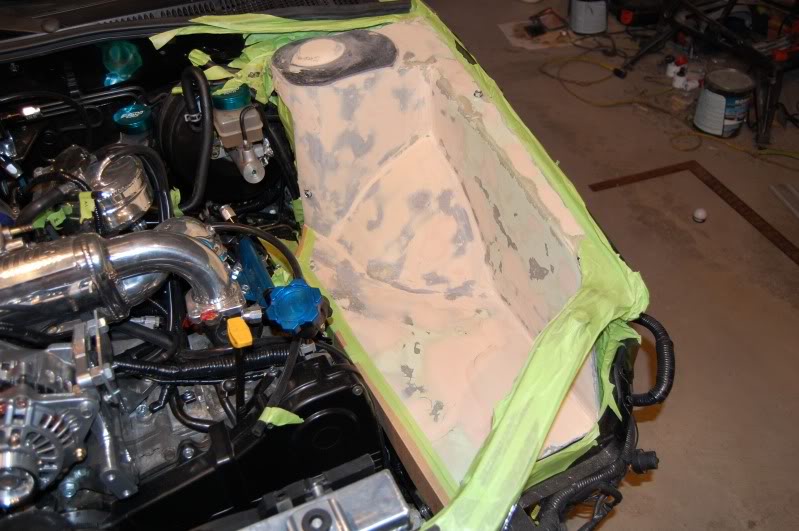
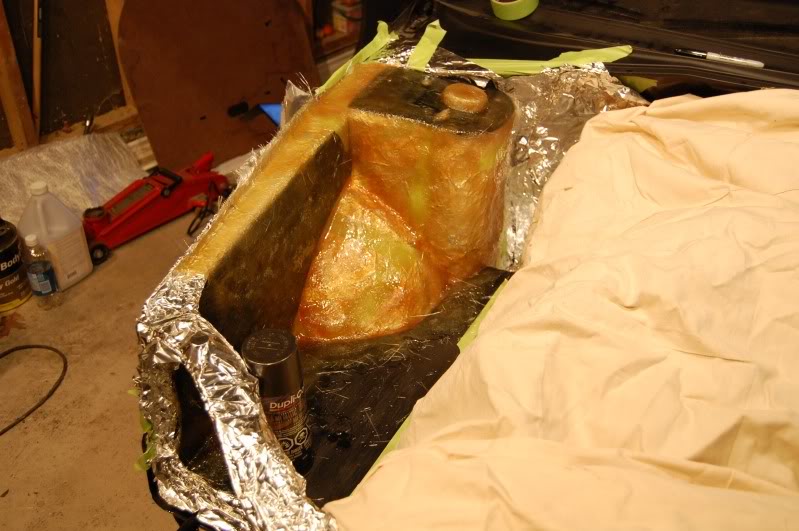
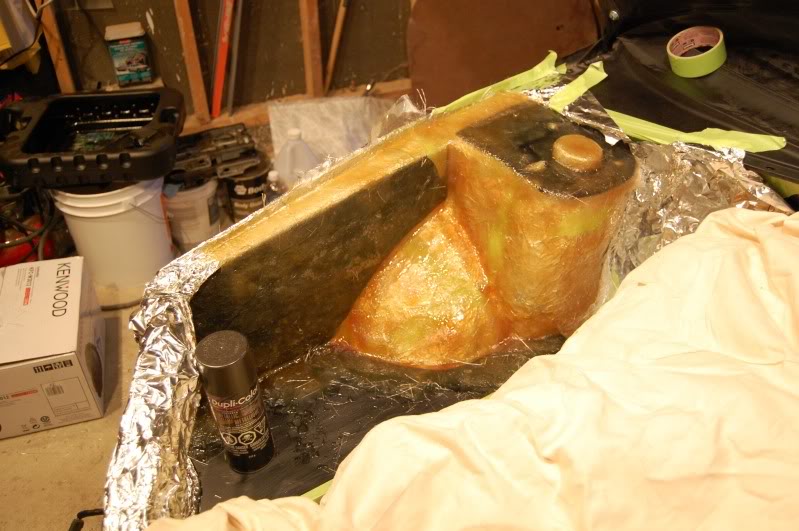
First layer of Fiberglass cloth and Resin:
And now with a couple of layers of fiberglass matt and more resin:
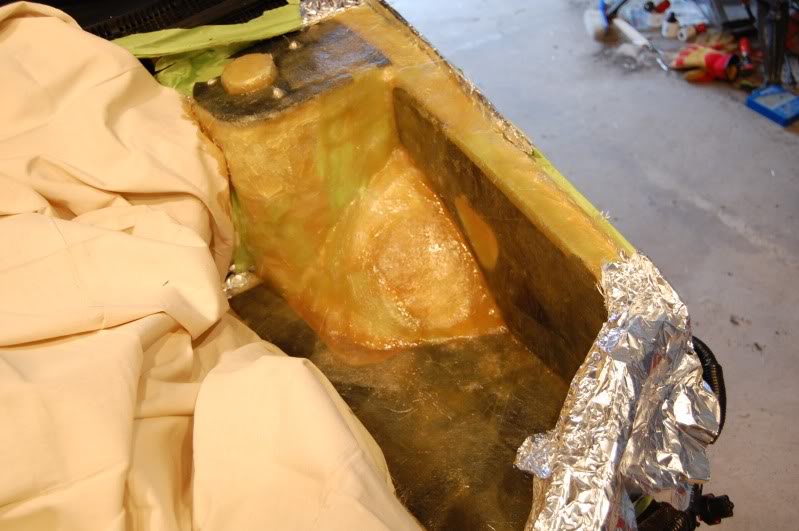
Tomorrow morning I’ll pop it out and start smoothing it. Then it will be off for a layer of Carbon Fiber.
Hopefully it pops out with very little persuasion
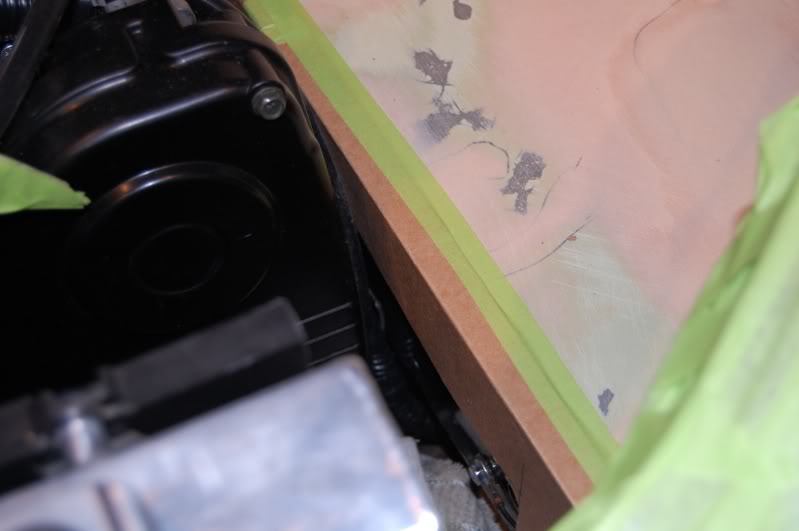
Well she managed to pop out.. I had to do a bit of trimming, but overall pretty good.
Now to do some smoothing, some fitting and re-enforcing
P&L power steering line came in…. Now I just need to get that -10AN fitting welded onto the power steering pump feed line and I can get the Power Steering pump re-installed and the lines run.
I also managed to get all of my braided fuel lines cut for the -AN fittings. Hopefully the fittings will be on and lines installed on the car this week.
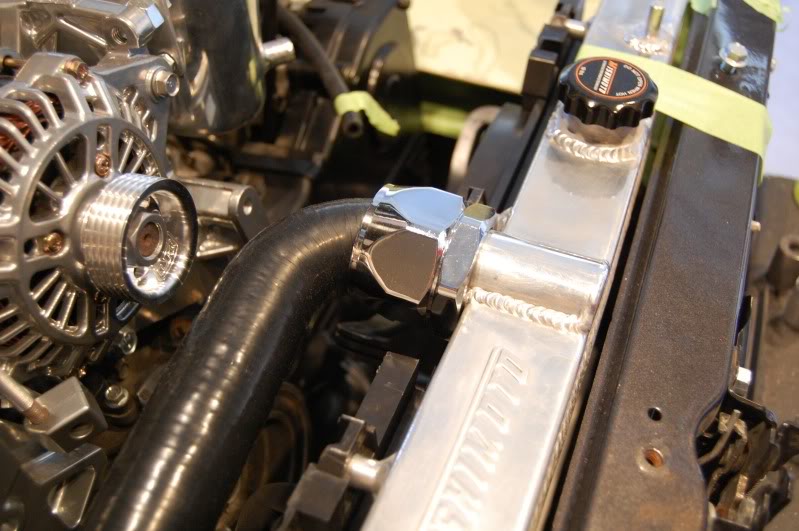
Oh.. and my shiny spectre hose end.. another one is on order for the connection point on the motor and a few smaller ones for various coolant lines. I had to trim the fan shroud a bit to get it on there.
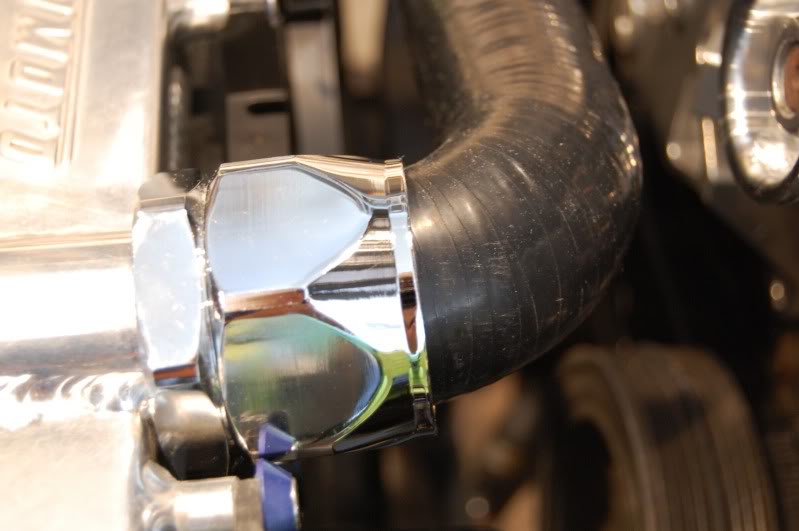
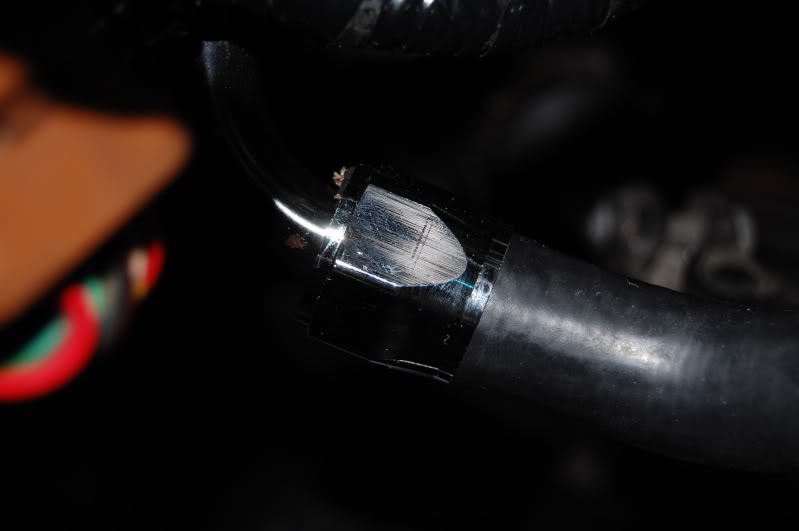
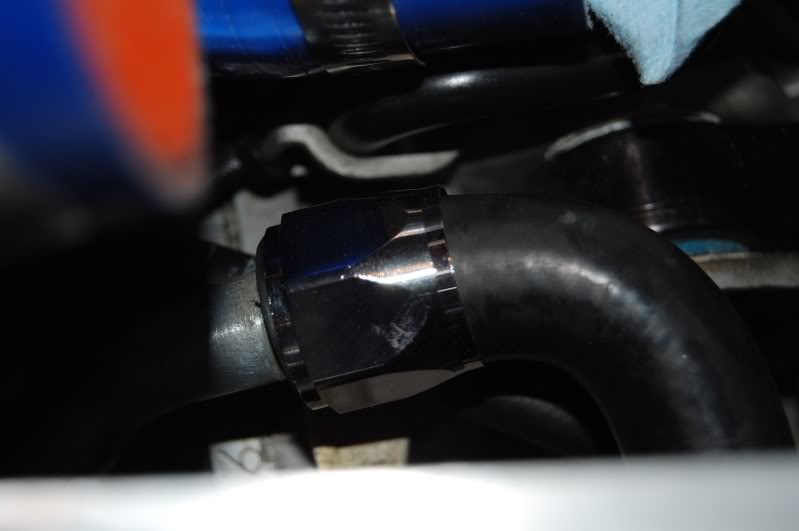
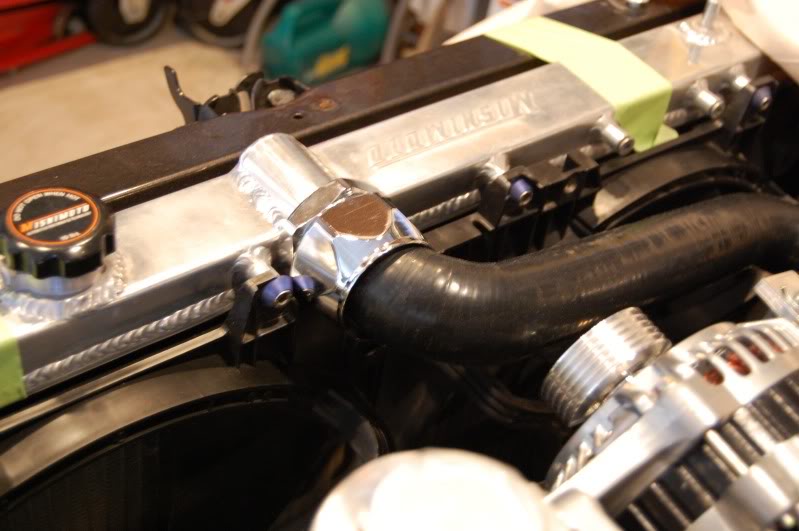
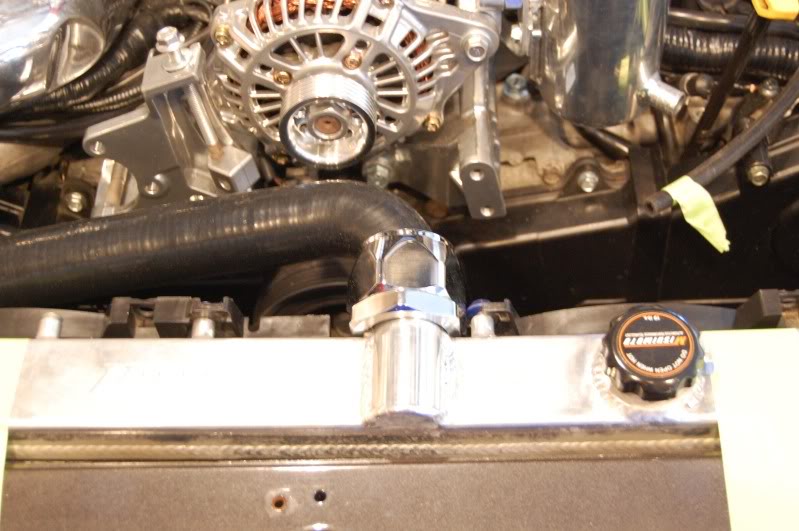
Here are some more pictures of the hose ends. They have a removable end on them that you put over the part that the hose pushes onto. You push the hose on as far as it will go and it pins the removable end so that it will not move.
Then you tighten the clamp and then push the cover onto the removable end. You really have to push. This holds it on nice and tight with no wiggling or jiggling
I need to straighten mine out so it lines up with the cover.. but I still have to remove the hose again to tighten on the power steering pump bracket so I’ll do it then.
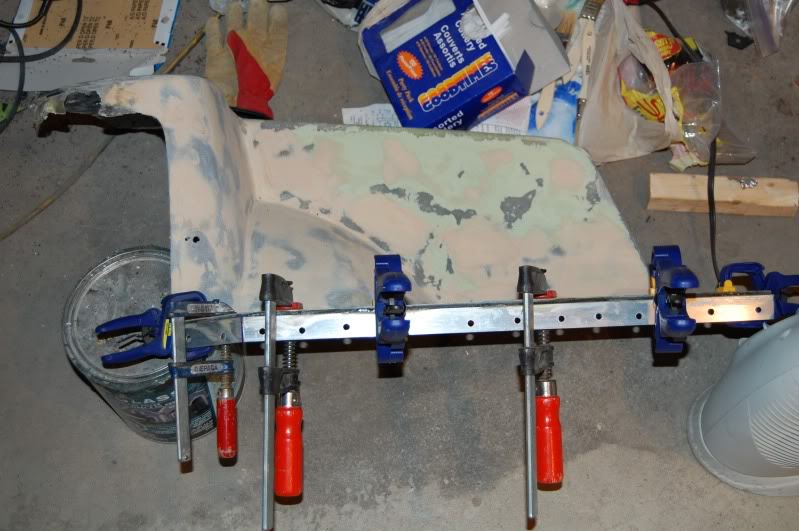
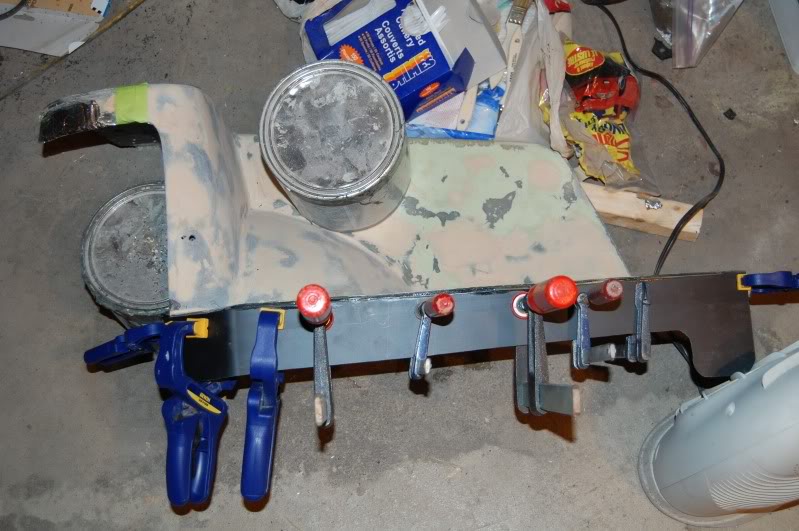
I was able to clean the panel up a little bit. I finished a couple of coats/sanding of body filler and short strand for shaping.
There will still be some work to get it looking right. As well I will need to add a section on the bottom so that it comes down and meets the frame along the engine and provides a tab to bolt onto the frame.
I forgot just how messy and itchy body work was
I also have one of these for both sides once I’m done

After looking how solid things are held in place and how the fender lip will hold the panel in place all along the drivers side edge, I think I’m going to cover up the bolts from the strut so that it is just one smooth piece across there with just the bump for the dampener adjuster.
So there will just be 3 bolts holding it in place along with the pressure of the fender all down the drivers side.
These will be the connection points for the bolts:

I now have the PS tank all ready for the -10 and -6 AN weld ons… and I also drilled a vent hole in the top of the PS tank cap so that it will let the pressure out as the fluid heats and cools.
I also picked up my last powder coated parts. PS bracket and the rad brackets:

My Redline shift boot came in today.. I can’t see any way that it will stretch to fit. I ordered a 06 STI shift boot because I have the 6speed transmission and the 06 TR console. From what I can see the 06 TR console is the exact same as the STI minus the extra aluminum trim. The Redline boot doesn’t look like it will even come close to fitting on the trim ring
Then I laminated on my covers for the strut bolts.. should be nice and smooth once I’m done
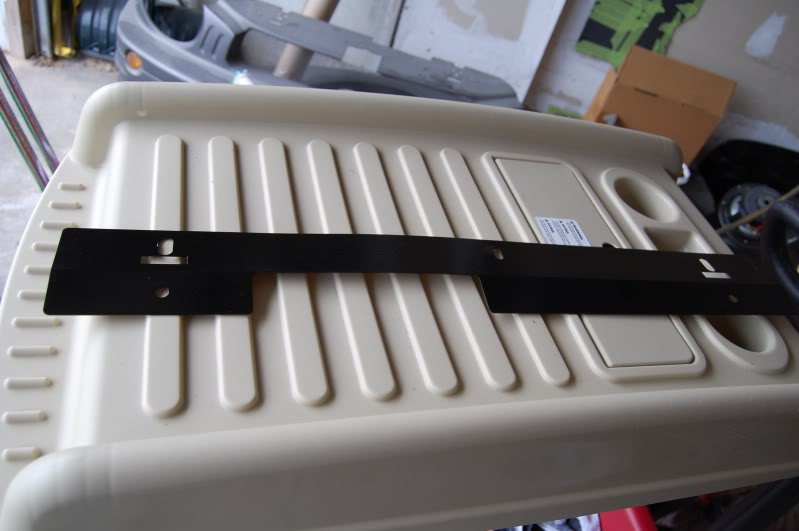
I was able to spend a couple hours on the engine bay panels today. They’re pretty much where I need them to be for “smoothness” before I have them laminated with carbon fiber. You can see that I have drilled the holes and fastened the bolts in place where they connect to the car. The panel slides in and out beautifully!!
They’re all 80grit smooth now. I just have a bit of work to do near the inside/top of the strut and I also need to make the section that will reach down from the panel to the frame beside the valve covers.
Here are some shots of today’s work:

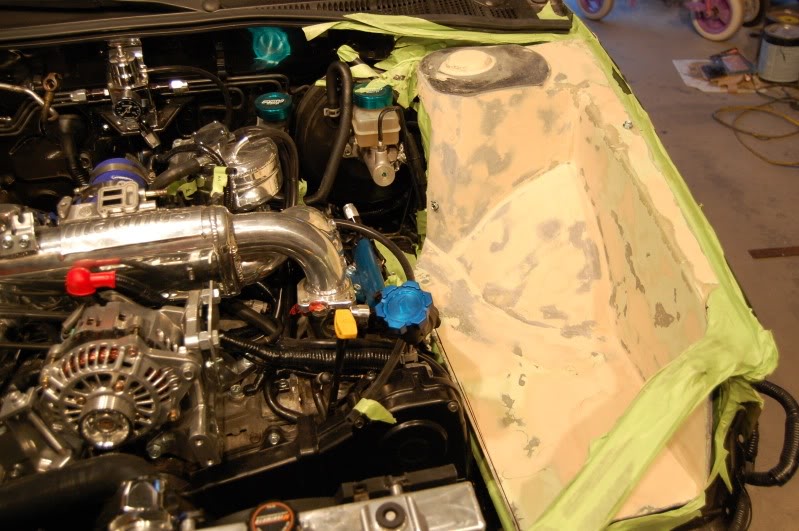
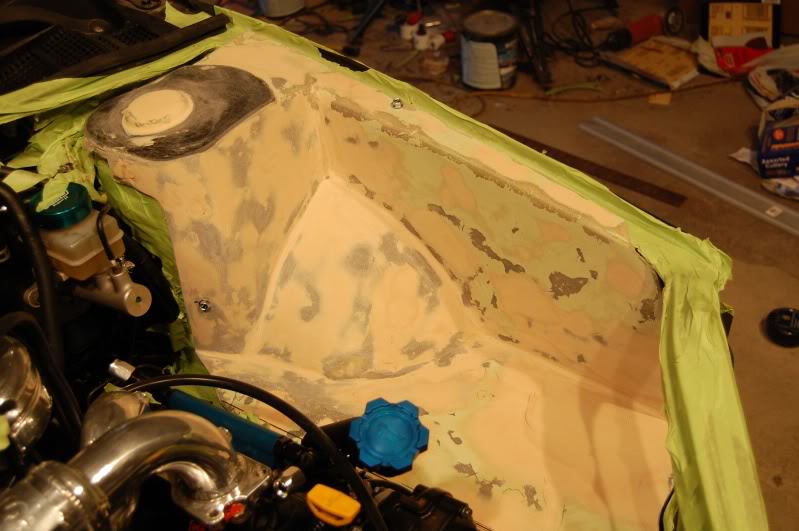
I still have a bit to trim off of the panel before I put the section on that reaches down to the frame. There’s a bit of an overhang on there now that I need to take care of. You can see it marked with the line.

I created the template for the section that will reach down to the frame out of cardboard. I’ll cut this out of plastic and construction glue it to the panel. Then I should just be able to smooth out the radius with some body filler where it turns down to the frame and we’ll be good to go:
Tomorrow after work I’m heading over to a club member’s house to put together my fuel/PS lines (-6 AN fittings, -10 AN fittings and braided lines)
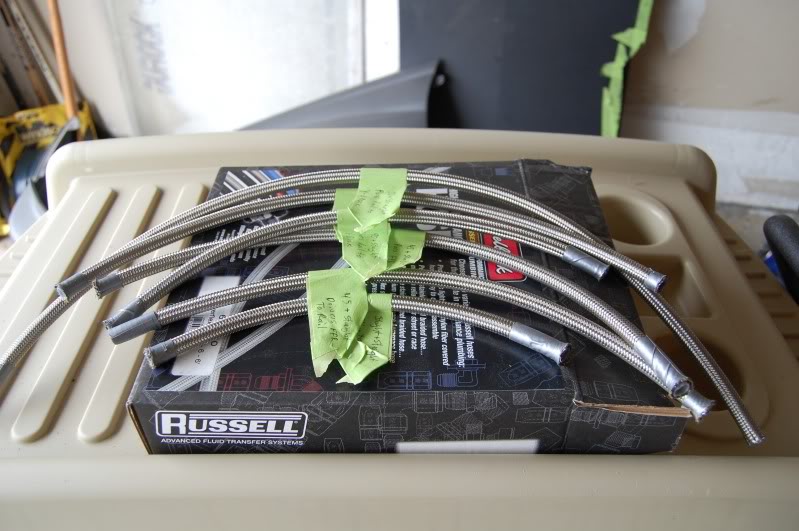
Fuel lines are installed and ready to go
Still lots of green tape on the fuel lines and hoses labeling where they go.
Time for some more crafty-ness
I was able to cut out my plastic piece that will extend down from the panel tray to the frame. I’m keeping the template for the passenger’s side.
Then I cut some aluminum angle brackets and drilled them and scuffed them up with 40 grit so that the construction adhesive has something to stick to. This should be all cured by tomorrow after work when I glue the plastic panel in place. Wait one more day after that and I can do some of the body work to blend the top and side piece together.
I was able to get the piece going down to the frame glued into place tonight:
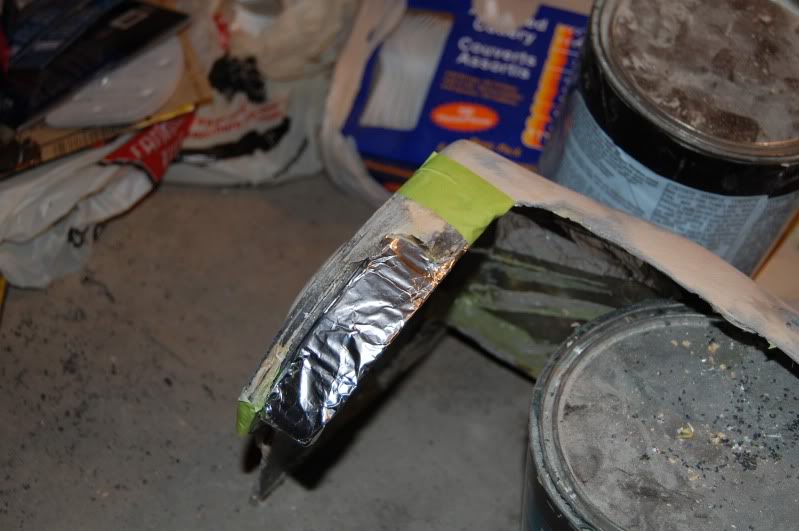
I also was able to get some cardboard wrapped in tinfoil taped into place on the strut tower part. This was a section that I wasn’t really able to get to when I was first adding the fiberglass when the panels were in the car.
This little piece will act as a backing piece so that I can lay on some strips of fiberglass matt to form the shape that I’m looking for and then pull the cardboard away once it hardens.
Hopefully tomorrow night I’ll be able to get both the strut tower piece laid up in fiberglass and also the new panel I’ve added blended in with body filler to create a nice radius.
Then I might actually be able to lay down some carbon fiber this weekend.. Now that would make a good fathers day
I’ll also be dropping off the parts that need some finish welding for the -10, -6 weld on bungs.
Things are getting closer!!!
I made a BUNCH of progress yesterday!!!
I took the advice of others and extended the panel to cover more of the strut tower. I couldn’t get all the way back but I did get it to go back a fair bit. The tricky part was that there is a bulge at the top of the tower so you can’t just slide something slim enough town over the tower…. it gets blocked by the bulge.
So I did a little engineering on the panel and I think I made a good compromise. The panel is all finished now and painted black. It needs to be painted black because when you put the Carbon Fiber cloth on it, some of the material below it will show through the weave.
It’s sanded down to about 80 grit right now which is good enough considering all I’ll be doing is spray gluing the CF cloth onto it. I actually probably did a nicer finish job on it than I needed to but oh well.
I’ll let the paint cure for a day or two before I attempt to glue the CF cloth onto it.
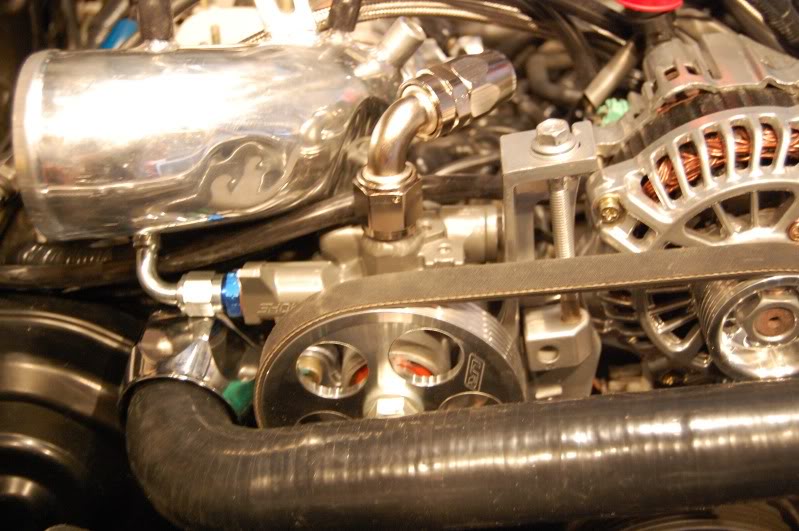
I also have my power steering pump and tank back from the welder’s. They welded on the -6 and -10 fittings onto the tank and it, and the other brackets for the tank and the coolant reservoir tank, have been dropped of at the polisher’s to get a nice mirror shine. They also welded on a -10 fitting onto the PS pump for my feed line.
The fabricator also made me up some nice -6 male ends welded to some nipples so that I can connect to the stock fuel lines for the feed and return.
I decided that I wasn’t going to polish the PS pump and Throttle Body but paint them instead. I think they turned out pretty nice. Now I just need to pick up some new screws for the the throttle body for attaching the sensors. The old ones just look like crap.
Today I’ll finish off connecting the wires to the starter and clean out the braided fuel lines to make sure there isn’t any anti-seize left in the lines from the fittings. I should be able to also snug up the orb ends in the Y-block and the Fuel Pressure Regulator.
I’ll try and get the PS pump installed and run the P&L braided PS feed line. While I’m waiting for my intercooler pipes to be finished, I’ll turn some of my focus to the trunk.
You can see some of the progress that I’ve made there as well. After I get the two enclosures sealed, I’ll connect them together so that there isn’t a big gap between them.
And of course, they will be covered in Carbon Fiber too!!
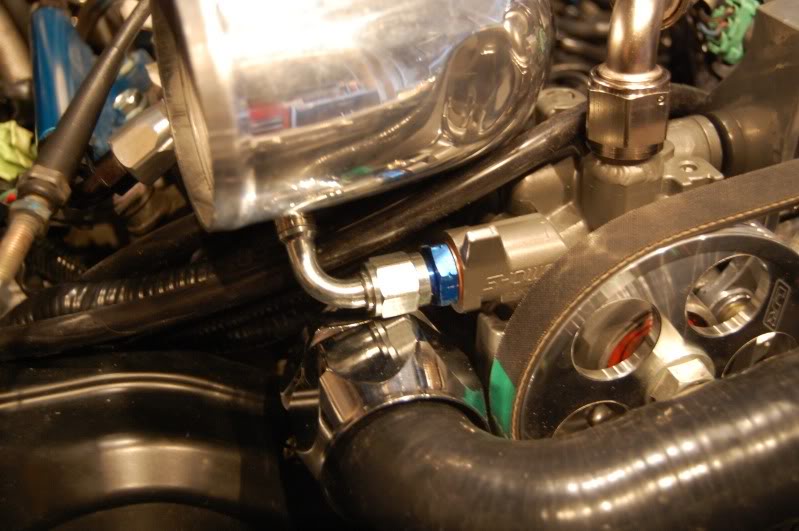
I managed to get the PS pump installed. Man that was a biotch trying to get the pump back in the bracket while not marking any of the paint or powder coat. I was fairly successful on not marking things up.
The whole front of the car is good to go..
– Rad, plugs tightened… check
– Fans, wiring and anodized fittings… check
– Radiator hose with polished hose ends… check
– All brackets, PS pump, Alternator tightened up… check
– Belt back on… check
– PS high pressure feed line routing… check
I was also able to get the fuel lines cleaned out and tightened. The FPR fittings are all tightened now too.
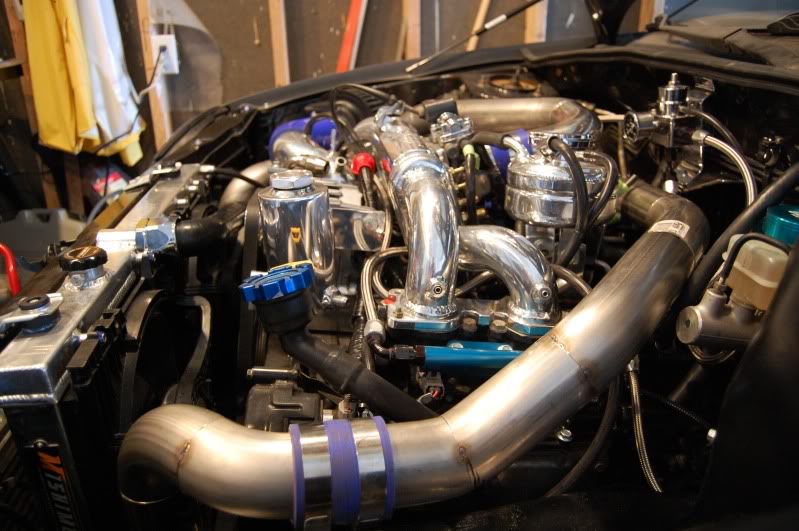
I was able to get the pipes test fitted and trimmed… They are all good to go!!
Now I just need to make my hole/bracket for the BOV down by the Intercooler. Hopefully I’ll have that done tonight. I was also able to get a few more things tightened up and ready to go.
I’ll be making the PS feed and return hoses tonight, and hook up the fuel return. Here are the pictures of the intercooler pipes in place
Here are some pictures of the Valve Cover polished BLING installed with all new hardware
Everything was going great.. I finished up everything and was tightening the last bolt. It just wouldn’t seem to snug up… and then it happened…
Sheered the bolt off 
From Here:
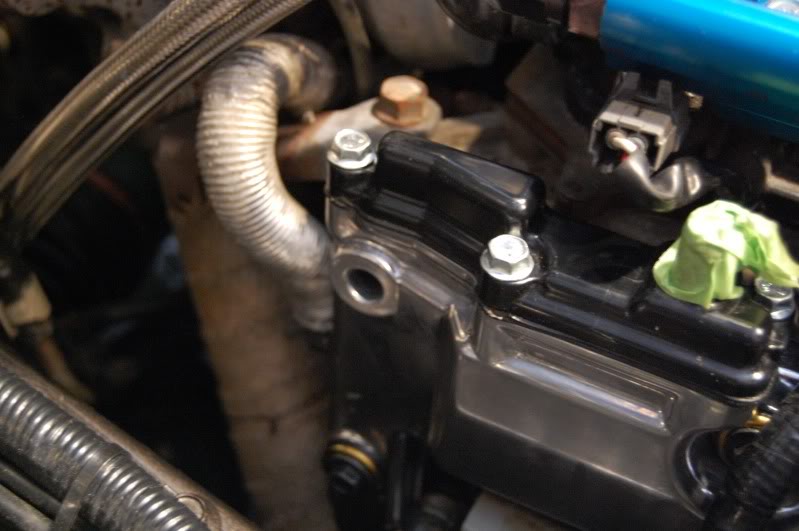
I haven’t had a chance to take the valve cover back off again to see if there is a stub that I can get some vice grips on, or if I will have to trill/tap the hole…. Good Times!!
I also did a quick paint job on a radiator shroud I had laying around. I figured I would use it as my guinea pig to see what it was like to laminate with Carbon Fiber… I’ll try and glue on the cloth tonight to see how it goes.
I also used the hole saw to make my hole in the lower intercooler piping for the BOV and used the wire brush attachment to clean up all the seams for welding.
Yahoo!!! ABS is OUT!!!
Now it’s time to start on the passenger side cover
Ok… Passenger panel underway.
Before Fiberglass and Resin….
After Fiberglass and Resin….
I’ll be letting it sit overnight and the pop it out… then the gluing, sanding and shaping begins all over again
Panel popped out like it was meant to be….

Well that was one hell of a hot day to do fiberglass work (95F + Humidity)
I had the day off of work so I tried to get as much done as I could. I was visiting relatives for the weekend.
But the drivers side panel is ready for the two top strut tower pieces to be glued on and the aluminum rail for the bottom piece.
I managed to get the car up on jack stands today too. I had to pick up a new floor jack so that I could get under the car to the right spots, but I wanted to get a decent one for a while now anyways.
Tonight I have the following I’m hoping to accomplish:
– Glue panel pieces
– Load up rims for new rubber tomorrow
– Fix my one fuel line
– Finish my starter wiring
– Take my first stab at the Carbon Fiber work
I’ll be picking up my nice shiny intercooler pipes tomorrow at noon too!!
Man.. am I ever starting to get exhausted!! Working all day and then working late into the night the last few nights.
I need to get the car mechanically sound to flat bed over to Kyle at Budd’s Subaru tomorrow morning so that they can give it a once over and bleed/burp everything and cross my fingers.
Tonight I need to finish:
– tighten down the manifold
– tighten one last fuel line
– tighten one last coolant line
– connect valve breathers to intake
– run/flare/bend drivers side brake line with T to passenger side
– connect starter wires
– fix trunk latch so that I can open the trunk and hook up the battery (trunk is stuck closed)
– create throttle cable bracket.. last nights attempt went sour
– re-attach fenders/fender liner/lights/bumper/wipers/cowl
Here are some pictures of the last two LATE nights..
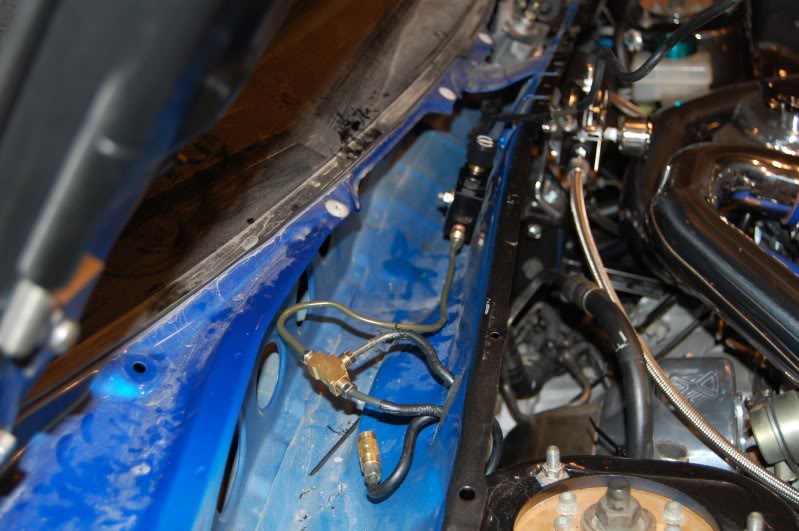
Brake lines are run up through the wiper cowl…
Fun with the line flaring tool…
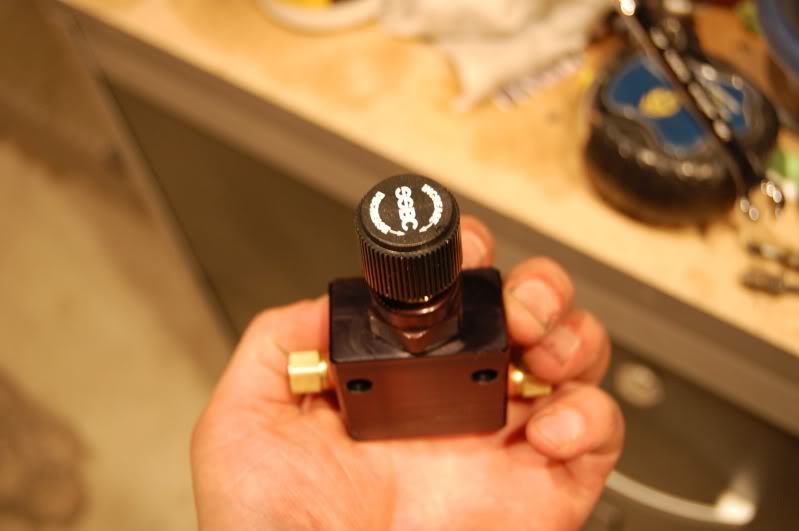
I added a SSBC rear proportioning valve so I can adjust my bias now that the stock proportioning valve is removed.
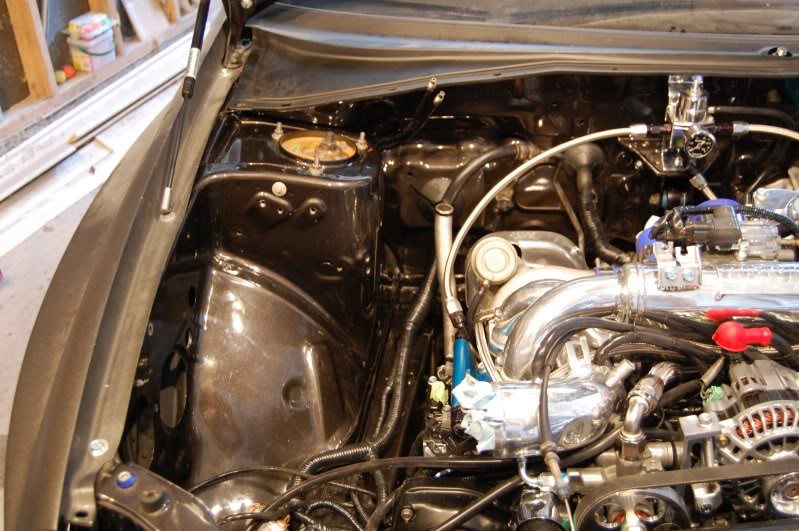
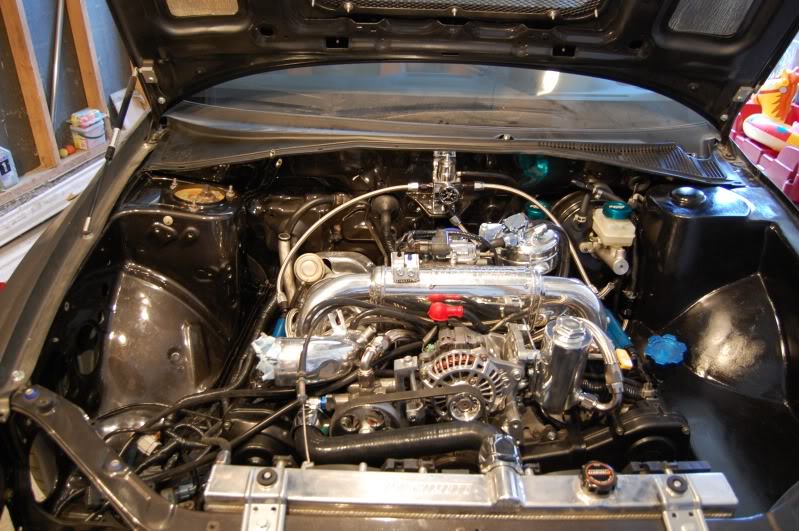
And here are some pictures with pretty much everything in place. I’ll be working on the panels after I get this biotch off to get started up.
Here are a few pictures of the car in its current state. I forgot to bring my camera to the car show, so they are “in the garage” pics again.
My cleavage:
Crappy Exterior shot:
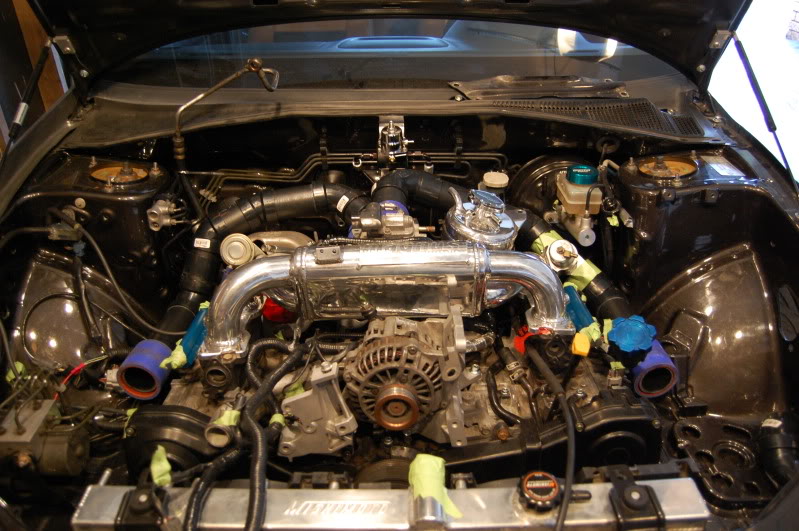
And some engine bay pics with my panels in place… No carbon fiber yet
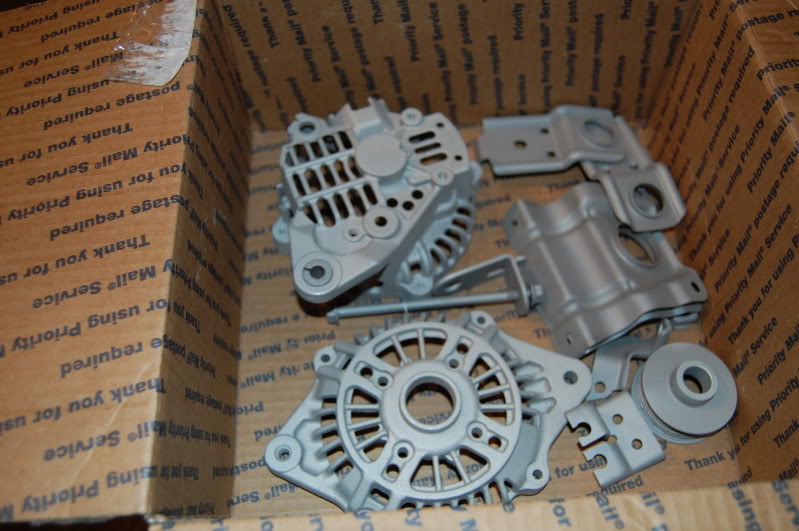
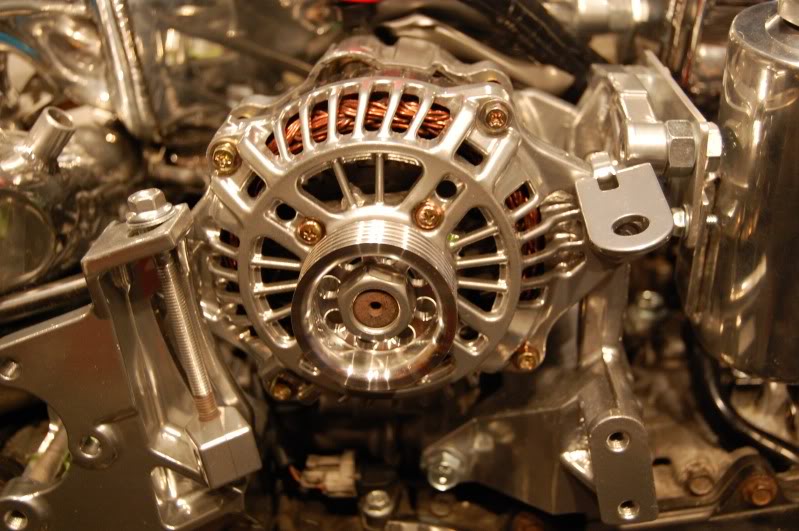
Alrighty… New alternator is installed and she’s running like a champ
The new alternator isn’t powder coated but it cleaned up pretty good with a wire brush attachment on the drill. I buffed it up using that attachment and it came out pretty good.
Off to Fourstar first thing tomorrow morning for an adjustment tune and vacuum bleeding of the brakes to get the remaining air out
Here are a couple of pictures on how the alternator turned out. I transferred some of my new bolts onto it for some BLING factor. Couldn’t get the screws to come out around the pulley so I wasn’t able to use the new hardware for them.
A few shots from the car show last weekend:

I was able to take top prize for Subaru at Scrape By The Lake yesterday.. The weather held out for the most part.
After a week off, I’m going to get started back in on the trunk
Here are a couple of shots from the show:
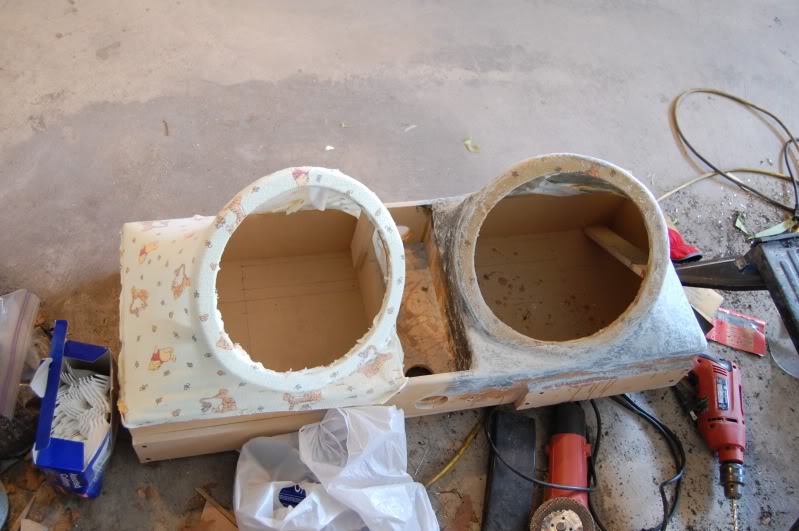
Here’s a bit of a sneak peek of the work that’s underway in the trunk
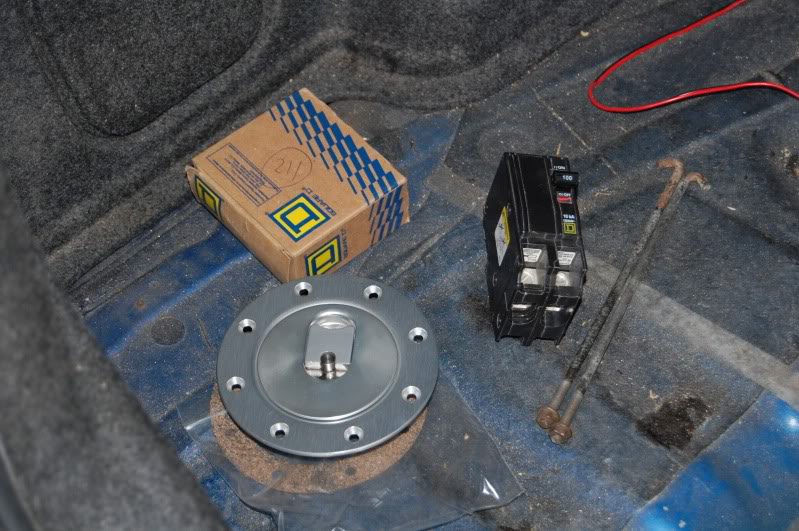
Still a work in progress, but the subenclosures will be connected to be one unit and it will be covered in carbon fiber.. and well… you can see what I’m doing with the floor of the trunk
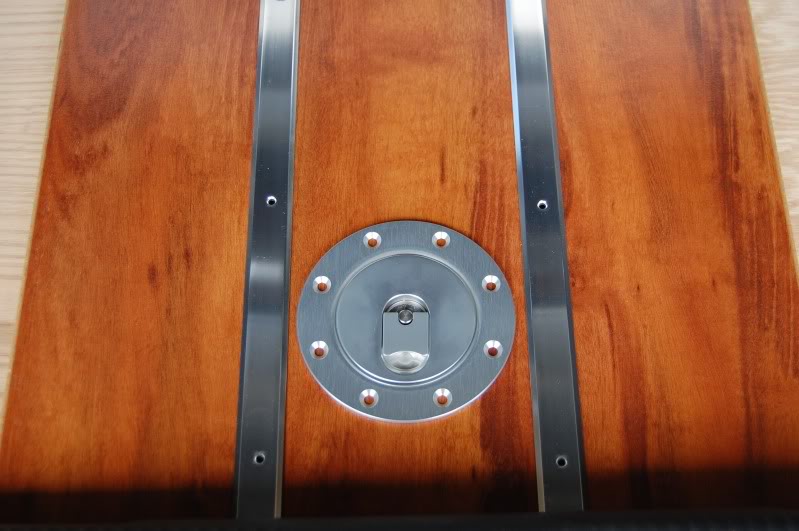
It is a false floor that has the two amps and a cap under it. The fuel door is an access door so that I can place a 110 amp breaker in there and flip the switch if I want to kill power to the car
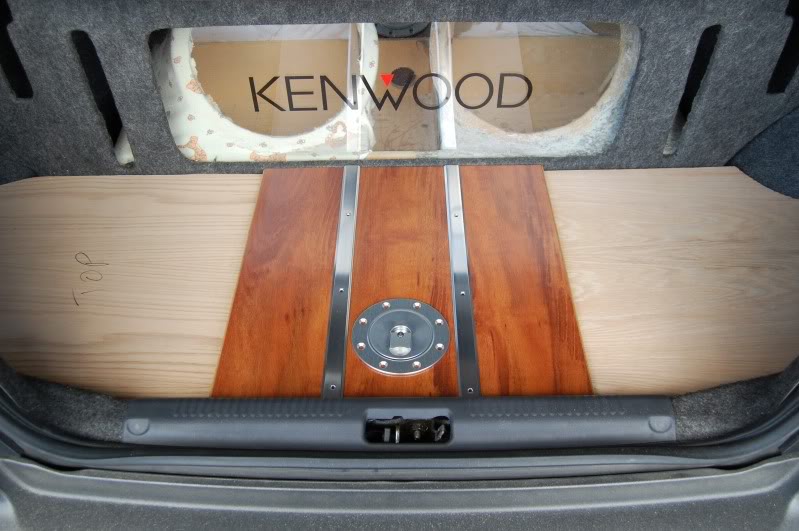
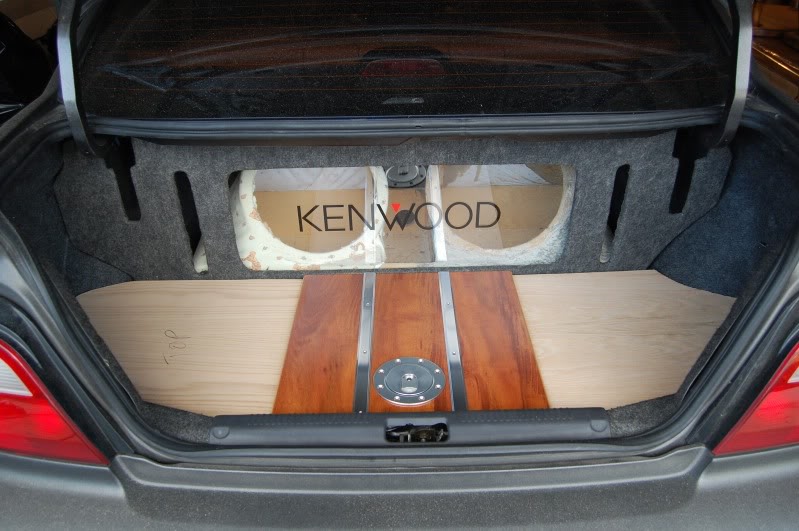
The trunk is getting closer
The glue is setting tonight, then I’ll be cutting and fastening the polished aluminum strips and the fuel filler cap tomorrow morning. I only have two of them just sitting in place for the pictures.

here’s a couple photos i snapped of this beauty this past weekend.
| This image has been resized. Click this bar to view the full image. The original image is sized 1024×680. |
| This image has been resized. Click this bar to view the full image. The original image is sized 673×1024. |
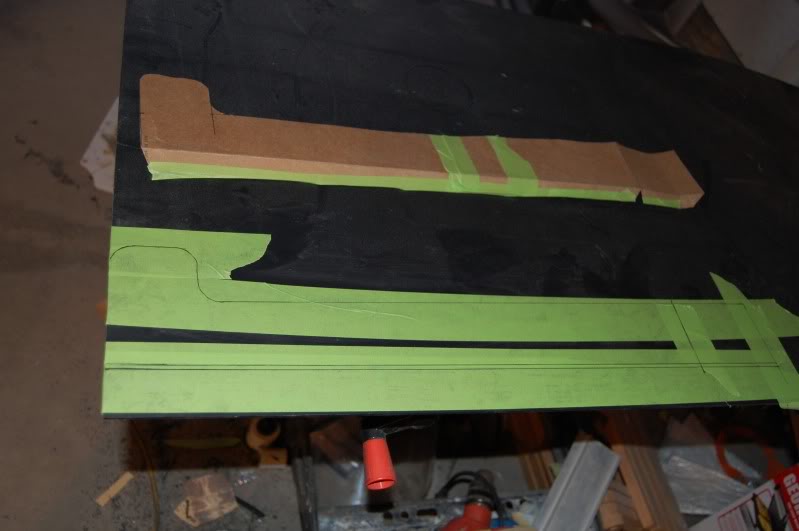
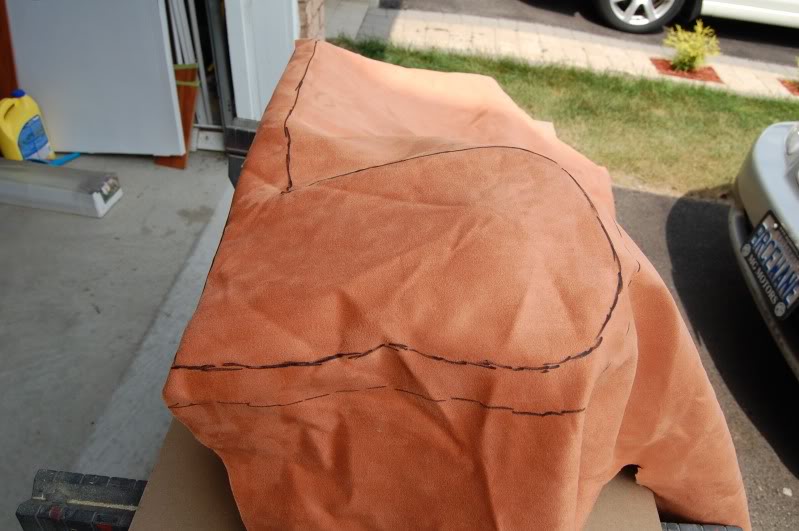
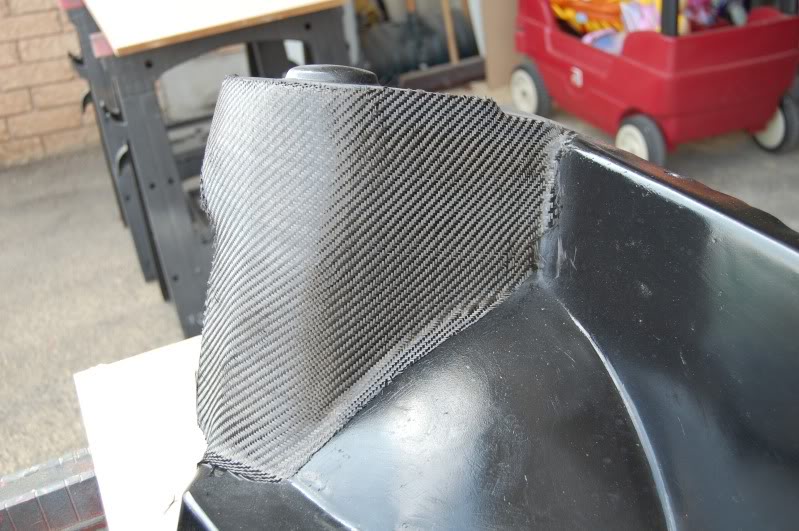
OK.. I was able to get started today.. I pulled the panels out of the car and made the templates out of fabric so that I had something to go by…
Since I am just covering the panels and not making molds, I will be gluing the CF twill onto the fiberglass. I’ll be airbrushing with a candy black where the seams of the fabric meet so that you won’t see the joints
Below you will see my template making. Then I cut out the CF based on the template, applied the glue to both the area to get the cloth as well as the back of the cloth and laid it on.
I quickly realized that I’m going to need a second set of hands to finish this off, so I just did the one piece today. One nice side effect is that when you let the glue sit on the cloth for about 30 seconds it makes it so that it will not unravel. It makes it much easier to handle.
After everything is glued, I’ll be applying a couple of coats of crystal clear epoxy resin on top.. Then sand it down smooth, polish and then airbrush and clear coat
This is similar to how the surf board guys do it too.
was able to get more done today than I thought.. I actually had to re-build the one area near where the turbo is. The plastic used as a base had started to warp from the heat.
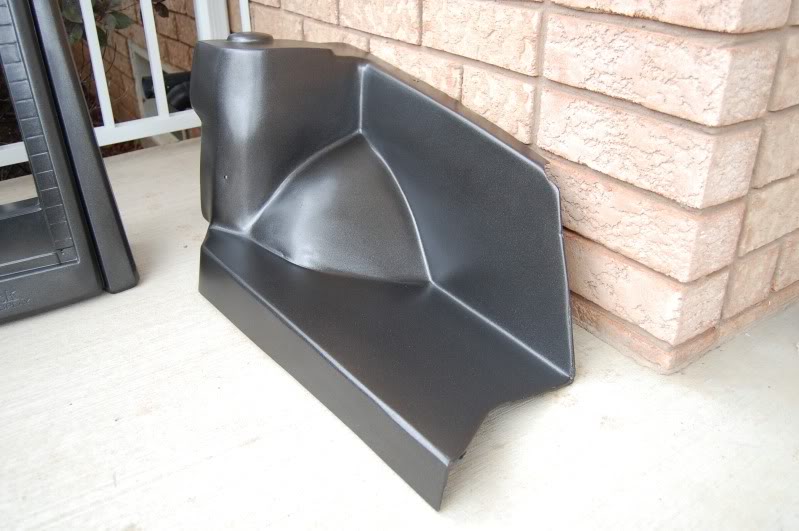
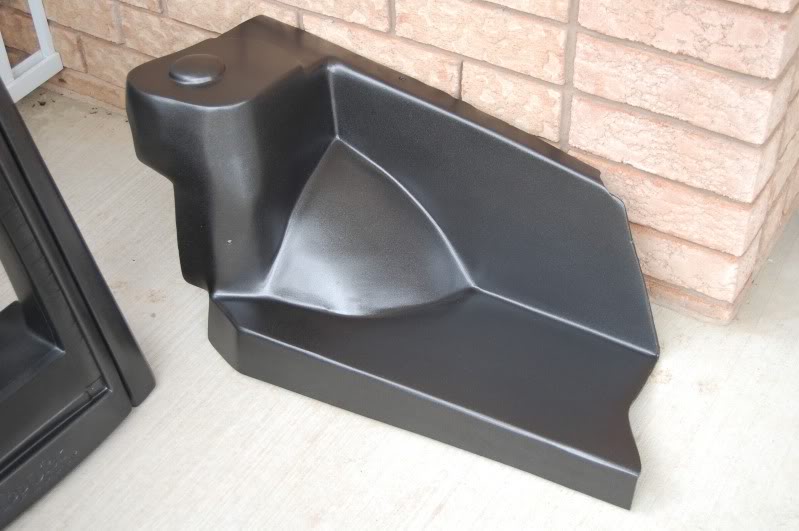
So I recreated it out of fiberglass so that it wouldn’t warp again. I managed to get everything smoothed out and shot with primer.
Then I thought of something that a couple people have said who have seen my car in person since I did the panels. Their comments were to paint the panels the same flat/textured color as my exterior. It would give even more of a “shaved” look and would also really set off the polished pieces in the engine bay against the flat backdrop.
Well, I did just that
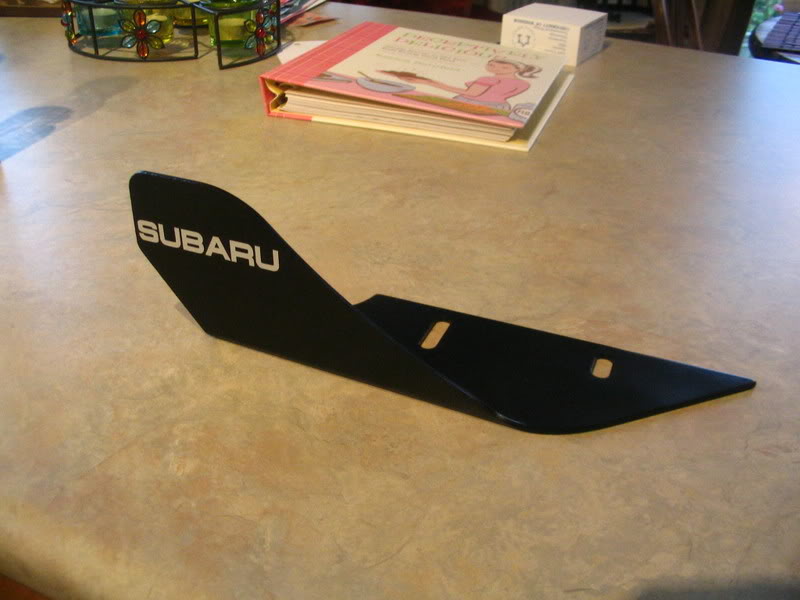
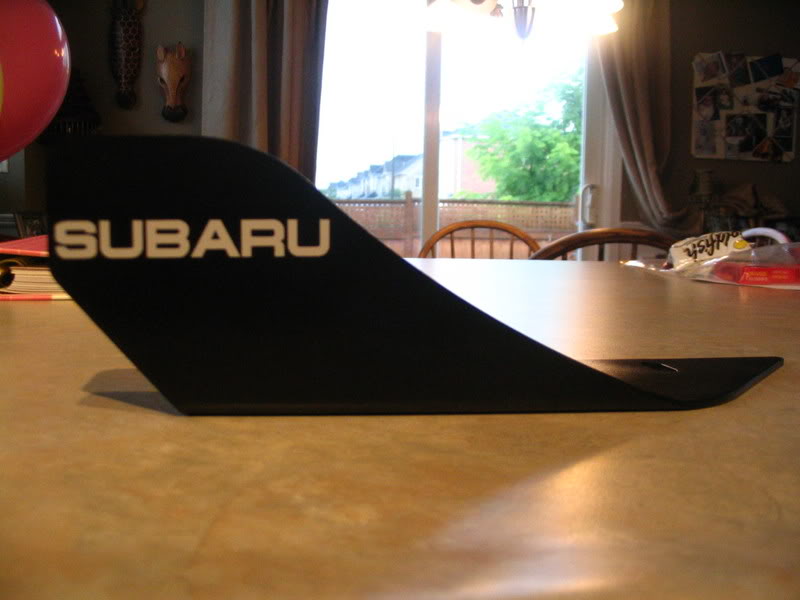
It might be a bit hard to keep clean, but we’ll see how she holds up. I also painted my “info stand” for use at car shows. Now I just need to whip up a sign in Gimp
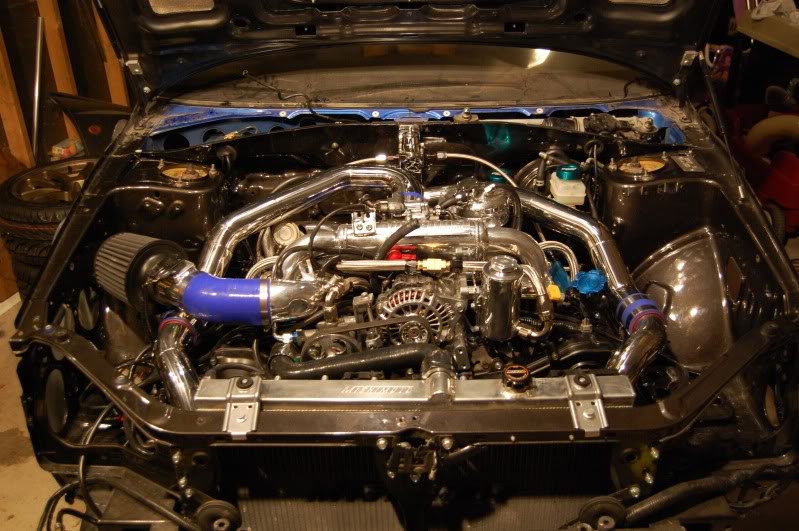
FINALLY…
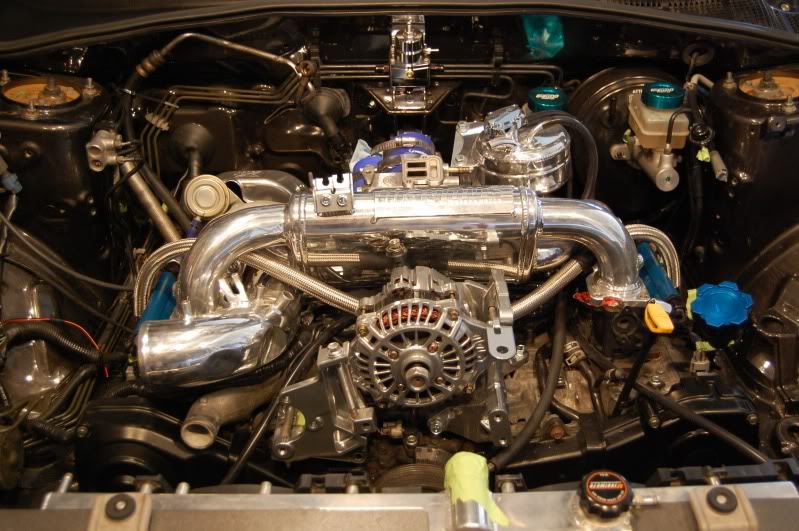
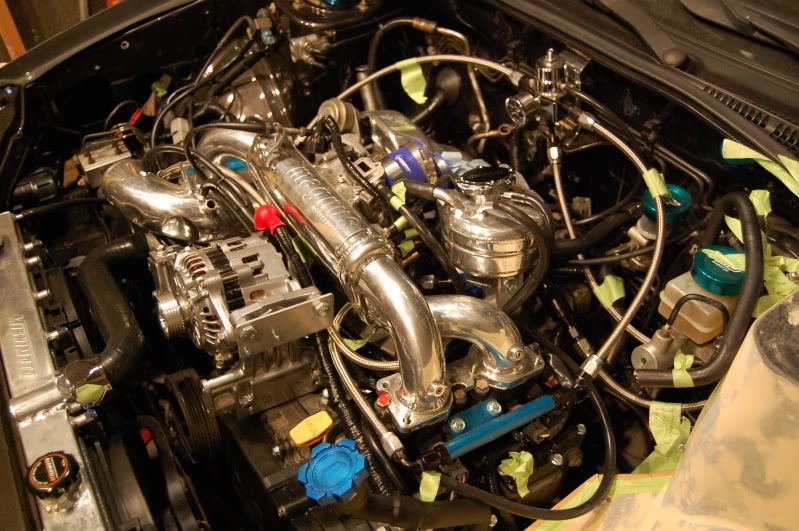
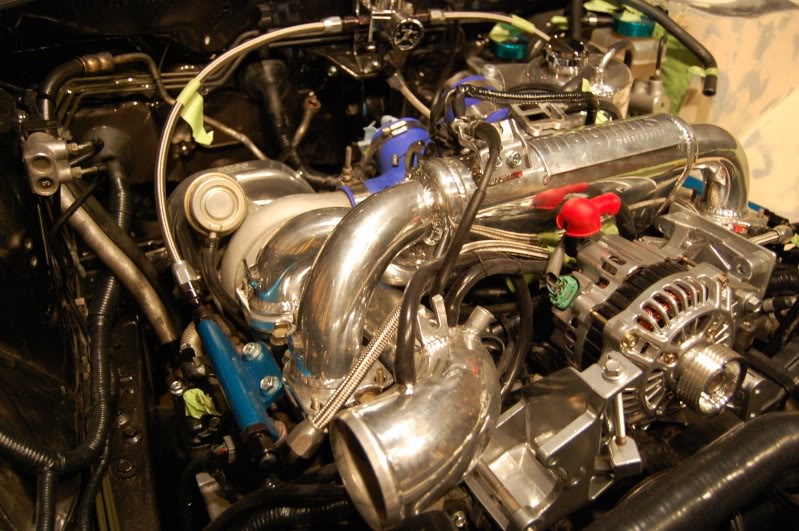
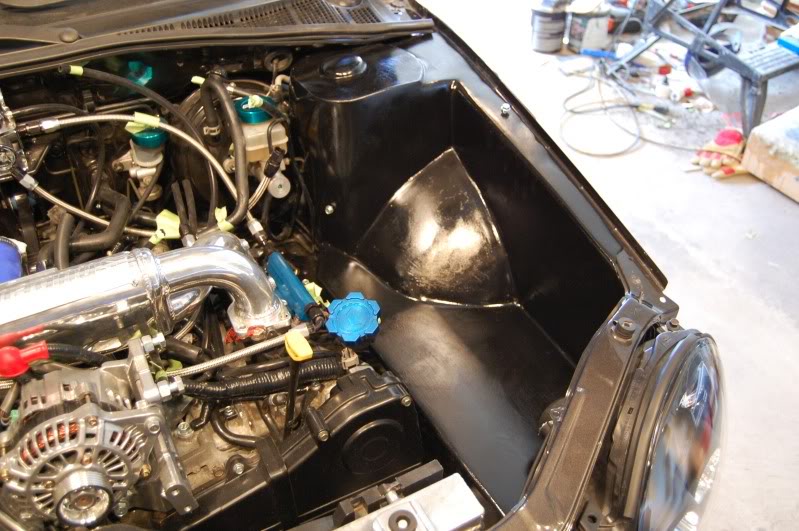
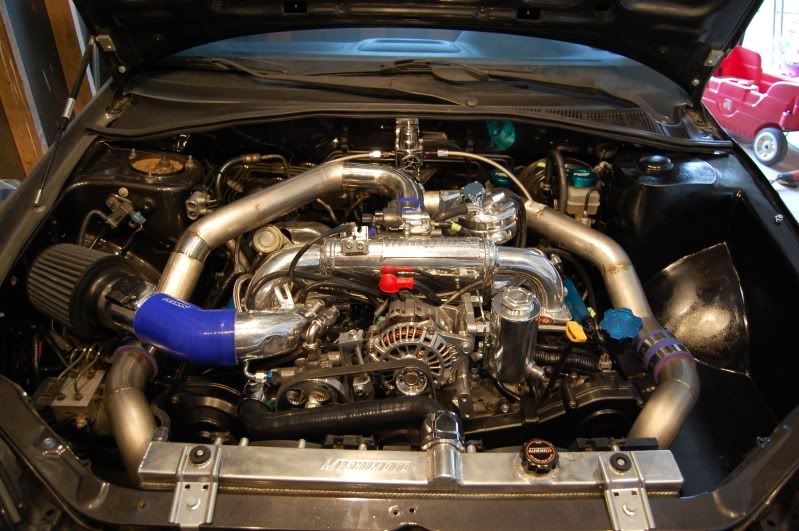
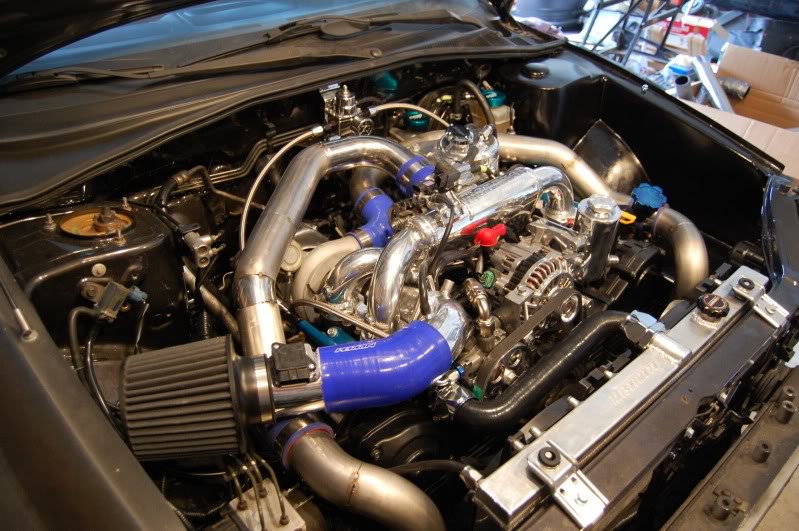
Tonight I finished my engine bay
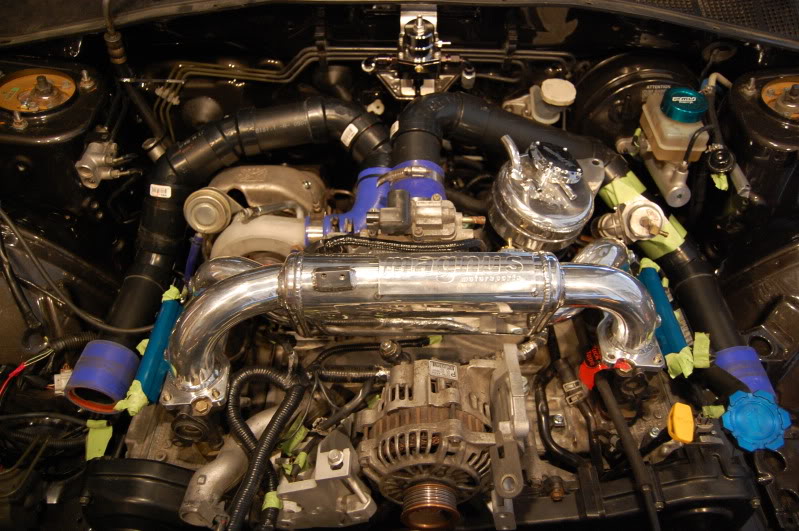
The painted panels are installed and I am very happy with the final product… And now for the pics straight from the Batcave!!
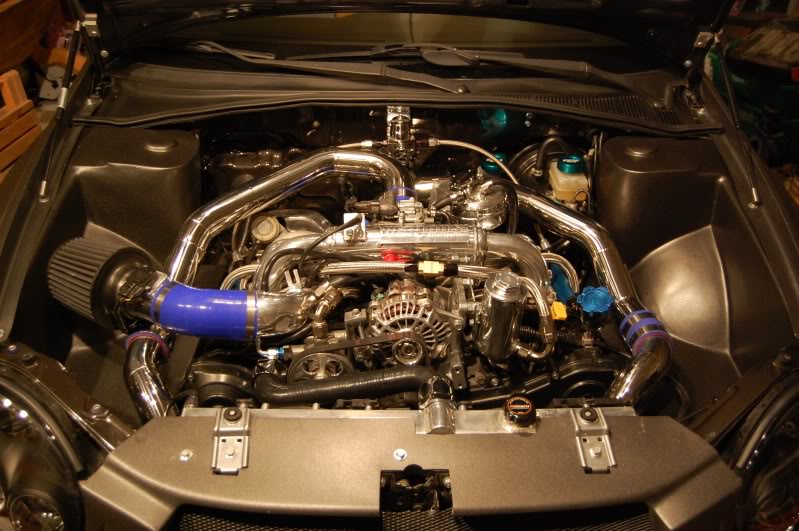
Here are a couple of photos from the show:

ok i like what i see except your turbo set,i would go rotated turbo mount cause if you want to go bigger on turbo it wont fit in that stock location.i don’t see the reason for making fiber glass inside fender,and also putting pvc pipe to make replica of intercooler pipe,that is on the market for your year car that’s time wasted.but other from all that you did a good job and i like what i see.