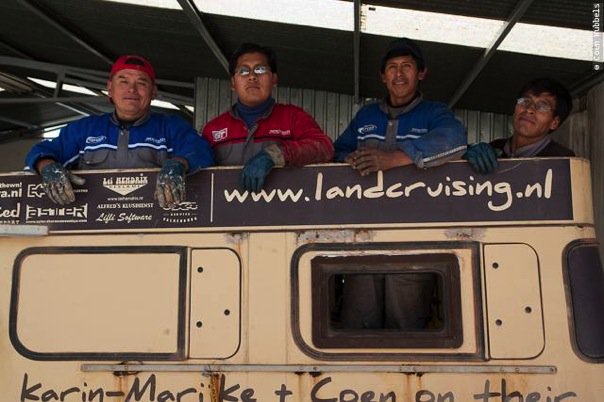
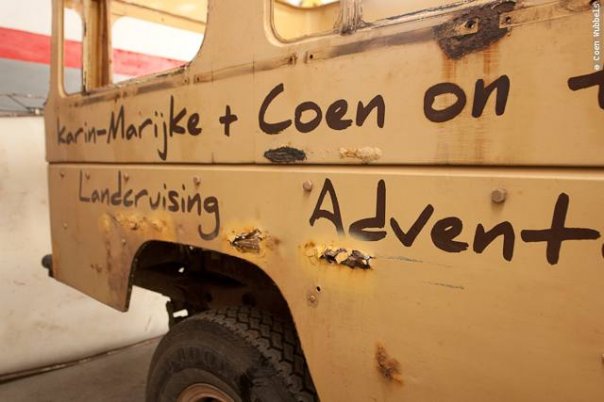
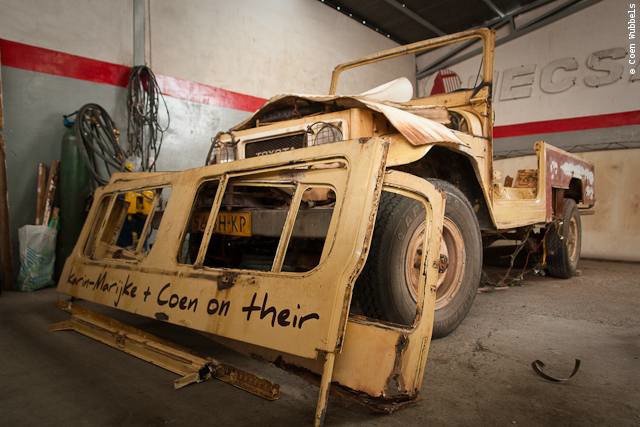
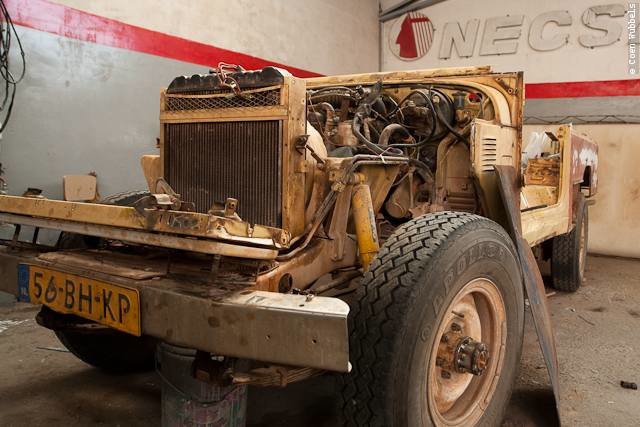
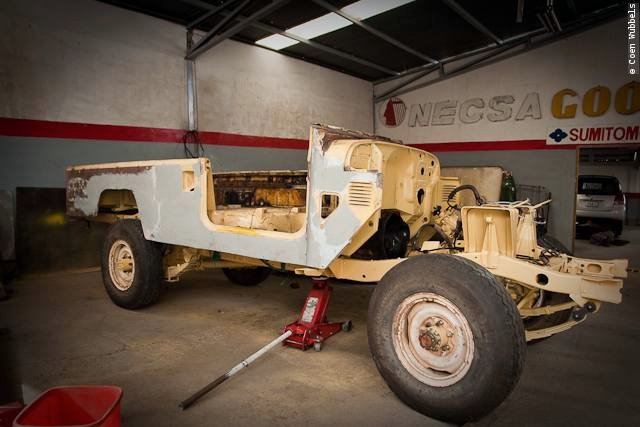
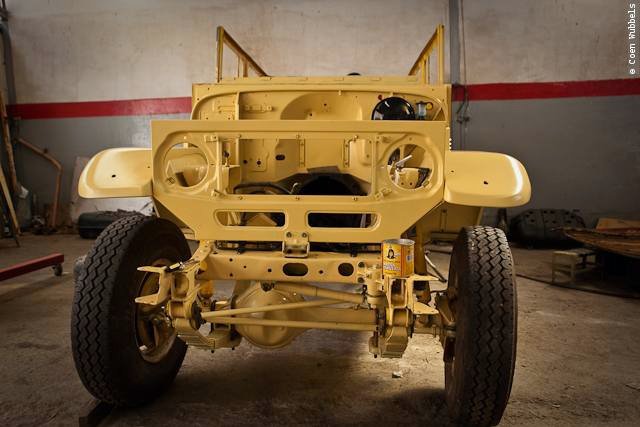
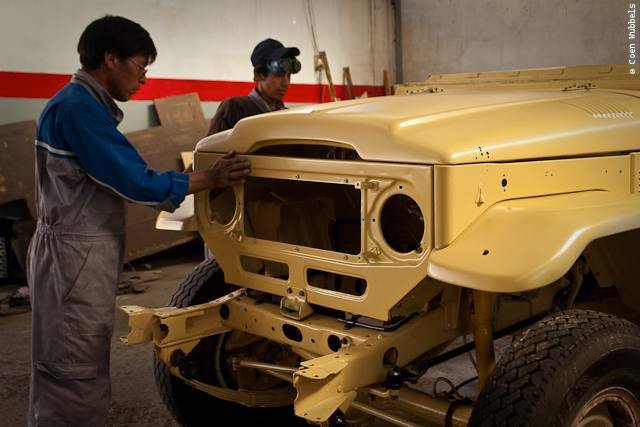
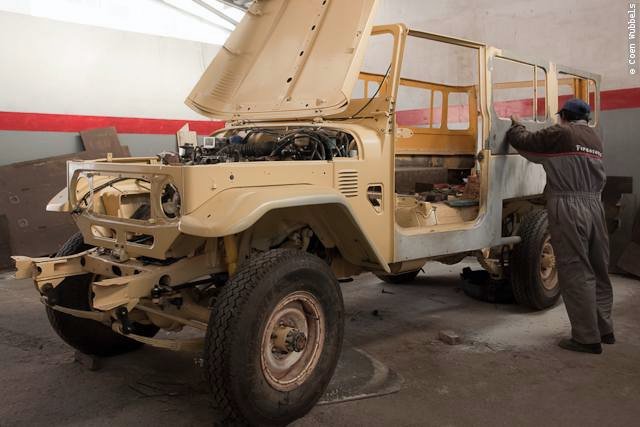
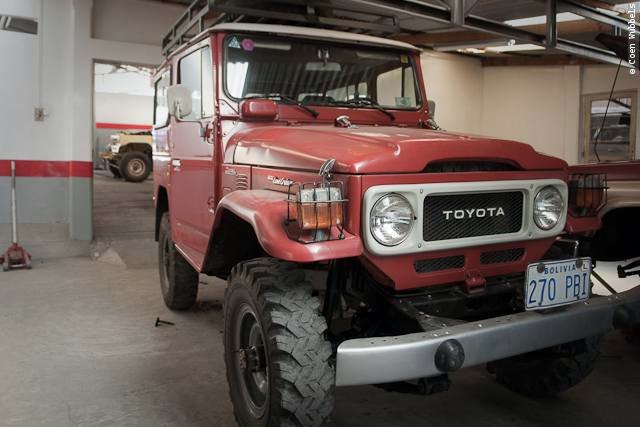
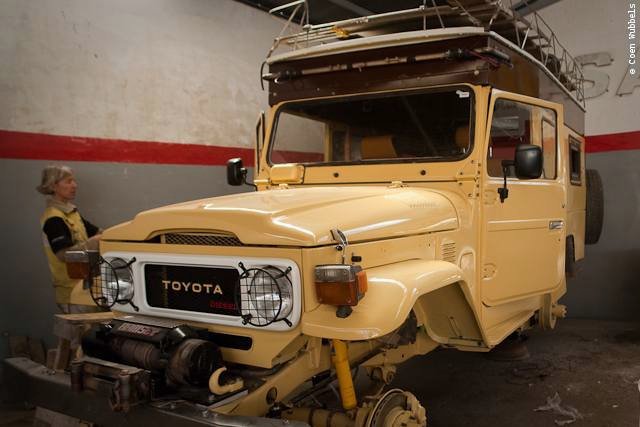
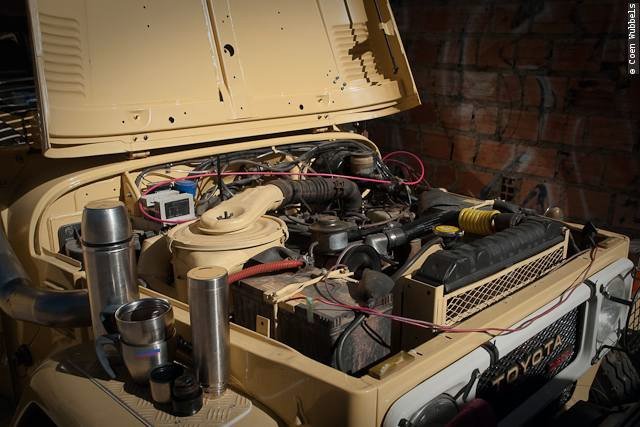
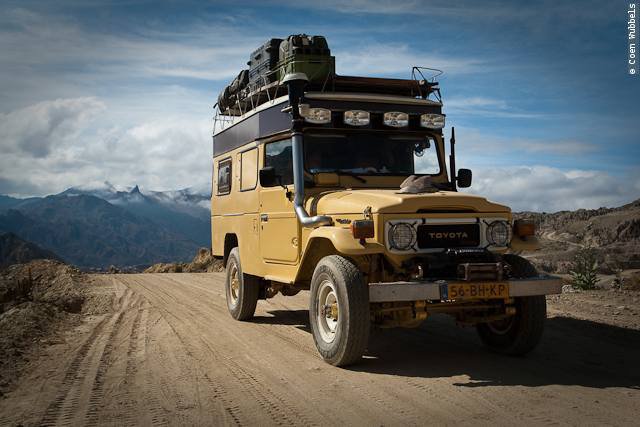
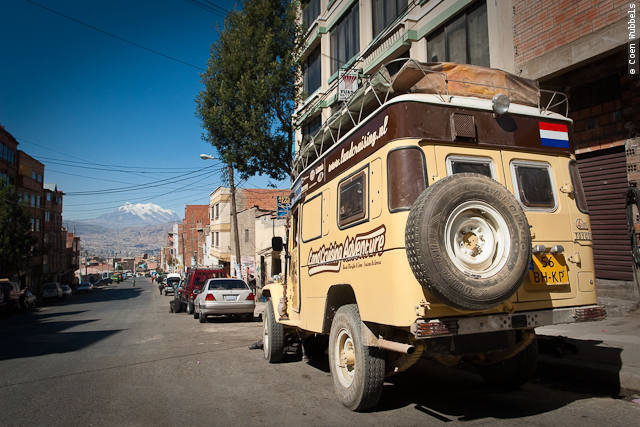
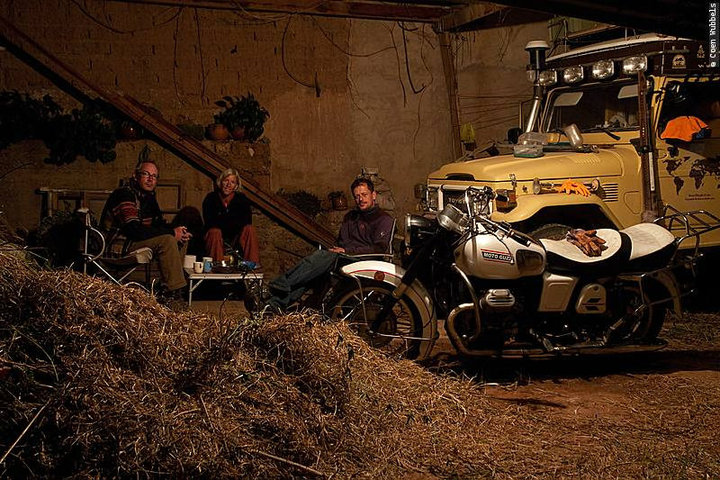
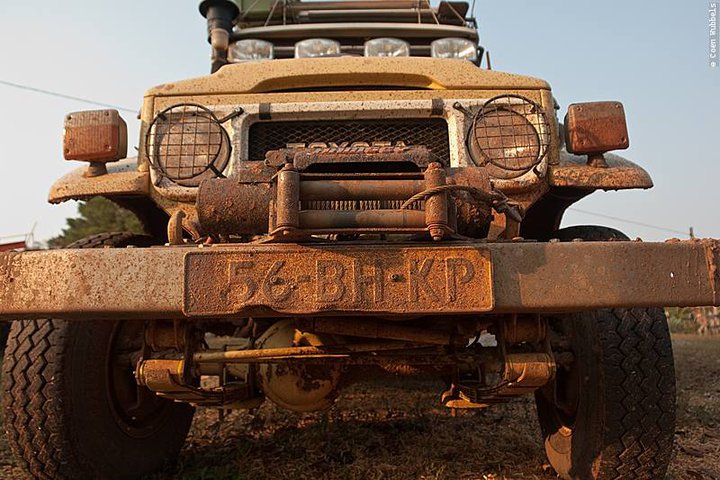
1984 Toyota Landcruiser BJ45 World Rig
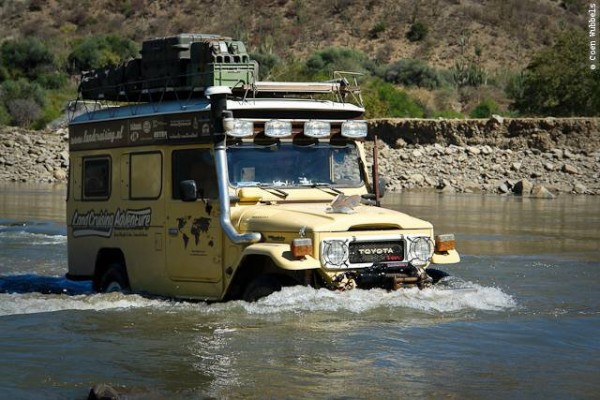

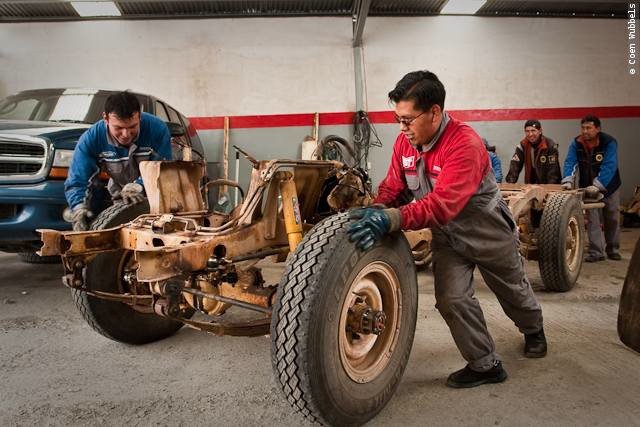
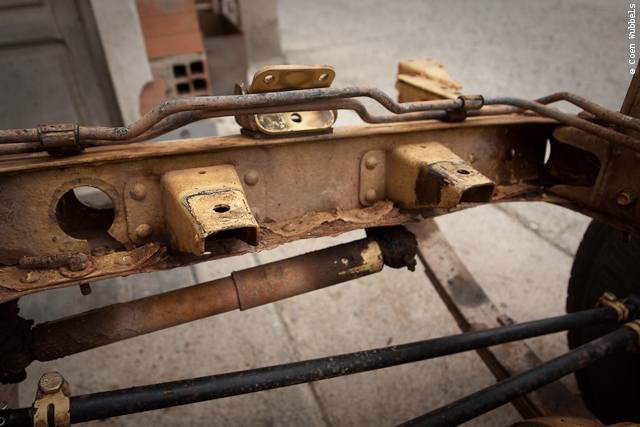
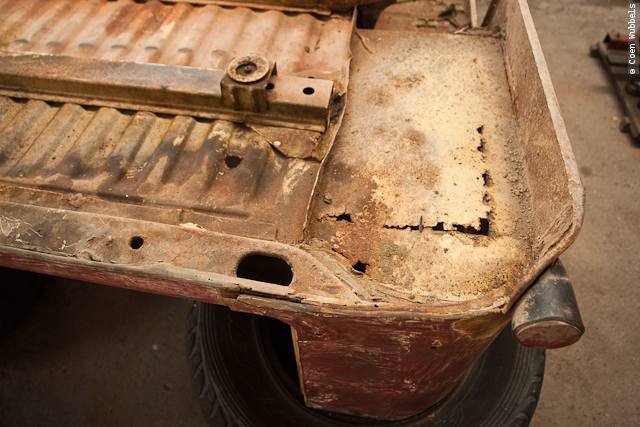
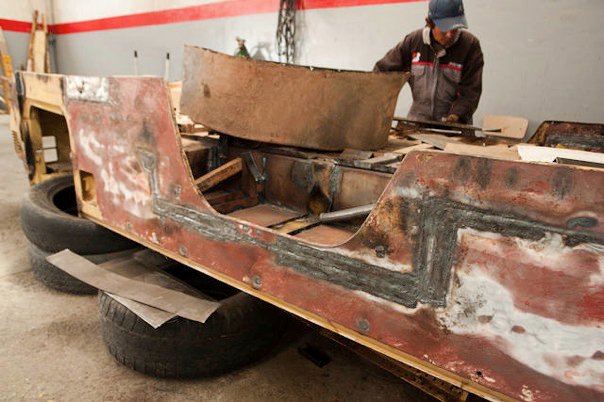
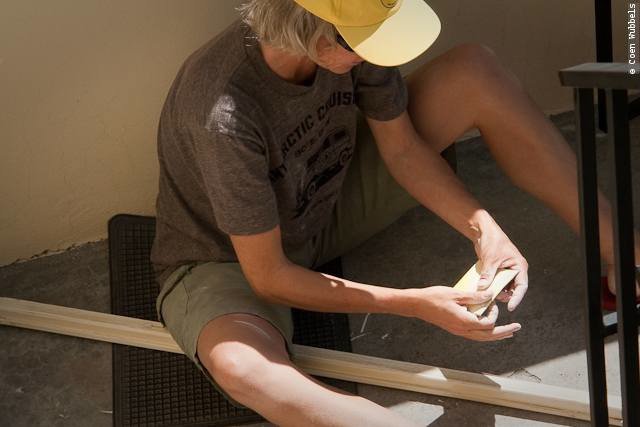
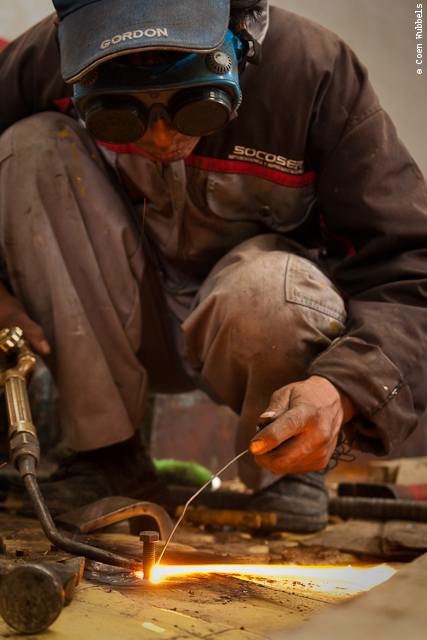
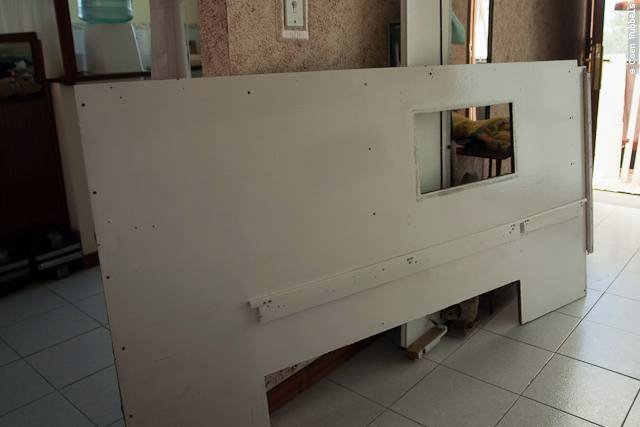
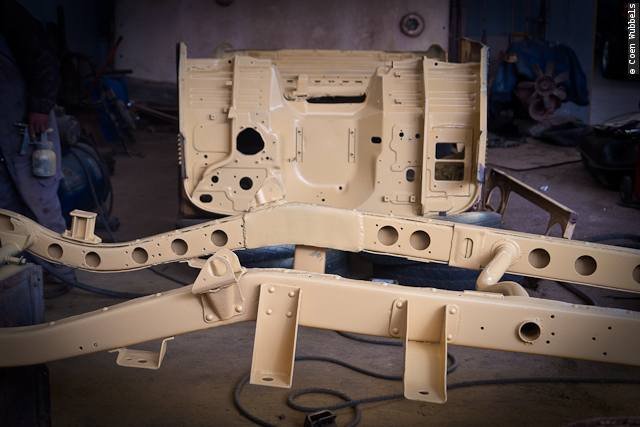
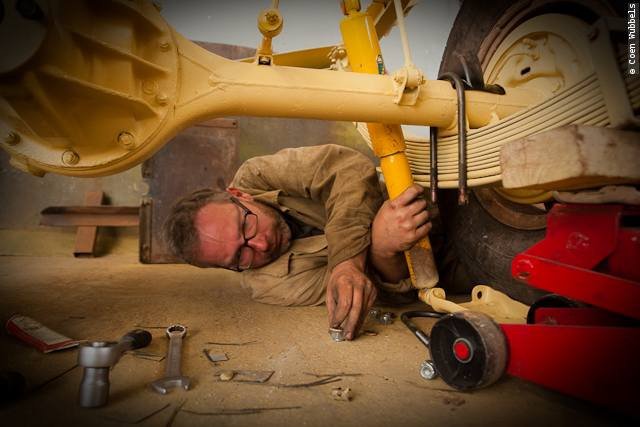
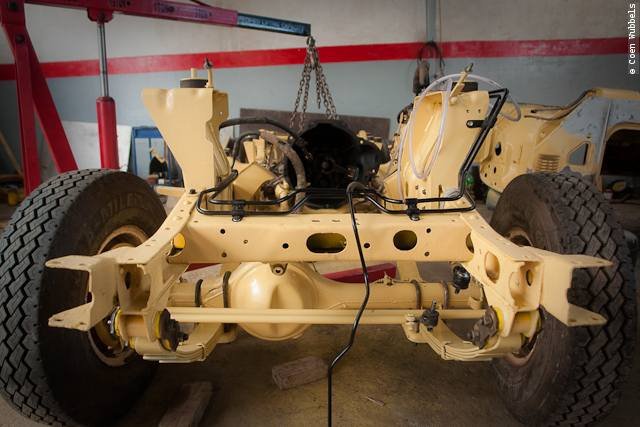
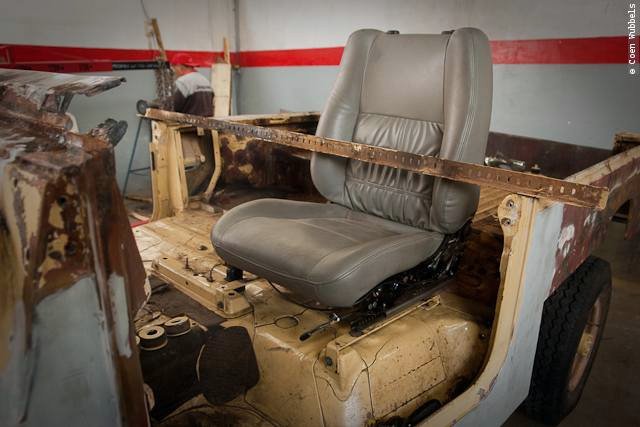
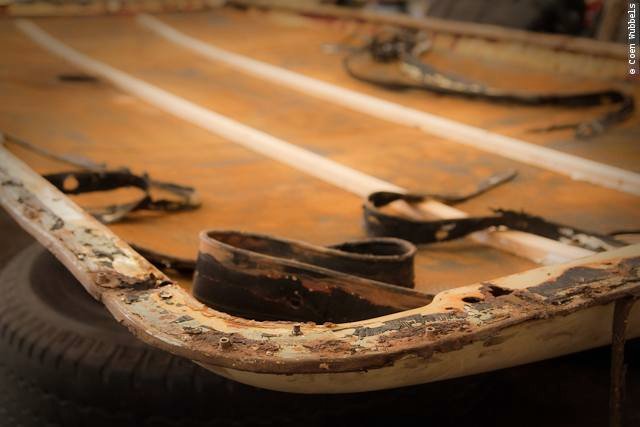
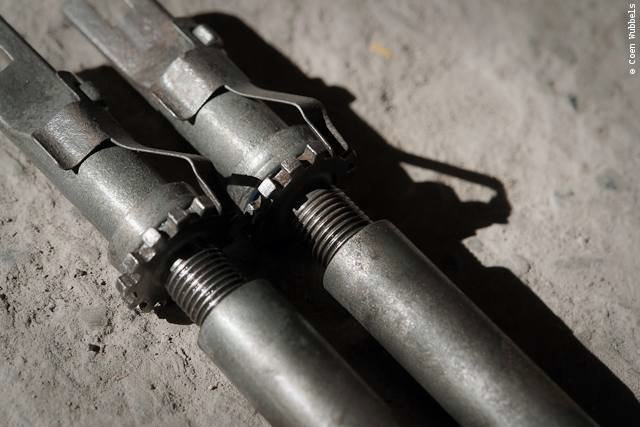
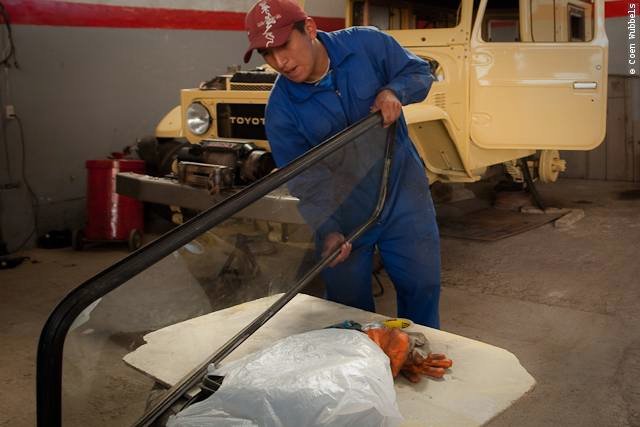
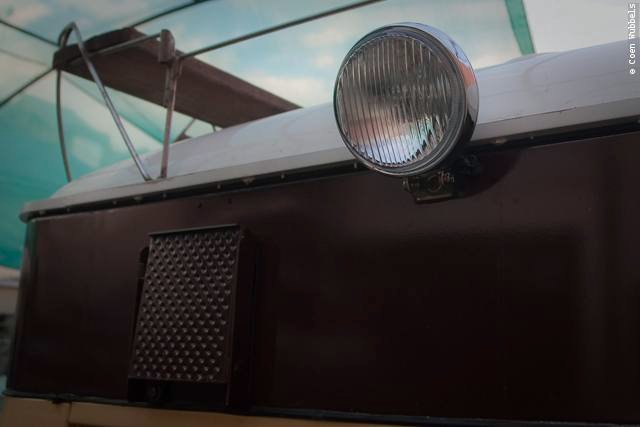
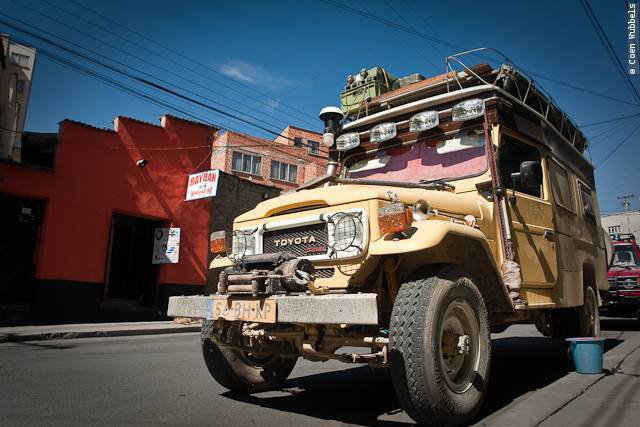
So it started with this:
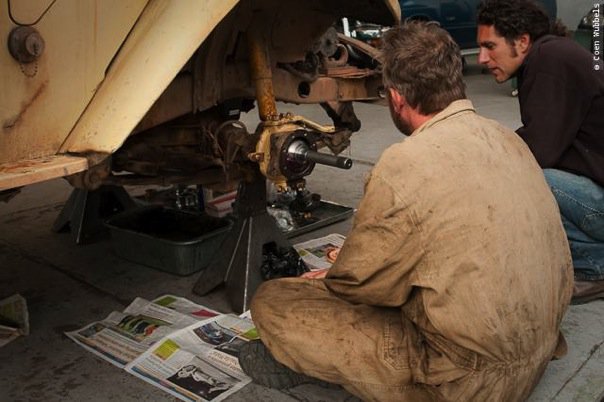
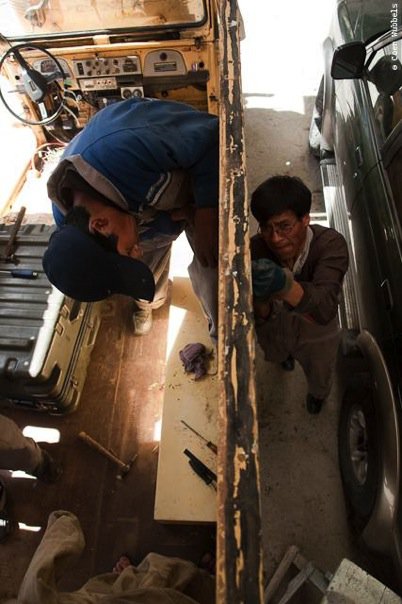
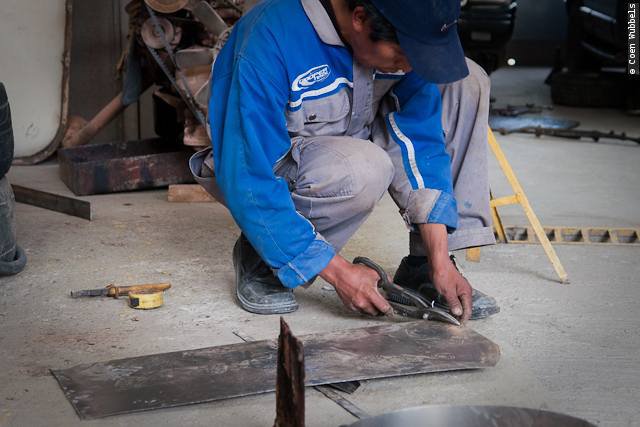
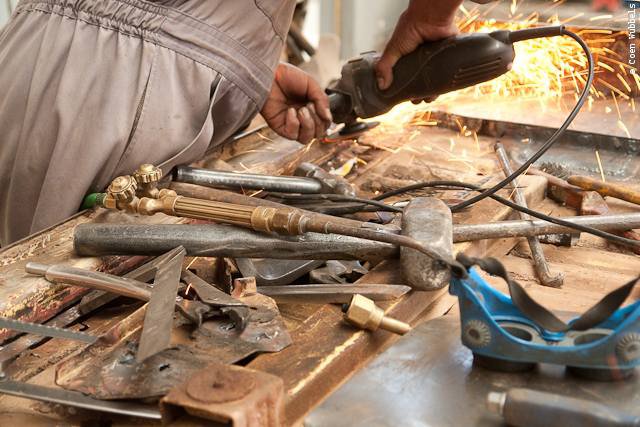
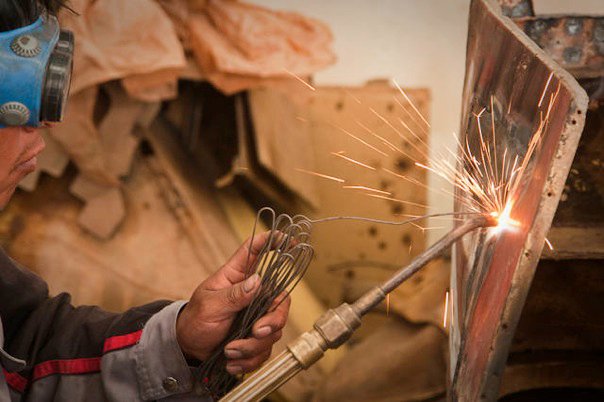
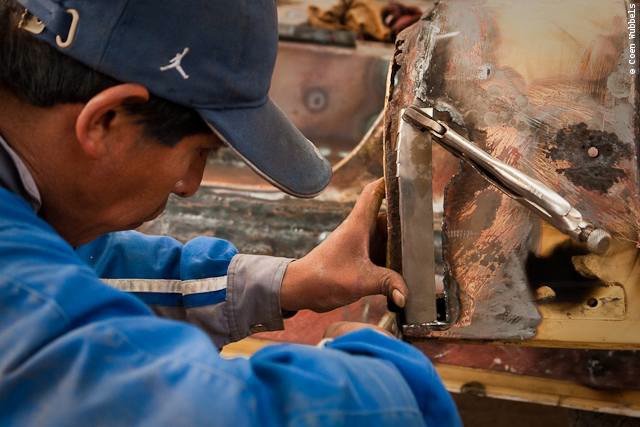
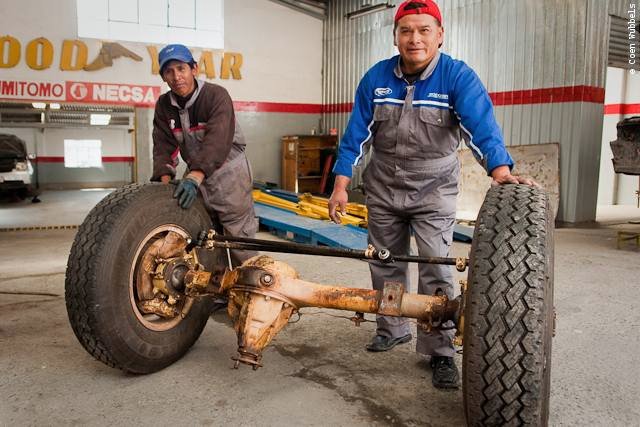
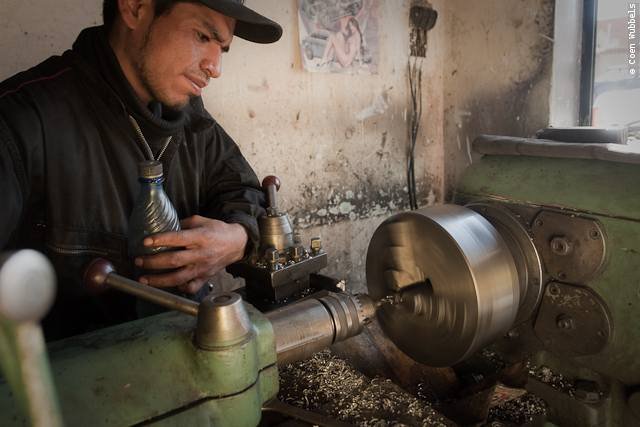
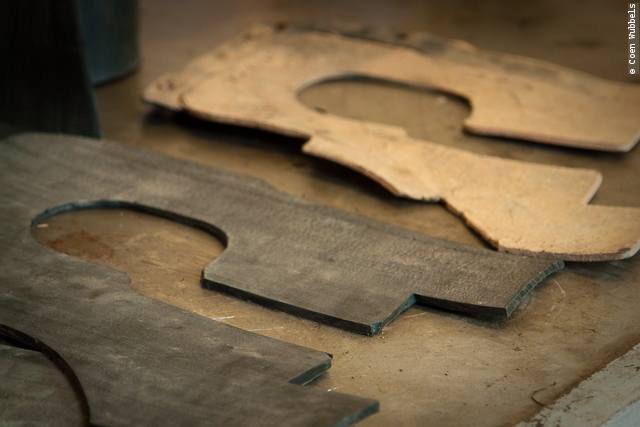
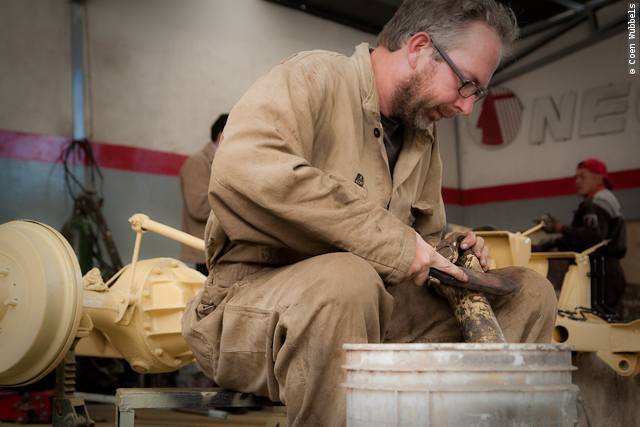
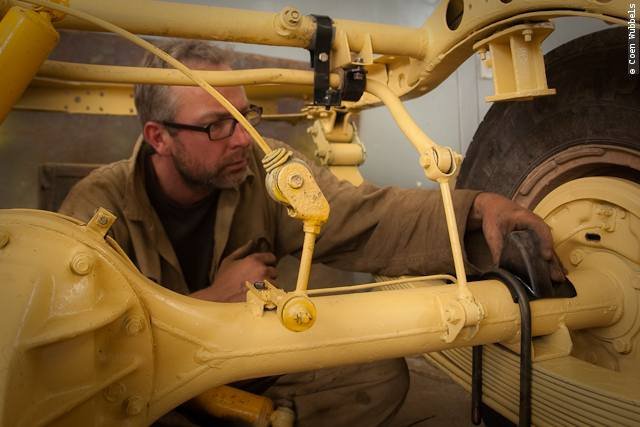
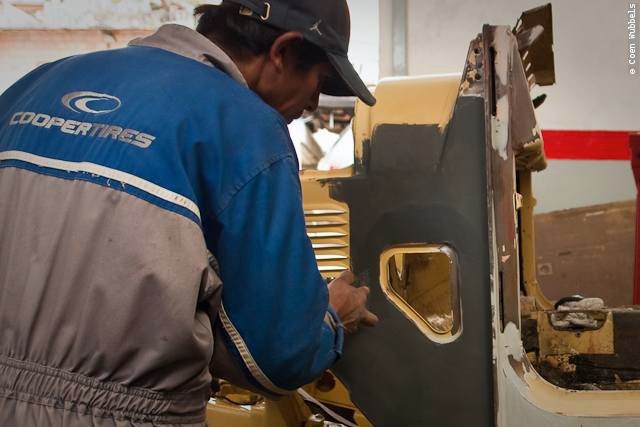
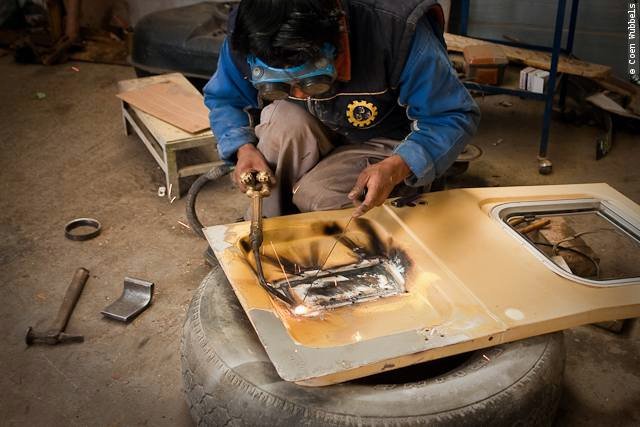
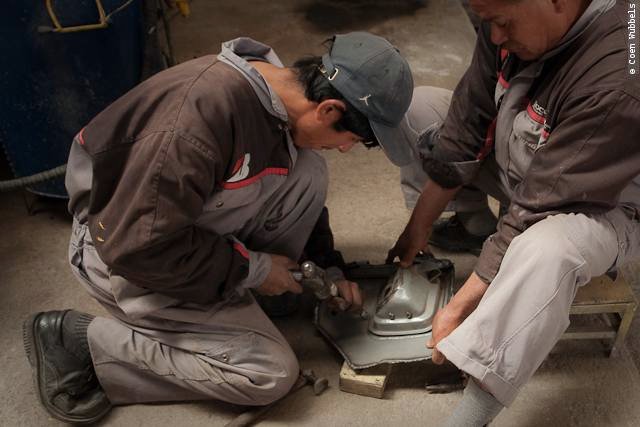
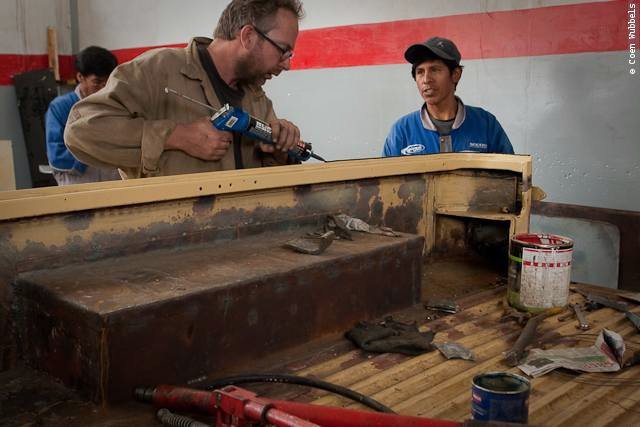
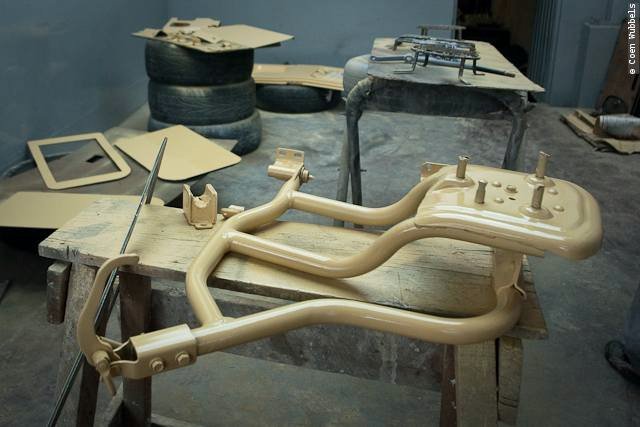
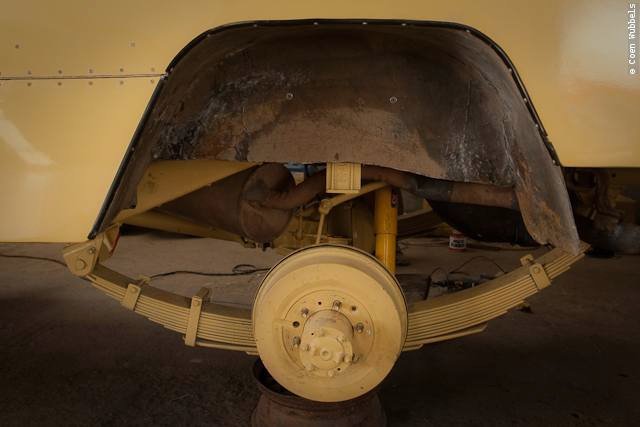
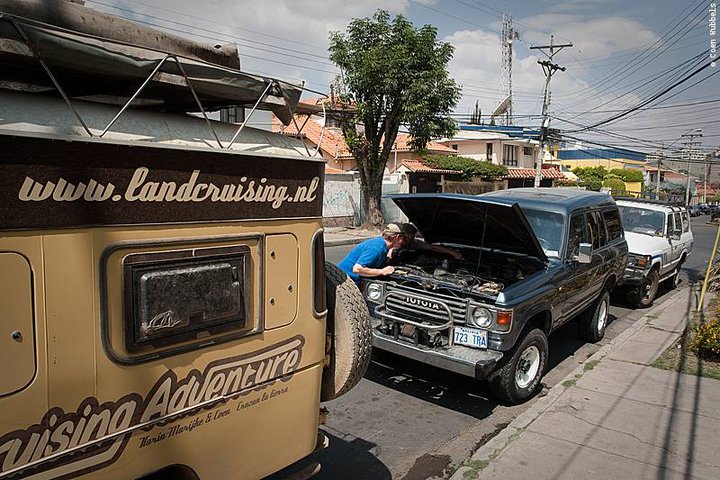
Completely revising the front axle. It’s not my daily job, but luckily all the necessary tools and expertise are just a shout away.
All parts for this job are available in the surrounding shops. Some parts are must be made from scratch on the lathe like the brass inner rings of the spindles.
The operator also makes the bearings fitting again which had some play. Working at Ernesto Hug’s place is a real treat.
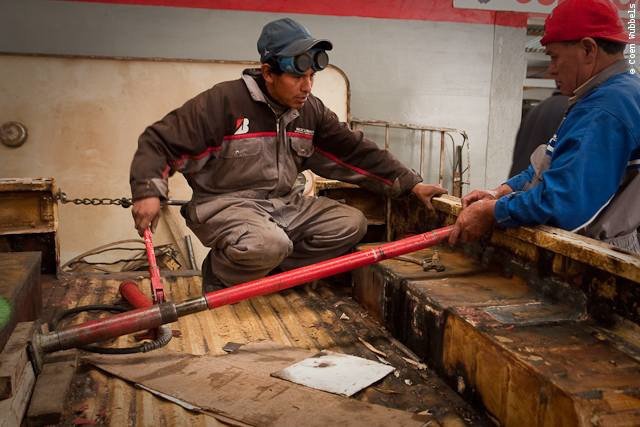
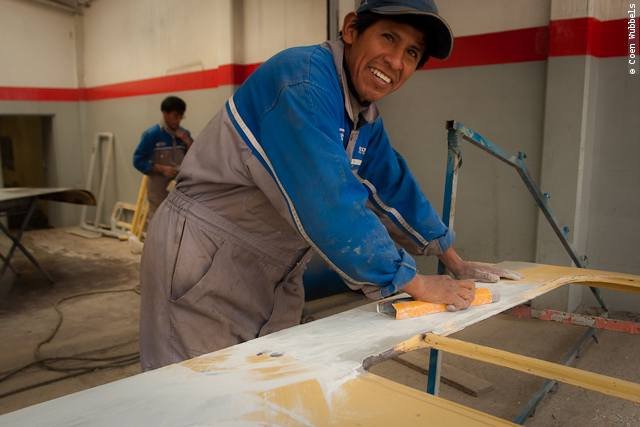
We have the key and we can sleep in the car. The guys working there are thoroughly brainwashed in the Swiss orderly way
. The place is tidy you wouldn’t believe. Not a drop is spilled and you could eat from the floor.
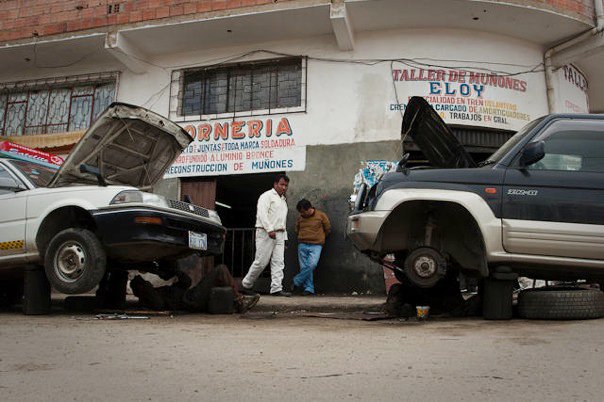
A nice contrast with the neighboring workplaces which makes me remind India or Pakistan.

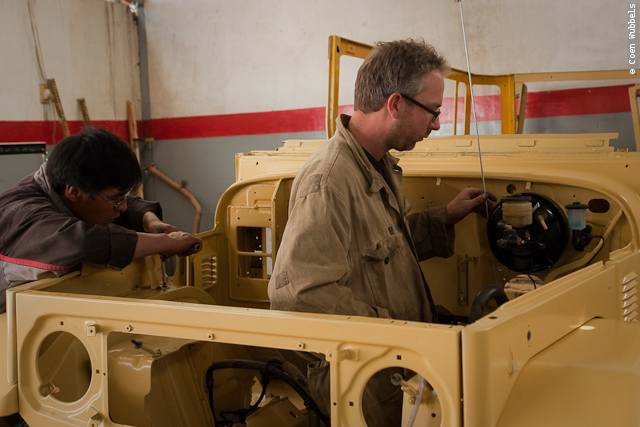
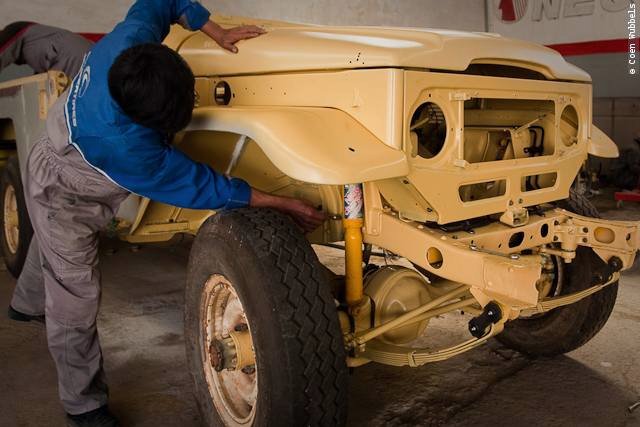
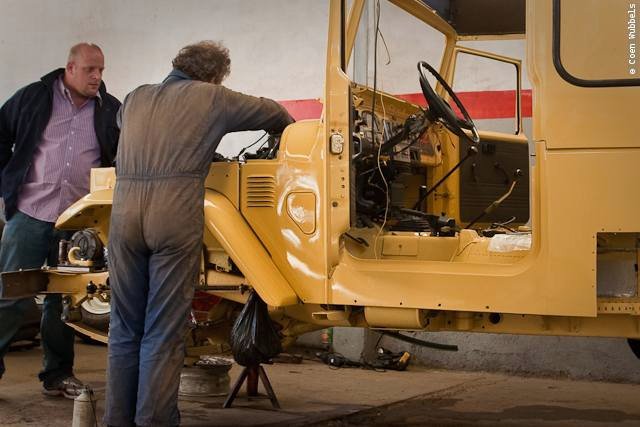
The front axle job almost completed. My Belgium friend Ben comes to have a look.
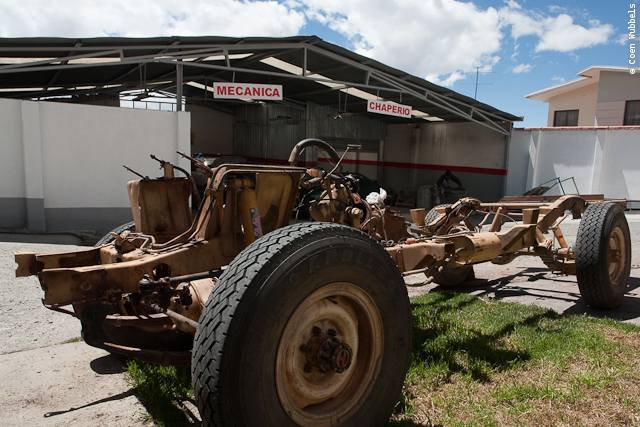
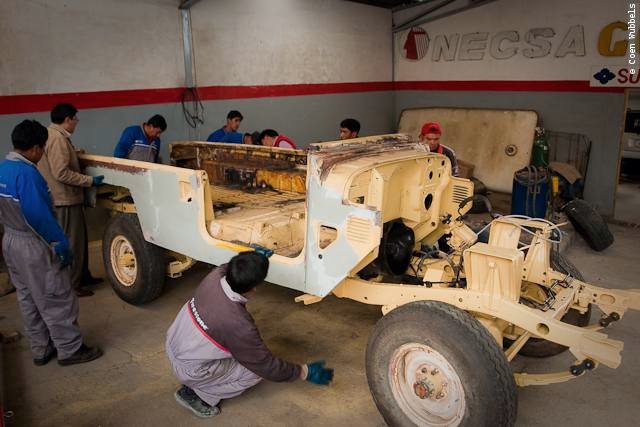
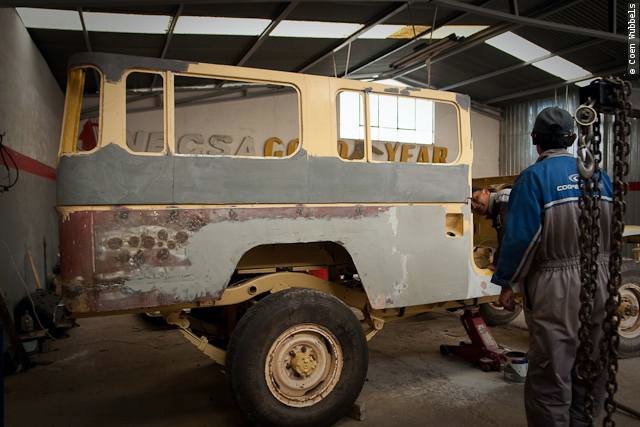
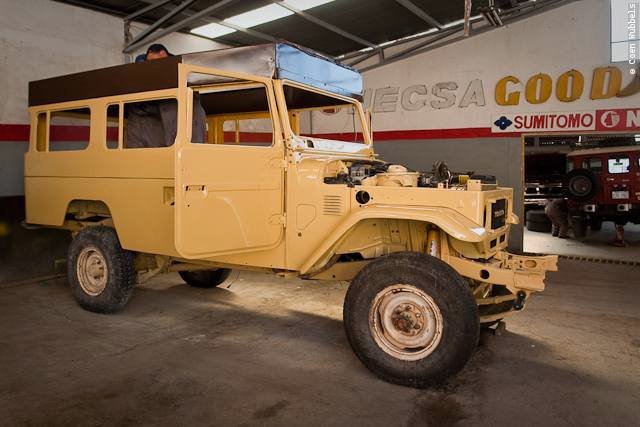
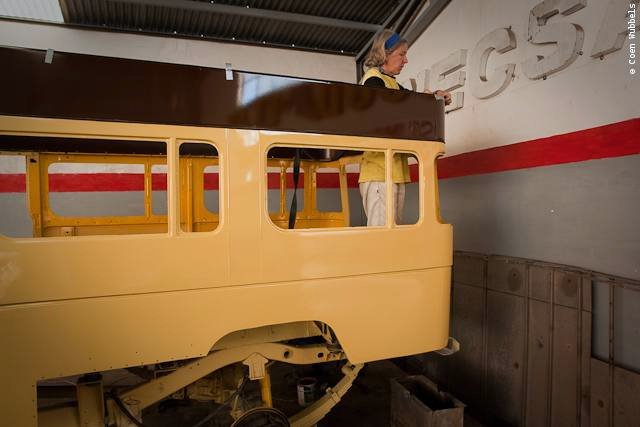
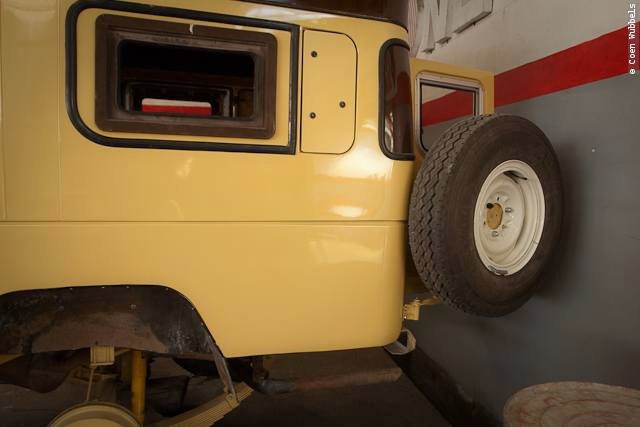
When the front axle is done, we decide to do something that we should have done from the start, seven years ago;
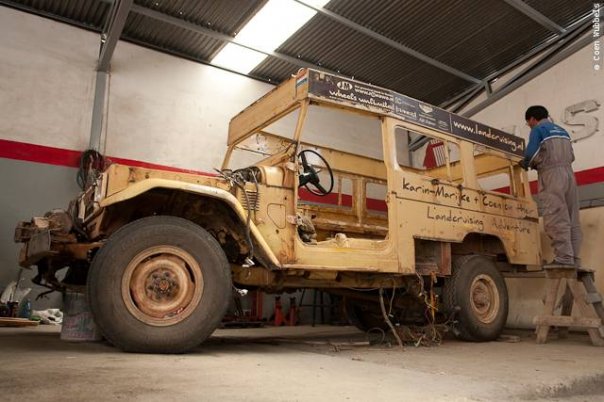
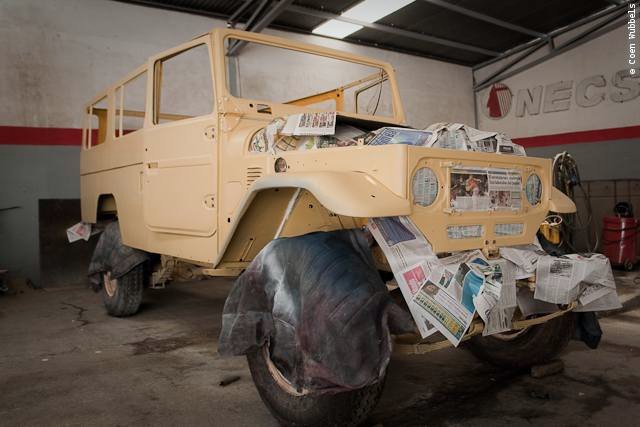
a complete build up of the car. We find a good place to live, the body shop has a roof and seems to deliver good work
, the price is right and more over parts are available in Bolivia. The decision is the easy part. Let the hard work begin.
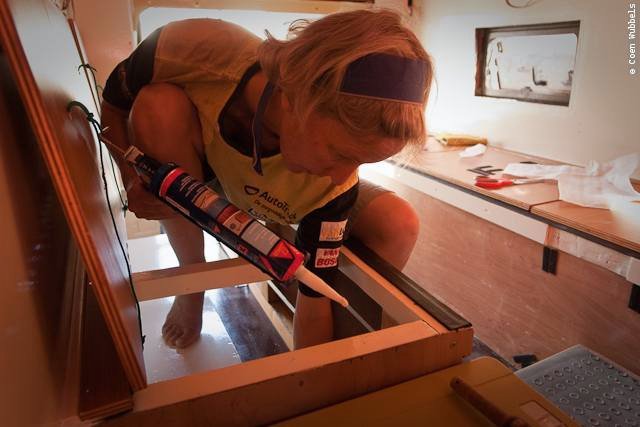
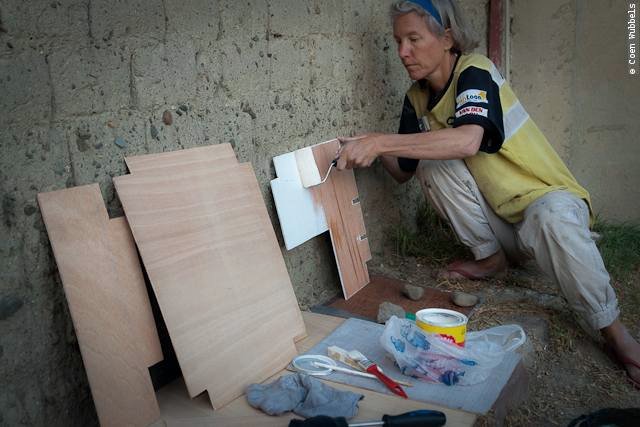
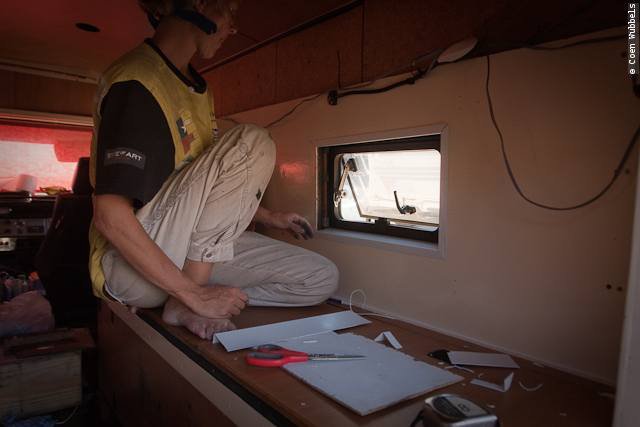
In one day we clean out our belongings and store them in our apartment. Now its time to disassemble the woodwork.
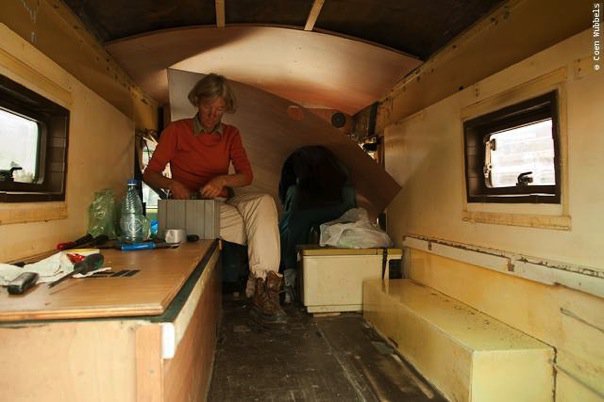
The benches and the ceiling are easy, I constructed them with Marc’s father seven years ago, so
I still remember how it is all fitted together. A piece of cake.
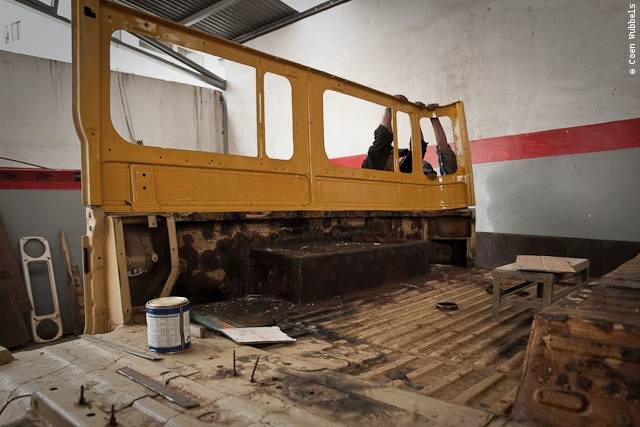
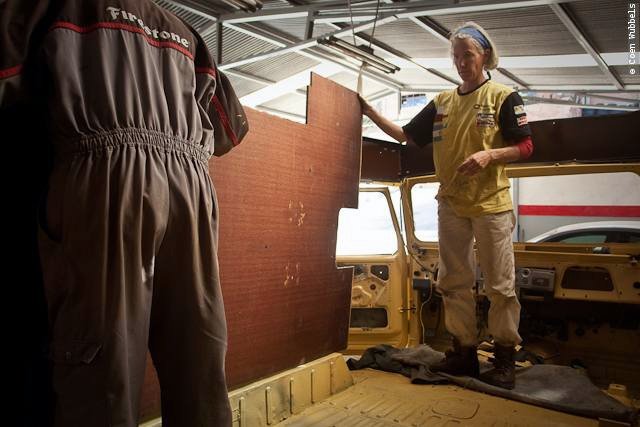
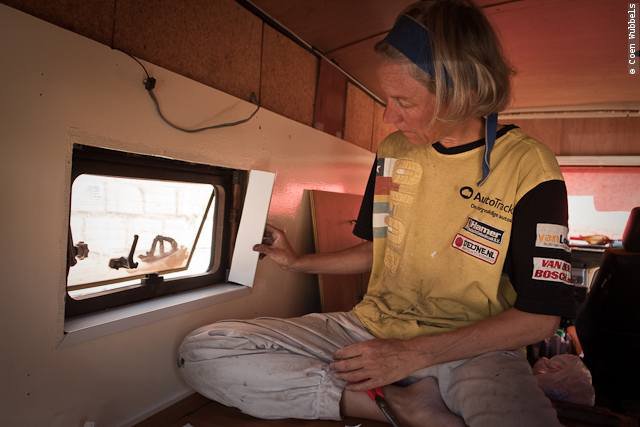
The biggest challenge now are the side walls. They were there when we bought the car, and I have no idea how they are fitted,
or let alone know how to take them out. Screws are hidden under several layers of paint and we first have to find them.
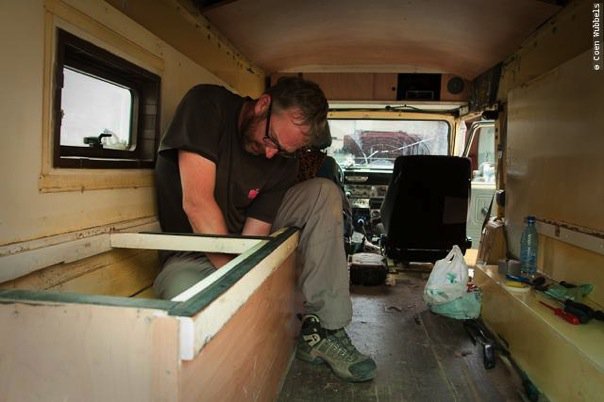
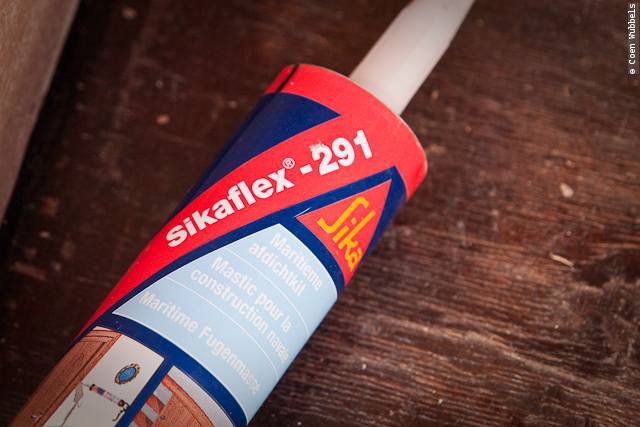
Sikaflex has been my good friend these last seven years, but now I curse the **** stuff.
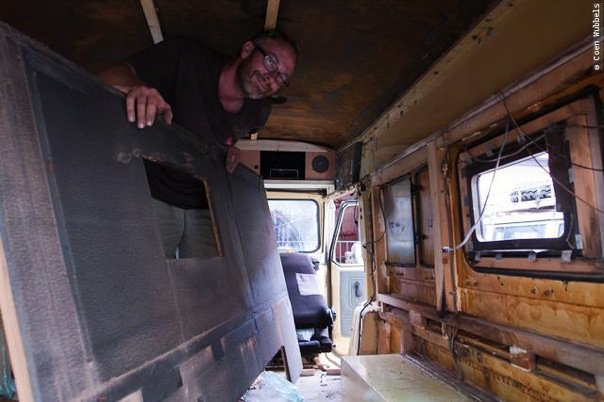
Then these nice little camping windows. How do they come off? The whole is stuffed with Sikaflex and nothing budges.
We decide to force the parts that would be easiest to replace, no other choice. I hope we can find the parts somewhere.
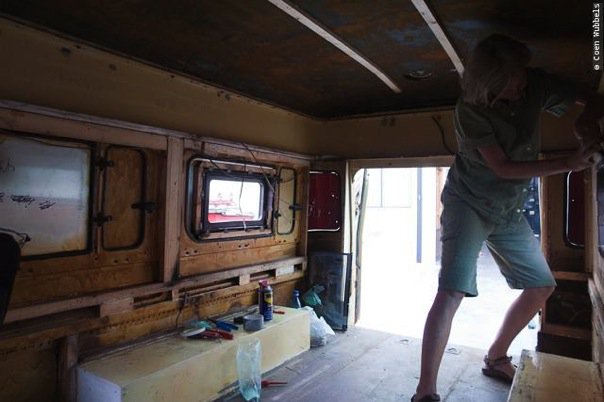
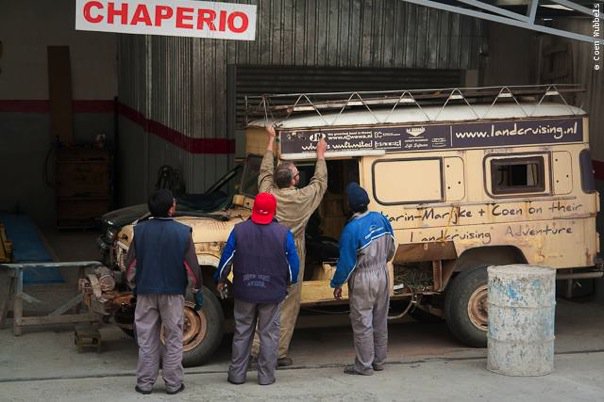
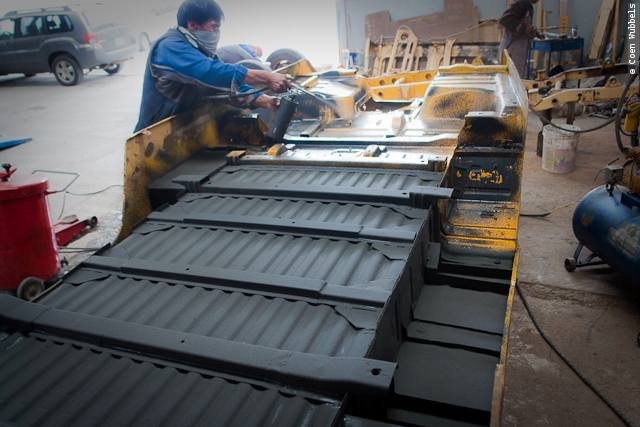
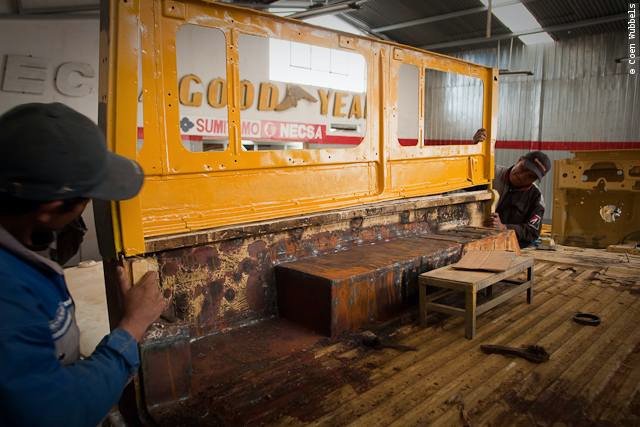
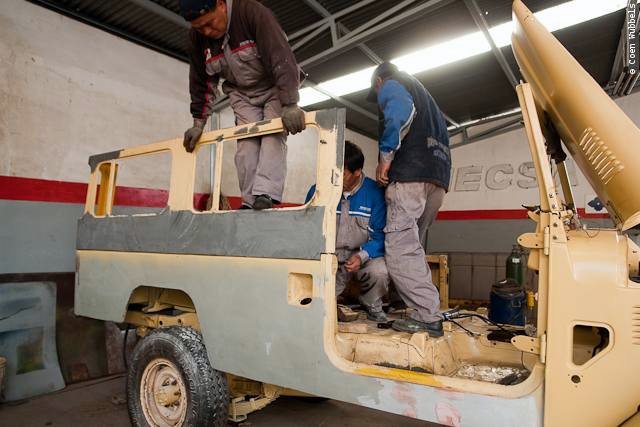
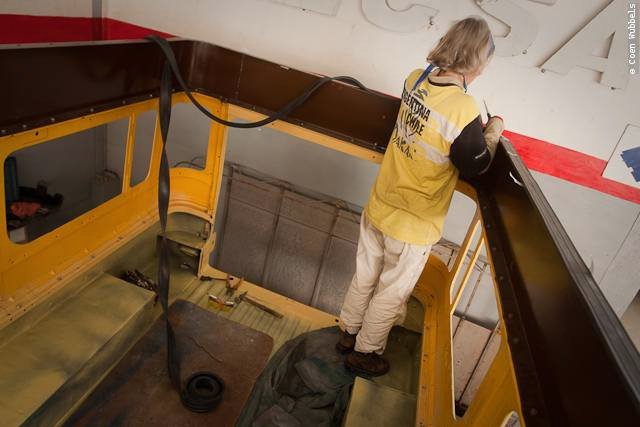
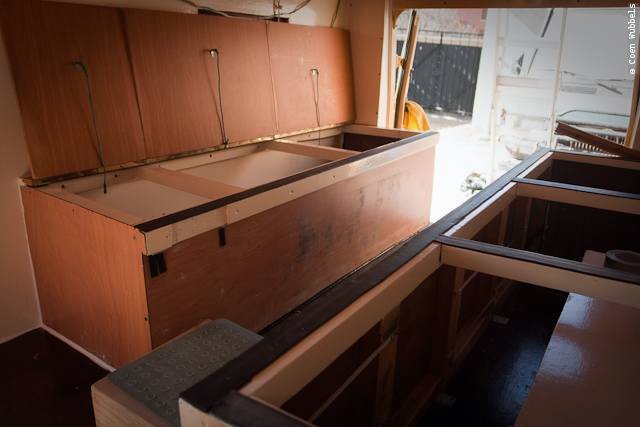
The side walls have gone now only the upper cabinet and we are ready to move to the ‘Chaperio’ [body shop] for the more bigger parts.
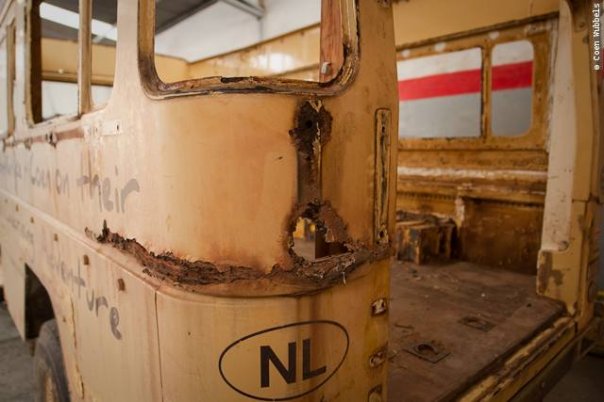
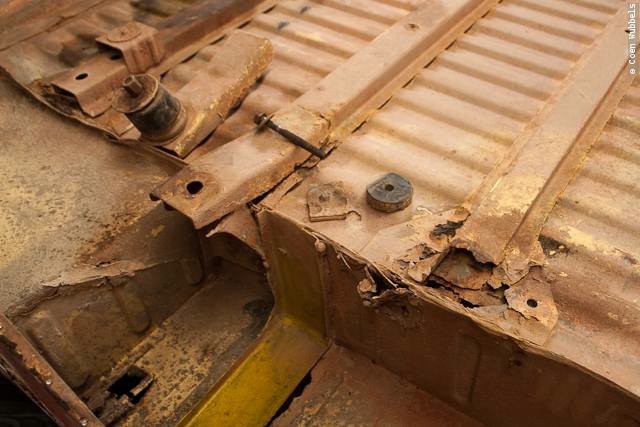
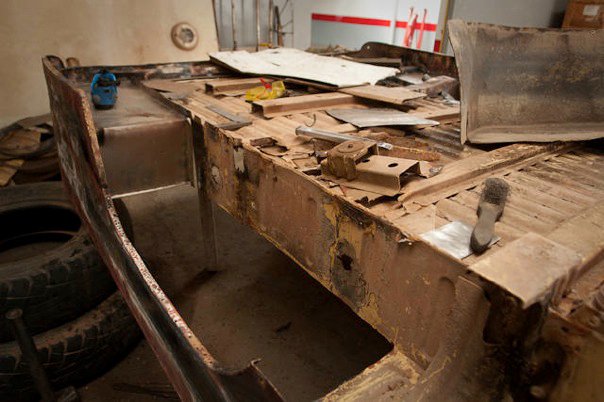
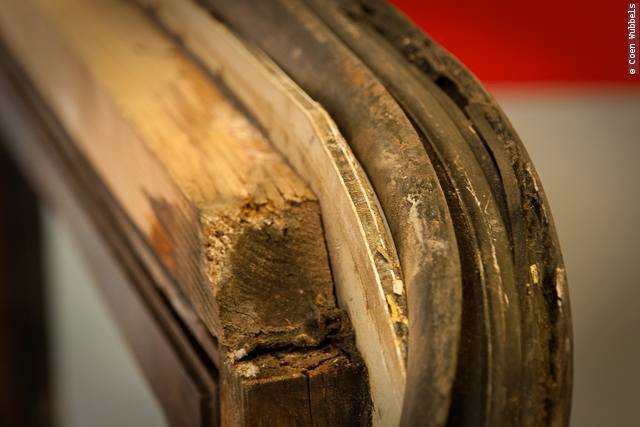
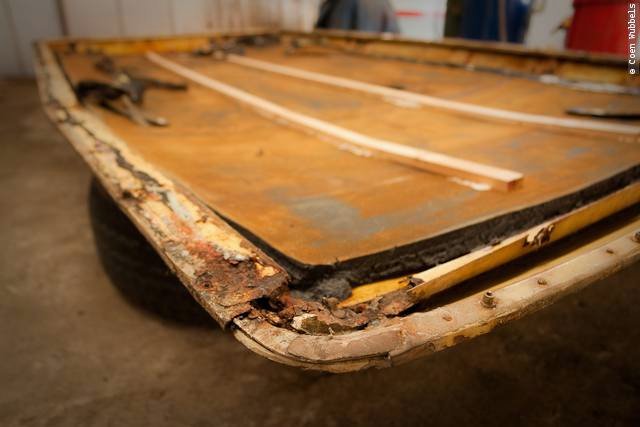
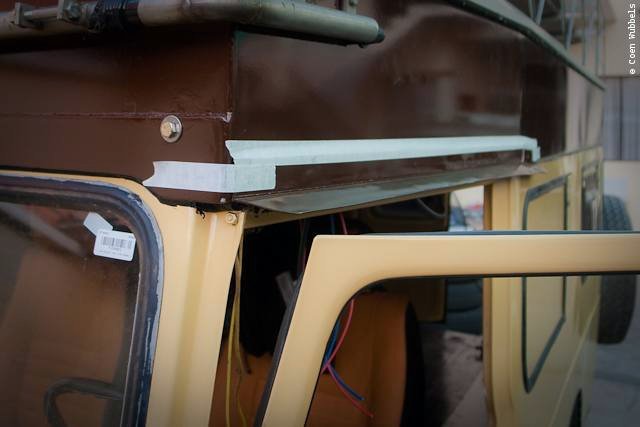
On this image you can clearly see what damage the water has done over the years.
Look on the lef side, the woodwork has completely decomposed. This must clear up some rattles in the back I hope.

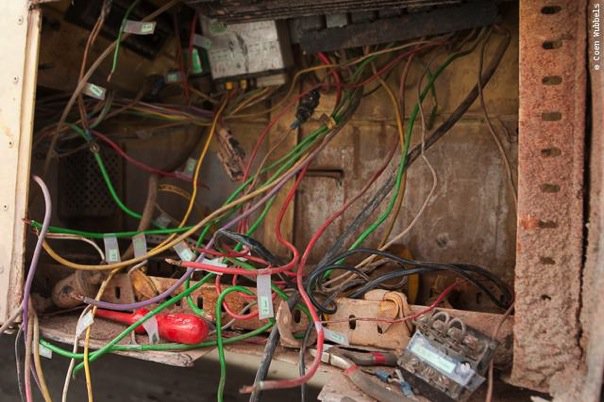
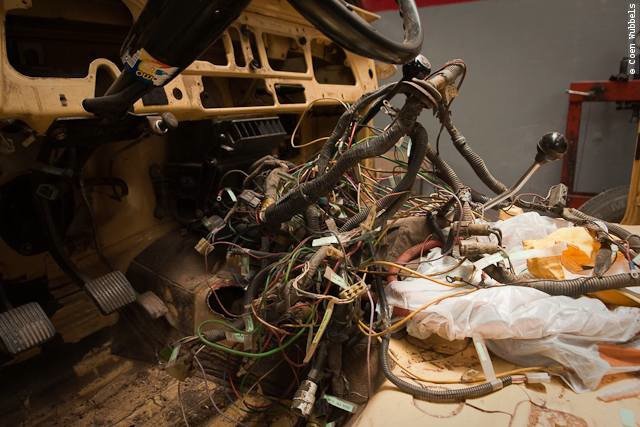
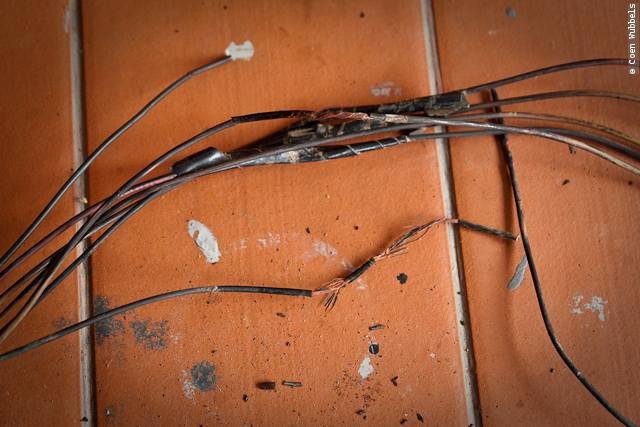
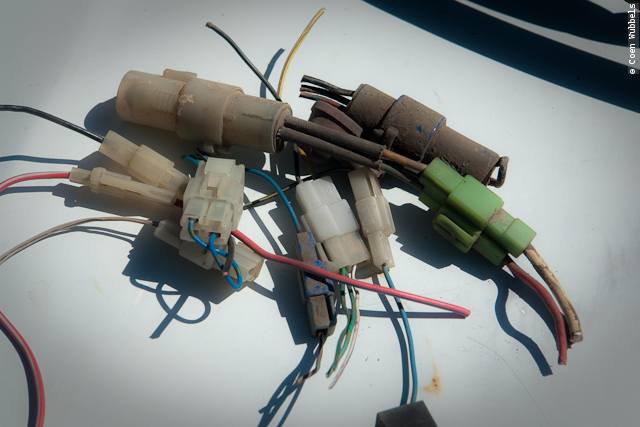
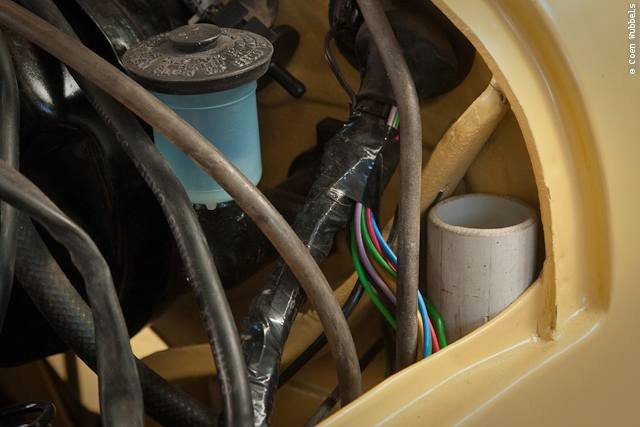
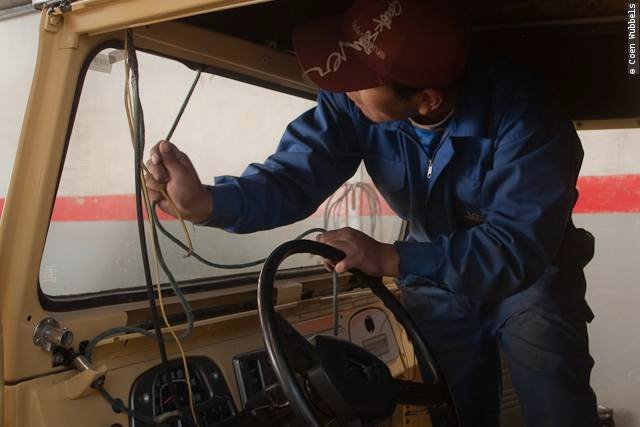
My worst enemy! Electricity. Now I have the opportunity to study once and for all where all those
wires are going and to draw up a scheme. Maybe replace some wires in bad shape and lead them all through a thick pipe to the front.
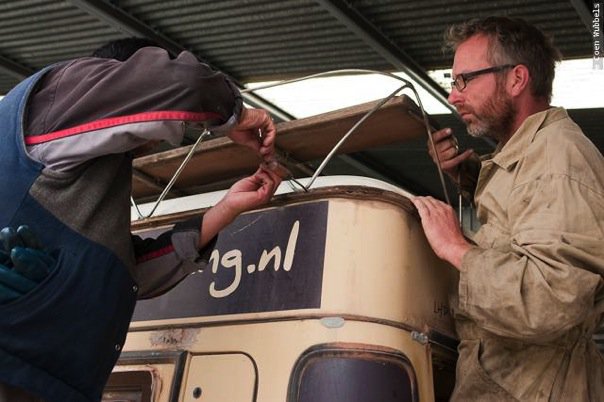
I’m telling the guys about Sikaflex that has been used between the roof rack and the roof, and between the roof and the
extension and between the extension and the side walls.
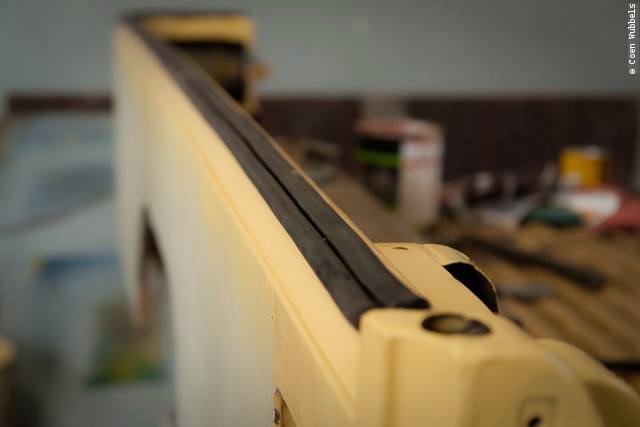
We discuss the best way to take apart the top section without damaging the original rubber seals between the parts.
Very carefully and with a lot of patience a thin screwdriver and a plasters knife we cut the roof rack away from the roof.
Pretty heavy with all those thick aluminium sheets on top.
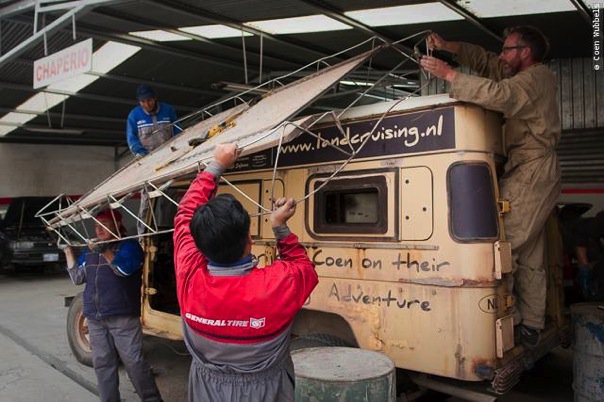
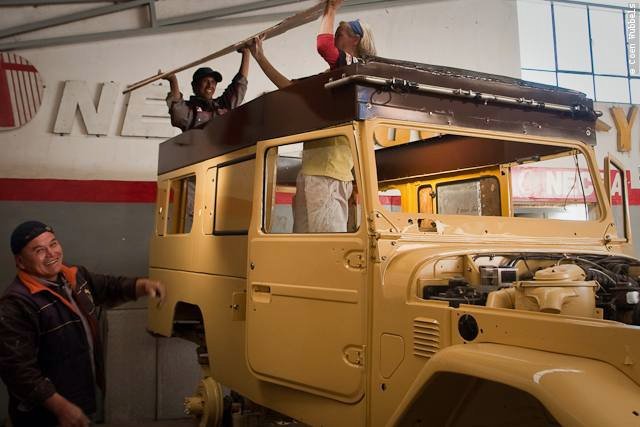
Next up, the roof. Again very carefully with the right tools trying to cut trough the Sikaflex. Jeeesss,
what is that stuff the guys keep asking me. So strong, not like normal silicone.
Later they will get more of this stuff to work on when they set on the wooden beams in the side walls.
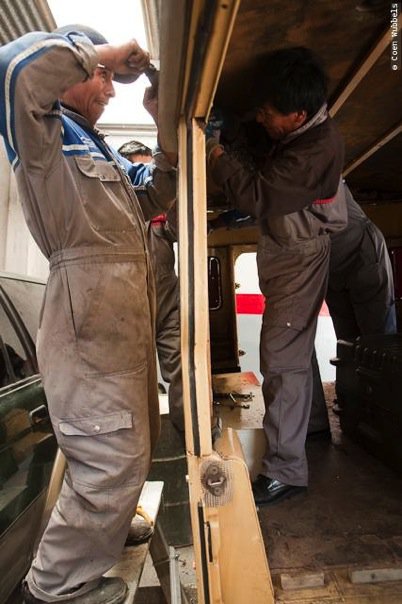
After an hour the roof comes off and we can cruise bikini style at last!
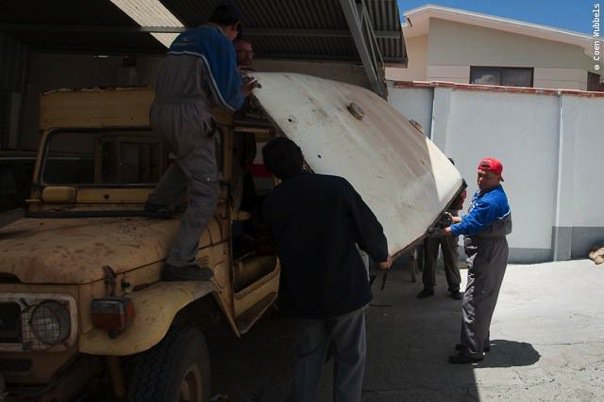
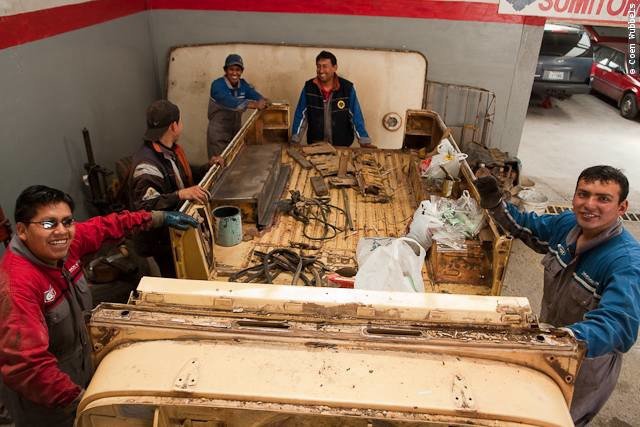
The guys are happy, the roof is gone and the heavy work can begin.
The original windows have been replaced by aluminium sheets and camping windows. All put in with a lot of Sikaflex. You can imagine the work.
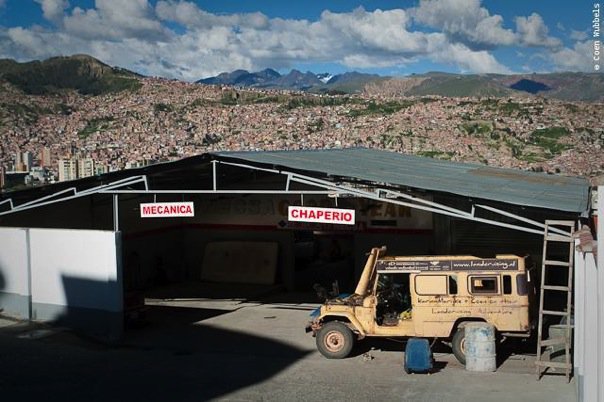
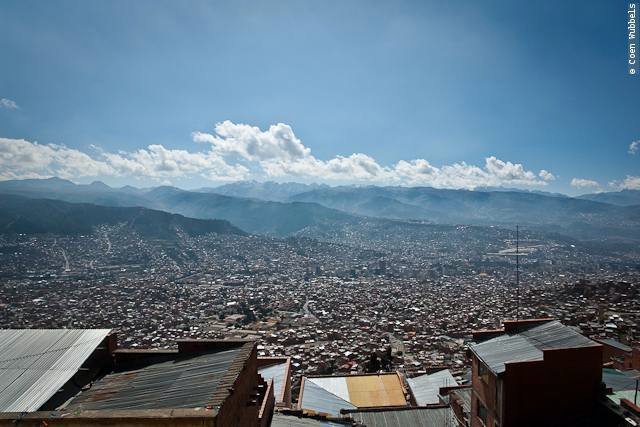
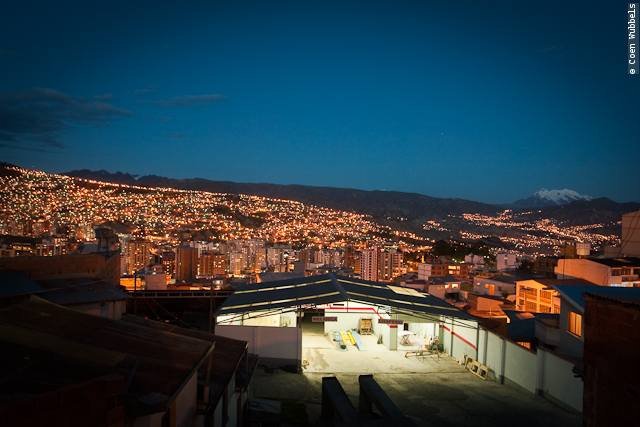
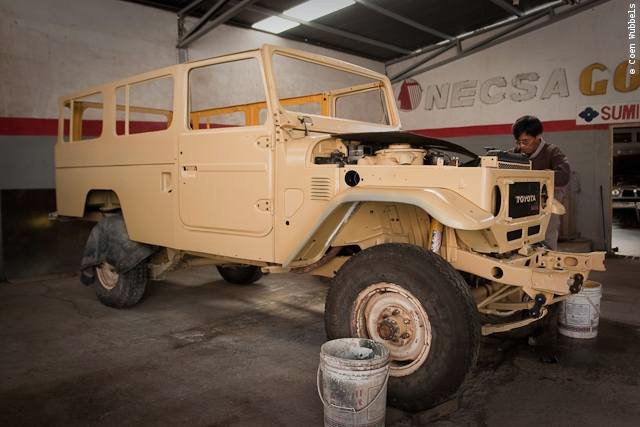
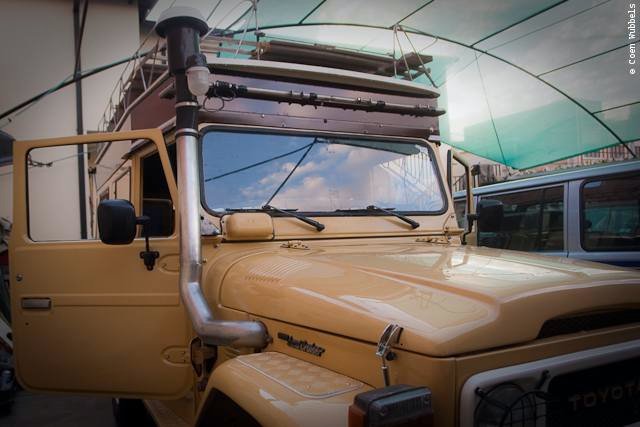
This is how the body shop looks like with a nice view over La Paz, Bolivia. Working at 4.000 meters!
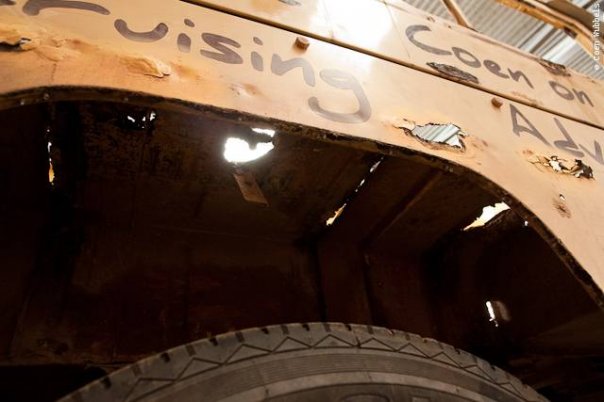
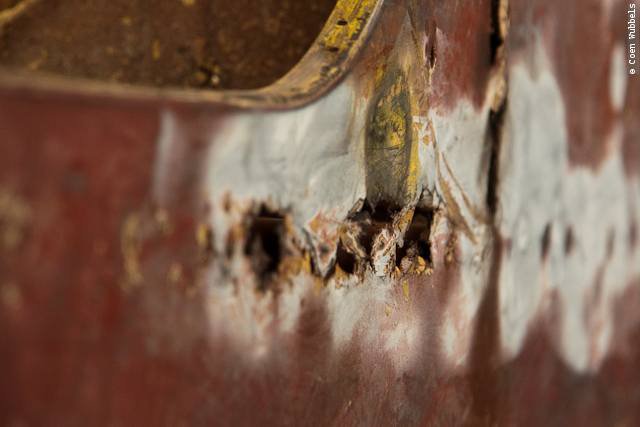
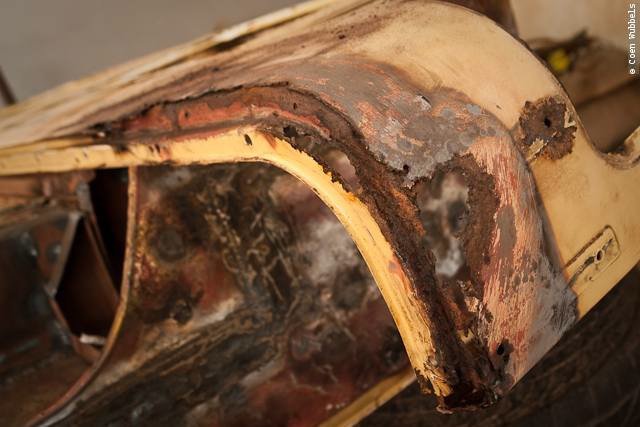
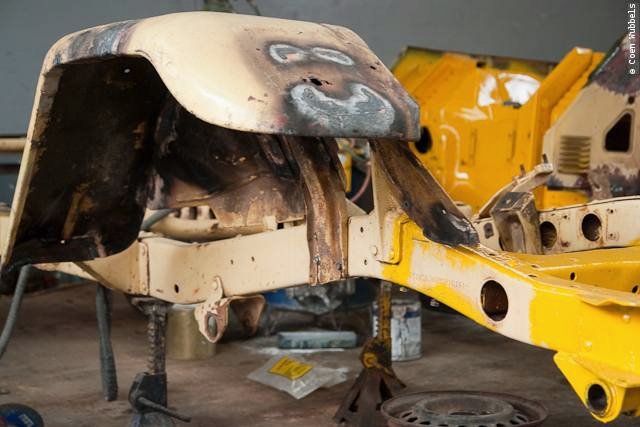
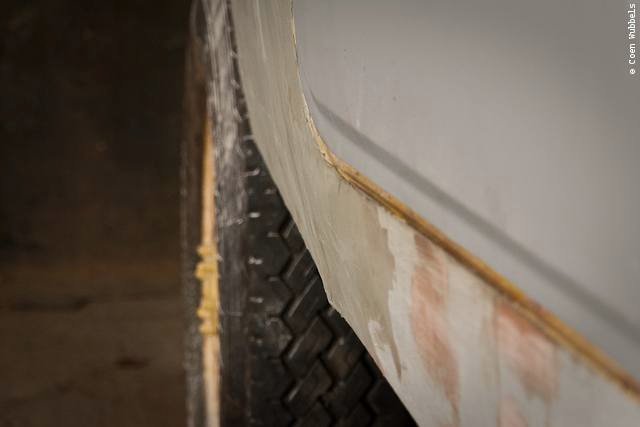
I’m loosing count on the days here, but after five days of carnival, we are at it again. You can see we have developed some small holes in the left rear.
The other side isn’t looking any better. Although the cooked oilseed from Fred my brother-in-law
has worked as you can see in the upper right hand side.
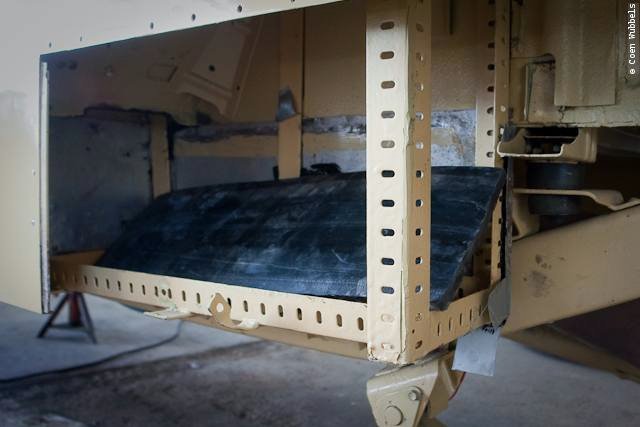
Other places I could not reach, so here you can see the famous Land Cruiser wheel wells. Always a problem.
Luckily we had some waterproofing made in Buenos Aires and we did not get any wetter inside.
So these protectors will be replaced when the wheel wells get fixed.
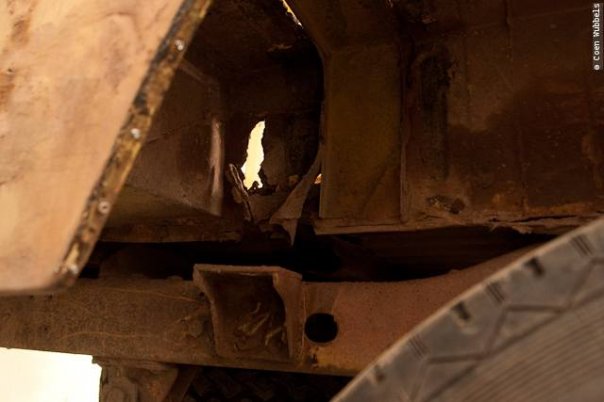
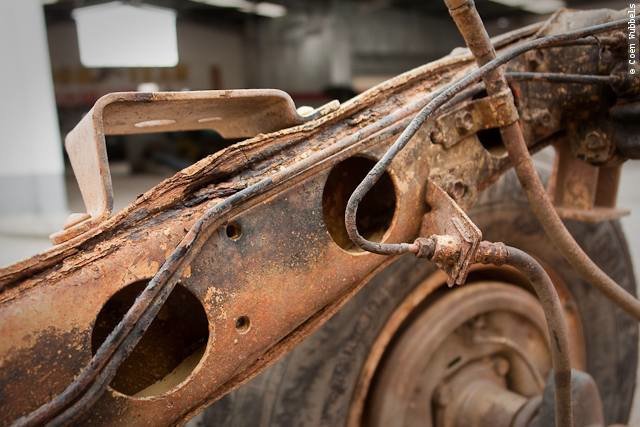
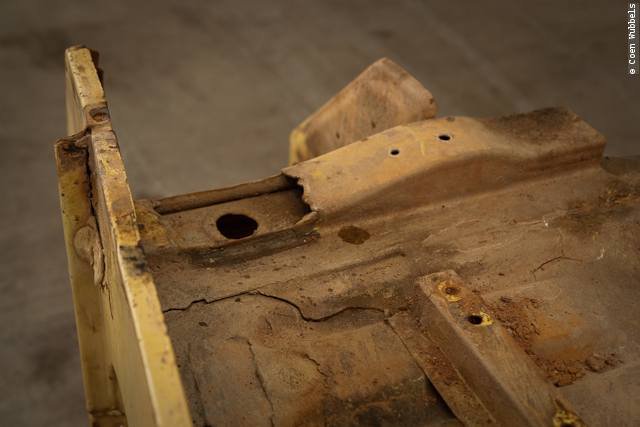
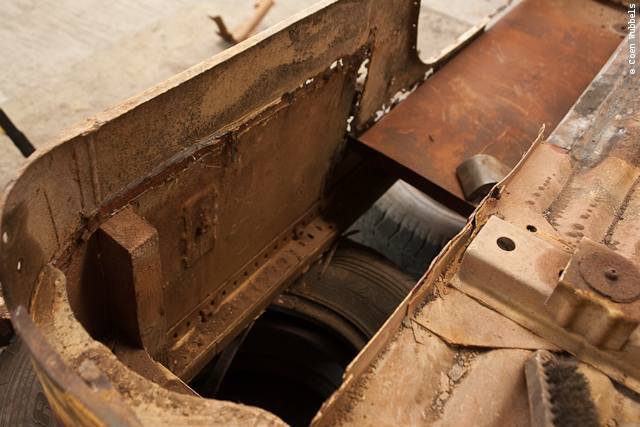
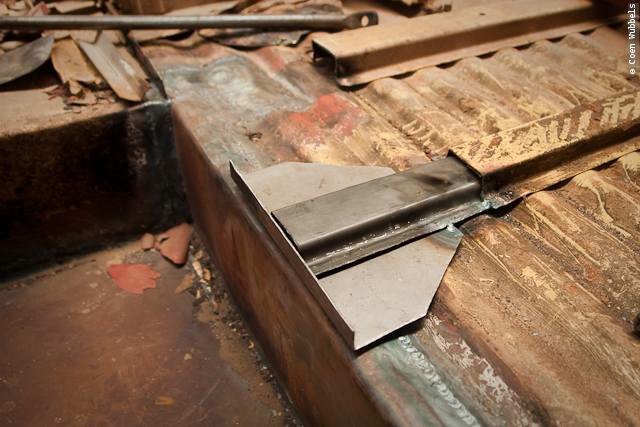
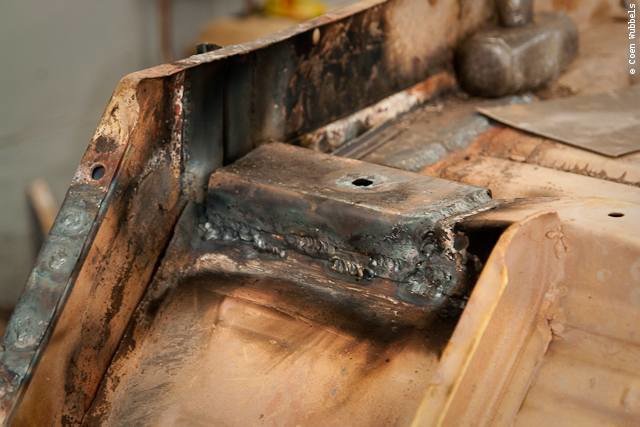
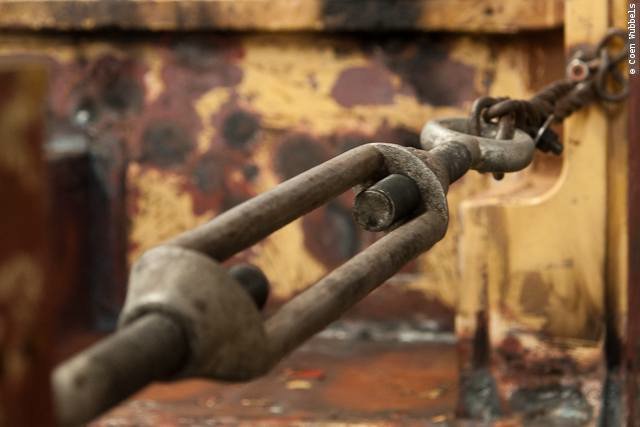
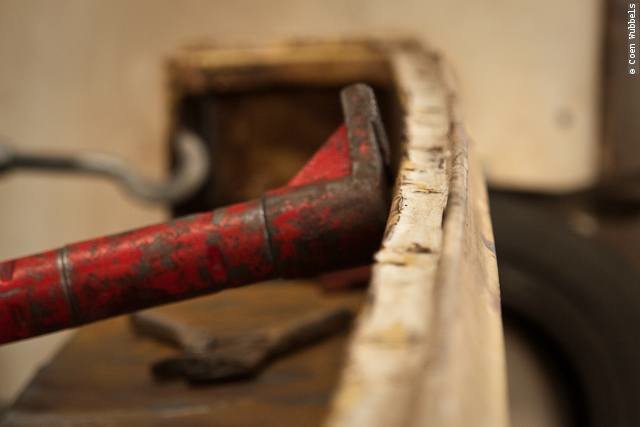
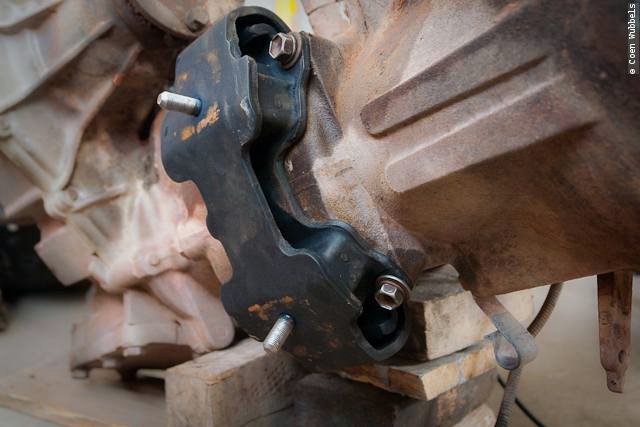
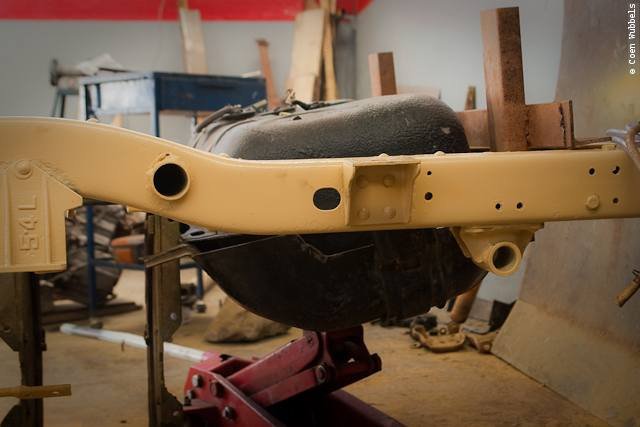
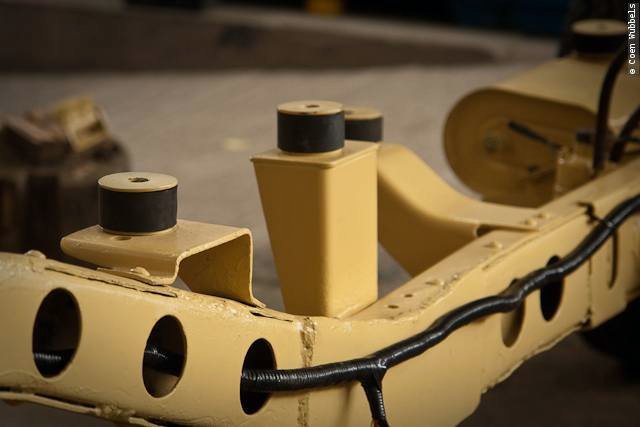
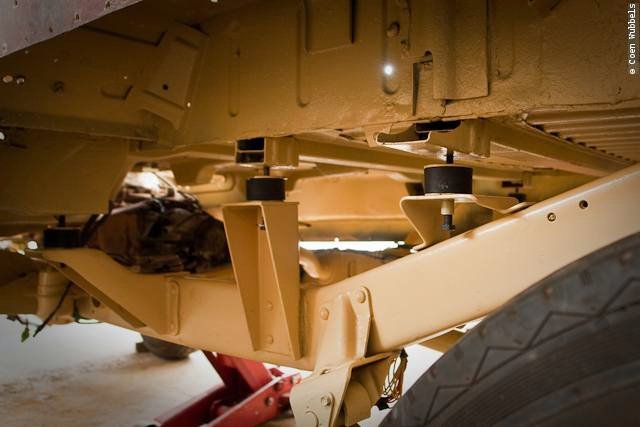
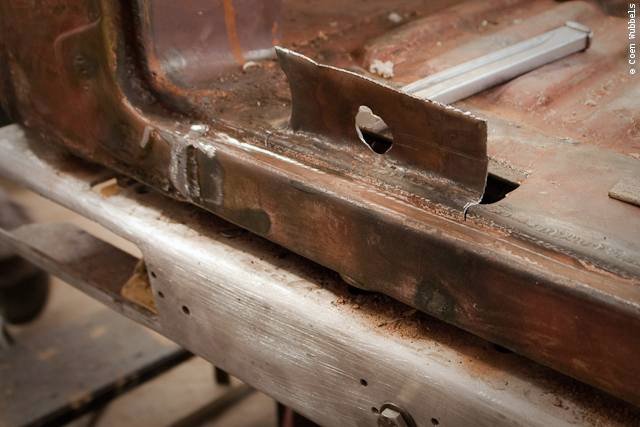
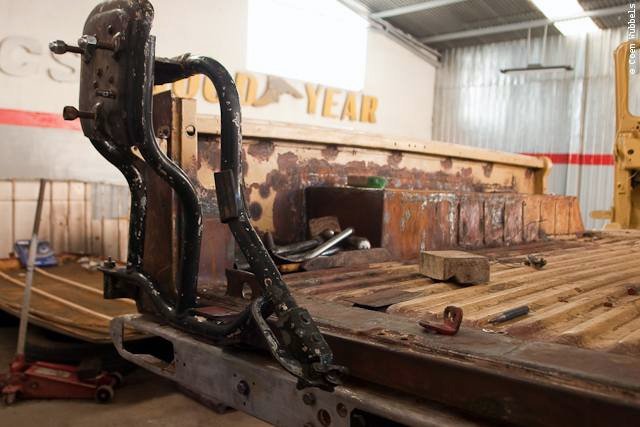
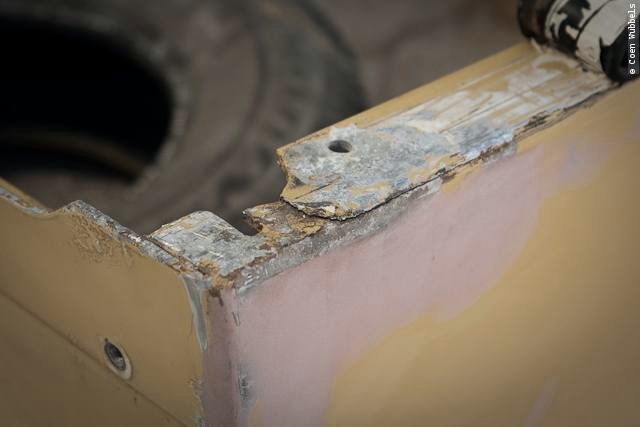
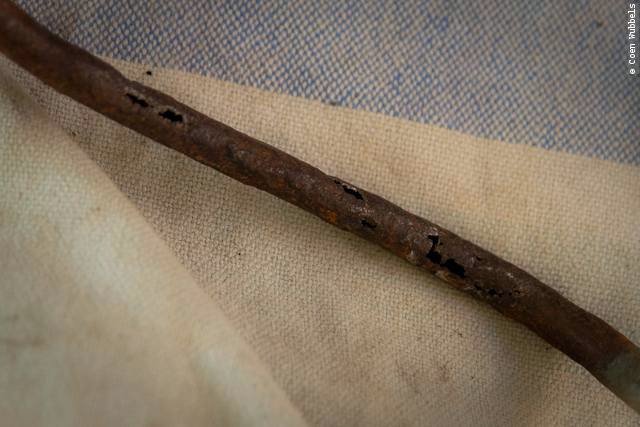
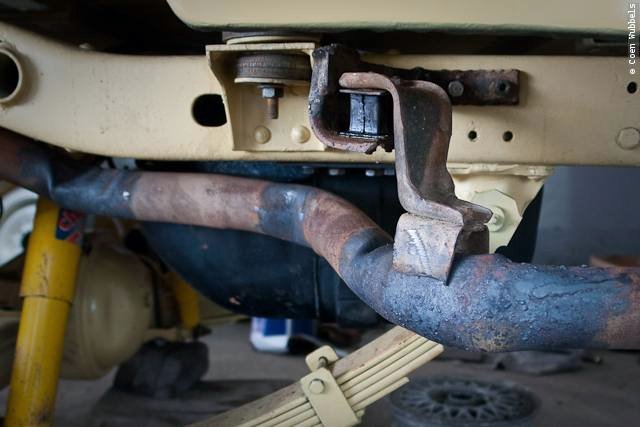
A broken support beam made the decision for the restoration final.
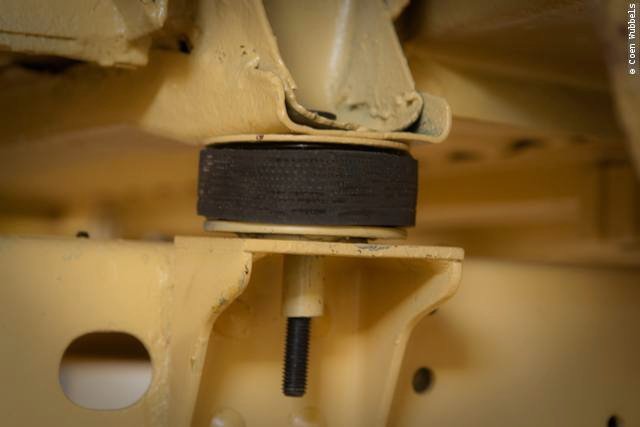
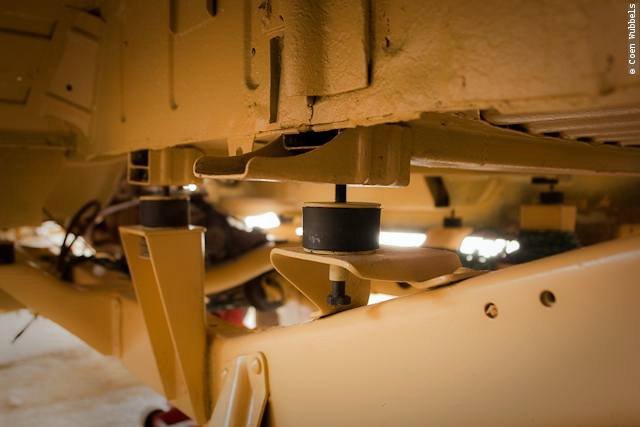
There is a whole part missing and there supposed to be two rubbers there which has also been gone for some time.
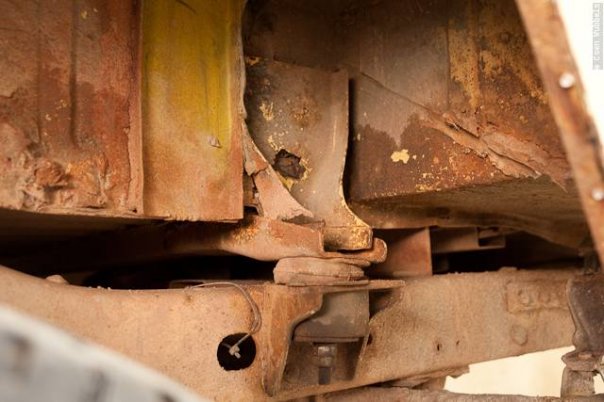
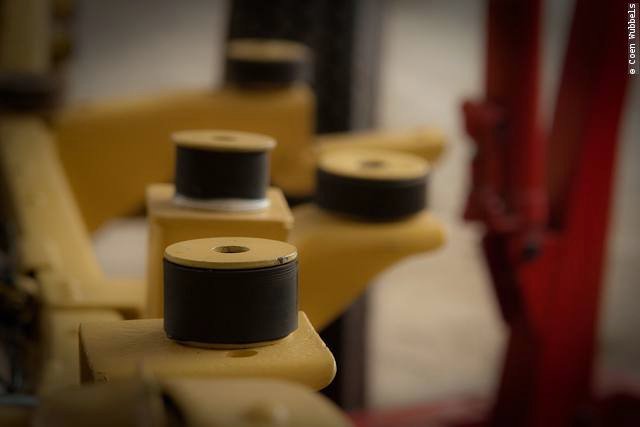
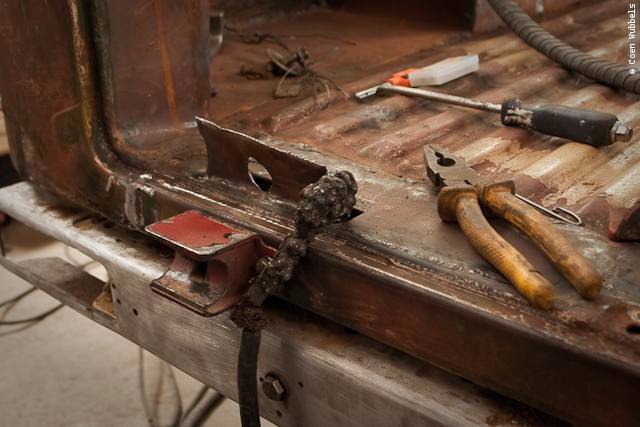
This is how the other side looks like. You can see the upper rubber in bad condition and the lower rubber
which I fabricated of some rubber hammer. The support itself isn’t looking that good either.
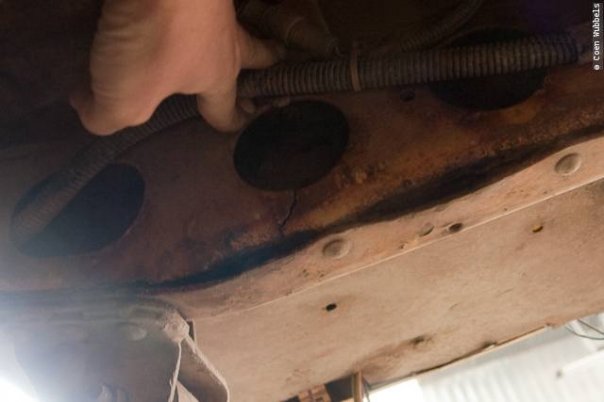
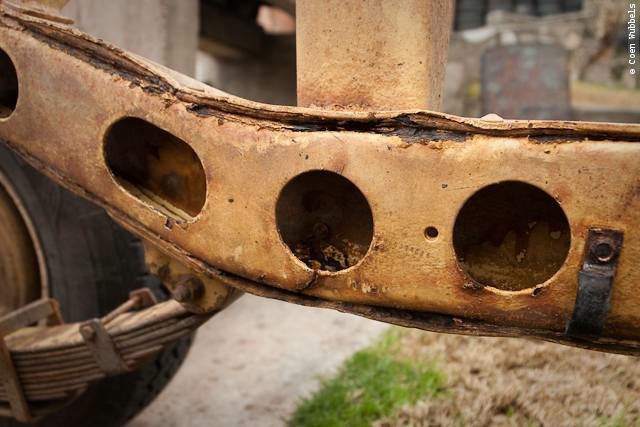
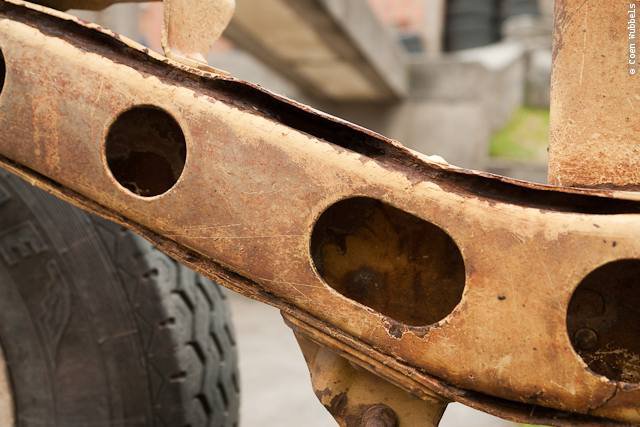
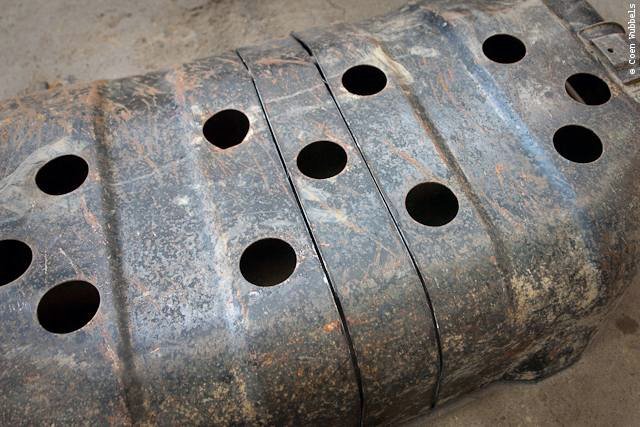
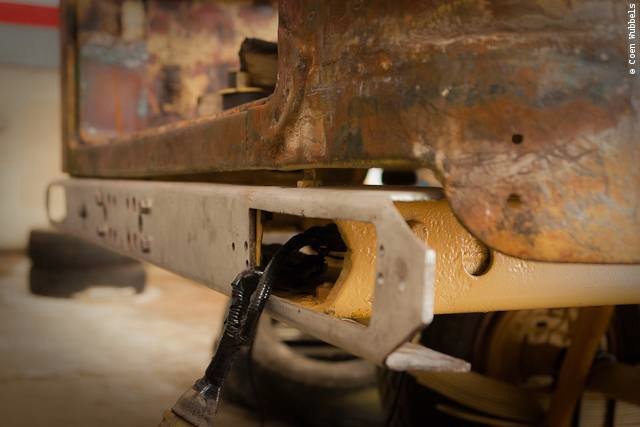
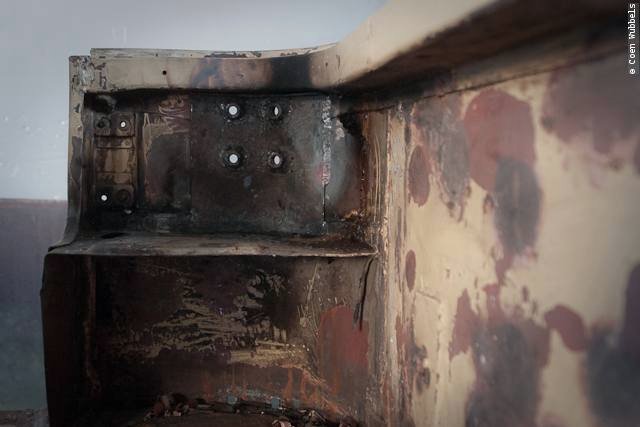
While cleaning the underside I came across this! A fractured chassis. And the frame is full of caked mud.
I don’t even know if this is how the origina frame looks like. I always thought it should be an open U beam?
These are two U beams riveted together and the mud, water can’t go anywhere. Maybe I should drill some holes into it?
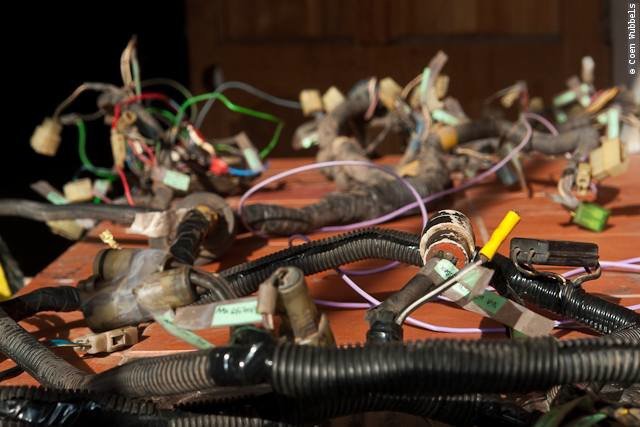
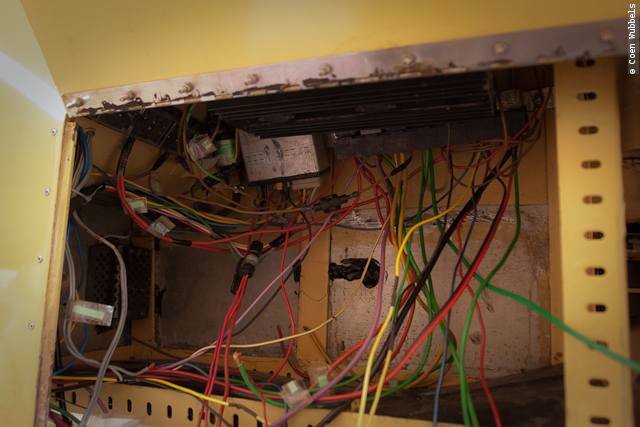
All electrics has to go. So all cables, connectors and links have to be labeled in order to get it back the way it was or better.
Simon is busy getting the aluminium board undone from its nasty Sikaflex.
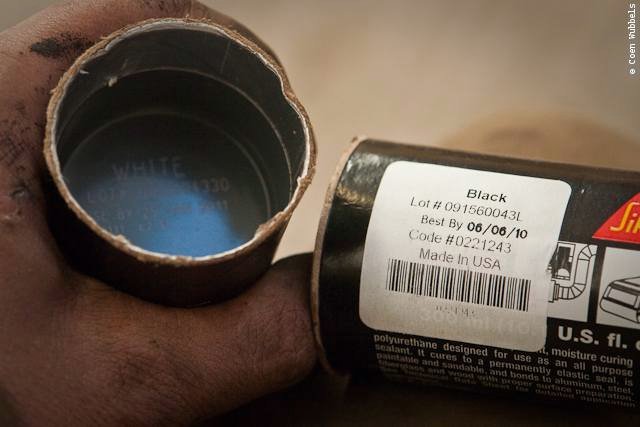
A good thing is that I have visited Sika Bolivia headquarters today and they have promised me to get my my fix;
although not the Marine version that I wanted, but a multipurpose number 211 in grey, black or white.
Centimeter for centimeter Simon gets the sidewall separated from the aluminium board as to not damage the original seal.
To get an original back door seal it would have to be flown in from Japan for around 120 USD,
I would not begin thinking what a roof seal would cost!
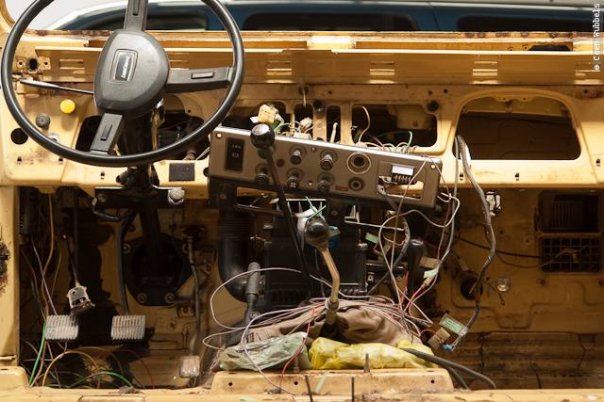
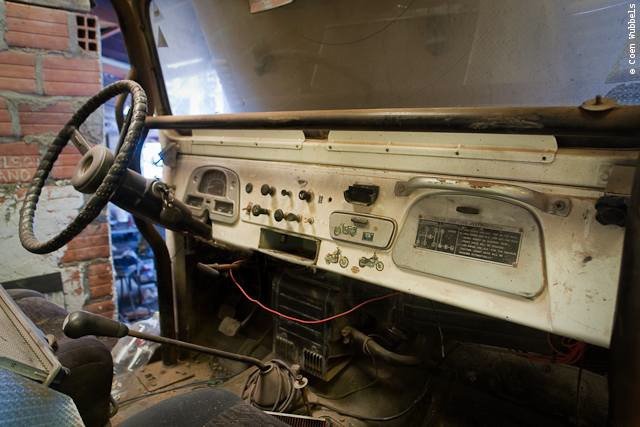
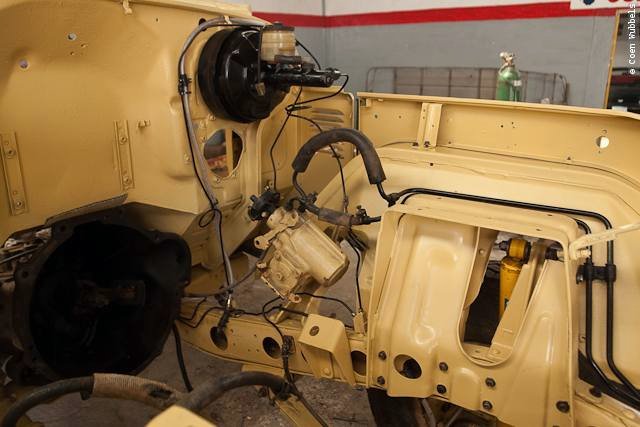
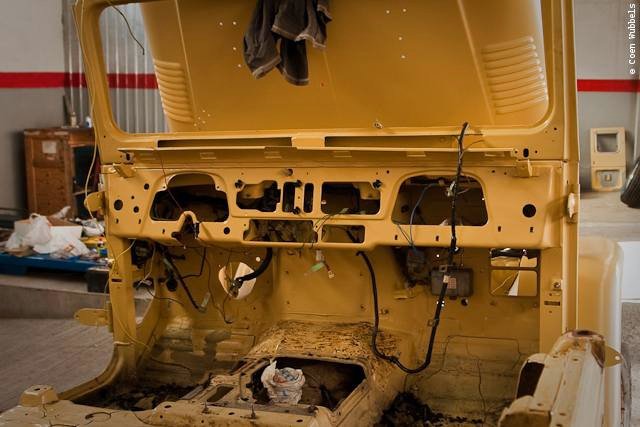
All cockpit cables have to go as well and all have to go trough these little holes in the firewall.
Very annoying is that the Webasto heater control unit has these big connectors that won’t fit trough there at all.
So either label and unclip every one plug or cut it and reclip every cable later?
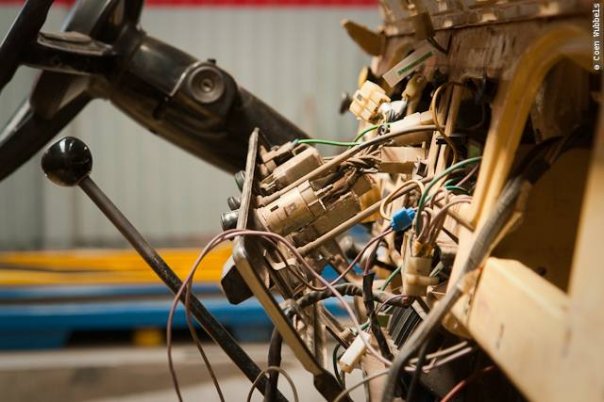
Progressing slowly. It looks like plenty of room, but still many cables are just long enough and
connectors are stiff and difficult to get to [not heaving small Japanese hands]. But I will get there.
Esteban already cut some parts out here on the right side.
The side panels can be salvaged with only some minor holes on the sides.
Finally I got the spaghetti wires out. Labeled everything as good as I could.
Hope I can fit everything in the right place again in a few weeks.
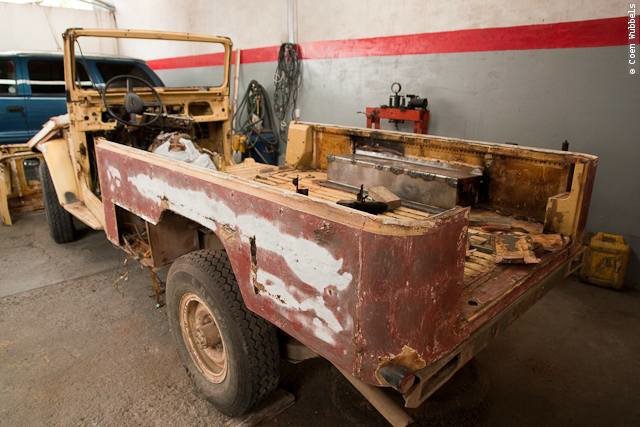
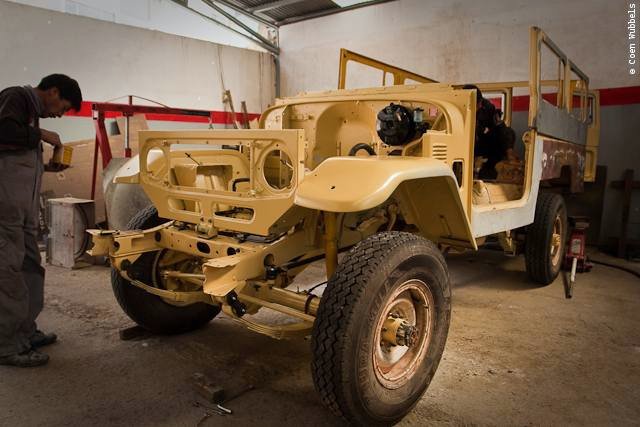
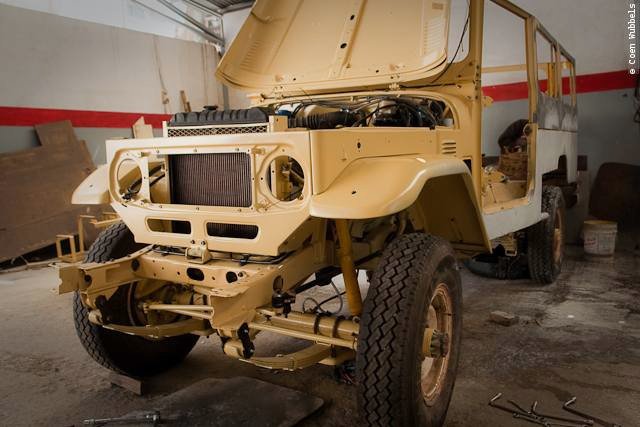
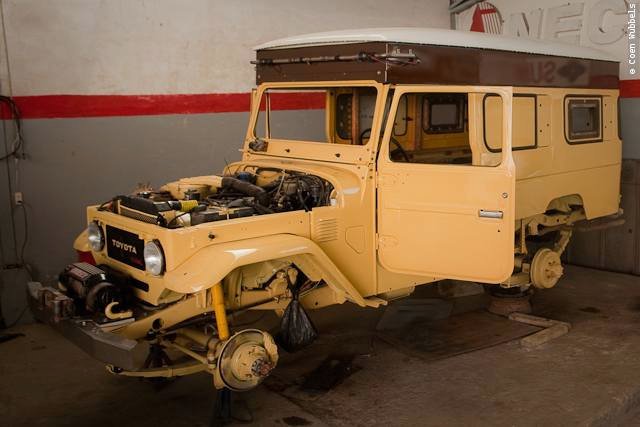
Now it is starting to look more and more like a rally old timer.
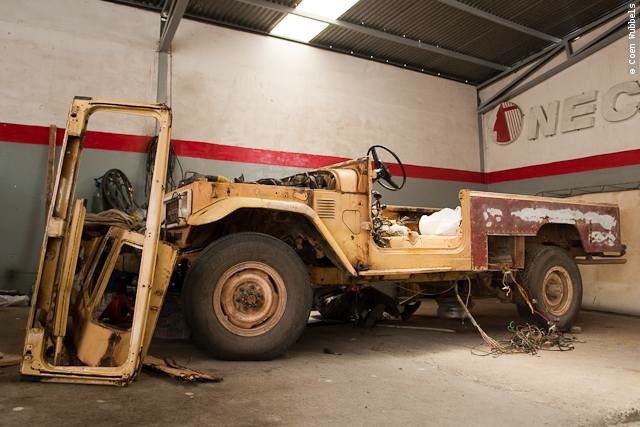
Esteban and Simon helping me a hand getting the tub loose from the frame.
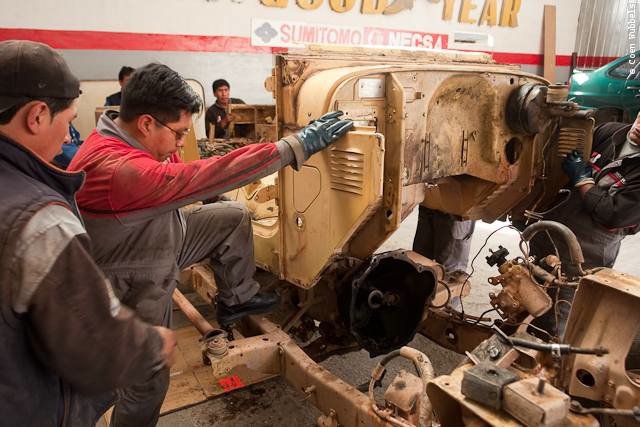
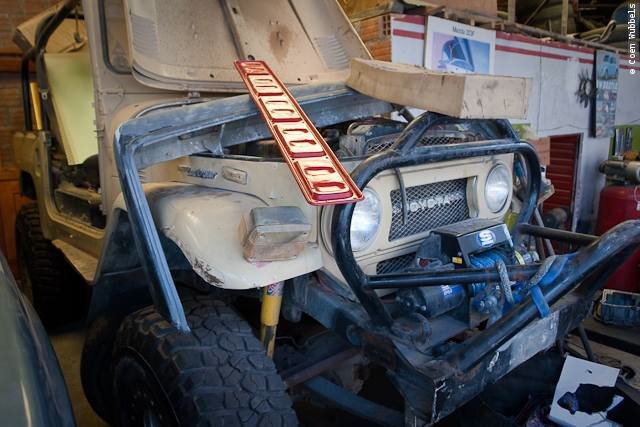
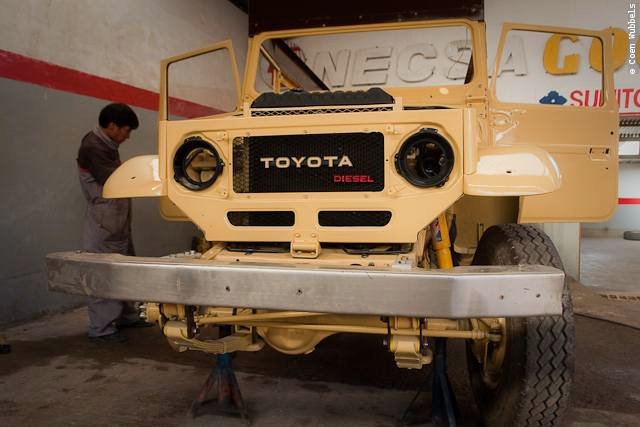
The fenders have gone, and the grill is tilted forward. The dismantling has started in earnest now.
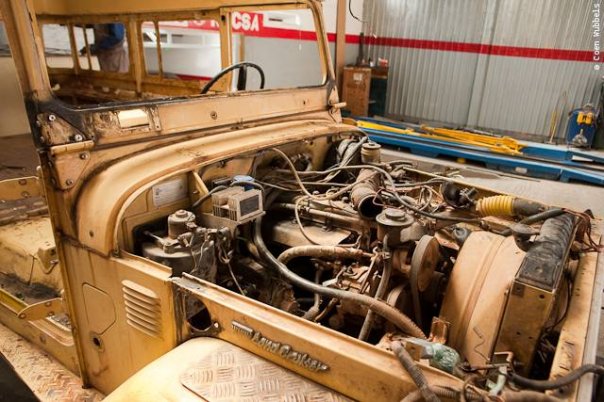
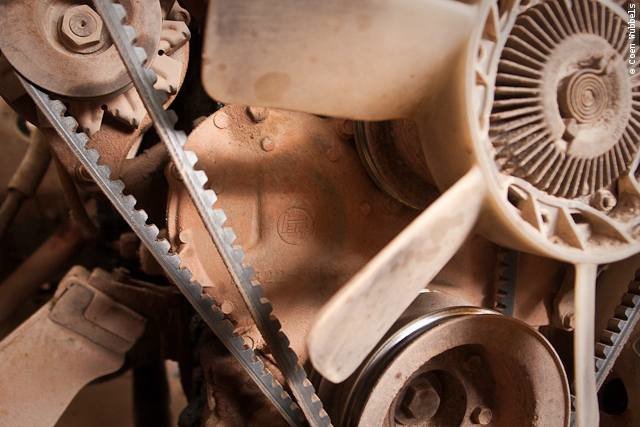
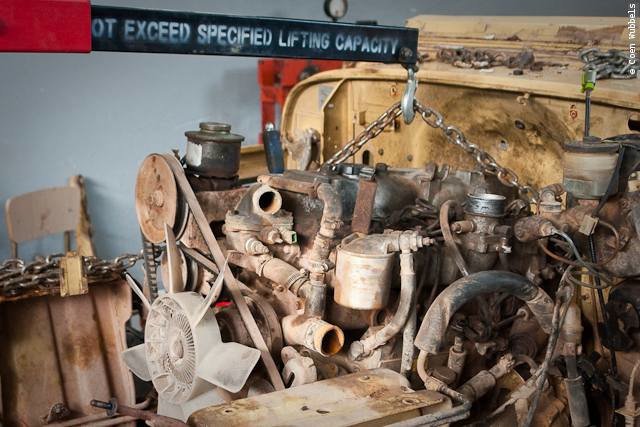
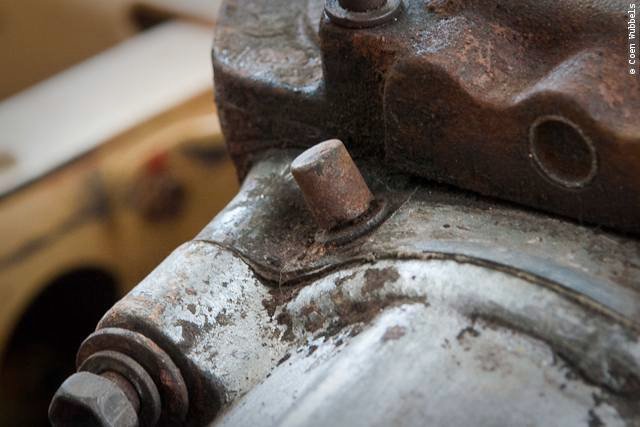
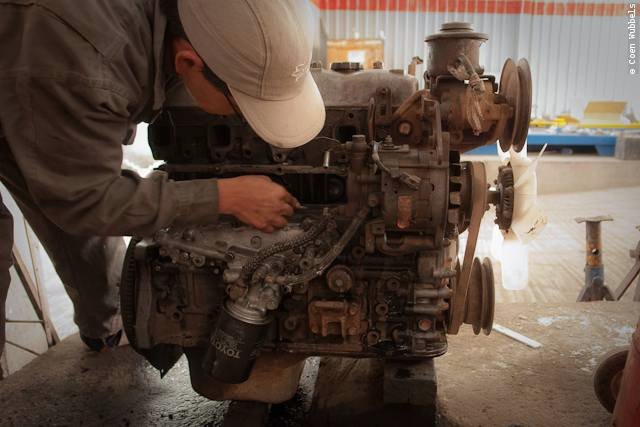
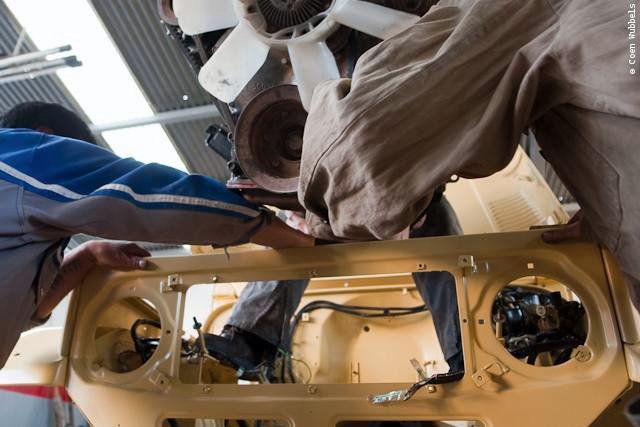
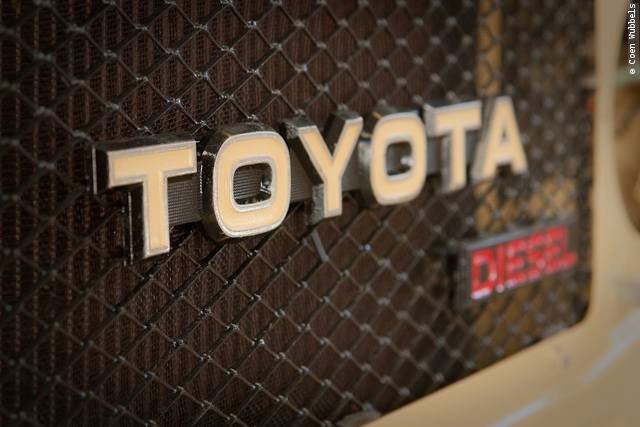
Now clearly visible the ‘TEQ’ logo of Toyota on the engine. I don’t know if newer engines and parts still have this?
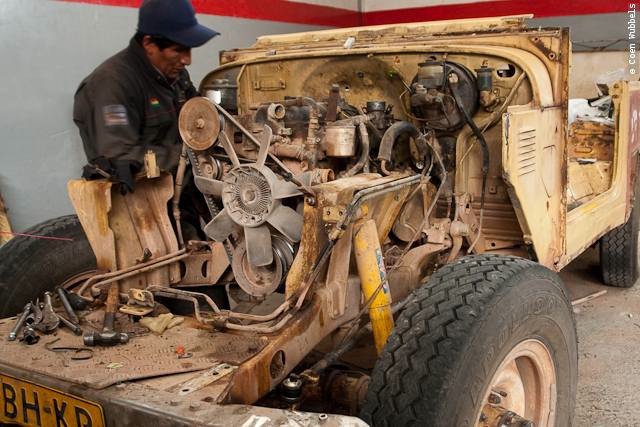
Caesar is helping me solving the stuck-nuts-problem on the exhaust.
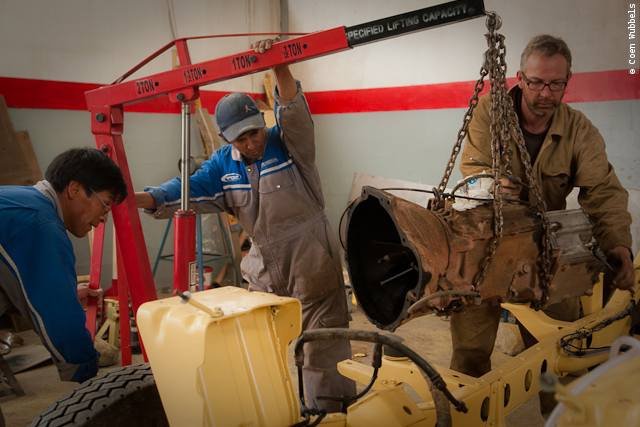
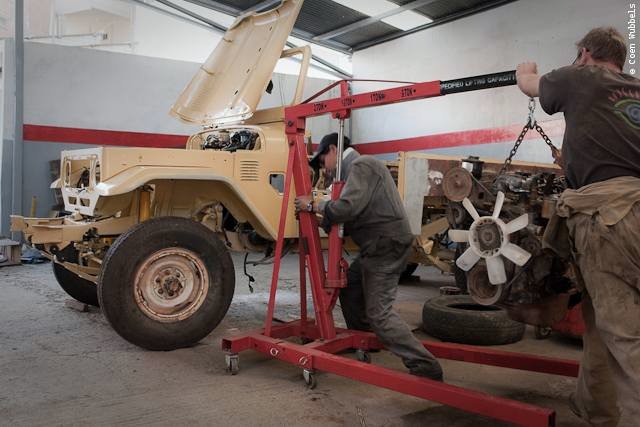
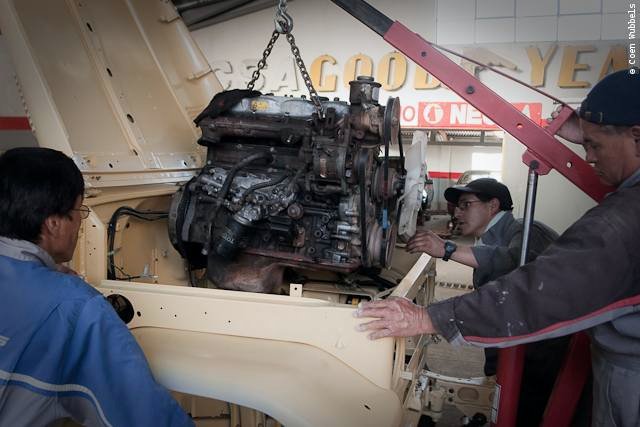
Time to lift the famous 3B out of what is left of the truck.
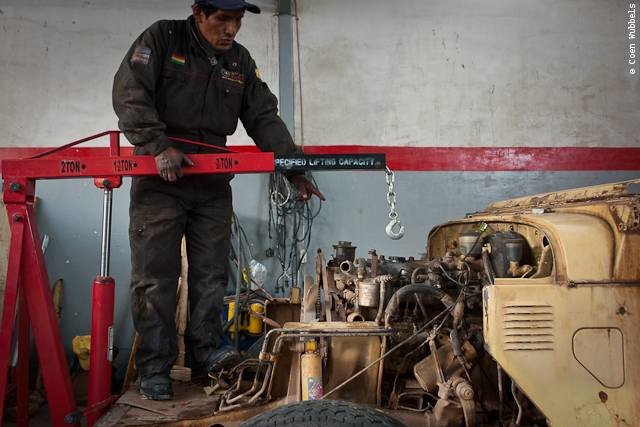
There is some speculations on the weight of the engine, because the lift cannot get closer to the engine, or there is not enough patience to clear the bumper and get closer.
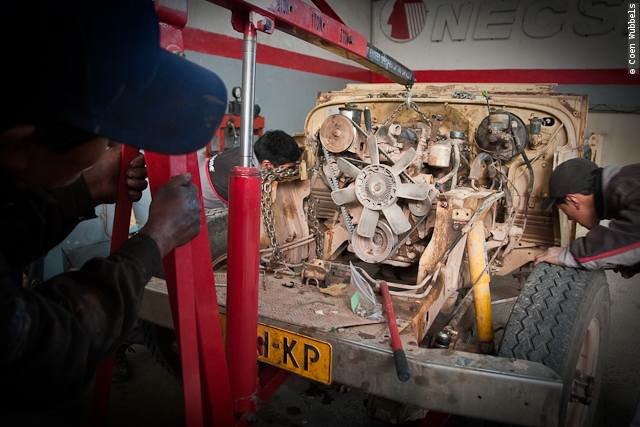
Getting the engine unstuck from the gearbox is the biggest challenge. Moreover when the exhaust is still attached
to the engine as we could not get two nuts of the pipe. While pulling and pushing we managed to ruin a pretty
good engine mount [the fifth in three years] and still got surprised when we need to take the oil filter off because of the exhaust getting in the way.
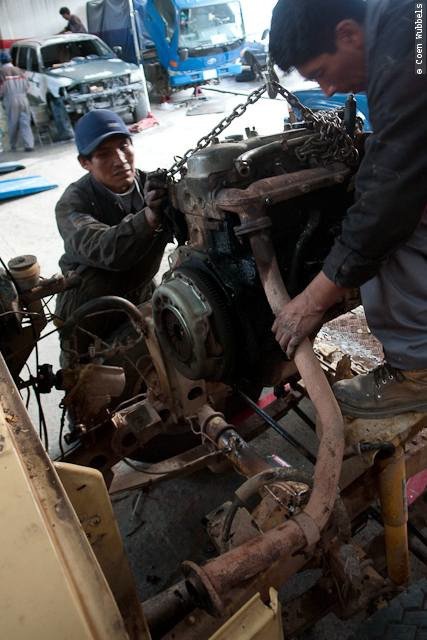
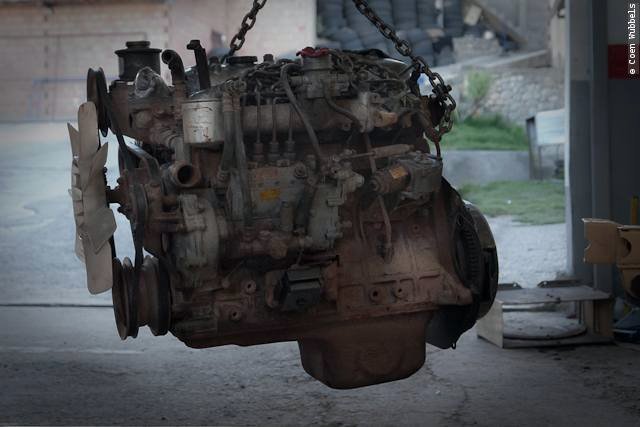
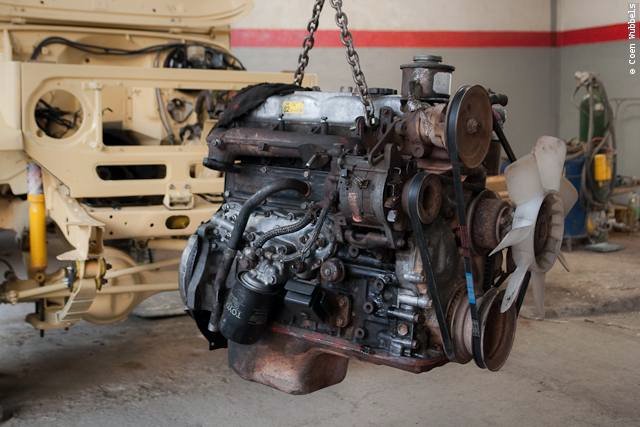
At last she gives away and the engine is airborne. The oil you can see on this side of the engine is still a mystery to me.
For seven years this side of the engine is covered in oil, not leaking, but sweating a little. There is no oil consumption.
Maybe while the engine is out we can clean it up and take it for some testing and see what is the problem?
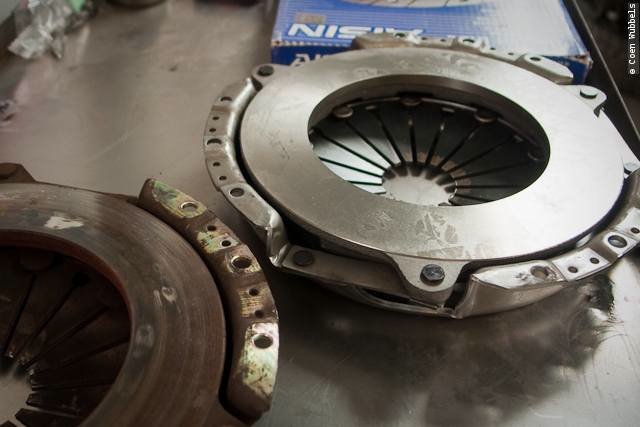
This might be also a good time to take a close look at the clutch and see that status on that.
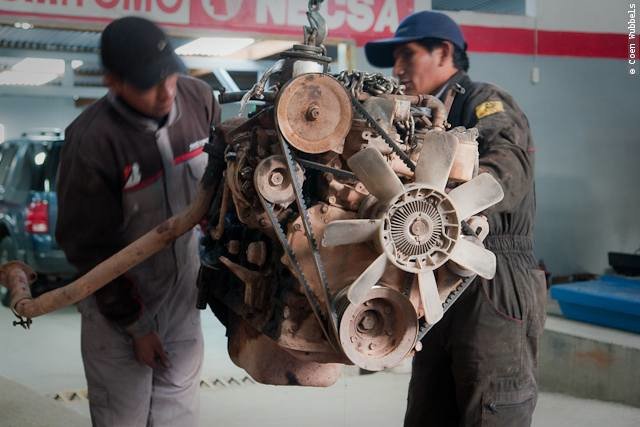
Hanging suspended in mid air is the famous 3B engine.
Maybe we could find an old Volvo air conditioning unit and attach it for us of compressed air only? If there is time and money that is.
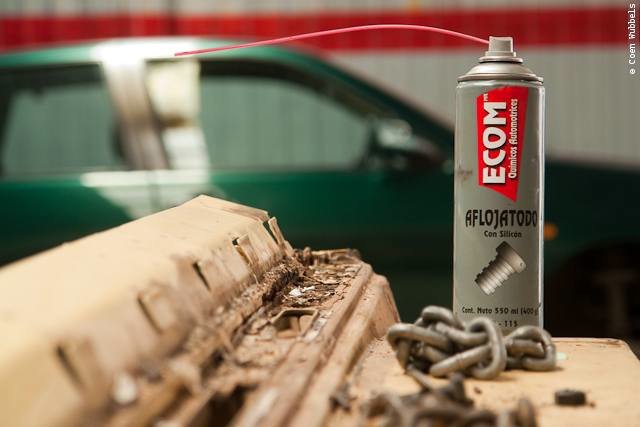
My favorite friend these days: ‘Aflojatodo’ – unloosening everything.
A Mexican cheap copy of the well known ‘WD40’ or ‘Liquid Wrench’ cans.
I like the long tube on this can for those hard to reach places. 550 ml for USD 4 it’s a bargain here.
and am continuing it now….
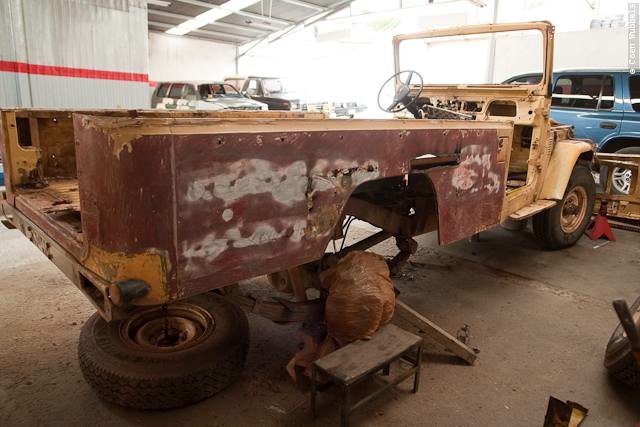
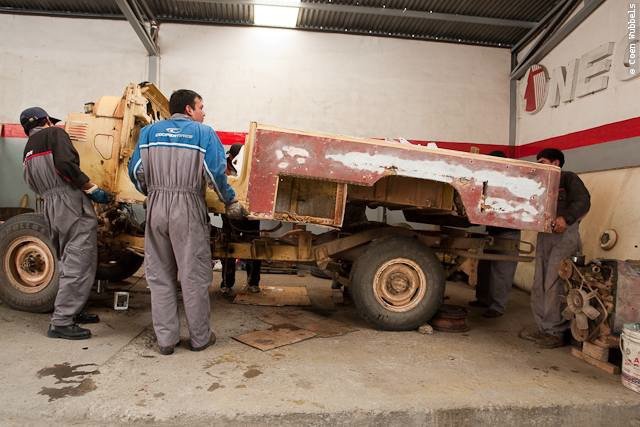
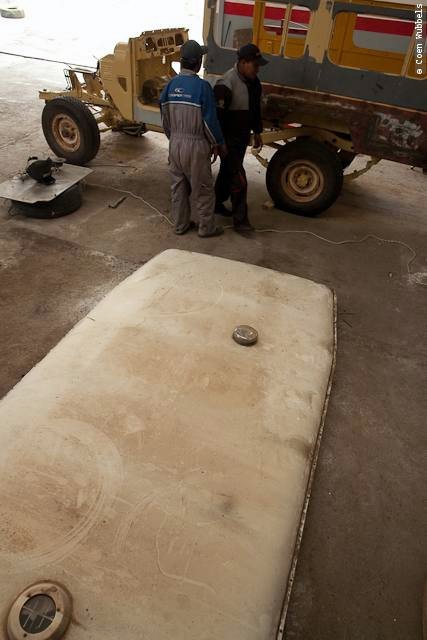
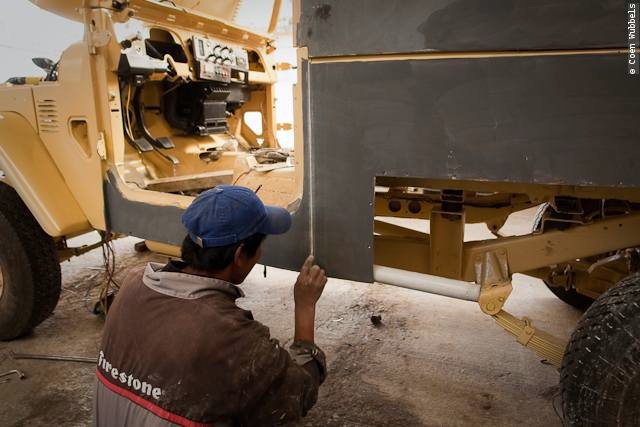
We gather the boys for the ‘moment supreme’ – getting the tub separated from the frame.
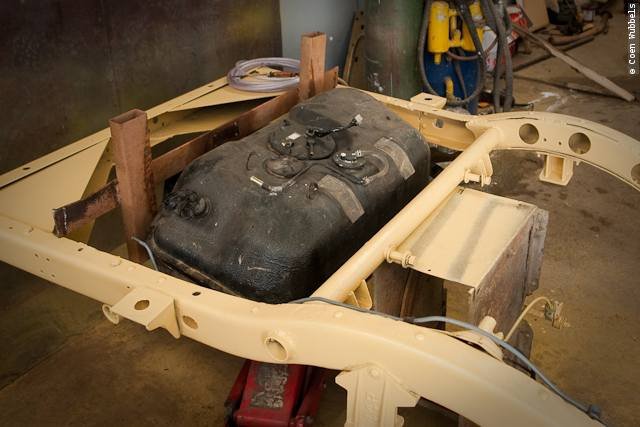
Lifting a clean 45 frame is still pretty heavy even if it is stripped from the 85 liter tank.
It takes some precarious steps before we have the tub clean from the frame, but with all the helping hands eventually it happens.
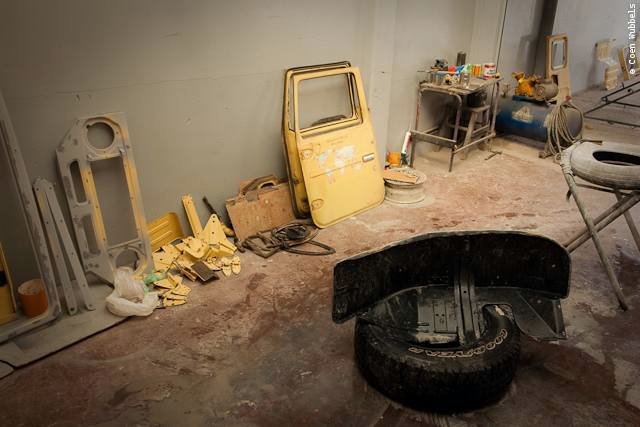
Not much room to maneuver at the back end, because somebody put an engine there on the floor!
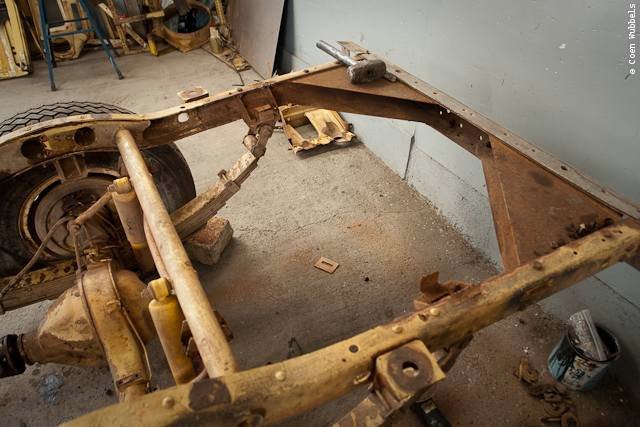
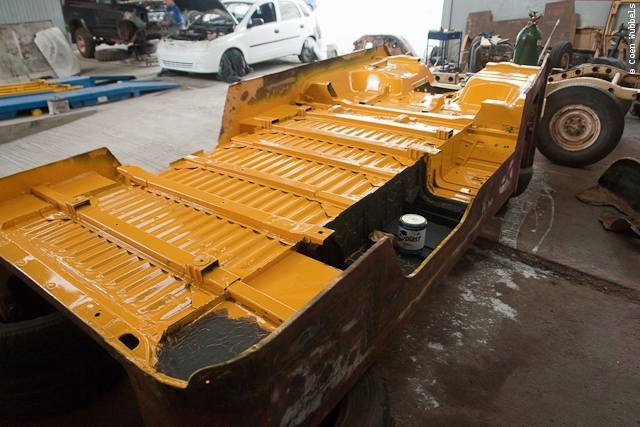
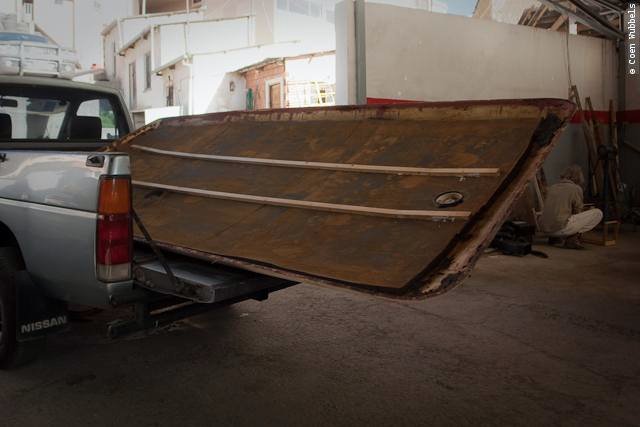
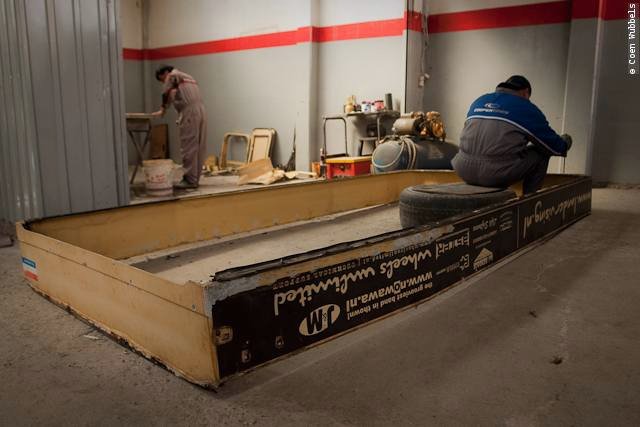
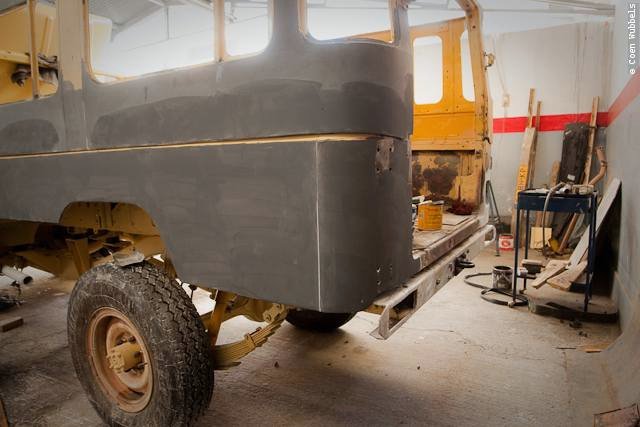
So the tub is off and wheel the frame outside for some serious cleaning and getting all the mud out.
Those tires look gigantic this way, or are my Bolivian friends that small?
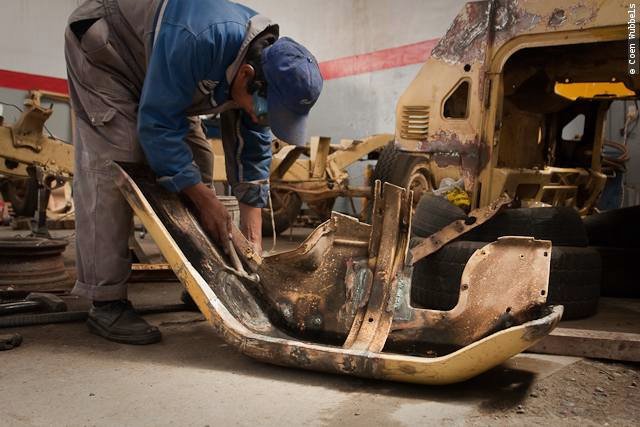
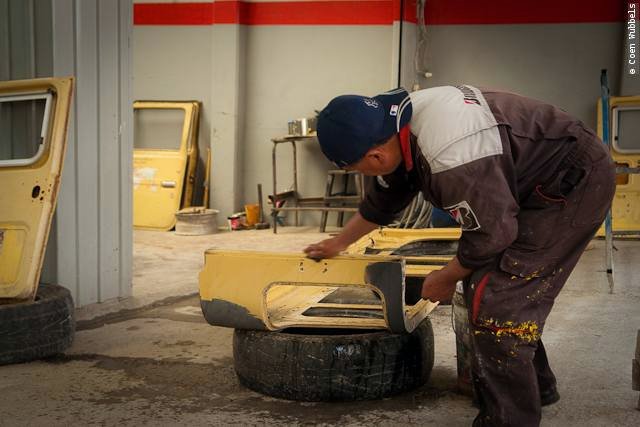
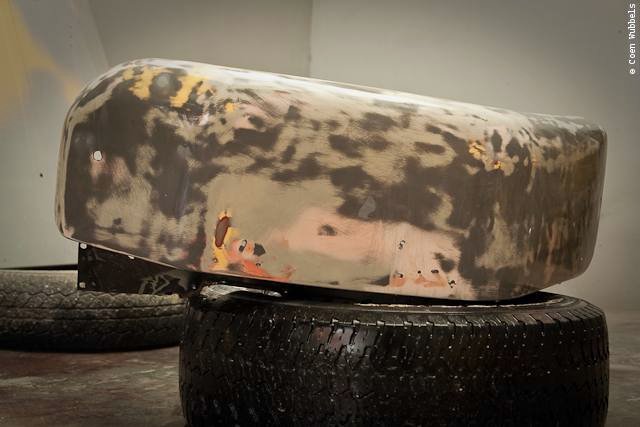
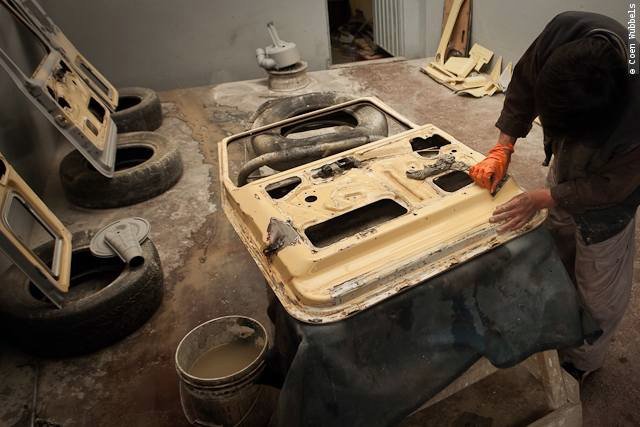
Turning the tub upside down on some old tires, so we can weld the bottom more easy.

Most of the cushioning is in very bad shape if they exist at all. 50% of the supporting beams need to be replaced and the wheel wells are gone.
Here we can see a crack in the lower part of the frame. And rust has worked its way in on all sides… Can this be salvaged?
The other side isn’t looking any better. Hopefully we can make this still work.
The front end has some precarious spots as well, but is more easily fixed I think
As promised, some more images…
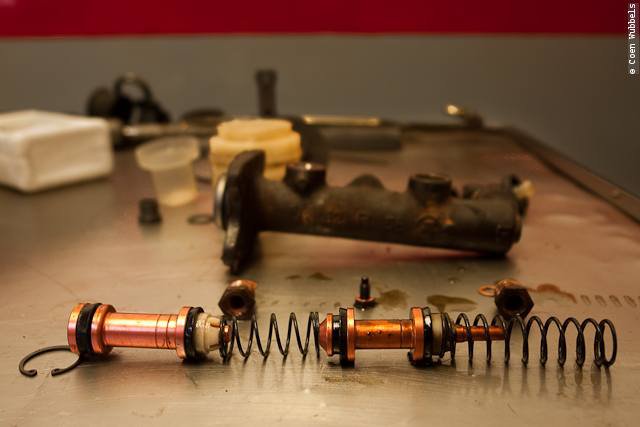
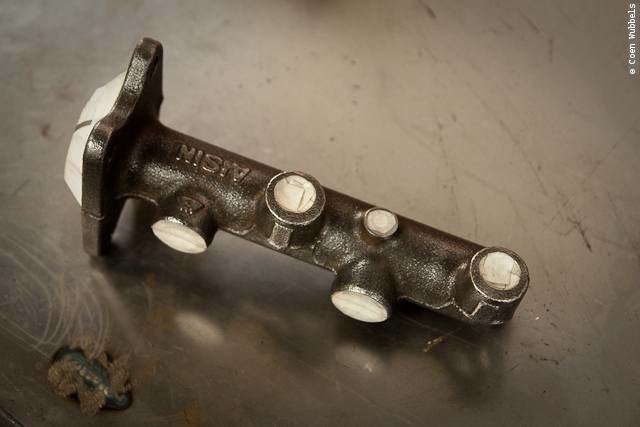
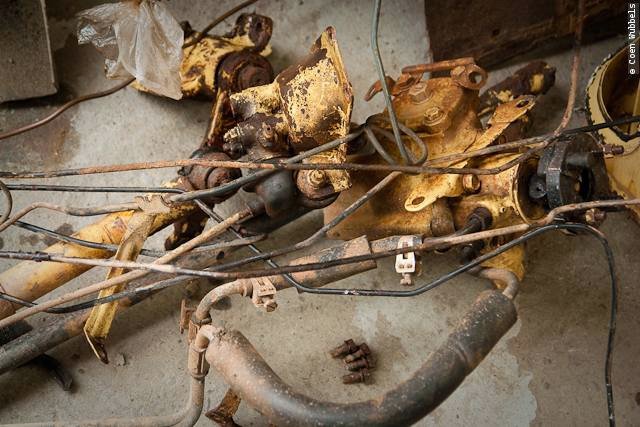
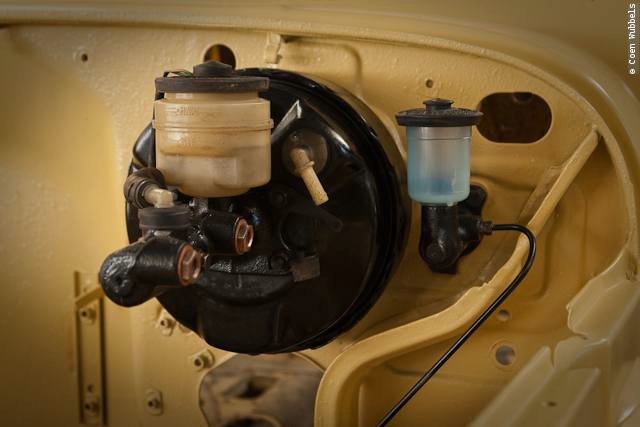
Okay, I just took the master brake cylinder and the master clutch cylinder apart and I will be looking for some repair kits.
Unfortunately the repair kit that Fred [my brother in law] had bought on a fair is for the drum brake version and we have discs in front.
So I will have to make someone else happy with that kit. Just a few aluminium parts with rubbers on them, and they have to cost almost seventy USD!
Original Toyota that is. Lets see if there are some other Japanese manufacturers out there that can provide the same for less?
The chassis is still standing outside and nothing much has happened here.
The gearbox is still sitting there. Let’s see if I can polish the brake lines and repaint them.
Another depressing image of the heavily corroded rear part of the frame. Not much to do really.
Sandblasting and acid dips are not available in La Paz. The best thing would be to find another frame,
but long body frames are scarce here. With some luck we can pick one out of a ditch this weekend.
Drunk driving is not out of the ordinary.
Otherwise we will get it as much rust out as possible and reinforce the frame by clamping another c-beam over the affected area.
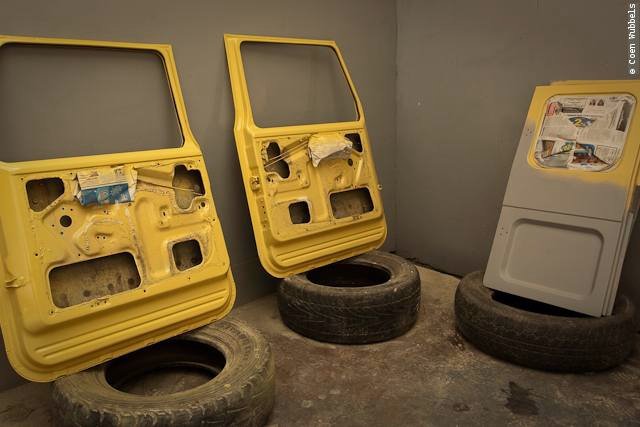
These worn cushions have to be replaced but are not available, so I have to improvise and get some alternatives.
People here don’t care for that, they just use old tires for that.
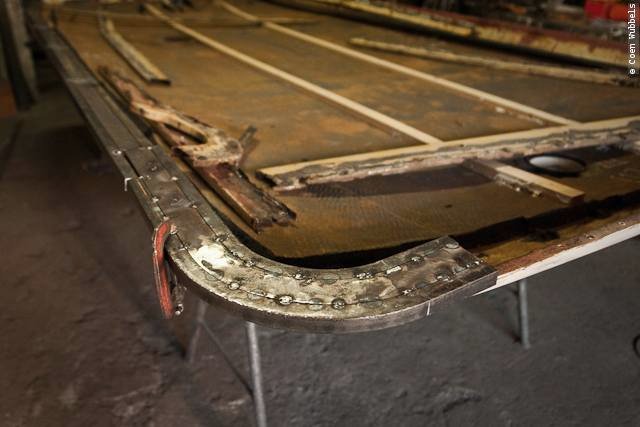
The right front side [up side down]. So the passengers side. Somebody has been stamping his/her feet very hard for the
bottom to look like that. One big crack. And one missing cushion.
The driver side isn’t in any better shape. A part of the beam and the cushion is also missing on this side.
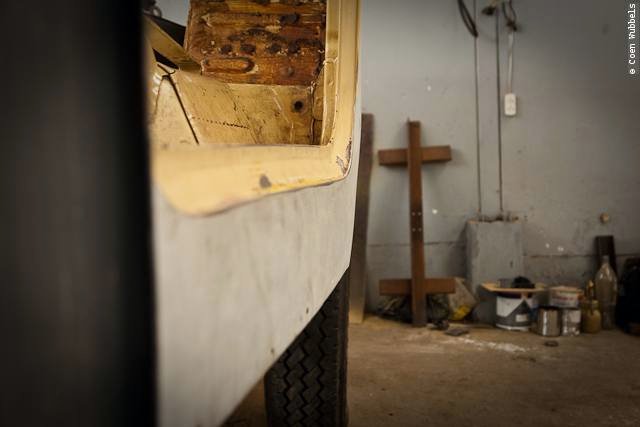
You can see that the rust has worked it’s way up all along the door.
Seven years ago I just drilled a big hole in that side-panel and bolted the Hi-Lift there. That is something we will take care off.
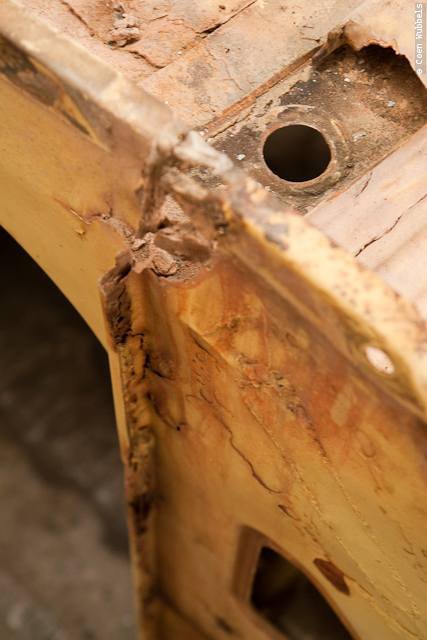
Just above the wheel-well, the metal has just gone.
This is the rear left. In the time that we didn’t have the wheel-wells waterproofed by some polyester parts,
water had worked it’s way inside and started working its way to the rear. How bizarre.
more to come…
More images:
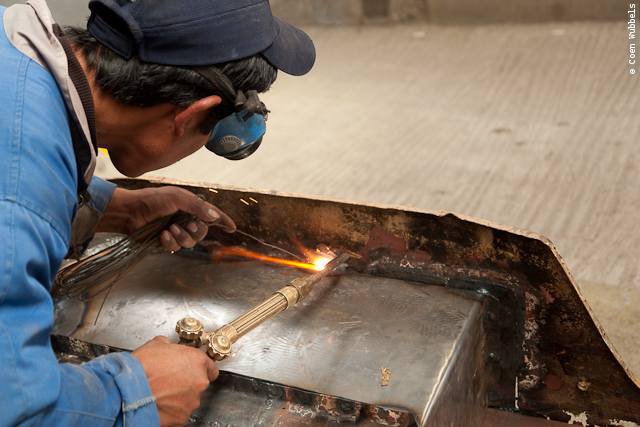
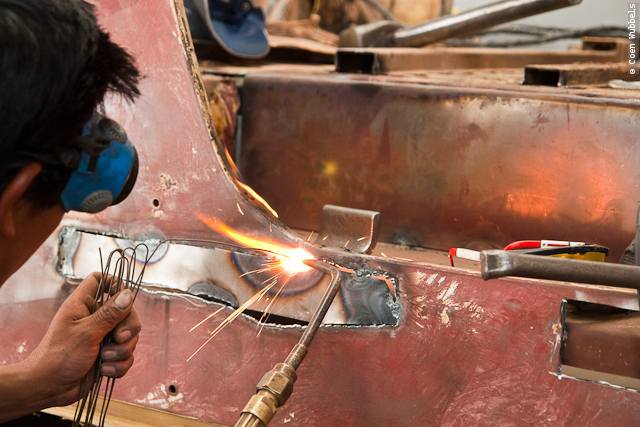
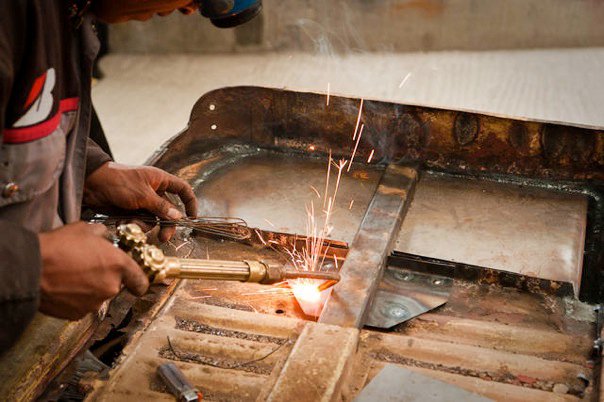
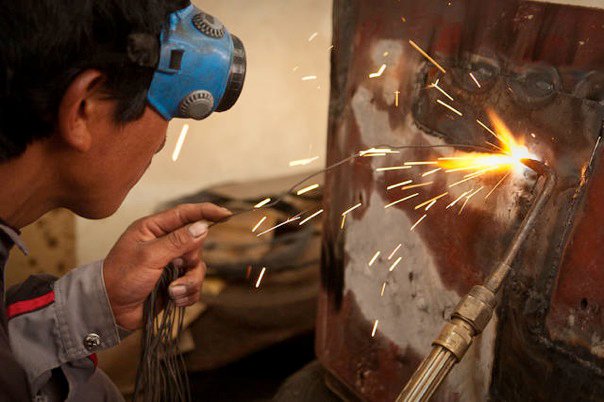
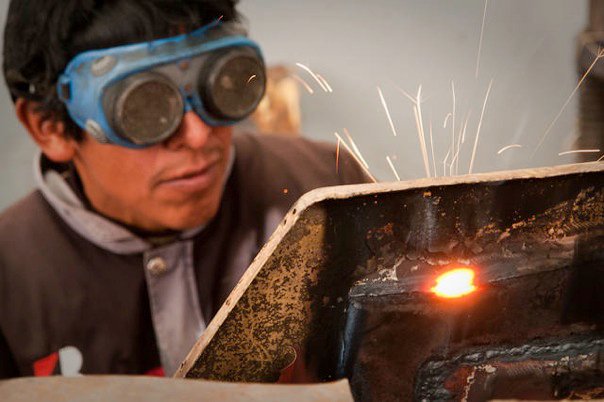
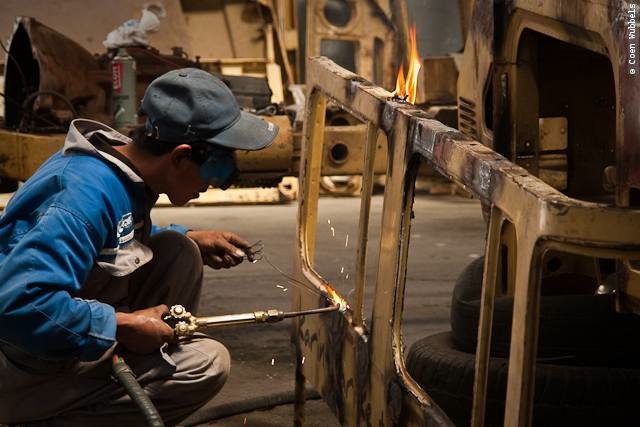
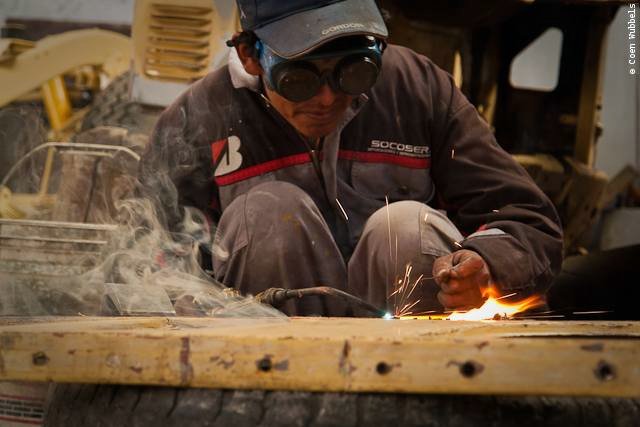
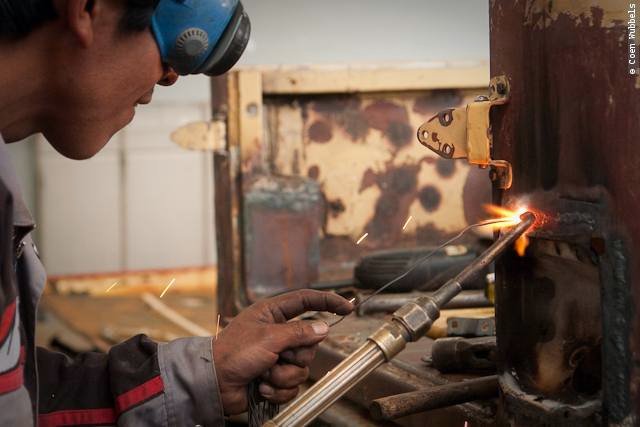
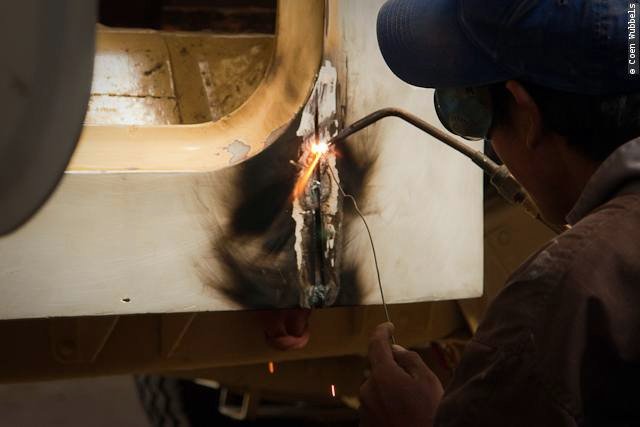
Esteban working with oxygen. That stuff is really getting hot!
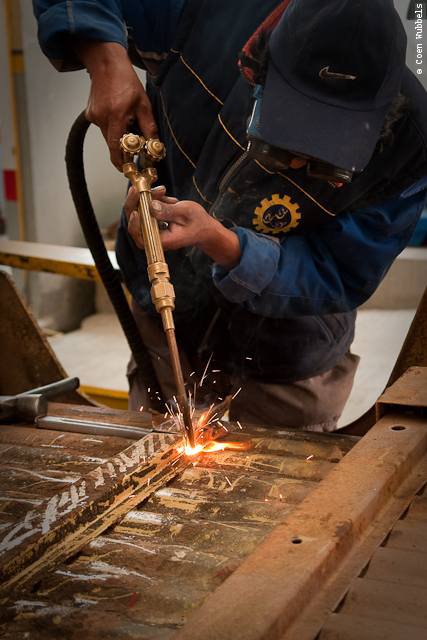
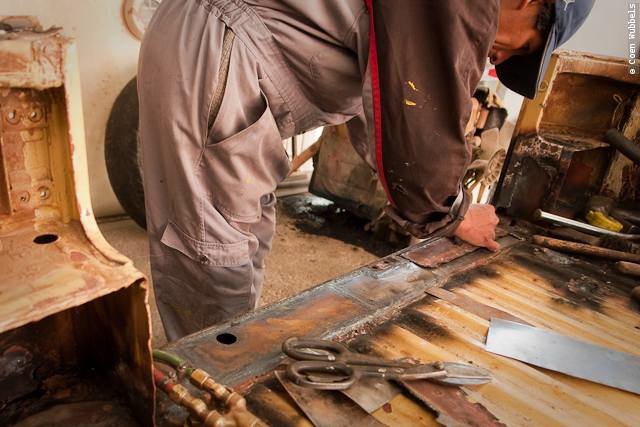
Cutting metal with the saw to get rid of the rusted parts. This is the bottom of the cargo floor.
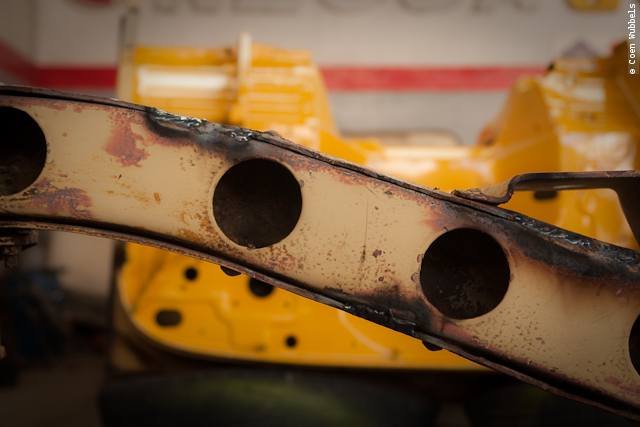
Both sides of the supports have to be reinforced.
The rear right is cut out. I see that there is still some wood left. Thick pieces of metal have to be placed here.
Cutting by hand. No guillotine nor any folding or bending machinery.
Meanwhile the oxygen tube is empty and a new one will arrive tomorrow.
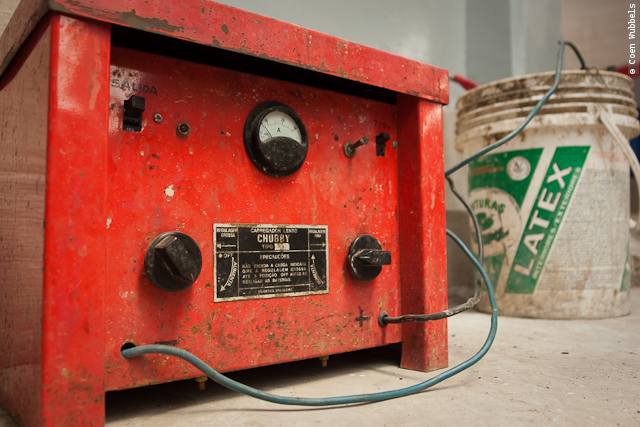
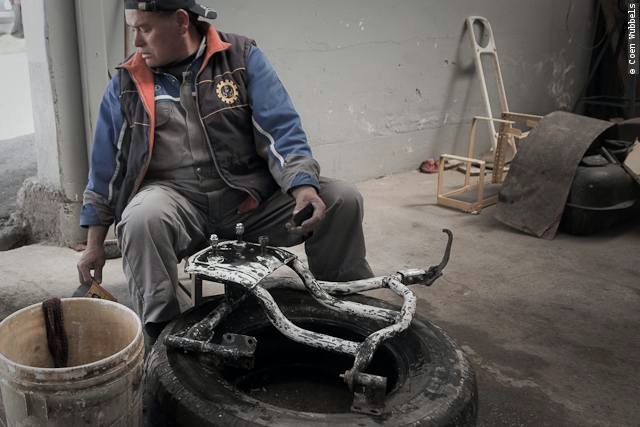
So I started experimenting with electrolysis. A big charger, a bucket of water and few hands of washing
detergent will perform miracles, so I have been told on the Internet.
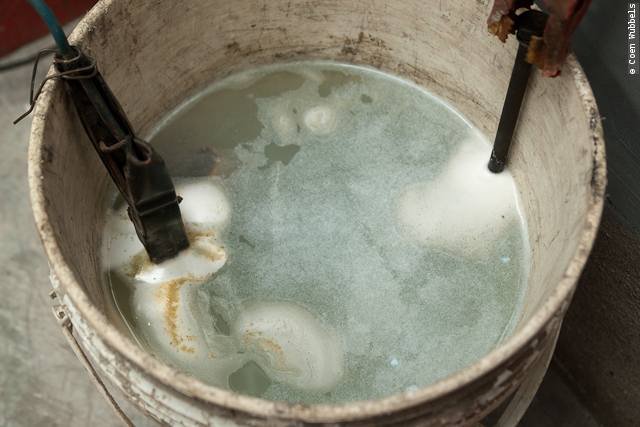
On the right side the positive is connected to a bold that hangs in the water.
This is the electrode. On the left a piece of heavily corroded metal attached to the negative pole.
Putting some current on there and the whole thing starts to bubble and get warm.
Later I have replaced the bold by an ever bigger one to get a greater reaction.
After two hours that piece of metal is clean of rust. This is only a test phase.
But I hope to get a bunch of nuts and bolds de-rusted this way.
So more images of last week:
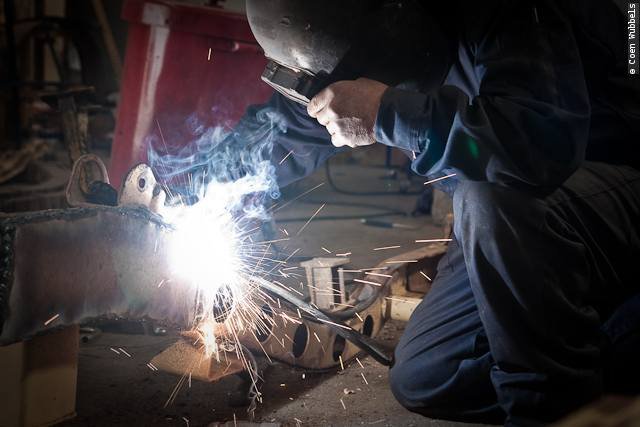
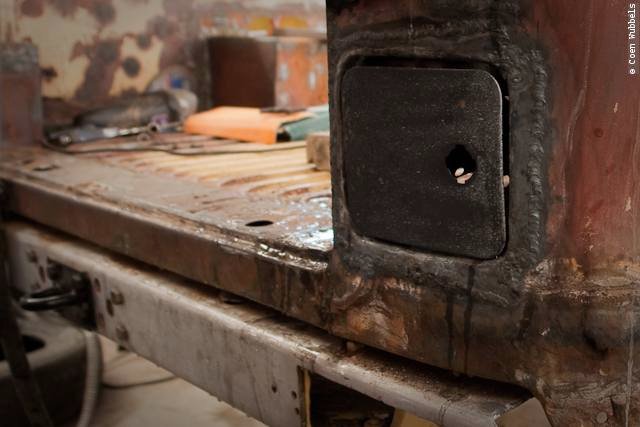
Esteban is welding the back of the car [the tub is still upside down].
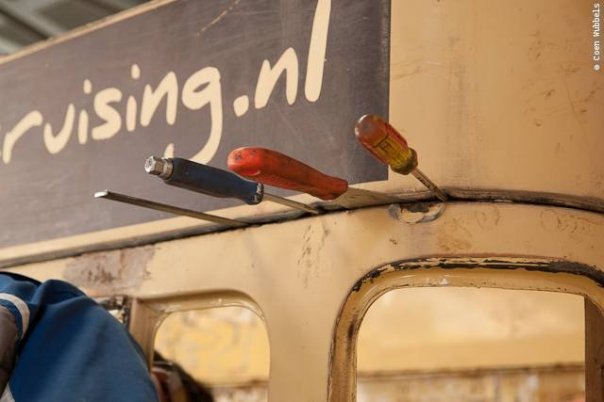
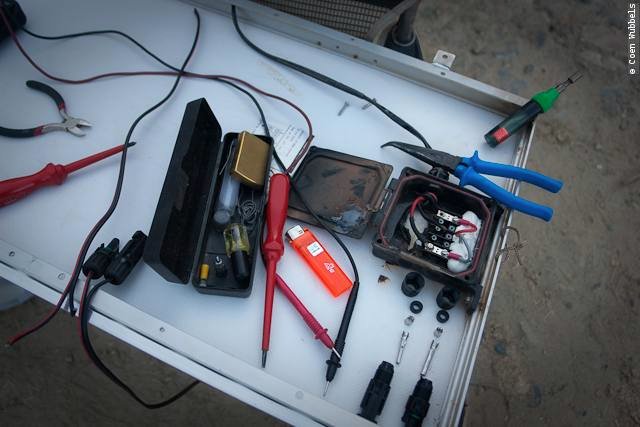
Tools of the trade.
I bought myself a nice repair kit for the Master Clutch Cylinder. Only 10 dollars, a bargain.
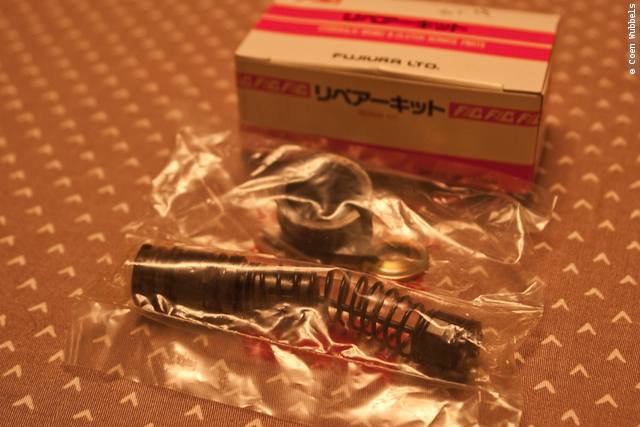
Okay, I had already bought the repair kit for the Master Clutch, then I see the cylinder has minor scratches and two
little holes. So I have to buy a new one. Stupid of me not to clean them first and check it. Now the kit is in vain.
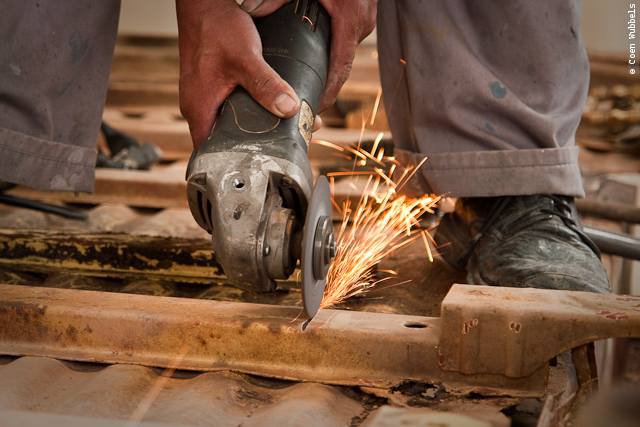
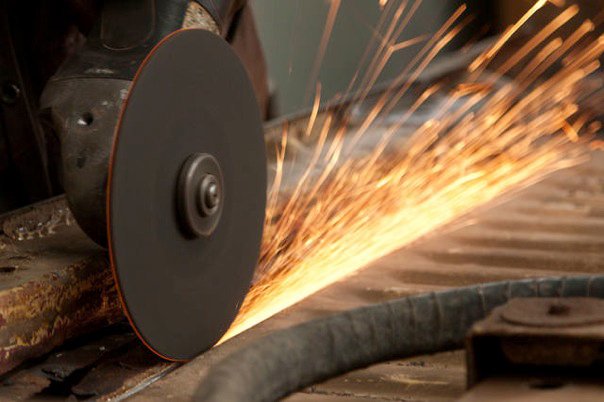
Esteban is cutting metal with the torch. Doesn’t look that nice I find so I did cut a piece with the grinder to show him how I
like it [right side]. So from now on, everything goes with the grinder.
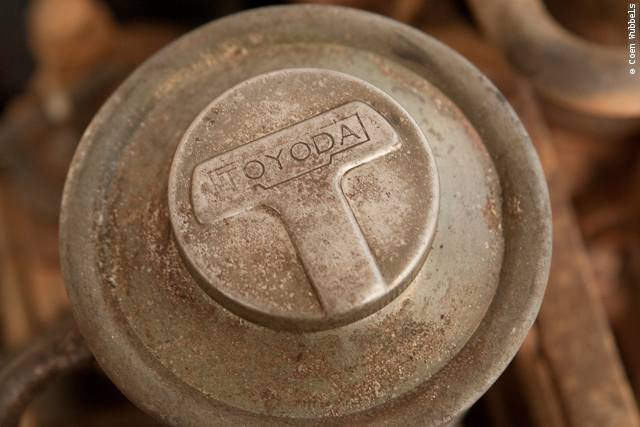
The hydraulic oil cap for the power steering shows Toyoda instead of Toyota. Now isn’t that strange?
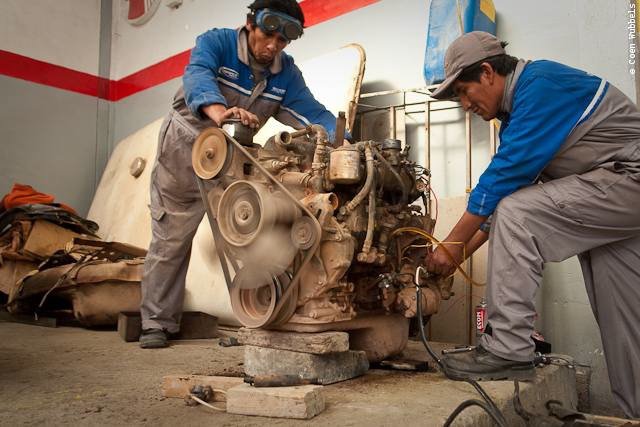
Esteban and Caesar starting the engine. It has to warm up a little in order to take the compression.
So diesel and a line, batteries, pre-heating and go… Flies like a jet.
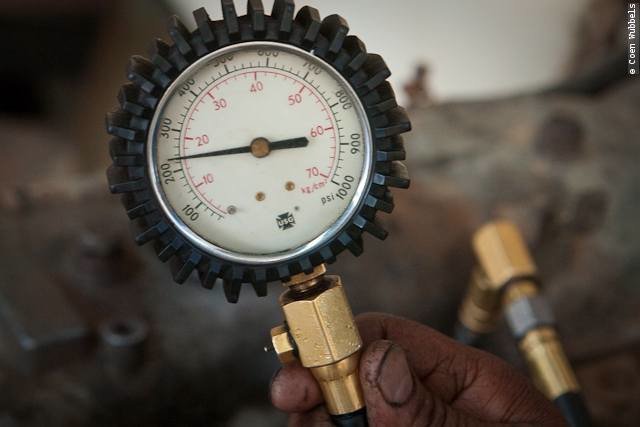
The compression on the number two cylinder shows a little weak on the first try. On the second try it did a little better, but still under 20 which it said to be the limit.
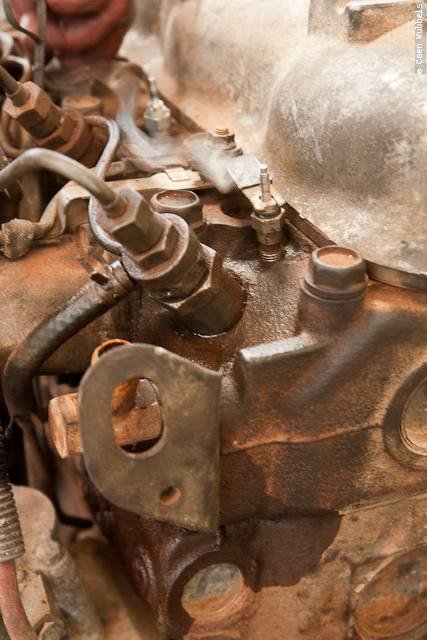
Leaking a little diesel at the number four injector. So they all go to the Bosch diesel service for a cleaning and adjusting job.
Meanwhile Esteban is getting reinforcements in place under the cargo floor.
Karin-Marijke and I are checking all the wires, cleaning them, replacing bad ones and make slight improvements.
So I scored a genuine Toyota gasket set for our 3B engine today. Only 200 USD. That must be a bargain.
Looked into a new clutch pressure plate and disc as well.
A new 88 degrees celsius thermostat is proving to be more problematic to find, but we will not give in…
more images….
Esteban is welding the reinforcements in the floor. We have opted for beams all the way across.
With a big disk he is trying to cut two layers at once. I think the disk needs to be replaced as it is not that sharp anymore.
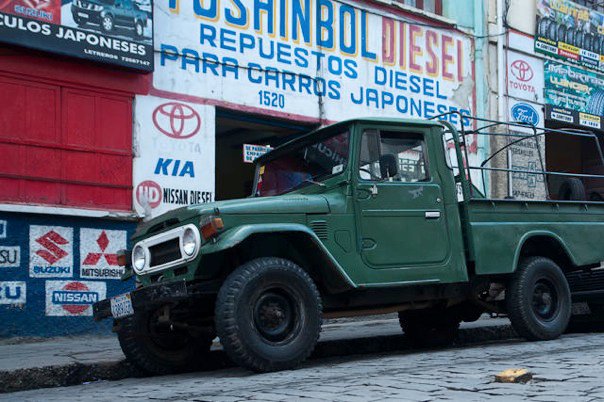
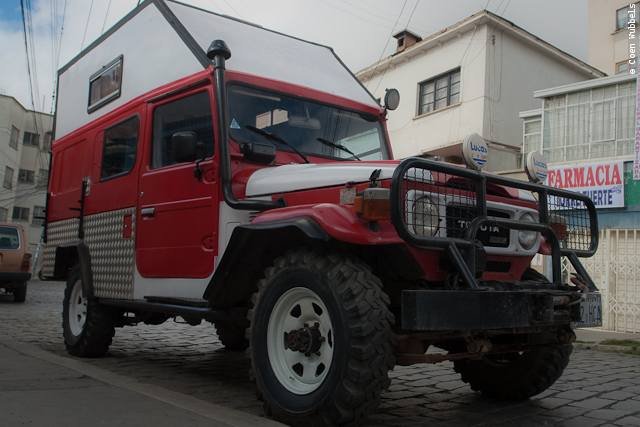
Look what was sitting in front of one of my favorite shops. A FJ45.
I don’t see long bodies that much here in Bolivia, and when I do, most always it will be a pick-up.
I have never seen a hard top long body. These long bodies are used as workhorses and hardly ever for sale here.
The more popular short wheel based are called ‘jeeps’ here.
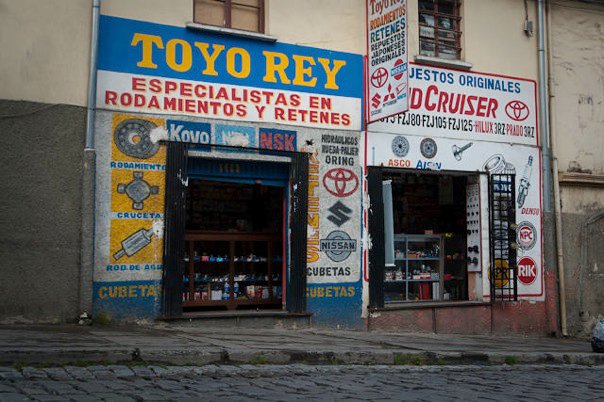
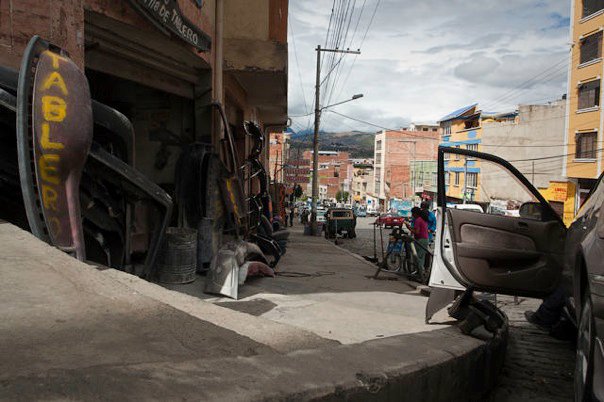
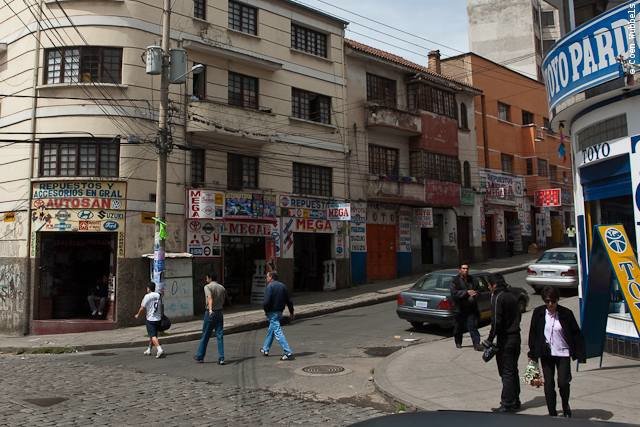
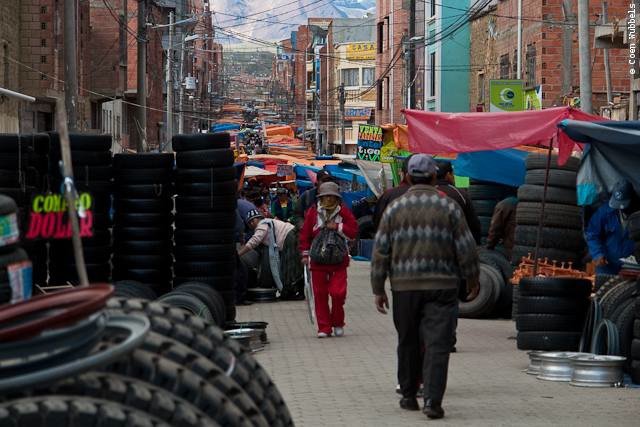
The ‘San Pedro’ district is full of these little parts shops. There isn’t a big store where you walk in and ask
what you want and walk out with it. No you just have to visit all the shops and hope you find your part.
They most certainly don’t know what their neighbor is selling,
but will always refer you to it as the shop that has the part you are looking for.
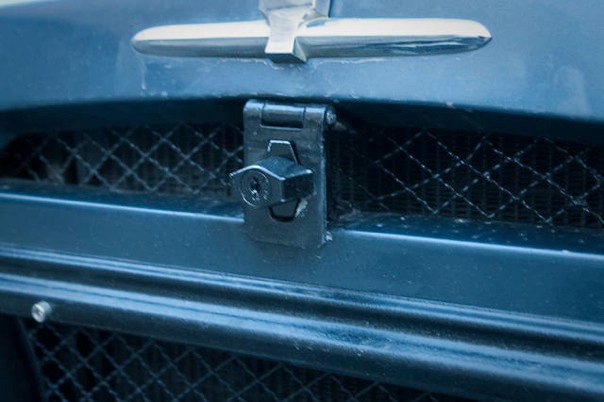
Custom made burglar solution. Apparently it is needed to keep nosy people out of your engine bay.
I did buy something similar, but I don’t know if I am going to install it. It kind of messes with the lovely look the nose has.
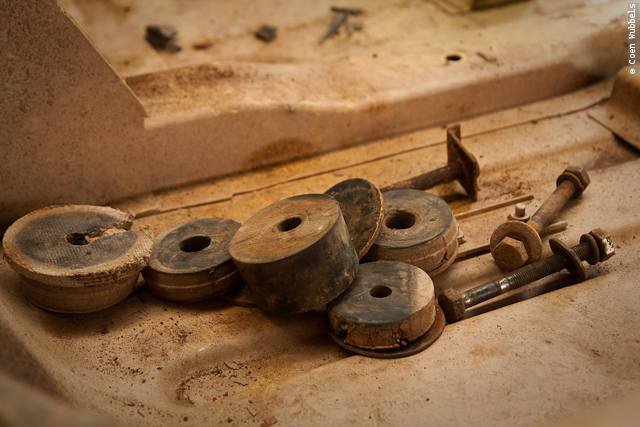
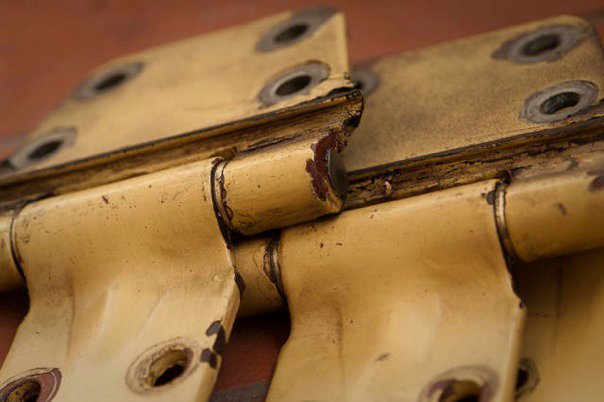
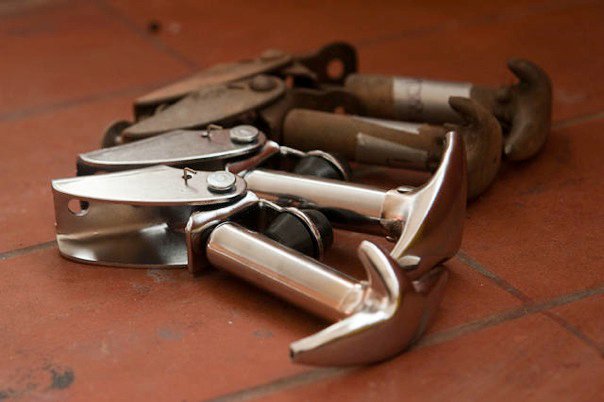
These are the hinches of the front doors. I had them fitted with brass bushings.
They wont budge now, but I hope that when the doors are attached that that will change. The original plastic ones came out in pieces.
These retainers which keeps the hood in place have a very strong spring inside.
The old once were rusted and missing the little rubbery things. I bought these for about 8 dollars the pair.
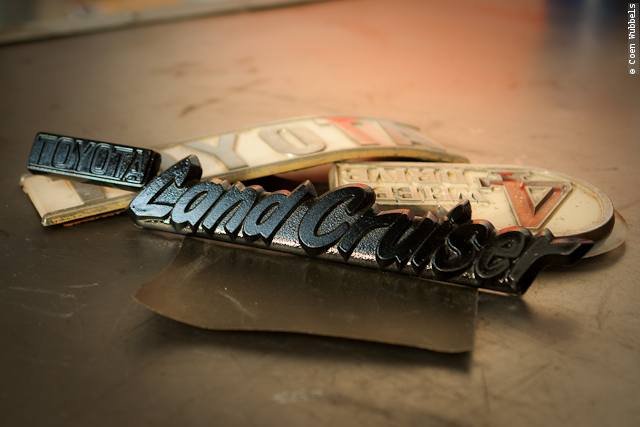
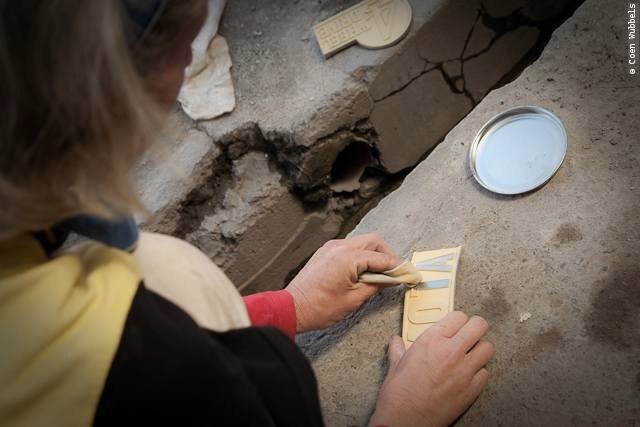
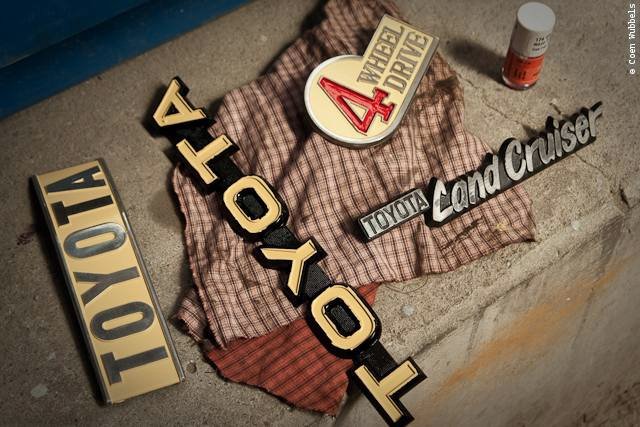
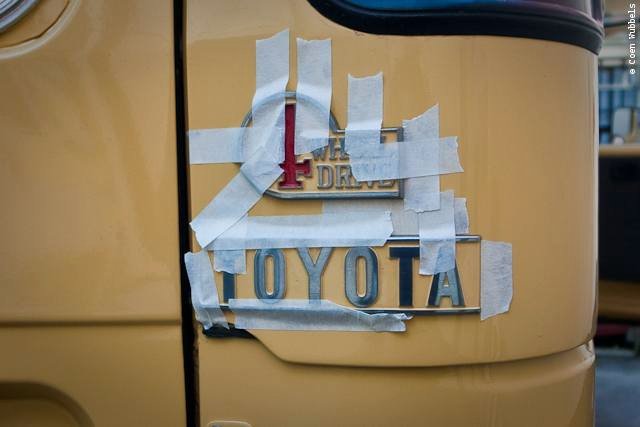
The original logo’s of the rear. I have to look if I can paint them nicely one way or another. New they are available,
but will cost a fortune, or as they tend to say her ‘vale un Potosi’ because of the big silvermines in Potosi.
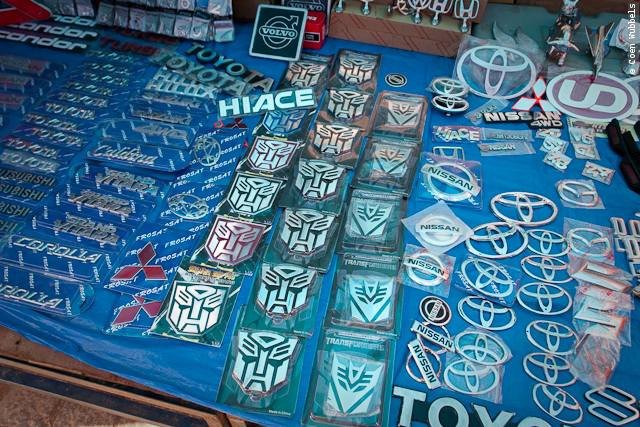
These logo’s and names are riveted on the cars here, I don’t know why, maybe they steal them here?
A few more images of Esteban welding. I does look odd, the whole side panel askew like that. But one blow of the big hammer puts all thing back into perspective.
The overall has to be buttoned up all the way. You don’t want any of the little sparks to find their way into your clothes.
Slowly the work is progressing. Utmost concentration here.
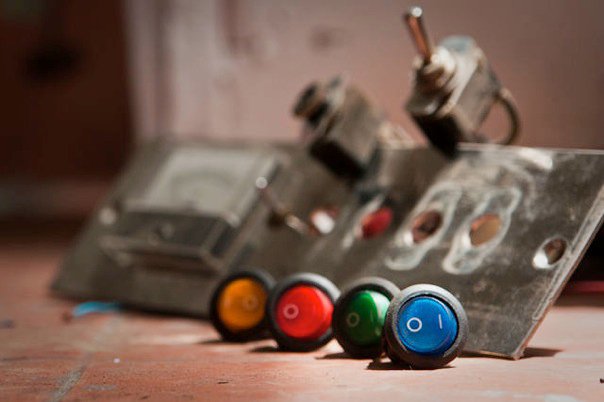
I have bough new switches at the electric shop. The old ones [in the background] are sticking out to much and
we have lost three plastic ones like that. I have replaced some by metallic levers, but they get switched accidently
sometimes and we’d be driving all day with the rear work lights on. So I thought of replacing them by something
smaller and also something with a light inside so that it would be obvious when switched on accidently or not.
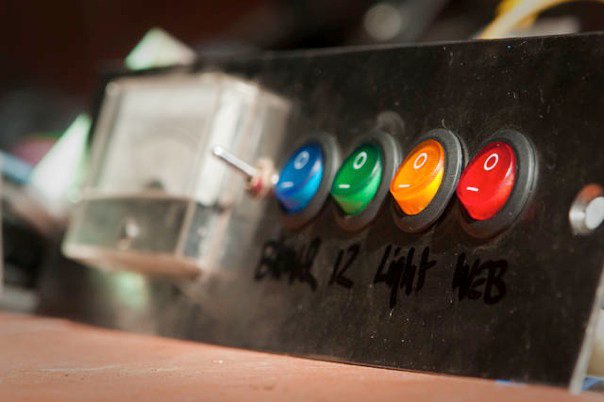
Mounted the Christmas lights.
More images…
Esteban took the left wheel well out. The sidewall of that is also going, because of the big holes in there.
The right side comes along great. Welding is done here. So we’ll start sanding soon.
Extra reinforcements in strange shapes. That diagonal piece is to make sure that the mud protectors we bought in Buenos Aires will fit again.
All of a sudden I find this in my view. The popular short version. They like it here to pimp those. I must say
I don’t object to the color scheme, but I personally don’t like those wide tires.
Neither the window wind deflectors, the big exhaust pipe and least of all the big wing on the top with a third brake light in it.
Preposterous. But that is my personal opinion.
I have to do some shopping in the car parts neighborhood and I took my camera.
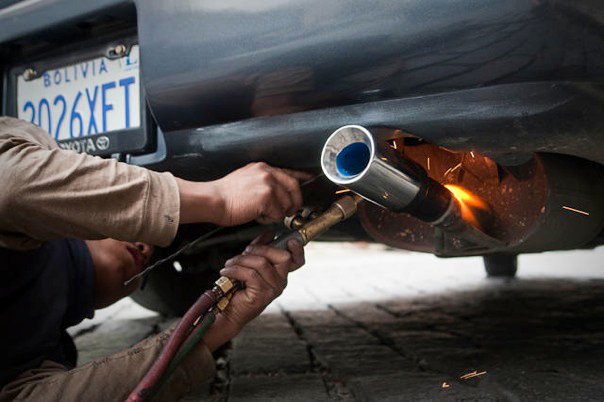
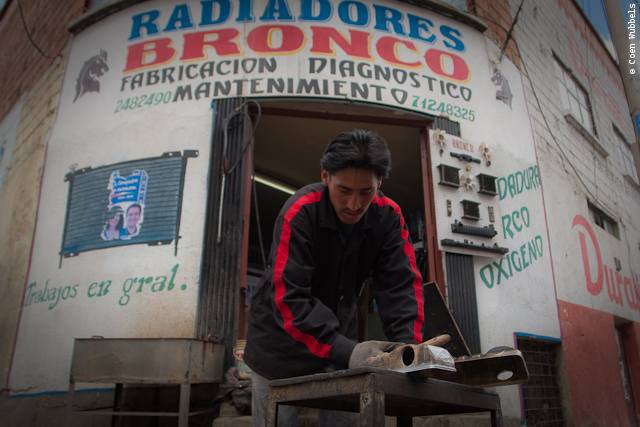
First I have to get something soldered at the radiator specialist.
He is doing something that is quite normal here in Bolivia; killing the catalytic converter.
I don’t have the official numbers, but I guess about 95% of the cars here are parallel imported from Japan and
so they contain a catalytic converter. But the gasoline quality in Bolivia isn’t top-notch so to say and the thing get clogged,
rusted and starts to heat up. The local solution is either to replace it by a tube,
or to take out the inside [it looks like a ceramic filter].
With the last option, at least the sensors keep working and you won’t have to look at a red light in your dashboard.
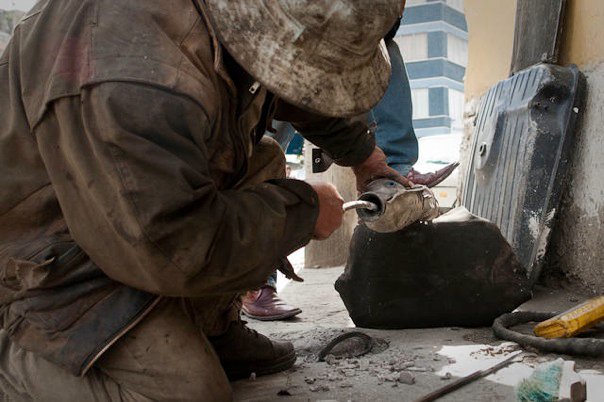
Street shops I call them. Very normal here. No space and money to own a real workshop so they take it on the street.
Cheap, cheap. Borrow the neighbors jack and quickly install the car on wooden blocks.
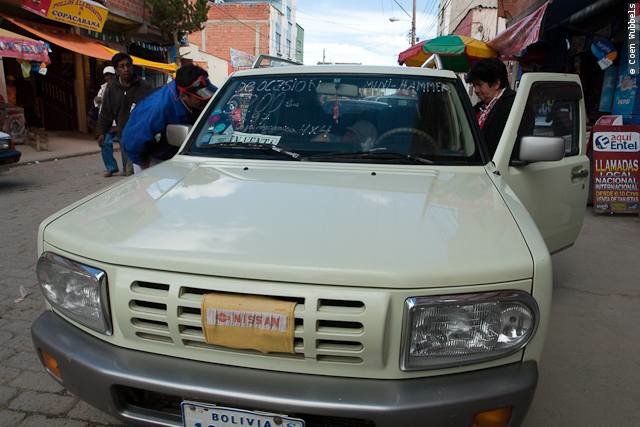
Those 95% of the cars whom I said came from Japan, can’t officially hit the street with their steering wheels
sitting on the right side.
Like we have seen in Paraguay, also here they have a whole industry of little shops that make the conversion.
The steering wheel is already in place and the dash is gone to be cut into pieces and plastic welded they
other way around. Cables have to be rerouted. Sometimes you come across the cheap operation where
the dials are still on the right side while the steering wheel sits left.
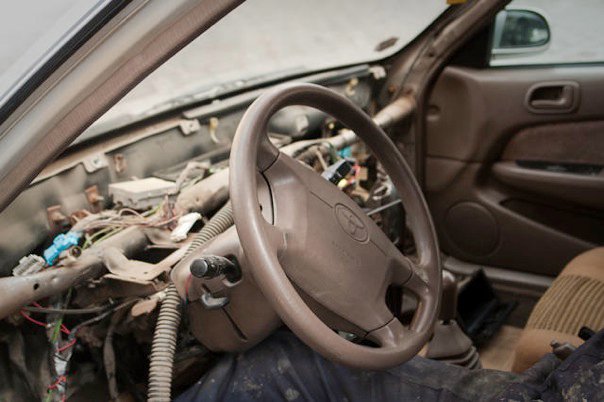
These Japanese modified cars are known here as Transformers, after the famous cartoons of the 80’s.
Real funny to see their logo’s on these cars.

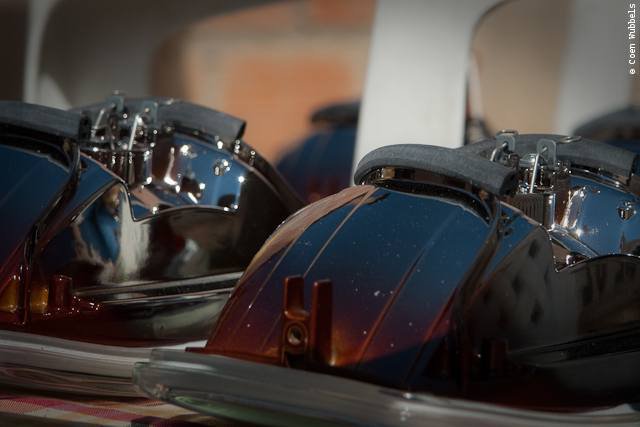
Of course with a fully kitted car you need some sound. These are guaranteed to deliver. I you hit the streets
with these, every single car alarm will go of. These are airbrushed they old fashioned way with a small blowpipe.
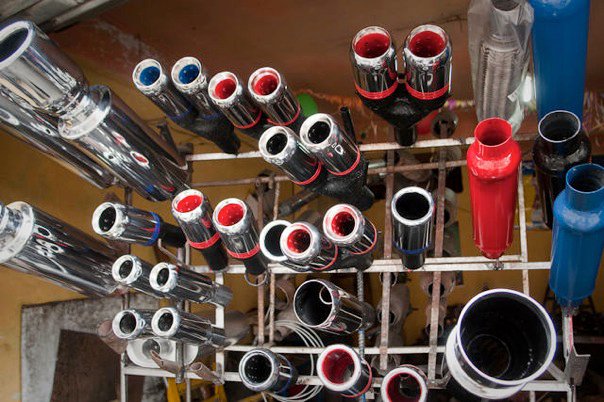
Ten dollars a piece! But then they are custom fitted while you wait. I am still thinking about a color… 🙂
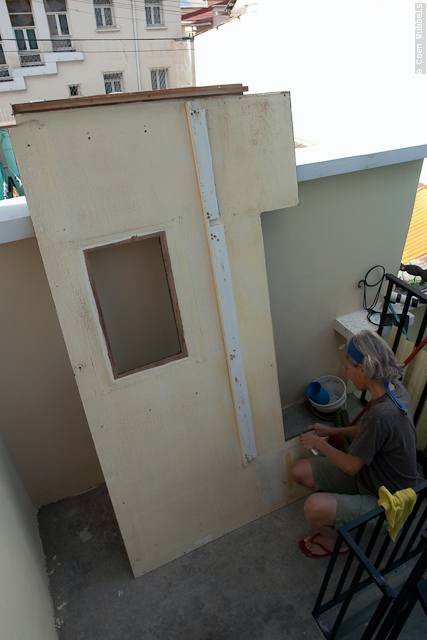
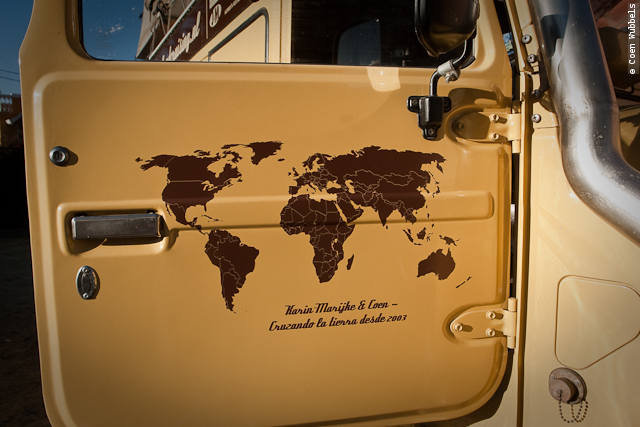
Okay, I’ve been busy in my favorite drawing program. The result; a dark cover for the spare tire that will be on the
new carrier on the left back door. I am still looking for a nice fuel tank that would fit under the Cruiser.
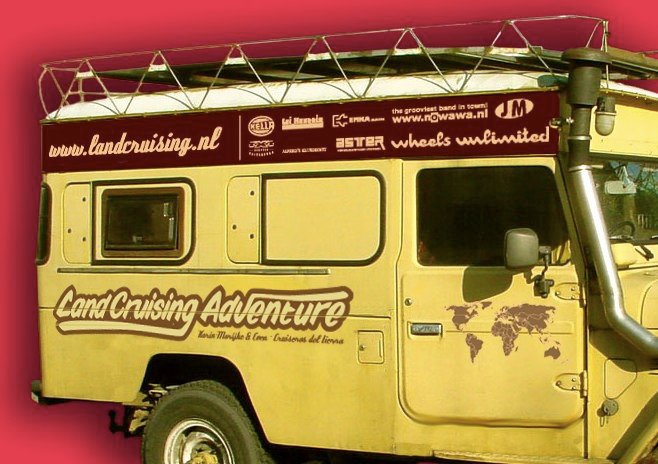
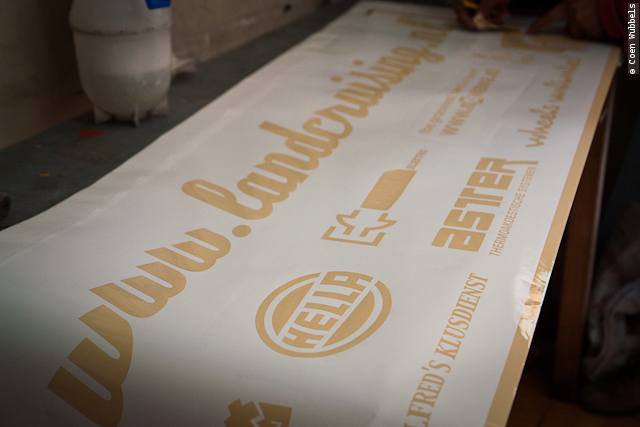
New Cruiser, new signing. Apart from some new friends on the top, I will revamp the lettering on the side and
I’ve designed a clearer world map. Some text will be in Spanish also. What do you think?
Esteban is welding new support beam on the underside of the Land Cruiser. The floor is getting more straight by the day.

The beams under our feet were gone and so were the cushions that go between the floor and the frame.
Downtown San Pedro. Every street has at least six part shops. In my whole life I have never visited more shops that I have in the last few weeks.
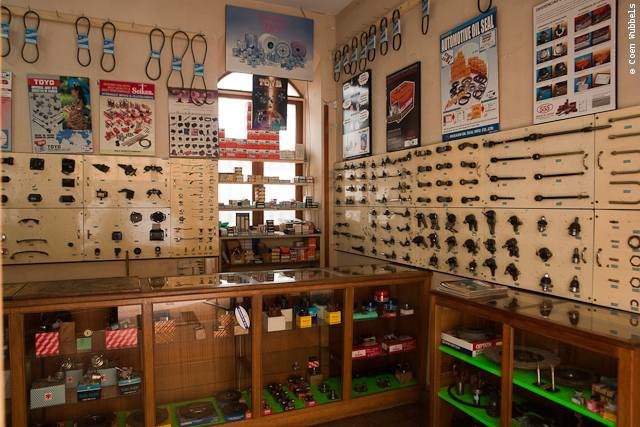
My favorite Toyota parts shop. This is not the official dealer, but sells parts direct from the Toyota supplier.
So I can buy a Master Clutch from Aisin for 30% of the retail price because the logo is filed off.
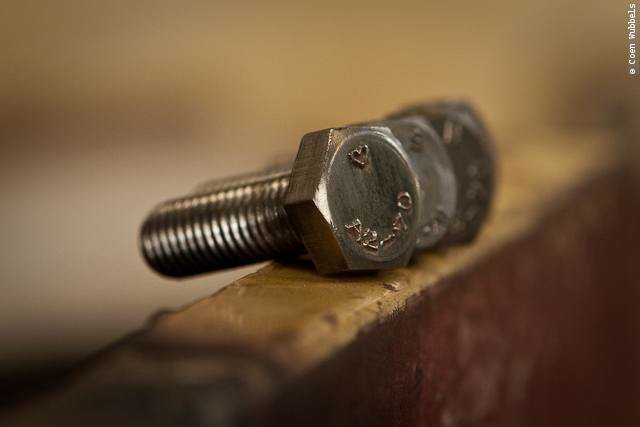
Here is something to show you my love for SS [Stainless Steel]. These bolts come from the front where the winch is mounted.
They have been there for seven or more years [I don’t know how long they have been there before I bought the car] and when
I cleaned them this is how they look. I tell you, it looks a whole lot better than the normal bolt that sat just next to it.
I had to trow that one away. The heart showing in the bolt symbolises my love for SS.
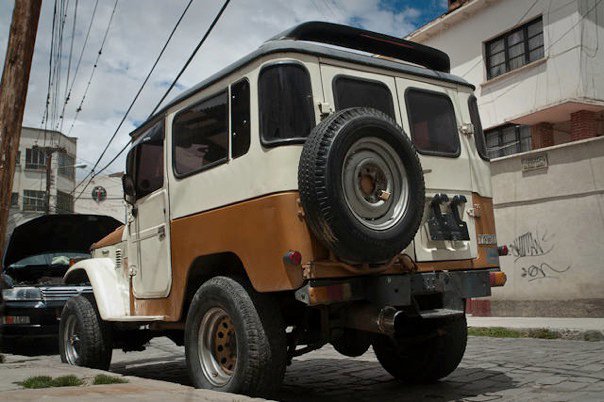
Outside I spot yet another old Land Cruiser. In this case an early model. It
is sporting an first generation tire carrier on the back door. I don’t know if this signing is original but if so, than
Toyota hasn’t changed it, because as of today the new Land Cruisers sitting in the dealers showroom show the same style striping.
The Jesus on the back door shows that we are in Latin America.
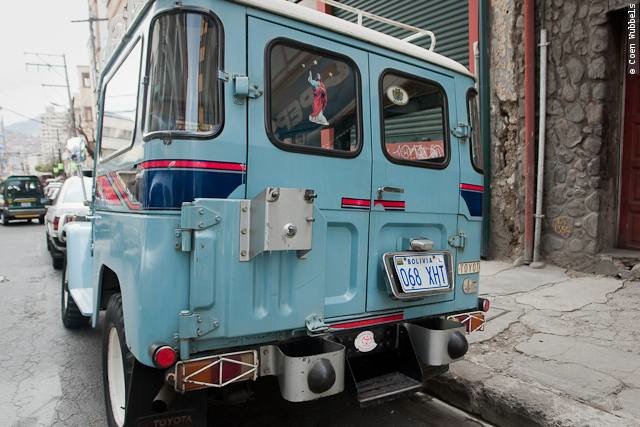
Nice old school mirrors. All in all this Land Cruiser is looking very good for it’s age. I keep on thinking about a bull bar, but I think this is a bit much.
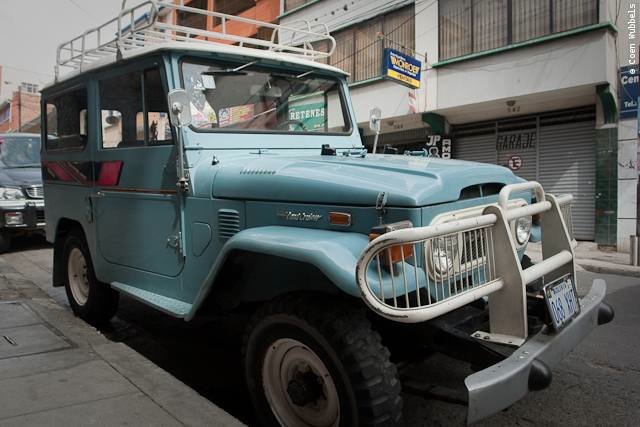
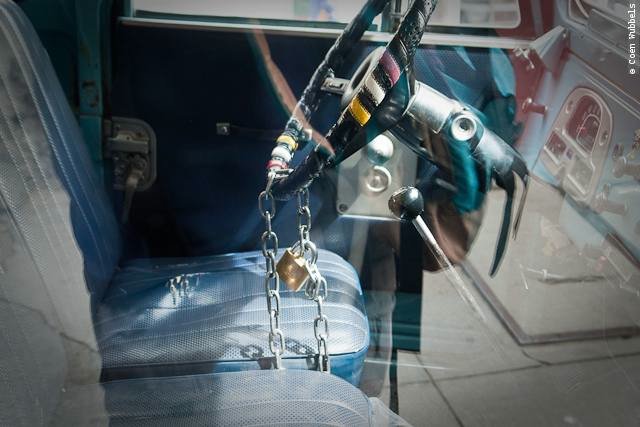
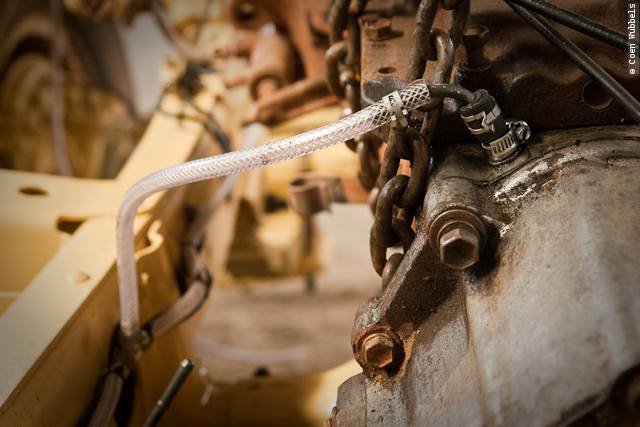
The owner is very careful with his Toyota. He chained the steering wheel to the floor.
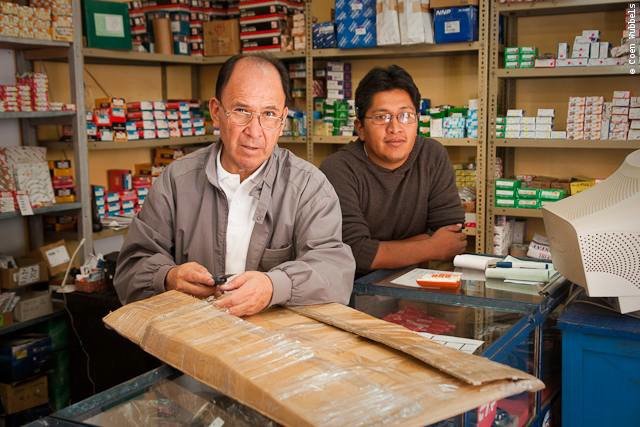
The guys at Toshimbol have been very helpful in getting me an original complete engine gasket set for 200 USD.
It arrives the next day by airplane from somewhere.
That same thing would take the dealer 30 days to get from Japan and would set met back a whopping 450 USD!
Looks real… I think how difficult would it be to fake a label like that, but the guys insure me, that it would be very difficult????
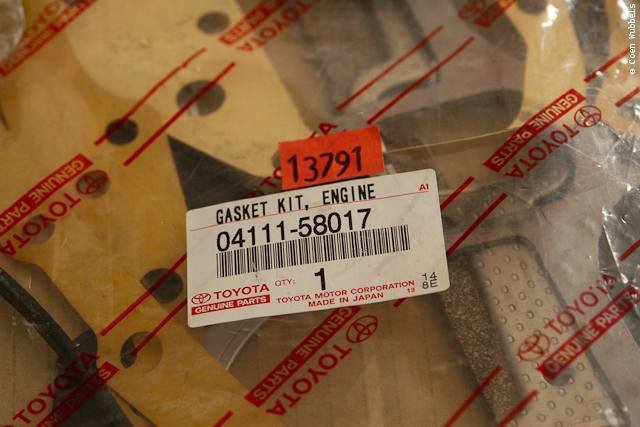
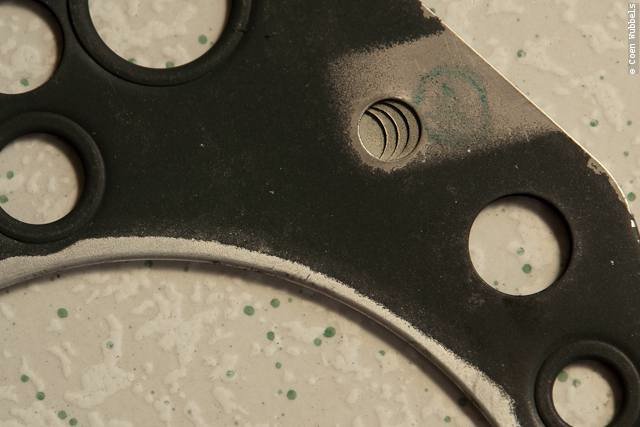
The 3B [our trusty diesel engine] is stamped on the head gasket. Pure metal quality I must say.
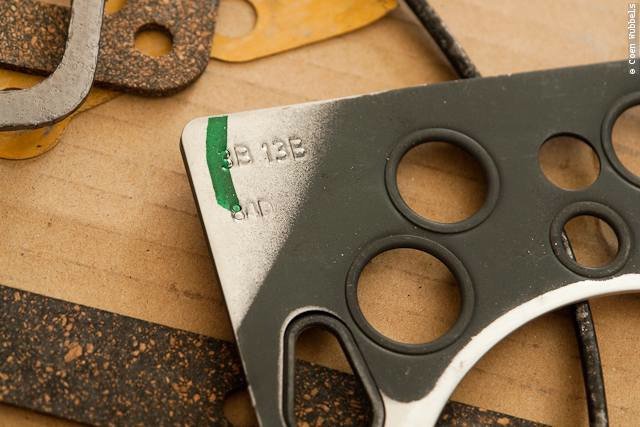
This is how they show off to let you see from how many layers of metal this is made.
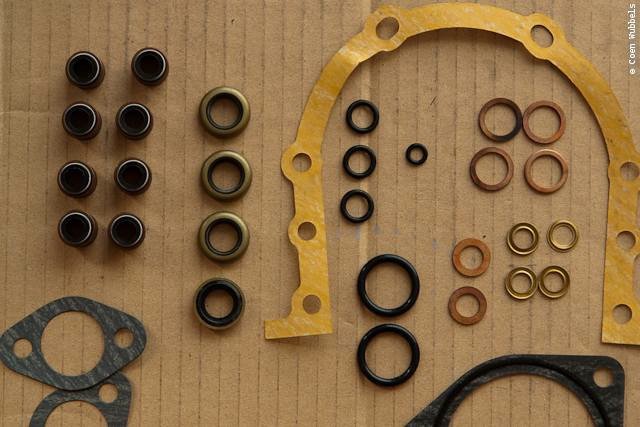
This is how the whole kit looks like. Most things I can recognize at once, especially the bigger parts.
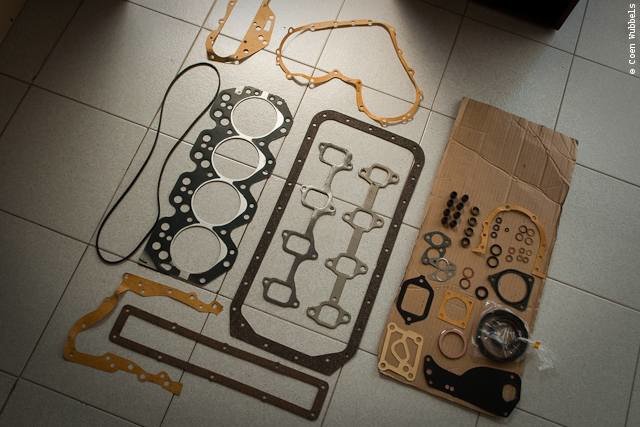
The smaller parts keep me guessing. But I will figure it out one way or another.
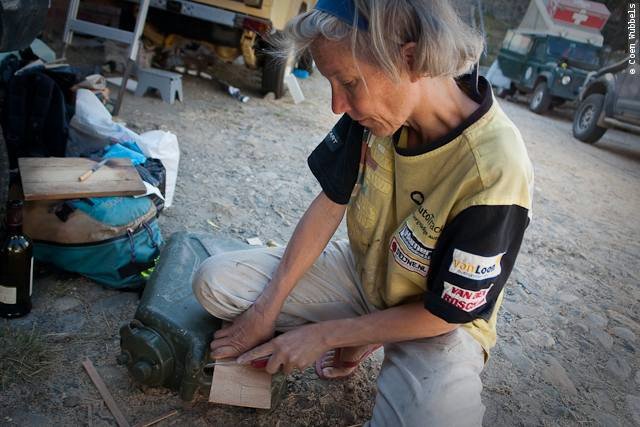
Karin-Marijke is busy sanding the wooden parts that we will use again on the inside of the truck.
Besides that, she is occupied with writing her book that takes a good shape these days.
I have been honored by proofreading the first few chapters.
During one of my many shopping tours I stand eye to eye with the BBC’s Top Gear Land Cruiser.
It is sitting somewhere in a shop. All the materials they used in the makeover in La Paz they had flown in from the US and England.
The Toyota is still property of the BBC and I couldn’t buy any part of it. A shame don’t you think…
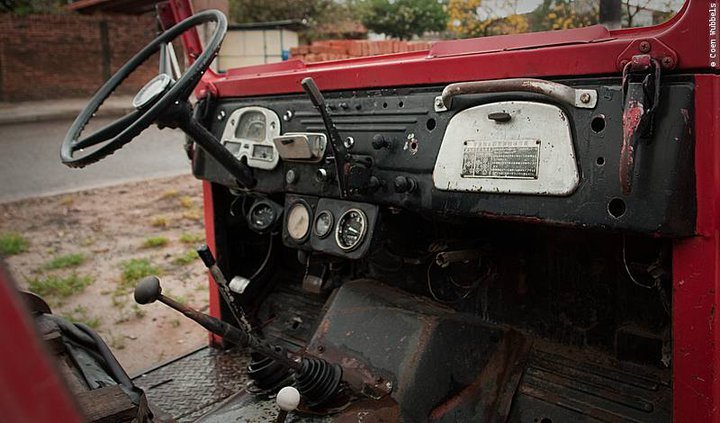
The cockpit of the BBC Cruiser.
I bought a big original Aisin clutch disc for 50 USD!
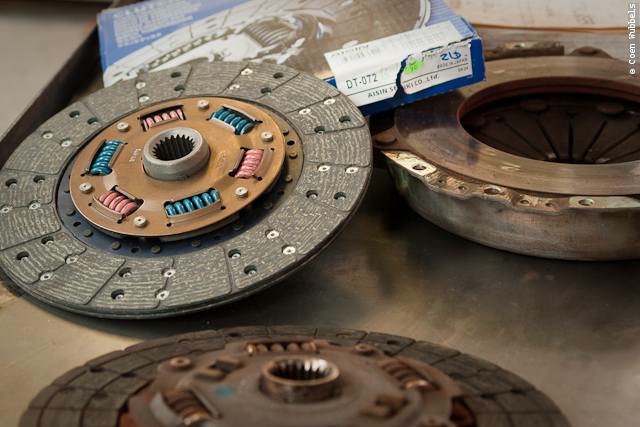
The pressure plate shows an impressive 220 after more than seven years on the road
[I think even more than ten years, but I not sure how long that thing has been sitting in there?]
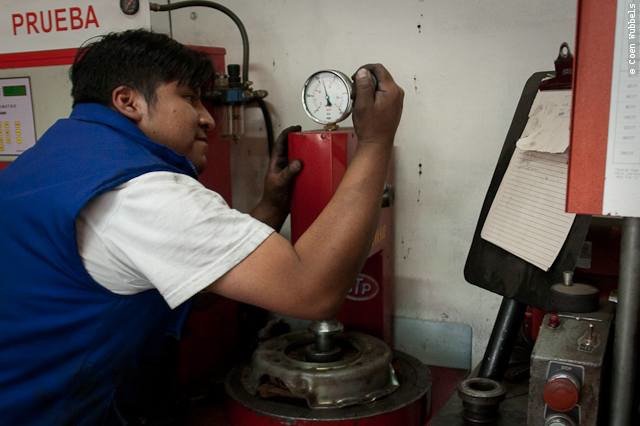
But when I spot a new Aisin clutch cover for 100 USD, I don’t have to think very long. I won’t take that risk.
The engine is out and it is very simple to replace it now. When I reuse the old cover, it could sit there for a good time,
but if it fails somewhere down the road, I would have to take the engine out yet another time.
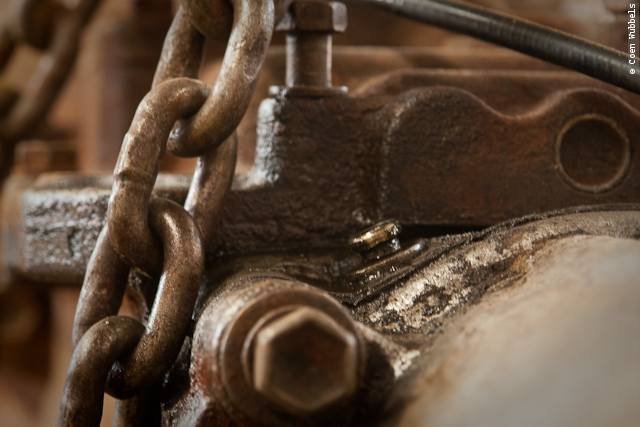
Meanwhile Esteban is busy getting the tub in ship shape. Everything by hand and scissor. Real handiwork.
Because of the great heat produced by oxigene welding, everything gets warped.
But chain and choke become very handy in restraining the movement of the tub.
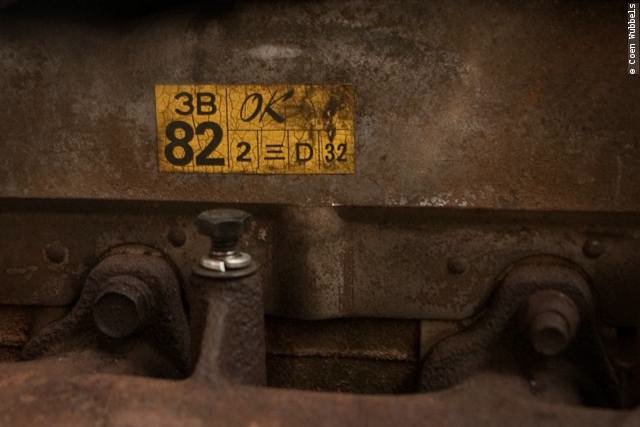
I’m a bit confused. My papers say the Land Cruiser is from late 1984.
Now I come across a sticker with a big fat 82 on it. Does this mean it is produced in Februari 1982?
So this is my new tire carrier I bought on the Junkyard for 30 USD.
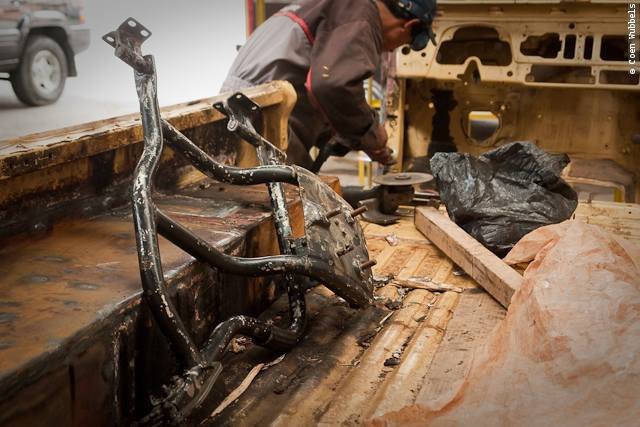
For almost the same amount I have the machine worker replace the bushing in bronze and have him put in grease points

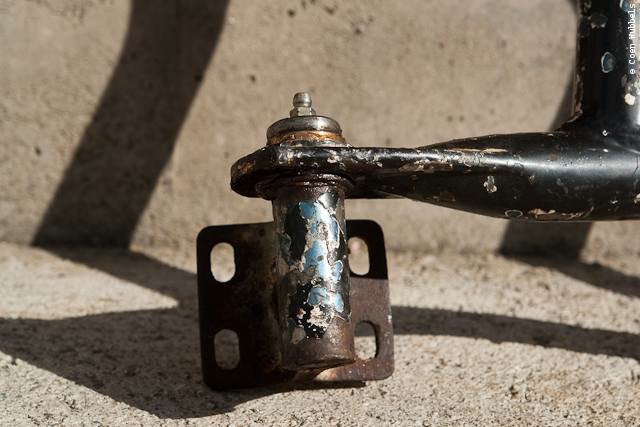
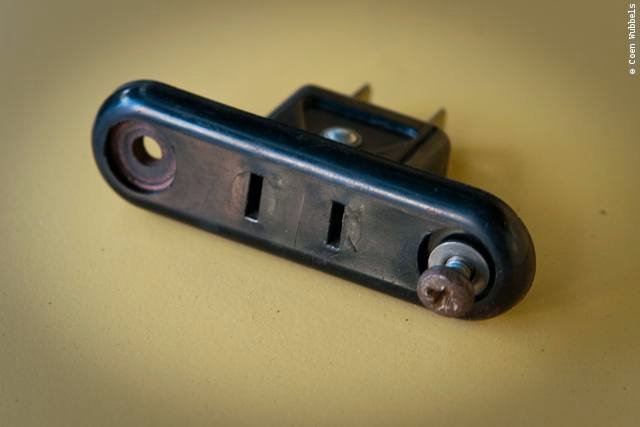
This is the bottom hinge. I am asking myself, why are the holes not round?
I sanded the master brake cylinder and taped it so it can be painted soon.
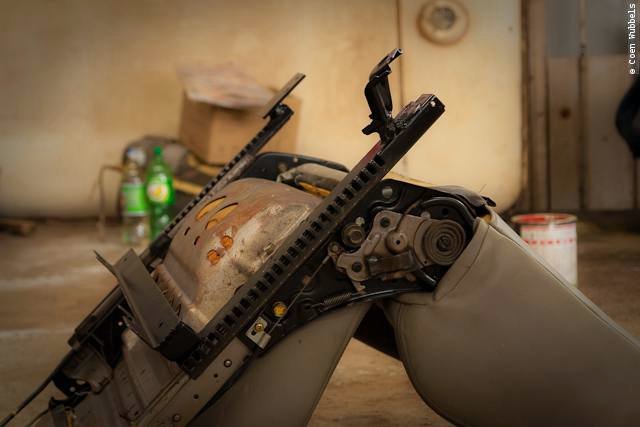
Esteban is welding the backplate of my seat. This has been broken for the last five years!
More to come..
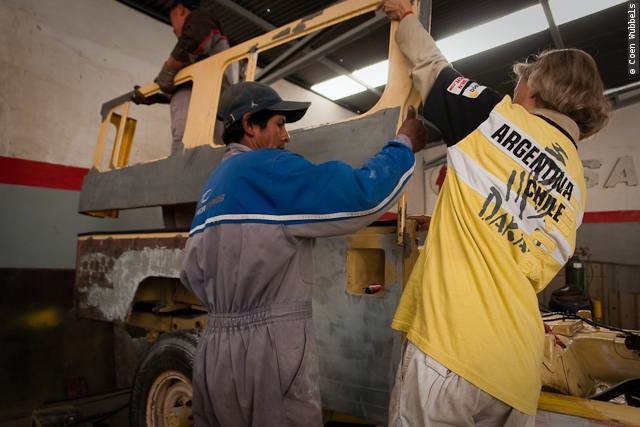
The sidewall is warped pretty bad, and heavy tools must be used to get the whole back into shape. Alex is assisting.
This is how it works. Our Land Cruiser is made of real heavy duty steal.
Not this plastic stuff they are using nowadays to produce cars.
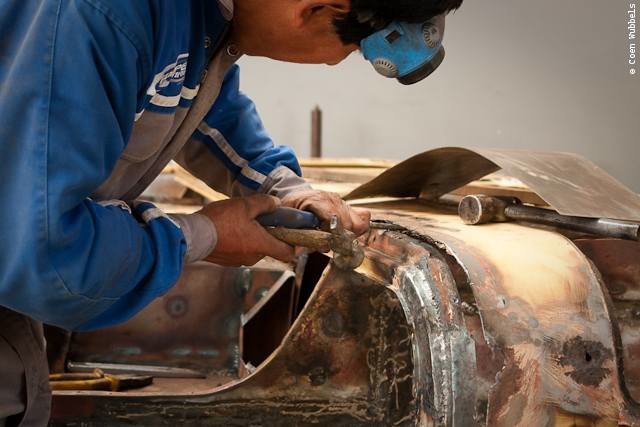
The left rear is the worst place I guess. This is a real challenge for Esteban.
Little pieces at a time.
Hammer and chisel are his best friend.
This is the almost final result. We have to pre-fit the top part on the tub to see where he might make some adjustments.
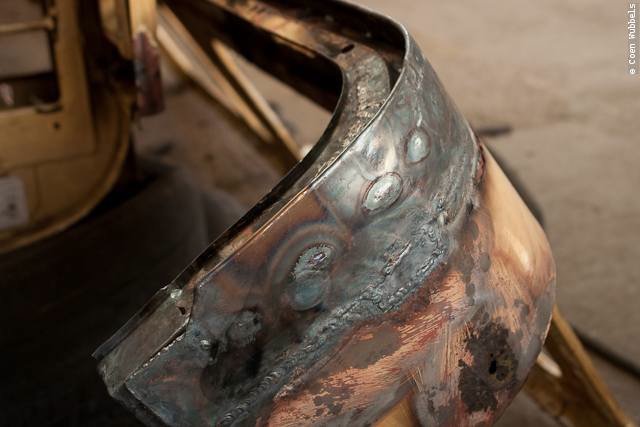
There are some nasty spots in the sidewall, but nothing compared the the back part. The whole inside of the walls
were sprayed with some sort of resin. A real pain to get of things. It is burning pretty hefty. Look the top of the sidewall is just burning away.
Thursdays and Sundays there is the biggest used car and parts market of the whole of Bolivia.
Everything you ever wanted. But you will have to look hard to find your part.
Crazy Transformers between the hardcore car brands. A huge number of cars are being transformed from right hand drive to left hand drive.
I am tempted to buy this mini-hammer [I think he means mini-hummer] for just 5.200 USD. A real 4×4 deal!
I have never ever seen this little car in my life… Lawyers make a good living. Open all days to arrange the needed paperwork to close the sale.
I am eyeing this Grand Vitara fuel tank complete with it’s protector. For 85 USD it would be a great spare fuel tank
under the back. I am not sure yet, because the fill neck is on the wrong side. I would like mine to open up on the right side.
Maybe this would be a nice idea to support the back leaf springs?
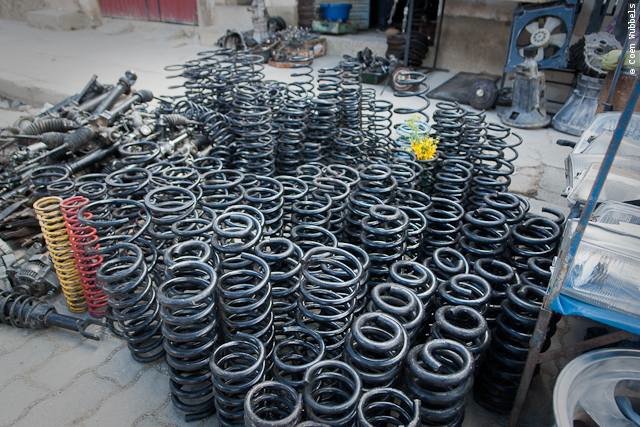
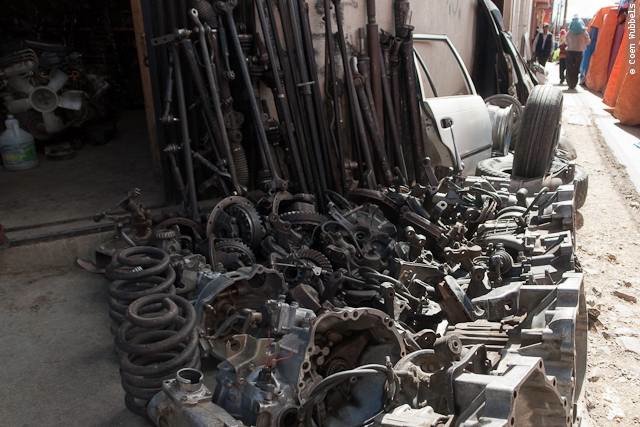
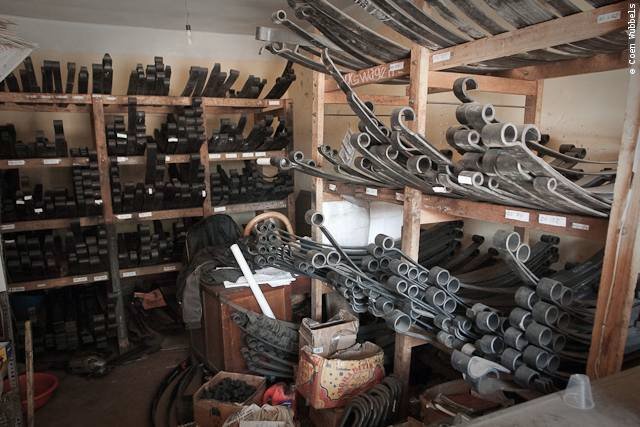
Springs, gearboxes, engines, birfields, linkages and the likes. Buy all you can carry.
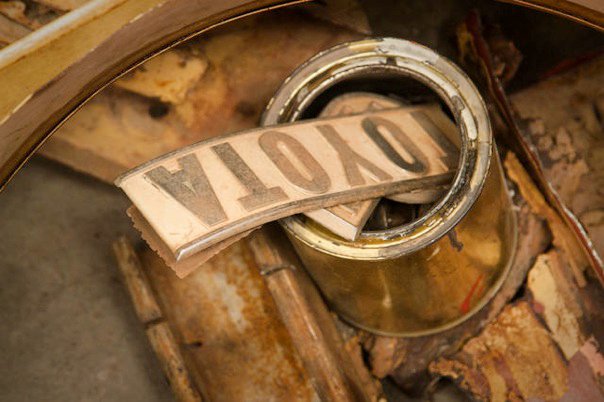
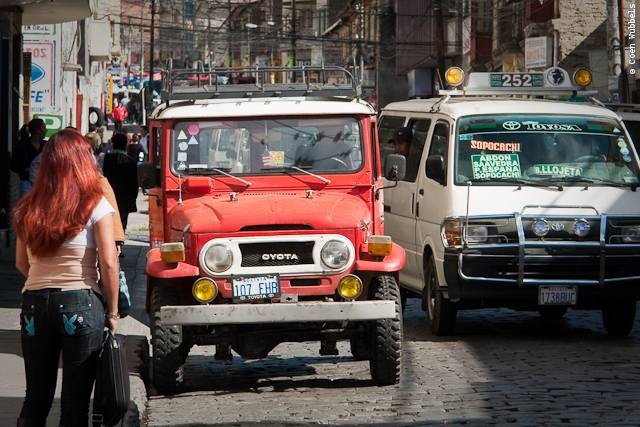
In San Pedro [the car parts neighborhood] I encounter this nice Oyota. It’s right side headlight is harbouring a fish.
Next to it is the every populair mini. 20 USD cents you get in and get of somewhere else. Also Toyota, like 95% of all the taxi and min’s.
Esteban working with Massilla, a kind of epoxy to seal of the welded seams.
The local brand.
The welds are sealed off.

Meanwhile I tore out the beam holding the tire winch because the spare thank is going to be in this place.
The spare tire is moving to the back door.
These two tanks I found in El Alto on the car fair. Now I have to look which one is most suitable as our new spare tank.
One is flat and long, but has the intake [for me] on the wrong side. The other is fat and high but comes with an excellent protecting plate.
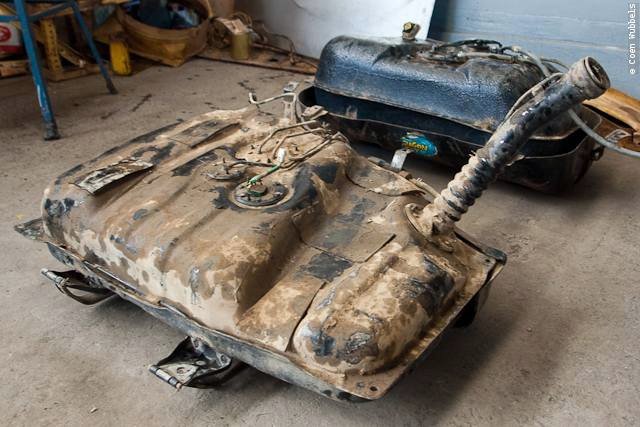
Esteban and I choose the last. But because the protection plate is not the original one that belongs to the tank,
I will have to adapt it a little. I am sending up a rooster tail of sparks with the grinder while cutting the protector.
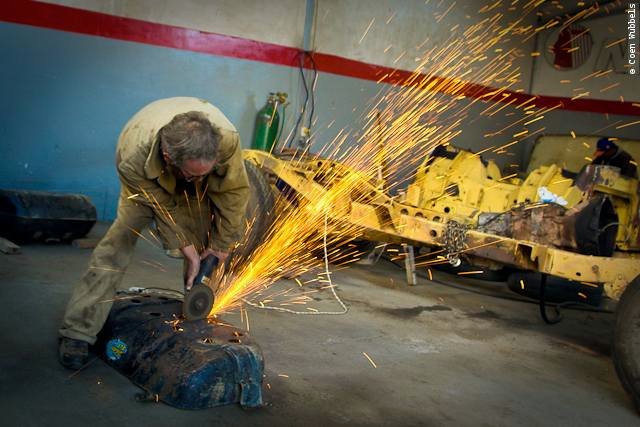
It has to be a bit narrower so it will fit in between the frame.
These are parts from the front of the frame; the steering gear housing, the steering center and some links and brake tubes.
When I am cleaning the brake tubes, I see some rusty parts. Those will have to be replaced.
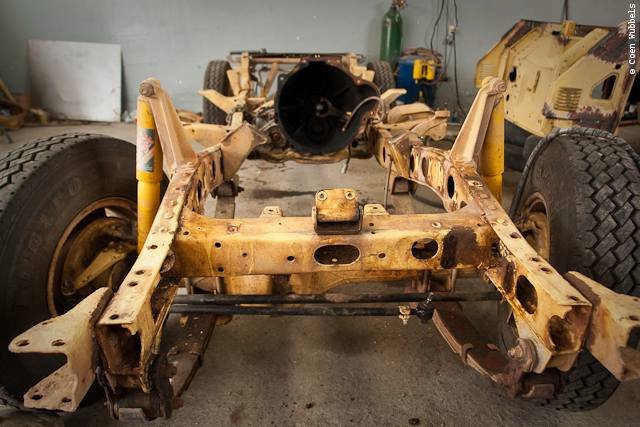
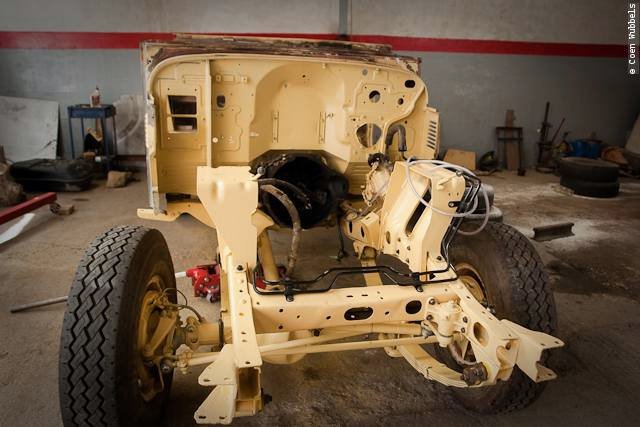
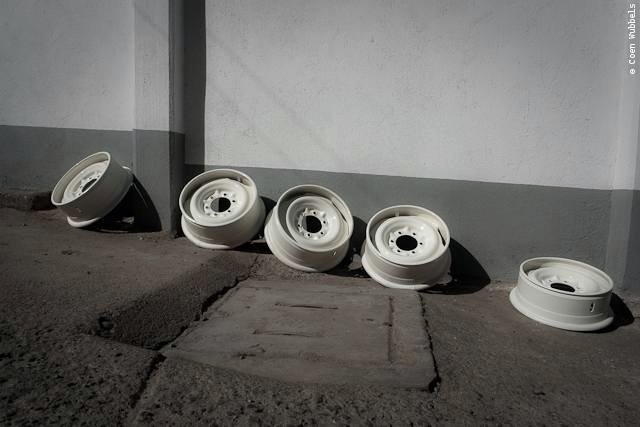
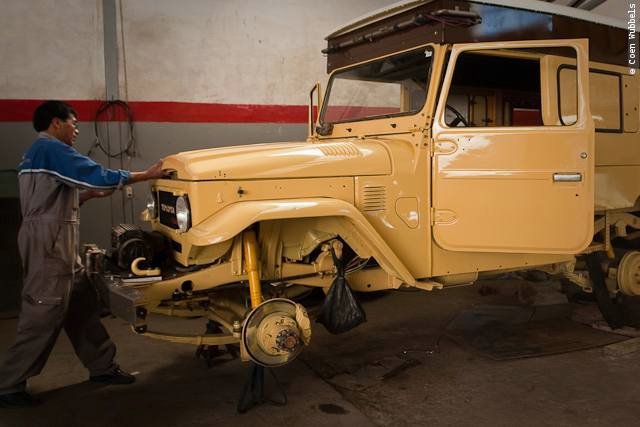
This is how the front is looking. Soon the tires will go so I can paint the rims. The front leaf springs will come off
as well as I want to replace them. They are one amalgam of leafs from different countries and there is no
consistency any more. The gearbox will go off so I can replace the dried out support rubber underneath.
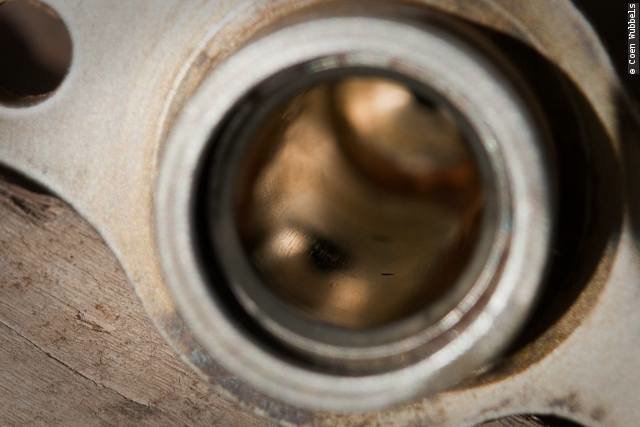
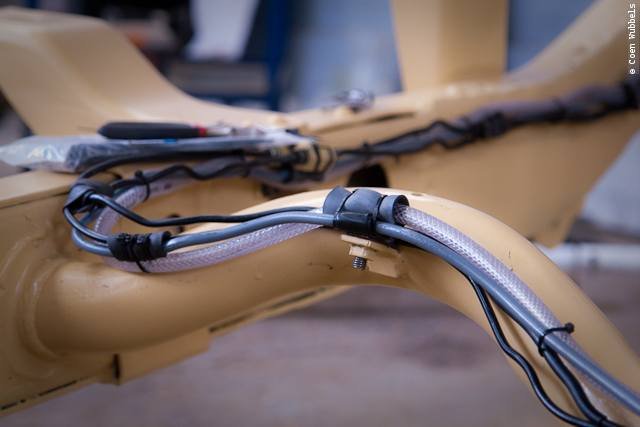
This is a close-up image of the breather plug on the gearbox. I would like to extend this one with a rubber hose to a
higher place, together with those of the two axles. Was there a fourth?
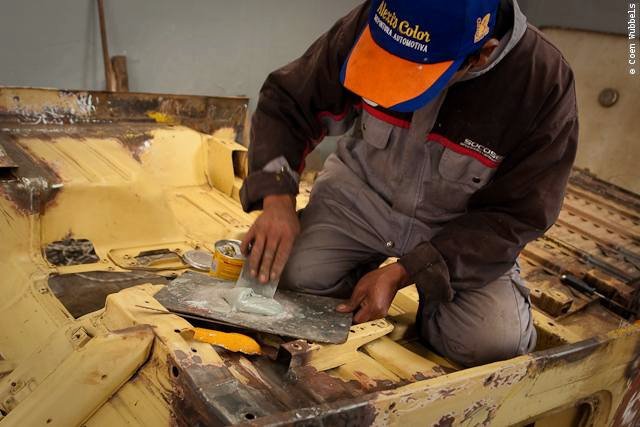
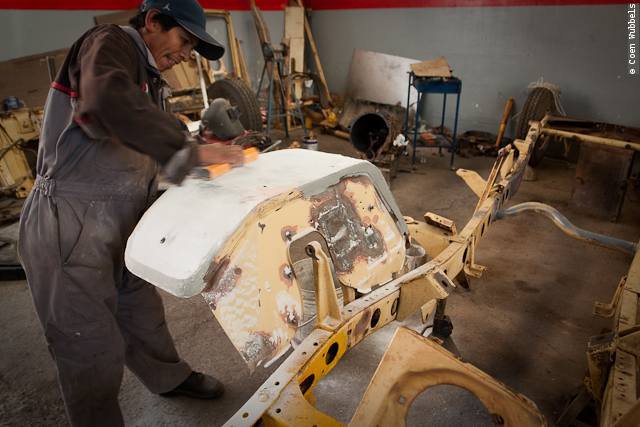
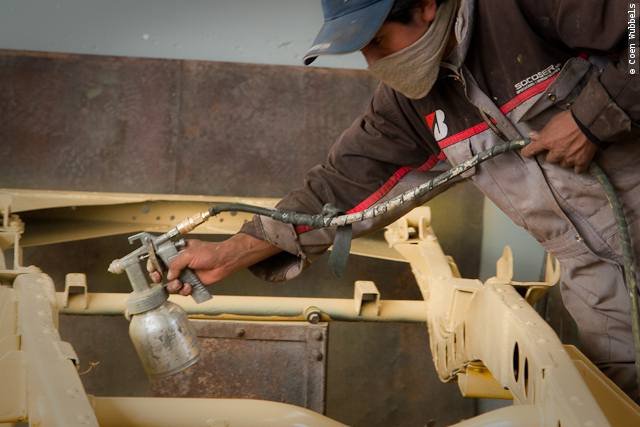
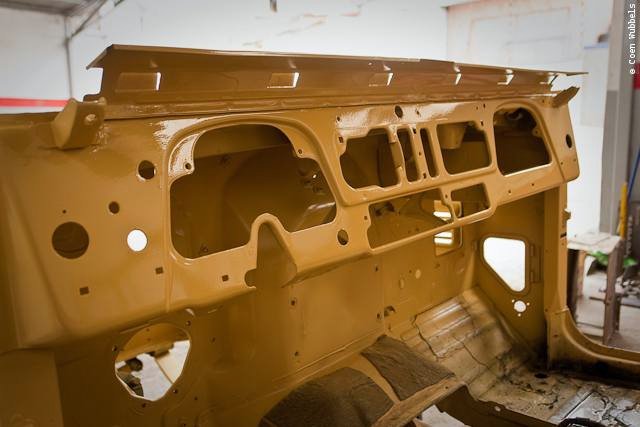
Esteban is quickly putting on a protecting layer of paint. Afterwards he will put two layers of some sort of asphaltic
paint on there after that the original color will be painted.
Getting the frame in shape is a big challenge. Fire and violence are needed to get the rust out.

The view from the bus to El Alto when I am going shopping at the car fair. With beautiful mountains in the back.
Remember this is 4.000 meters.
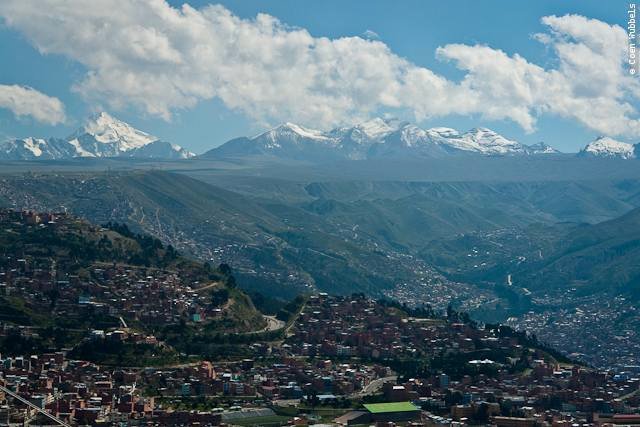
And here with La Paz down in the valley.
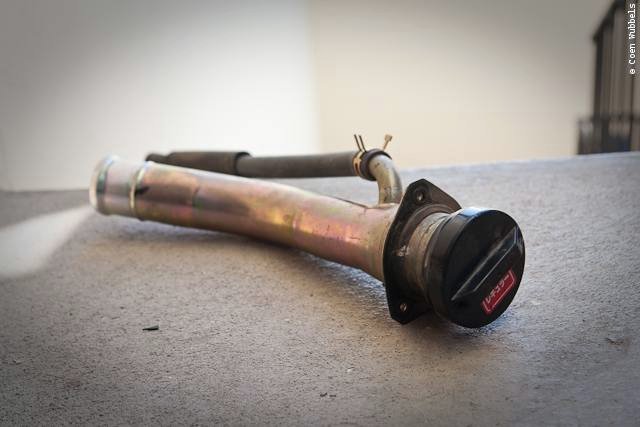
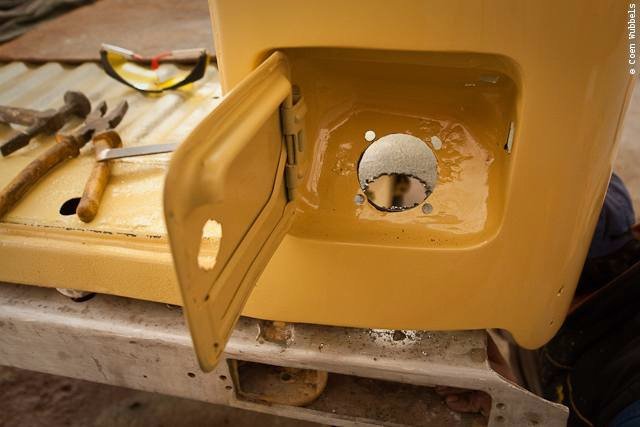
I have found a fuel intake pipe for the spare fuel tank. Now I have to find a little door and the inside housing for this.
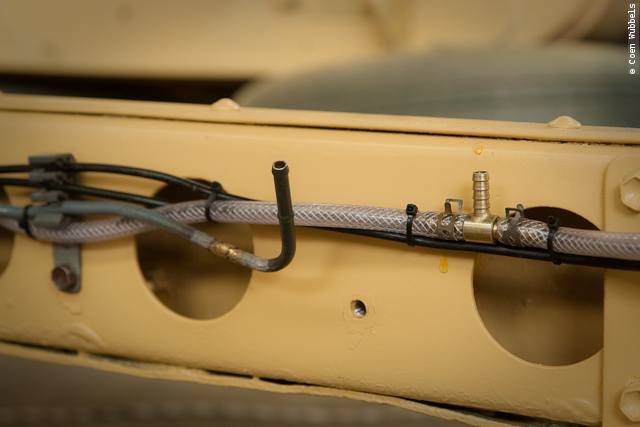
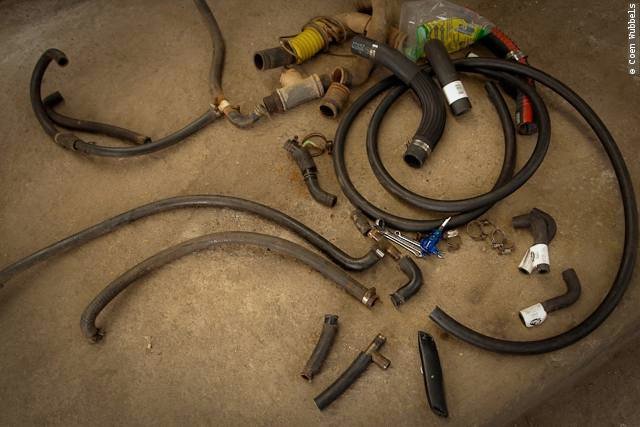
Fuel lines I have found. And since our setup will be simple without return lines or emission control stuff
I would only need one line to a mechanical three way ball valve.
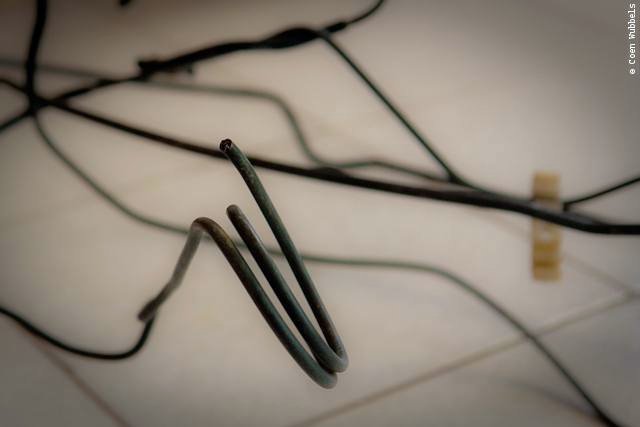
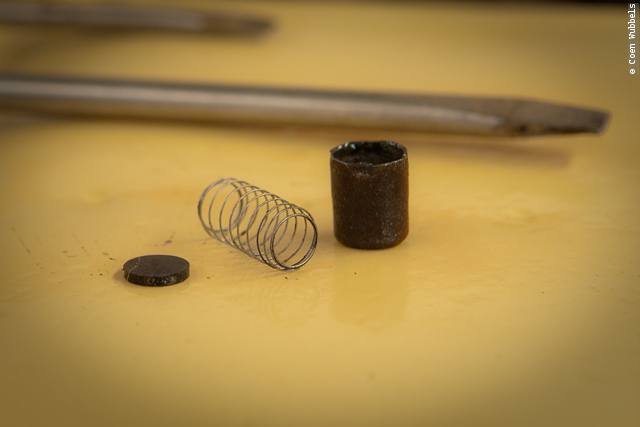
The secondhand brake tubes I found. Can somebody tell me why they sometimes have these spiral parts in them?
Does this have a function or is this only to not have to cut the material?
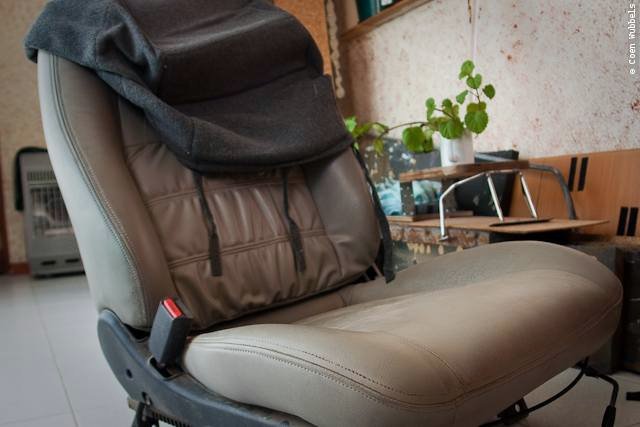
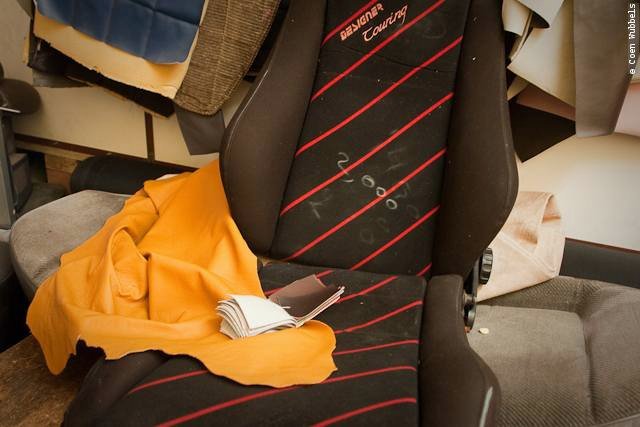
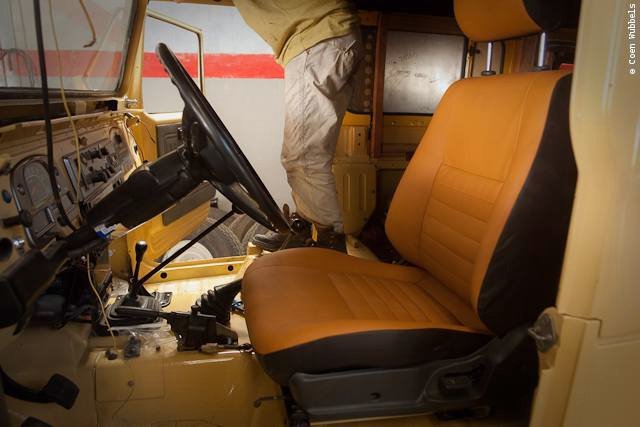
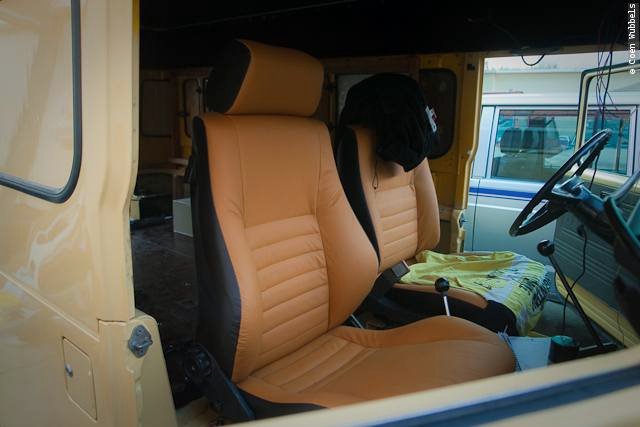
For 30 USD I bought this very nice looking quality seat. My seat is lacking support on all sides and the middle part is sagged.
Although the leatherette looks good, we will replace both our seats with real leather. I saw some very nice nappa,
but I guess that would not be sturdy enough for car seats? What do you think?
What kind of leather would be the best for a seat? Costs are not to be considered here.
Depending on the quality of the leather we would pay between 50 and 100 USD per seat. Ready in one day.
What have we been up to this week:
Karin-Marijke sanded all the woodwork that goes inside the car, bought paint and a roller and started working.
The first layer is applied. The appartement is filled with wood drying.
Little asorts of stuff being painted.
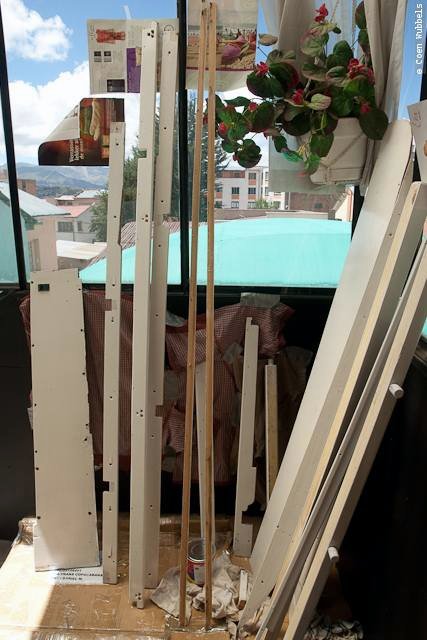
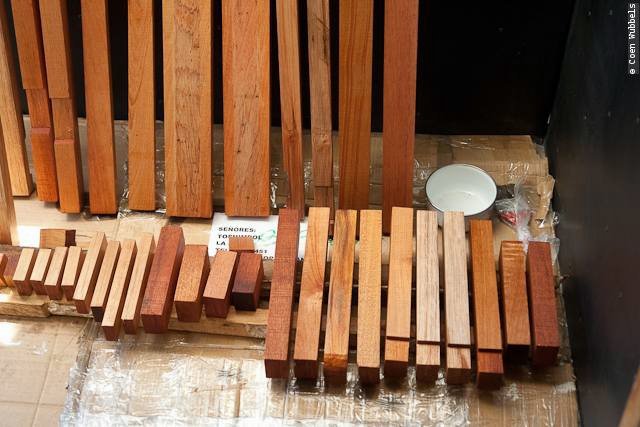
She had new pieces of wood made of the original rotted pieces that have been used between the walls.
To bad we won’t see any of this beautiful cigar cases wood. It will be in between the wall again.
Meanwhile Esteban is helping me getting the u-bolts off the leaf springs. Those are always a pain to get off. 3 break.

The front is looking better that it had been the last few years.

Esteban and Alex roll the front axle to the side.
The leaf springs on the front were giving me troubles for some time. In Cambodia I had one broken leaf replaced
, but they didn’t match the two sides, so I tried to correct the works in Brazil, but now I am fed up with it.
After taking the sets apart, we see that they are rusted and I have opted for a complete new set.
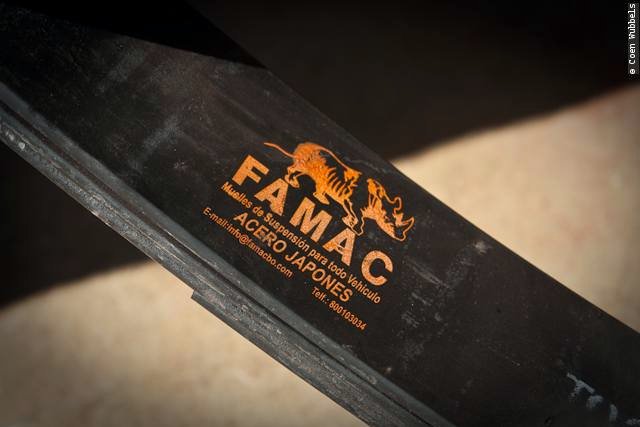
I have the option between Peruvian or Japanese steel. The latter a bit more expensive, but it is looking real swell.
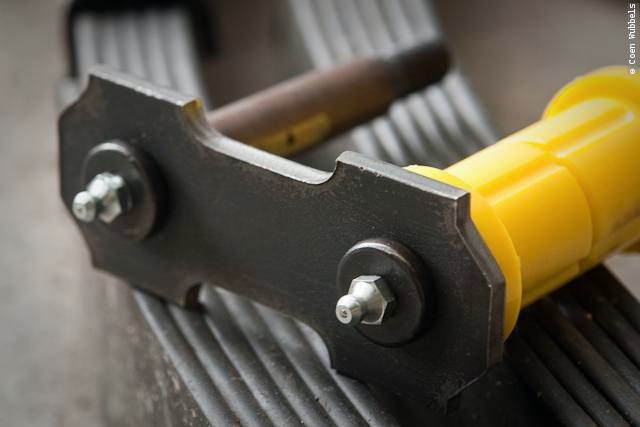
New leafs, new u-bolts and new bushings that come close to the Australian OME version.
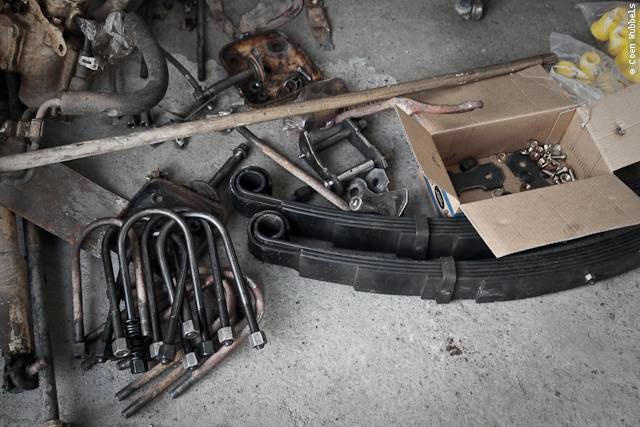
These Mexican bushings have a certain firmness that I like. The OME version is very stiff.
I have the machine shop drill holes in the bolts to apply grease to the bushings.
Now that the gearbox it out I can see that the support is dry and is sporting cracks so I get a new original one for 60 USD.
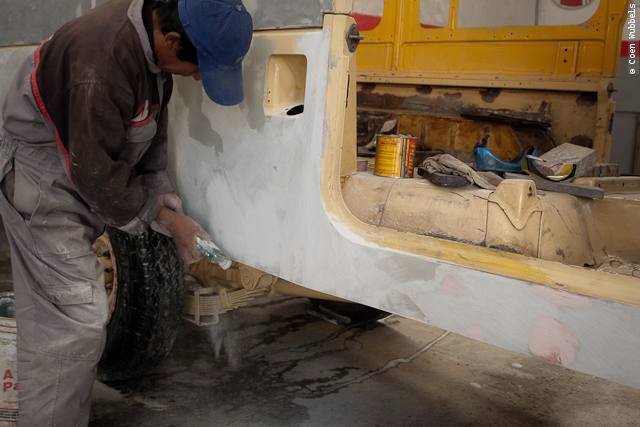
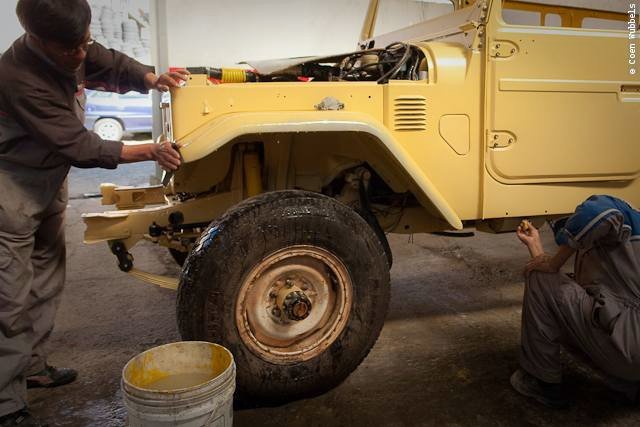
The fenders are like a calling card of our Land Cruiser, so rightfully Esteban is spending some time and dedication on those.
Trying out how the fender is sitting.
A thick orange protective layer of paint is awaiting its rubbery spay protection. We are trying different stuffs to see how it holds.
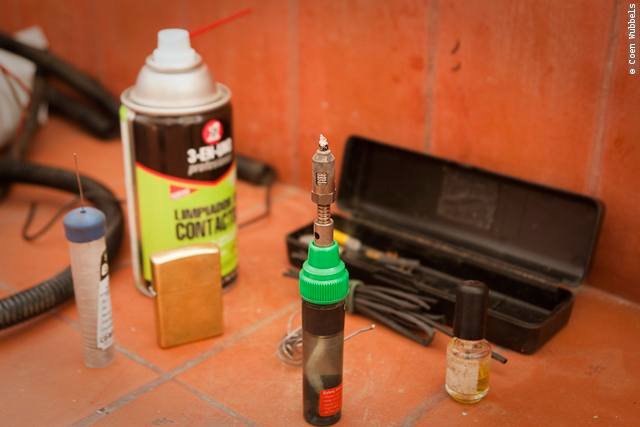
Karin-Marijke encounters some bad wires. I can get my mobile soldering tool kit once more and get to work.
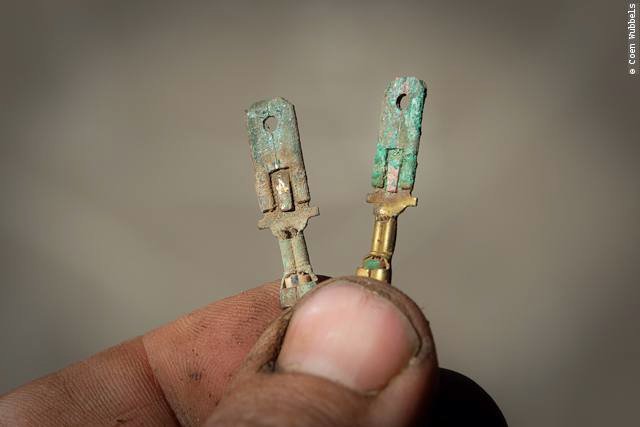
Maybe this is why some of the meters never worked. Pretty bad connections.

This is how my mobile soldering set up looks like. The little gas burner has different heads.
Pretty nifty and I am glad we bought that thing back in Argentina. It has proved its worth several times now.
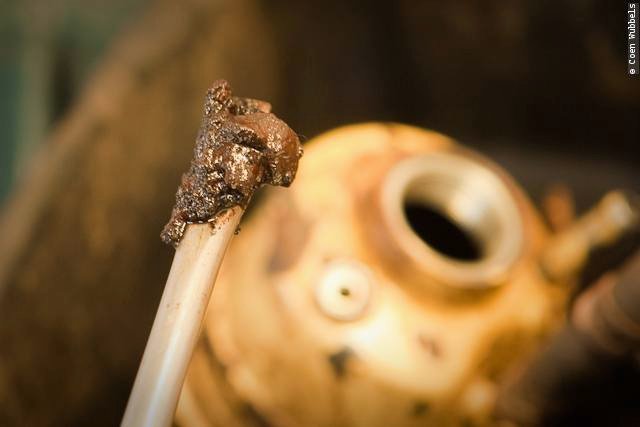
The torch head produces remarkable heat that helped me get those conical washers out of the front hubs.
This is never going to work. Good thing I am replacing them now.
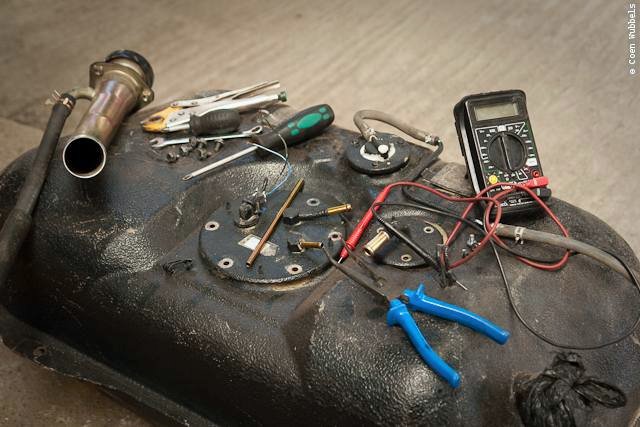
The new spare fuel tank. I emptied it and poured some diesel in it as to see the walls would be lined with a thin
protective layer. It seems not the case. I stripped the pump and hope I get the floater working with a universal fuel gauge.
Because the pump with its filter were reaching the bottom and are gone now we had to extend the tube.
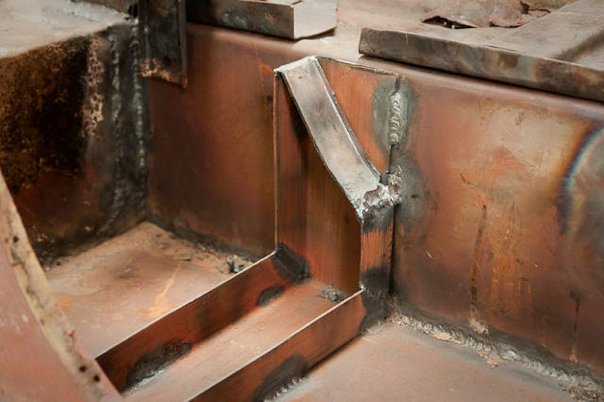
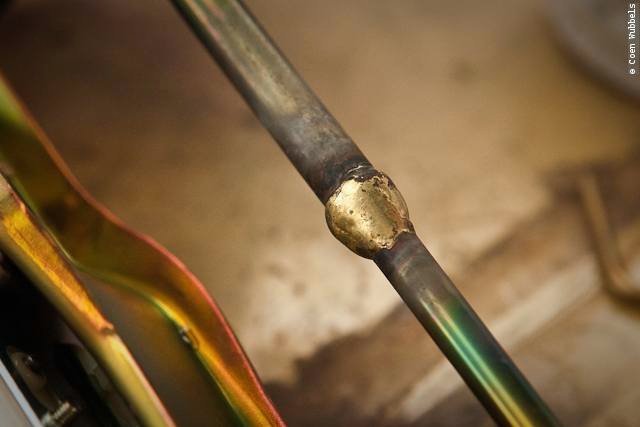
Luckily a lot of extra return line are not used, so I cut one of the tubes for this purpose. Esteban is soldering with copper.
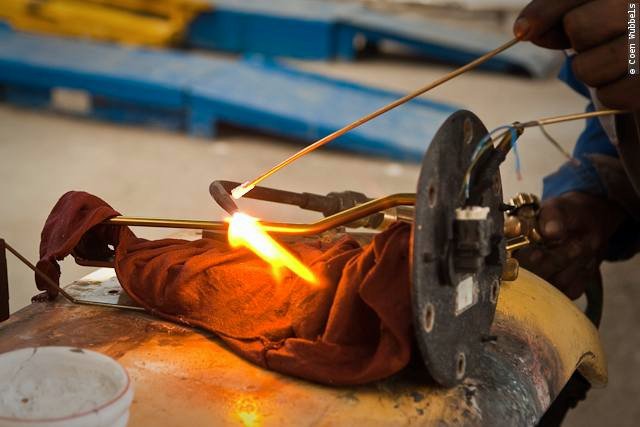
It looks like the weld is made from gold.
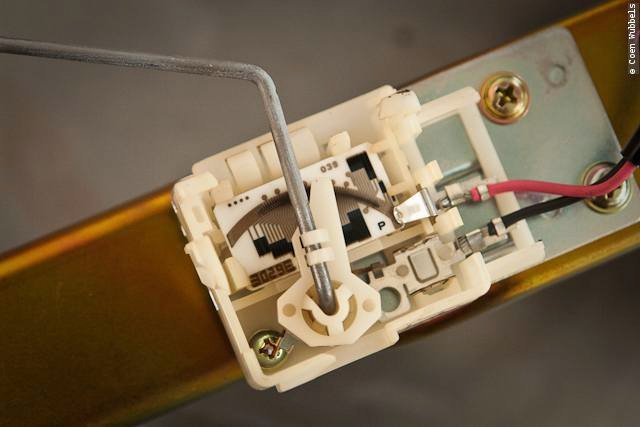
This is the transistor [or is it called a potentiometer] that is part of the floater. This gives the resistance back to the
fuel gauge that would be installed in the dash and for you to read how much fuel there is left in the tank.
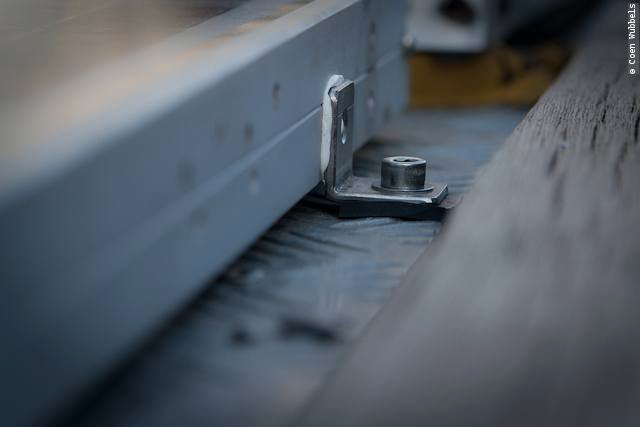
Today when I fixed the tub to the frame with the bolts that go trough these cushions, I did see s huge difference in
hight between the different cushions, but Esteban assured me that everthing would be ok once all the bolts had
been torqued. But when I came from under the cruiser, I saw two big dents in the board just uder where the doors
should be. All bent. We haven´t a clue yet as to what has happenend. But I quickly undid all the nuts and we are
going to mount the sidewall first and see what had happened later.
Some more images:
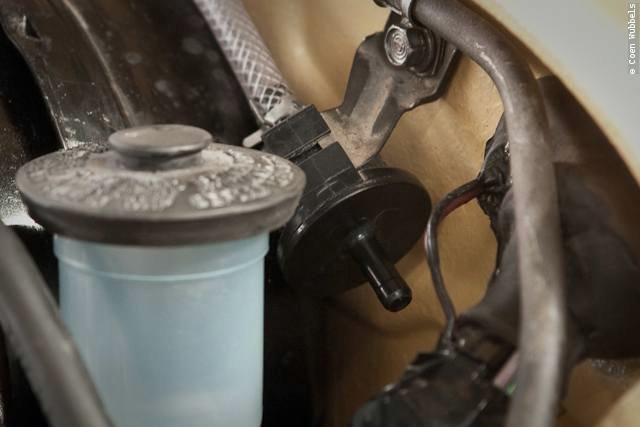
I am having a look inside the waterseparator [because I am curious what is inside]. No filter what soever, just an
empty bowl with a floater inside. But I discover an awful lot of rubbish on the bottom. So it’s a good thing I looked inside.
In general you always have to be careful with your stuff, but here in Bolivia it seems that people are being careful
about a lot of things as seen here, many cars have their logo’s or brand names riveted to their cars.
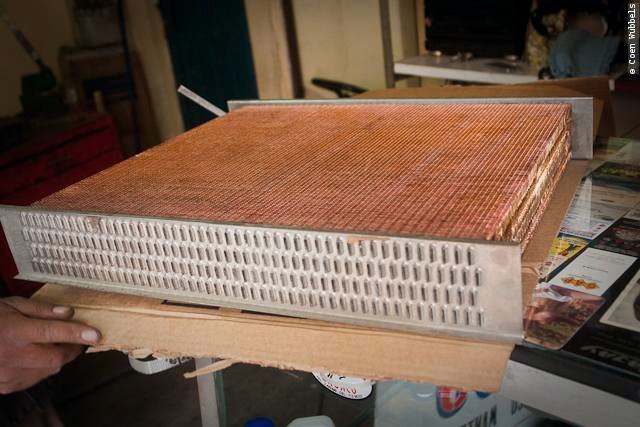
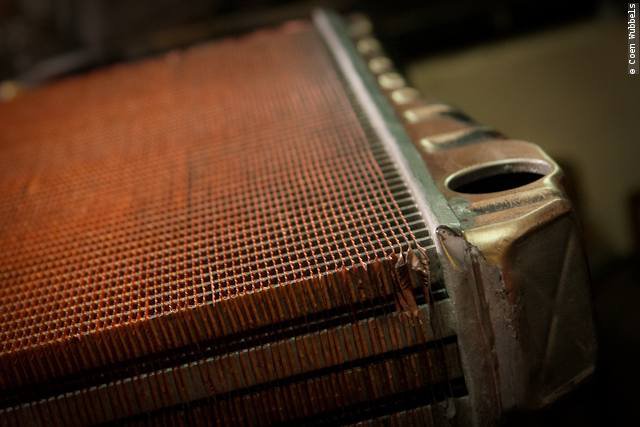
After a month our new radiator panel just came from the factory. They produce mainly for the mining industry that
is situated in this region. I’ve got the phone number from the big chief in case I want to visit the factory for a tour one day.
Karin-Marijke found a good upholsterer and went with him to visit various leather shops to see what the market had
in terms of quality and color. She bought a nice beige that matches the car color and I am hoping to make the
seats duo colored with a darker mocca color so that would really make the seats distinct.
I needed a new hollow bolt for the blinker.
Heavy tools for the reinforcements of the frame.
Every Sunday it’s junkyard shopping.
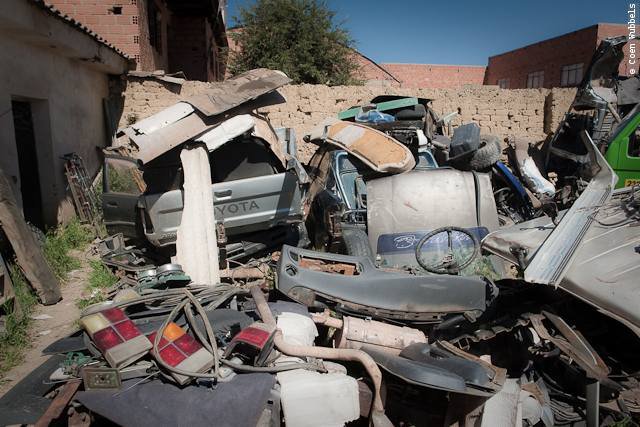
This time I get some almost new doorrubbers, and a bunch of genuine Toyota connectors.
I bought a roll of rubber and I am cutting new dust covers for the front which go around the shock absorbers.
The old radiator gets dismembered.
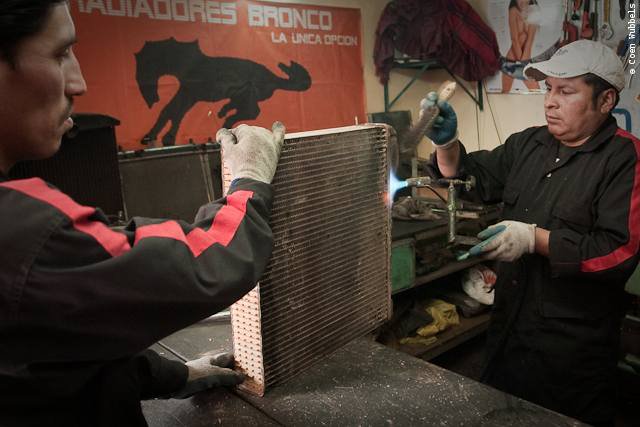
The top and bottom get a real scrub with acid and a steel brush.
Then the top gets soldered to new panel.

This is looking real good.
Meanwhile Esteban is sanding the right fender.
This is how the enforcements look like. It is still very rough because I did not grind it yet.
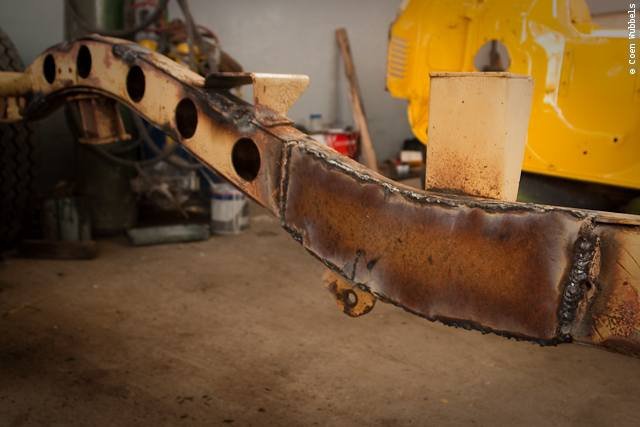
In the rear section some parts have been cleaned of rust and bent back together and welded. It is looking a whole lot better than before.
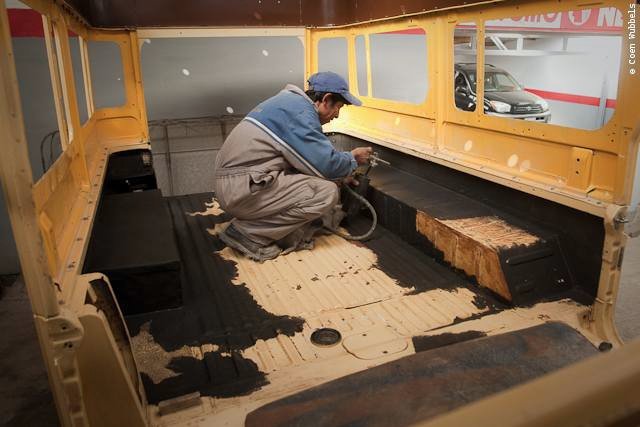
Simon is applying the asphaltic protection layer on the bottom of the tub.
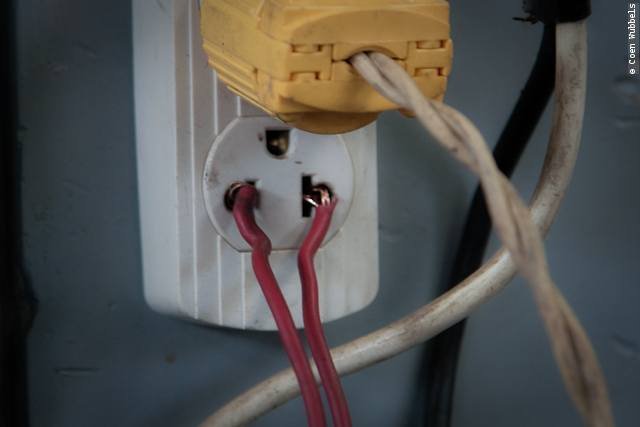
Because there is a very small local appliance industry I guess most things are imported from all over the world and
you can have all sorts of plugs that don’t correspond with the socket.
So to cut the plug and just stuff in the wires is a common thing to see around here.
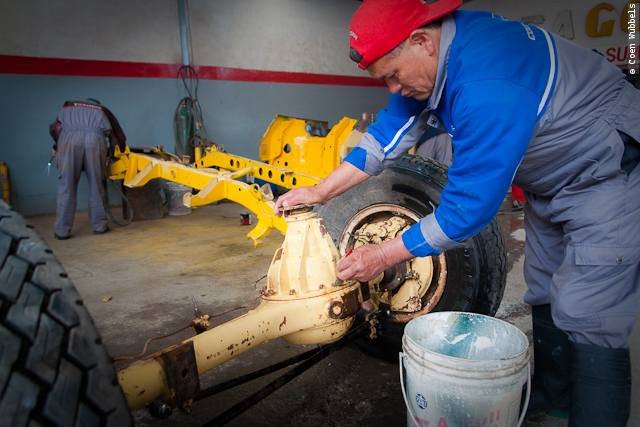
Alex is cleaning the front differential housing. In the back the frame is getting a thick protective orange layer of paint.
Esteban is passing a layer of paint over the frame. Very quick drying paint. Notice the absence of a decent dusk mask.
So you can see, that pink isn’t the color we’d chosen finally
This is how the frame looks like with the reinforcements cleaned up and the right color applied.
I am trying a fix on the emblems to see if I can get the shiny front back, but with the black background… I am still figuring this out.
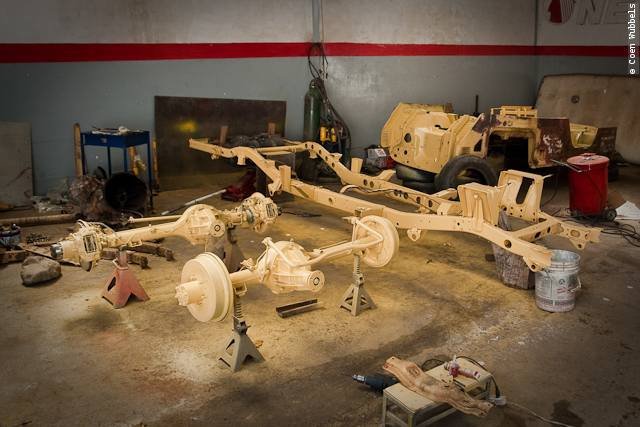
The tub in the back, the frame and the two axles in the front. If you see it like this, it looks pretty basic this car. In fact it is.
Esteban is helping me finding a way how to fit the spare tank in the rear.
It would be something like this. But we will finally see how high it can sit when the tub is over there.
I am spotting this strangely adapted BJ45 in a street not far from the shop. This one has Bolivian plates,
but it has Germany written all over. I did talk to the driver, but he wasn’t the owner and he knew very little about the car, or where it came from.
Me cleaning the front cardan. Making it ready to be painted as well.
The two axles painted and ready to roll in place under the frame.
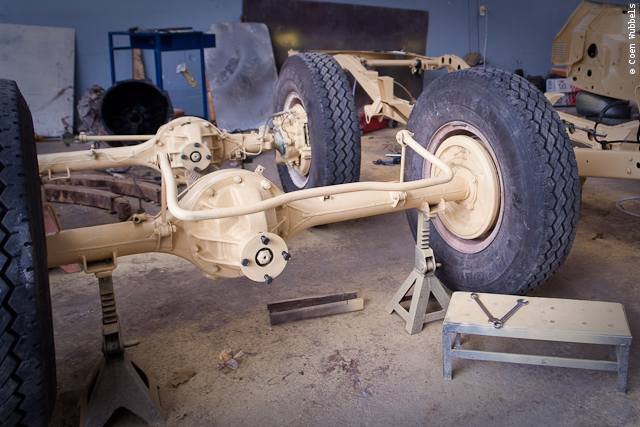
I redid the brake lines, added a new fuel line for the spare tank and a hose for the breather plug on the rear axle.
I want to combine that one with the front one and the one that sits on the gearbox.
The end of the fuel line that needs to go to a 24v solenoid port selector which I haven’t found yet. Most likely I would need to source that outside Bolivia.
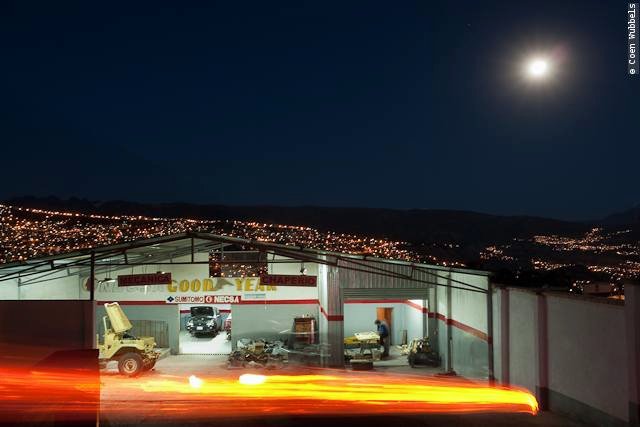
When I am finished for the day after seven, I have one last look back at the shop.
La Paz in the back is illuminated by thousands of lights. And the Illimani is still visible.
I am putting the u-bolts back on its place.
I bought some nylock nuts but they are wider and lower than the original nuts that go with the u-bolts.
So more turning, and a little less space to get the socket on the nut.
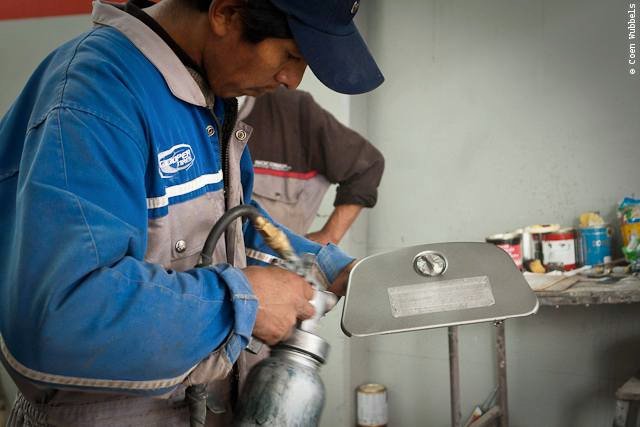
Esteban clearly enjoying himself while sanding the sidepanel.
Simon is putting a layer of primer on the hood.
The guys are helping me in re placing the gearbox. I still need the dust cover on the clutch arm, I hope that one will arrive shortly on Toyota HQ downtown.
So this is how it looks so far. So far so good they say.
Finally I got the courage to pry the cap off the gearbox breather.
I was hoping for something that was screwed in the housing, so I could simply get a nipple with the same thread.
But I was nicely surprised by a pressed in thing that I had not the courace for to get it out.
And I did not want to thread that one in fear of getting metal pieces in the gearbox.
So I fabricated something with a piece of hose. Clamping it to the gearbox housing like this.
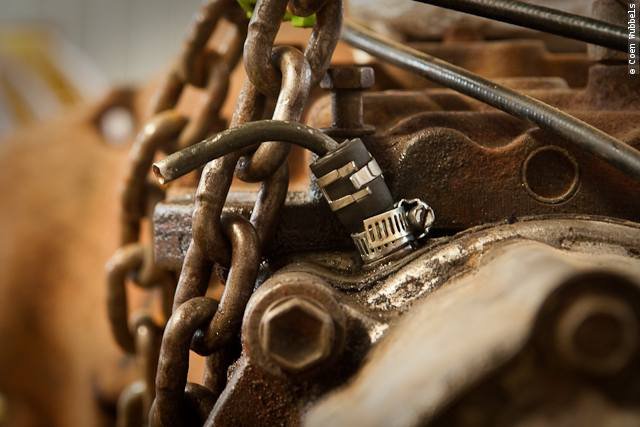
And then getting it with a tube to combine the three breathers.
This is how my homemade cushions look like. I hope I did well and the will last a bit?
Here again from a different angle.
At the car fair up in El Alto, I got myself some new gauges. One fuel gauge for the spare fueltank and two temperature gauges.
One mechanical for the oil temperature that I will mesure at the carter plug and one 24v electrical one for the water temperature measured near the thermostat.

I am dismantling the camping windows and have great difficulties in getting the Sikaflexed rubbers off.
I see that the metal used is a form of sandwiched aluminum. Very light and strong enough for this purpose.
Esteban again playing with fire. Smoke coming from every corner.
We gather more hands in order to get the tub on the frame. A little adjusting and it sits good.
Still al little high because we need more weight for the leaf springs to get lower.
Ready to get started mounting stuff. The engine sill needs some cleaning and I want to look at the oily side, together with Caesar
I will change some seals and get the valves checked out.
Looking good.
This is how the rubber cushions look like from underneath.
Here a close up from a cushion made from a truck tire.
The back also needs some adjusting. I guess that the previous owner never installed any cushions here,
and we made some holes, but they do not even out, so we have to drill some new holes for the cushions at the back.
My new seat needs some adjusting as well, as the rails will not fit instantly on the original bars.
Esteban is working his modeling magic with the grey stuff.
I am working my creativity on getting a solution for my new seat which doesn’t like the Land Cruiser rail.
So I am cutting pieces of left over steel and feet of the original rail and weld up something that will fit.
Some black paint and all looks like new. Ready to get leathered up.
Alex is working his ass off on the pieces that litter the place. Sanding is his main job this week.
Simon is getting the fender super smooth.
Pieces lying all over the place in different stages of restauration.
Degreasing, wire brushing, sanding, filler, sanding, primer, sanding, filler, sanding, paint, sanding, varnish.
The tub must get a bit lower on the frame which is not easy because of the great tension that is sitting between them.
When that happens, we see the pieces just under the doors bending. We have to solve that on a later stage. First we must get more pieces on the tub.
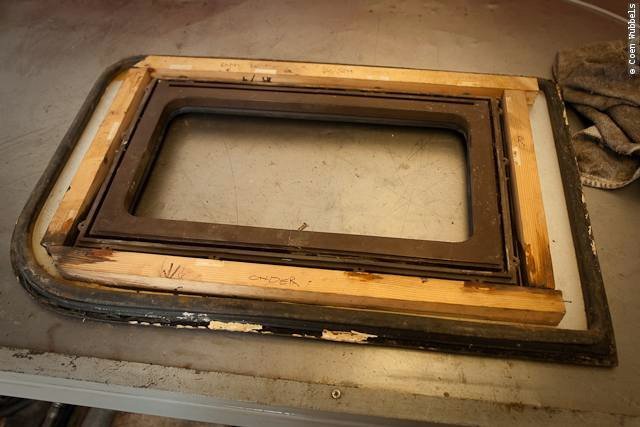
The gutter and seals aren’t looking that great. Karin-Marijke found some original Toyota looking molded roof seal per meter.
We decide to redo the gutter by a specialist. 3 to 4 days work for 100 USD.
We have many testing going on trying to fit every piece.
The cockpit is varnished so that I can start getting things wired when it is dry in a few days.
Little adjustments are made, but over all things are going great.
The other side brings more problems. Esteban redid the whole back curve and now doesn’t sit well.
I separated the gutter from the roof. The roof is awaiting a big job. Initially I wanted a stainless steel gutter or
even aluminium, but here in Bolivia that stuff is really expensive. It isn’t used on a large scale, so pretty exclusive. To bad.
Alex and Esteban working with heavy tools to make the panels sit good on the tub.

The engine is clean and ready for the next step. New thermostat, clutchplate and pressureplate, setting valves,
new seal on the breather side, and fixing a little hole that I punched in the carter.
Unluckily Caesar is calling to say that he doesn’t have any time any more to take these jobs and that I have to tackle this problem myself.

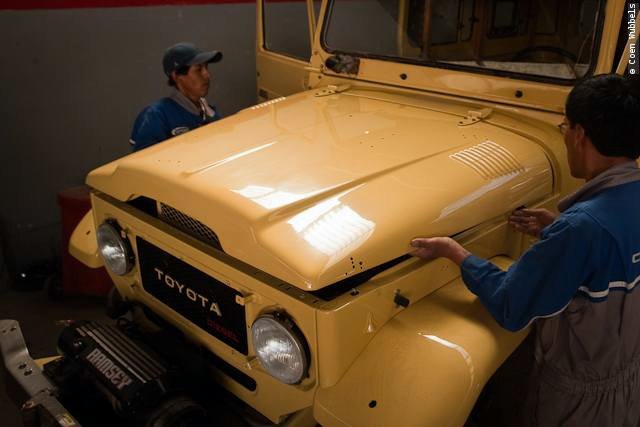
Simon is getting the fenders and grille on.
This begins to look like a car now isn’t it?
I redid the master brake cylinder and bought a new clutch cylinder.
Thinking about where the heck all those lines went.
Luckily I have the parts manual where I find good images of where all the lines, tubes and hoses go.
Now that we are going to have a spare on the back, we have to switch over the licence plate to the other door.
So the carrier with the lights have to be transfered.
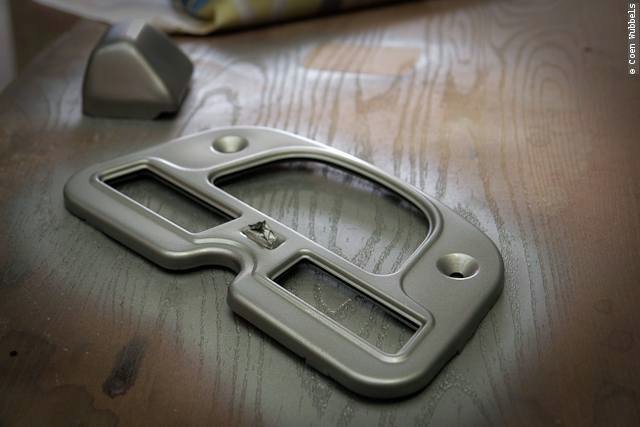
Several parts of the cockpit are getting a new coat of metallic grey.
As well as the light caps of the license plate holder [in the back].
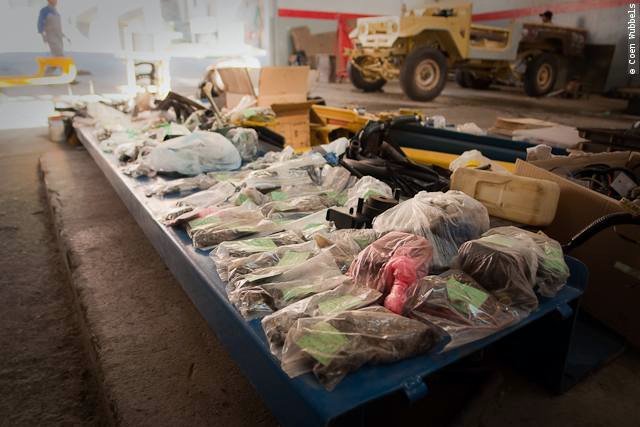
I don’t know how many zip lock bags with parts are awaiting their turn.
Simon is adjusting the hood. Everything must fit exactly. Otherwise the door might not close correctly for instance.
I am still working under the hood.

Adjusting needs time and patience.
Esteban is cutting up the back a few times to weld reinforcements and nuts as to accommodate the spare wheel carrier.
Our longbody Cruiser was never prepared for this as the smaller versions have, so we have to improvise here.
We are fitting the support here.
The inside of the side panel is getting the same treatment. Reinforcements and welded stainless steel nuts.
This is how it is going to look when finished.
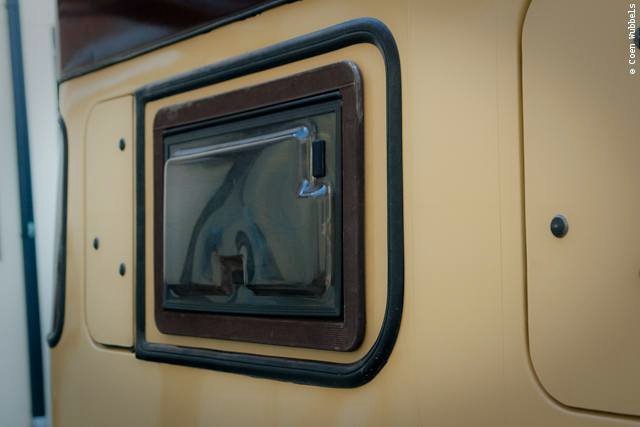
This little socket is sitting on the inside of the glove compartment. Never new we had that until we took it all
apart and discovered it. Don’t know why it is there or what voltage it would be. I guess 24 volt. Maybe a light?
I am getting the wiring in.
In the meantime we hired Emanuel to get the engine jobs done. I would like to do them myself, but I cannot split
myself in three to do all the jobs I want to do. Luckily Karin-Marijke is getting my shoppings.
Once a day she asks me if I need more nuts or bolts or rubbers or the likes.
She is getting recognized in some shops because I have been spreading some of our postcards.
He getting the carter clean and Esteban is welding the little hole with bronze.
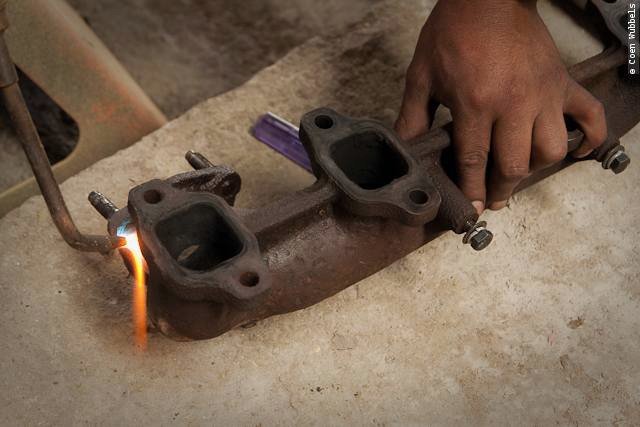
Two tough bolts are getting removed with heat.
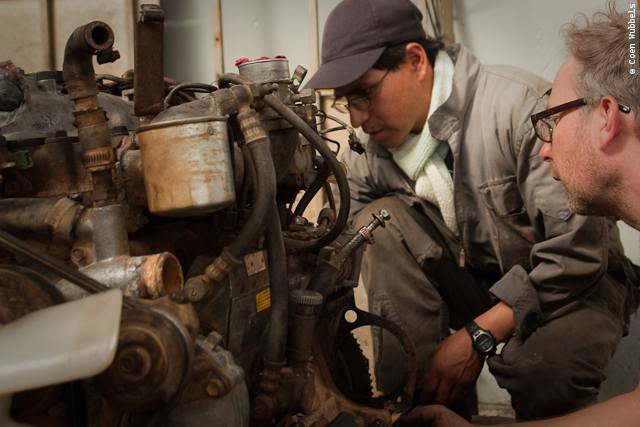
Emanuel and I are getting a closer look at the clutch bearing.
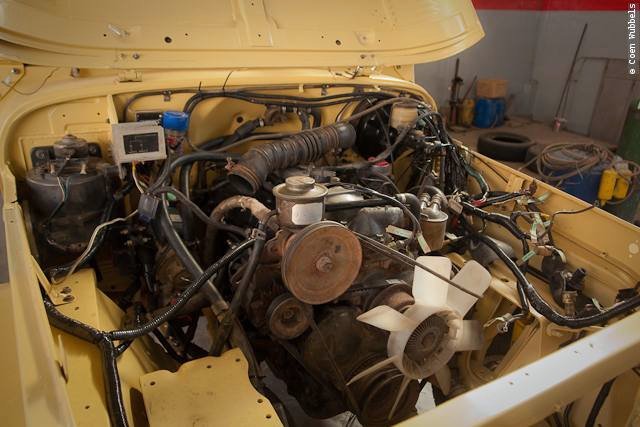
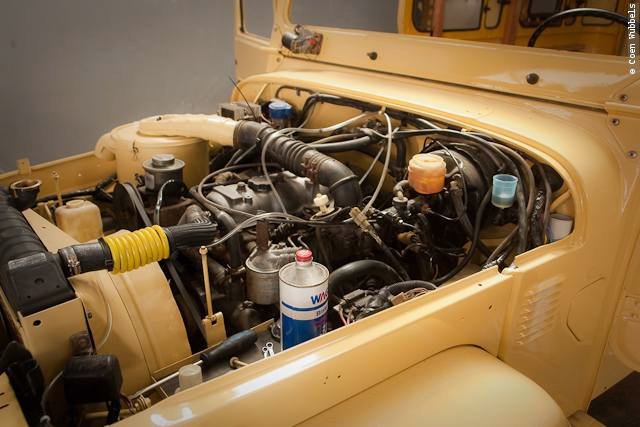
Time to get the engine into the bay. It has been sitting long enough outside.
Our trusty 3B engine. 320.000 kilometers [or more] and purring happily.
Ready for the big job.
The grille is getting in the way, but removing 12 bolts is too much work! So we lift the engine over it.
Actually the engine is hanging still and we are rolling the Cruiser under it.
Getting this far is easy.
Getting the engine hooked up on the gearbox is more challenging because they both are sitting under different angles.
Some jacks and patience get the job done.
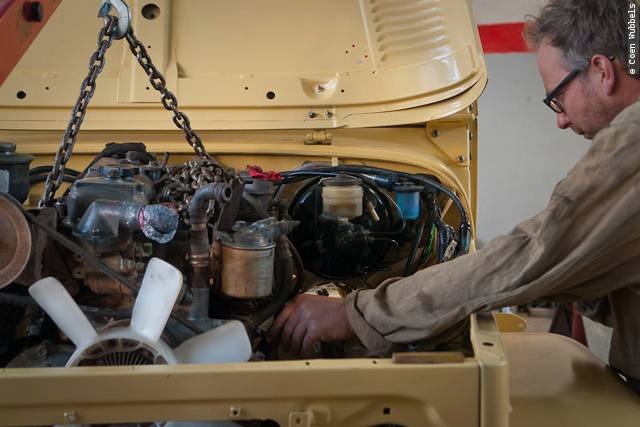
I can start getting the hoses into place. I bought new hoses. Because we have a rear heater, a Webasto auxiliary
heater and an electric heater it brings six additional hoses into the game. Pretty tight in some places.
A full moon on a cloudless night illuminate the Illimani and La Paz.

Working late.
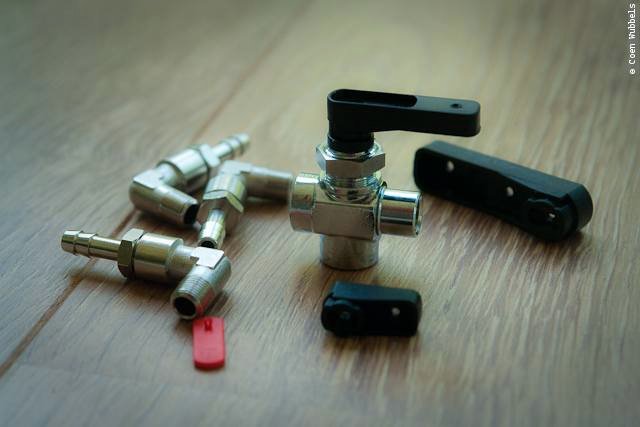
The only logical place for the fuel cap is on the back. I would have loved a dual mouth on the original place, but
those things are alien here. I am trying to get a 3 way ball valve for weeks. Not heard off around here
. “Get two single ball valves and a T” is all I am getting, but I don’t want that.

Space is limited so adjustments have to be made in order to fit it all in the lower part of the back.
In the end we manage to find the solution.
This is how its going to look like. Karin-Marijke buys an extra lock and has it adjusted to our keys. So we can keep
using our original keys. The locksmiths fee is 2 USD!
Esteban and Karin-Marijke are test fitting the weatherstrip she bought.
All is well so Mr. Sikaflex can start applying the magical stuff on the body. The guys are really impressed with
Sikaflex and are considering to buy a tube themselves. But I think the stiff Bolivian price of 17 USD is to much for them.
Letting the strip dry one day before setting the side panel.
Alex is throwing his weight around to get the panel seated well. Simon and Esteban are getting the bolts in.
Don Edwin takes me and the roof for a spin to find a specialist who is going to get the gutters in shape again.
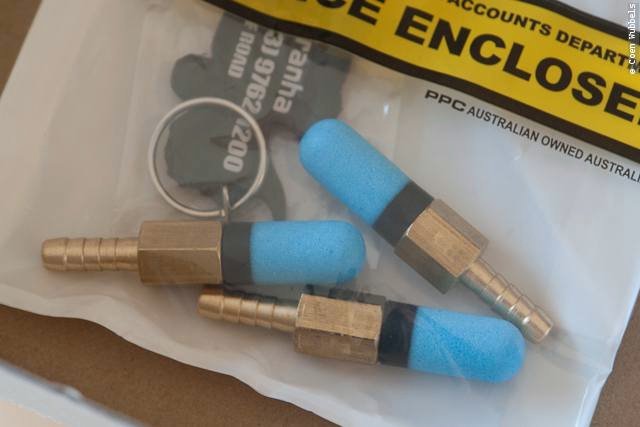
This is my solution on the breather lines of the differentials and the gearbox. This is a temporary solution.
Thanks to Graeme Baily from down under I will be placing some Piranha Offroad Diff Breathers on the lines soon! Thanks Graeme.
Okay… a week of full 14 hours per day and a lot of stress…. More images:
The parts under the doors due to much heat while welding have been deformed. The doors seat well and so does the rest.
So Esteban cuts these parts and welds them again to get it all nice and clean.
Alex is cleaning the raised roof of aluminium. Getting the old adhesives off without a heater is a pain.
And again Esteban is sanding the body.
This is the electric water heater. They are sometimes used in parts where is is getting -20 or more during the night.
People can plug it into their 110v or 220v and during the night this little thing keeps the water hot and circulating
in the engine. In the morning just unplug and drive off.
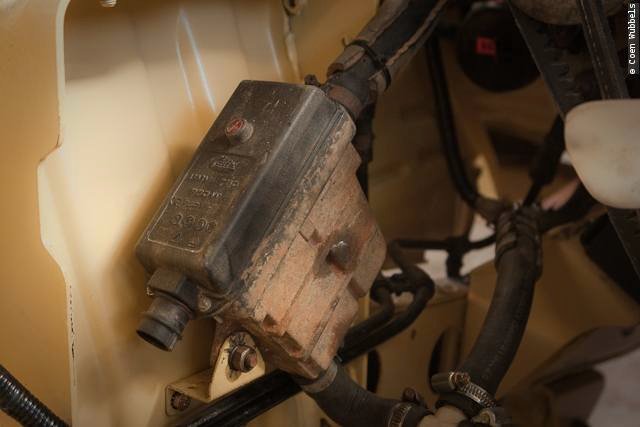
If we are in the middel of nowhere and it gets more than -20, we can use our Webasto.
This thing actually does the same thing as the electric one, only is works on diesel.
An added feature is that it also drives the inhouse heating blower. Say you want to sit up late and watch a movie,
this little device can keep the heater going while the engine is off. You even can program it. So you want to heat up
the engine and pre heat the cabine at seven in the morning. We never use it, but it can do all that.
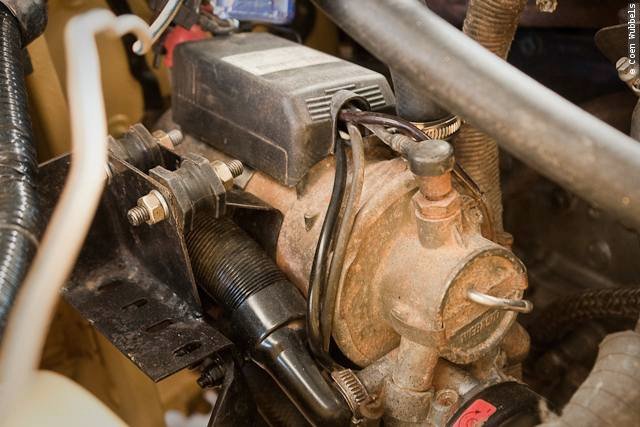
All these carry al lot of tubes and wires.
We buy a fat plastic tube to carry all the extra wires to the rear where all the extra fuses and relais are with the dual battery setup and the inverters.
I’m putting the radiator in its place so I can hook up all the tubes.
Just got these figures from Karin-Marijke:
Landcruising Adventure Some facts and figures:
– Overhaul took exactly 100 days
– Based on an 8-hour workday:
* Coen worked 617 hours
* All mechanics together 922 hours
* KM 294 hours
– Total costs 6000 US dollars:
* workshop for overhaul bodywork + extra work like 2nd dieseltank, support for spare tire etc 3000 US dollars
* all costs for spare parts, material, tools etc 3000 US dollars
some more images:
Esteban puts little details into the sidewall.
The rear looks nice. The aluminium bumper is fixed. It had a little crack somewhere.
Simon is putting a lot of attention to the doors. He’s very meticulous. I like him for that.
I pay a little visit a few block down the road where the roof gets a new gutter. Carlos works very precise, but has to
be told several times what I expect from him.
Alex is sanding the spare tire carrier.
The body is getting another good scrub with sandpaper and a wooden block.
Meanwhile I’m checking up on things and I see the aluminum raised part of the roof has two huge cracks in them.
Just in time, because the guys were planing to paint it today. I’m hurrying it to the special welder to fix it. 20 USD
and one hour is all it takes.
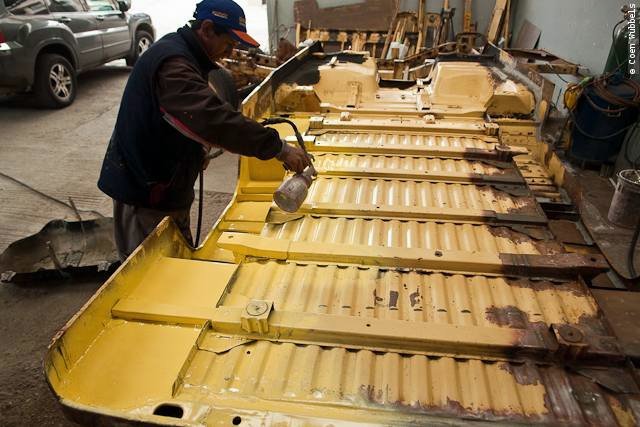
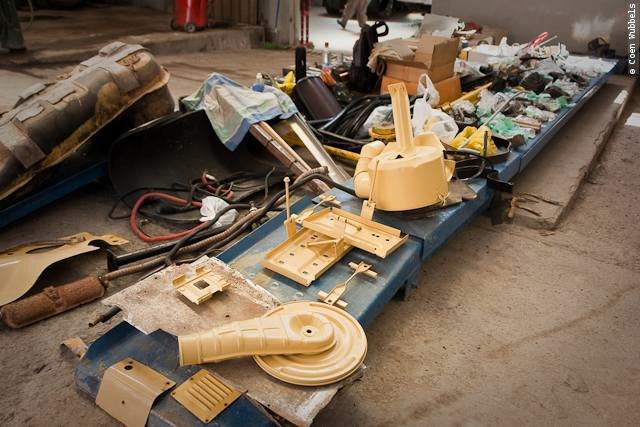
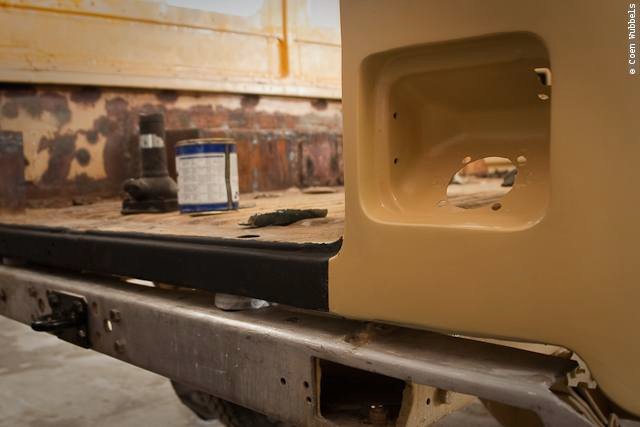
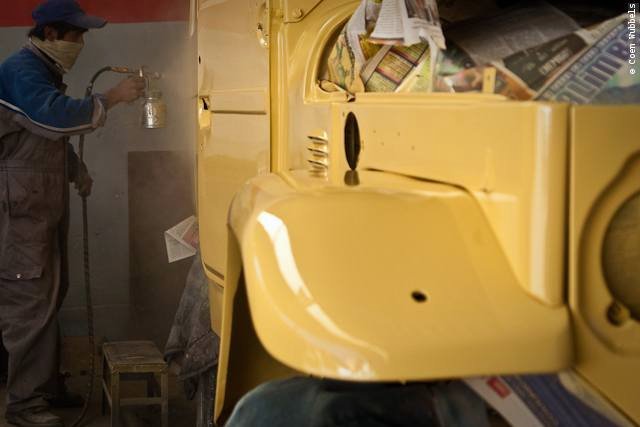
More and more parts can be installed after they have been giving a nice yellow color.
Simon is on track with the doors.
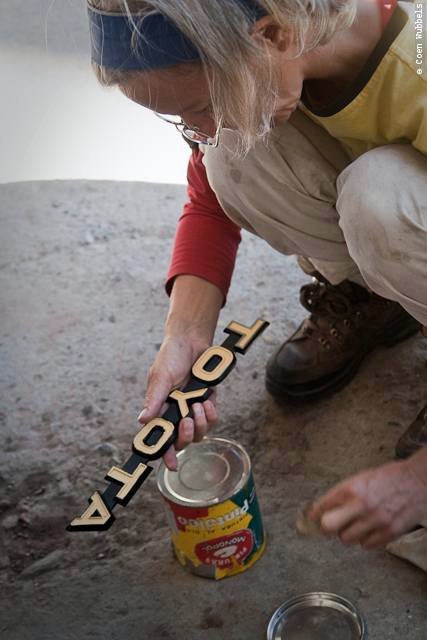
Karin-Marijke did a successful test with the thinner and the emblems, so the rest is undergoing the same treatment.
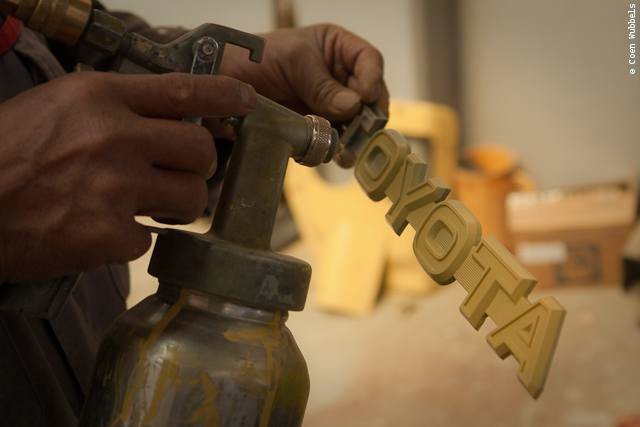
See how she gets the magic working and puts the glamour back where it belongs.
I can paint the ‘4’ and the ‘diesel’ in red. After that I paint the background of the big Toyota emblem black and Karin-Marijke conjures their shiny borders.
Just a little bit of thinner works like magic.
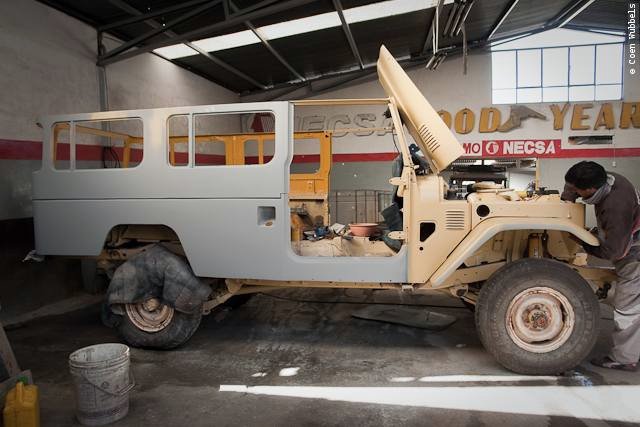
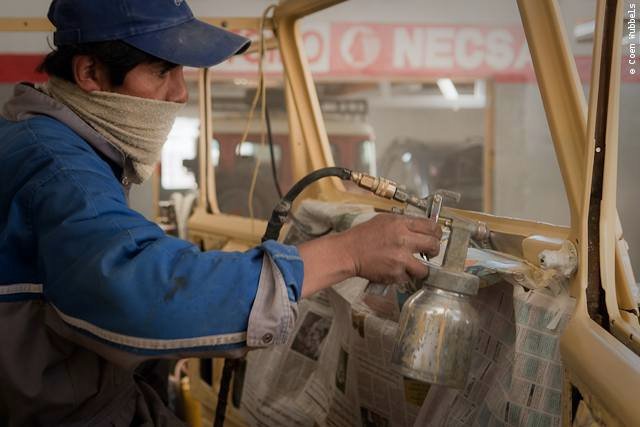
The Land Cruiser is ready to get some layers of paint.
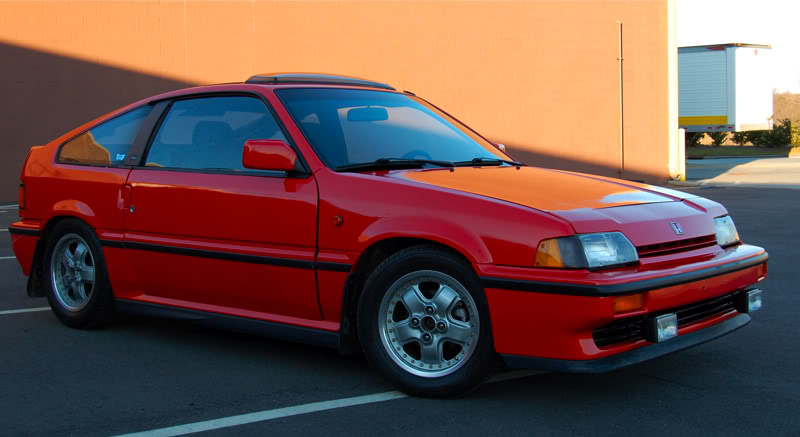
This nice red one is getting some new leaf springs.
Simon is washing the car for the last time and Esteban is getting some protective paint on some spots.
I glued the emblems with Sikaflex on the grille.
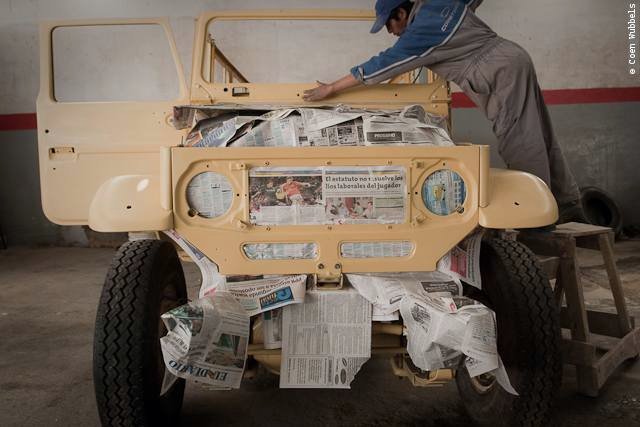
Washing and Rinsing
After that, packing the whole in newspapers and wiping it down with dry hands.
The new fuel intake on the rear. This was the only option where it wouldn’t take to much space from the inside ‘living’ area.
How it will look underneath, we still have to figure that out.
The hood looks super! 3 layers of paint and 3 layers varnish.
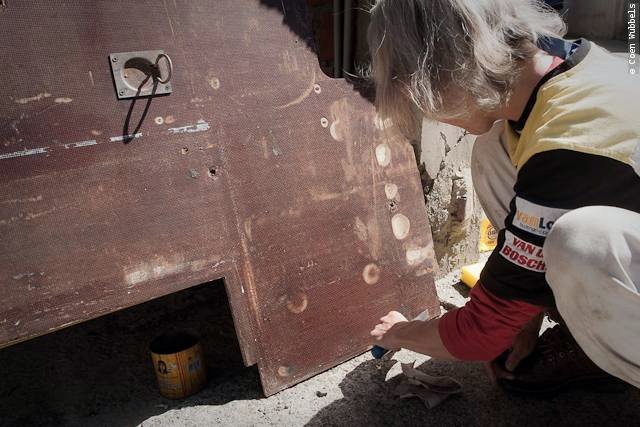
Karin-Marijke is getting the cargo floor into shape and is looking for a way to paint or vanish it. Maybe they even
have a similar sort of wooden system that doesn’t wear? The rear of the floor looks very good, but we can’t flip it
because of the non uniform layout.
Did I tell you we were ready for paint and varnish?
They have real dust covers, but they get clogged easily and I think they are a bit expensive for the guys.
They have to buy all their stuff, even soap to wash your hands. So a wet cloth works best says Esteban.
A few layers of varnish.

Does it shine or not!
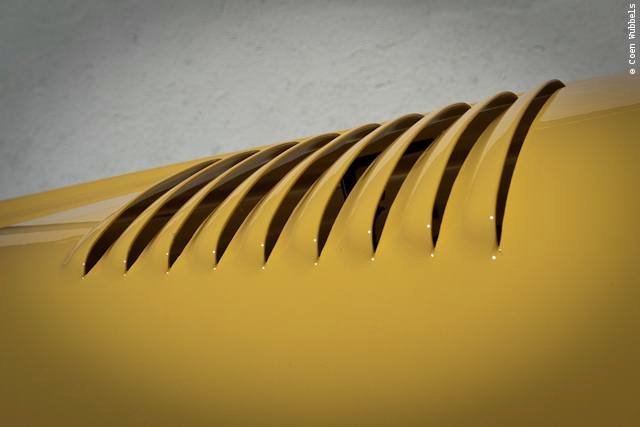
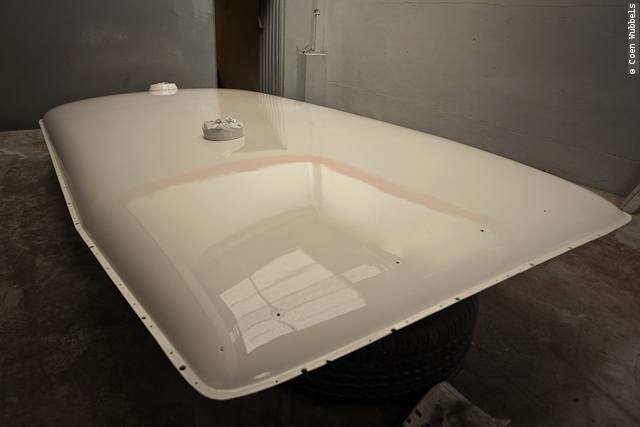
The raised part of the roof is going to be in coffee.
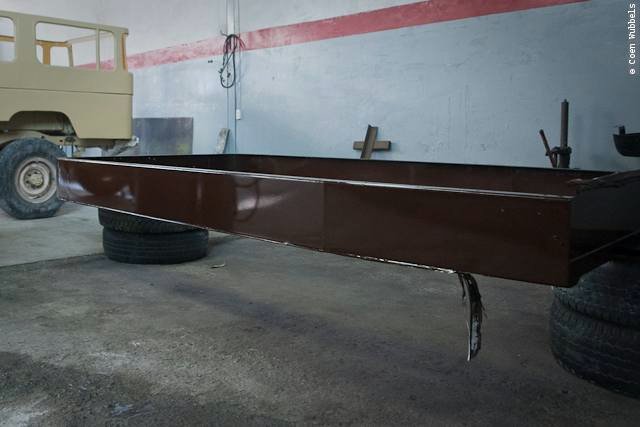
The tire carrier and asorts are being painted.
The raised section is getting attached.
Alex is getting the wheels off. The rims are getting sanded and painted.

I am trying to get the stainless steel bumper shiny and to mount the tow hooks and winch.
Getting some more protective asphalt paint on the inside.
The extended section of the roof sits well.
Karin-Marijke is getting a new weather strip seated. Getting the holes on the right spot is most challenging.
This is how the new inlet is going to look like.
When installing the original tank I come across a pretty devastated fuel line. Luckily this is the last line of the breather section of the tank. Not some main line.
Karin-Marijke buys some new brake shoes for the rear.

And I am cleaning the adjustment system. Funny In my book they show as two with different directional threads. I have two similar turning ones.
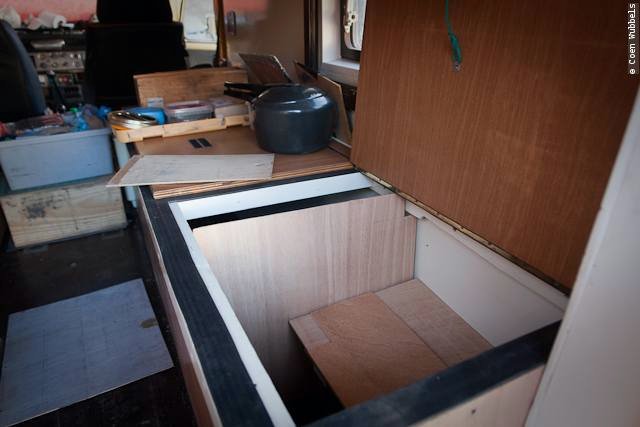
Karin-Marijke cleaned and varnished the floor and is preparing to install it again. How convenient like this without the roof.
Let’s have a look. How was it again?
The roof got a few layers of paint and varnish.
This is how the once looked.
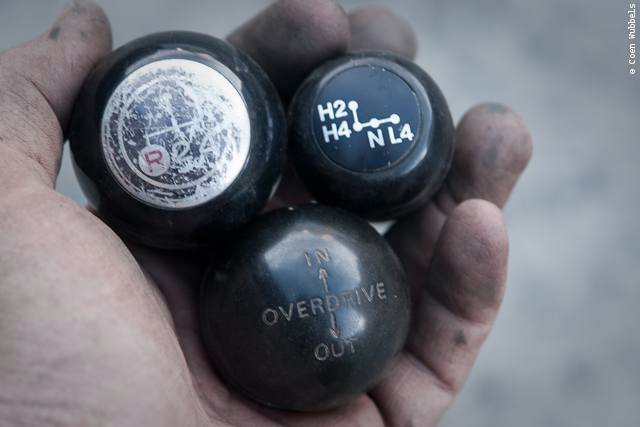
The balls that direct my life at the moment.
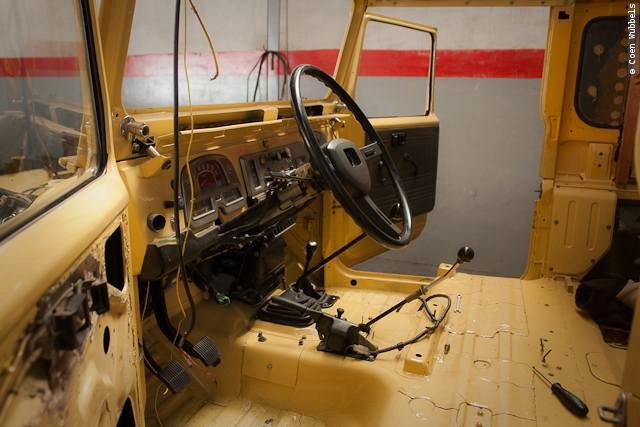
Steering wheel is in and the shifters are connected.
Getting the brake fluid in the system.
Karin-Marijke buys a new window lifter.

Somewhere on a market I came across some old Sika with the expire date neatly covered with a small new sticker with a different date.
With the latest batch Sika changed it into an engraved notice on the bottom and removed the side stickers.
“Mr. Zigzag cruiser” Fred from France helps out to get the engine running.

“Mr. Bronco” Jeroen from Asuncion, Paraguay took a plane for a few days to take a peek at the work in process.
I am getting my fill of rivets. A little over 130 go into the roof!
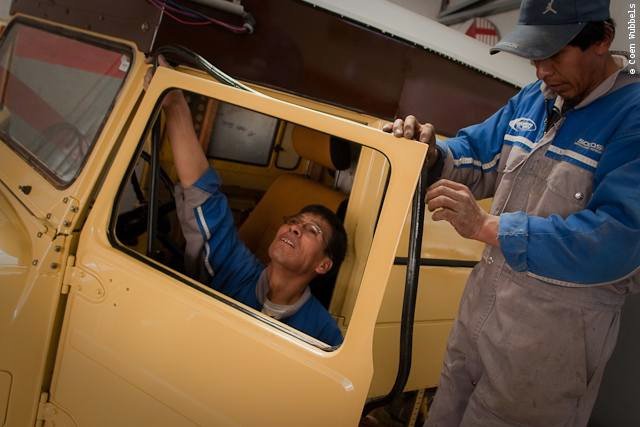
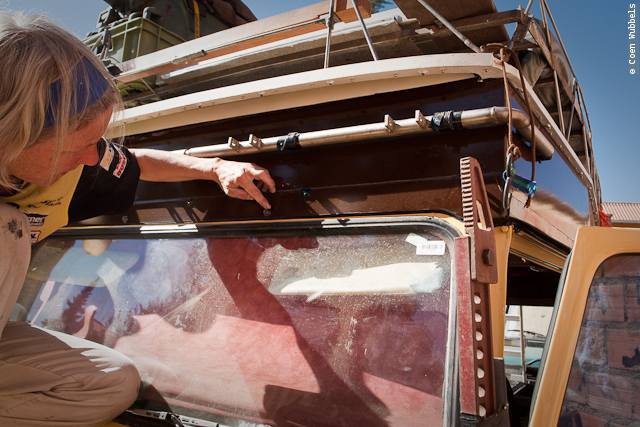
We ordered a new screen and the guys come over to install it.
Three minutes it takes to get it in.
Esteban and Simon are placing the hood.
Simon is adjusting the hood
I get the new seat in. Looking great in duo tones.
Simon and Esteban fixing the door rubbers.
To get some space for the new tank we have to adapt some parts of the exhaust system.
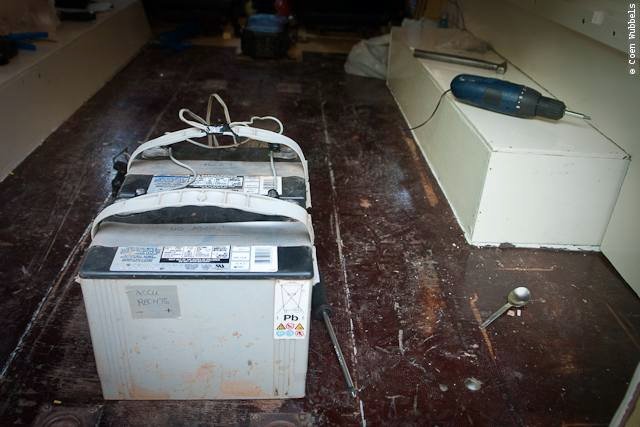
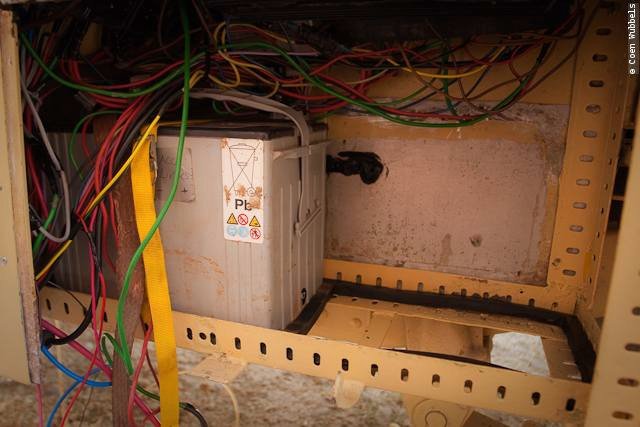
This is the place for the dual battery setup.
The mudguards are getting a touch up.
The spare wheel is going here from now on.
The roof rack is on there again.
Getting a new spot for the logo’s. Fixing it with masking tape waiting while the Sika cures a bit.
I bought a nice light for the back.
Getting rain protection over the doors.
The pre filter needs some adjustment after the body has been altered a bit.
Camping double layered windows are installed.
The newly leathered seats sit really well.
I am improvising to get the drill working.
The inside is slowly changing.
razor sharp mail from down under in my moms mailbox
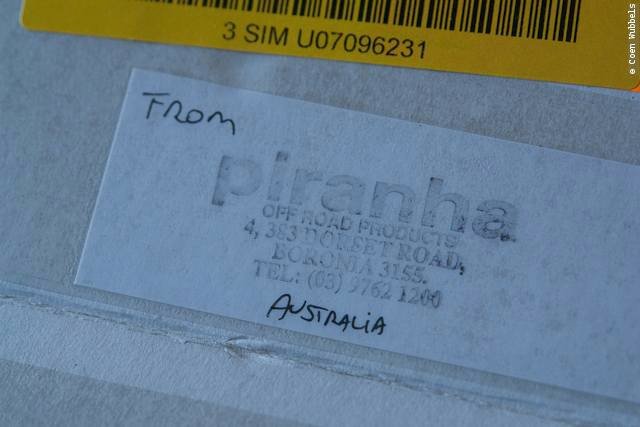
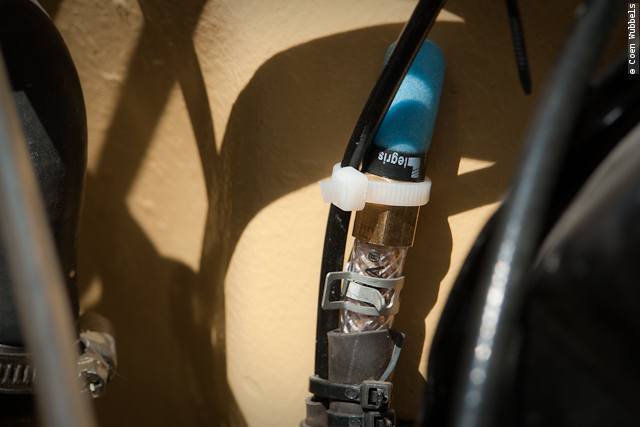
Graeme Bailey from Australia send us this nice box of goodies. Thank you Graeme.
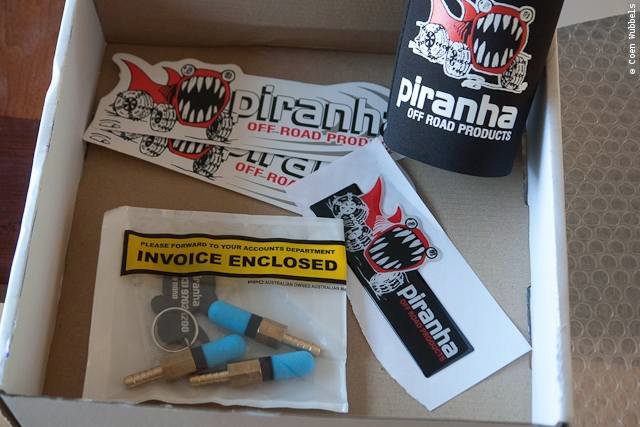
You might be wondering what these funny little blue things might be. But I might save that for a
later photo moment to explain. Close readers should know what this would be.
So we are in the Netherlands for a short holiday [we really needed a break]. Seeing family and friends again makes
us very happy. But also for me a change to find some little strange things that are very difficult to find in Bolivia.
This is my switch that will go between the two diesel tanks.
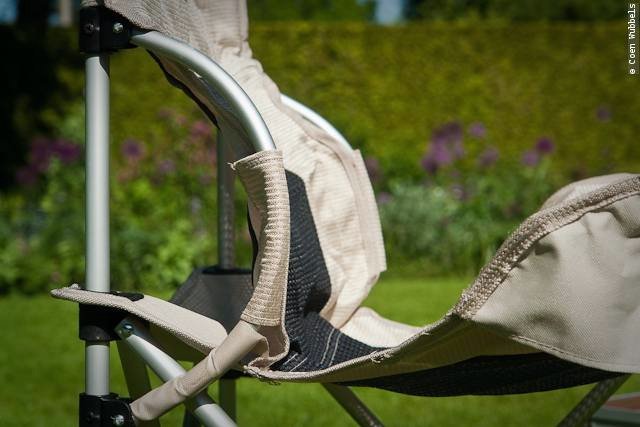
My chair was showing weak parts. After five years of use we will replace it with this smaller one.
We learned a few things in these years on the road. Smaller is better. Space is everything.
So my new chair is definitely smaller.

Apart from that, it has a strange curve in the lower back region. This will support more and doesn’t hang as much
as the older chair did. Karin-Marijke’s chair is still okay and isn’t as big as my old chair so we won’t be replacing that one yet.
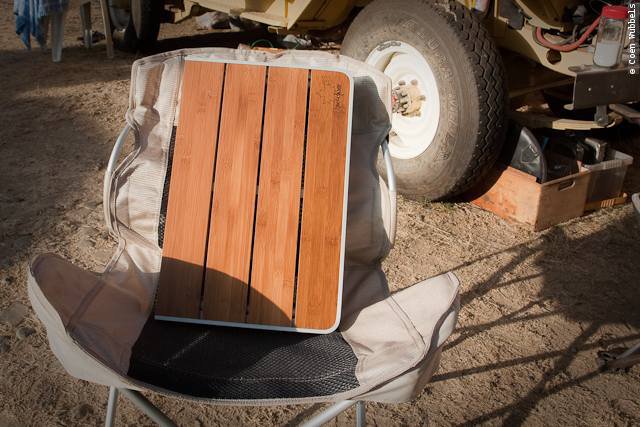
We spot a nice small side table. We left our big dining table at Harold Stephens’ place in Thailand because of the
huge space it took inside the car. And since that time we looked for a suitable replacement. After four years I found this.
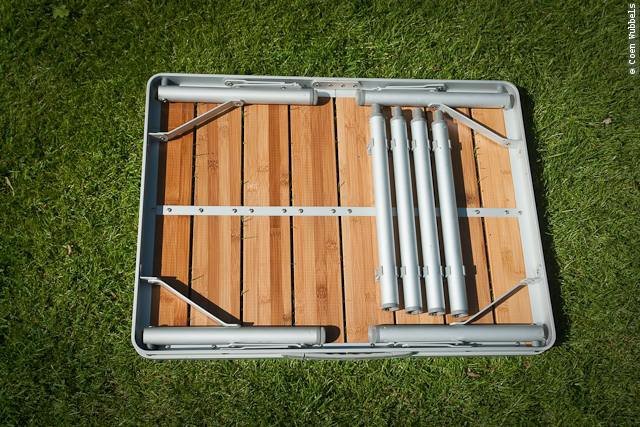
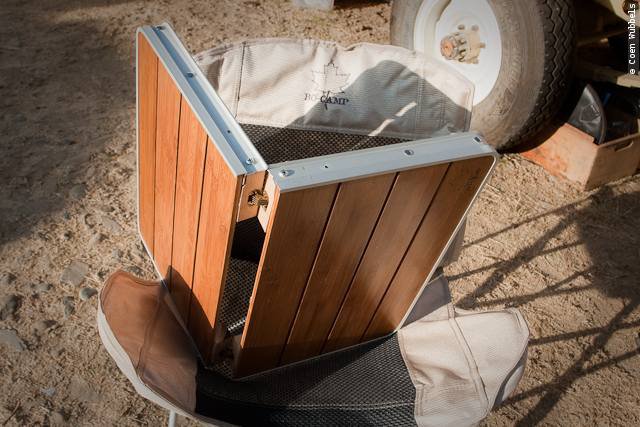
Folding legs that can be extended.
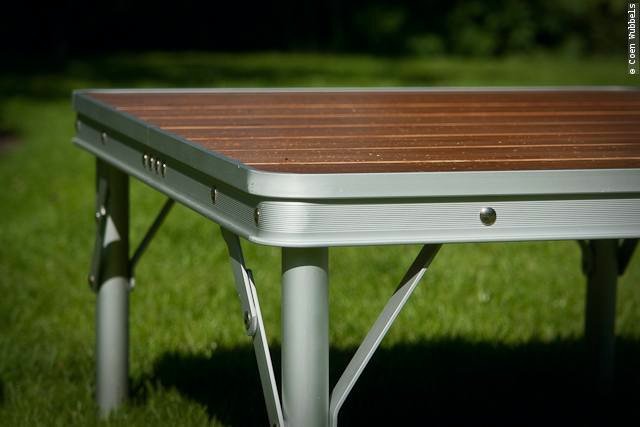
But still to big. So I bring the saw and cut it in half.
Drilling some holes in the wooden blocks that will form the hinges for this little table.
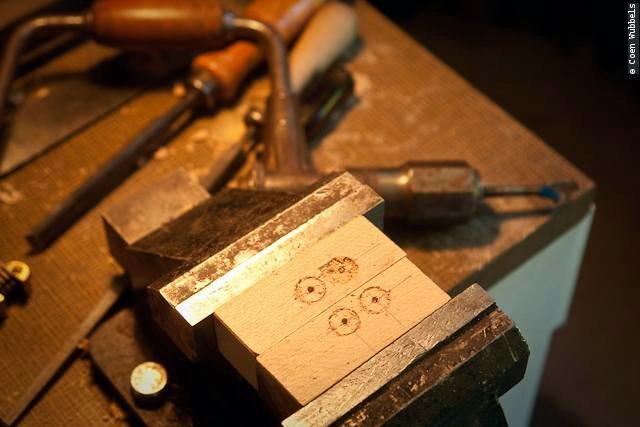
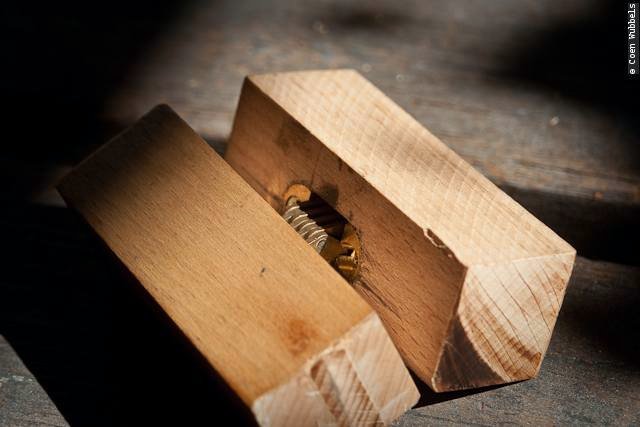
I bought some very nice bronze blind hinges. Sturdy and waterproof. Sikaflex will be used to glue them into place.
Dad takes me touring in the region to look for some stainless steel parts.
I have to construct a table for Karin-Marijke inside the car. It must be able to lift and turn.
Fred has a new gadget and welds the parts together.
This is never going to break.
Now the only thing that is missing is a knob.
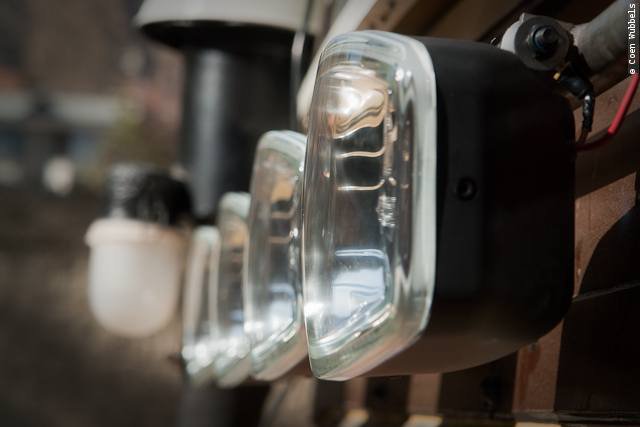
I find a huge big box in front of the house. Bastiaan is a big fan of us and is employed at Hella.
He likes our adventures and said it would be out of the question that we would put those ‘old lamps’ on the ‘new’ car.
He would handle it.
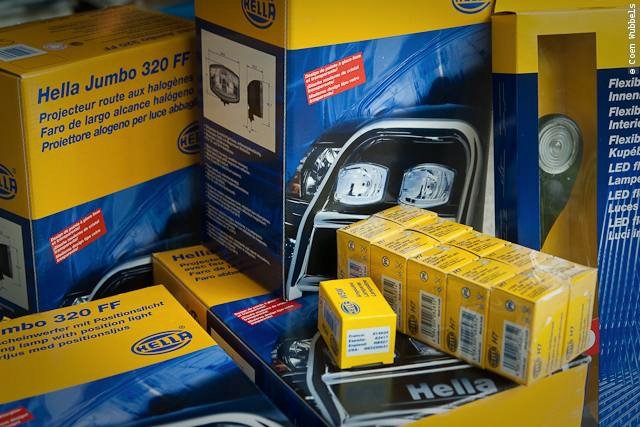
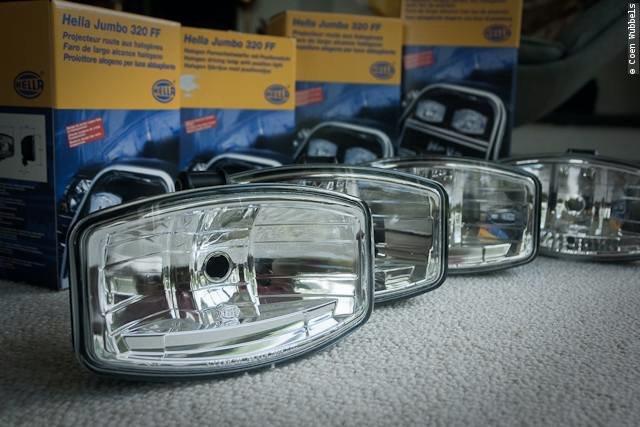
He did. The ‘Hella Jumbo 320 FF’ is a very strong bright light yet doesn’t consume the batteries to death. Thank you Bastiaan!
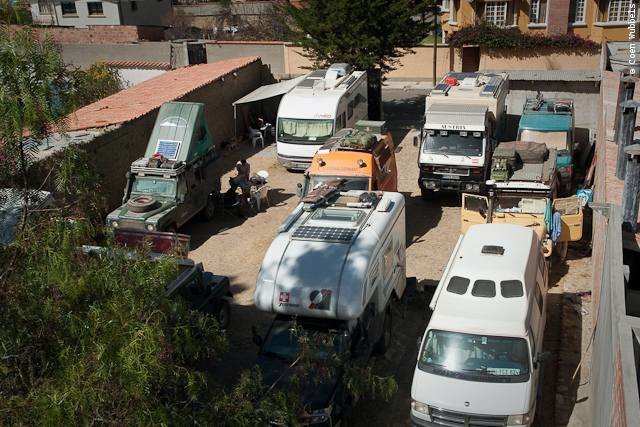
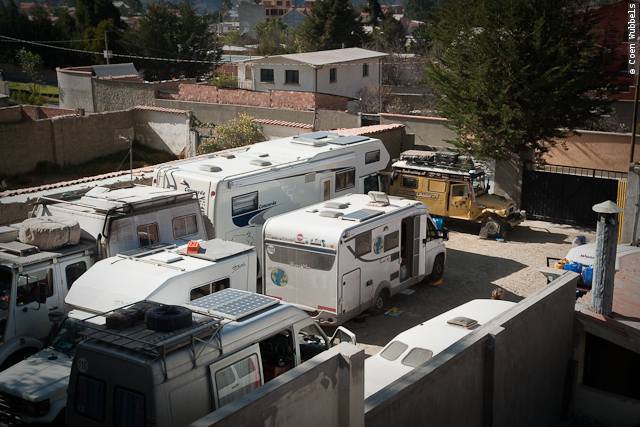
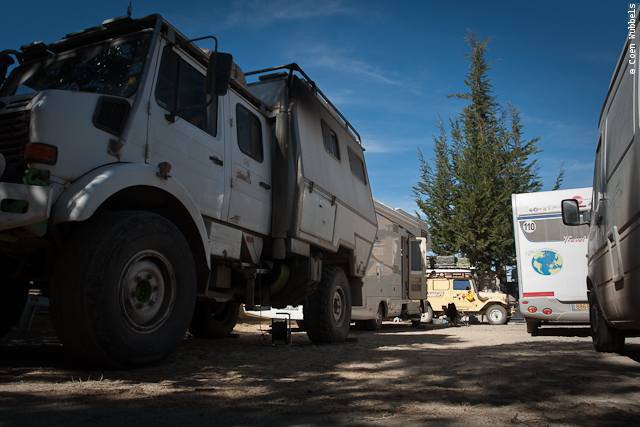
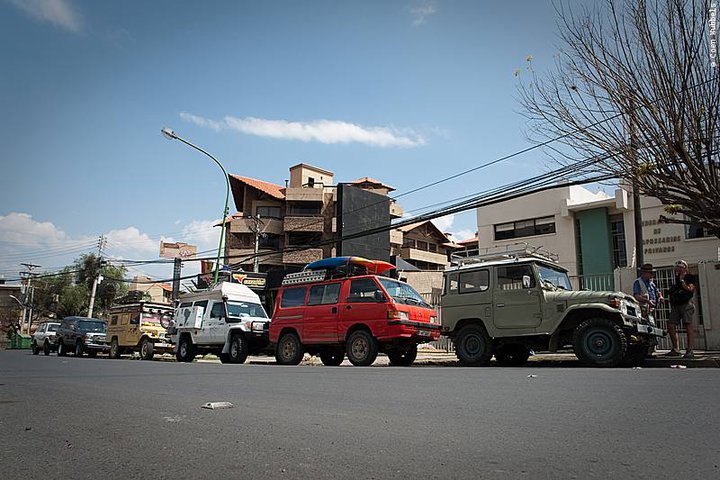
When we arrive in La Paz, we see our car surrounded by overlanders. The dry season is also the high season.
There is not much time for talking during the day. Work is waiting. And we dive in early, so we can wake up early again. This being the shortest days of the year here.
I am getting the relais back in order.
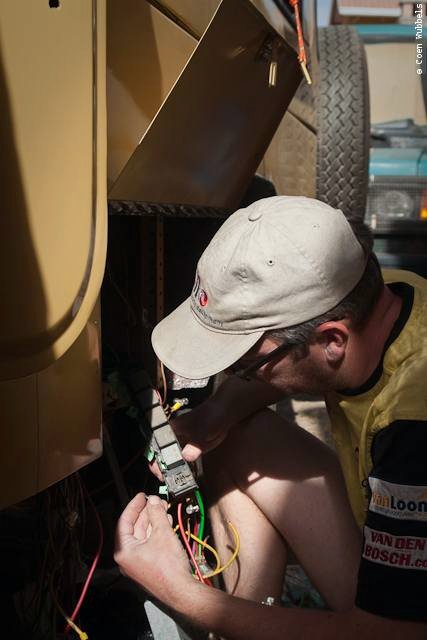
Under the hood we need to replace certain cables.
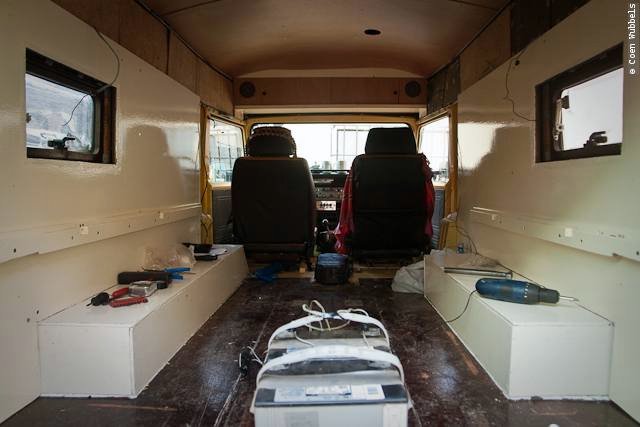
This is where the second set of batteries are coming.
To prevent the batteries from shifting, I cut some rubber to keep them in place.
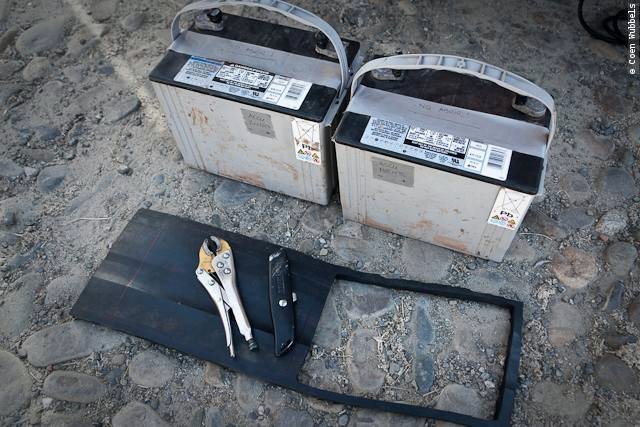
One is in, now the second one.
This is looking like our house again.

But inside the benches Karin-Marijke has some new ideas.
There will be separators between the compartments.
The saw of our Swiss army knife is working overtime.
Karin-Marijke makes some sort of second level inside a compartment so she can store things more easily.
A coat of paint needs to protect the wood from bending.
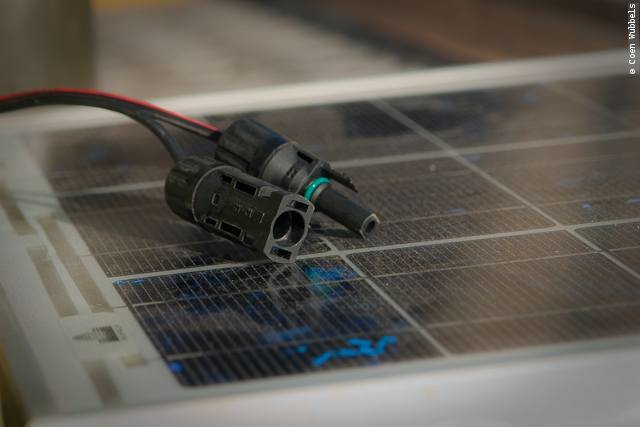
Meanwhile I work on getting the solar panel back on the roof.
Here I have glued some aluminum strips on the roof as wel as on the panel.
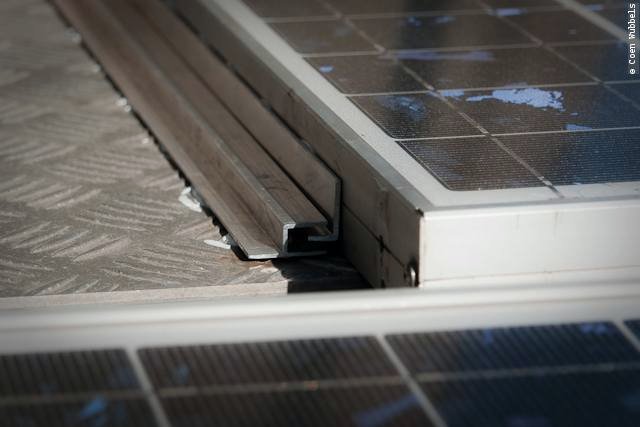
Fixing the other side with stainless steel corners and allen bolts.
This is the waterproof connection between the panels and the charger.
Karin-Marijke is sealing some bolts with Sikaflex.
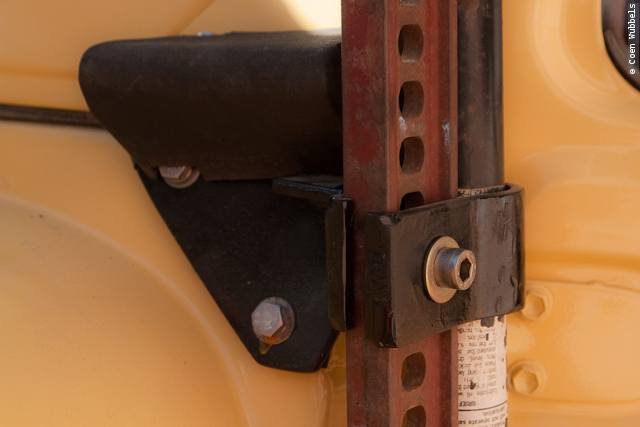
I made a new carrier for the High Lift, after some idea I saw on the Ih8mud forum.
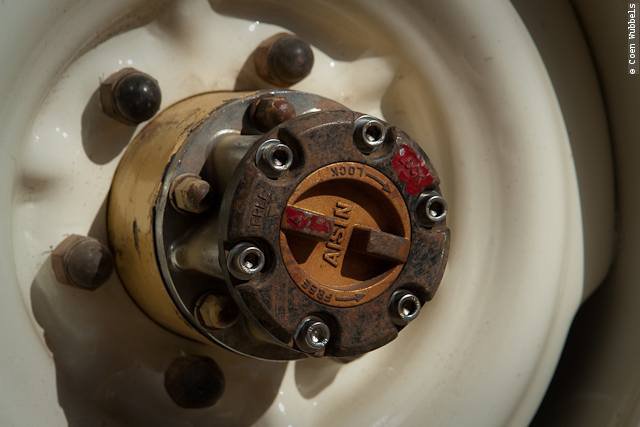
Getting stainless steel allen bolts in the locking hubs in order to get them less quickly stolen.
My favorite Marine Sikaflex.
Karin-Marijke gets the windowsills in order
Looking good.
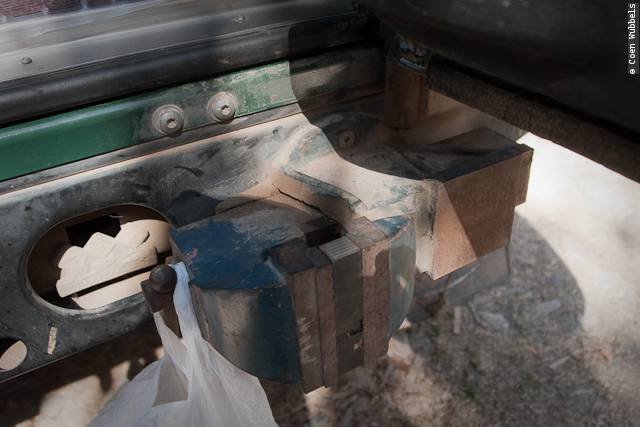
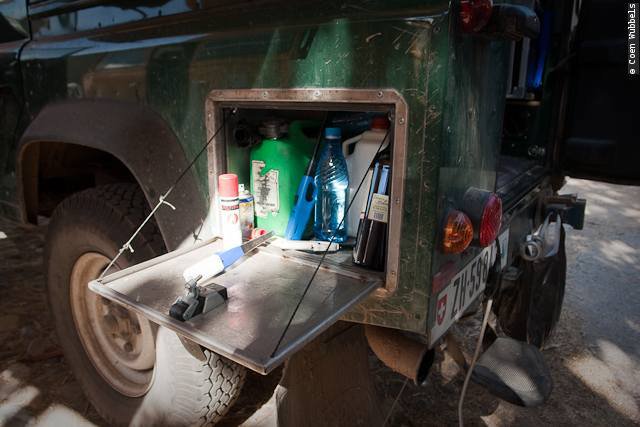
Next to us stands a nice Land Rover with some nifty ideas. Here seen is a vice screwed onto the bumper.
Or a foldable sand ladder that seconds as a table.
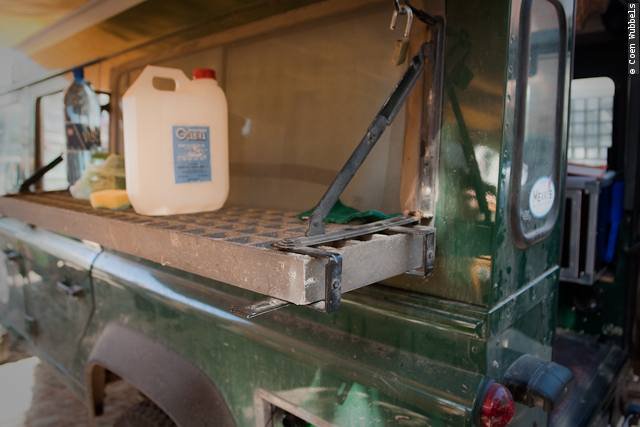
Or a nice little locker on the side.
Karin-Marijke seals Sikaflex on the side where we have glued a small strip so we can attach our side table more easily.
The nice Hella lights we got from Bastiaan are getting a honorable spot.

Very nice lights they are.
They will certainly give a bunch of light when we need them.
Graeme’s filter is getting fixed on the end of the breather lines of the axles.
This is how our little side table looks like after I cut it in half.
And my hinge system works.
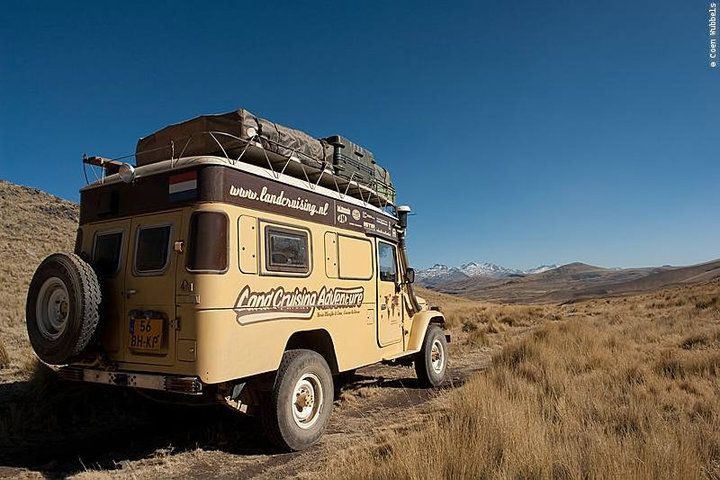
The test drive to the customs.
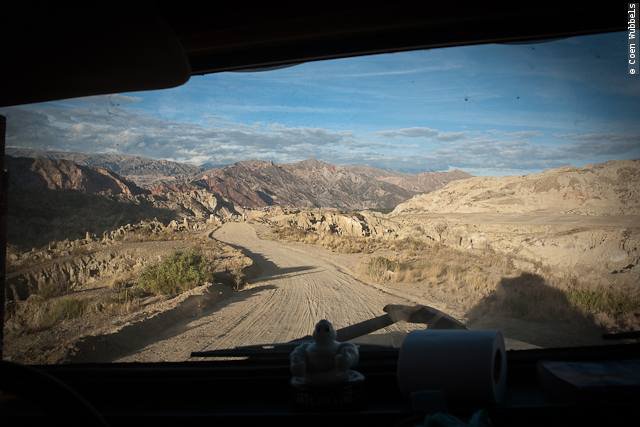
This is how the beautiful tracks on the highlands look like.
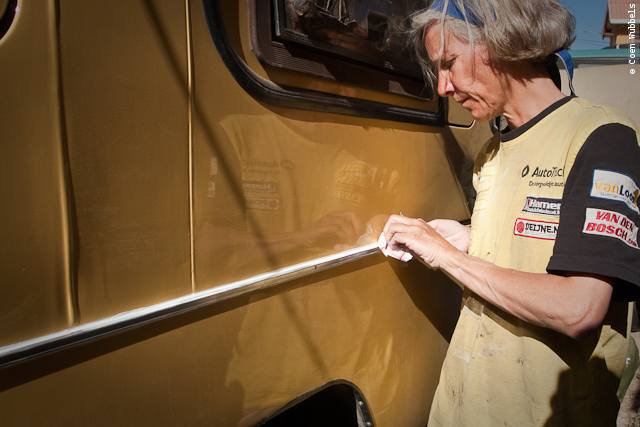
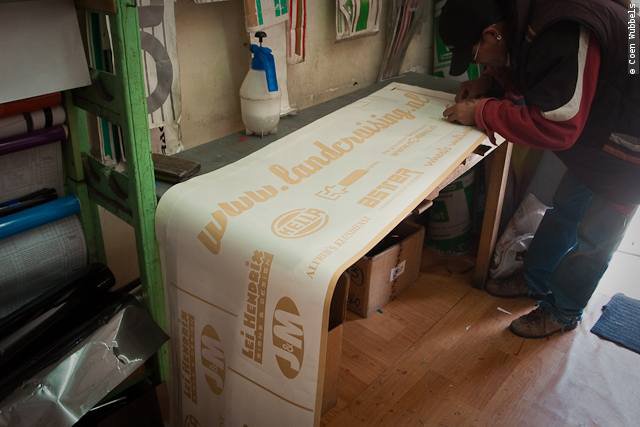
We are ready to adorn the car with some vinyl.
Lei Hendrix send me some beige vinyl. That color was not to be had in Bolivia. So my good friend did his best to get me my color. Thanks Lei.
A detailed look of our friends.
Transfer paper is more expensive than ‘Rayban’ sticker [the stuff they use to darken the glas of cars] so they use this instead of transfer paper.
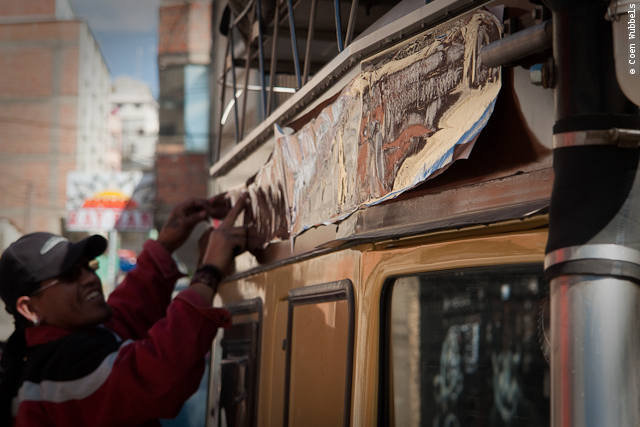
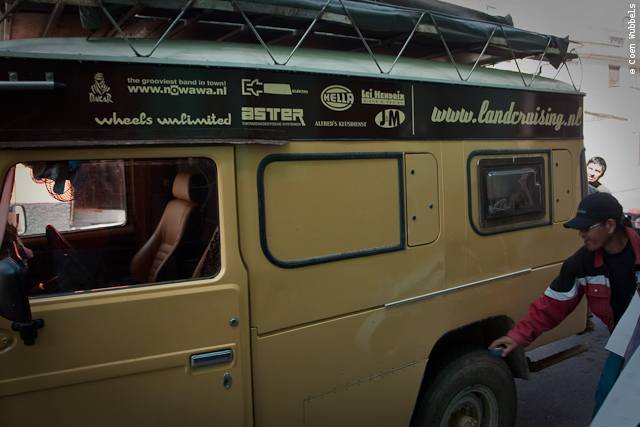
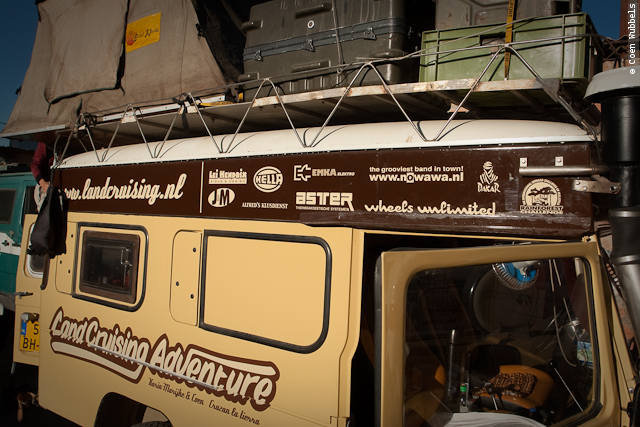
This is how the top looks like.
First the dark outlines.

Then the beige lettering on top. Getting it into the seam is not easy and to make things a little more difficult, we have glued in a aluminium strip.
This is how we camp between the other overlanders at Hotel Oberland in La Paz.

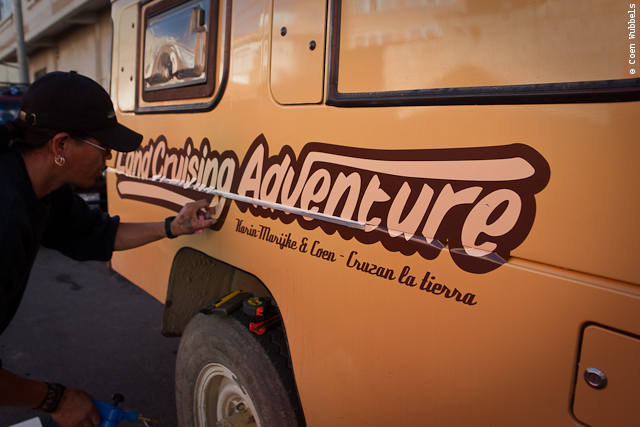
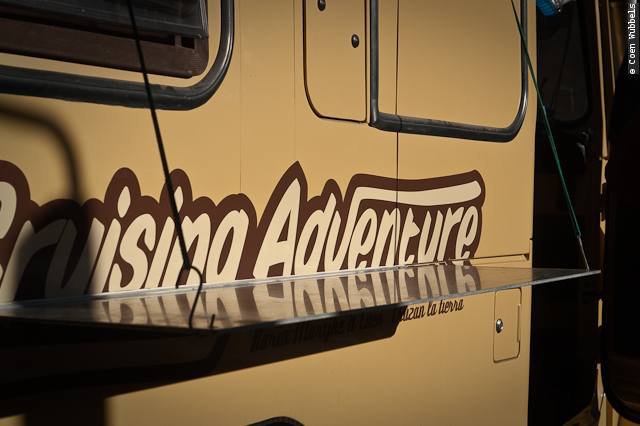
I still have to get the lines out between the countries. This is a very delicate work but I must say I like the result.
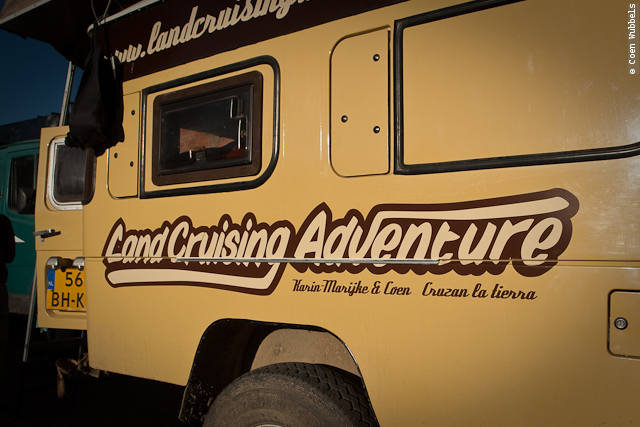
The side logo looks great!
Now with Le Dakar and Rainforest Challenge logo!
We start off with a problem right away when we begin our long distance test drive. Friends have suggested I use
Nylock nuts on the u-bolts of the leafsprings. This has proven to be a not so good idea.
Because these nuts are shorter and wider and have given me headaches.
So on our way to lake Titicaca I had to make a quick pitstop and change them back into the original ones.
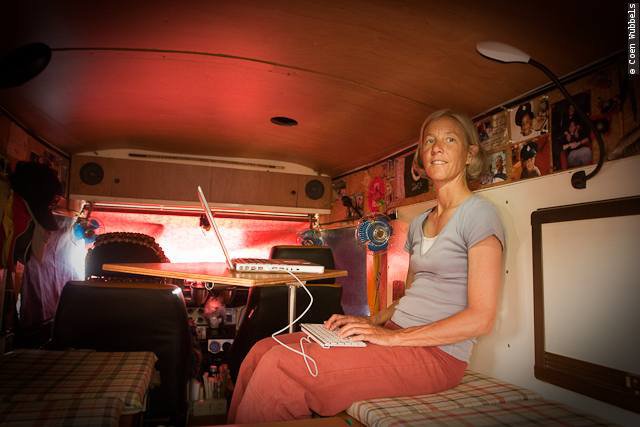
Karin-Marijke is very happy with her new office.
Hotel Oberland in La Paz is filling up quickly as the dry season is progressing. Notice we are the only non white vehicle.
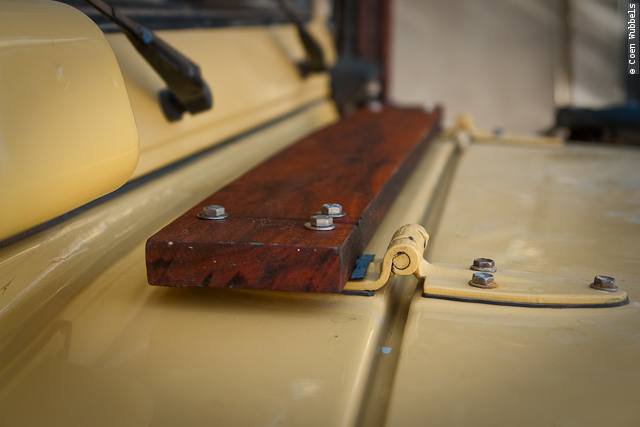
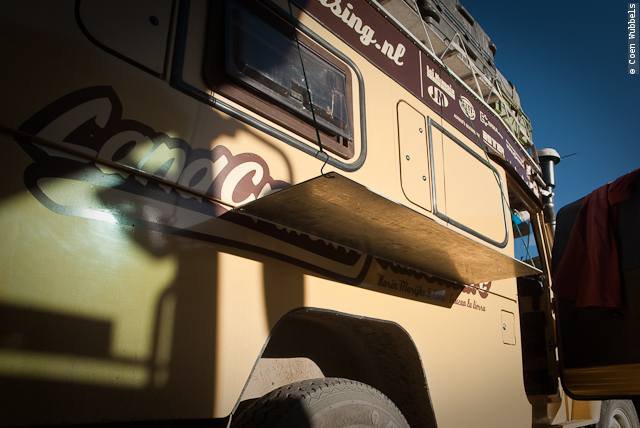
I got myself a plank on the bonnet. So that we are not cracking the new paint when climbing on the roof all the time.
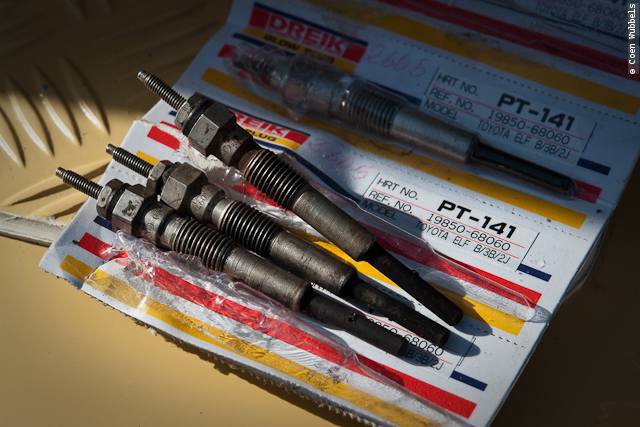
So these are the old 14 volt glow plugs. Two of them have exploded and the remaining two are burnt severely.
That is why she started so very poorly the last few times. Raw power starting in the cold!
When we did a compression test and the motor was on the floor, we did the most stupid thing we could do:
we glowed her with 24 volt direct. Now I know where all those coils and transistors are good for.
Our aluminium plate fits exactly in the u-profile we glued in the sides.
So our side table hangs sturdy with only two cords.
The little beast among great others.
We’re testdriving again for a longer period. Lots of dust and cacti.
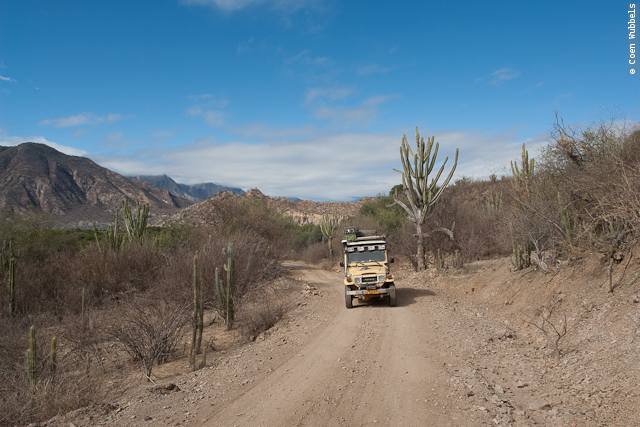
Big cacti here in the Bolivian outback.
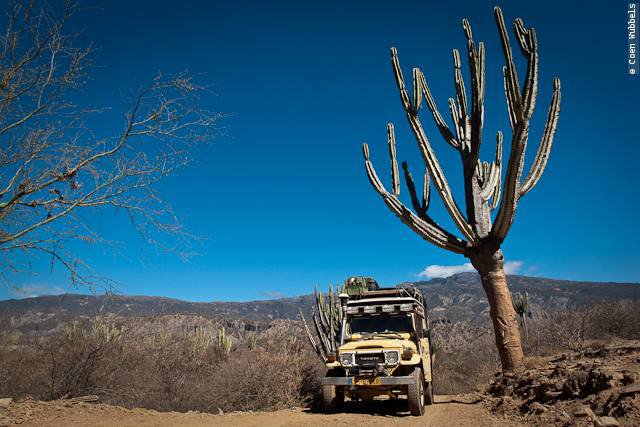
Spectaculair views.
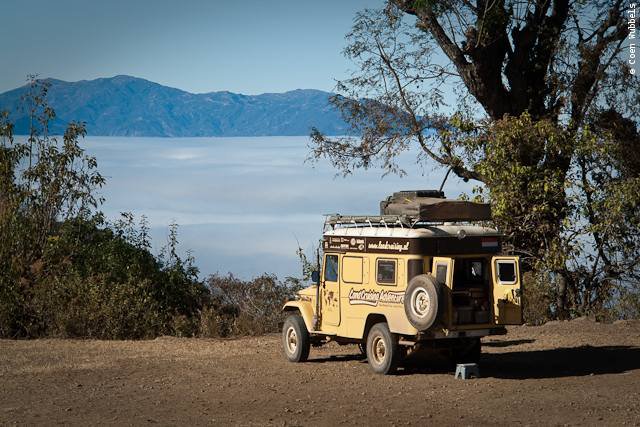
Camping above the clouds.
Steep downhills.
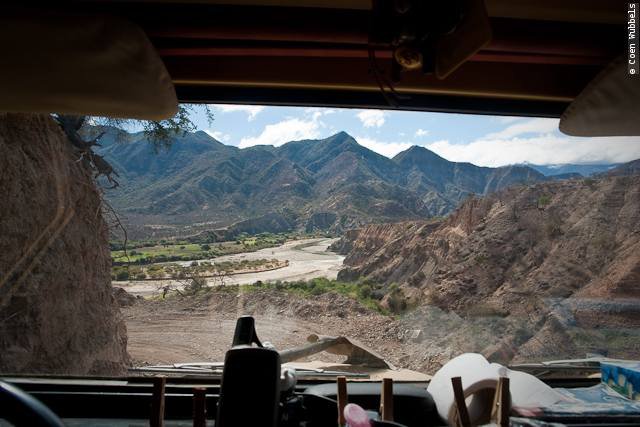
And deep rivers.
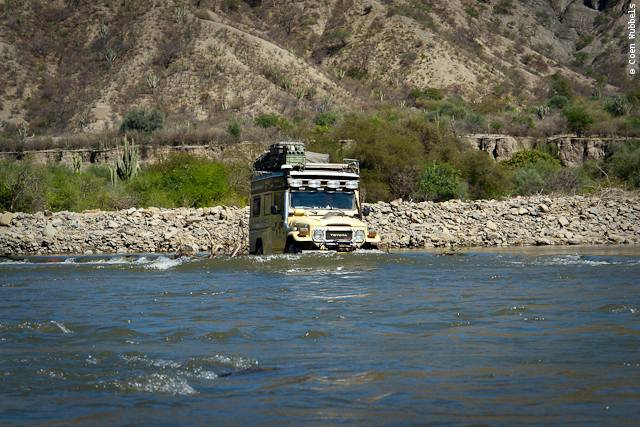
We meet nobody on the road in these desolate outbacks of Bolivia.
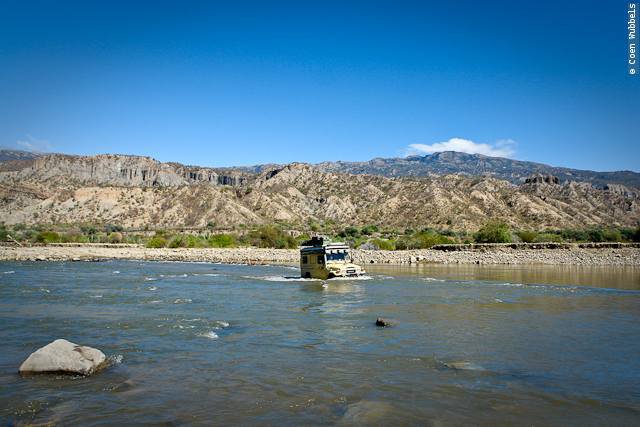
Time for a downside wash.
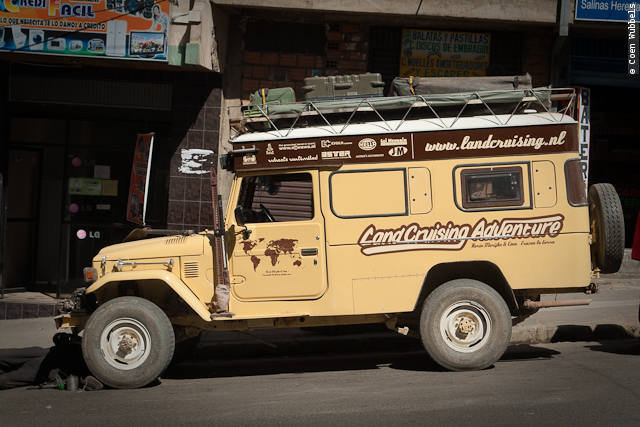
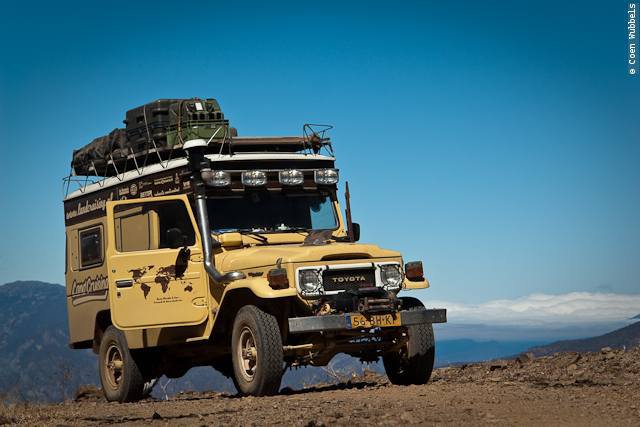
Ready for the next adventures
Camping some time at Paul van Hooff’s garage.
Ad Hoc Ih8mud meeting in Cochabamba.
the local guys brought their Cruisers.
on a straight road….
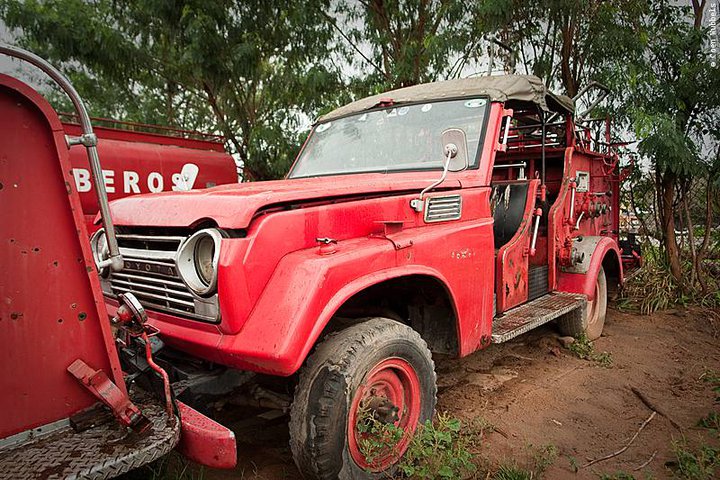
Spotting some working Cruisers in Santa Cruz.
I had never seen Firebrigade Cruisers before.
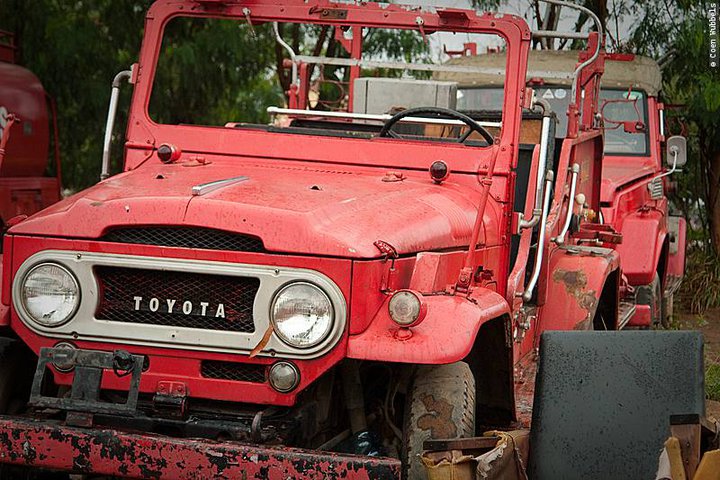
The longbody version just like ours.
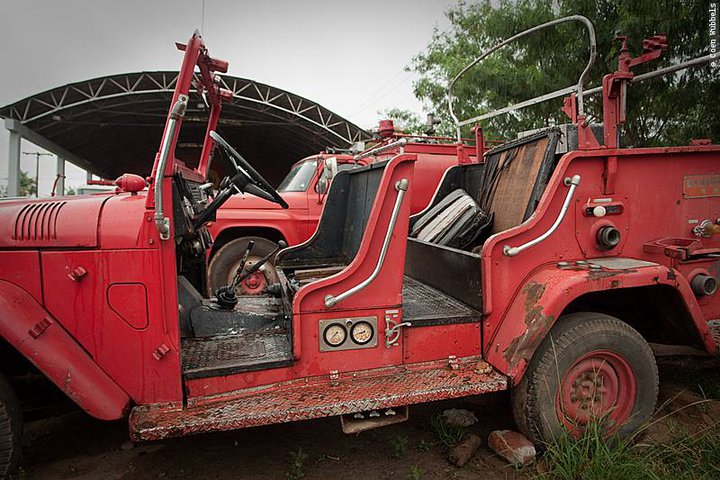
And the pig in red.
The Land Cruiser after some Bolivian dust.


please help me to supply parts for making my vehicle as same as above
good work and i would like to join for the same
this was so cool to read and to view all your pictures. thank you for sharing. it cool! love the ride!
its been pleasure and inspiration for me to see such a nice hard work u people have done with team .
Great rebuild and photos. Best of luck for your future trips.
you still around lapaz? like to hook up, if you are.
hi can i have the parts company address
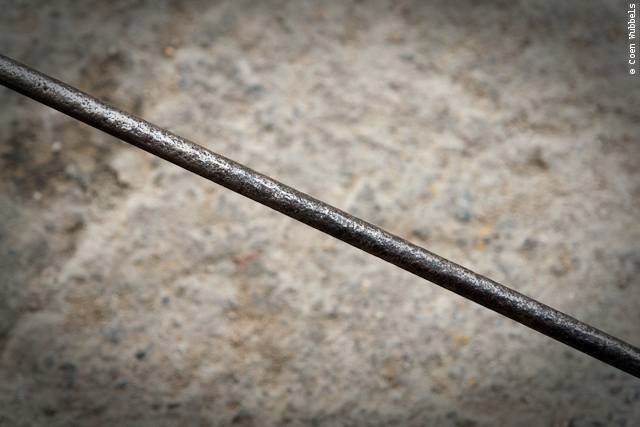
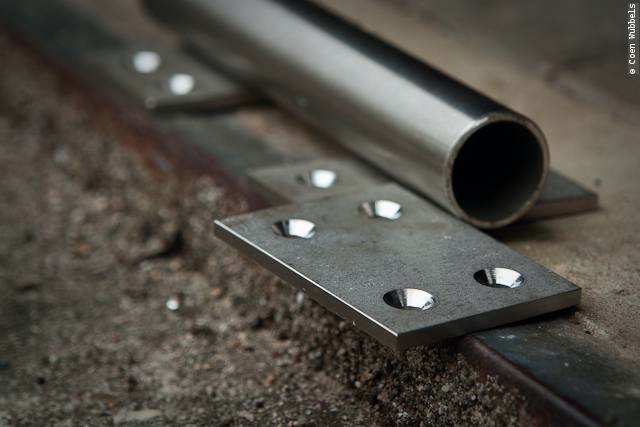
what are specs on rod used to build roof rack? stainless? diameter?
Hi Coen
You guys did a great job with limited resources. I must add a job well done. I enjoyed reading your whole restoration step by step. Hope you will get another 500 000km out of it. I also have a old cruiser that I have done a lot of work on but nothing to the extend that you went through.
Good luck on your travels
Congratulations fantastic Job i like a lot
very nice pictures and documentation! really great!
sick build, so much hard work and dedication! love it!
Great job.
Would love to have shop like that in my neighborhood.
I sure would keep them busy.
What a great read. Thank you for sharing your daily progress. The pictures were just perfect for the story. I only hope you are more to share in the future.
very nice job, thanks for sharing and pictures!
Ich grüße Euch, Maria-Marijke & Coen.
Danke für Euren ausführlichen Bericht. Mit begrenzten Mitteln
hervorragendes geschaffen. Mein Kompliment. Ich weiß wovon ich spreche, lebe seit 15 Jahren in Ecuador, auch da sieht es mit Ersatzteilen dünn aus, aber mit 2 rechten Händen und Köpfchen geht Alles. Ich bin ca 6 Monate jährlich in Süd und Zentralamerika mit einem Ford Bronco (rot mit gelben Gepäckträger)unterwegs. Möglicherweise kreuzen sich mal unsere Wege. Wäre toll. (Bin 70 Jahre alt und habe katzgraue Haare, 184cm groß und 100kg schwer. Ihr werdet mich erkennen).
Christophorus sei mit Euch und mit allen anderen Fahrensleuten ebenso.
Adios y cuidase.
Peter.