74 Ford Bronco Build

Well, I started this build a while ago, but decided to post the build on this site. Here are the basic specs:
Here’s what I plan on doing, quite a bit is already done:
104″ Wheelbase
3 link rear – upper wishbone, 2 lower links
Front axle forward 4 inches
203/205 Doubler
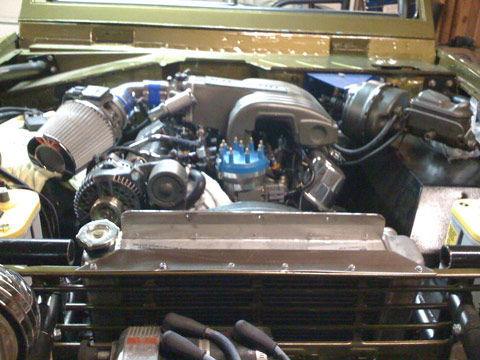
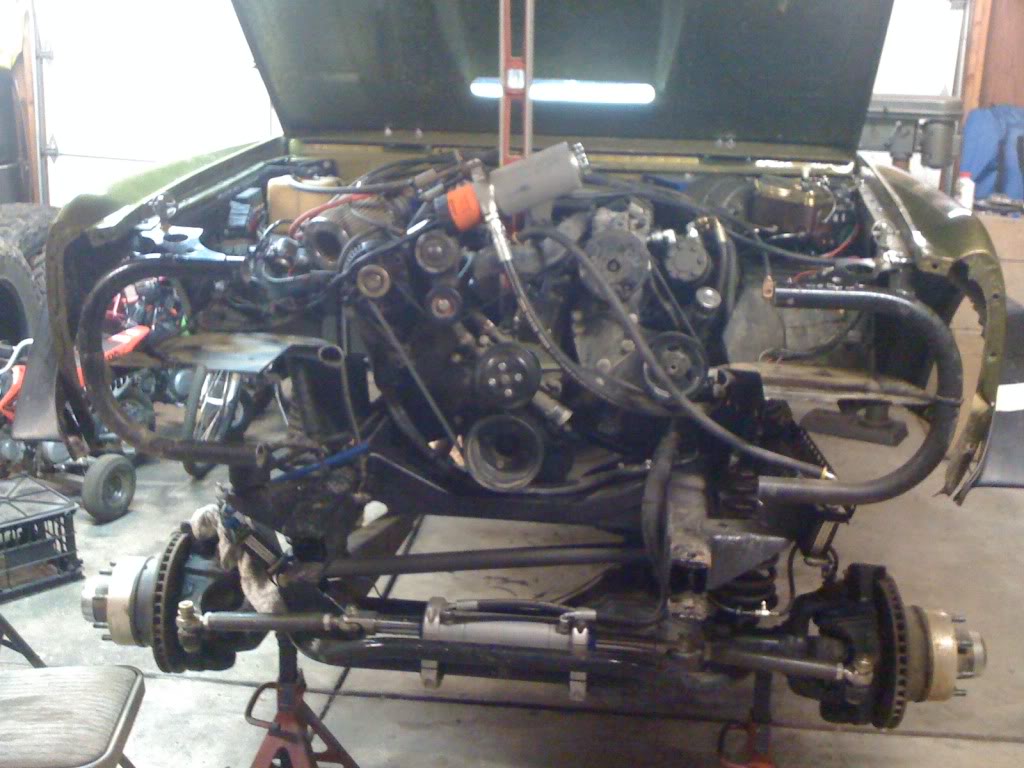
351 EFI (Mustang Fuel Injection)
D60 Front 35 Spline Warn Axles, 5.13 gears, ARB
14 B Rear, 5.13 Gears,Welded Rear
etc.etc. Whatever else the mind decides!
This is my first actual build, so any constructive criticism is great!
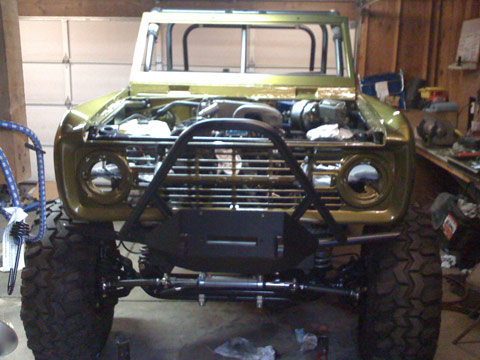
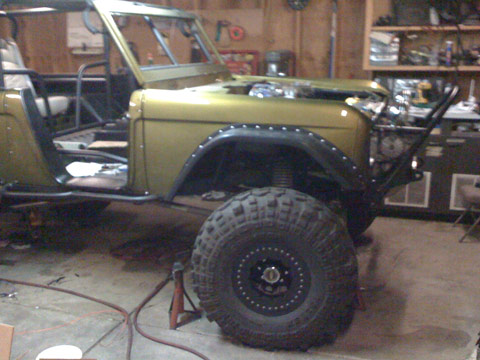
Here’s some pics of what I started with, my new motor, and build pics:
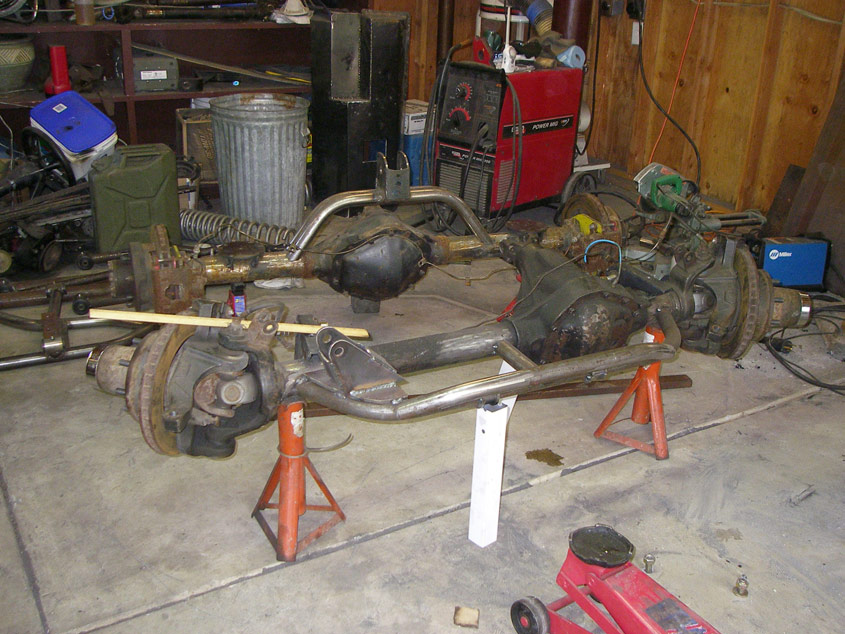
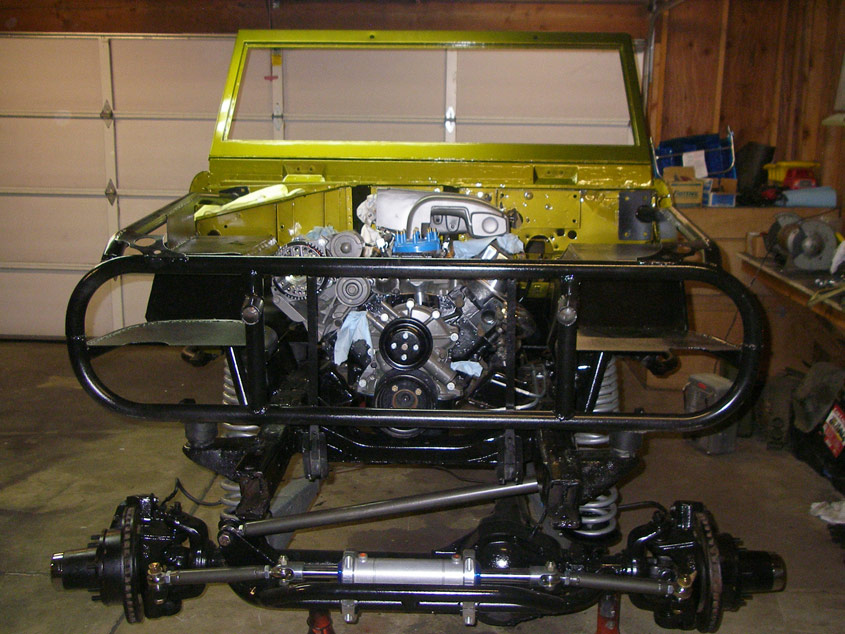
Axle pics before paint
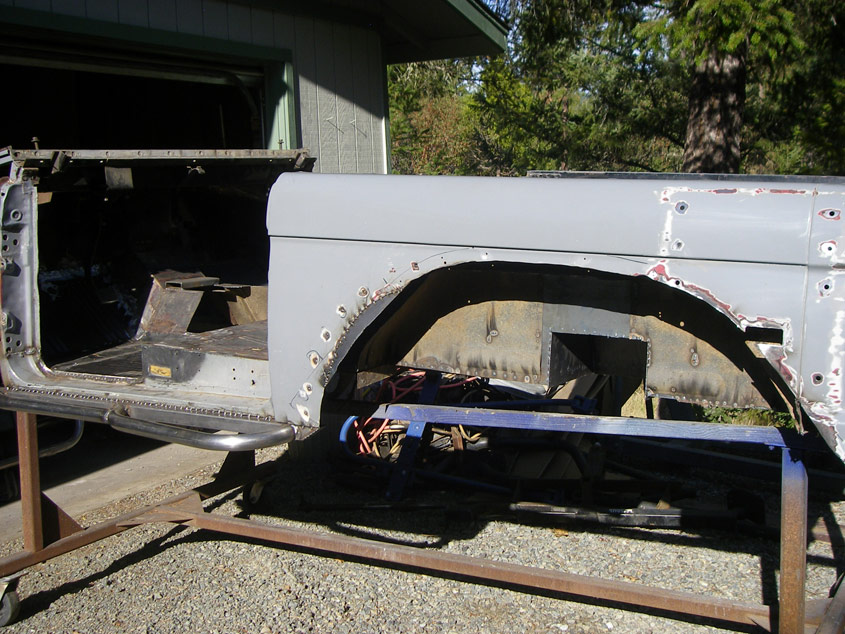
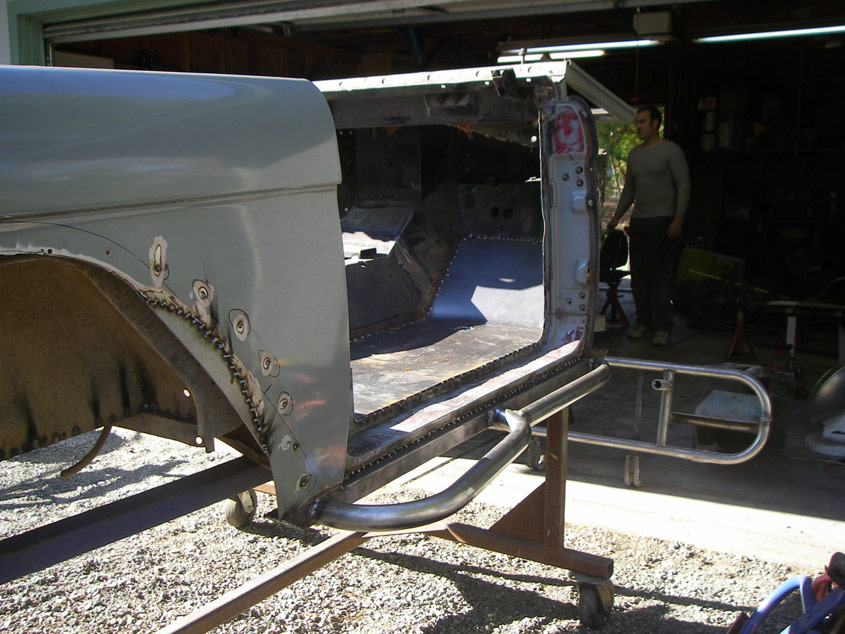
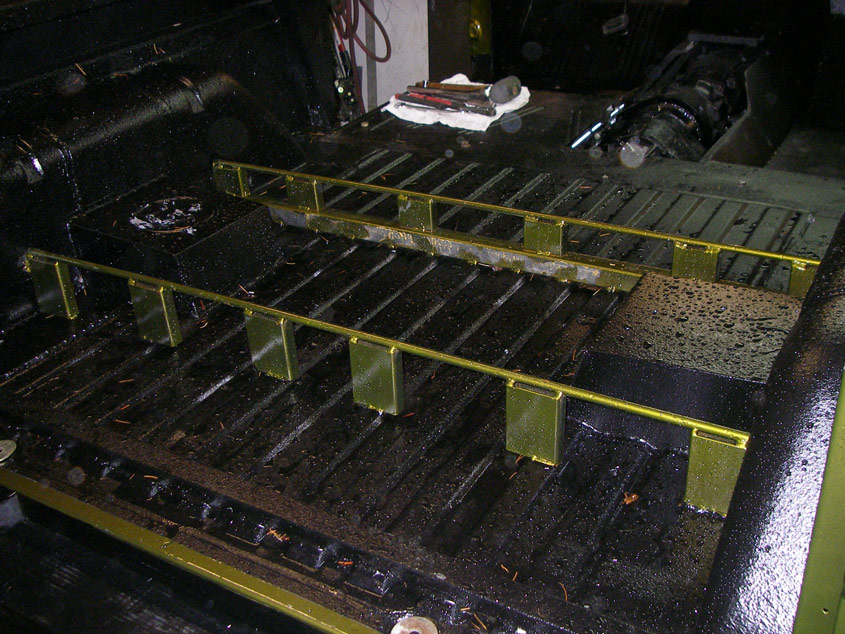
Bed with patchwork before paint
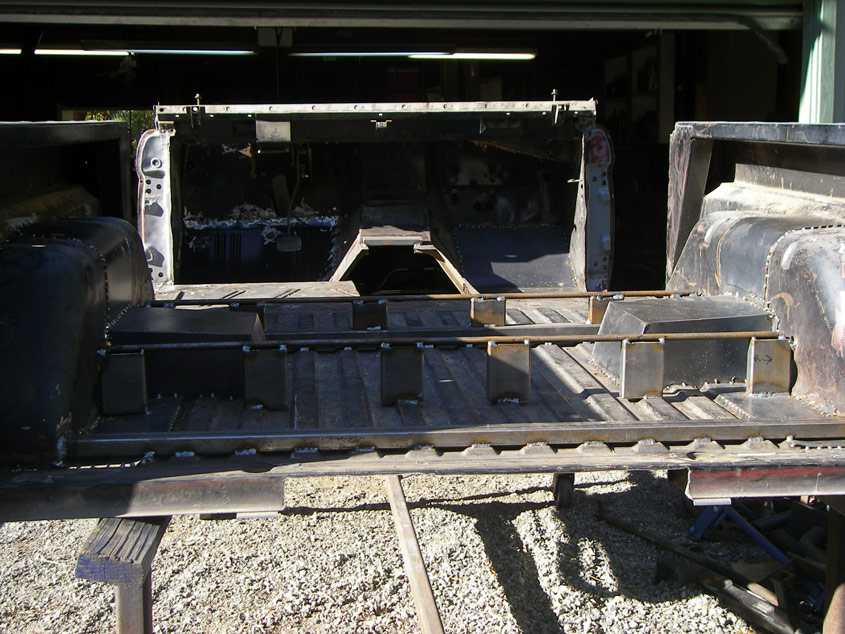
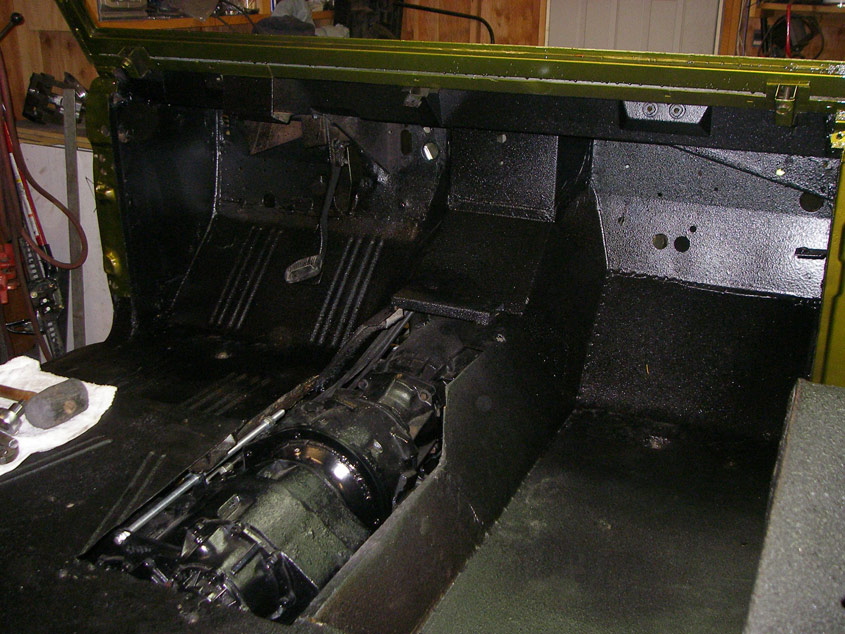
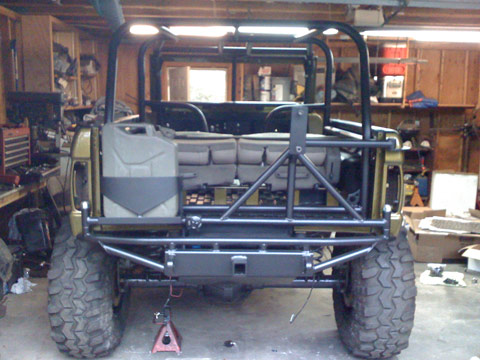
Rear with gas tank notch and seat mounts
Rock sliders
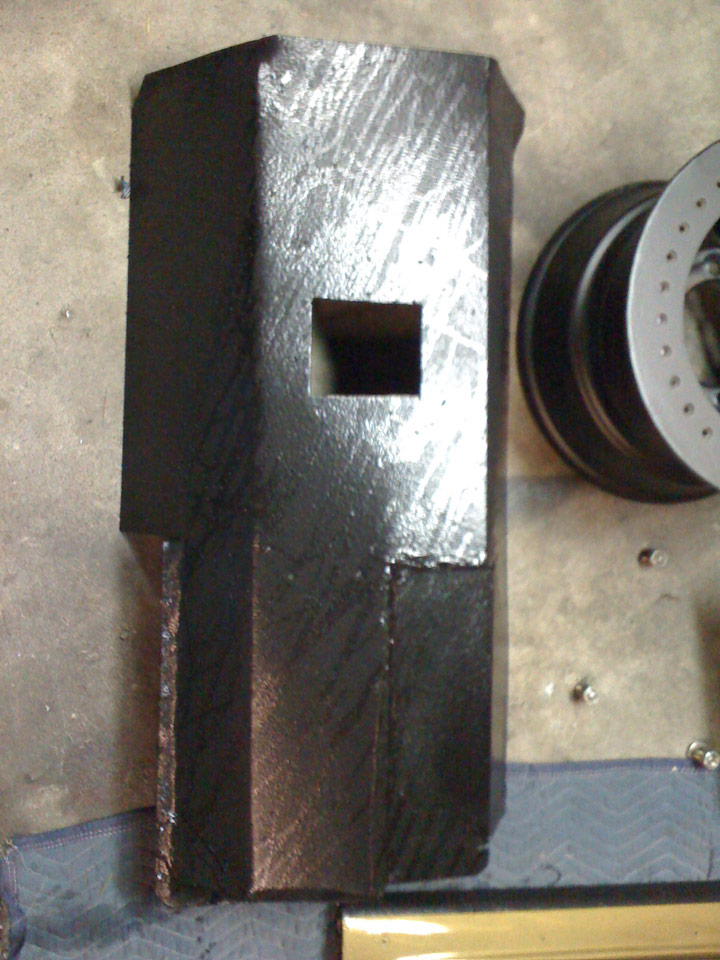
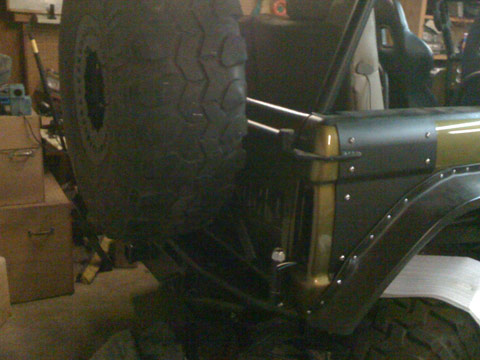
Front core support (note, this was my first piece made and we had to do a little filling on my first tube notch)
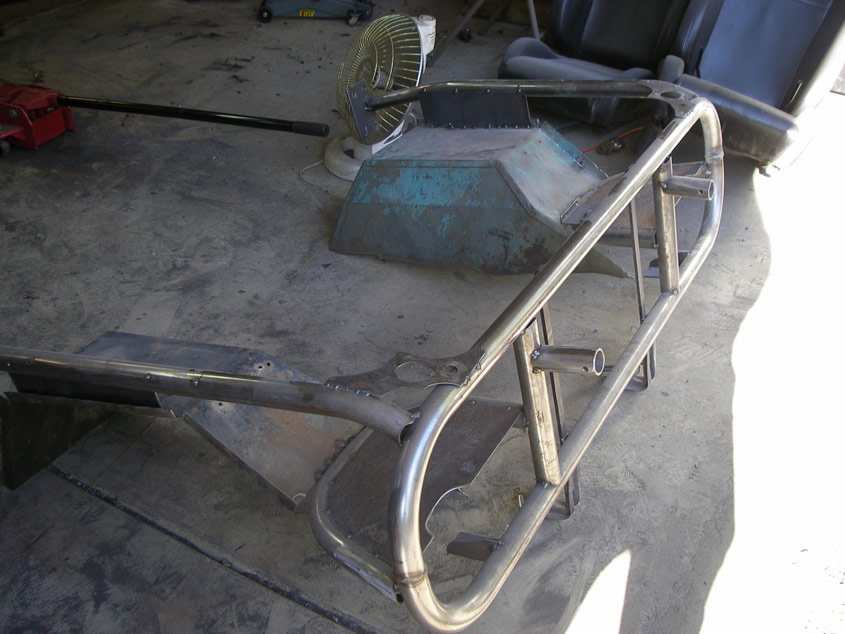
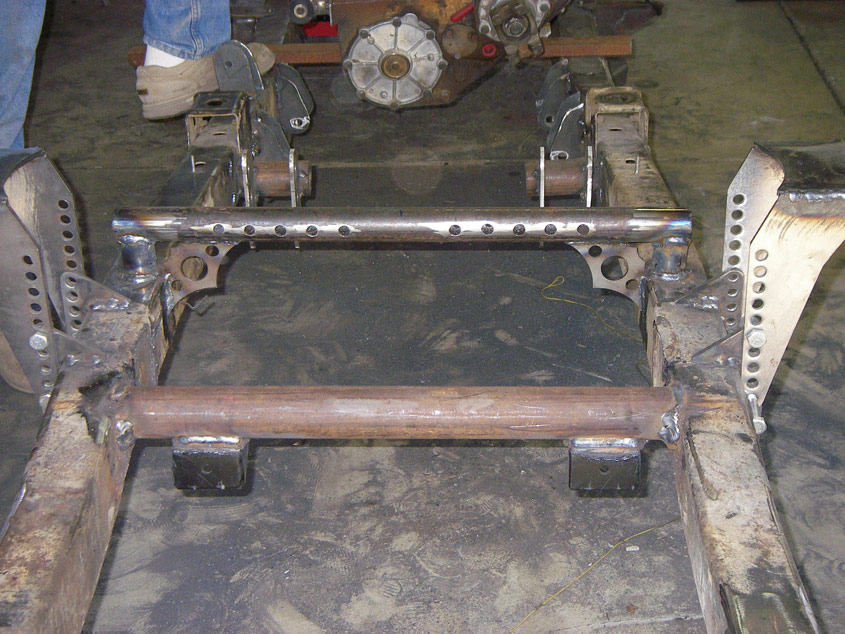
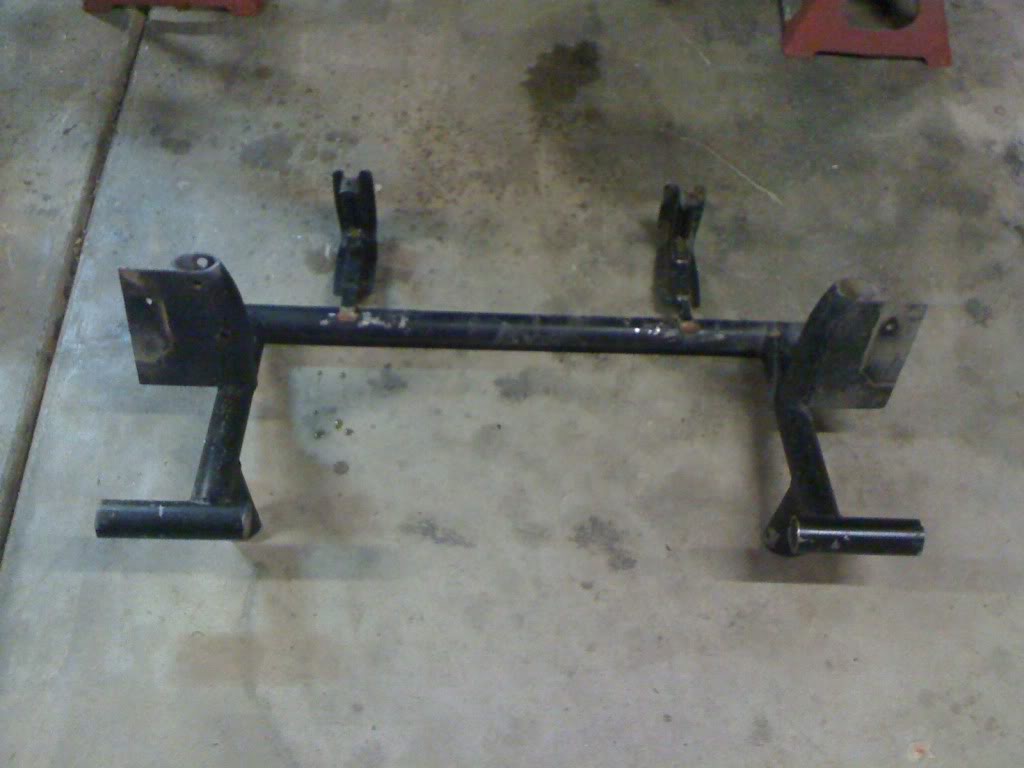
Rear Cross member, shock hoop and coil mounts
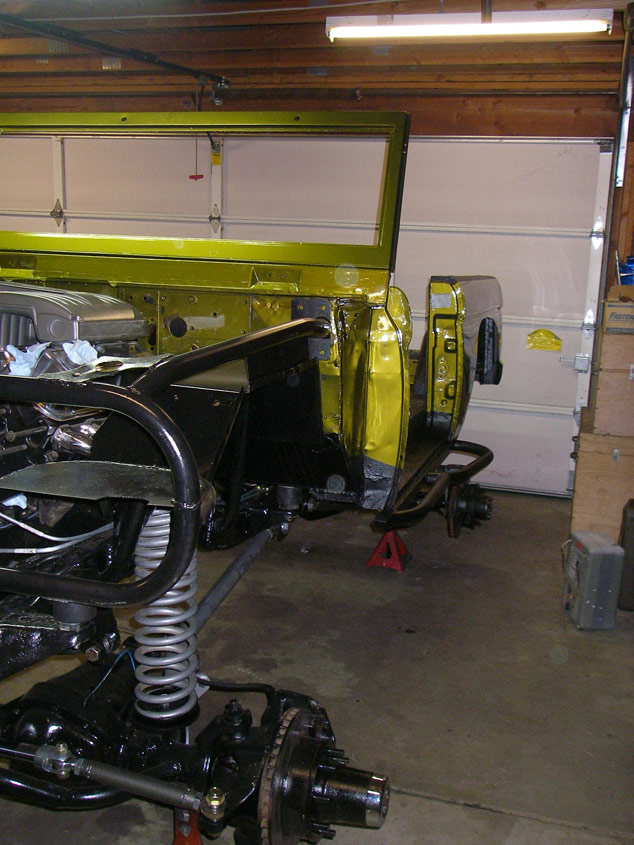
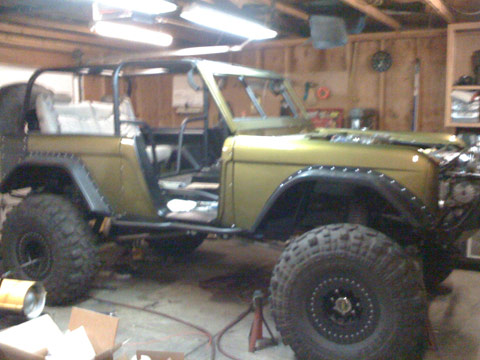
Now, here are some pics with paint:
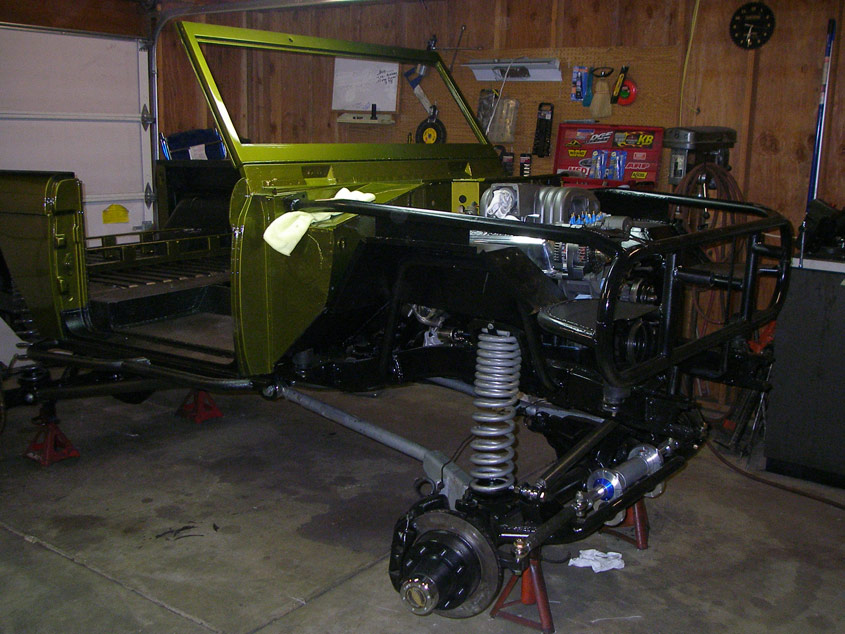
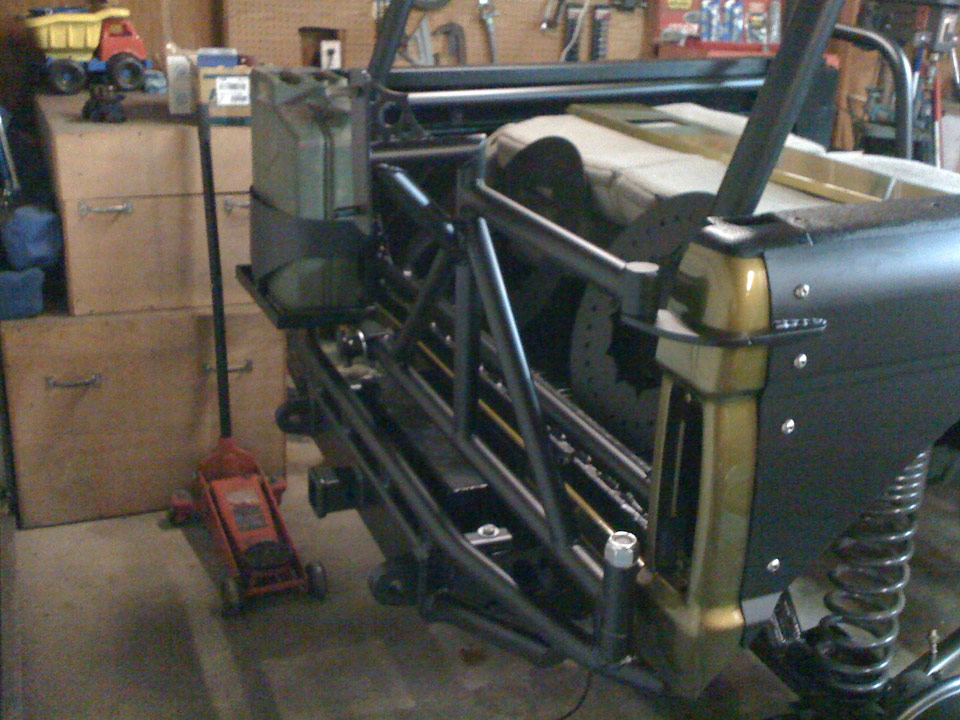
Chassis all painted, sitting on the springs:
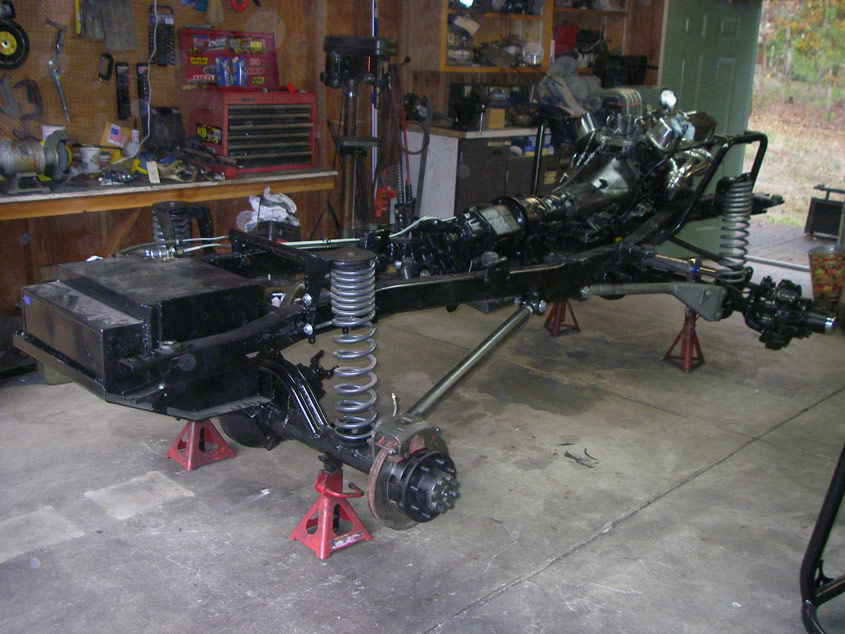
Another chassis pic
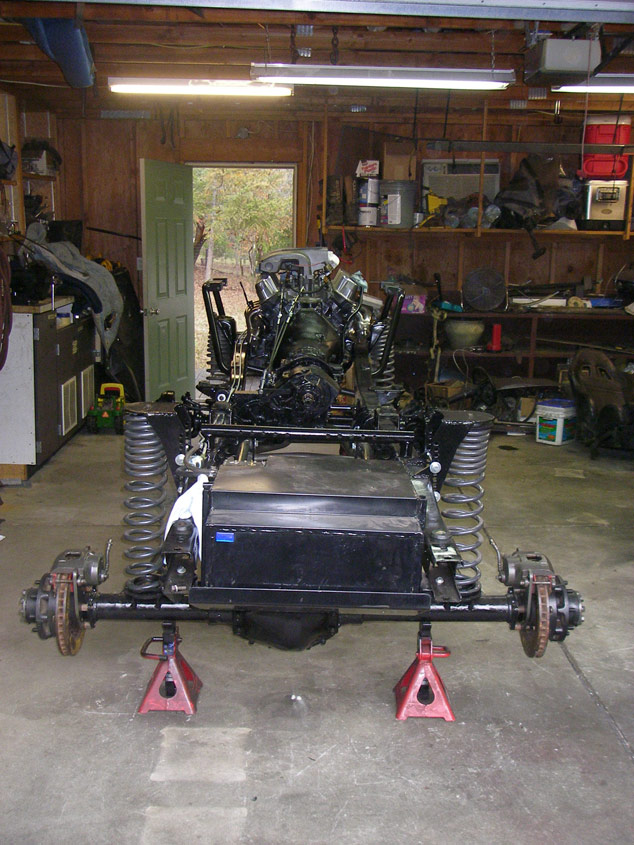
More Chassis
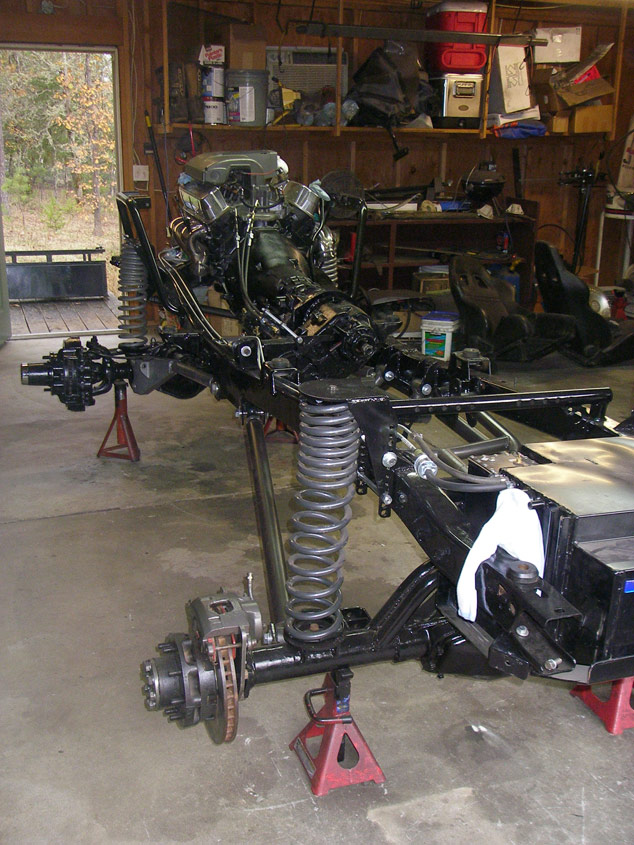
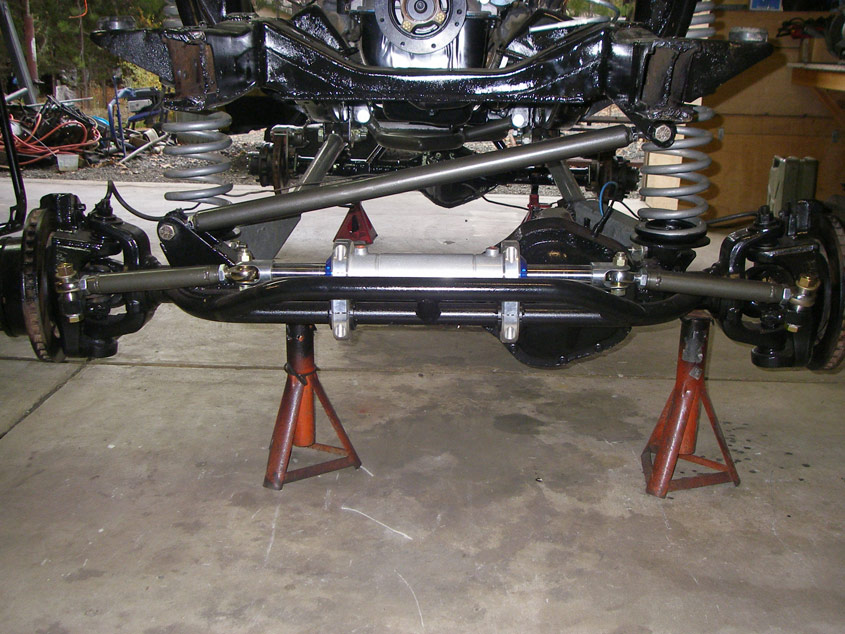
More chassis with from hydraulic steering
Closeup of hydraulic steering from POS – Performance Offroad Solutions
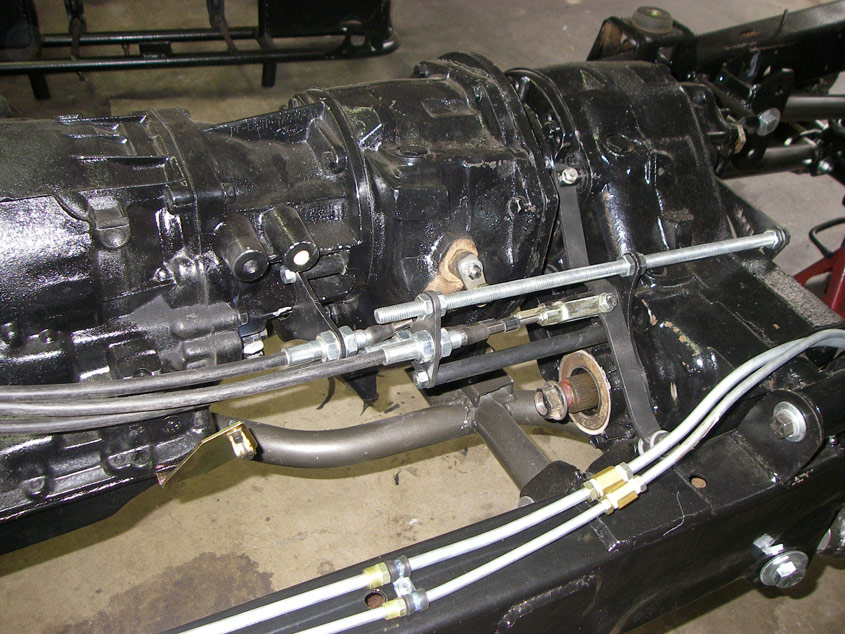
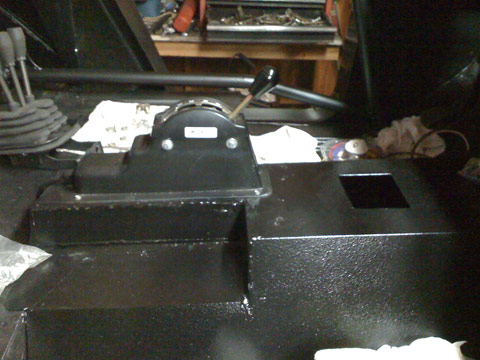
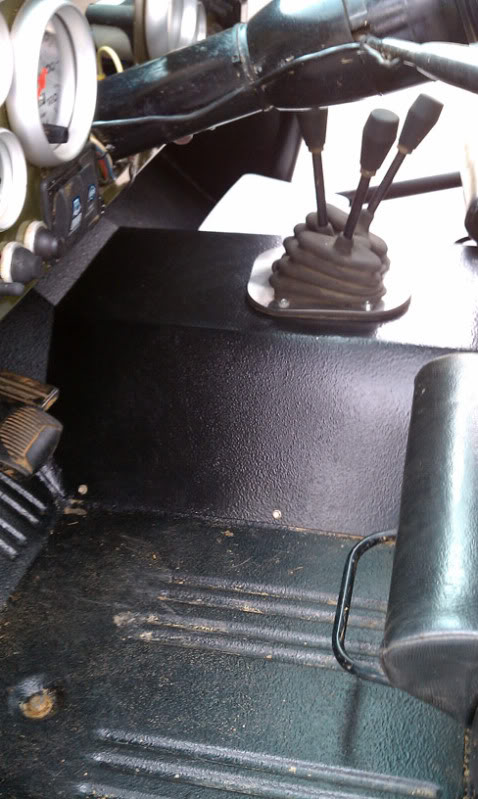
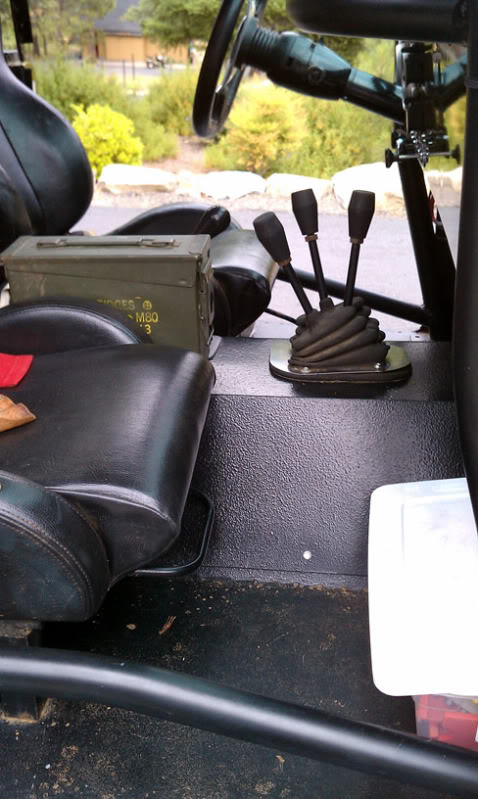
NW Fab doubler triple stick cable shifters – pretty sweet setup
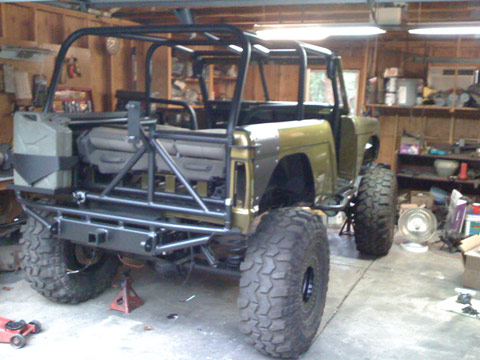
More pics:
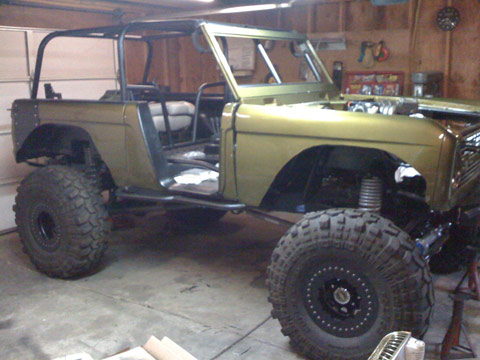
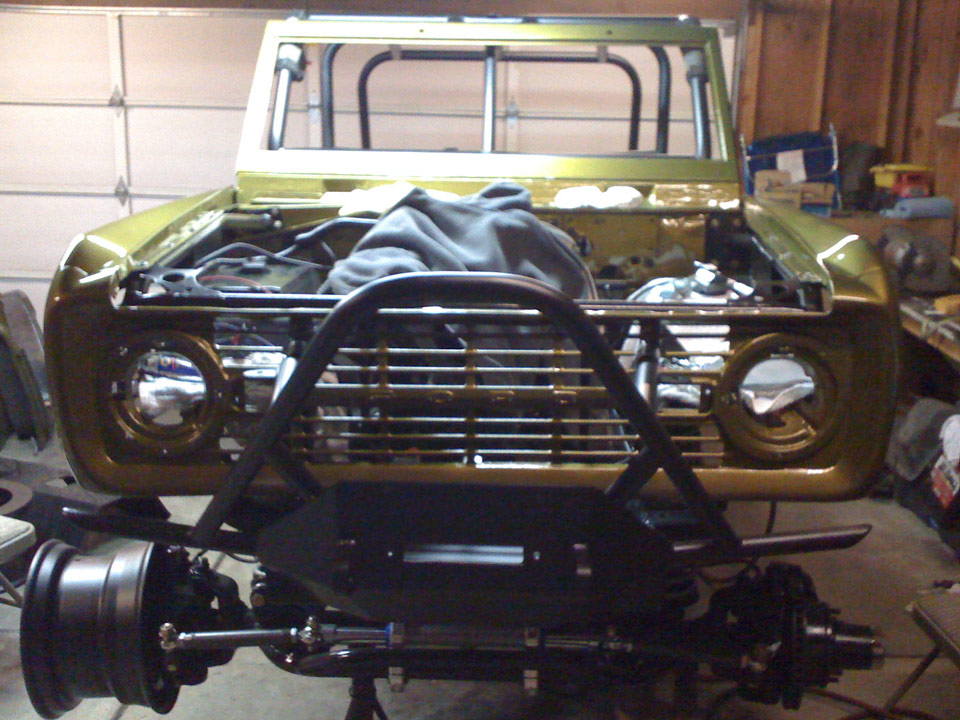
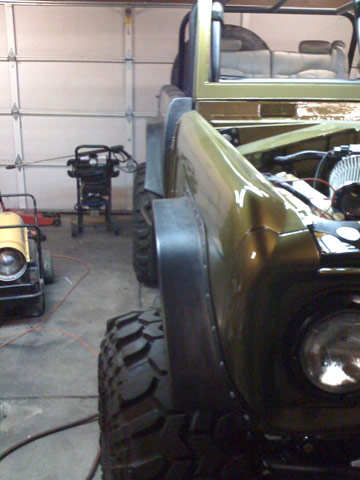
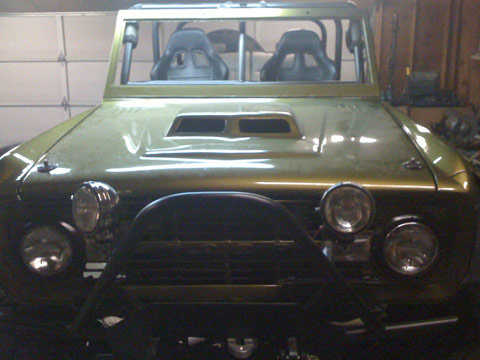
With green paint and body sitting on chassis – we did a quick 1 day paint job on this thing, with the help of family!!

Quarter panel

Bed is all bed coated on top and underneath
More coating shots
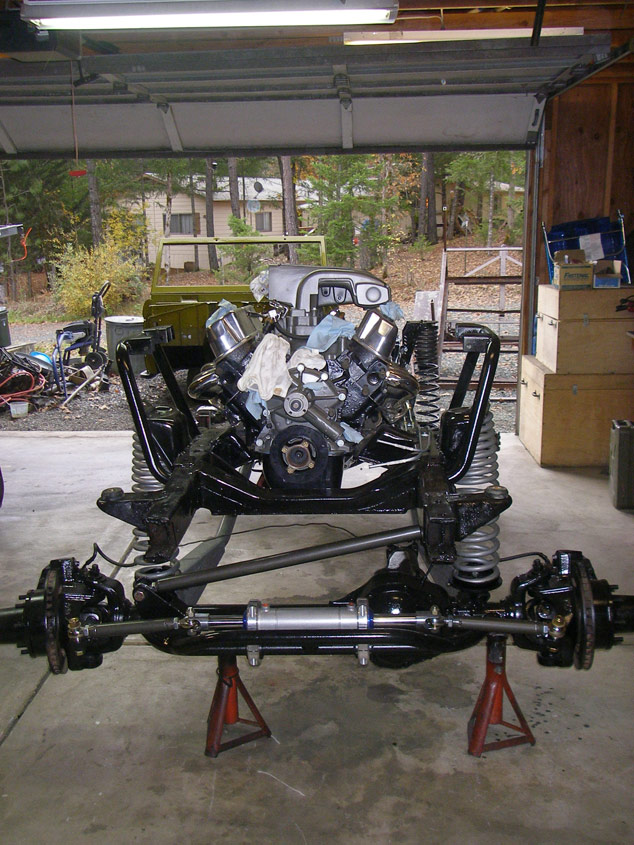
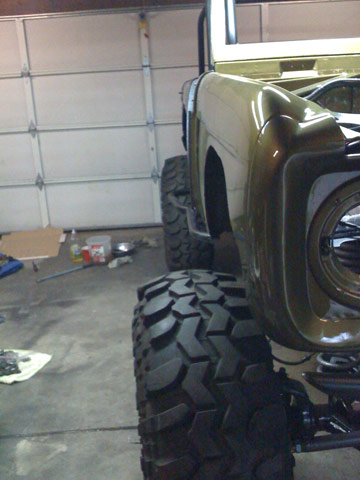
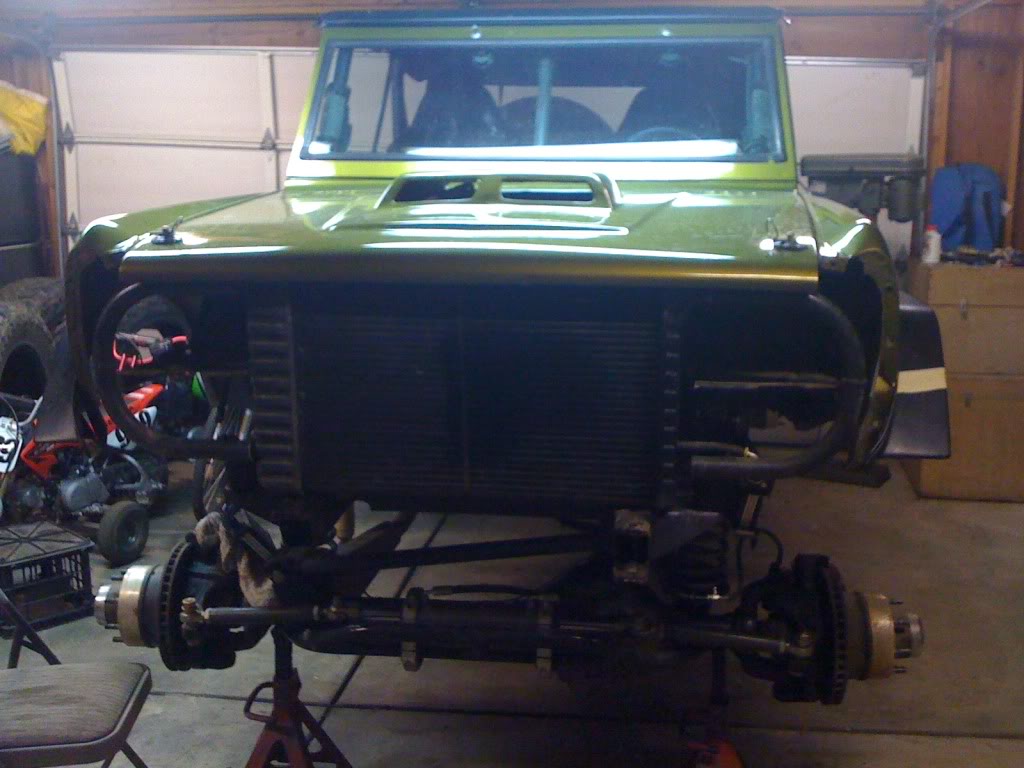
Front shot, everything blacked out and painted – time to get it dirty (sad thought)
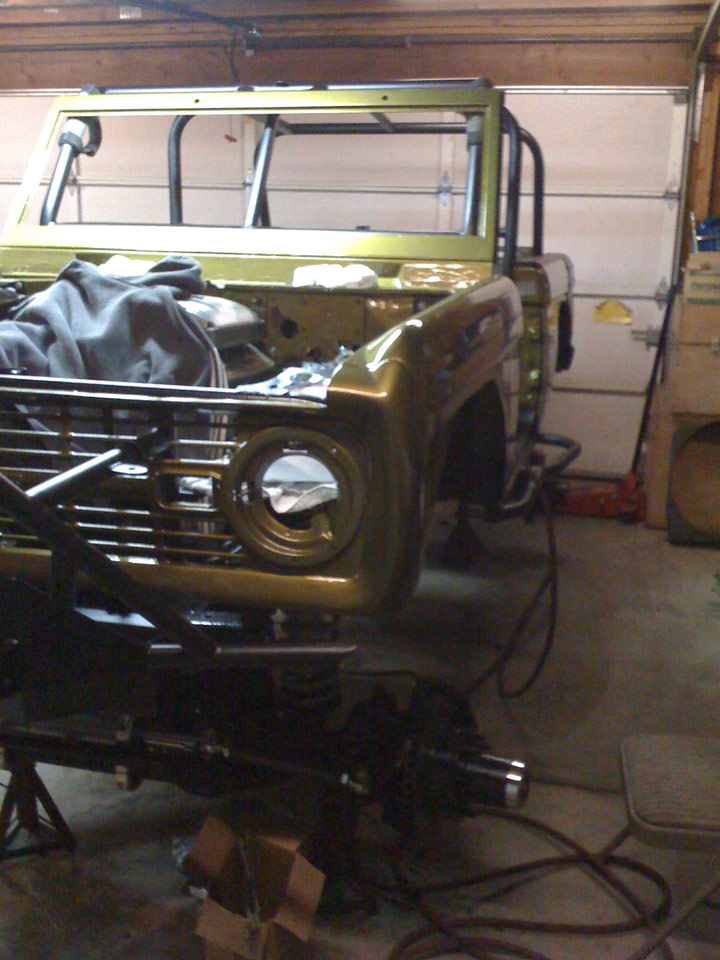
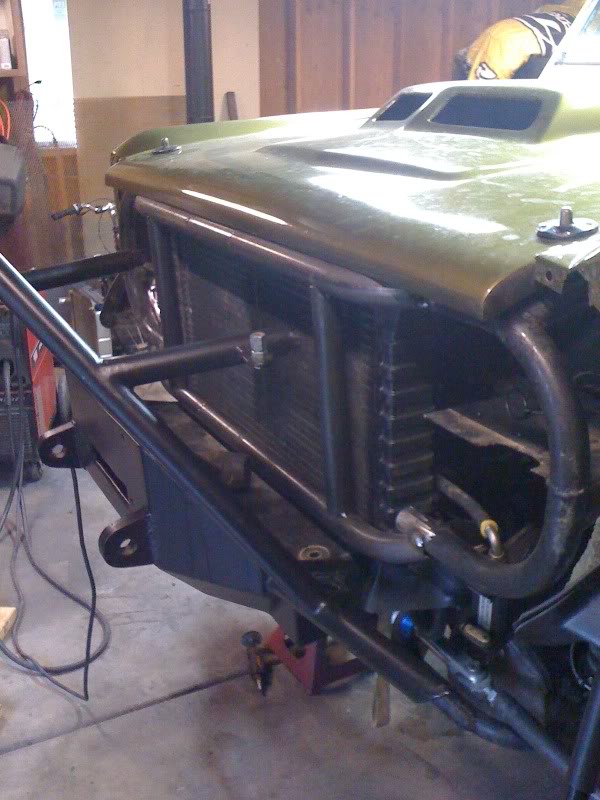
Front tube core support installed
Side shot
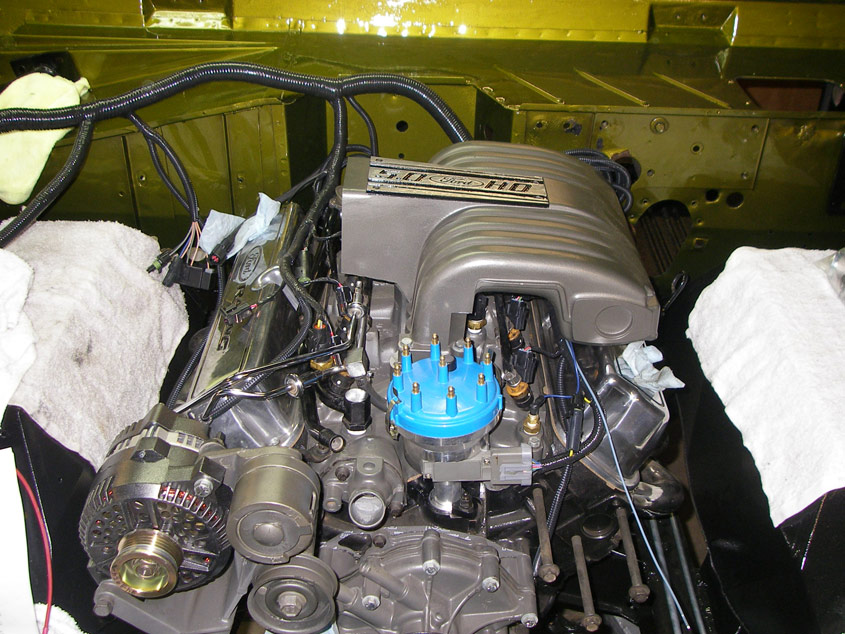
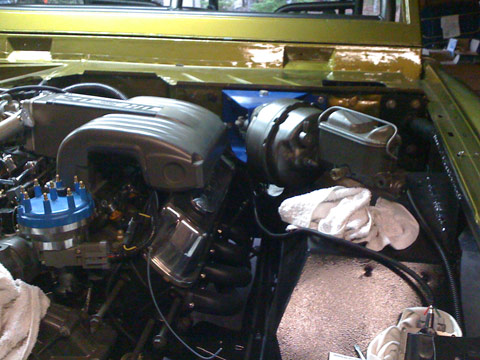
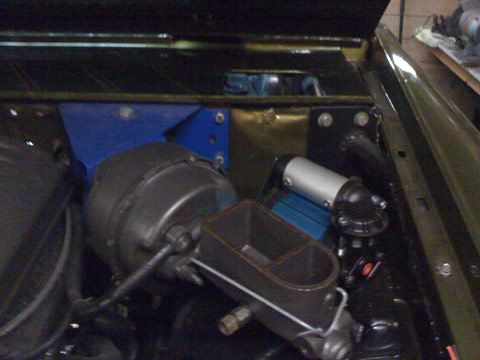
Motor with RJM harness started
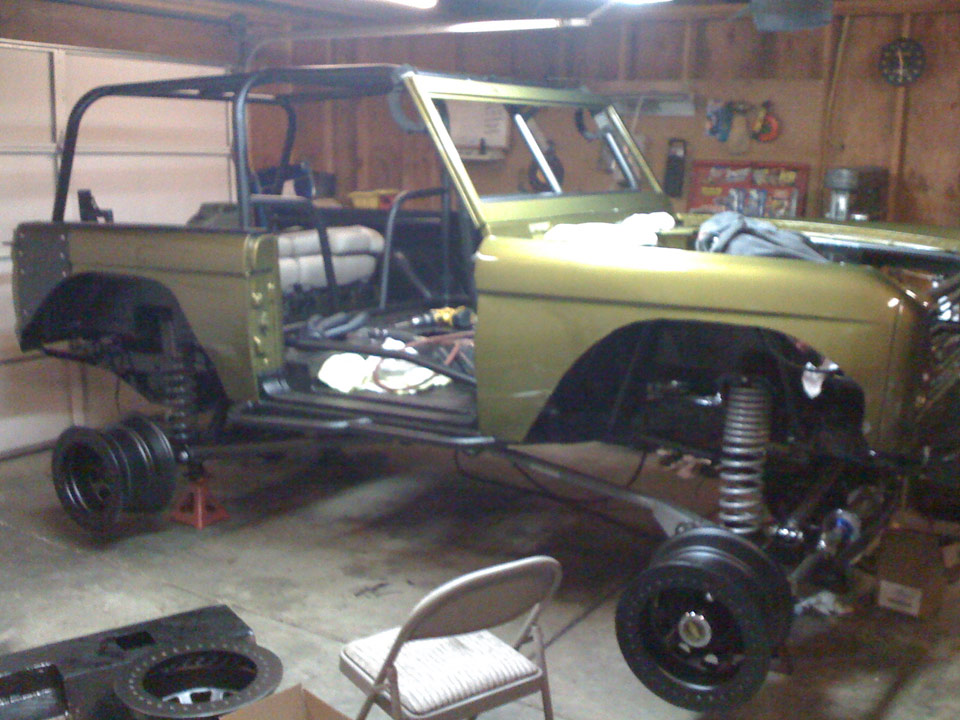
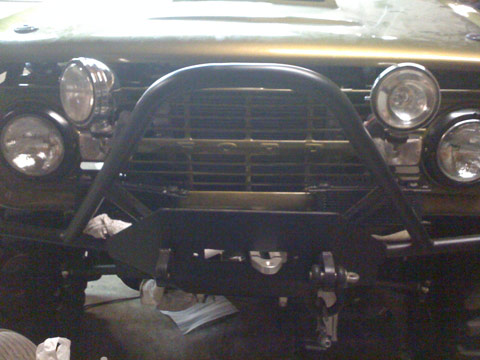
Alright, so I’ve been working late nights on this thing. The wiring is going well. I got all my parts back from the powdercoating shop: bumpers, wheels, cage, beadlock rings, and quarter panel protectors. Most items are back on, the front bumper is just sitting there for now since I need to work on the motor, I’ll take it back off.
(Sorry for the not so great pics, from my iphone)


Well, here’s an update. I mounted my beadlocks and tires and have been working on a few other items. Mounted the Art carr shifter, bumpers, etc.

Okay, since I posted last a little while ago, I’ve done the following:
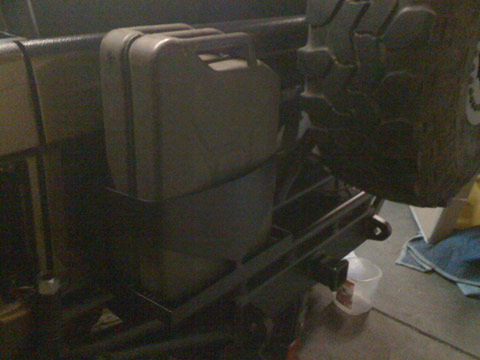
– Front and Rear 1410 High Angle Drivelines Installed with E-Brake Setup (very nice)
– Mounted Dual Optima Batteries
– Installed Heater with Chevy Blower and Cage
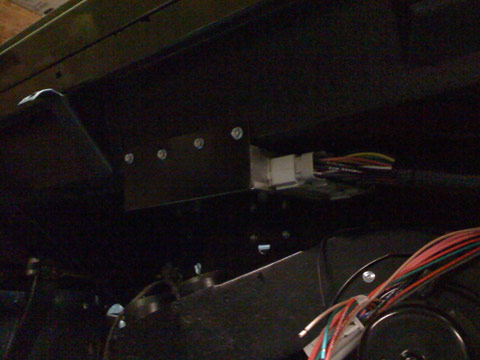
– Built and Mounted ECU above the heater – the bracket is very simple and seems to hold the ecu very tight
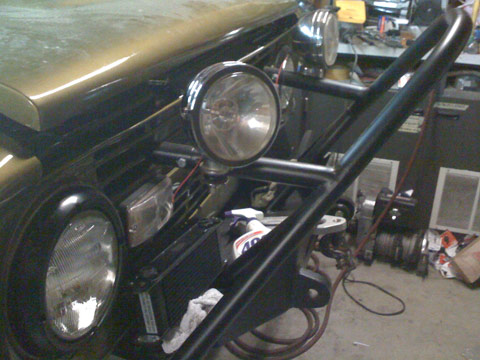
– Mounted Fender Flares
– Mounted Front 60 Diff Guard from GLO
– Mounted 14BB Pinion Guard from GLO (ready to mount the 14bb diff guard shortly)
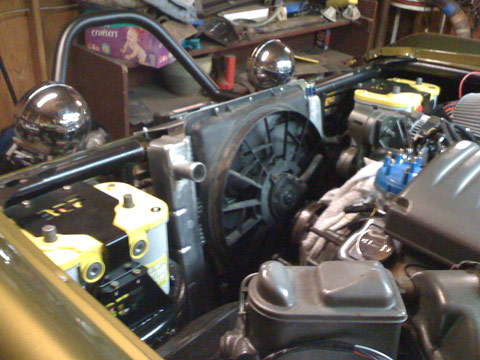
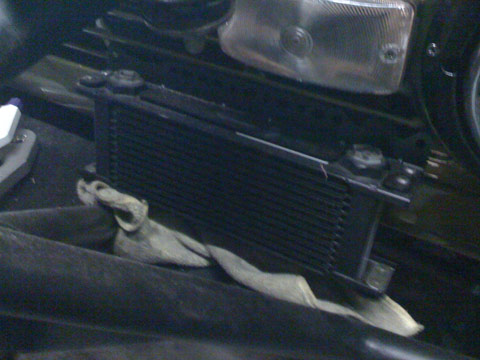
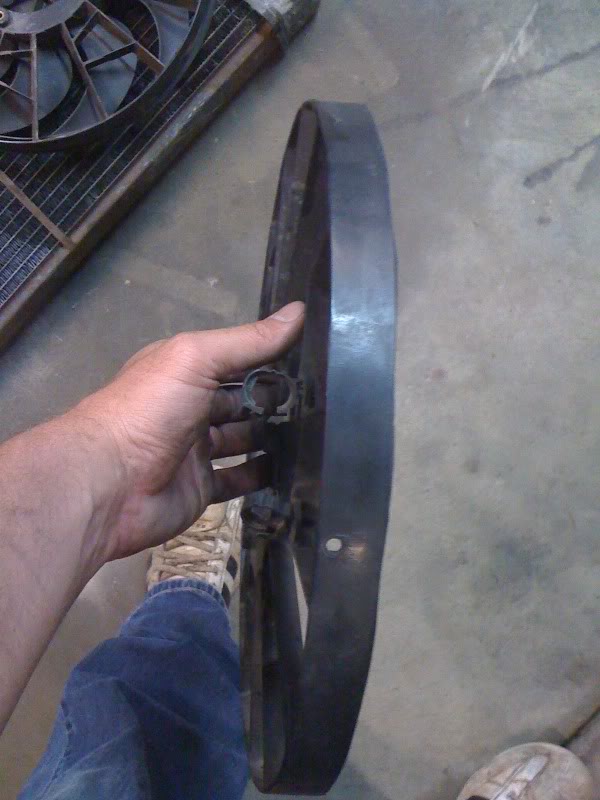
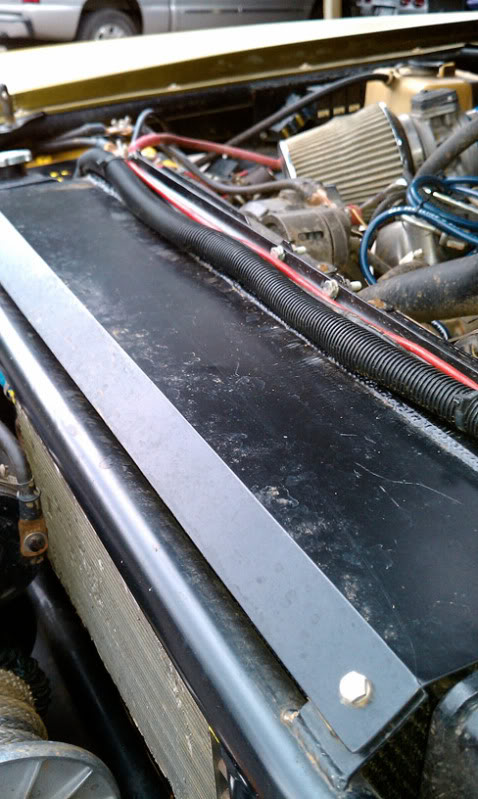
– Mounted radiator and taurus fan
I think that’s about it. Here are some okay pics. I’ll take better ones later. Have a good weekend guys!!!
Fender Flares Mounted
ECU mounted and Heater Mounted

Radiator Mounted with Taurus Fan
Okay, I’m working on my dash. I already have the dash made, just need to cut holes for everything I need. I’ve thought about this pretty hard, but would like any ideas/opinions anyone may have as to what I should add or arrangement.
Items to include on dash:
• Ignition
• Check engine light
• ARB switches – Compressor, front ARB
• 6 gauges: MPH, Tach, Oil, Volt, Temp, Fuel – 3 3/8, 2 1/16
• 3 heater switches
• Headlight switch
• Wiper switch
• High beam led
• Blinker leds
• 2 Cigarette Lighters
• Air Tank Gauge?
• Winch Controls
o 1 on off toggle, two starter buttons for in / out
• Toggle Switches:
o Front Rock Lights
o Rear Rock Lights
o Backup lights
o Interior lights
o Front KC lights
o Electric Fan
o Tranny Cooler Electric Fan
o A/C Compressor
Optional Items:
• Heater vents
• Speakers
• CD Player
• Glove Box
• Cup Holders
• Ipod Holder
I’ve been working on the bronc some more, here are some updates:
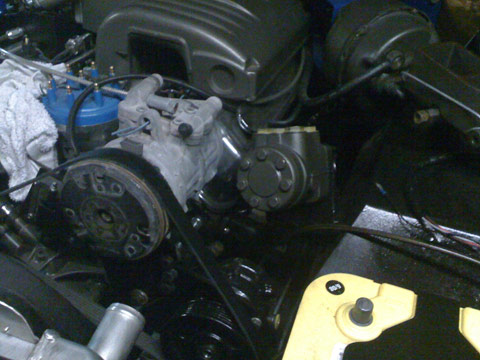
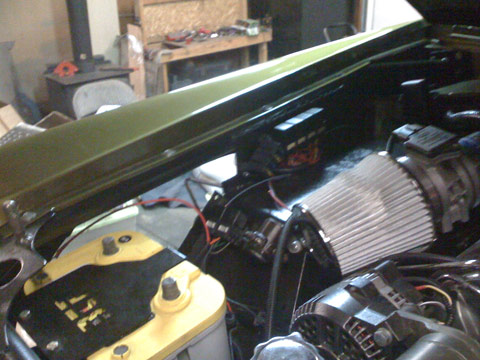
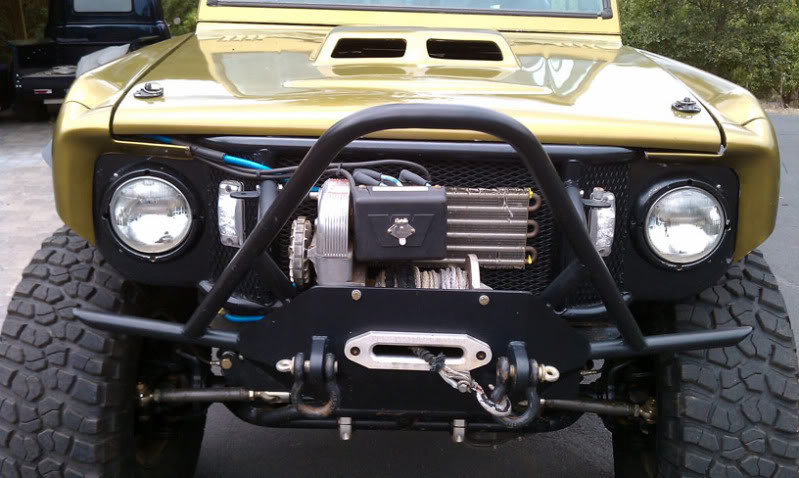
1. Mounted orbital valve, it’s kind of a weird location, but only decent spot I felt to mount it – this engine compartment is getting very tight
2. Mounted ARB compressor
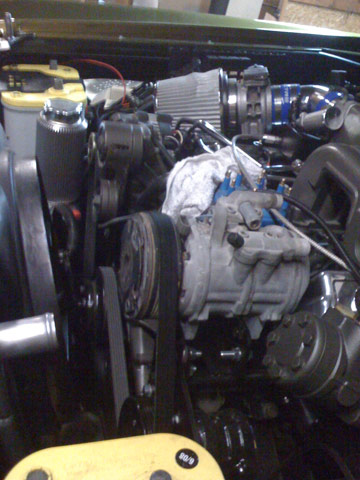
3. Mounted AC Compressor: I bought a Multi-Steer bracket from BC Broncos to run the saginaw POS pump I have and a Sanden 508 ac compressor. I could not find a Sanden that would fit, Jeep cherokees have them, but they were too deep and hit the head. So, I used the stock Mustang compressor which is a Nippondenso and made a couple brackets that bolt to the Sanden bracket. It was pretty easy, and you can find these compressors almost anywhere.
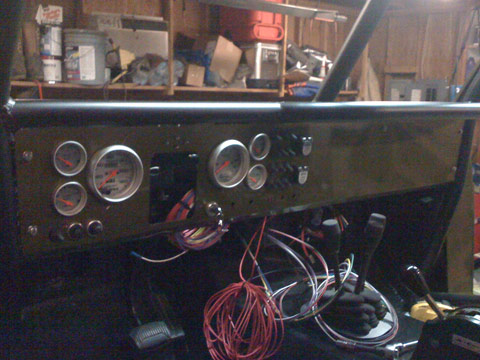
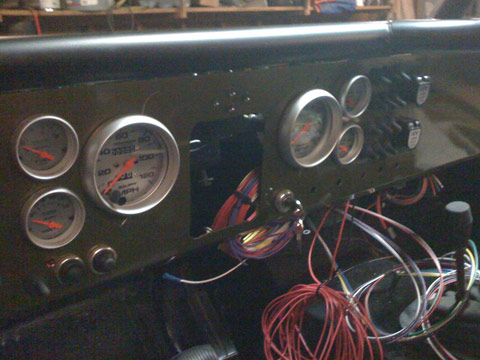
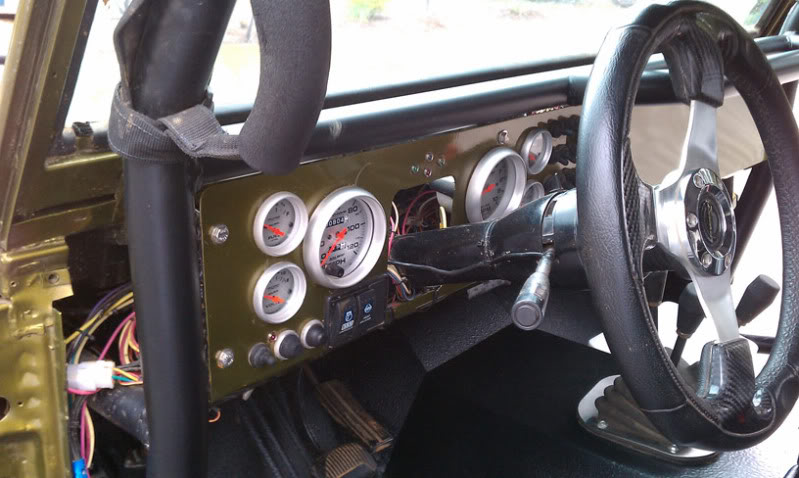
4. Dash: I installed my guages, switches, etc. I still need to install the arb/compressor switches, but in all it came out nice. I definitely should’ve cut the holes before painting it, as there are 3 nice scratches from the dremel. But I don’t really care too much, afterall it is a wheeler, just a little pretty.
5. Started mounting engine harness relays, fuse panel, etc. Planning where to mount all other electronics
6. Hydraulic steering cooler / Tranny cooler: I removed the winch to put the tranny and steering coolers in front of the radiator. I’ll have to cut the grill quite a bit to put those in and it will be very tight, so I’m looking for alternative places to put them. Any ideas? I was thinking maybe on the face of the grill under the blinkers and build a guard around each.
7. Misc. items: seats/tailgate/hood, etc.
Here’s a quick update. I have been working on wiring, tranny lines, brakes, etc. I’m almost ready to start this thing, hopefully this weekend. I just got hydro lines ran, exhaust done, etc. I’ll post pics later.
In the meantime, I scored some brand new 40 in Toyo MT’s on 22 x12 black rims. I know, you may be thinking 22’s for wheeling? However, I personally think they will look sick, and I may just run two sets of tires, one for street and one for wheeling.
Here’s a bad pic of them:
Alright, here is a quick video from the first time we started it. Yeah, we were a bit excited to hear it run, even though it wasn’t running well. Since then, it’s all dialed in and timed properly. I drove it down the drive way, which felt good. It has a ton of power.
The annoying squeeling sound you’ll here is a brand new alternator that the bearings were shot in, pretty frustrating. I’ll post up some pics and other videos soon.
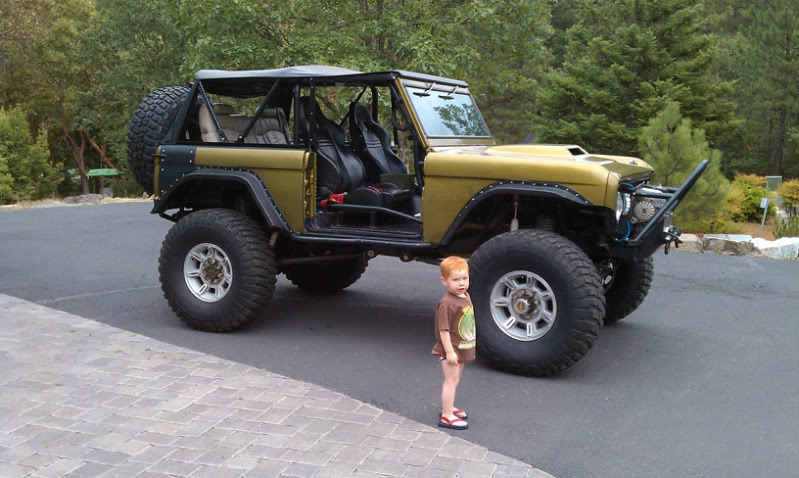
Okay, so, I just drove the Bronc to work for the first time, with my 3 year old! It ran great on the road!
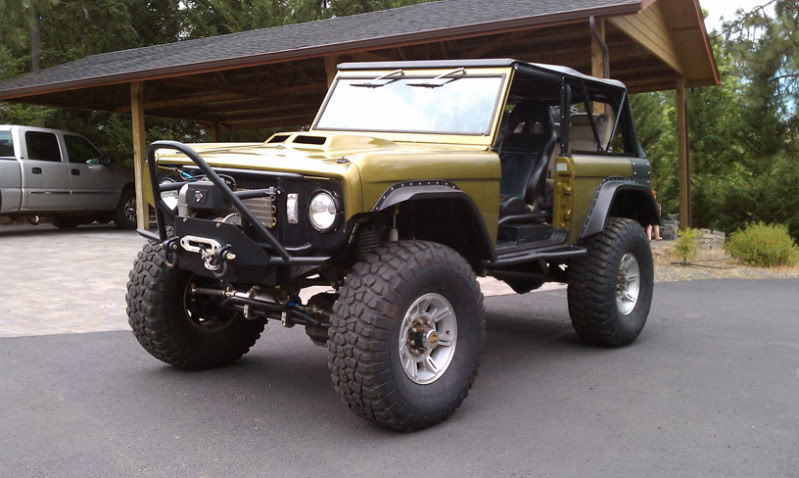
Love it or hate it, here is a bronc on 22’s and 40 inch Toyos! I have had mixed reviews from my friends. I still have the other tires and rims for wheeling, these for the street and some wheeling.
Here are some pics from just playing around last night. I don’t have my cables adjust for 4 wheel drive, but I was pretty happy with 2wd. With this new wheelbase, this thing feels like a caddy.
Alright, I took it wheeling Friday, it did great. A few little issues, but nothing major. I’ll post those pics later.
I had a chance to take it to my cousins shop and play a little with the forklift. I was pretty happy with the results. The rear tire will flex 41 inches off the ground before it rips off the fender flare. It wasn’t hitting metal in these pics, just the flare. I could probably go 2 or so more inches by not having the flares.
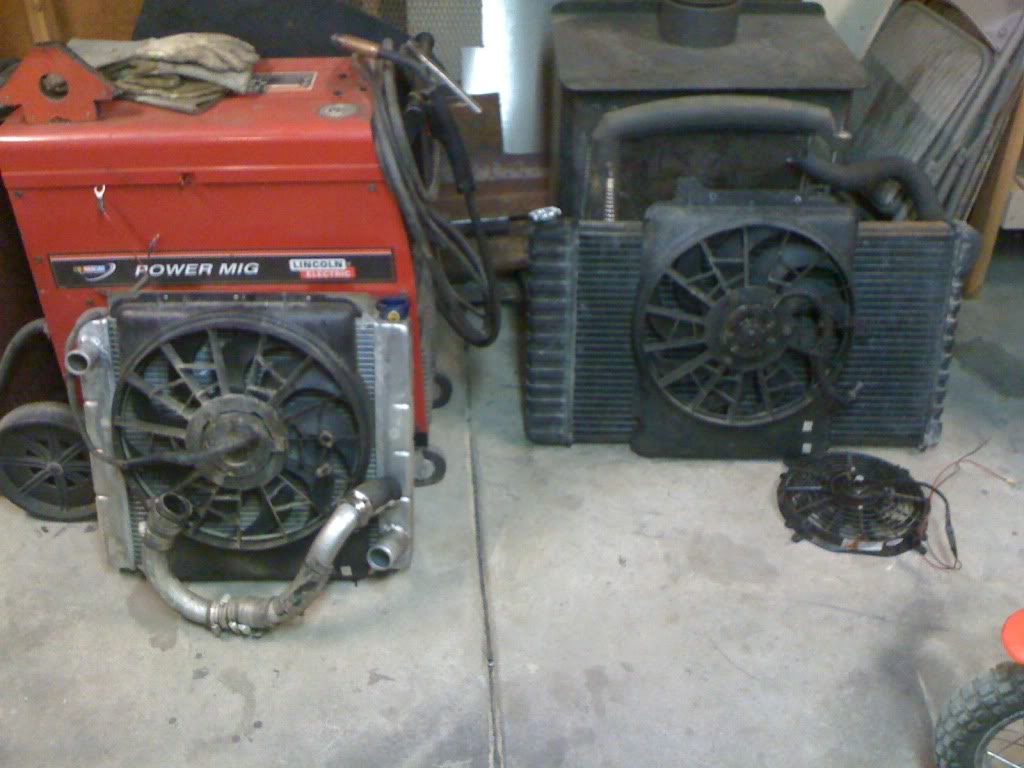
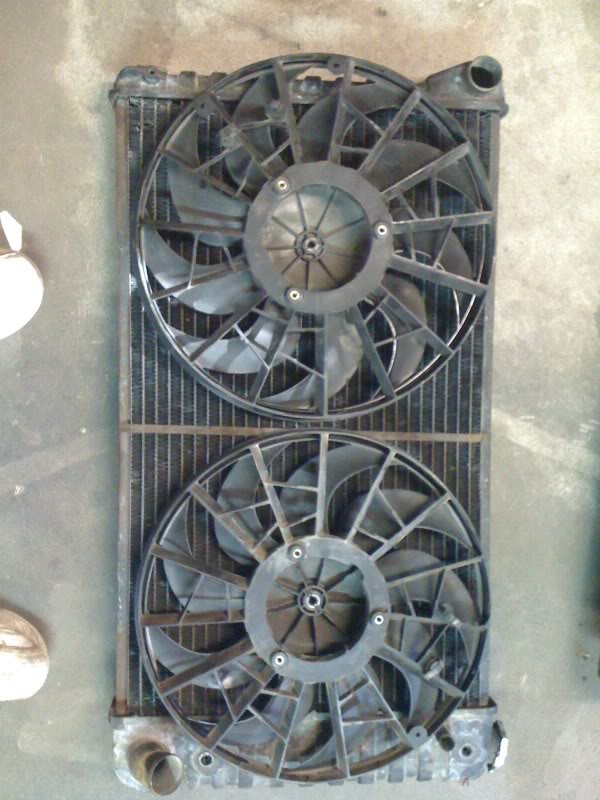
Well, I’ve been dealing with some heat issues ever since I started driving this. The radiator/fan just cannot keep up with the continual RPM’s of traveling up a steady incline or engine load. So, I’m going to do the following:
1. Install a 34 inch wide x 19 tall 4 row big block chevy radiator (this gives me almost 12 inches more core area and 1/2 inch thicker core). I got this radiator used and it seems to be in great shape. If not, it was only $20. I just don’t have the cash for a Ron Davis or C&R radiator right now.
2. Build a shroud and install two taurus fans on the shroud: one fan is the two speed taurus, the other is a single speed taurus fan out of an SHO model. I will have both on manual switches to turn them off, but primarily they will both be ran off their own temp switches turning on at different temps and both will run only if it’s say around 210 or so.
While the Bronco is down, I’m going to finish my checklist of items that need to be addressed after driving it for some time.
Such as:
– ARB hooked up
– Finalize rock lights and some wiring
– Limiting straps / bump stops
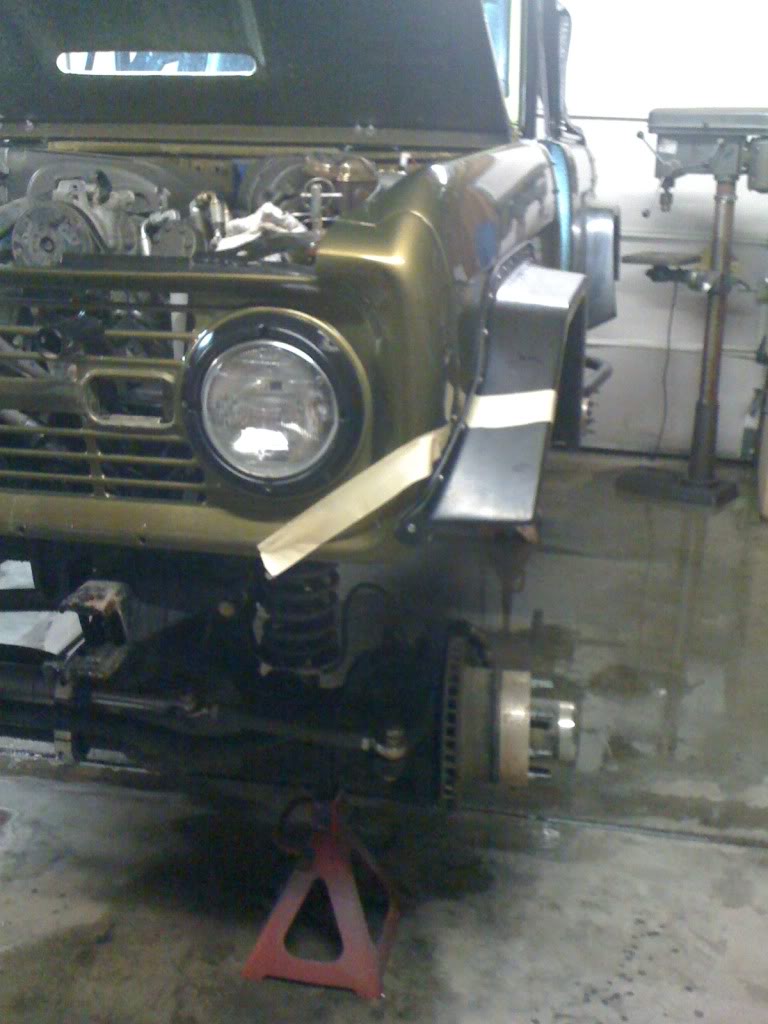
– Trim front fenders – at full turn and bump tires rub
etc.
Also, my rims are getting powdercoated this week Silk Satin Black to match my bumpers, cage, etc.
Once this is all dialed in, it’s time for some good pics and I heard of a magazine that might want to feature this thing!
Here are some pics of last nights progress: removed existing radiator and bumper. Notice the size difference!
Worked on the radiator some more last night. Here are some progress pics.
First, shows I removed the grill.
Started trimming with the sawsall!
Here’s the radiator and roughly how it’s going to be mounted. This radiator is way bigger than my last, I sure hope it keeps this thing cool!
Also, going to trim some sheetmetal and flares as the tires rub at full bump and turn
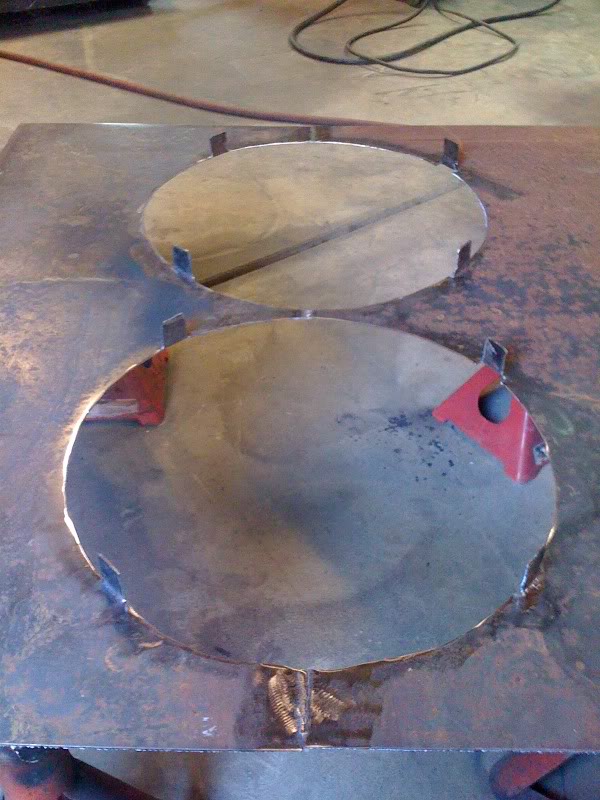
‘ve been working in pieces on a new modified core support to fit a larger radiator. Also, I started a dual fan shroud to house two Taurus fans. It’s going to need some flap disc help, and a brake wouldn’t been nice! I also had to use some metal I had laying around for the shroud, so it has some surface rust. Once done I will sand blast it and paint it up all nice.
I’m a little stumped as to a grill center section. I’m basically going to mount a left and right pieces of the grill with each headlight attached, so the sides will look like stock. However, this center section has me. I could put some expanded steel behind the bars. Or I could run horizontal bars similar to a new style ford truck grill? Any ideas?
Here’s some pics:
New core support almost ready for final welding:


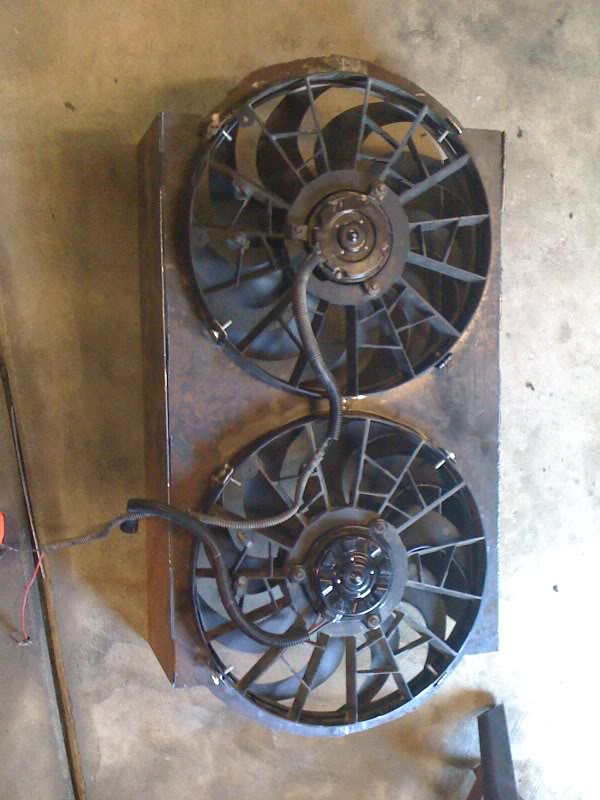
Taurus Dual fan shroud:
Both sitting on the radiator:
Starting the layout:
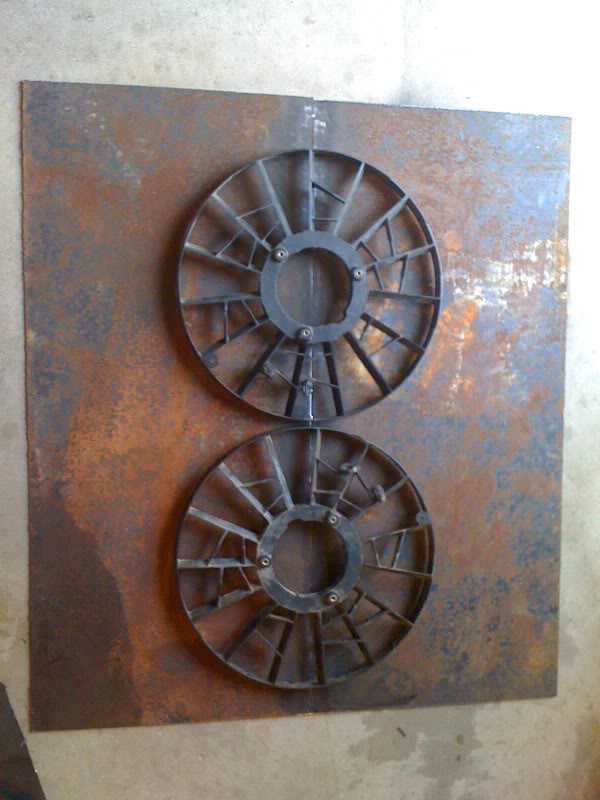
To get the fans off the fan motor so I could take the Taurus shroud apart, I had to grind just a little here:
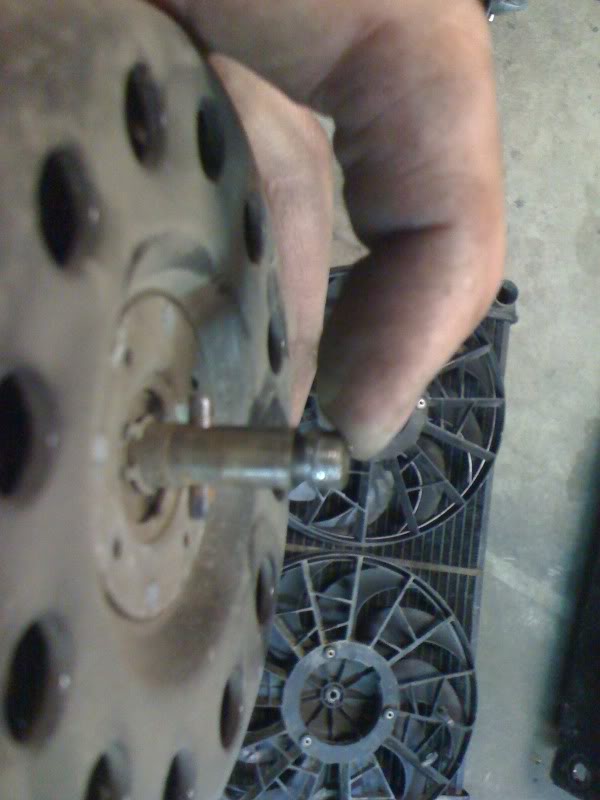
Once the fan motors were off, I cut this piece off the original Taurus shroud:
Then, I cut holes in the sheet metal and bent some tabs to attach to the plastic shrouds. I drilled 1/4 inch holes through both the metal tab and shroud and will bolt them there:
Here is what it looks like all bent (by hand) with the two fans sitting there:
More to come once I finish this up!
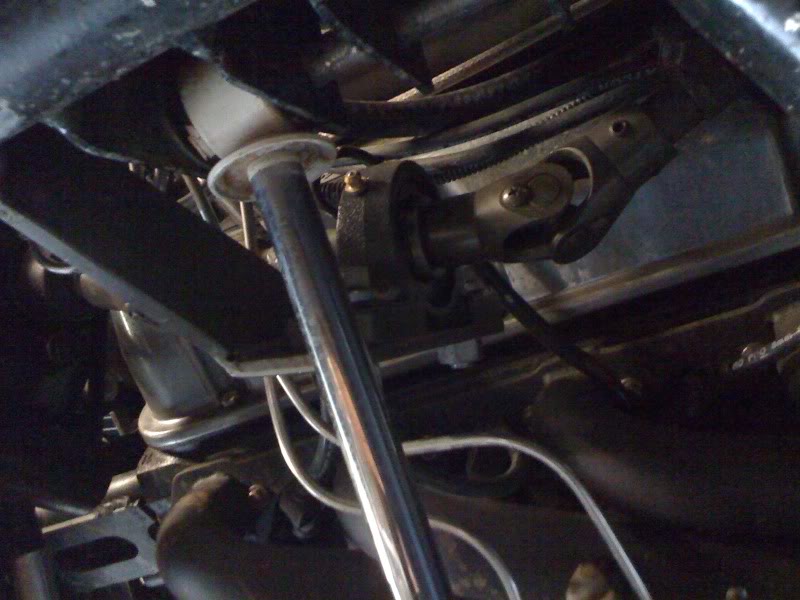
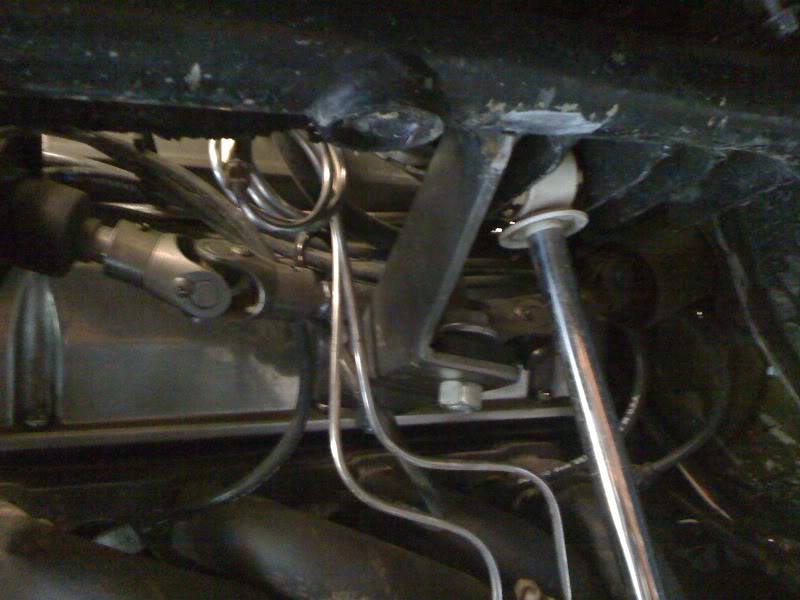
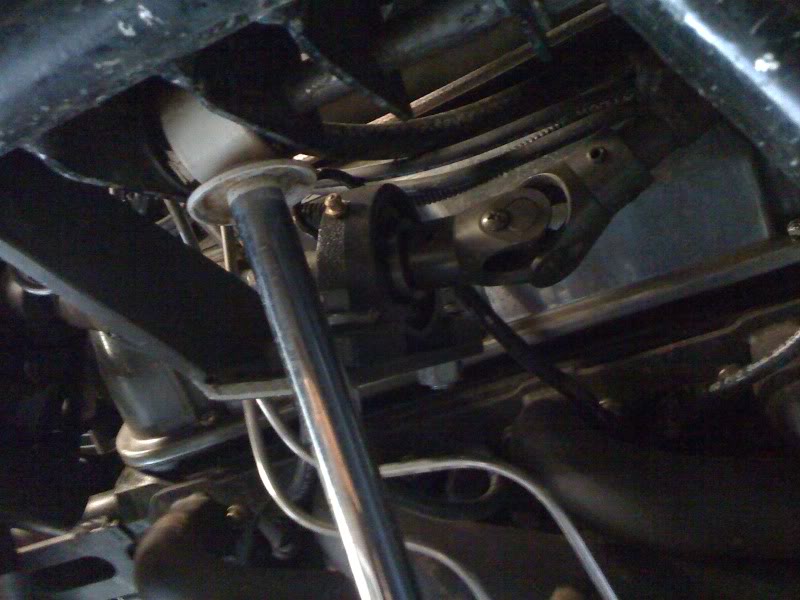
Also, forgot to post pics, but about a month ago I figured out a weird steering issue I was having due to all the weird angles of my steering shaft. So, I purchased a Pillow Block and made a bracket off my shock hoop to support it. This solved the movement of the shaft when you’d first start to turn and fixed the weirdness when you’d turn going any speed.
Okay, I finished the new grill, fan shroud and radiator setup. I installed dual taurus fans, a custom built radiator shroud for them, a BB chevy truck radiator, and it all works great! Driving down the road, I don’t even need the fans on and it will run consistently at 180. With one fan on, I can make it to a spot when before it would hit 235, it was at 185. So, I’m stoked it’s all working.
The custom grill and blinkers came out better than I thought. I really didn’t want to chop up the stock bronco look, but I think I kept it as close as possible to the Bronco look.
Also, I got some different tires. Yes, they are the stiffer military XL 46 inch tires on 20 inch double beadlock rims. But honestly, I’ve had them on two quick trips and they outperform my Toyos for sure. Someday I may still go for some Pit Bulls, but for now this is all I could afford to run.
Okay, so, the 46’s only lasted about 2 weeks, and they were just too big. I ended up getting a set of 44 TSL’s and mounted them on some new beadlocked rims I initially made for the bronco. Here are a couple pics.
I still need to turn the knuckles to make it handle better, but everything else is working very well.
Well, it’s been a while since I posted any updates. I’ve done minor items to the Bronco in the last few months:
- Lowered / New wheels / Tires
- Rebuilt front end, all new ball joints, bushings, cut and turned the knuckles for proper caster
- Built front bump stop mounts (I’ll post pics later on this)
- Fixed rear seal transfer case leak
- General maintenance to get ready for Winter wheeling
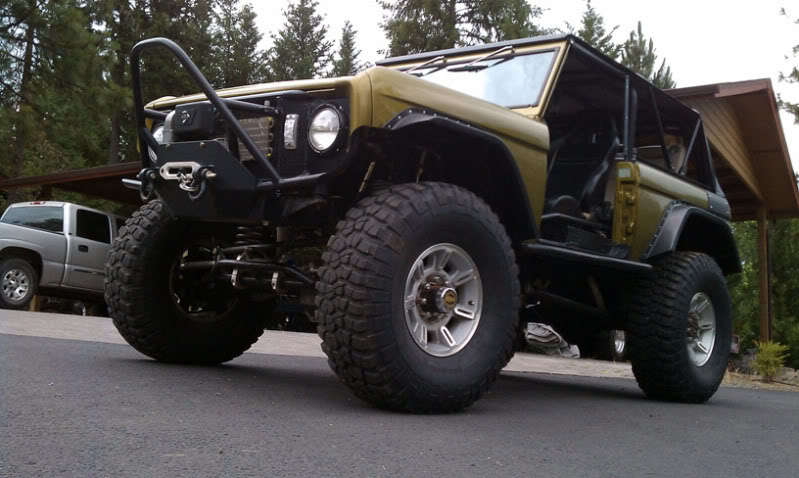
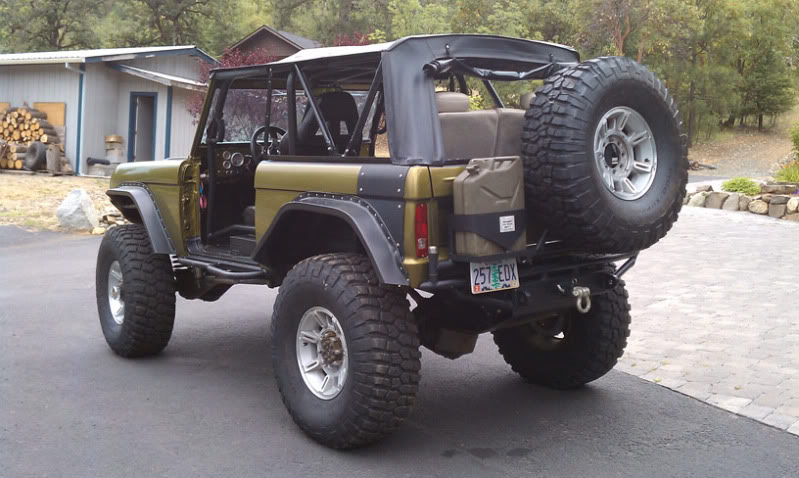
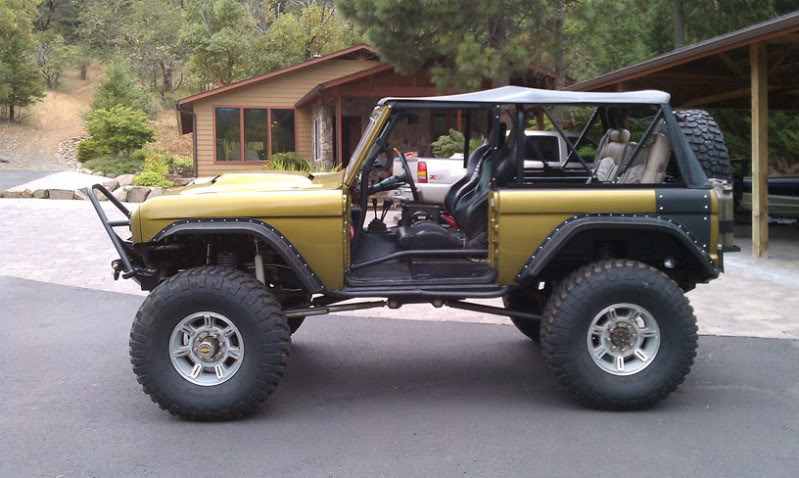
First, I sold the 44 TSLs and lowered it back down and am running some 40 inch BFG KM2’s on some H1 wheels. The last tire/wheel switch for a long time. I absolutely love this setup, only wish the wheels had less backspacing. I’m going to get some spacers for the rear so they won’t rub my inner fenders. Other than that, totally love the tire, wheel combo. Way light, fast, and has way more power. I’ll be painting them black soon:
Also, some pics of the newer core support and grill. This has been done for a while, but so far on a 105 degree day pulling a hill to the top of the mountain, it only got to 210. I was very impressed!

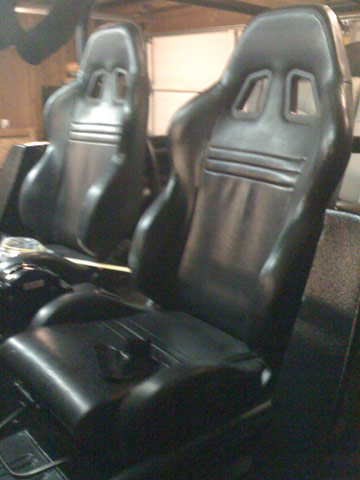
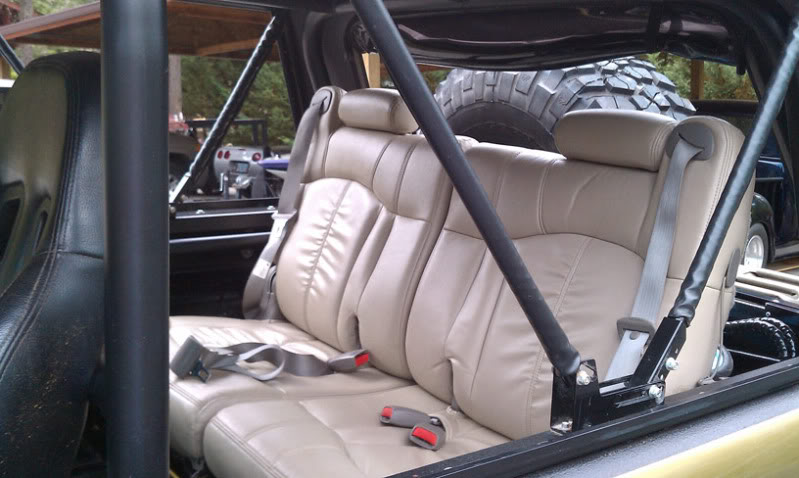
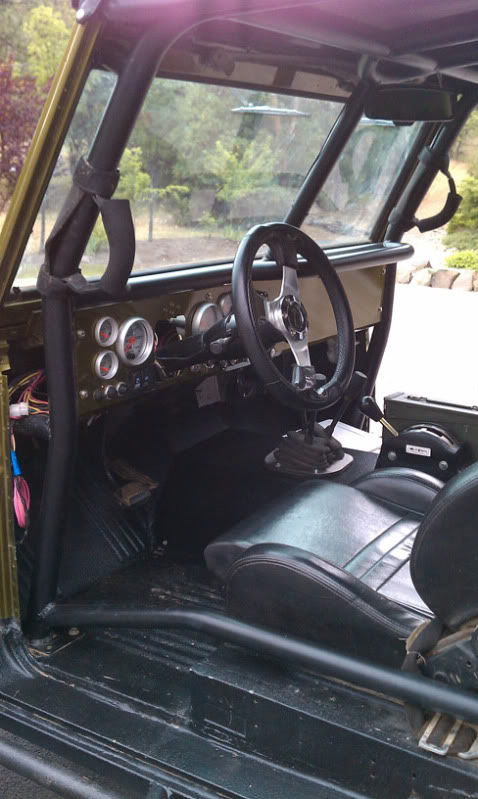
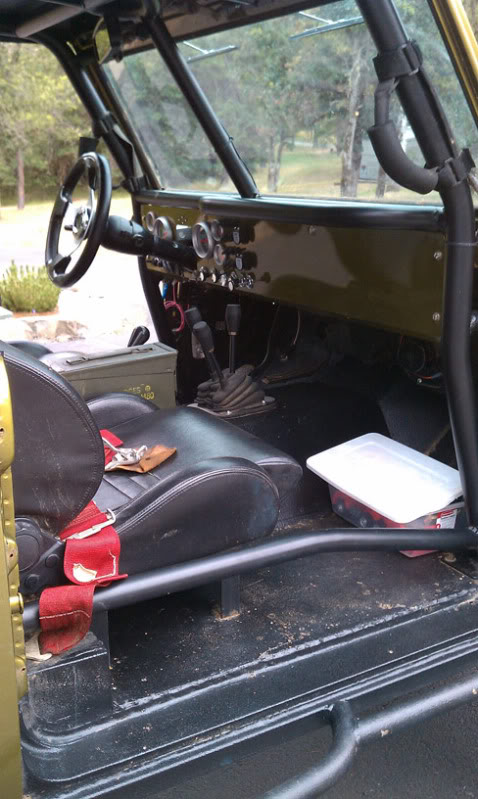
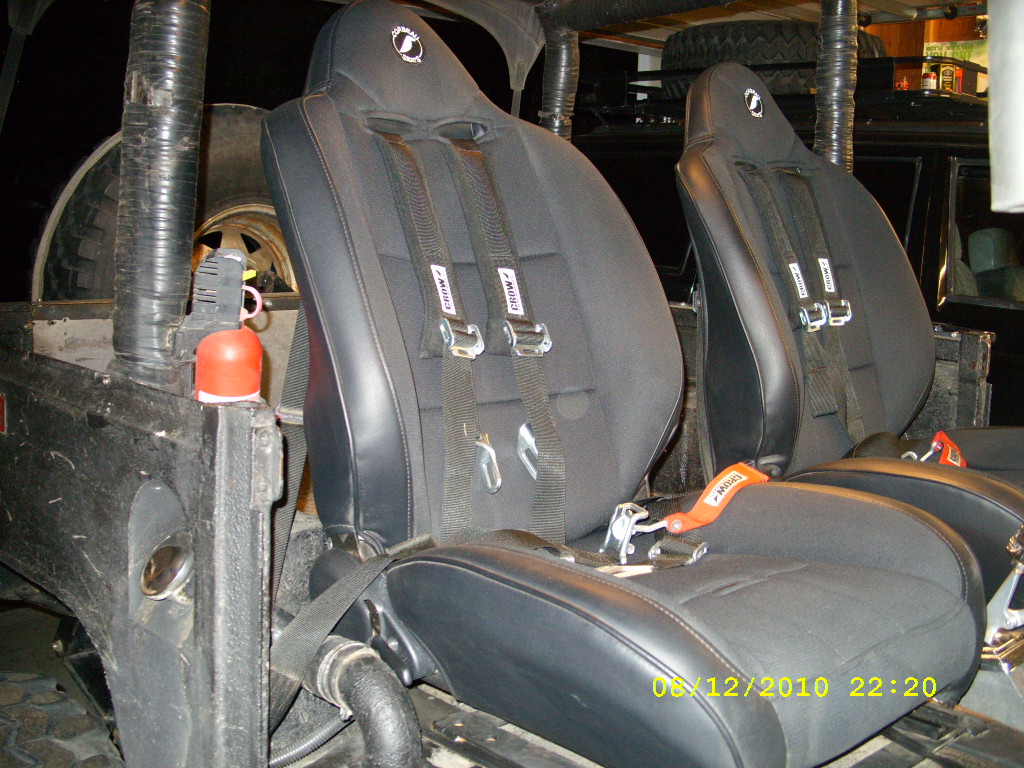
Here are some pics of the interior. I’ve never really posted what it looks like inside:
just purchased and installed some 4 point harness Corbeus for my L.C. , they are a suspension seat’s that recline, i have never been so happy with seats before!!!! I would rather be in my new seats than on my couch [IMG]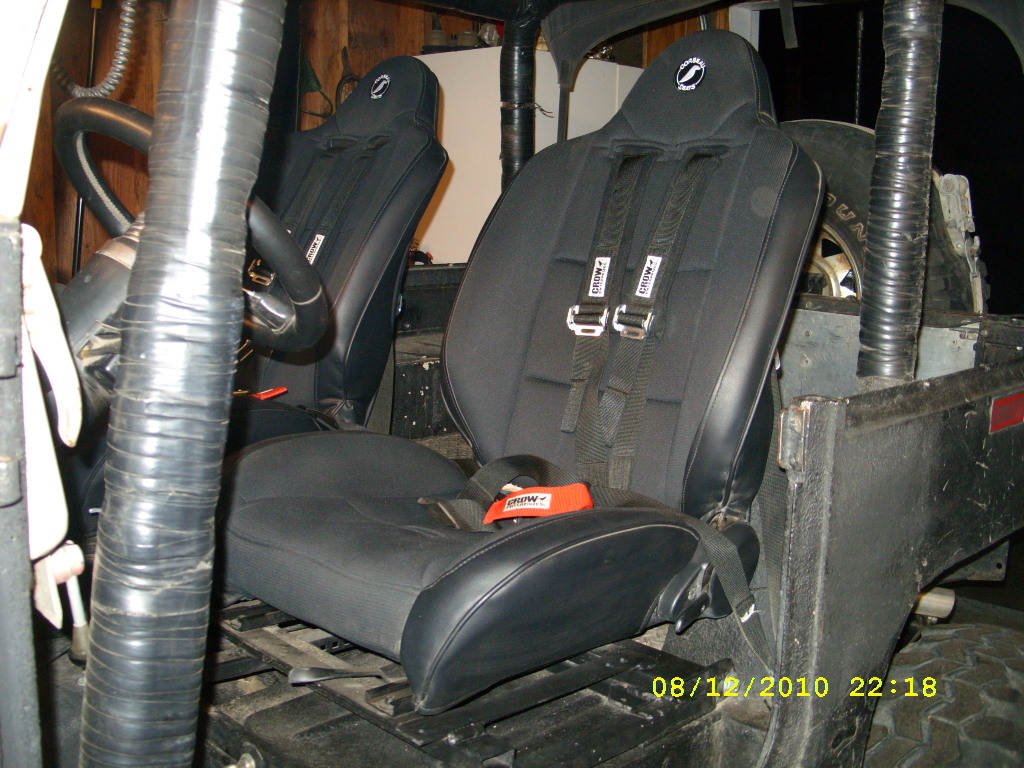


Hey, sweet bronco build man.
Wondering if you could measure those 40″ km2’s mounted for me? Im thinking of getting a set for my fj60 but want to know the actual mounted size before ordering. It used to have 39.5″ iroks that supposedly measure out to 39″, curious to see what the km2’s will read.
Thanks
D
It’s freaking awesome bro, but I have a question and I might sound stupid but why are there 3 shifters
Thanks for sharing your build. It Must have been fun to have the freedom and skills to build what you wanted.
I am just staring a frame off. I have been looking for a rear seat. I like the rear seat out of a Chevy Yukon. Is that a Yukon rear seat in your bronco.
Thanks
Ed