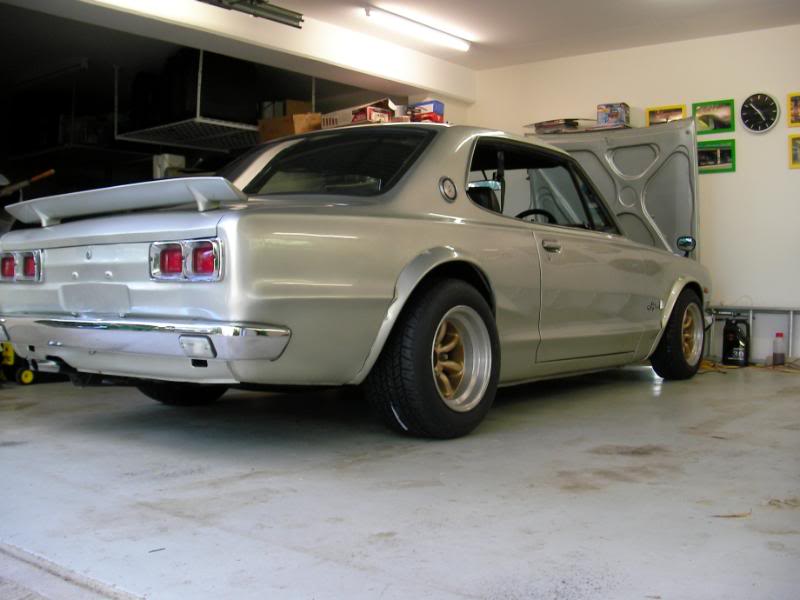
1971 Nissan Skyline 2000GT Hakosuka Restoration


It’s been quite interesting for me to read over these old updates, and in hindsight, I was so unbelievably optimistic about getting the car on the road quickly and how, at every step of the way, I was convinced that we were “close”!
Ahh…so innocent.
Without further ado, here are the original GrandJDM Project Hakosuka updates, reproduced!
15th Feb 2008: So…..I bought a Hakosuka
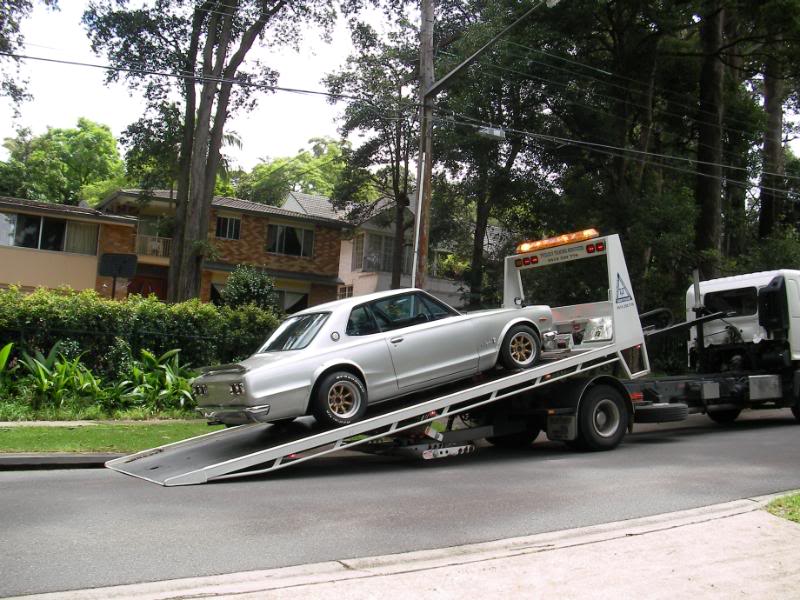
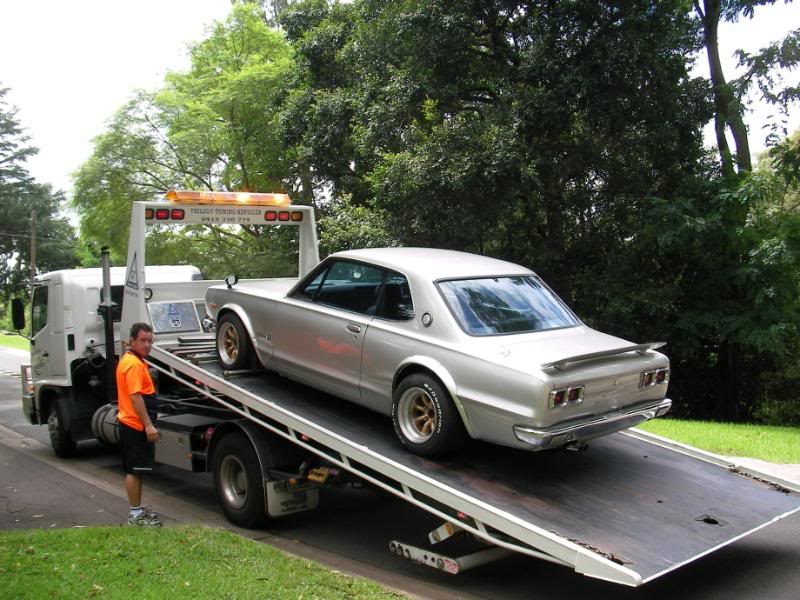
It’s been quite a long time in the making, but I think we can now let the cat out of the bag. Late last year we hinted that we had some surprising big plans for 2008, and this is one of them. I’ve bought a Hakosuka!
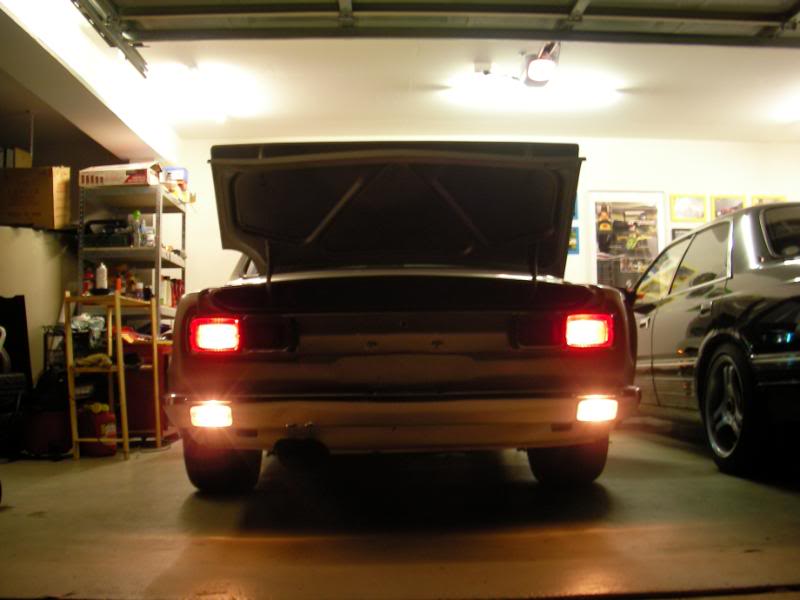
She arrived on the back of a tow truck today, fresh from her long journey from Japan, and I can’t tell you how excited I am. I’ll tell the whole story soon, but getting this beauty into my garage was a very long journey that began in October last year.
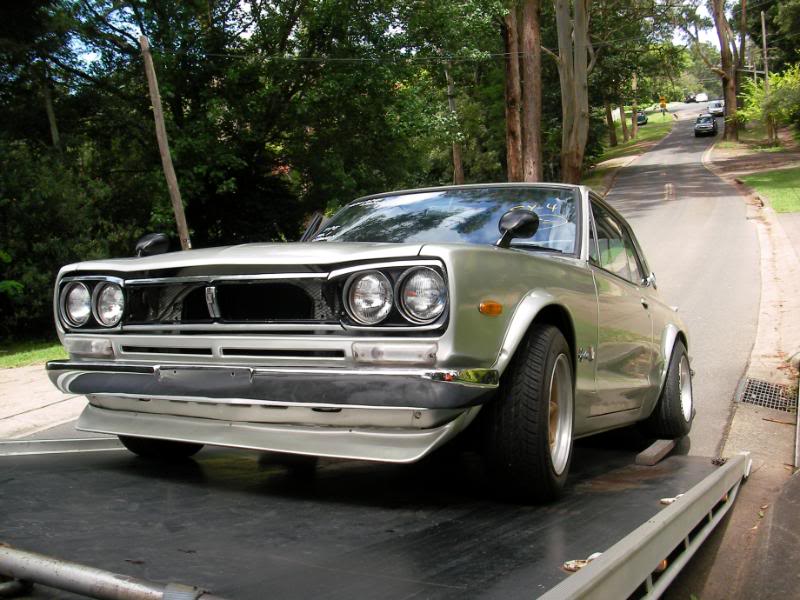
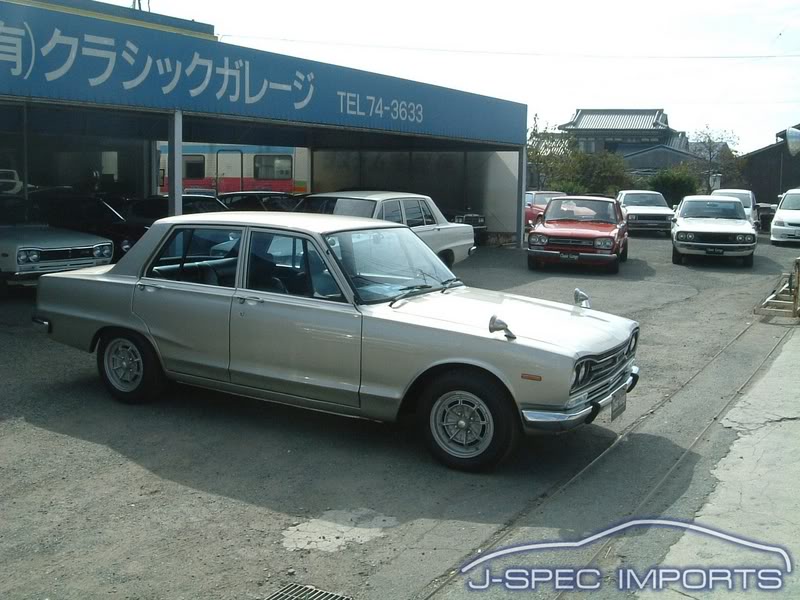
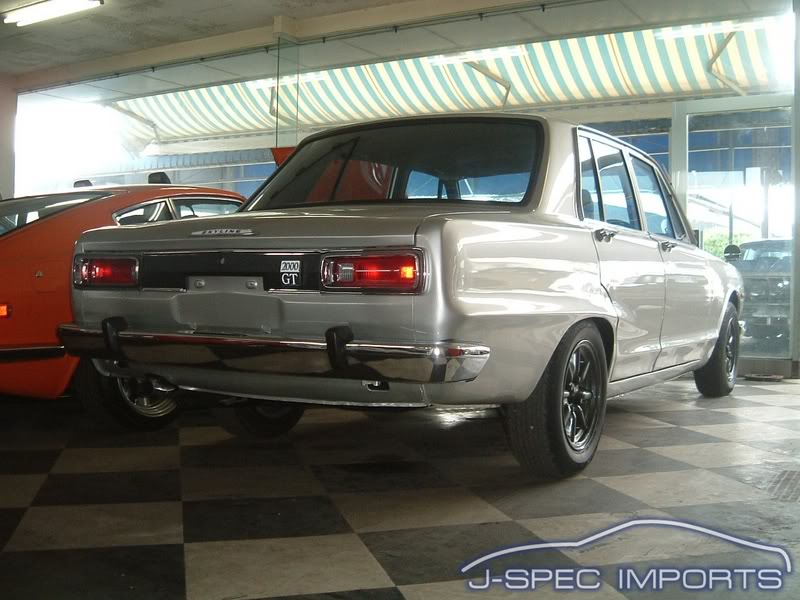
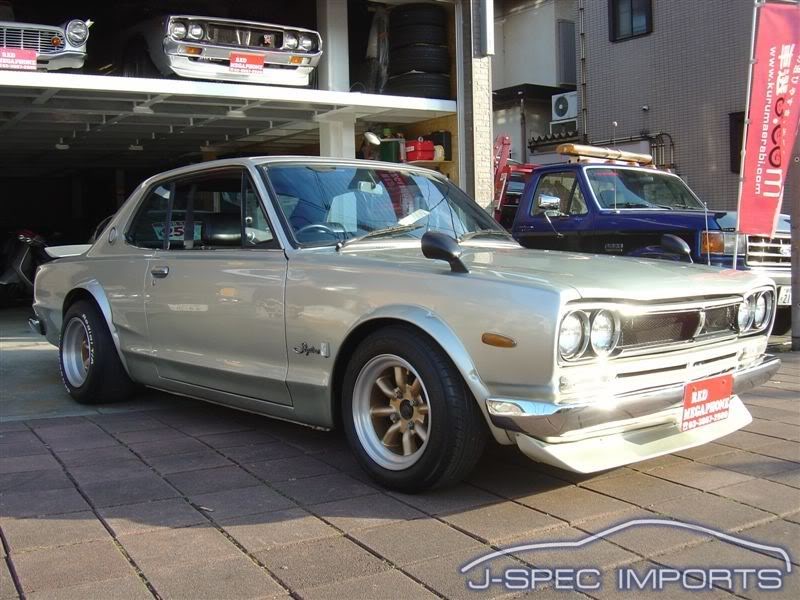
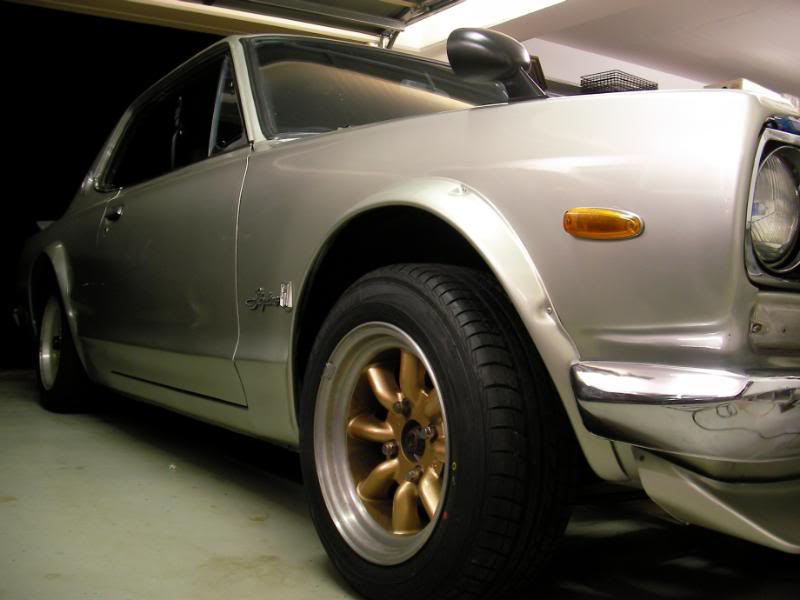
She’s a KGC10, so not a proper 2000GT-R but a replica instead, having began life as a 120ps 2000GT in 1971.
As for what happens now? Well there’s a lot of work to do before she’s ready for registration and can hit the road.
But I hope you guys will enjoy this latest facet of GrandJDM, I’ll keep an ongoing diary of what’s happening with the car, as its maintained, restored and upgraded, and the long term goals are that the motor will be beefed up for more power, and the brakes and suspension will be uprated for track events and maybe even a tarmac rally or two. I’ll document the highs and the lows (well hopefully there won’t be too many of those!) as we live life with a Hakosuka.
Over the next few weeks, we’ll have more articles to tell the story of how this old lady ended up in Sydney, and we’ll also do some articles on hints, advice and pitfalls on how to charm a piece of JDM history into your own garage. And I’ll tell you a little bit more about the car itself soon, too.
Can’t talk now…’got some Webers to go and take apart.
Welcome to Project Hakosuka!
17 Feb 2008: Project Hakosuka: Right Back At The Beginning (Part One)
Well, I guess I better tell you guys a little more about the car! And I suppose the best place to start is at the beginning.
It was almost three months ago that I decided to take the plunge and buy a JDM classic. I’d owned JDM imports before (there are plenty of second hand imported JDM cars in Australia) but nothing this old. So on 12th November I send an email to our friends at J-Spec.
I want a Hakosuka I said, and described what I wanted. Initially, I was quite flexible about buying a 2dr or a 4dr, my main aim was to buy the best-condition car possible, irrespective of the number of doors.
What then happened was quite wonderful…everyday, my email inbox would be filled with new Hakosuka candidates, as J-Spec searched available dealer stocks in Japan and sent the details and pictures to me. This was both wonderful and a curse, since it meant that from November to December, I didn’t get any work done and spent the days emailing pics back and forth with my friends, discussing the merits of each car….so basically about 20 of my friends didn’t get any work done either!


Now let me tell you something about this stage of the process….they ALL look great. It’s like being a kid in the most awesome, biggest candy store. But that was also the problem…pretty much any car will look clean and straight in a picture, and of course the Japanese have such great taste in wheels, stance, etc that there is a great temptation to assume that every car is perfect. As western car guys, we tend to assume that if something looks right, it is right, but that turned out to be a very dangerous attitude to have when it came to shopping for JDM classics.
One rather shocking learning from this whole experience is that when it comes to buying classic JDM, you should be extremely careful. And the reason for this is a difference in focus between western car enthusiasts and JDM car guys.
In western car culture, good workmanship or a good restoration, is in the detail. It’s all the little things that make the difference, and the mark of a good restoration is in the quality of work done in the areas that you don’t normally see…but in Japan, a good restoration is simply one that looks good. It may be a generalisation, but in my experience, most JDM car guys would be happy for their car simply to look good from 5-6ft away.
It’s not a question of dishonesty or anything like that, things are just a bit different in Japan. For example, when a car is resprayed a different colour, in 90% of the time the engine bay will be left the original colour. In 10% of the time, the door jambs will be left the old colour too! Very often, old cars are given very “cosmetic” restorations, where all the work is focussed on the shiny-side and no attention at all is paid to rust removal. It’s not uncommon to find tuner shop demo cars, and even showcars, that look a million bucks on the top, and it’ll have all the cool hardware, and the right wheels, etc but have holes in the floor under the carpets.

Here’s an example below. This is a Tokyo Autosalon showcar, a highly desirable and gorgeous classic with the right look and all the good hardware. It’s also one of the most expensive examples of its kind on sale in Japan currently, at a very well known classic car dealer. But when you look at the detail, it is simply not of a standard that would satisfy most car guys in the west.
Like I said, it’s not a matter of dishonesty (and I certainly am not trying to be judgmental), it’s merely a difference in focus. In Japan, the money simply gets spent on other things: things that make the car look good, and go good….and let’s face it, it is those things that we love about JDM classics in the first place.
But buying a JDM classic is an expensive business, and so we tend to expect that the car of our dreams will still look good in 10 years time, but the reality is that a great proportion of JDM restorations will not meet that expectation. There are, however, like-minded JDM car guys out there so it’s a question of sorting out the cars that were good, from the cars simply looked good. And the search threw up some stunning examples.
This 4dr was an awesome example. Not only was it in great condition, but the seller was also keen to show what lengths had been gone to during the restoration to do it all right…a very good sign.

But unfortunately by then I’d decided that I really wanted a 2dr Hardtop….in a light colour (preferably white) with flares front and back, a hot engine and Watanabes….BIG Watanabes. The right car eventually came up at Tokyo nostalgic dealer, Red Megaphone.
Like all the others, it looked a million bucks, but the details were promising. The car had been restored 2yrs prior, an engine-out, glass-out resto that saw the interior, engine bay and boot repainted. The floor underneath had been rust treated and repainted too. The engine had triple Webers, extractors and dual exhaust…and yes, it had big Watanabes. The fact that it wasn’t a recent restoration was a plus in my book: if there were any really serious short cuts taken, then we should see rust bubbling up or excessive filler start to crack and swell by now.
J-Spec are great for us classic enthusiasts because they’re quite willing to look for the oddball cars, and then they’re quite willing to check it out for you. They have their own car inspectors in Japan, so I agreed to pay the A$250 to get the Red Megaphone car looked over.
What came next was a total surprise: a very long and detailed report (that even covered gearknob wear) and a few hundred pictures of the car. J-Spec’s guy even lifted the carpets to take pictures of the floorpan, I got pictures of the chassis rails, engine bay, door jambs, pretty much every nook and cranny of the car.
The verdict was that it seemed to be quite solidly restored. Not perfect in the areas you can’t see, but all the rust repairs looked sound, and the car was straight.
There were some minor things, like a little rust in the rear quarters, but overall the pics assured me that all the areas had been addressed in the resto. In typical JDM style, some of the detail work in the boot shut, door jambs etc were a little rough, but at least I could see that it was a proper repair and the important things like shutlines were great. So the car looked solid and built to last, and it fulfilled all the various things I wanted in my car. So on the 14th December I made a telegraphic transfer for the purchase price to Japan….
19 Feb 2008: Right Back At The Beginning (Part Two)
Ok, where we left the story yesterday was that I’d paid for the car, and J-Spec basically takes it from there. The car was picked up from Red Megaphone, and then towed to the docks at Yokohama…where it would wait….and wait.
Now, by far this was the worst part of the whole process. It had been a lot of fun up until then, but now there would be a long period of waiting.

The Hakosuka would sit on the docks in Yokohama for over a month, while we waited for a spot on a car carrying ship bound for Australia. Normally the wait isn’t as long, but there was a change to the importation rules in New Zealand that kicked in at 31 December, so the Kiwis had basically block-booked all the available spots right up until the end of the year.
Even after the 31st December had passed, there was a backlog to be cleared and so the Hako didn’t board the Graceful Leader car carrier until the 21st January.
After I bought the car, J-Spec offered me two choices: the standard option is to put the Hako on a roll-on, roll-off car carrier (called a RORO) or I could pay an extra grand and get a container.
Ben at J-Spec advised that the RORO would be fine. Yes there was additional risk of damage with the dockworkers driving your car on and off the ship, but generally it’s ok. If anything, there might be a ding or a scratch or a cracked spoiler, but generally nothing that would cost more than a grand to fix, so you’d be financially ahead with the RORO option.

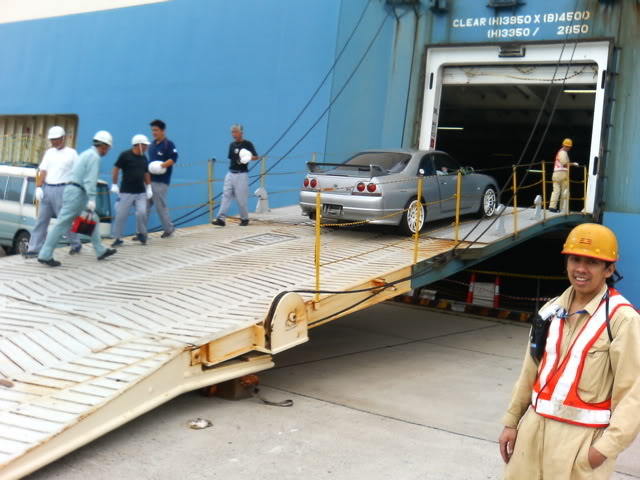
I trusted Ben and went with RORO….which is a very interesting thing. I had envisaged that a RORO ship would be like the human farm in the Matrix…racks and racks of cars piled up in a grid.
But in fact, a RORO ship is like a giant, floating shopping centre carpark, and the dock workers simply drive the cars into it and park, just like at the mall. The only difference is that each parking bay has hooks on the floor so that each car can be tied down. These ships usually have four or five floors of parking, and the floors can be reconfigured (at great expense) to carry tall trucks or normal-height cars. When you think about it, it all makes sense…how else would you do it?
After the 10 day journey to Australia, the Hako was delivered to Glebe Island Cargo Terminal in Sydney, where it would sit for a further two weeks. Australian laws require that each car has to sit through a quarantine period, where the car is inspected and then steam cleaned to remove any bugs etc that might be lodged on it.
Once that was over, I had to pay the customs agent for the seafreight and various other things, and then the car was towed to my home (you saw the pics on Monday), just over two months after the day I decided to buy it in Japan. And how much has it cost so far?
• A$1,000 In-Japan inspection, transport to docks, de-registration and handling fee
• A$1,000 brokerage fee for J-Spec (considering that they’d spent over a month looking for my car, and then organised the shipping, customs, etc this was excellent value)
• A$1,000 seafreight from Japan
• 10% GST (or VAT)
• Zero import duty (there is an exemption for vintage cars)
• A$1000 wharfage/customs agent/quarantine fees once the car got to Sydney
The costs (on top of the Japanese purchase price) sure do add up! Now, it’s worth noting that the only cost that varies with the cost of the car, is the GST on import. So, even if you bought a really cheap car, all the other costs would still be the same!
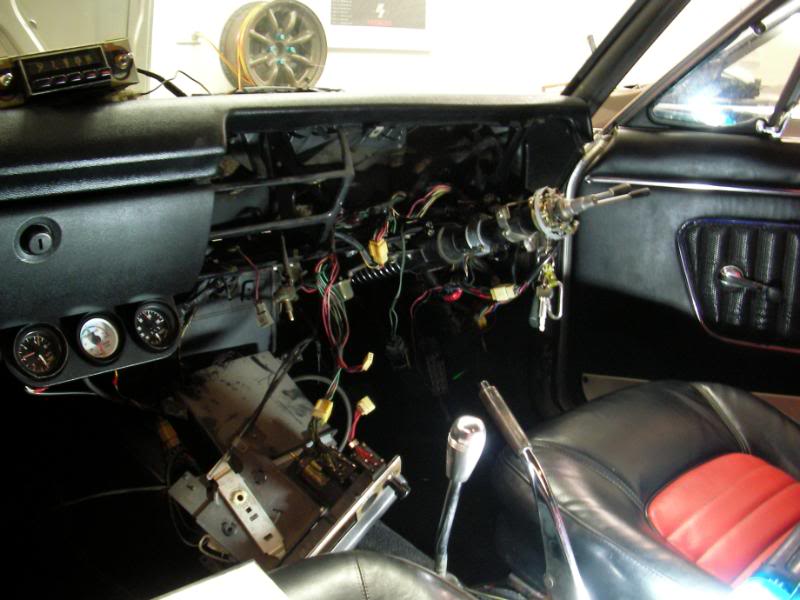
As of right now, the car is in the garage and I am slowly fixing it. I’ll elaborate more in the next instalment, but there were a few things that made the car undriveable, so I am fixing a few things, as well as doing a few things like fitting seat belts etc. The next step is to prepare the car for presentation at an engineer, who has to certify that the car is fit for road use. Once I get that (precious!) piece of paper, we can go to the roads and traffic authority to get some number plates issued, and we’re driving, baby!
More tales of mechanical mayhem tomorrow!
20 Feb 2008: Project Hakosuka: No, she doesn’t go
One of the truths about old cars are that classic cars that are in regular use are the best ones to buy. Old cars (even low mileage cars) that have been inactive or stored for a long time often have issues when you try to recommission them for the road again, and my car was no different.
It’s a good thing it was towed to my house, because I don’t think it would have made it from the cargo terminal to my place under its own steam anyway.
When an old car is inactive, it’s already-aged (and old-tech) seals and gaskets tend to dry up and shrink, things start to leak and a vicious cycle begins. Brake fluid will leak, absorb a bit of water, which then causes a little ridge of rust in things like master cylinders and slave cylinders. Then when you try to drive it, you press a pedal and the weakened seal gets torn to shreds by the ridges of rust and the whole shebang gets worse. So a perfectly good vintage car can become a smoky, leaking pile of crap when you try to recommission it after a long hibernation.
And my Hakosuka had a looong hibernation. It sat unsold at Red Megaphone for maybe 6mths, long enough for its registration to lapse. By the time it was in my hands it was maybe almost a year since it was driven regularly. And yes it had issues.
The prepurchase inspection had mentioned that the clutch master cylinder wasn’t working very well, and the tow truck driver said that the car had to be push started to get it onto the truck. When the car was delivered, I pressed the clutch pedal and it went to the floor as if there was nothing more substantial than air behind it. With the engine running, there was no way I could get it into gear, so I just absent mindedly pumped the pedal a few times, felt some resistance, and then quickly slotted it into gear, and drove into the garage before the clutch gave out again.
So the first thing I did was try to remove the clutch master cylinder, but the nut holding on the fluid line was so corroded, I couldn’t shift it. Nothing worked…Rostoff Plus spray, Rostoff Ice spray, even a blowtorch, but the nut was stubbornly stuck. But to be honest the master cylinder looked ok, and there wasn’t any leaking fluid out the back of it, so I tried looking at the slave cylinder instead….and eureka, I think we have the culprit for the non-working clutch. What a mess.
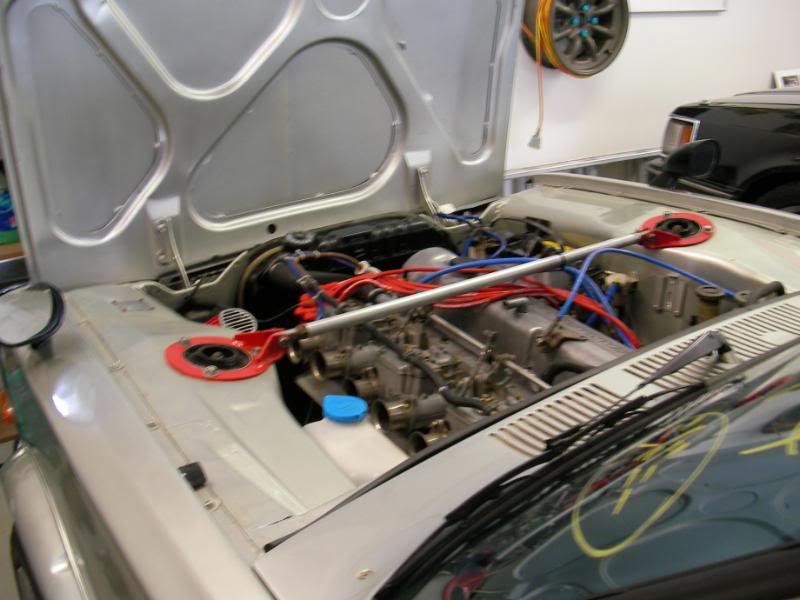
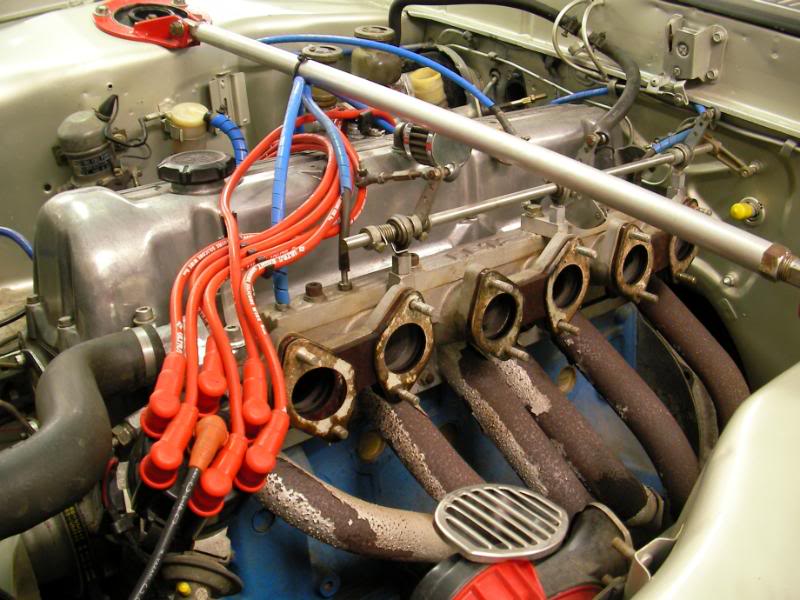
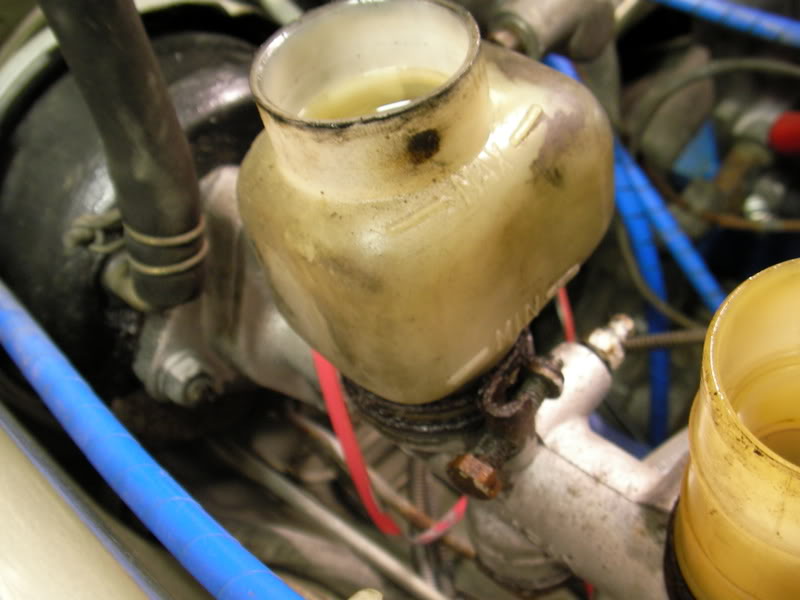
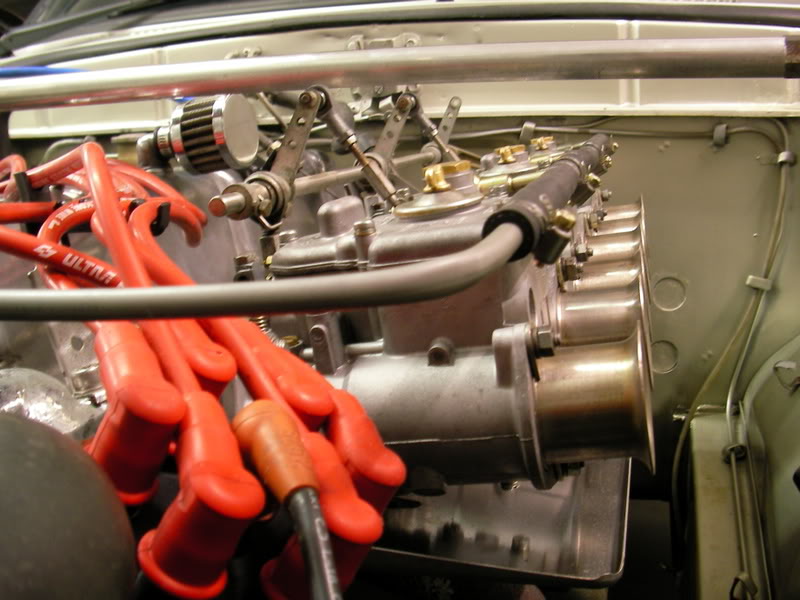
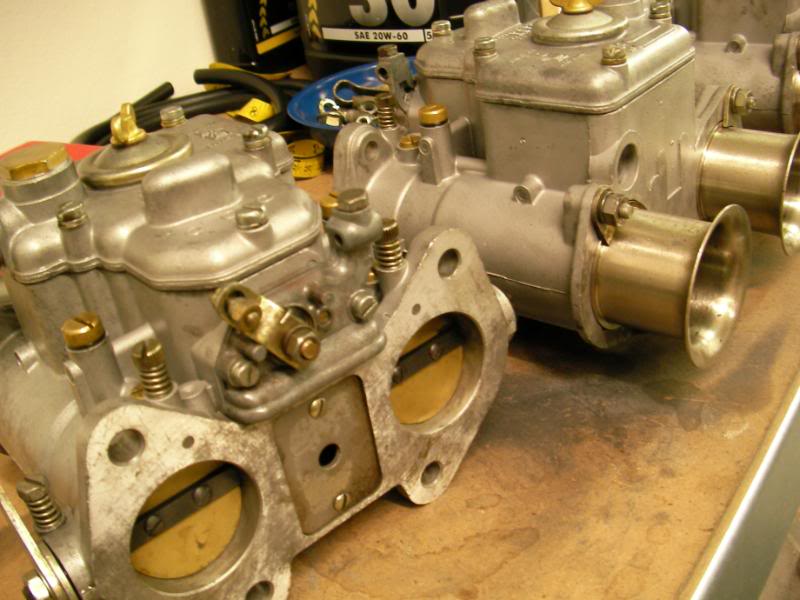
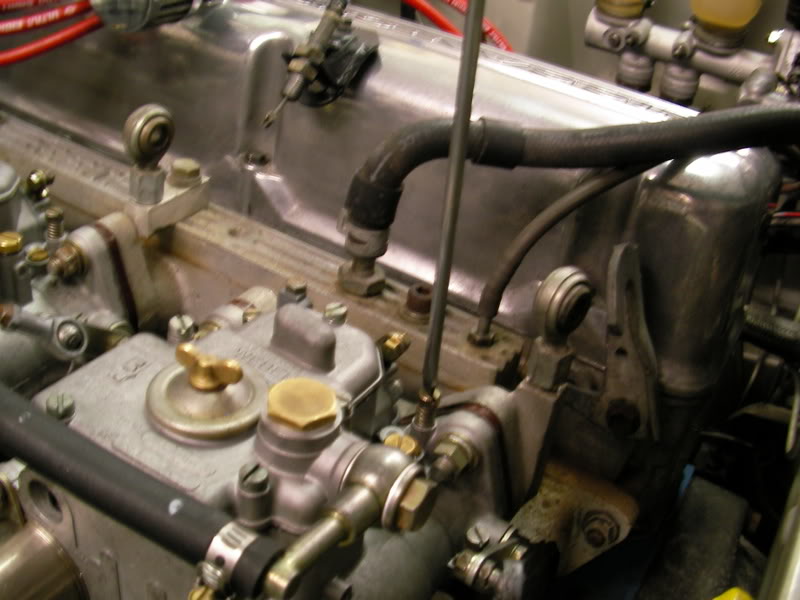
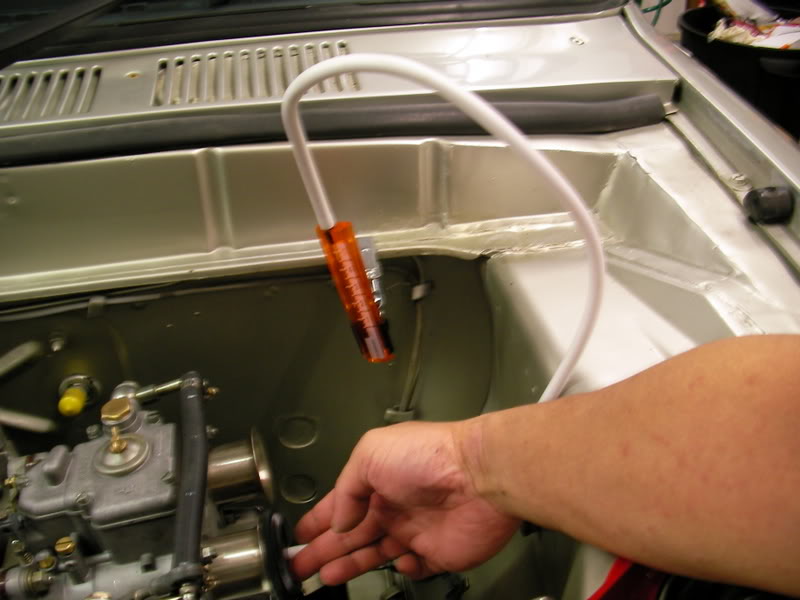
The other problem was that the (rather sexy looking) carbs had a rather ignominous puddle of fuel under them, pooled in the heat tray.
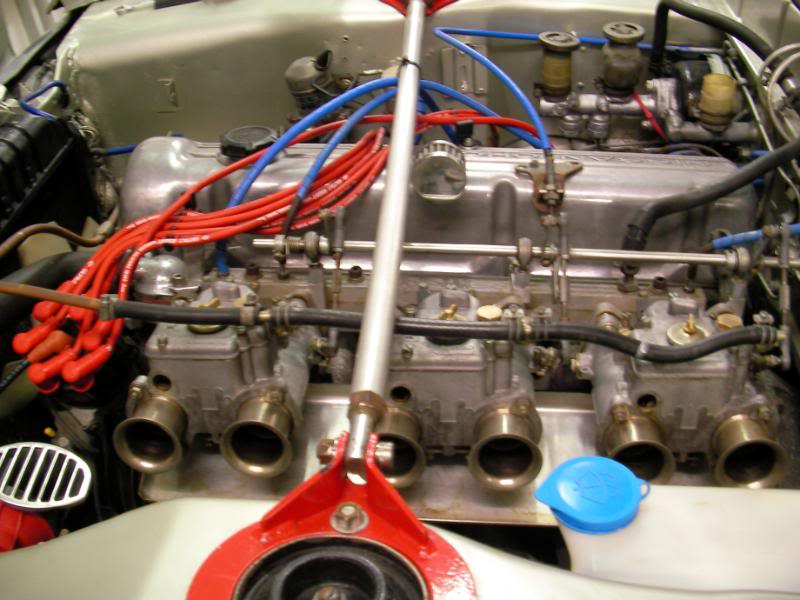
A closer inspection showed that they were leaking like sieves, no doubt from rock-hard and aged seals. You can see the bottom is wet from fuel. After only 10mins of idling there was a few tablespoons of fuel spilt, so this is not a trivial leak. Some of the hoses are a bit cracked as well, so those will be replaced too…
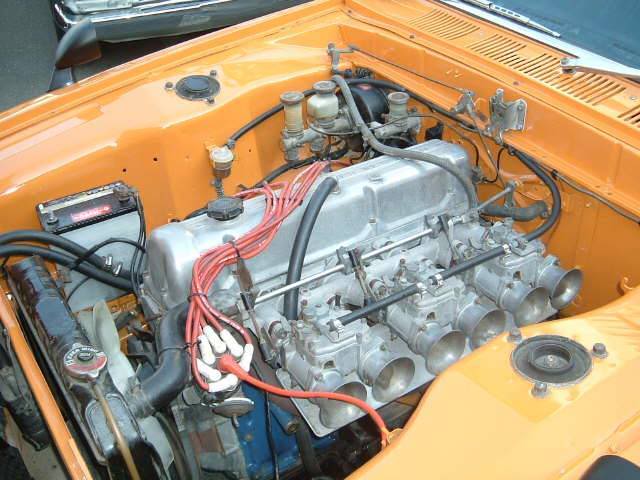
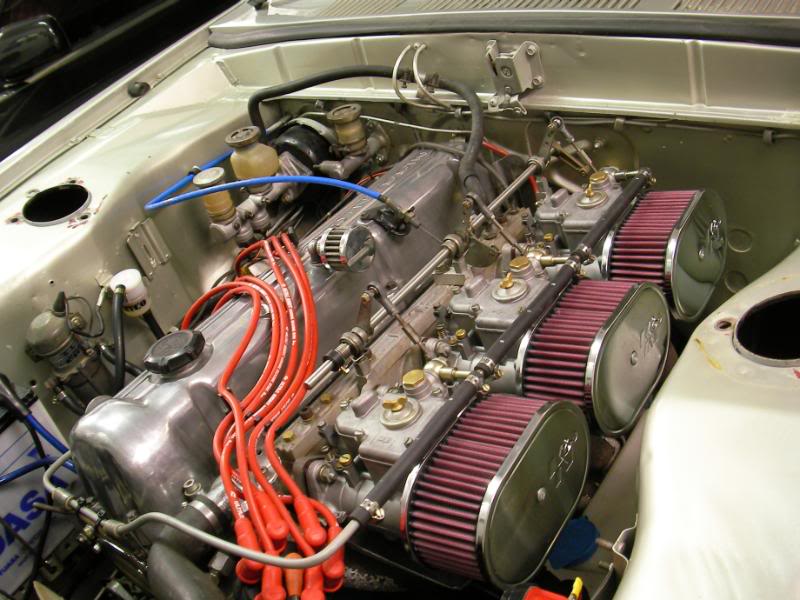
In an L-series, the carbs are mounted above the headers, and so this was potentially a problem that starts with a fuel leak and ends with the fire brigade putting out the inferno that has become your car, so all 3 carbs were removed, and sent away for rebuilding. Oh, here’s what it sounds like by the way.
[youtube]http://www.youtube.com/watch?v=vbhpNvPiIig [/youtube]
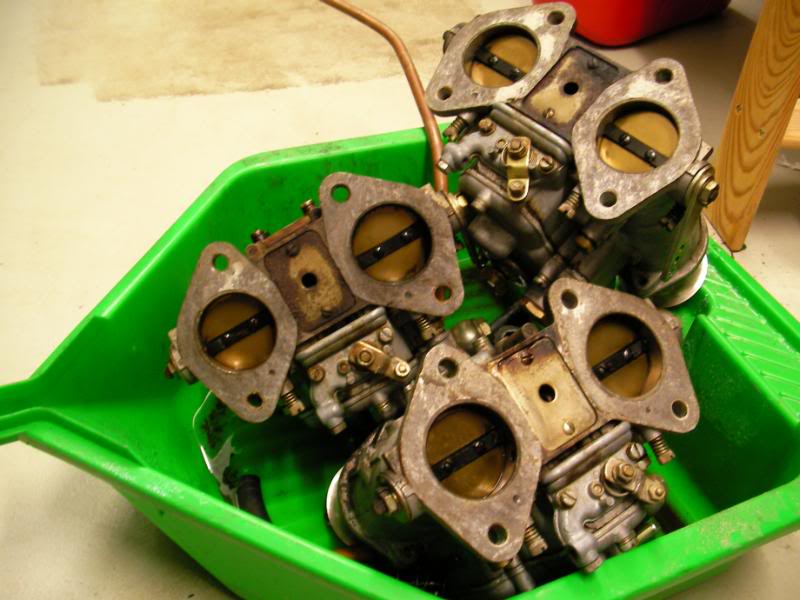
But you know, one of the wonderful things about old cars that I had forgotten was how simple they are to work on. To remove the carbs, just unplug the fuel hose, unhook the throttle linkages, undo 12 bolts and…..voila!
Three very sorry looking carbs off to the specialist.
A new clutch slave cylinder for a 240Z was a perfect fit however, and the clutch is working fine again.
And that’s where we are today.
The carbs will probably be ready next Monday, and in the meantime the car is up on stands and I’ll give the brakes and running gear a good going over, and it’ll give me some time to do a few little jobs like install Australian-spec seat belts.
Hopefully we’ll be on the road the middle of next week….hmm…it’s true what they say about hibernating old cars!
25 Feb 2008: Project Hakosuka: Nope. Still doesn’t go.
Where we left things last week were that I’d sent off the carbs to a specialist for rebuilding, and the wayward clutch was fixed. The carb guru estimated that it might take a week to re-do the Webers, so this left plenty of time for little jobs while the Hako was up on jackstands.
But it also left some time to give the car a good going over. I’d had the pre purchase inspection done in Japan, had spent countless hours poring over each of the 400 pictures, but now that it’s in the garage, we can have a proper look.
Basically the car looks like it was restored quite thoroughly, and it’s clear to see where rust has been cut out and a patch of new steel welded in.
In places it isn’t so well finished, like for example the undersides of the bonnet and boot and the boot shuts aren’t clearcoated, but overall the fundamentals are pretty solid, and it looks like the sills and lower rear guards were replaced too.
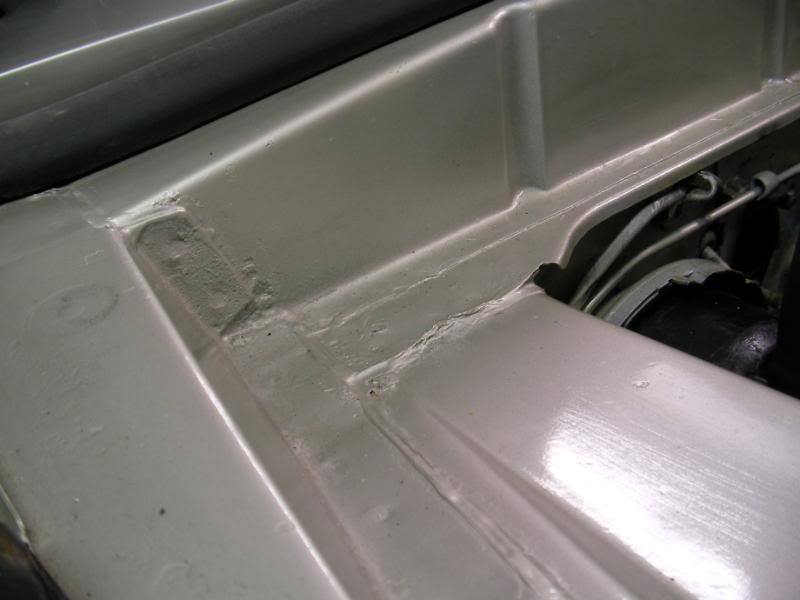
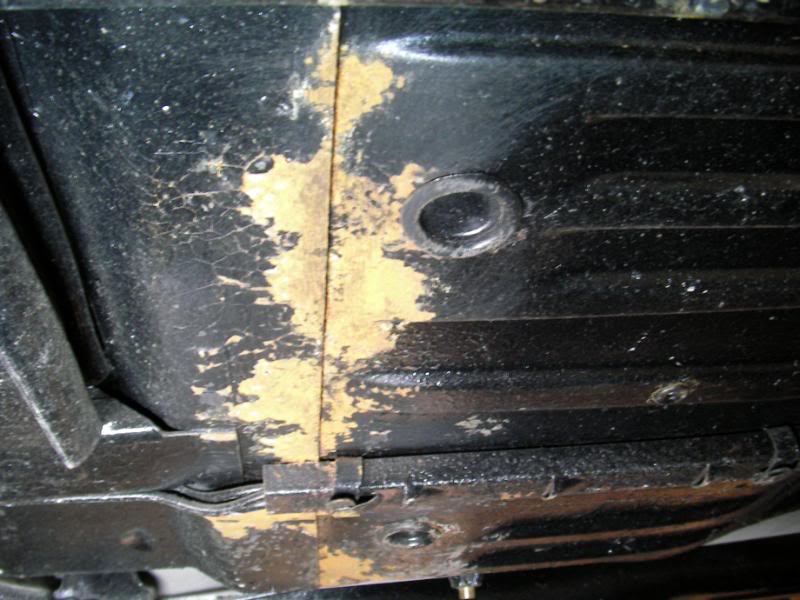
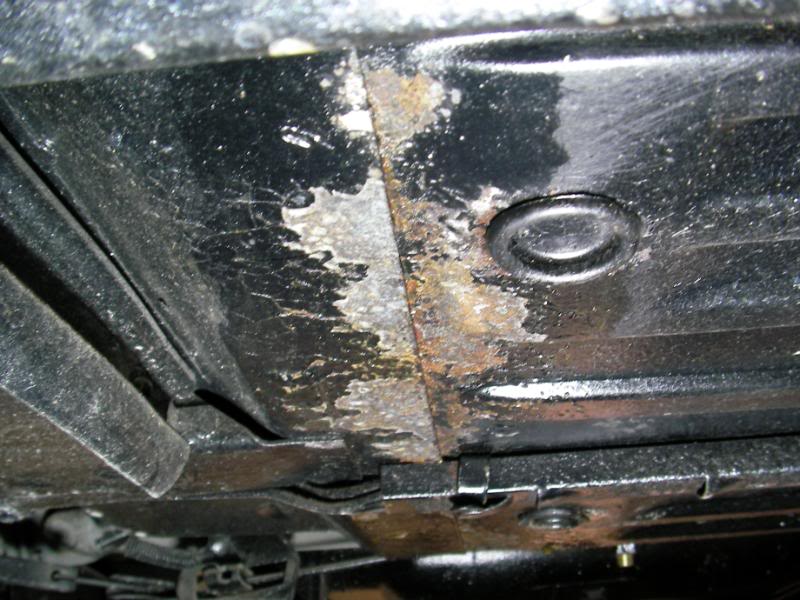
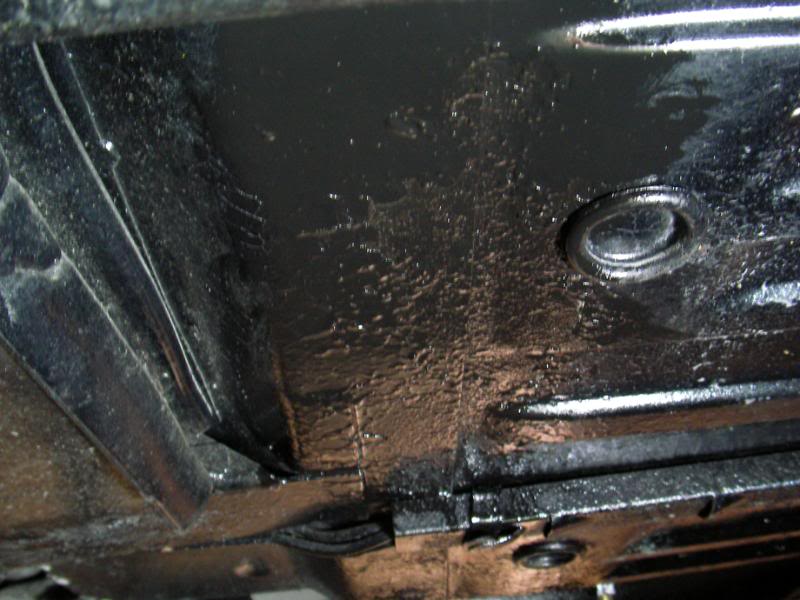
The only place where I found some rust was here in the rear floorpan. During the restoration, all the old sound deadening was removed, the floorpan painted and new insulating mat was laid down. But in this section it looks like it didn’t stick, and allowed water (I think the car leaks like a sieve) to be trapped underneath. But after wire brushing it, it was just surface rust.
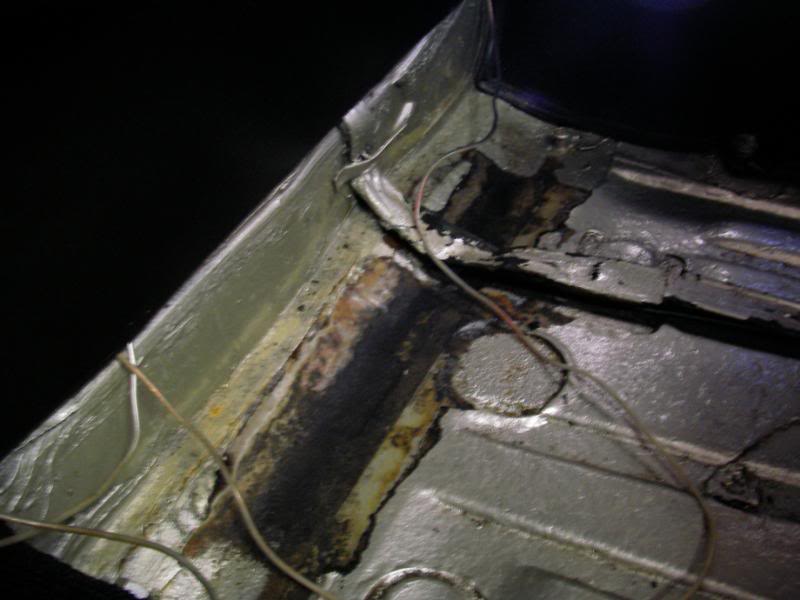
Underneath that same spot was rust too, but also on the surface.
A lot of restorers and vintage car guys swear by this stuff: POR-15. If you look at their website, it claims that once a piece of metal is treated, it will never rust again! Sounds good to me….
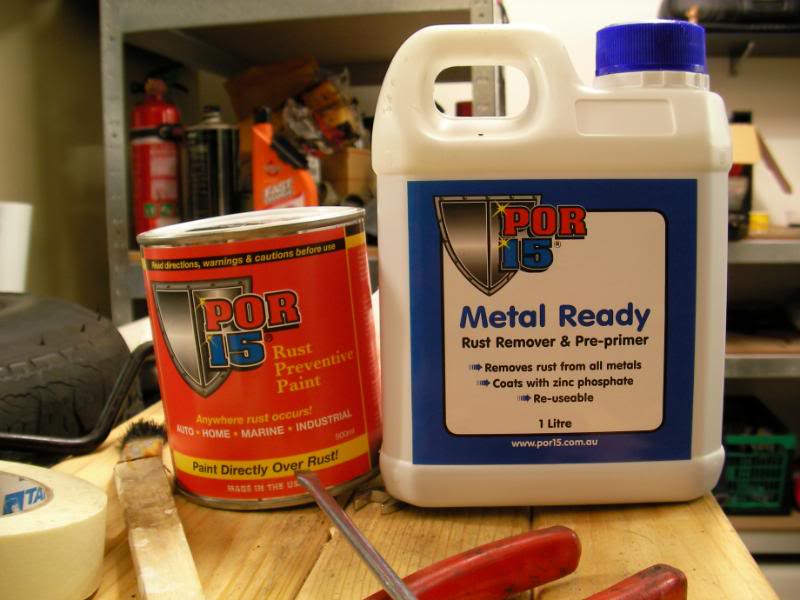
So first you paint the rust with the Metal Ready, which neutralises the rust…
Then you paint on the POR-15 which is quite thick.
It dries to a very hard, plasticky finish, which is supposedly waterproof and so tough that you can hit it with a hammer or bend the metal and it will not flake off.
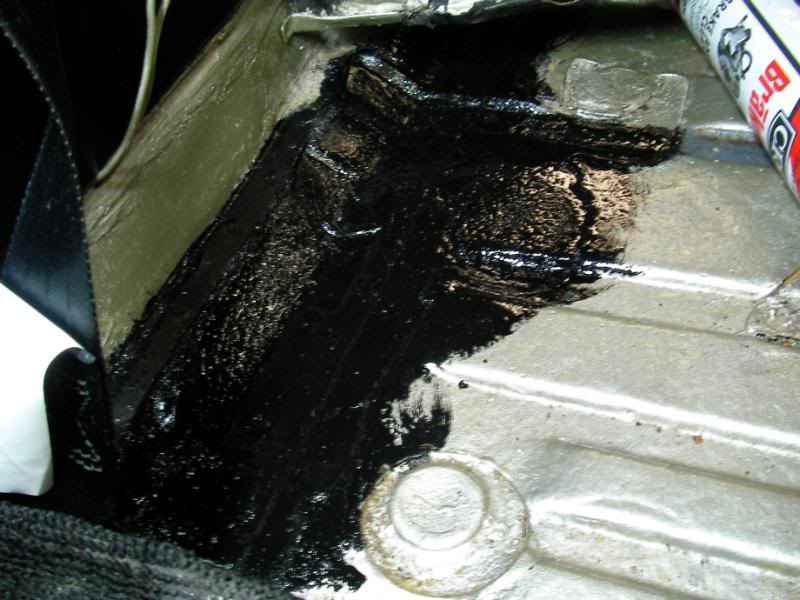
So hopefully this will be a permanent repair!
The other amusing thing that happened was that I’d replaced the old steering wheel that came with the car:
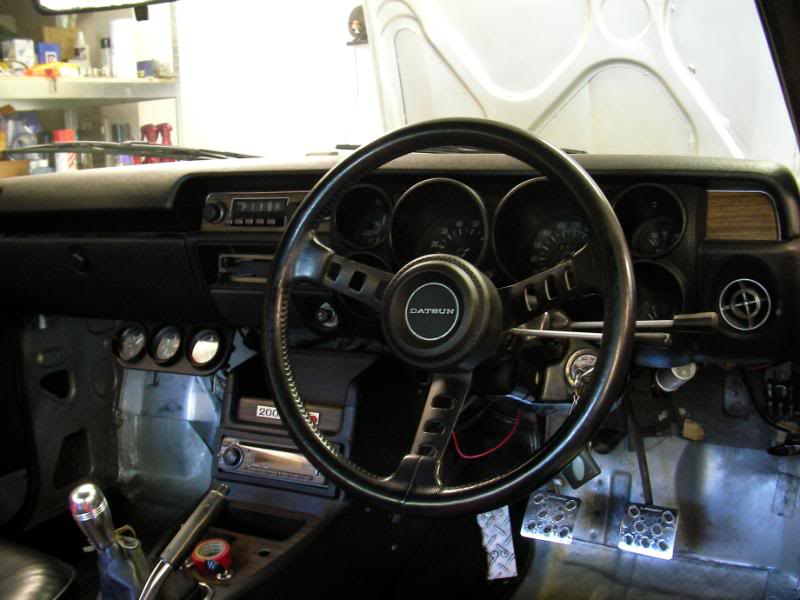
…which I thought was a 240Z steering wheel. So I bought a nice Nardi wheel….
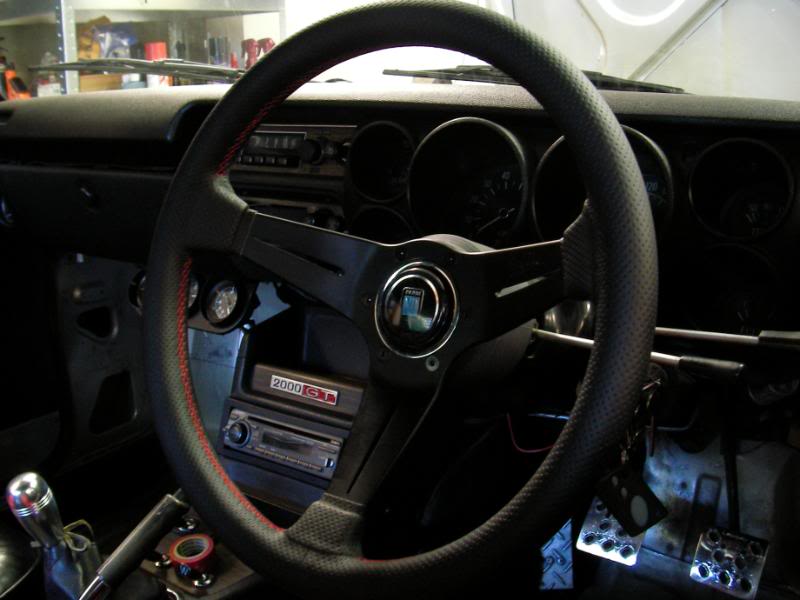
But then someone said that the old wheel was a “Compe” steering wheel, which is to say that it’s a replica of the Japanese dealer-option sports steering wheel from the late 60s. Nismo did a short run of reissue Compe wheels in 1992, but only 1000, and they’re very rare, historic and desireable and I shouldn’t throw it away. So umm….yes. Anyone want to buy a nearly-new Nardi? ![]()
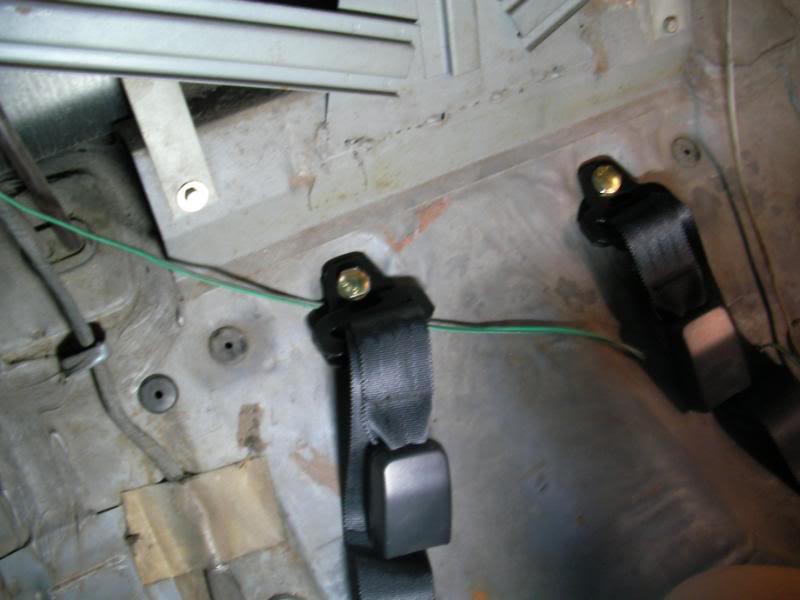
Here’s another funny thing. The stock Hako seat belts are like an airliner lap belt…
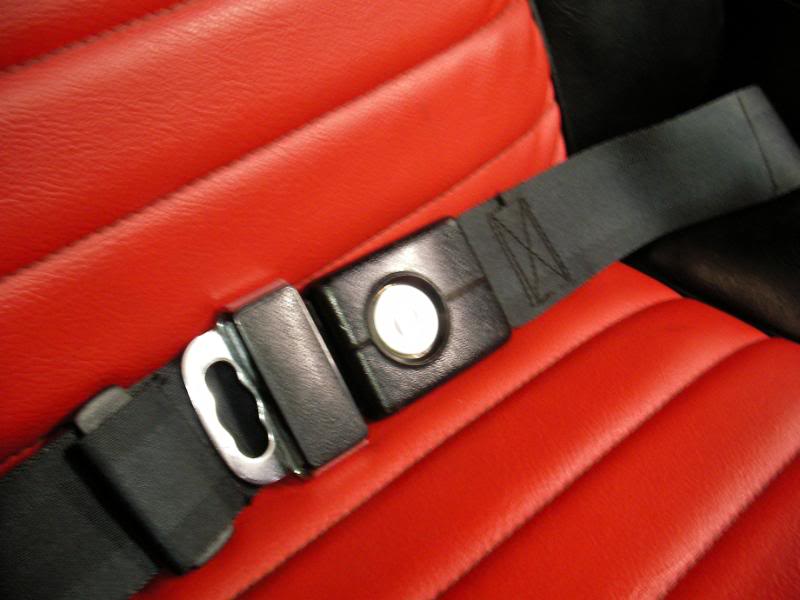
…with an optional over-the-shoulder strap that clips into the buckle like so…
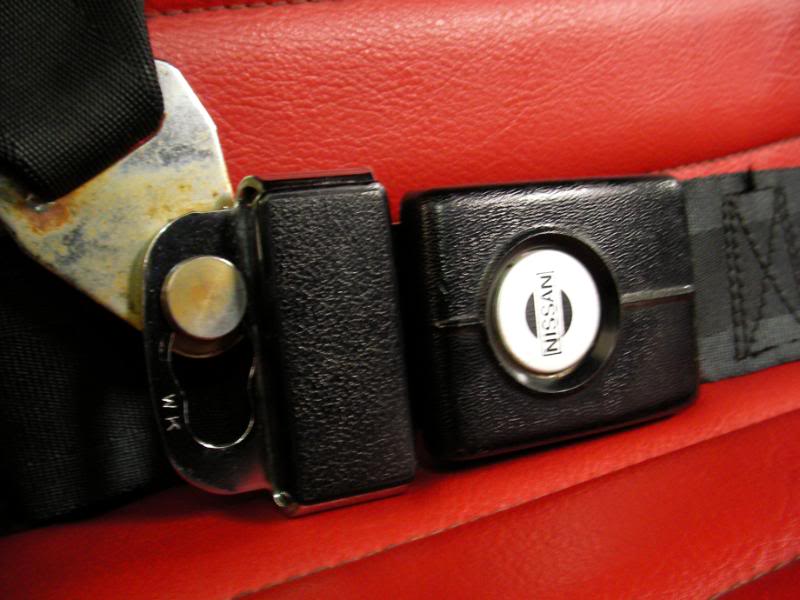
..I’m quite sure this isn’t even remotely legal in Australia! So the Hako got an approved set of seat belts installed.
Tomorrow….more tales of mechanical mayhem.
25 Feb 2008: Project Hakosuka: Umm….yeah. Still not going.
With the rust now dealt with, and the clutch now fixed, attention was turned to the car’s running gear. Translation: are the wheels going to fall off?
Well…I hope not.
First, the brakes. Now the clutch hydraulic system was pretty worn out, and since the braking system is the same technology and potentially the same age, the stoppers needed to be checked out. If the clutch was ruined by a long period of inactivity, then the brakes could easily succumb to the same fate too.
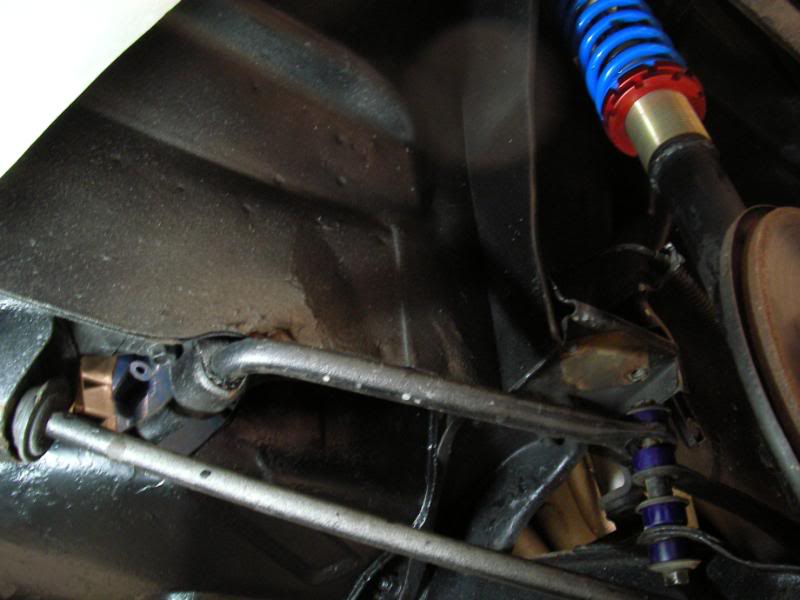
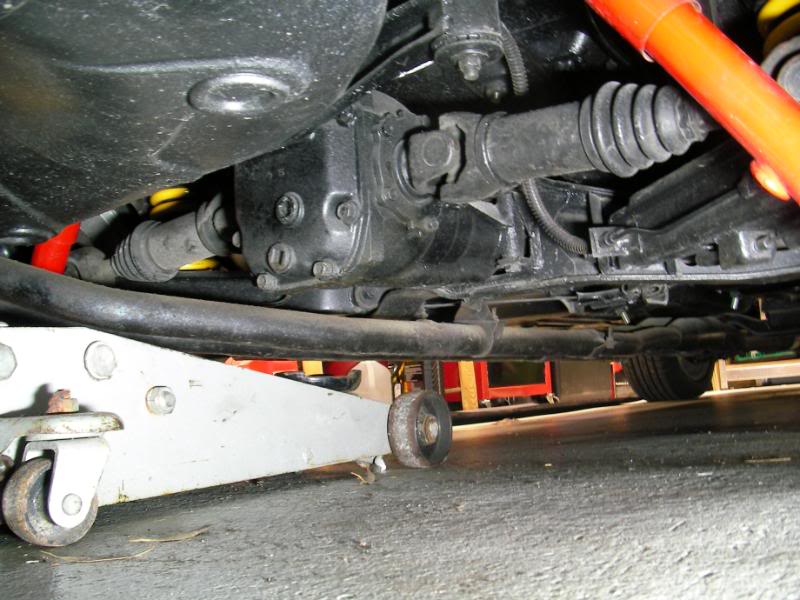
First the back. These, ladies and gentlemen, are drum brakes (which you may recall from your history classes!). The shocks are KYB adjustables, but the adjuster dial is stuck, so the shocks are possibly due for replacement. I’m not sure what brand the lowered springs are, though…..and yes we did the “spin the wheels” test and sadly no, she doesn’t have an LSD.
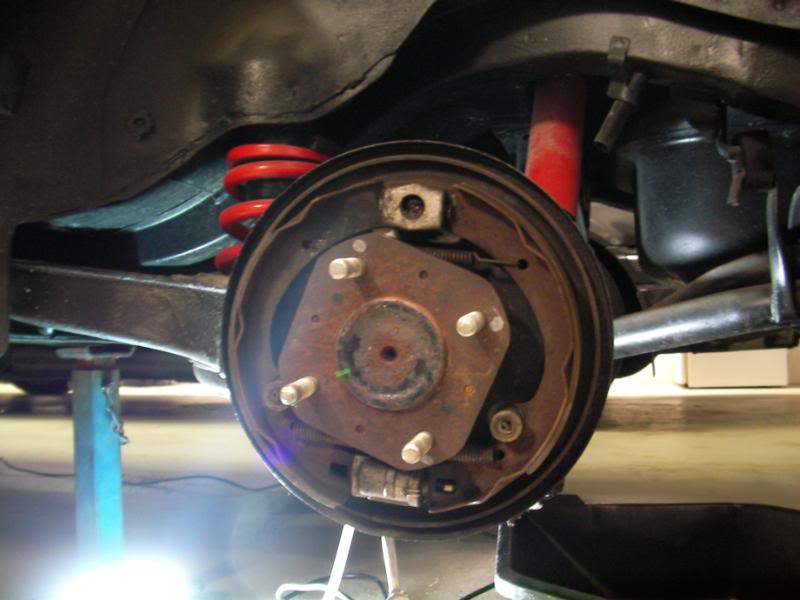
But it seems to be in good shape…the shoes are about 70% and the wheel cylinders look quite new. No leaks.
At the front, it’s the same story, the rubber seal looks like it’s only a few years old and there’s no leaked fluid behind, so it looks like the calipers have had a seal kit put in quite recently. Pads are about 70% too, and still had a fresh looking smear of copper grease on the backs of the pads.
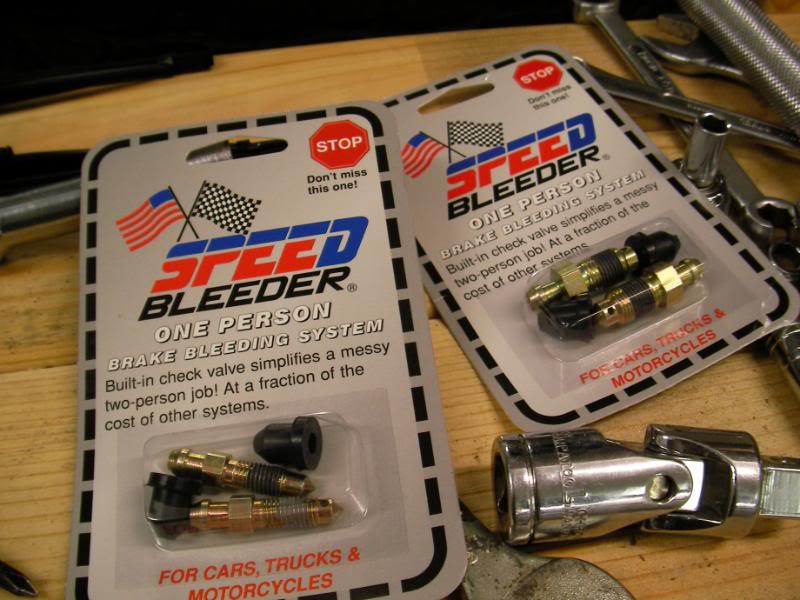
Since the brakes seemed in good shape (they must have been refurbished during the resto 2yrs ago), I decided to put these in. I’ve had them on many cars, and they’re great for one-person bleeding. I took a chance on the 240Z part number but they fit perfectly.
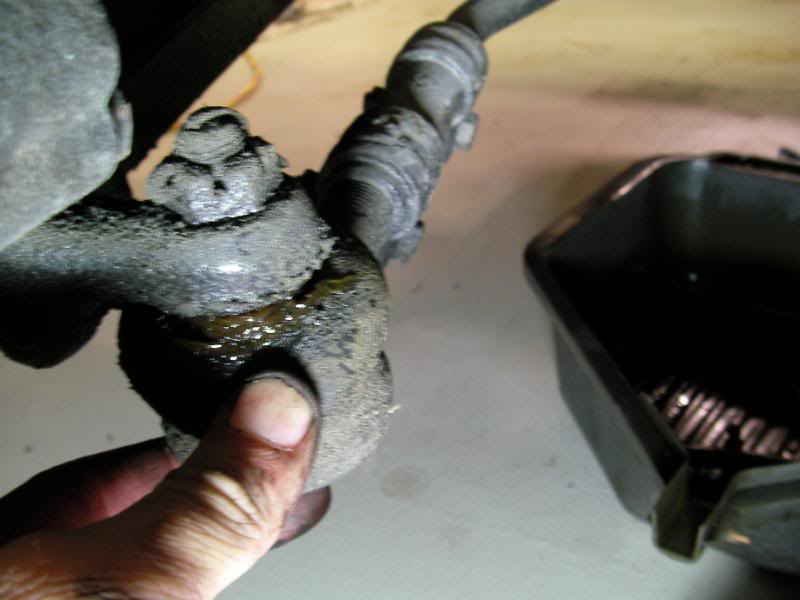
But while bleeding the brakes, the master cylinder started to make moaning noises when you depressed the pedal (possibly the fluid leaking past the internal piston). And it does look a bit leaky. So off it comes for a replacement.
Again, I took a chance on the 240Z part number, but it was quite different (even though the twin piston calipers and rear drums are the same as 240Z). It turned out that the master cylinder is shared not with the 240Z, but the Fairlady 2000 Roadster of the same era. One of those wasn’t available new, so the brake specialist is boring out the old mastercyl and rebuilding it. So far I’m discovering that a lot of parts are definitely shared with 240Z, but lots aren’t. So getting maintenance parts will probably be a bit of trial and error from now on…it’s a good thing the guys at my local parts store are patient…
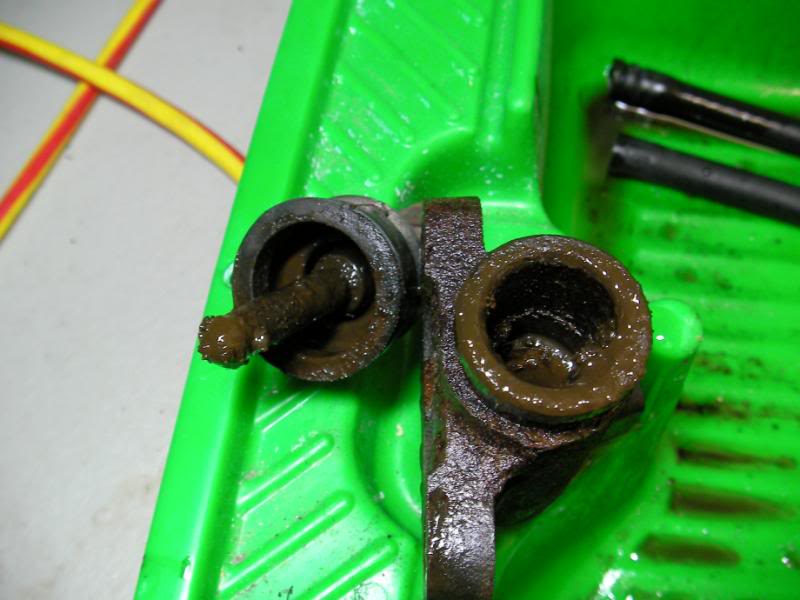
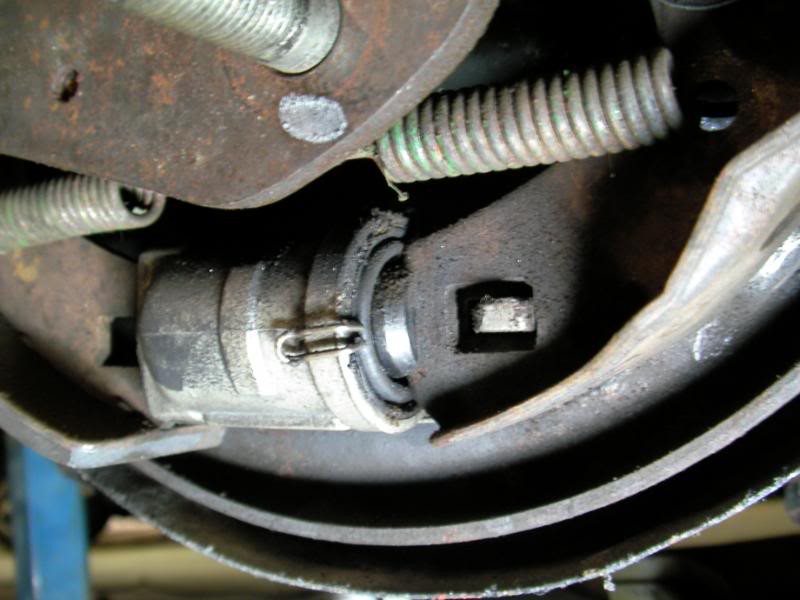
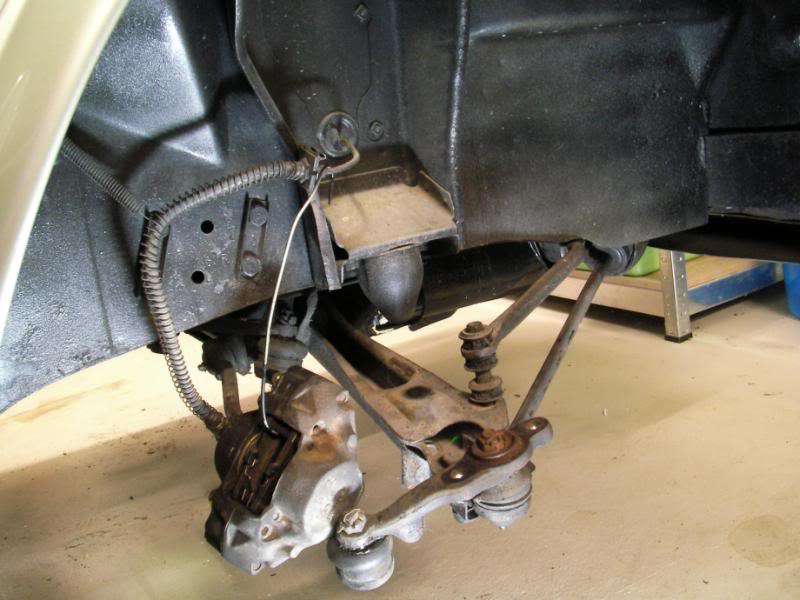
One discovery which surprised me was these…grease nipples!
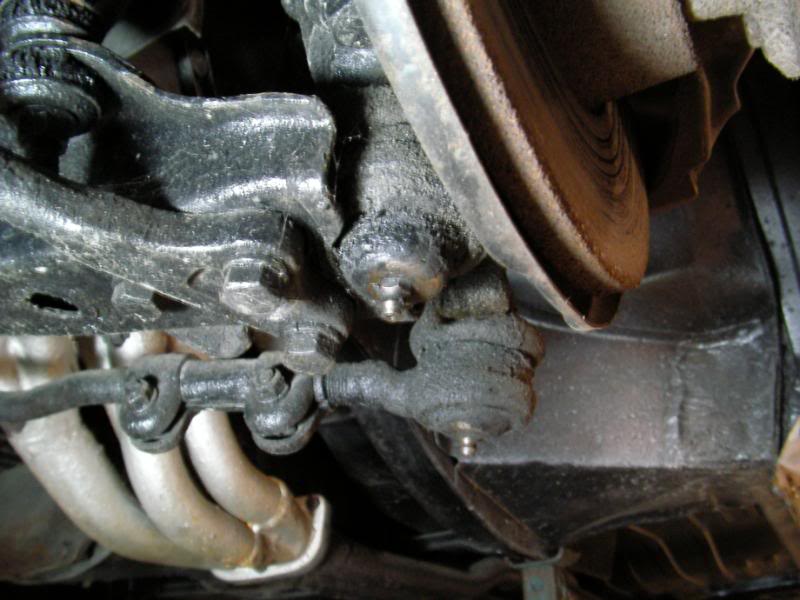
Nowadays (well the last 3 decades or so!) cars have had balljoints that are sealed for life with grease inside. But back in the Hakosuka days, you had balljoints with grease nipples. You attach a greasegun, and squirt in fresh grease until you see the old dirty grease ooze out the top. Then you’re good to go for the next 5,000kms. But since it’s a maintenance item that hasn’t been necessary for a few decades, many new owners of classic cars don’t realise that these is something that you should address with every oil change. But the grease looks clean and caramel coloured, so it looks like the previous owner took care of this. I’ll have to buy a greasegun though….probably from a museum or something…
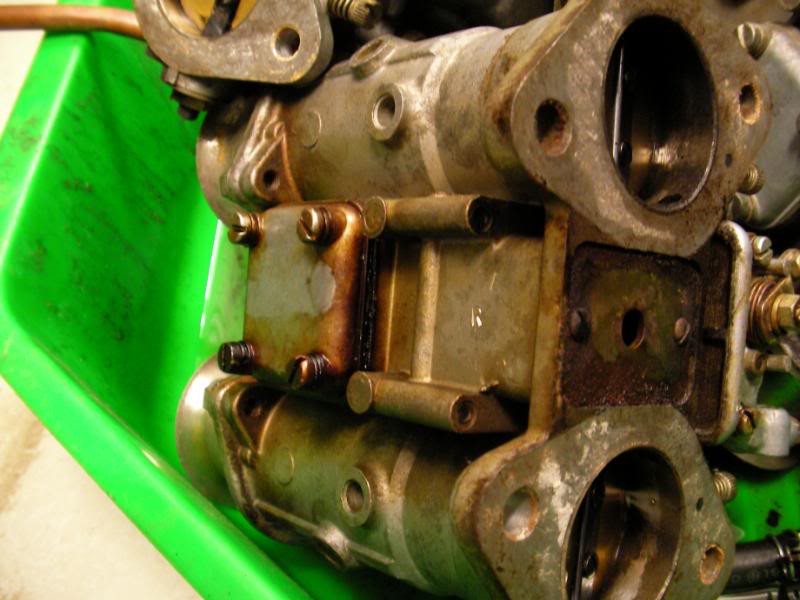
But one job that I did with pleasure was to remove the three Omori vacuum gauges. Not only did they rub on your clutch leg, but they were possibly the nastiest wiring/install ever. Garbage ties, twist n’ tape wiring, the whole nightmare.
In theory they would be great for balancing carbs if you hooked them up to each inlet manifold runner (that’s how the bike guys do it) but in this case, they were connected to the manifold balance pipe (and hence all 3 gauges read the same). No great loss taking this mod out!
The carbs are still being restored, the brake mastercyl is also still being worked on, but the car looks like it’s good to go. Just got to fix a minor issue with the throttle pedal and linkage, replace some fuel hoses, and pick up some new tyres on Wednesday. With any luck the car will be firing again in a couple of days.
27 Feb 2008: Project Hakosuka: ….almost going.
When we left things yesterday, the brakes were in good shape but the mastercyl needed rebuilding. The carbs had been sent off for refurbishing, but the setup that the car came with left something to be desired (apart from the fact that the carbs were leaking fuel!).
When floored, the carbs only went to 70% throttle, and the installation was a bit messy, with some cracked hoses and mismatched pipes. And then there is a wrongly sized fuel delivery pipe at the front of the engine that fouled the radiator hose. And it just looked messy.
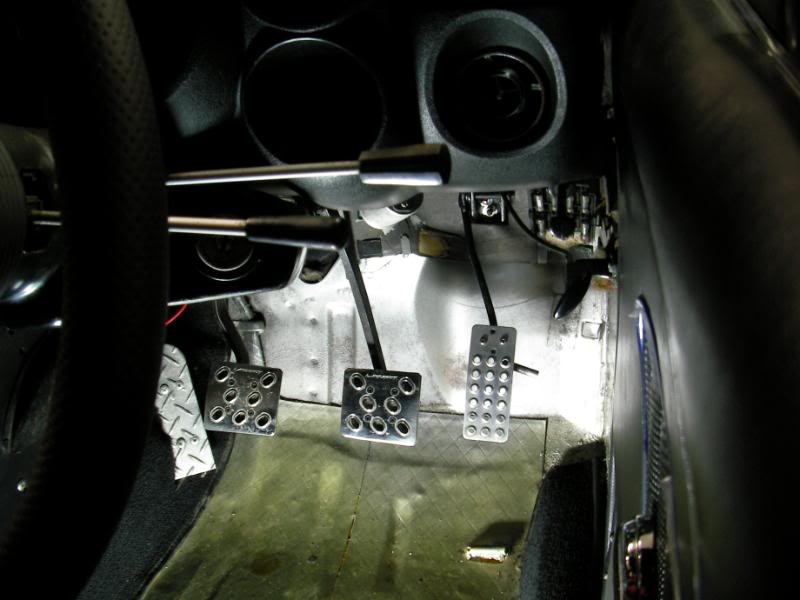
But first, the throttle pedal (the most important component in the whole car!). It was not only badly adjusted, but wobbled from side to side when depressed.
The culprit is this…the section of the firewall where the accelerator pedal bracket bolts to was cracked. It’s double-skinned there, but the bolts were only tapped to the thin inner skin. This probably wasn’t an issue with the stock Hako’s Mustang-style rod linkage throttle, but mine had been converted to a more modern cable throttle, and obviously it had side loads that the stock mounting wasn’t designed for.
So I added an extra bolt in the middle, and put a spacer behind it give it more support. Feels okay, but I’m not convinced that I’ve fixed it and I think I’ll be revisiting this later.
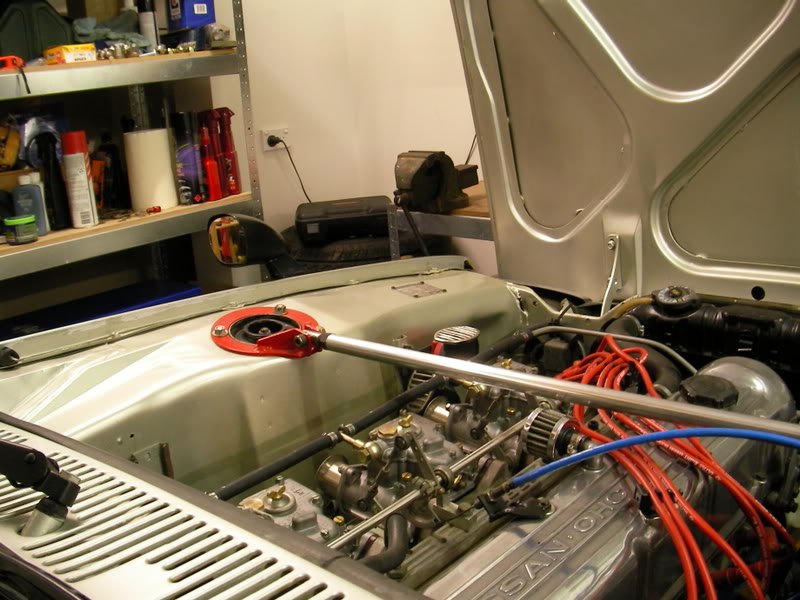
The other good news are that the carbs are back! From this…
To this!
Carburettor Services had done a great job on the carbs, and bead blasting the castings made them like new. But the important thing was that there are all new seals inside, so the old fuel leak should be gone. The jetting of the carbs were a bit odd though: 40DCOE18s, with 32mm chokes, 145 mains, 220 correctors and 50F9 idle jets. Probably a bit too rich for a stockish 2.8L but when the car’s running I’ll get it on the dyno and see what’s what.
So on go the carbs with some new hoses…
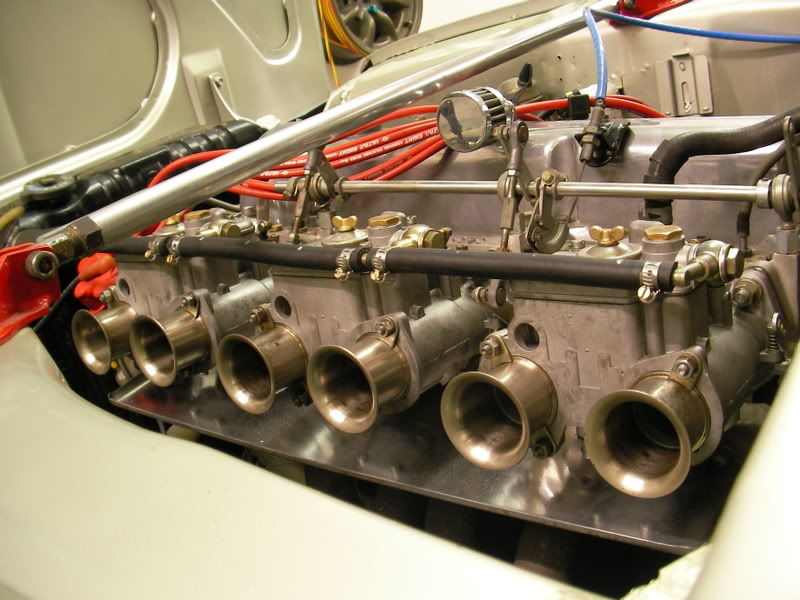
And a new filter and more new hoses…
Then I bent the accelerator pedal to move it closer to the brake pedal for heel and toe, and also for more travel. From this (the pedal is only a couple of inches off the floor):
To this! The carb linkages also had to be adjusted too. Now that the pedal has more travel, the danger is that the carbs will reach full throttle before the pedal is all the way down to the carpet. This will bend all sorts of things inside the carbs over time. Luckily the carb linkages have so much adjustment that it was perfect after a lot of twiddling around.
I’m really quite chuffed with how it looks!
The other cool thing about the Hako are all the oldschool things in it. Like say, this interior window trim….plastic, right?
Actually it’s metal, and the leathergrain pattern is stamped into the steel. So to clean it up you polish it…and it doesn’t clip into place,it’s held in with screws!
At the moment, the car is engine-wise ready to go, but brakeless. Tomorrow the brake mastercyl should be ready and tomorrow night I’ll get some helpers and attempt to tune the Webers. After that, all we have to do it book ourselves in for engineer certifcation and we should be on the road!
29 Feb 2008: Project Hakosuka: The Plot. It Thickens (no, still doesn’t go)
When we left Project Hako last, the carbs were in, the fuel system was all set up and we were ready to turn the key and see what happens. Of course when you do this, it’s a good idea to wait until a few friends can come over: one to hold the fire extinguisher, one to juggle the throttle to keep the car running, one to stand on the other side of the engine bay to keep an eye out for fuel leaks, and one last guy standing by with the ambulance on speed-dial.
So that’s what we did.
And here’s how it starts up and sounds.
[youtube]http://www.youtube.com/watch?v=U-easTaJOYA [/youtube]
As you can hear, it starts up very easily on the key, and then settles to a very busy, lopey idle. The carbs seem to be working fine and there are no leaks to worry about.
But as I tried to tune the Webers, the car began to fight me. The idle was so unstable that half-turn adjustments on the mixture screws (which is a big adjustment) were having no effect at all. And the airflow through the carbs was so weak that it hardly registered any reading at all on my UniSyn carb balancing device. The vacuum gauge showed a very low reading that was fluctuating wildly too.
Pulling the plugs showed that they were pretty fouled, wet and black (although it could still idle and was easy to start).
Something was definitely amiss, so the first step was to eliminate the obvious variables. Check the ignition timing. But when we did, the timing marks were not on the right side of the engine where the ignition timing marks were bolted onto the block:
It seems that I have a combination of an early pulley (which has the marks on the driver’s side) and a later block (which has the marks on the passenger side). This was a little confusing at first, but it wasn’t hard to measure up the right spot and mark TDC with some paint.
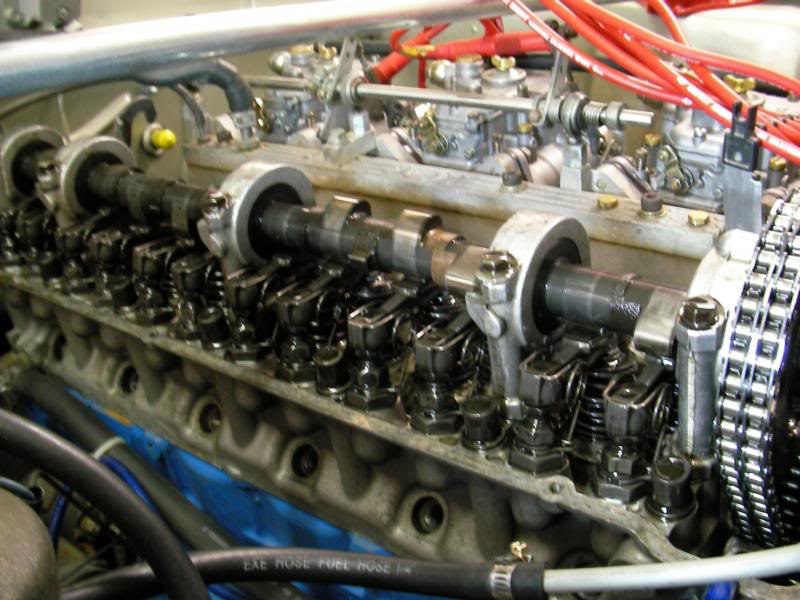
The ignition was a little too retarded for a hot engine, but not so much that it would have caused such terrible idling. So with a deep breath, we unbolted the cam cover to have a look inside…and what a surprise!
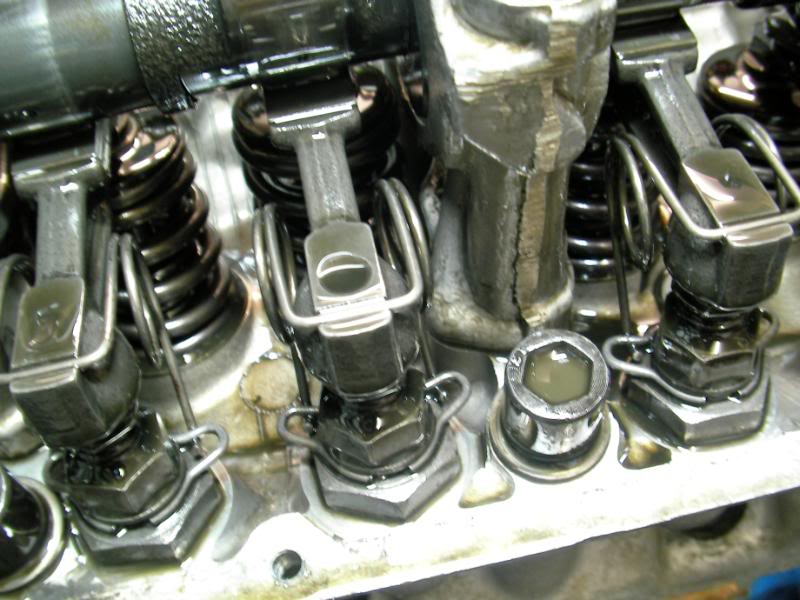
It’s…NEW. No more than a thousand kms old. And furthermore…it has a rather big cam in it.
So now the poor idling and manifold vacuum at idle makes sense….this cam needs to idle at more like 1800rpm, not 800rpm!
It was pretty much at this point that I gave up and went to bed! When we bought the car, Red Megaphone had very little knowledge of what had mods had been done, so it’s a very interesting situation. We know that at the tune that the car was delivered, it wasn’t really driveable: the clutch didn’t work, the carbs were leaking, and the whole thing was generally untuned. But the engine looks like the previous owner poured some money into it not very long before selling it, and it almost looks like he was in the middle of a hardcore upgrade and rebuild but then gave up when it was only 90% there.
I’d assumed that the car was going to be an easy cruiser, a big capacity lazyboy with a stock cam, but the situation is rather different now, it’s all a bit more serious. I’m not so sure how I feel about the whole thing, but it is a nice surprise to discover that the engine is fresh (and of course I wonder what other mods are inside). But it doesn’t change anything, we still have to get the car going and registered (although how we are going to pass the emissions test will be interesting now!)
The next step is to get the car tuned and driveable, so I’ll have another go at setting up the Webers, and resetting the ignition timing. The brake mastercyl should be ready tomorrow they say, so possibly sometime on the weekend the car will come off the stands and be theoretically driveable (but then again, I’ve said that a few times and something always came up to delay things!).
Where we left things in the last instalment was that I’d made some attempts to learn to tune the Webers, a task made somewhat harder by the discovery that the engine might be in a somewhat more hardcore level of tune that I’d bargained for.
But for the first time in weeks the Hakosuka came down off the axle stands, and at least it looks good (even if it doesn’t go)!
First I had another go at the carbs, and actually got a pretty decent result after a bit of experimentation. Basically what you do, is adjust the low-rpm mixtures until you optimise them (listen for the point where the idle is highest).
Then you use this device to measure the amount of airflow going into each carb. There’s a plastic cone at the end of the white tube, and when you stick it in the carb airhorn, a little pellet rises up that orange tube. The higher it goes, the greater the airflow. You adjust the idle speed screws on the carbs until the airflow is all the same.
The result was this:
[youtube]http://www.youtube.com/watch?v=vcft18l_USo [/youtube]
As you can see, it’s reasonably smooth, but the idle’s a bit fast, it’s a bit slow to return to idle when revved, and when you shut it off, it runs on (called dieseling) somewhat. What I think I did wrong was set the idle speed with the linkages attached. I’d loosened the linkage arms on the main throttle jackshaft (so that adjusting one carb wouldn’t affect the others) but I think the weight or stiction of the heim joints of the linkages were holding the throttles of one carb open a hair….and so when I adjusted the other carbs to match it, it all ended up too fast.
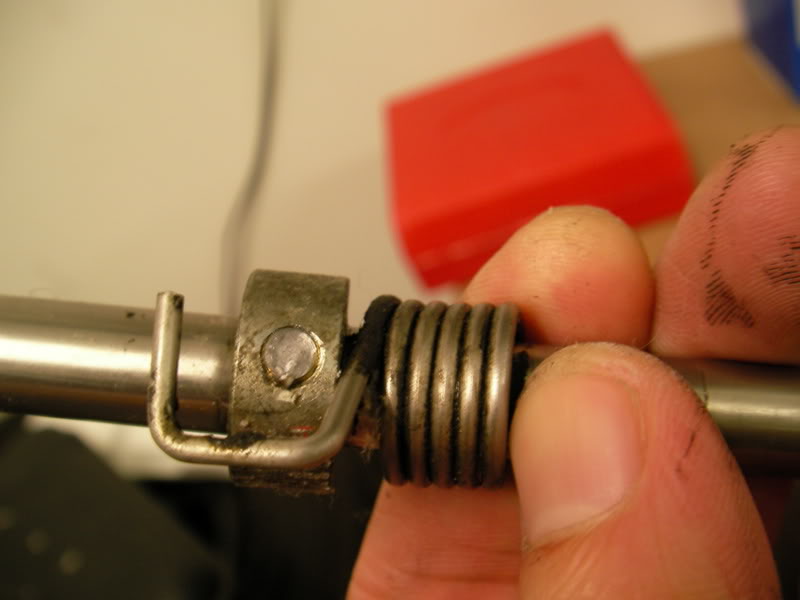
And also I think the main return spring for the throttle linkage was too weak, and not forcing the carbs closed properly. So I decided to tighten the spring tension when PA-TING! The spring retaining bolt broke! Ahh well…easy enough to get a new one.
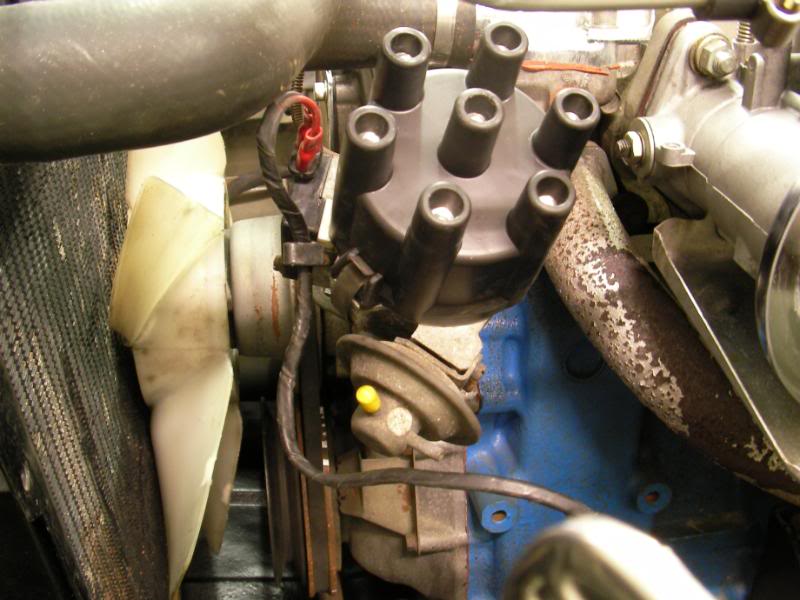
Oh, by the way, before I tuned the car last I replaced the distributor cap and rotor:
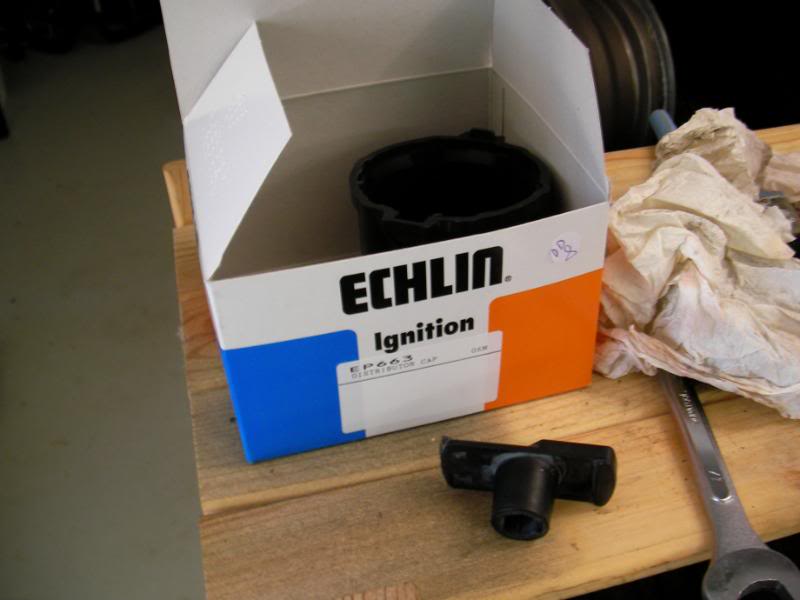
I guess it’s one of those things…on new cars with cam angle sensors and coil on plug ignition, these parts don’t exist. I’d just forgottten that on old cars these are regular maintenance items. Replacing the worn old ones made a big difference in smoothness:
But since the engine was warmed up I did an oil change, and one of the goodies I discovered was this extended sump. It holds 8L, which means that an oil change involves two cans of oil and two drain pans!
But remember that wobbly throttle pedal? I’d made an attempt to fix it but it was still a tiny bit wobbly. So I made a bridge: a short strip of thick steel to bridge over the uneven firewall surface and provide a flat surface for the pedal to bolt to. Success! It’s rock solid now.
The brake mastercyl arrived too. Chatswood Brake and Clutch bored it out and inserted a stainless steel sleeve, then fitted new modern seals (which required some machining). Expensive but worth it, the brakes feel good. One unique feature of the Hako mastercyl however is that you have to bleed the master cylinder after installation. Weird.
So far, we’d done pretty ok. I’d broken a component on the carb linkage, but it was easy enough to source a new one, the car now had brakes, and I was looking forward to having another go at tuning the carbs. I had a couple of days to wait for the new part to come in, so I decided to have a look over the electrics.
…and that’s when we hit a snag.
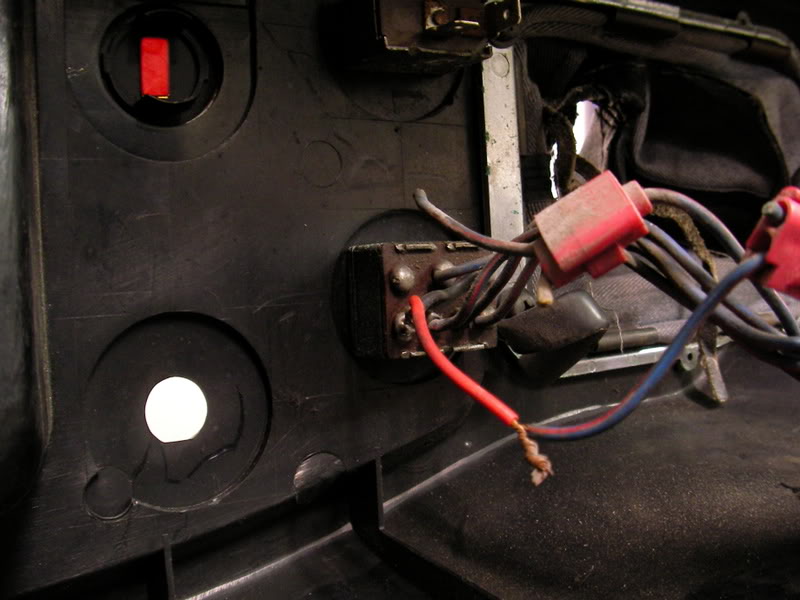
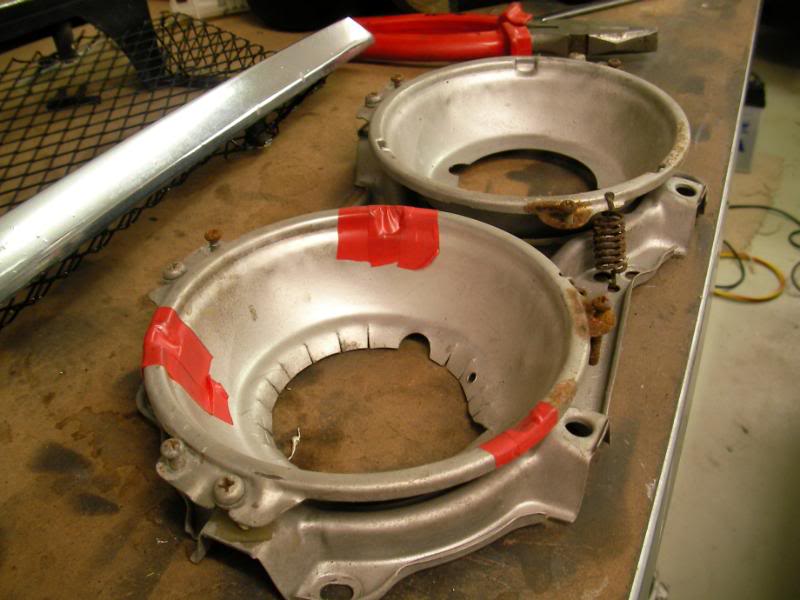
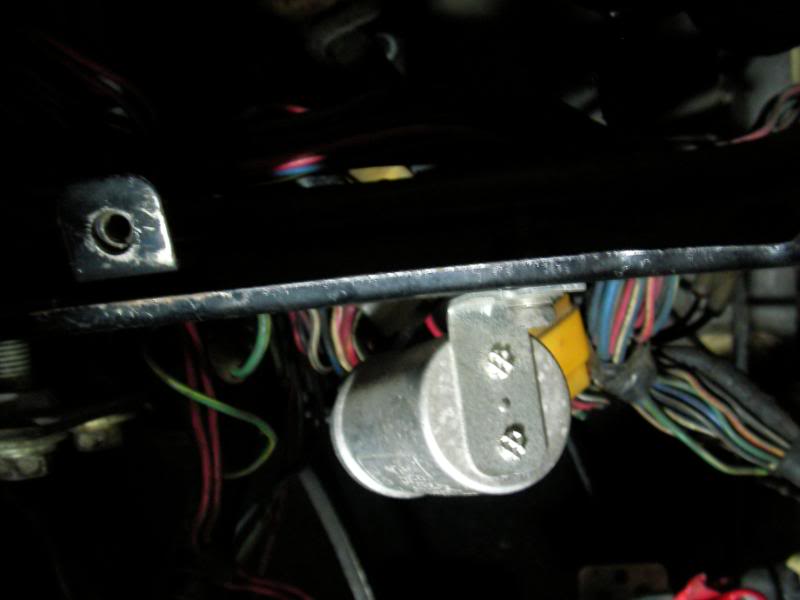
First, the headlights didn’t work. So I start at the beginning, and trace the +ve wire from the battery to this block of fusible links…which helpfully has “HEAD(L)” and “HEAD(R)” on it. So I wiggle some wires, and when I wiggle the orange one (which is NOT for the headlights), the headlights come on!
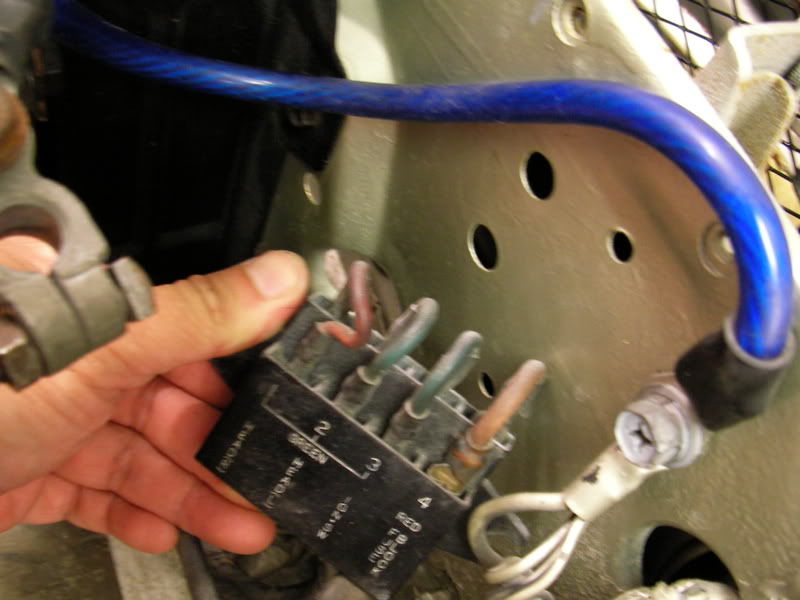
Um…alrighty then. Then I replaced some blown fuses and everything went haywire….put on the hazard lights: headlights will come on (but hazards won’t). Put on the park lights: headlights will come on (but park lights won’t). Press the brake pedal: headlights will come on (but brake lights won’t). Turn the headlight switch: nothing….go back under the bonnet and wiggle the fusible link block again: somewhat returns to normal but indicators don’t work. And hi-beams don’t work.
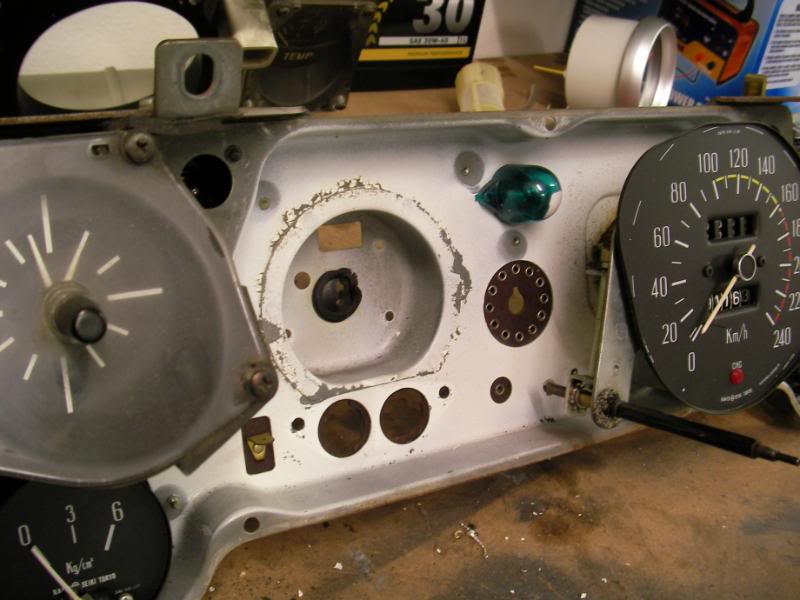
So I take off the dashcluster to have a look behind and the surprise was that the wiring is very hacked-up…there are vampire taps (with cut off wires) everywhere, and lots of wiring has been re-routed to different things…the most bizarre thing is that there is a wire tapped into the instrument lighting that goes to the front of the car….I suspect that some genius decided to use it to trigger the headlight relay (maybe the headlight stalk is broken)…and if the headlight switch is somehow bypassed then it might explain why hi-beam doesn’t work.
Oh dear…well, this is pretty much the limit for me. I’m okay at taking apart the oily bits but I can’t even figure out how to use a multimeter. So I think the next step will be to get an electrician over to spend maybe a whole day on the car cleaning up things. Will be expensive but if it fixes the electrics for good and is reliable, then it’ll be worth it. Some amateur MacGuyver has been at work butchering the electrics, so getting it sorted properly will be a priority…if only to avoid the embarassing scene at the engineer when they ask me to test the brake lights and the headlights come on instead.
A few weeks ago I said that when buying old cars, it’s better to buy a car that’s in regular use, rather than a car that’s been lying idle, like mine has. Maybe I should start taking my own advice! But I think we’re close…very close to getting the car nice and solid for the road….anyone know a gifted auto electrician in Sydney?
12 Mar 2008: Project Hakosuka: Electricity Hates Me
Where we left things last was that the mechanicals were now in good shape, but the electrical system was a little haywire. Press the brake, and the headlights would come on (but not the brake lights). Turn on the headlights and the indicators would come on (but not the headlights). Turn the indicators on and….nothing would come on.
So it was time to put down the spanners and pull out the multimeter and get hardcore with a soldering iron.
Firstly, taking the car apart to see what we have to work with. There was a lot of patched up wiring (much of which was just twisted and taped and had since come apart).
A lot of the connectors were also quite old.
But the first pleasant surprise was that my initial fears about there being lots of wiring hacks and modifications was unfounded. Sure, there were vampire taps everywhere and additional wiring, but it didn’t do anything. For example, there was a wired tapped into a brake light wire, and it was neatly cable tied around the boot as it went into the rear parcel tray. But under there it was just disconnected. There was also a wire tapped into the instrument light wire, that led to the headlight area, but it just terminated. It wasn’t wired up to anything, and it looked like someone started along the path of a wiring hack, and then gave up and taped everything up neatly anyway. That’s a relief, it means that any issues with the electricals are probably just age-related.
First, the wobbly fusible links block. Wiggling them made the lights come on and off, so replacing the corroded old copper links with new ones seemed a good place to start. But it didn’t make any difference and the electricals were still haywire.
The main problem at this stage was that I couldn’t get the headlights to work. Since I got the car, the high-beams had never worked, so I thought that might be linked. It was at this point where a good samaritan who had been following the car’s buildup, a fellow Hakosuka owner, contacted me and sent me a factory GC10 wiring diagram. And it was at that point when everything started making sense.
I had a Haynes manual for the 240Z but looking at the wiring diagram for the Zed showed that it was quite different. The 240Z doesn’t have headlight relays and instead runs the entire headlight current thru the indicator stalk (!). Looking at the wiring diagram showed that the Hako actually has wiring that is more in common with a 510 rather than a Zed, in the sense that the headlights are always fed a positive current from the battery, and the relays are switches are actually on the negative side of the headlights. A very unconventional way of doing things and very much the opposite of what you would have expected Nissan to do.
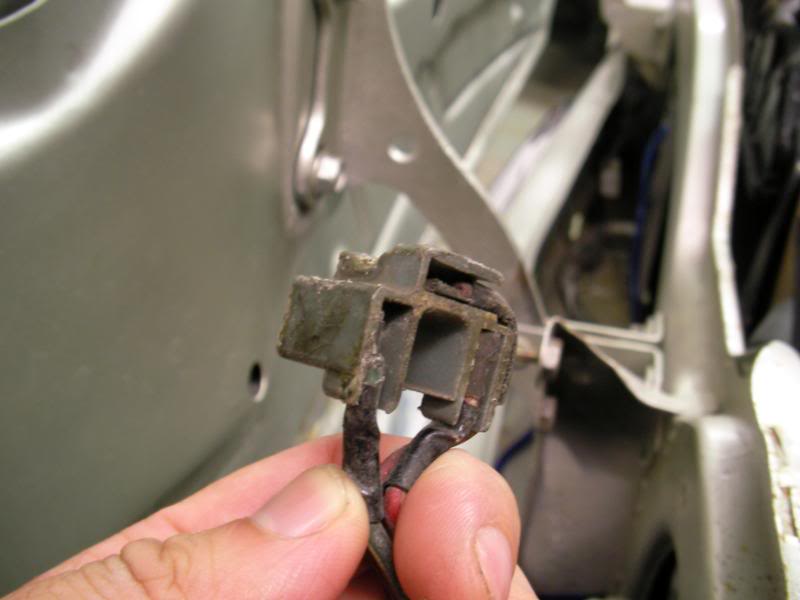
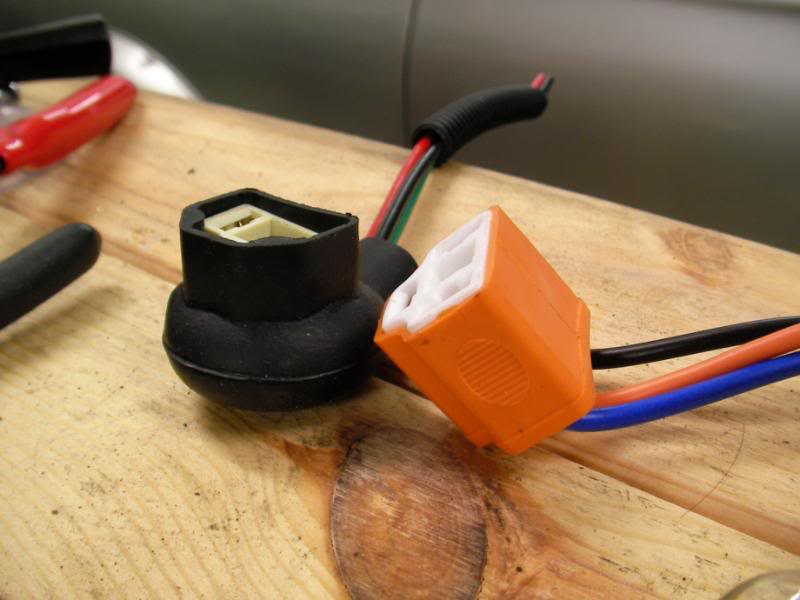
So the first step was to ensure that the headlight buckets weren’t grounding. If they were, then the current would go straight to earth instead of thru the bulb. The stock headlights had some metal locating tabs on them, which had some rubber coating which was peeling off. So I put some insulating tape on the headlight brackets to prevent any grounding. I also replaced the headlight plugs with new ones.

That didn’t help. So the next step was to pore over the wiring diagram for answers, and it looked like the oldschool relays for the headlights and hi-beam flahser grounded through their metal bodies. So I took them off, and discovered that they were held on by loose-fitting self tappers and had some healthy corrosion at the point of contact with the body. So I cleaned up the metal surfaces with emery paper and drilled out the mounting holes to replace the self tappers with clean new bolts.
Then flick the headlight switch and voila! Hi beams are now working too!
I think the problem was just an earthing issue. Very often when earths go bad, the current finds other ways of getting to ground, and so the electrics often go haywire and you press one button and something else comes on. So I go and clean all the wiring earth points in the engine bay and cabin, and now the electrics were no longer haywire. But the indicators were lifeless, and the fuel gauge and reverse lights didn’t work.
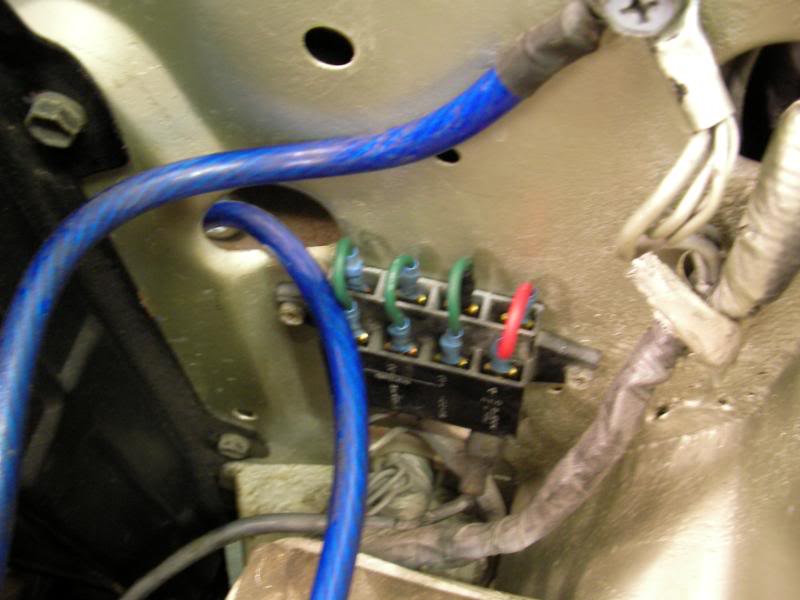
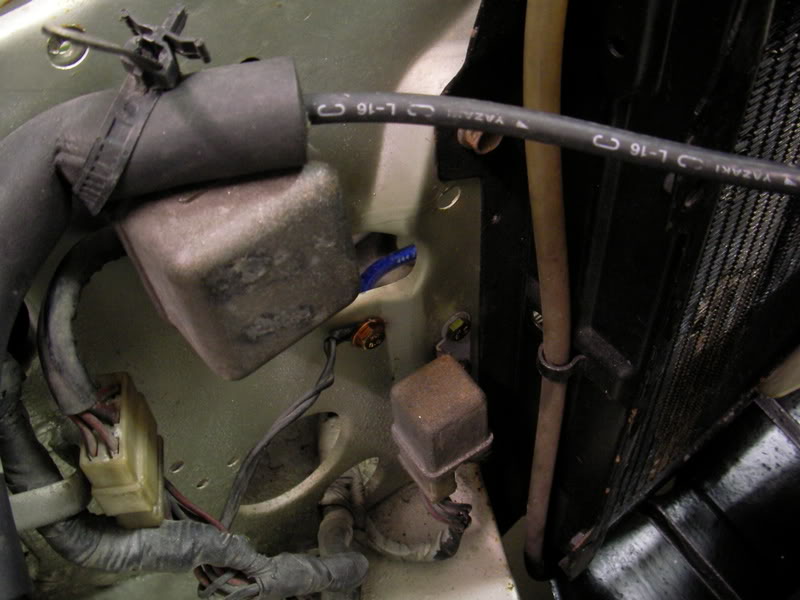
Looking at the wiring diagram again showed that all 3 things were fed off the same fuse. So it’s time for this to come out:
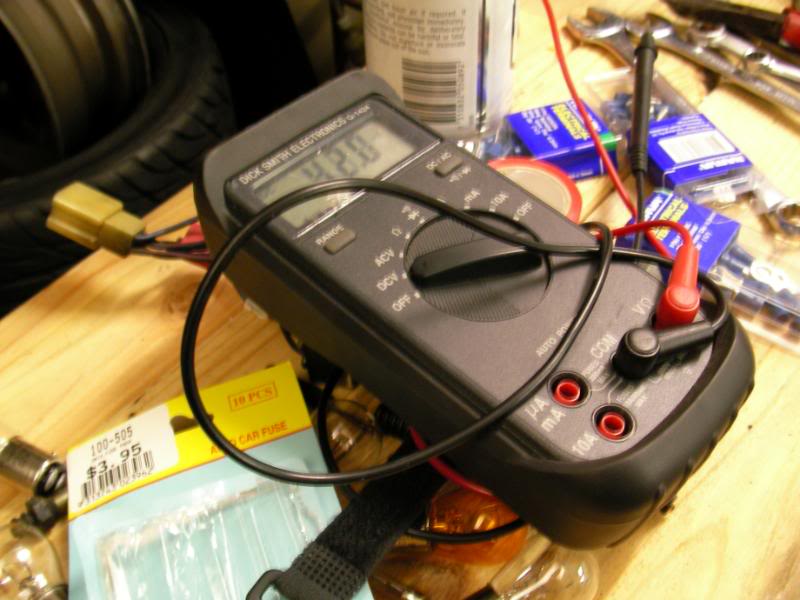
Now I have to admit that when I look at one of these things, my mind just goes blank. It’s like picking up a book, turning to the first page, and then discovering that it’s all written in Russian or something. So a few calls to friends, and they gave me the lowdown on how to test for continuity and power.
I thought I’d start with the indicators. According to the multimeter, the fuse powering the indicators/reverselights/fuel gauge was getting power. The wiring diagram showed that the power then went into this clicker can, and testing the wire for continuity (one side to the fuse, the other to the clicker terminal) showed that the wire was ok with an acceptably low resistance. But testing the output terminal of the clicker can showed no voltage. So I replaced it with a modern one, and now there was voltage going thru the new clicker can…but the indicators still didn’t work.
Looking at the wiring diagram showed that the fuse in question went to the indicators, and branched off to the reverse lights, the fuel gauge, and then finally to the rear demister relay, where (like the headlights) it was an oldschool one made out of metal that grounded via its body:
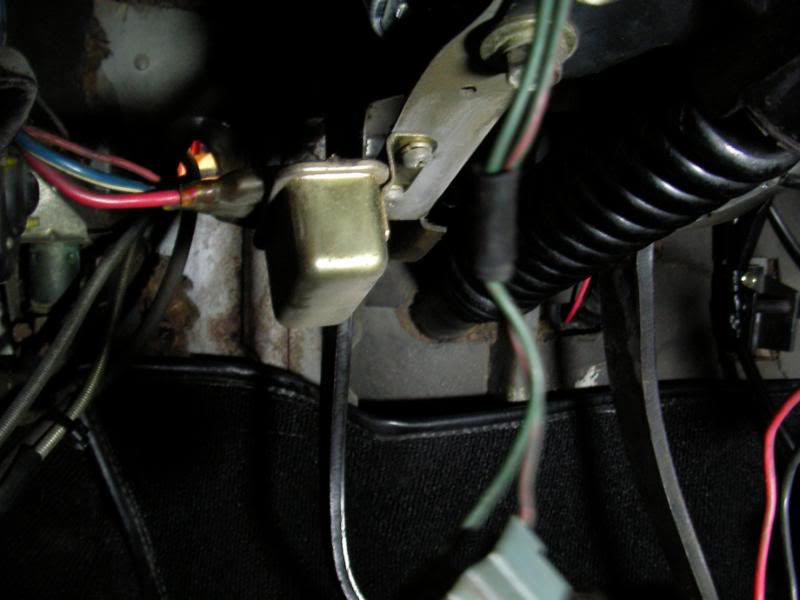
I removed it and cleaned up the touching surfaces (you can see my sanding marks) and…voila! We now have reverse lights, indicators and a working fuel gauge!
Not having delved much into electrics before, I do find this all very illuminating (boom-tish). My mental image of electricals is that you have separate circuits that are all independent. But now I understand that they aren’t really all that independent, and something as remote as the reverse lights can be affected by the demister…because they are all interlinked. And it was all mainly due to earthing issues! I mean, before today, I would have thought that since the whole car is made of metal that earthing would not be such a problem. But I guess you learn something new everyday!
And this is where we are at the moment. I have to put the car back together now (the above article actually covers a period of almost a week of working on the car and staring at the wiring diagram!) and the only thing I haven’t tested is the wipers. But I think we’re on the downhill stretch and can now think about getting the car certified for road use.
Not long now. I hope!
5 Mar 2008: Project Hakosuka: Now Going.
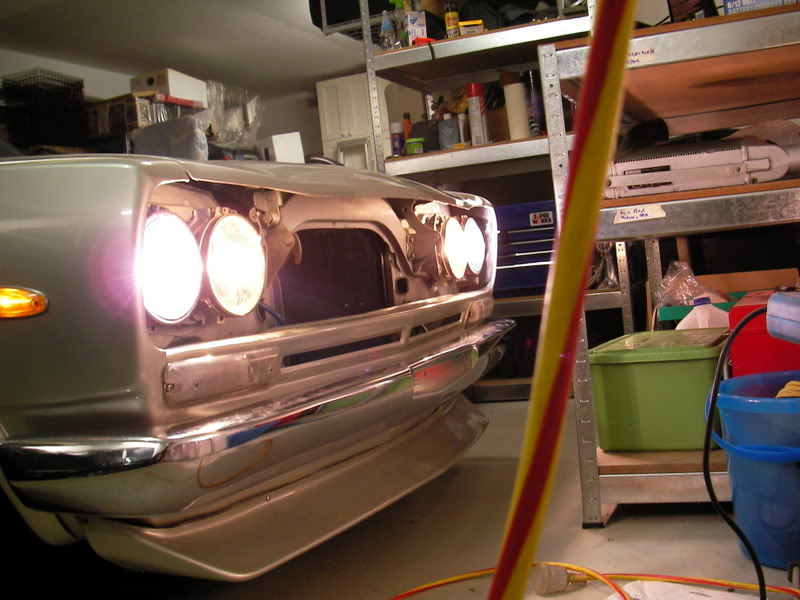
After a quite a long period of firstly waiting for the car to arrive from Japan, and then a seemingly-even-longer period of fixing the various issues that the car came with, it was with a certain trepidation that I fired her up and gingerly backed her out of the garage under her own power for the first time.
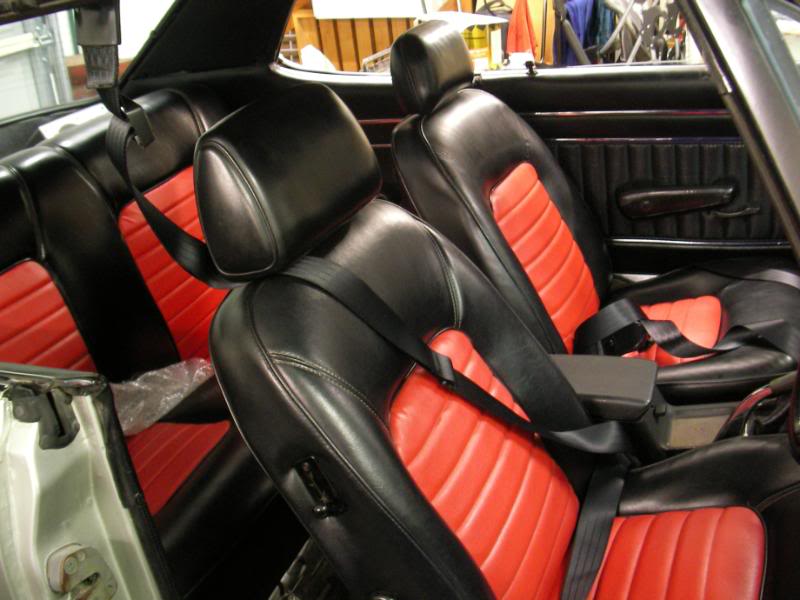
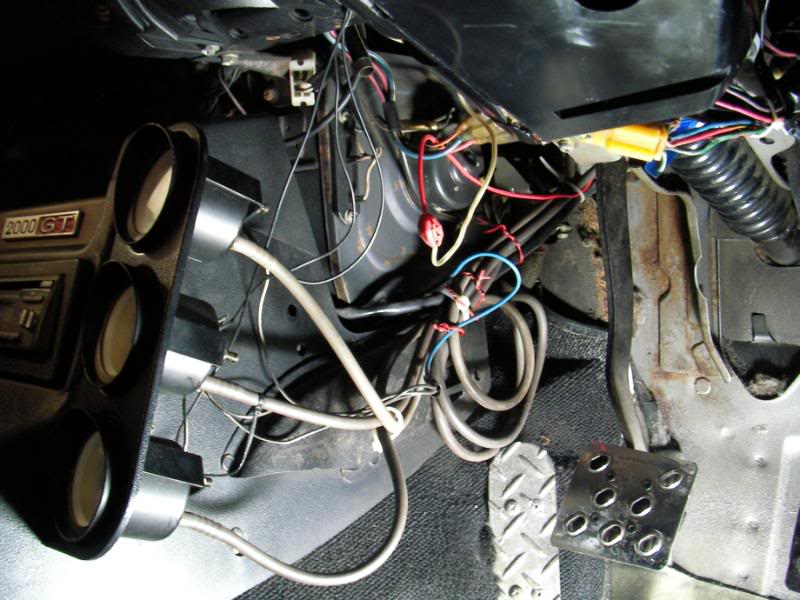
Now that all the various mechanical issues were sorted, and the electrics were all working again, I put everything back together again in the engine bay:

And the interior was converted from a mess of hanging wires back into something resembling a normal dashboard:
Those readers who’ve been following the buildup over the past mth or so will know that I’ve had quite a few attempts at tuning the Webers without actually getting it right! But now that the car was ready for the road, it was time to have a last go and this was the result:
[youtube]http://www.youtube.com/watch?v=LURiUq6iYxo[/youtube]
Although I think it still isn’t perfect (and the driving impressions below suggest that there is some room for improvement) I think this is the least-worst result I’ve got so far ![]() It idles steadily at 1200rpm, starts easily, gets off idle quite cleanly and doesn’t diesel-on like it did before. Good enough as a starting point I think.
It idles steadily at 1200rpm, starts easily, gets off idle quite cleanly and doesn’t diesel-on like it did before. Good enough as a starting point I think.
But one last job I did before rolling her back out of the garage was a little mod I was saving for later. Now, the engine was upgraded to a 280ZX electronic distributor in Japan, which isn’t compatible with the stock GC10 tachometer. The stock tach relies on an inductive loop principle, which assumes that you have a flow of current through a set of old fashioned points in the distributor. The later electronic distributor doesn’t have this so the stock tacho is dead.
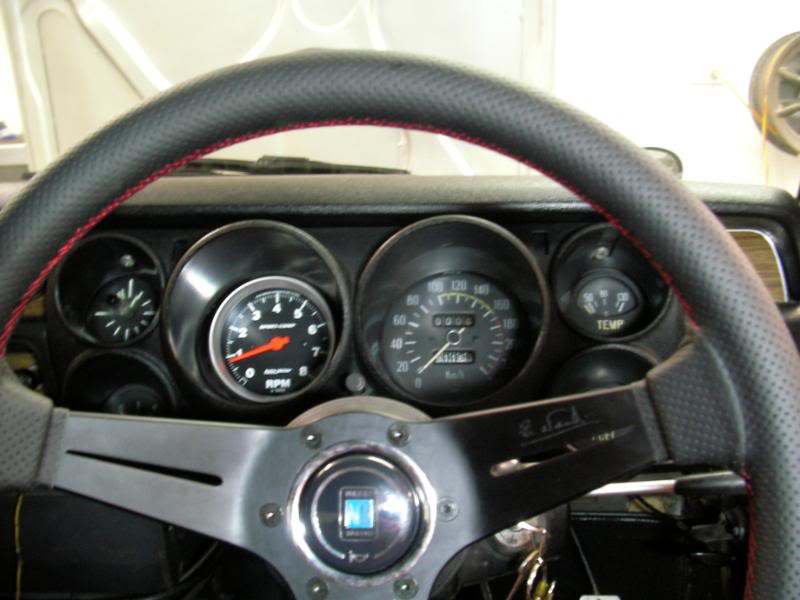
So I did a mod which has proven to be surprisingly divisive. Most modified Hakosukas you see in Japanese magazines are fitted with Autometer tachs, and of course Autometers have been popular with the 240Z guys in Japan and everywhere for a very long time. So I removed the stock tach and fitted an Autometer 3’3/4 tach in its place.
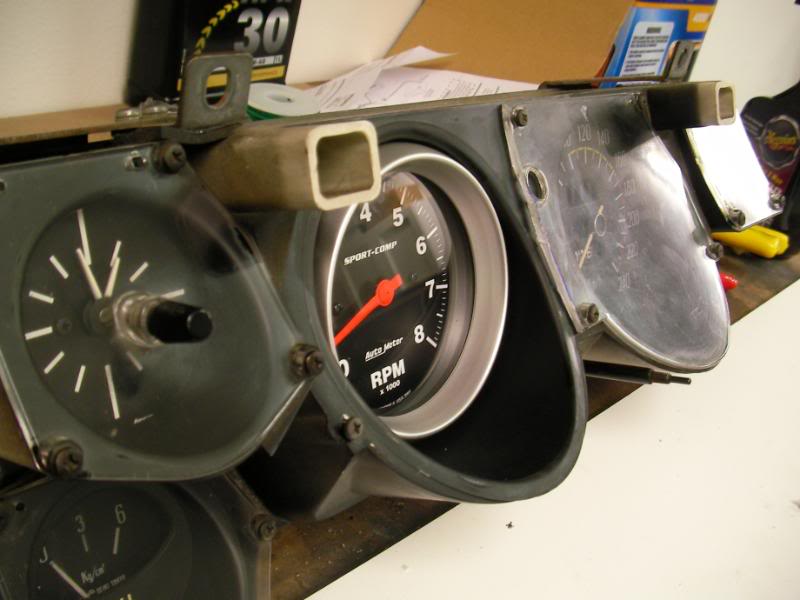
The Autometer slotted snugly in place, and to my eyes, looks subtle and very appropriate. The font and colours etc are more oldschool than say a modern Defi gauge, and I like the fact that it sits deep in the instrument cowl, and you don’t really notice it unless you’re sitting in the hot seat.
But like I said, it’s been quite a divisive little mod in that some people are so upset about it that you’d think that I’ve just ruined the whole car ![]() Of course it’s 100% reversible should I want to return it to stock in the future, but I guess some were disappointed that I didn’t go for a JDM brand instead. But if it’s good for Hakosuka guys in Japan then it’s certainly good enough for me and I think to drive the car without a working tacho would have been a disappointment. After all this work I wanted the car to be as “finished” as possible when I hit the road for the first time.
Of course it’s 100% reversible should I want to return it to stock in the future, but I guess some were disappointed that I didn’t go for a JDM brand instead. But if it’s good for Hakosuka guys in Japan then it’s certainly good enough for me and I think to drive the car without a working tacho would have been a disappointment. After all this work I wanted the car to be as “finished” as possible when I hit the road for the first time.
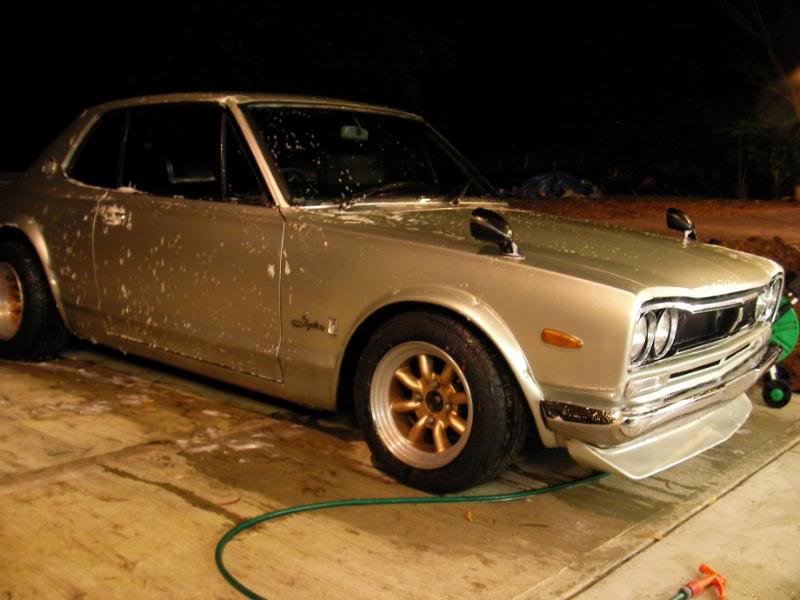
And with that….I fired her up and drove her out of the garage for a quick wash!
The next day….I had an appointment at an inspection station to get the car certified for road use, and so it was hugely nerve wracking to take the Hakosuka out onto morning rush hour traffic, a car that was pretty green and unproven when I first got it a mth earlier, and a a car that I had only ever driven up and down my driveway.
But I need not have worried. The car sat happily in peak hour gridlock with the water temps holding steady between 70 and 80 degrees, and she didn’t stall, smoke or eat her plugs or get sucked into a wormhole or anything like that. To my relief, it’s a very solid, tight car with no rattles or squeaks and I have no doubts about being able to drive it anywhere now. The downsides at this point are that the suspension and brakes are simply awful.
The suspension is soft and way too low (more of this anon) and in fact is resting on the bumpstops at the front, so is very bouncy and pogo-ey as we negotiate Sydney’s bumpy roads. Not confidence inspiring at all, and the shocks also seem to be quite worn. But even less confidence inspiring are the brakes. The pedal goes a long way to the floor before anything really happens, and then in that last centimeter of travel, it’s a fine line between stopping safely and locking up the front wheels. This is usually the symptom of a worn mastercyl, so I suspect that the rebuilt master cylinder may be the culprit, so I’ll give the brake shop who did the job a call. Old cars are reknown for poor brakes, but my old 63 Beetle had much better brakes than this, so I think something is definitely amiss.
On the good side, the engine has plenty of power even though it’s not quite 100%. Nothing smokes or rattles and oil pressure is a steady 1.2bar at idle, and the sound from the Webers under full song is simply unbelievable. Give it more than 1/2 throttle and you get the Italian National Anthem being played at deafening volume out of the Weber carbs and it’s a wonderful thing!
The response at low rpm is quite fluffy however, and the powerband hits a real brick wall at about 5000rpm so the powerband is a thick slice of torque between 3000 and 5000rpm. The low rev response is due to the 280ZX not having enough static advance. Big carbs and big cams need to have about 18~20 degrees of advance at idle, but the 280ZX distributor has 18 degrees of (rpm based) mechanical advance built into it, so if I set it up with 20 at idle, then I would end up with 38 degrees of advance at high rpm which I think would be too much. So the current setup is 14 degrees at idle, which translates to 32 degrees at redline, which is not optimal for low rpm running but is safe and won’t hurt the engine at high revs.
I have some parts coming from Japan however that should address this issue so watch this space. As for the power tailing off abruptly up high, I think that is something that I won’t be able to diagnose properly until I get the car on a dyno. At the moment the car is stable and driveable but feels a little out of sorts and you get the feeling that there are just a few tweaks that are holding it back at the moment, and once those are sorted the engine will really be unleashed.
As for the registration inspection, well we didn’t pass. But there are only 5 items that I need to address and we’ll be legit. All of the electrics checked out, and rather surprisingly the hot, big cammed and multiple carbed motor actually PASSED the pollution test (maybe that tune isn’t so bad after all)! But the issues I have to fix are:
1. The car is too low and needs to be raised 25mm at the front. The sump is only 7cm off the ground, and given the poor driving characteristics of the current setup, this is a problem that I am looking forward to fixing. I think I’ll remove the front struts, and convert them to coilover so that I have height adjustment, and also put in a Koni insert while I’m at it. Changing the rear shocks should be a quick job though.
2. The car is slightly too noisy. The legal limit for a car of this age is 96dB and the Hako tested at 95.7dB. While it’s under the limit, it’s borderline and technically I have to pay for a second, drive-by noise test to reconfirm that the noise level is legal. However the engineer at the inspection station suggested that if I put the K&N air filters on the car the next time I have it tested, it would probably take the edge off the noise level enough to pass without a drive-by test.
3. Inoperative horn. Believe it or not, one electrical item I didn’t check was the horn! But I guess since I mainly work on the car at night maybe I subconsiously didn’t want to wake up my neighbours!
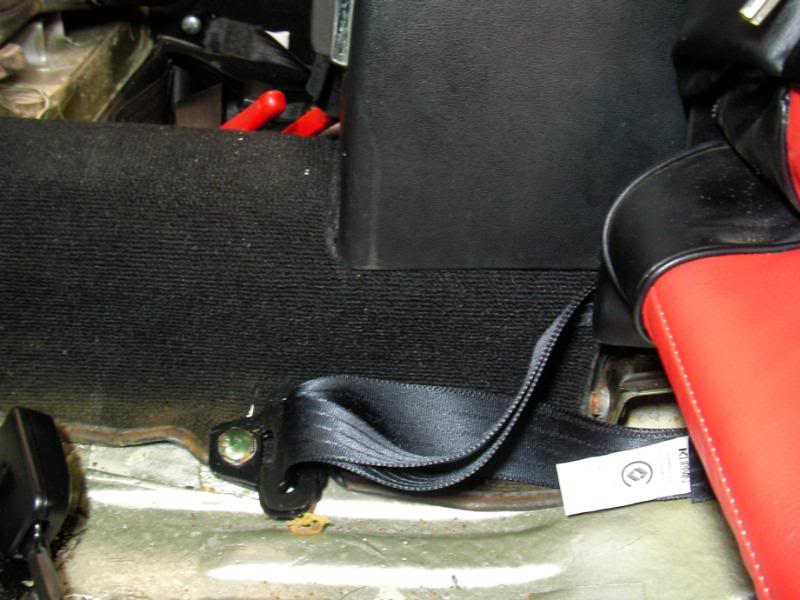
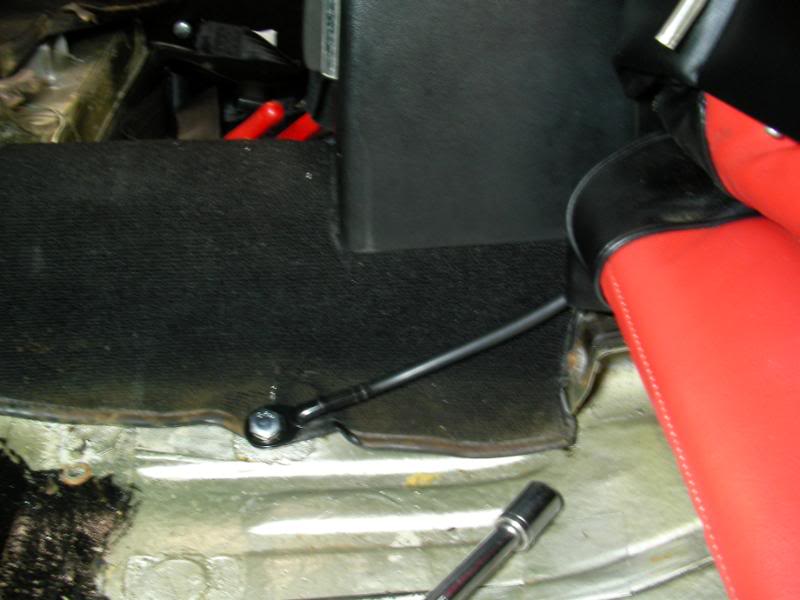
4. Fit rear seat belts. I fitted front seat belts but rear ones are required for a car of this age too. I believe that the holes and mounting points are already in the chassis, so this might be an easy mod.
5. Fit a stalk buckle to the front seat belts. The mounting point for the lap part of the front belts is very far behind the front seat on the trans tunnel. And the longest buckle on a stalk I could find from an Australian supplier was 450mm, which is about 100mm too short. But the rules say that the buckle can’t be on fabric webbing, since the movement of the seat may abrade the fabric over time. So the answer is probably to bite the bullet and redrill new mounting holes further forward on the trans tunnel so that I can use the approved stalk mounted buckles. Motorsport shops sell FIA-approved harness plates with a seatbelt sized nut welded to a thick steel plate, and I can rivet one of these to the inside of the trans tunnel as the new mounting point, so that shouldn’t be too much of a headache.
And that’s it! All I have to do is address these 5 things and I will get that precious piece of paper that will allow number plates to be issued to me. For an old modified car I think I got off very lightly and I think that anyone will agree that the modifications they want made are quite reasonable. After having driven the car properly for the first I’m more relieved than excited I think. The car still needs a lot of work before I can really enjoy it and I think the excitement will come later when the car is in a more refined, finished state.
The build continues…but hey…it runs!
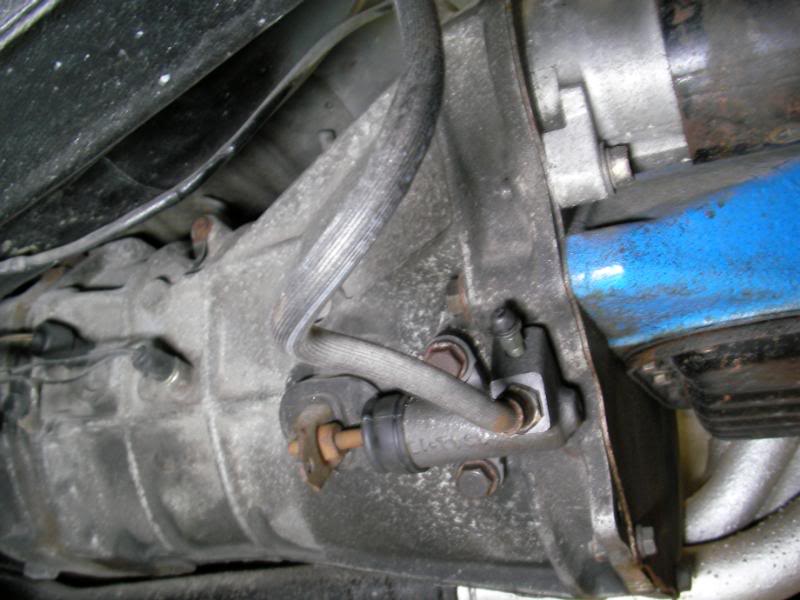
20 Mar 2008: Project Hakosuka: We have BRAKES!
You might recall that, in the last (and only!) time I drove the car, the brakes were awful. With the pedal going most of the way towards the floor with little feel or resistance, and not actually doing any braking until just before the pedal hits the carpet. Quite terrifying, actually, and the more I thought about it, the more I was convinced that there was something wrong, rather than any inherent weakness with the Hako braking system.
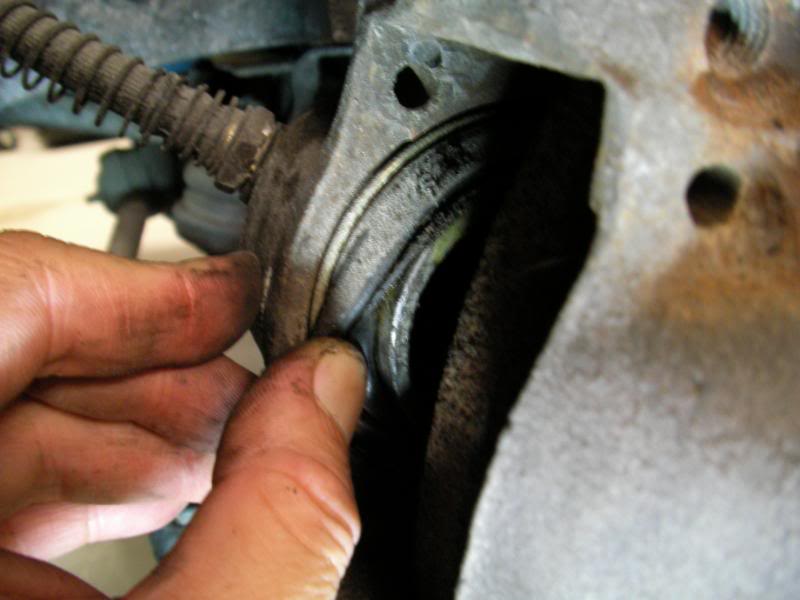
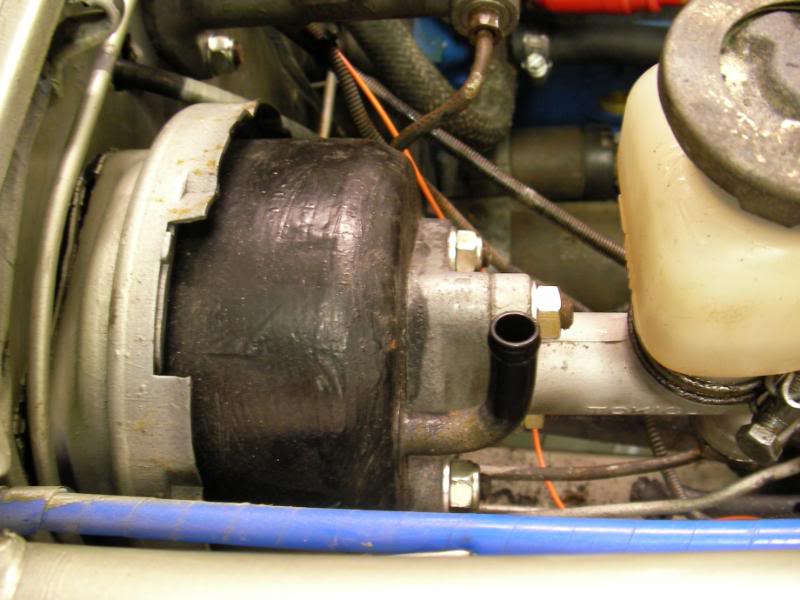
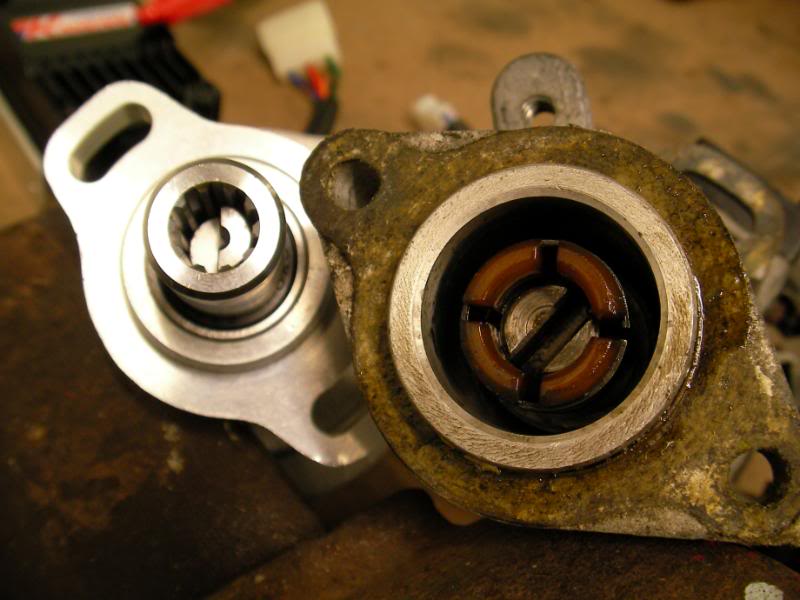
I did a bit of searching around the vintage Z forums and there were an awful lot of posts complaining of the exact same symptoms. After replacing or repairing the brake master cylinder the pedal goes all soft and long and the brakes hardly have any retardation at all. In most cases, it was blamed on something called a Reaction Disc, which is this striped, #18 thing in this diagram below:
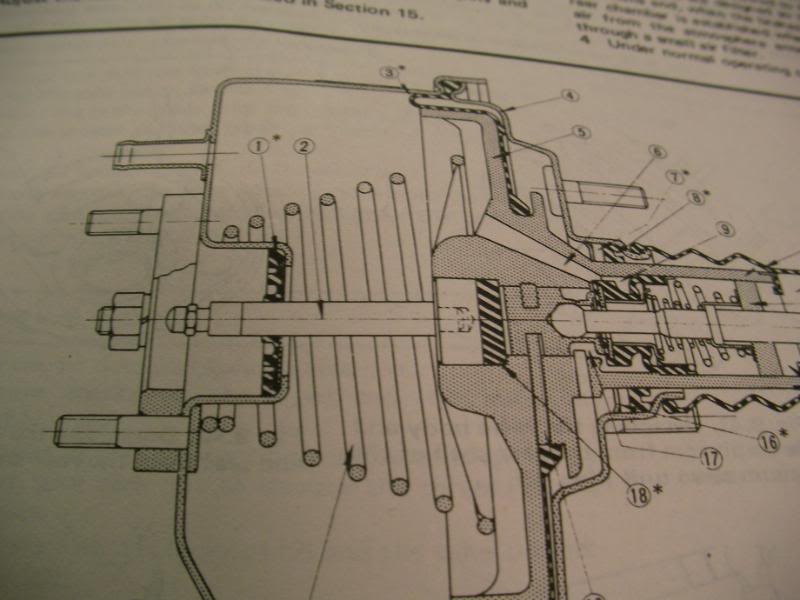
This is a diagram of a 240Z brake booster (a Hakosuka one is similar in design but smaller), and the Reaction Disc is a 6mm rubber spacer that sits between the master cylinder activation pushrod and the internal plunger inside the brake booster. If you remove the brake mastercyl and dislodge the pushrod, then it’s possible for the little rubber disc to fall out, and into the depths of the brake booster. When that happens, you have 6mm of freeplay inside the mechanism, and so the first half of the brake pedal travel does nothing except bridge this new gap.
It sounded plausible to me, so I took off the master cylinder and measured the depth of its internal piston. Then I measured the depth of the pushrod inside the booster…and well what do ya know? 6mm gap! So I reached inside the booster with my finger, and yes, down at the bottom was something round and rubberlike. But after 20mins of trying to dig it out with my finger (you can only get one finger in there!) I bit the bullet and removed the brake booster.
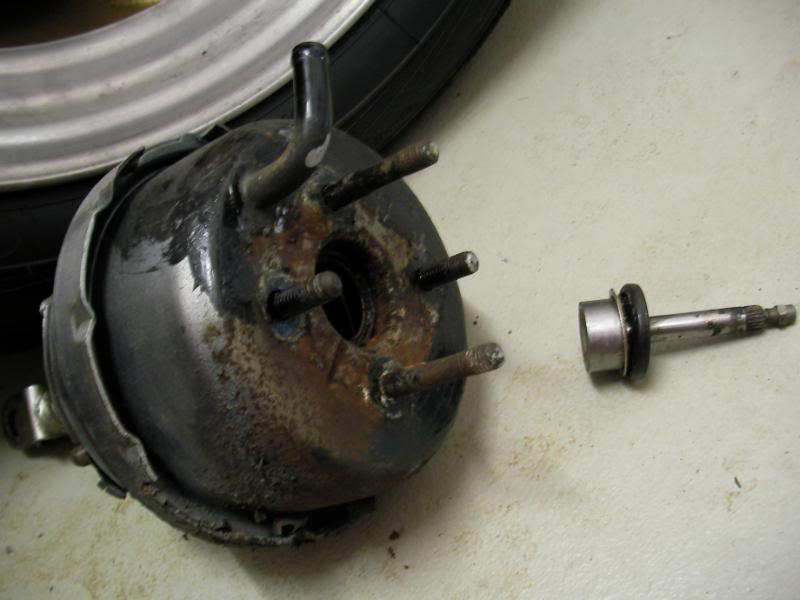
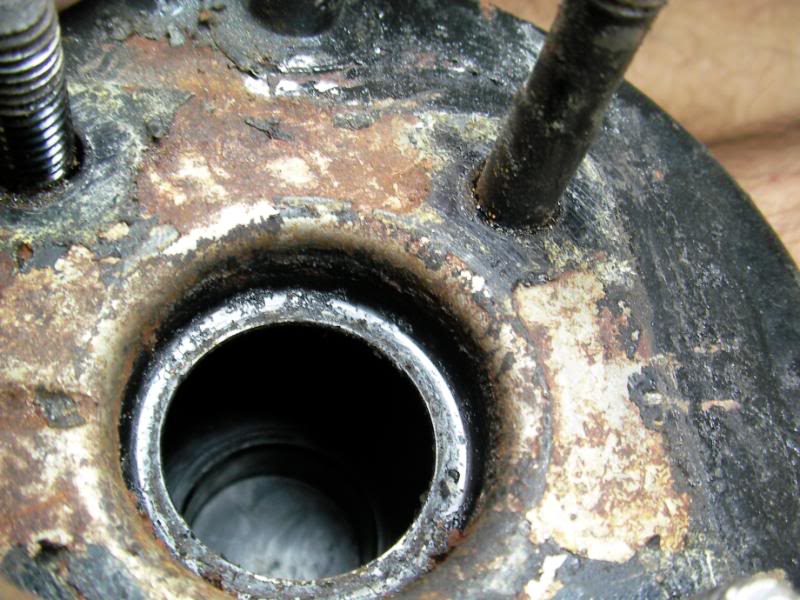
Here it is, with the pushrod removed (the rubber disc goes behind the piston end of the pushrod). And after jiggling the booster around for a while, the little rubber disc flopped into position, and you can see it at the bottom of this “well” inside the booster:
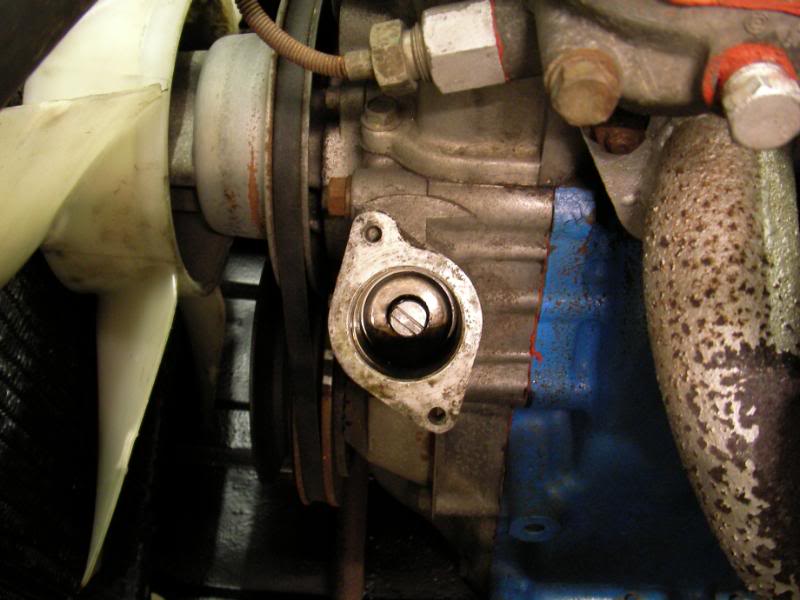
Carefully put pushrod back in place before the little %$@^ rubber disc falls out again…
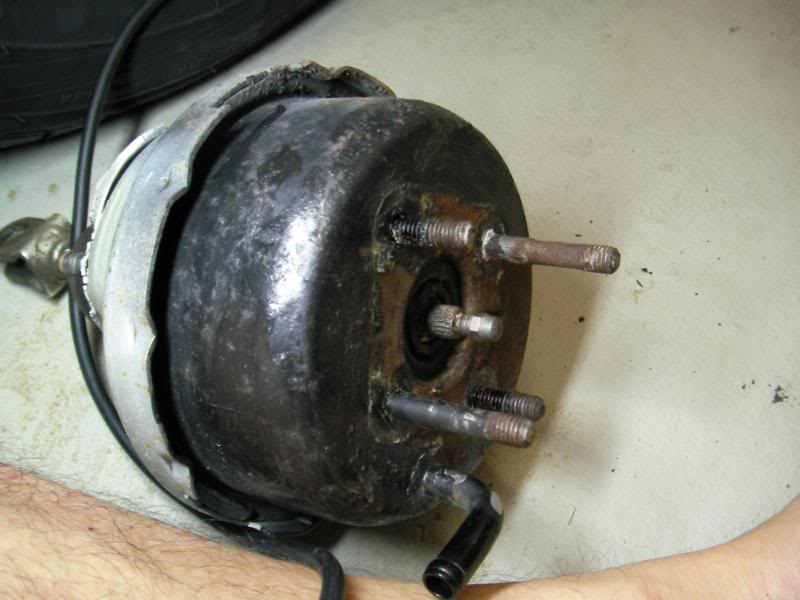
And bolt the master cylinder back, all the while keeping an eagle-eye on the pushrod!
Reconnect the pedal, bleed the fluid, and….PHEW. The pedal feels normal. With the engine off, the pedal goes firm within an inch or so of travel….basically like a normal car in other words! I haven’t driven it yet but the pedal feels good, and I am sure this will restore normal braking power to the Hakosuka….so now I can floor the accelerator pedal in safety!
When I removed the brake mastercyl, I was quite careful not to touch the pushrod (I was scared that there might be a clip or something holding it in). But you might remember that when I sent away the mastercyl for rebuilding, it took quite a few days before it came back, and during that time I was working on getting the accelerator pedal adjusted correctly. I think what I did was accidentally brush against the brake pedal when I was mucking around adjusting the accelerator pedal mounting. So the pushrod got nudged out a bit and the little rubber fell out.
We get a 4 day long weekend over Easter this weekend, and all of the necessary parts to install the rear seat belts have arrived. So I’ll do that, and remove the front struts for coilover conversion this Saturday or Sunday.
…and yes, now that I look at the pictures above, it’s really bugging me that I didn’t repaint the booster before putting it back!
26 Mar 2008: Project Hakosuka: we’re getting there….
The jobs that had to be done before we could go back for certification was to fit rear belts, convert the front belts to stalk buckles, fix the horn, and raise the front ride height. And some of those jobs more or less fixed themselves, and we’ll soon see.
The easy one was the horn. I hooked them up to the battery directly and they honked just fine…in fact they’re Fiamm El Grande Twin electric air horns and are obscenely loud.
The answer was quickly found at the steering wheel end. For the horn to work, this copper tang has to contact the back of the steering wheel boss, and pressing the button merely completes the circuit. The design of the Nardi boss kit was slightly different to the stock one, and this wasn’t touching the boss by about an mm or so. Bending forward the tang so that it touched the boss brought the horn to life straight away!
The next step was the front seat belt buckles. Originally I had bought seat belt kits with the longest stalk buckles available, but they turned out to be too short. So I swapped them for fabric mounted buckles, which had a longer reach…but the engineer said that those were unsafe, since the fabric could get caught in the seat folding mechanism or simply abrade away over time by rubbing against the seat rails, etc. Fair point.
So the plan was to drill new mounting holes for the buckles further forward on the tunnel, but when I measured it….hmmm. Well to cut a long story short, it turns out that the original seat belt kit I ordered with stalk buckles was mis-boxed with the wrong parts. I ordered a new set and they fit perfectly.
And I didn’t have to redrill the tunnel either.
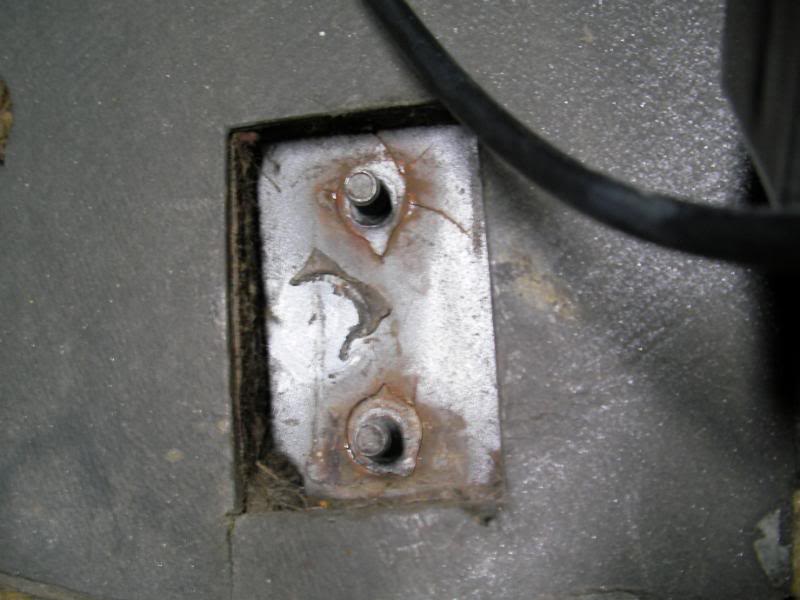
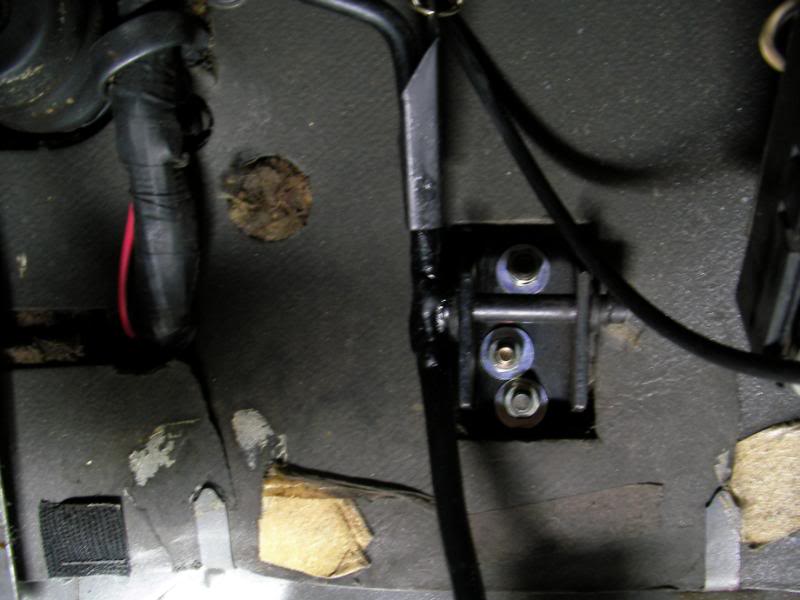
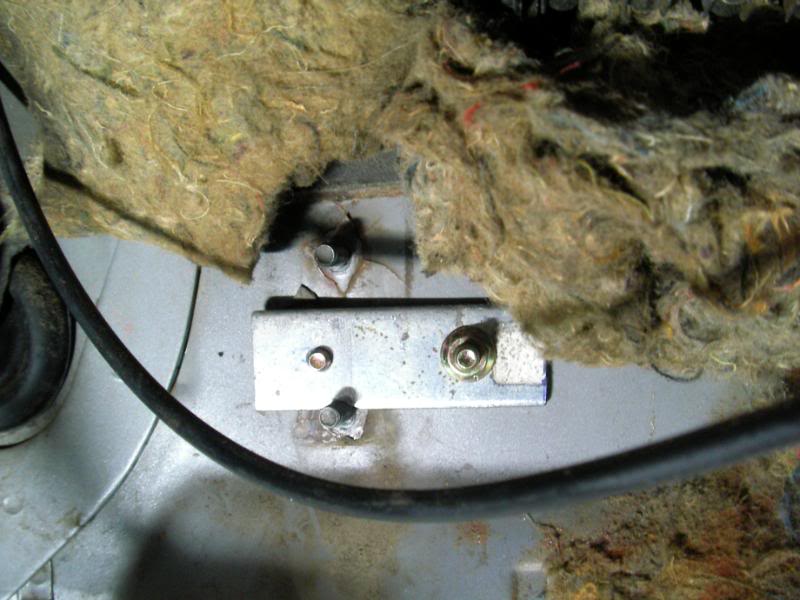
The good luck continued when I had a go at fitting the rear belts though. I had bought these: motorsport harness plates, which I was going to rivet in place under the floorpan as mounts for the new rear belts. The floorpan would have to be drilled to accept the seat belt bolts of course.
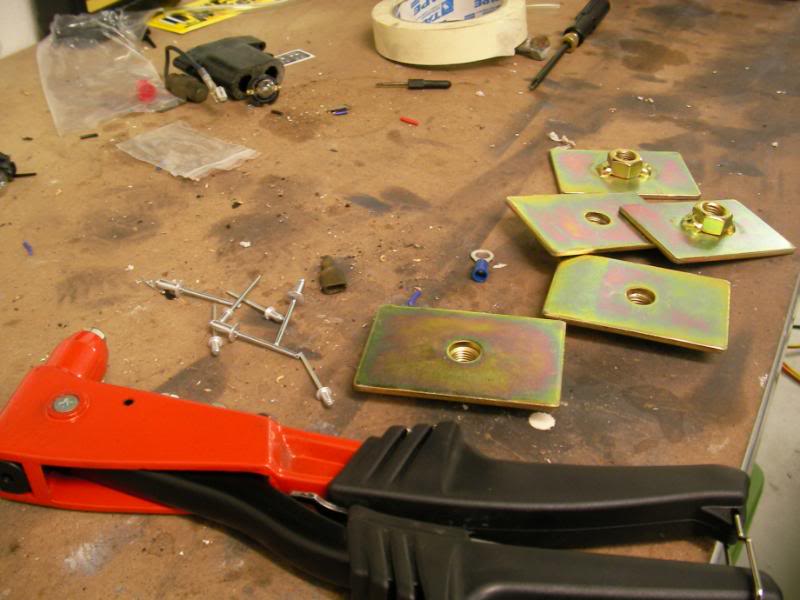
But then….wow. Under all the trim, the car already has seat belt mounts!
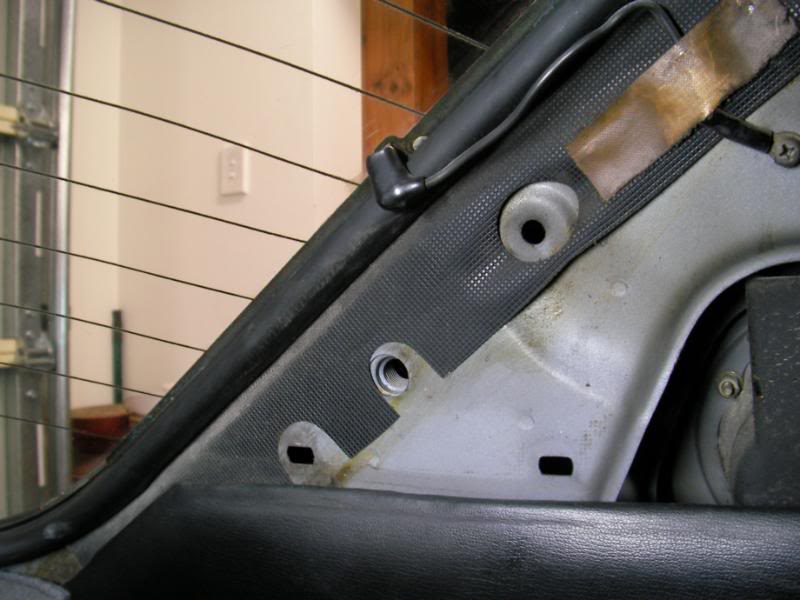
There were mounts in the base of the backrest for the inner buckles…
All factory style reinforcement underneath too…
So for perhaps the first time in the whole project, something turned out to be easier than expected….which is very refreshing to say the least. I’m not sure why the Hakosuka has seat belt mounts in the back: maybe they were a dealer option, maybe they were required for one of the few export markets for the GC10 (South Africa and some Northern European countries as far as I know)…or maybe Nissan was simply future-proofing the car against expected safety regulations that didn’t come until many years later. Who knows…but I am not complaining!
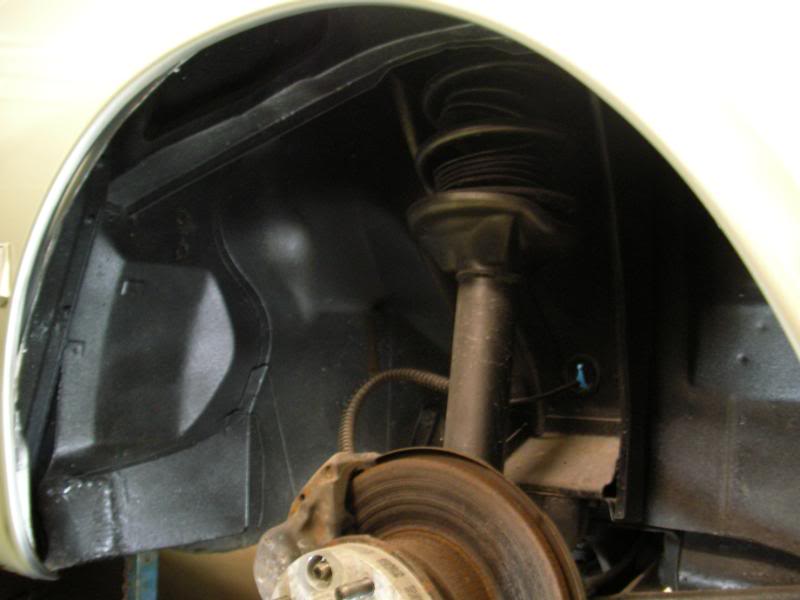
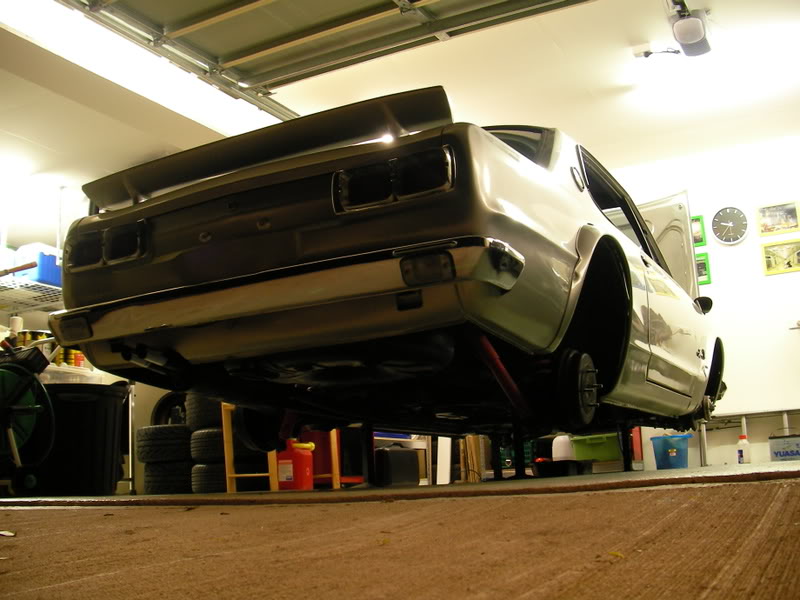
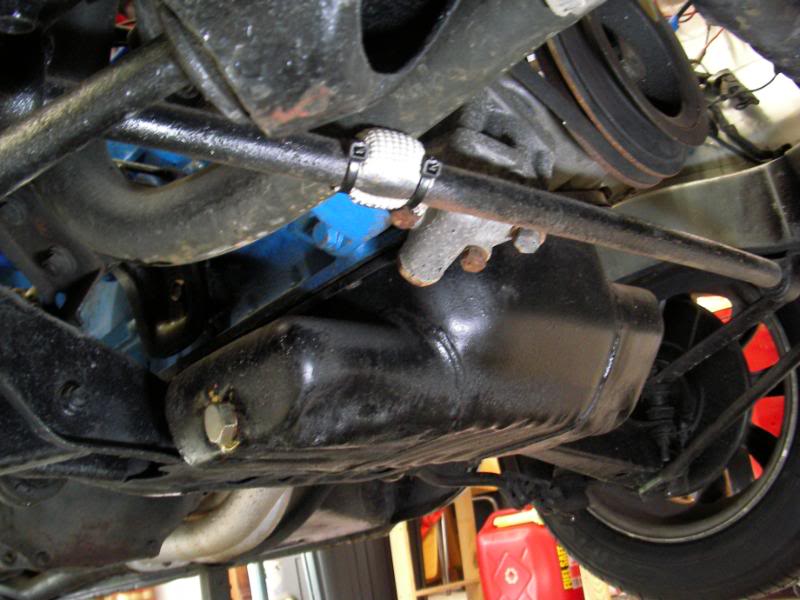
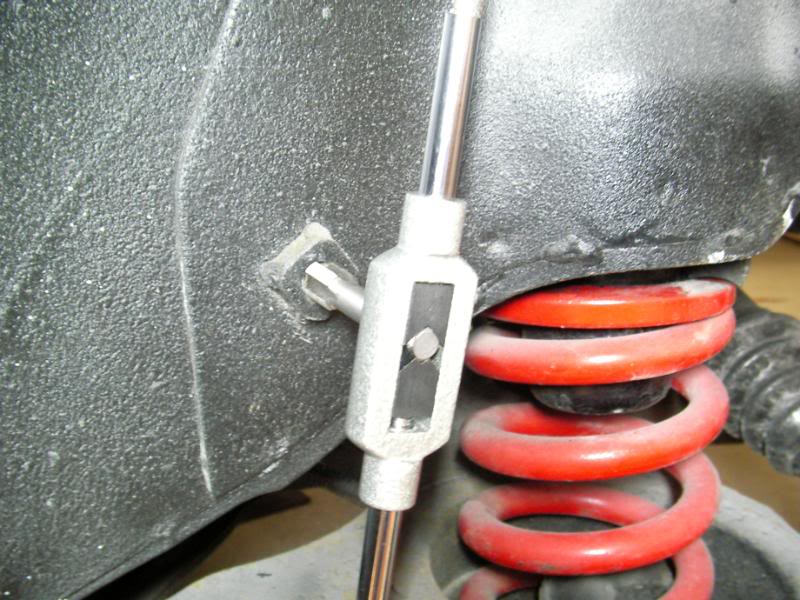
The last job was to remove the front suspension. I needed the car to have 10cm of ground clearance at the front, and when it was tested, it only had 7.5cm. So the front suspension needed to go up a whole inch, and rather than try to mix and match various aftermarket springs (‘can’t just waltz into an Aussie suspension shop and ask for GC10 parts!) I decided to go the extra step and convert the front struts to coilover, so that the height would be adjustable.
Surprisingly for an old car, all the major bolts came off without complaint and there was just a stubborn swaybar bolt that refused to cooperate. The struts are now in the custody of my old friend Dave Falson at East Coast Suspensions. The spring pans will be cut off, threaded sleeves welded in, and racing springs installed on adjustable perches. Dave also recommended shortening the strut tubes so that a Z32 300ZX Koni insert can be fitted. He’s done this for me before, the Z32 shocks have stiffer valving for the heavy V6 ZX and the shorter body means more travel when lowered. Hopefully the struts will be ready by the weekend.
One of the reasons the car rode and handled so badly at first was because the front suspension was resting on its bumpstops. These are a really oldschool design, and you can see in the image two pics above that it just acts as a snubber for the lower control arm. For the ride height that the Hako now sits at, these bumpstops are too long, and given that they are almost 40 years old their material has more in common with granite than soft rubber. These will be ditched, and modern squashy bumpstops (which mount on the shock itself) will be fitted, which should free up more upward travel.
The seat belts and the horn were a pleasant surprise, and now all we have to do is wait for my friends at East Coast Suspensions to wave their magic wand over the front struts and we’ll be ready for another go at certification.
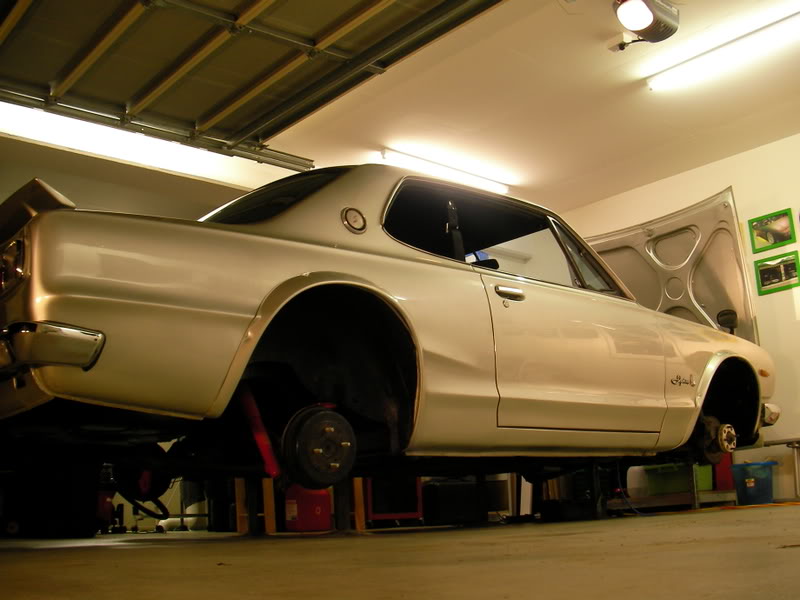
9 April 2008: Project Hakosuka: Yes. We are Ready.
When we left things at the last instalment, we only had a few little things to do, and the major part was waiting for the front suspension to come back. Well….it’s come back.
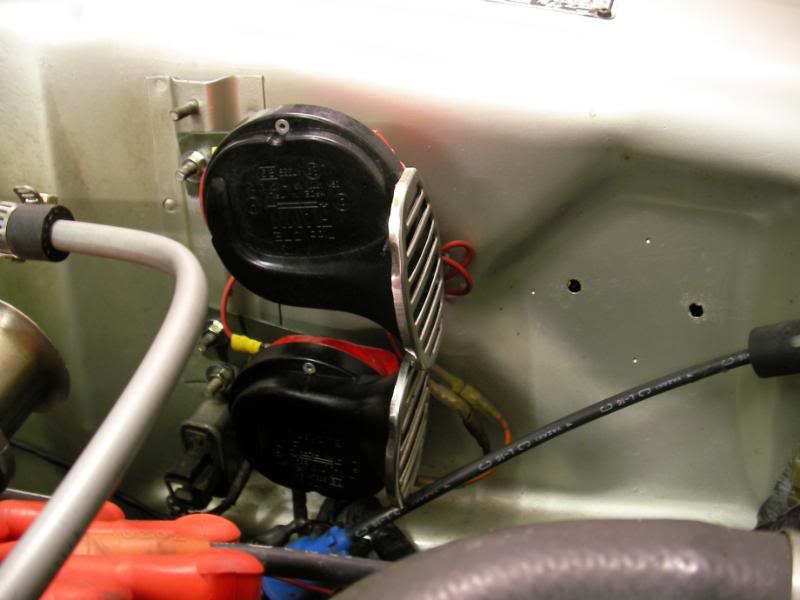
But first a few little things. One of the cool funky oldschool things that came with the car was a pair of 80s vintage Pioneer TS-X9 pod speakers. For the Hakosuka speakers like this are very popular in Japan, simply because the parcel shelf is just a few inches above the fuel tank and so there isn’t room for conventional basket speakers.
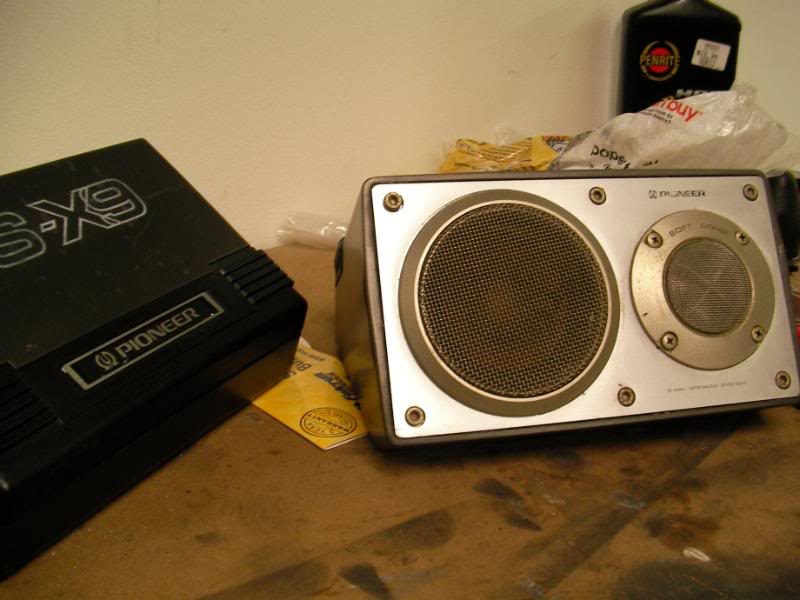
They are two-way splits, but don’t be that impressed, the speakers are pretty small and only sound “okay”. But there’s lots of space inside those enclosures for I think, a modern pair of 5 in splits. That’s a mod for later. But the great shock was that these heavy metal bodied speakers were attached to the parcel shelf….with tape.
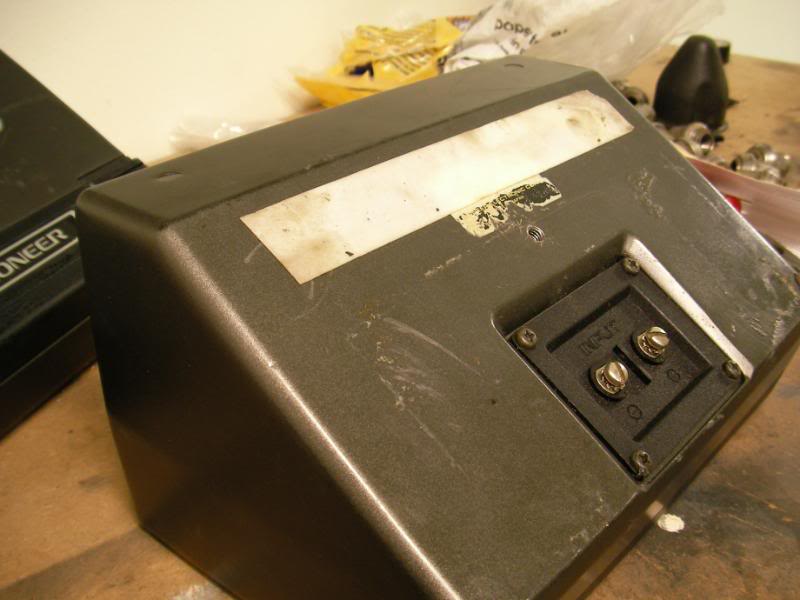
There is as you can see a provision for it to be bolted down with a 6mm bolt but it wasn’t used. So in a collision, the 3-4kg cast metal speakers would split your head like a melon before heading through the windscreen with barely abated speed ![]() Gosh, life must be cheap in Japan! So, I made a bridge of thick metal so that I could bolt the speaker down from underneath.
Gosh, life must be cheap in Japan! So, I made a bridge of thick metal so that I could bolt the speaker down from underneath.

They’re still 80’s as all hell but now much less lethal!

You might also remember that the Hako was only just below the official noise limit, and the engineer himself suggested fitting air filters over the Weber horns, which would have a flow-on effect of muffling the exhaust slightly. And while I was worried that filters would uglify the engine bay, I don’t think it looks too bad at all…
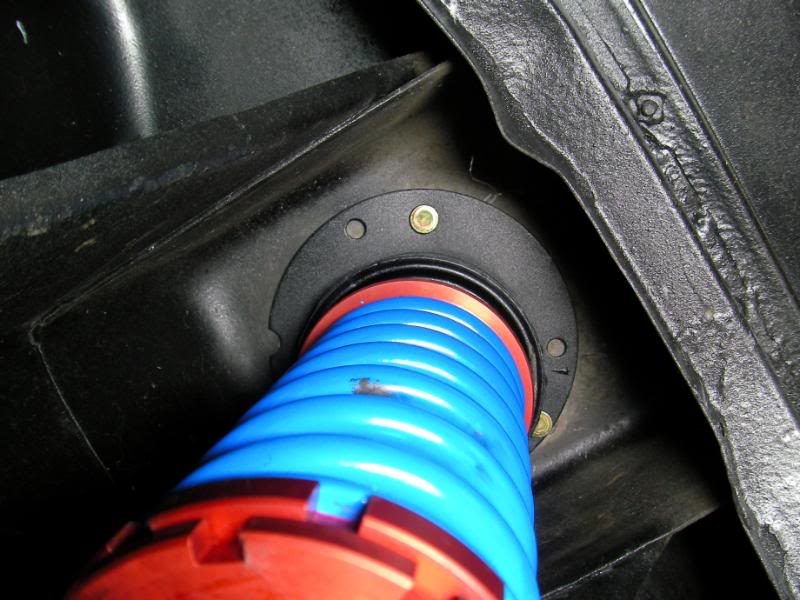
Now for the suspension! My friends at East Coast Suspensions had cut off the stock spring perches, fitted a shorter, firmer Koni Sport shock intended for a Z31 300ZX, welded on a threaded collar, and fitted a 250 pound spring and height adjustable collars.
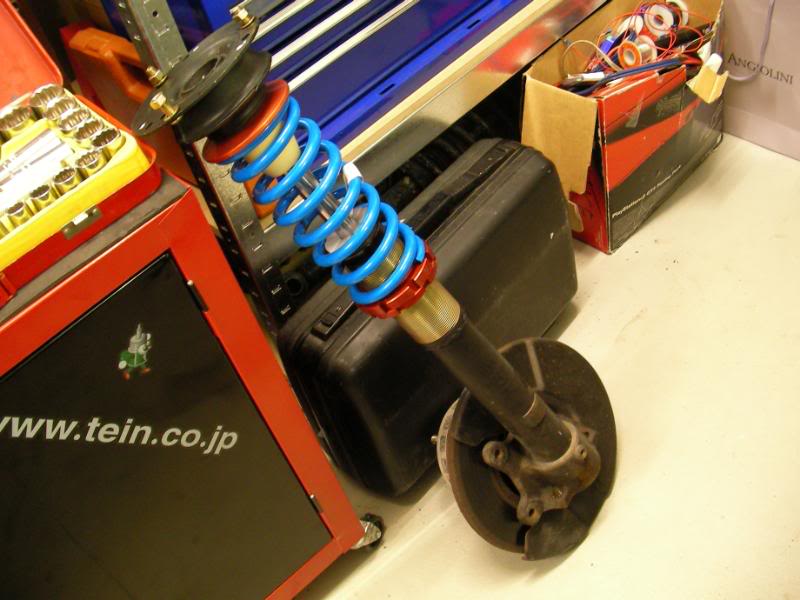
The quite clever thing is that they found that an oem strut top mount from a 1991 Australian GM sedan called the Commodore was a bolt in fit for the Hakosuka.
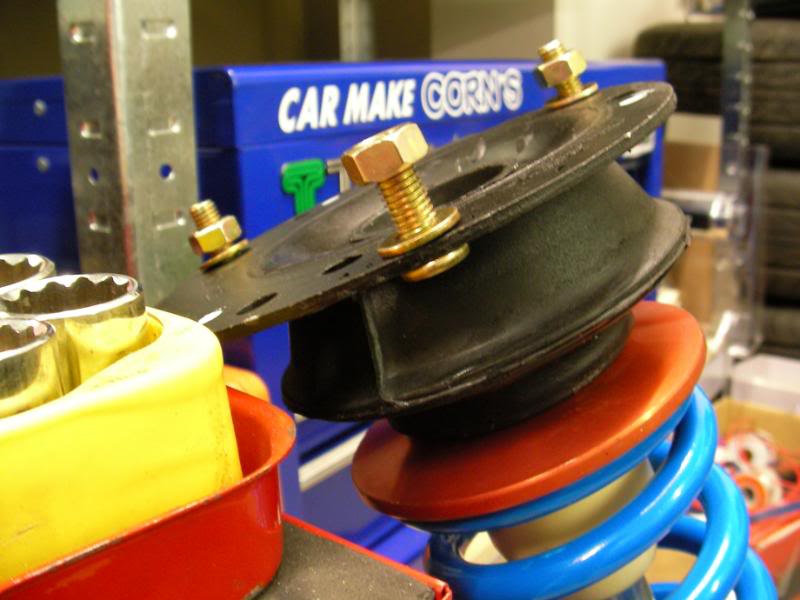
It’s a stock-style rubber isolated mount, which will be kinder on the near 4 decade old bodyshell and being GM, a brand new one was dirt cheap. It was also offset for additional castor and camber. And while I really like the idea of this, I think it’s a bit too thick, you can see that the red spring hat is over two inches below the strut top and this eats into valuable shock travel. We shall see, but I suspect that I may have to swap the GM tops for Cusco camber tops, which are less than half as thick. This will retain shock travel if I want to run a low ride height.
But I have to admit….it does bolt up perfectly like it was designed for the car. If you look closely you can see that the strut is mounted inwards and back for more aggressive geometry (yay for GM).
But before I could finish up with the suspension, I wanted to renew some of the crusty old rubber suspension bushes….which were on the verge of falling apart.
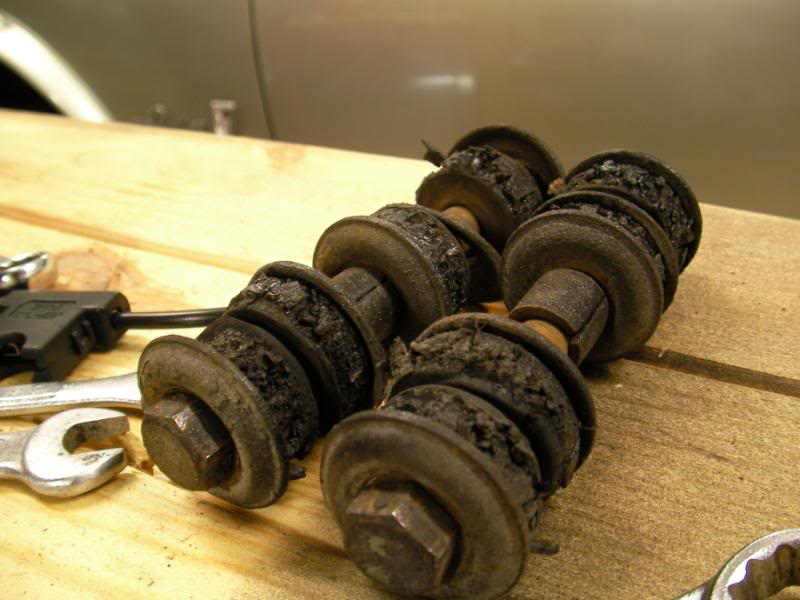
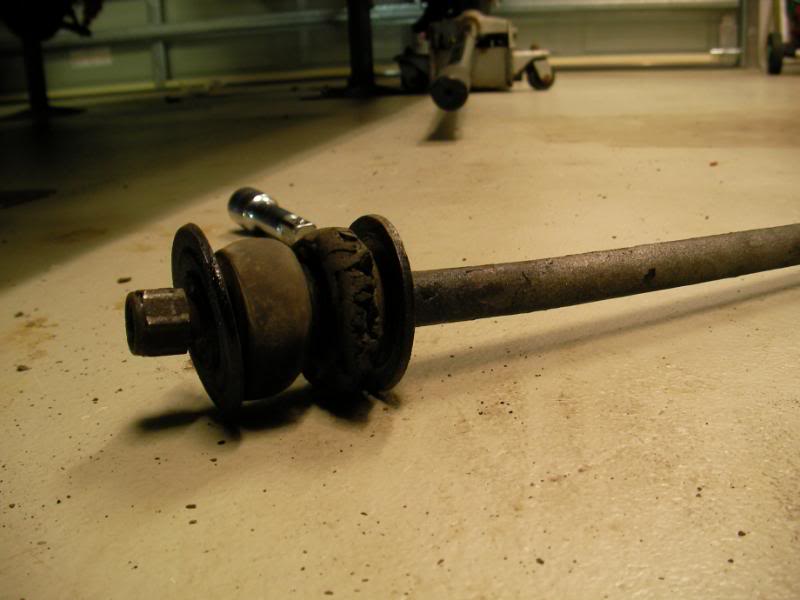
Here’s a completed corner (except for that loose swaybar link!) with new urethane bushes for the sway bar, new rubber bushes for the radius rod, and new grade-8 hi tensile bolts throughout.
And I think you will agree….when we present the car for certification again, a lack of ground clearance (at the front anyway) should not be an issue….behold the Hakosuka in Safari Rally Mode! I think that the clearance all the way under the car is over 10cm, except maybe one exhaust bracket which is a few mm under. Maybe I should over inflate the tyres on the day!
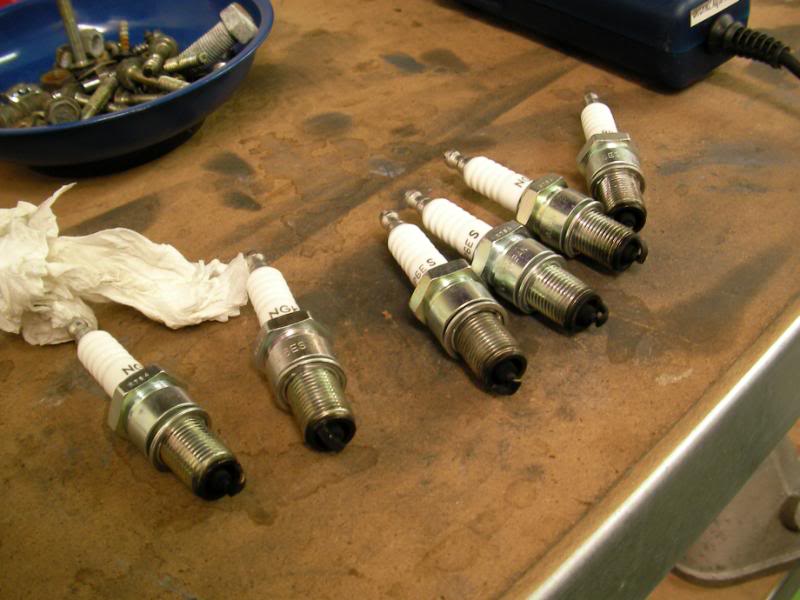
One easy last mod I wanted to do was to upgrade the coil. You guys will know that at low rpm and at idle the engine’s always been a little fluffy, and I thought that might have something to do with the coil, which looked like it was the original low output one that came with the points ignition. Given that the car now has bigger carbs and cam, the engine probably really needed a high output ignition to run well.
So I bought one of these:
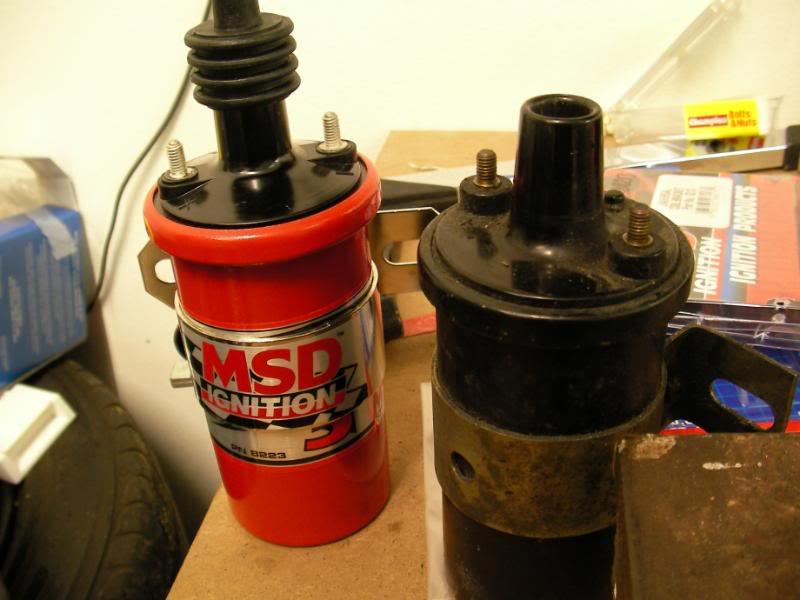
It’s an MSD Blaster3 coil, which should provide a much bigger zap, and so I fitted some new NGK BP6ES-11 spark plugs, which have a 1.1mm gap instead of the 0.8mm gap ones which are recommended for the car.
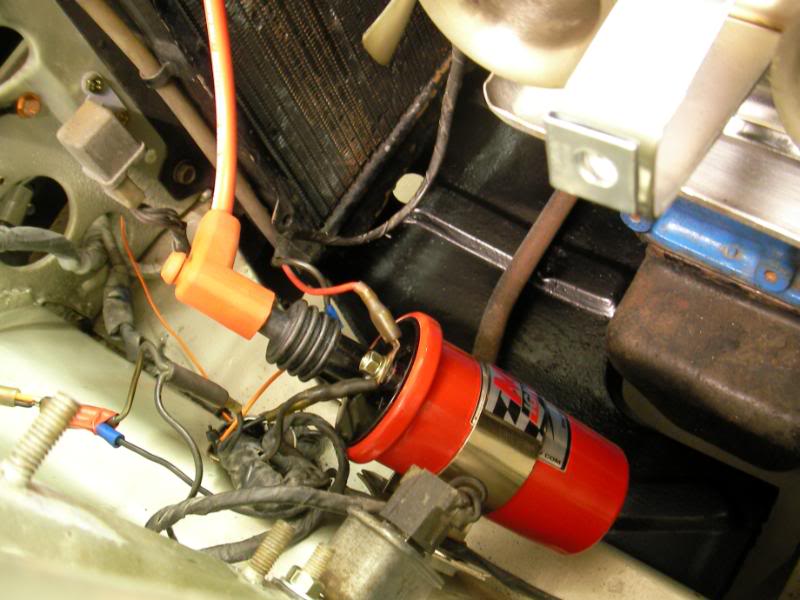
They’re quite easy to install, too. And I have to say, it does discernably start more easily.
[youtube]http://www.youtube.com/watch?v=F8NYjF5foIw[/youtube]
And seems to rev a little more crisply too, but we’ll see if it drives any different.
[youtube]http://www.youtube.com/watch?v=e6aXzPmddIE[/youtube]
But if you think that it’s all going a little bit too easy….well the car had one last surprise ![]()
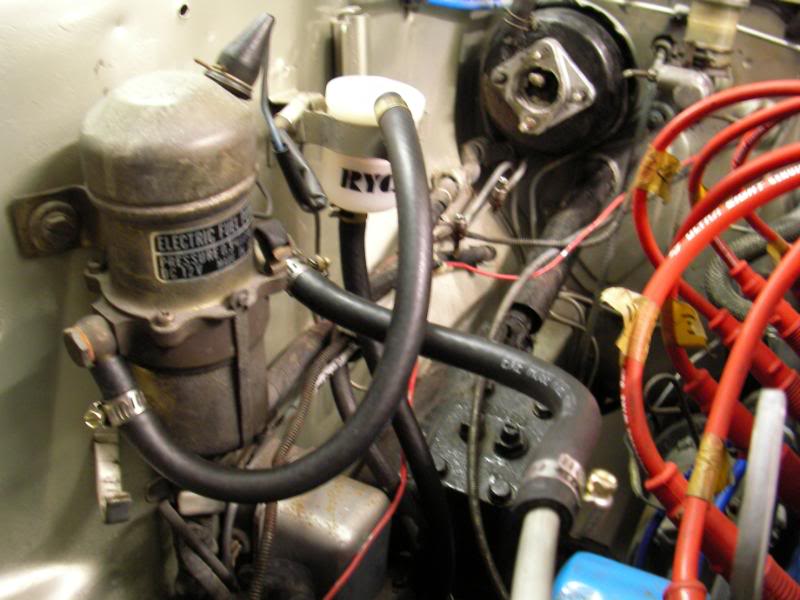
Just as I was putting the car back together, I reinstalled the air horns which I had removed to get access to the coil. And the car wouldn’t start. Unplug the horns….and the car will start. Oh dear….not electrical problems again. Anyway, the culprit was obvious once I took a close look at the wiring. The -ve terminal at the coil had two black wires attached to it. One went to the electronic distributor black box, as you would expect. The other black wire…went into a connector, which went into another connector…which went to the +ve feed for the air horns. Um….what?
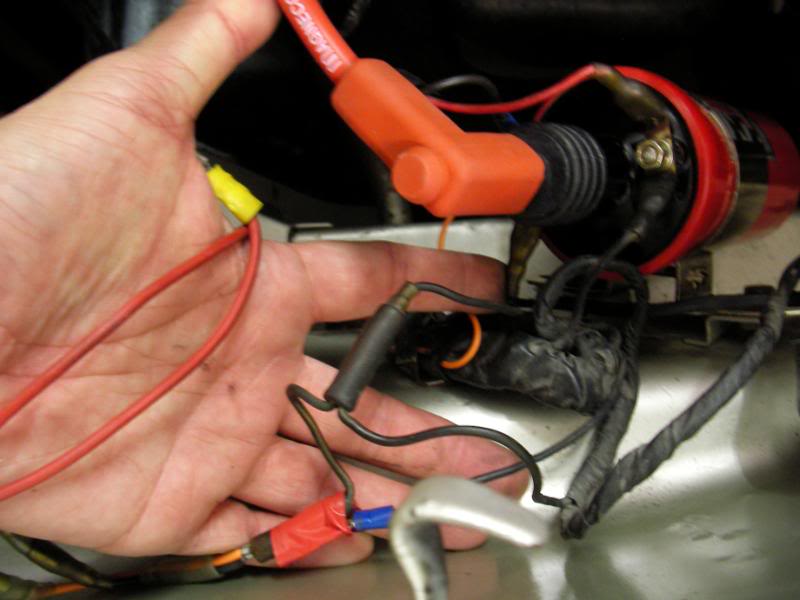
When I got the car, the horns were disconnected, which is why the car ran. However, re-connecting the air horns means the car doesn’t start.
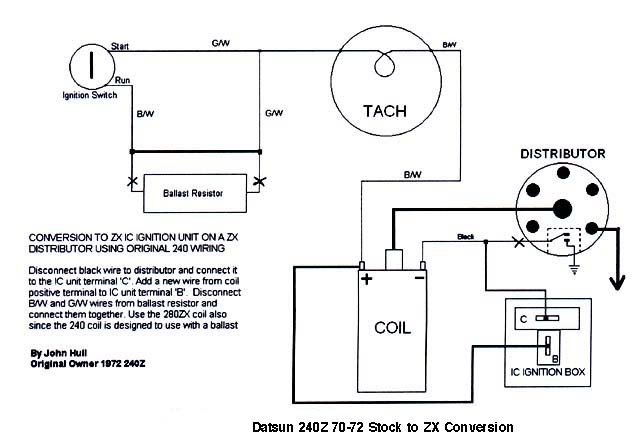
The conversion to electronic ignition was done by a prior owner in Japan, so I thought it would be best to retrace those steps, and I started with the excellent DIY instructions at the Atlantic Z Car Club site. Their excellent tech tips section had this diagram which clearly shows that when you convert the old Nissan points ignition to 280ZX electronic, there is only meant to be ONE black wire attached to the -ve coil terminal, not two.
So I disconnected that second black wire that went to the horns….and voila! We have horns, and the car starts (at the same time even!).
Damn…this car really won’t let me go easy….but I am glad to say that everything is now in order, and I’ll give the engineer a call tomorrow and make an appointment for certification. Hopefully we get through this time!
12 April 2008:
Well as it turns out I did take the car out for a drive yesterday. I needed to get a weighbridge ticket before presenting the car for engo again, and the weight was 1,135kg.
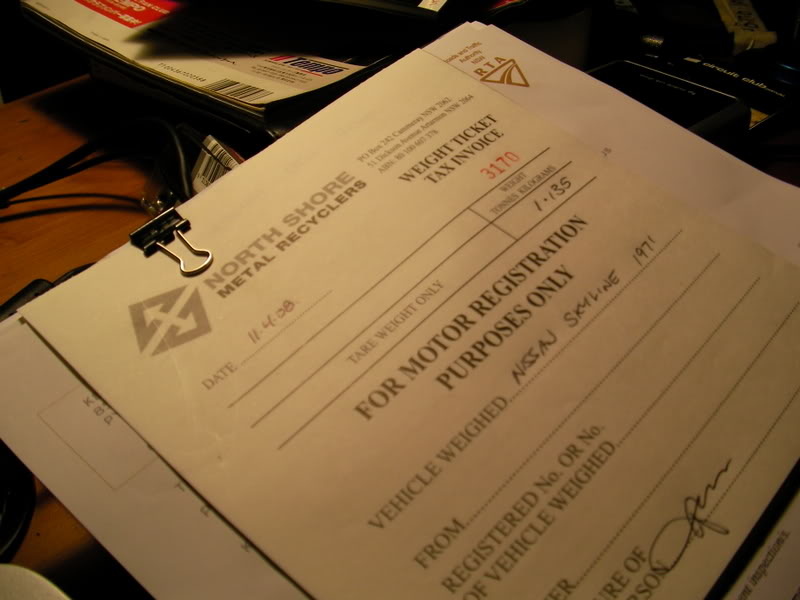
That was with the spare wheel in, and also my “get you home” box of stuff which includes my socket set, roll of spanners, 5L of oil and water, etc. So that lot probably weighs about 30 odd kgs or so.
It was funny to drive the car again. The braking issue is gone, it now has a normal pedal feel although you do need to give it more of a stomp than you do in a modern car. The front suspension is terrific, just perfect but the rear is now the weak link, bouncing off its bumpstops and not being terribly well controlled by the old KYB shocks.
But now that I wasn’t constantly worried about the suspension and brakes, I could think about the engine a bit more….and something doesn’t feel right. It’s something like say failing spark or wrong cam timing or something like that. Squeeze the throttle from a standstill and it picks up cleanly and feels strong, and then all of a sudden it’s like someone pulled on the handbrake…you need to give it a lot of throttle to get it really going and even in the upper rpm it doesn’t quite feel right…I think after it’s rego’d a priority will be to drop the car off at Stewart Wilkins Racing and let them shake the bugs out of the motor. It feels like it really, really wants to run but something’s holding it back.
So tonight I thought I’d fit the Kameari racing distributor, see if maybe the ageing 280ZX ignition system might be causing an issue…..but hit a bit of a snag.
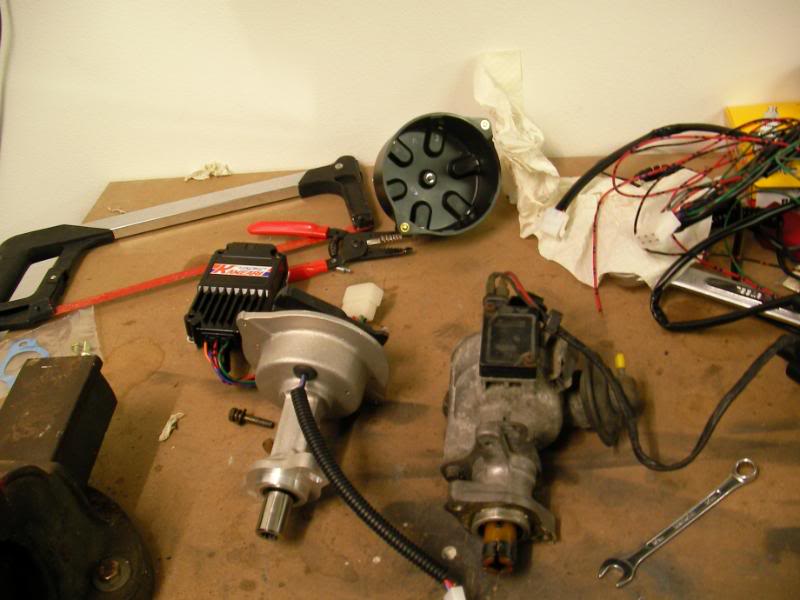
I think I might have a bit of an issue fitting the Kameari one though, the female coupling thingy on the Kameari one is 10mm, whereas the 280ZX one is 12mm.
The dizzy shaft is 12mm so the Kameari one won’t fit…hmm….I’ll have to send off some emails and get the lowdown of what I’m supposed to do.
So it looks like I’ll be using the 280ZX dizzy for the time being. The electric module earths thru the dizzy body itself….heavy corrosion.
(Edit: it turns out that in order to use the Kameari distributor, I need to either buy the billet distributor driveshaft from Kameari, or buy the oem shaft from the later L-series block.)
Tidied up the corrosion until the metal was shiny, then a smear of dielectric grease all over.
Hopefully it works better than before.
12 April 08
The search for lost hp continues ![]()
Since the Kameari install fizzled out, I thought I might as well check the plug leads. The ones that came with the car are really nice Ultra leads, with fancy terminals and a feel of good quality…they really “click” into position positively and well…they’re JDM ![]()
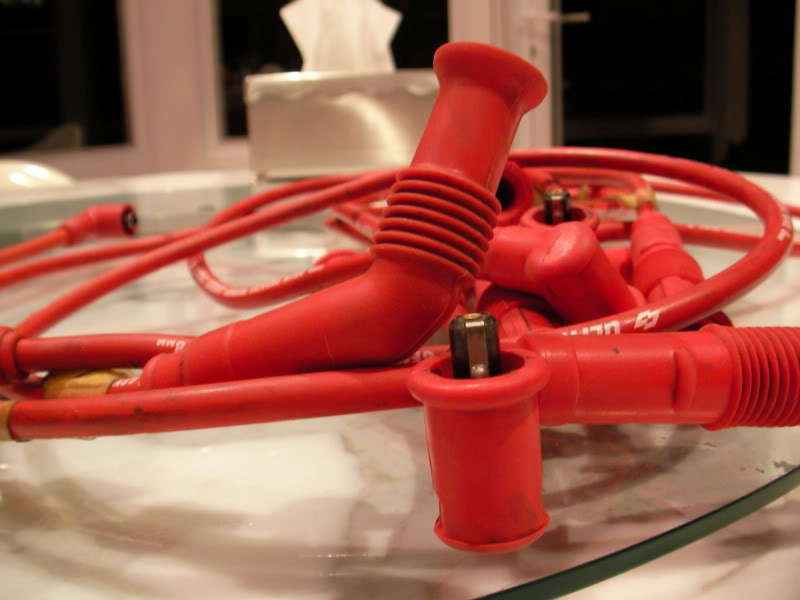
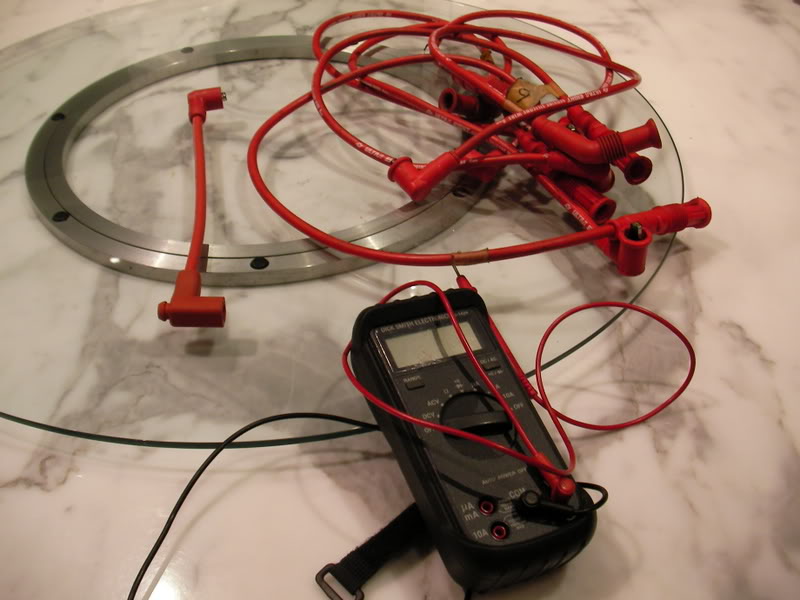
But when I tested the resistance…whoops. 4 of them were from 4-7 kohms but two of them were 45 and 69 kohms. They’re easy to test, just set your multimeter to ohm, and touch both ends of the plug lead. To give you an idea, Toyota’s factory manual says leads should be replaced when ohms exceed 25kohm so the two bad ones are really toast. The shorty coil lead is a Magnecor btw which was 1.6kohms (Magnecor ftw obviously), and I got it made last week when I bought the MSD coil.
Looks like I’ll be getting new leads then ![]() Hopefully this is the cause of the poor running and I can collect my free 50hp when I fit new leads
Hopefully this is the cause of the poor running and I can collect my free 50hp when I fit new leads ![]()
14 April 2008
Update!
I went and got some inexpensive $6ea Top Gun leads from the local parts shoppe and fitted them. They all tested to 5.7 kohms so I thought…cool.
The other good news is I went back to the engo and….we *almost* passed. The horn was passed, the seat belts were passed, front ride height was passed and with the air filters in place the exhaust noise was 93.5dB instead of 95.7dB. Passed.
The only issue was that there was insufficient ground clearance where the exhaust goes under the rear cradle. I’d mucked around with the hangers and got it above 10cm, but I think that once I got the car driving, the ride height settled a tiny bit more and so I got stooged by gravity to the tune of 6mm.
Now that the front suspension feels so good the bouncy rear really stands out, so I think I might get some new springs for the rear to give it some more travel. King springs does a pair of rears for the Kenmeri and I believe they’re the same. Might give them a call to see what rate they are etc.
But the engineer was a good sport, he said we could consider the car done, and he’d finalise the report. When I sort out the rear ground clearance, I could drop by to pick up the report and he could quickly have a look to confirm that the rear was high enough.
The other thing is….the engine is still a bit funny. It’s not very fast and in fact if anything since I fitted the MSD coil, new leads, and cleaned up all the connections, etc…it’s gotten worse. I’m thinking maybe the 280ZX dizzy and module is on the way out, so finding a way of fitting the Kameari dizzy is now a priority.
Rego is getting real close….but now the light is shone on the engine. It feels like it would struggle to put out 40rwkw let alone what it should be putting out. If ignition is not the culprit, I think I better look into confirming true TDC and then checking the cam timing.
20 April 2008
To fix the ride height issue at the back, I ended up ordering new springs. Of course, you can’t just rock up to an Australian parts shop and ask for Hakosuka lowering springs so I looked up the spring kits on the Kameari Engine Works website:
http://www.kameariengineworks.co.jp/catalogue-P42.pdf
The milder package they offer for my GC10 Skyline are 5/14 so that’s what I’ve based my setup on. The front coilover springs are already 4.5 so something slightly softer than a 14 would be perfect for the back. Also it’s good to note that the Kameari catalog seems to list the same parts for both the Hakosuka and the C110 Kenmeri Skyline (or 240K as it was sold in Australia).
So I ordered some 1 inch lowered springs for the 240K from King Springs. The rate was 12, so my eventual 4.5/12 setup would be pretty close to the Kameari set….the King spring is the yellow one, the red one is the one that came out of the car, so I’m pretty sure it’ll raise the ride height.
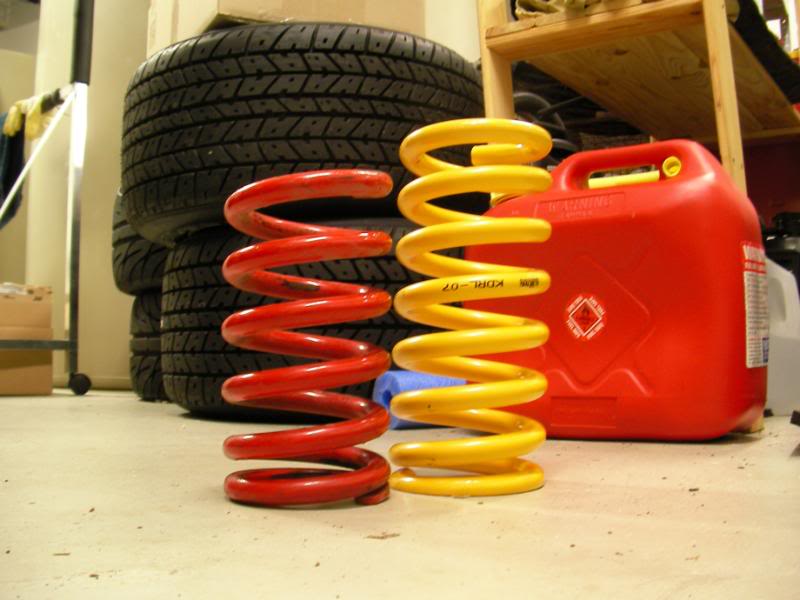
Starting off, you can see that the rear spring is separate from the shock, which makes it quite an easy one to change.
Undo the shock and it doesn’t quite allow the arm to hang down enough to remove the spring….
But unbolt the driveshaft and it sure does.
New spring in place…
And the final ride height!
Before, the lowest part of the exhaust was 9.5cm off the ground, which was 5mm below the limit. The cup of my trolley jack is 11.5cm off the ground, so we now have about 13.5cm of clearance. This is just off the jack and it’ll settle a bit on the first drive, and then settle a bit more as the springs sag over time, but I think I’ll be more than ok for 10cm clearance next week.
That’s it…the engineer will have no reason not to pass us now!
20 April 2008
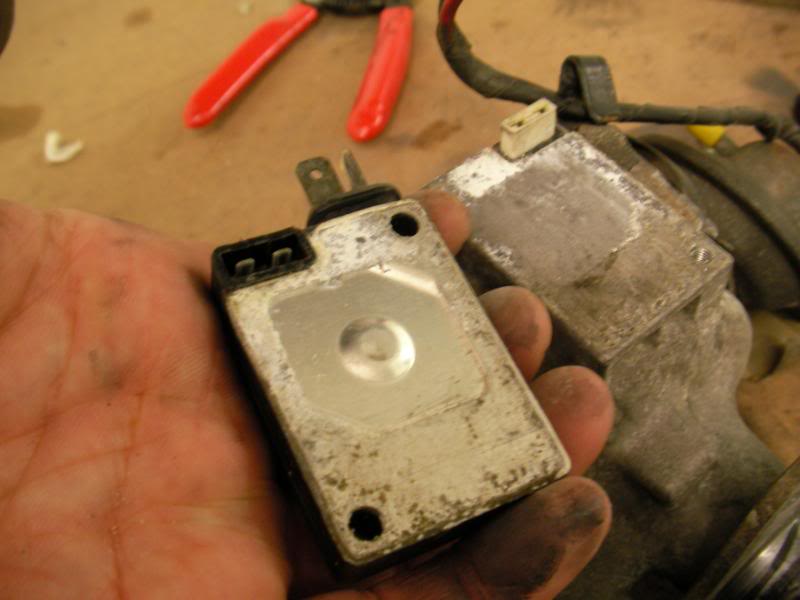
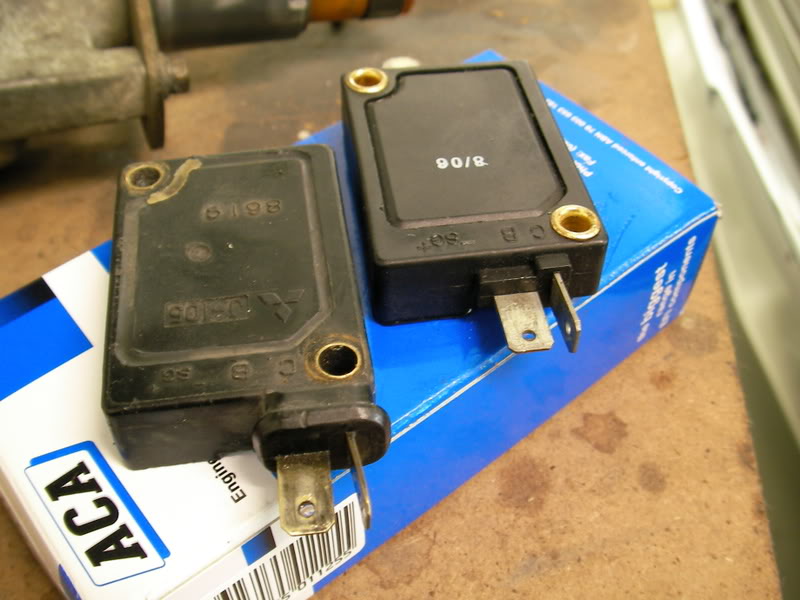
I figured I’d replace the ignition module, since the engine seemed to run worse after I fitted the hotter coil. It could be on its last legs and can’t handle the extra current of the MSD coil, and it wasn’t expensive to replace.
Turns out I don’t have a 280ZX dizzy after all, but a dizzy from a 1978 JDM C210 Skyline Japan.
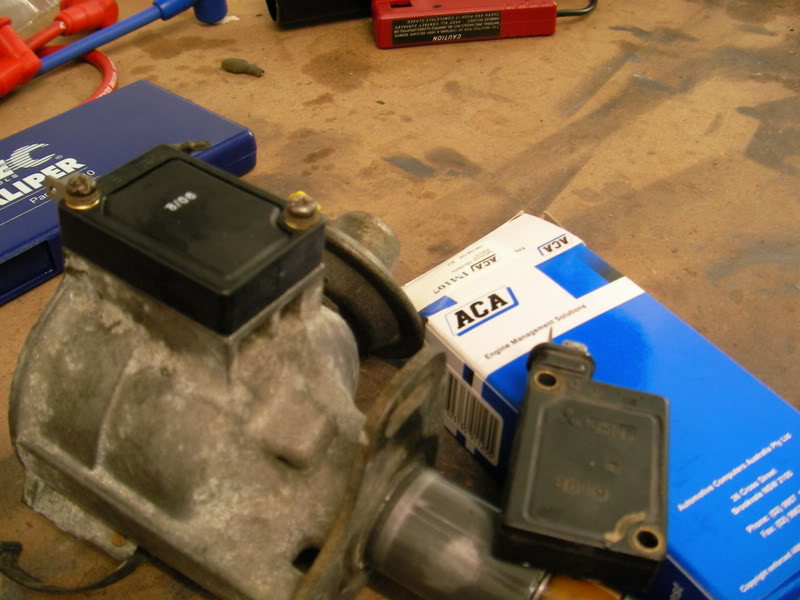
The Aussie Skyline of that era seems to have points, so it took some searching to figure out which module would fit. Helpfully the module has the Mitsubishi logo on it and the pictorial catalog of electronic parts at the local parts shop confirmed that it was the same module as used on electronic dizzies on early 80s Mitsubishi Colts and Sigmas.
But here’s an interesting thing I only just noticed. The dizzy is quite slow to advance. Check out this vid:
[youtube]http://www.youtube.com/watch?v=YVDeDyEaxU0 [/youtube]
Base timing is 15 degrees which equates to 32 degrees max. But you can hear that it doesn’t start to advance (in fact it retards 2-3 degrees initially!) until about 2800rpm then it goes all-in in one spurt.
This might explain why it runs so badly at low rpm, it should start to advance the ignition smoothly as you increase rpm, with total ignition advance reached at about 3000rpm. The current distributor seems to not start advancing until its at about 2500rpm. Very possibly this is the culprit to the poor running, maybe the advance mechanism just needs some crud cleaned out of it or something….
Okay…had a quick look under the rocker cover. One of the possible causes of the poor running I thought was maybe that the cam timing was out…
First step is to get TDC (Top Dead Centre) is on the crank pulley….that’s when #1 piston is at the top of its stroke. Sometimes the TDC mark can be quite inaccurate, especially in the case of L-series motors where the outer ring of the crankpulley (where the markings are) is insulated from the inner part of the pulley by a layer of rubber. With age, this rubber can de-bond from the metal and the outer ring can slip…meaning that your TDC mark is now way off.
To check for this, I rocked the crankshaft back and forth with a spanner on the cam bolt, while shining a light thru the #1 plughole and then tried again with a screwdriver thru the plughole (rotating the engine by hand while feeling the piston rise and fall). The TDC mark on the crankpulley seemed to be an accurate indicator of when the #1 piston was at the top of its travel.
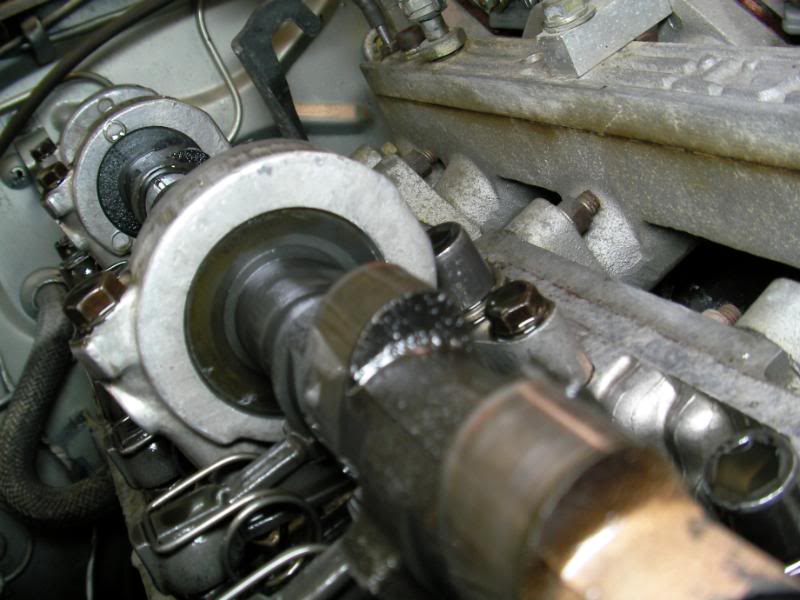
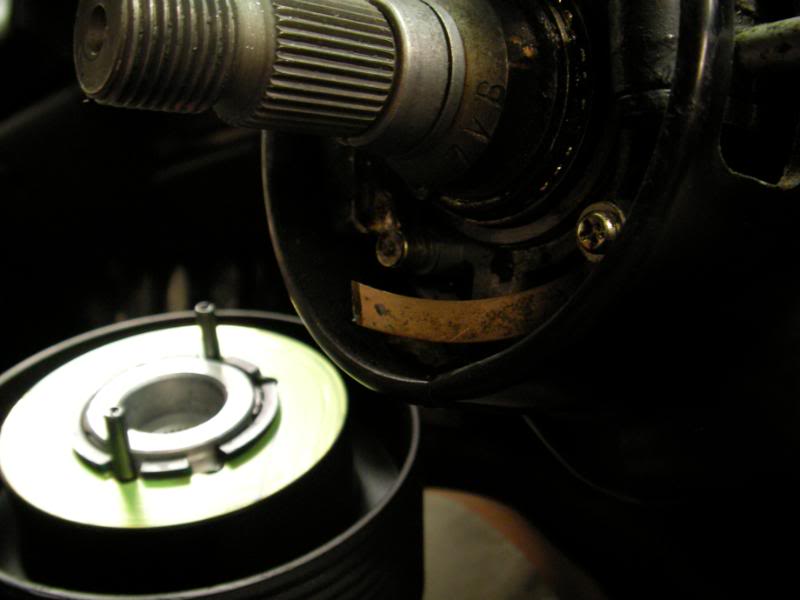
And now that the crank is at the TDC position, check the position of the cam via markings on the cam sprocket.
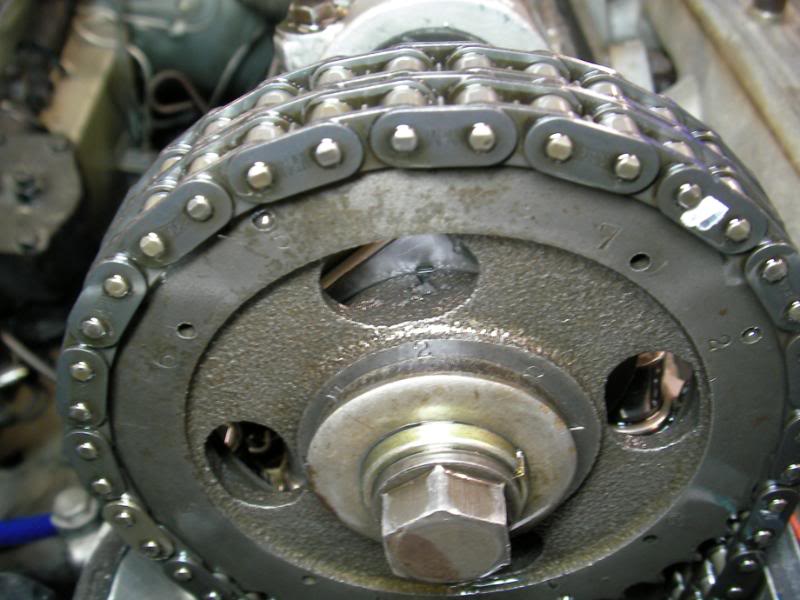
Look closely and you’ll see a triangle on the sprocket, and an oblong groove on the cam tower….it lines up perfectly.
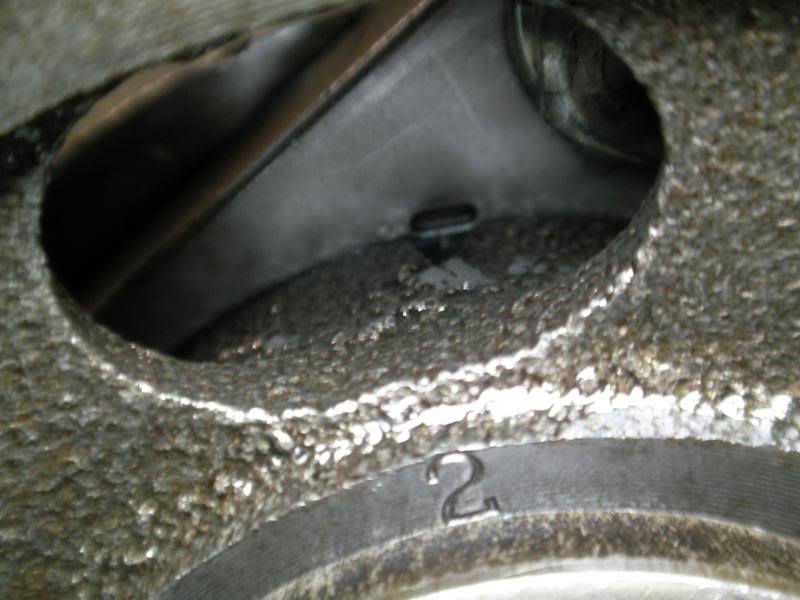
A lot of this is by eye and feel, so this doesn’t actually prove anything really super-accurate, but it does eliminate something really obvious like a cam one tooth out. The sprocket has multiple dowel holes which you can use to compensate for chain stretch but it seems like the adjustmend is on the money because the cam sprocket marks line up real nice.
Being an aftermarket cam (and a big one at that) it’s hard to say what position it’s meant to be relative to the stock cam to run best. But at least for the moment it’s at stock timing, so I would say that the cam timing is probably not the cause of the engine’s issues.
The next likely culprit are carbs…
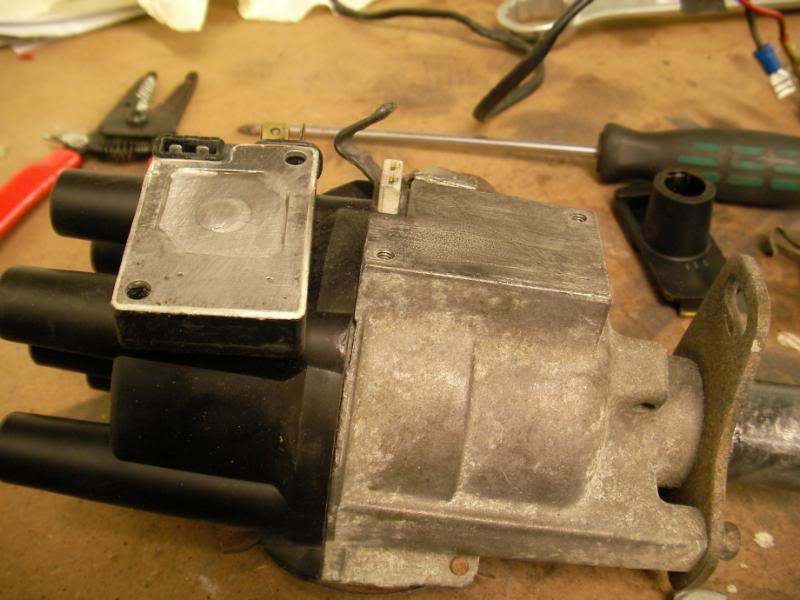
Tonight was dizzy rebuild nite ![]()
First I took off the dizzy and it was pretty grubby inside.
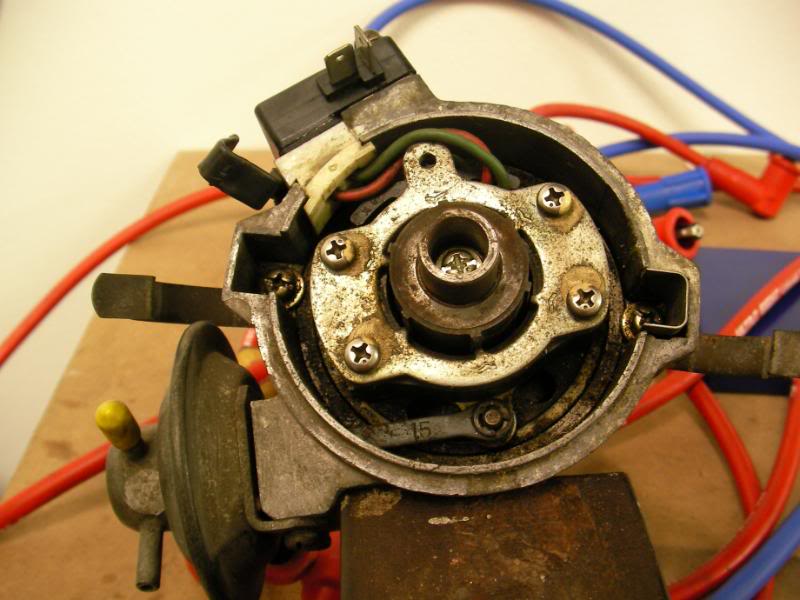
Then I took off the vac advance pot thing, which you have to do to take the top half of the internals out. This is actually disconnected on my car, vacuum advance is mainly a fuel economy and smoothness thing but in general it doesn’t work well with Webers, which don’t provide a strong vacuum signal at low rpm (you can tell by the way it idles so lumpy that it isn’t very efficient at low rpm).
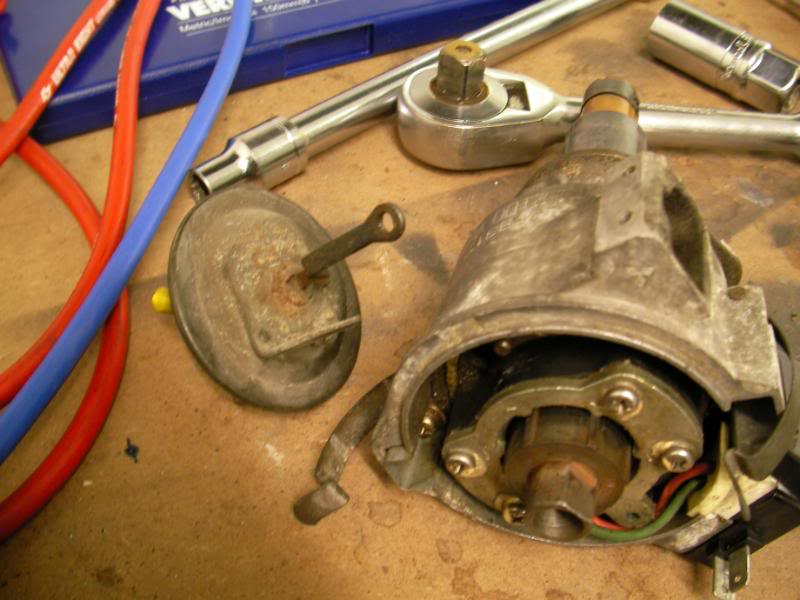
Then you take off the whole vac advance unit, which also is attached to the coil magnet thingy. The way an electronic distributor works is that the middle shaft spins, and as the points of the middle shaft pass points of the star-shaped outer ring (which has a magnet underneath) it creates a magnetic spike. The ignition module (that little black box attached to the side of the dizzy) senses this spike and triggers the MSD coil to fire….current travels up the coil wire, thru the dizzy cap, where the rotor will conduct that current to the appropriate spark plug.
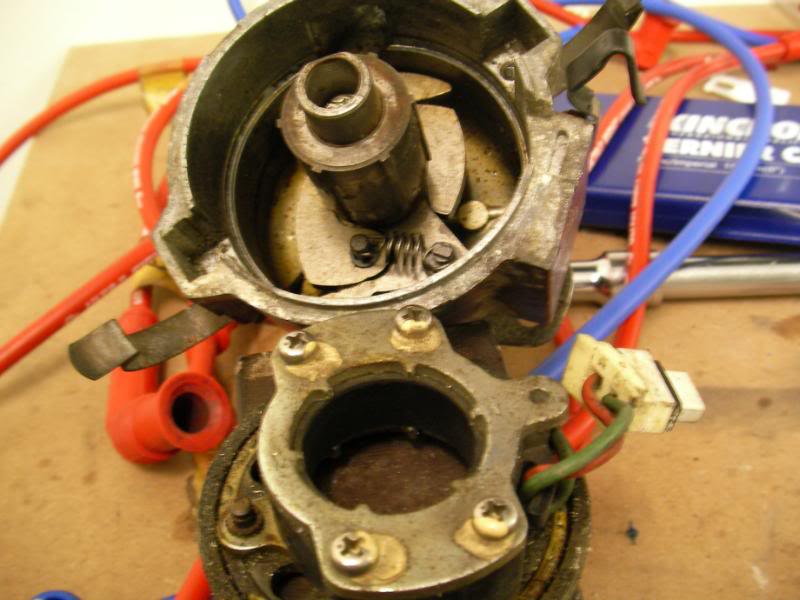
Odd looking advance mechanism….those L-shapes weights fling out with rpm and push the S-shaped advance plate counter clockwise….(thus advancing the ignition firing the spark earlier as revs rise). With Webers it’s a good mod to remove one of the springs so that the advance comes on earlier (you’ll recall from yesterday’s instalment that I was concerned that the advance came on too slow with revs). But someone’s already removed one of the springs in Japan…either that or it just comes with one spring.
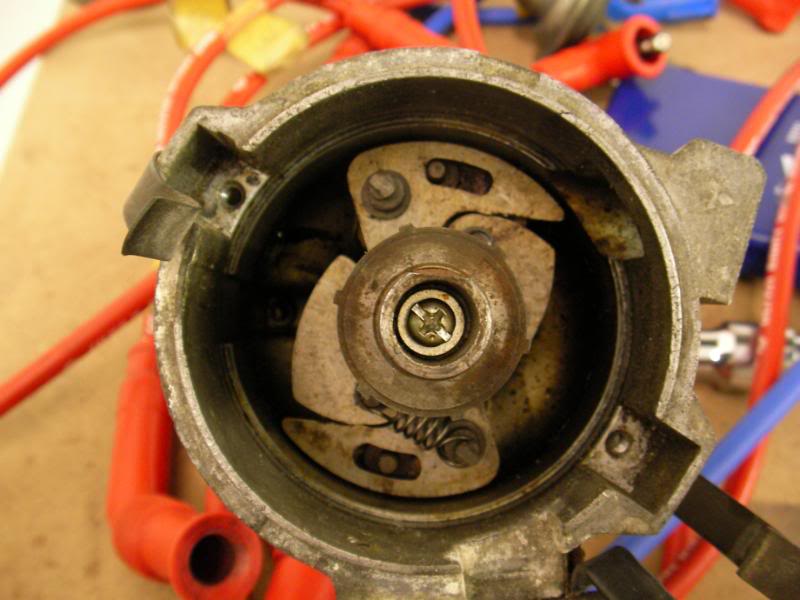
Tap out the spring pin with a punch and gently pull the whole shaft and advance mechanism out.
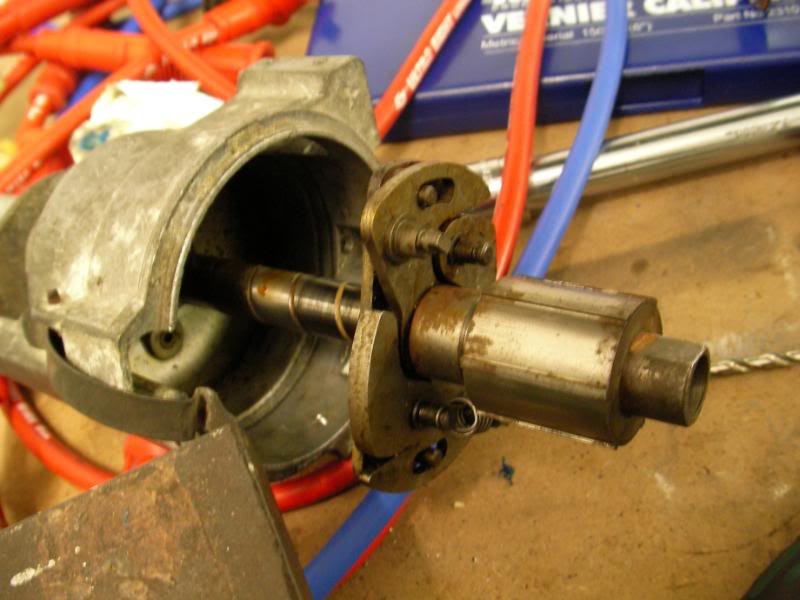
Pretty grubby inside…after the shaft and advance mechanism comes out…there’s nothing left inside the dizzy
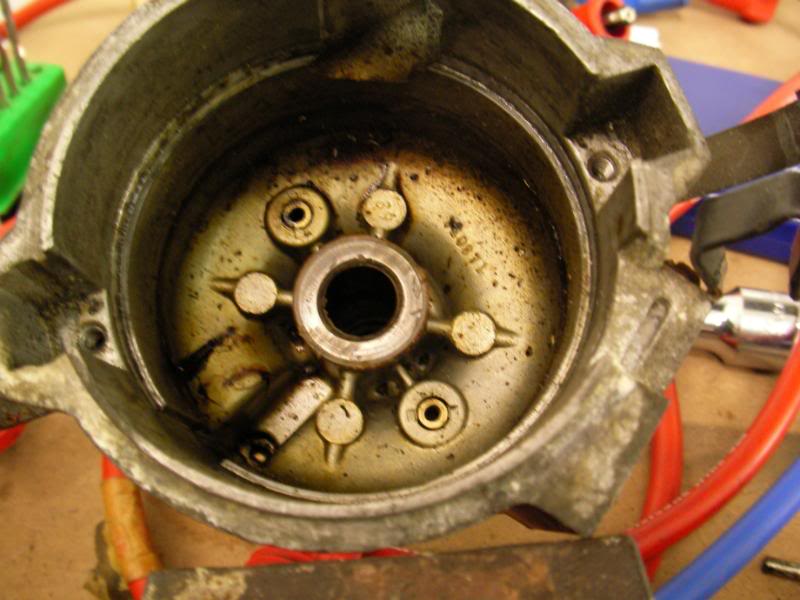
The old grease has long ago dried up and it was all very stiff
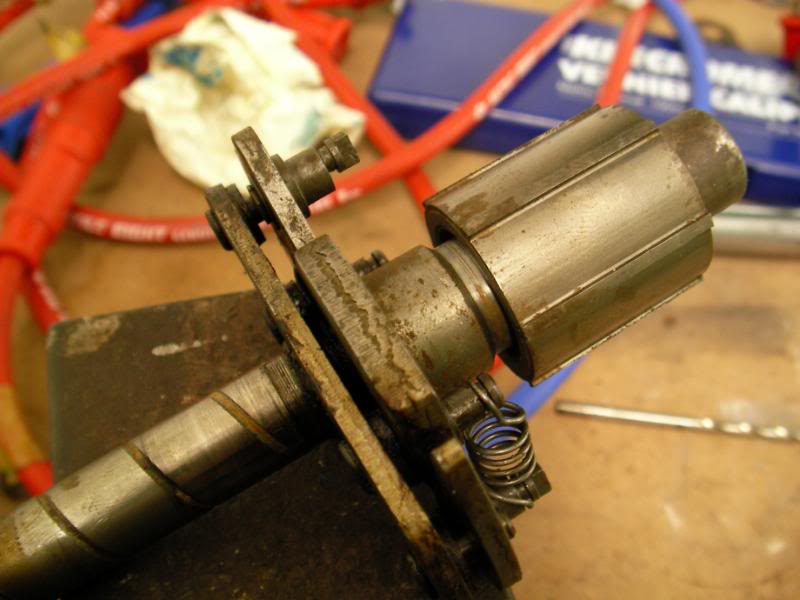
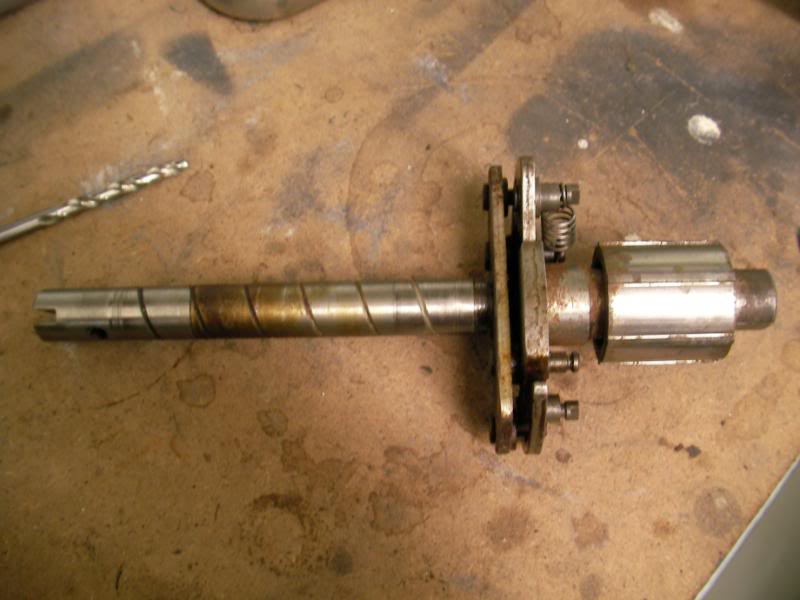
The advance shaft (the top bit) didn’t spin on the main shaft very easily, which it needs to do to be able to advance the timing smoothly…you want the whole mechanism to work like butter

Very crudded up
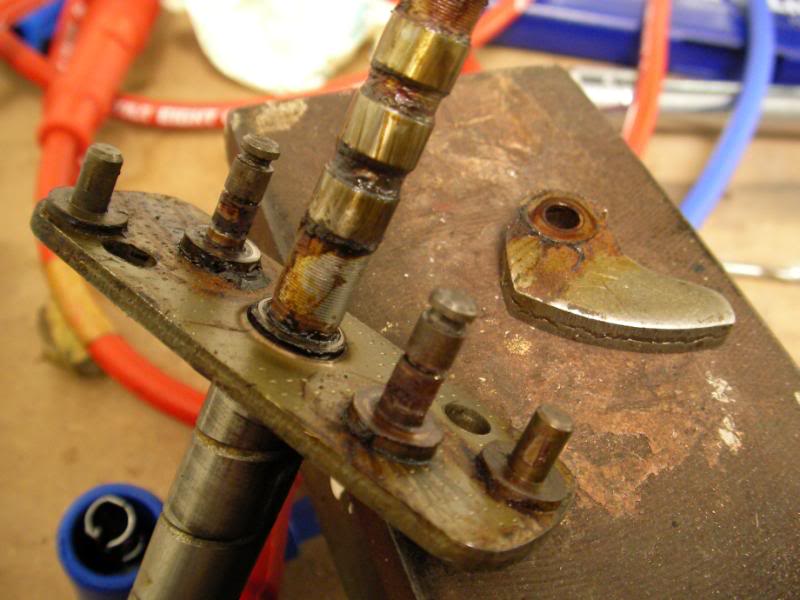
Clean everything with a scotchbrite washing up pad
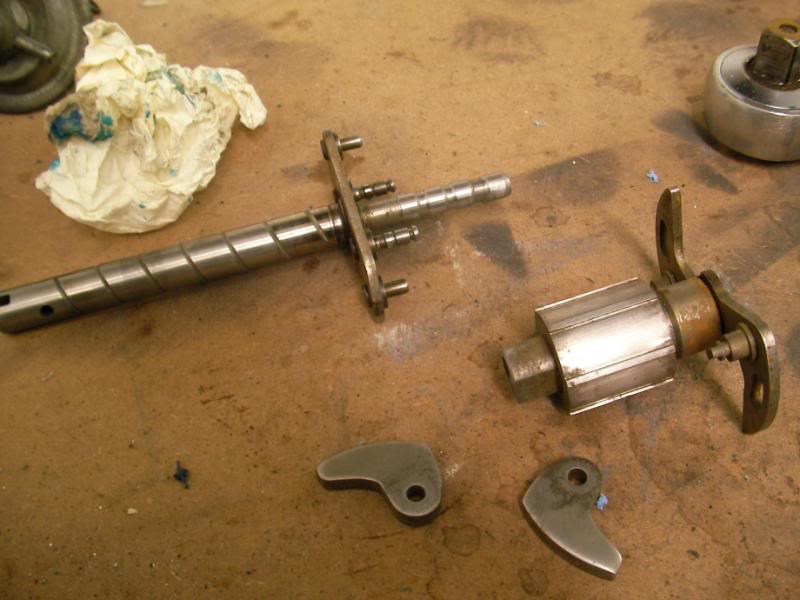
Grease me up woman, I’m going in: after this the advance mechanism was much smoother to turn by hand, in hindsight I think it was quite notchy before:
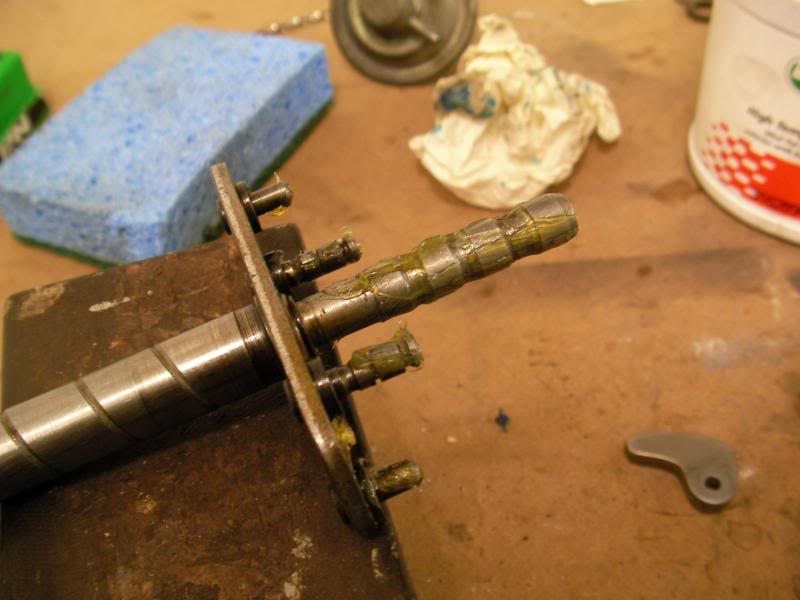
Reassemble…

Bung back in the car…
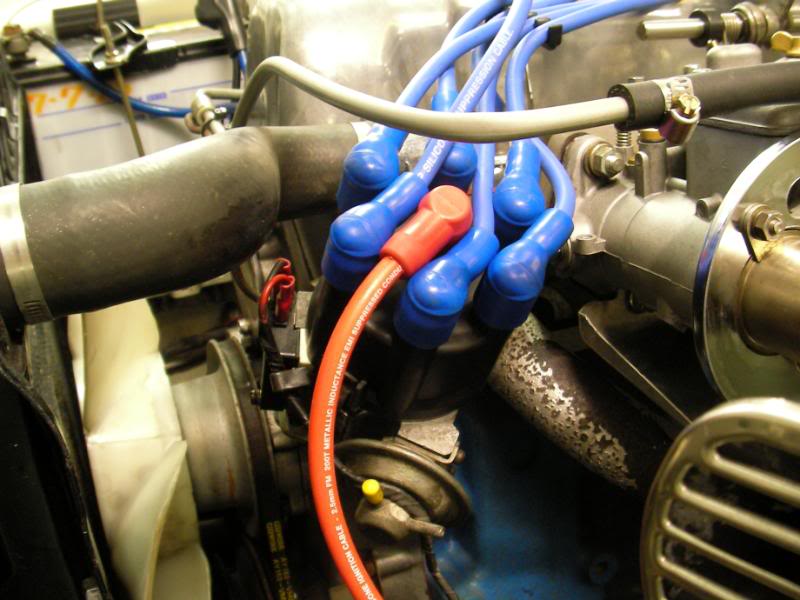
I think it advances a bit smoother…still has that little dead spot just off idle, but it seems to come on earlier.
Before:
[youtube]http://www.youtube.com/watch?v=YVDeDyEaxU0 [/youtube]
After:
[youtube]http://www.youtube.com/watch?v=mfDM_-40xWQ [/youtube]
I’m pretty sure it isn’t my imagination, but it does seem to advance a bit earlier and smoother…not a massive difference but I guess we’ll see when I drive it next.
Well the engo gave me a call this morning, said that he was in the office doing some paperwork and would I like to come by and pick up the certificate? (Is a frog’s ass watertight?)
So, pouring with rain (was a bit nervous driving it in the rain in case there was some major electrical meltdown or something) I drove the car to his workshop and I have to say I think fixing the dizzy has addressed one of engine’s issues, because it’s never driven smoother or better. Heaps less coughing and spitting and very smooth response. It’s not much faster (if at all) which means I think that the dizzy isn’t the root of the power problem.
I cruised at 3500rpm for a few kms and then pulled into a gas station and pulled a plug, which was a very odd panda-colour where parts of the electrode and ceramic were whitish and the rest was jet black. But when I got home, all of the plugs were 100% black.
But the car can be rego’d now, I have all the paperwork and I think next week a dyno run is in order and maybe the carbs are way too rich. I reckon it’s very, very possible it was carbs all along.
But hey….tomorrow I can register it!
30 April 2008
Ok, so I don’t have number plates today ![]()
It turns out that in addition to the engineer’s certificate, I also need a “blue slip” which you get from another type of authorised inspection station.
No worries, I’ll get it sorted next week, and so I got bored tonight and decided to take out my jets ![]()
I didn’t realise before how easy it was to take them out, so when I got the carbs rebuilt I asked the mech to write down the jet sizes for me, and they were: 145mains, 220 air corrector, F11 emulsion tubes, 32mm chokes. Now this may seem to be mumbojumbo but its actually not that hard to understand.
The way I understand it is that the chokes are what determines the airflow into the carb. The chokes are that grey “insert” you see inside the mouth of the carb, and you can see that it’s smaller in diameter than the body of the carb.
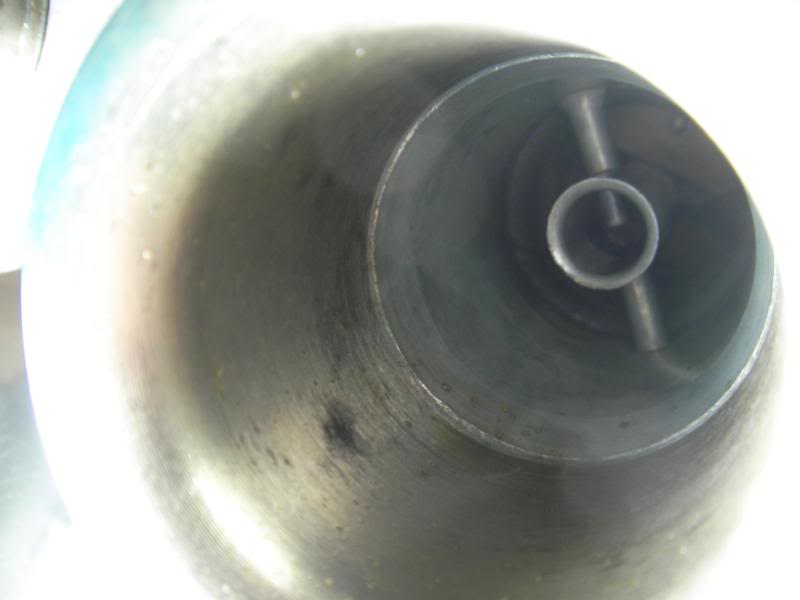
This is deliberate, since the choke is a restriction in the carb, which causes the airflow to speed up, hence drawing/sucking fuel out of the jets (fuel comes out of that little tube in the middle). So my 40DCOE Webers aren’t really the same as 40mm throttle bodies, they are really 32mm throttle bodies.
The choke is an airflow restriction and so the rich/lean fuelling is determined by the ratio of the choke size to mainjet size. The bigger the jets, the more fuel will be sucked out of them. In theory, once you get the jetting right, you shouldn’t need to rejet the carbs for extra mods since the extra mods might suck more air into the engine but the ratio of fuel to air is controlled by the main jet to choke size ratio and so the AFR should remain the same.
Weber recommend that a jet size 4x the choke size is a good starting point when tuning. So for my 32mm chokes I would need 128 jets (but they come in steps of 5, so either 125 or 130 would do). I had 145 mains (or so the carb guy said) which sounded too rich…and given that the car fouls plugs black like it’s going out of style that made sense.
Taking out the jets is pretty easy…remove the round jet inspection cap and just unscrew this long thing (there’s 2 per carb).
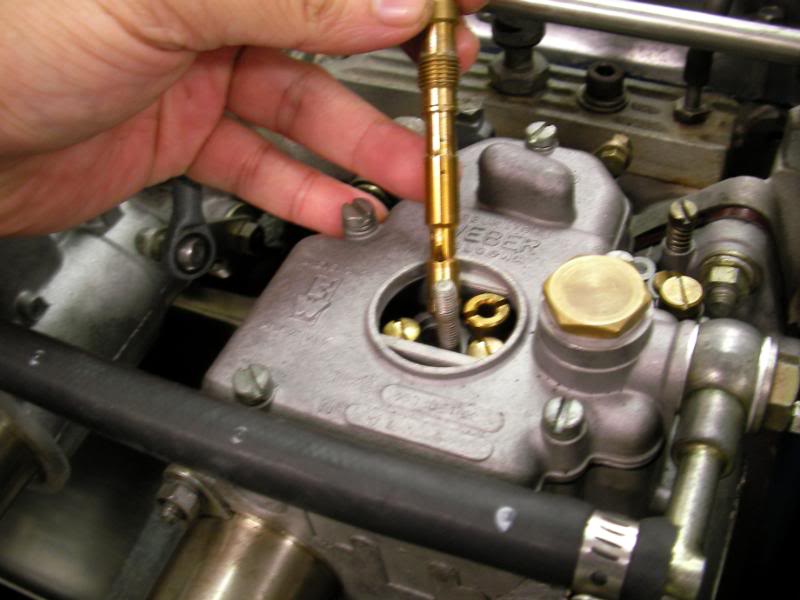
The jet stack then just pulls apart into its component bits (from left to right): main jet, emulsion tube, air corrector and the threaded bit is just a holder for the whole shebang. So it’s pretty easy to swap jets etc, and I guess you have to remember that back in the day before dynos, you would set the jets by swapping sizes, going for a blat in the car and determining if you were rich or lean by pulling a plug and reading the colour. So I suppose Webers were made so that swapping jets is more or less a 5min job you could do by the side of the road.
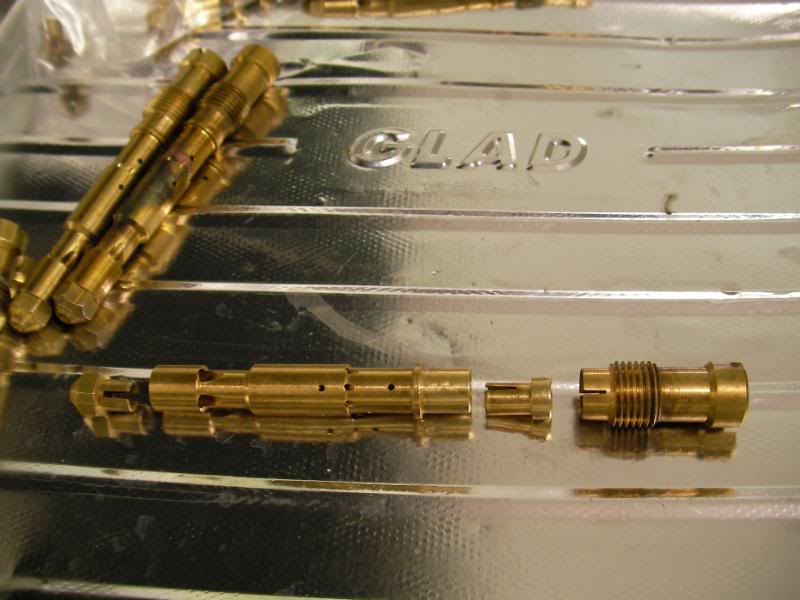
Now here’s the funny thing…on closer inspection…I have a 125 main jet after all….which should be more or less on the money.
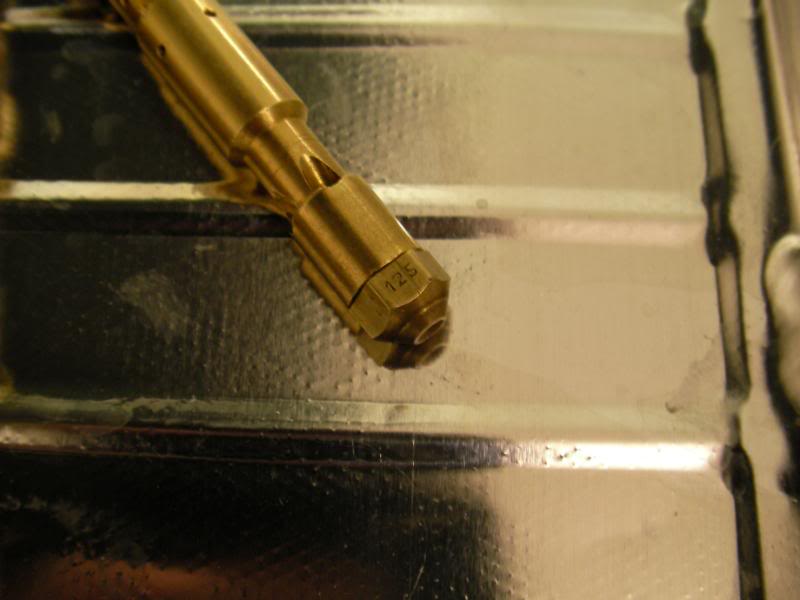
The air correctors are definitely 220 though.
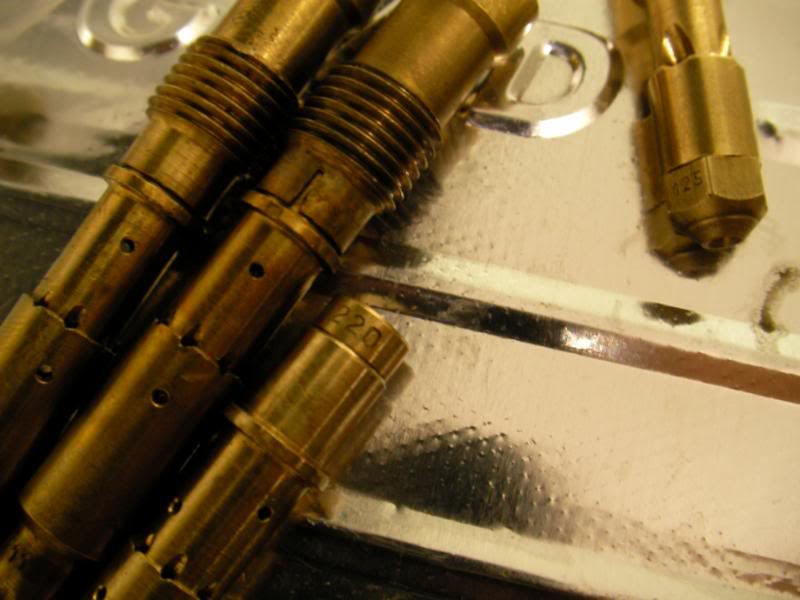
Now as for the correctors. The main jets control fuelling from the midrange upwards, but the corrector adds some air into the fuel to lean things off at the top end. I guess any engine is going to be more efficient at high rpm, so if the fuelling is perfect in the midrange, at the top end it would have so much more airflow/suck that it would pull a proportionately higher amount of fuel thru the jets and hence run rich.
So the corrector adds some air to counteract that…Weber says that for a slogger engine, you would have a corrector size +50 above your mainjet size, and for a screamer race engine you would need more fuel and so it may only be +10. So for my L-series which might have peak power before 6000rpm something like a +50 corrector would be the go, while for say a really worked 9500rpm 4AGE it would be more like +10.
Put this all together and the ideal (or close to it) starting point for my engine should be 125 mains and 175 correctors.
Hence my 220 corrector is very weird and should make the engine fall flat at high rpm (which it does) from extreme lean-ness. But the midrange should be pretty close since it’s the theoretically ideal 125. And at the moment the midrange power is crap.
I wonder why it’s running so rich then…maybe the 125s were redrilled in Japan to a 145 size, which is possible……..or maybe the ideal jet size is something like 115. Weber also says that when you have a big engine and small chokes, you often need smaller jets than the ideal because the big donk will get such a great suck thru the carbs that the main jet will work too well and overfuel, so it’s very possible that the theoretical ideal 125 should be downsized to a 115.
I’ll go see the carb guy and report back.
Ok, the update is that the carb guy goofed when he wrote that the jets were 145 on the invoice He checked them today and they are actually 125, which means that the carb jetting for the midrange and low end anyway should be close to ideal.
After a bit of a chat he suggested two possible things.
One was to use hotter range plugs. I am using BP6ES plugs, and the “6” signifies the heat range and is the “normal” heat range for any modern car you care to name. But he said that old school cars running big carbs often need hotter range plugs for city driving and so maybe I could try 4s or 5s. So I bought a sextet of BP5ES to see if it makes any difference. Hotter plugs mean literally that…the plug surface will have more insulating ceramic to retain more heat and so be hotter…which would burn off excess deposits better. So possibly my carbs aren’t rich, but the plugs were too cold to get rid of excess deposits from fouling.
Suggestion #2 was to reduce the fuel pressure. I have a 4psi fuel pump and the ideal pressure for Webers are 2.5psi. 4psi should be ok, but it’s possible that the pump is overpowering the float needle mechanism in the carbs and causing some minor fuel flooding (which is the same as running mega rich). So I got an adjustable fuel pressure regulator I can try, see if it runs better with less fuel pressure.
2 May 2008
The fuel pressure regulator was a pretty easy install, I just put it inline in the short run between the fuel pump and the hard fuel line that goes around the front of the engine to the carbs.
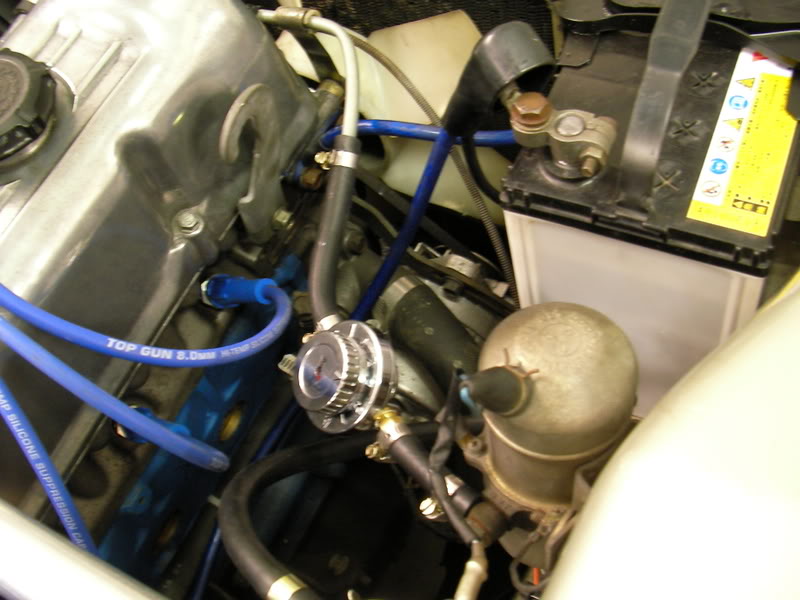
Weber recommends 2.5psi…so 2.5psi it is.
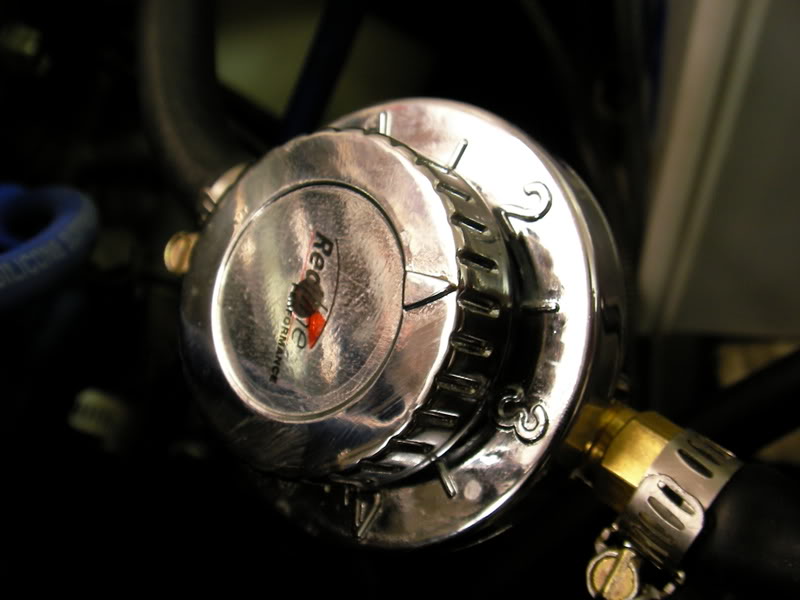
Doesn’t seem to idle much differently, although I did give it a 1/4 turn more lean on the idle screws and it seemed to like it.
The only changes are the richer 175 air correctors and the lower fuel press. The air correctors should only have any effect at the very top end of the revrange, so if it drives better at low rpm then excessive fuel pressure would have been the culprit all along.
I guess we’ll see if it’s any different when I get to drive it next.
2 May 2008
Ok, I got to drive the car this morning to drop it off for the blue slip, and with the lower fuel pressure it definitely does drive better. Plug colour is better too. This pic is after holding it at 4000rpm for a bit, so maybe it might want even more fuel up top than the 175 correctors
(Before vs after)
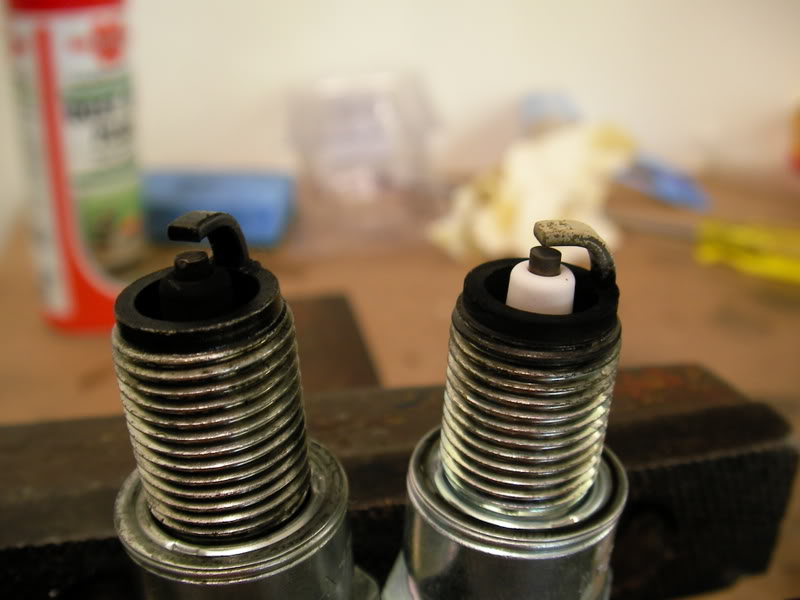
It’s still a little “funny” and fluffy but the richer jetting has opened up the top end quite a bit…the plug on the right is still a bit whitish which is a sign of high combustion chamber heat so maybe it might need to be a touch richer…
But even if you say hold it at 4000rpm and then crack the throttle open a bit it responds cleanly for an eyeblink then goes “brrrr” and you can feel it fighting itself a bit. But it is faster…not torquey and easy like you would expect a near 3L engine in a car that weighs 40kg more than an MX5, so still there is something wrong.
I did verify that the stock timing marks lined up but maybe the cam needs to be properly degreed or maybe it is just a piece of crap cam.
Bad news about the blue slip tho. There were a few little things like indicator and number plate lightbulbs that mysteriously died since the last time I checked them, and the left rear drumbrake was binding a bit (might have to change that wheel cylinder after all) but two things are a bit more serious.
One is that the heater matrix must have been leaking at one point, because the pass side floorpan has a few pinholes of rust (say the size of a pea). The floor itself seems to be still thick, so I was going to put in a POR15 floor kit or something to fix it later but that has to be plated now. Not a difficult job but it will be a hassle to organise it with someone who has a welder.
The other thing are the coilovers. The new height made the engo happy but the blue slip guy says he needs that coilovers to be separately engineered since they are cut and welded from the stock parts. I’ll be giving the engo a call and see what he says.
Aaaaaargh *throws spanner at car*
6 May 2008
Update! Some bad news actually.
I looked deeper into the floorpan rust issue that got me rejected from the blue slip inspection.
From below, it doesn’t look so bad…to give you a sense of scale, the circular drain hole is about the size of a 20c piece. So the section peppered with little holes is about 12in long.
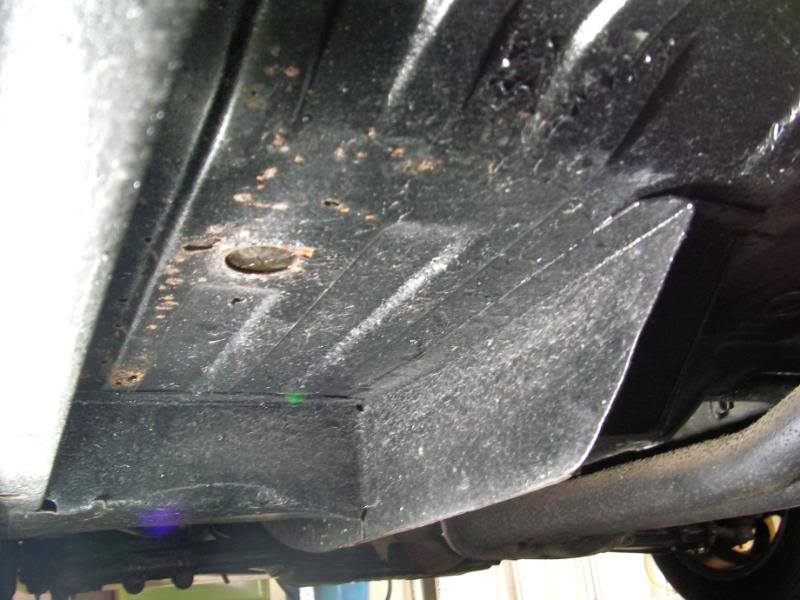
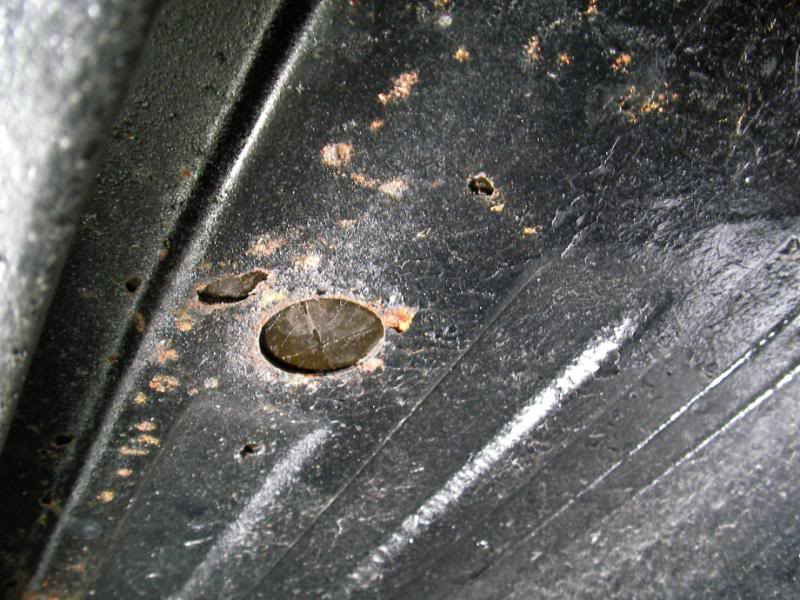
From the top, the JDM guys that restored the car a few yrs ago chipped away the stock sound deadener and then laid down some new sound deadening mat, which as you can see didn’t stick down very well and whole sections of it peeled off quite easily.
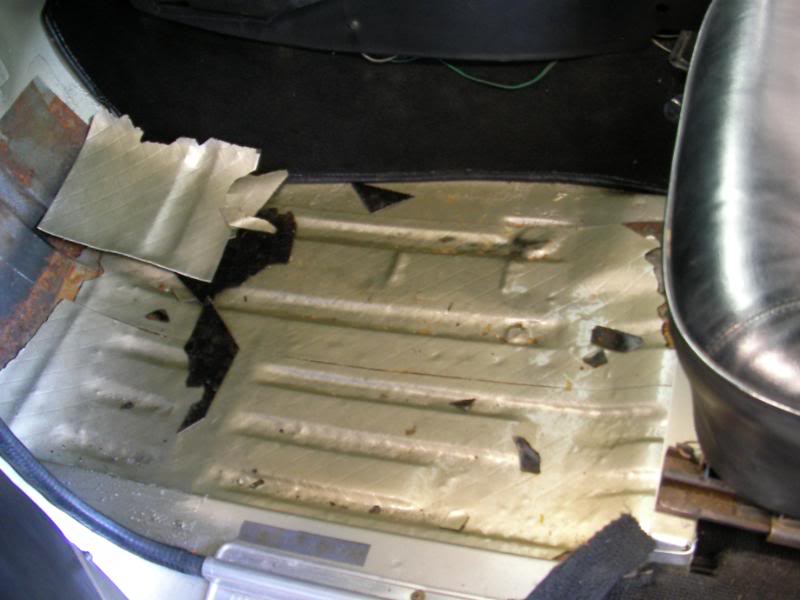
…which meant that the mat acted as a water trap for any water leaking from inside the car, or from under the car (since they didn’t put back all of the floor plugs)
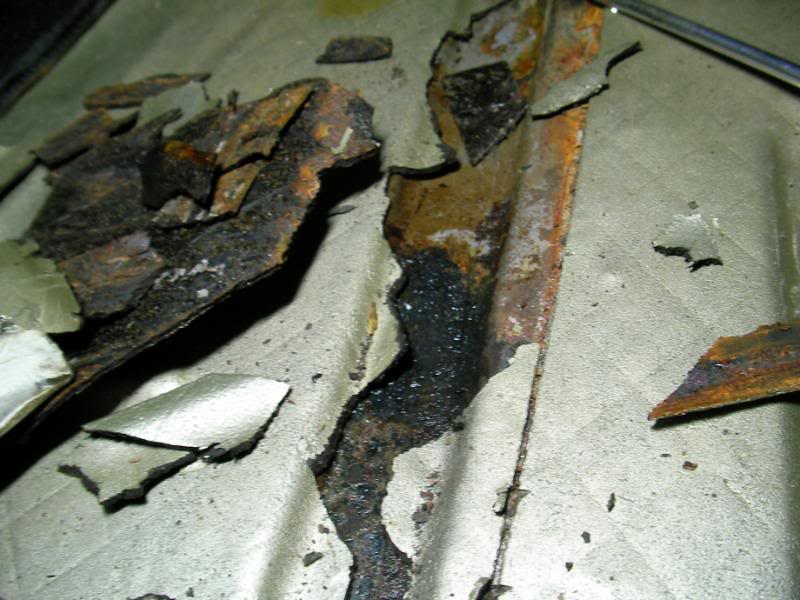
And since they didn’t paint or rustproof the floor (denuded raw unpainted steel now that the stock tar mat was gone) before putting on the new mat…it acted as a rust trap. The steel to the left of that big fat ridge running down the middle of the pic is pretty pitted and thinned. But to the right of the ridge the surface of the steel is intact and it’s just got a dusting of surface rust.
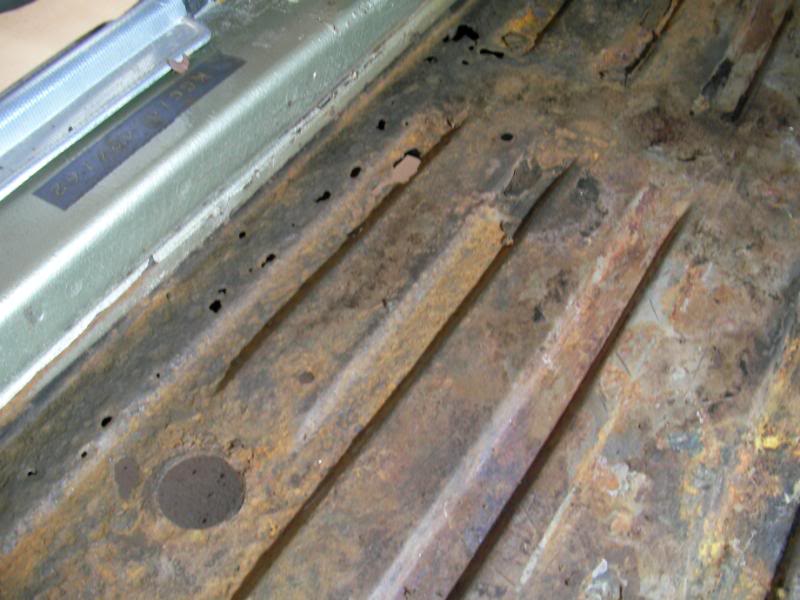
It just boggles the hell out of me how someone in Japan could spend hours and hours chipping away at the stock deadener mat (very thorough job) and yet not be arsed to spend 30mins to paint/rustproof the resulting bare metal before putting down the new mat.
As I chipped off all of the mat, and then scraped the hell out of the floor with a wire brush, the holes got bigger…but again remember that the round hole is a 20c piece, so we’re talking about a 12in x 3in section of the floor. Not that bad…but not that good either.
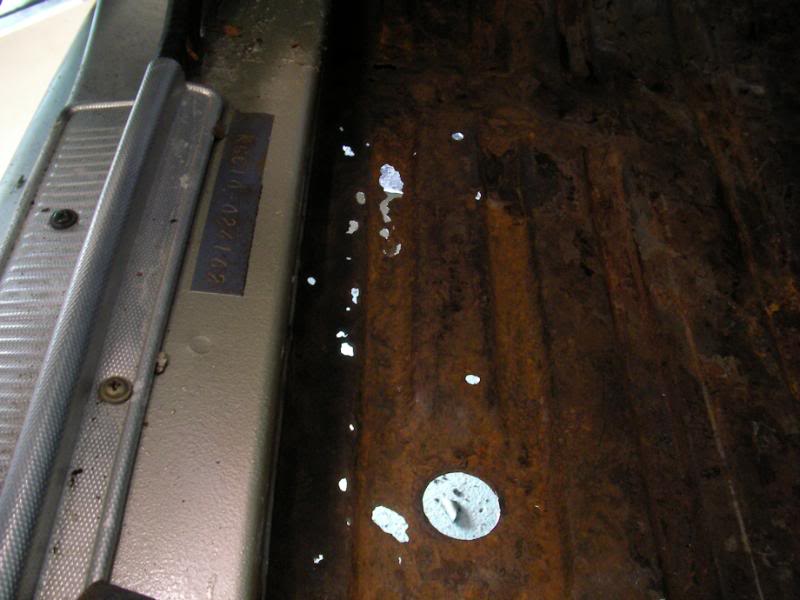
The driver’s side is pretty ok, just these pinholes in this little localised area, and as you can see the surface of the metal is intact and it hasn’t been eaten away and thinned like the outer sections on the other side.
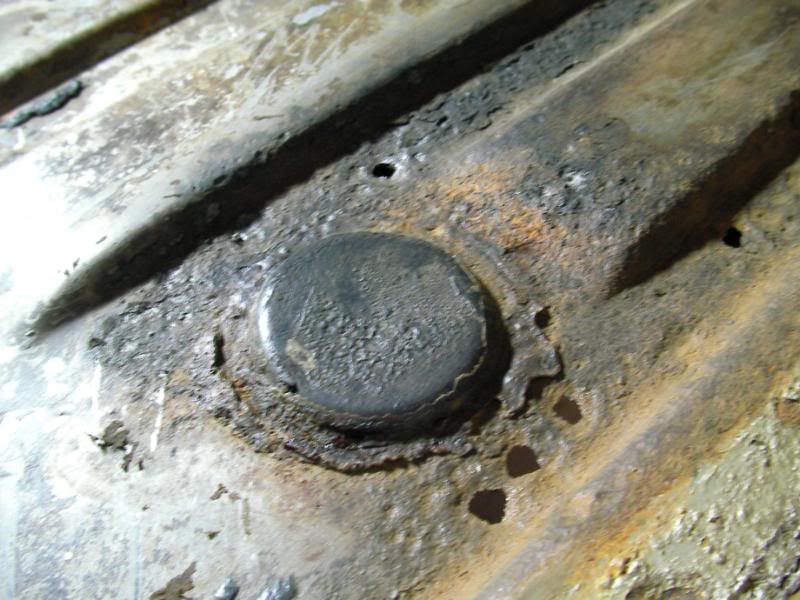
Options at this stage are….fix it myself. Buy a good MIG welder and all the gear, take my time and practice a lot on scrap steel before having a go, cut out the cancerous steel and weld in a fresh new patch.
As someone said to me the other day, I’ve done all the work on the car myself so it’s a shame to outsource it now, and it’s a skill that I’ll build on for the rest of my life. Give a man a fish and you feed him for one meal, teach a man to weld and he’ll be building hot rods from scratch next yr etc etc.
But the Hako is also a pretty rare and special car, and it would be a hella huge shame if I borked it up. Anyone who’s tried will know that normal panelbeaters won’t touch this sort of thing, but my chance I managed to find a small outfit near my house who’s quoted about $750-1000 to sort this all out. They’ll flute the patch panel to try to match the floorpan pattern so that it’s as seamless as possible.
Hmm….choices, choices. And while I love the idea of leaning how to weld, I think the Hako is a bit too special for me to be experimenting on. And I guess I have saved a bit of money so far by doing it all myself, and a grand is not a high price to pay to get it done once and done right.
So at this stage, Plan B is looking good and the Hako will be dropped off at the panel shop next week when I’m in Japan.
7 May 2008
Tonight I thought I’d sort out the rear brakes. One of the blue slip failure points was that one of the rear brakes was binding quite a lot. Now, when I’ve driven the car, I’ve said before that something feels “wrong”, like maybe the handbrake is on…well in a sense it was!
So up goes the rear of the car, and yes, even with the handbrake off the driver’s side wheel is very, very stiff to turn by hand.
Now the Hako has very 60’s style drum brakes back there, which are manual-adjusting. What you do is that periodically you have to adjust this bolt at the back of the drum. Newer cars have a ratchet mechanism which advances the shoes as they wear automatically.
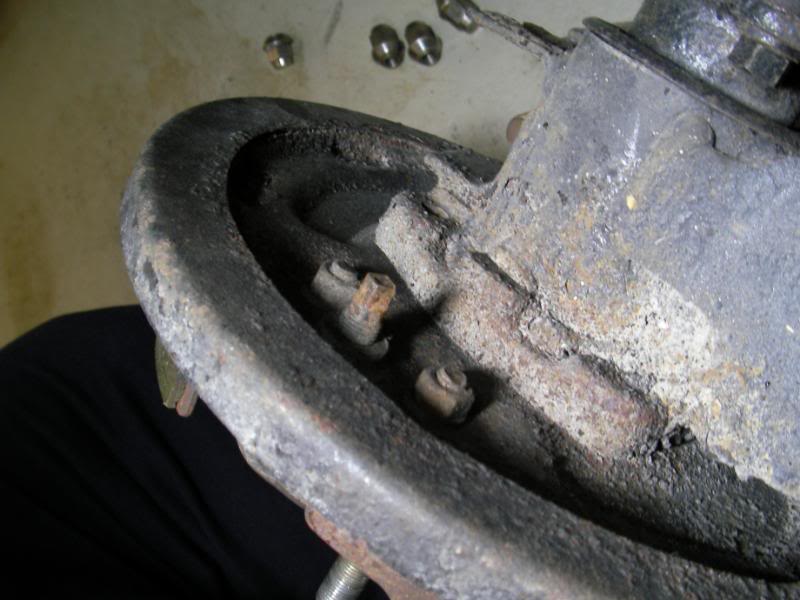
What it does is as you tighten it, it drives a wedge between the brake shoes, which moves them closer to the drum surface. The ideal is that the drum shoes should be lightly touching/scraping the inside of the drum in their resting position, but not so tight that the drum can’t move freely. So what you do is tighten the bolt until the drum locks, then back it off one click. There is a cam on the bolt inside, so it helpfully turns with a definite click, which makes it easy to adjust.
So I back off the adjuster one click, and the drum is still tight. Another click and another click and finally the drum frees up. But when I nipped the handbrake up and down, the drum was frozen again. As I turned the wheel (which was very stiff) you could feel that the wheel would free up, then get tight as you turned it.
Dang. Time for some maintenance….the best diagnostic tool for drum brakes are your ears. As you turn the wheel you should hear the brake shoes make a light scraping noise. If the wheel can move freely, then that means that the drums are well adjusted. An uneven scraping noise means that the inside of the drum is no longer round and has gone oval.
So the first thing to do is to get the drums machined round again at a brake shop.
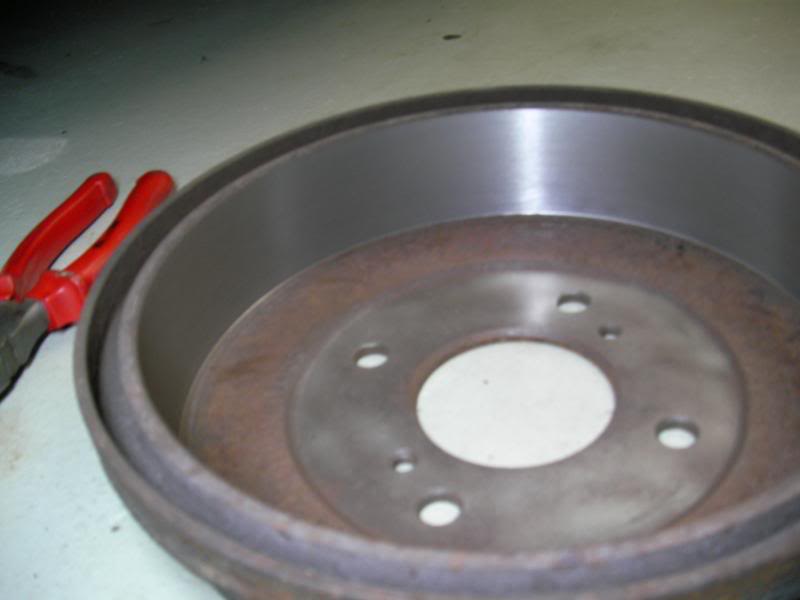
Now the exposed drum. The wheel cylinder is at the bottom, and as you press the brake pedal, a piston pushes the brake shoes apart, to contact the drum. Very strong springs pull the shoes back to a resting position when you release the brake.
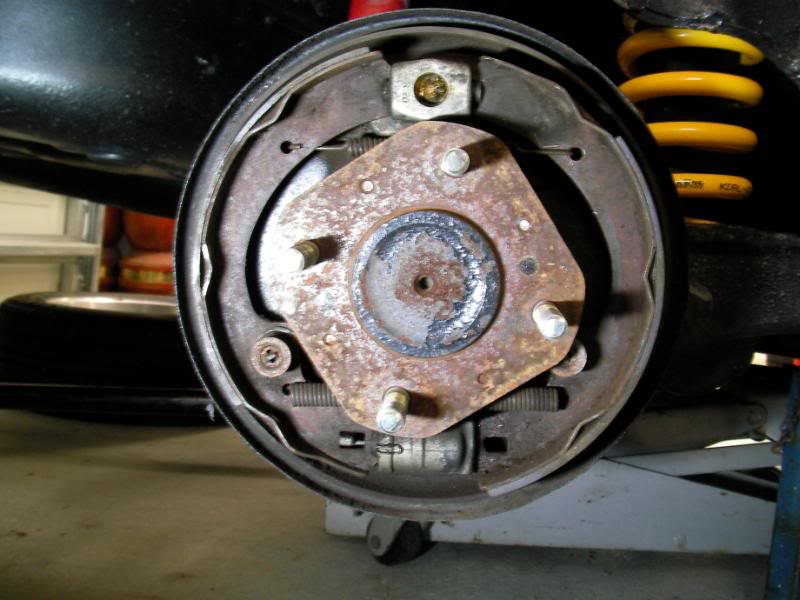
First you remove the steady springs. Pretty easy to do, just push them in with your fingers, then turn to allow the spade head to go thru the hole.
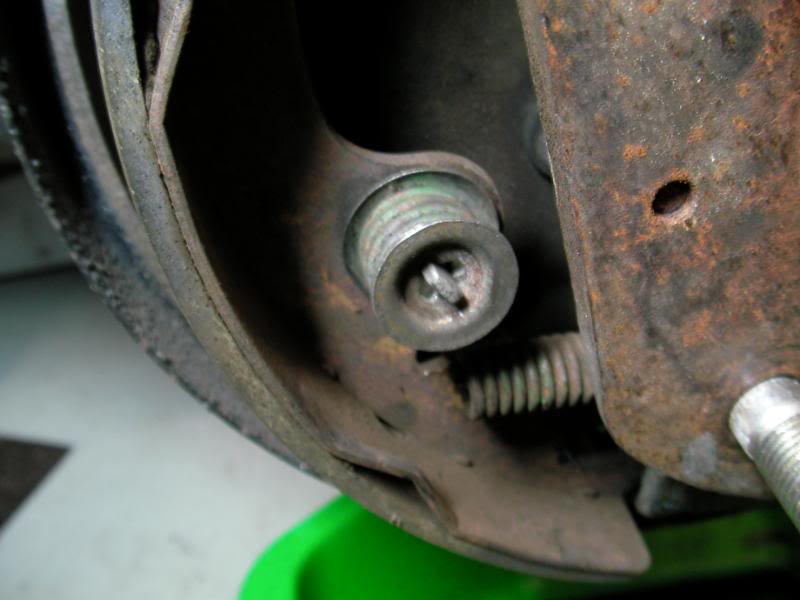
Then pull one of the shoes off its locating slot, and that slackens the spring enough to remove it.
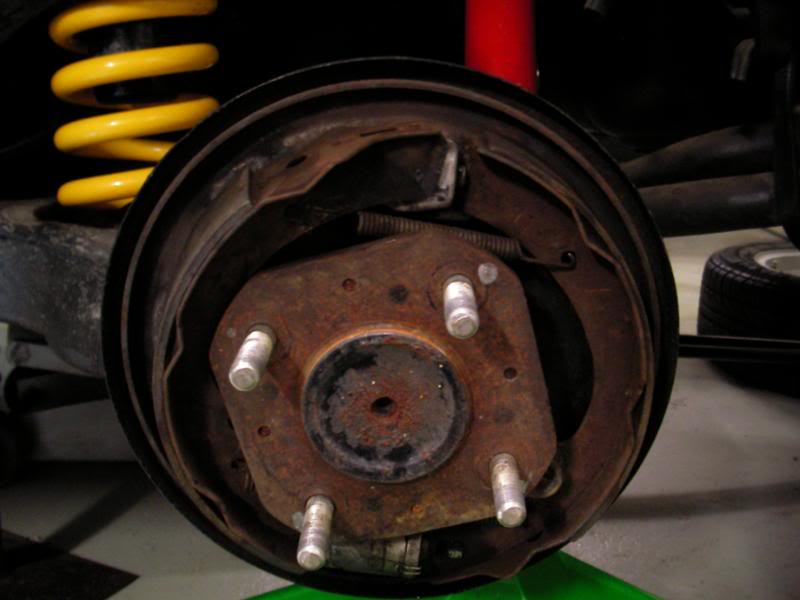
Now remove the shoes.
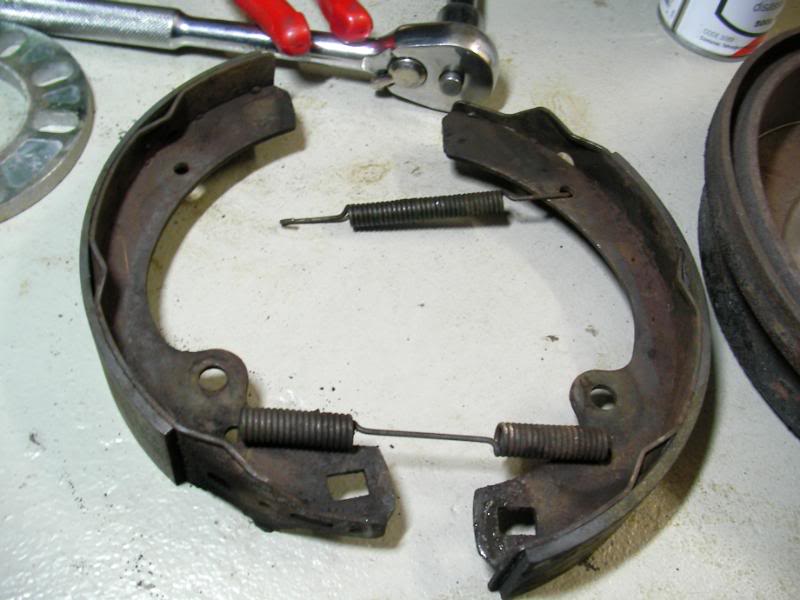
For the shoes to move back and forth easily, you need to put brake grease on these oval contact patches. Not just any grease (which can melt with heat and go all over the shoes) but brake grease which is super-super hi temp
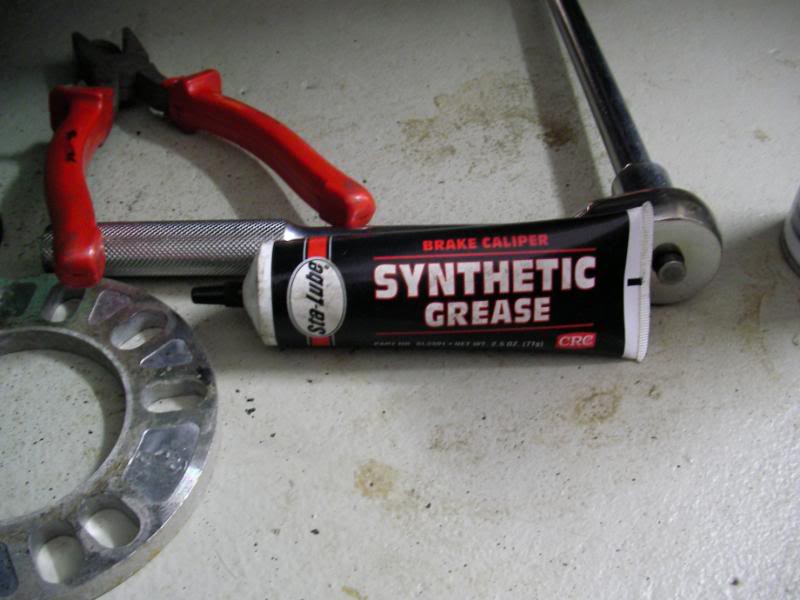
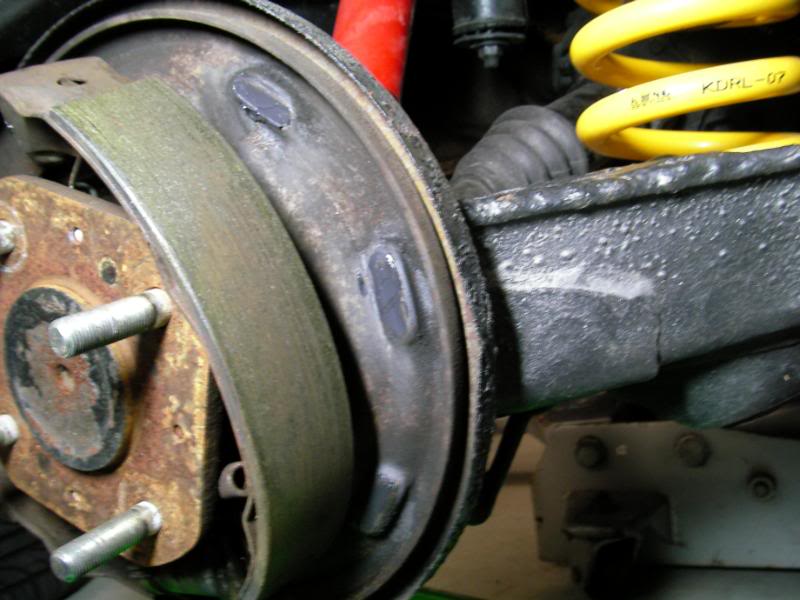
Here’s how the handbrake works…see that little bar sticking out? That bar sits in a slot in one of the brake shoes. Pull the handbrake and that moves fwd against the drum.
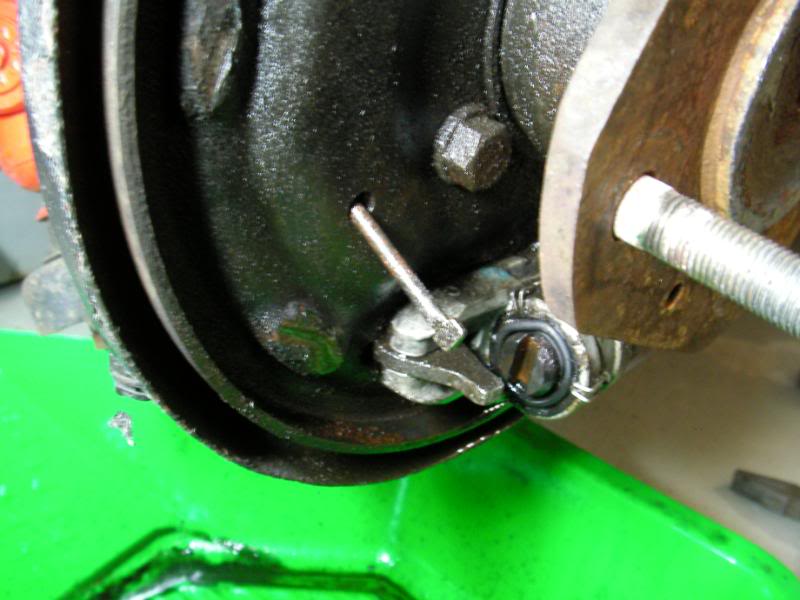
Put it back together…
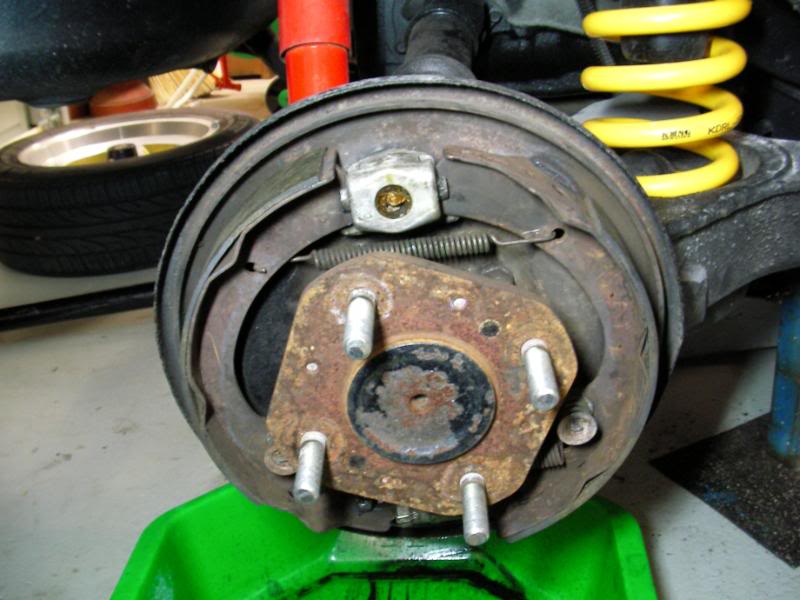
Then refit the drum and adjust. Tighten until the drum locks, then back off one click….and both drums now move freely! I think what might have happened was that the drums were very ovalised before, and was poorly adjusted in Japan to be too tight. Maybe not so noticeable when the car is cold because the ovalised drum probably made the wheel feel like it rotated freely enough. But once you start driving, the brake will bind a bit, then heat up some more, and then everything expands with heat and it binds even more.
It’s a vicious cycle which ends up with the brakes dragging and holding you back as you drive. But it’s fixed now ![]()
Tonight I thought I’d spruce up a very important part of the car. The fender mirrors. They are so iconic of old japanese cars that you can’t afford to let them look poorly.
When I got the car the mirrors looked ok but some paint was flaking off. They looked ok from far away but up close needed some attention.
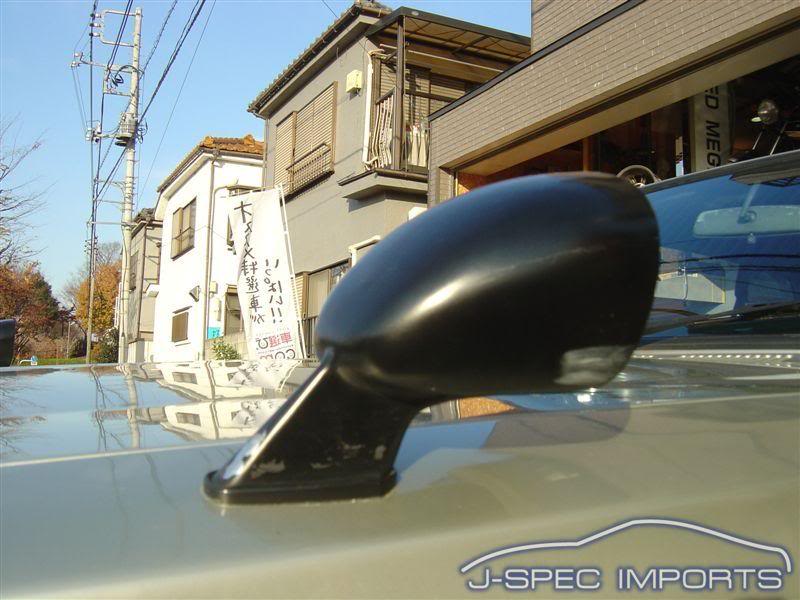
Off they come, and you can see that they are mounted quite simply. That rod goes into that spring loaded cup (which lives under the fender) and that’s it. You can mount fender mirrors to any car, all you need to do is make a hole.
First feather the paint with some light emery paper.
Then mask off the mirror.
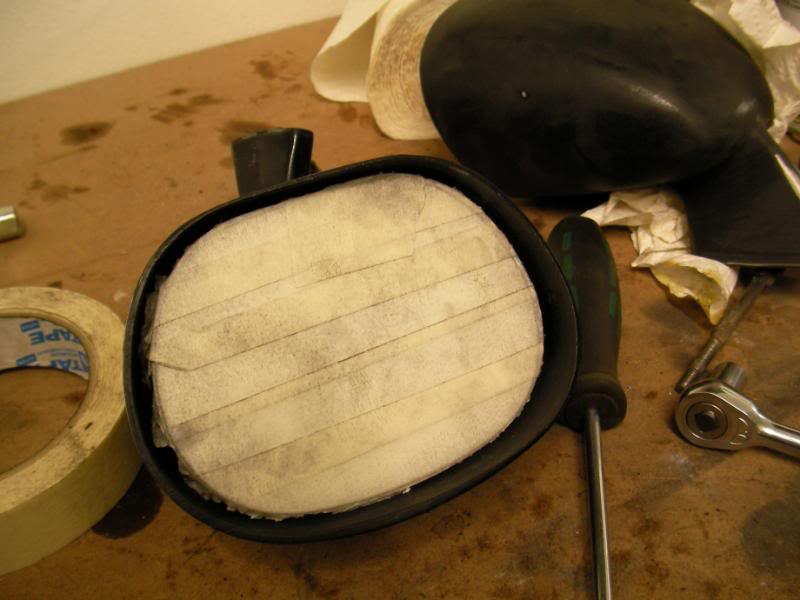
So I decided to capitalise on the mounting design and mount the mirrors on cardboard squares for painting.
This is my favourite DIY paint, it’s VHT Roll Bar & Chassis Epoxy. It goes on super easy and it’s hard to not get a nice even result. The trick is to remember to do very light, dusting coats of paint, and build up your coverage over 5 coats, with 15mins drying time in between.
Then you get this nice factory looking satin black finish, which I find also works well for things like wiper arms too.

On go the mirrors tonight, but not before a mod or two.
The problem with the mirrors before was that if you nudged them they would rotate, and as you can see there are some small scratches on the paint from this happening in the past. There’s meant to be a rubber prong sticking out of the mirror base that locates in that little hole in the fender, but the jdm panelbeaters broke those removing the mirrors for the repaint.

So I drilled out a hole in the mounting cup to take a bolt (after removing all that rust and smothering it in POR15 antirust coating!)

Bolt it in place
And now when say a passer-by nudges against the mirror it will just tilt against its retaining spring rather than rotate.
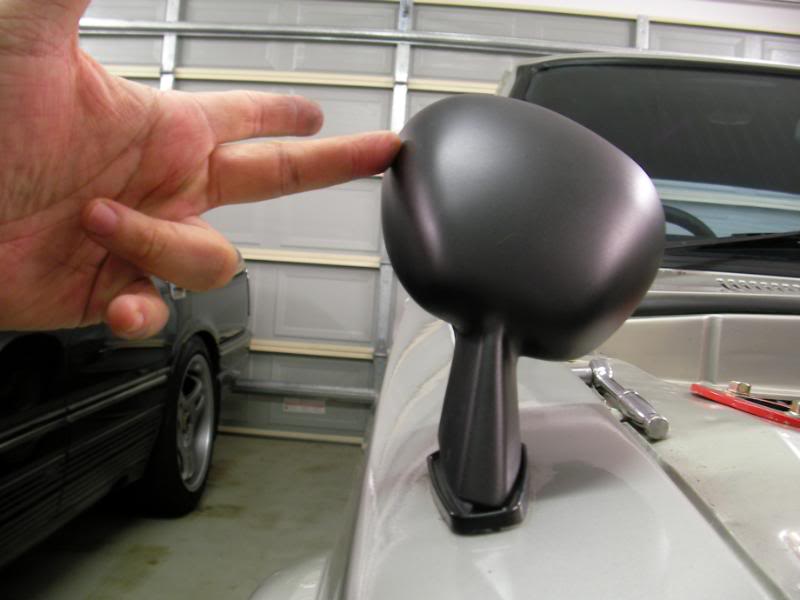
Done! (Well one more little job out of the way)
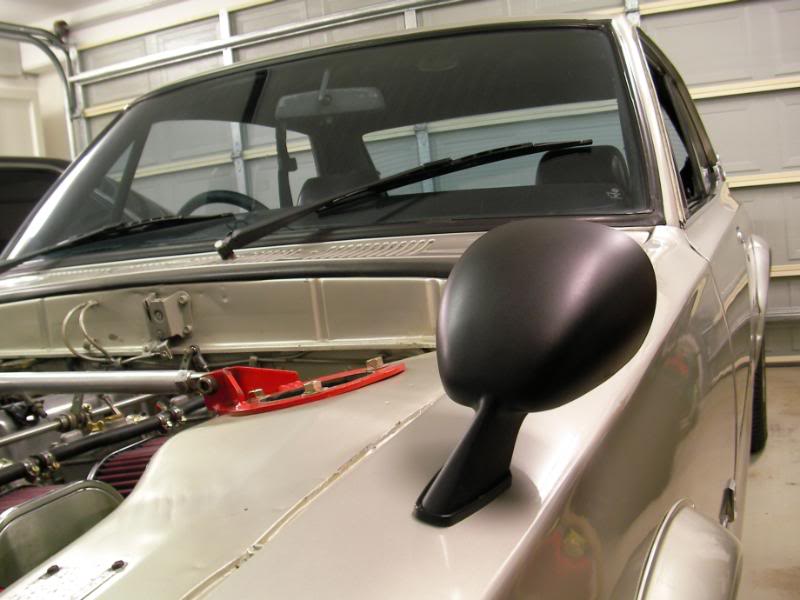
Tomorrow it goes to the panelbeater.
There is a spot on the engine bay tower which is a common rust point on the C10 Skylines, it’s that box section on the left edge of the pic here. You can see a separate box section welded onto the top of the fender at the left of this pic:
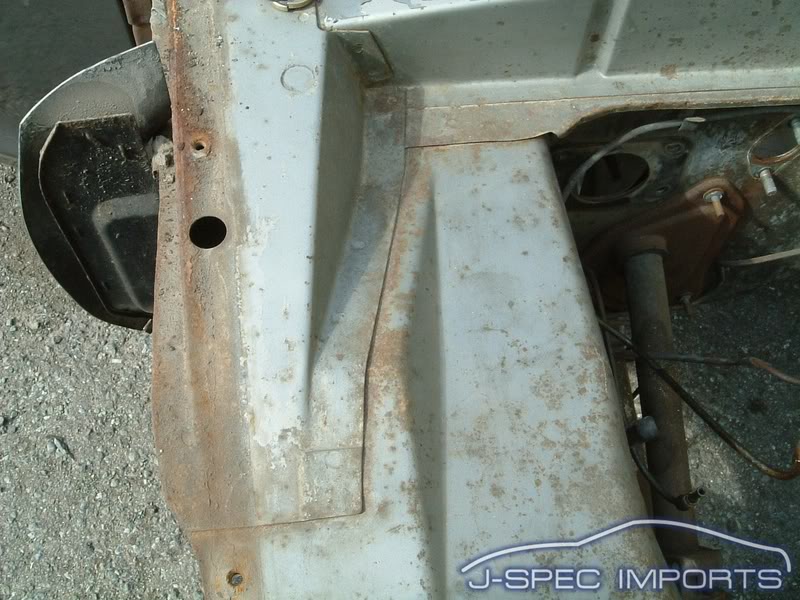
The top of that box section can develop rust because of moisture trapped inside (as you can see there’s holes to allow water in but not to let it back out again)…and there is a magazine feature car which has a chromed plate riveted on top of this panel (one assumes to cover up a rusthole). It’s folded carefully and matches the contours of the box section perfectly and is beautifully chromed.
But it makes you think…wouldn’t it have been just as easy to fix it properly?
Those tyres were cracked and dried out so they are now residing in the bin

They have been replaced by Yoko A352s
..and before we even think about drifting I have to fix the engine so that it produces more than 50hp ![]()
After a loooong session in the panelbeater, Project Hako is safely tucked in the garage again ![]() As for what transpired at the panelbeaters…well that’s a long story.
As for what transpired at the panelbeaters…well that’s a long story.
Where we left things last was that we were rejected for blue slip inspection on various grounds, the most serious of which was the discovery of some rust pinholes in the floor….which, when the sound deadener was removed and the panels wire brushed, turned out to be rather more than just pinholes ![]()
At first, I thought the worst side was the passenger side, but Col at Gordon Smash Repairs actually thought that it was the driver’s side which would turn out to need more work, and right he was.
First to be cut out was the passenger side, and new floor sections were made up and welded in without drama.
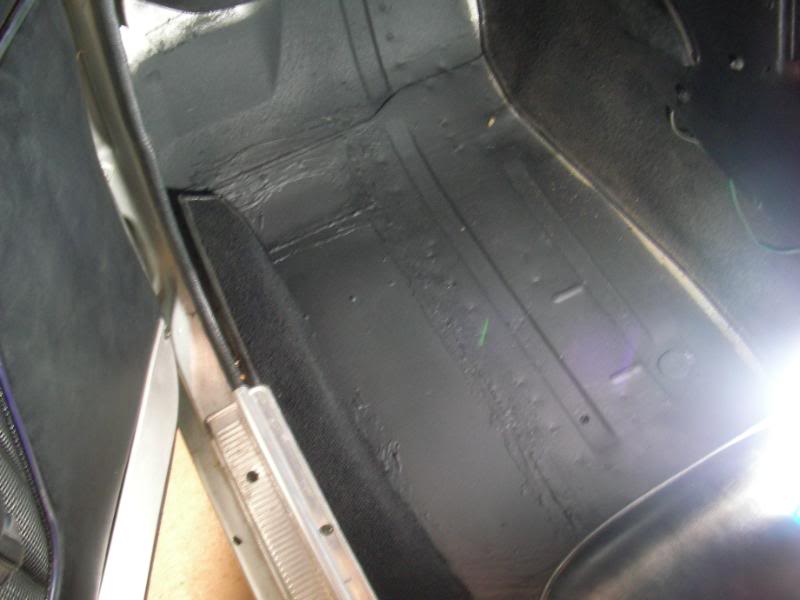
But when the driver’s side was cut out..
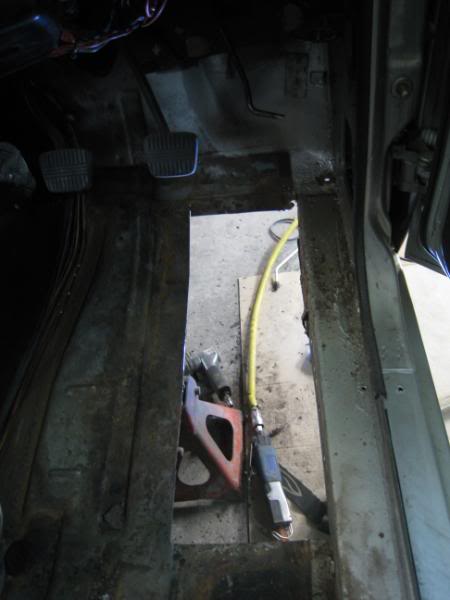
…more rust was found. There’s a box section under the front of the floorpan, and when that was cut out, there were holes in the inner and the outer rail as you can see. Sadly the hole was big enough to see that there would also need to be some work done on the outer sill, the part which is hidden by the lower fender.
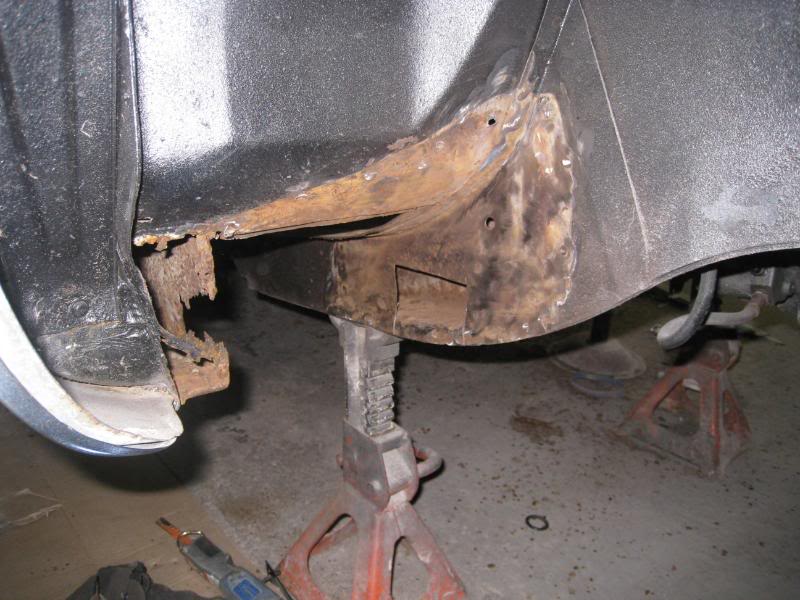
The GOOD news is that the hole was also big enough to allow one to see inside the outer rail and see that the outer sill had been cut out and replaced (from the front edge of the door all the way back to the rear wheelarch) and appeared to be a sound job. Why they didn’t keep going and repair the front of the outer rail (the new patch is visible here) is a mystery. Thankfully when we cut out the passenger side it checked out okay.
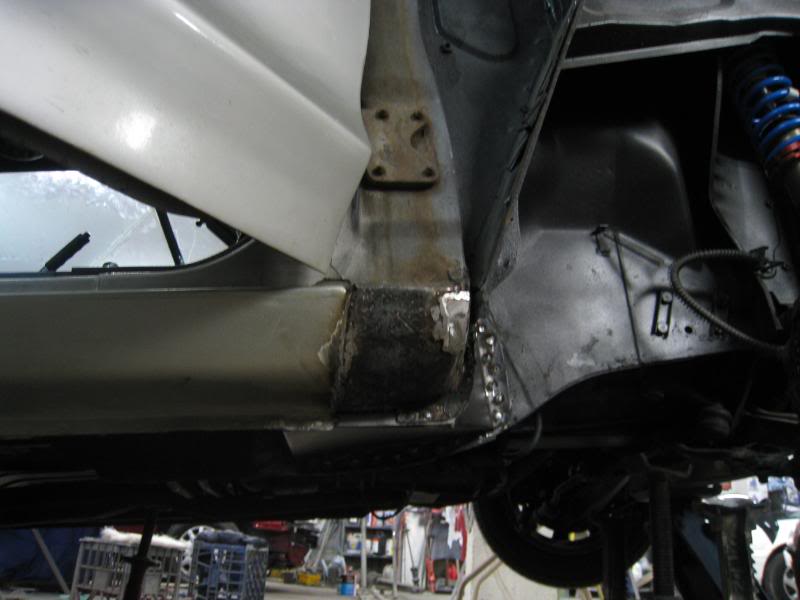
On both sides, it was determined that the section of floor metal that was closest to the outer rail was thinned by rust, so for strength, all of it would have to be removed and the floorpan was cut out all the way to where it butts up to the rail.
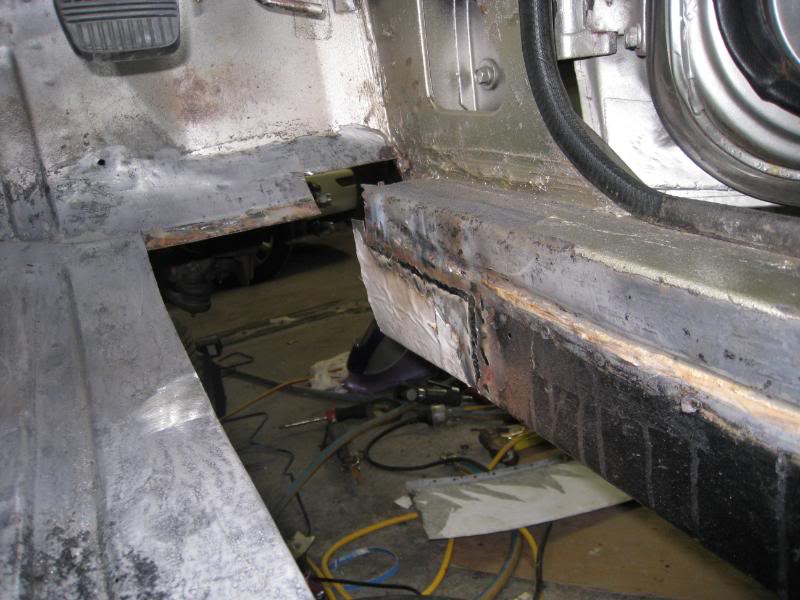
Large holes!
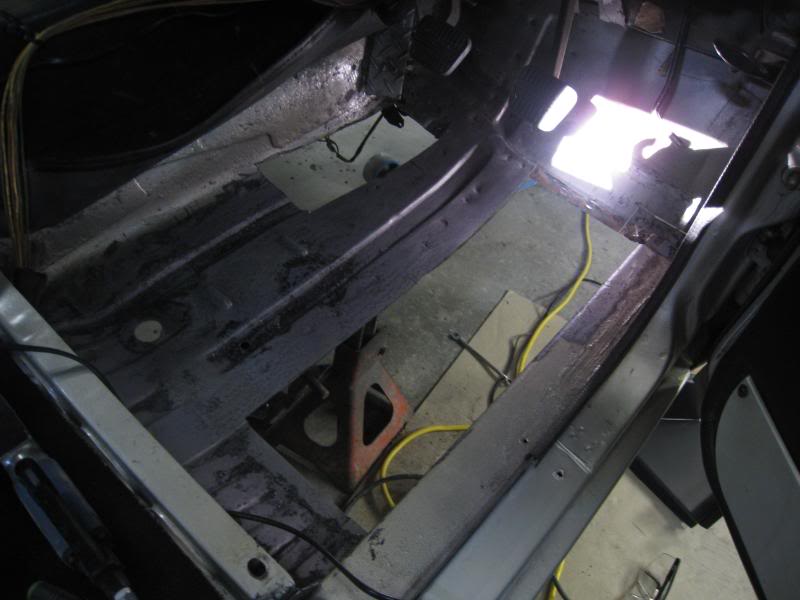
A new section welded in, with a flange at the outer edge, and plug welded to the outer rail, factory style
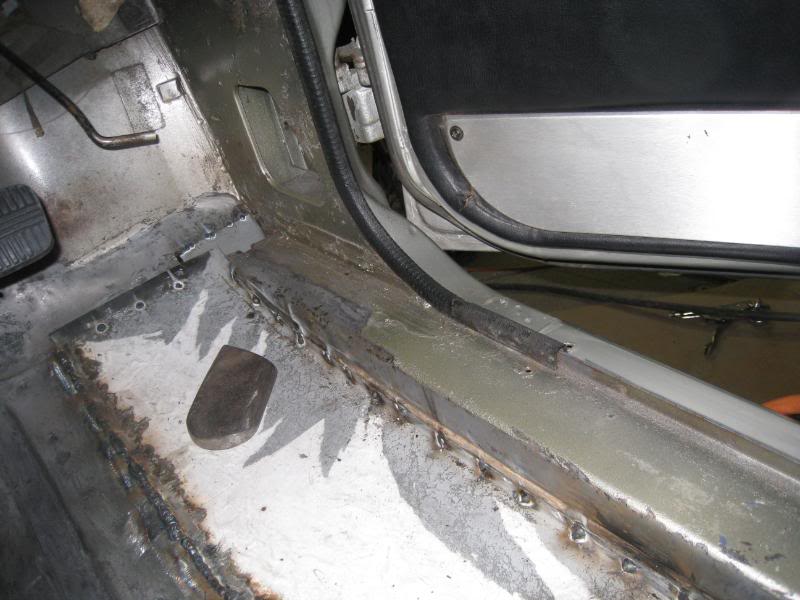
The outer rail patched and the inside of the rail rustproofed as far as the brush would reach!)
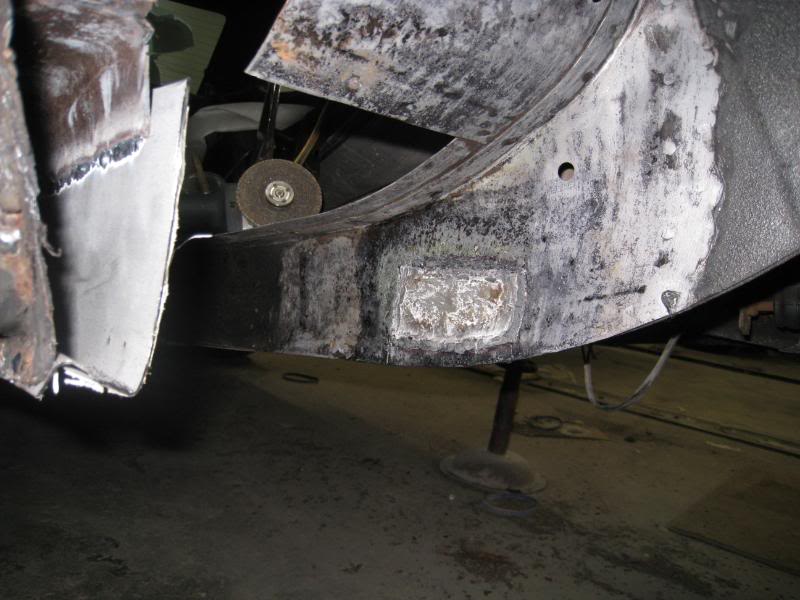
The trick part was when they made a new box section by hand….

…which was then trimmed and welded in place
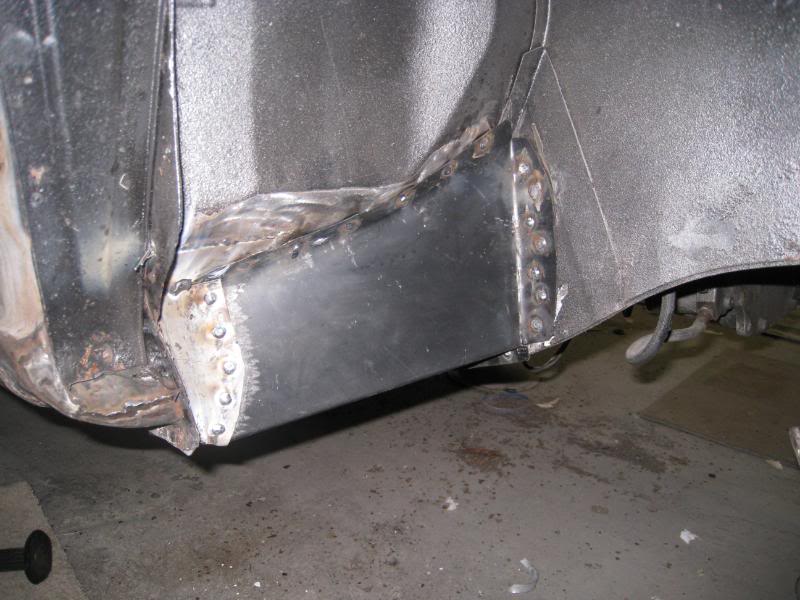
The welds sealed
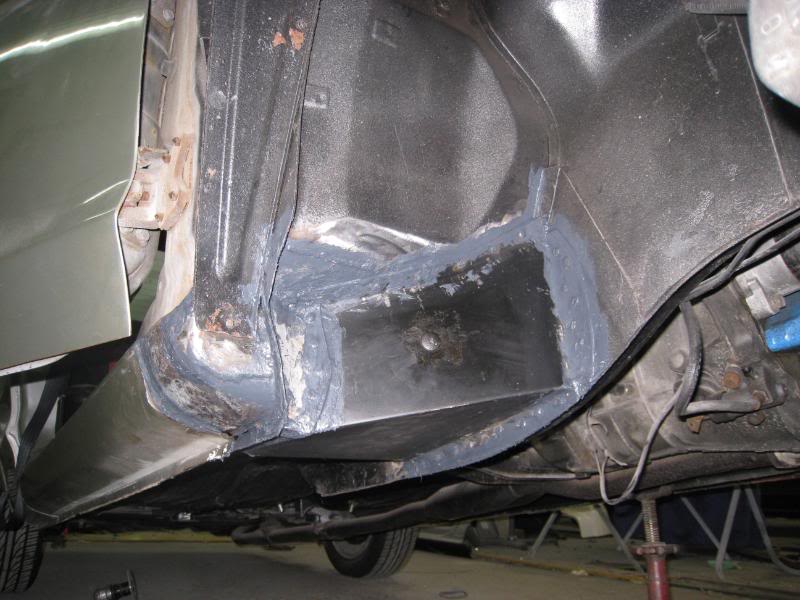
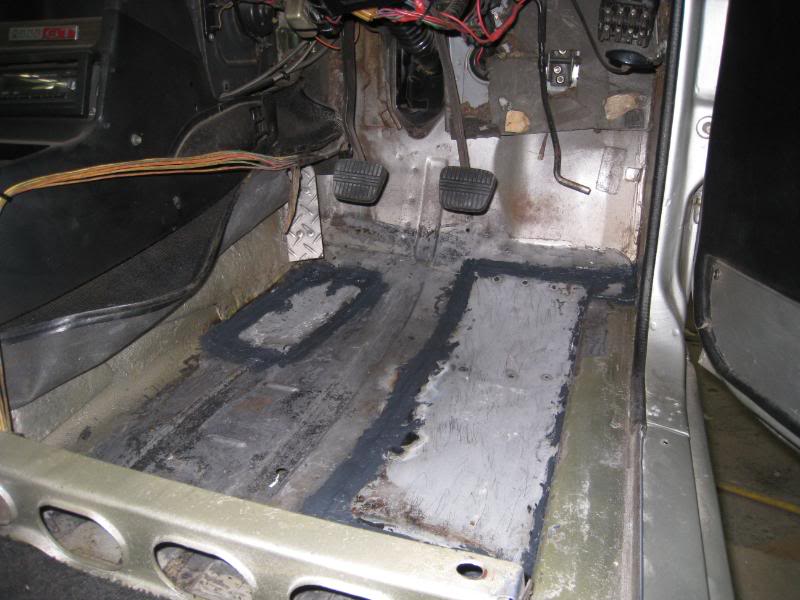
Then the whole lot stoneguarded and painted

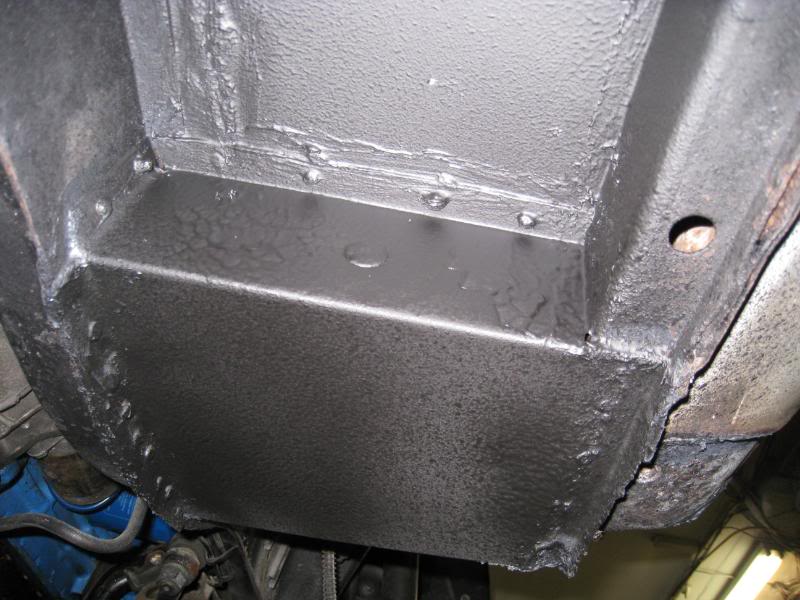
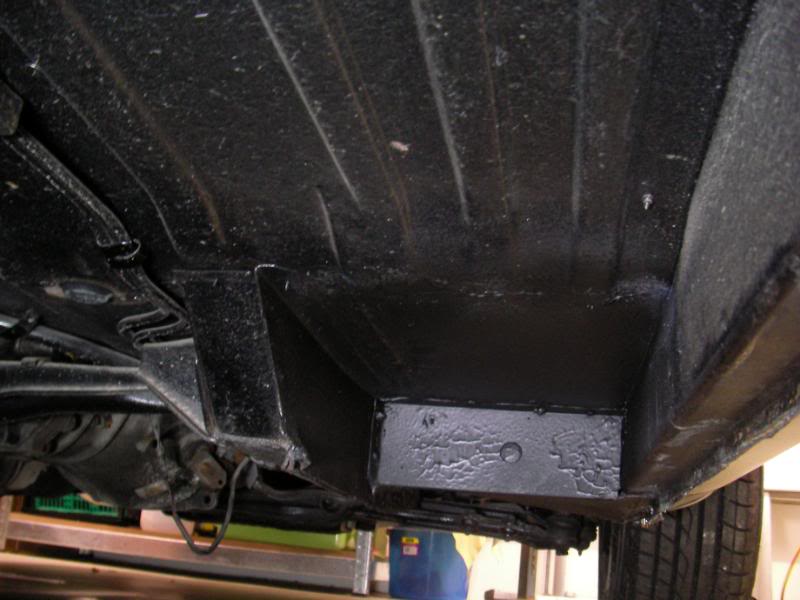
The outer sill had to be resprayed because it some of it had to be ground back for welding and in the end I am very happy with the job. I think that it isn’t an invisible repair by any means (and certainly not to BIGJOHN standards! ![]() ) but it’s a thorough and solid job and I’m happy with their attention to detail and reckon it’ll be a long lasting (and strong!) repair. I’d definitely recommend these guys and would be using them again for any more work that the Hako might need. I really liked these guys and it was nice (and a pleasant surprise) that they fixed up a few extra things without being asked.
) but it’s a thorough and solid job and I’m happy with their attention to detail and reckon it’ll be a long lasting (and strong!) repair. I’d definitely recommend these guys and would be using them again for any more work that the Hako might need. I really liked these guys and it was nice (and a pleasant surprise) that they fixed up a few extra things without being asked.
The other job I got them to do was to fix the front spoiler which was cracked during the Hako’s shipping from Japan to here.

The cracked area was reinforced with extra fibreglass inside…and then resprayed
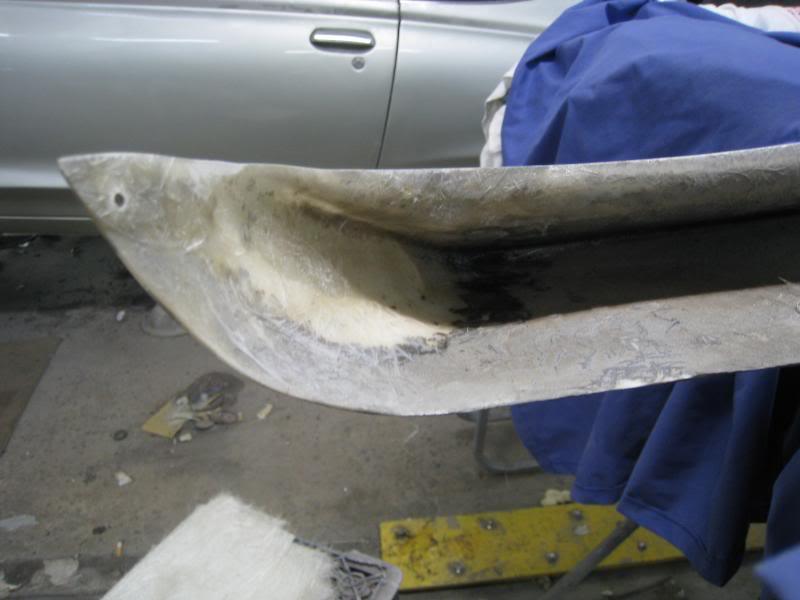
The final result is pretty good!

The best part was that the final price was somewhat less than the figure I was mentally steeling myself to pay! But phew, I’m relieved that the Hako is fixed and I think it’s probably stronger than when it was new….
Anyway, when I had to drive it back home, I was again reminded of how badly the engine runs. After 6wks of being started and moved around Col’s bodyshop, I think the plugs were more junked up than usual and driving home, it would cough and spit and really struggle up hills.
But first things first….the engine bay was covered in dust (panelbeaters are dusty places!) and so I started to detail the engine bay as a first port of call..
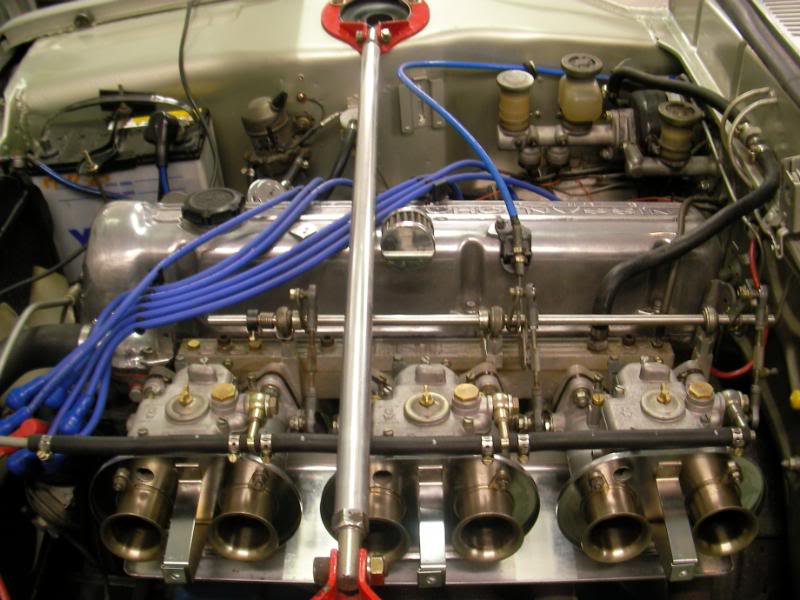
While the Hako’s been at Col’s bodyshop, I’ve been thinking about what might be causing the poor running, so I fitted a fuel pressure gauge. If there was crud in the tank or lines, or if the fuel pump (admittedly an old looking Mitsuba) was not flowing enough fuel, then that could cause the poor running I’ve been experiencing.
So I teed in an inexpensive pressure gauge and…yup, the fuel pressure is on the money, 2.5psi.
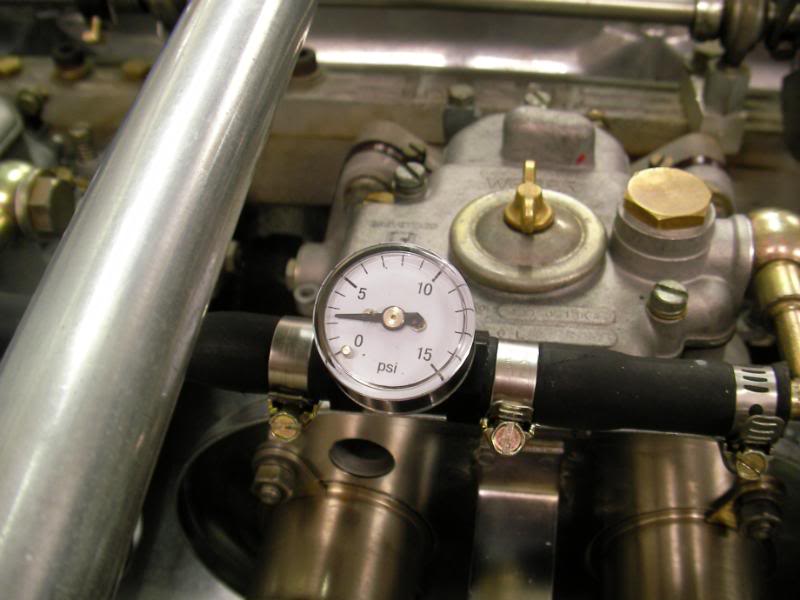
Of course that’s just at idle, when fuel demand is low. At full revs and full throttle the fuel pressure may drop if the pump isn’t up to it. The Mitsuba is rated at 1.5L/min flow at 4psi pressure, so testing the pump’s flow wouldn’t be that hard, since I could dial up 4psi on the adjustable fuel pressure reg that I installed just before I sent the car in for panelwork.
But it was at that exact moment that I noticed it. You know…I must have stared at that bank of carbs a zillion times and I can’t believe that I’ve not noticed it until right NOW.
See that nut right inside? The one that would be holding on the headers?
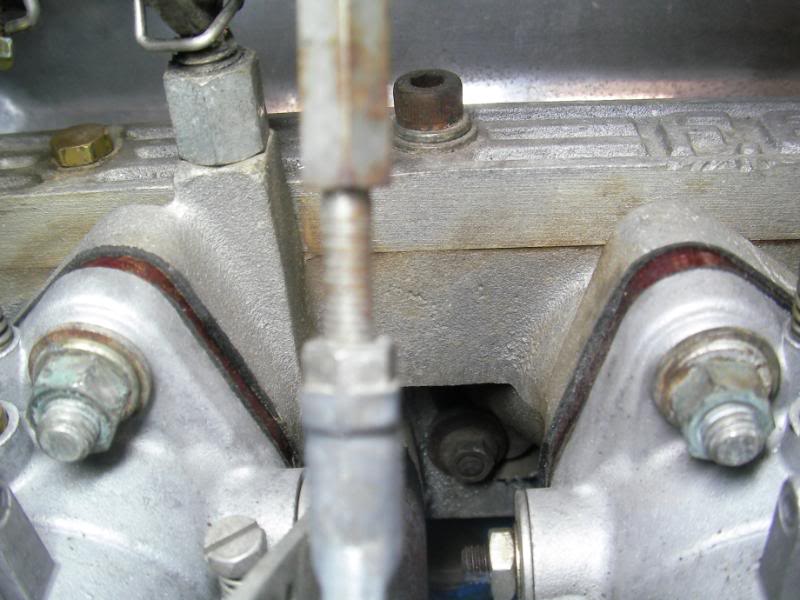
The L series has a weird arrangement where some parts of the inlet and exhaust manifold are secured by a common nut and a “bridge washer”. So instead of the header and inlet manifold having a hole which has a stud and nut holding it down, the stud goes between the manifolds and the edges of the bridge washer hold them down.
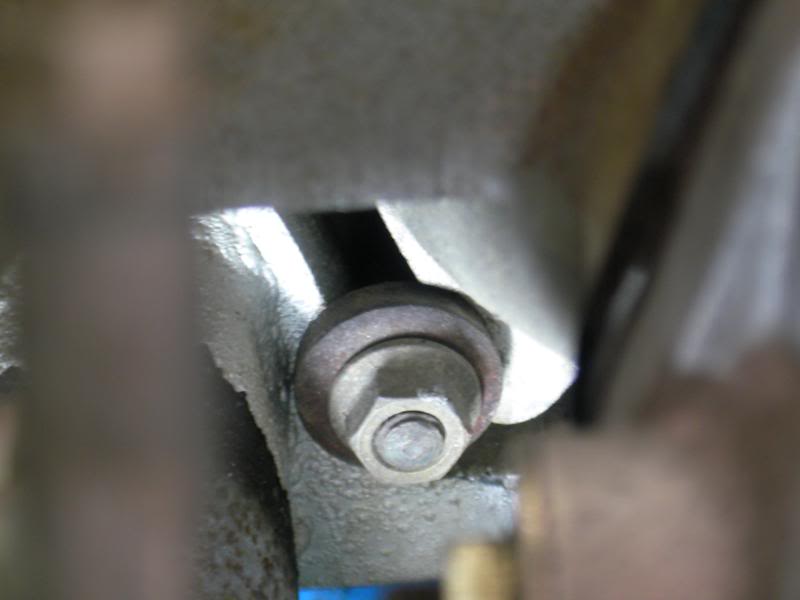
…and for the first time, I noticed that the bridge washer is CROOKED!
Holding a straight edge against the header flange proved it….the header flange is a little thicker than the inlet manifold flange and so the bridge washer is cocked at an angle and isn’t really doing much to hold down the inlet manifold properly…causing an air leak. You can clearly see a shadow between the straight edge and the inlet manifold flange…
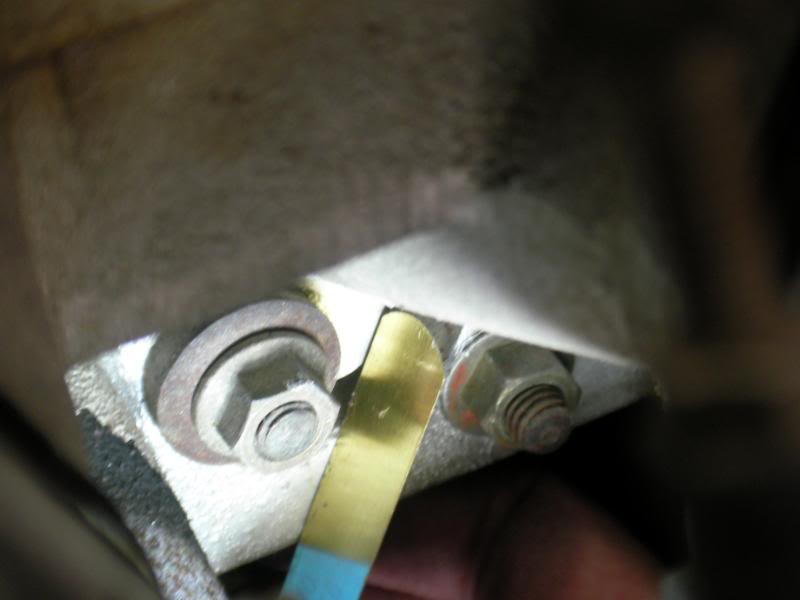
Bloody hell…the problem was this all along and it’s massively obvious now! So now the carbs, inlet manifold and headers will have to come off. I think the best way to do it would be to machine the flange of the header thinner to match the thickness of the inlet manifold flange. Then the bridge washers will sit flat and the inlet manifold will seal properly.
..and while the headers are off I might as well get them ceramic coated….woohoo! Project Hakosuka is back ![]()
Ok, tonight’s job was to get the headers off the car, so that I could get the header flange machined down to match the thickness of the inlet manifold. Now there are quick fixes that don’t involve taking everything apart, like say making up a bridge washer of stepped thickness, but since the engine doesn’t run very well, I think it’s time well spent taking it apart as much as I can to learn about what it is that I got.
First, the carbs came off.
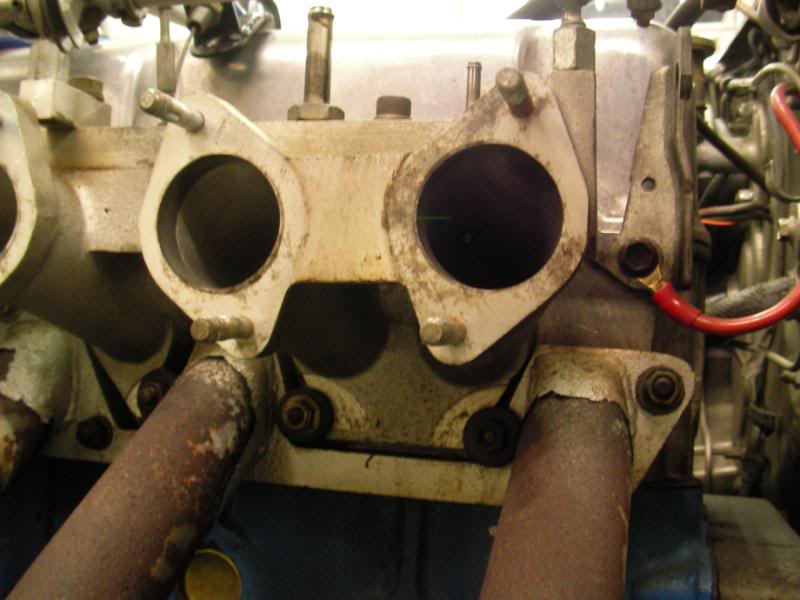
Then the manifold…
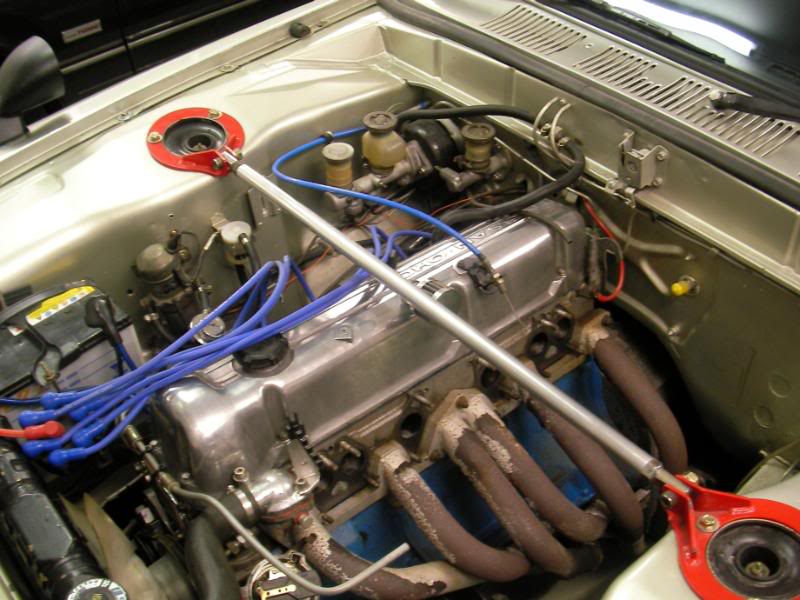
Then the headers…now so far it didn’t take very long to get to this stage, because the engine does seem to be pretty new, so all the nuts and bolts came off pretty easily, and as you can see, the gasket isn’t even stuck on, it pretty much popped off by itself.
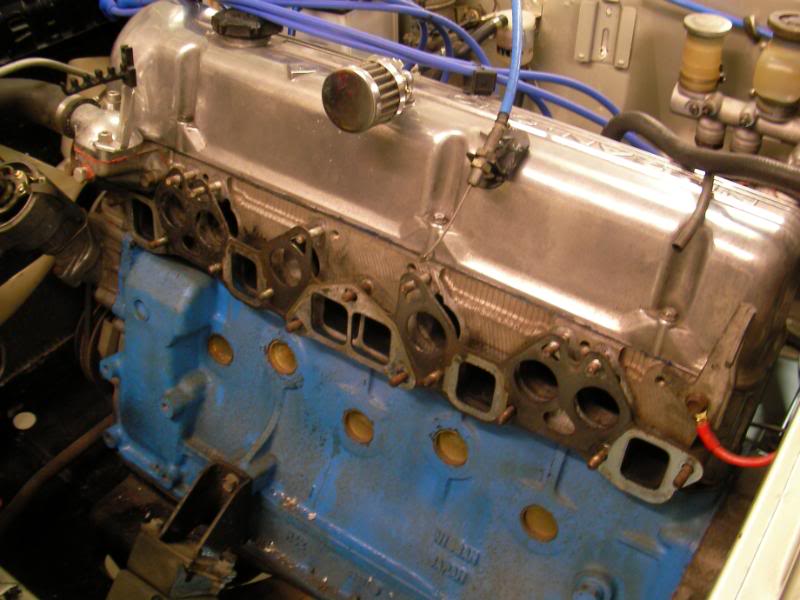
Mucking around with the feeler gauge told us what we already knew, the inlet manifold flange was 15mm thickness, but the headers were just a tick over 16mm. Ok, so the header flange needs to be milled down a bit over 1mm in a few spots.
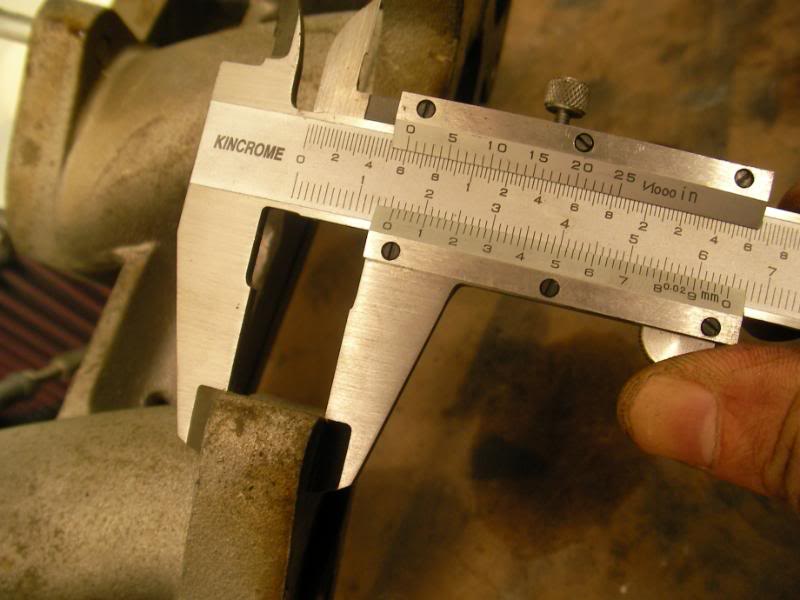
So now I started to look at the cylinder head. Now, L-series heads normally have a 3 digit code cast into the head at this spot between #1 and #2 plugs (which is mysteriously blank on mine)

There’s a lot of variations between the heads over the years and mine is definitely a late head, at late 70s because it has notches for injectors in the round inlet ports.
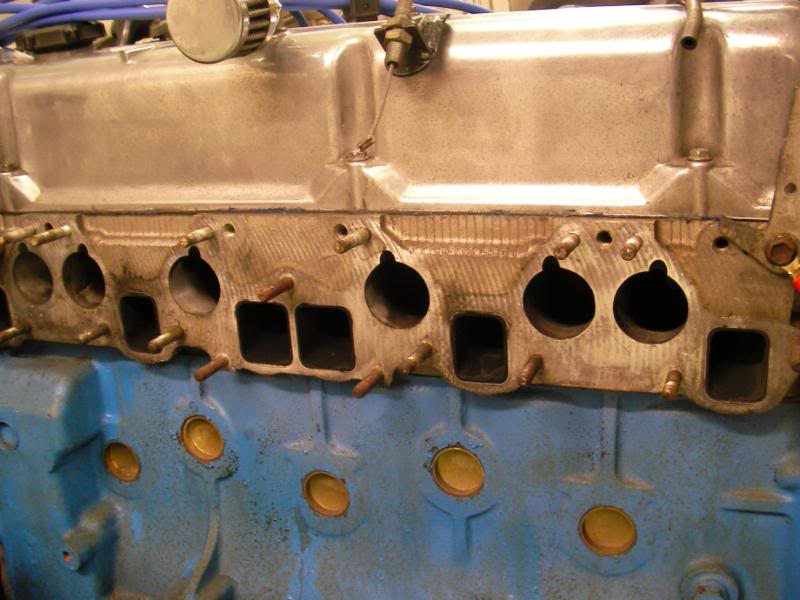
And the ports look to be a decent size, too, 40mm, so this is probably a 2.8L head
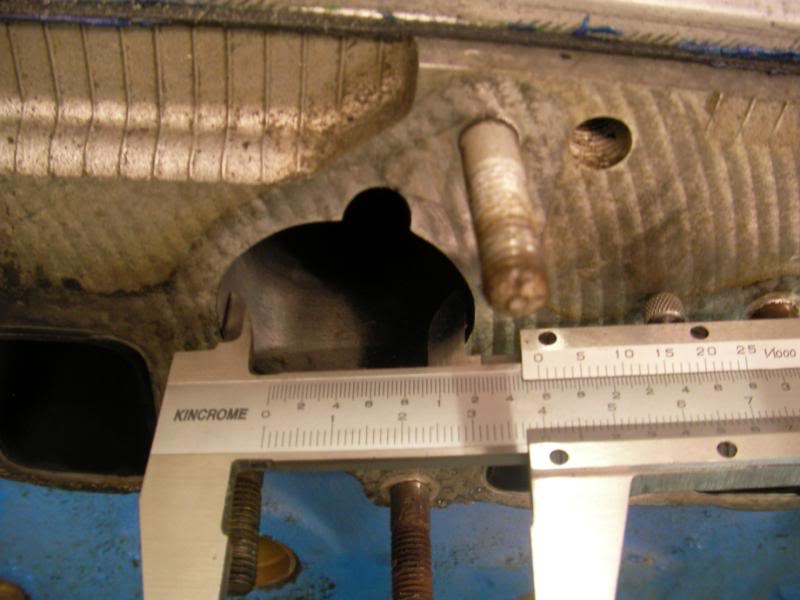
The problem is…the inlet manifold runners are nowhere near that big..they’re only 30mm.
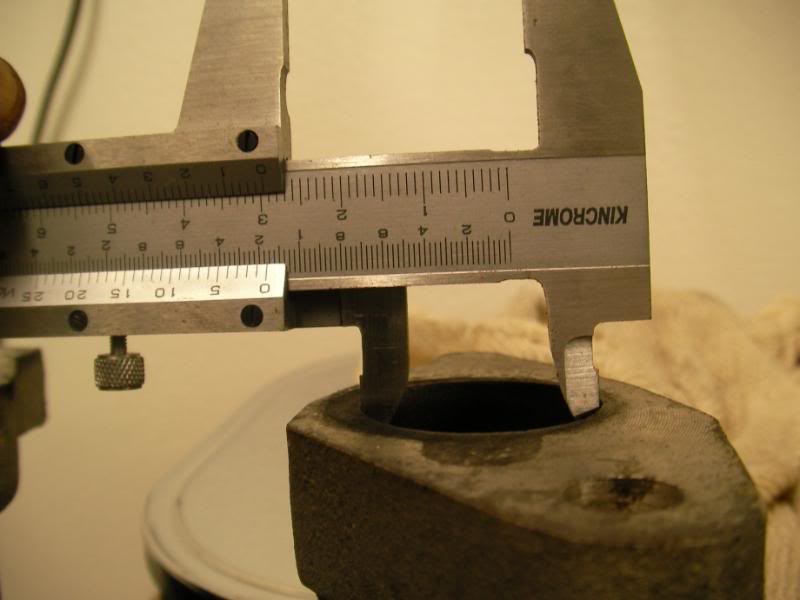
Here’s the magnitude of the problem…the gasket is 5mm too small for the head
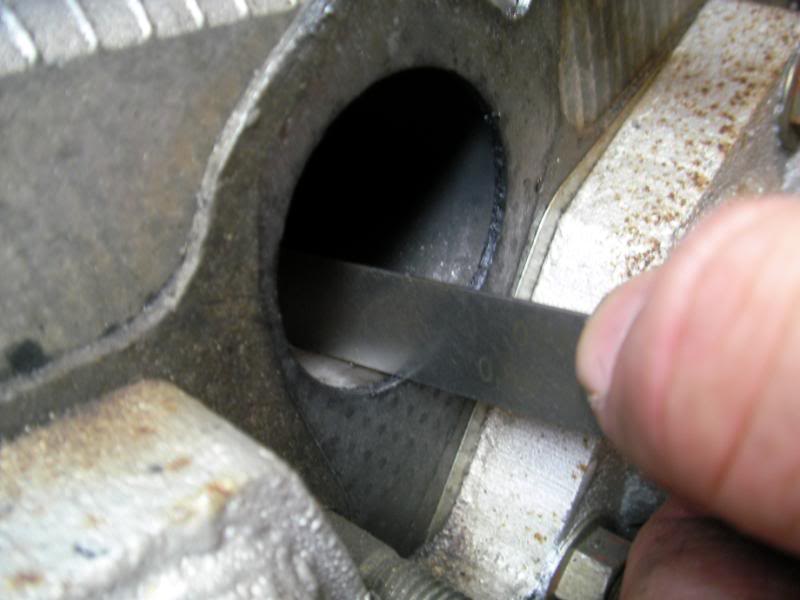
..and the gasket is also 5mm too big for the inlet manifold.
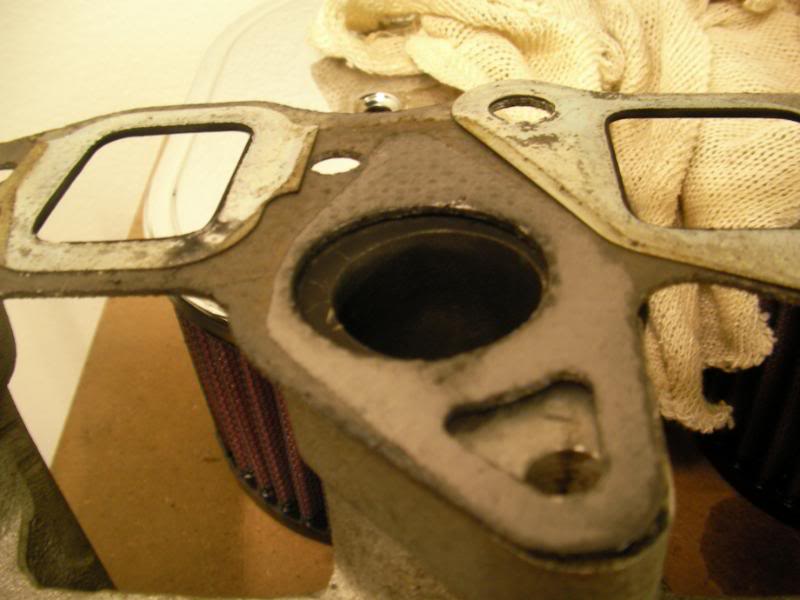
The exhaust side seems ok though, the gasket, headers and head ports are all the same size.
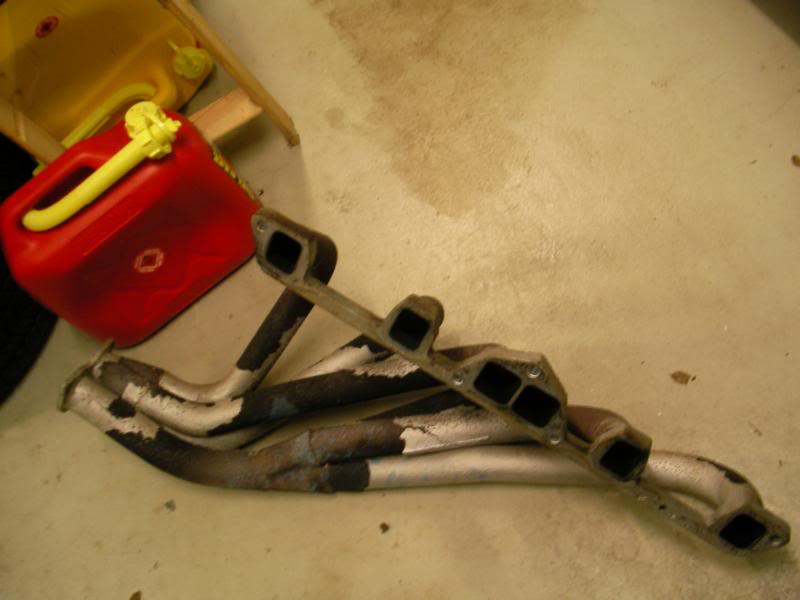
And looking down into the head, it does look like the ports have been worked too in Japan. That looks a bit too smooth to be factory?
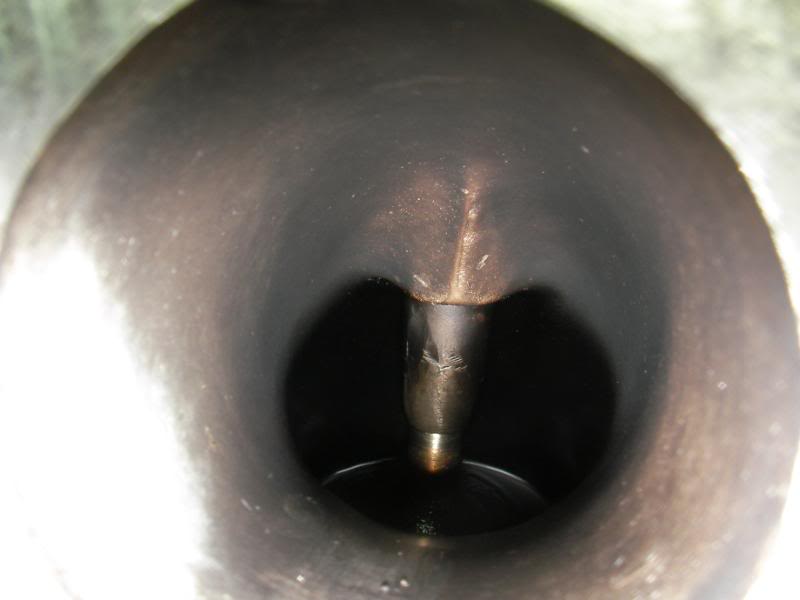
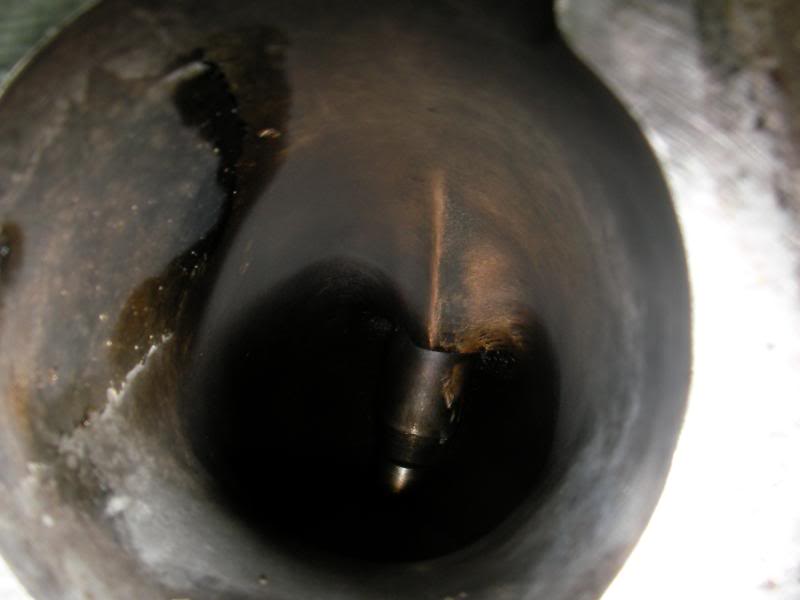
Hmmm…but now I’ve got a big questionmark over the FET inlet manifold. The good news is that I’ve got the right head (and it’s worked too) but the inlet manifold looks like it’s going to be a huge restriction. 40mm vs 30mm seems like a lot of difference to me…
I reckon I now have to think about what I’m going to do with that inlet manifold before I start modifying the headers…but at this point it now does make sense why the engine doesn’t seem to make any top end power.
Not sure if there is room in the manifold for it to be opened up *that* much…if you look at this, you can see the pattern left by the gasket.
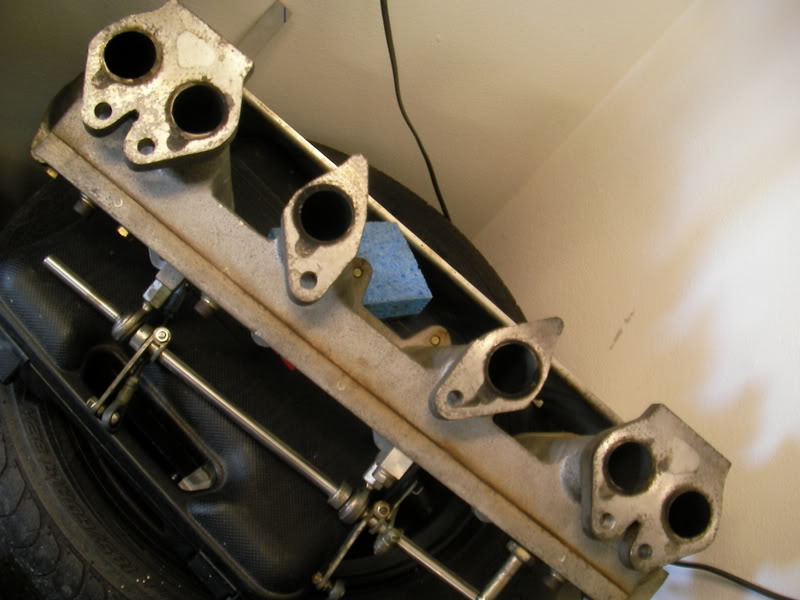
In the middle 2 cylinders, there is hardly enough meat to allow the intake to be matched to the gasket, and the gasket is yat again too small for the head.
I’ve spoken to a few ppl today and it seems that the std port size for the 2.8L head is 36mm, so mine has been opened up quite a lot…the only option I think open to me at this point is to buy a new 36mm intake and then open it up that extra little bit to 40mm. I spoke to the tech guy at www.redlineauto.com.au today and he said that there should be enough meat in the casting of their std 36mm manifold to be opened up another 4mm, or at least very close to it…
So the next question is (apart from how thick the manifold flange is!) whether the Redline manifold is compatible with the old FET throttle linkages…I guess I won’t know until I buy one.
Still weighing up my options with the inlet manifold, so only did fun stuff tonight.
The underside of the bonnet is something that tends to be on display quite a lot for obvious reasons ![]() So its lack of finishing was bugging me. It had these painted-over, squashed bungs etc.
So its lack of finishing was bugging me. It had these painted-over, squashed bungs etc.

So I put on the repro underbonnet stickers that I picked up in Japan.
And with the addition of pristine new bungs, it looks a lot better.

Also when I got the car it was missing some c-pillar trims…

New ones just clipped into place….big improvement.

Last thing was to swap in the new window winders to replace the busted looking old ones.
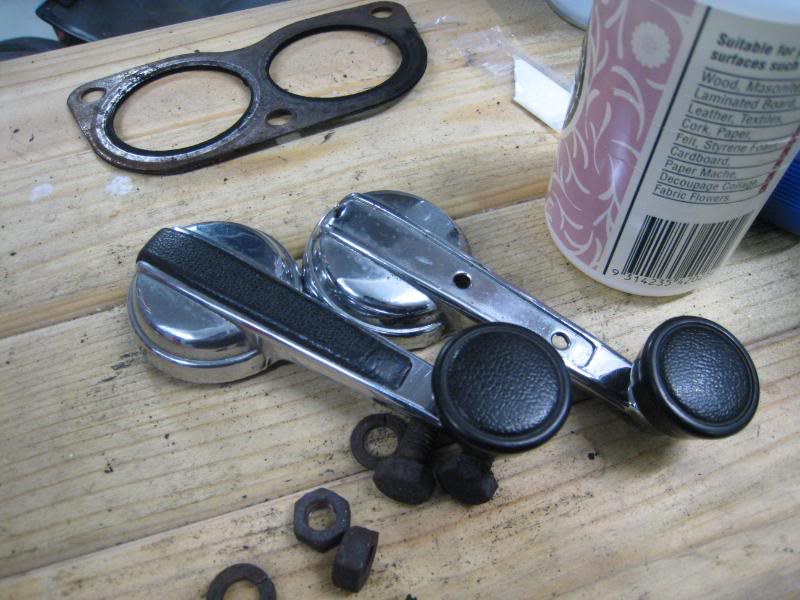
Replacing them is easy, you just wiggle a cloth behind the winder…
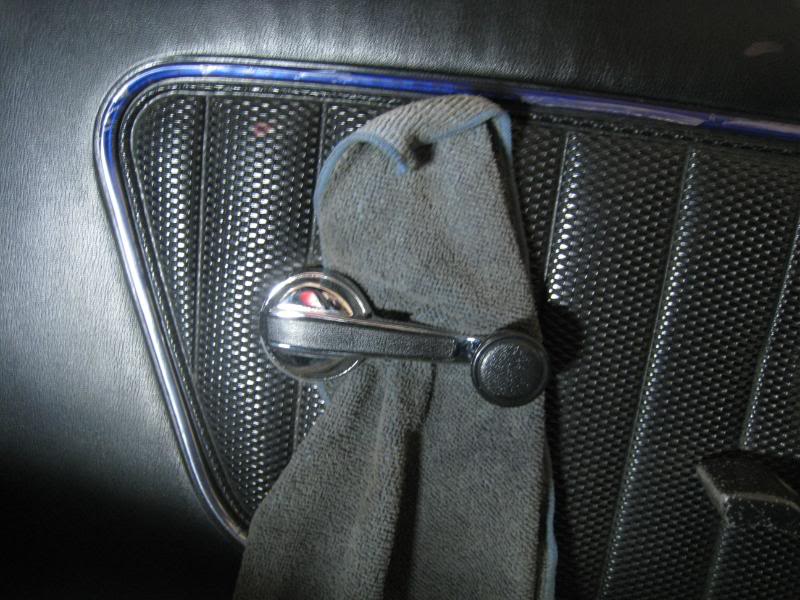
…to try to snag this clip out, which will allow the winder to just pop off.
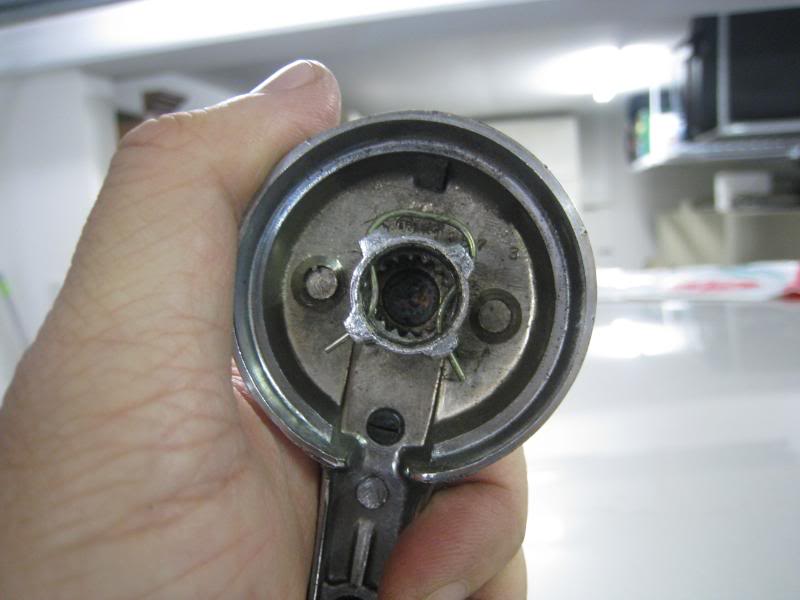
New winders!
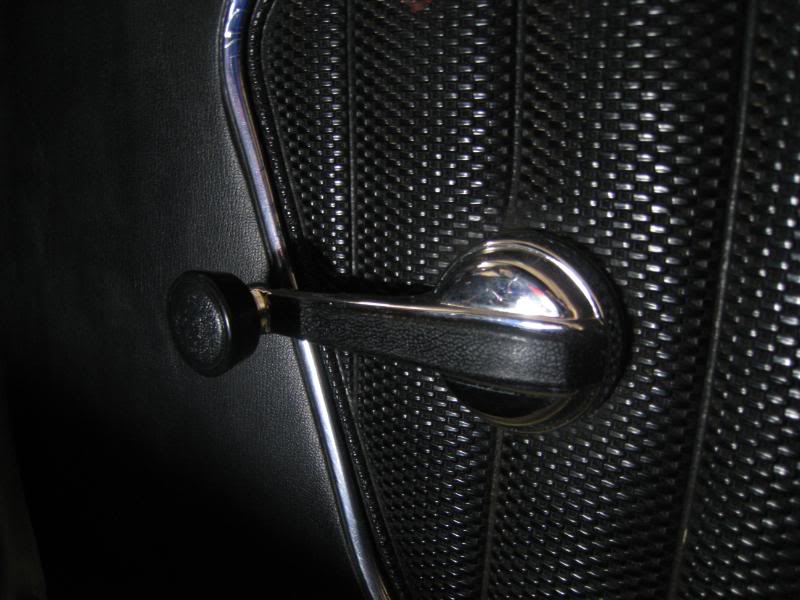
Ok…enough fun…back to the engine tomorrow ![]()
w00t! The Hako headers are back from sandblasting and they look great! Mild steel will start to rust in short order though, so tonight they get coated with the POR15 header stuff.
Before:
After:
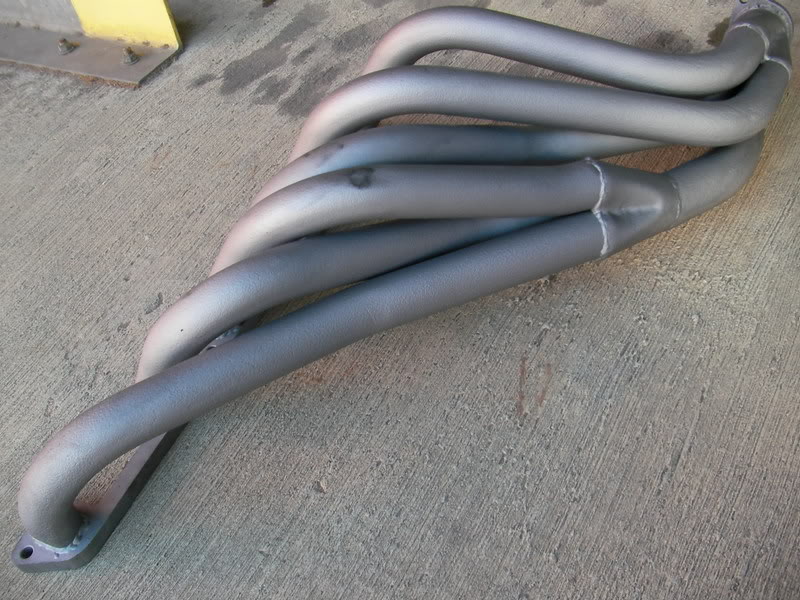
From looking at them before (ie flaky rust) the header looked quite corroded but in fact they’re fine, the material is still nice and thick.
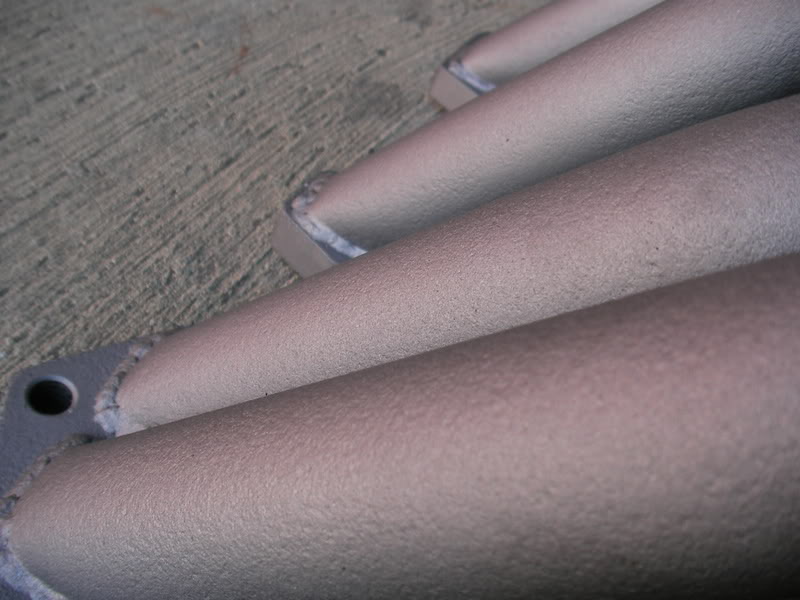
was going to coat the headers with POR15 Black Velvet hi temp paint, but beforehand I applied Metal Ready to etch the metal surface for a better bond with the Black Velvet. This isn’t necessary according to the instructions since my headers were abrasive blasted anyway, but the guy who sold me the POR15 recommended it.
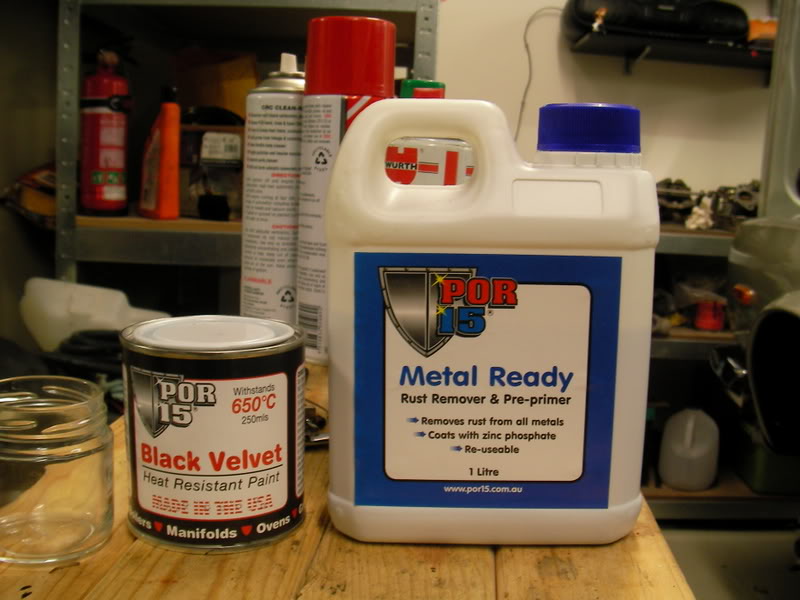
Hang it up for painting…
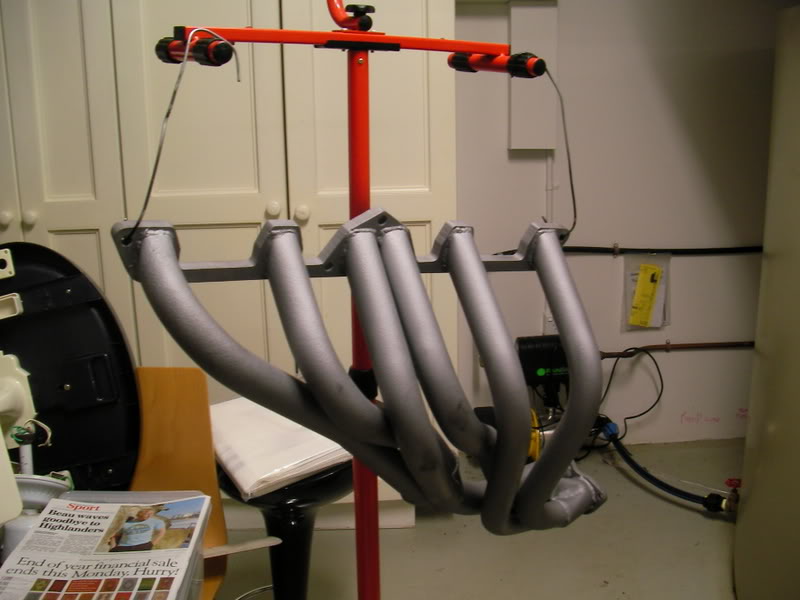
Black Velvet is a very thick, honey-like coating, so it goes on quite thick and glossy
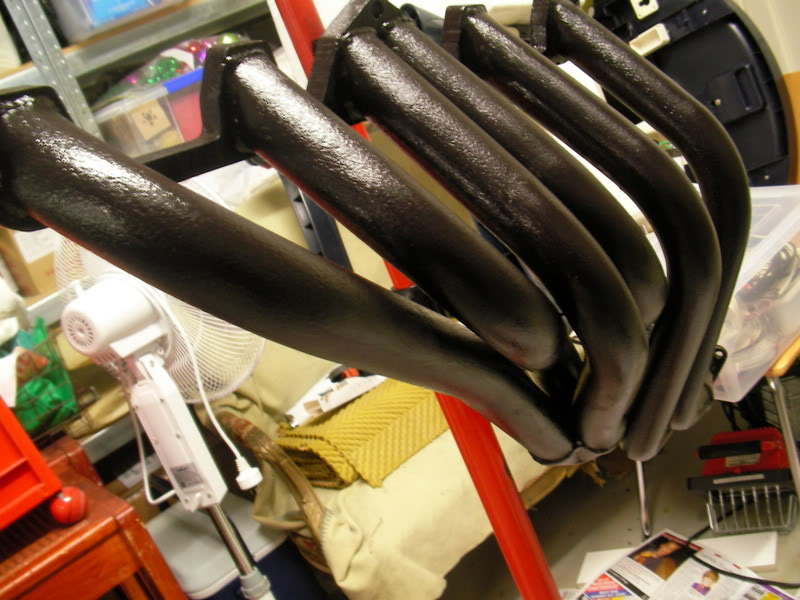
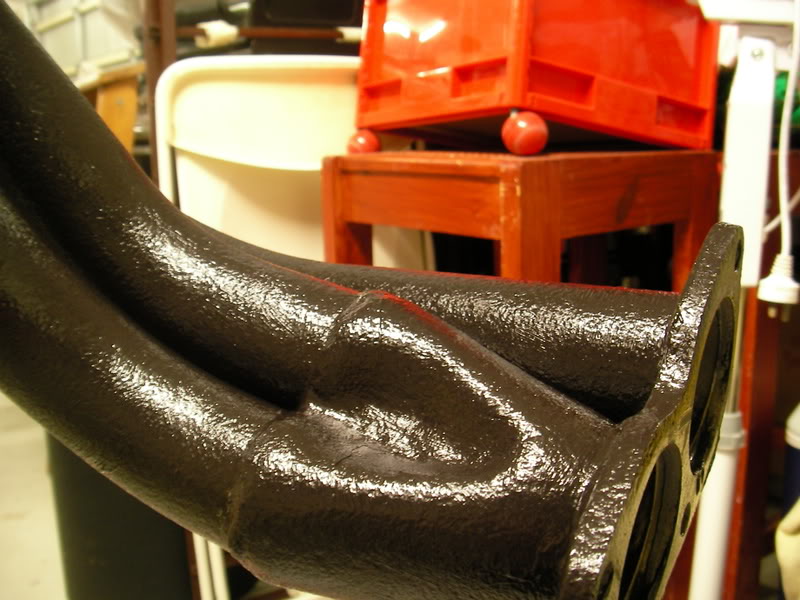
But the next day it dries to a matt finish.
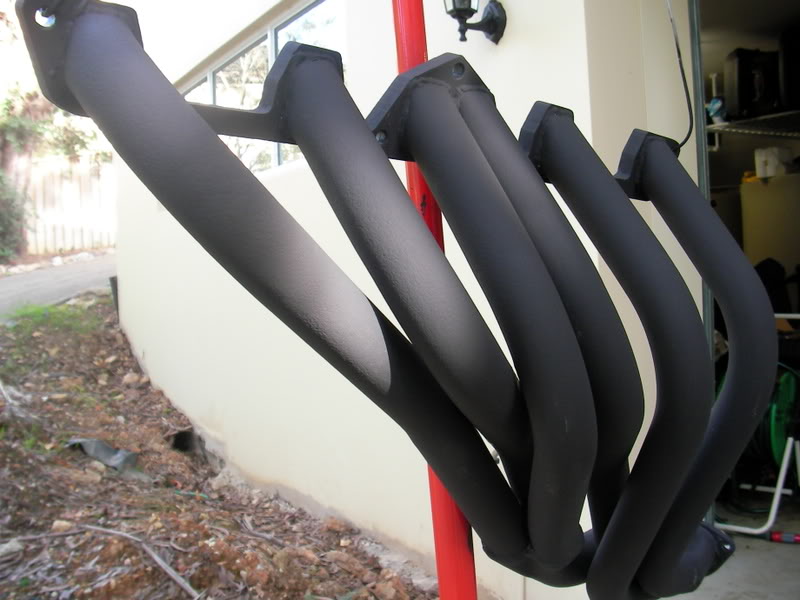
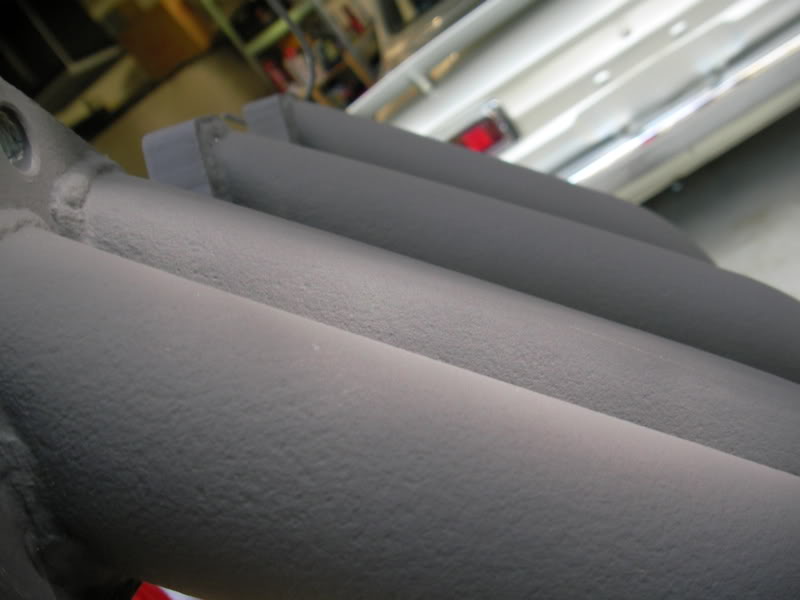
I have to give it 24hrs between coats, and so tonight it’ll get a second coat.
Ok, the latest addition to the project are a new set of Watanabes, and here’s why.
The front pair of watanabes that came with the car are cracked. Quite a few of the spokes have a little fracture right in this same spot.
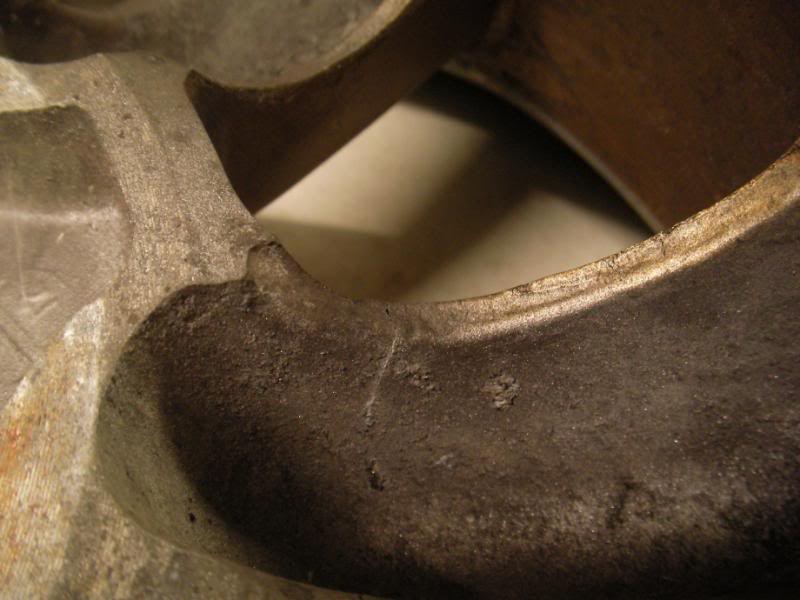
This actually isn’t the first set of Watanabes which have cracked on me. The set I had on the MX5 did it too, but those were the “race only” magnesium ones, and at the time I thought that hey, it figures.
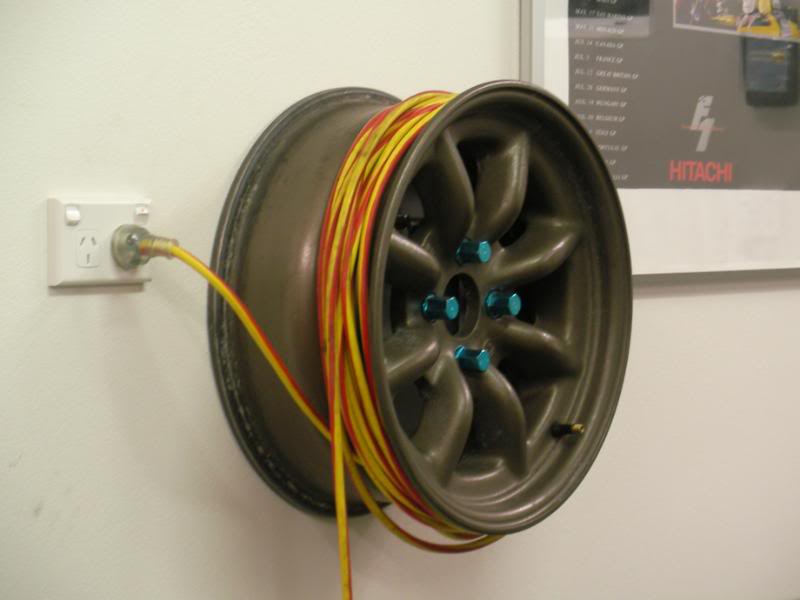
But it would seem that it happens to the aluminium ones too. I don’t know if it’s a difference in the castings between production years, or if it’s core shift from poor quality control, but you can see that the cracked wheel on the right is a bit thinner in the casting than the new one on the left. The new wheel is about 1.5mm thicker-walled in the spoke.
The rear pair seem to be ok. The front pair are the “A” model eight-spoke Watanabe, which is the most common kind. The rears are the “R” model, which are generally only in much wider sizes, and the spoke is a lot thicker at the spot where the A’s crack.
Having to get new wheels was a dark cloud with a silver lining though. The front cracked wheels are 14×7 +8 offset, which wasn’t enough dish/offset to fill out the flares at the front, so the previous owner fitted these 25mm thick KICS spacers.

Say what you like about spacers, but the key thing to me, is that a 25mm spacer is a wasted opportunity to fit wheels with 25mm more dish!
So the new wheels are 14×7.5 -3, which means they stick out 11mm more than the old ones did.
…and without the spacer in place, the new wheels will stick out 12mm less than the old ones did with the spacer. Since the old wheels actually protruded past the flare, I think these new ones will be a good compromise.
The other thing I wanted to do was spruce up the centre console a little, with its torn and old shift gaiter.
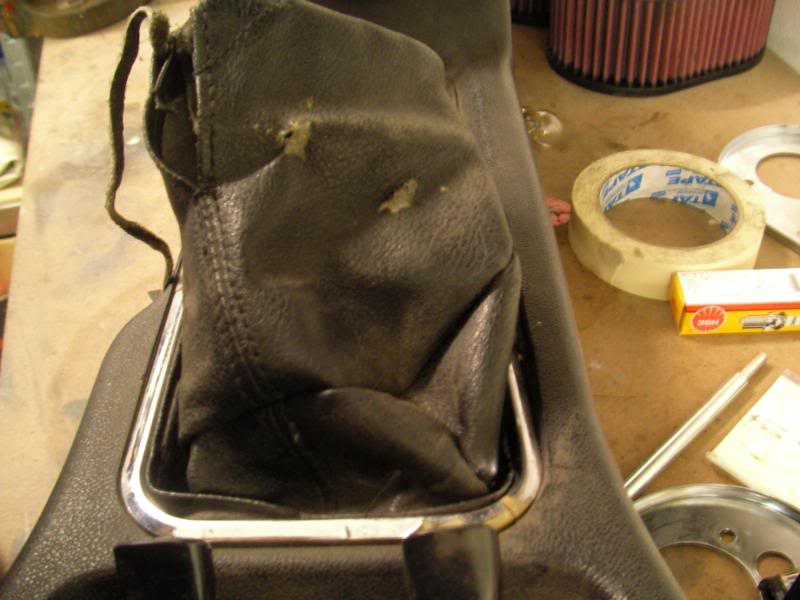
The gaiter is vinyl, which is clipped to the plastichrome trim surround.
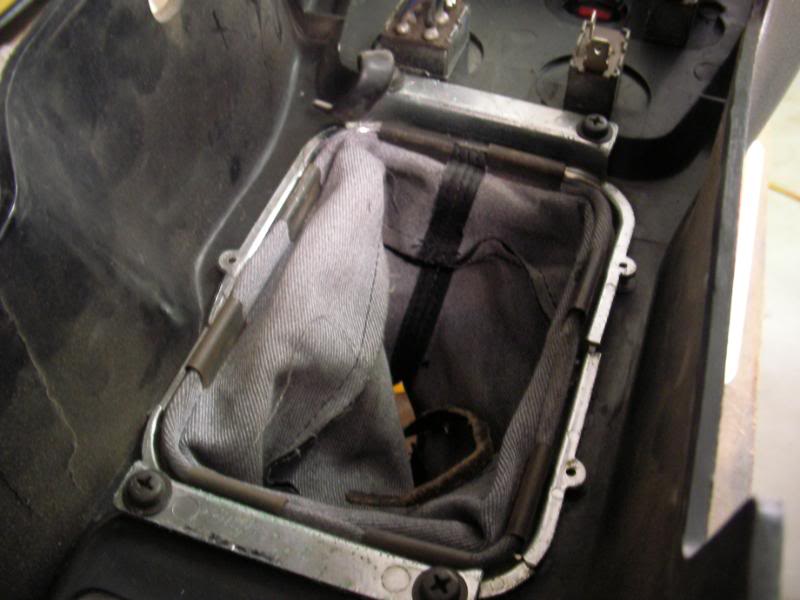
…which is sadly broken (and I couldn’t find a new one in Japan)
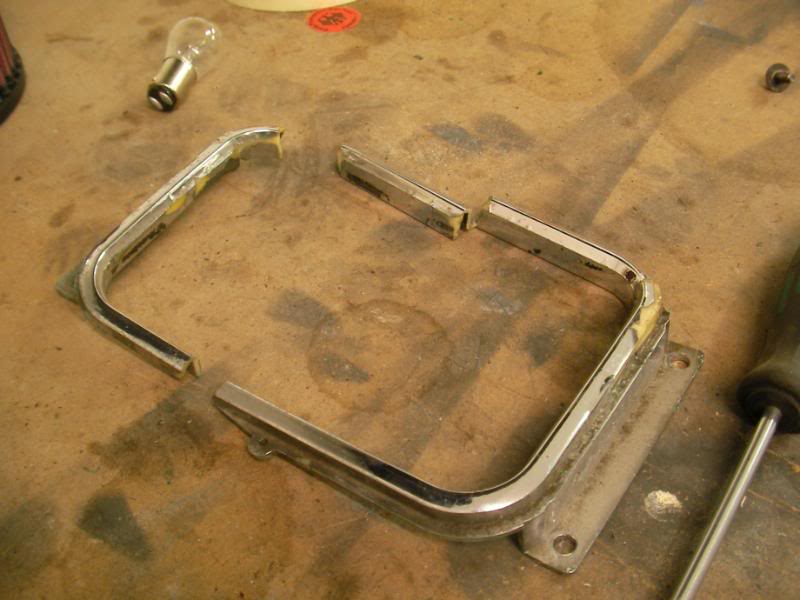
I did however, managed to track down a new shift gaiter…
And clipped in place, with the plastichrome surround reinforced with some tape, it doesn’t look too bad…I’ll definitely be on the lookout for a new trim surround the next time I’m in Japan tho
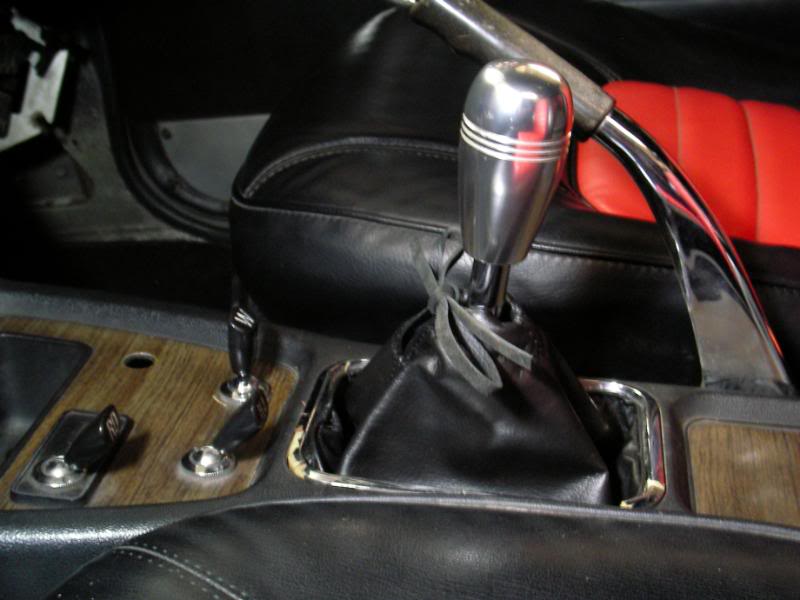
Here’s another weird Hako-ism….the centre console is only bolted down at the front. At the back, there is no facility to screw it down to the tunnel at all. So when you rest your arm on the console it does feel quite wobbly.
So they have these in Japan, which are springs which tie the console down to this convenient little hole in the seat mount. Works brilliantly, I’m not sure if it’s a factory solution or an aftermarket one though. Pretty expensive little springs at $15ea ![]()
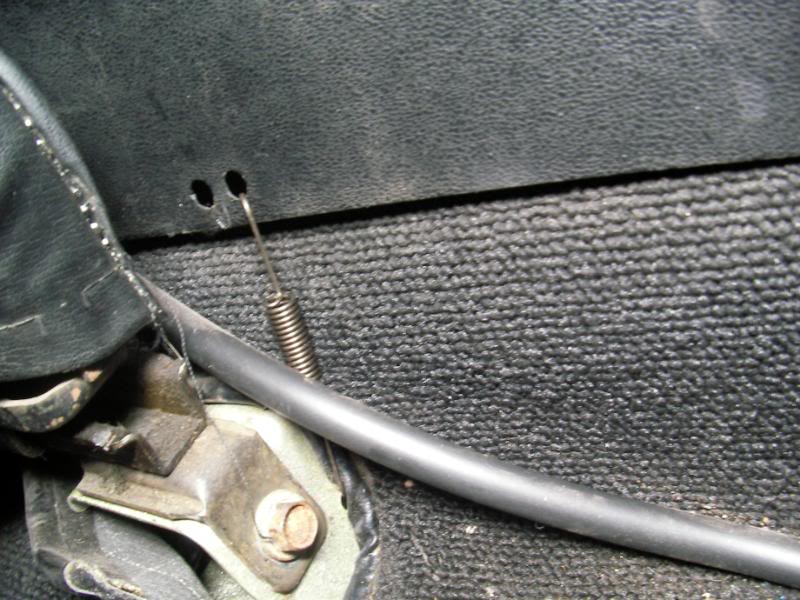
At the moment, a pair of the new wheels are being refinished in gold to match the rear wheels, and the good samaritan who’s offering me the new inlet manifold and I keep missing each other. It’ll happen soon though, and then the manifold can be ported out to match the head and we’ll be in business again.
Been a bit busy, so haven’t had much time to spend on the car, but things have been progressing…
First thing is that the replacement front wheels have been painted to match the rears.
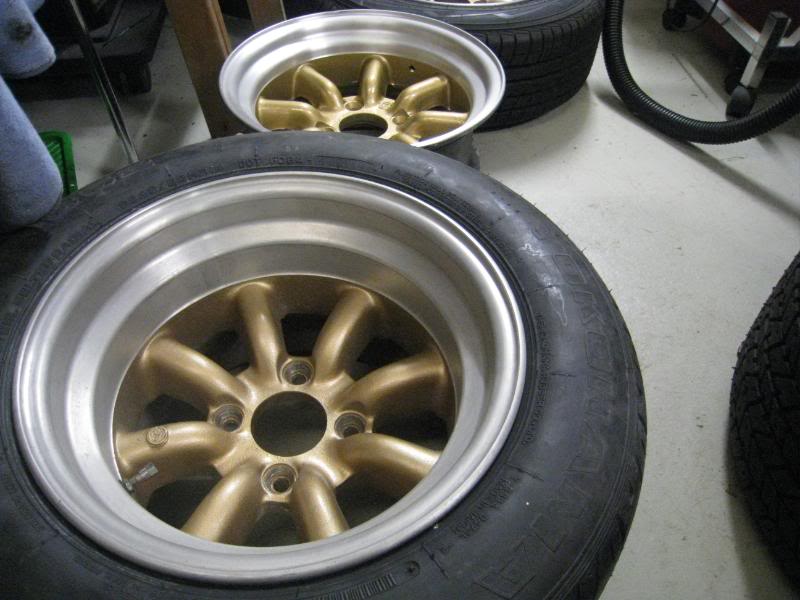
When I got the new wheels, they had charcoal centres with a polished rim, and the decision was whether to polish the rears to match the fronts…..but I thought that polished was maybe too blingy for this sort of car, so for the fronts I went for a brushed look, like the rears.
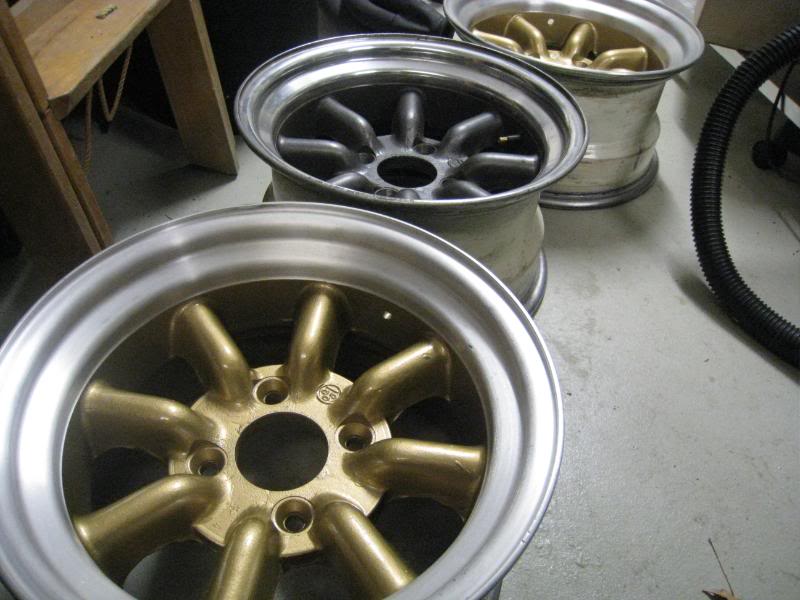
The new ones look great (courtesy of Neale Wheels) and are noticeably dishier than the old cracked ones.
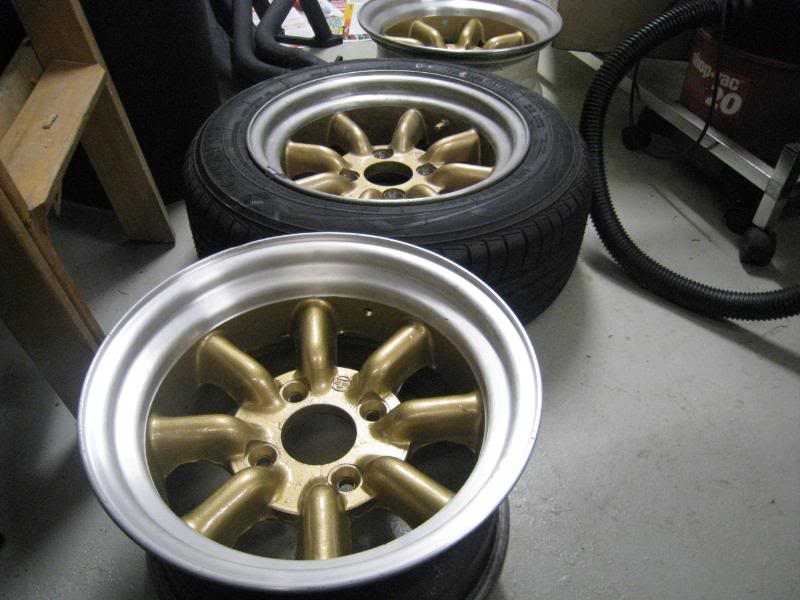
The other little job I had done was the powdercoat the strut bar mounts. As they came with the car, they were painted red, which I thought was a bit too flashy for a classic car.
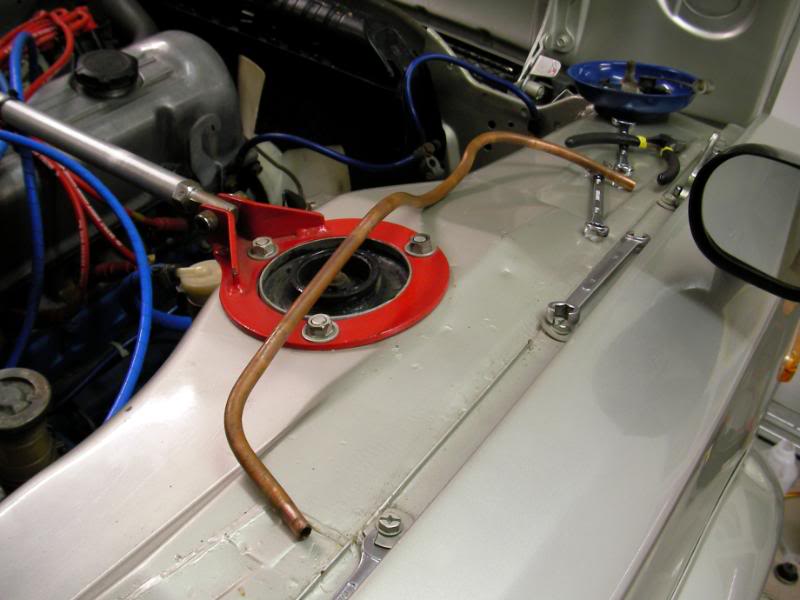
Also they had been painted rather poorly a few times, so it was nice to get them sandblasted smooth and coated in black.
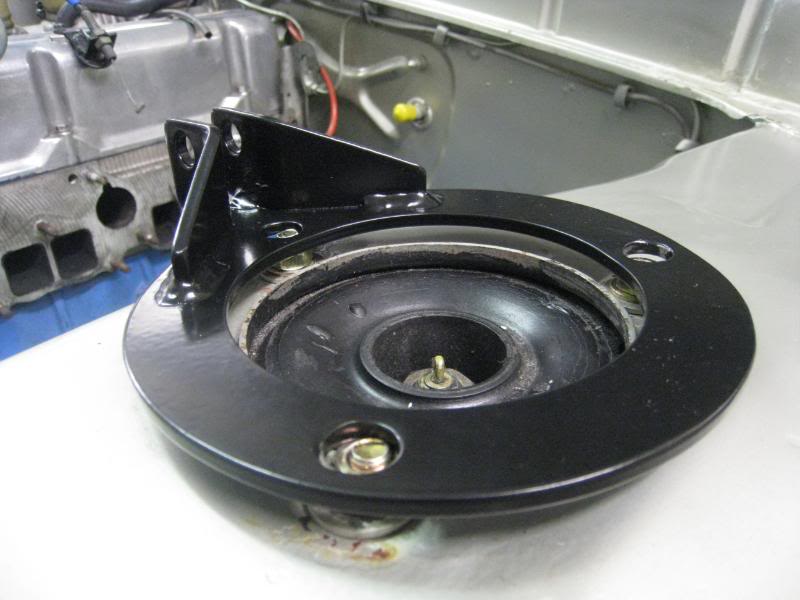
Also…remember the broken gearknob?
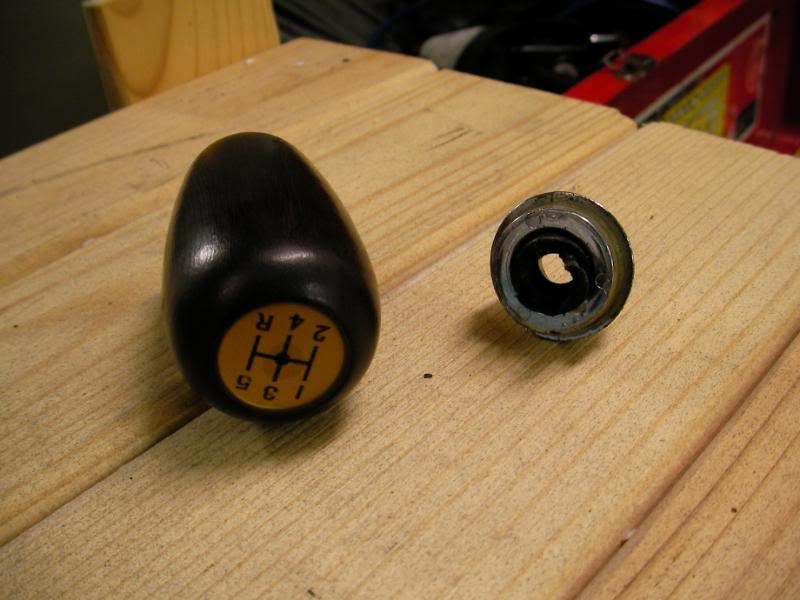
Anyway, I had a close look at it and realised that it was wrongly installed. The gearlever was only screwed into the plastic bit and so it’s not surprising that the plastic bit broke off. But there was actually a threaded insert that kept going into the wooden bit, so with a bit of fiddling around….voila!
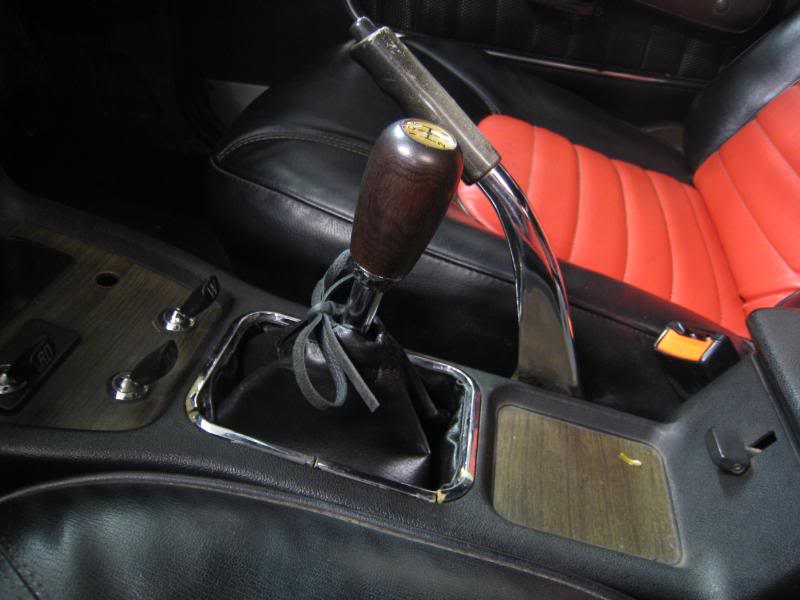
Much better than the temporary supercheapy one, and it would have been a shame to throw it out, since it was a replica GT-R one.
The last thing I did tonight was have a closer look at the dizzy…the rotor looked a little burnt.
The cap was fine, with no signs of tracking…but the thought has occurred to me that maybe the MSD Blaster3 coil is too big for this system….I guess when it’s all back together we will see.
As for the rest of the engine, I haven’t got my hands on the new inlet manifold yet, and I think maybe this weekend I’ll try to go over and grab it.
Ok, this is for Latka, who asked for some interior measurements of the cabin to see if he can fit ![]() So I thought this info could be useful to others.
So I thought this info could be useful to others.
B: from base of squab to the roof – 90cm
A: with seat all the way back, from base of squab to steering column – 49cm
C: from base of squab (seat all the way back) to un-depressed clutch pedal 93cm
D: from floor to steering column 51cm
Got the manifold back!
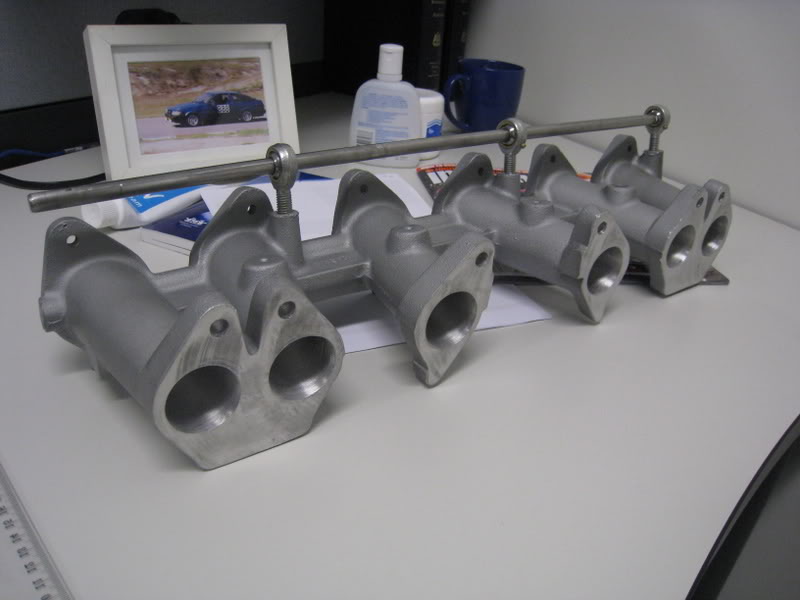
They didn’t think it was a great idea to perfectly match the manifold to the inlet and the guy reckoned you want to leave the manifold slightly smaller to get a good seal.
Anyway, here it is.
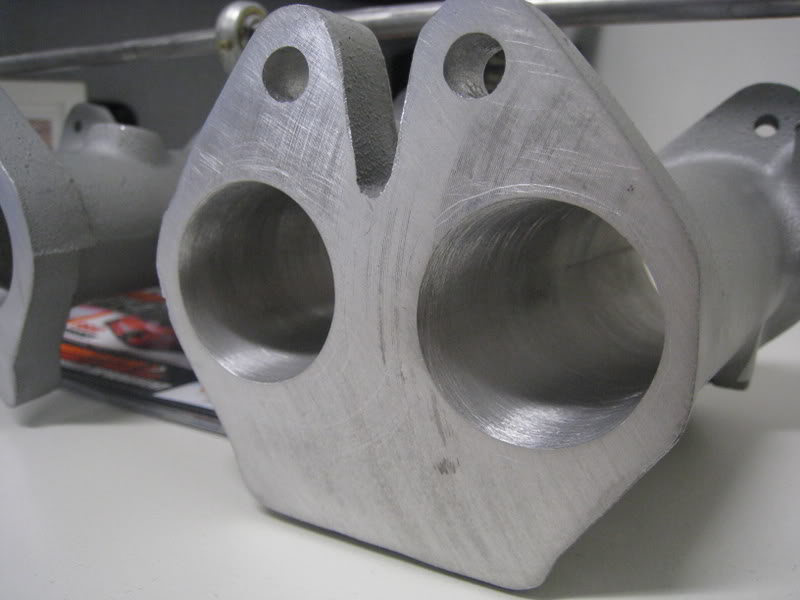
The manifold faces weren’t 100% flat, so they milled them down a tiny bit. This is the carb-side.
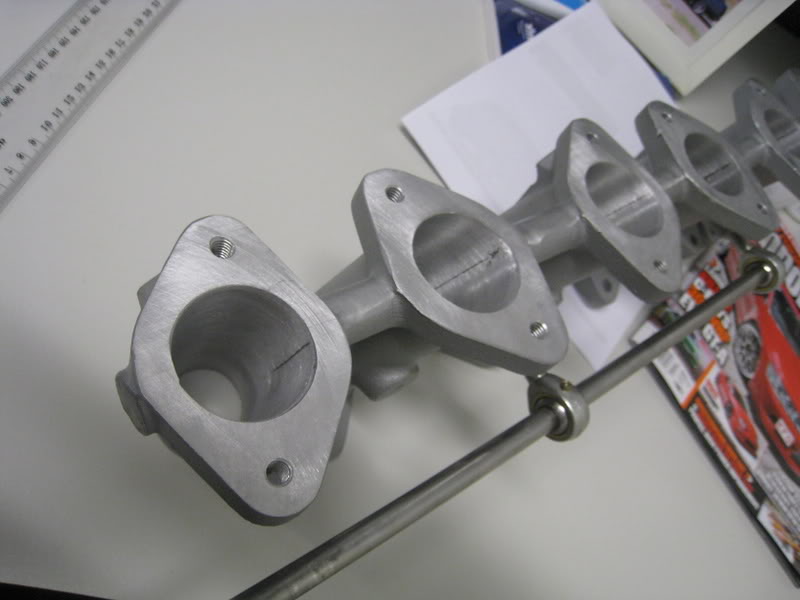
On the head-side, the ports have been opened up from 35mm to 38mm. The head is 40mm, so that is a 1mm lip all around.
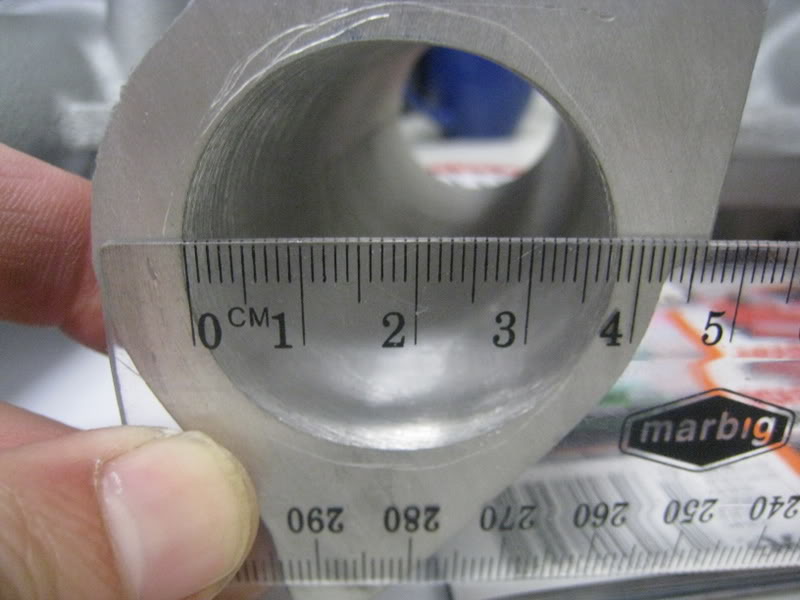
The Redline manifold was also drilled and tapped to accept the beefier rod ends that support the japanese throttle linkage.
But the rod ends don’t line up 100%, but I think all I have to do is give one of the ends a tiny little bend and I think it will be sweet.
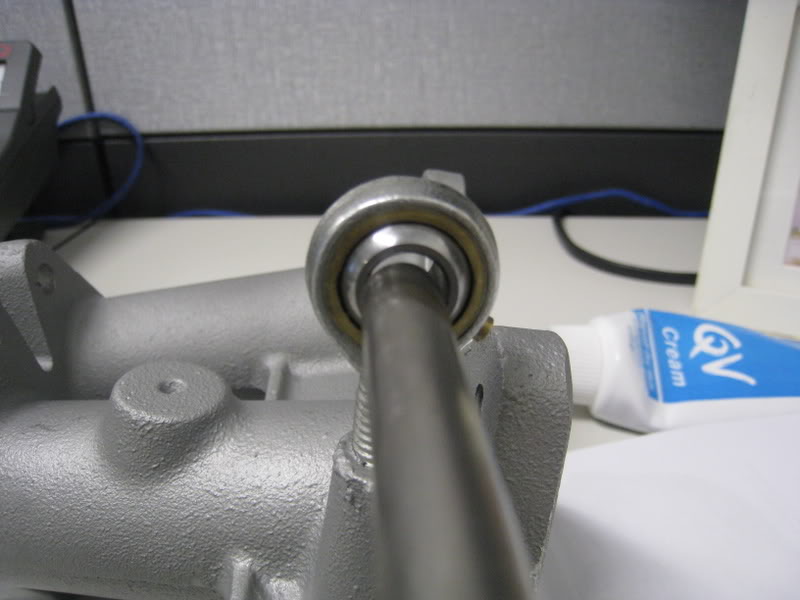
I forgot to buy the hi-temp silicone, so tonight I’ll just do a dryfit and see if everything fits properly and then I’ll assemble it all properly on the weekend.
Ok, test fitted everything up and it looks like it’s fine. I have to say the coated headers looks a zillion times better than its old rusty self.
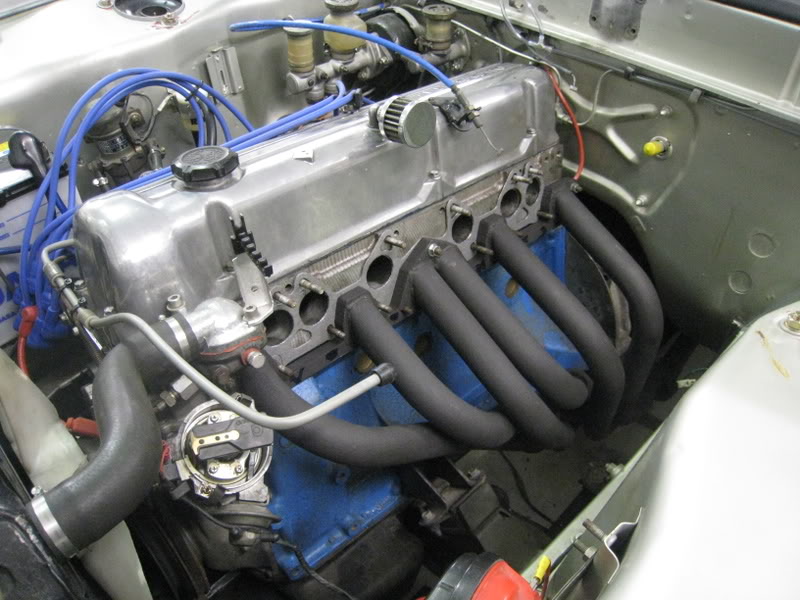
There are two spots where the inlet manifold juuust touches the header flange tho. Might just file it down a hair before fitting up. It doesn’t look like it prevents the inlet manifold from sitting quite flat on the head, but pushes the manifold to the side a bit.
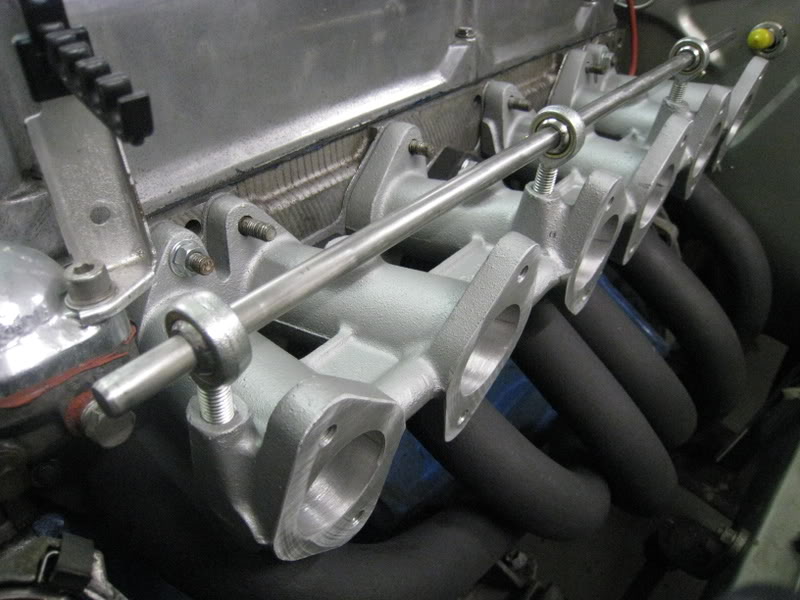
Remember the bridge washers which were crooked, due to the header flange being slightly thicker?
The headers were too big to fit into the cylinder head milling machine, so rather than machine some material off the header flange, I made up a set of stepped washers.
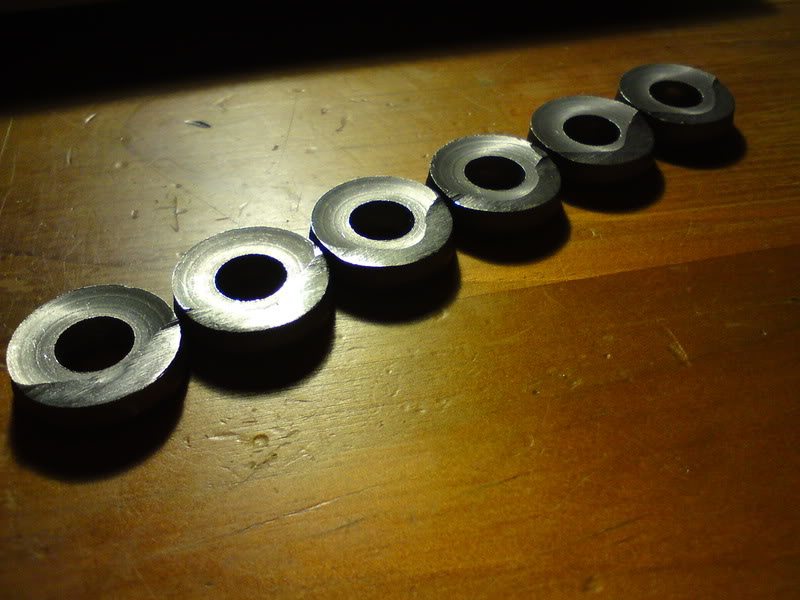
You can see the step quite clearly in this pic, and the home made bridge washers look like they’re sitting quite flat too.

Putting the new manifold next to the old one shows how much bigger the new one is.
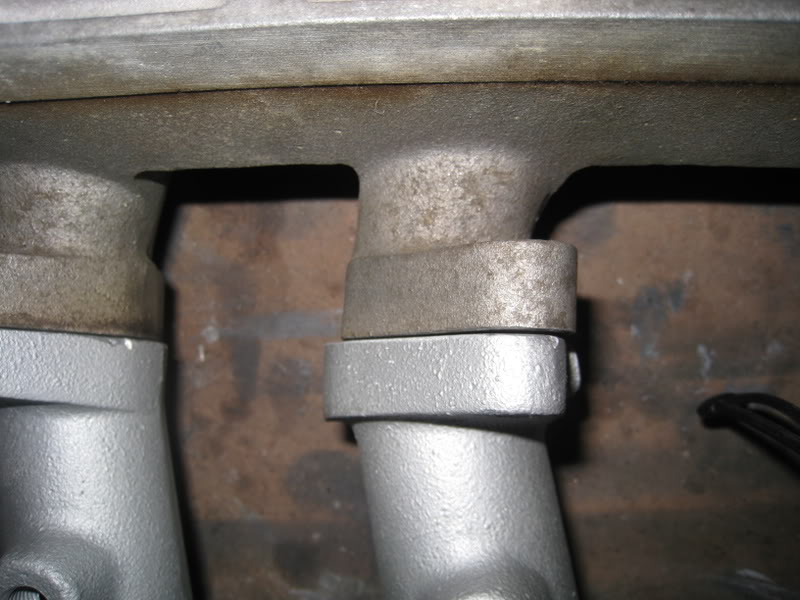
This shows how undersized the old one was. The scribed line is the inlet port shape, which is actually bigger than the flange at one spot, which must have cause a huge air leak on the centre carb.
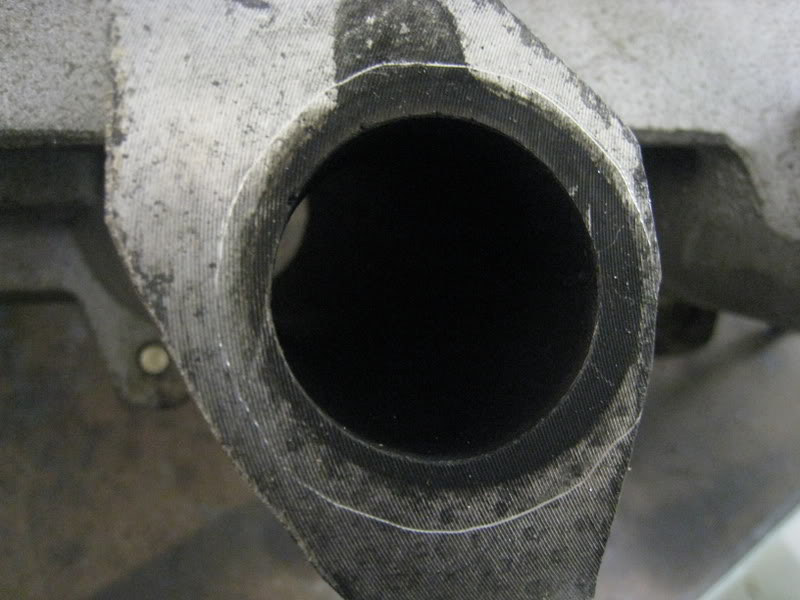
I now have to set up the old japanese carb linkages on the Redline manifold, which also entails swapping the throttle arm on the carbs from the firewall-side to the radiator-side, but that doesn’t look like it’ll be a problem….hmm, this is starting to look like a proper engine ![]()
Okay, it turns out that swapping the throttle arm on the carbs from one side to the other will require new arms, since the little tab for the idle speed screw will be facing the wrong way ![]()
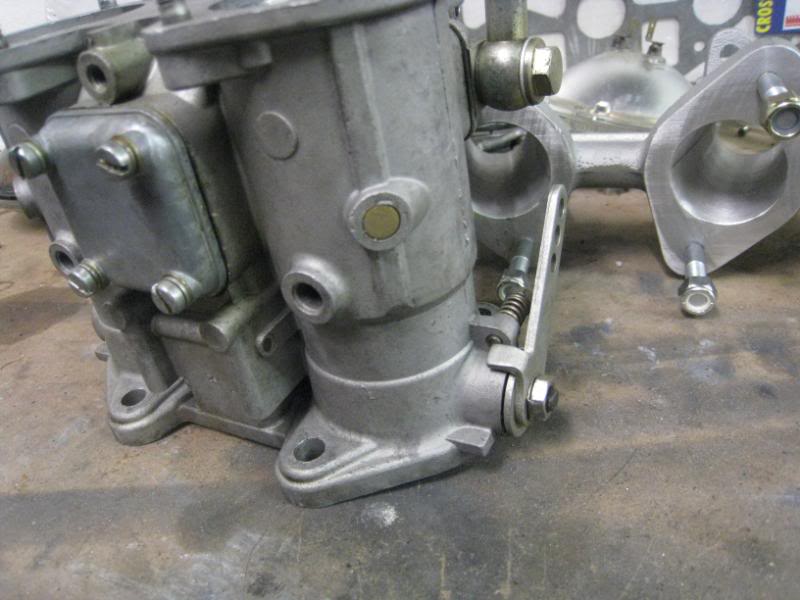
I’ve got the day off on Monday, I’ll pay Redline a visit and pick up a set.
So tonight I thought I’d just finish up a few cleanup projects I’ve been working on. A couple of the disappointing things about the engine bay visuals (apart from the headers when they were rusty) were the fact that the dodgy japanese painters painted over everything, including the bonnet catches and the windscreen washer tubes (how hard would it have been to spend 30 seconds unplugging the washer tubes?).
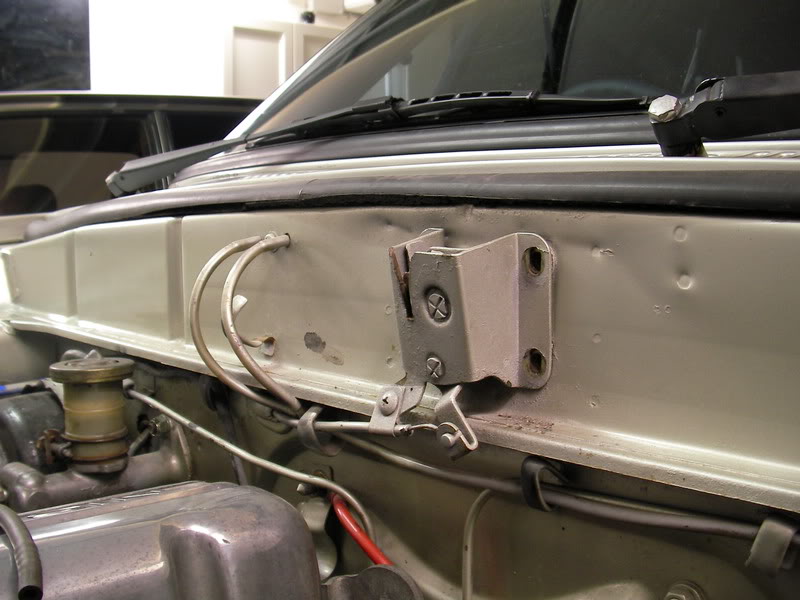
That, and the corroded headlamp bowls (which you can’t miss when the bonnet is up).
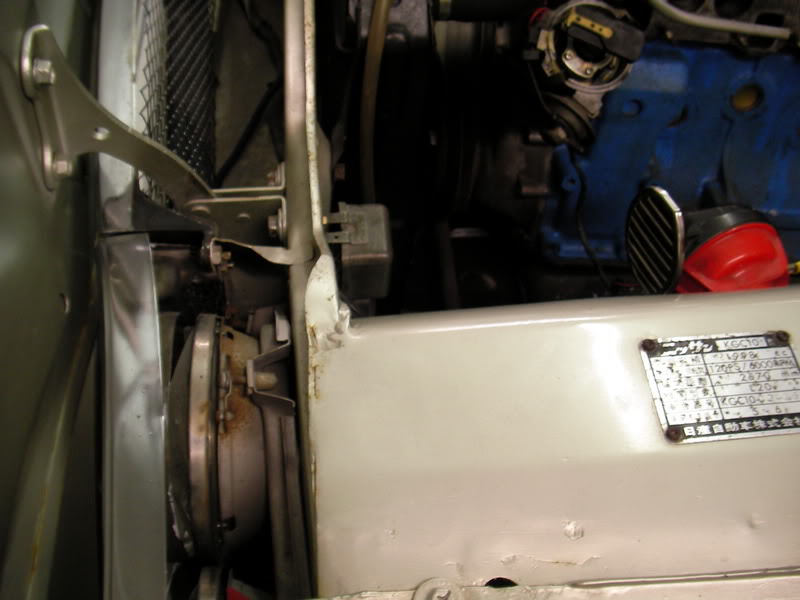
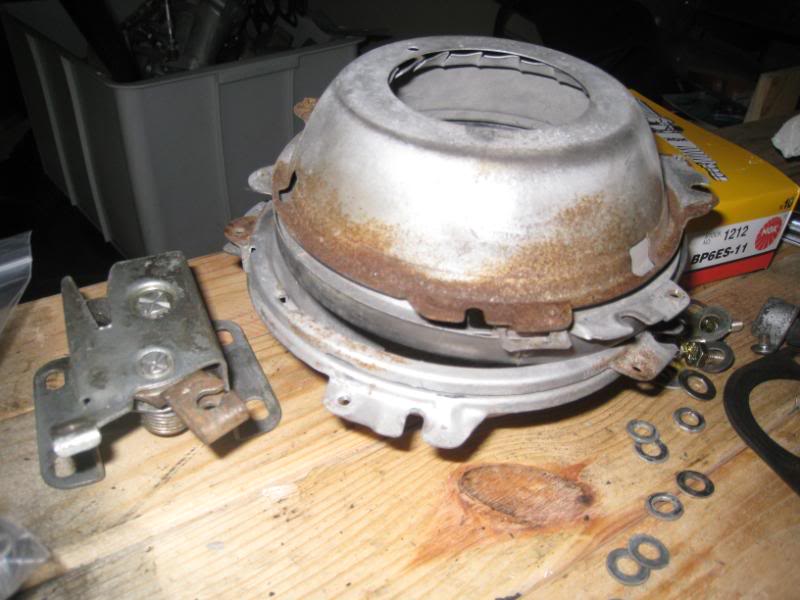
So I figured that it would be interesting to get them replated. Down the road from where I had the manifold done is Artarmon Electroplaters, and I was pleasantly surprised when they quoted me $30 for a big pile of bits I wanted cad-plated. Cad plating is that yellow/goldish finish that is on door strikers, etc, and I wanted that finish for that factory look.
The end result is…not bad, but not as shiny and glassy as new factory items I guess since the base metal is a little corroded. The process starts with an acid bath to remove the old plating and corrosion but of course it can’t make the metal smooth again if the surface is slightly matted by surface corrosion I guess. Oh, I also replaced the washer tubes with new ones, and the brake booster hoses too. For some funny reason, the Redline manifold takes the vac feed for the booster from #1 cylinder, which is the furthest away from the actual booster, so I had to get a much longer tube anyway.
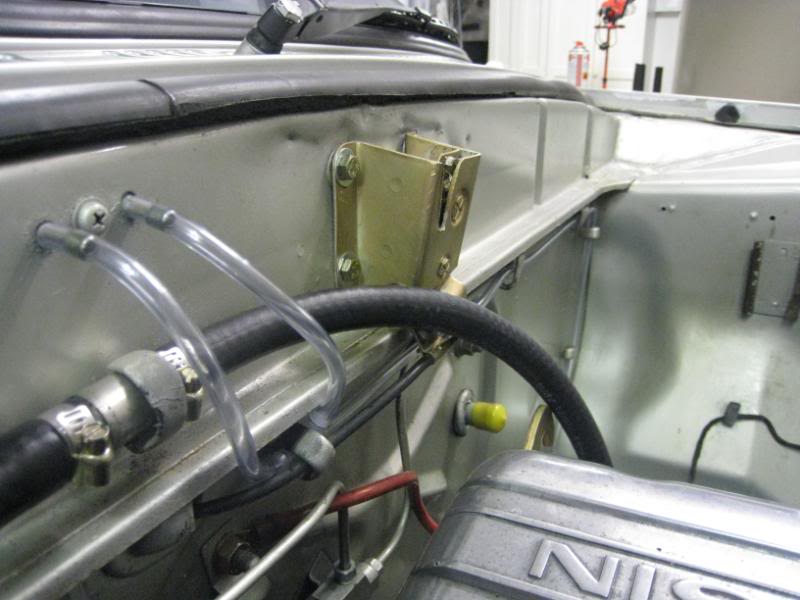
I sanded the paint off the bonnet catch cable with 600 paper, then smoothed it with 1200 paper, then hit it with Meguiars plastic polish and it came out pretty good. Too bad I can’t do anything about the rubber boot where it goes into the firewall.
The headlamp housings are actually several pieces. The lights fit into bowls, which have their own chassis which then bolts to the body. The problem is, the chassis have these nylon inserts for the headlamp screws, and I was 100% sure that they would break if I tried to remove them, and I couldn’t find anything remotely similar at Rare Spares. So no plating for those pieces, and I decided to paint them instead.
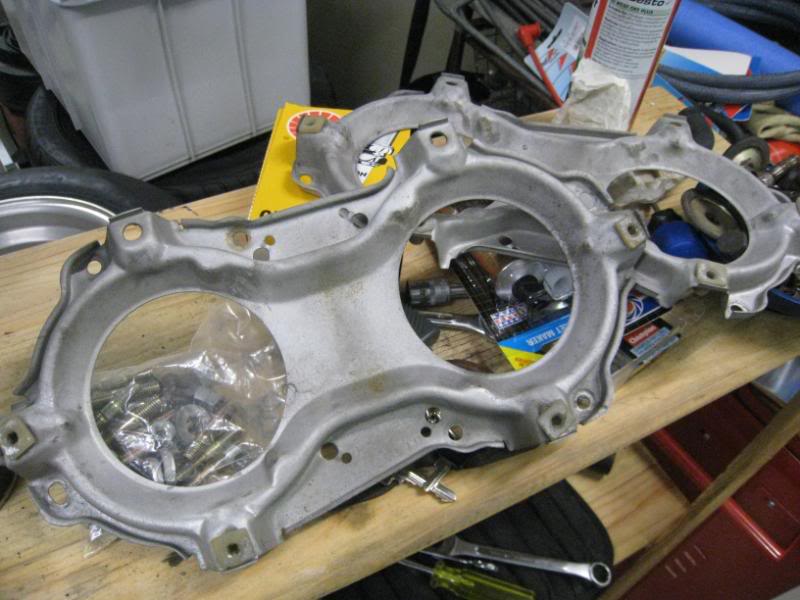
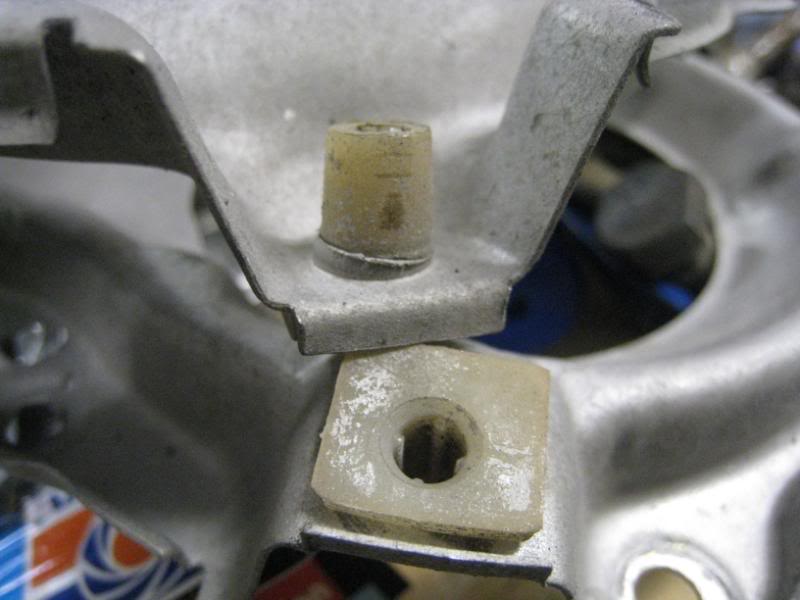

So start off 2 coats of etch primer, after sanding down the old surface as much as I could, and wiping it with wax and grease remover.
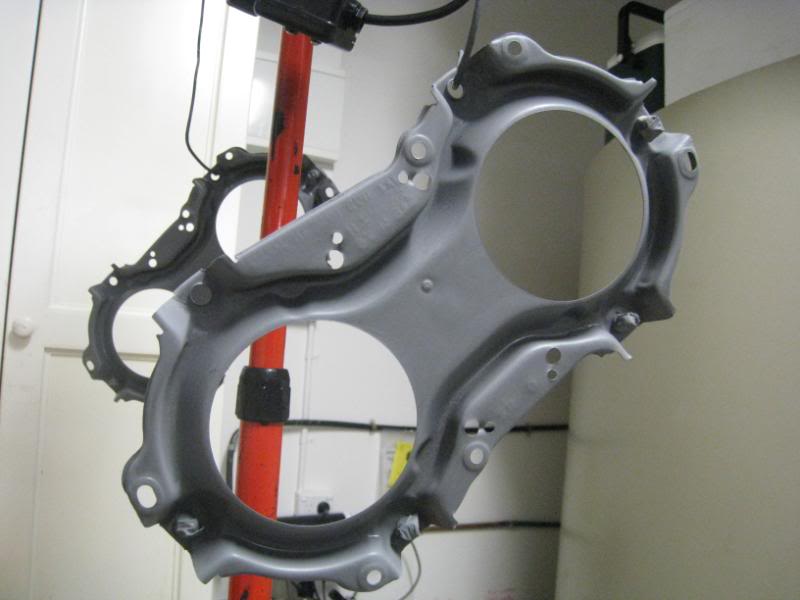
Then hit it with 4 coats of metallic silver.
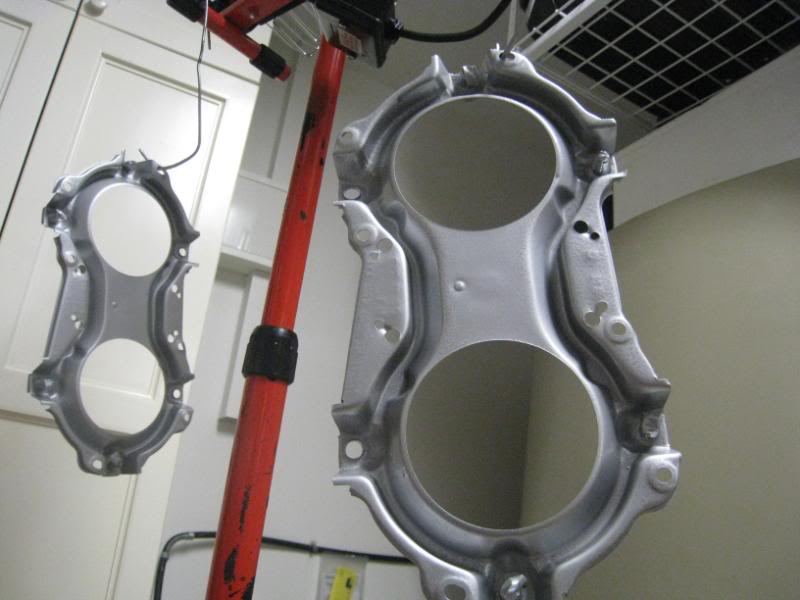
The final result is not too bad, although the cad plated pieces look more factory, the finish is a bit more cloudy than new factory pieces, so I think painting the whole lot in silver would have been a nicer looking result….well, it’s not too late to paint the headlight bowls I guess.

I’ll put the manifolds on the engine over the weekend I think, and then next week I can fit the Webers when I have the new throttle arms.
YES! Finished something tonight that I was really dreading.
Now, the studs for the manifolds were always a little chewed up, and some of them were bent a little, which made it difficult to fit up the manifolds: it was hard to get the nuts “started” on the threads and then they were very tight to turn. Also, I’ve got new nuts to install, and having the daggy old studs poking out (at different lengths I might add) was bugging me something fierce.
They are just screwed into the head, but the trouble with removing them is that on the L-series they are quite small diameter at 8mm…mix that with some decades old corrosion to lock them in place and they can snap quite easily when you try to back them out. And then you’re quite screwed (boom tish).
I bought a set of studs, nuts and bridge washers ages ago from www.thezstore.com and you know what I’ve done with the bridge washers, but was hoping I wouldn’t have to do the studs too. But tonight I was test fitting the manifolds again and the inlet manifold wouldn’t go on without some persuasion, so I decided to bite the bullet and replace the studs.
So first you douse everything a few hrs beforehand in this magic stuff (basically it’s WD40 on crack):
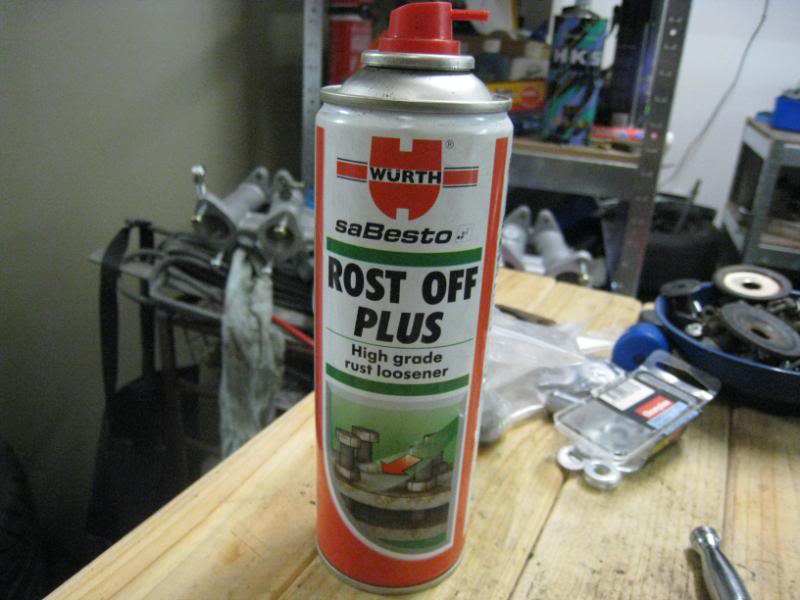
Then you lock two nuts together on the stud, and very carefully, and very slowly, try to wiggle it in and out a little to break it free from the threads, and then wind them off. (you can see in this pic some of the studs aren’t even screwed in all the way…JDM workmanship ftw)
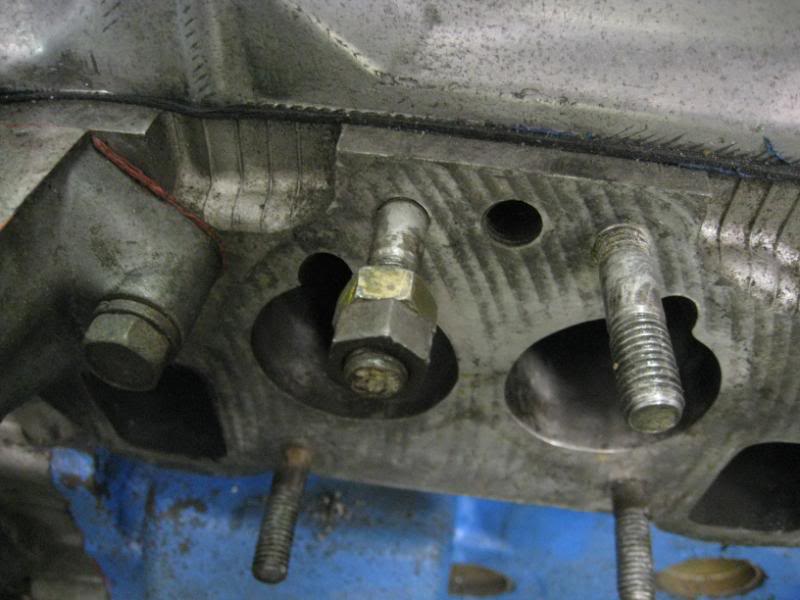
About 2hrs later….ta-da! I can’t believe none of them snapped, there were a few of them where I was leaning on them so hard I thought they’d go ping just as they started to rotate out.

You can see quite a few of them are banana-bent, and the threads on most are chewed up.
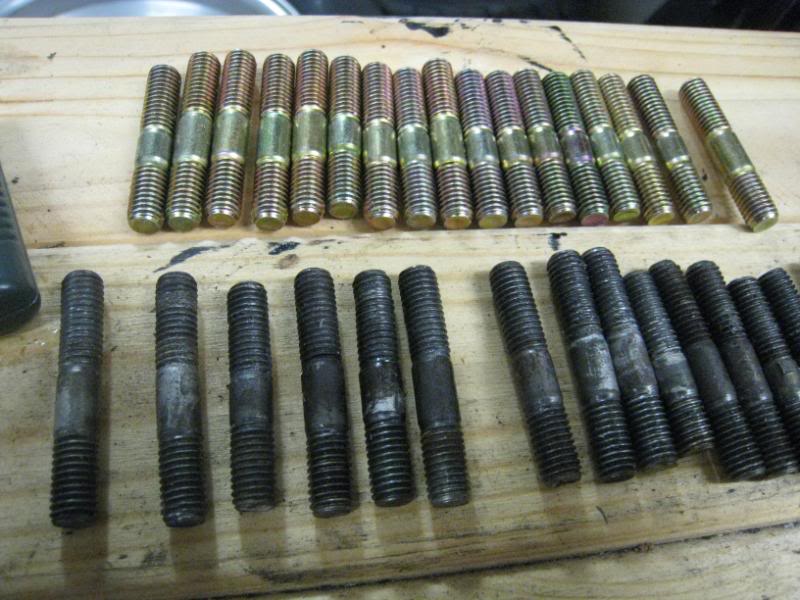
Before installing the new ones, I chased a M8x1.25 tap into the threads to clean them out.
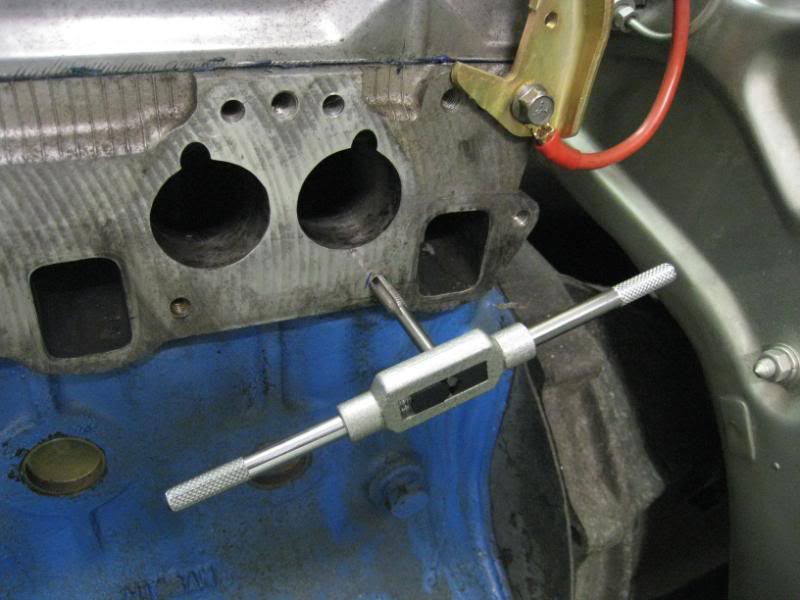
Taps have these grooves to trap the crud, so it’s much better than just running a new bolt in there to do the same, where the crud would just grind into the threads and the whole thing gets stuck.
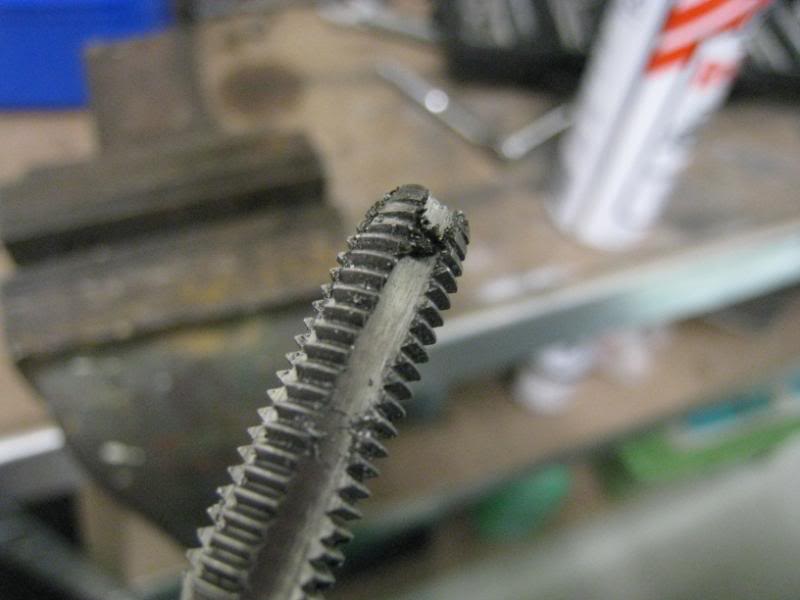
Instead of anti-seize paste, I was advised to just dip the ends of the studs in some engine oil and the new studs just screwed in by hand.
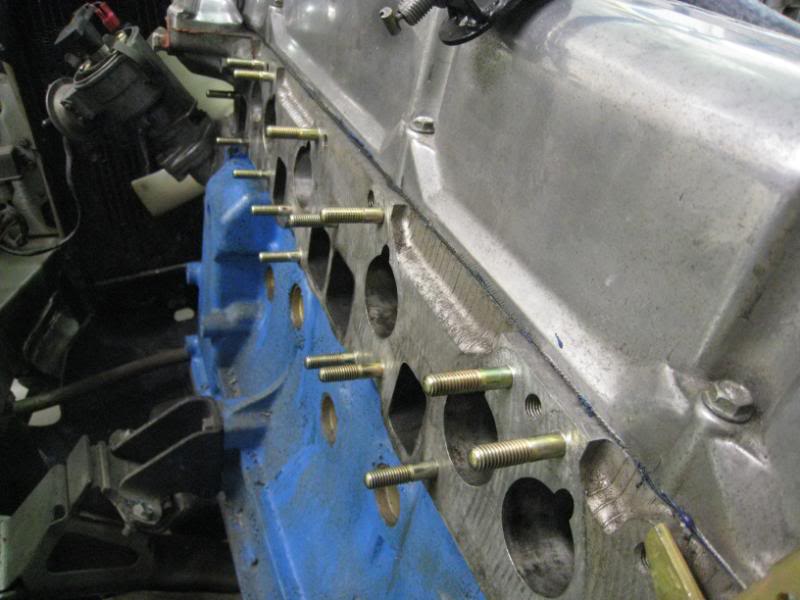
Phew…I was really dreading having to do this but it turned out great!
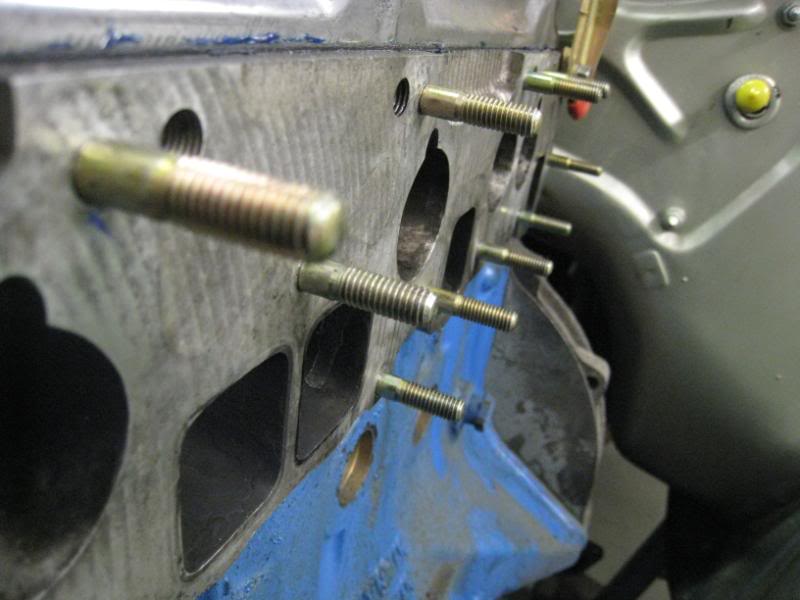
Test fitted the manifolds and they slide on like butter, and of course the nuts spin on and off with no trouble too. Tomorrow the manifolds get installed.
Alrighty..didn’t work on the car today, but did get a couple of things I need to button it all up.
I needed to swap the carb linkages from one side to the other, so here are the genuine Weber parts: they are a lot shorter than the arms that the carbs came with, so I think the old throttle arms must have been part of a Japanese kit, possibly came with the manifold. Also since the Weber arms have a ball, I can’t use the old linkage arms which bolt on to a hole in the arms. So I bought these new “ball rods” which have a plastic cup design which can pop on to the Weber arms.
But geez, Weber parts are expensive! Would you reckon that the throttle arms are $30ea and the ball rods are $20ea? Well they are.
Also dropped off some bits for chroming today. Since the strut brace plates are now powdercoated, the manky fittings were going to stand out. Dropped them off at the same joint that did the cad-plating, and we’ll see how it all goes. All this lot is going to be $30.
It’ll be interesting to see how they turn out. The guy says that the acid bath won’t get the old chrome plating off, but it will remove the corrosion, and he’ll have a quick go at removing the old flaking chrome beforehand with a wire wheel.
Ok, had a pretty productive day today, but as you’ll see there’s still a bit of mucking around to do before we can fire her up.
Here’s the new manifold gasket vs the old one (underneath). The new one is actually an off the shelf one, but Stewart Wilkins enlarged the inlet holes for me to match the ports on the head.
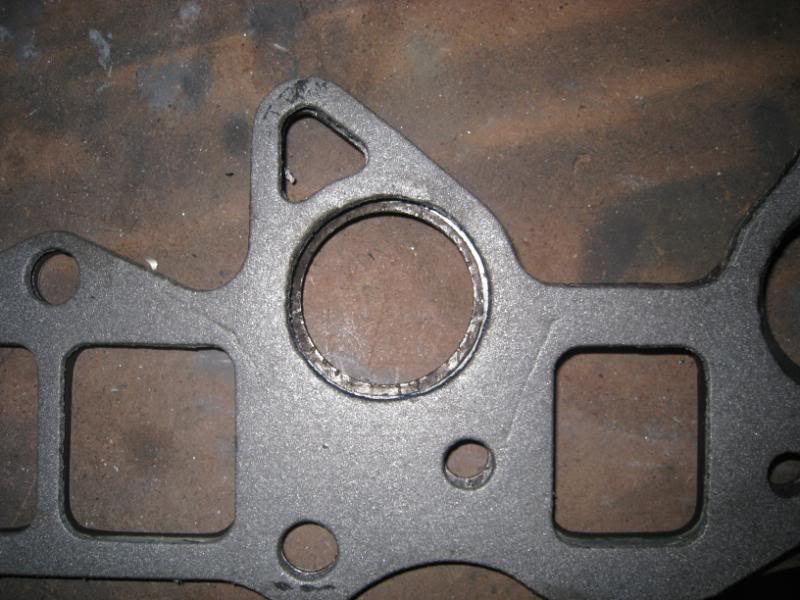
Second job was the swap the throttle arms from one side to the other to suit the Redline manifold
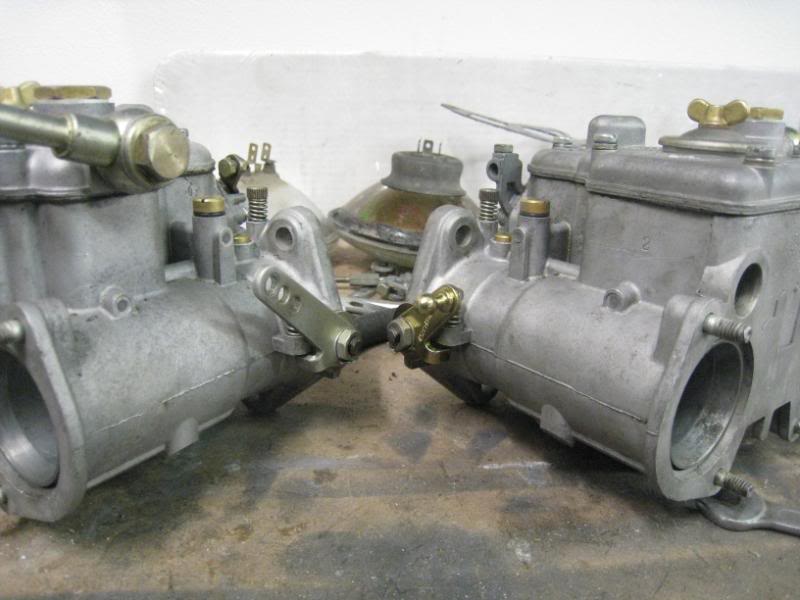
…and the idle speed screw is moved to the other side as well…so far so good, it was pretty straightforward
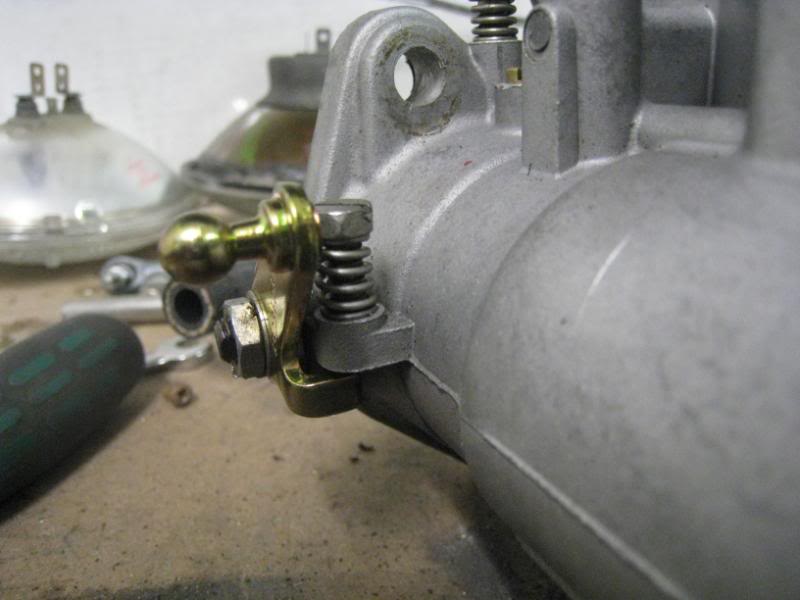
Ok, now the moment of truth. The machine shop that did the manifold recommended that I use the gasket with a very thin smear of hi temp silicone (Copper RTV)…this is the side facing the head.

The manifolds get some silicone too.
On we go…everything fits much better with the new studs.
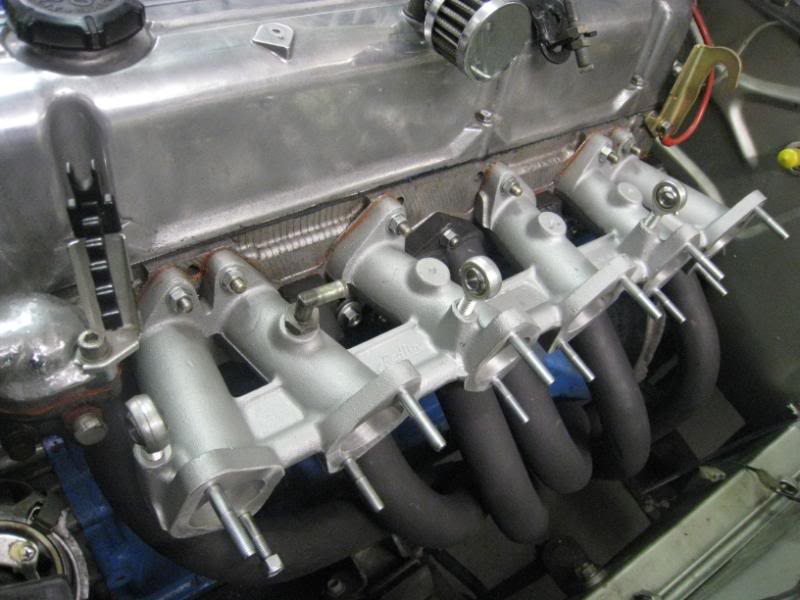
Next are the Redline softmounts…I’m not reusing the bakelite spacers that came with the JDM manifold, and also the Redline manifold is about an inch longer, so I’ve got space issues anyway. Interestingly, when you use softmounts, you don’t just bolt the carbs to the manifold, instead you use these squashy rubber washers.
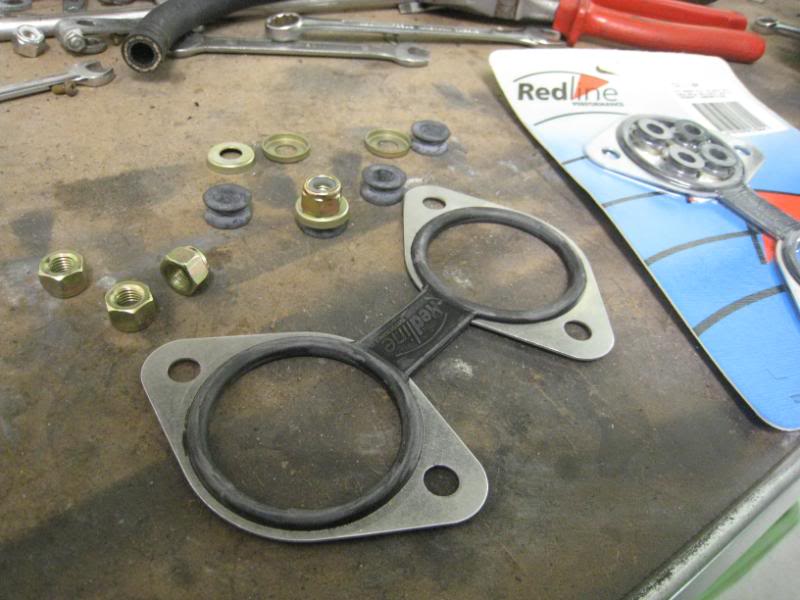
The instructions say to tighten the nut until it touches the rubber washer, then give it another 1.5 turns. This isn’t very much at all, the carb is held quite firmly but you can still wiggle it a tiny bit, which is the whole idea I suppose.
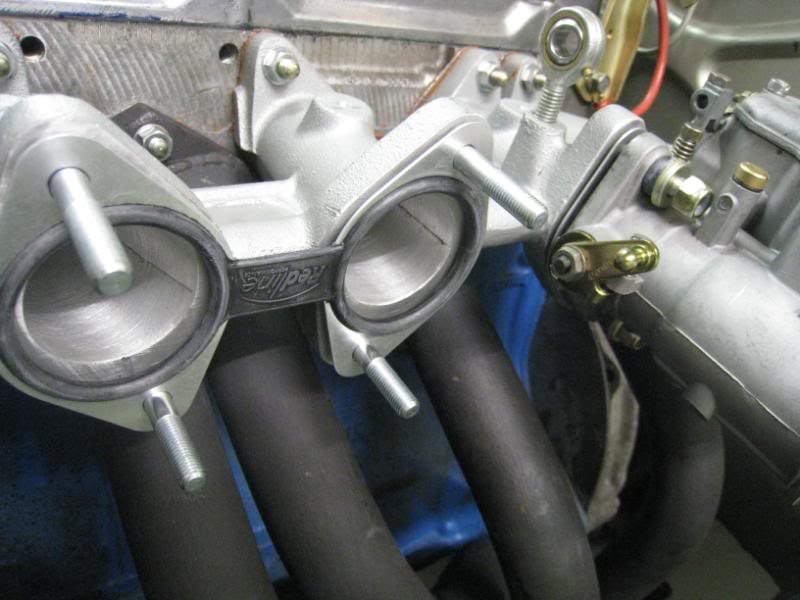
Looking good!….but at this point I’ve actually made a HUGE error, as you’ll see in a moment ![]()

But anyway…the Redline manifold is so much longer that one of the K&N airfilters wants to occupy the same real estate as the washer bottle. Also the other two filters are so close to the bodywork that I can’t get a screwdriver in there to fasten the top of the filter….looks like I’ll be driving around JDM-stylez without filters until Plan B makes itself known.
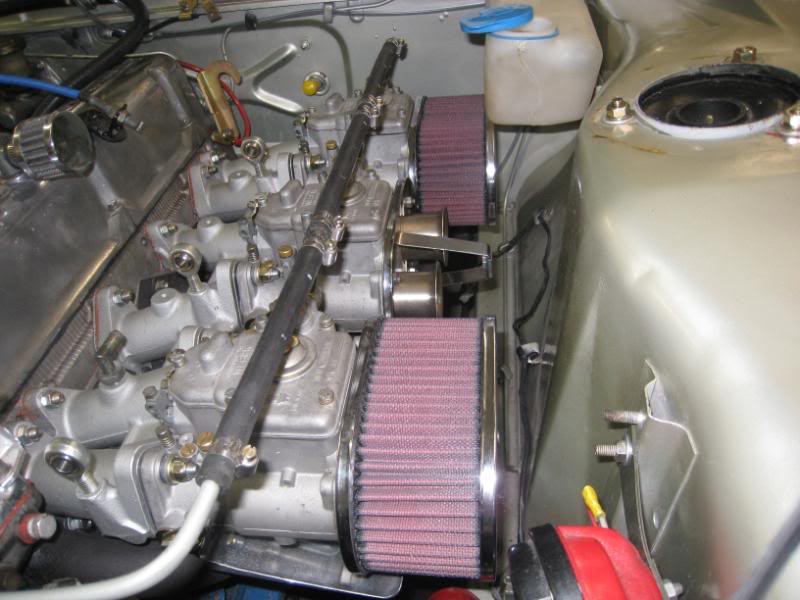
Well anyway here’s the stuff-up…I should have installed the linkages before I put the manifold on.
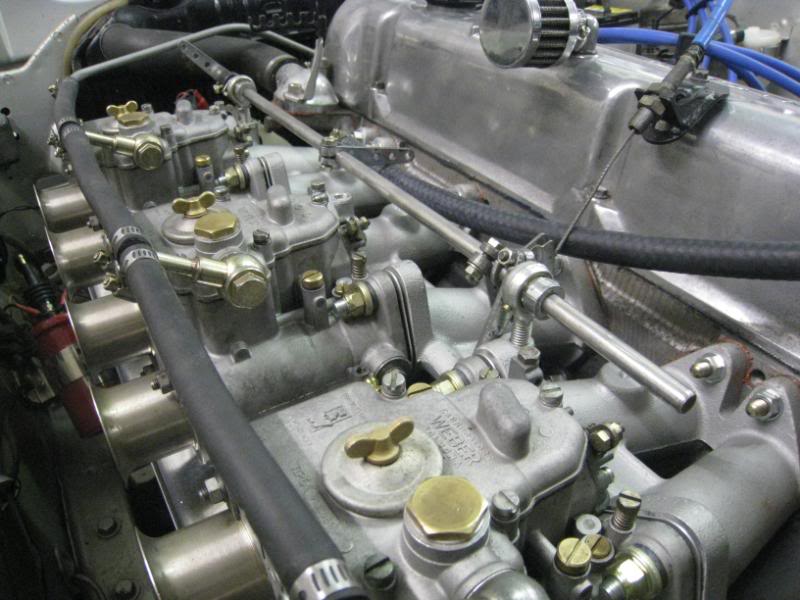
The Redline manifold has got different positions for the jackshaft mounts…the old FET had the mounts in different spots and you could still somehow get the jackshaft in and out…but with the Redline manifold, the only way I can get the jackshaft in now, is to remove the radiator ![]() …or remove the centre mount for the jackshaft, which you can see in the pic above.
…or remove the centre mount for the jackshaft, which you can see in the pic above.
I want to take the radiator out after rego anyway, and also replace the fixed fan with a clutch one, and check the waterpump…but for the time being I think this bodge will be ok. The jackshaft is 10mm steel, so I can’t see it flexing or getting bent or anything like that, especially since the bellcrank for the throttle cable is mounted right next to one of the mounts.
An immediate problem is that the longer Redline manifold means that the original throttle cable mount is now too far away to get full throttle travel. I’ll have to make up a longer bracket to put the tip of the cable closer to the jackshaft…and re-route the brake booster hose too!
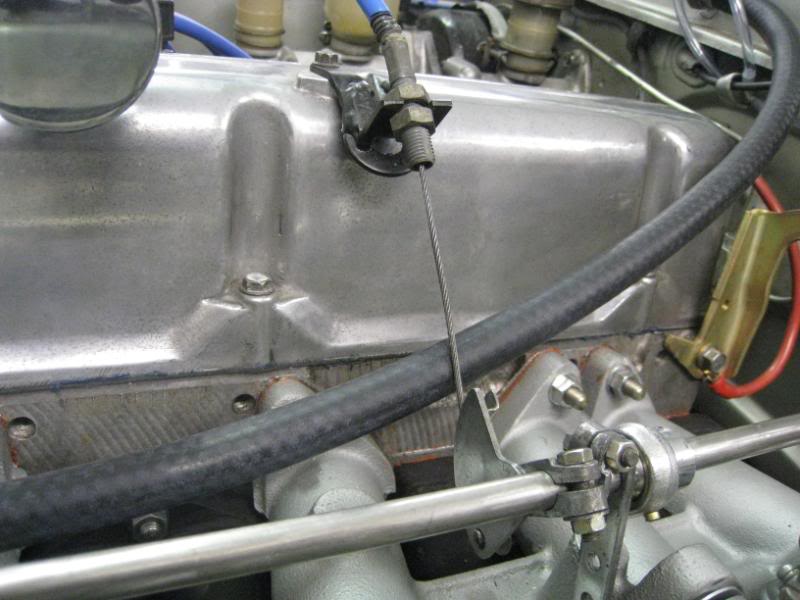
As you can see, with the softmounts, there is quite a big gap between the carbs and the manifold. It should be good to prevent heat from being conducted to the carbs from the manifold (but the main source of heat in an L-series installation will be radiated heat from the headers below anyway)
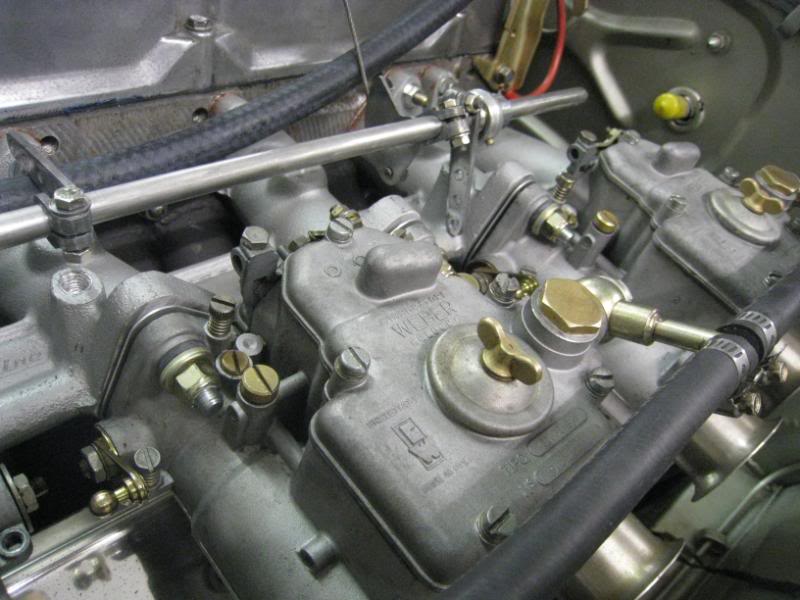
The other issue is this…moving the throttle arm to the other side means that the linkage for carb #1 is awfully close to the distributor and ignition cables.
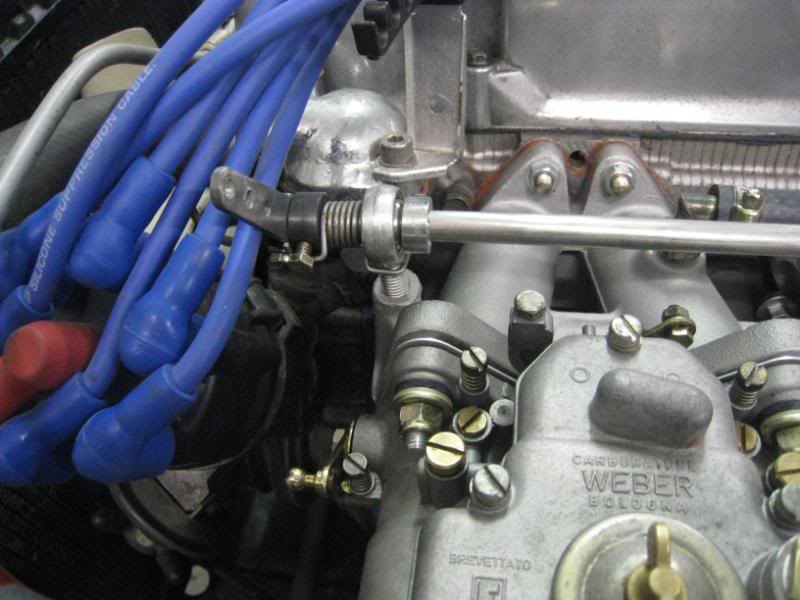
I can re-route the plug wires to get some clearance, but it isn’t ideal and it makes sense that the Japanese manifold put the linkages on the other side. I can make juuust enough room by making the plug wires go around the front of the engine, but now will have to get new wires of a different length, because now most of them are too short. Just as well these are just $6ea cables from Auto One.
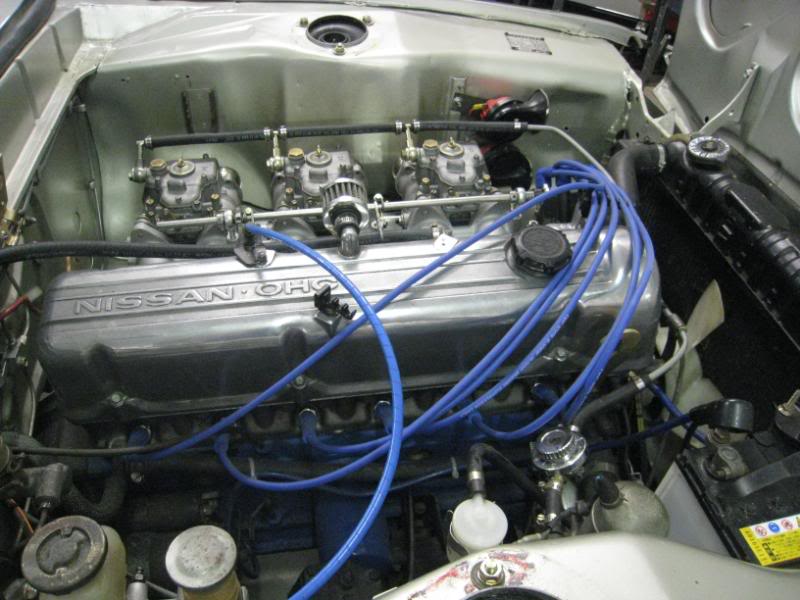
Ahh well…still some more fiddling to go, but nothing insurmountable. At least it all looks nice… ![]()
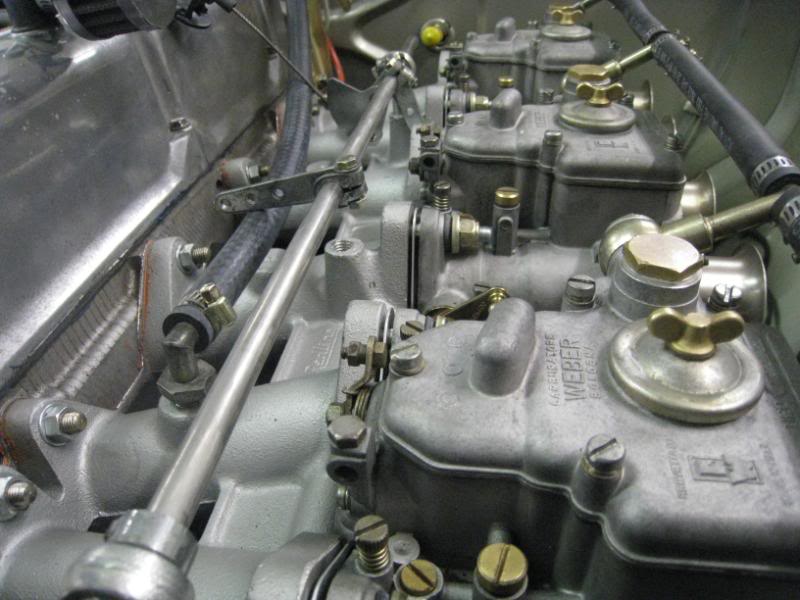
Yup…they say that the vibes from the motor will “boil” the fuel in the carbs and compromise the fuelling. Some ppl swear black and blue that you must have softmounts, but generally JDM carb kits don’t come with them, and also some stock cars that come with Webers just bolt the carbs to the engine solidly with a normal paper gasket. But…it’s worth a try, and in my case will prolly do as good a job in temp insulation without adding as much length as the original bakelite spacers…
A couple of little things weren’t too hard to sort out this morning. I found a nice bit of scrap stainless and made a new cable bracket (much nicer than the dodgy japanese one). Polished up quite nice.
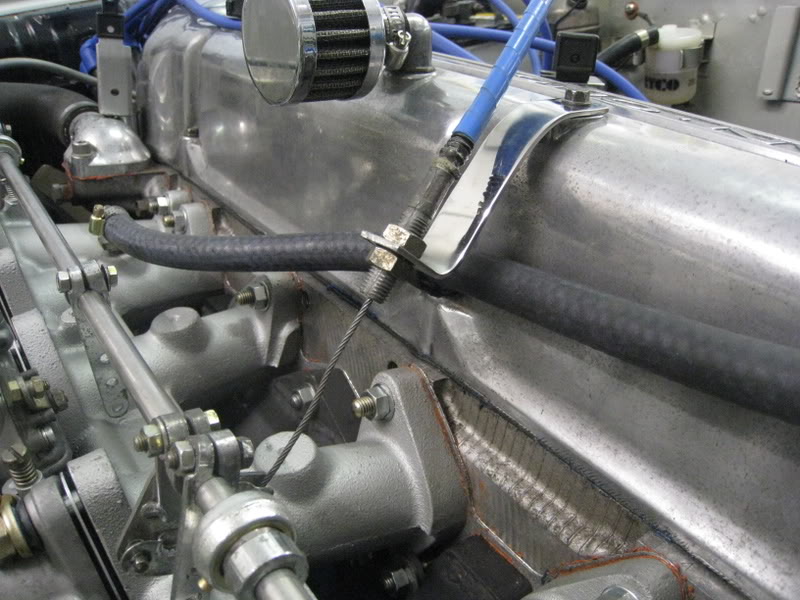
Bolted a loom tie-down to the rocker cover to hold the booster hose. It’ll do the job, but from an aesthetic point of view I think it’s a bit messy how you can’t miss that big black hose.

Just need to measure up the plug wires to see what lengths I need to get…
onight’s session was fun because it was the time when all the pieces are ready and it’s just reassembly and fine tuning.
Remember the strut brace fittings that I sent off for rechroming?
Here they are, and for $30 I think they turned out great! I also asked for a set of nuts and washers to be chromed too, and I’ve put a normal cad-plated nut there as a reference to what it used to look like.
The only thing is, the process is re-plating, and it doesn’t remove the old chrome plating, the new chrome just goes on top. So the new chrome plate actually makes the threads tangibly thicker, and I had to sand the threads down a little and even then the nut was a very tight fit on the male brace end. Before, the nut was a very loose rattly fit, but the first time the nut went on it had to go on with quite a bit of force, and I had to keep backing off the nut to clean out the little bits of chrome plate which were being worn off the threads.
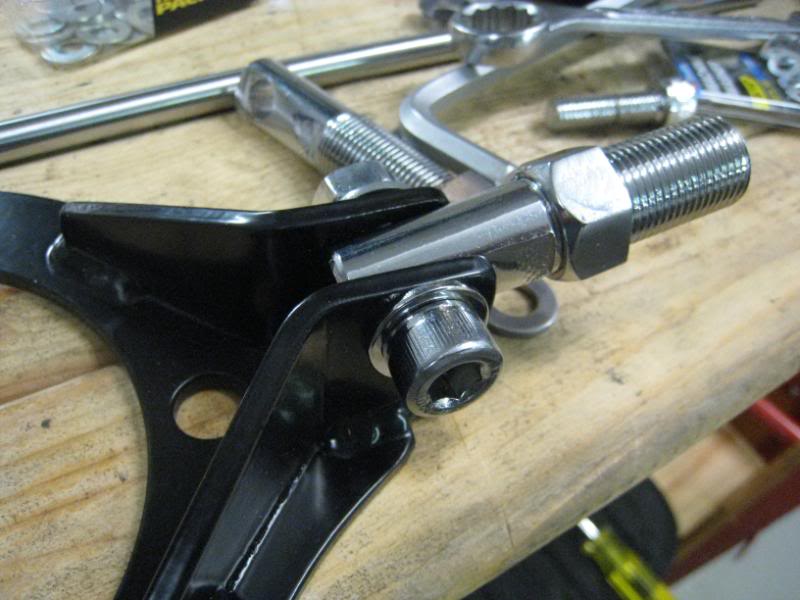
It’s worth thinking about when you get parts rechromed, that you may have to clean the excess chrome off the threads with a tap and die later, but I think with the powdercoated tower brackets, the strut brace will look quite nice.
Ok, onto the engine. Remember how the Redline manifold requires such a long brake booster hose that it’s a little unsightly?

Someone made the excellent suggestion of using a hardline to replace some of that rubber hose. So I started off with this dodgy bit of 10mm copper tube that the JDM engine builders used as a fuel rail.
Straighten it out, polish it up and cut it to length…
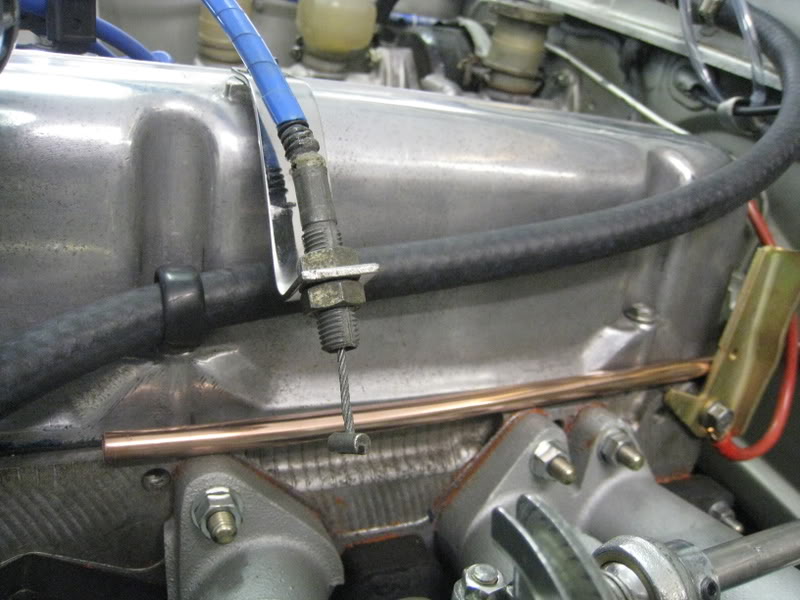
Then seal in the shine with a few coats of clear…fit up with a couple of P-clips to the rocker cover bolts and voila!
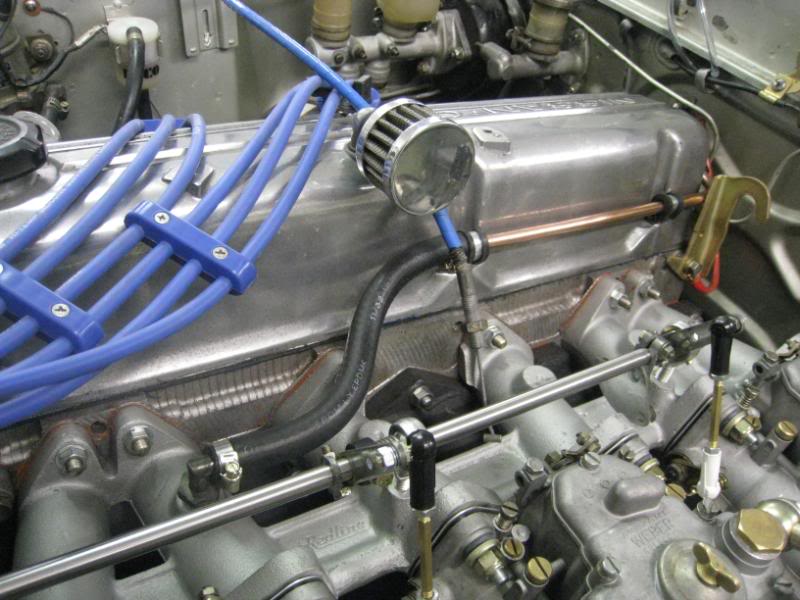
It curves around the back of the head…
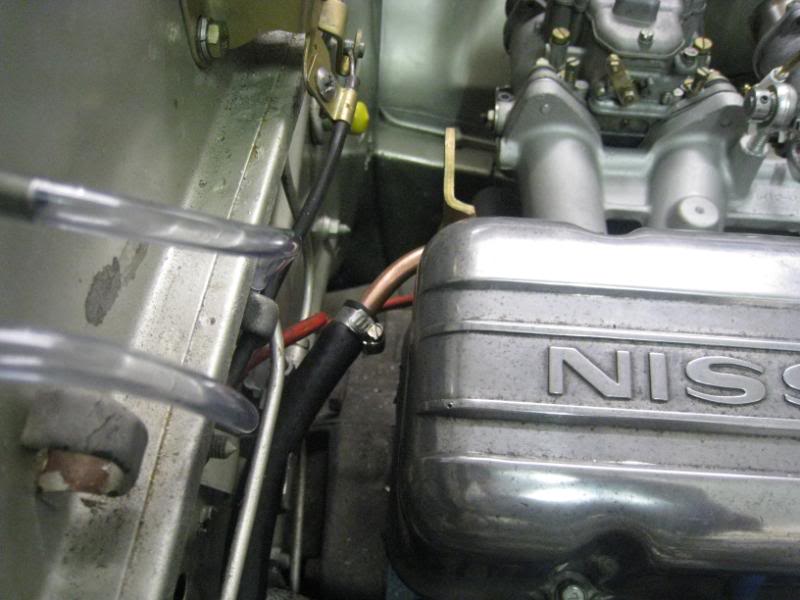
Where I rerouted the rubber hose and one way valve under the clutch master cylinder. Came out pretty good.
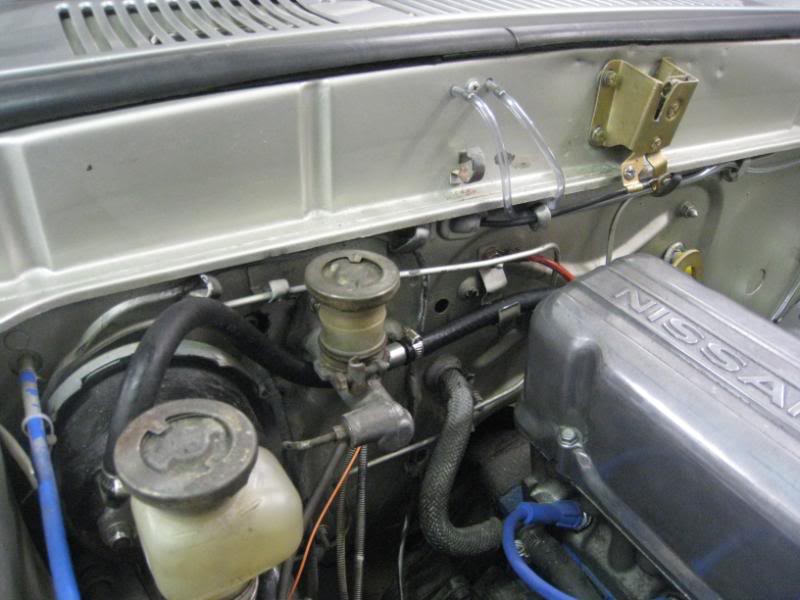
Next thing to do was to finish the throttle linkages. Before, I goofed and didn’t realise that the Redline manifold required that the linkages be fitted before the manifold goes onto the engine. I did get the linkage jackshaft on, but only after removing the centre mount so that I could swivel it in place.
Anyway, it turns out that a length of steel 10mm rod is only $20/m, so I bought some and had it cut to length. It’s much shorter than the JDM jackshaft, and gave me enough clearance to fit it with the centre mount back in place.
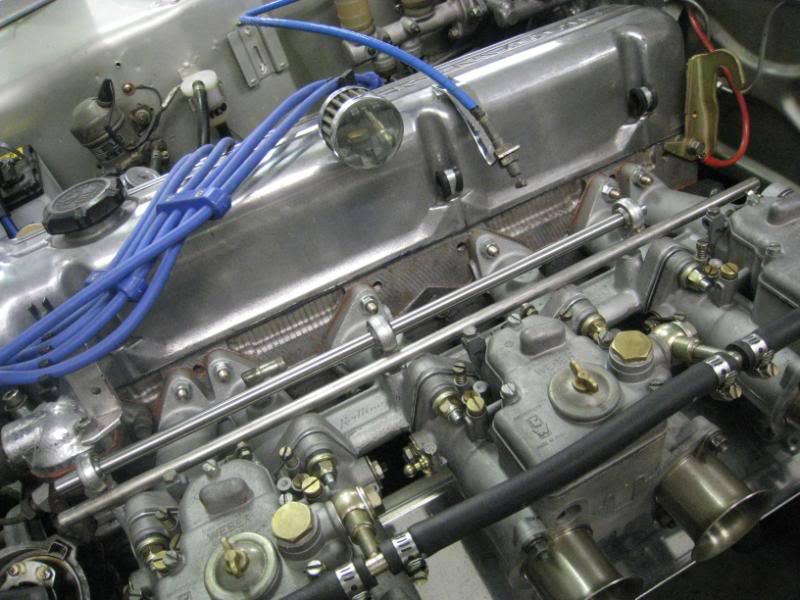
Next, set up the new Lynx ball rods. They have to be the exact same length.
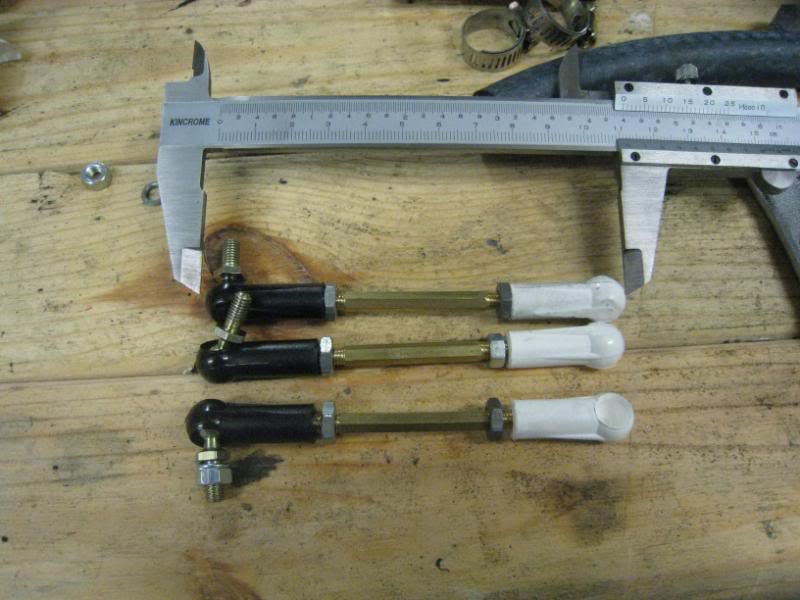
You might notice that the throttle arms on the jackshaft are almost vertical. If the jackshaft arms were exactly parallel to the carb arms then there would be a 1:1 movement ratio when you depress the accelerator. The arms on the carbs are at 45 degrees or so, so adjusting the ballrods to have the jackshaft arms more vertical means that the throttle is slightly progressive.
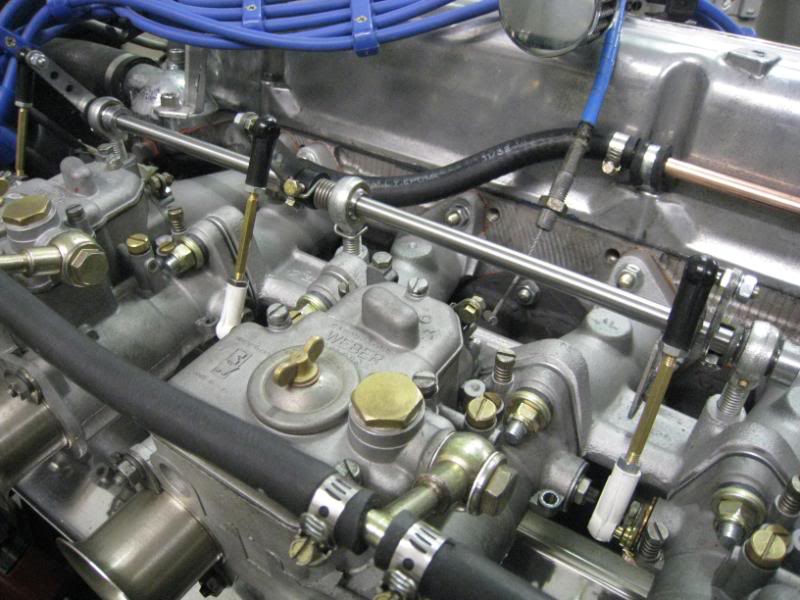
Setting up the linkages for the first time is a little fiddly and time consuming since there are so many variables. In the end I got it pretty close, but I wasn’t happy with the angle of the cable bellcrank, and also the amount of slack in the cable I had to adjust in to get the right pedal travel.
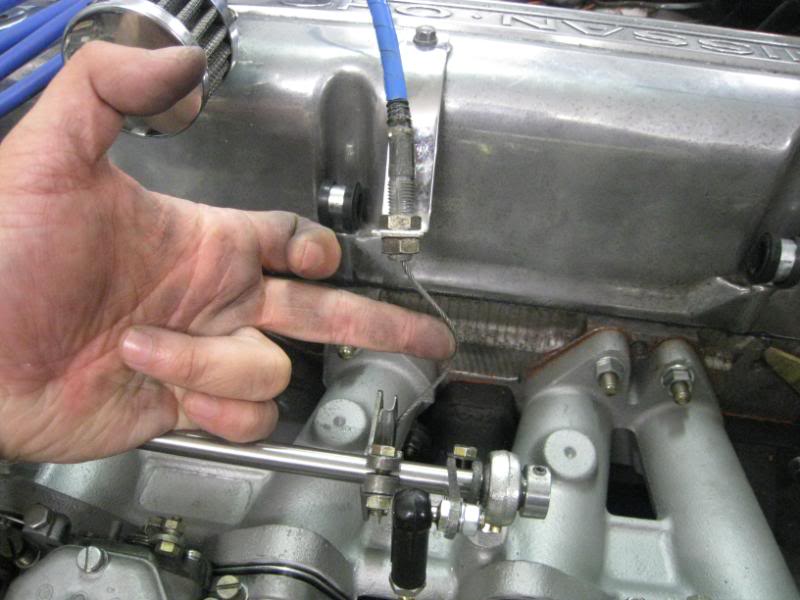
So I shortened the stainless bracket I made by 20mm, which made it a lot better.
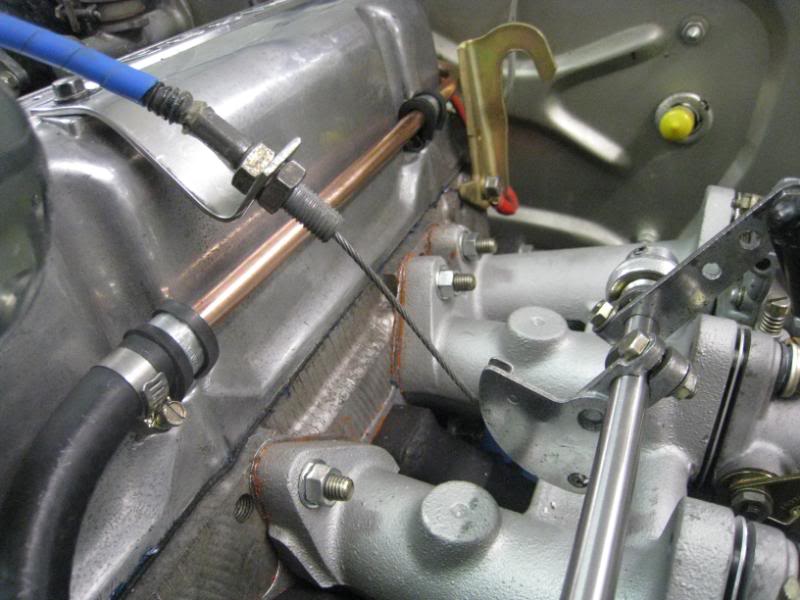
Then the angle of the bellcrank is adjusted so that when the pedal is floored, the carbs are at full throttle. At full throttle, I think it’s ok, the cable isn’t going to fall out of the groove of the bellcrank when it returns to idle, and there isn’t too much slack.
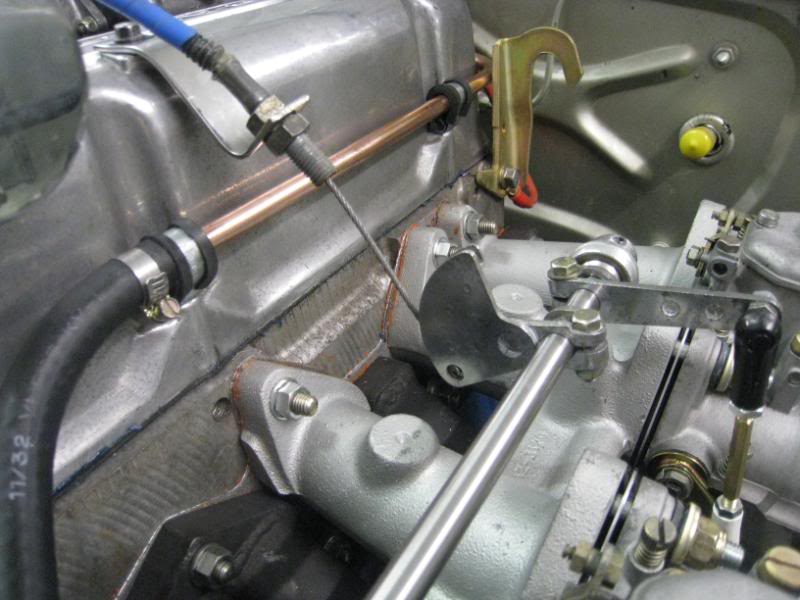
There’s probably more fine tuning to do on the linkages when I get the car going, but at the moment it turned out pretty nice.
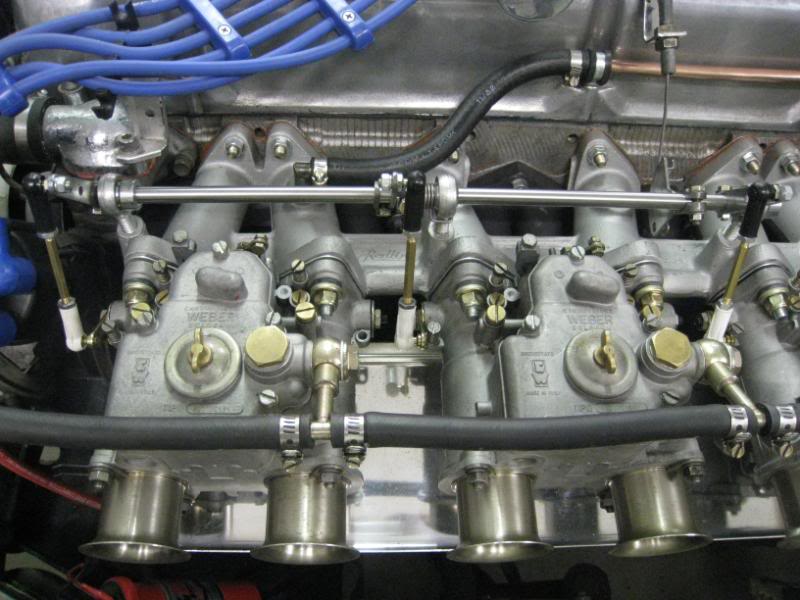
Ok, tomorrow night I’ll triple check everything and then have a go at firing her up and giving it a tune. Fingers crossed…but at least it looks nice! ![]()
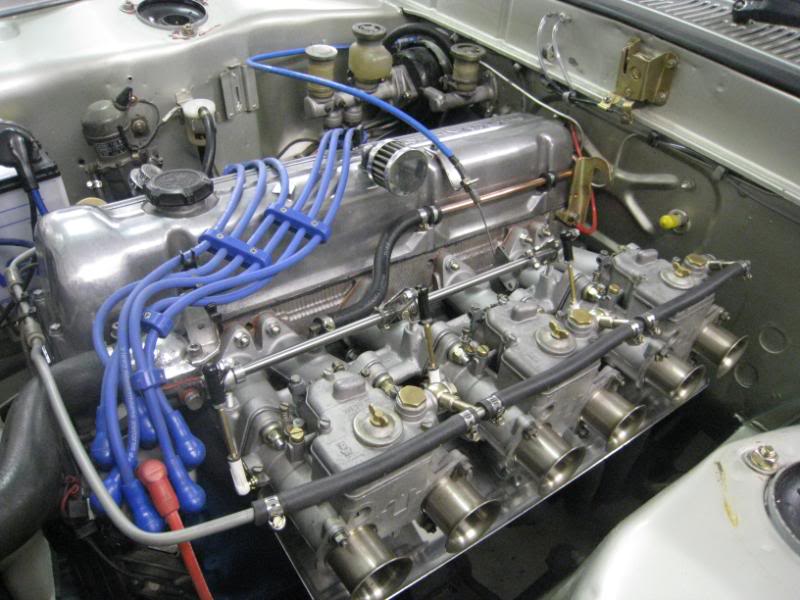
Allllrighty. Checked over everything, retightened all the hoses etc and had a go at firing her up. Good news is that I’m still alive, and not in the burns unit or anything and I still have all my fingers and eyebrows ![]()
Fired up on the first go with a snort of starter spray down the air horns and settled down to a pretty steady idle. I’d set the carbs at the mixture settings that seemed to be optimal from before, and after a quick check it seemed that was still good. It’s much easier to tune now, before the airflow measuring thingy would get inconsistent and weak signals, now it gives a solid reading and responds to small adjustments where it didn’t before (I think that was just the manifold air leak at work).
Idle speed set at 1100rpm and it does sound quite different from before. Before, it had this weird offbeat lope, but that’s gone now and it sounds more like a normal lumpy idle.
As usual my camera seems to pick up all this thrashy valvetrain noise, but in reality it sounds much more normal than that. Blipping the throttle does seem cleaner and more responsive, and doesn’t diesel on when you shut it off anymore (again I think that was caused by the air leak). It still seemed to spit a little bit when idling, but it seemed to go away after it warmed up, maybe it just needs to be driven.
Here’s what it sounded like before:
[youtube]http://www.youtube.com/watch?v=LURiUq6iYxo [/youtube]
And this is tonight:
[youtube]http://www.youtube.com/watch?v=gEmArO5Ekck [/youtube]
I took it for a bit of a go up and down my driveway and it seems more tractable for sure. Fingers crossed for the first drive…
Ok, well last night it was 1am when I fired up the car, so I couldn’t really give it a big rev. Well, today @ 6pm this was not an impediment.
[youtube]http://www.youtube.com/watch?v=jPy4JcOcLxM [/youtube]
Sounds great, and from another quick squirt “up and down the driveway” it seems much more toey than before. But I didn’t get out of first gear obviously.
Here’s what she looks like at the moment, with the “rego wheels” and “rego ride height”
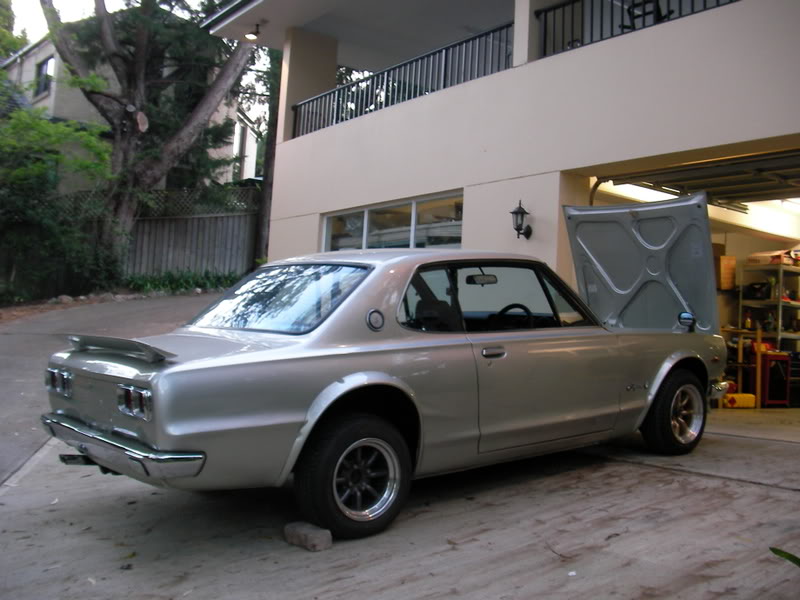
Only concern at the moment is rather large pool of fuel under the carbs after a idling for a while. I get the feeling this might be quite normal tho.
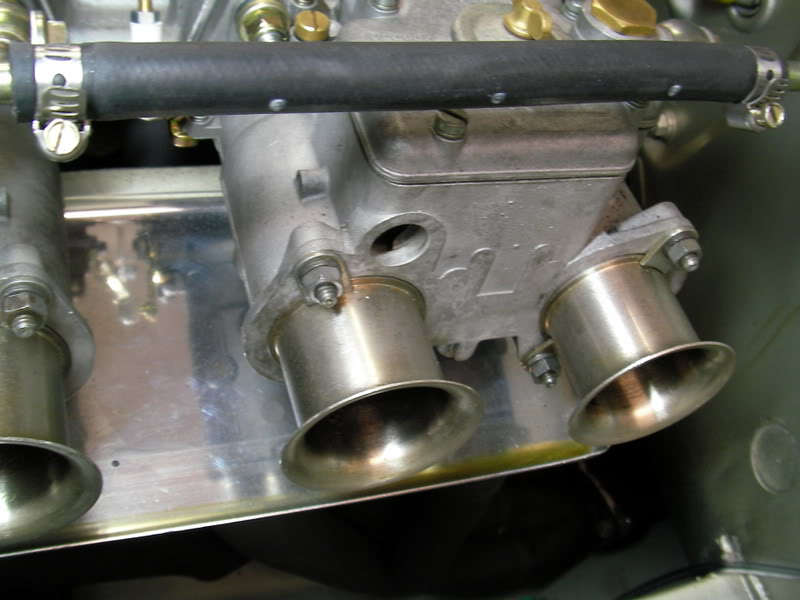
Ok, one of the blue slip (which I need for registration) issues, and the thing that I left to the very last (since I hate wiring and diagnosing electrical issues) is fixing the front left indicator.
So anyway, out comes the trusty wiring diagram. The dashboard indicator flasher is working, so the issue isn’t with the stalk itself. The problem was at the front of the car. But poking around with the multimeter showed that there was no juice at the indicator connector at all. So the issue would be somewhere in the wiring loom, between the front of the car and the dashboard (great!) ![]()
An early red herring was this broken connection on the side indicator…bit fixing it didn’t do anything at all, the problem was further up the loom.
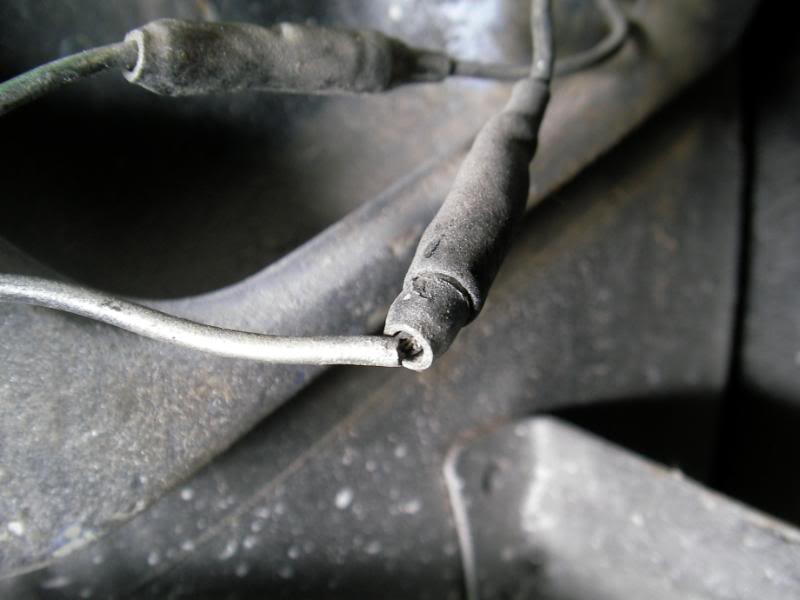
So unplug everything and slowly pull out the loom from the front of the car so that I can have a proper look at it.
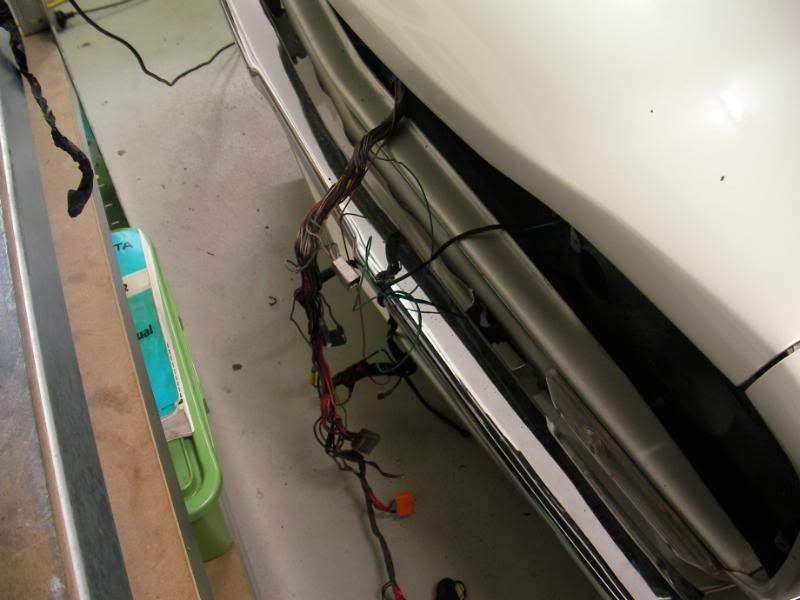
Slowly unwrap the tape, and after about half a metre or so, I notice this:
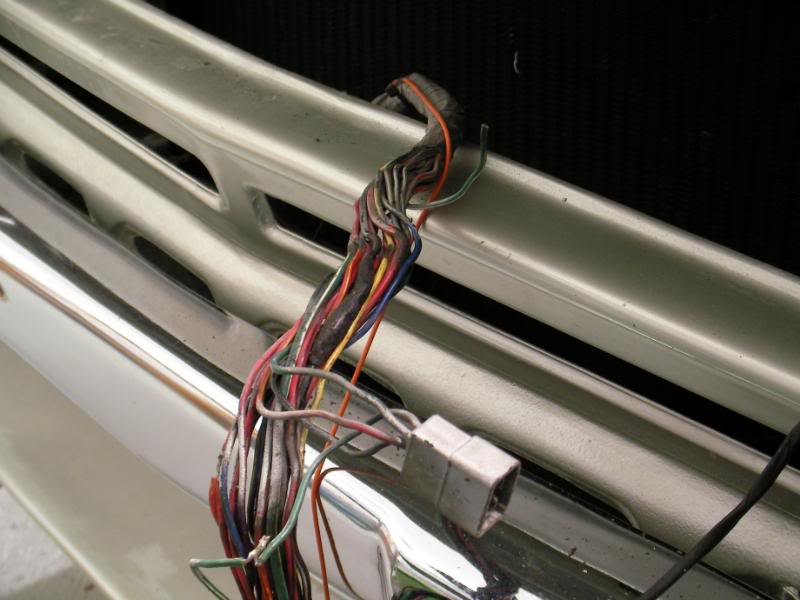
See that exposed soldered joint at 6 o’clock on the pic? That is like a T-junction between the front indicator and the side indicator. There is meant to be a 3rd wire that feeds it juice from the indicator flasher under the dash….and that wire just happens to be the broken one sticking up at 12 o’clock on the pic.
Someone in Japan’s had a go at fixing this obviously, since I didn’t find the broken stub of that wire, even though that part of the loom was taped up quite tightly. Anyway, hooking up the multimeter showed that the broken wire was pulsing like a mofo when the left indicator was on, so I made a new wire to join it up to the bottom bit, and voila, working indicators (on both sides, even):
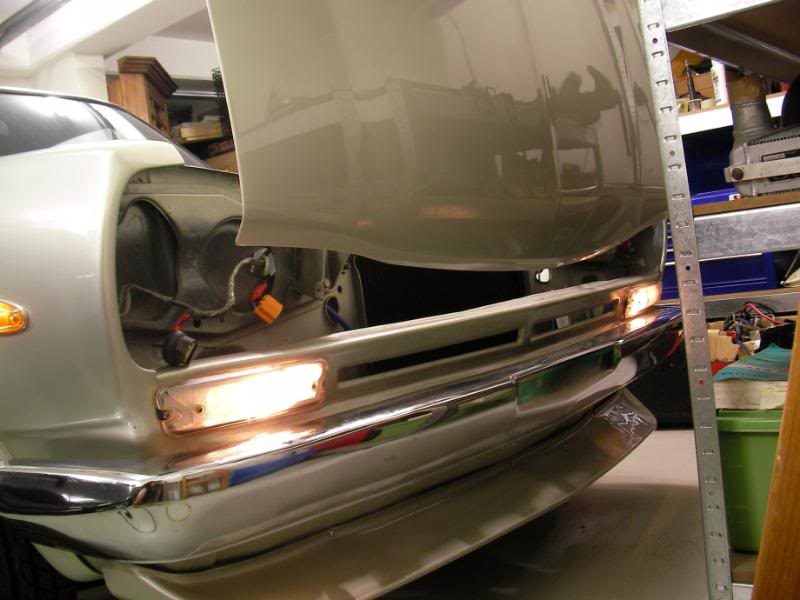
While I was at it, the front indicator units under the headlights were bothering me, since they were quite corroded looking:
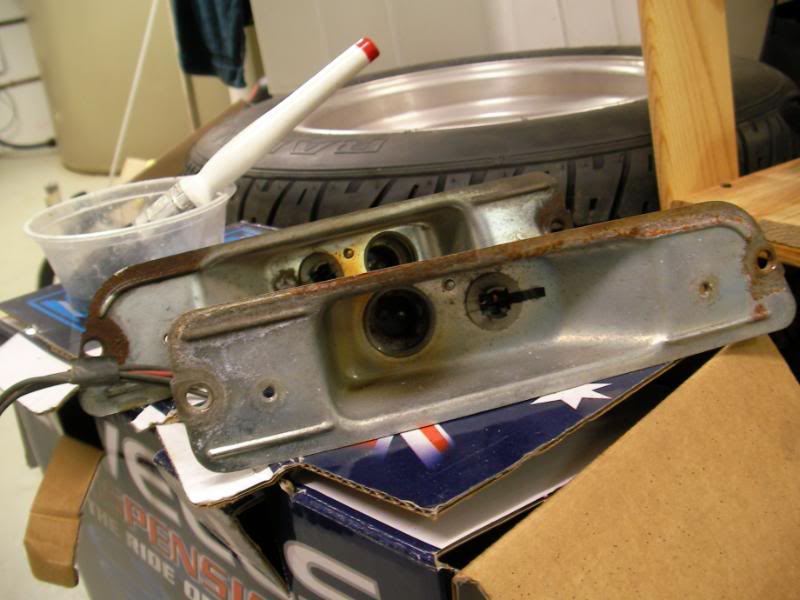
So I wire brushed off the rust, then treated it with POR15 Metal Ready and the hit it with some etch primer and metallic silver:
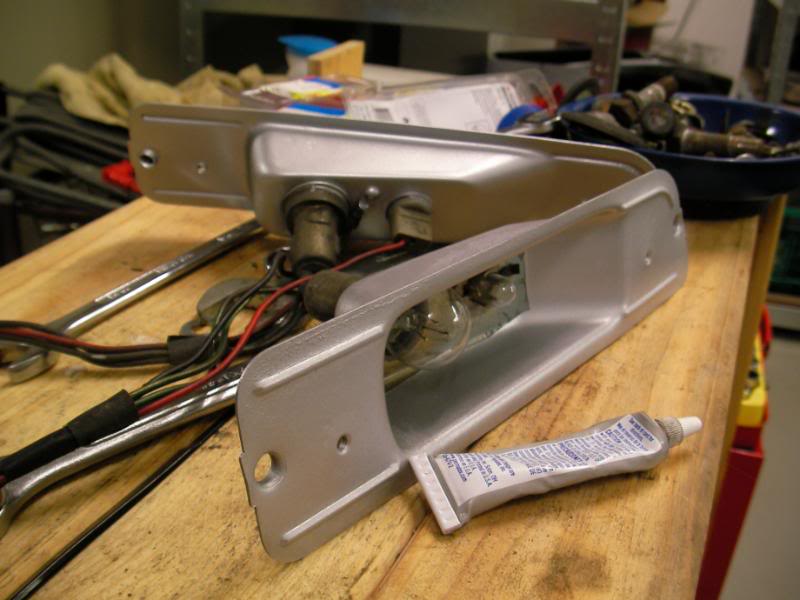
The indicators are also meant to have a rubber seal around it, but one side was missing, and the other side was quite perished. Clark Rubber sells this u-section rubber extrusion, so I decided to make a new gasket out of that:
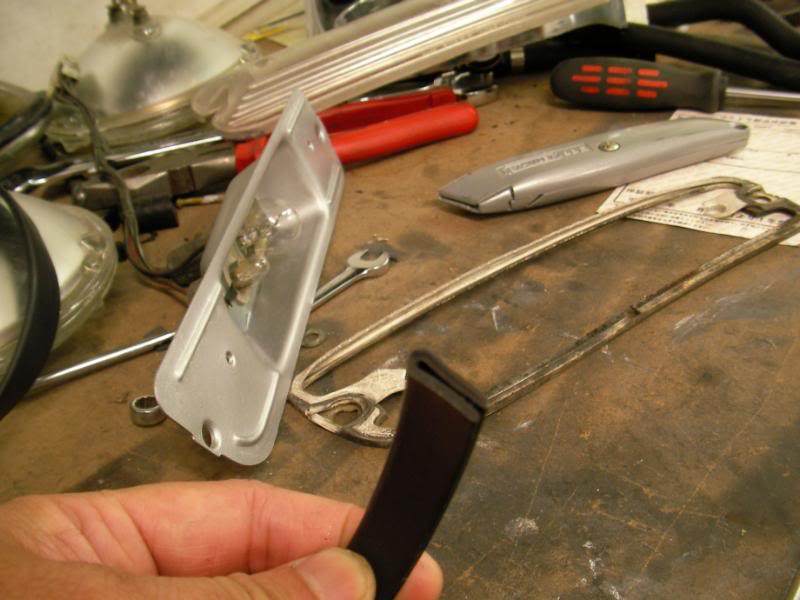
Turned out pretty good, the indicator lens is a nice snug fit and it looks like it’ll be watertight.
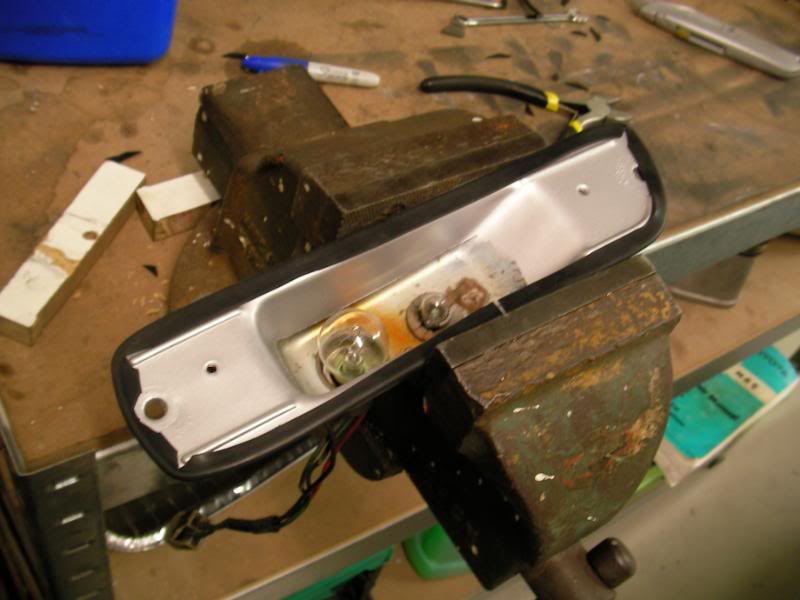
…and that’s it! Everything fixed (touch wood). I just have to put the headlights back in, but tomorrow I’ll make another appointment for blueslip.
Put the car back together today…everything works woohoo! (the first time in 8mths of ownership everything works).
So I gave her a wash…Zymol polish FTW:
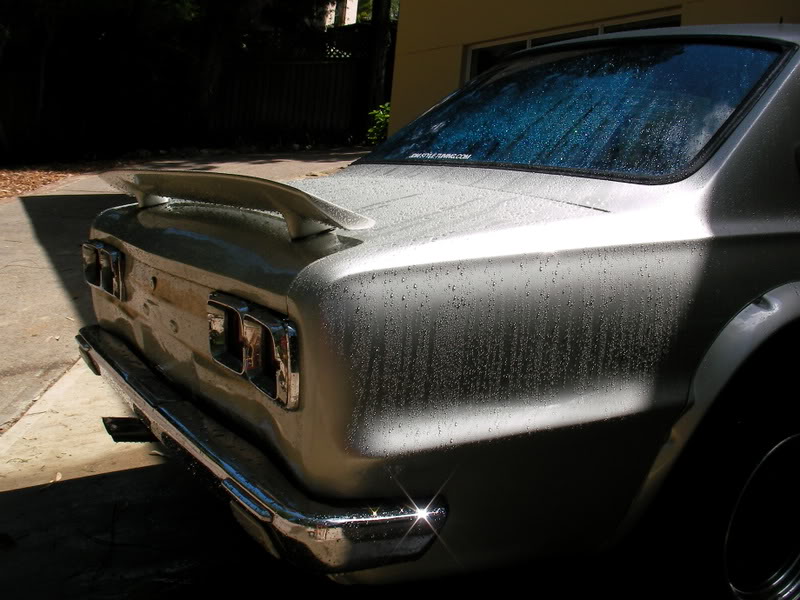
Alrighty then….spark plug swapfest tonight!Here’s the results. The BP6ES that I was using before are on the left, 5s in the middle and 4 to the right: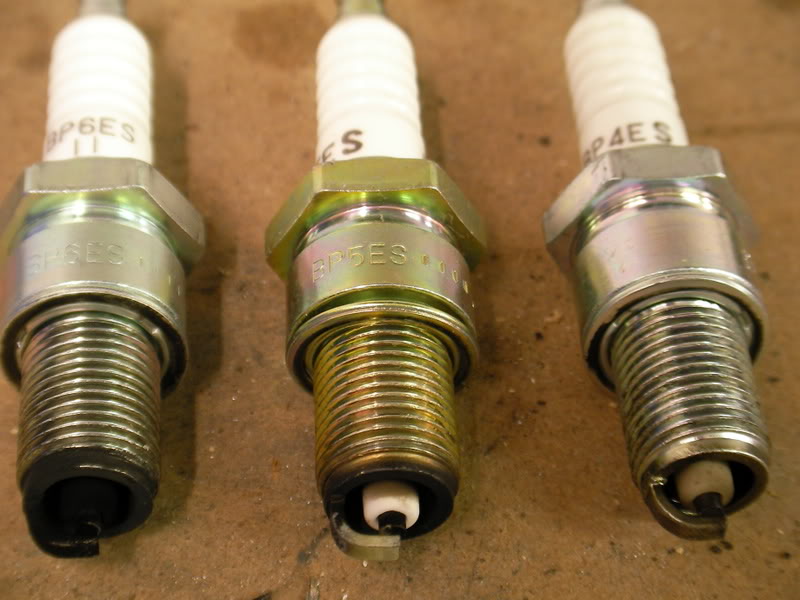 The lower the number, the “hotter” the plug. If your plug is too cold, it will not burn off the deposits that form on them and foul up. But on the other hand, too hot a plug can reduce performance and maybe even cause pinging. The theory was that maybe the NGK BP6ES plugs I was using before were too cold for the grumpy cam and inefficient Webers, and hence the fuel spitting back out from poor combustion. Well, it’s a plausible theory, worth trying out, The 6s are quite fouled, but after 10-15 mins of idling, the 5s and 4s look quite ok. If I had to put my finger on it I’d say that the 4s seemed smoother and crisper. And get this, with the 5s, there was still a bit of fuel dripping out after prolonged idling (maybe half of what it used to be) but with the 4s…only one drip under the second carb: The 5s still had a little bit of fluffiness just off idle, although they were definitely better than the 6s. At this stage I think I’ll stick with the 4s for pootling around, at least until I get the car rego’d and can do some proper driving on the road. I think that there is still “something” at play here, and the hotter plugs are just compensating for it. The last remaining thing (unless there is something wrong with the ignition system) is cam timing, and so I think I’ll have to take the plunge and check that over properly soon. Oh by the way, the restored headlamp assemblies look quite nice too. Before: After: |
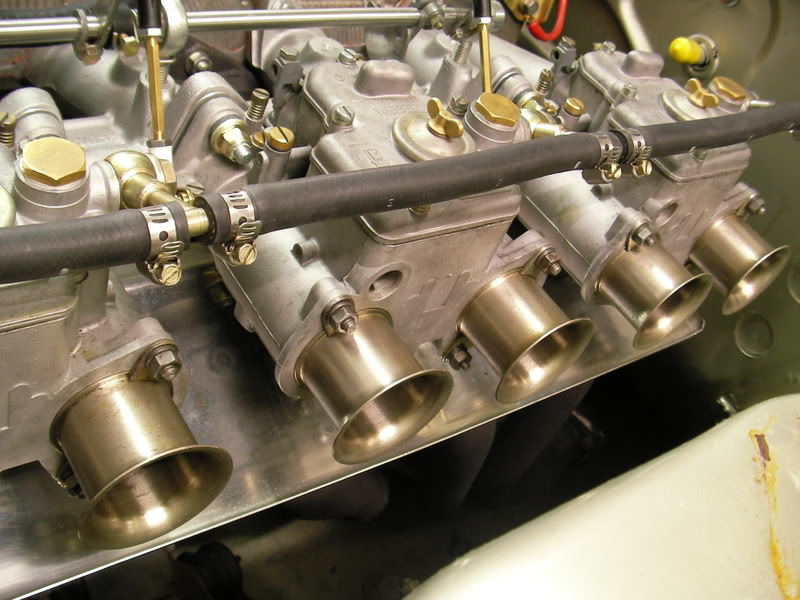
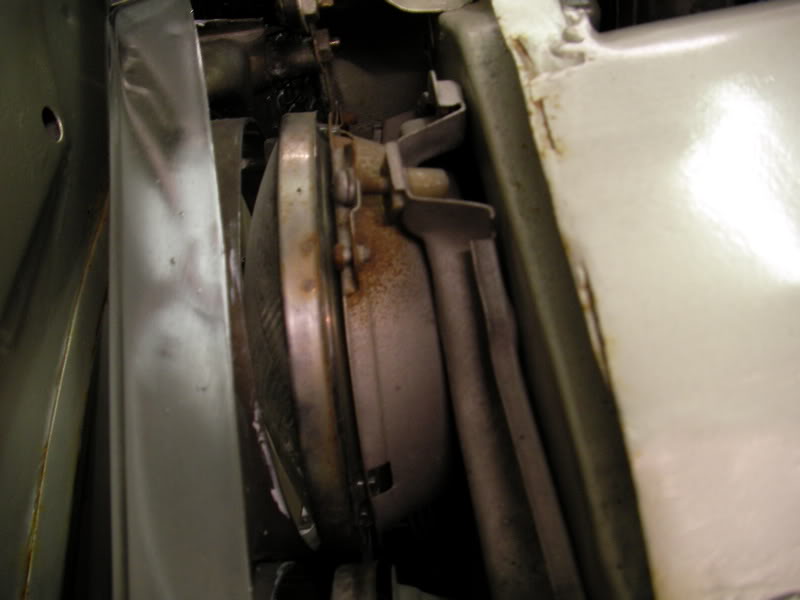
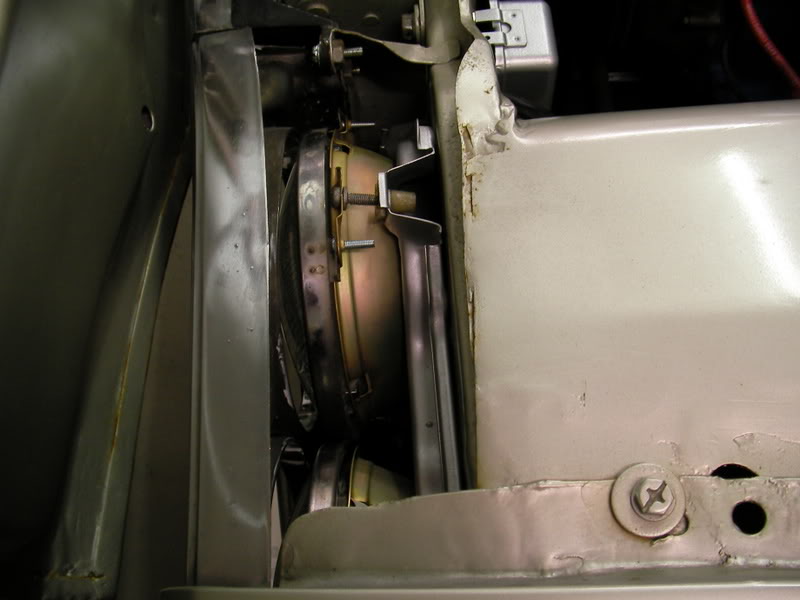
Well….some ppl have suggested that the engine problem may be compression-related, so I dug out the compression tester and gave it a whirl and….
….the readings are all very high! 190~200psi. This is the same gauge that I’ve always had and after I had my MX5 engine rebuilt with 10.5:1 comp it read 205~210psi, so the gauge is reasonably accurate.
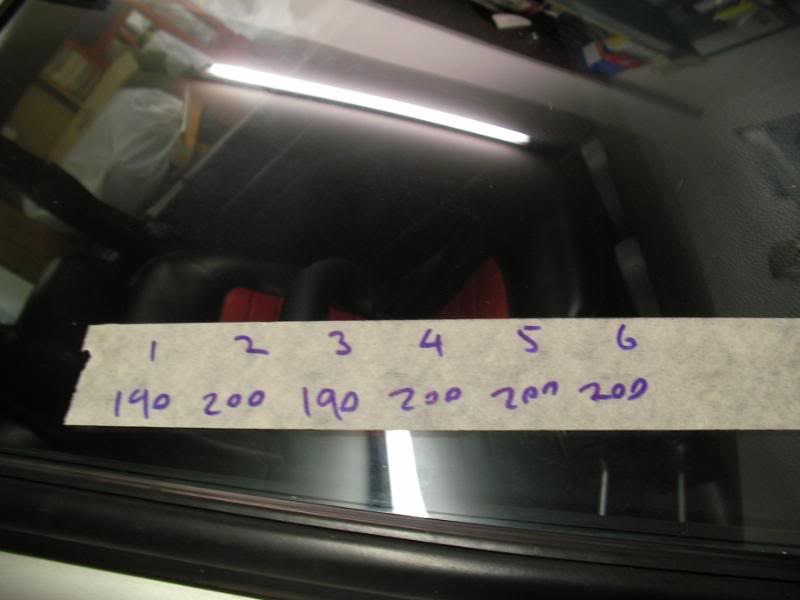
Now, what I was expecting was that if the cam timing was way off, then the readings would be super low from the valves opening too early on the compression stroke….but these are very high readings for something with an allegedly big cam…
But it’s a massive relief that the engine isn’t rooted, and I presume it’s as freshly built as the head is. Hmm…I am starting to think maybe it’s an ignition issue instead….
Anyway I moved on and decided to re-lower the car ![]() For rego, I’d installed these tall King springs which gave the car 16cm of ground clearance
For rego, I’d installed these tall King springs which gave the car 16cm of ground clearance ![]() I only needed 10cm but decided it didn’t hurt to overkill it.
I only needed 10cm but decided it didn’t hurt to overkill it.
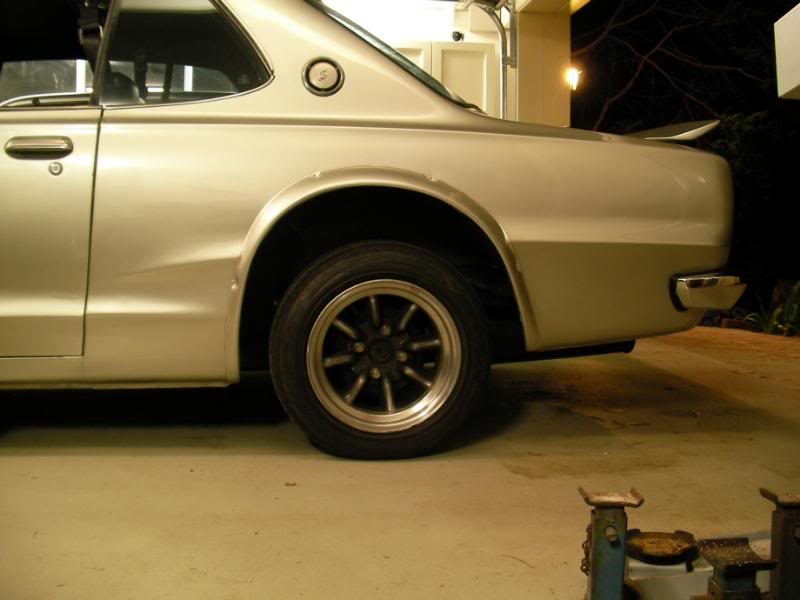
As before, to remove the springs, you undo the shock and the driveshaft and the control arm will swing down enough to remove the spring.
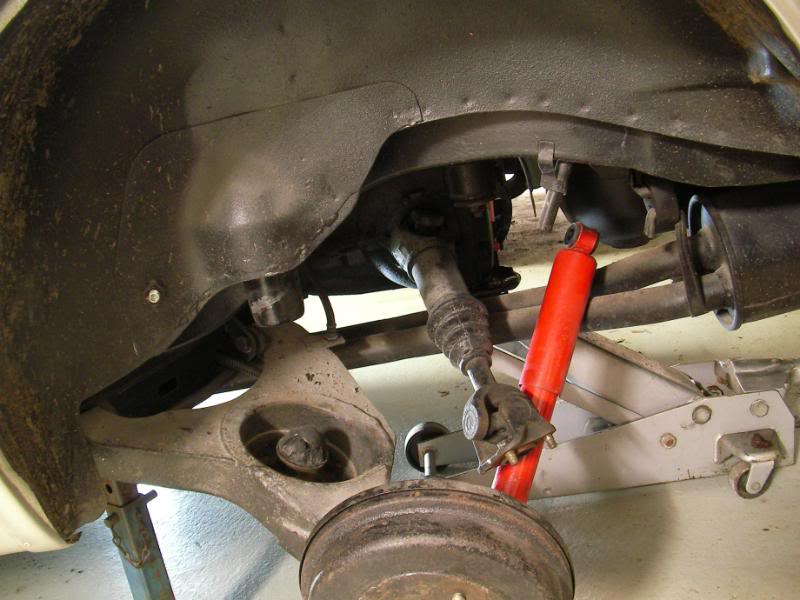
When I first got the car it was so low that it was sitting on the bumpstops, and so I got these shorter bumpstops from GTR specialists http://www.protec-s20.co.jp/ when I was in Japan…as you can see they are 40mm shorter than the stock ones.
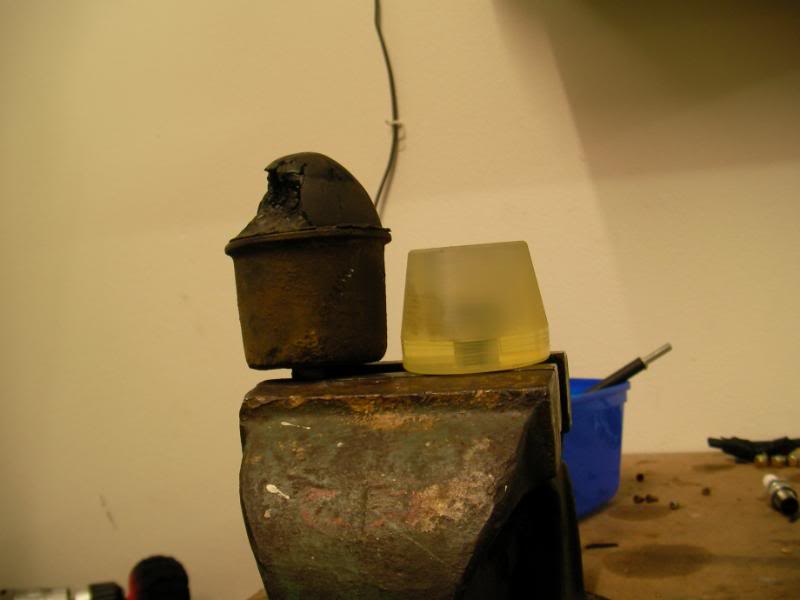
But are they TOO short?
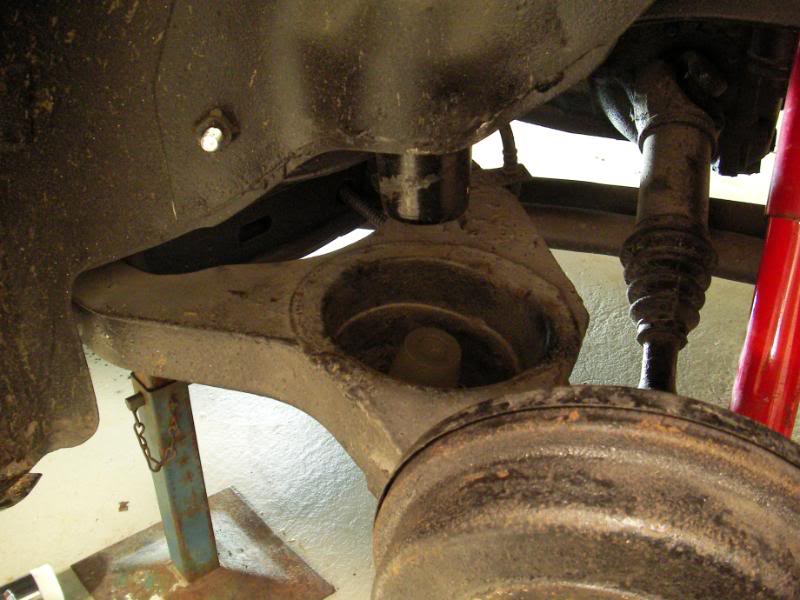
I compressed the shock by hand, and the masking tape marks where the shock bottoms out. As you can see, when I push the suspension up to its bump limits, the shock is bottomed out…
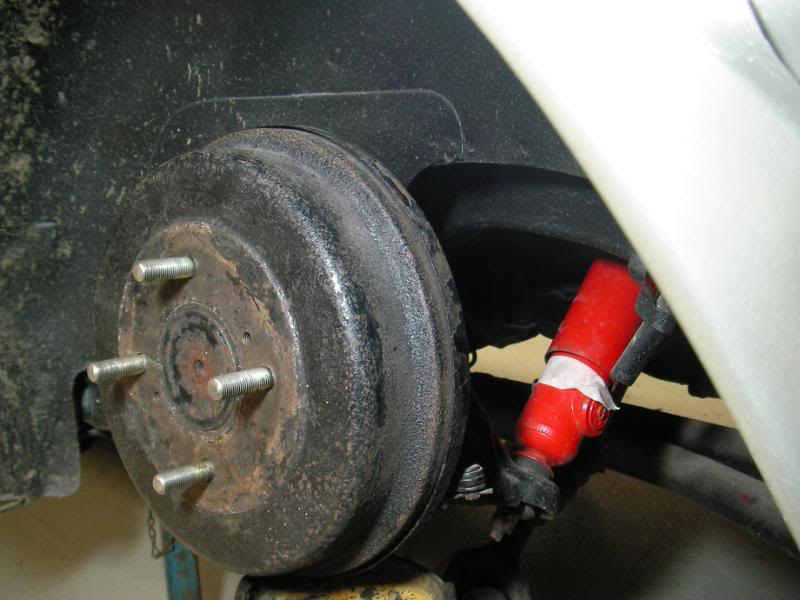
…the tyre is actually jammed against the top of the wheelhouse
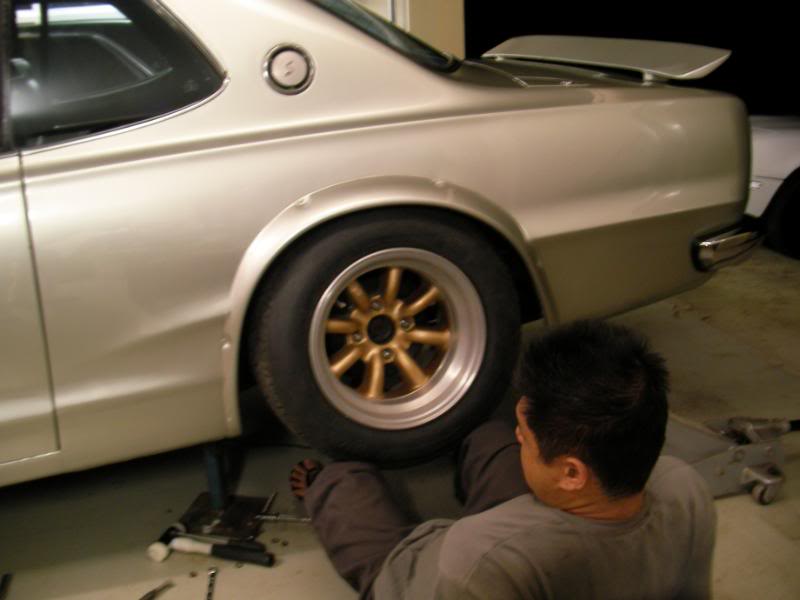
…and the fancy JDM bumpstop isn’t even touching yet!
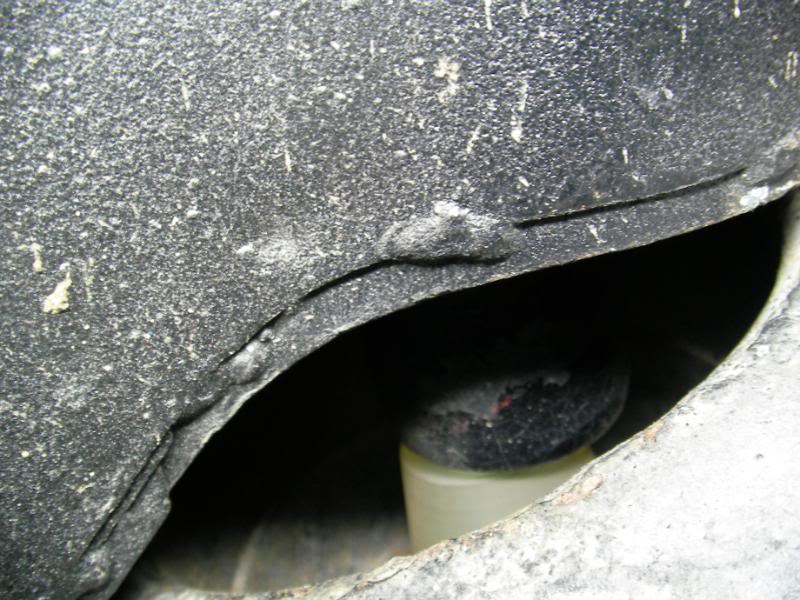
The solution seems to be to space the bumpstop out, so that it’s not a whole 40mm shorter, but only 15mm shorter than stock…
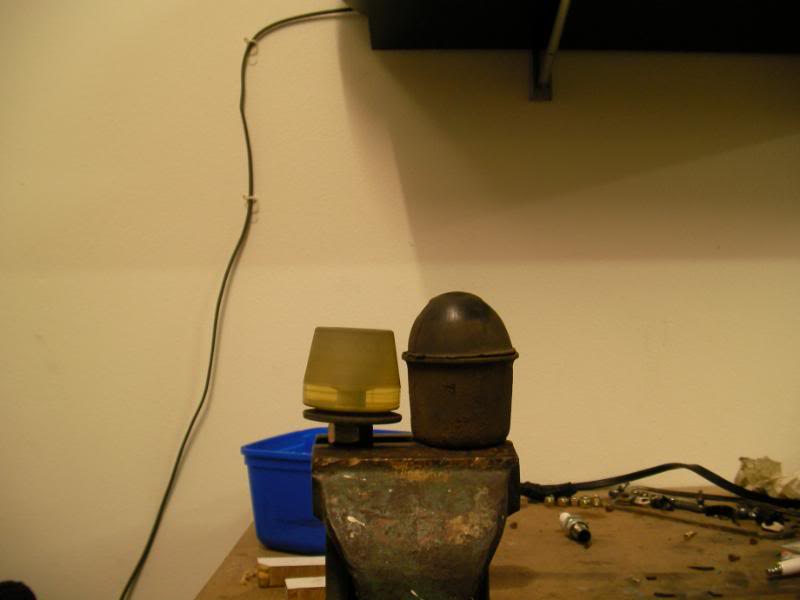
At that point there is still 30mm of shock travel left…
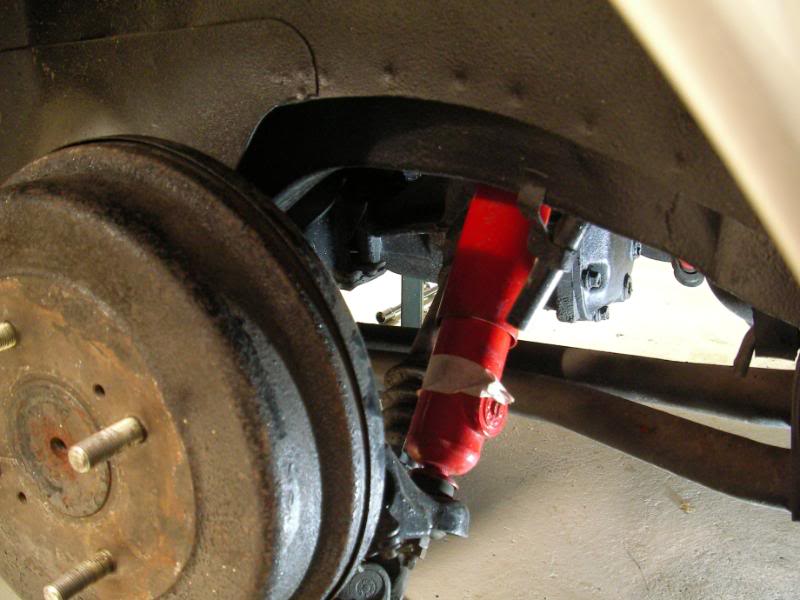
…and about an inch and a bit before the tyre starts to remove parts of the bodywork.
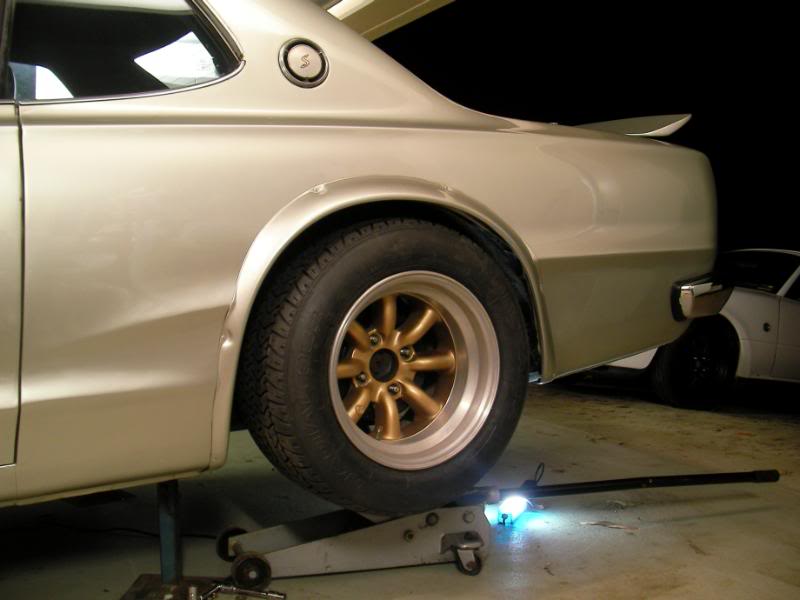
This is rather bizarre…the bumpstops are definitely the right part, and I’m pretty sure there isn’t some special spacer or anything that I was supposed to buy as well. Just goes to show you should check new parts before fitting them up…I guess it’s possible that a real GT-R has a deeper wheelhouse so you can go lower?
I’ll seek out some proper 25mm spacers and longer bolts tomorrow and that should get the new bumpstops sorted.
This weekend I’m doing suspension. As you know, the car was way too low when I got it from Japan, and failed its engineering cert inspection initially because of it. The solution was height adjustable coilovers at the front….
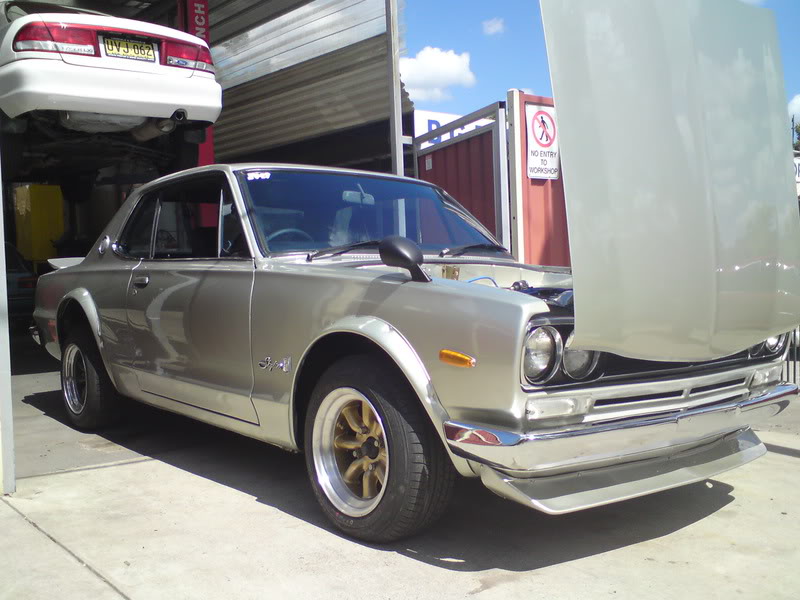
…and King Springs at the back. These were meant to be lowered springs for the C110 Skyline (ie 240K). However they raised the Hako a whole 9cm, but the resulting 16cm of ground clearance (a bit higher than stock) was more than enough to pass rego.
First we start at the back. The Protec-S20 bumpstops I got in Japan were way too short (the shock bottoms out before the bumpstop even touches). So I bought a stick of “Wearlon” which is this hi-strength nylon, and cut off two 25mm roundels.
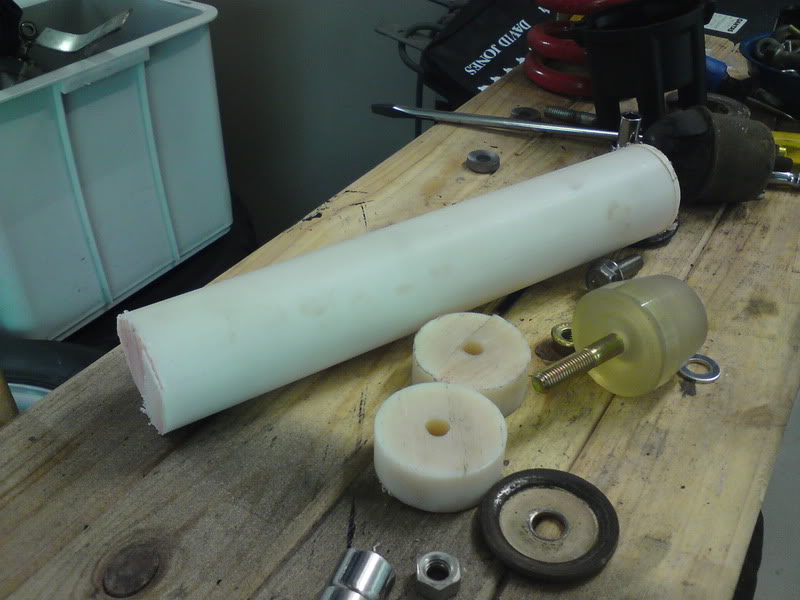
With a suitable hole drilled in the middle, the new bumpstop spacers make the Protec bumpstops only 15mm shorter than stock. The springs are very inboard on the Hako, so 15mm at the bumpstop translates to more like 30mm at the wheel, so this is a bigger difference than it may seem.
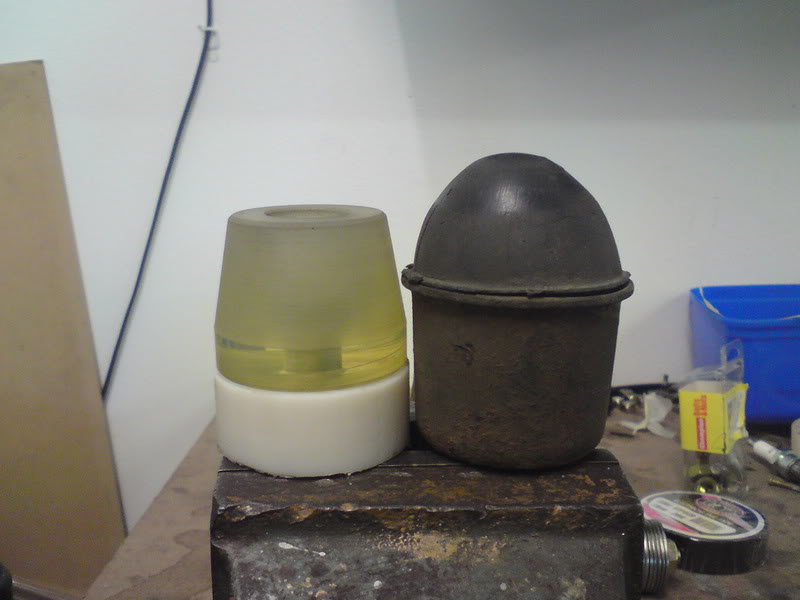
With the extended bumpstops in place, when the suspension is compressed to its limit, there is still 30mm of shock travel left.
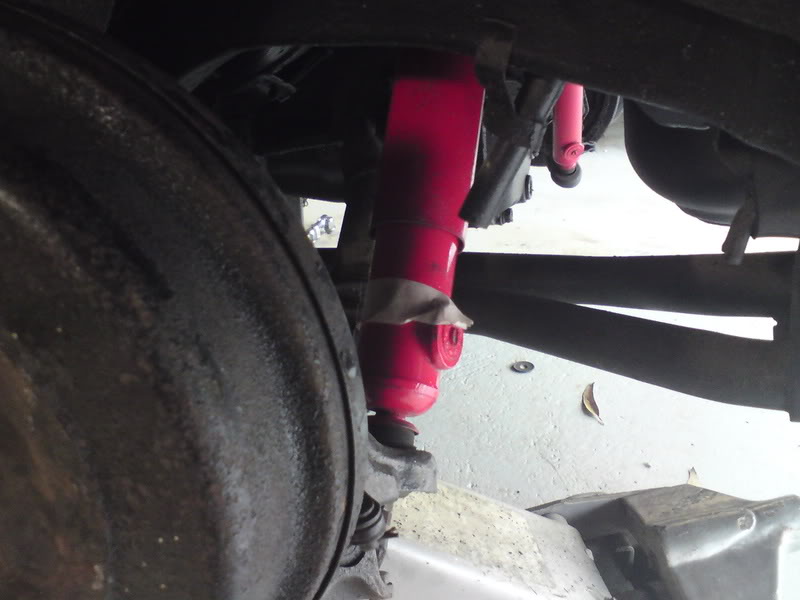
And 40mm left before the tyre starts to shred the bodywork

I can’t just sling in the old Japanese springs however, since they are too short, so I bought these when I was in Japan a few mths ago. Billet 25mm spring spacers fromwww.kameariengineworks.co.jp
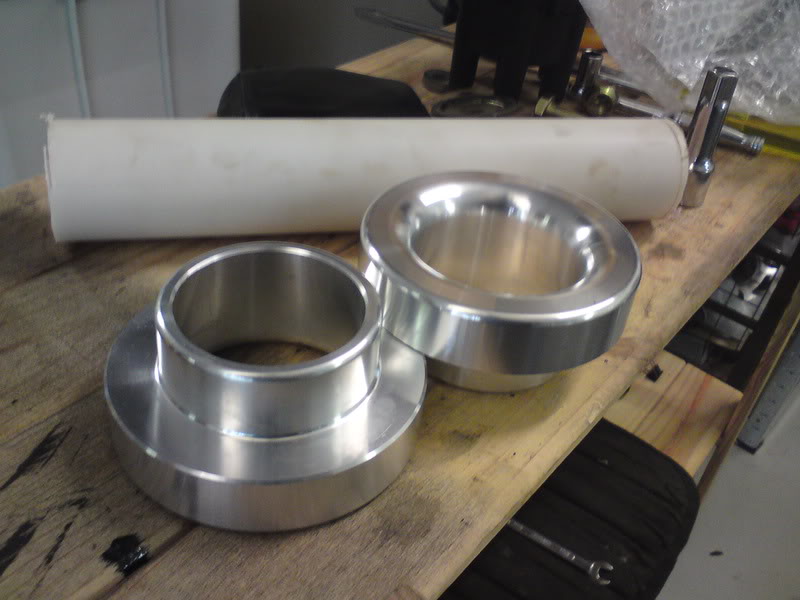
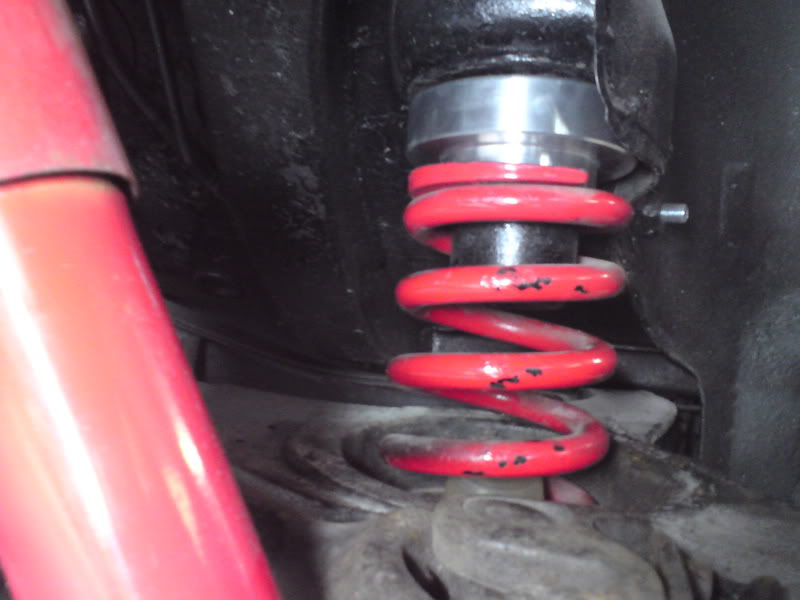
Here’s the resting height with it all buttoned together. There’s 40mm of upward travel (at the wheel) before the bumpstop comes into play, and with the bumpstop compressed, there is another 20mm of travel. My rule of thumb for street cars is that you should aim for at least 2ins of wheel travel, so this should be quite ok with 2.5ins. The only thing I don’t like is that the JDM springs seem a lot softer than the 600lb King Springs. We’ll see how it goes on the road of course but I think I might end up getting some shorter 600lb springs from King at some later point. The back is a lot softer than the front at the moment (and there is no swaybar back there).
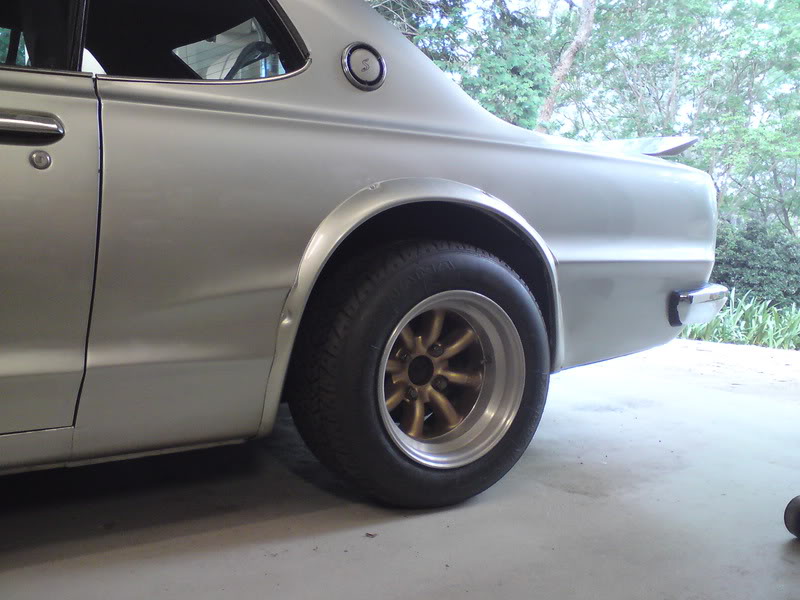
Also, the car came fitted with 10mm spacers at the back, which actually worked out quite well because the super low ride height meant that the rear wheels had a lot of camber and so they tucked under the flare. I’m not running anywhere near that low, so I removed the spacers. But even with less camber, the wheel fitment is about right I think. Not *too* illegal ![]()
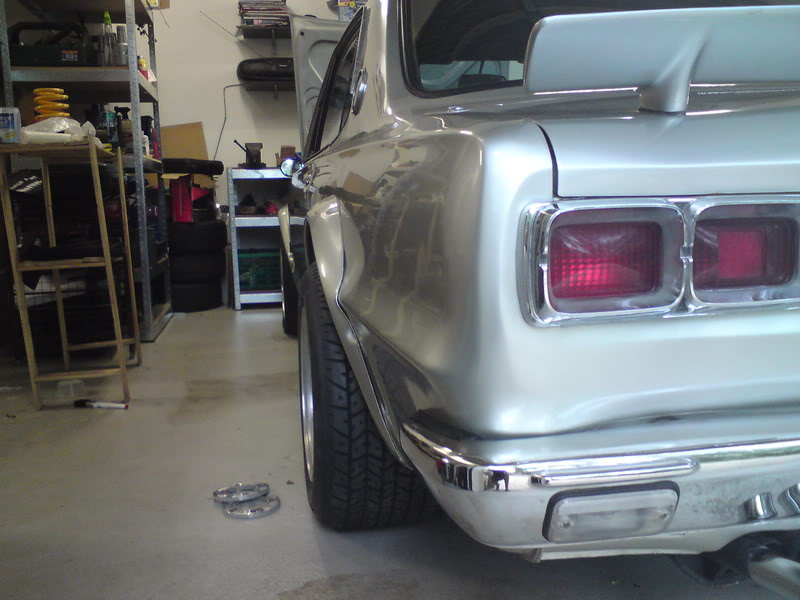
Right!
I’m taking the plunge and fitting up the Kameari Engine Works distributor kit, just to eliminate the ignition system as the cause of the engine’s woes. To refesh your memory, the kit includes an electronic module, the distributor, and a wiring loom. Also, I had to get a new distributor drive shaft since the Kameari dizzy is only compatible with the post 80’s L-series engines. After this, the entire ignition system will be new, so if this doesn’t fix it, then the problems lie elsewhere.
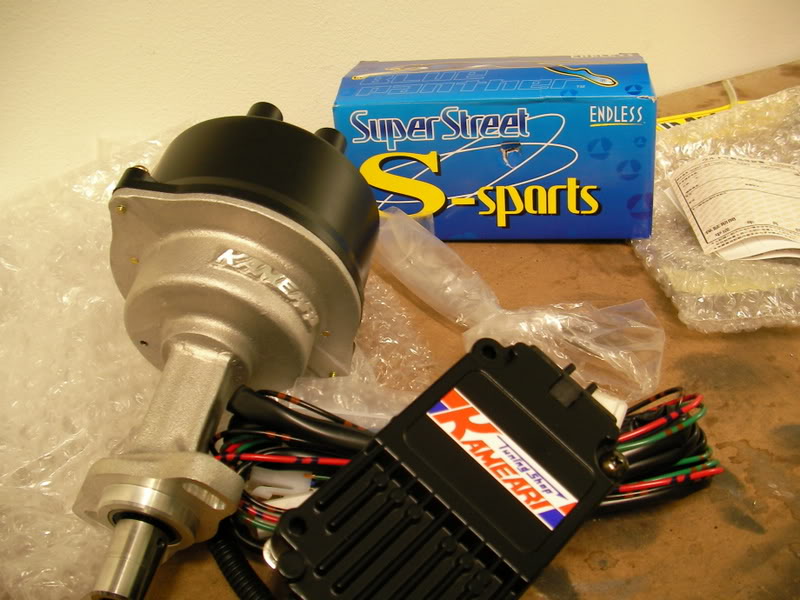
It’s a good time to do this since I have to remove the coilovers anyway. I have a set of Cusco camber tops to replace the VR Commodore top rubbers, but I can’t get the top nut off the shock, the whole thing just spins around. So I’ll get them rattlegunned off tomorrow. It’s so much easier to disassemble the car now that everything’s clean and the bolts are new!
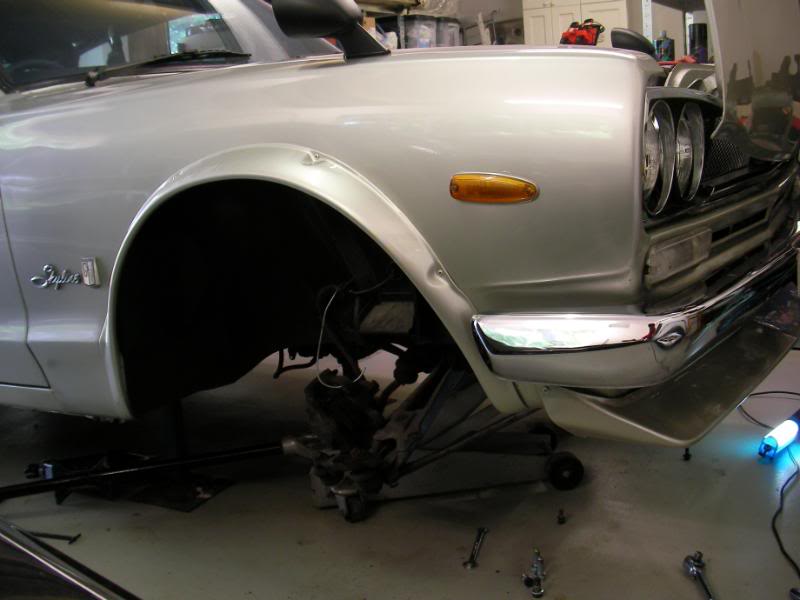
The L-series is a little unusual in that the oil pump hangs outside the block (it’s that square box behind the crank pulley). The distributor is driven off the same shaft that drives the oil pump, so the oil pump has to be dropped out in order to replace the shaft with the later one.
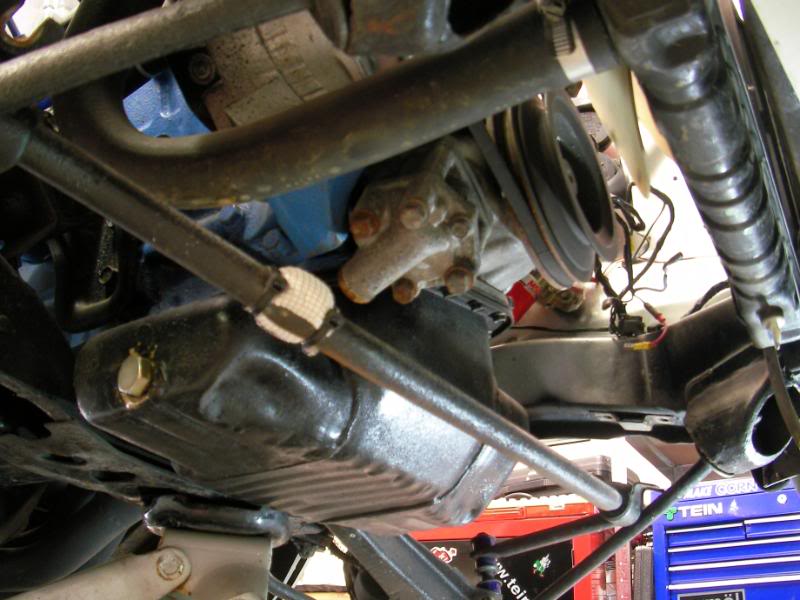
You can see here from a different angle, as the oil pump comes out the shaft is quite long, and the distributor mounts to the pedestal at the top of the pic.
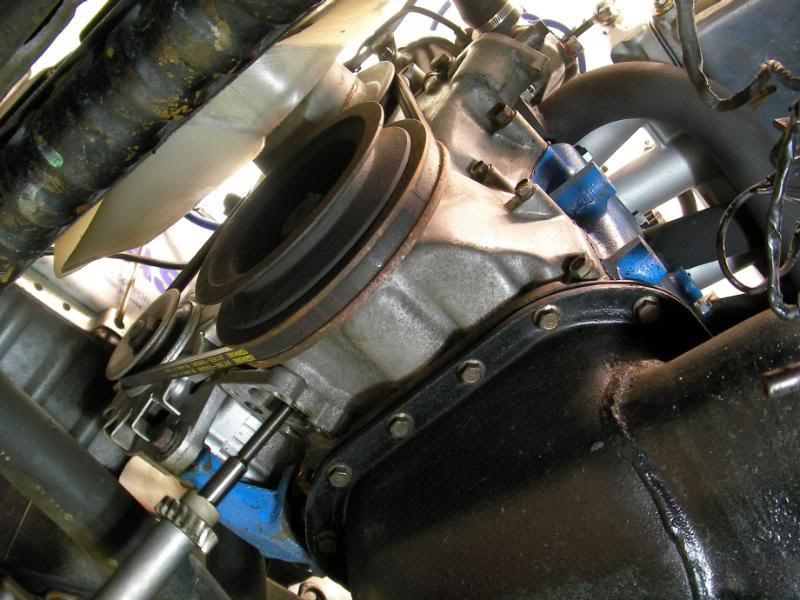
I mounted the Kameari module just behind the passenger side headlights, and the loom is a simple one, just has 3 wires that go to earth, and the pos and neg terminals on the MSD coil.
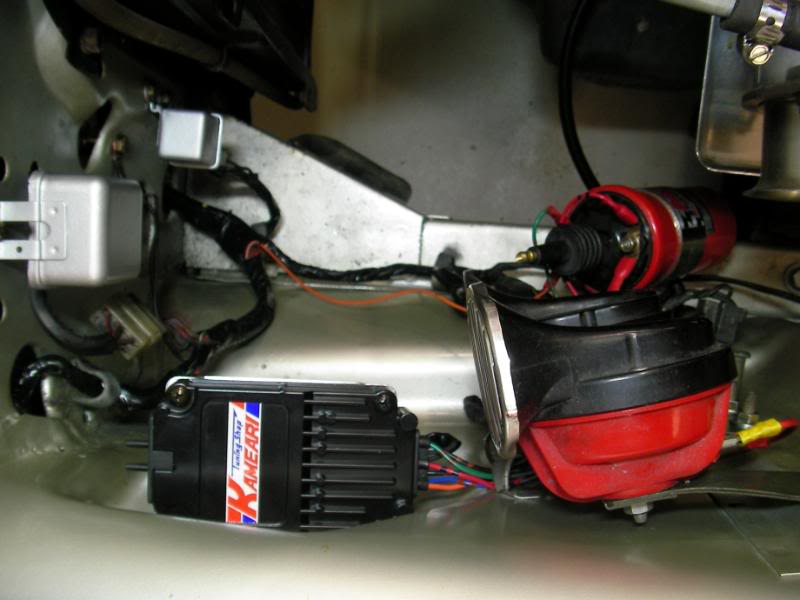
And that’s it for tonight….I’m waiting on an oil pump gasket to arrive and then I can put the oil pump back and fit up the new dizzy.
Good news and not-so-good news…
First the easy stuff. One of the things I wanted to do while the car was up on stands was to replace the VR Commodore strut tops with Cusco camber tops. The main reason was that the GM tops were very thick, and so the 15mm lower profile of the Cusco plates would mean that the front would be lowered 15mm automatically, without any sacrifice of shock travel.
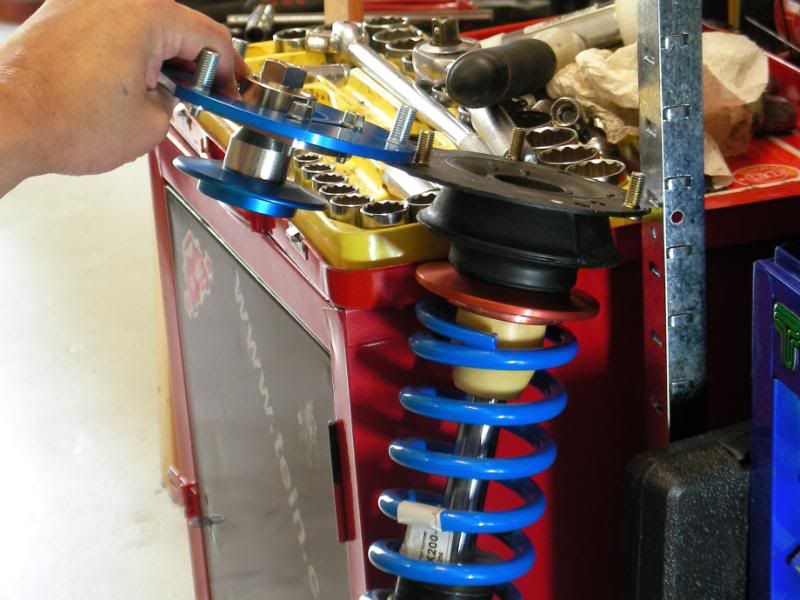
The Cusco plates are actually for the GC10 Skyline, so they fit perfectly, but they don’t fit the shocks on the car….the issue is that the Cusco tops are for shocks with an M12 thread on the shaft, whereas the Z31 300ZX Konis on my car have an M14 thread.
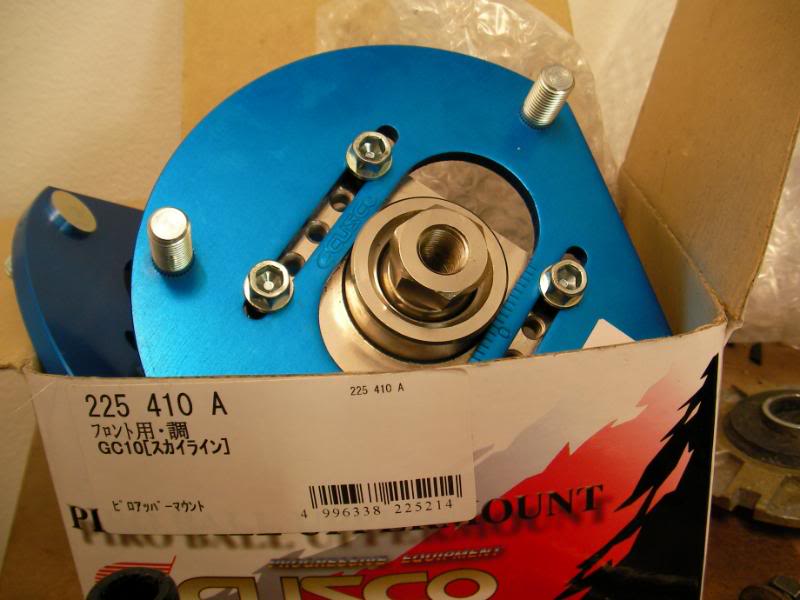
Pretty much everything on the Hako is Datto 510-sized, so it makes sense that at some point Nissan went up a size. It shouldn’t be a huge drama to sort this out however, I’m sure that all I have to do is find some parts off a Silvia Cusco camber top and that should be compatible with the Z31 Konis and then I should be able to retrofit everything together with the Hako camber tops and fit them to the car. But at least I could I fit up the restored strut tower brace and it looks very nice.
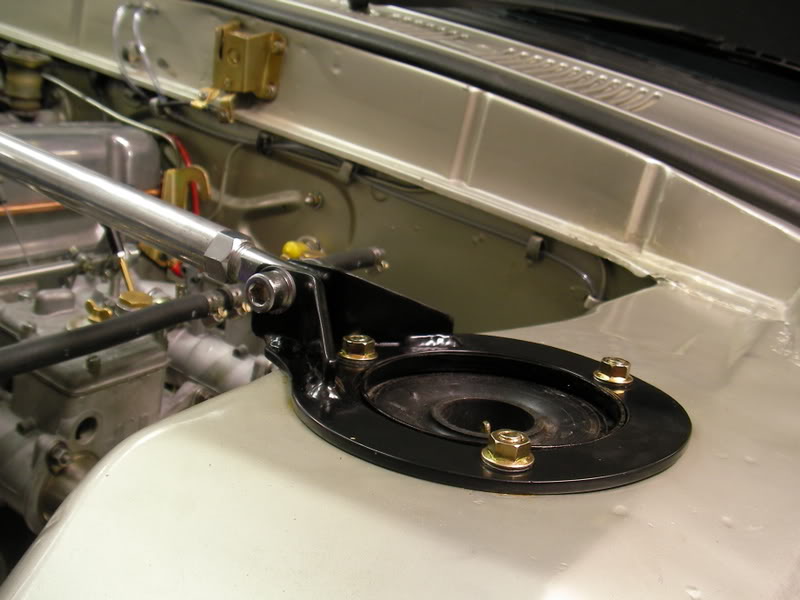
But for the time being the issue is the ignition, and getting the car going with the Kameari distributor kit. First I have to fit the later-style dizzy/oil pump driveshaft.

Then you line up the dot on the shaft with the mark on the oil pump. Since the dizzy is geared to the crank you have to get this bit right, or the dizzy will be timed wrong.
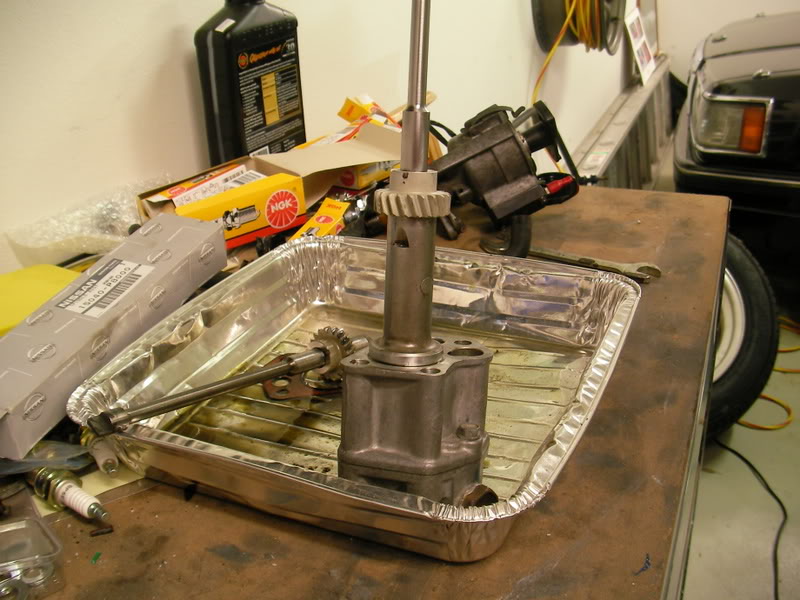
The oil pump is filled with oil (so that the pump gears aren’t grabbing air when you start up) and then you carefully insert the whole lot into the bottom of the engine.
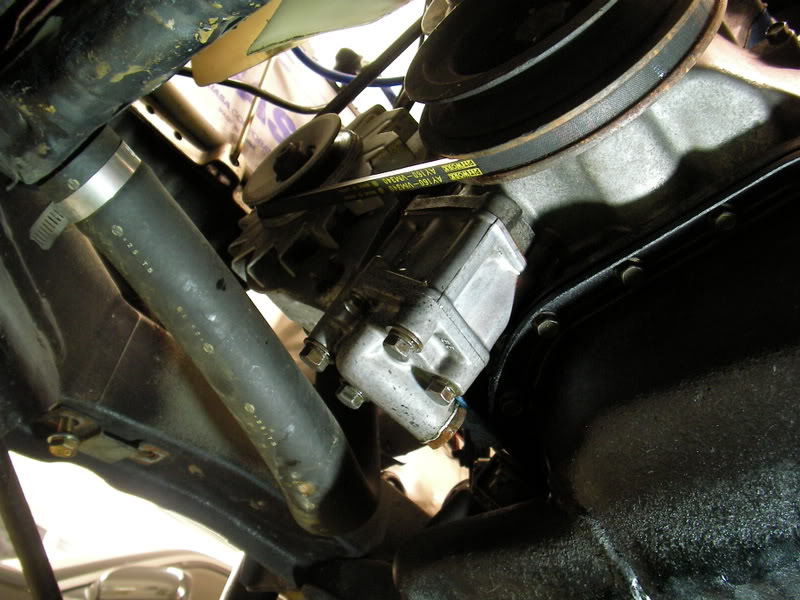
It takes a few goes but eventually you get the position of the dizzy shaft right, which is to say that the ‘flat’ of the shaft points to 11.25 o’clock.

…which should point the rotor to fire #1 cylinder.
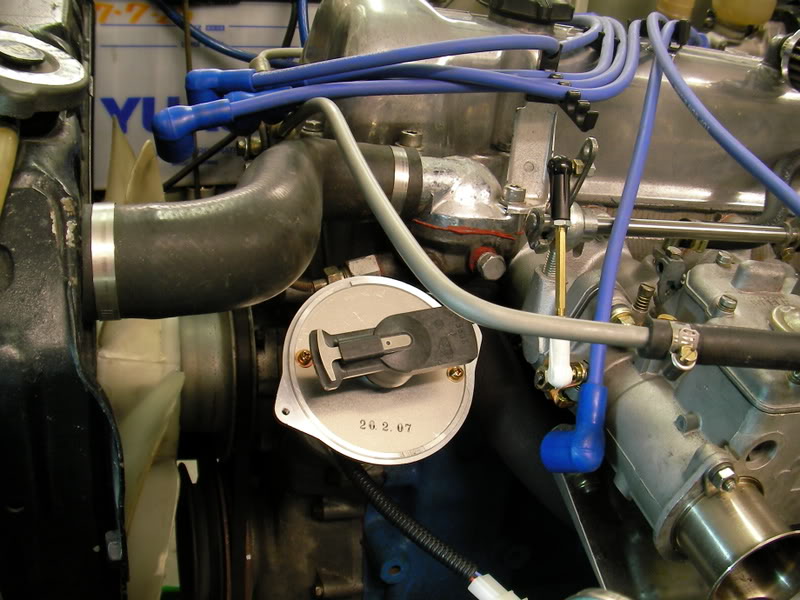
Looks great! But no start! I took out one of the spark plugs and rested it on the rocker cover while I cranked the engine, and it definitely isn’t getting any sparks. The coil is getting juice though, and I also checked the Kameari loom for continuity and it’s fine. The Kameari module isn’t getting hot or anything and there isn’t any burning smell…
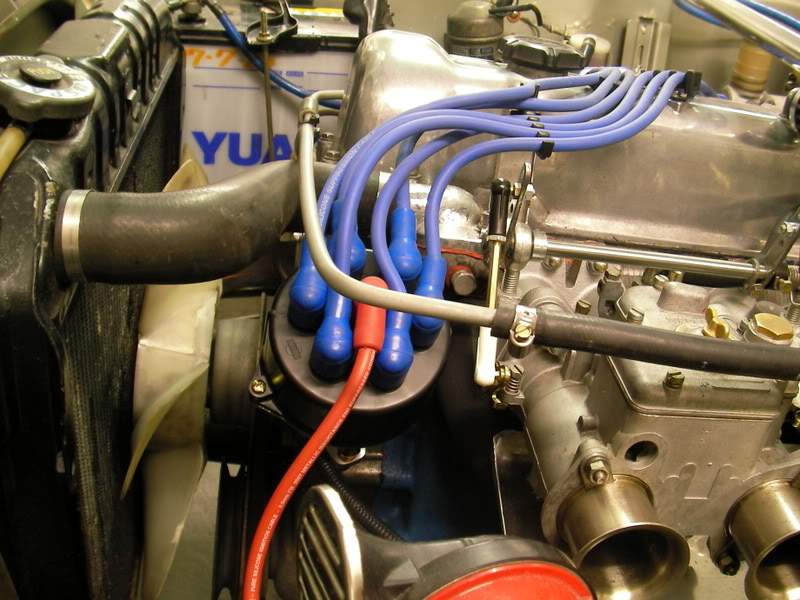
The only thing I did before fitting up the new ignition system was clean up some redundant wiring that was for the original stock points/ballast resistor setup. I’m pretty sure I didn’t disturb anything but I think that’s the next thing to check. From the looks of it, there was some hacking about of the wiring loom when the ignition was converted from points to electronic in Japan, but the thing is…if it’s hacked about, then how come it worked with the previous system? Strange…
Firstly…it now starts!
The first idea I tried was that maybe the engine wasn’t earthing properly. I already had 2 earth straps to the engine (one straight to battery) and I’d cleaned the contact surfaces with emery etc so I thought that this probably wasn’t the issue. But it was worth a try, so I added an earth strap from battery directly to the base of the dizzy….and with that, I cranked her over with one of the spark plugs removed and resting on the rocker cover and there was a nice fat spark! Plug reinstalled, the engine started and idled with no problems.
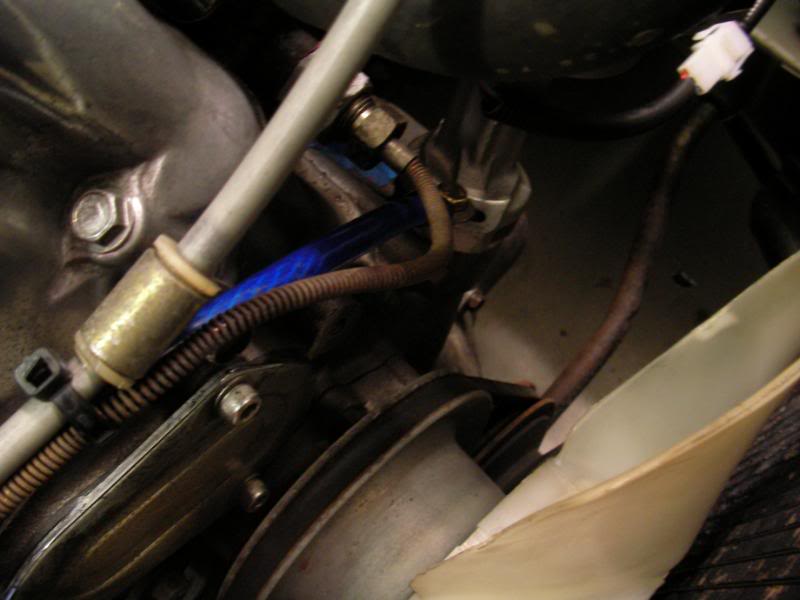
It did have quite a lot of difficulty starting however, so I checked the voltage of the black/white “run” power supply when starting. When cranking it dropped as low as 6V, so I ran a wire from the unused black/red “Start” +ve wires to the coil. Now it had two power wires to the coil and started more easily…but still needed quite a lot of coaxing…
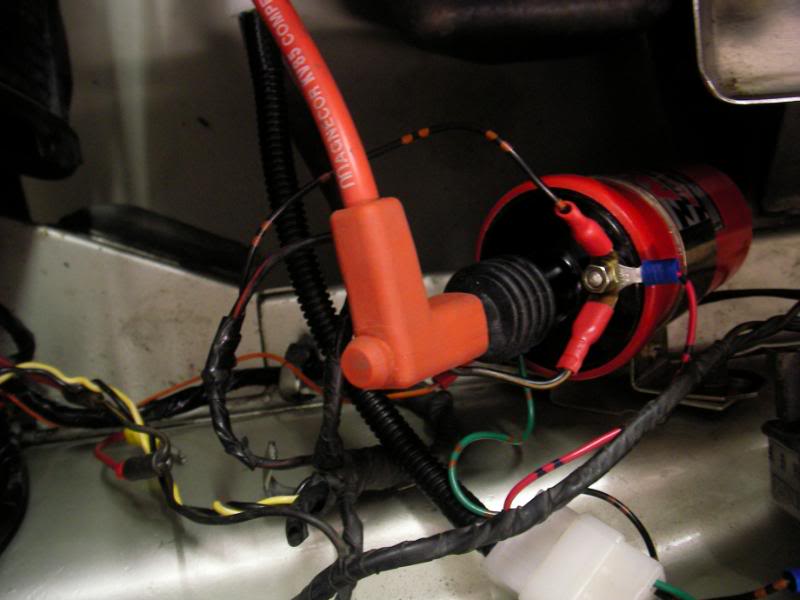
So I put a timing light onto the engine to set the base timing, and….WHOA…its all the way at 35 degrees! I retard the dizzy as much as I can, but it only goes back to 22 degrees, but more to the point, it’s not advancing at all. The timing seems locked at whatever the base timing is…which is weird.
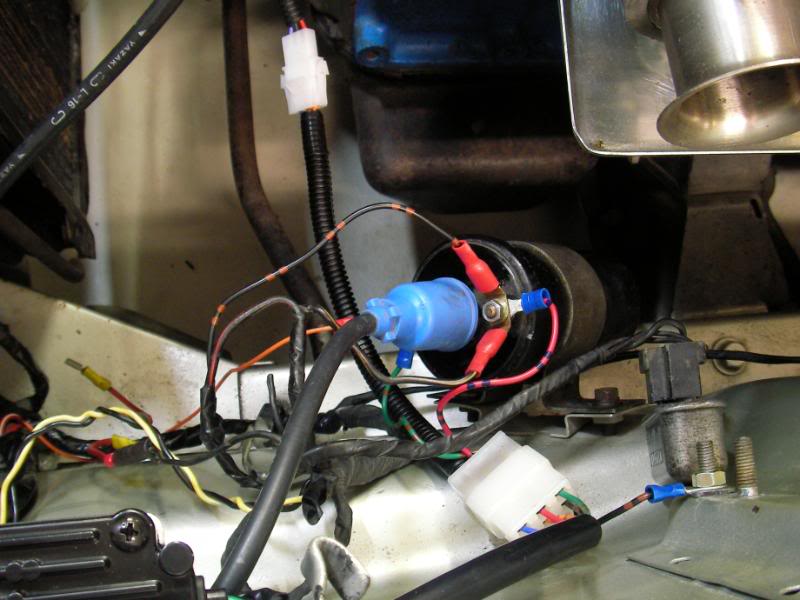
Just to try, I swapped in the stock Nissan coil, but the results were the same.
The funny thing is…the timing advance is obviously all electronic, the dizzy doesn’t look like it’s got weights and springs in it. And the ignition module has no buttons or user-settable things on it:

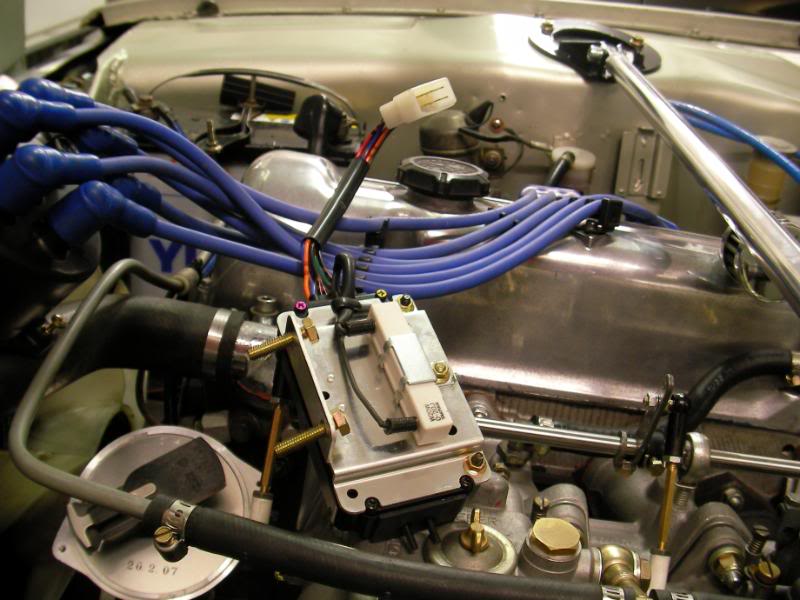
Here’s the funny thing…the only deviation from the instructions is that I am not running a ballast resistor. And I am not sure if that should have anything to do with this weird advance issue that I am currently having with the Kameari system. Alan, it’s not meant to be a setup with locked timing, now is it?
Ok, tonight I removed the whole distributor kit and started again. As you can see, there’s really not much to wiring it up, the black goes to body earth, the red goes to coil +ve and the green wire to coil -ve. Then the loom just plugs between the module and the dizzy and you’re set.
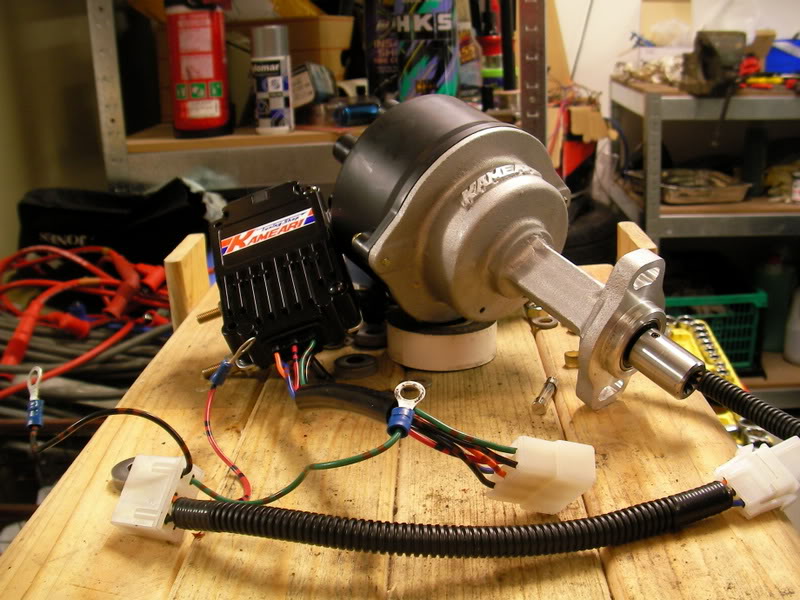
I also checked the continuity of all the wires and plugs (they were fine), all the earth points (all checked out fine with continuity test back to battery -ve with zero resistance) and the coil +ve gets a nice steady 14V when the engine’s running. At this point, I don’t know why it didn’t work at first, but started to work when I wired up an additional earth point to the engine. The existing 2 earth points tested back to the battery -ve with zero resistance, so they were fine.
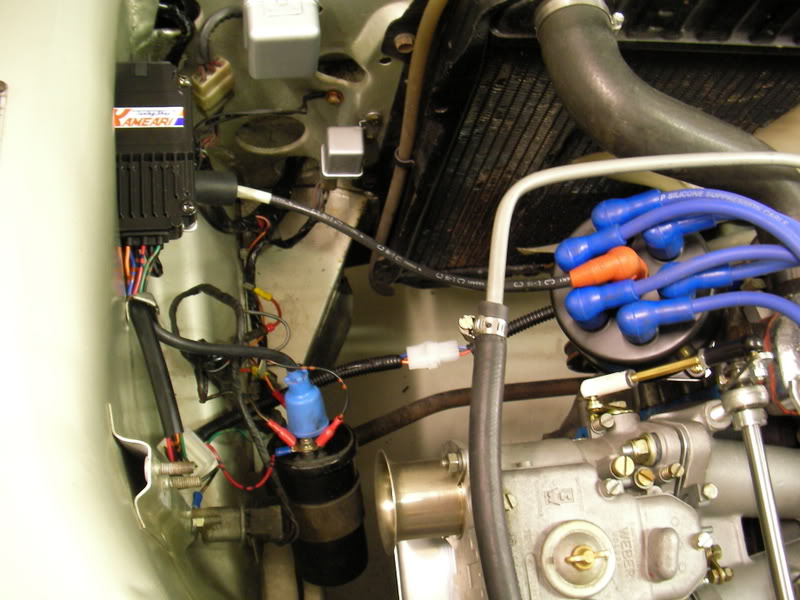
And as you can see from this vid, it’s still got issues. It starts and runs fine, but the ignition timing defaults to maximum advance, and I have to manually retard the dizzy all the way to get it to start. And even then, as you can see it doesn’t advance with rpm at all and the timing stays locked at base timing.
[youtube]http://www.youtube.com/watch?v=h2h-YK73XOw [/youtube]
I can’t help but conclude at this point that it really isn’t anything wrong with the car or the installation, but maybe I got a dud ignition module from Kameari. It’s a long shot, but I’ll try sending some emails to Kameari in Japan.
You never know, maybe they got a bad batch of them or something, and for example I notice that the module only has 2 screws on its casing missing (look at the top pic). Worse comes to worse, I can refit the old Nissan electronic ignition system, which would be a shame as the Kameari kit looks like a nice bit of gear….not to mention that it will also be a rather expensive $700 series of paperweights if we can’t get it to work.
Oh, I opened up the plate on the dizzy to look inside…no pics sorry since the screw holding on the rotor button was overtightened and I couldn’t get it off. But I could just slide the plate up enough to see that in the bottom of the dizzy was just a chopper wheel and a 3-wire optical pickup. So no mechanical advance mechanism in there, it’s all electronic.
Well…no driving this weekend then, but on the bright side, someone contacted me with some Cusco camber top bits from a dead set of shocks they have, so I might as well use the time to sort the front suspension out.
Anyway, now that we know that the Kameari ignition kit is supposed to be like that, I put it all back together, set the timing at a locked 32degs and…went out for a drive!
Tonight I guess marked a milestone in the build because it’s the first time I just took it out for a drive. Even thought I had my doubts, the Kameari dizzy seems to work just fine without any advance, and it’s never run better or cleaner. It still isn’t fast though, and still feels like it’s somehow fighting itself. No guts and won’t rev and is quite breathless.
But I think by process of elimination the new ignition setup has at least taken that aspect out of the picture…I don’t think it’s necessarily a fuel delivery issue though, it seems to hit this wall at 5k very reliably and at no point does it stumble. In fact it drives quite smoothly, just slow. Plugs read quite black still, too.
But good news is that the suspension feels great (it does need an alignment badly though). Anyway here’s some pics ![]()
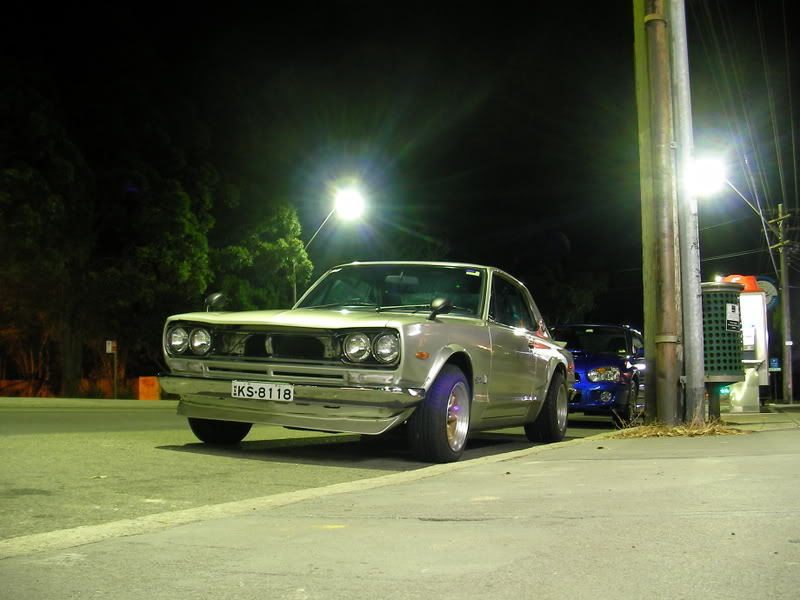
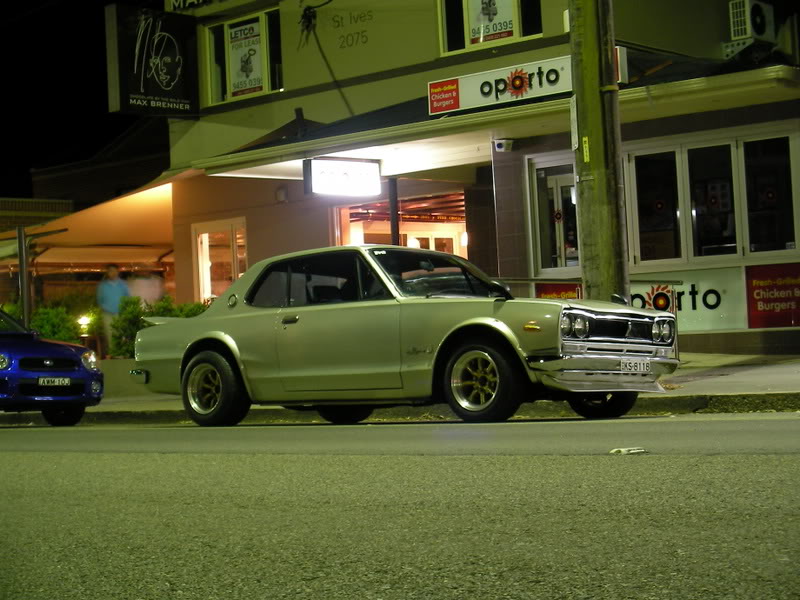
Next port of call is checking cam timing. I’m thinking it’ll definitely be out. It has to be…pretty much everything else has been covered. At the moment, the Kameari ignition is doing its job and has made the car better than it was before (I thought it would be quite a compromise but Kameari was right…it’s quite streetable).
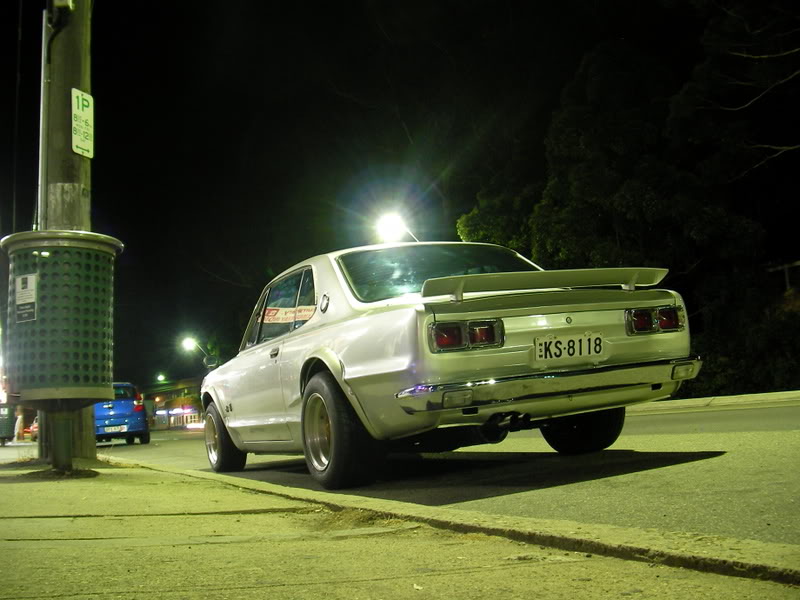
But hey….it runs! It drives! It’s a car now, not just a garage ornament ![]() Now we’re just fine tuning the suspension and searching for that lost hp. On the bright side, we have an engine with great compression, new carbs and ignition, a big cam and a new head with a huge port job. It *should* scream. Hopefully that moment is soon, but tomorrow the car goes up on stands again.
Now we’re just fine tuning the suspension and searching for that lost hp. On the bright side, we have an engine with great compression, new carbs and ignition, a big cam and a new head with a huge port job. It *should* scream. Hopefully that moment is soon, but tomorrow the car goes up on stands again.
In the next instalment of Hako of Trouble…
When I was driving the car around a few evenings ago, one thing I noticed was that the water pump squealed a a certain rpm. It didn’t sound like the belt, and so it was a good idea to take it out. Replacements are pretty cheap.
Removing the waterpump in my car means taking the radiator out, but it was a good idea anyway as you will see. Sticking a hose in it for a few mins really flushes out a lot of gunk. The radiator wasn’;t difficult to remove, it’s just bolted to the core support by 4 bolts that are easy to reach, but the time consuming bit was prising off the hoses without damaging them.
Now the fan has to be removed….the bolts for the fan are in front, and you can’t reach them unless the radiator is out of the way.
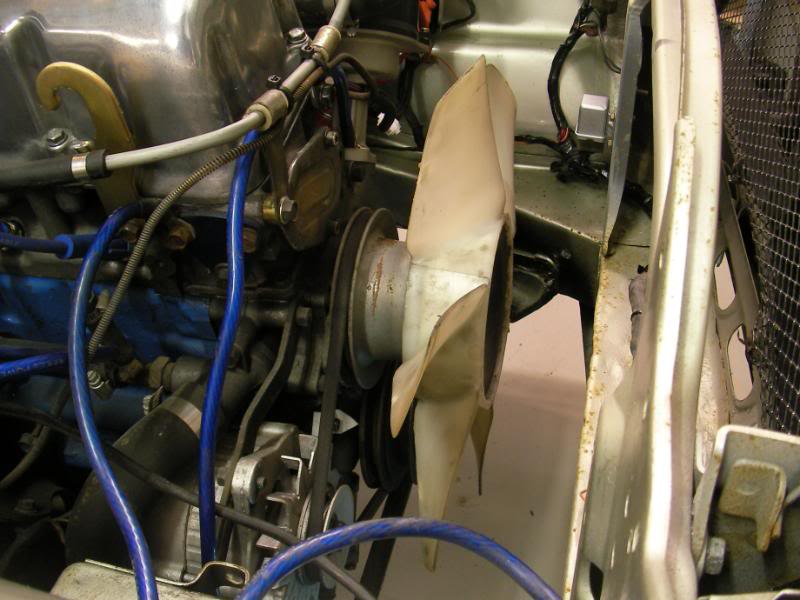
And yup, when I spin the water pump by hand it makes a squeal. I guess the bearing is toast.
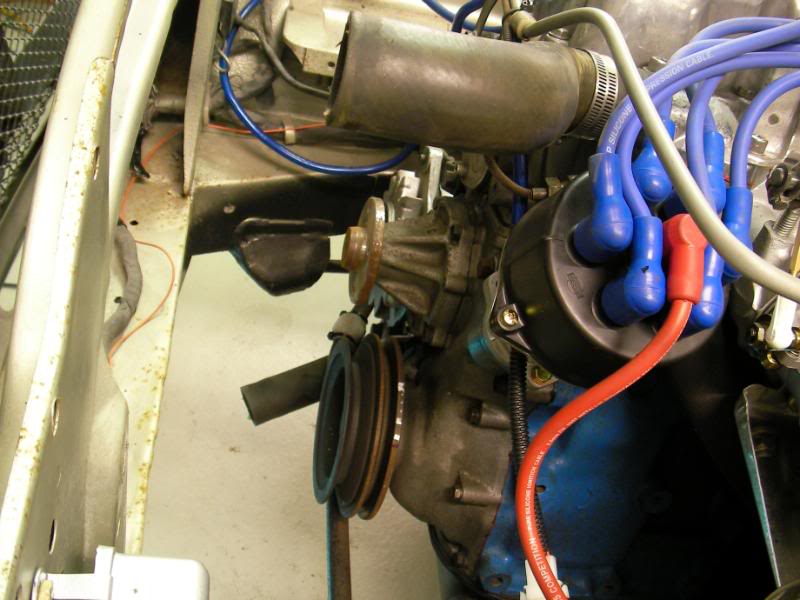
It doesn’t look too bad, but it doesn’t spin all that freely. A new one should only be $35 (same as any L-series) or so however so it’s no great loss.
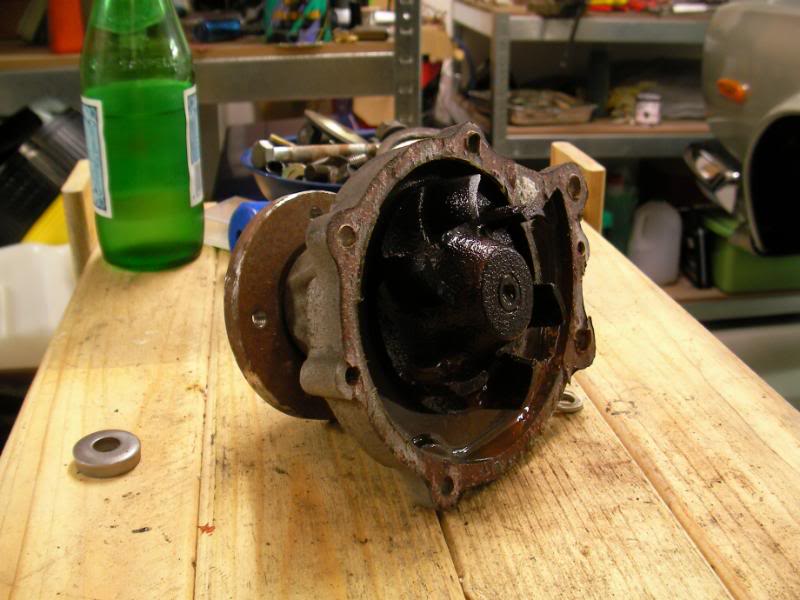
One of the things I wanted to do anyway was to upgrade the fixed fan to a clutch unit for quieter running and less power loss. If you look closely you’ll see that it’s also a little cracked, so this is good timing.
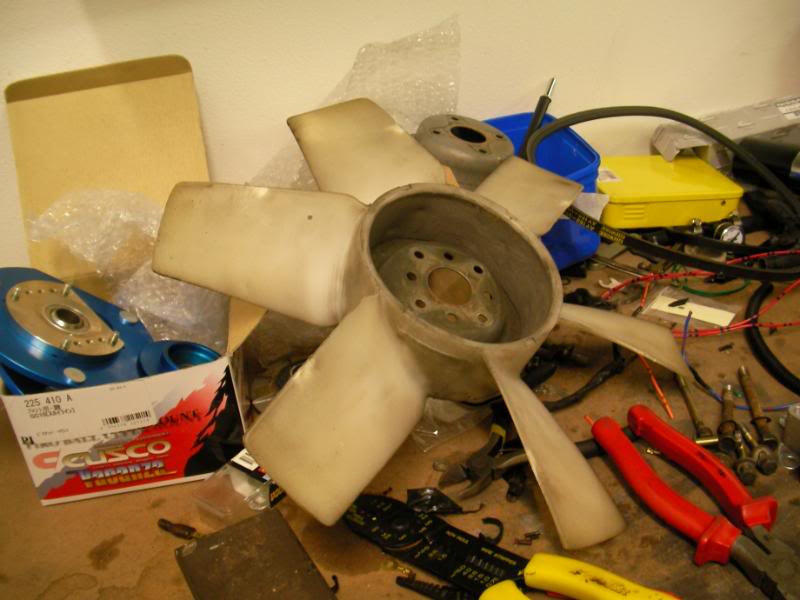
And now we have tons of room for cam timing shenanigans!
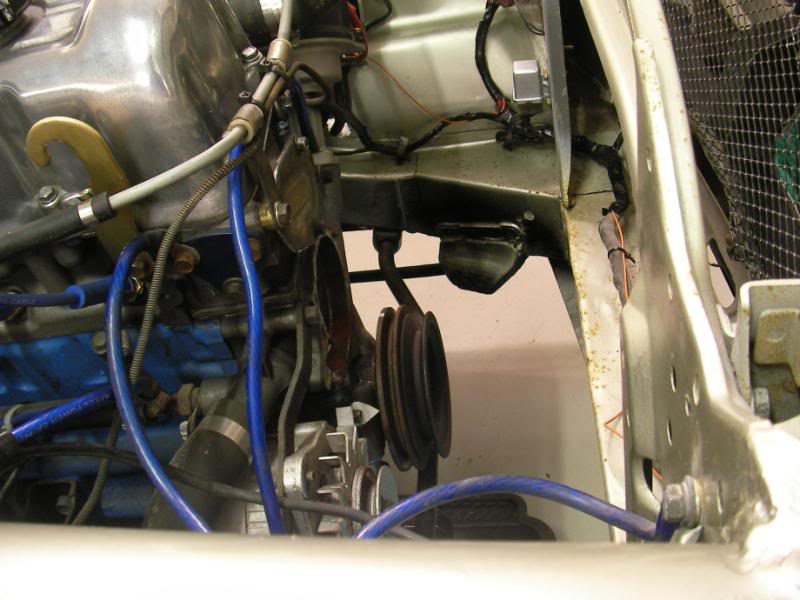
I’ll source a new waterpump and belt tomorrow, and then we can start to take the cam cover off and start measuring things
Ok, did a few things tonight.
First, I bought some goodies. New water pump, drive belt, and thermostat. Also you can see the home-made degree wheel, which will be attached to the crank pulley with double-sided tape.
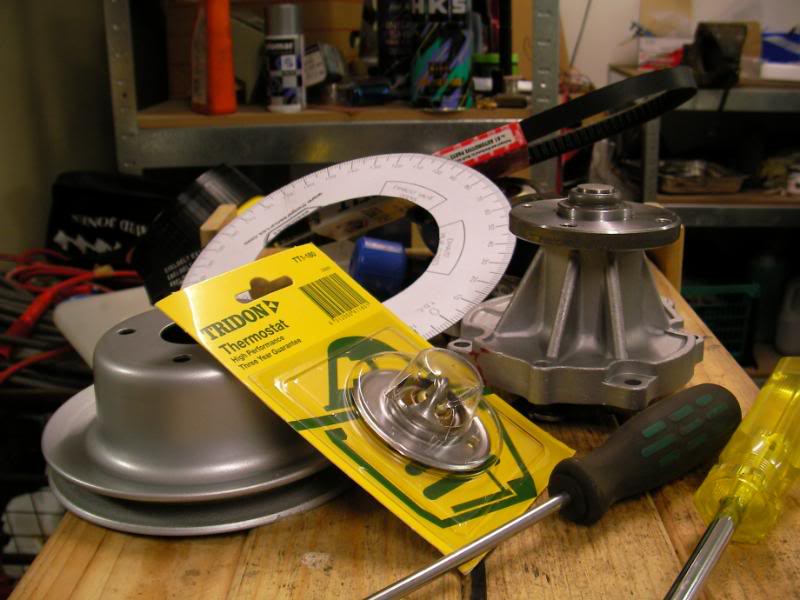
I also cleaned up the pulley/bell thing for the water pump, the usual 3 coats of etch primer and 4 coats of silver.
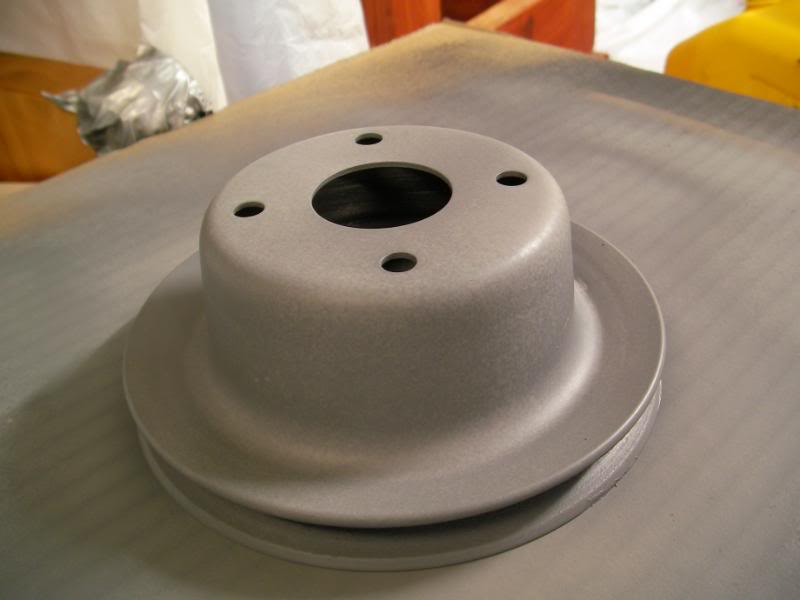
First surprise…no thermostat! I suspected this was the case, since the radiator top hose gets warm very quickly when the car is started from cold. If there was a working thermostat installed, the top hose would be cold and then suddenly get hot when the thermostat opens. This is because the thermostat closed when cold, to stop the coolant from going into the radiator and so allowing the engine to warm up faster. I’m not sure if this is another cheapskate shortcut from the prior ppl who worked on the car, or if it was a deliberate mod to get the engine to run cooler, but I will be putting a new one in.
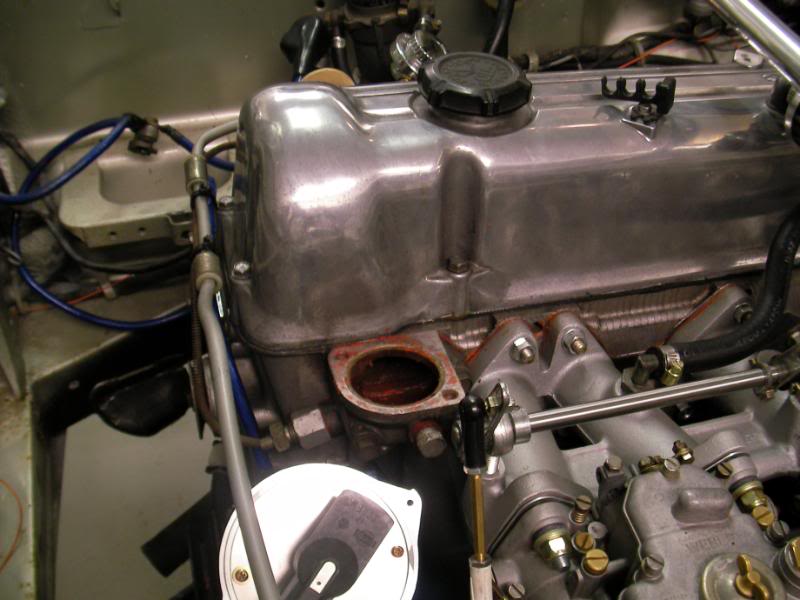
First easy thing to do was to check the lobe wiping pattern. Basically, the rocker has to sit under the cam at the right angle. Since my cam is reground, it’s physically smaller in the base circle, so the rocker has to be adjusted upwards to take up the slack. This has to be matched by using thicker lash pads (which are spacers which sit on top of the valves) so that the rocker maintains its geometry. If this isn’t done, the cam may not ride on the correct part of the rocker. Ideally, the cam should ride right in the middle of the rocker pad.
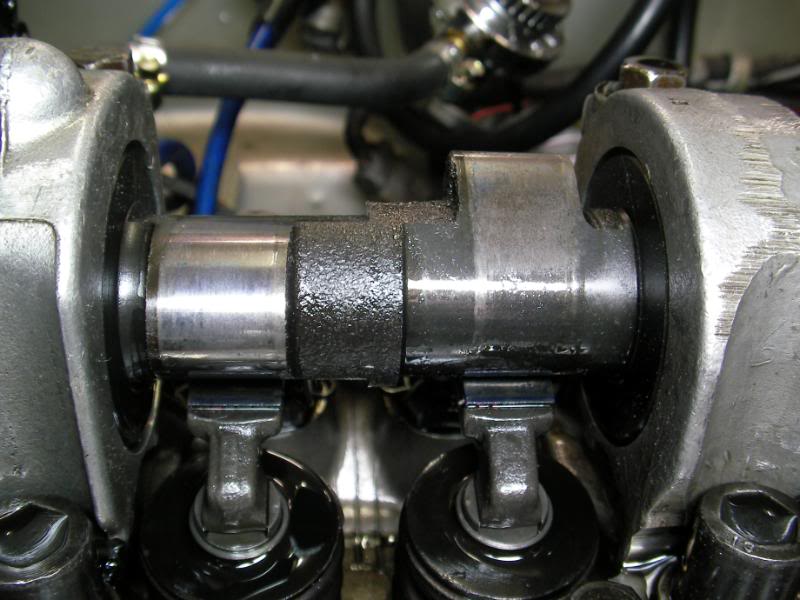
So what I did was clean the oil off a couple of the cam lobes, and coloured in the rocker pad with a texta. Then I rotated the engine by hand and the ink that is wiped off by the cam lobe should tell us how the cam sits on the rocker. On one side it looks like this…about a 2mm strip of ink left on the rocker pad…
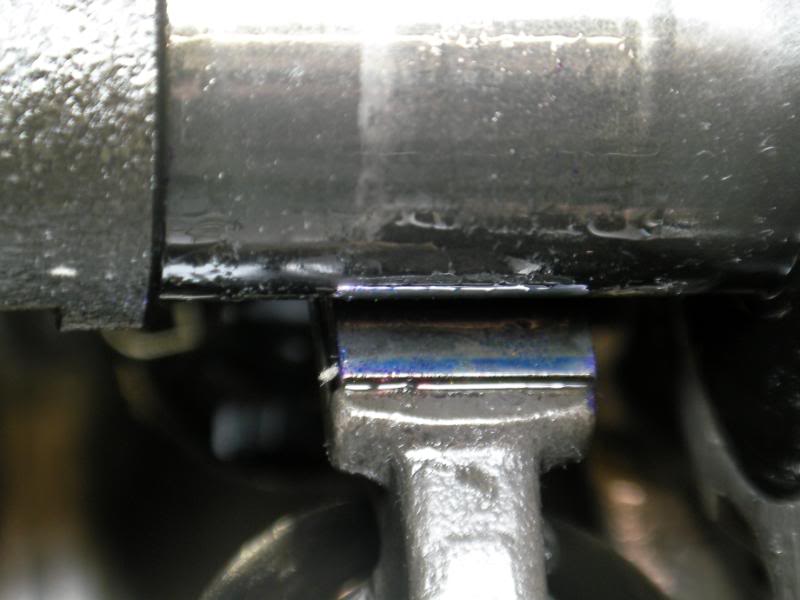
…and on the other side it looks like this…also about 2mm of unwiped ink left. That means that the cam is wiping across the centre of the rocker. Cool.
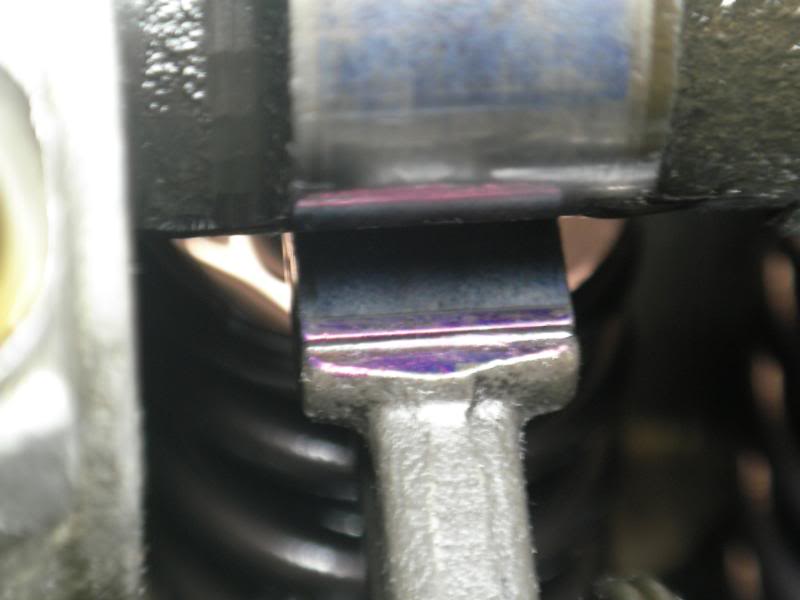
Usually when you get a new cam, the cam grinder will recommend new lash pads of XX thickness, so it would have been a bit of a shortcut if this wasn’t done when the cam went in.
Next job is to verify top dead centre. There is a mark on the crank pulley, but the pulley itself actually has an insulating rubber ring in the middle of it. So over time, it’s possible that the outer metal ring of the pulley will slip a bit, and once that happens your crank pulley markings will be off. So it was a good idea to double check that the crank pulley was accurate before checking the timing at the cam itself. So I made up a cardboard degree wheel, and coathanger-based pointer device ![]()
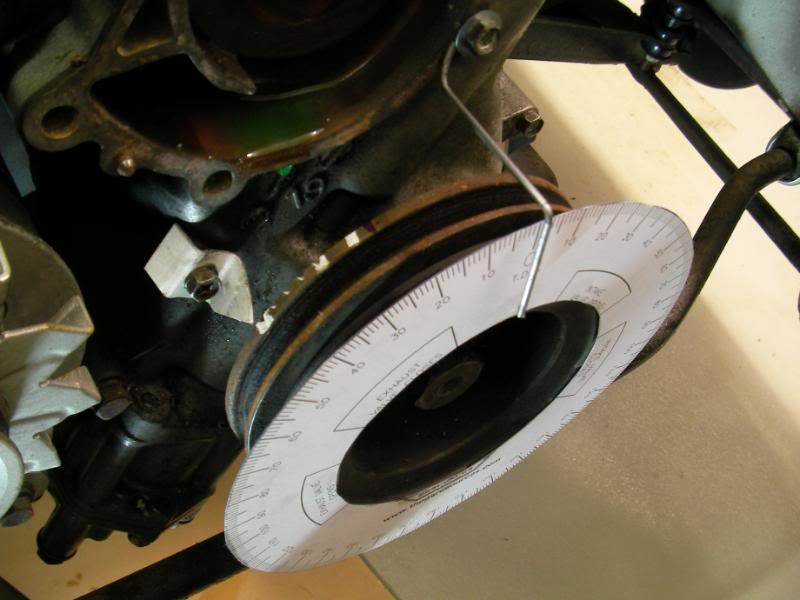
I then jammed a dial gauge into #1 cylinder, to measure the rise and fall of the piston.
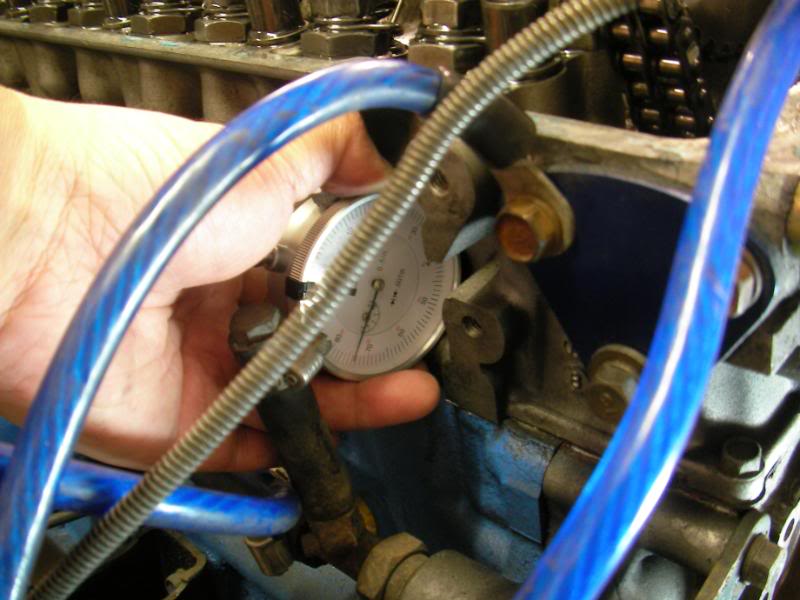
It’s not very accurate to just turn the crank and record the peak of the piston travel, because at the top of the stroke, the piston will hang there for a few degrees while the crank goes up and over before coming down again. So it’s more accurate to measure the piston at a particular position before and after TDC.
The position I measured related to 10 degrees before (indicated) TDC:
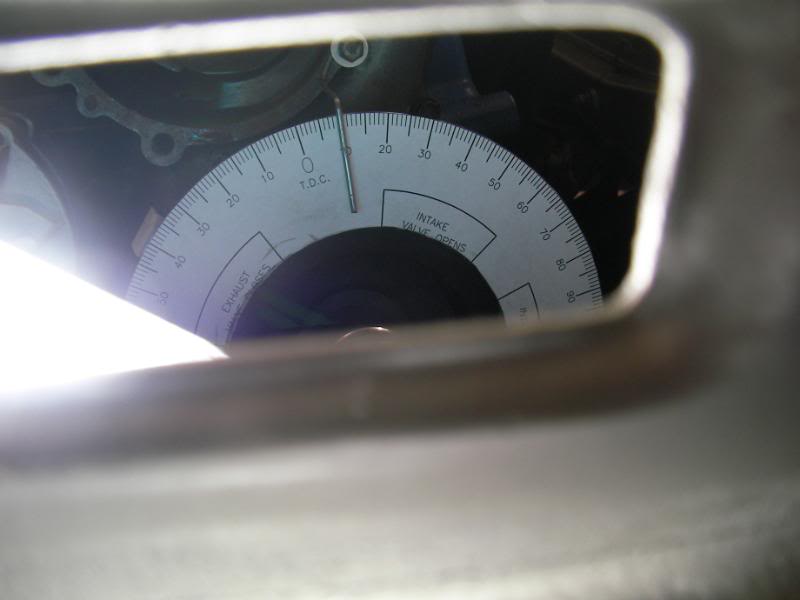
And then the piston goes up to its peak, then down again, and at the same position after TDC it related to 5 degrees.
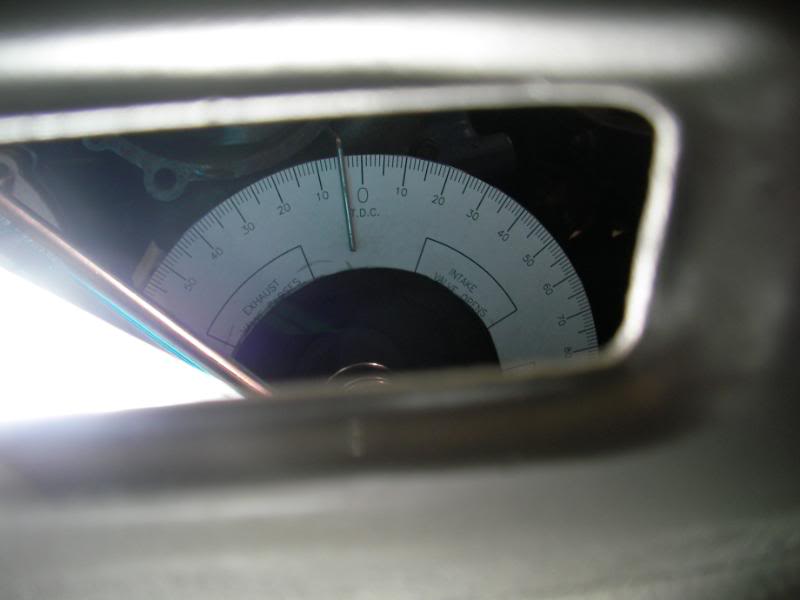
Ah, so the crank pulley was a little out, but not by much. “True” TDC is the mid point between 10BTDC and 5ATDC, which is 2.5 degrees BTDC. 2.5 degrees is not a hell of a lot of error, so it was actually pretty close. This is the position of TDC vs the crank pulley pointer, so I just modified the pointer (after this shot was taken) to point to the right spot.
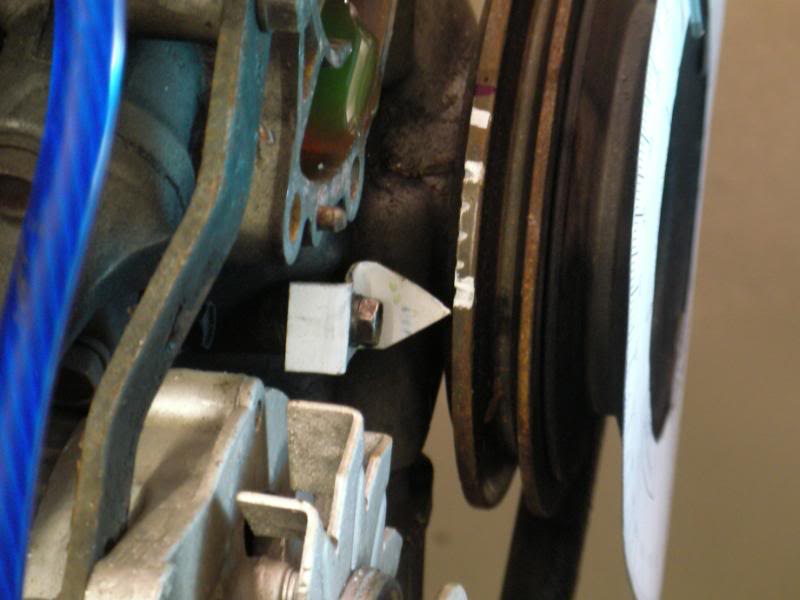
So far we’ve eliminated two possible causes of poor cam timing. If the previous engine builders relied on the crank pulley marking for cam timing and the crank pulley markings were wrong, then the cam would be out too. Also if the rocker geometry was miles out, then that cam have an adverse effect on cam timing too. But neither of these things appear to be the case here.
..and that’s where we are. Now that we know that the crank pulley was accurate enough, tomorrow night I’ll rig the dial gauge to measure cam lift, and then try to determine cam timing.
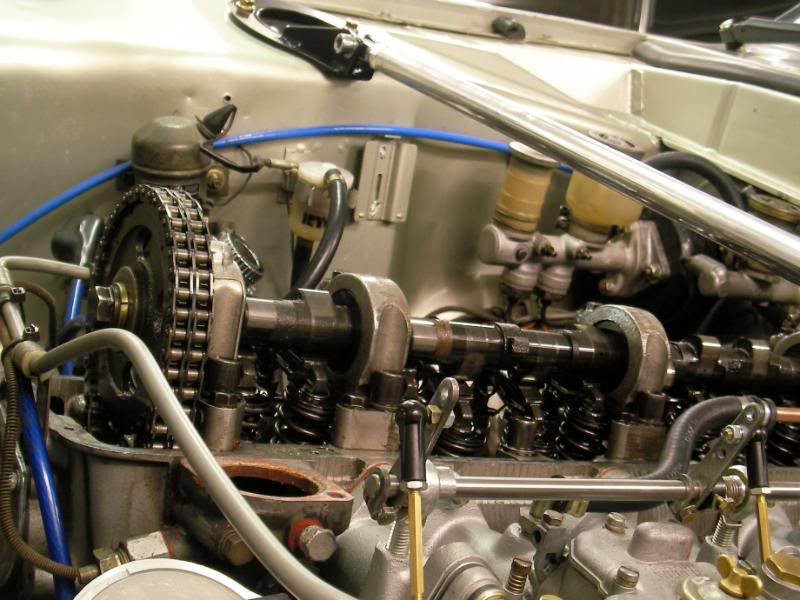
Alrighty….tonight we checked cam timing.
First I noticed that the cam is an asymmetric profile….dunno if this will affect our measurements, but we’re measuring cam timing at 50thou, which is very little lift, so possible the cam is still symmetrical at that early stage.
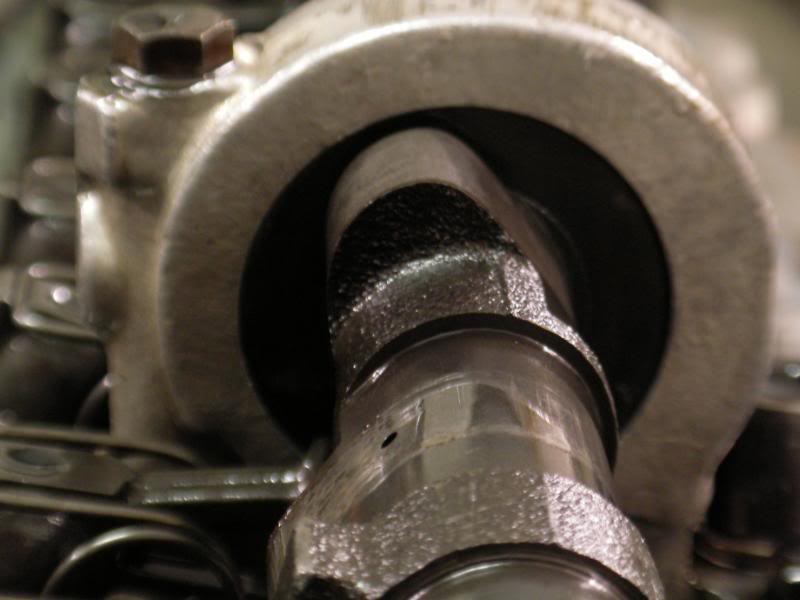
First step is to crank the engine until #1 intake cam is off the rocker. Ie, zero valve lift.
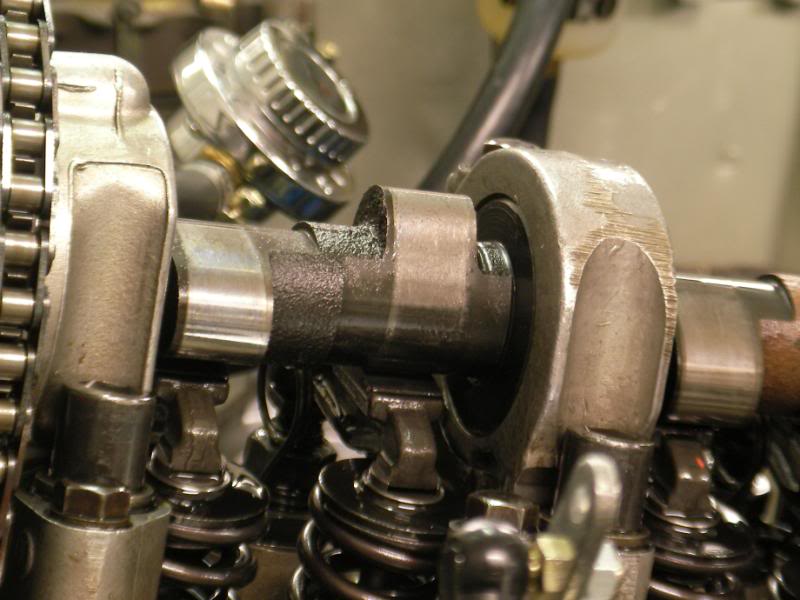
Then I attach a steel plate to the thermostat housing…this will form the platform for the magnetic dial gauge mount.
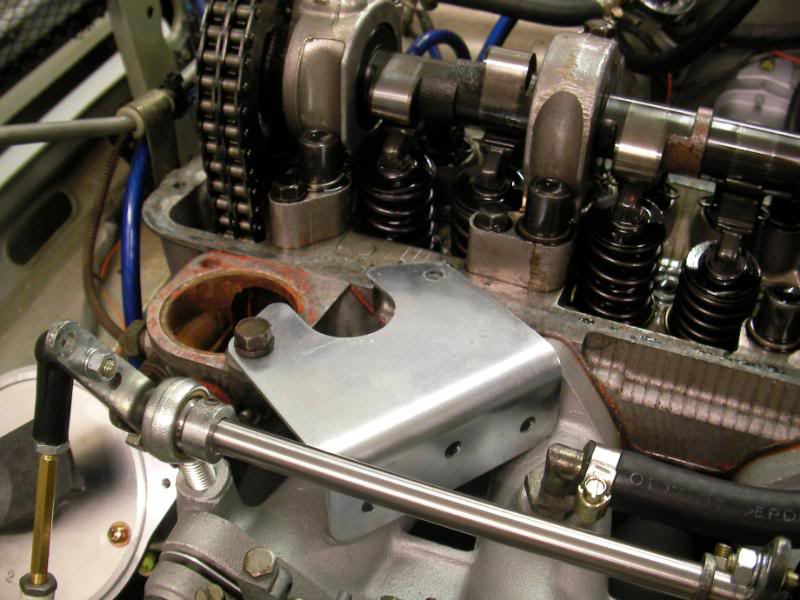
…which looks like this. First I’m measuring the intake lobe, so the dial gauge is set up so that its pointer is resting on the valve retainer.
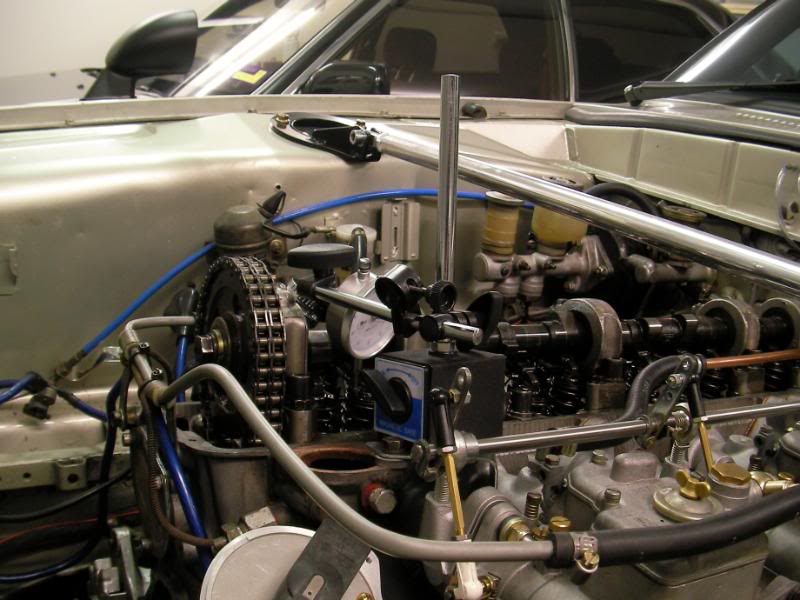
…zero the gauge. That little knurled wheel on the arm of the mounting allows small adjustments to be made to the angle of the arm, so it makes zeroing the gauge quite easy. Also the face of the gauge can rotate too.
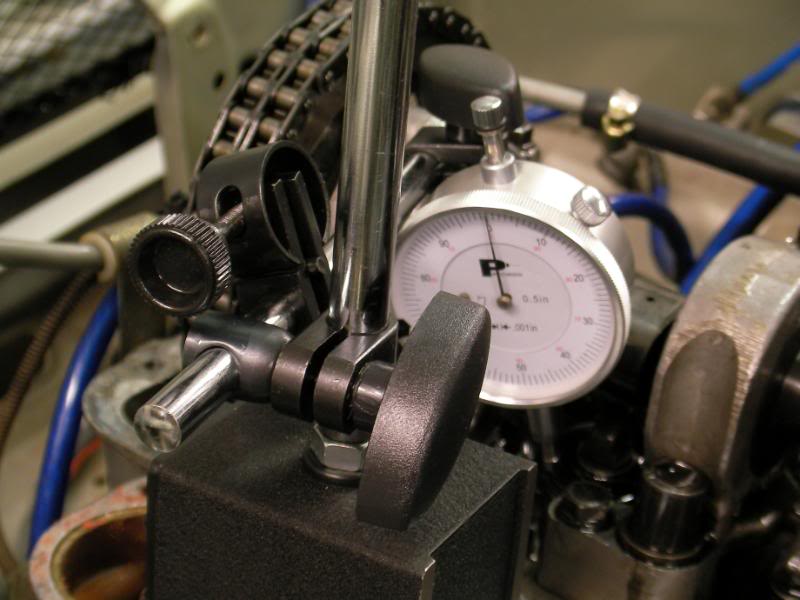
Now turn the engine until the intake lobe starts to lift the valve. At 50 thou of lift, stop turning, and record the crank angle.

Which is 40 degrees BTDC. The degree wheel usefully has little sectors which say when the valve should open and close, and so the intake valve opening is right in the middle of the range.
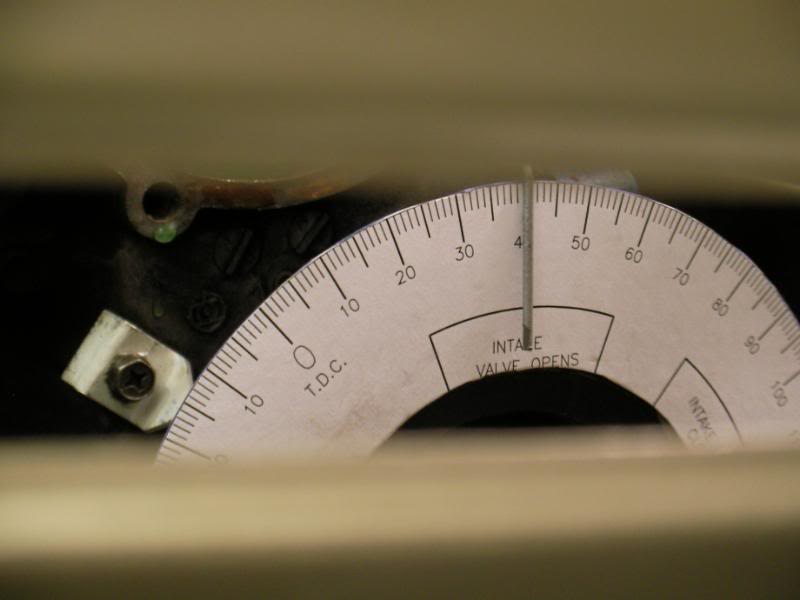
Now slowly keep turning the engine until the valve starts to close and the cam lobe is starting to come off the rocker (it’s the lobe on the left in this pic)
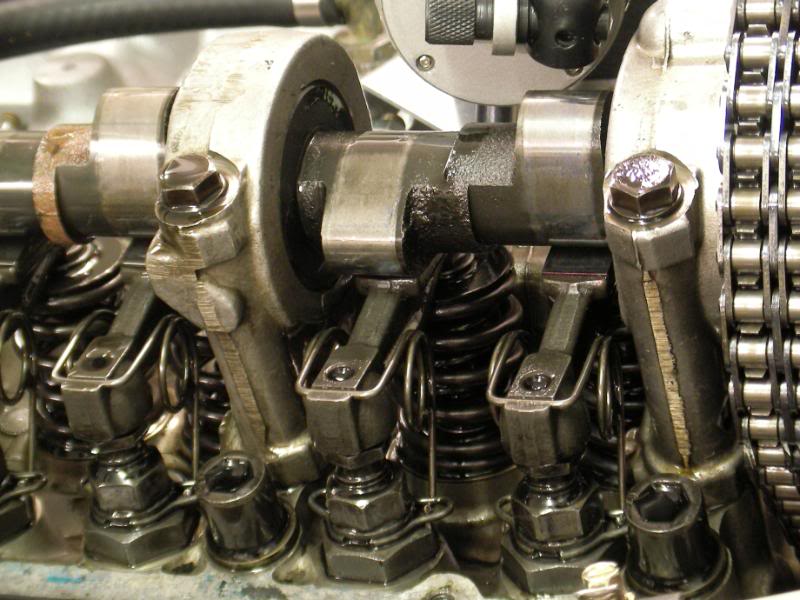
Stop turning at 50 thou of lift again, and record the crank angle.
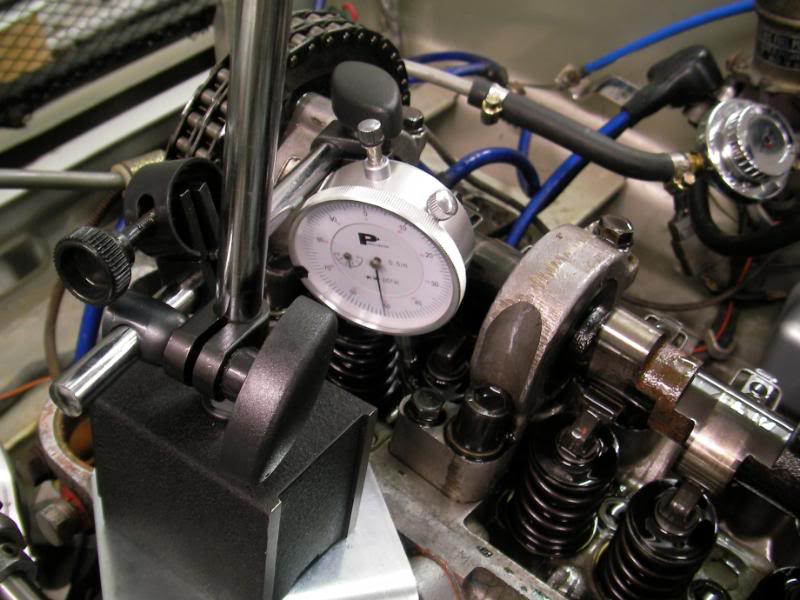
..which is 122BTDC…which is out of the guideline range of valve closing time on the degree wheel…hmm
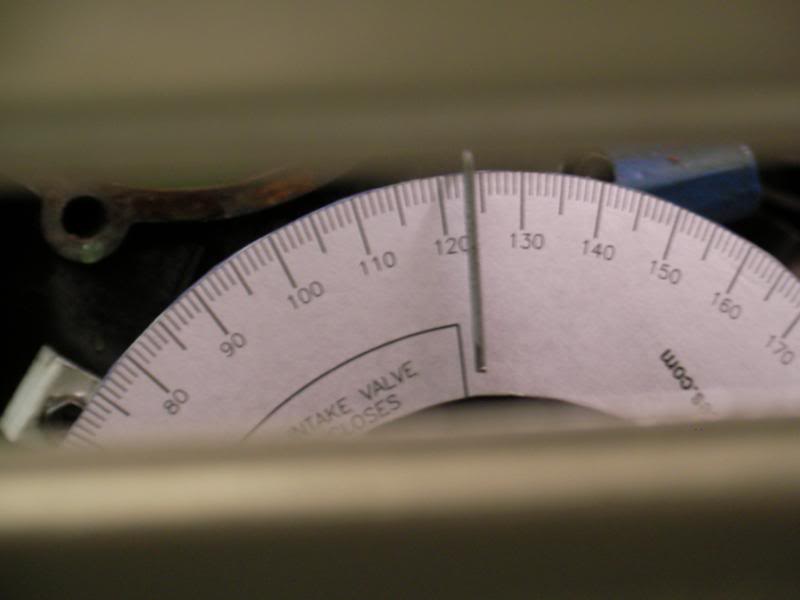
Ok then! Now we have some useful data on the inlet of that cam.
What is happening is that when the inlet cam starts to open, when it has got the valve open 50 thou is it at 40 degrees before TDC. Then the cam opens the valve all the way, and as the valve begins to shut, it is at 122BTDC which is really 238 after TDC) at 50 thou before closing. This means that the total duration at 50 thou lift is 40 + 238 = 278 degrees. Max lift occurs at the midpoint of 40BTDC and 238ATDC, which is 99ATDC.
While the dial gauge is on the cam, you can also measure max lift, which in this case is 591thou.
Now we move onto the exhaust:
Repeat the whole process and here are the specs:
Exhaust cam is at 50thou 110degrees after TDC and when the exhaust valve is closing, it’s at 50 thou again at 28 degrees before TDC. Duration is 278 degrees at 50thou, just like the intake lobe, and max lift occurs at 110degrees BTDC.
So.
It looks like we have a HUGE cam, 278 degrees @50thou, 591thou of lift and is timed at 99/110. If we compare this to the cams for L-series available at Ivan Tighe:
http://tighecams.com.au/profiles3/nissanlseries.htm
..this cam is quite a bit bigger than the biggest they have. Also, Tighe cams recommend timing at 105/105, which is rather different to the 99/110 that I currently got. If I advance the 5 degrees, it will be 104/105, so I think the cam timing is definitely a little out.
But what’s concerning me is how big this cam is. Tighe’s biggest race cam is only 242 duration @50thou. Mine is a lot bigger than that at 278.
I’m thinking this cam is firstly not timed correctly at 99/110, but also that it’s way too big. At this point (unless I’ve done it wrong!) I am thinking that rather than try to adjust this cam to 104/105, I should just start again with a known-quantity street cam.
The plot thickens…but if we’re looking for a reason why the engine runs funny, I think we just found one.
New bumpstick time!
It’s the cam I described above, and I also got the adjustable cam gear (might as well dial the cam in properly since we have all the gear set up).
I didn’t end up getting the lash pads however…he calculated that the lash pads I would need would be 4.6mm, however the ones I already have are 5mm. So he recommended just recycling the old lash pads, do the texta-on-rocker-pad trick and see if it might be ok. He reckoned the formula for ideal lash pad is only a guideline anyway, so it’s possible that my lash pads are half a mil in the right direction anyway. We’ll find out I guess.
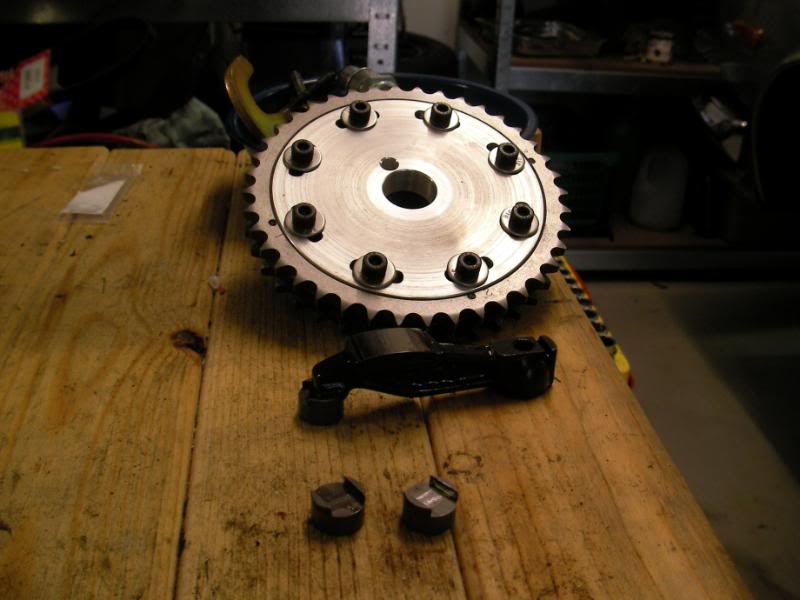
The problem with taking out the cam however, is this:
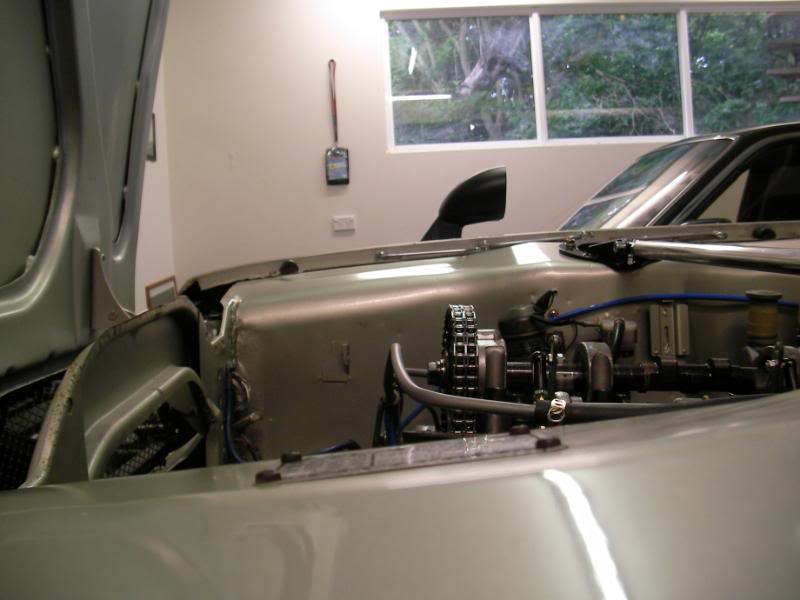
Normally to take the cam out, you slide it out the front. This works fine in a Zcar but in my car the radiator support is in the way. So (unless we are taking the head off) then cam removal will involve removing the cam towers. Some ppl say that this should never be done since the towers are factory line-bored after installation, but then others say that as long as you number the towers and put them back exactly the same way then it should be cool. I asked Stewart about it, and he reckoned that if removing cam towers was the only alternative then it’s ok, as long as you’re careful, and as long as the cam spins freely by hand afterwards then it’ll be fine.
The other concern that someone raised was that my compression readings are very good. TOO GOOD in fact for an engine with a badly-timed, massive cam. One thing we have to watch out for is that the compression may be way too high when we install a smaller cam. So I’ll have to re-test the compression with the new cam installed before driving I think.
Haven’t done much this week, I think I might leave the cam swap until the weekend when I can have a decent go at it.
I did however send the radiator off to North Shore Radiators for a refurb. Modern radiators have aluminium cores with plastic end tanks crimped on (with a rubber seal in between). In comparison, the old-style Hako radiator has a copper core, with copper end tanks which are soldered in place.
The radiator shop removed the top tank, and rodded out the gunk from all the passages, before putting the end tank back in place. As you can see, the radiator is in a sorry state, having some battle scars.
The radiator guys said that one of the tubes was leaking, so that was fixed, but the rest of the damage was just superficial and the radiator tested out just fine. They also said that the bent fins wouldn’t really affect the cooling much, but just the same I started straightening them with a little screwdriver and a pick tool.
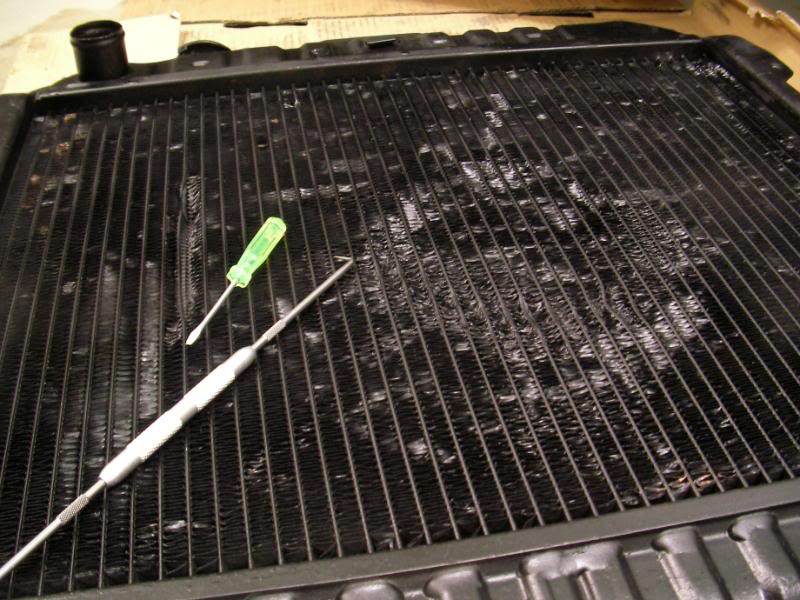
It didn’t turn out too bad…
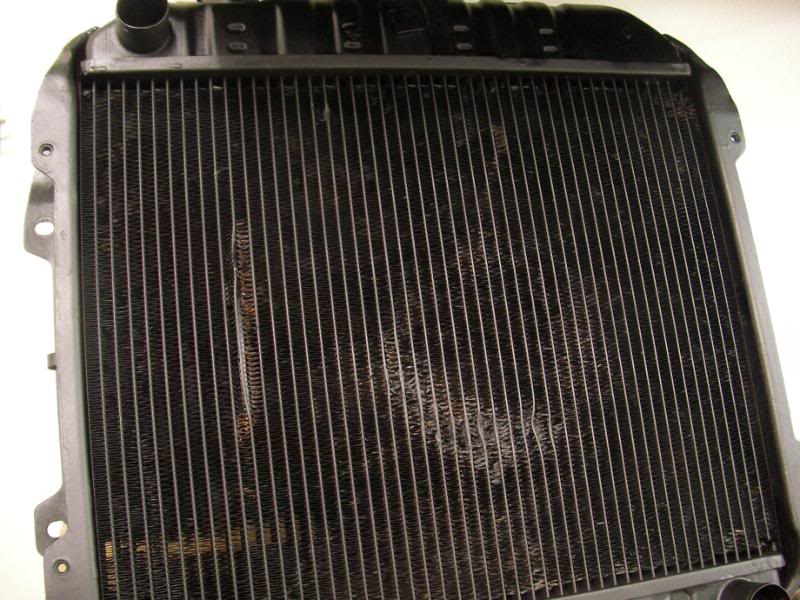
But the thermofan will cover all the sins anyway ![]()
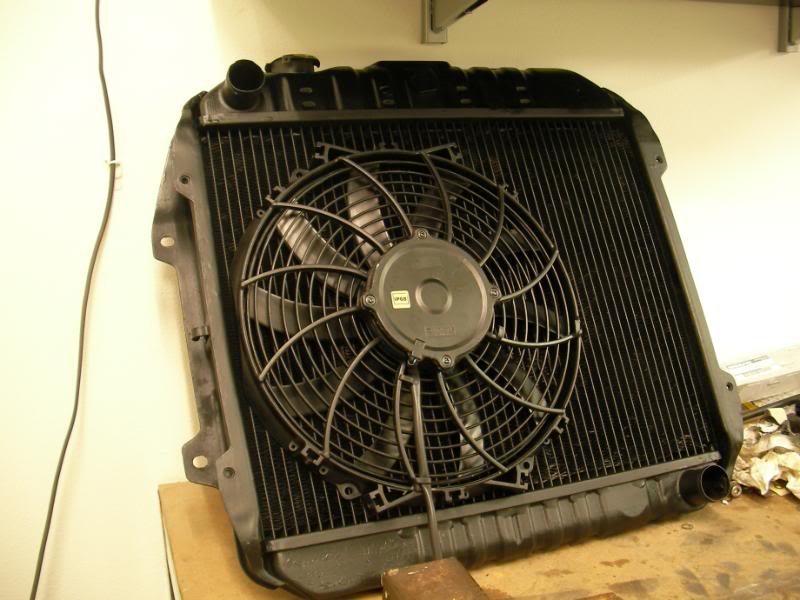
The radiator guys sprayed it with some black paint, but I thought it might be a bit nicer if I redid it in some satin black. You might remember that I did the water pump pulley in silver, but since the water pump itself is silver I thought it was a bit much. So now it’s a matching satin black.
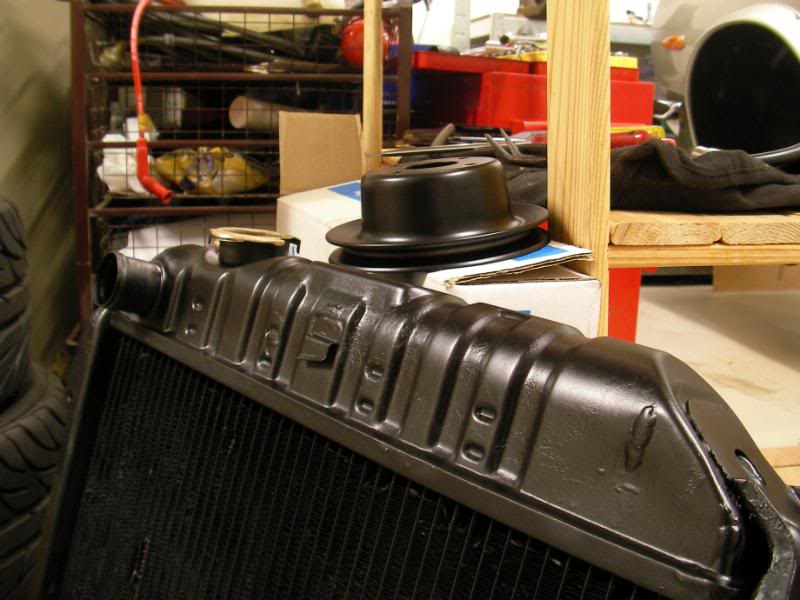
Other thing I made in readiness for the cam swap is a chain wedge.
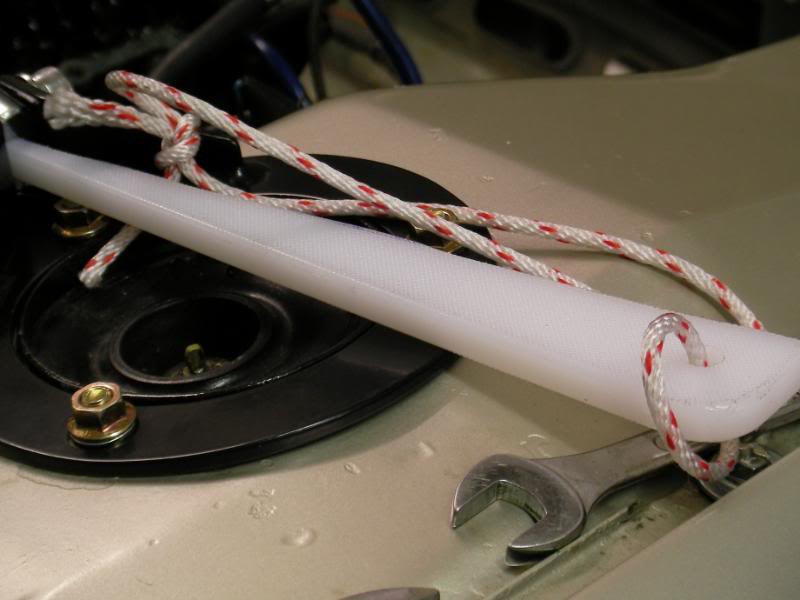
It goes in here…the L-series has an annoying feature in that the timing chain tensioner is a spring loaded plunger that is hidden right at the bottom of the block behind the crank pulley.
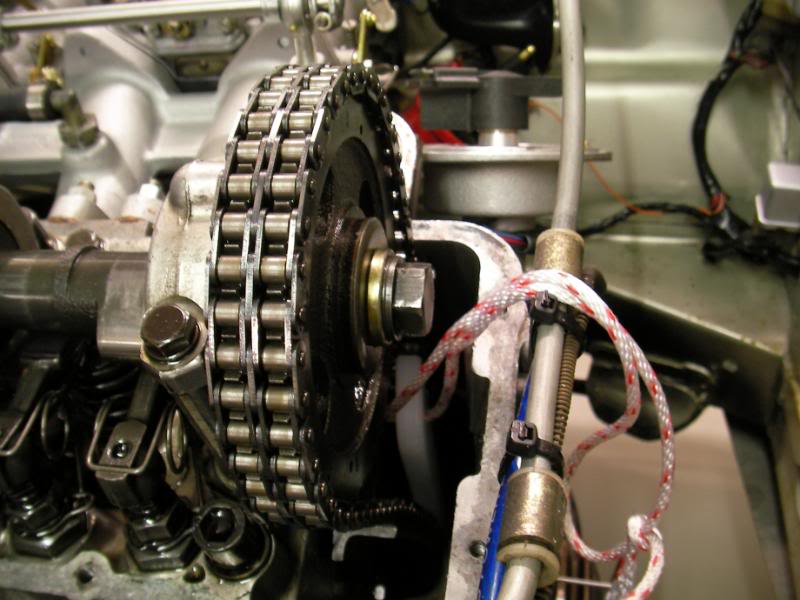
…if you remove the cam sprocket, you run the risk that the tensioner will pop out, and if that happens you are pretty much screwed. It’ll be impossible to get the cam sprocket back on without sorting out the tensioner, so the crank pulley, timing cover and sump will have to come off to push the tensioner back in place. So I made a wedge out of an old chopping board, which will wedge the chain against the side of the timing cover, and hopefully wedge the chain tight enough that the tensioner can’t pop out (making a wedge is the factory recommendation by the way!).
Finally got my butt off the sofa and into the garage to perform the cam swap!
First order of business is to remove all the rockers. With the rockers in place, some of the cam lobes will be pressing down on the valve springs, and so when I loosen the bolts holding down the cam towers, some of the valve springs will try to push the cam upwards at an angle. That might damage the soft alloy cam towers, so it’s recommended that you just take all the rockers out beforehand.
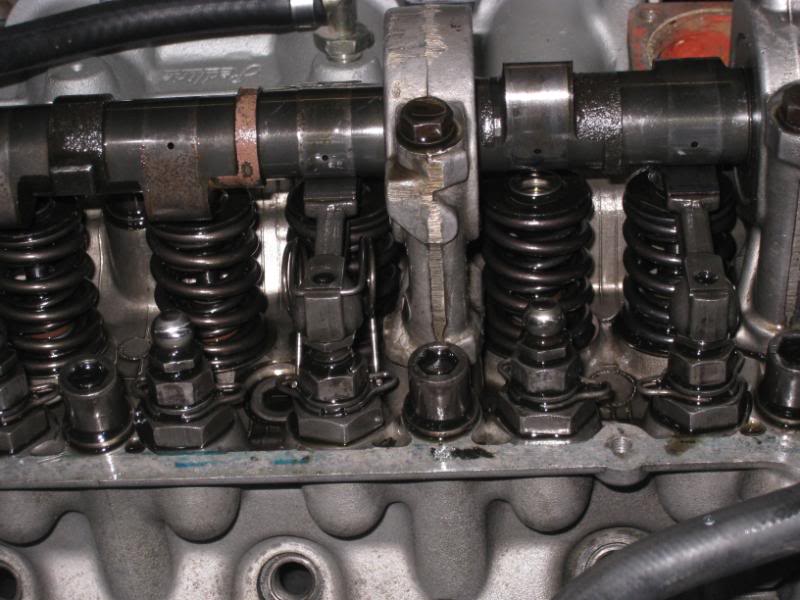
The rockers sit on a ball-topped pedestal, and so you first loosen the adjuster, and screw down the pedestal as far as you can.
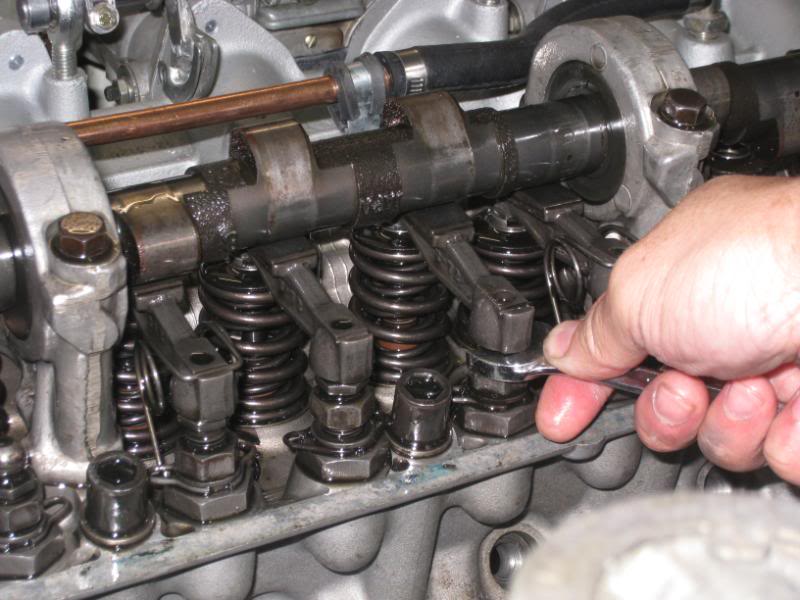
You can see here that the rocker is a lot lower than the ones next to it. This is to free up some wiggle room to slide the rocker out from beneath the cam. This isn’t enough however, and there isn’t enough room to lift the rocker off the pedestal. By the way, those weird hairclip springs on the rockers are to hold the rockers horizontal to the cam. Since the rockers are located on a ball stud, they can flop from side to side when the cam is off them, so the springs help to keep them level.
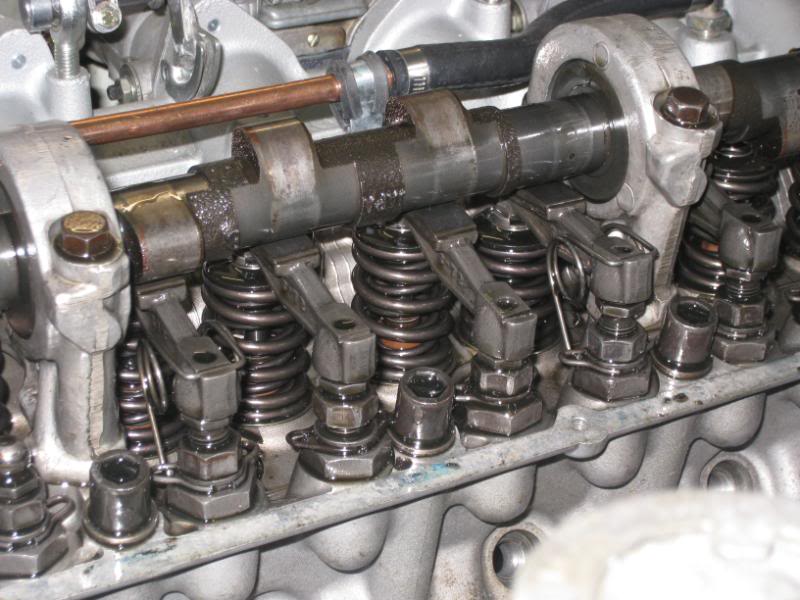
So what you do, is get a big screwdriver, and lever (not on the cam lobe, but on the blank bit of cam between the lobes) the valve spring down, just 5mm or so…that frees up enough room to wiggle the rocker out.
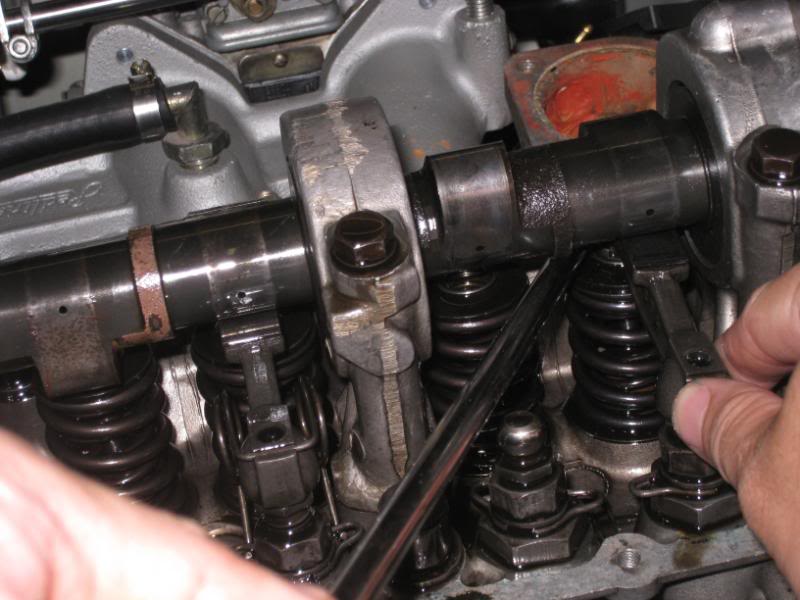
If you were putting back the same cam, it’s recommended that you don’t mix up the order, since the cam and rocker pad will wear-mate a pattern into each other. Since we’re putting in a totally new cam we can probably mix up the rockers but it doesn’t hurt to be careful and keep them in the same order.
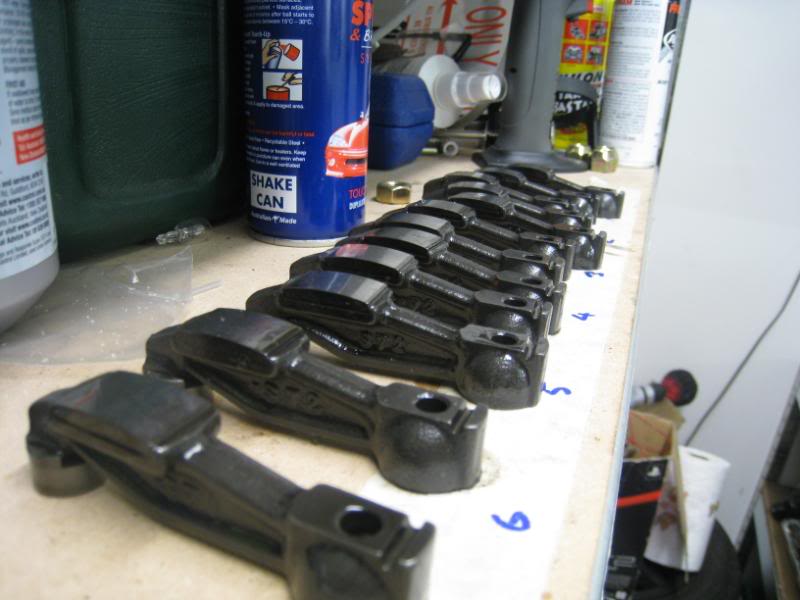
Now to loosen the retaining bolt on the cam. I put a socket on the crank pulley, and braced it against the chassis rail. That locked the chain in place and allowed me to undo the cam bolt.
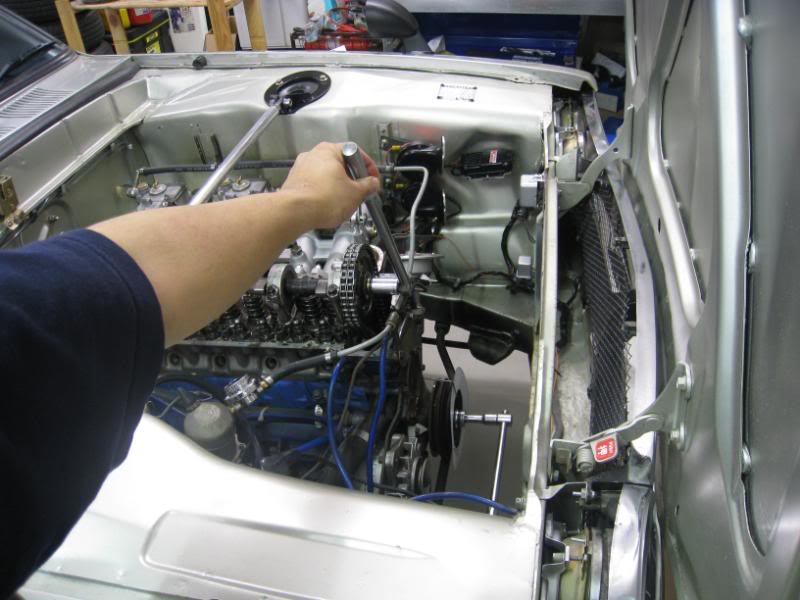
Last step: rotate the crank to TDC on the compression stroke on #1 cylinder. So that’s zero on the crank degree wheel, #1 cam lobes pointing up at 10 and 2 o clock, and the dizzy rotor at the #1 piston firing position.
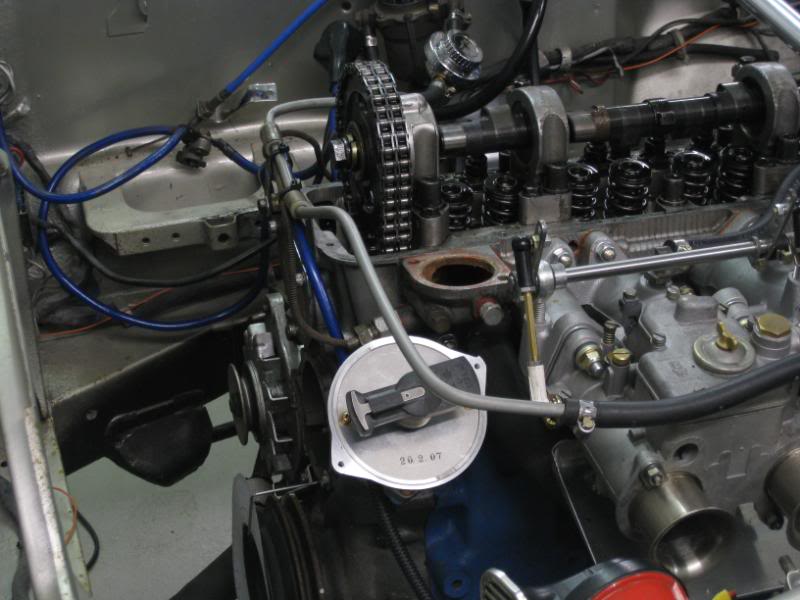
….and that’s it! The chain wedge can go in, the cam sprocket can come off, and then we can slowly undo the cam towers and lift off the old cam tomorrow night.
PHEW!! What a relief, nothing went wrong…
First step to removing the cam (given that we’ve removed the rockers the other day) is to remove the head bolts that go thru the cam towers. Haynes manual says you undo the centre bolt first, then work outwards, 1/2 a turn at a time to gradually unload it. The head bolts are an allen bolt, rather than a normal bolt too…if you look at where they are, it wouldn’t be possible to get a big fat conventional socket in there for a conventional bolt.
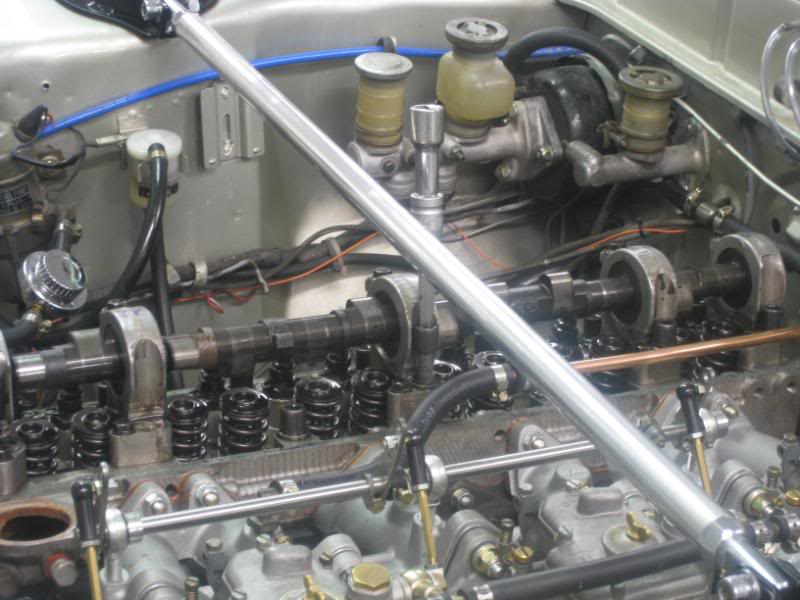
The head bolts, removed. Here’s another sign that the engine must have been built just before it left Japan: the anti seize paste on the bolts are still fresh and soft.
Now the chain wedge goes in, and the sprocket is removed off the front of the cam. As extra insurance against the bottom of the chain falling off the sprocket on the crank end (not really possible if the chain wedge does its job tho), I tie the chain to the bonnet catch with an occy strap.
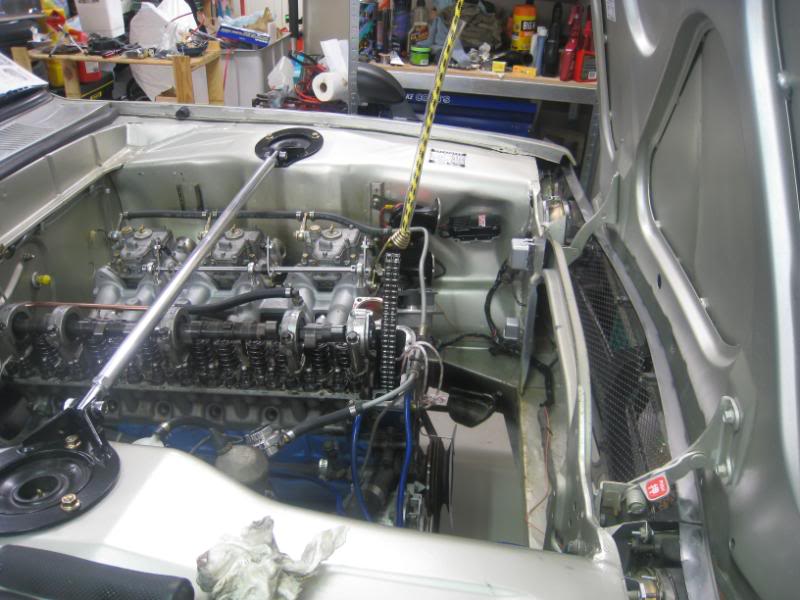
Undo the small bolts holding down the cam towers, and then lift off the cam very carefully.
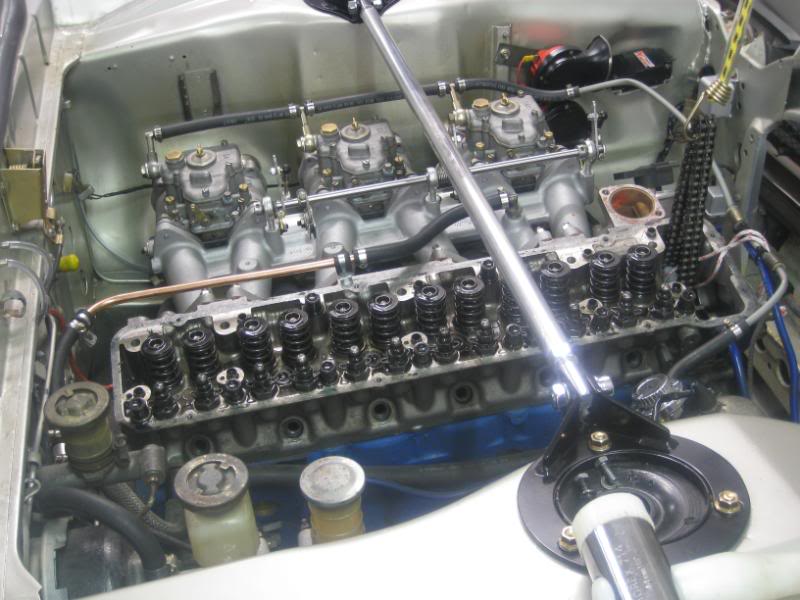
Here’s the old cam vs the new one. You can see that the old one had a LOT more material ground off it than the new one. In the background are the cam towers, which have to be put back in order, so I numbered them.
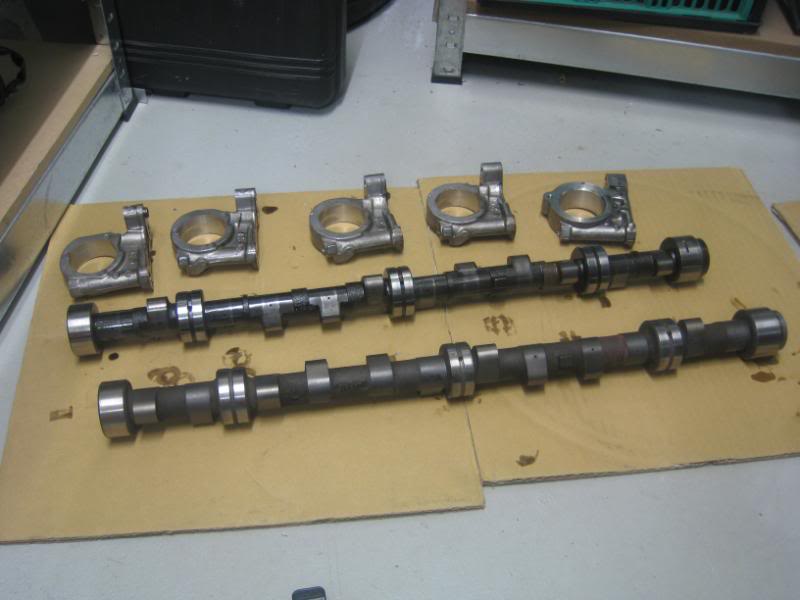
Cam towers don’t have any bearings…the cam just rides on the alloy towers. There’s a little bit of wear, but I think it’s ok. Not actually any grooves.
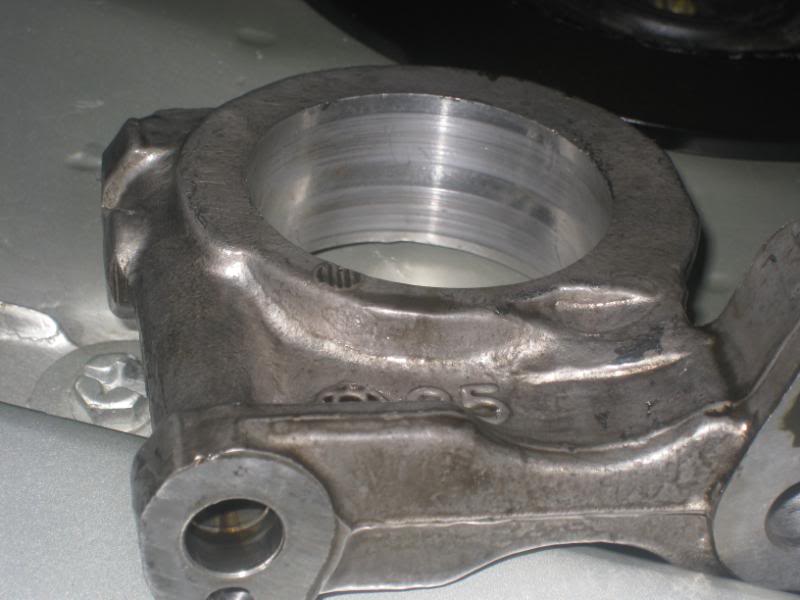
Use lots of oil to lube the cam journals, then carefully slide on the cam towers in order. They are a VERY precise fit!
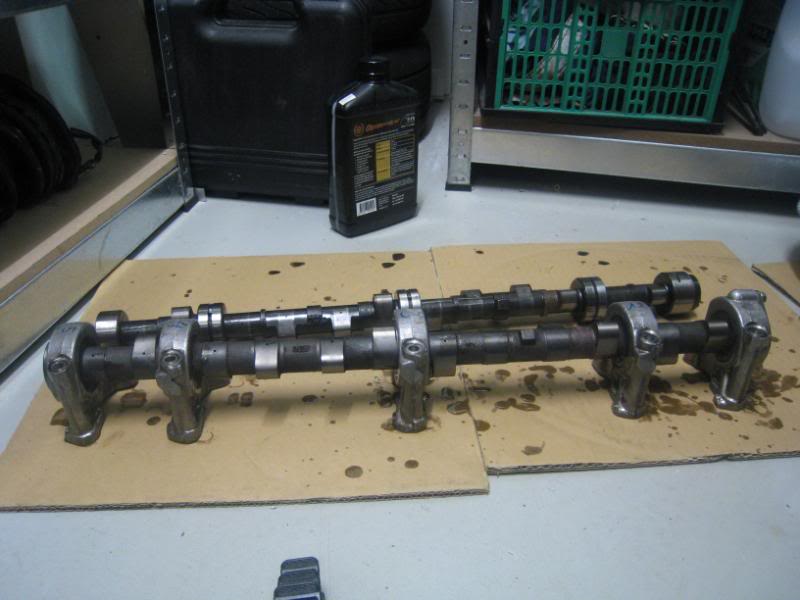
Lower the cam back onto the head, and give each cam tower a few gentle taps with a plastic hammer to settle them onto their dowels firmly. The test as to whether it all worked is whether the cam spins freely, and thankfully it does. It spins quite silkily with just one finger, so it’s fine. Phew.

Now the cam towers get bolted down. First are the small bolts, one on each side of the cam towers, which get torqued to 13ft/lbs, which isn’t very tight. The little bolts are just to locate the cam towers on the dowels, and the main job of handling the stresses goes to the big head bolt, which is torqued up to 60ft/lbs (which IS very tight!), in 3 stages, going from the middle cam tower outwards.
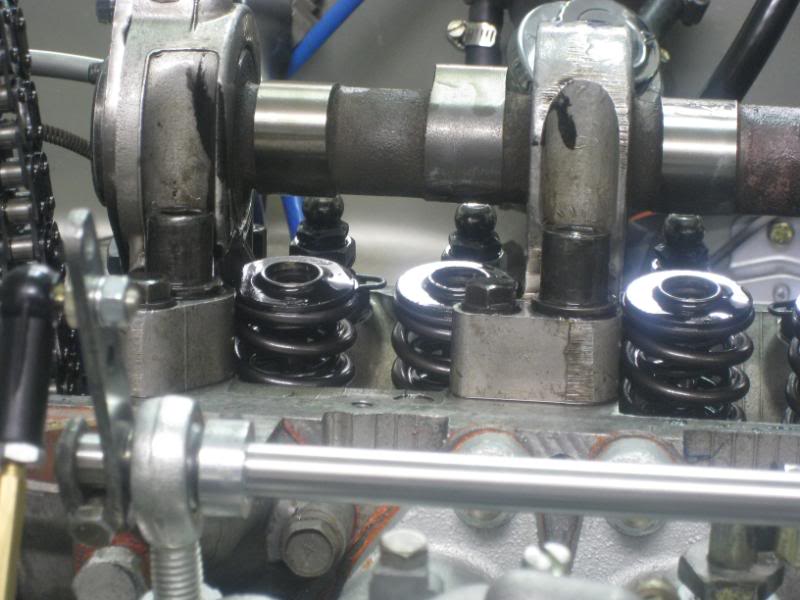
Slide on the new adjustable cam gear. Before I removed the stock sprocket, I made a mark on both the chain and the sprocket with paint. I then marked the adjustable sprocket in the same spot, so that I could mate it up to the chain…and then I know that the cam is in the same spot as before. But being able to get the chain on was the big worry, if the cam tensioner popped out, I wouldn’t be able to get the sprocket on, and that would mean another few night’s work taking off the crank pulley, oil pump, dizzy, timing cover and sump, in order to reset the tensioner. This was a massive relief.
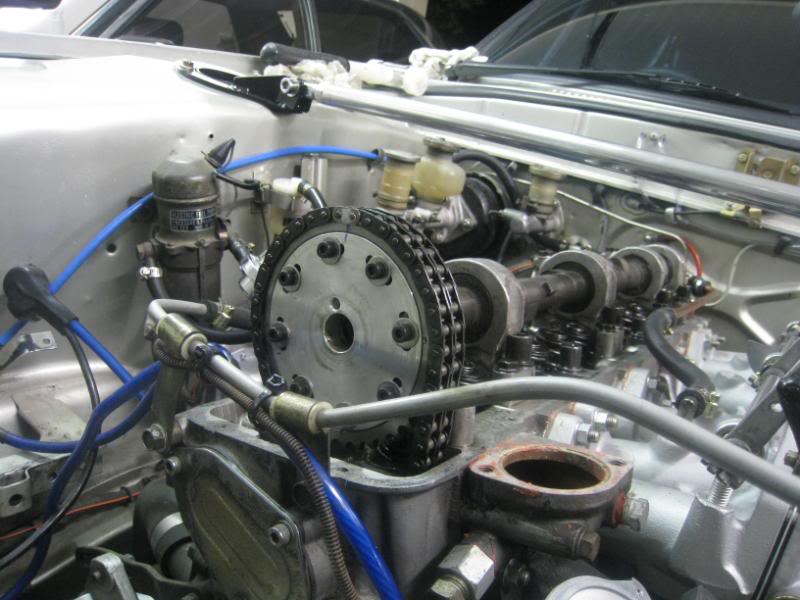
So basically now we have the new cam in the stock position, and the cam gear in the middle of its adjustment. This should give us enough adjustment to dial the cam in right.
The new cam has to be checked for its wiping pattern against the rockers, to see if the cam lobe wipes in the middle of the rocker pad. So I coloured the pads in with texta, and we’ll observe what the wiping pattern is later as the ink gets wiped off by the cam. If it’s not quite in the middle, we’ll have to get different lash pads (that sit on top of the valves). Easy to buy and replace, but they do cost $14ea and I need 12…
The new cam has a lot more meat on it, so it was quite fiddly to put the rockers back compared to removing them. I had to lever the valve springs down quite a lot to make space to get the rockers in.
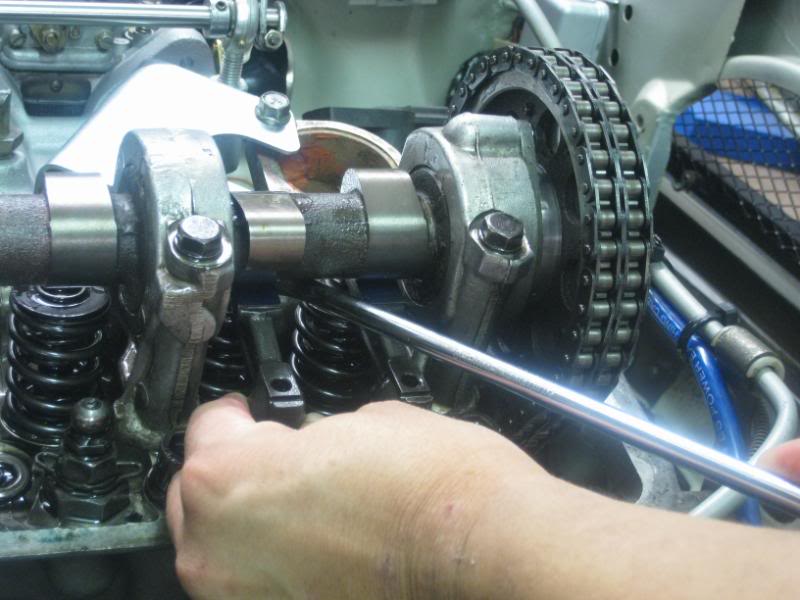
…and that’s it for tonight! Two things that I was worried about was whether the new cam would spin freely in the cam towers (since we’re not theoretically allowed to remove the cam towers) and whether the chain would be ok. Huge relief on both counts.
Next stop is to refit the dial gauge and we’ll dial in the cam to the manufacturer specs by measuring the valve opening and closing, and adjusting the cam gear to suit.
Phew…
Riiight…well things were obviously going too well because we have hit a snag ![]()
I only put in rockers for #1 cylinder last night, and went to set the valve lash so that I could dial in the cam…and there was no lash. The rocker was pressed up against the bottom of the cam.
This pic shows the extent of the problem…you can see that the rocker pad is touching the bottom of the cam…with the rocker pedestals screwed down all the way.
I figured it could possibly be a too-thick lash pad (you can see the disc-like thing sitting on top of the other valve in the background of the pic above). So with the lash pad completely removed, there is more room at the pedestal end.
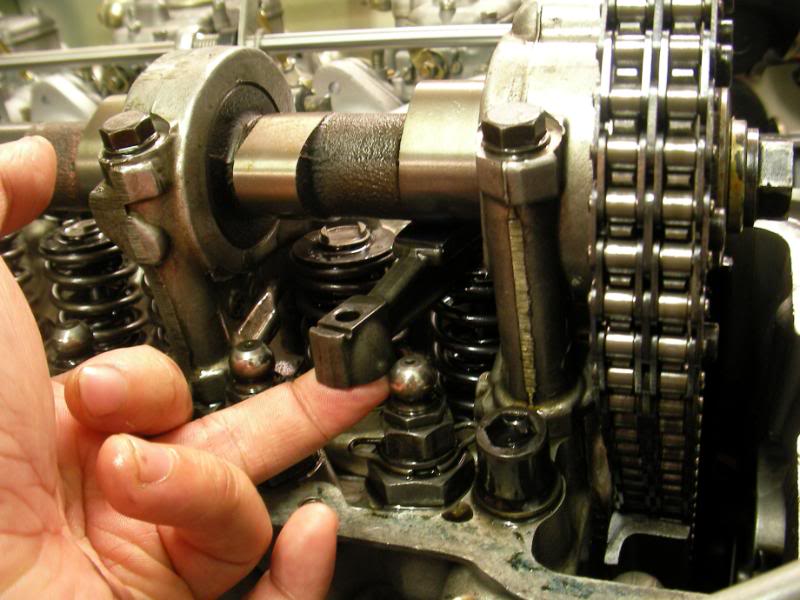
But there still isn’t any room at the valve end. In this pic the lash pad is removed, and there is still hardly any clearance at all between the rocker pad and the cam.
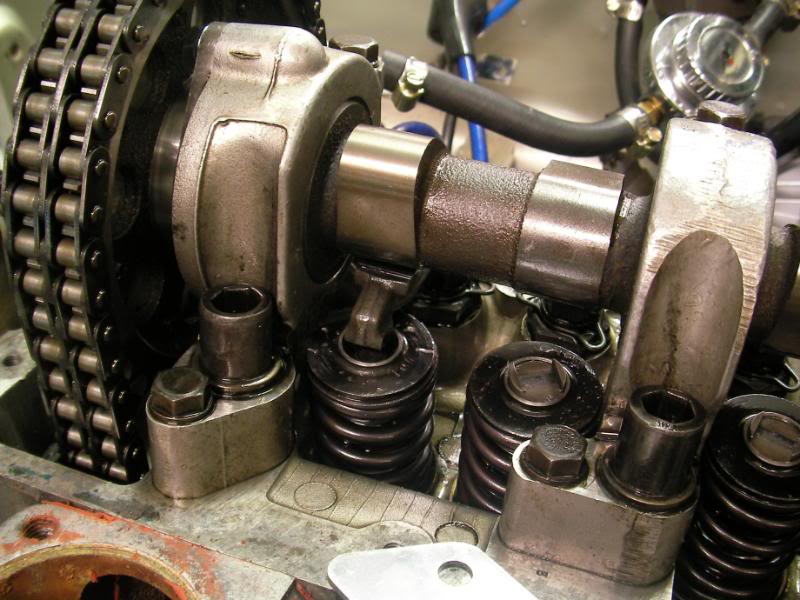
Logically…I thought maybe the valves are some weird tall installed height to suit the previous cam:

Height from head to retainer is 50mm though (I’ll ring around to see if that’s normal)
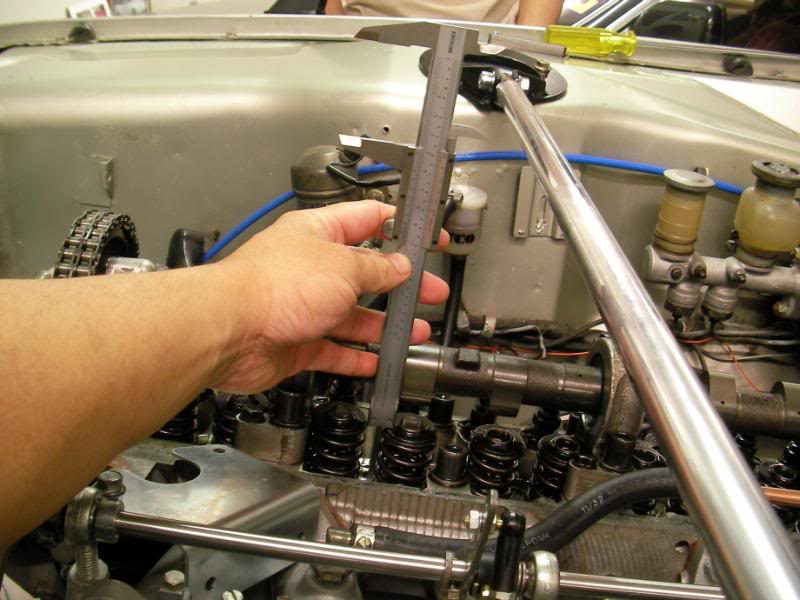
Possibly the culprit is here…the rocker pads themselves. They can be removed from the rocker and replaced with thicker ones for small-base-circle cams, so possibly the rocker pads are ultra-thick to suit the old cam, which really had a lot of material taken off it.
Rocker pad thickness is 3.8mm
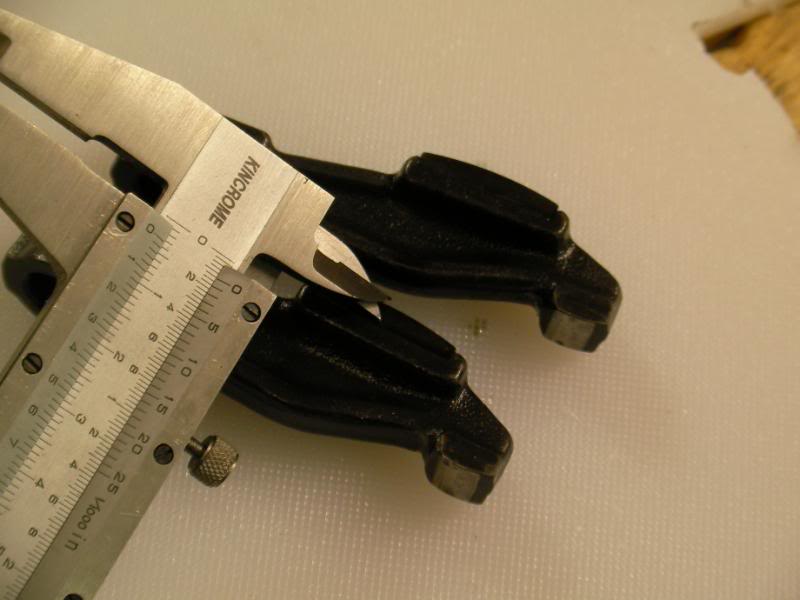
Oh btw, this might have been the reason why the previous cam was retarded, even though the timing marks on the sprocket lined up perfectly to factory mark on the head….the previous builders enlarged the peg hole for the cam…I guess to give some wriggle room on timing (The Lazy Man’s Way I presume), but how could you keep the setting perfect as you tightened the cam bolt…I would have though that it would move clockwise a little….anyway, this looked dodgy to me.

So…the problem seems to be that there isn’t enough clearance at the valve end of the rocker. I think it’s unlikely that it’s a valve spring height issue, though. I know the lash pads are theoretically 1/2mm too thick, but the issue seems bigger than that. Maybe a combination of thinner lash pad and rocker pad is the solution? I’ll have to do some ringing around tomorrow…
The mystery of this engine continues unabated though.
Well unfortunately Plan A has been a fizzer.
To recap, I was going to try thinner lash pads to see if the issue went away. So I borrowed a few stock size lash pads, which were 2.5mm vs the 5.0mm ones that came with the engine.
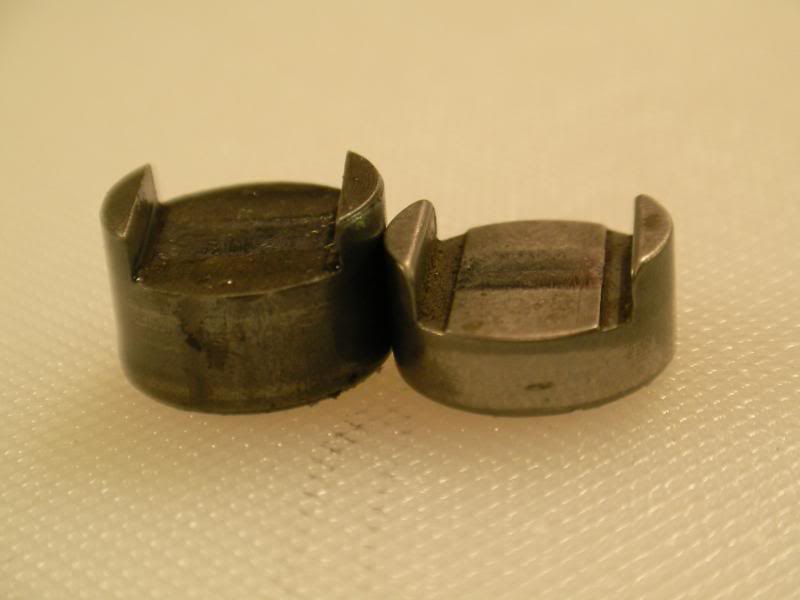
Slide one of them in place and install one of the rockers and umm…doesn’t feel right..
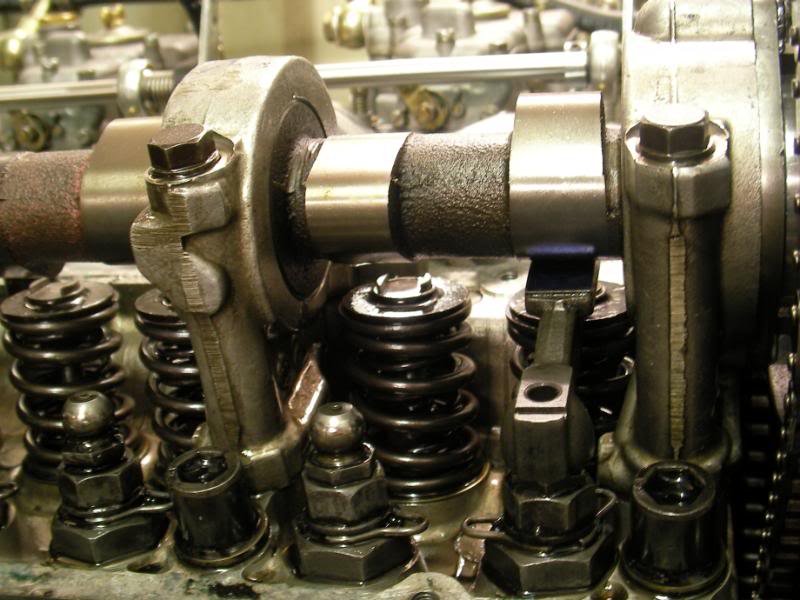
Even with the pedestal adjusted all the way up, on the valve end it looks as if the valve is too tall, and the rocker is struggling to reach up to it. Notice how the tip of the rocker doesn’t quite sit in the middle of the lash pad?
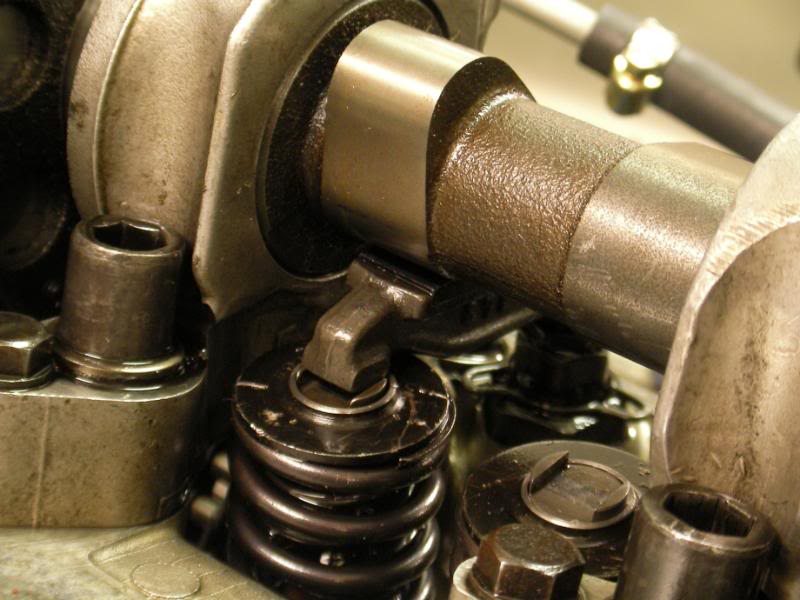
And yes, even with the thinner lash pad and the pedestal wound all the way down it’s still…zero lash, zilch clearance between the rocker pad and cam.
That’s it then…onto Plan B. Head comes off, goes to a pro engine builder ![]() Instead of struggling with trying to diagnose this myself anymore, a race engine builder that I trust has offered to take care of the head for me, measure the valve heights, etc and do whatever custom work is needed (maybe install new valves) and then set up the rockers to work nicely with the cam, button everything up and send it back to me ready to bolt in
Instead of struggling with trying to diagnose this myself anymore, a race engine builder that I trust has offered to take care of the head for me, measure the valve heights, etc and do whatever custom work is needed (maybe install new valves) and then set up the rockers to work nicely with the cam, button everything up and send it back to me ready to bolt in ![]() After all, a man’s got to know his limitations
After all, a man’s got to know his limitations ![]()
The good thing is, I’m getting quite used to taking this engine apart, so an hour and a half later it looks like this:
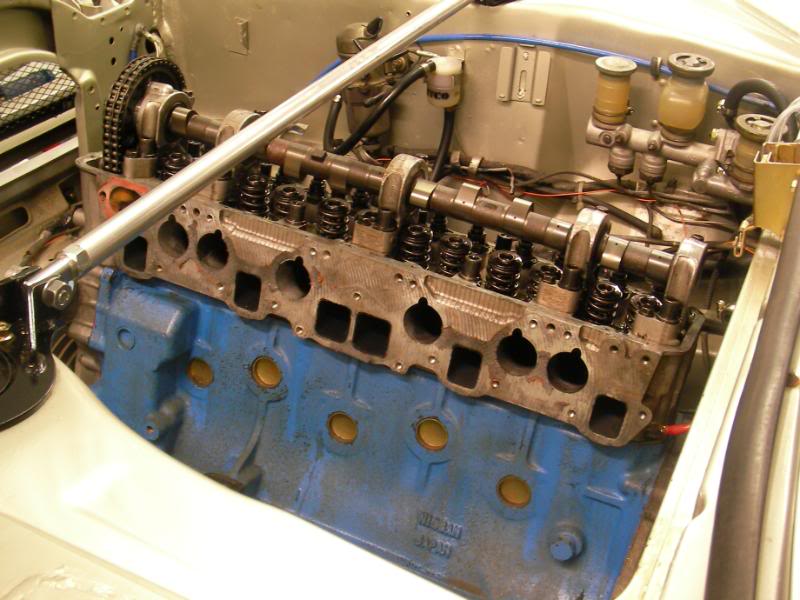
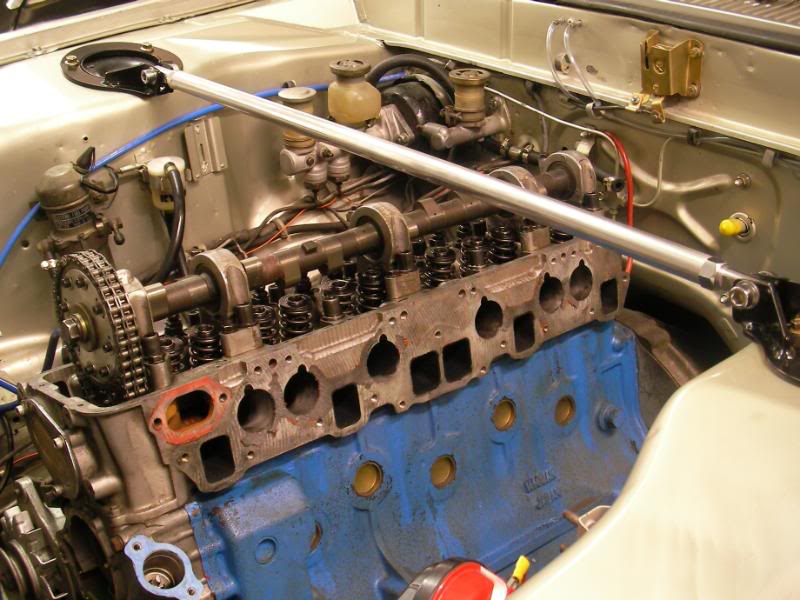
There’s just another half hour or so in removing the new cam and then I can start to pull the head off.
Update…ok, last night I was a little pissed at the engine and so when the thinner lash pads didn’t work, I immediately tore into the induction and exhaust to start removing the head…today I had a second look at the thinner lash pads and tried again.
In goes the 2.5mm lash pad, and the rocker…but this time I am taking more time to have a closer look from all angles.
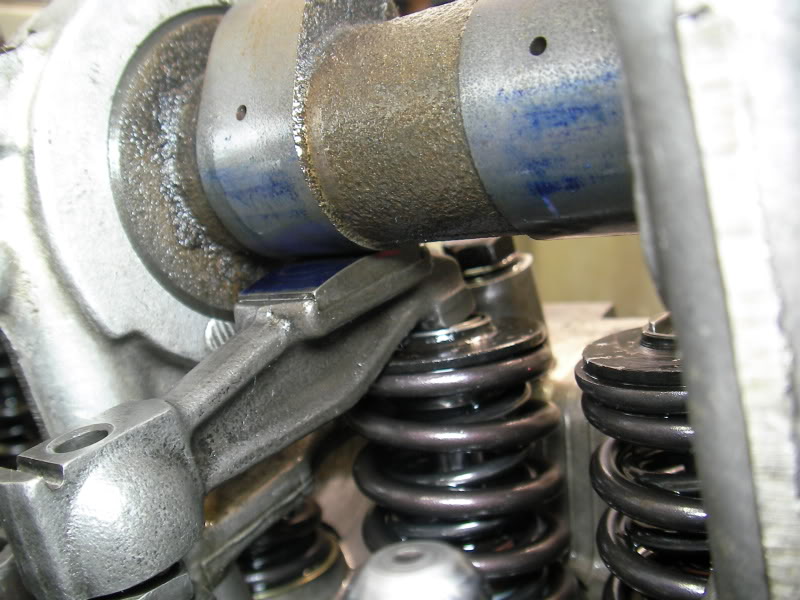
The result is the same….but….this time I notice that the underside of the rocker is fouling the edge of the retainer.
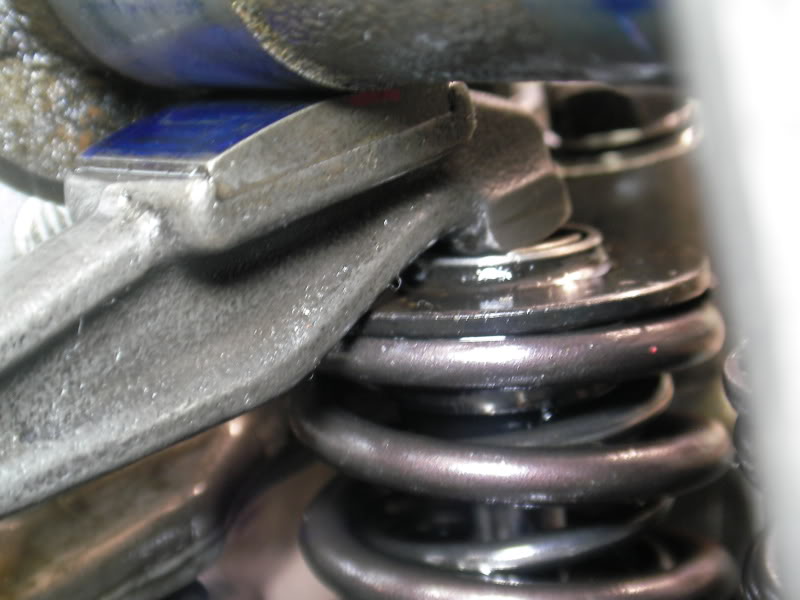
…here (where my finger is)
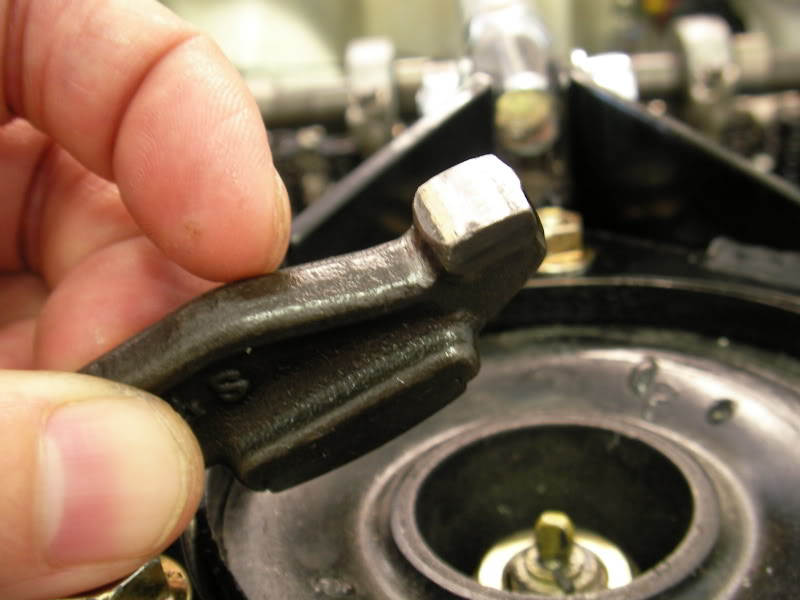
So…a possible theory proposed on another forum is that what I may have is a P90A head (early 80s) fitted with N42 head (late 70s) valves. N42 valves are bigger diameter, but about 3mm taller in the stem. What should have been done is that the taller valve stems should have been shortened, but it’s possible that the Japanese head builder used a very small-diameter cam instead as a workaround…
Hence I think it’s not a retainer issue (that’s just the symptom) it’s actually an issue of valve height. Taking the head off and shortening the valve stems should do the trick. It has to.
Ok the head is off now.
I stripped off the carbs and manifolds the other day, and of course the radiator was removed a few weeks ago. Off come the head bolts, and the cam (although I think I didn’t really need to take the cam out)…
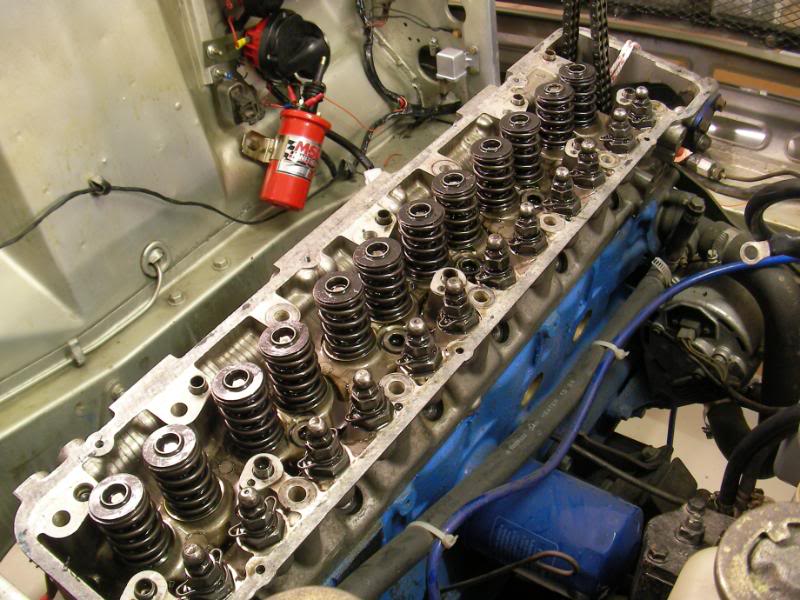
And off the head comes! I’ve said before that I’ve suspected that the engine is quite freshly built, and certainly the head came off quite easy. Didn’t have to prise it off or anything, it just lifted off the head by hand.
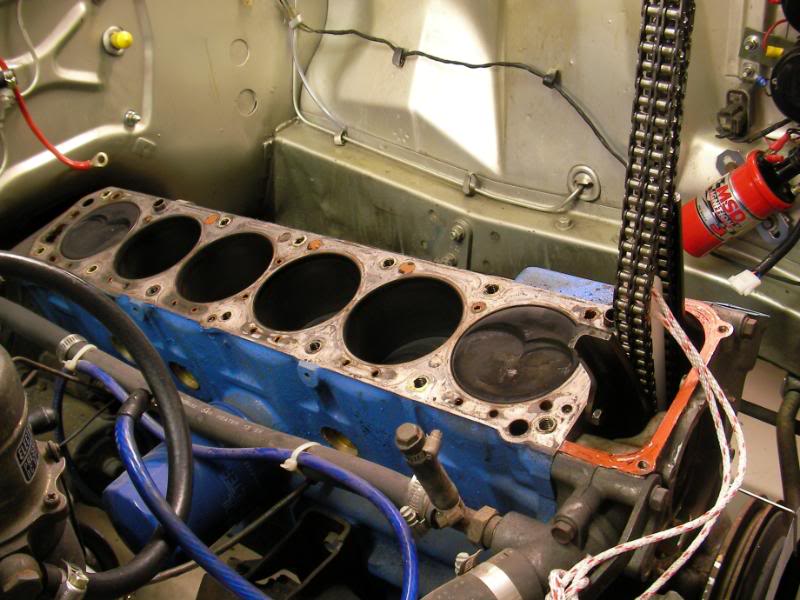
I think the L3.1 stroker theory may have gained a bit more credence too. Stock L28 bore is 86mm, and as part of the 3.1L conversion you bore it out 3mm. My bore measured at 89mm, so even if the crank is a stock L28 item, the capacity will be at least 2950cc. You need the stroker crank to bring it another 150cc, and I dunno if I have that or not.
I didn’t measure the stroke however, since I have wedged in the chain, etc and so I’m a little gunshy about turning the crank in case the tensioner pops out….but I’m sure there is a way of measuring it. In terms of wear, there is that spot on the far side of the bore which is a little scuffed, and you can barely see the cross hatch pattern from the honing, but given the great compression figures I guess it’s not a problem. Bores aren’t lipped either so wear seems to be ok, although I would feel better if there weren’t so many vertical wear marks….
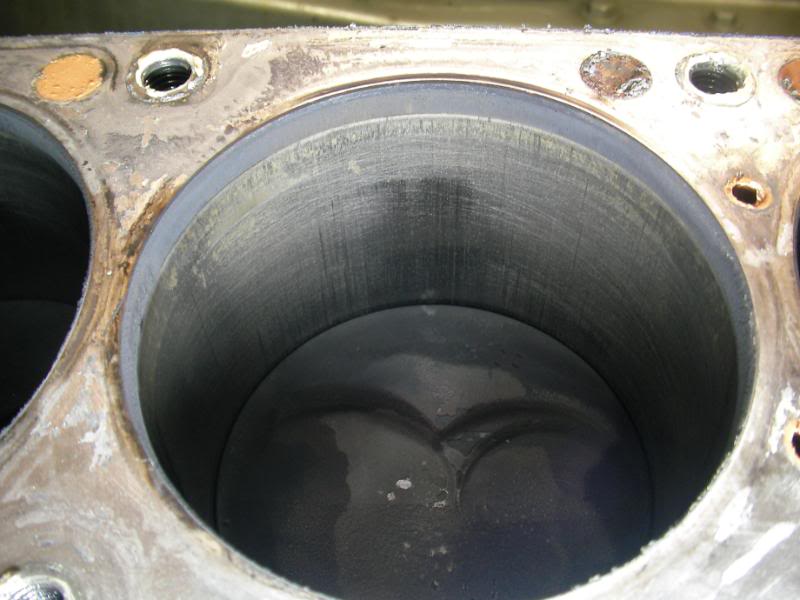
Pistons are flat tops, zero deck height.
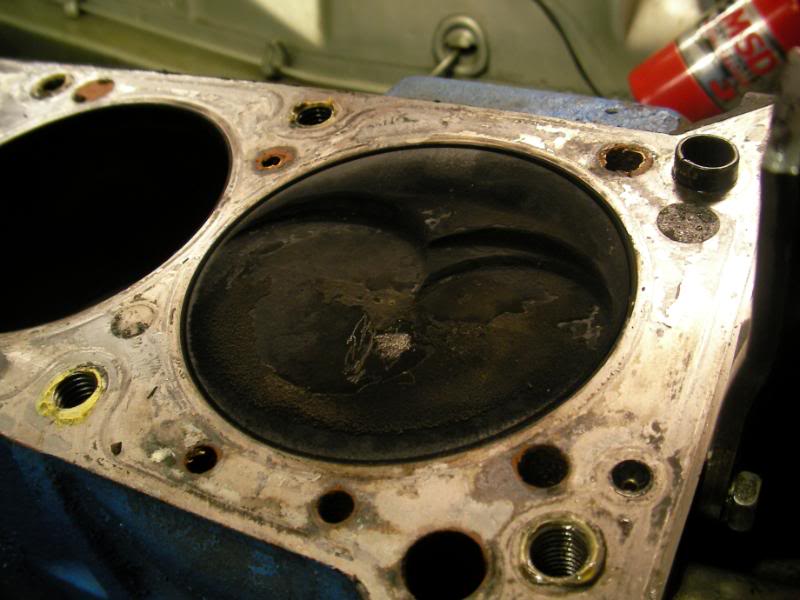
The head as I said came off easily, in fact it popped off the block on its own while I was messing around with removing one of the coolant hoses that goes to the back of it.
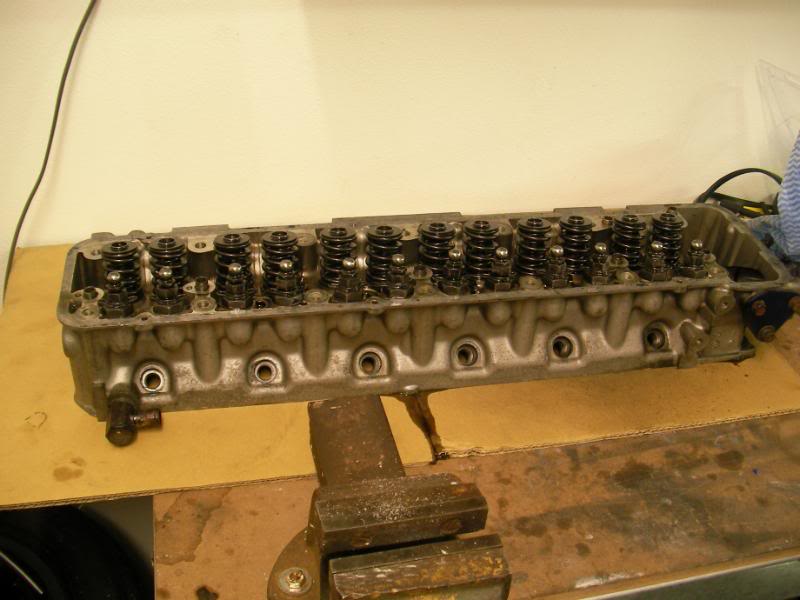
Based on the combustion chamber shape, I think it might be the later-P90A head as suspected.

Valve sizes are 37mm EX
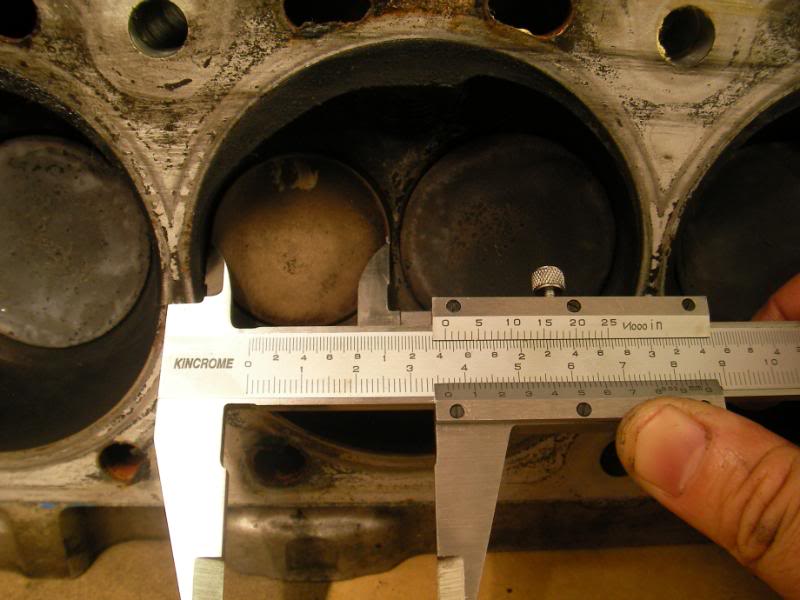
…and 45mm IN. So I think that yes, they are older/larger N42 valves from the late 70’s L28, which does now confirm why the valves are so tall
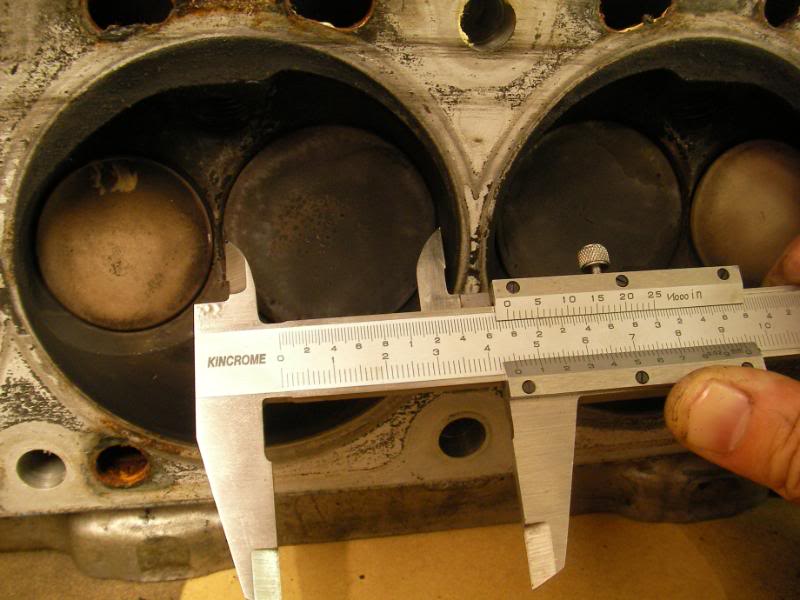
And that’s where we are! I’d love to find a way of measuring the stroke, without upsetting the chain, and I’m sure there is a way, but it seems that it’s definitely been given a big overbore, and is almost 3L as it stands. A stroker crank would push it up to 3.1L and it would be great to discover that I do in fact have one.
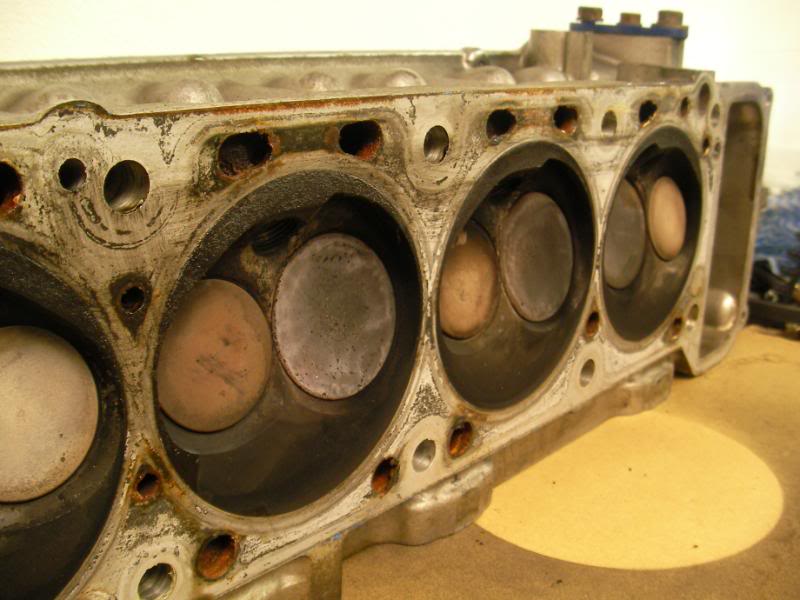
But it seems that the tall-valve theory is on the money, so it’s now over to the pro engine builder for sorting.
Alriiiight. First I spent some time giving the head a bit of a clean:
And all that (plus the old cam, the rockers, lash pads and cam sprocket) plus 4 layers of bubblewrap, turns into an extremely heavy box like this:
…it’s on its way to Adelaide for some TLC by a pro race head builder.
First the head is disassembled:
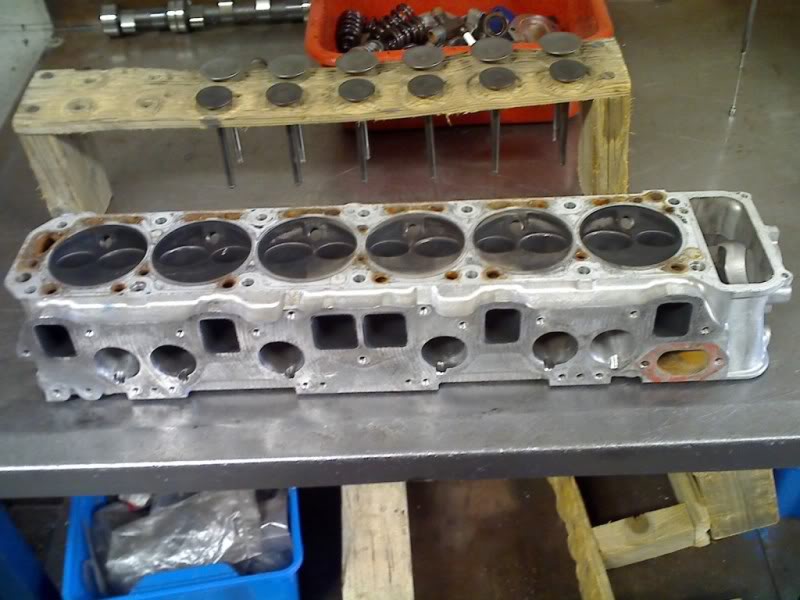
…where it is discovered that the valve seats are only 1/2mm (ie the valve seat only “seals” to the valve thru a thin contact patch 1/2mm wide). Tony said that was way too thin for longevity on the road, and is more evidence that this was a purpose built race head.
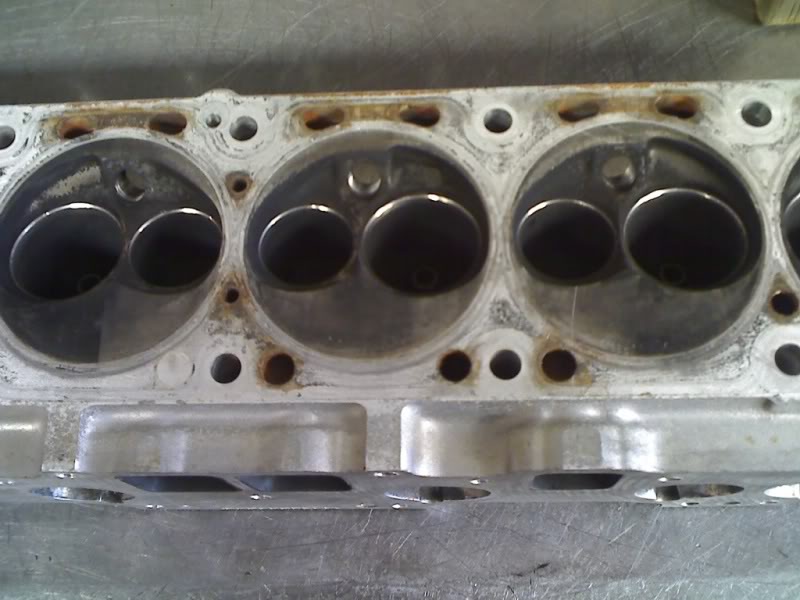
The head is bead blasted to clean it up.
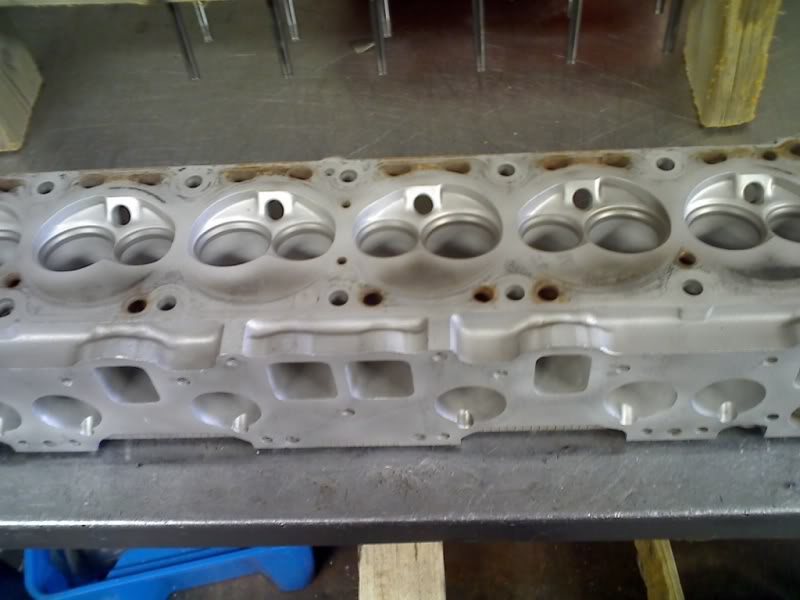
Inpet ports are reshaped, you can see the valve guide boss has been trimmed down in size and made into a more streamlined shape. Also the surface finish of the inlet ports was deemed too smooth by Tony, and hence he roughed up the surface a bit to prevent fuel pooling on the port walls. One of the inlet ports had broken thru to water jacket by the head porter in Japan, and the hole was filled with 2 pack metal putty. It was holding ok, but Tony blasted it out, drilled out the hole and filled it properly with Devcon. He also said that the short turns (whatever they are!) were lumpy and ridged, so they’re now smoothed and reshaped for better low-rpm flow.
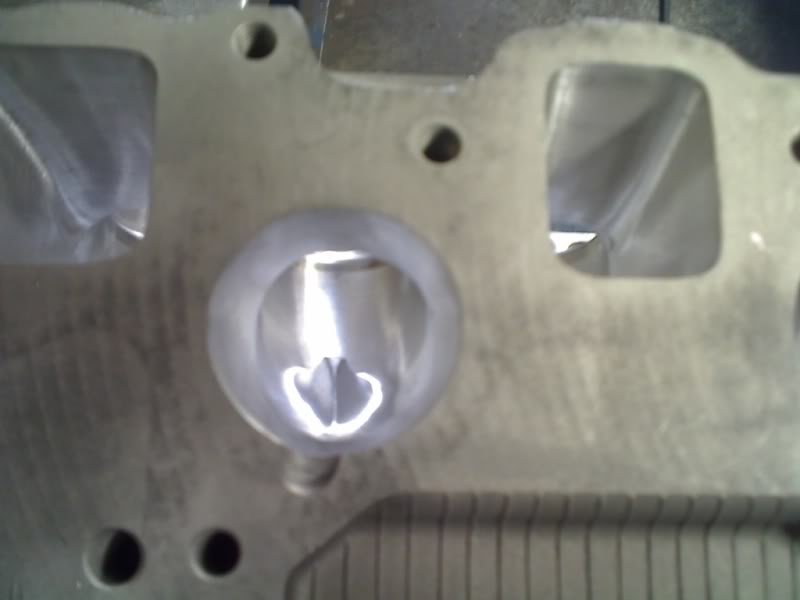
Exhaust ports refinished too.
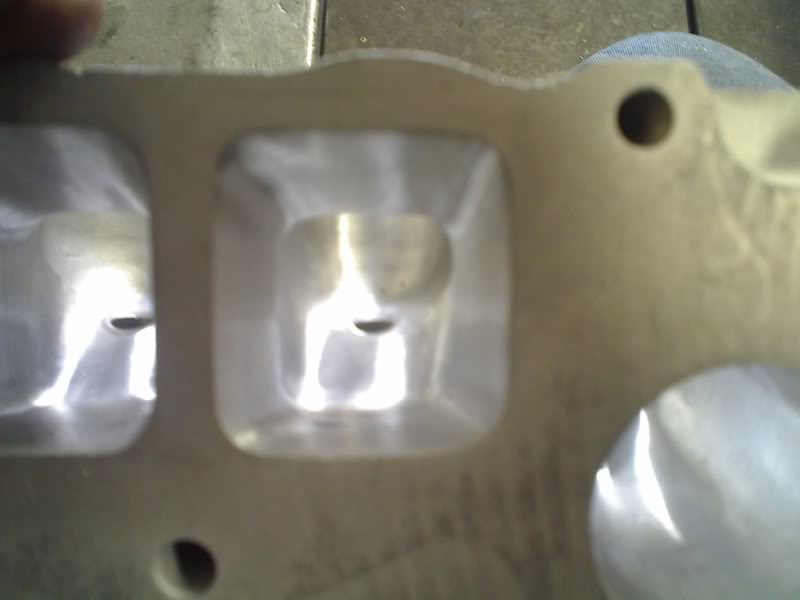
Almost the finished product….
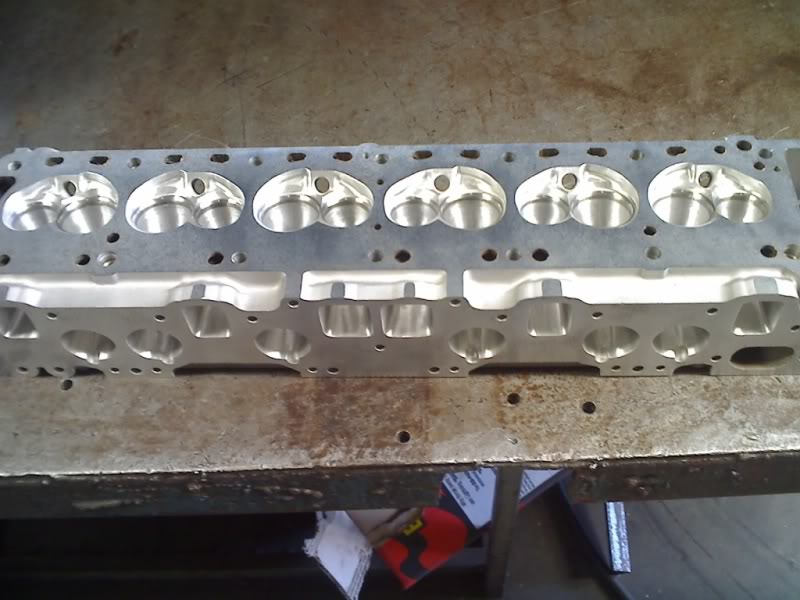
…combustion chambers were opened up a little bit to unshroud and expose the valves, the valve were also not concentric in the seats, so he’s recut them to be central, and also remachined them to widen the valve seat from the thin 1/2mm to more like 1mm.
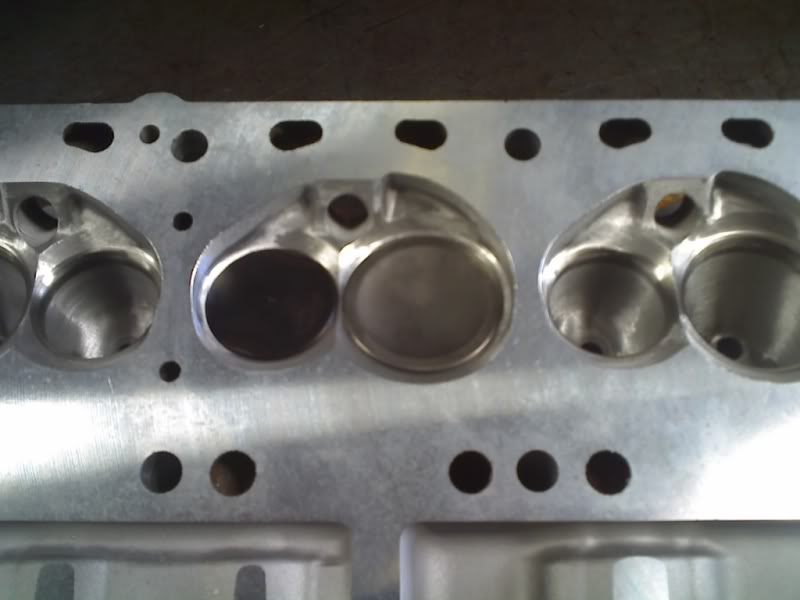
The finished ports.
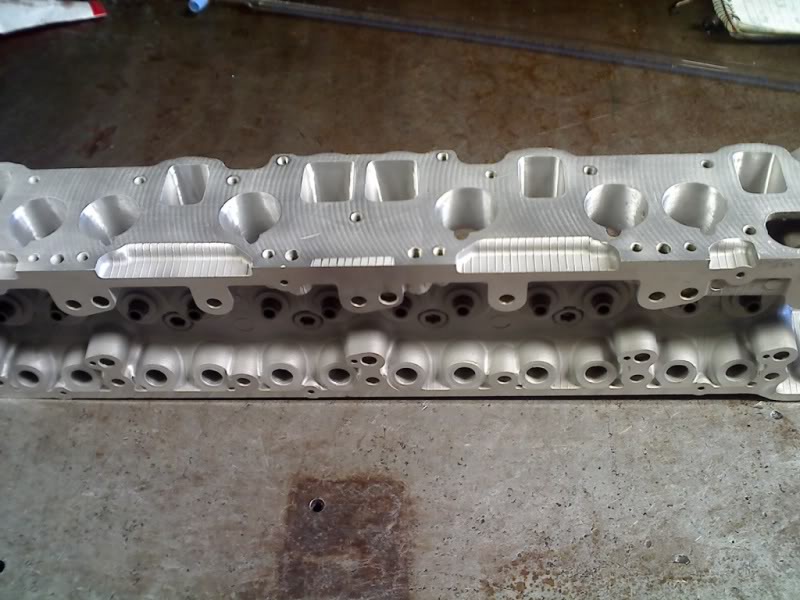
The head will be assembled, and then sent off for flow testing to see how much hp it will support…should be interesting, Tony says this should be a pretty optimal L-series head ![]() He said that if he were to start again, he wouldn’t have the ports quite so big and the bowls would be smaller too, for better low-rpm flow, but just the same he’s pretty happy with how it turned out (and I’m pretty chuffed too).
He said that if he were to start again, he wouldn’t have the ports quite so big and the bowls would be smaller too, for better low-rpm flow, but just the same he’s pretty happy with how it turned out (and I’m pretty chuffed too).
So the simulation is telling us that the existing 40DCOE Webers are too small for the engine and we’re choking peak power to the tune of maybe 50hp, and it seems that the bigger carbs won’t even cause a loss of torque either, so it’s all good. But just the same, it’ll work well enough with 300hp and I’ve got bigger fish to fry with the rest of the car. So the 45DCOE Webers will be an upgrade we save for another day.
The huge Japanese cam got 440hp at nearly 8000rpm on the simulation, but was inferior to the new cam below 6k, which is no great surprise. No VTEC for me!
But now the head is assembled and complete!
Here it is with valves in place you can see the “shiny” bits of the combustion chamber are where it’s been reshaped
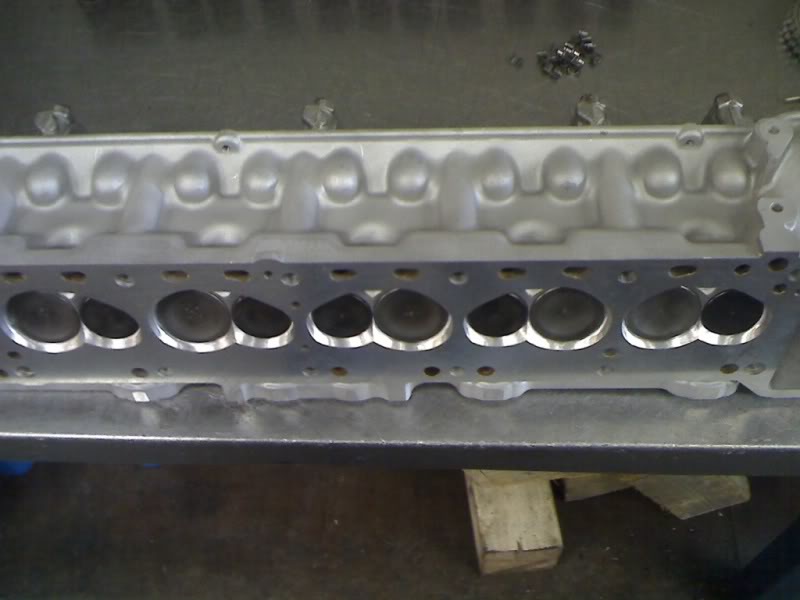
The modified retainers. From this:
To this. The raised “collar” has been machined flat (now that we’re using thin lash pads the tall collars aren’t necessary since the lash pads don’t stick out as far as the thick old lash pads did). Also the retainer edges have been machined down and given a bevelled edge to free up some space:
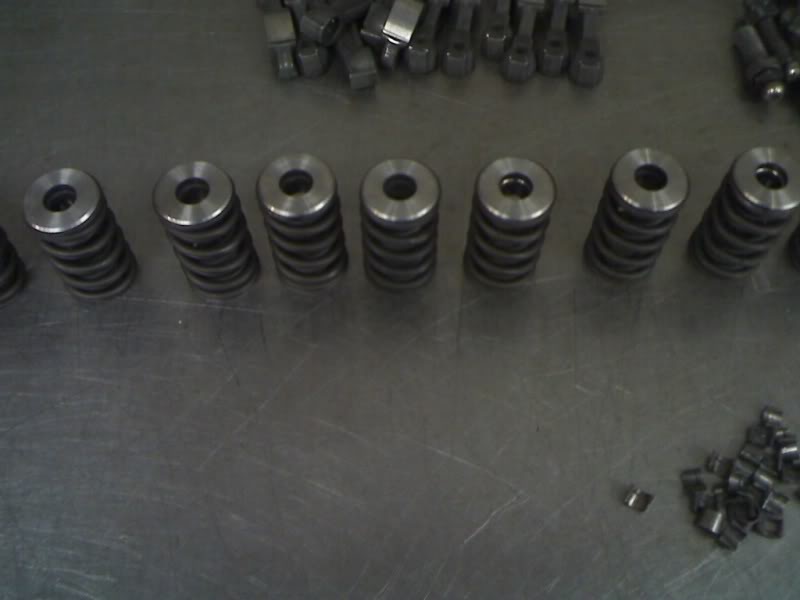
Rockers have been clearance lightly at the spot which used to touch the retainer too
Assembled with cam in place, and valve clearances set so that the head is pre-adjusted, ready to drop in.
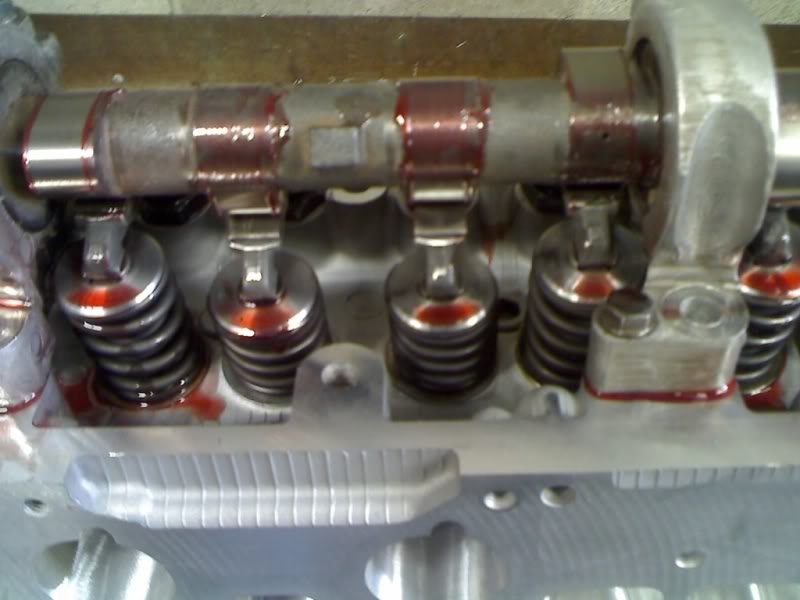
Underside of the rocker cover bead blaster clean…from this:

To this:
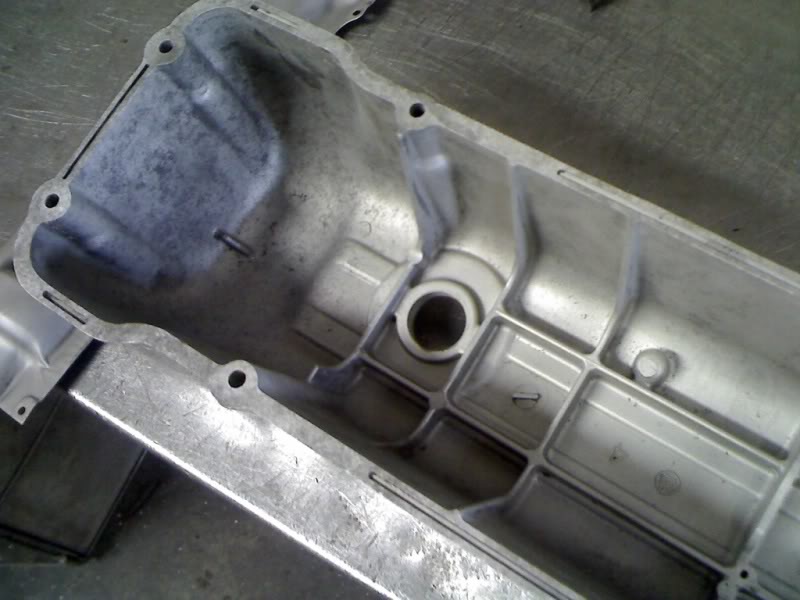
…and it’s all done!

Now we got to take the bottom end out, and take that apart before the head goes back on.
After a pretty long break ![]() I’m back on the case again.
I’m back on the case again.
To cut a long story short, a few things have changed at work and I’m suddenly a bit time poor. And while rebuilding the bottom end of the engine is something that I’d enjoy, there’s tons of things I need to go and organise and buy. But the clincher is that I figure that if the cylinder head is full of custom stuff, then the bottom end probably is too. And so it might be a bit beyond an amateur builder.
The decision has been made to tow the car over to a workshop, where the bottom end will be pulled, taken apart and inspected by someone who’s a bit of an expert at L-series engines. Whatever needs to be done will be done, and then it’ll be put together and hopefully I can drive it home ![]()
So I’ve been combing through the garage, gathering all the bits and pieces, nuts and bolts etc that’ll be needed. Including all the new stuff I’ve been accumulating in the past few mths: water pump, new coolant hoses from Japan, and a hi-volume oil pump from the USDM 280ZX Turbo.
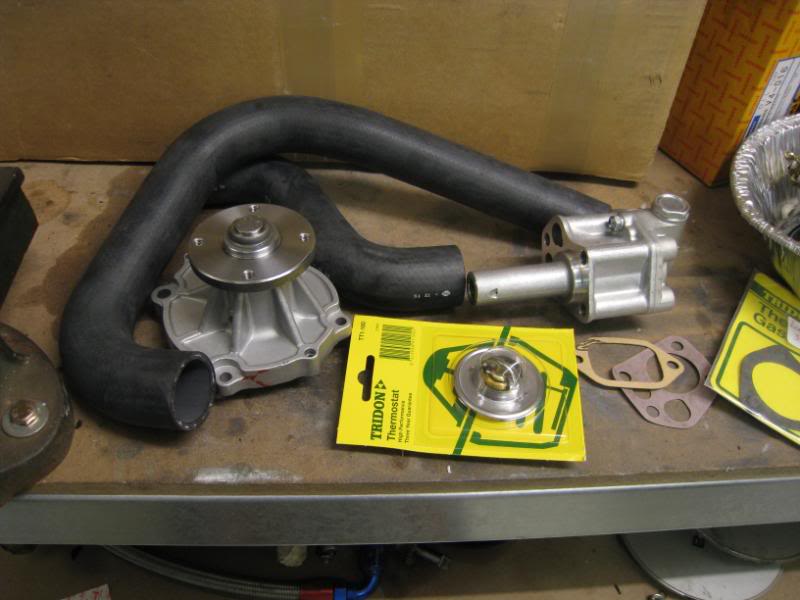
Big-port manifold gasket (Stewart Wilkins has a process to embiggen the inlet port holes to 41mm), rocker cover gasket and 89mm factory head gasket (I think it’s from the diesel L series).
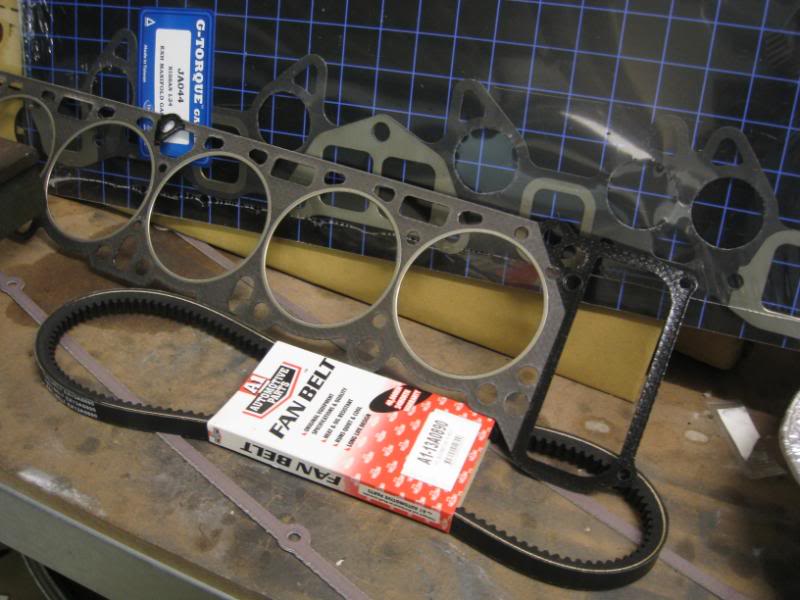
Then clean up and bag everything else for reassembly:
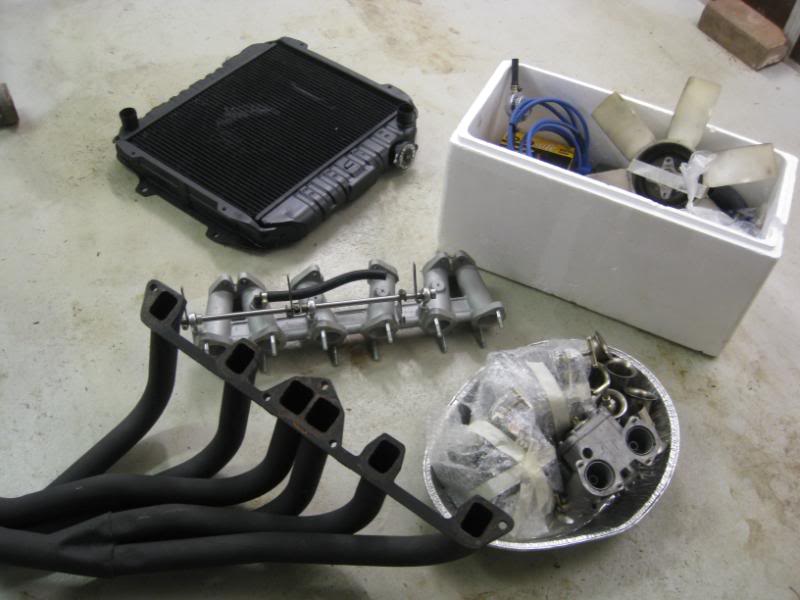
Wind up the front suspension to Paris-Dakar spec again and remove the front spoiler to make it more towtruck friendly.

Hopefully soon the engine bay won’t look like this anymore ![]()
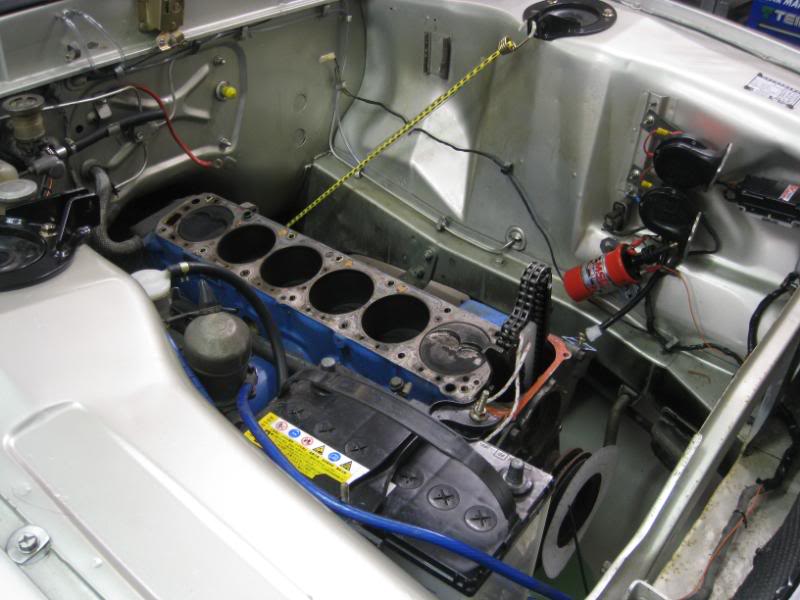
Fingers crossed, we’ll get the Hako going in the next couple of weeks.
So…this morning my good friend Jim (who also owns a Hako) came over with his tilt tray.

…and before long, we were at my mate Nathan’s workshop at Mt White Automotive (who also owns a Hako by the way)

And we didn’t waste any time getting stuck into the car!
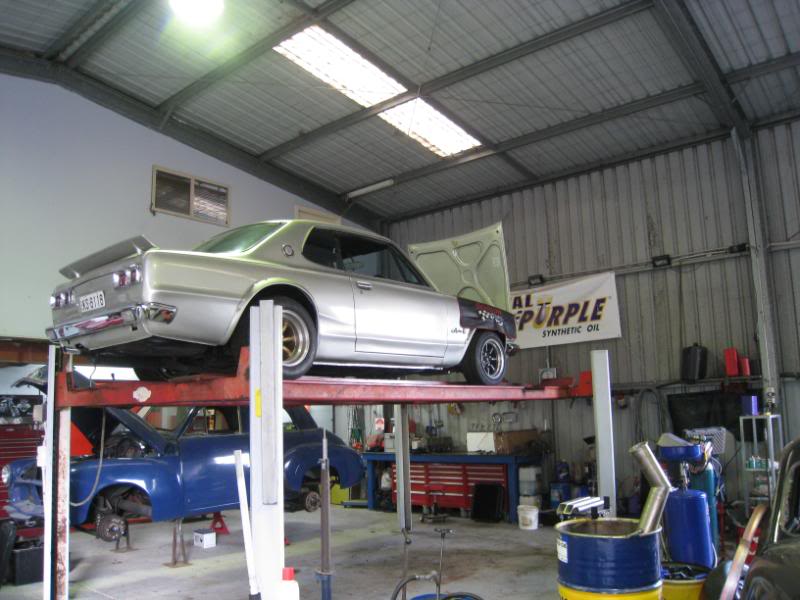
Onto the workbench goes all the goodies, the big box on the right is the cylinder head, fresh from Knight Engines, and on the left side of the bench is another hot L-series being built for my mate Greg (who…um..also owns a Hako).
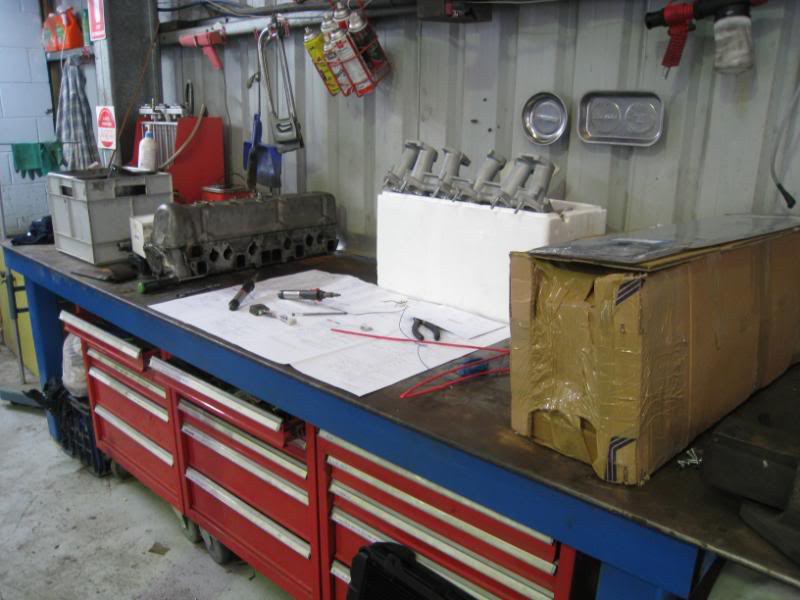
Nathan will get stuck into the car next week and we’ll have some news to update on Monday or Tuesday ![]()
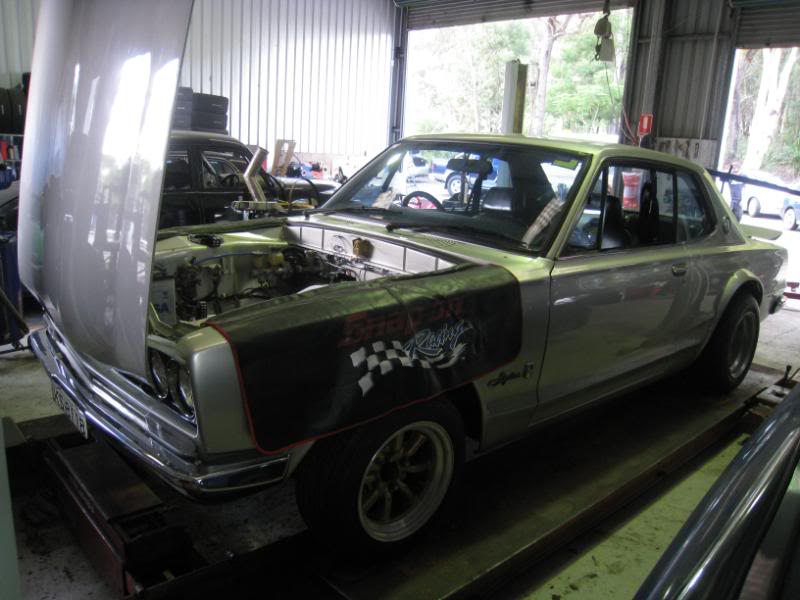
Well…Nathan doesn’t waste any time and when I paid him a visit this morn, the engine was already stripped down ![]()
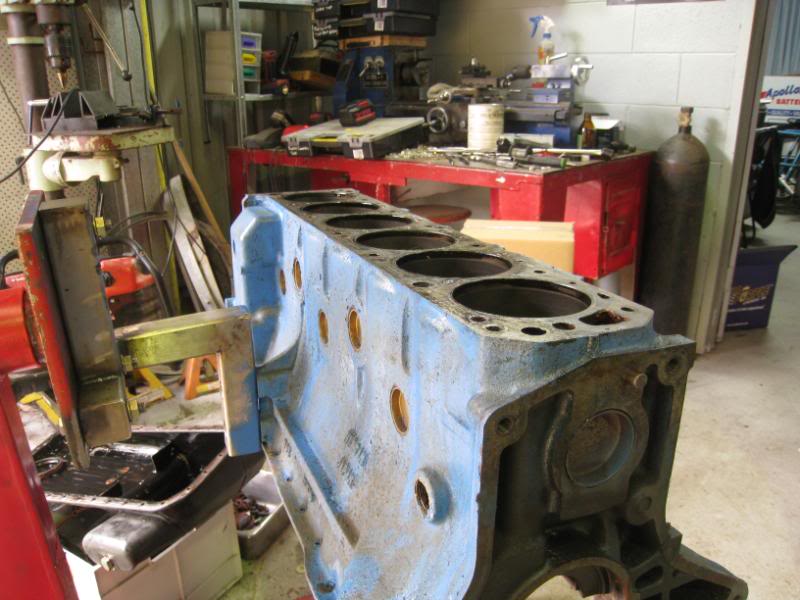
The headline? It’s a stock crank, so it’s not a 3.1L stroker but only 2950cc.

But there’s some interesting stuff. As expected, it’s very fresh, and hasn’t done more than maybe a thousand kms. It’s also not very standard, but in line with the rest of the car, it’s a weird mix of hi-end work and some very shocking shortcuts and laziness.
The pistons are a brand called ART, and are racing items, which very thin compression rings. Nathan says that as a result it’ll have a somewhat shorter lifespan than normal, and also that we have less margin for error when tuning, as those thin rings will be more easily damaged than usual. It means that I might only have 100,000kms between rebuilds, but for a Sunday car this isn’t a big problem.
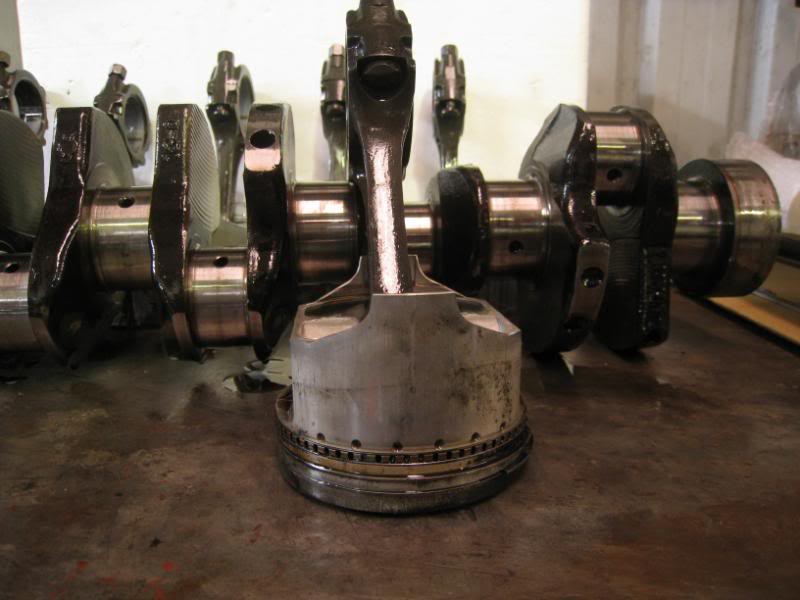
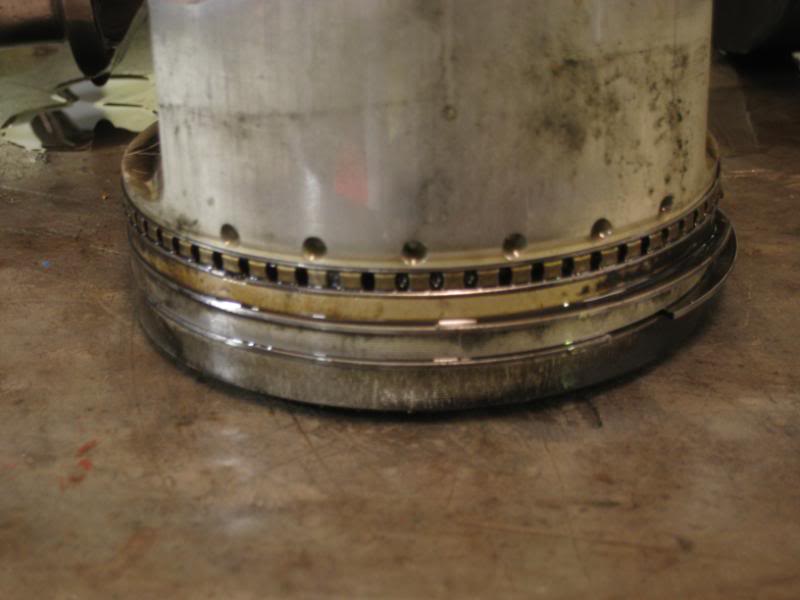
Brass button clutch…
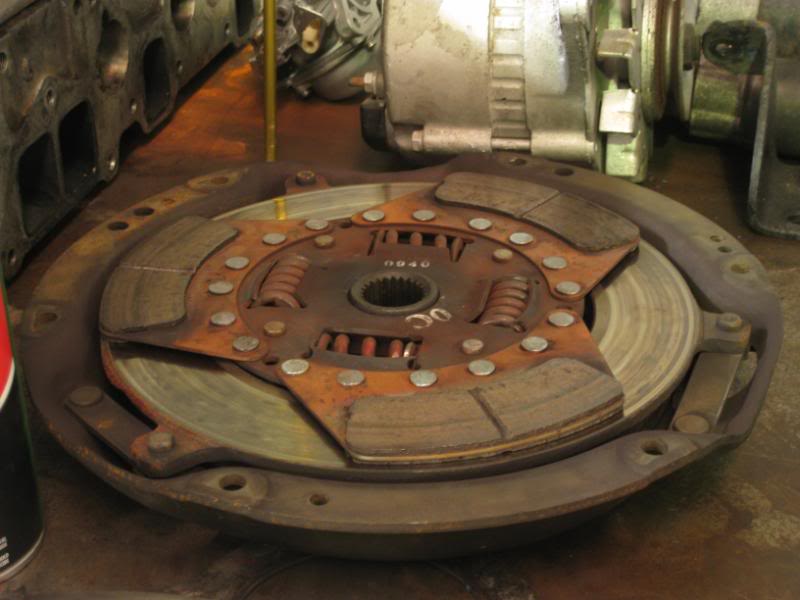
Balanced flywheel…
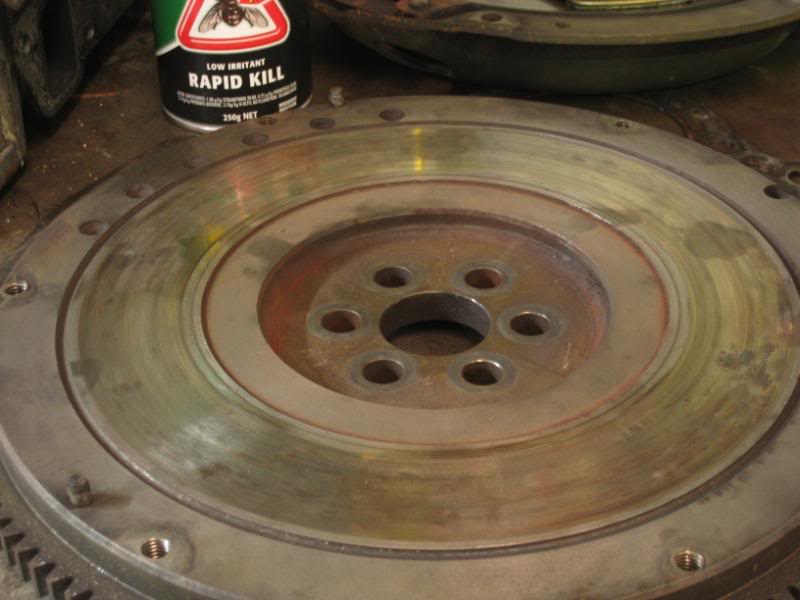
And a balanced crank. There’s been quite a bit of material taken off it, so it’s been lightened quite a bit, and is probably a new item since there’s no wear on it. It’s an N42 crank for a 280ZX.
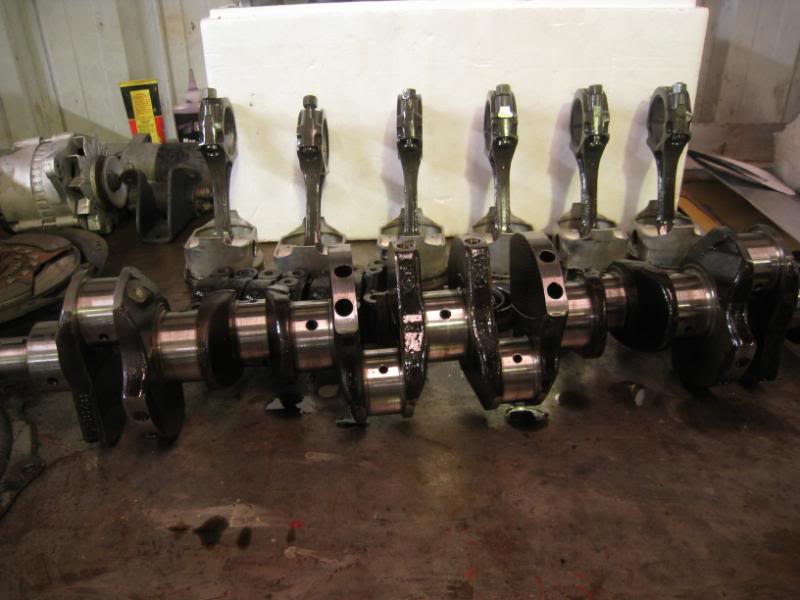
Here’s a short cut though….after balancing, they didn’t clean up the edges of the lightening holes….there are little curly bits of metal hanging off the edges, waiting to fall into the oil supply…
…which is undoubtedly what happened here. Some of the bearings show that some metal has passed thru and scored the surfaces. Interestingly the Japanese builder built the bottom end with two sets of bearings. See how both the upper and lower bearing have that groove in the middle? Only one side is meant to have that oiling groove, and the other side is plain. By using two top/grooved halves, you reduce surface area and friction and hence make more power at the cost of a somewhat reduced lifespan. But it’s not quite a “grenade” engine though and the clearances checked out perfectly with no wear on the crank journals. But when Nathan puts it back together, the engine will be rebuilt with conventional bearings for longer life.
Another short cut is balancing. Even though the crank and flywheel are balanced, there was a 10gram difference between the heaviest and lightest piston/rod! The whole set will be balanced before reassembly, but it’s weird that you’d go to the trouble of preparing the crank and flywheel, and then undo all that good work with a very unbalanced set of pistons.
More dodginess awaits on the block…
As you can see here, the hole for the oil pickup is in the middle of the block. This is correct for a Z-car, which has the bowl of the sump at the back….
…but for a Skyline the sump bowl is in the front, so they modified the oil pickup tube to extend to the front bowl! Not exactly top notch workmanship…
The extended oil pickup tube also meant that they had to cut away the baffle in the sump. See that missing section from that plate in the middle of the sump? That plate is to stop oil from sloshing to the back of the sump under acceleration, where it will be frothed up by the crank, where it will not only cost power but also compromise the lubrication if the oil supply is full of bubbles.
Nathan will redrill the block to resite a new oil pickup tube at the front, where it can go straight down into the sump bowl. The old hole will be blocked up, and the sump baffle repaired. The bores are in great shape so they’ll just be treated to a light hone.

The next step is for the block to be drilled, the welch plugs removed, and then it’ll be tank cleaned and repainted in Ford Blue.
The engine is in good hands ![]()
Today I dropped by Nathan’s to check on progress..
The engine block’s been drilled for the new oil pickup tube location and the dipstick has been moved to the front of the block too. The block’s now having a good soak in the acid bath to clean it up.
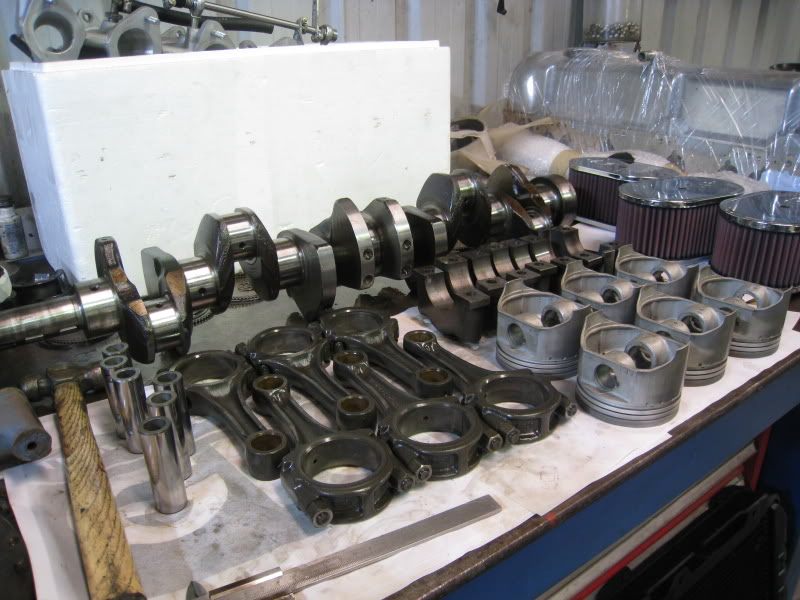
Meanwhile the rods & pistons have been balanced. The pistons, gudgeon pins and rods were all individually weighed and balanced to one gram difference.
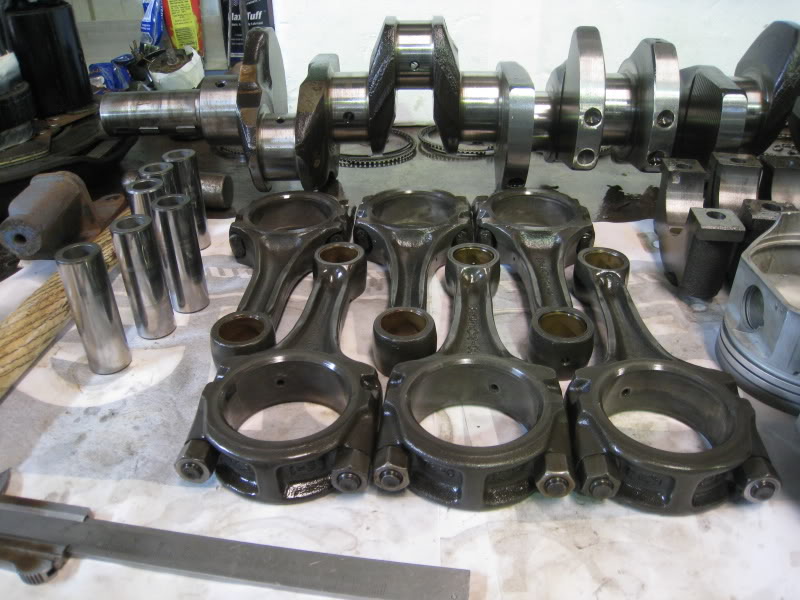
Turns out the ART pistons are actually made for HKS. So we’ve ordered rings from HKS which should have arrived today. The pistons went into the acid bath to clean them up too, but Nathan said that you don’t leave them in for very long since the top of the piston has a special coating and you don’t want to remove that (notice the the section of the piston from the top ring upwards is a darker colour)
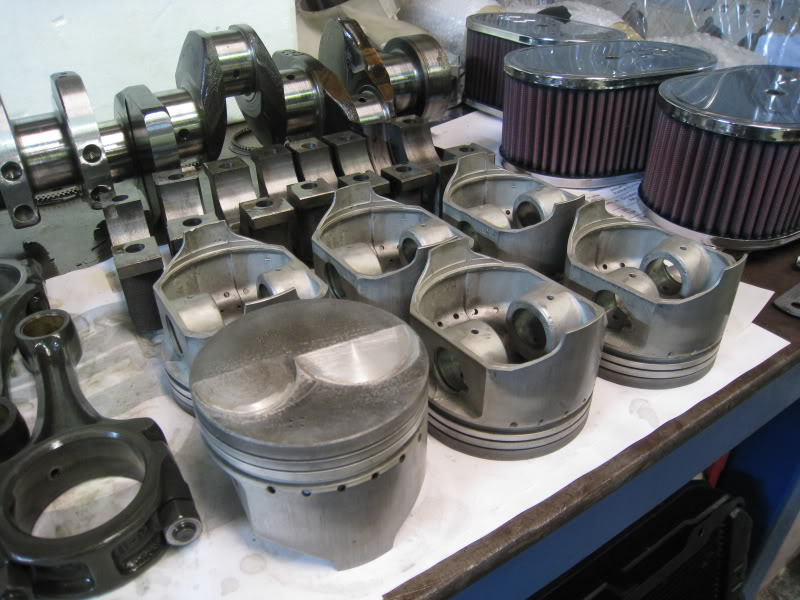
The reassembly should begin either tomorrow or over the weekend.
How’s this for suspension porn? ![]()
As you might remember, we converted the stock front struts to coilovers, with shortened bodies to take a Koni Sport insert from a Z31 300ZX. This was for two reasons: the Z31 shock is a little shorter so you could run a lower ride height without losing bump travel. Secondly, since the Z31 300ZX has such a fat ass, the damping rate is nice and stiff.
The custom coilovers were then topped with VR Commodore strut tops, which fitted into the Skyline perfectly….the only problem is that the GM strut tops are very thick, and in fact raise the car slightly.
So I ended up getting a set of Cusco camber tops from Japan, on the basis that they are a thinner profile and hence would lower the car about 20mm without sacrificing travel…but the problem was that the Z31 struts have a 14mm thread, and so didn’t fit the Cusco camber tops which were intended for the stock 12mm thread of the C10 Skyline.
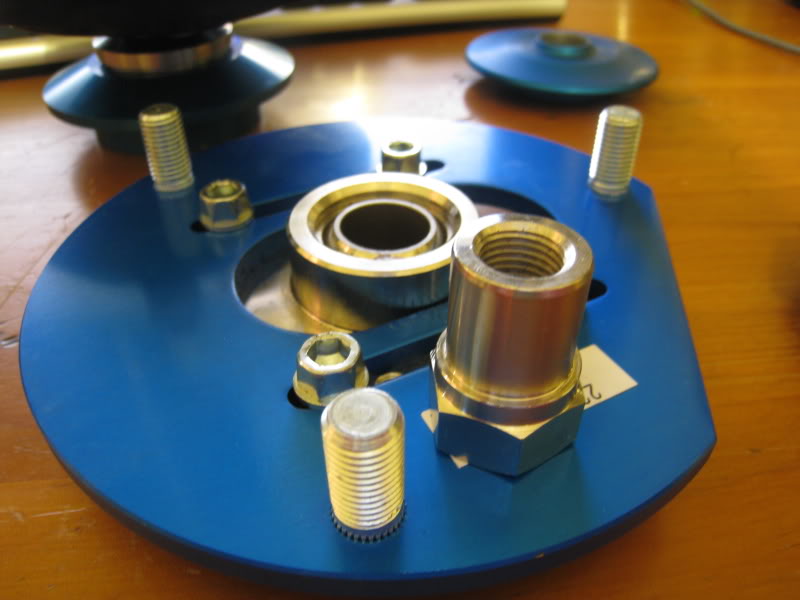
The solution would have been to scrounge around for say a Silvia camber top, and steal the 14mm parts from that…but while I was ringing around, I ended up talking tohttp://www.datsport.com/ and Barry started to describe his own camber tops…and you’ll see why I had to have a set ![]()
http://www.datsport.com/Camber_plates_with_thrust_bearings.html
Firstly the Datsport camber top (on the left) is about the same “profile” as the Cusco one, so it would also drop the ride height 20mm.
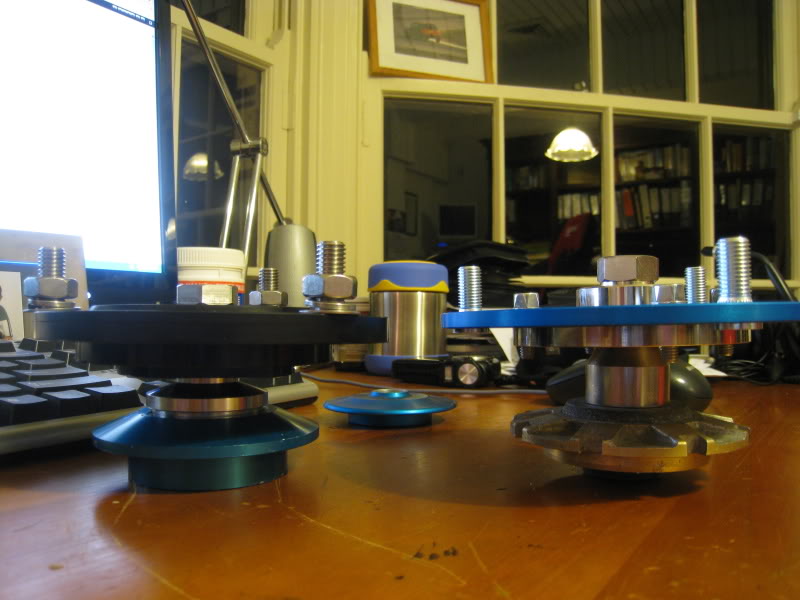
But a big difference is here….this is the Cusco camber top. As you turn the wheel, the whole shock is meant to rotate and so the shaft rotates the pillow ball in its housing. But sometimes what happens is that the pillow ball binds up (after all the weight of the car is on it) and as you turn the wheel, it’s the spring hat which rotates against the bottom of the pillow ball.
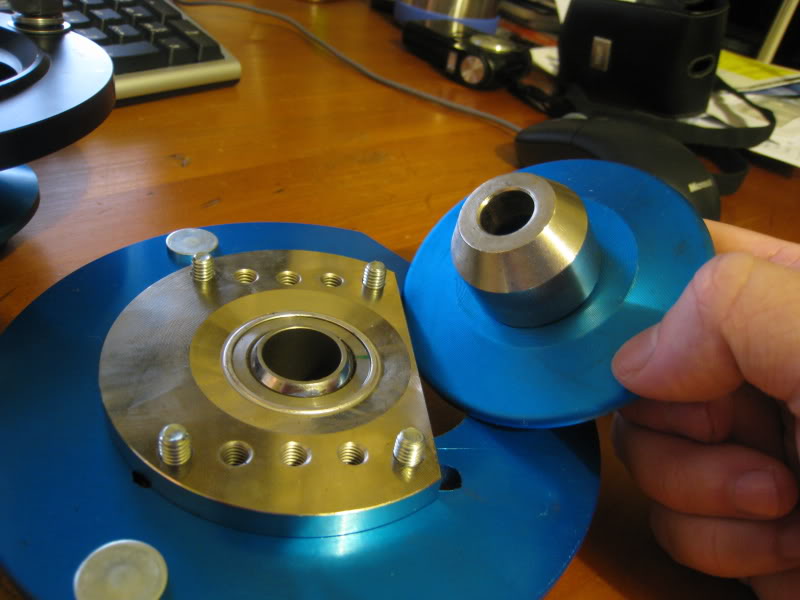
This isn’t the end of the world since the Cusco pieces are quite hardened, but it does mean that they don’t last forever and eventually start to rattle as the conical spacer, pillow ball and spring hat grind against each other and wear.
So the Datsport one has this billet spacer on top of the spring hat….
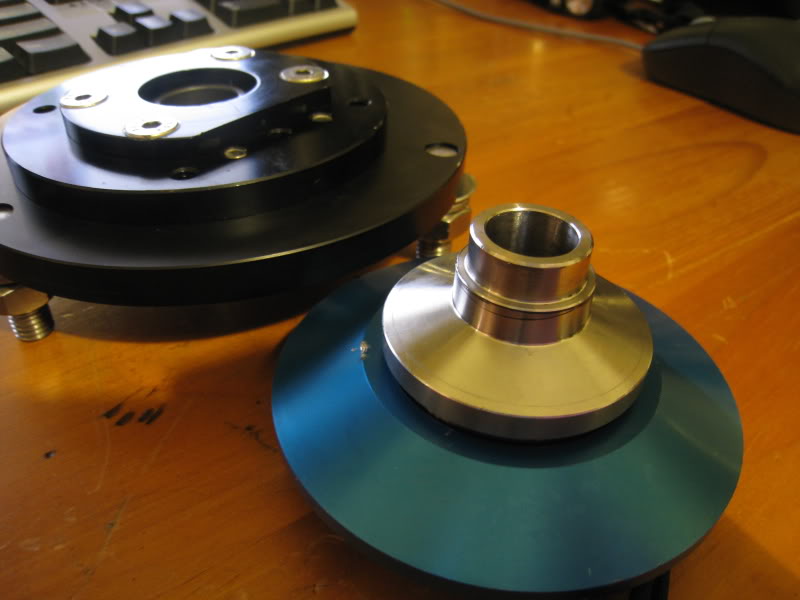
…which has a bearing inside! So as you turn the wheel, the shock rotates on the bearing, and the pillow ball doesn’t have to rotate, and the bearing even has a rubber seal on it to prevent crap from getting into the bearing…
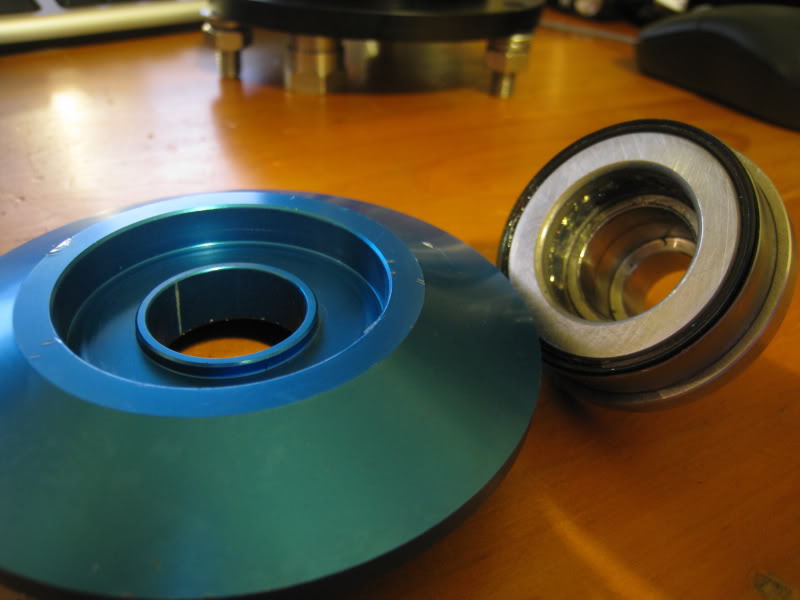
And the camber plate itself is billet and anodised…
They are actually intended for a 510 but Barry from Datsport reckons it’ll fit in the C10 no probs. And you can order the Datsport camber tops in 14mm to suit Z31 inserts too.

There’s nothing wrong with the Cusco camber plates, but this is a much more elegant solution, and wonderfully over-engineered. Obviously Hako had to have some ![]()
Hope they fit…
Update for today is that we’re waiting for the HKS rings to arrive (the importers promise it’ll be ready for pickup today). And if that happens then the engine can be assembled tomorrow morning.
The engine block is out of the hot tank and has been painted NISSAN BLUE (ok Alan you convinced us) ![]()
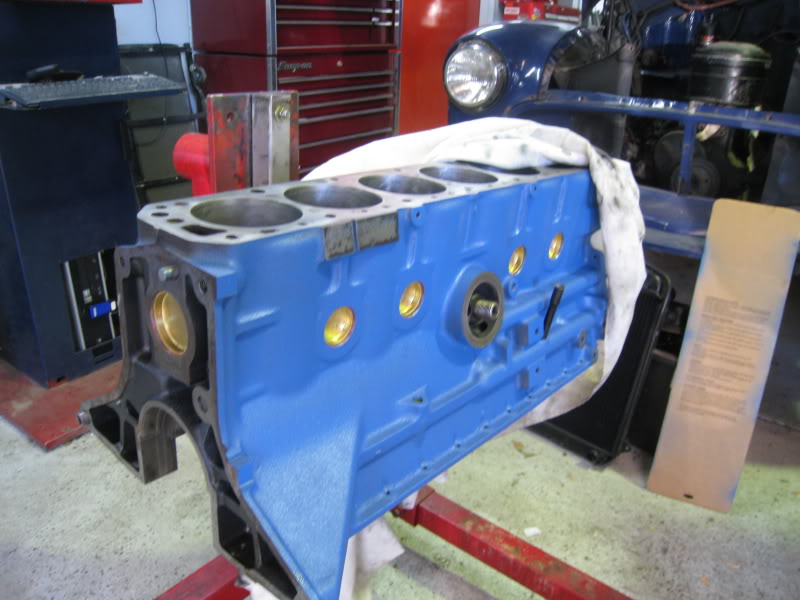
..and the oil pickup location has been redrilled to the front of the block, and you can see the old hole has been blocked up with a welch plug.
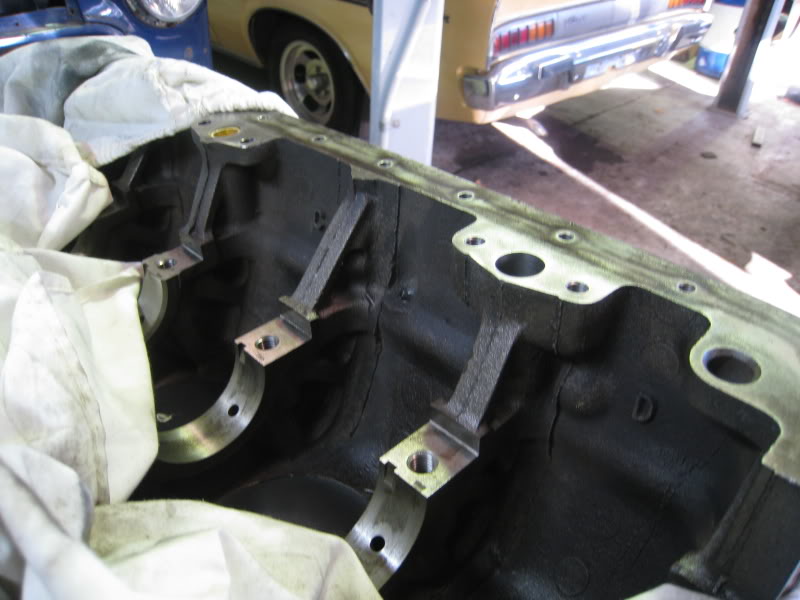
Fingers crossed for tomorrow!
Engine porn time!
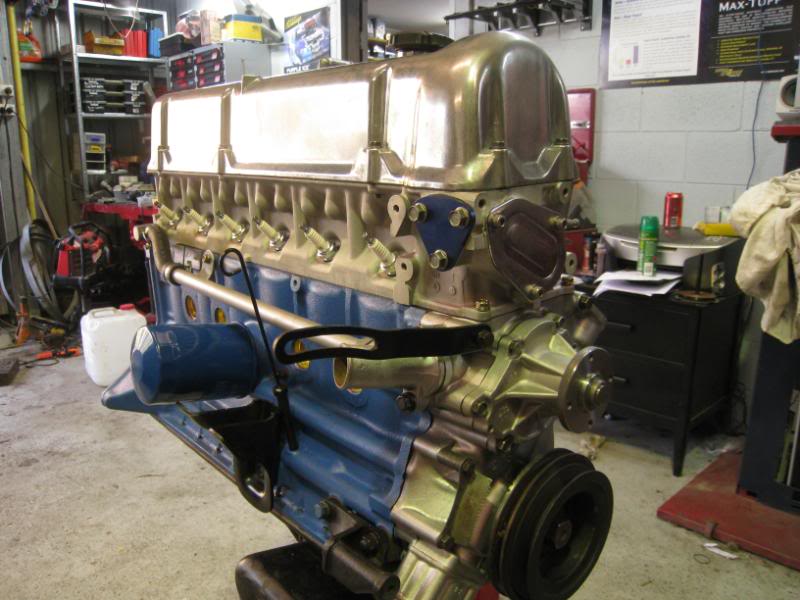
The HKS rings arrived and so the engine went together yesterday afternoon. The timing cover’s been bead blasted to clean it up and the new oil pump and water pump are in
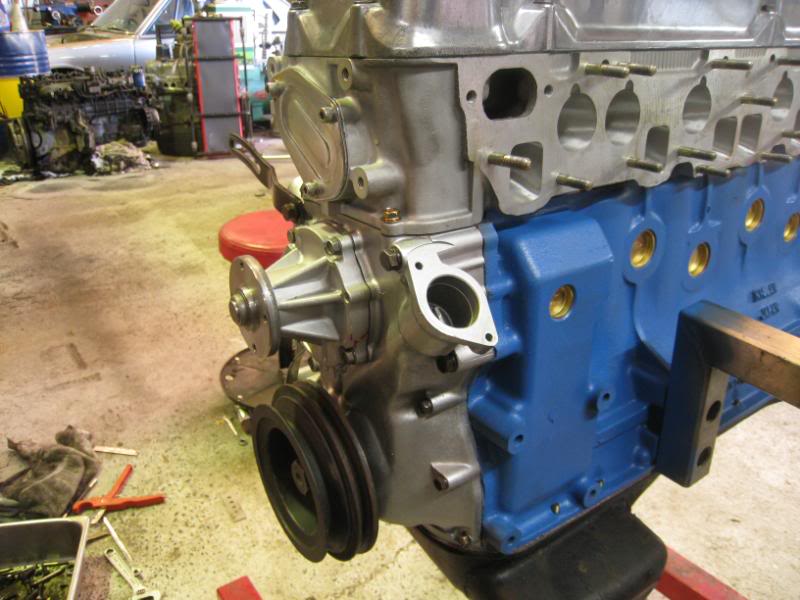
Manifold studs back in and head back on
Headwork porn, courtesy of Knight Engines ![]()
New welch plugs and main seals
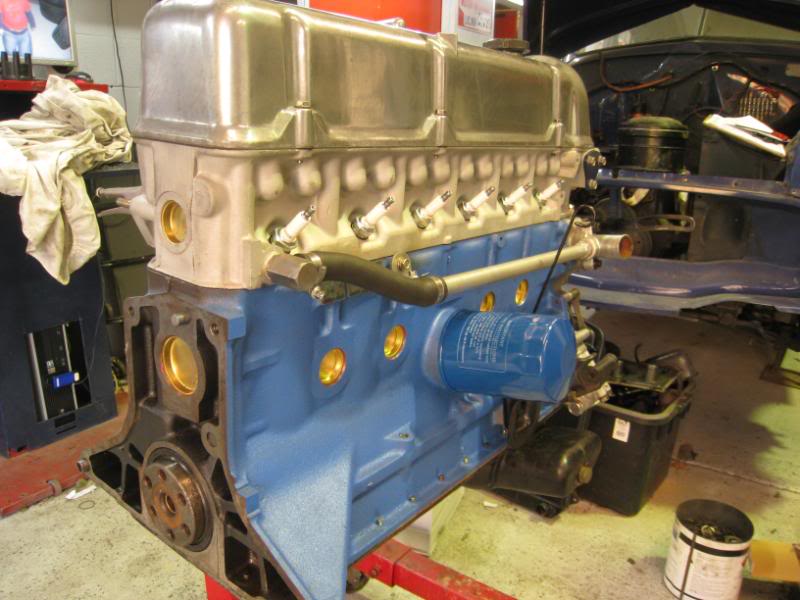
Nathan also fabricated a nice steel pipe for the coolant bypass (was just a long rubber hose there before). You can see to the left of the oil filter, the old dipstick tube which was intended for the ZX sump (which has the bowl in the middle). The dipstick is now moved to the front where the bowl is on a Skyline
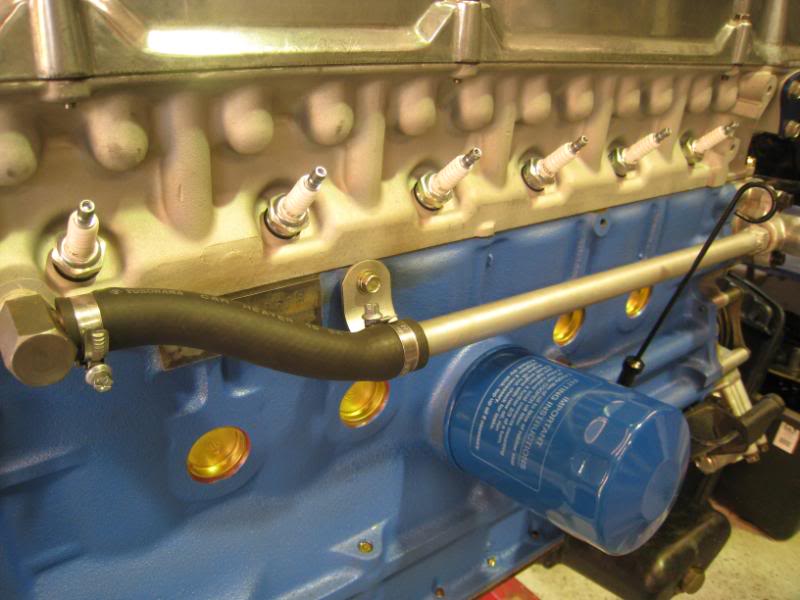
When I was there today, Nathan was in the middle of checking the distributor curve
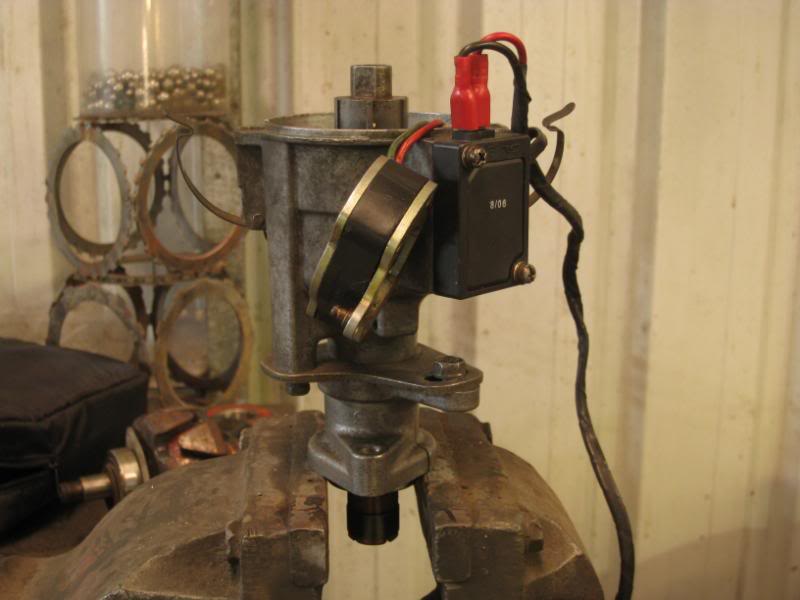
The engine bay will be filled soon…you can see here the weird exhaust system, which is dual pipes all the way to the back of the car….this is a copy of the Nissan Sports Option (ie Nismo) exhaust from the early 70s
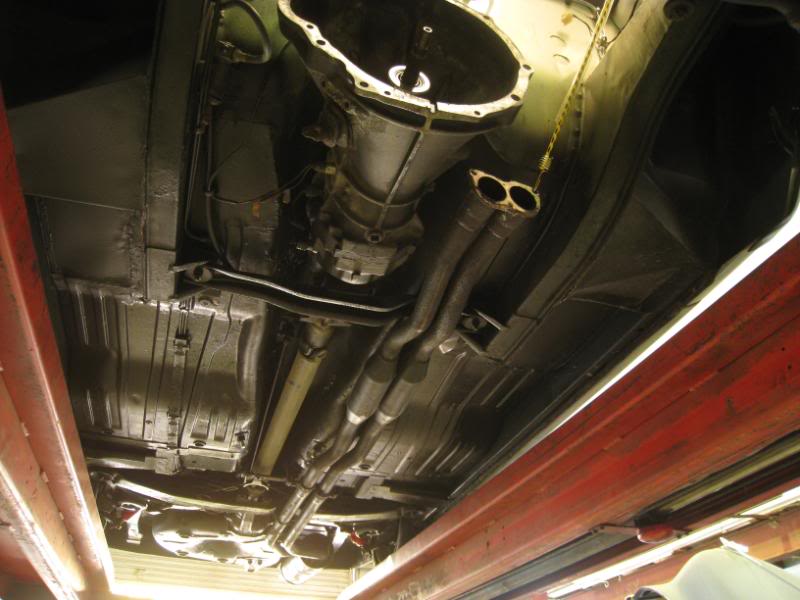
Mine’s a Trust system
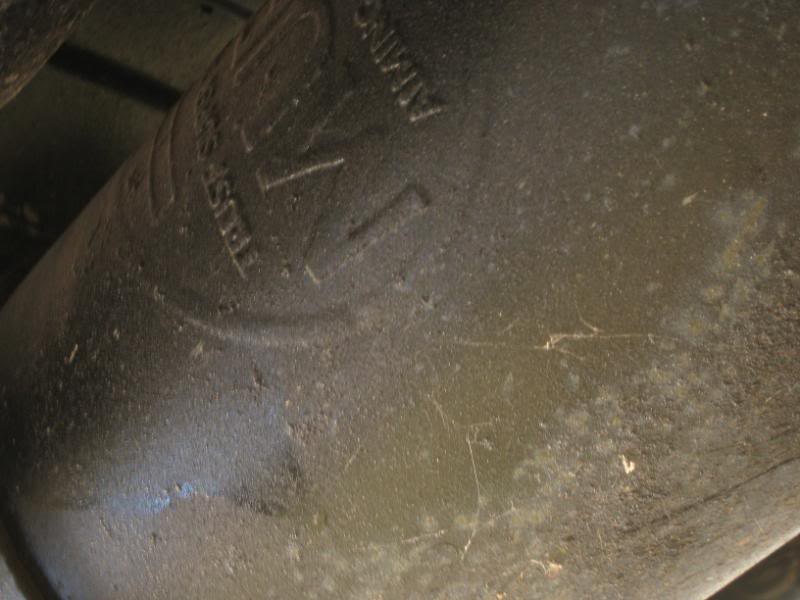
We’ll be back on the road maybe early next week…
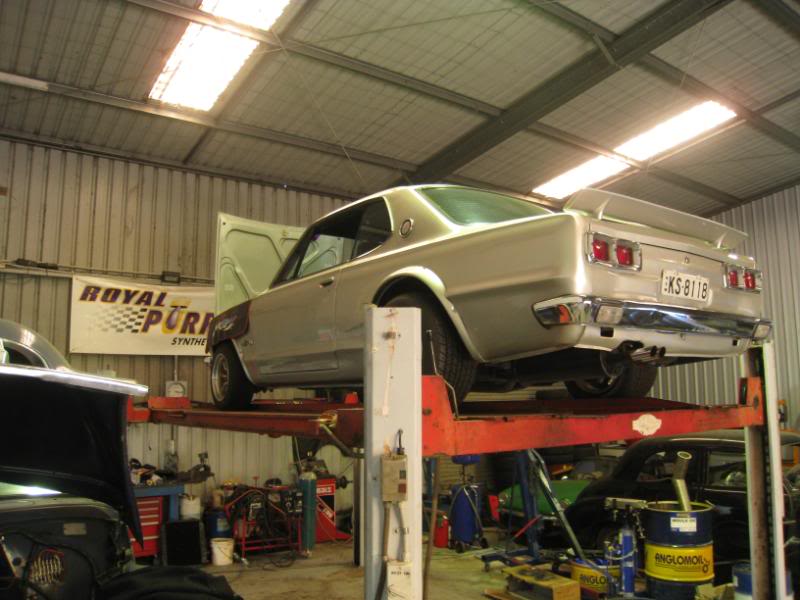
Here was my ride today, a cool silver C10 hardtop rolling on Hayashis:
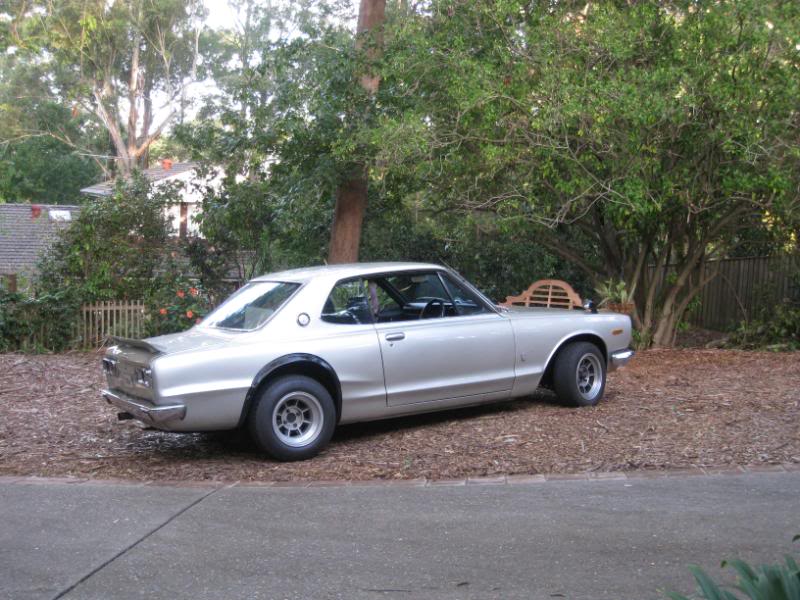
A mate was on his way to Nathan’s workshop for a checkup and quick tune after running in the new engine that Nathan built for him. So I grabbed a lift.
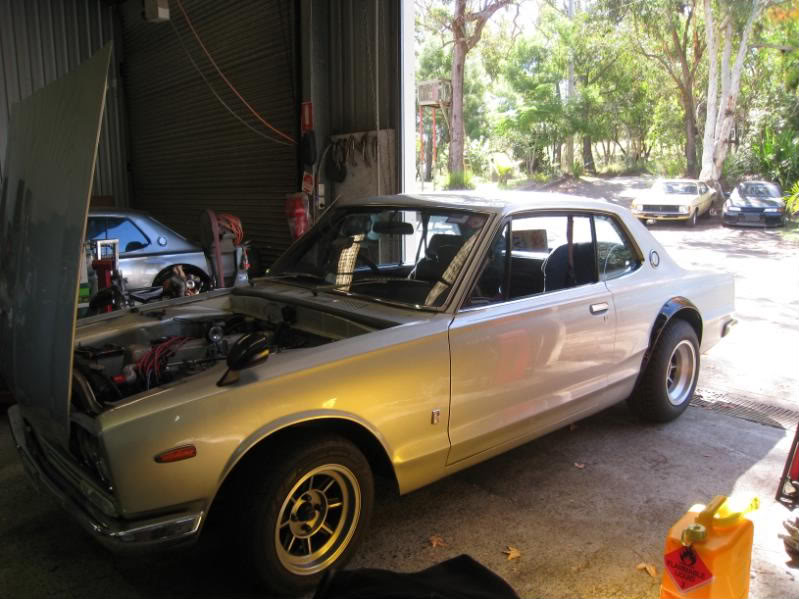
But when we got there, Nathan was having problems tuning my car…it would start and run, but didn’t respond to idle adjustments (then again…it never has, but I put that down to lousy low rpm efficienty due to the big ol japanese cam)
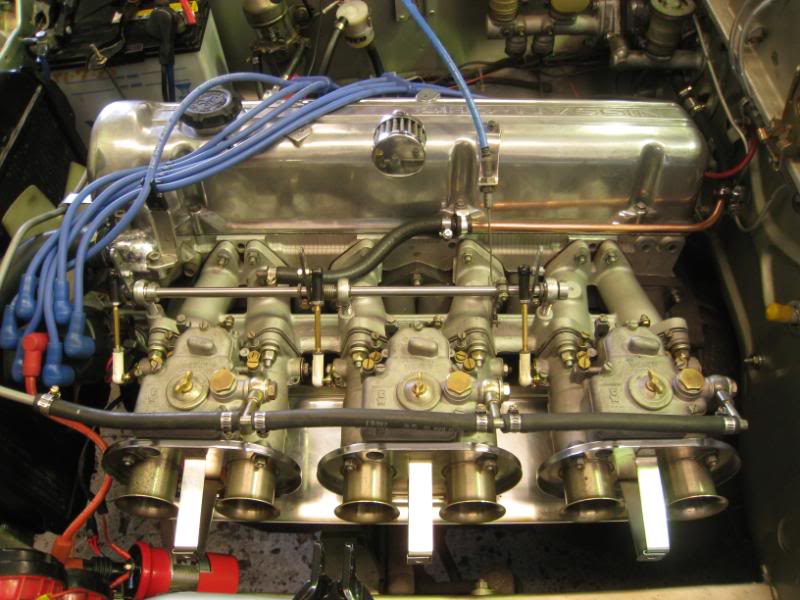
So we pull off the carbs for an inspection.
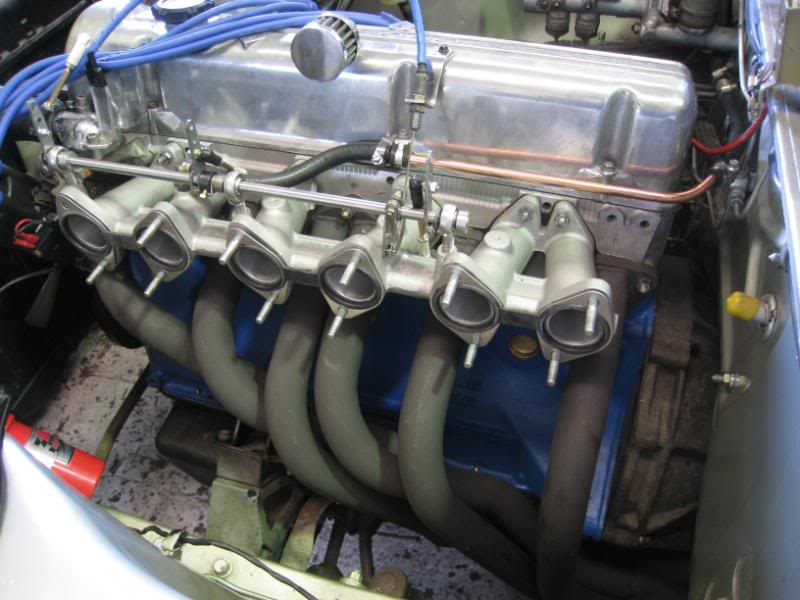
Straight away, a few things become apparent…there is a bit of grit and gunge inside.
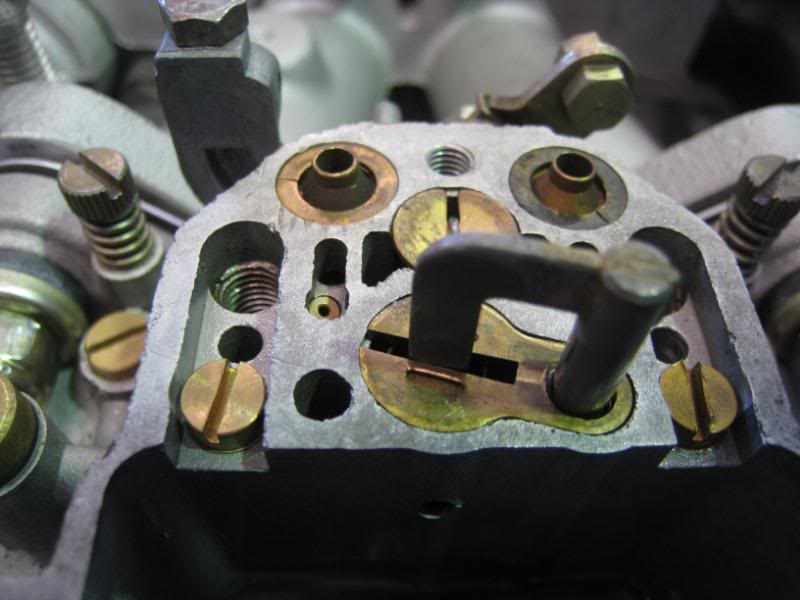
Here are a couple of the idle jets, you can see dirt in the threads too.
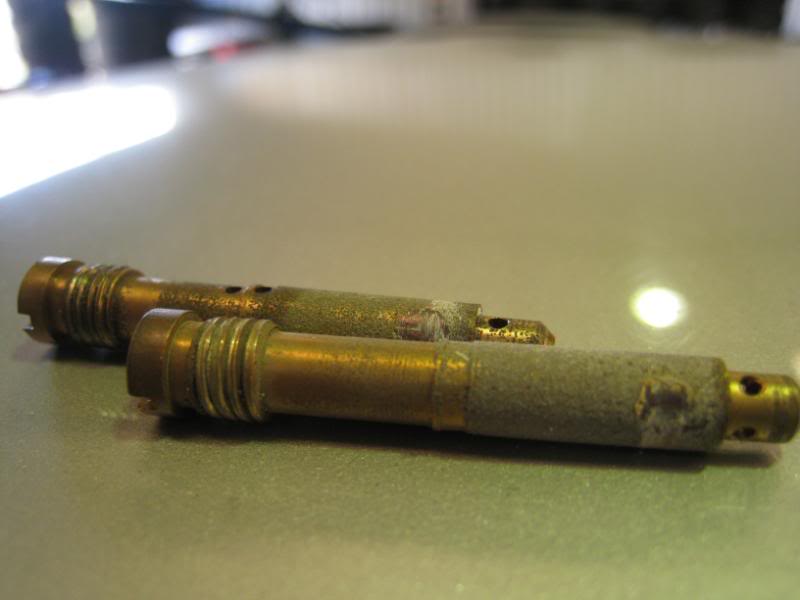
The the float levels turned out to be too high.
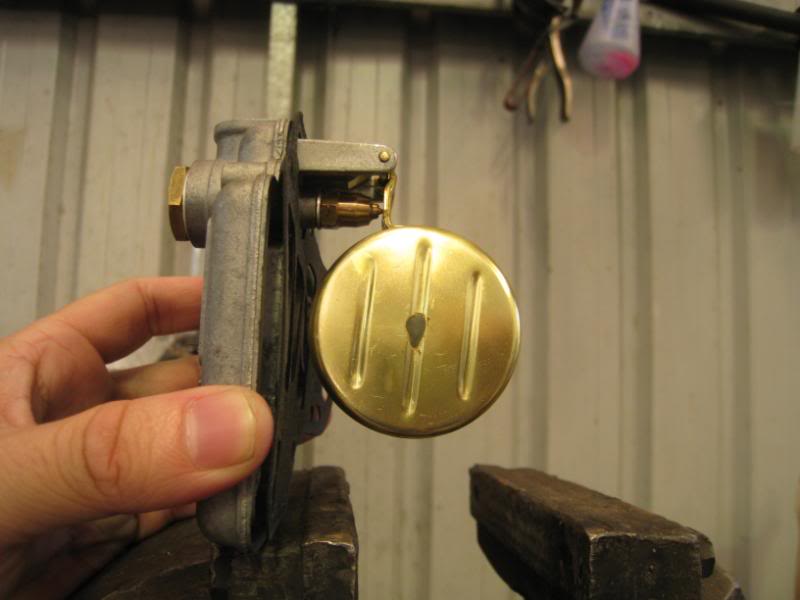
To set the floats, you set the top upright, and then measure the distance between the top plate and a point on the float body itself. Then you bend the tab that touches the needle until the clearance is just right.
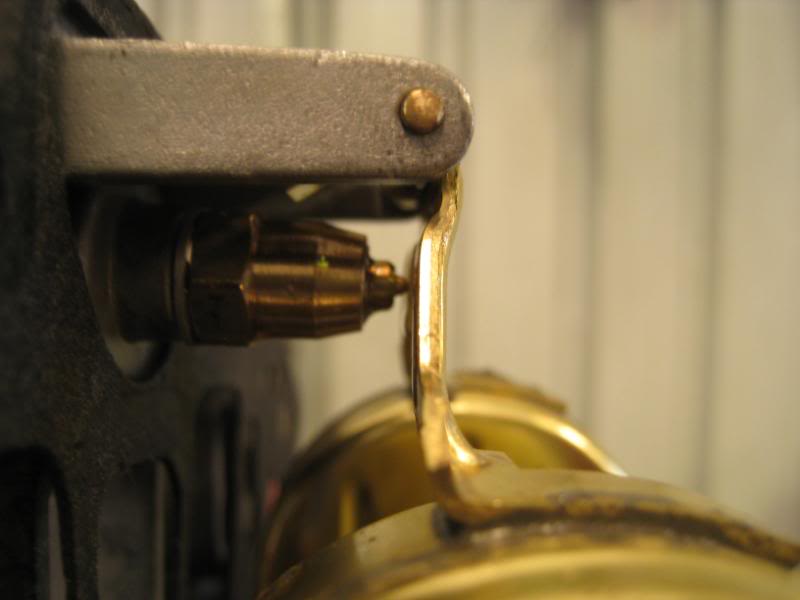
In our case, two of the carbs were miles out…but look inside the carbs and there’s lots of silt…
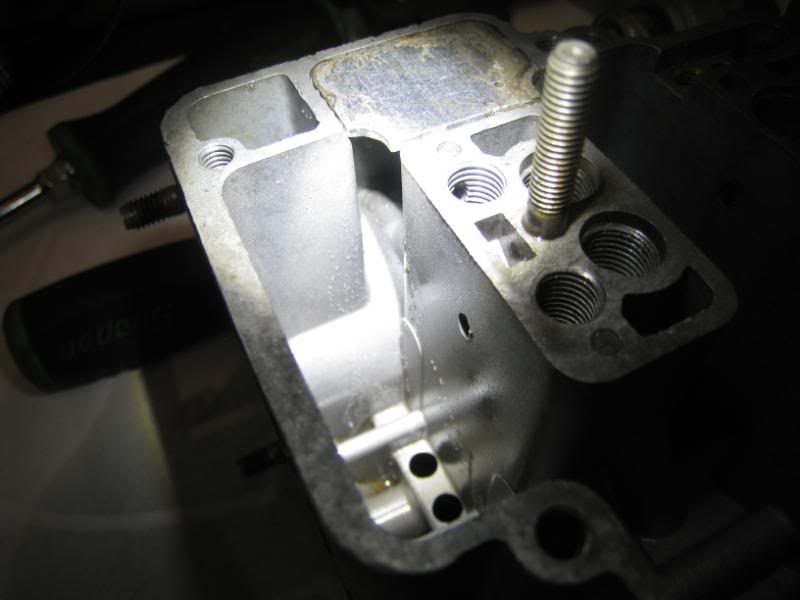
Tip out the petrol in the carbs into a clean dish and you can see all the grit floating in the petrol,
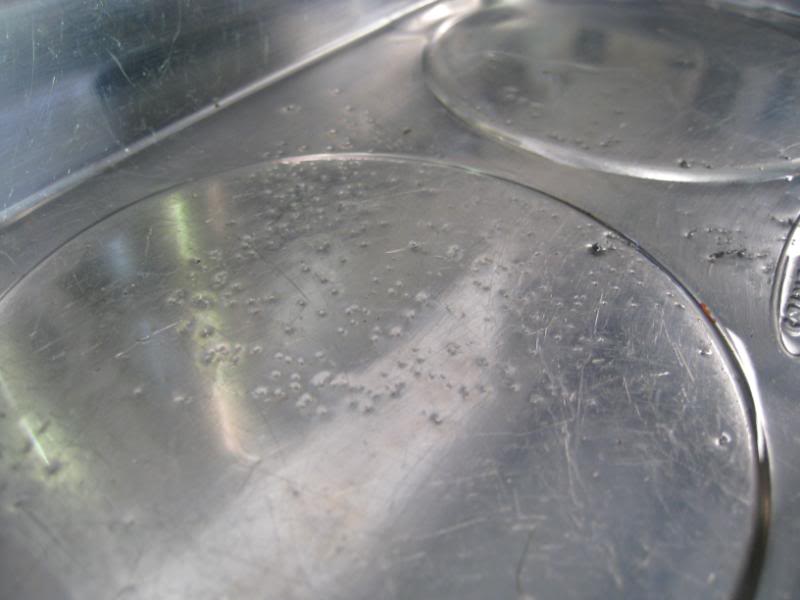
I’m not sure how it got there, maybe it is from running without air filters for a while, maybe it was dust blown into the carbs when they were sitting on my garage bench for months, or maybe it’s blasting sand from when the carbs were restored.
Whatever the reason, this would be one of the reasons why the car ran funny at low rpm and why fuel dribbled out of the carbs at idle. If the idle jet circuit has some junk in it, the fuel will be more of a dribble than a spray, and so the engine will show signs of both running too lean and also having black plugs since the fuel delivery is inconsistent. So the next task is to disassemble the carbs, give them a good chemical bath, then reassemble after a very long session being blown out with compressed air.
But the good news is that I think we have eliminated (touch wood) the final variable. Everything else has been renewed or rechecked…not long now…
Here’s my ride when we went to check up on progress over the weekend. No it’s not the same car as the other day, this one belongs to my good mate Jim:
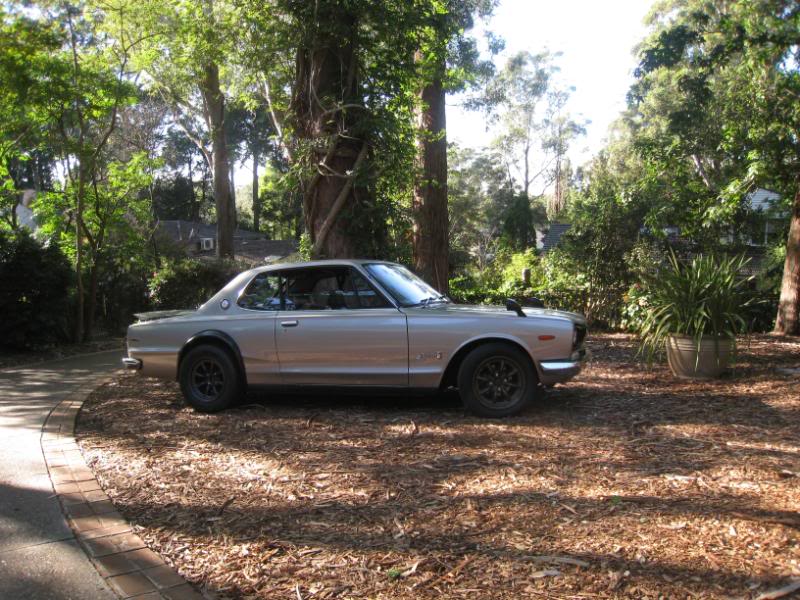
But…where do we start?
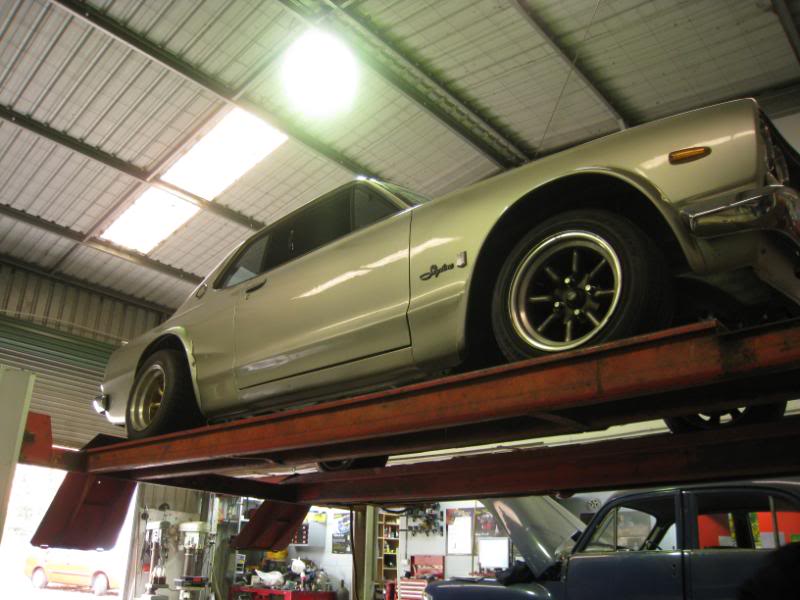
I’ll put you out of your misery: the car is fantastic. The engine, which was by far the worst aspect of the car before, is now the highlight of the car.
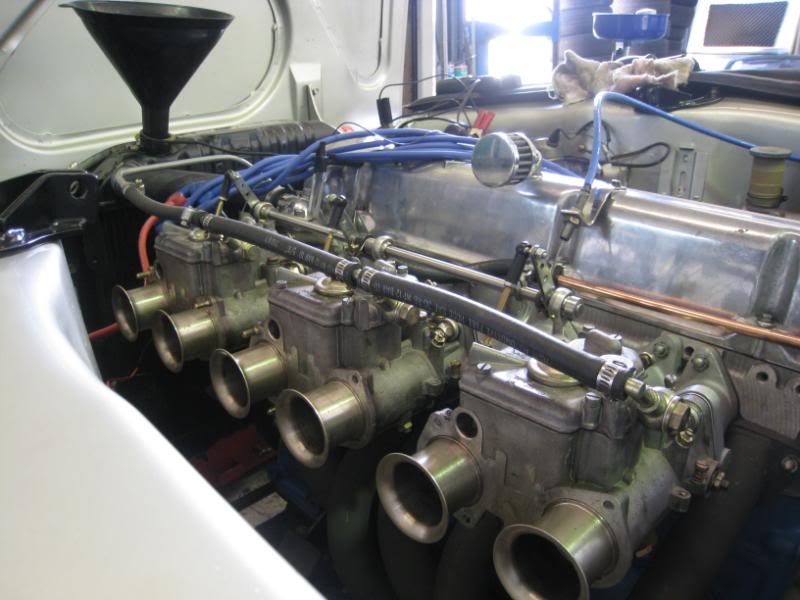
But it certainly didn’t go easy….I’m sure you’ll all agree that the car’s been fighting me all the way for one and a half years, and even after we rid the carbs of all that glass bead silt clogging it up, it still had a few curve balls left to throw at us.
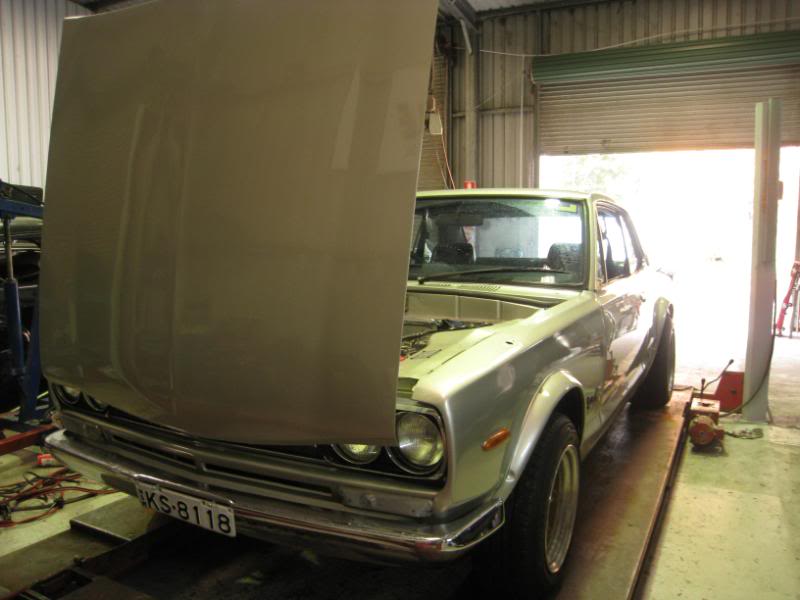
Firstly, it was hard to start. No, make that impossible to start. It was hard to find the “window” of ignition timing where the engine was happy and we went thru quite a few sets of plugs trying to get it to maintain idle. Put in a new set of plugs, and after a lot of futile cranking, they’d be wet and you’d have to take them out and dry them before starting again. If it somehow managed to actually start, then the plugs would go all black and fouled after a bit of idling and then just stall all by itself.
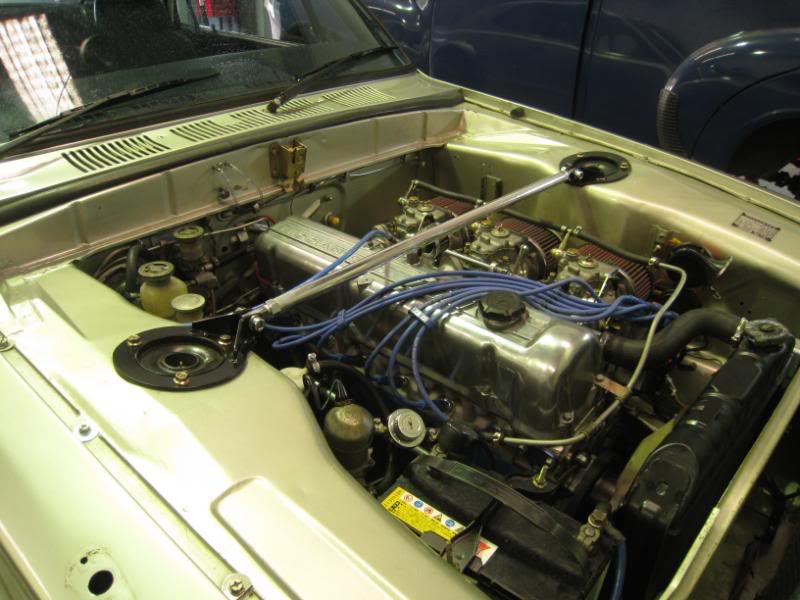
Then when you gave it a rev, it would immediately bog, and start to SHOWER fuel out of the airhorns. It’s always dripped a bit of gas out of the carbs but if anything cleaning the glass silt out the carbs now made it ten times worse. It still didn’t want to respond to fiddling with the carb idle settings, and taking it for a quick run up the road proved that if you gave it so much as a hair more throttle than 1/8, it would bog so badly it would stall.
This was horrible, and was a lot worse compared to how it was before the rebuild. But it just didn’t seem to be an issue with the actual engine though, and all that fuel coming back out of the carbs seemed to indicate some sort of massive carb issue, we tried swapping main jets, emulsion tubes, accelerator pump jets, idle jets, you name it….but to no avail. We swapped out the coil and distributor too…same thing.
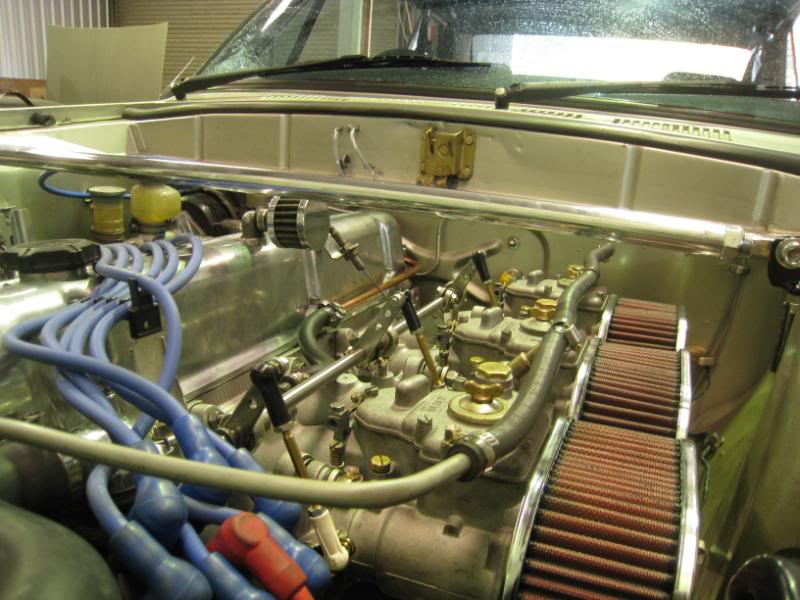
Then Nathan decides to check the voltage going into the coil…and…it’s fluctuating between 3 and 7V. He traces the problem to a connector under the dash, and after fixing some loose and corroded terminals, this happened:
[youtube]http://www.youtube.com/watch?v=G8qcBOUl9Qg [/youtube]
Instead of endless cranking and fouled plugs, it starts without even touching the throttle!
Now, coil voltage is something that I’ve definitely checked before…if you look back at the part of the build thread where we were playing around witn the Kameari racing dizzy, I did check coil voltage and it was a rock solid 14V. Maybe it was an intermittent problem before, and the 6mths of inactivity grew that little bit more corrosion and made it worse? What seems to have happened was that the poor juice to the coil meant that the spark was weak, and while it could idle (in a fashion), once you put some load on it, it developed kinda like a misfire and shot all the fuel back up the intake again.
Who knows? But after one last attempt at being a pain in the arse, it now runs clean and crisp. And for the first time…no fuel coming out of the carbs! Not a drop! And it’s really very touchy and responsive to the throttle too…just look at the throttle and the rpm will just zing ![]()
[youtube]http://www.youtube.com/watch?v=qt59nZU9dnw [/youtube]
And how did it drive? Well being a fresh engine, I kept it to 3000rpm and only 1/8 throttle, but even then, you can hear that it’s crisp and sharp and pulls effortlessly up through the gears. It’s a bit hard to see in the video, but this is actually a bit of a hill, and we’re bounding up it in 4th gear, 2800rpm and with just a hair of throttle, and even with only 3000rpm to play with, it’s almost impossible to stop it from zinging up to 4th gear and wanting to keep going and going.
[youtube]http://www.youtube.com/watch?v=T2ml9uQPFpo[/youtube]
If I could pick a work to describe it, it just feels *toey*. Very toned and sharp: lots of torque and response. I love it, and can’t wait to get it all run in and use up the rest of what it’s got.
While we at Nathan’s we fitted the fancy Datsport camber tops.

…much easier to do when you have a rattlegun at your disposal, and as expected, they dropped the ride height one inch at the front. The spring is lightly trapped, and there’s 50% bump travel and 50% droop travel at this ride height. I think that the front could certainly come down a hair without sacrificing too much travel though.
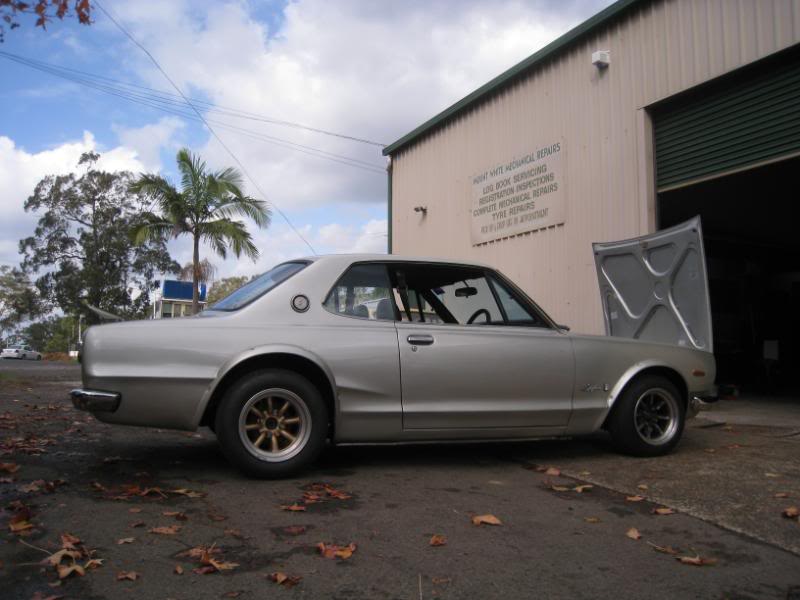
Just for fun, I put them in at max camber, and it looks to be good for about 2degs. I’ll pull them back to 1.5degs when I get a wheel alignment.

The last thing we did was pop the rear end in the air to see what diff ratio we got. Looks to be a 4.6:1, so that explains the low geared feel. I think with so much torque, it’s not really necessary to have such low gearing but it would be a shame not to take it for a run down WSID first ![]()
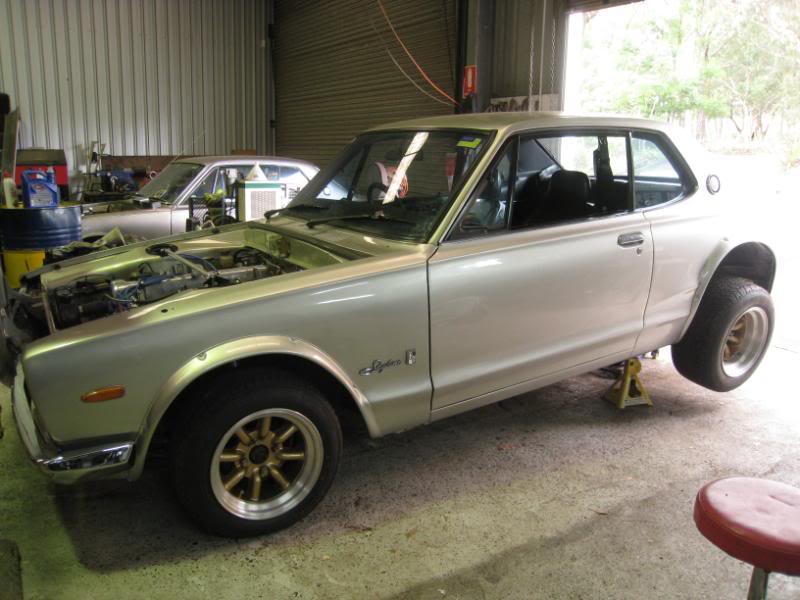
So there you have it…after one and a half years of restoration, the Hako finally feels good. All along, the looks of the car have made promises that the actual driving experience kept breaking, and at the heart of all of this was the coughing, spitting, low performing engine. I mean if the engine is lousy it makes the rest of the car seem like a bit of a fraud. But it’s now all new and feels just great. This is an awesome engine, even at 3000rpm you can tell it just want to run and run, and it’s so smooth and crisp.
TK and Nathan, you guys are farkin legends ![]() I’m going to take good care of this engine.
I’m going to take good care of this engine.
Finally it’s a car I can enjoy driving ![]() I got to run it in now though, so that means no fun for 1000kms…but ahh, who’s complaining.
I got to run it in now though, so that means no fun for 1000kms…but ahh, who’s complaining.
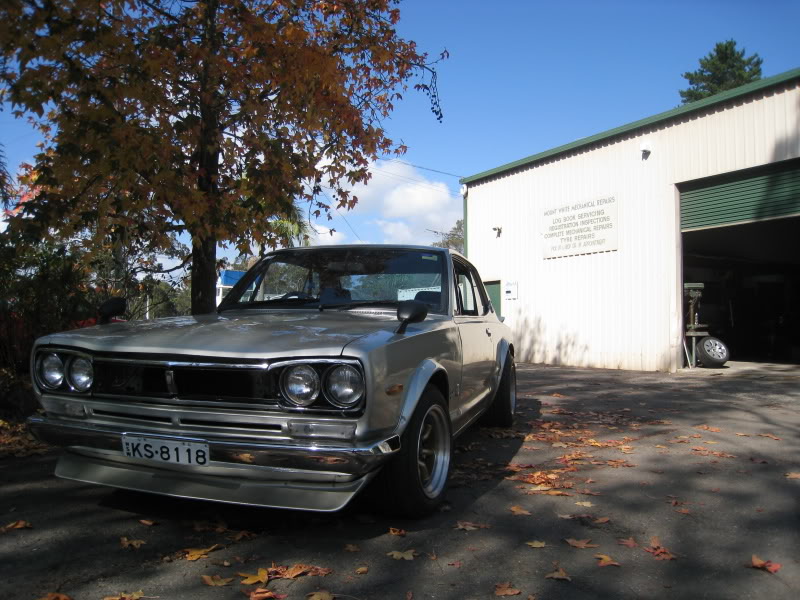
Picked up the Hako this morning from Nathan’s (Mount White Automotive) who is on the Central Coast.
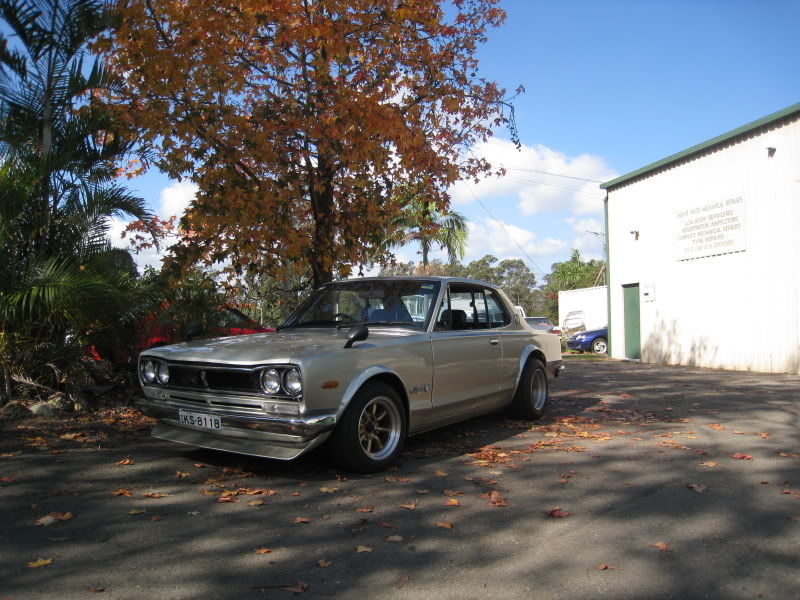
…which means that I can take the Old Pacific Highway on the way home ![]()
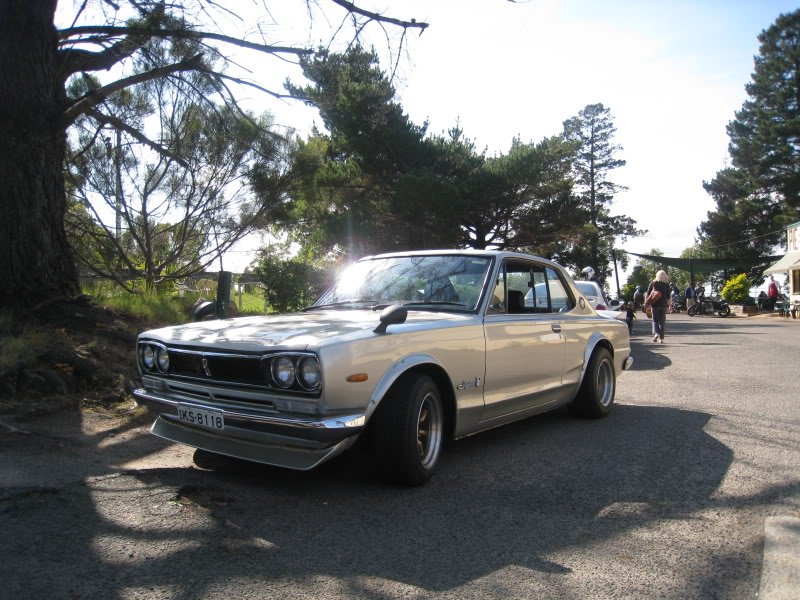
Pics taken at the Pie In the Sky biker hangout.
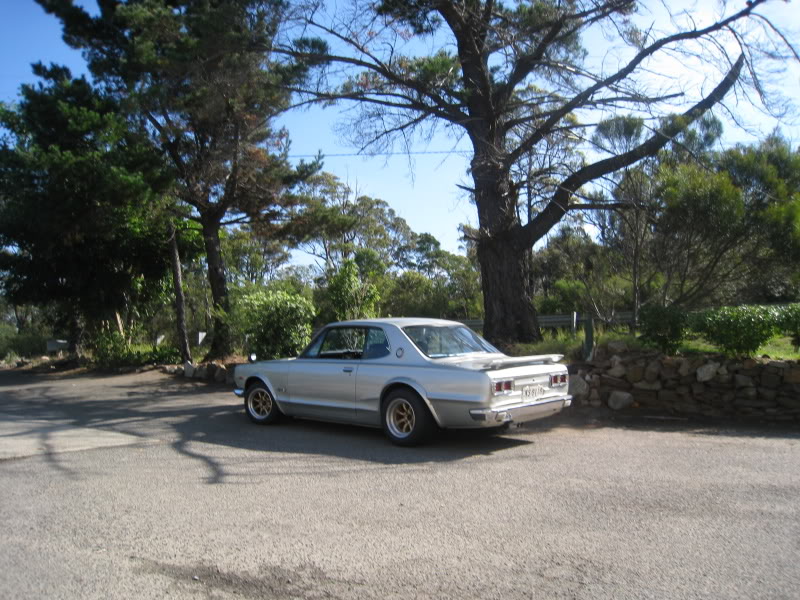
It drives just great, I’m restricting myself to 3500rpm, but using a fair bit of throttle to load up the engine to bed in the rings. It pulls very cleanly and strongly, even as low as 2000rpm, and at 3500rpm you can hear anf feel that it’s just about to go into VTEC when I change gear ![]()
Suspension wise, the front spring/shock is spot on I think, although the steering feel is a little stiff and vague, so I’ll try to dial in more castor. The back end is a bit too soft, so new springs will be in order, and on the fast dips on the Old Pac I can occasionally feel what might be a bit of coil bind as the rear suspension gets onto the bumpstops.
But it drove just fine, thru all the Sydney traffic into work. The brass button clutch is a little sudden, and the gearshift, clutch and steering are very heavy (especially the steering) so it’s quite a physical car to drive, but it behaved itself and is reasonably well sorted for something fresh of the box with no tuning.
Got an appointment for a wheel alignment tomorrow morning, and I’ll do some minor fiddling tonight. Vids of old Pac twisties run will be uploaded when I get home….don’t get too excited, it was filed on Shaky-Cam(tm)
So I went to Racetige this morning, which is run by Nick, who used to work at East Coast Suspensions, but Nick brached off to start his own shop last year, specialising in trackday and race cars.
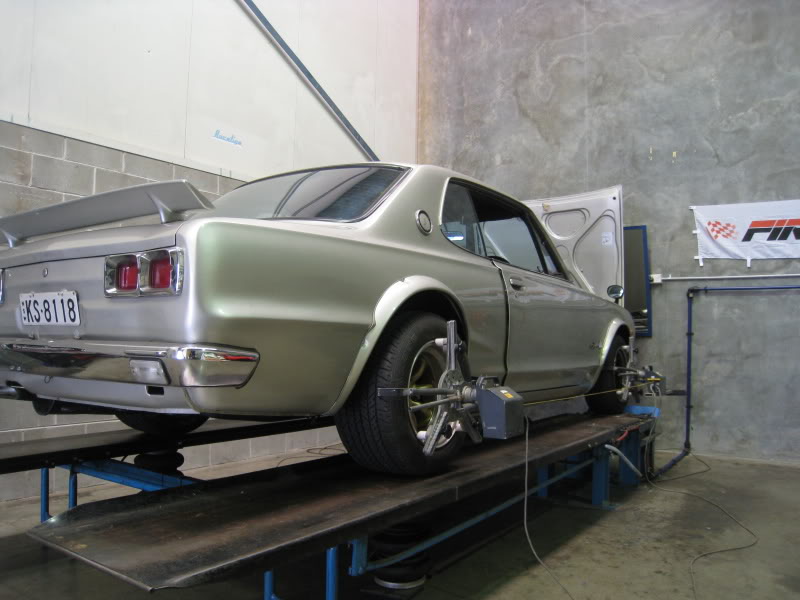
The initial verdict was that yes the alignment was well off, with 6mm of toe out at the front, 2 degs of camber and 2.5 degs of castor at the front. Good news was that the rear suspension was square, with 1 deg of neg and zero toe (which is just as well because the rear isn’t adjustable).
Nick felt that the steering would lighten up a lot if we added more castor, and the 2 degs of camber that was available from the Datsport camber tops was excessive for a street car anyway. So we rotated the strut tops so that the adjustment slots pointed backwards, so that we could lay-back the struts for more castor. We’d sacrifice some camber adjustment in the process, but 2 degs was too much anyway.
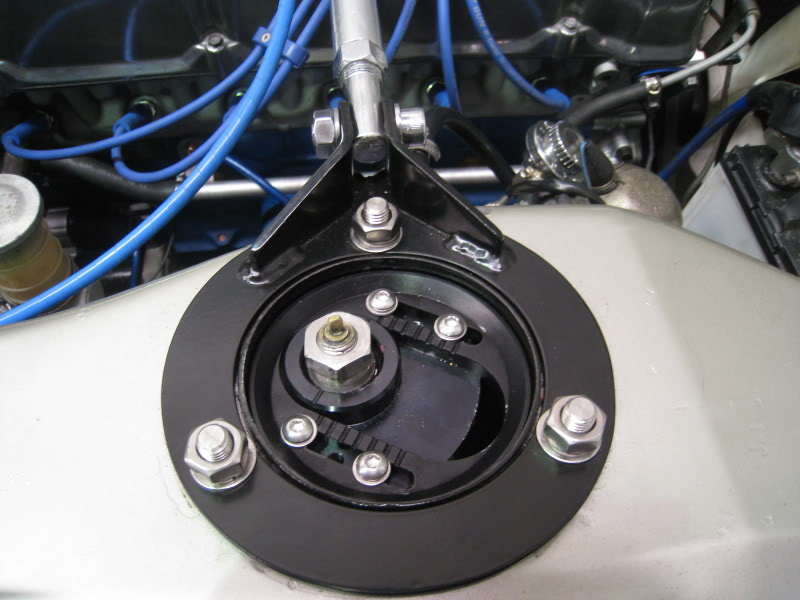
In the end we settled on 1.2 deg of negative camber, 4.5 deg of castor, and 3mm of toe in at the front. Camber is spot on, however I’d have liked maybe a degree more castor but that’s as much as we can get without modifying the radius rods.
And it feels great! Nick was right, the extra castor has lightened up the steering quite a bit. It’s still heavy, but once you start rolling it lightens up a lot and the increased self centering means it feels a lot less stiff. So now it’s more like how my old MX5 used to feel and the steering is a lot more fluid.
That’s great because my shoulders were aching after driving the car around yesterday ![]() Oh and if you’re looking for a good alignment shop in Sydney I can definitely recommend Nick at Racetige.
Oh and if you’re looking for a good alignment shop in Sydney I can definitely recommend Nick at Racetige.
320kms on the odo now.


…more than once I had to pinch myself when I was looking thru the viewfinder that yes, that’s actually my car!
Then on Saturday a group of my close friends threw a bit of an epic drive day for the Hako. Now, I’m lucky that so many of my mates are talented semi-pro photographers, which have made the Skyline look so great. The day started off at 6.30am with some much-needed coffee (since the midnight photoshoot from the evening before had left me with precious little sleep).

This shot’s by Melvin at the rendezvous point before the drive
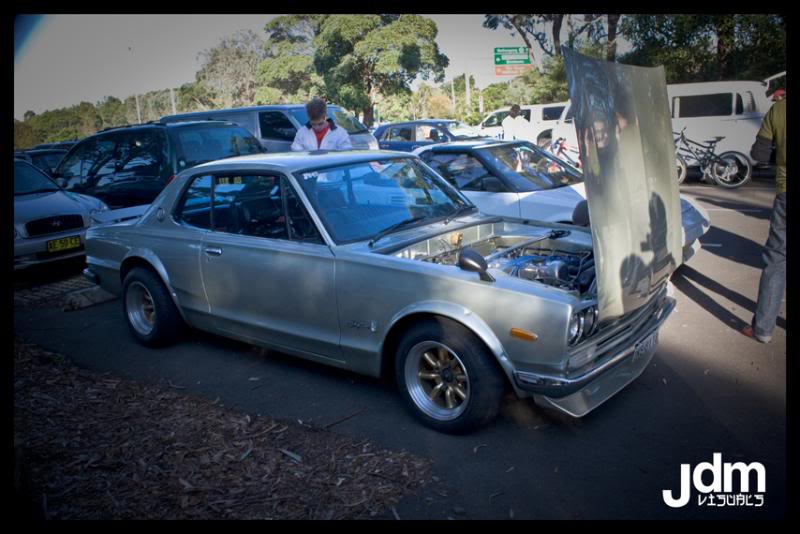
This one by Kevin Cheng, also at the rendezvous
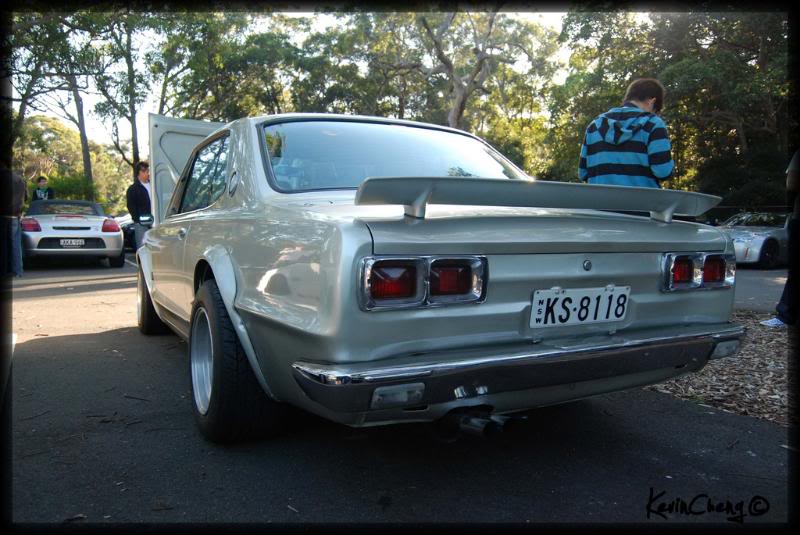
The day started with a drive through the Royal National Park, which for non-Sydneysiders, is a very long and winding country road which takes in bottom-of-the-valley forests to soaring crests along the coast.
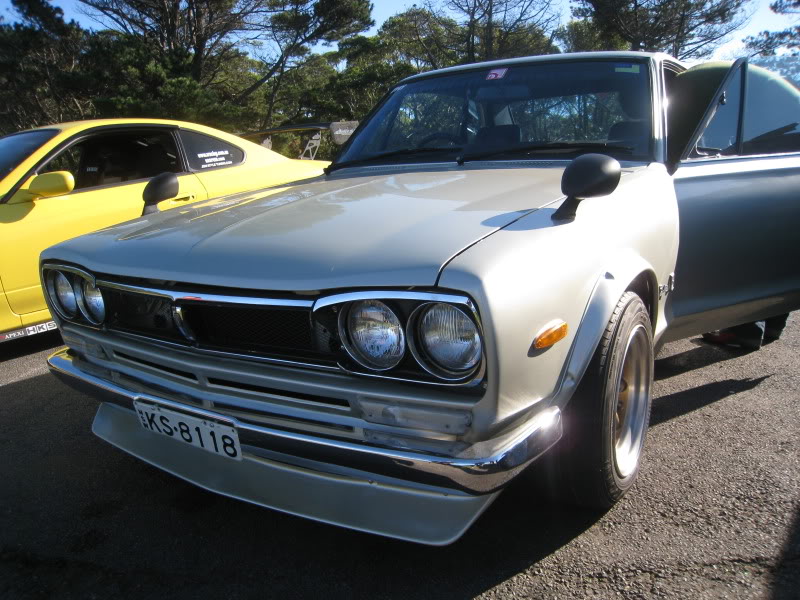
This shot by Russ at our first rest stop
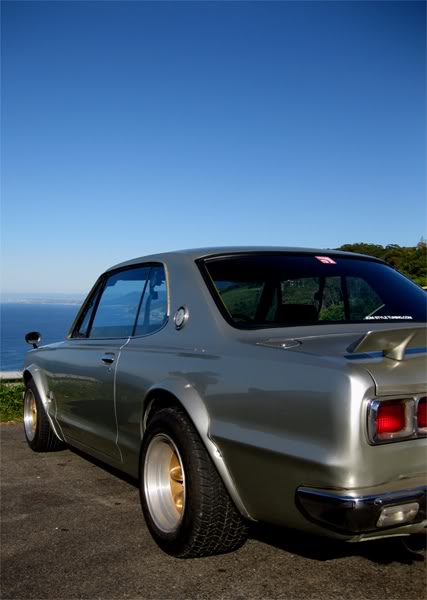
I love this shot by Melvin, also at the same location

I just love these B&W pics by Derek Lau. Wow.
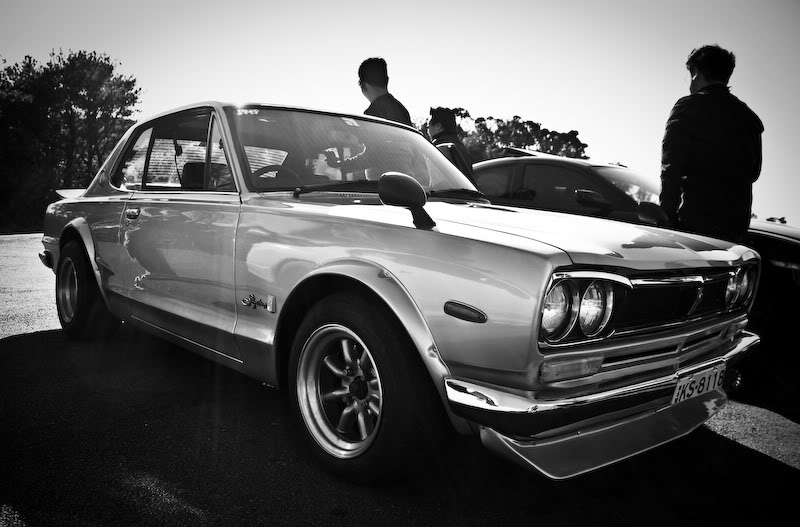

I especially like this one!

Fine shot by Andy Wana
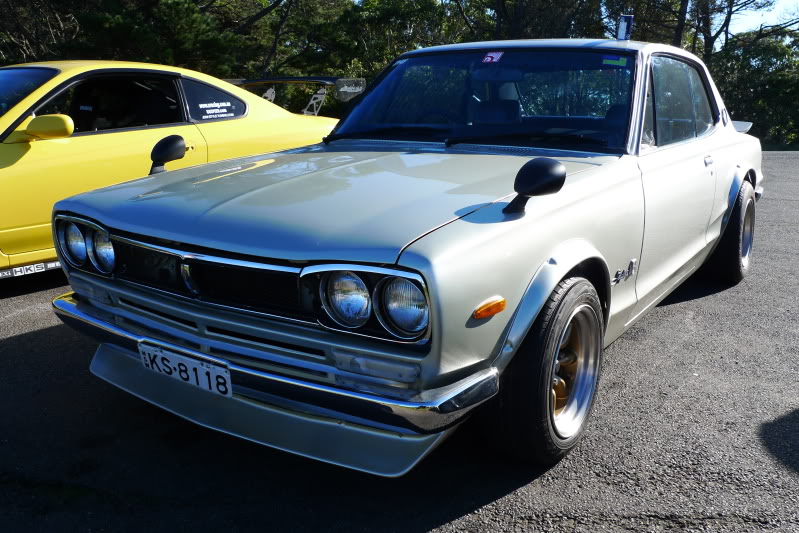
Then we were on the move again, hugging the winding road along the coast. Mad props to Carmen for bodily hanging out of Al’s 350Z to get these awesome shots

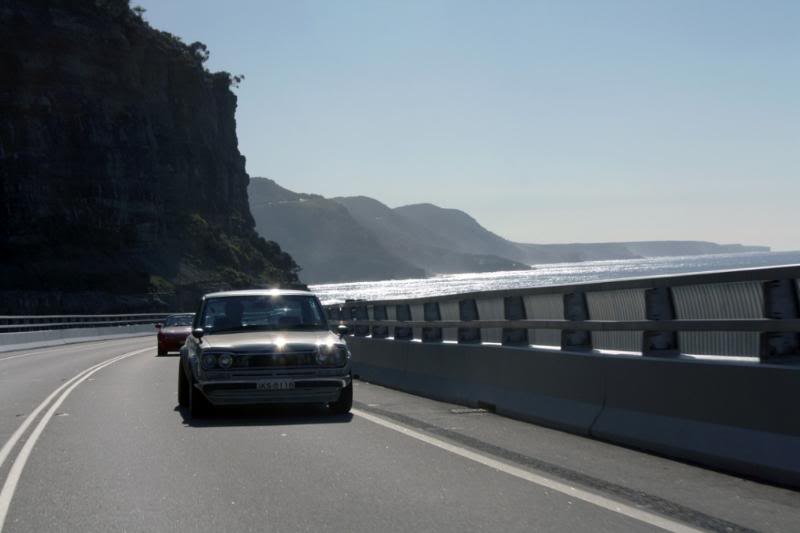
Then we stopped for another breather at Seacliff bridge (this pic by Carmen)
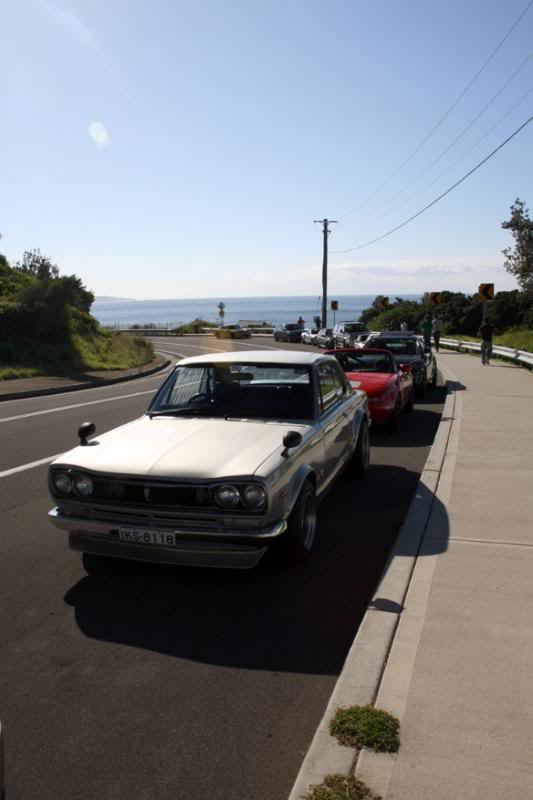
This shot by Jonno…wait a sec…is that petrol I smell?
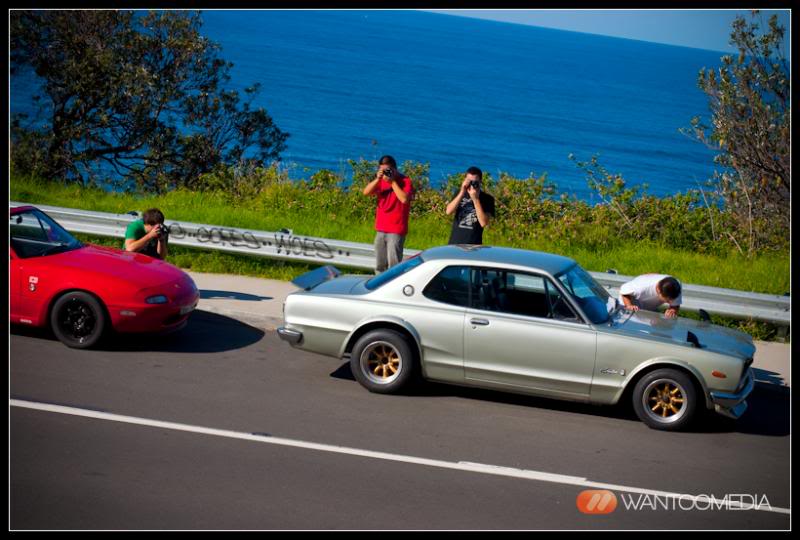
…nope…all good ![]()

Another awesome shot by Jonno

My “office” for the day!

Hako didn’t miss a beat all day, not even when we got stuck in that nose to tail traffic for an hour. It ran strong, didn’t leak anything, get hot or use any coolant.
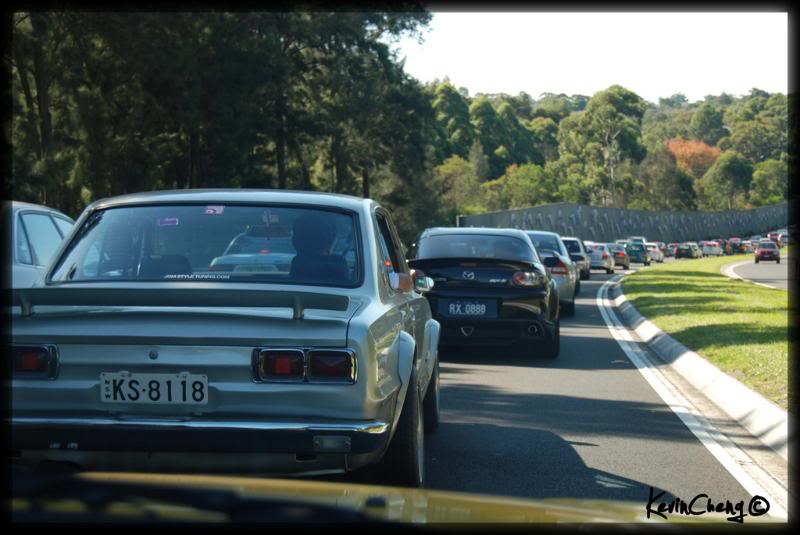
The other cool discovery was that it’s a pretty good winding road car, plenty of grunt and lots of ground clearance and suspension travel so if anything it rode the Nasho bumps a lot more comfortably than my old MX5 did. In terms of handling, it’s very benign. In the faster stuff it’s very stable, you can be a bit aggressive with the steering and push the front a little, and if you lift off it doesn’t bite you. In the slower stuff it can sit the tail out a little going into tight corners if you carry a lot of brake, but it comes back quickly and puts the power down without drama. So it handles pretty much like it looks like it would handle, with those huge rear tyres and not-so-huge front tyres. In terms of steering, there’s a little slack at the straight ahead (normal for a Datto steering box) and the first 1/8 of a turn is a little vague, so you tend to turn in a little too early as a result because the actual turn in is quite sharp. But I guess that could just be me having to get used to it.
Dynamically, if anything it reminds me a lot of an older 911, all stiff front and supple rear springing, which you push to the limits of its understeer in fast corners and go slow-in-fast-out in tight corners. And like a 911, it does feel like it doesn’t want you to get it sideways, but there’s tons of traction and within its limits it’s very exploitable and friendly. And it’s definitely fast enough not to hold anyone up on a crowd of modern sports cars. It’s a good thing, because if it was an edgy handler I think I wouldn’t enjoy pushing such a rare car hard, but it’s such an easygoing and fun car to drive fast so I’ll enjoy taking it for winding road runs more often.
Other impressions? Well the gearing’s stupidly low for a start. At 120kmh in 5th it’s pulling 3800rpm. What that does mean is that on tight winding roads it offers brutally violent acceleration in pretty much any gear, but I’ll have to fit a taller ratio if freeway driving is to be a realistic proposition.
The odometer reads 810km so we’ve got a little more driving to do before the running in period is up, but even with the 3500rpm I was trying to restrict myself to, it had more than enough grunt to push you in the back and put a grin on your face ![]() It’s weird…for so long the car’s fought us, and all the way it’s had a spiteful streak, almost as if it resented being taken away from its home and brought to Australia. But over the weekend everything was….perfect. Everything. After so long restoring the car, it was almost too good to be true.
It’s weird…for so long the car’s fought us, and all the way it’s had a spiteful streak, almost as if it resented being taken away from its home and brought to Australia. But over the weekend everything was….perfect. Everything. After so long restoring the car, it was almost too good to be true.
So, many thanks again for all the good wishes, and especially to Tony of Knight Engines, Nathan Sawczak of Mt White Automotive and Col Mitchell of Gordon Smash for giving the Hako the deluxe treatment. And thanks again, not only to all the people who lent their advice during the build, but also to all the ppl following the build thread, for your good wishes in the one and a half years it’s taken us to get to this point. And of course, thanks again to my awesome friends who made the weekend so memorable.
The restoration of the Hako isn’t complete by any means, we have a lot more work to do. But what follows, should hopefully be the fun part ![]()
Tonight I fitted up something I picked up in Japan ages ago. You might remember that the current aussie-made Redline inlet manifold is a bit longer than the FET one that came with the car, so there was now not enough room for the aftermarket washer bottle that came with the car.
The proper washer arrangement for C10 Skyline is actually a bag. It’s called “Kangaroo” because of its shape obviously when it’s full of water. I’m fairly sure the bag is a reproduction item rather than a NOS Nissan part.

The stock arrangement is a set of pressed metal hooks welded to the side of the engine bay, but those were drilled out and removed on my car. So I cut down some hardware store dynabolt hooks instead. Those neat little rubber plugs are actually from a Fuel Miser kit, which is a bag of assorted hose ends and plugs of various sizes (very handy)
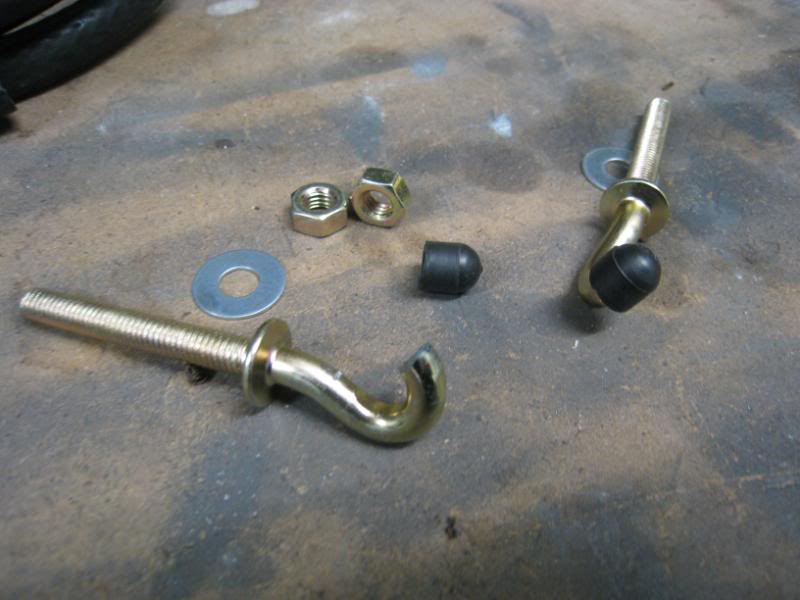
It fits just nicely between the engine bay sides and the air filter.
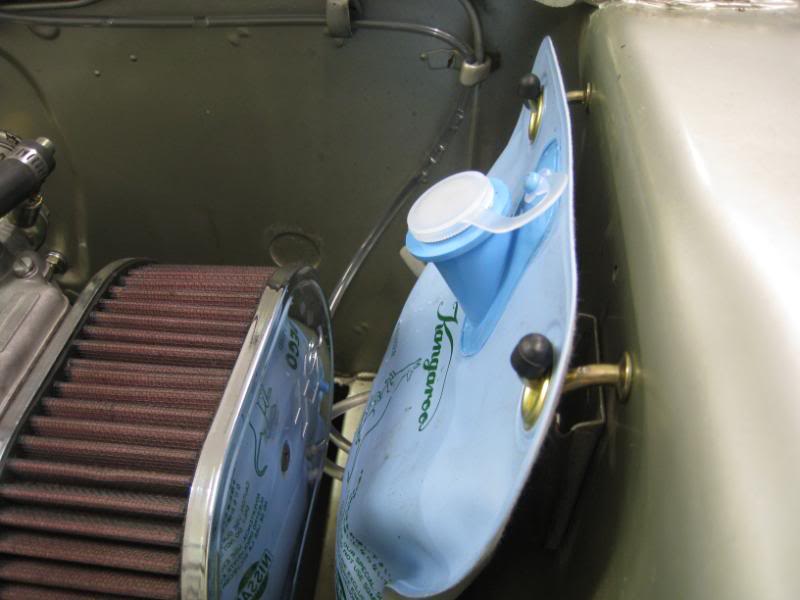
Looks great ![]() Shame it doesn’t work though….I’ll test the wiring later, it definitely was working before with the old bottle.
Shame it doesn’t work though….I’ll test the wiring later, it definitely was working before with the old bottle.
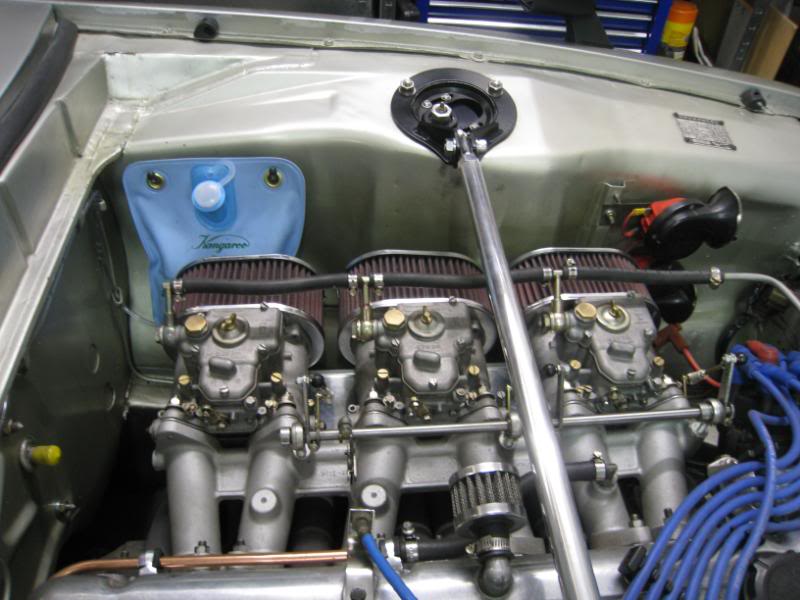
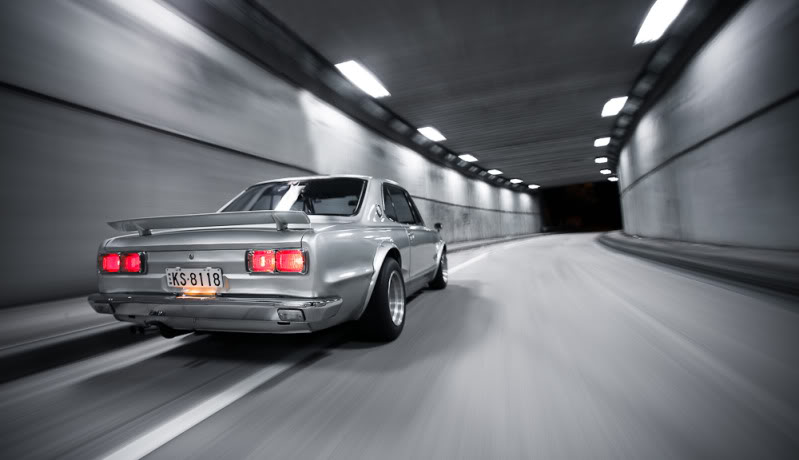
Well I guess the run we’ve been having was too good to be true, and so the car had to return to its regular form at some point in time…
I decided to do a late night run on some local twisty roads. Nothing too hard, just a brisk cruise to continue the running in, and besides the hi-beams are 1971-spec 30W Koito’s which are mainly decorative. For fast night driving you might as well turn them off to save the electricity and just use The Force.
Anyway I get to Mt Colah, which is before the twisty country road section actually starts, but is well past the outskirts of Northern Sydney.
Then I hear…wukka-wukka-wukka. I pull the handbrake up a bit to diagnose, but it doesn’t go away, so I don’t think it’s brake related. It’s speed related for sure….then the wukka-wukka becomes clunka-clunka-clunka, and I decide to pull over asap. By the time I pull over, clunka-clunka is now BANG-BANG-BANG. I experiment and go fwds at walking pace: Bang…pause….Bang….pause. Go in reverse….nothing.
Poke my head under the back of the car (dagnabit how do you turn on the light on a Sony Ericsson C702) and the driveshafts seem ok, the wheels don’t have any play so I think it isn’t wheel bearing related, and there isn’t anything silly like the exhaust deciding to rub on the halfshaft.
But the diff is a bit hot to touch and is covered in oil….
So all factors seem to point to the diff. Then at that moment, a Silvia pulls up and two guys get out, James and Brendan who turn out to be mechanics who have also been following the build thread and recognised the car! They jump in for a short drive back and forth and after a poke around under the back of the car, all three of us are thinking that it’s the diff (well it was the best diagnosis we could come up with given that it was on the side of a deserted road in pitch darkness). Anything out of sight rubbing on something would make the noise going both fwds and backwards and yet this only made the noise going fwds.
So I call the NRMA, and get towed home. I discuss the car with the towie who agrees that generally diffs will seize only in one direction and if it isn’t clunking in reverse then that is the best bet. So we load the Hako onto the towtruck so that we can reverse off, and when we get to my place, he reverses the tow truck up the driveway as far as he can (overhanging trees were threatening to scratch the Hako on the flatbed) and I gingerly reverse the rest of the driveway and into the garage.
Phew…I was worried that the diff would blow and seize halfway up the driveway (which is 80m long and uphill). Then again I guess I’m a little lucky because the diff could have chosen to go when I was really up it on the countryside, where there might not have been any mobile reception….or I might have been having so much fun that I didn’t notice the noise, and it locked up and unloaded me around a fast corner…
Oh well, tomorrow I start taking things apart. I guess I was always going to upgrade to an LSD anyway…
Righty oh, into the diff we go.
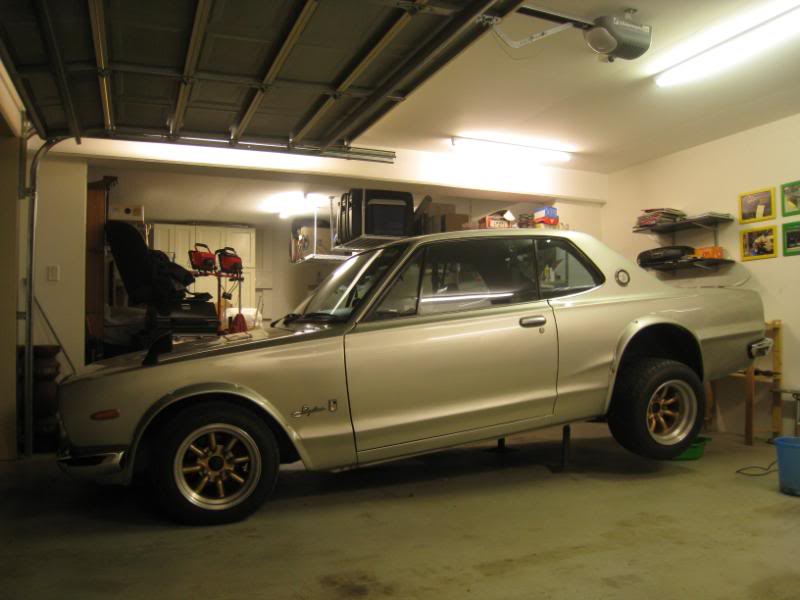
You can see that the bottom of the diff is a bit wet with oil, so is the top bit around the moustache bar

…and it had plenty of oil in it. When we checked it a week ago, it was if anything a little overfull, but today the level was maybe 1cm below the fill hole. So it’s lost a little bit of oil but had plenty left. The first part of the mystery is that the oil coming out is…clean.
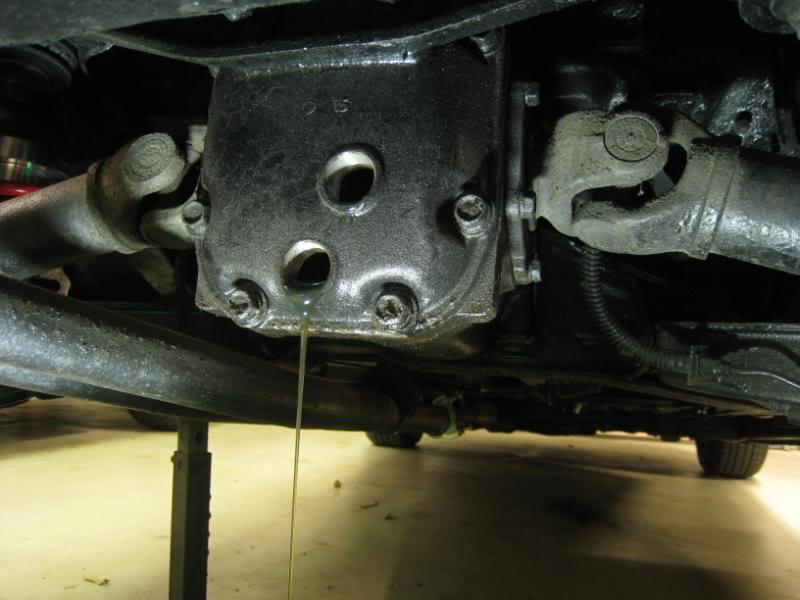
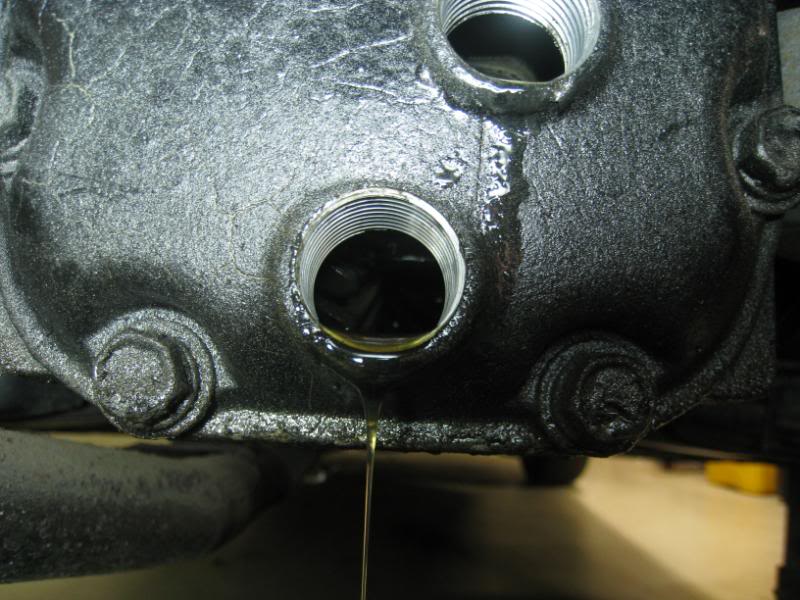
No bits of metal or swarf…at all.
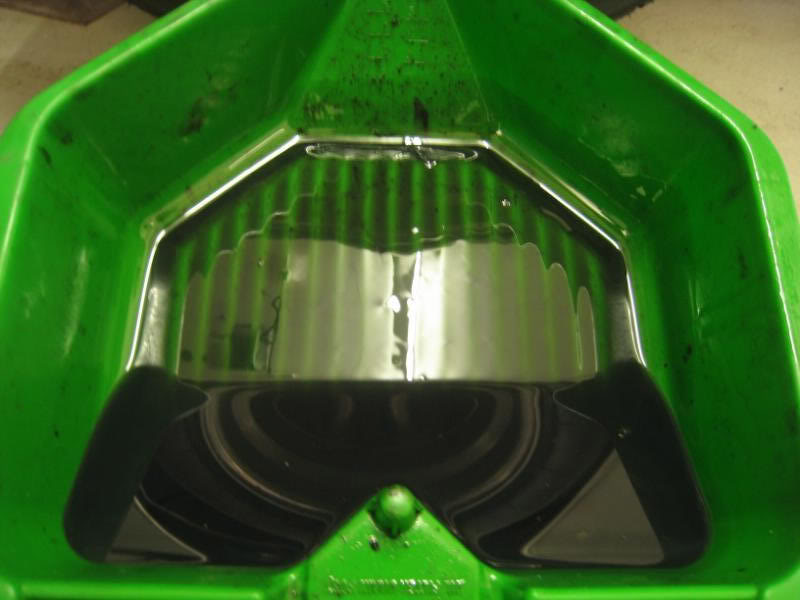
Not even on the magnetic plug
I peeked inside the fill hole and rotated the half shafts and as far as I could see, no missing or chipped teeth, and everything rotated smoothly.
I checked the brakes in case it was something weird like one of the shoes coming loose and locking but they look normal too.
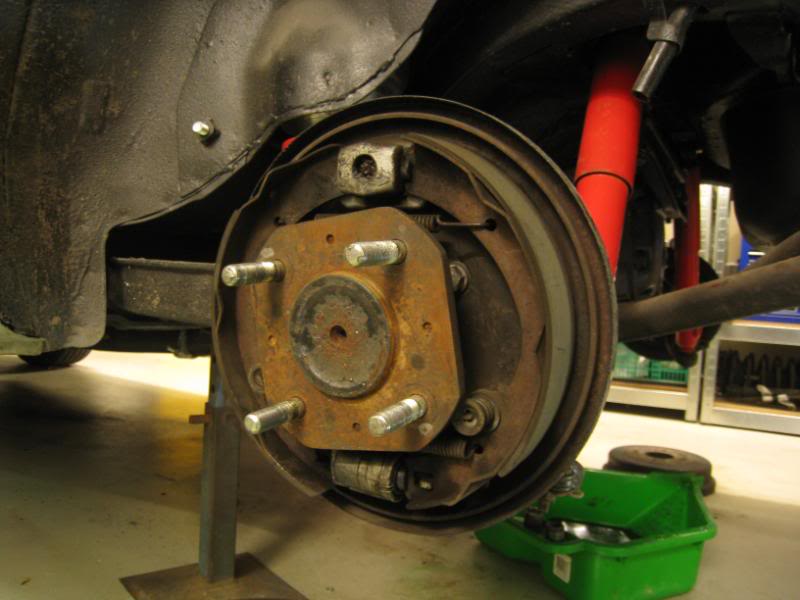
I would have thought that if there was anything wrong with the diff, there would at least be some sort of damage, but the oil is clean as a whistle. One of the wheel bearings feels like it might have a tiny bit of play, but I can’t see how that would have contibuted to the bang-bang-bang noise (roughly one bang per wheel rotation).
Okay…now officially confused ![]()
Ze plot…it thickens…
Okay. Fact that the driveshafts seem ok..
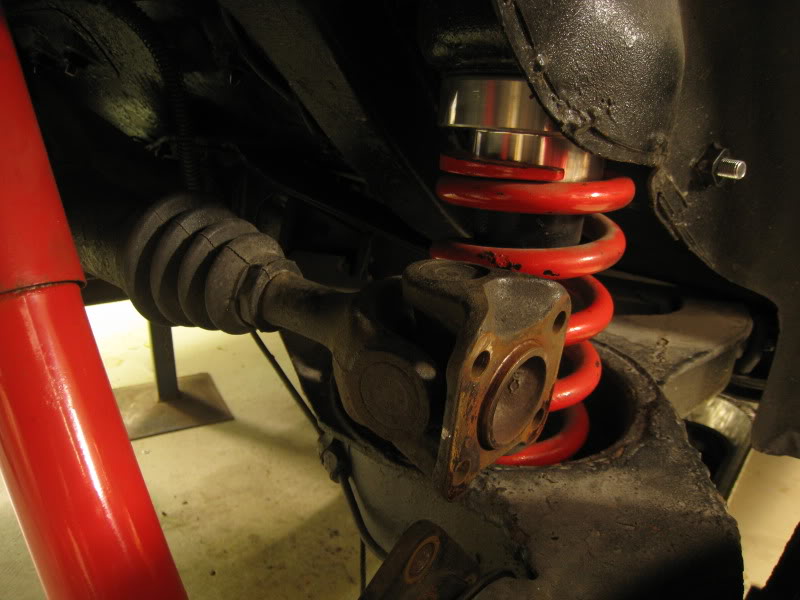
…and the fact that there was no shrapnel coming out with the diff oil (in fact nothing came out at all), plus the fact that a few Datto owners have contacted me to say that yes, they tend to make that banging noise when wheel bearings go…suggested to me that the wheel bearings might be at fault. But when I rotated the axle, they rotated smooth…
So I disconnected the driveshaft and removed the drum, just so that I could spin the stub axles by hand freely without the inertia and friction of the shafts/diff etc.
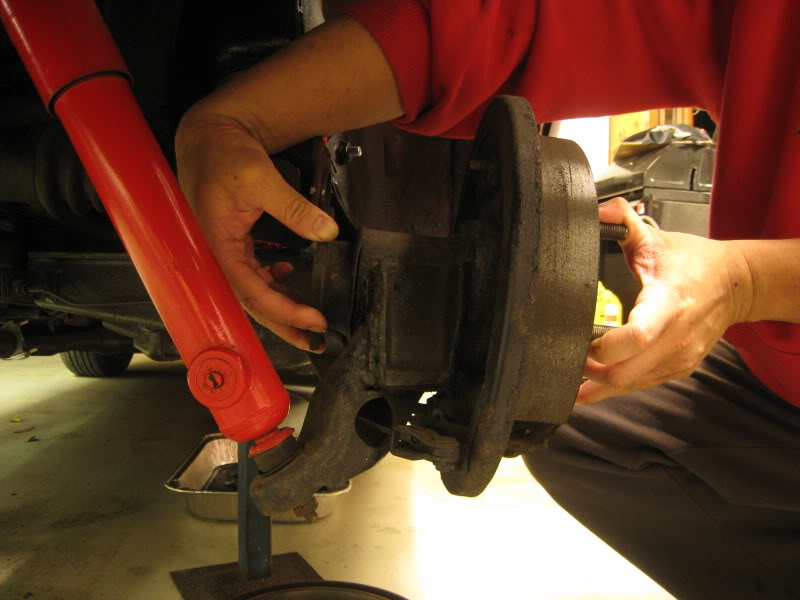
And…both sides spun smooth as silk. In fact, looking at the stub axle inner nut, it seems that it’s been changed, not that long ago (and in fact the person who did it seems to have forgotten to “stake” the nut in place)
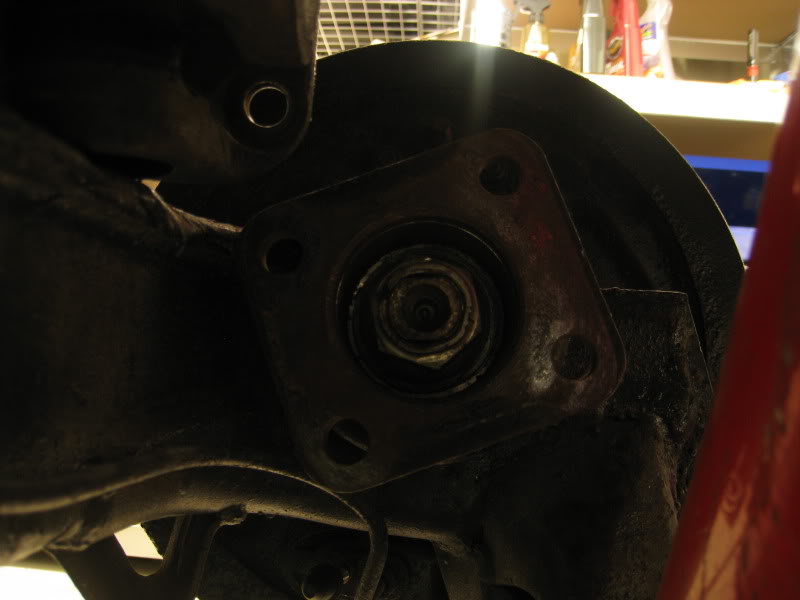
So at this stage, it looks like…nothing’s wrong. If I had to bet, I am thinking maybe it’s the bearings. They have definitely been messed with, and maybe were reassembled without the spacer tubes inside or something. So the next step will be to remove the trailing arms for a looksee at the bearings.
Ok had an hour to kill today so decided to have a play with the wheel bearings.
It was the passenger side which seemed to be making the clunking noise, and it is the side that has suddenly developed a tiny little bit of play. So I started with that side, and did a quick rig to get some leverage on the inner axle nut.
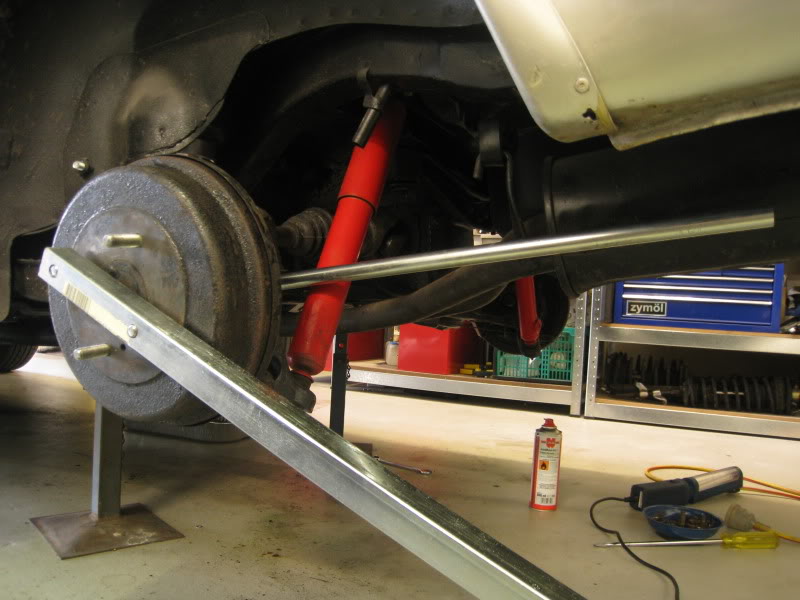
In hindsight, there is no way this should have worked. The manual says that the axle nut is meant to be done up to 180ft/lbs of torque, which is bloody tight (cylinder head only needs 60) and the manual recommends a bar of “at least 3ft” long to get enough leverage to remove the nut. But if anything it came off without any heaving at all and was a bit loose.
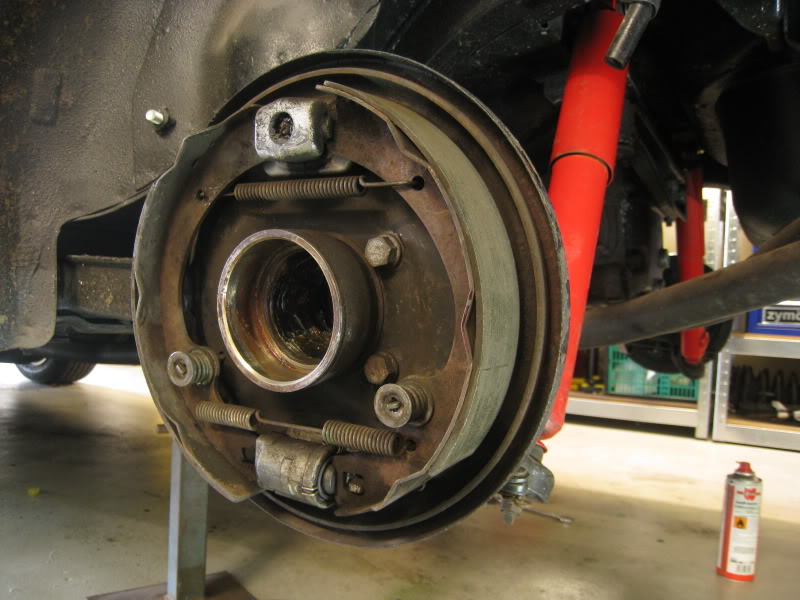
The inner and outer bearings are intact…
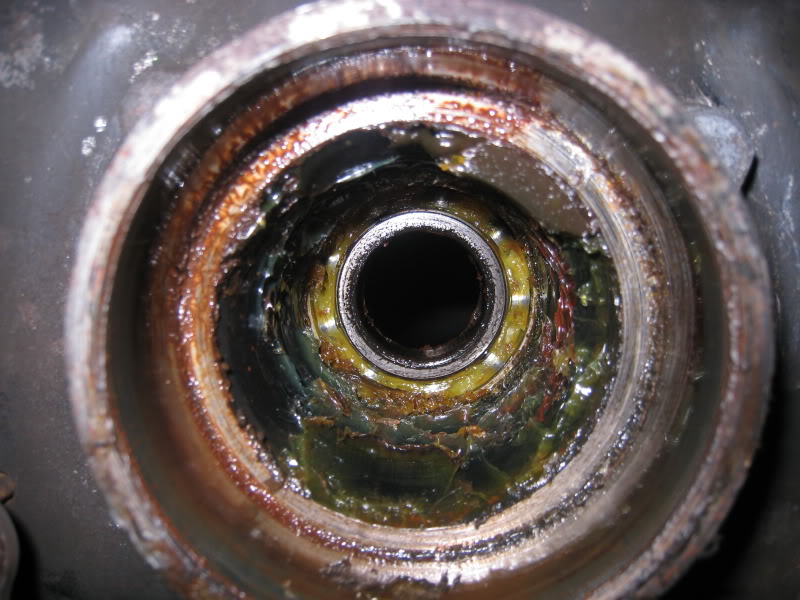
The component parts laid out in order…the stub axle, outer bearing, crush tube, inner bearing, dust seal, inner axle stub, spacer and nut. The bearings seem ok and don’t seem to be sloppy or anything. There are a bit of rust stains in there though.
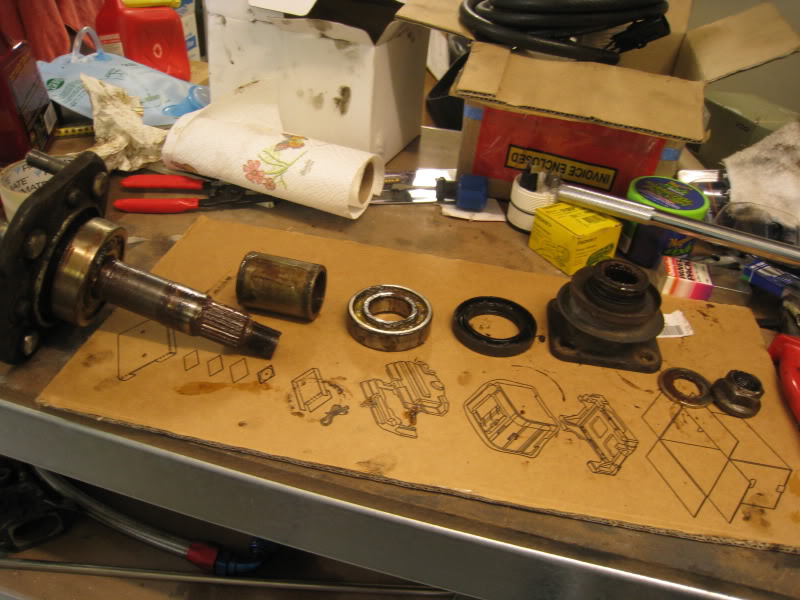
The last ppl to replace the wheel bearings in Japan ground off the top of the axle nut, so that they could recycle it. But there is not enough of a “collar” sticking up for the nut to be staked down…this is the passenger side which is unstaked, but the nut on the other side definitely is staked.
I’ve got new bearings, axle nut and dust seal lined up and ready to go, I just need to take the whole caboodle to a workshop to get the outer bearing pressed out and the new one pressed in.

As further proof that maybe the passenger side was loose…this is what happened when I (unsuccessfully) tried to remove the driver’s side axle nut ![]() I couldn’t budge the thing even the slightest little bit.
I couldn’t budge the thing even the slightest little bit.
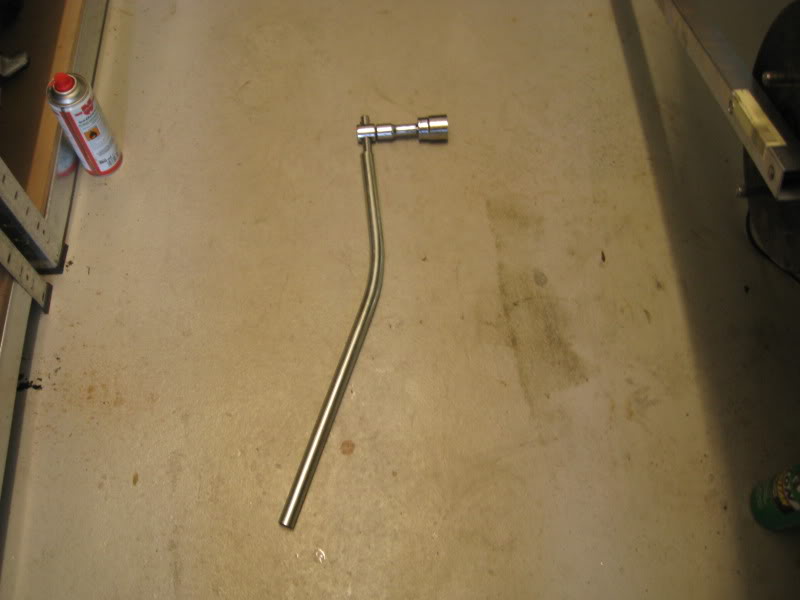
I’m thinking…maybe the passenger side was loose? I’ll get the bearings replaced on that side, put it all back together and see how we go.
Ok, first I started off with replacing the bearings on the passenger side (that was the side with the loose axle nut).
I’d ordered a bearing kit from Datsport, and had the new outer bearing pressed onto the stub axle by my friend John Edwards. The outer bearing is a very tight press fit.
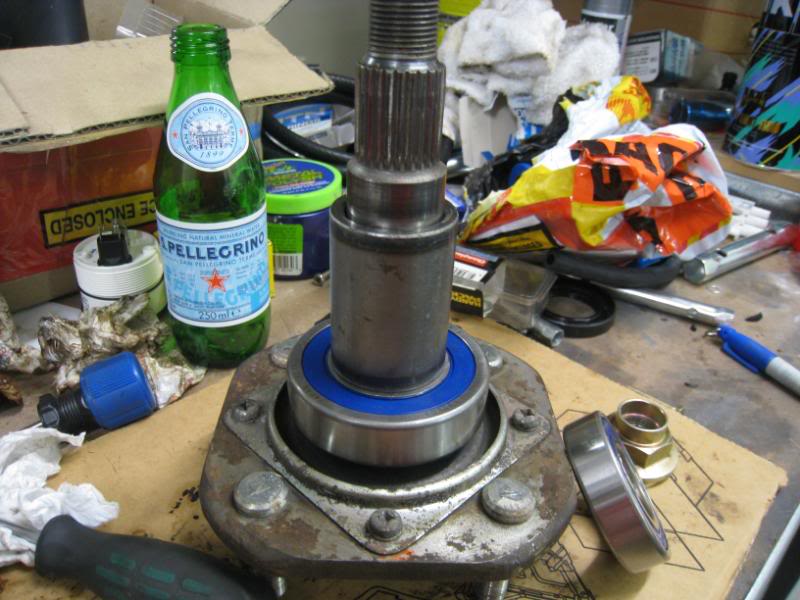
The inner bearing is then tapped into place, I used a big socket as a drift then tapped it into place with a big plastic hammer.
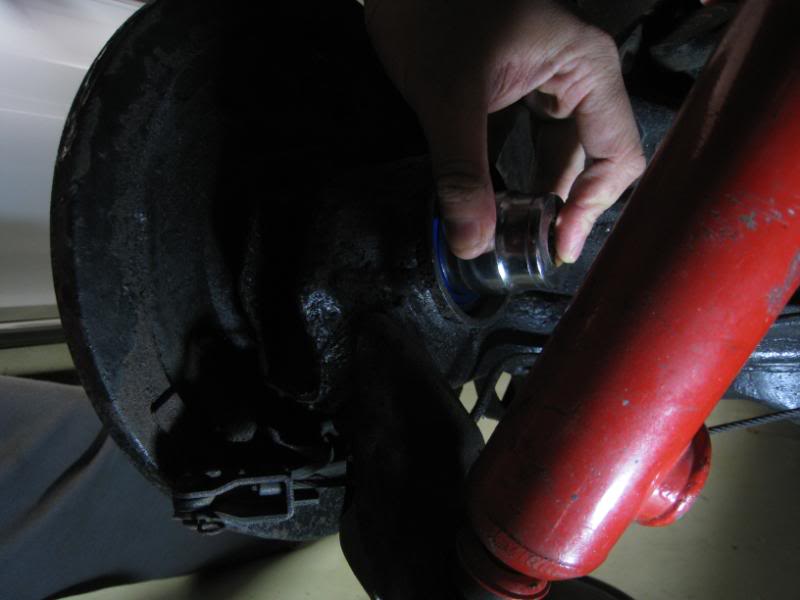
It has to go quite deep into its hole.
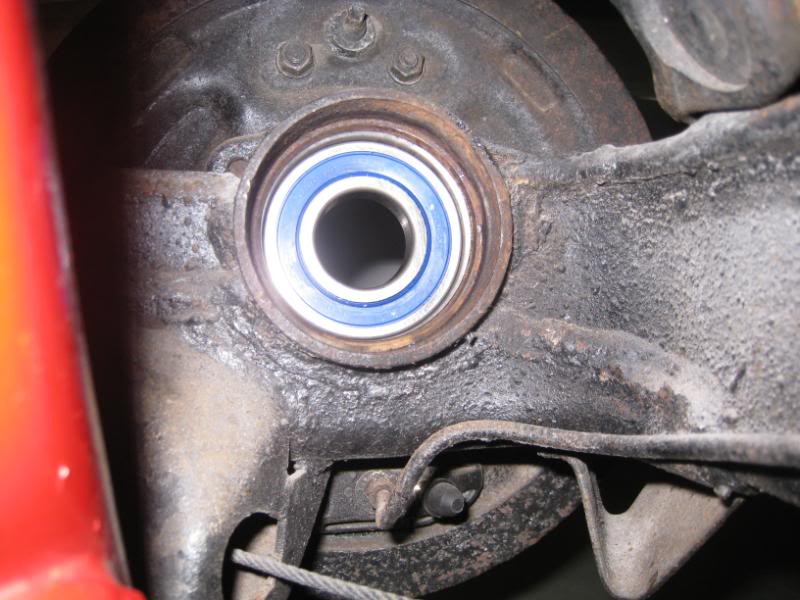
Then offer up the axle, with outer bearing and crushtube in place, and that needs to be tapped into place with the plastic hammer too.
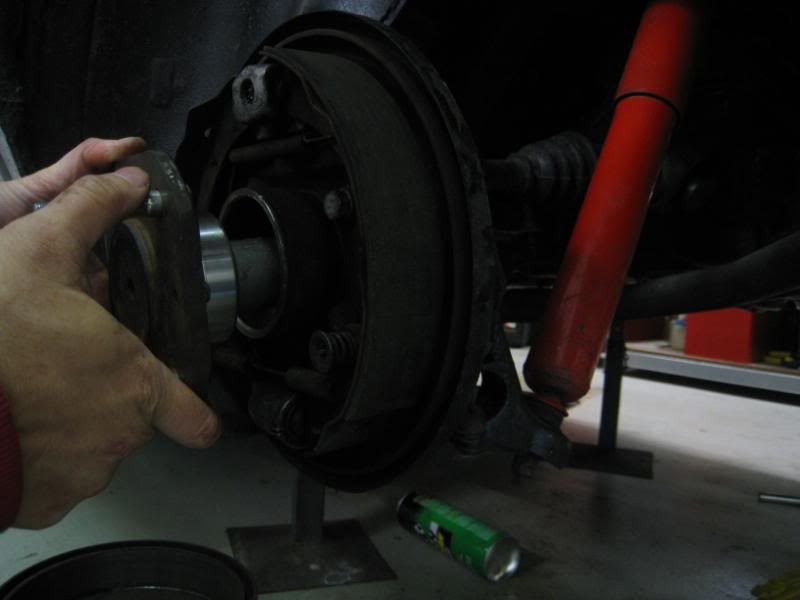
…no grease needed since these are modern sealed bearings, except for a little bit on the axle nut washer so that it all torques up smoothly.
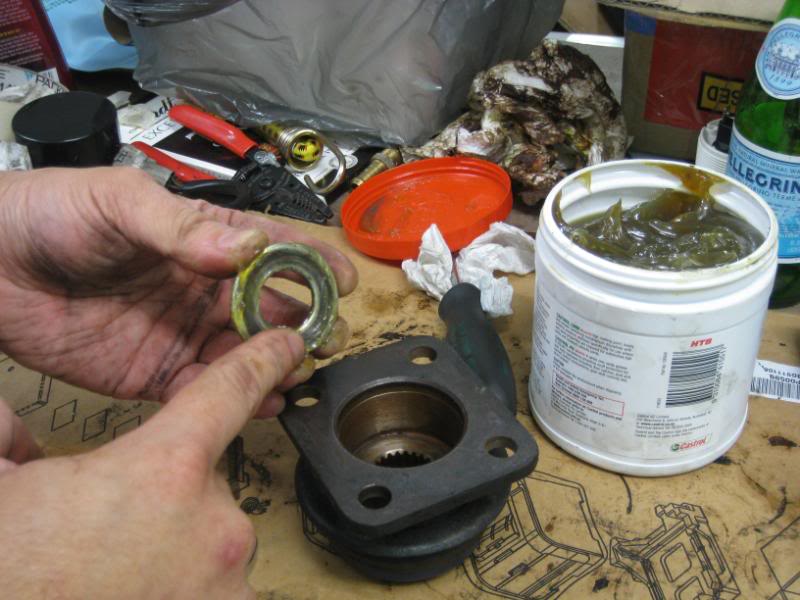
Axle nut in place and ready to be torqued up…the manual says that the next step is to put the wheel back on, drop the car back on the ground, handbrake up, and then tighten the nut to 200ft/lbs (which is a hell of a lot) and then loosen, and retighten to 105ft/lbs. I guess this is to make sure the bearings are all seated properly. Then finally I’ll hit the collar of that axle nut with a big screwdriver to stake it to the flat part of the axle stub.
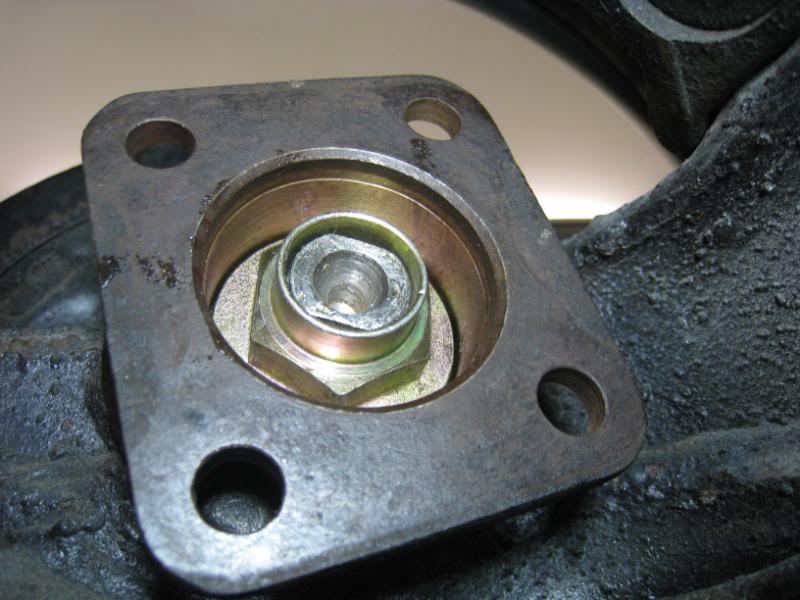
Then I started on the driver’s side, which didn’t seem to have anything wrong with it, but since I had ordered bearings for it, I thought I might as well change them too. The first problem was the axle nut, which had the collar cut off, but they managed to stake it against the threads of the axle anyway. Normally what happens is that you dremel off the collar, and then undo the nut normally, but this is not possible in this case…
…and trying to remove it by hand bent my cheater bar like a banana
I tried to push out the stake mark as best I could with a screwdriver and hammer but the more I did it, the more I wrecked the threads…so I went to Bunnings and bought this $99 900W el-cheapo Chinese rattlegun, which as you can see is not a modest implement and is rather a huge, heavy thing.
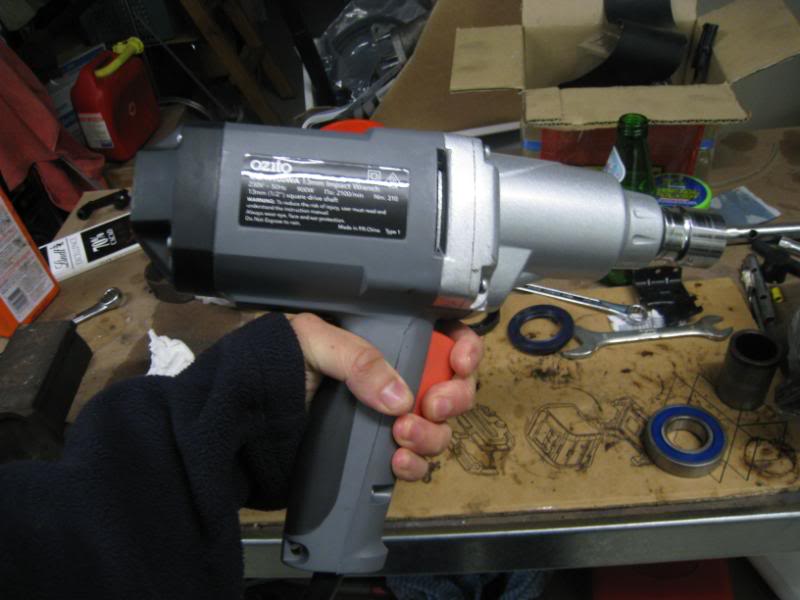
The rattle gun spun off the nut like NOTHING and is now my favourite tool! But another problem emerged. The outer bearing was fine, but it seems like at some point in the distant past, it’s had a seized bearing, which wore a groove into the axle. And rather than replace the axle, the previous guys just pushed a new bearing on top and hoped for the best.
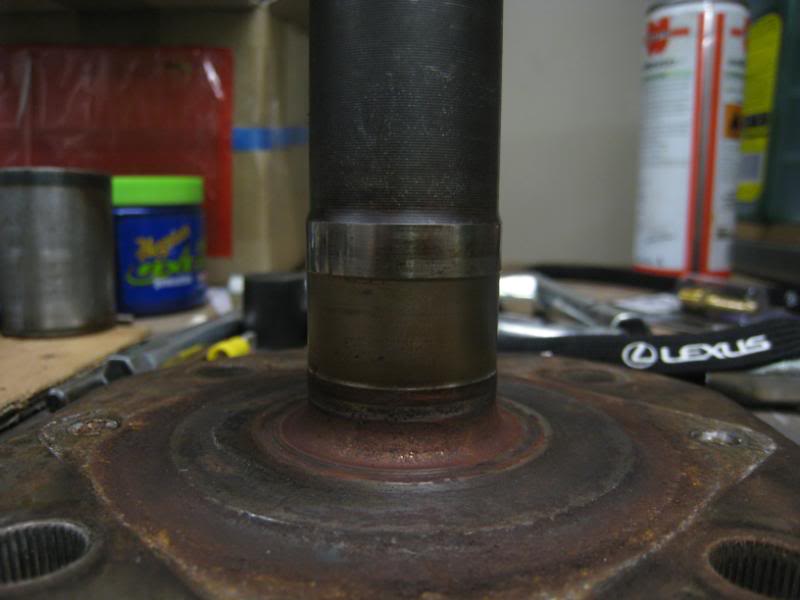
The problem was that when we installed a new bearing, instead of a tight press fit you can wiggle it around a little with your fingers. Now, since the bearing is squashed in place by a spacer on the outside and a crushtube in the middle, it’s held in place very well anyway and probably isn’t a bodge that is that bad…but I figured since we want to track the car, I’d always have the image of that dodgy axle at the back of my mind…
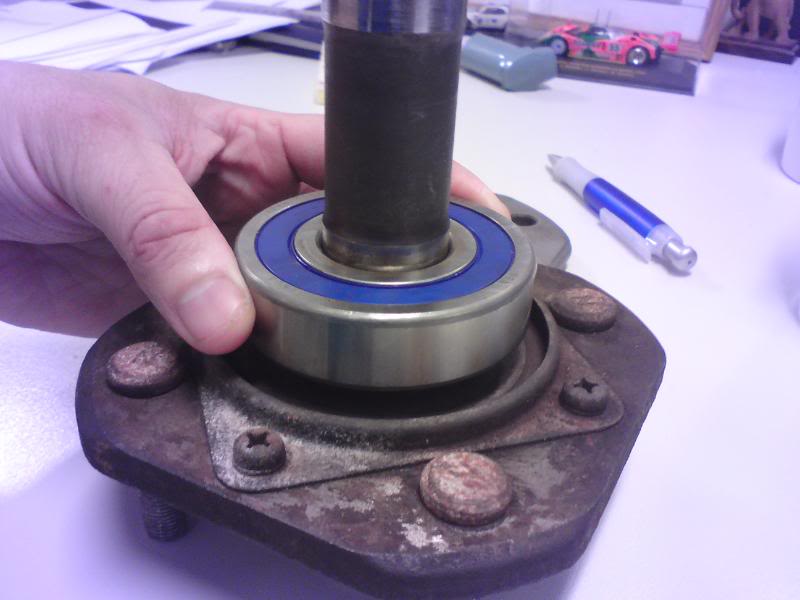
…So I bought a good stub axle from Stewart Wilkins Racing.

…which has a good, undamaged surface (had to swap across the wheel studs and the dust seal)
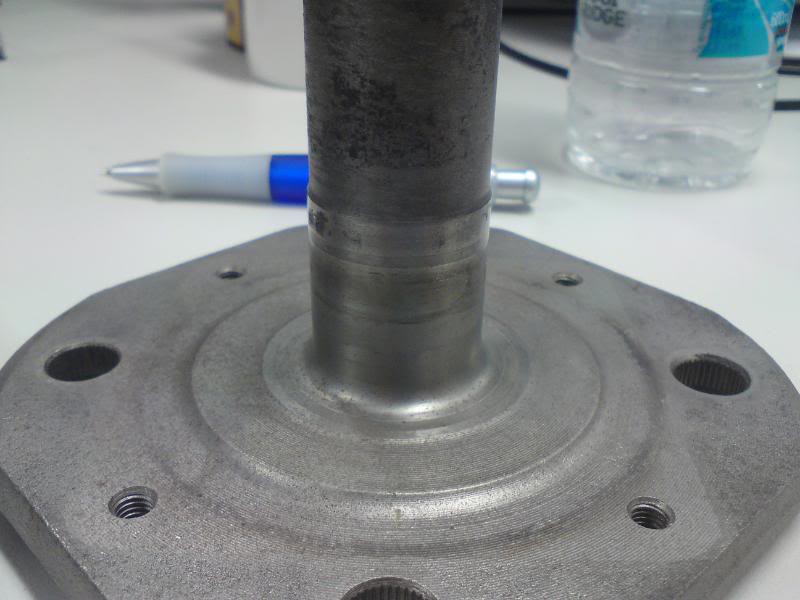
Press on the new bearing and it’s a perfect fit.
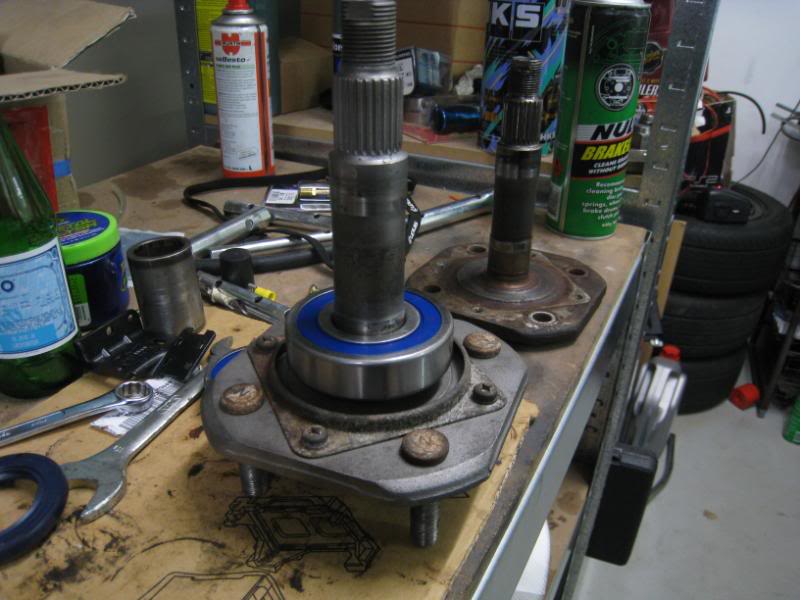
And in it goes!
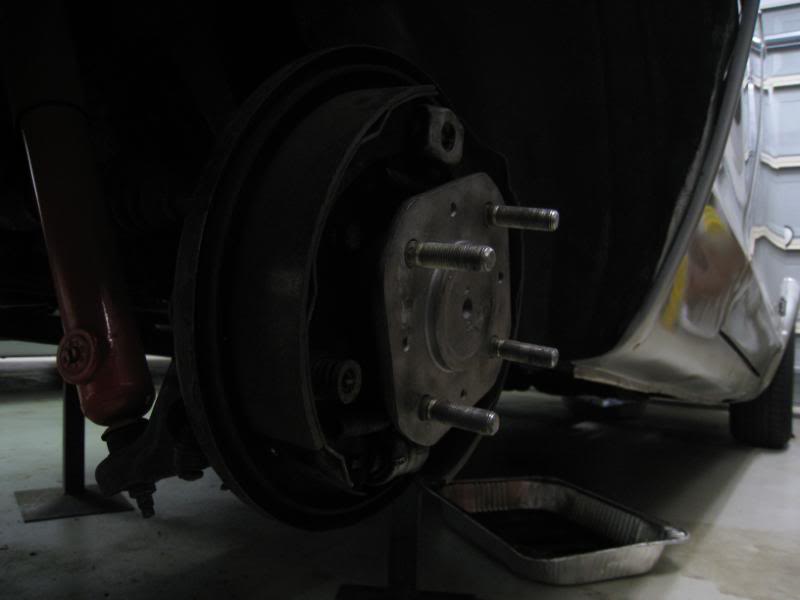
Both sides are ready to be torqued up, and we’ll see if it fixes that clunking problem. I’m not sure if the wheel bearings were the issue, yes the passenger side one has a loose axle nut, and the driver’s side stub axle was worn and had a bit of play, so I’m glad we’ve fixed these things, but I’m not 100% sure if either thing was enough to create a loud clunk…anyway we’ll see soon enough ![]()
If not, everything points to the diff as the culprit again ![]()
Ok, where we left things a few days ago was that I’d installed the bearings, but hadn’t torqued them up yet, which is a bit of a process since they have to be done super-tight…manual says 180~240 ft/lbs which is HEAPS….if you use a spanner 1ft long, tightening it would be like lifting 240 pounds, and so I needed to brace the hub with a long bar that attached to the studs and jammed against the floor, use a massively long cheater bar, etc.
Oh yes the thing I forgot to mention the other day was that before the driveshaft flange goes on, you have to install the dust seal, which is a rigid plastic ring that needs to be tapped firmly in place.
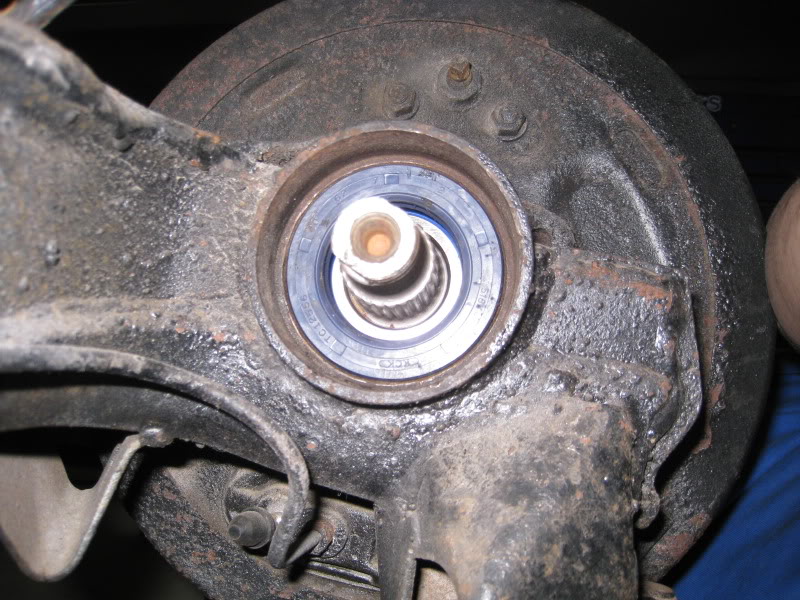
Eventually the nuts are all tight and ready to be staked, which as you might recall, the previous japanese owner didn’t do, and so the passenger side nut was working its way loose. Notice the flat sections on the nose of the axle?
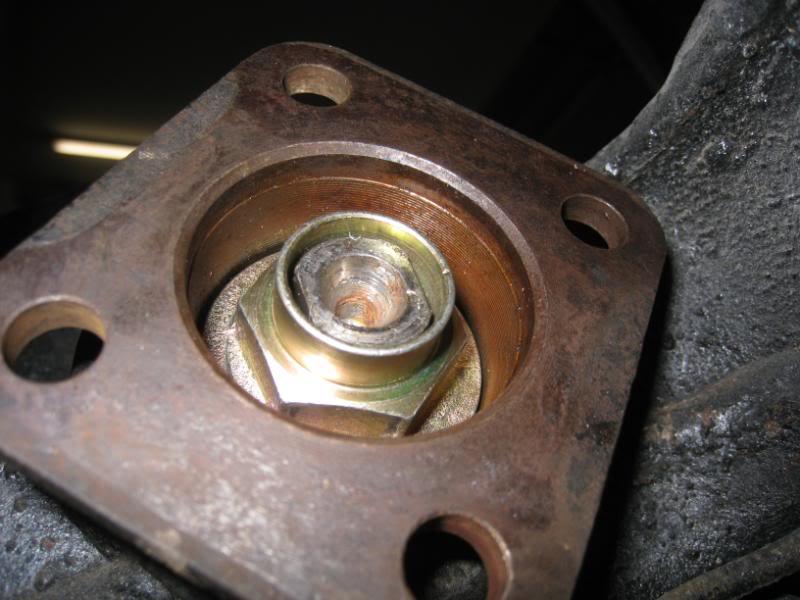
I get a hammer and a pin punch (which has a flat end, so shouldn’t damage the axle nut as much as using say a chisel or flathead screwdriver would)
A few taps with the punch to dent the axle nut collar down onto the flats of the axle. The idea being that it should be impossible for the axle nut to loosen itself without the indentations jamming against the flats.
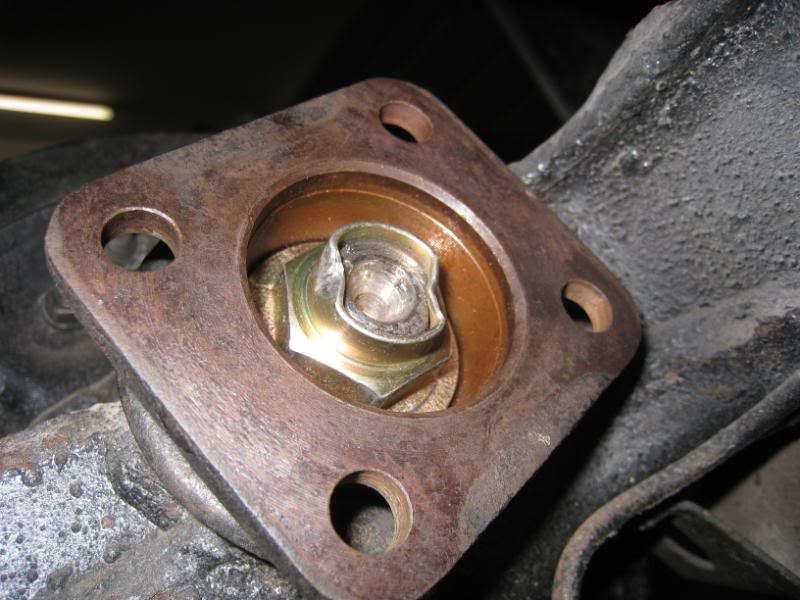
One really cool thing that happened this week was that Royal Purple Oil had agreed to support the project, and so you’ll see me using a lot of Royal Purple products during the build ![]() But I’m sure you guys would have figured it out eventually
But I’m sure you guys would have figured it out eventually ![]()

Then the half shafts get bolted back onto the stub axles, and before we take it for a drive the diff needs to be refilled with oil…and I’m going to use something that I used a lot of in my old drifting days, Max Gear 75~90W, which is a synthetic gear and diff oil.
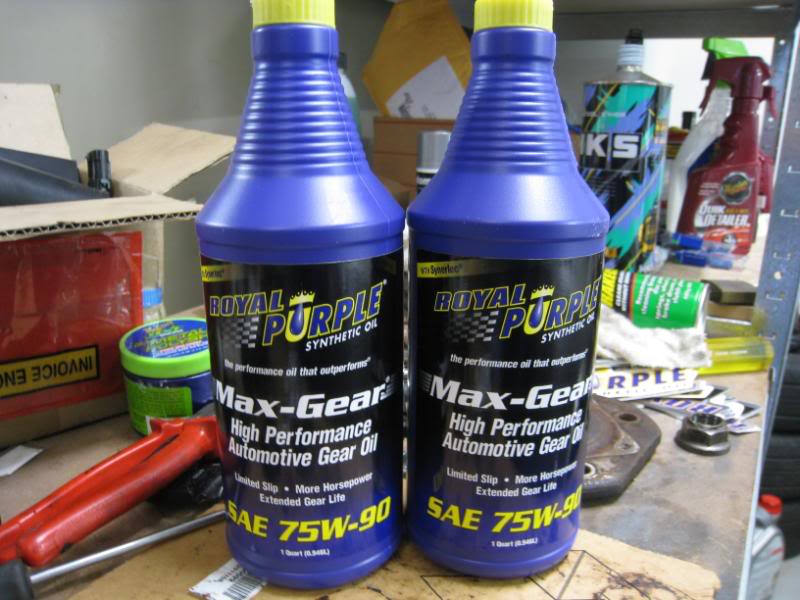
The Max Gear comes in a squeezy bottle so it’s quite easy to squirt into the diff (the bottle is quite crushable so you can get the last bit out).
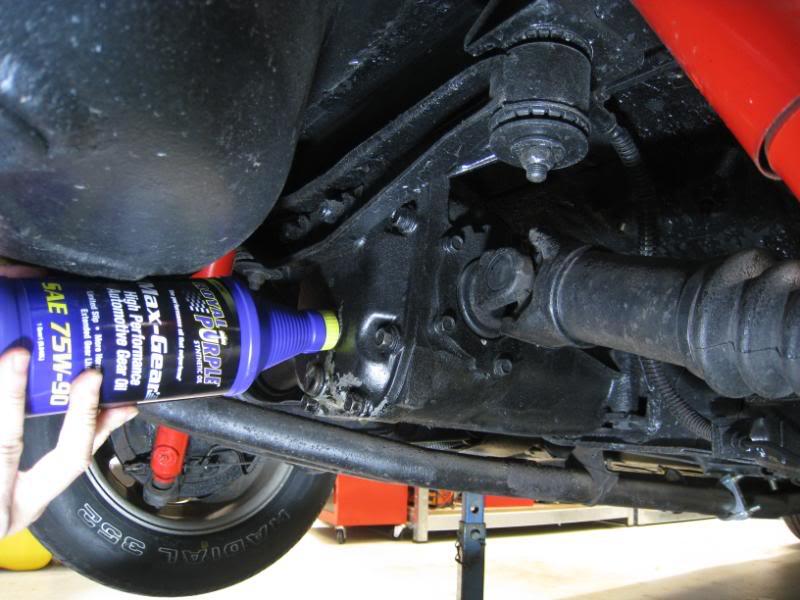
And with that…..I dropped the car off the stands and gingerly drove out of the garage….and from a quick drive it seems to have been fixed. So I guess the culprit for the clunking noise must have been the unstaked passenger side axle nut, which was loosening itself (it was hand tight) and allowing the axle to flog about. But now we have new bearings and a new axle on one side and I have to say it is quieter rolling down the road, so the old bearings must have had some wear. The next thing is to check and renew the front wheel bearings if necessary.
But I’m really stoked about my new association with Royal Purple! It’s high end stuff of good quality, so when the JNC editors tee’d it up with Royal Purple USA, they didn’t exactly have to twist my arm ![]() I’ve never had a sponsorship of any description ever before so I think this is really cool…..and I get a funky inflatable oil can too.
I’ve never had a sponsorship of any description ever before so I think this is really cool…..and I get a funky inflatable oil can too.

The running-in continues ![]()
Tonight, some tuning, to fit these: 140 main jets for the Webers
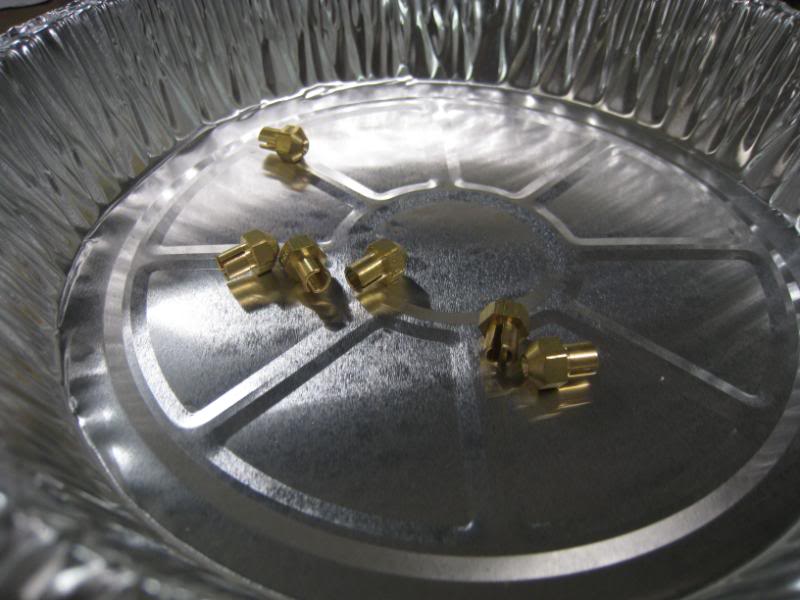
I’d wanted to do this for some time, and I’ll explain why. As you know, last year we tried every tuning trick in the book to get the engine to run, all the while not knowing that there were some deep-seated issues that wouldn’t be sorted until we bit the bullet and tore down the engine properly. When it came to jetting the carbs, the Weber charts (google Weber DCOE tuning, there’s tons of recources online) suggested main jets of 130, based on engine size, choke size and power peak. It’s just meant to be a good starting point, and we ended up with 125 mains, which is one notch leaner.
As part of the rebuild, Nathan recurved the distributor, with an advance curve that didn’t max the ignition timing until 4500rpm, and total advance was 14 degrees. This struck me as being a little unusual as I thought it was ideal to get all of the advance in by say, 3000rpm. But given that the Hako runs very high 11:1 compression I figured having a non-aggressive advance curve would not be a bad thing since it would provide a buffer against low-rpm pinging. When Nathan finished building the engine, he set the ignition timing at 14BTDC. This was 3-4 degs less than ideal, the idea being to set the tune soft while running in the engine. When the Hako passed 1000kms, Nathan set the timing at 18BTDC, so with the 14 degrees of mechanical advance that the dizzy would add with revs, that means max ignition advance of 32 degrees at 4500rpm.
But when I drove the car back home, there was a bit of pinging at 3500rpm (when the dizzy is adding its last bit of advance). So I backed the timing off to 14BTDC again and the pinging went away. But it also meant that max ignition timing was now only 28 degrees, which by rights is not enough to make top end power. I figured that running the carbs a little lean probably made the pinging worse. 125 mains were close enough to the Weber recommendation of 130, but at 3500rpm the cam is really starting to kick in, and the dizzy is continuing to add advance, so the Hako probably needed more fuelling in the midrange than normal.
So the plan was to fit richer mainjets to fatten up the fuelling in the midrange, and then adjust the ignition back to 18BTDC again. With Webers, changing jets is really a 10minute job…just undo the round cover at the top of the carb, then start to remove the emulsion tube, which is basically a main jet holder (that long stick…there’s 2 per carb)
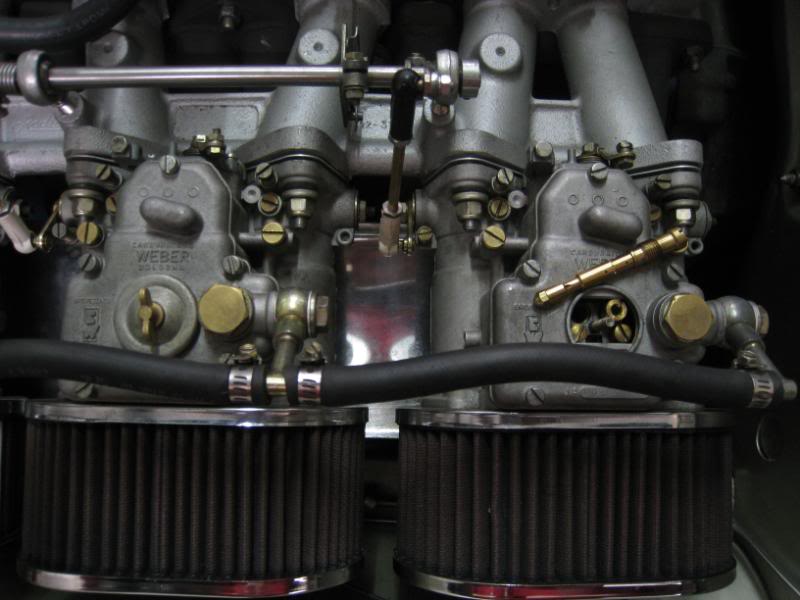
The jets just slide on the end of the tubes, you can pull them off with just your fingers
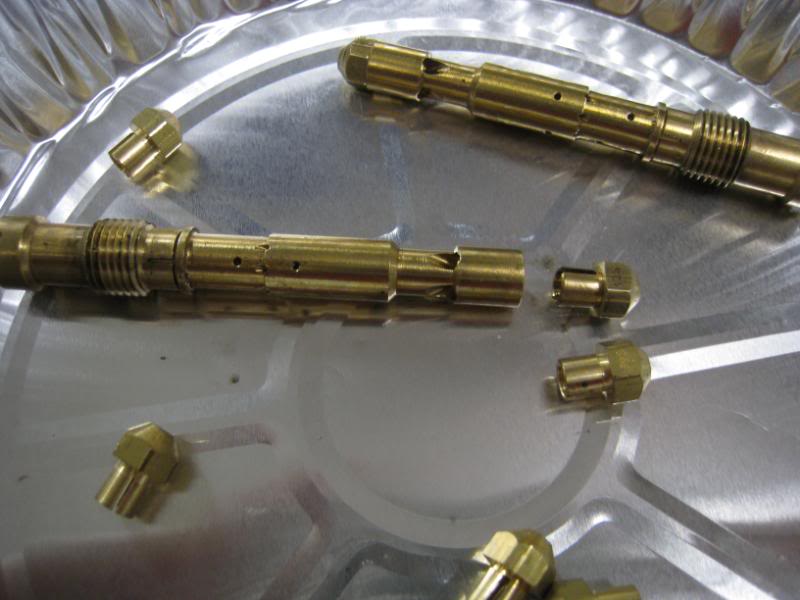
…swap the 125s for 140s
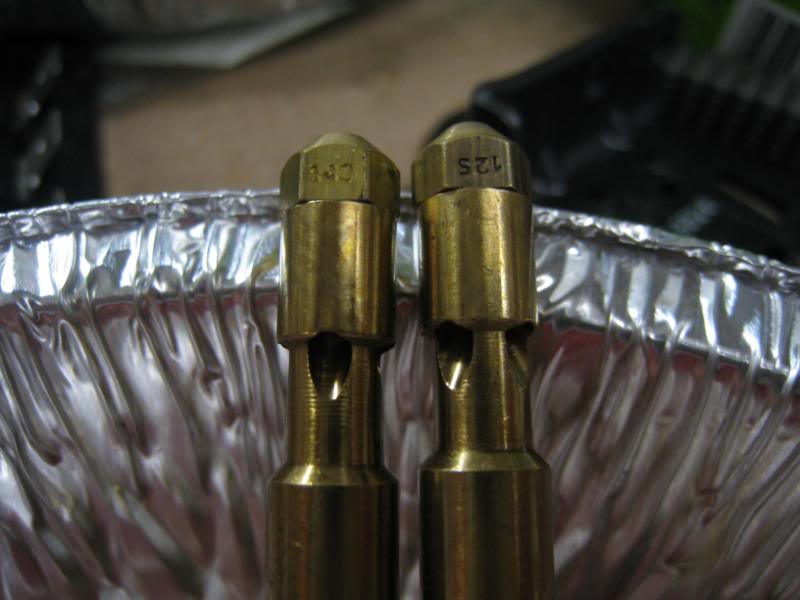
And pop them back in. And that’s it!
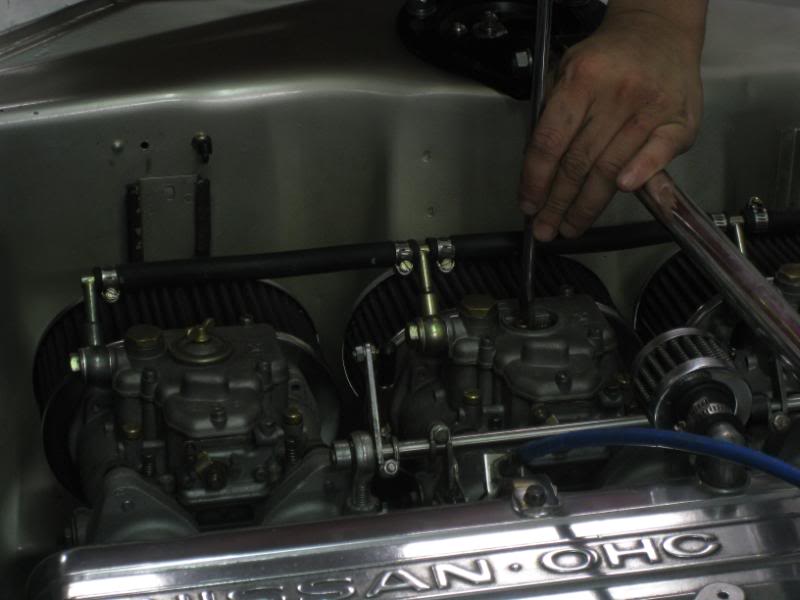
First I took her for a run with the ignition at the existing setting. At 2500-3000rpm there’s a little bit of fluffiness where before it was really sharp and toey, but above 3000rpm it really seemed to pull more cleanly. I figured this was a really good start, and very possibly the fluffiness at 2500rpm might be a hole that the extra ignition advance would fill…
So I got back into the garage and advanced the ignition timing to 18BTDC, and then went back out to see if the pinging returned. So far, no pinging! There is definitely a loss of sharpness at 2500rpm, but above 3000rpm it’s a lot better.
I’ll drive it around a bit more in the next few days to see, but I think these new jets might be what the engine wants.
Went out for a quick drive tonight (1600kms on the odo) when the Hako decided to have a minor wobble….PING! goes the alternator charge light.
I limp to the nearest servo and the answer’s pretty obvious, the +ve wire coming off the back of thr alternator was detached. I’ve cleaned it up a bit here, but the ring terminal was burnt and the first cm of insulation around that thick wire was toast.
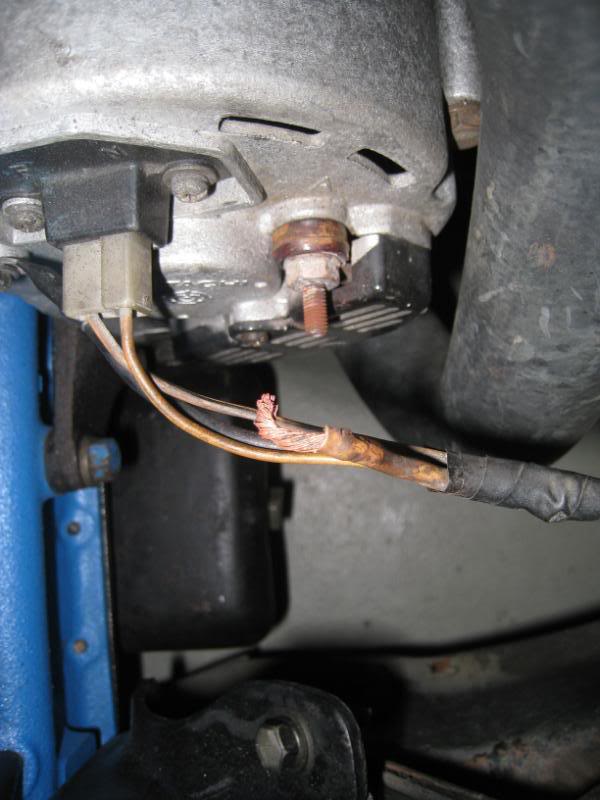
So was the rubber cap that goes over the terminal

I think maybe what happened was that the ring connector was getting a bit crusty and maybe some of the wiring was severed…and then when the charge tried to pass thru the remaining (few) strands they burnt out.
So I cleaned things up as best I could and Macguyvered the wire back onto the back of the alternator.
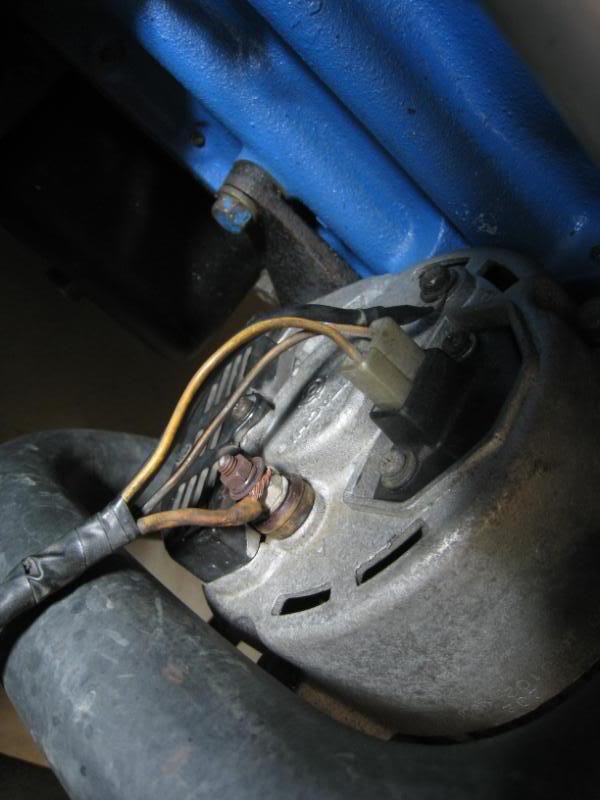
…that I woulda thought, should have fixed it (at least temporarily) but the charge light was still on. The funny thing was, with this bodgy fix the battery was getting some charge in the low 13Vs, which I thought would be enough, but the charge light is still on like a beacon.
I’ll clean it up properly and put a new ring terminal onto it tomorrow, maybe with a better/cleaner contact it’ll get more charge and the light will go out.
Well, since it’s seems more and more unlikely that a new connector is going to fix it, I pulled out the alternator and the voltage reg.
The alternator is quite easy to reach once the battery is out of the way, and a L-series-ism is now the lower radiator hose has to take the long way around the alternator. But after removing 3 bolts, the alternator can be wiggled out.
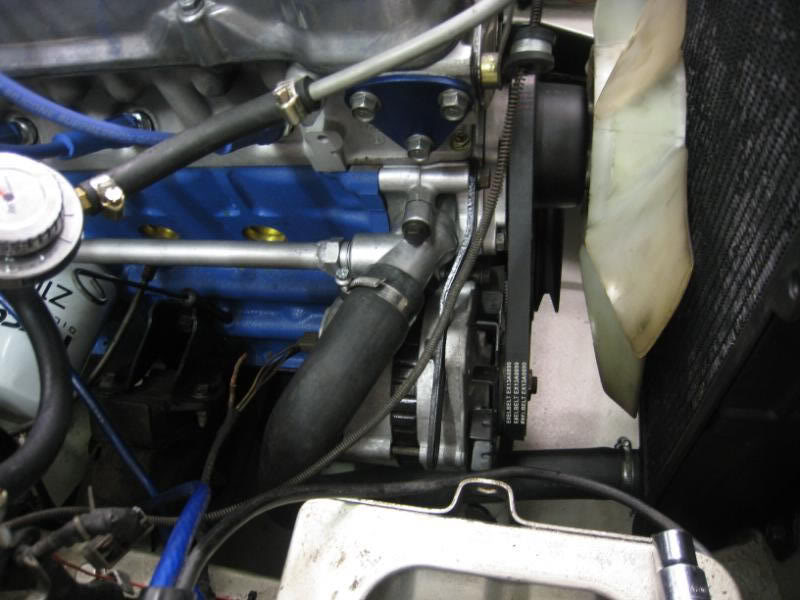
First thing is that there is nothing visually wrong with alternator….
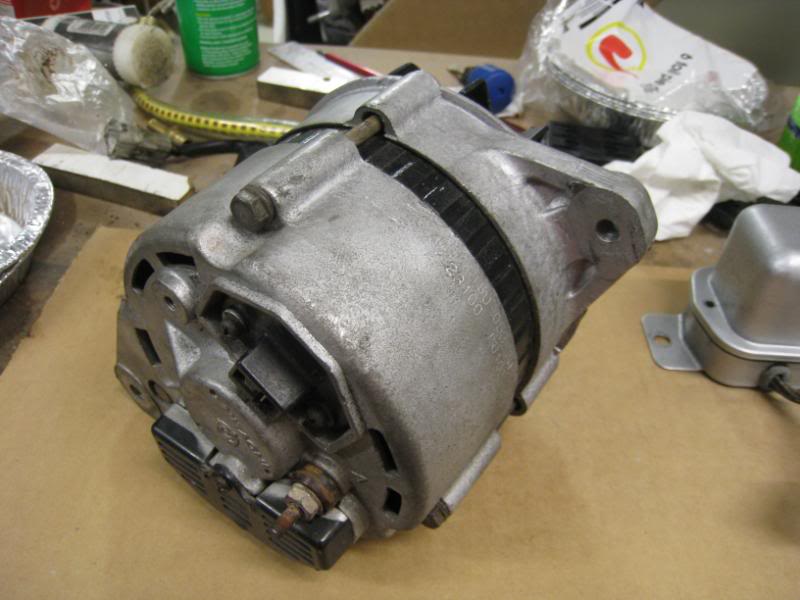
…although I really don’t know what I am looking for ![]() , there is nothing obvious burnt or broken.
, there is nothing obvious burnt or broken.
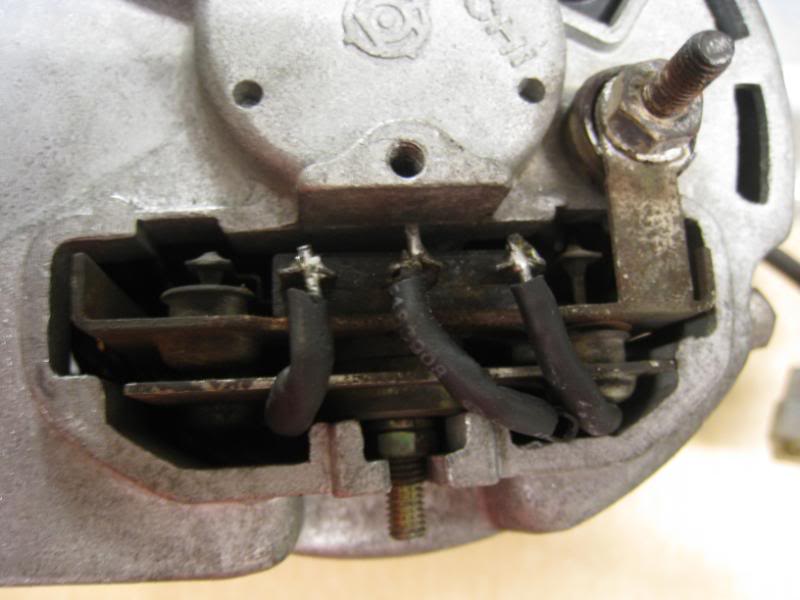
The terminal for the battery +ve wire is a bit crusty and rusted (it’s the one where the wire got burnt off)
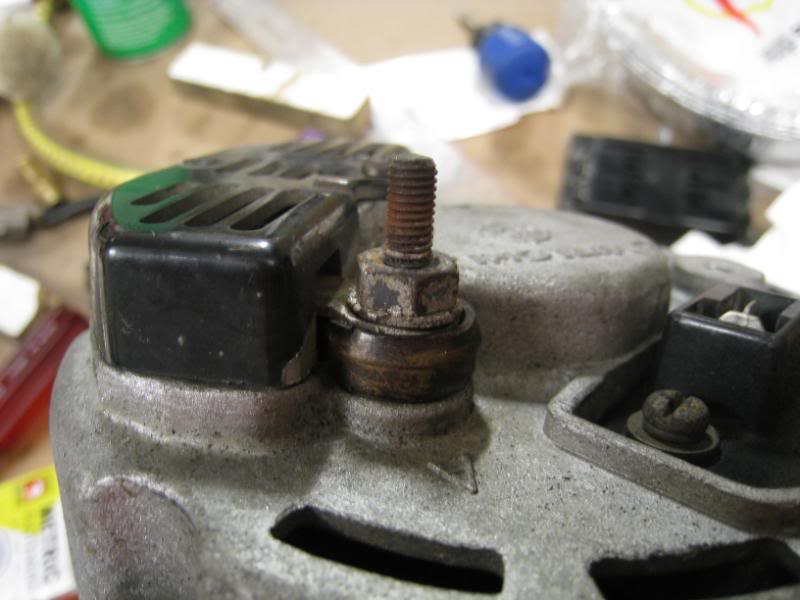
The nut was a little frozen so I decided to use some *cough* penetrating fluid to free it. Oh, look at that, I’m using Royal Purple MaxFilm, all all purpose lubricant with Synerlec, the same revolutionary additive that can be found in Royal Purple’s high end engine oils ![]()
Fancy that …anyway after a little bit of cleaning up (which was probably more for psychological benefit) it does look a lot better.
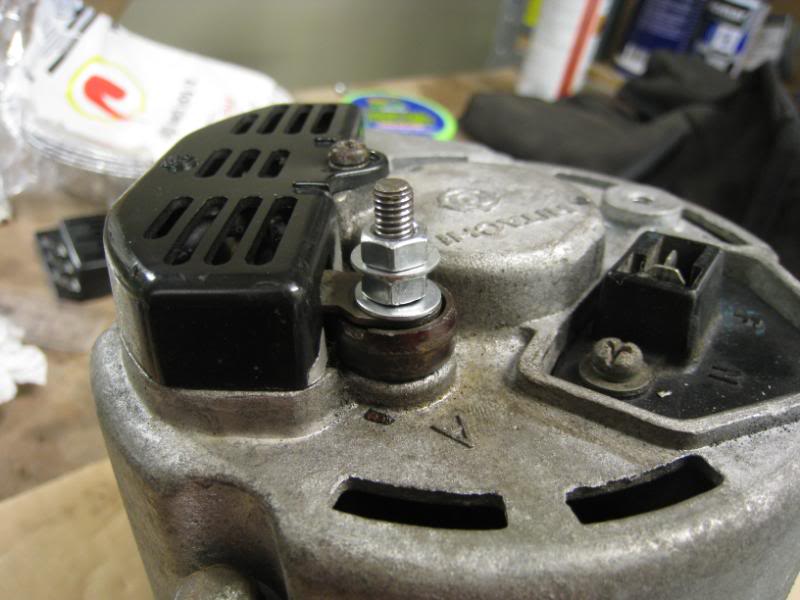
The voltage regulator is a metal box that’s bolted to the side of the engine bay. Externally there is nothing outwardly wrong, but hmm…
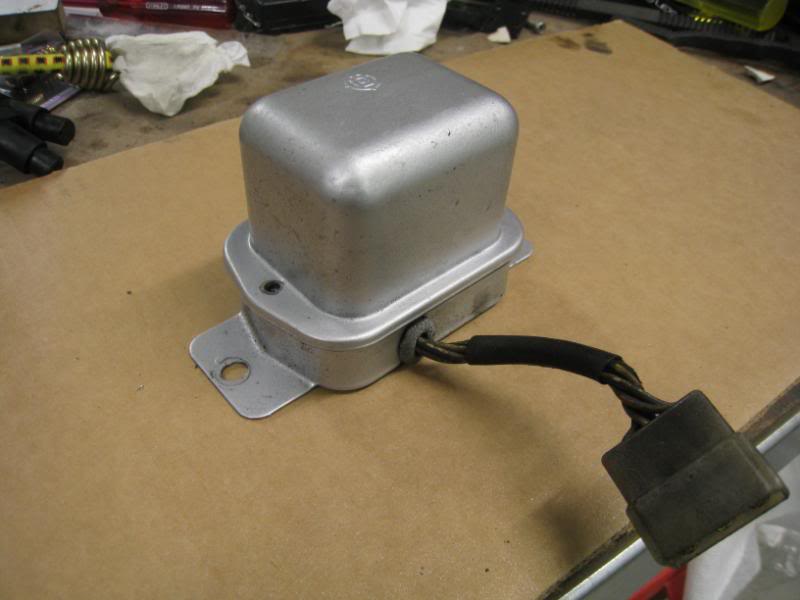
It’s actually a really oldschool thing, you can see that there are two halves of it, and it actually has mechanical contacts that flip up and down to make a circuit…but when you remove the cover there is a definite weird smell…
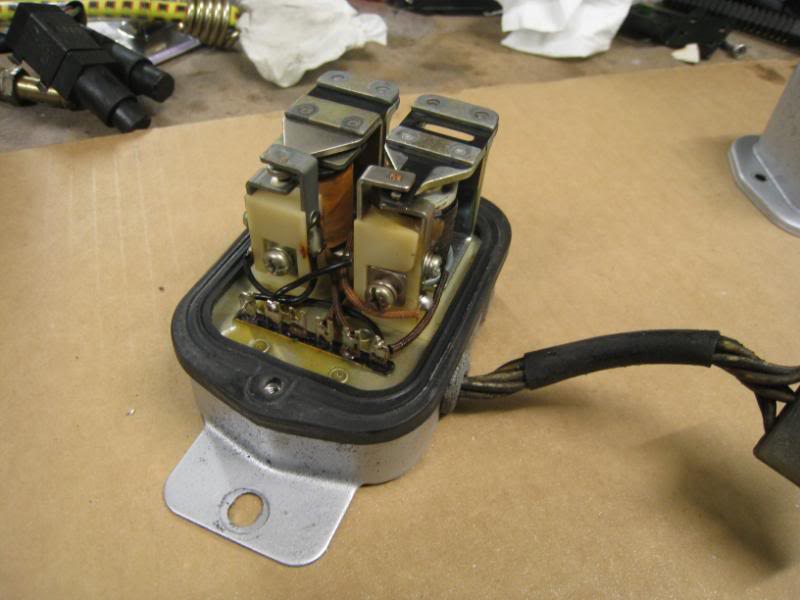
…and when you look at one side of it, it’s very clearly melted to bits.

The other side is ok, and this is what it’s meant to look like.
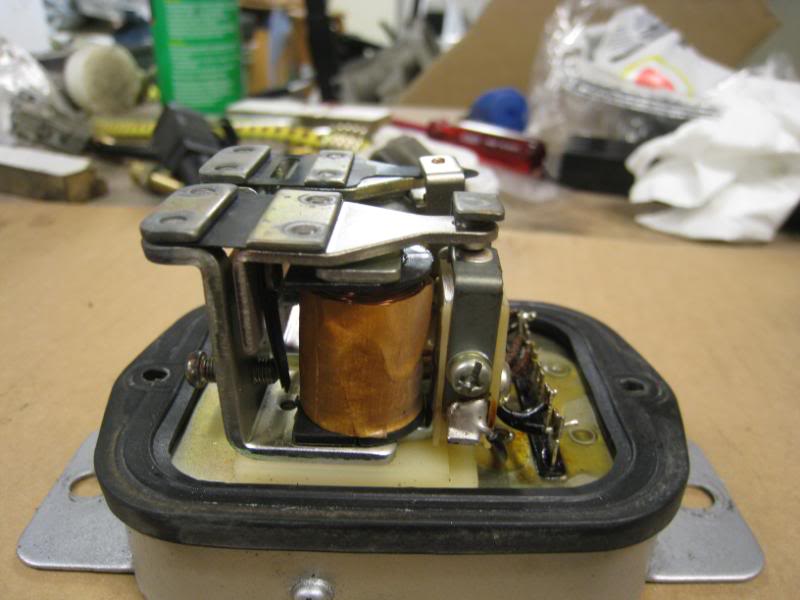
To my mind there is a bit of a chicken and egg question here….which is whether it was the wire that fell off, which then caused the alternator to overcharge and fry the regulator…or was there something wrong with the alternator which then fried the regulator, which then let the alternator overcharge which then burnt the wire?
I guess it doesn’t matter since we obviously need to get a new regulator anyway ![]() It’s the same as 240Z or 510 and apparently they are still available new so I’ll try to track one down at Ingrams tomorrow. I’ll also get the alternator tested by an electrician to see if it’s somehow been damaged by this whole episode. Hopefully the alternator is fine, and we can just bung in a new reg and be back on the road in two shakes of a 12mm spanner.
It’s the same as 240Z or 510 and apparently they are still available new so I’ll try to track one down at Ingrams tomorrow. I’ll also get the alternator tested by an electrician to see if it’s somehow been damaged by this whole episode. Hopefully the alternator is fine, and we can just bung in a new reg and be back on the road in two shakes of a 12mm spanner.
Alrighty…in the end Mark at North Shore Auto Electrical rebuilt the whole alternator, although the part that was really fried was the rectifier.
Remember that bit we looked at yesterday and how I said it didn’t look like it was fried? Umm…well it appears that yes it was fried, because we have a new one ![]()
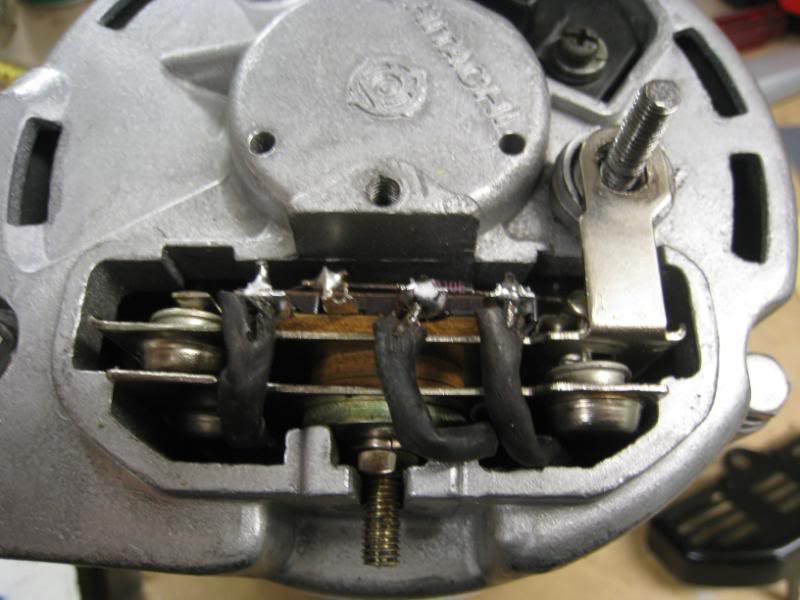
The new voltage regulator on the left, sourced from Ashcroft Ingrams…it’s solid state, so is totally electronic instead of semi-mechanical like the stock one with the moving contacts and magnets.
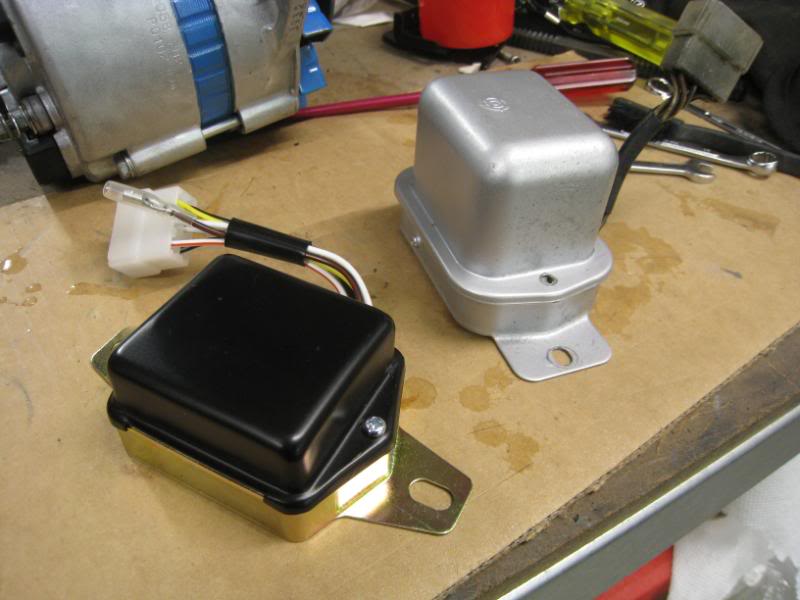
Carefully button it all together…
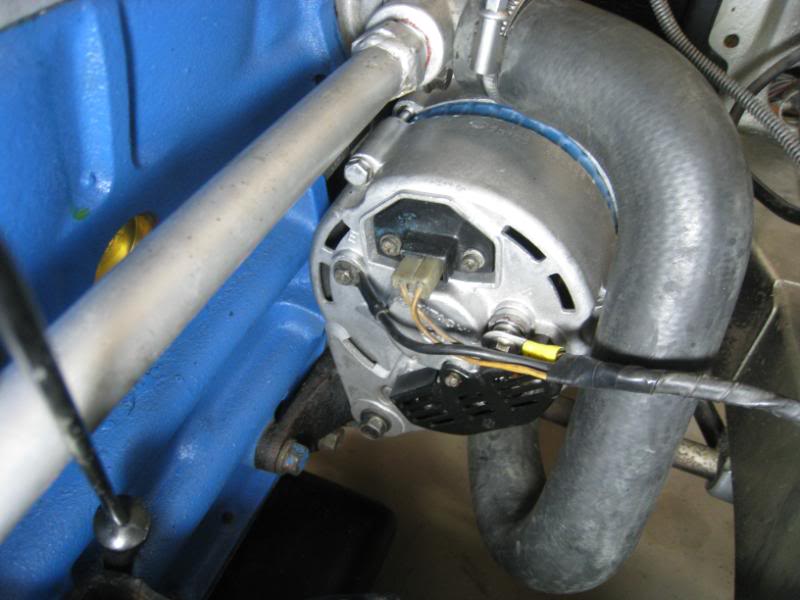
…fire extinguisher at the ready… ![]()
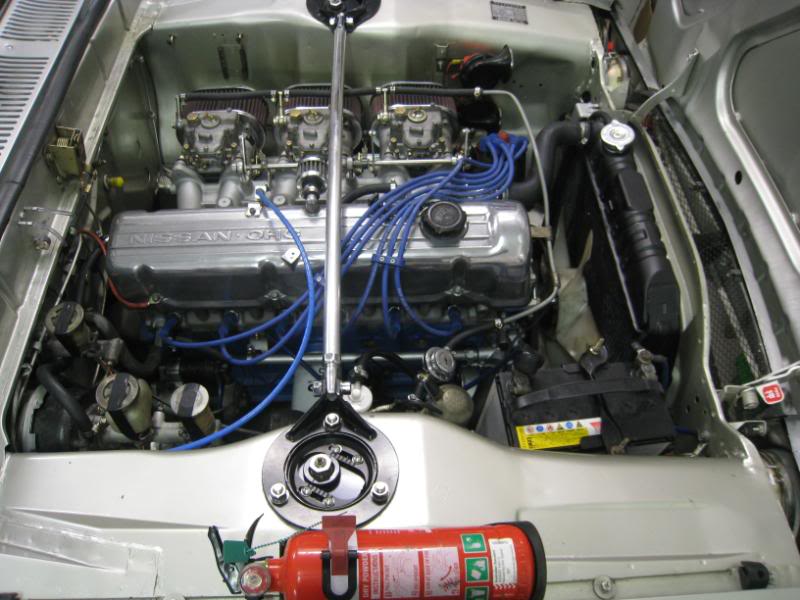
Turn on the ignition, and the charge light comes on (as it should), start the engine and it goes out (as it should). Nothing seems to be on fire or melting (touch wood) and the alternator/regulator combo is charging like a champ.
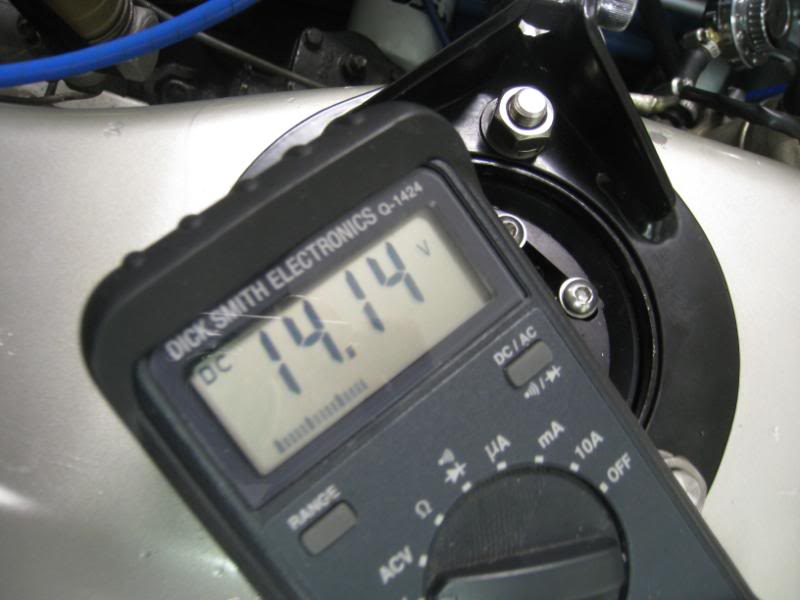
According to Mark, what probably happened was that the rectifier in the alternator died, and then started feeling AC current instead of DC, which then fried the voltage regulator, which then fried the battery +ve wire. So what I thought was the cause (the broken wire) was probably the last thing to happen in the whole chain of events.
Anyway….back to running in now.
Aha…after 4wks of driving (interrupted by wheelbearing and alternator issues) we are finally over 2000kms ![]() Even though we’d done one at 1000kms, Nathan recommended an oil change, since there’d be a fair bit of fuel in the oil since Webers overfuel a little at the best of times, and there might be a fair bit of it sucked into the crankcase as rings bedded in.
Even though we’d done one at 1000kms, Nathan recommended an oil change, since there’d be a fair bit of fuel in the oil since Webers overfuel a little at the best of times, and there might be a fair bit of it sucked into the crankcase as rings bedded in.
We’d used 2 sumpfuls of normal-grade mineral oil, but now that we have a few kms on, this time, it’s 4L of Royal Purple 10W~40 Synthetic. The old oil that drained out was very black and smelly, so Nathan was right, and with the new oil it’s smoother and picked up a bit of oil pressure too.
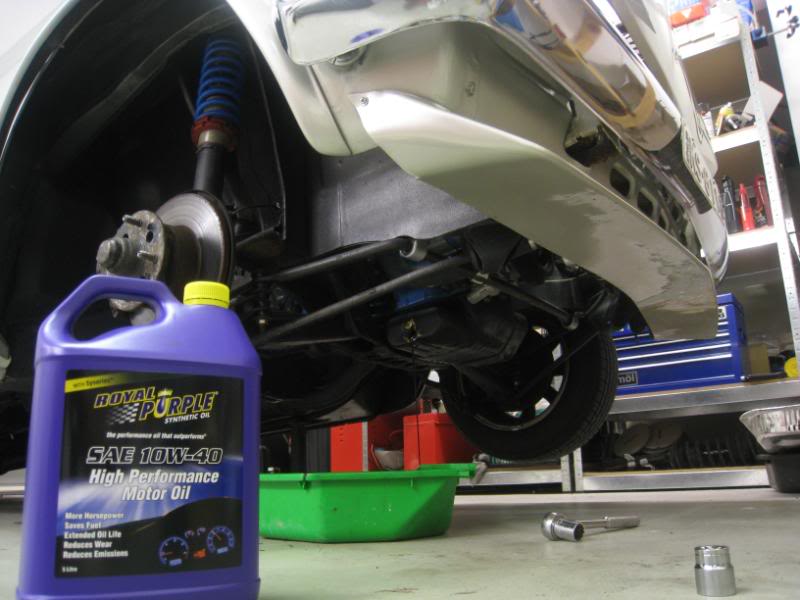
This weekend also gave me an opportunity to do some minor tinkering. You might recall that the previous Japanese owner had a bit of a gauge fetish. Six Omori gauges: three vacuum gauges (all hooked up to the manifold balance tube, so they all said the same thing), one water temp gauge (which died a few mths ago), an oil pressure gauge and an oil temp gauge, whose sender was ziptied to the side of the engine bay (and hence whose indications of oil temp might be called into question somewhat)
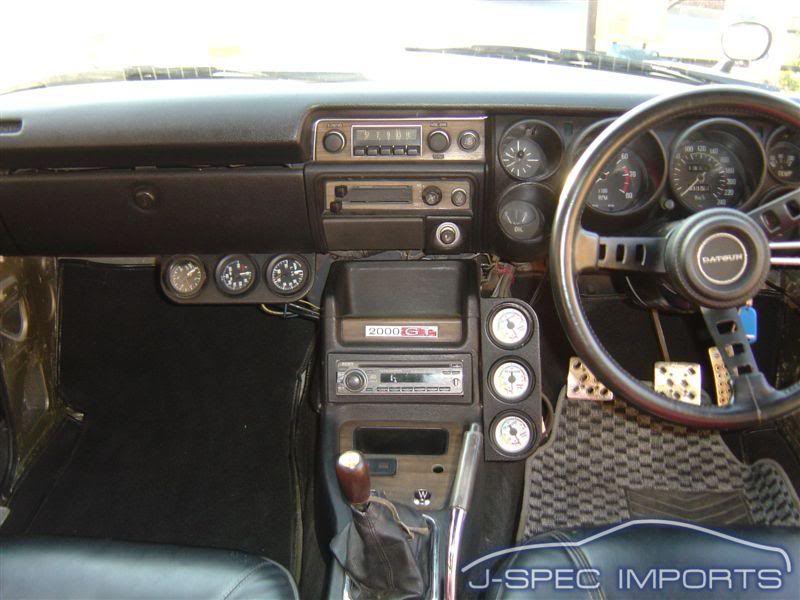
But now we’ve narrowed that down to just one supplementary gauge for oil pressure.
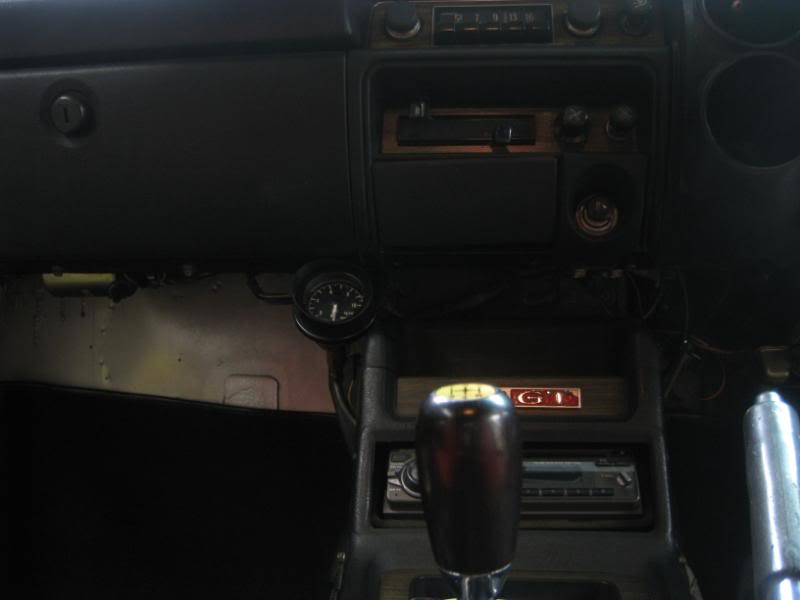
The Omori water temp gauge died, so I decided to reinstate the stock gauge.
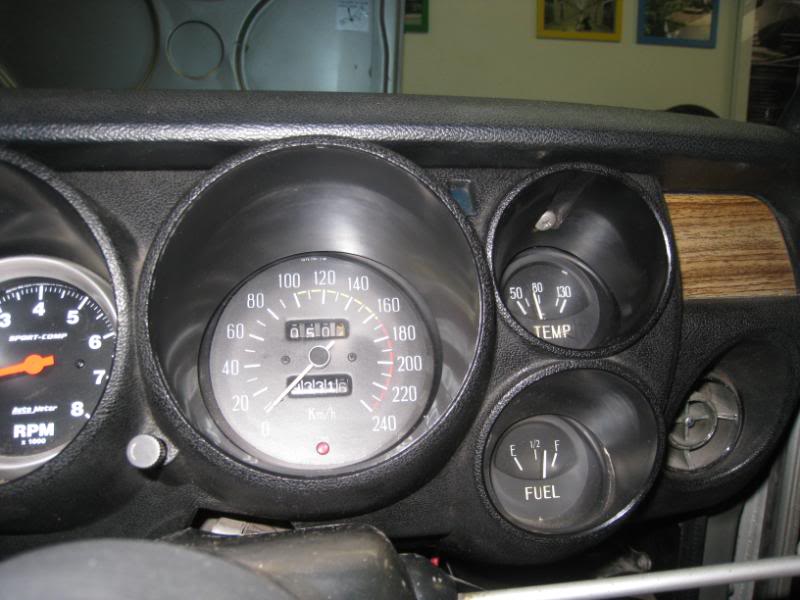
The thermostat housing had, however been modified to take the Omori sender, and while you can still get the stock sender (240Z & 510) from Nissan, they couldn’t source the brass nut that locks the sender in place.
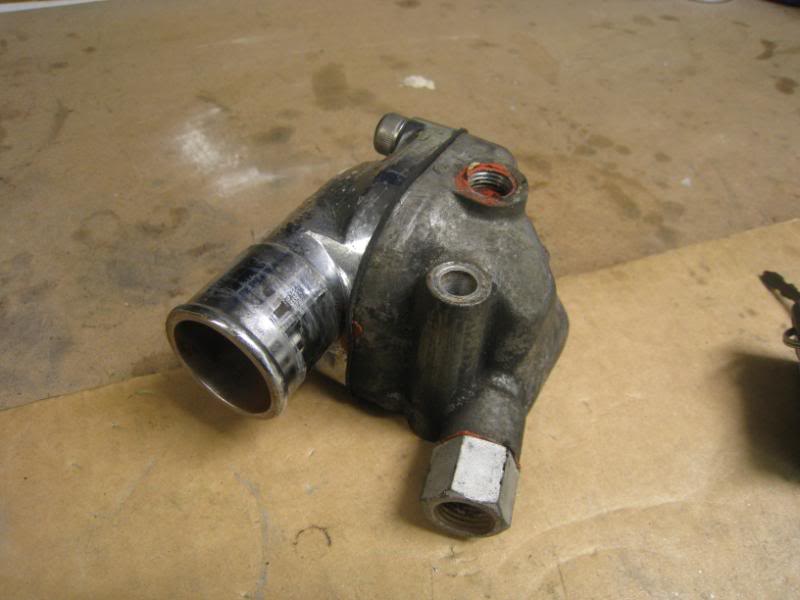
My mate Greg gave me a thermostat housing from a spare engine he had (from a Patrol of all things) which had a working stock sender. To test the sender and gauge, it’s pretty easy, just hook up the sender to the stock gauge wire and dunk the sender in a cup of hot water. The gauge leapt to life, so that meant that everything was working and we could button it all together. The new thermostat cover isn’t chromed like the old one was but it polished up pretty good anyway.
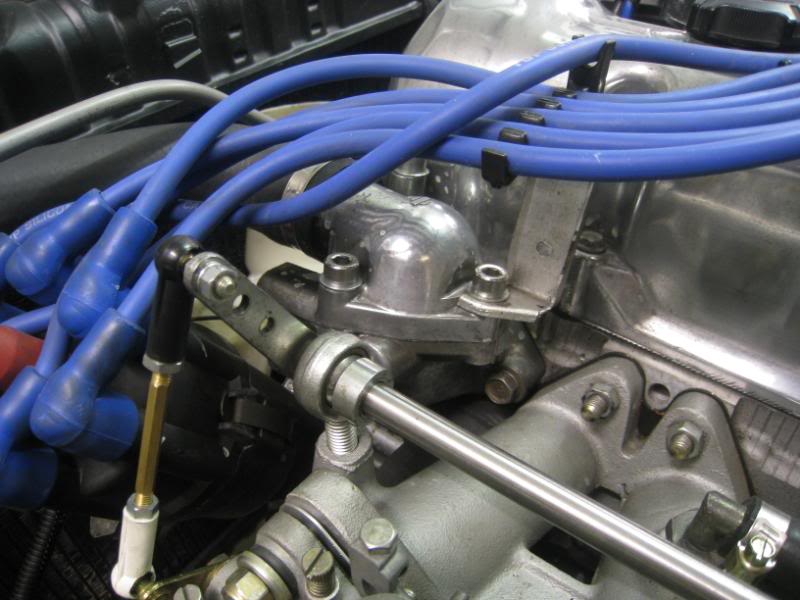
Anyone want some Omori gauges? ![]() For a time, Omori gauges were tremendously popular in Japan and you can see why. They’re mechanical rather than electrical, so you just hook up the sender, and the only wiring you need to do is for lights. Inside that coil spring cover is a mercury-filled copper tube I think.
For a time, Omori gauges were tremendously popular in Japan and you can see why. They’re mechanical rather than electrical, so you just hook up the sender, and the only wiring you need to do is for lights. Inside that coil spring cover is a mercury-filled copper tube I think.
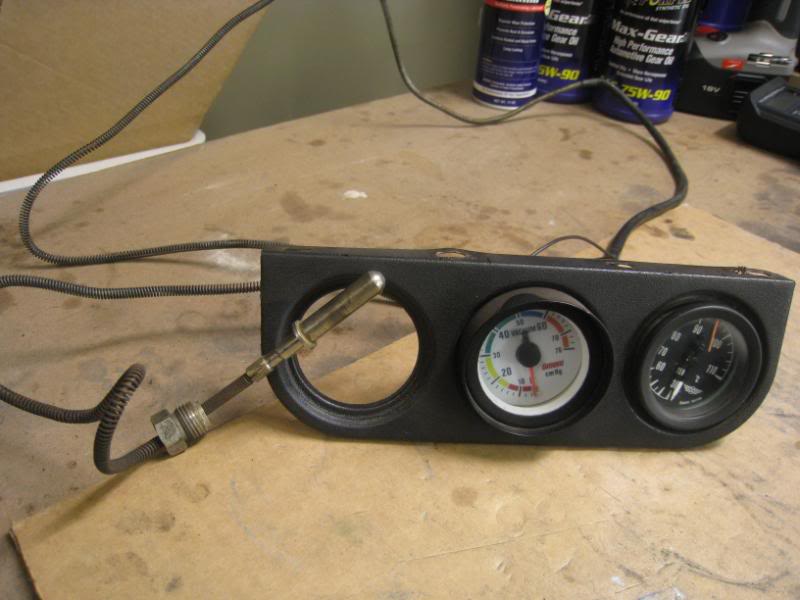
So far (touch wood) the car’s going great. Now that it’s got some kms up I’m not so scared to push it, although it does have a certain “untuned” feel to it, it’s rather fast ![]() What has come to light is that the rear suspension needs a fair bit of sorting. Driving normally it seems fine, but give the loud pedal the full beans and it sits down at the back like a motorboat and starts pogo-ing off the bumpstops. I think it’s probably a combination of not enough suspension travel before the bumpstop coming into play, the spring being too soft and the shocks not being in tiptop shape, but stiffer springs would be a good start.kay,
What has come to light is that the rear suspension needs a fair bit of sorting. Driving normally it seems fine, but give the loud pedal the full beans and it sits down at the back like a motorboat and starts pogo-ing off the bumpstops. I think it’s probably a combination of not enough suspension travel before the bumpstop coming into play, the spring being too soft and the shocks not being in tiptop shape, but stiffer springs would be a good start.kay,
I had a go at fixing the rear suspension’s lack of wheel travel, and the first thing was to take the springs out so that I could move the rear suspension up and down to measure things.
First step is to unbolt the shock and the driveshafts, so that you lever down the suspension arm low enough to release the spring from its little hidey-hole.
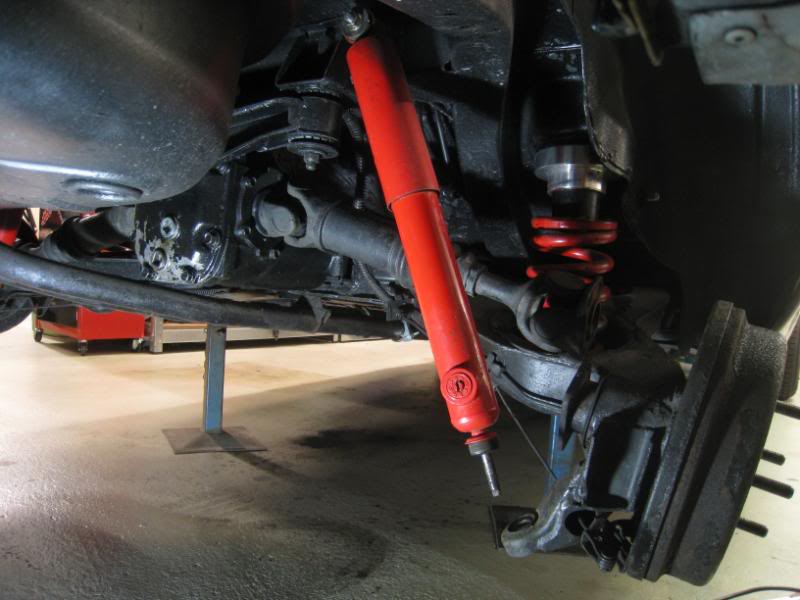
…which also allowed me to check up on the rear wheel bearings, which spin freely and sweetly and the stake nuts are still nice and tight.
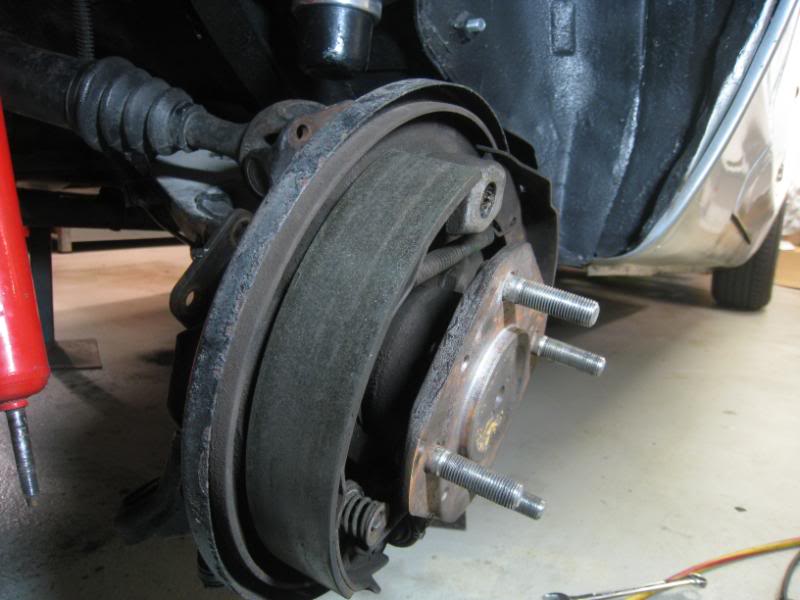
With the spring out of the way, I jack up the rear suspension arm to simulate the normal ride height, which leaves 6cm between wheelarch and tyre.
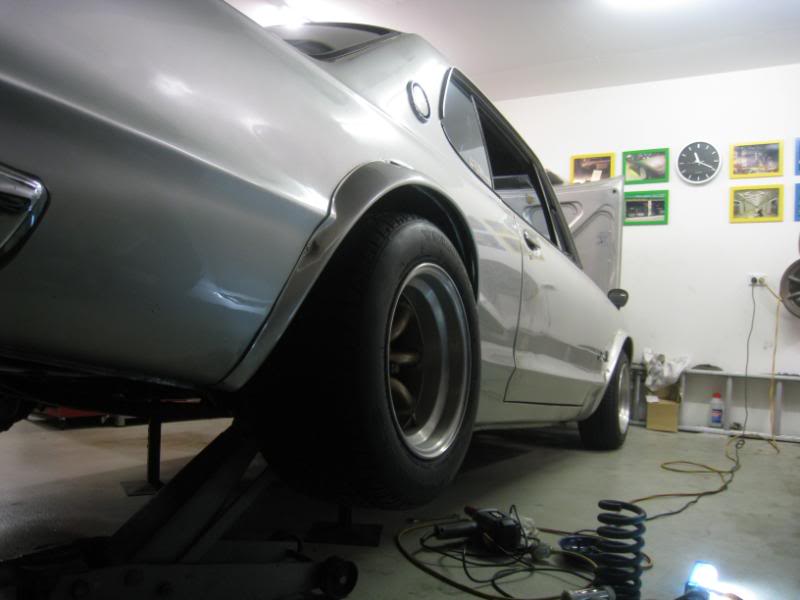
At that point there is lots of travel left in the shock, the lower tape mark is where the shock will bottom out, and the top tape mark is a hypothetical Camaro Koni that we’ve been thinking about. Koni don’t make a Sport adjustable shock for the Hako Skyline, but a friend looked thru the Koni catalog and found that Koni does make a shock that will bolt up to the Hako, it’s intended for an ’82 Camaro but is slightly longer than the KYB shock I have in the car. So part of this exercise was to see if the Camaro Konis would work out.
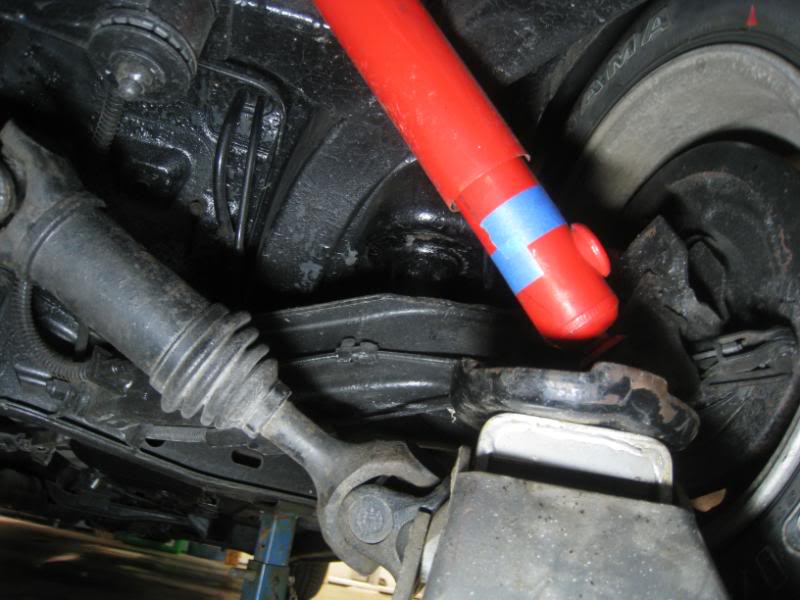
But as we know, if I jack up the suspension there isn’t much travel before the bumpstop comes into play, and this is what’s causing the ride to be so bouncy, especially under full power.
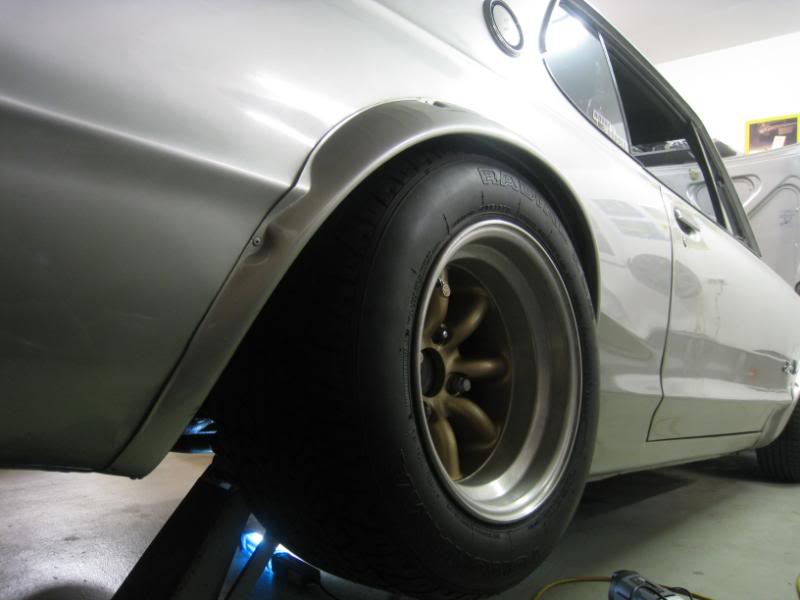
So now I think about shortening the bumpstop, to get it to come in “later” and so free up some bump travel. On the right is the tall bumpstop from Protec-S20 with the nylon spacer I made, and on the left is a shorter bumpstop with the spacer discarded and just a short stack of washers instead.
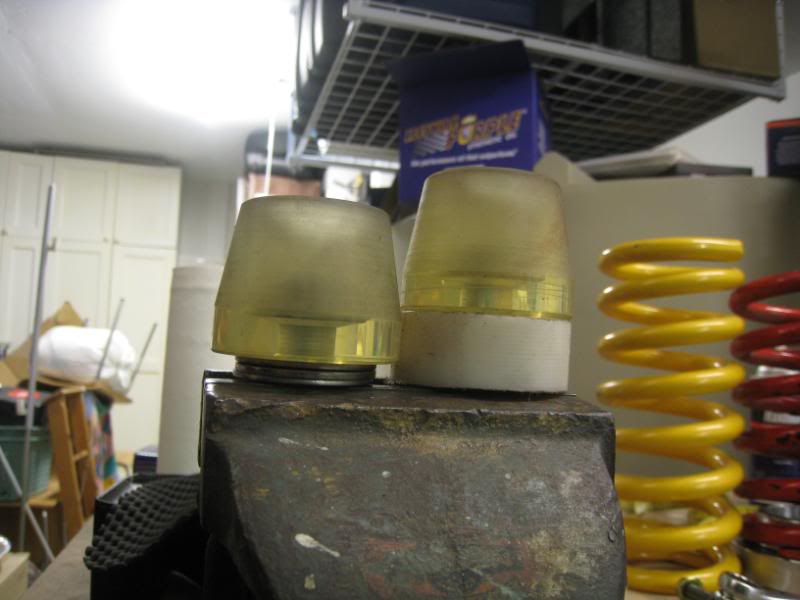
Just for fun, I bolted in the bumpstop without any spacers or washers at all and it’s a bit tight. By the time the bumpstop comes in, you can hardly squeeze a finger between tyre and bodywork. I’m thinking there’s too little room for error so I stick with the idea of stacking washers under it.
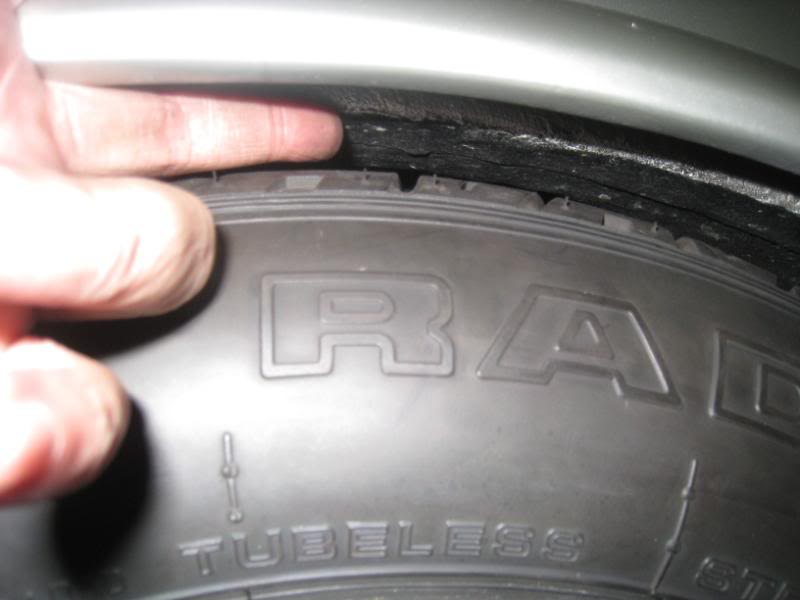
Oh, and at that point, the hypothetical Camaro Koni has already bottomed out, so I’ll definitely need a shorter shock than that alternative.

While we are at it, I also wanted to sort out the spring rate issue. The red Japanese springs were too short and too soft, and needed some thick spring spacers from Kameari Engine Works to get a decent ride height. The tall yellow spring is a 600 pound lowered spring for a C110 240K Kenmeri Skyline but that resulted in a 4×4 ride height in the Hako (the stiffness was just about perfect though)….so Stewart Wilkins Racing lent me a short 600pound spring to try. The yellow spring is 250mm tall, the red one (with spacer) is 240mm tall and the borrowed blue spring is 220mm tall.
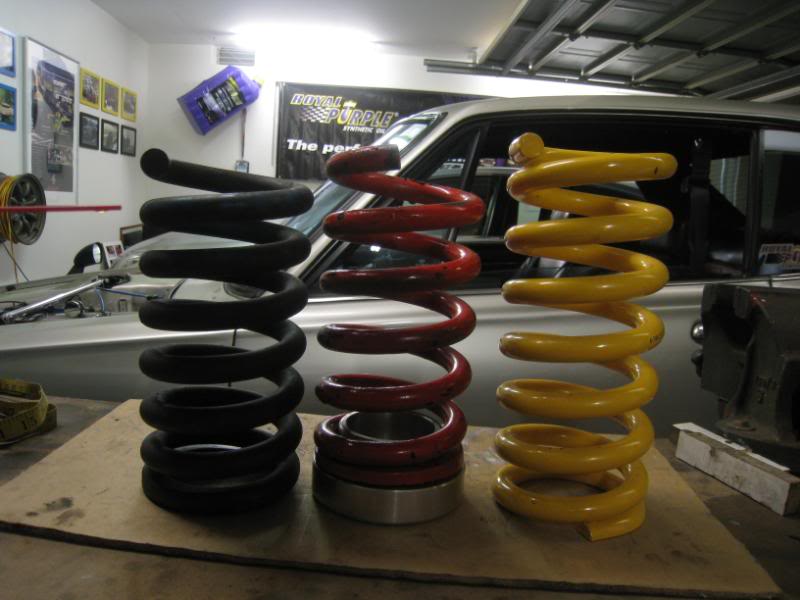
With the new shortened bumpstop and borrowed springs in place, this is the ride height we get.
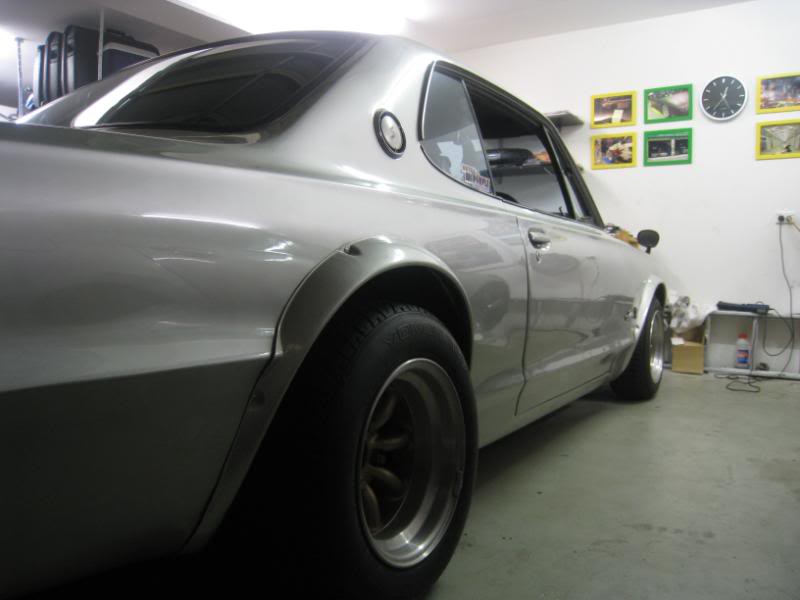
The new springs have raised it 15mm, so we have 75mm between tyre and bodywork, and the bumpstop doesn’t come into play until the last 20mm. So that means 55mm of bumptravel.
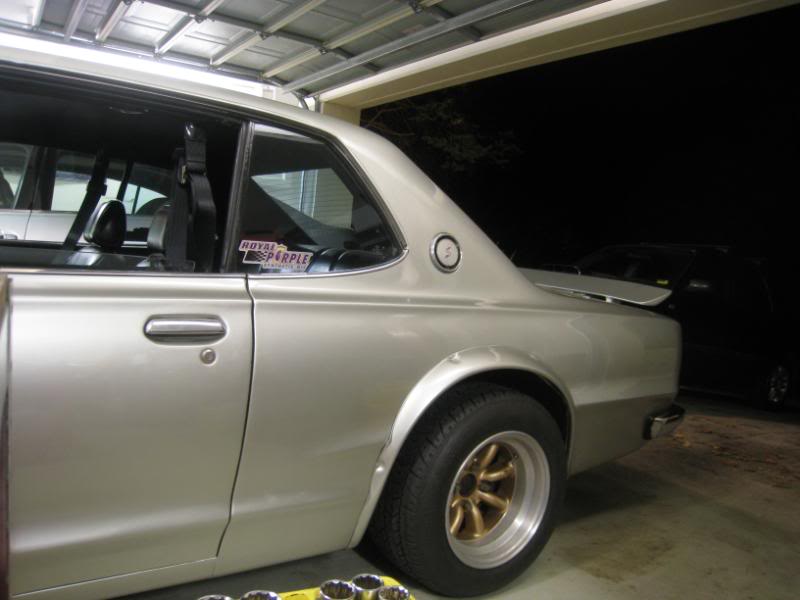
And…it’s great! The ride is immeasurably better, no more bouncy-bouncy pogo-ing over bumps and undulations and I can hoon over those traffic calming suburban road humps without bottoming out on the bumpstops. The stiffness is just right. So far the shocks seem to be okay, so possibly we got a bad impression of them because they were fighting against the bumpstop.
We’ll see how we go over the next few days, but so far I think we’re sorted: the spring balance is better (250F/600R) and we have 2+ins of travel before the bumpstop. I hope that the remaining 20mm of travel is enough for the bumpstop to do its thing and prevent the tyre from shredding the bodywork, but with the stiffer spring that’s got to help too. I think maybe we can go up another 100 pounds on the rear spring but so far it seems pretty balanced…oh and I guess I have to go to Stewart Wilkins to make some financial arrangements which do not involve me giving his springs back.
Since we got the car rego’d last year, we’ve been using a modern Nardi Deep Corn steering wheel, which has been nice.
But the wheel the car came with was a Nismo Compe.
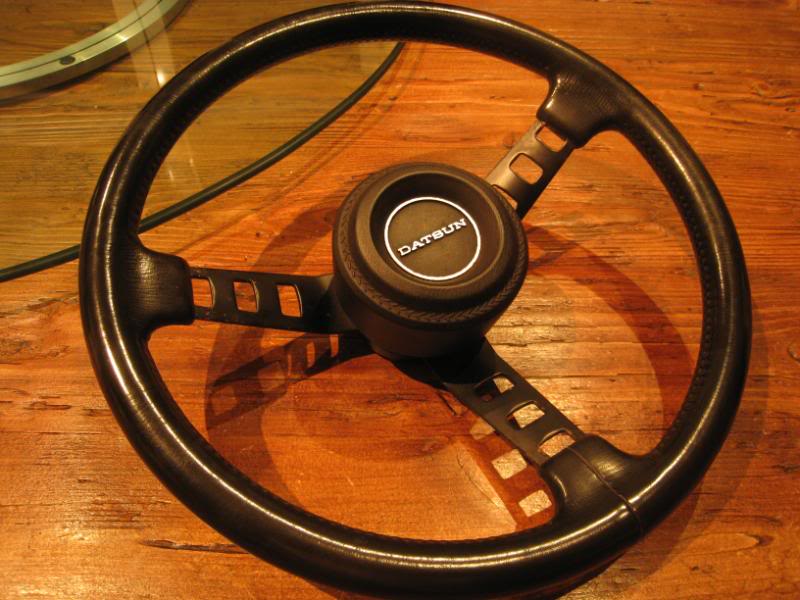
At the time, I didn’t know what it was, but after a bit of research it turned out that the Compe is the aftermarket steering wheel from Nissan Sport Corner-R in the early 70s. It’s very similar to a 240Z wheel but smaller in diameter and with a thick, squashy urethane rim that looks like leather but isn’t. When Nismo had its 10th anniversary in 1992, they re-issued 1000 of these old Compe wheels, and it turns out that our wheel is one of these re-issues, so it’s pretty cool.
But while the urethane rim was in good shape, the spokes did have a bit of patina in the form of some rust.
So we rub back the spokes with 400-grit emery until all the rust is gone and we’re down to shiny metal
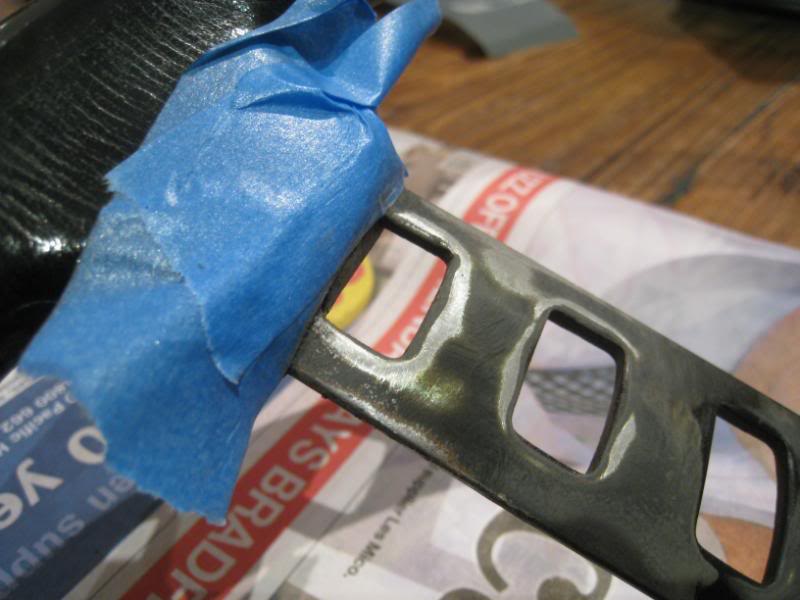
And in between the spokes to clean up the rust there too
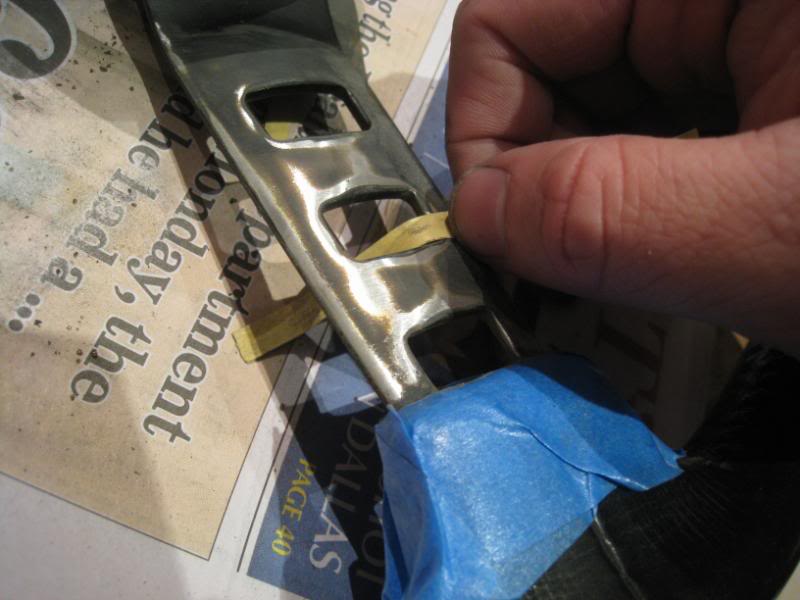
Then sand it all over with finer 800-grit to feather the edges of the existing paint (so that they’re not visible under the new paint) and to rough up the surface in general to give the new paint something to key to.
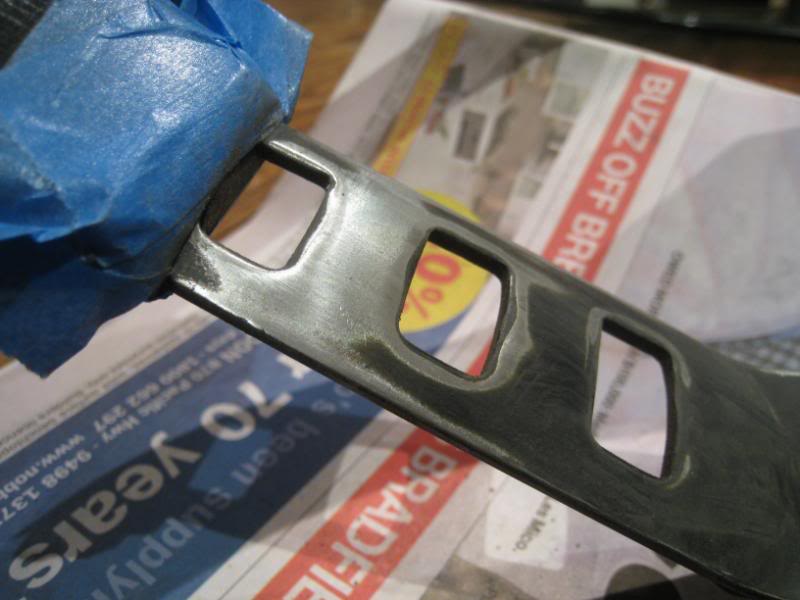
Then clean the spokes with prepsol
Then mask…
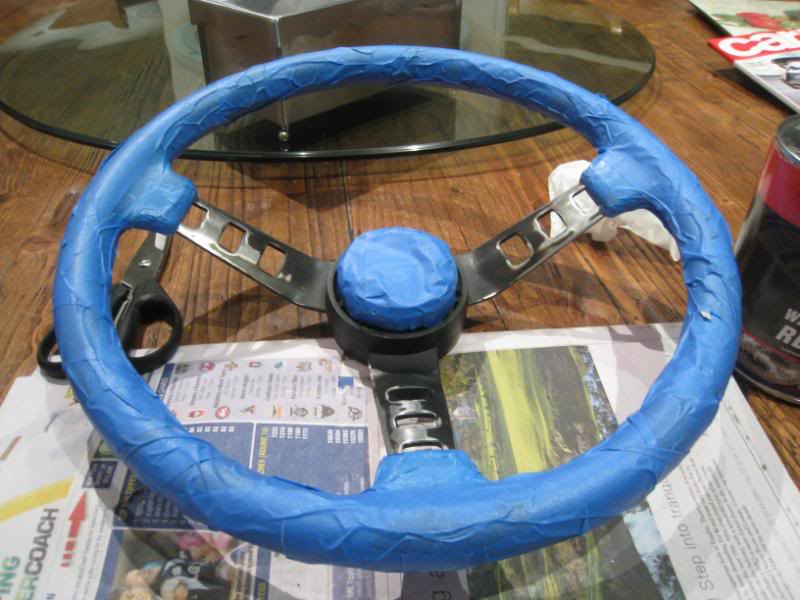
Then 2 coats of etch primer (they call it etch primer because it has an acid element in it which eats into bare metal to stick better)
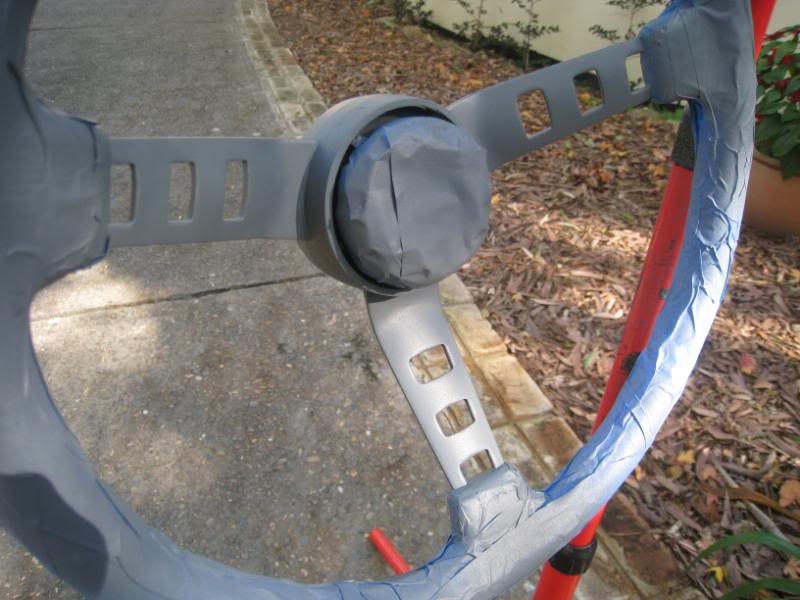
Then we use VHT Roll Bar Black, which is something I use all the time, as it’s very versatile (as you’ll see).

First you start off with some very light misting coats, just 2-3 passes. After 3 passes, it should still be pretty light, and not full coverage yet (so you still see some primer poking thru)
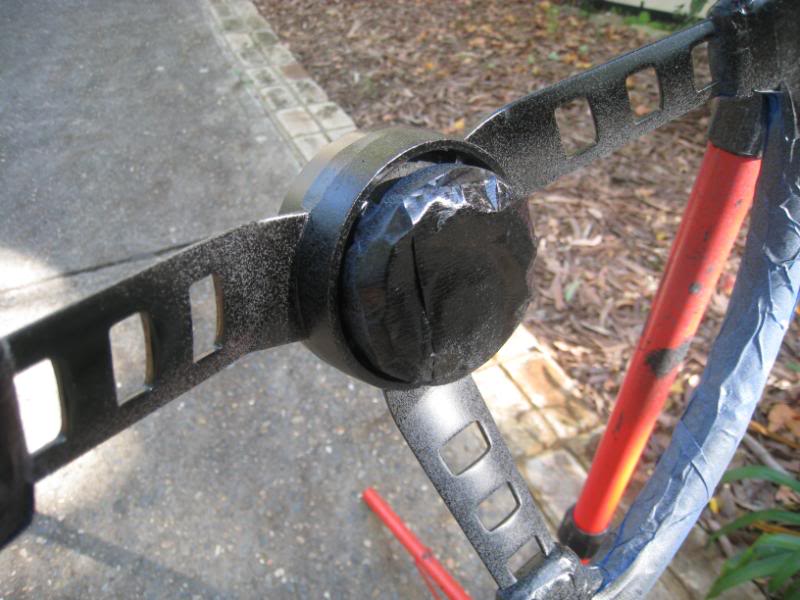
After 2-3 misting coats, you give it a heavy coat, and then a 5th misting coat. At that point, the finish you get is like this:
And when it dries, it looks like this, which is close-ish to the factory finish. I’ve found that if you want a more smooth finish, like a powdercoated finish, then the 4th and 5th coats can be heavier. And if you want a more satin/matt finish, like on my mirrors, then you just keep going with the misting coats until you get full coverage. It dries fast and so you can recoat after 5mins, and so it’s not as time consuming as it sounds, but I use this a lot, for the fender mirrors, wiper arms, you name it.
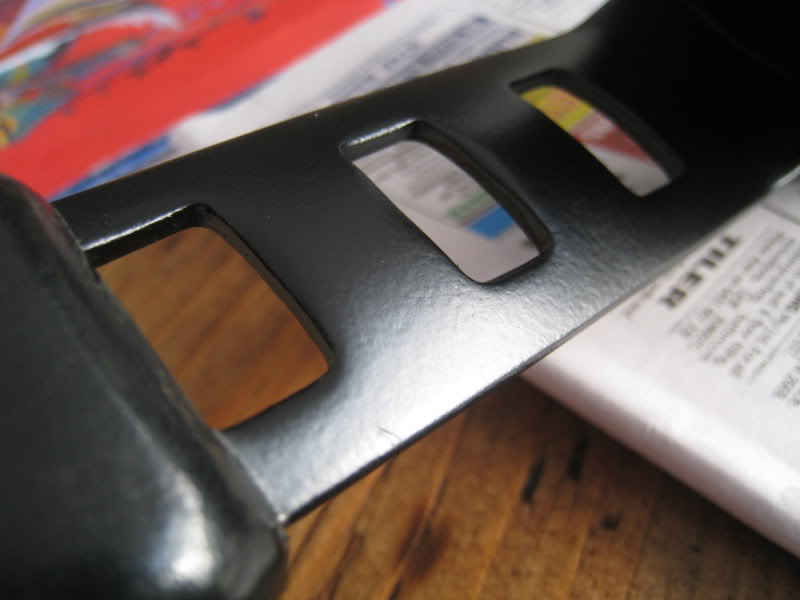
One last addition before it goes on the car is this horn button. At first I really didn’t like that massive, chunky DATSUN Compe hornpad, but over time I have to say I’ve gotten used to it and have to admit that it IS very appropriately 1970s.
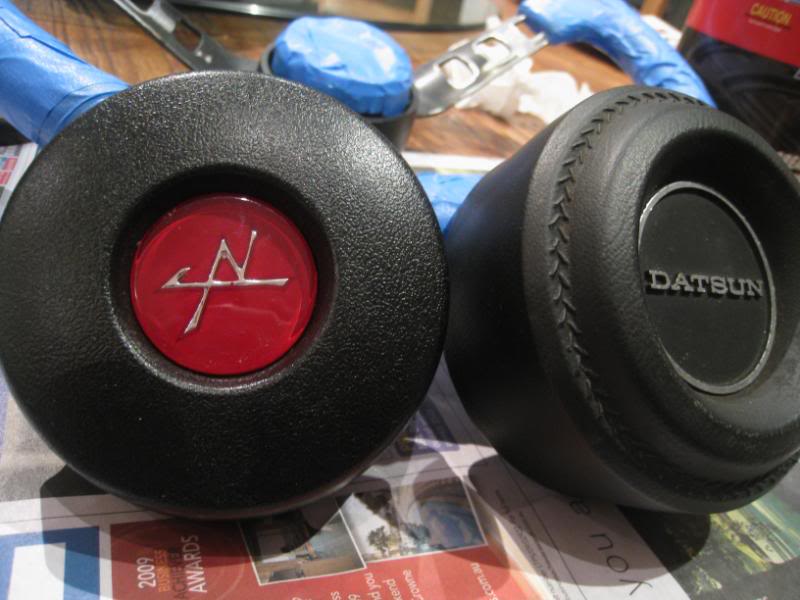
But the original 2000GT-Rs came with this steering wheel, and you can now get replica 2000GT-R hornpads which fit onto the Compe wheel.
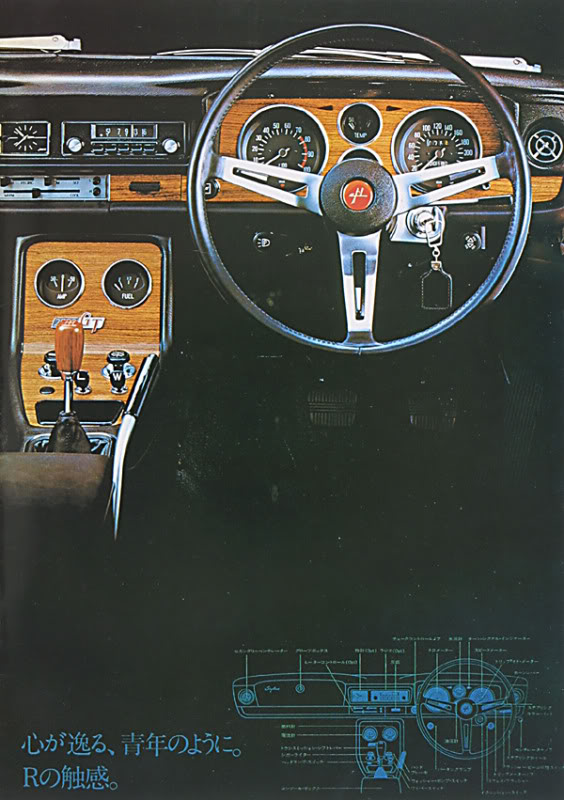
The GT-R hornpad is an interesting one. There is actually no “Nissan” anywhere on the Hako. While the Hako was sold as a Nissan it is actually more of a product of the defunct Prince company, and in the wake of the 1966 takeover of Prince by Nissan, the C10 Skyline was born under some pretty serious corporate politics. So the 2000GT-R has a hornpad which actually is a throwback to the old Prince logo, except that there is an “N” instead of a “P”. You can read the full story in issue #3 of Japanese Nostalgic Car Magazine ![]()
…and the restored Compe wheel is ready to go back in the car.

Well here’s the Compe installed…
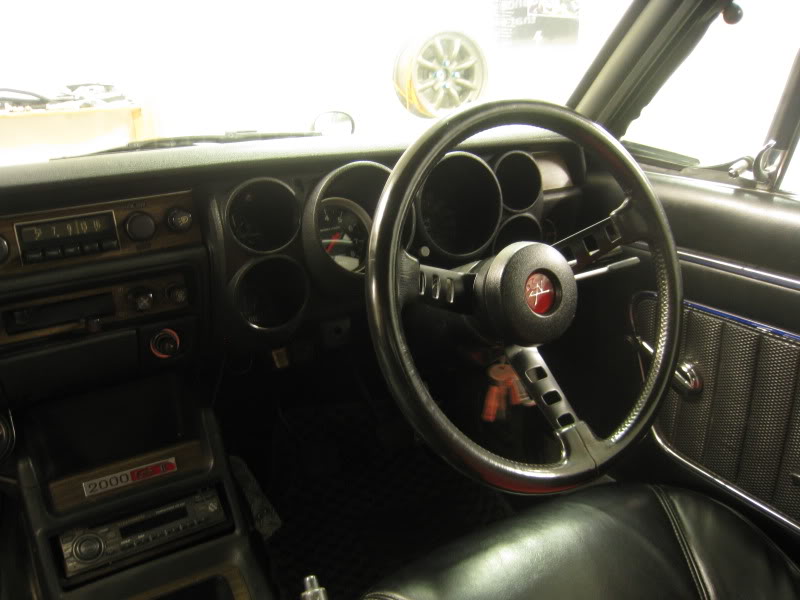

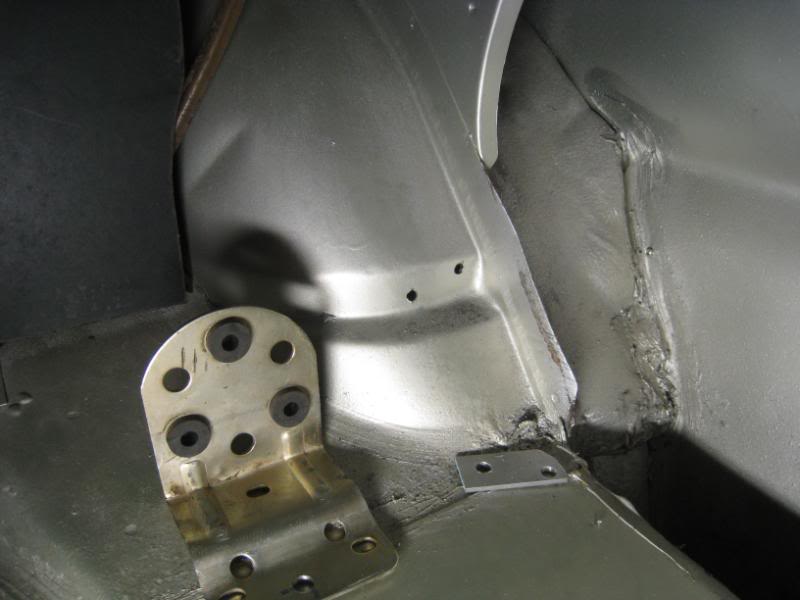
Fits good. Jamie bent the bracket a certain way for his Lancer installation, and now I’ve bent it the other way, so it does look a bit ghetto, but it’s solid.
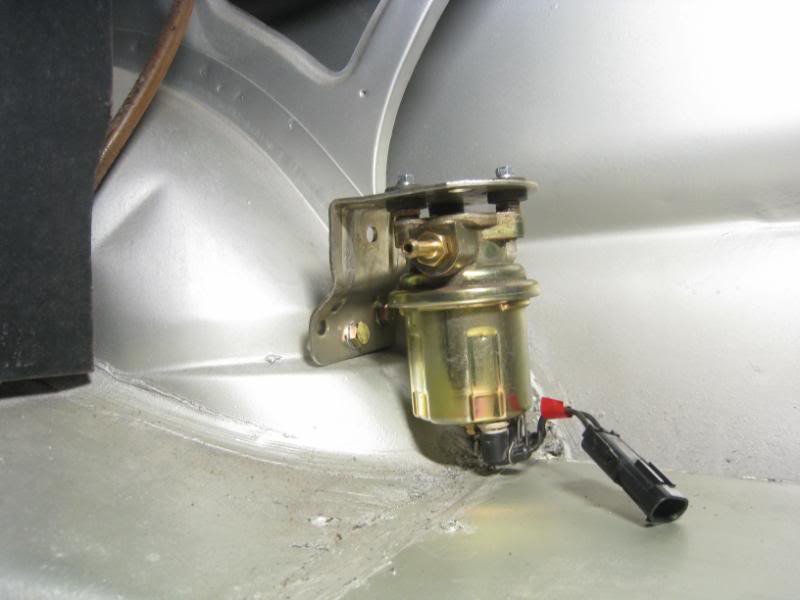
Remove the back seat, which gives good access to the fuel hoses going down thru the floorpan
Clamp the stock line to stop fuel from spilling everywhere…
The 40yr old hose didn’t come out easy, I had to cut a slit in it and prise it off.
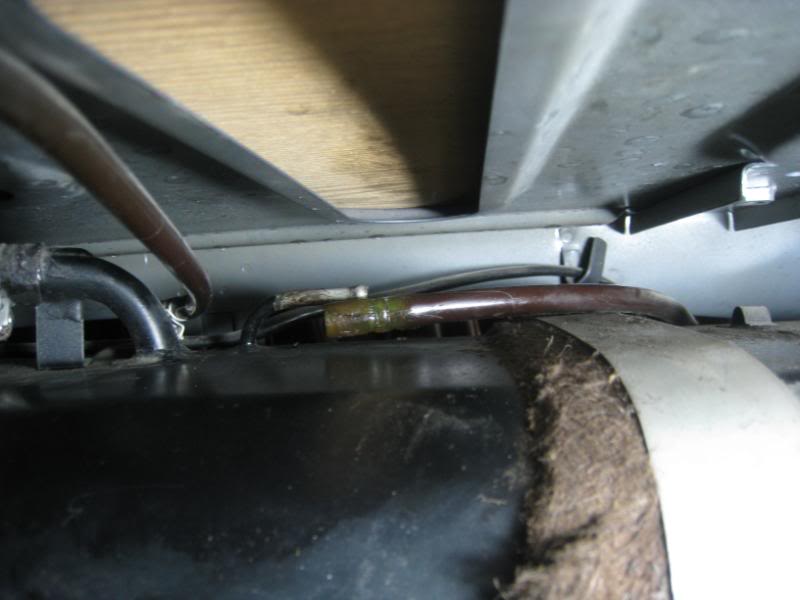
It wasn’t easy underneath either, and the stock hose clamp was pretty seized with rust too.

But in the end I got the old hose off and a new hose onto it.
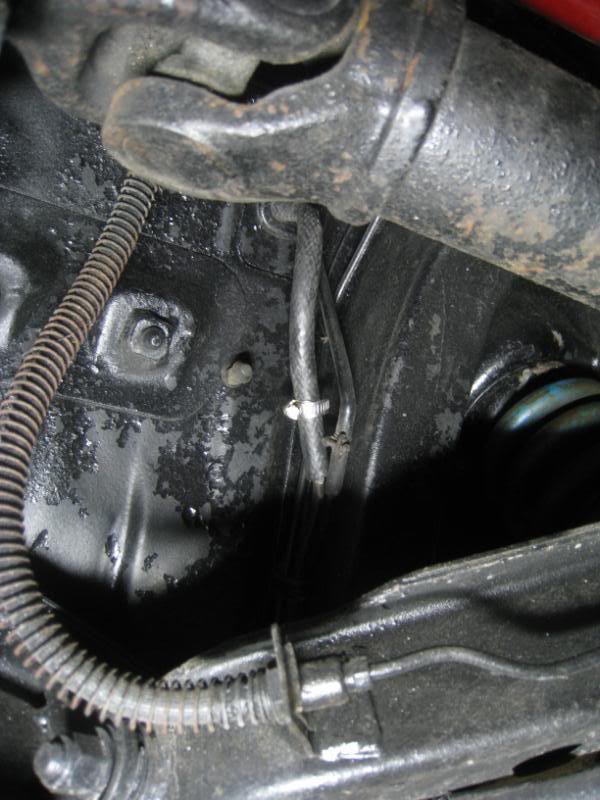
Up thru the stock grommet in the floor…I dunno about this next bit, but I used conduit tubing in spots where I though the hose might rub against something. Not really sure if it’s necessary, but it seemed like a good idea to give the new hoses some abrasion resistance
Run a new line from the tank to the input side of the Carter, and run the new hose from under the car to the output side, slip on some more conduit tubes and it’s done.
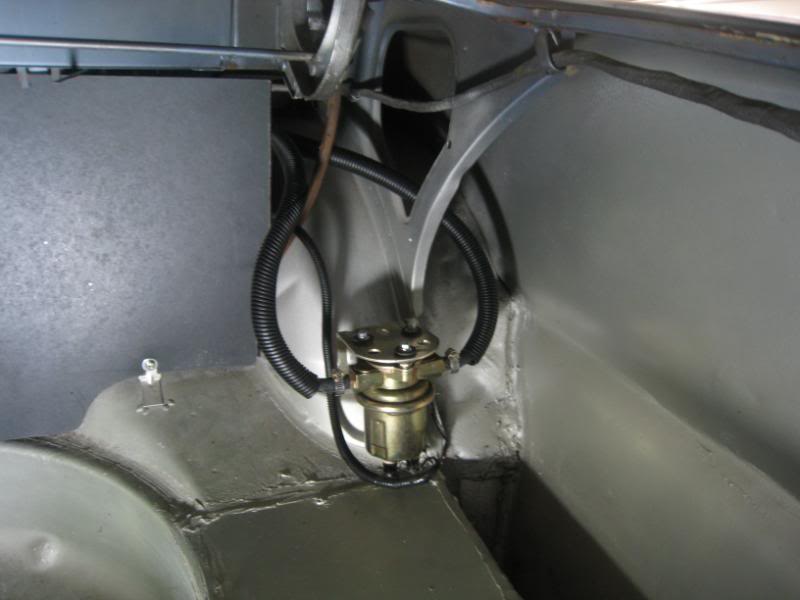
The stock fuel hose material is interesting…it’s like a clear plastic tube. It’s a bit hard now but not cracked or brittle, and after 40yrs still worked.
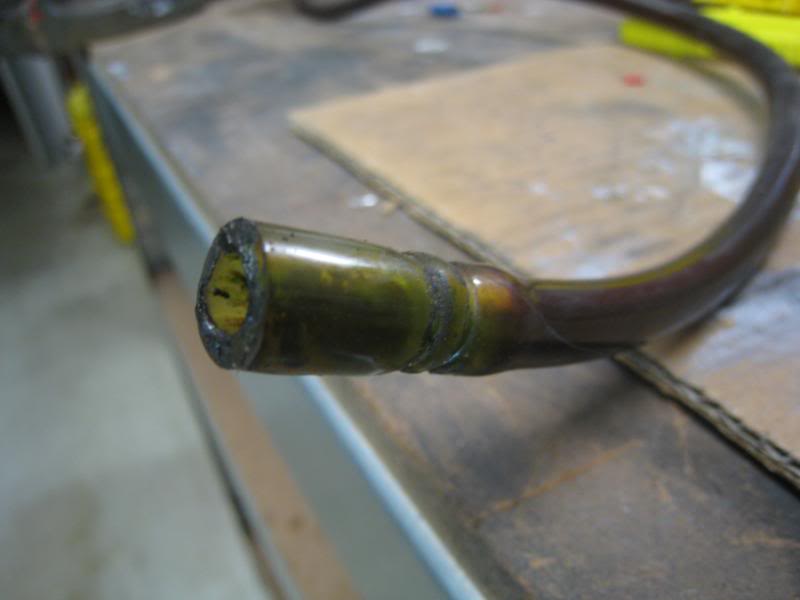
Under the bonnet we can now remove the old Mitsuba pump.
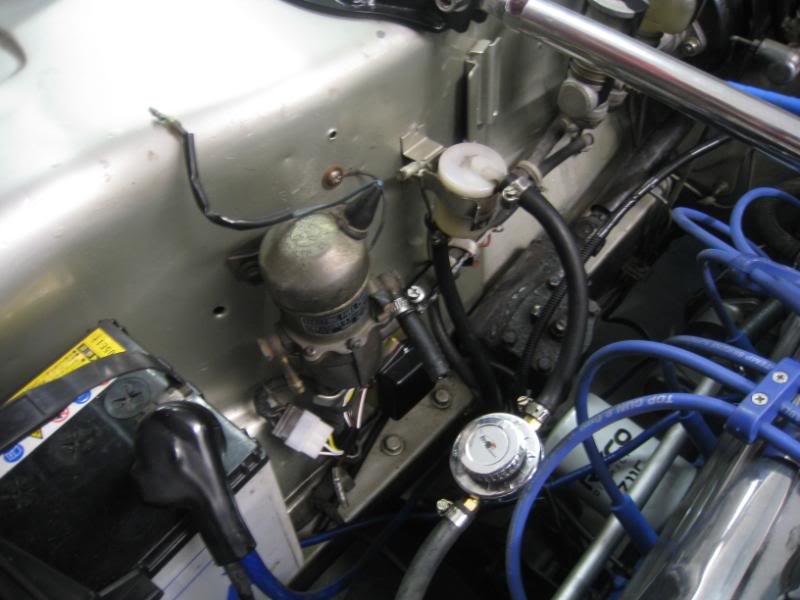
…which cleaned up the engine bay visuals quite nicely.
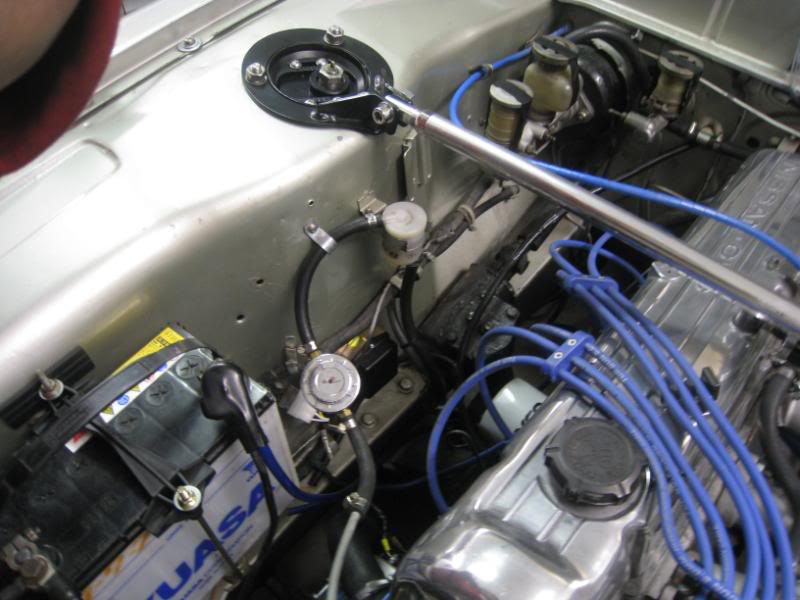
Wire it up, and then cross your fingers and turn on the ignition. The Carter whirrs to life, then coughs as it gets its first mouthful of fuel and settling to a steady buzz. But uh-oh…there’s a leak, at the output hose end. It’s coming from where the hose adapter screws into the pump (that hex head)
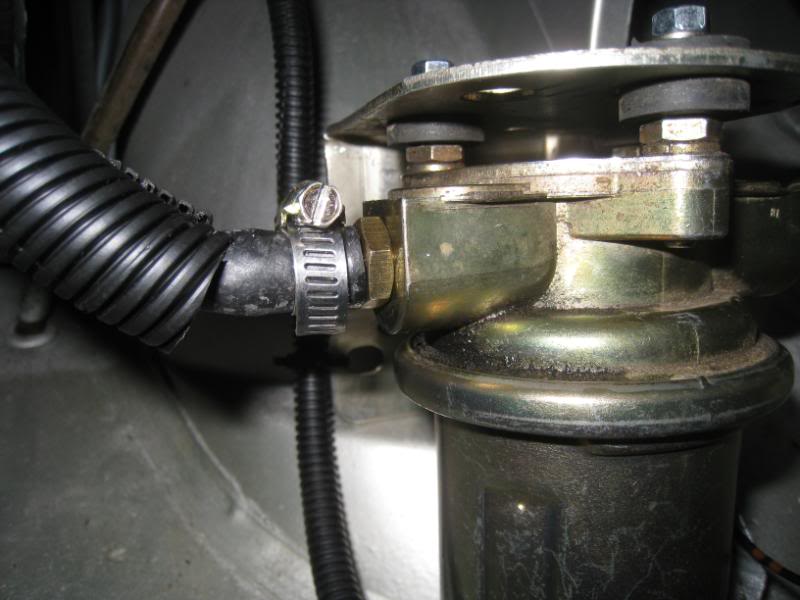
The Carter has a sticker which says not to use any teflon tape in screwing on the barbed hose adapters, but in this case I didn’t see that I had any choice, and reinstalled the hose end with some teflon tape, and the leak stopped.
Went for a drive and it all seems to be fine.
Well, under the recommendation of Nathan, I went to see Scott and Greg (top blokes btw) at Insight Motorsport for the dynotune.
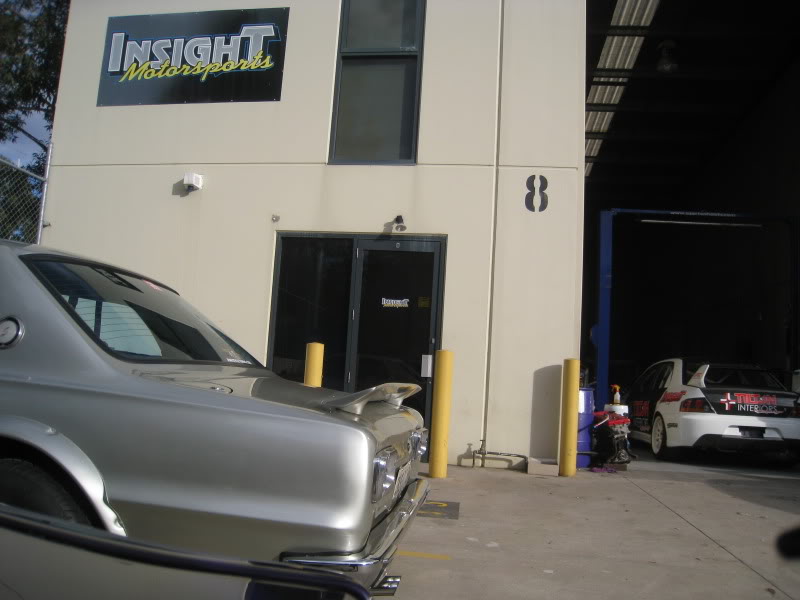
…which turns out to be one of those motorsport-focussed places that is chock full of time attack and drag cars..
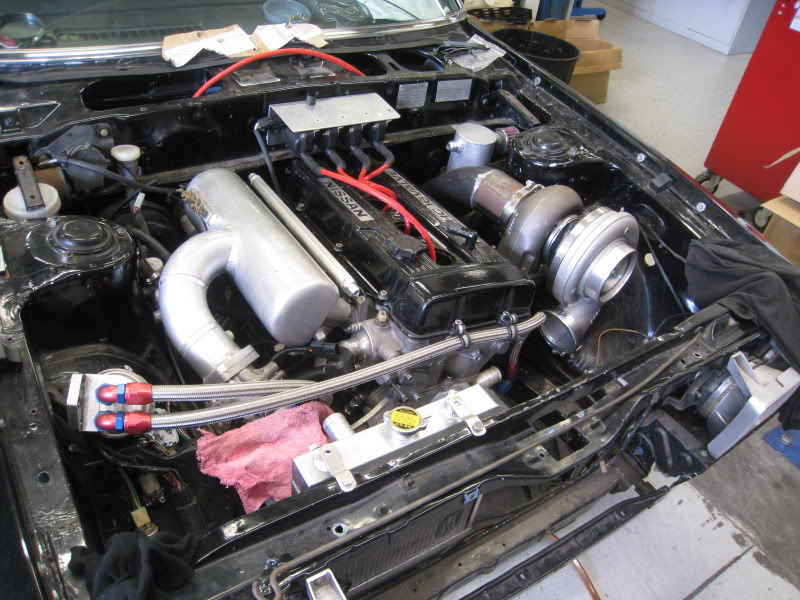
…now this is what I call a decent-sized turbo.
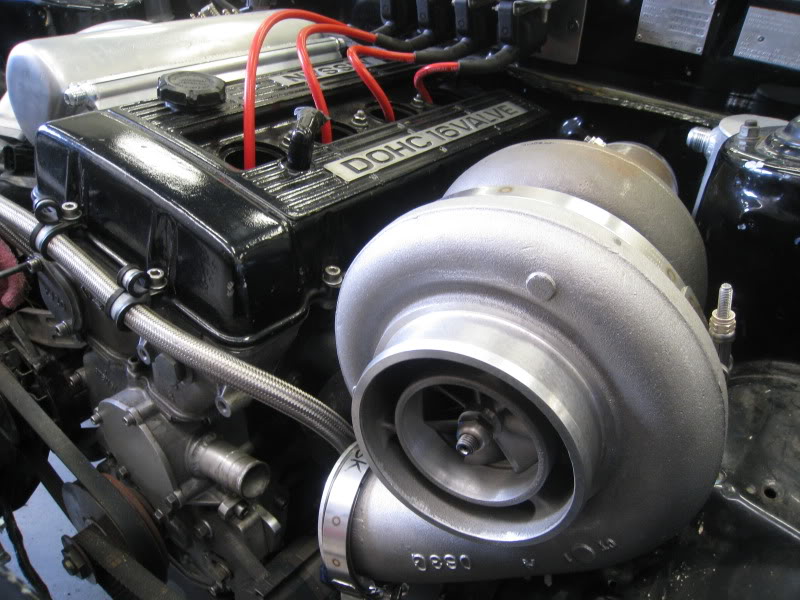
…and this was on the dyno screen from the car before the Hako ![]()
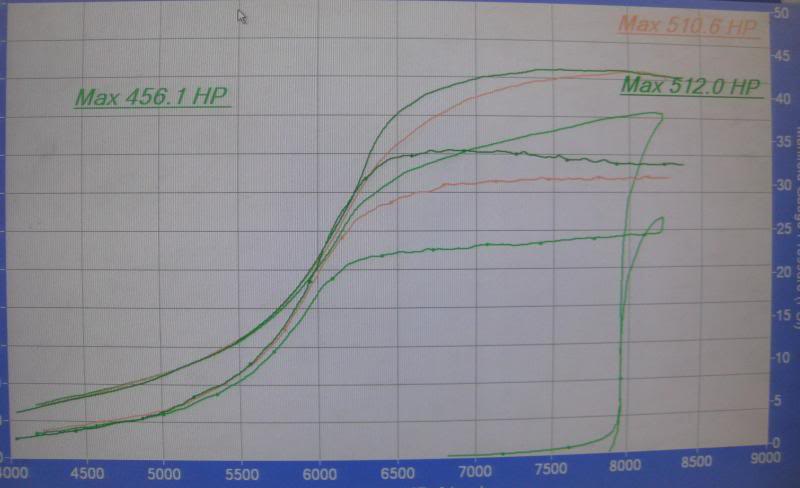
So we strap the Hako down for a serious session of dyno tuning. Scott had prewarned me that the first session is really just a diagnostic opportunity, to verify the ignition timing and carb settings, etc and also to see if there are any other fundamental issues which should be addressed before the serious tuning begins (like a bigger fuel pump being needed, etc).
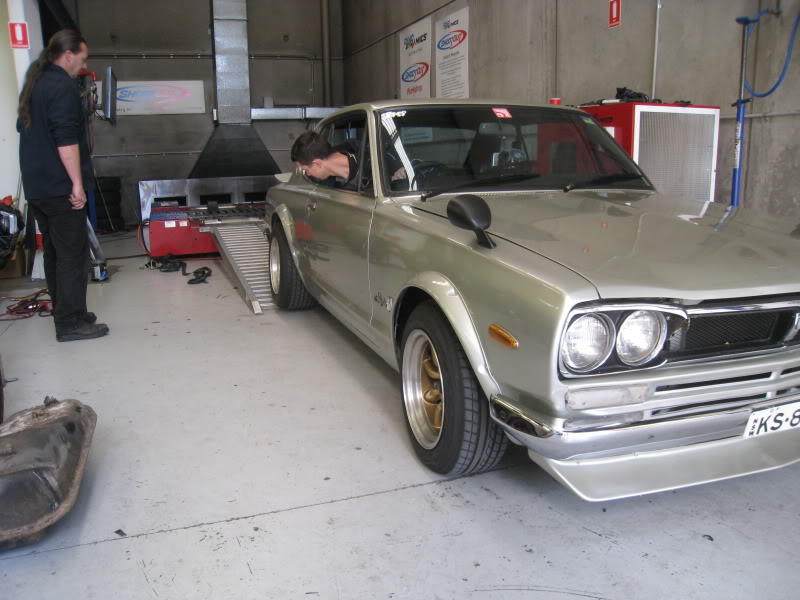
….and so we load it up through the gears and do a power run….hmm. That looks ok…then we do a second one.
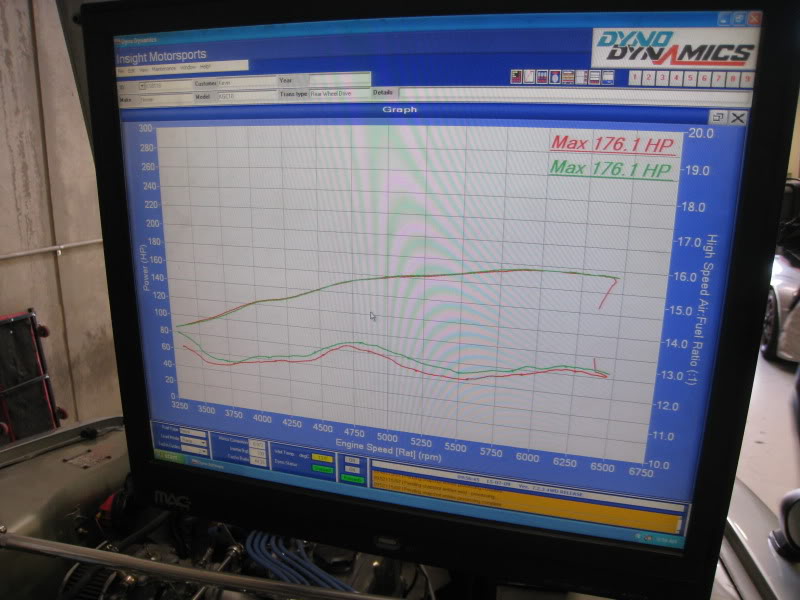
…and that’s it!
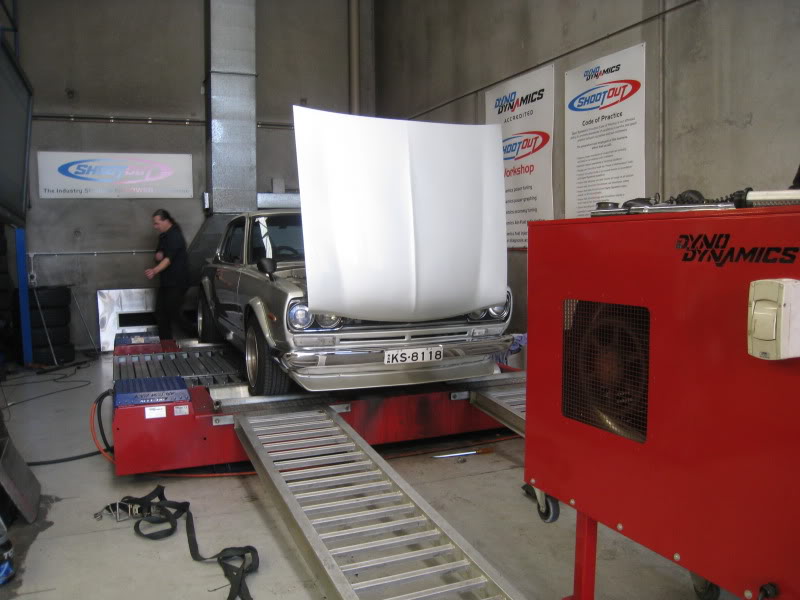
That’s the result! 176rwhp or about 240hp at the flywheel.
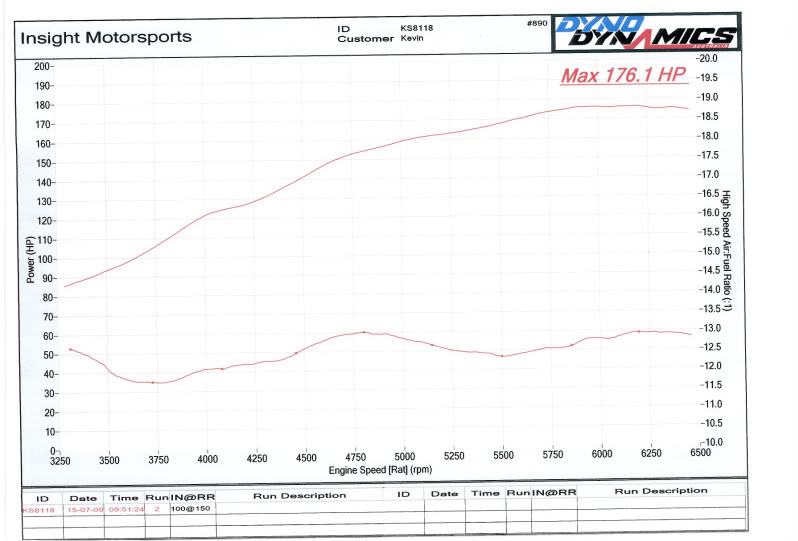
The AFRs were pretty good off the bat, it gets a bit of a lean spot at 4700rpm, probably from the convergence of the cam hitting peak torque coinciding with the last bit of ignition advance and a resonance sweet spot pulling more air thru the carbs for a brief moment.
Then it goes a bit lean at the top end again, but given that it was very cold today, Scott felt that it was a good compromise. In warmer weather it would be naturally richer, and while we could correct the lean tune at the top end with a smaller corrector (say a 160 instead of the 175 that’s in it now) that might mean that it would be too rich in summer. In terms of ignition, we have 14 degrees base and 28 degrees max, and Scott didn’t think that the engine wanted to take any more.
So in the end….we didn’t actually tune anything and all this stuff about tuning old school by seat of the pants and looking at plug colour appears to actually work, and we didn’t have to change a thing ![]()
We started talking about what might be holding the engine back. Scott and Greg thought that going to a larger choke on the carbs (say from 32mm to 36mm) would maybe open up another 10-15hp, but that 200rwhp is perhaps all that we were going to get out of the existing combination of carbs, headers and exhaust. The motor could definitely take a bigger cam, since the current one starts to tail off at 5500rpm, but we would start to sacrifice low end torque and response. The zorst might be a bit undersized for the motor, so that’s one option that we could think about modifying, but I do like the quiet tone it has now (where the carbs are louder than the exhaust).
So there it is ![]() To be honest I expected a bit more power, but I think the reality is that while the engine itself has got more headroom, the induction and exhaust are holding it back. Then again, as Scott pointed out, that is also why the car feels so tractable and zingy at low rpm. And it does surpass the peak power of my old MX5 at only 3800rpm, so it’s a good compromise for street (but I get the feeling that after we sort out a few things with the rest of the car, the chase for more power will begin in earnest)
To be honest I expected a bit more power, but I think the reality is that while the engine itself has got more headroom, the induction and exhaust are holding it back. Then again, as Scott pointed out, that is also why the car feels so tractable and zingy at low rpm. And it does surpass the peak power of my old MX5 at only 3800rpm, so it’s a good compromise for street (but I get the feeling that after we sort out a few things with the rest of the car, the chase for more power will begin in earnest)
The car’s been running great, and since today was a bit rained out, I ended up doing some tinkering instead of the planned Sunday drive.
The object of my ministrations will be the late 70’s vintage Pioneer TS-X9 surface mount speakers.
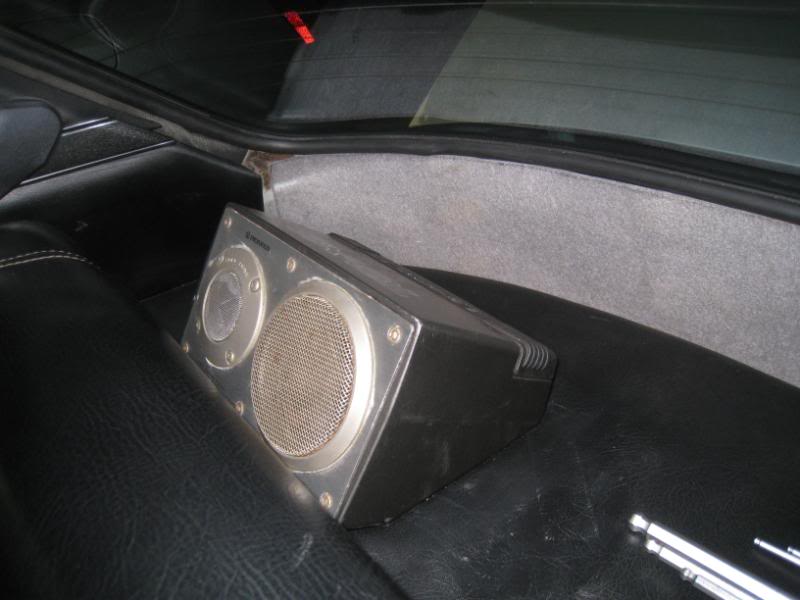
Directly under the parcel shelf is the fuel tank, and there really isn’t enough space for normal speakers, so most Hakos in Japan seem to have these vintage pod speakers instead.
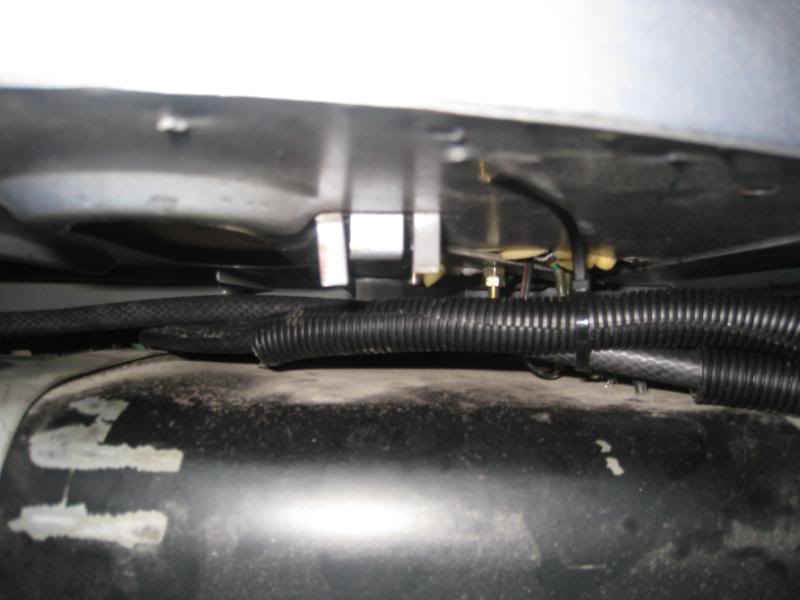
They still work and sound ok, but the bass driver on one side sounded blown. They’re also reasonably era-appropriate, so I figured let’s restore them too. Upon taking off the speaker grille, it’s obvious that the bass driver is totally gone. But even after removing all the bolts, I couldn’t get off that front plate.
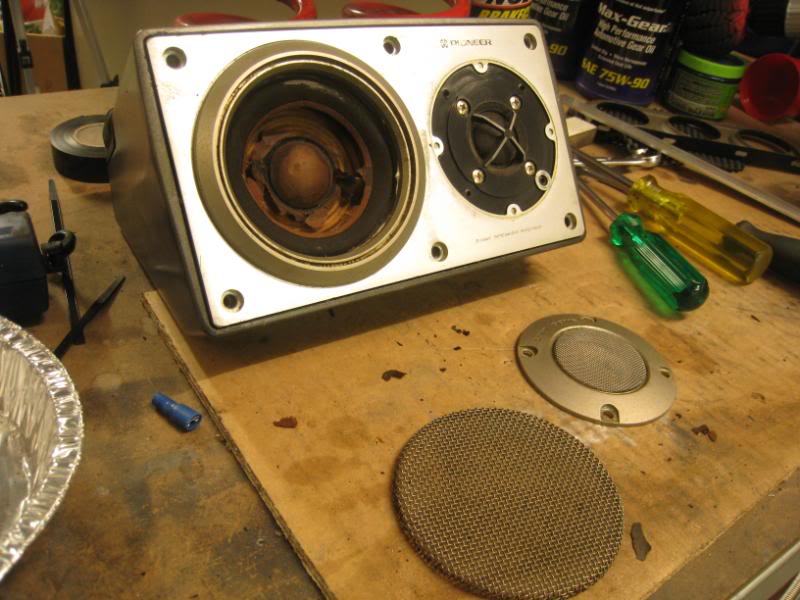
The whole speaker is cast metal, and the only way to get the speakers out is to remove the front plate. So I unscrew the plastic plate for the wires (and discover that the crossover is mounted on the other side) and then nudge the plate out from the inside.
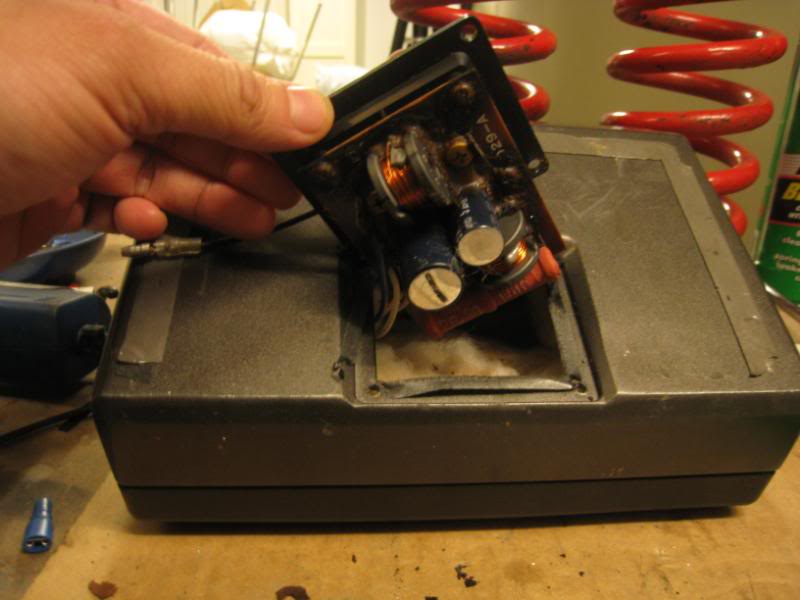
The plate was sealed to the body of the speaker by a rubber gasket, and after 30 yrs it was pretty stuck fast.
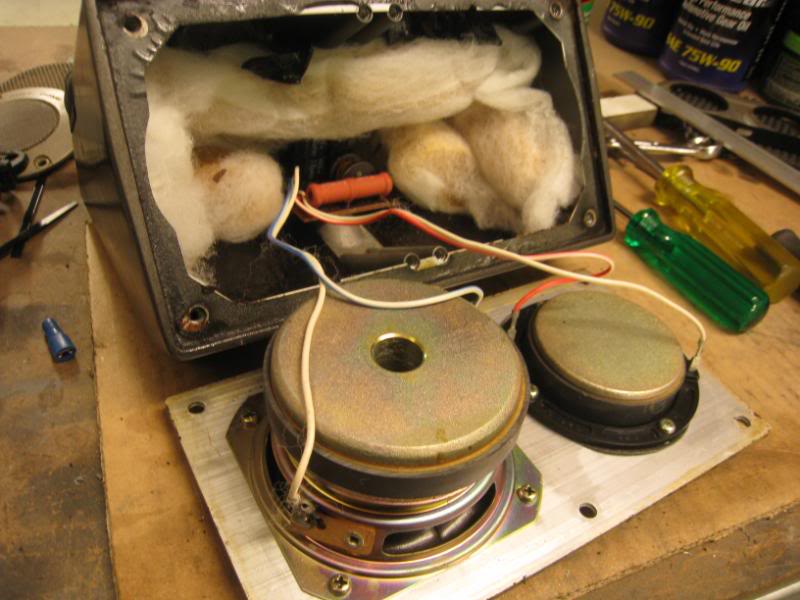
It looks like a pretty conventional 4in bass driver, so that should be easy to replace. The tweeter I’m not so sure since it’s such a big diameter. But at least the tweets are still working ok. So off we go to the stereo shoppe tomorrow to see what we can find.
As for the rest of the car, it’s doing alright. The low gearing is starting to shit me though….lots of fun when giving it a good squirt thru the gears but then you get onto the freeway and at 110kmh it’s pulling 3900rpm…anyway I reckon I’ll leave the 4.6 diff gears in for now, at least until after the Wakefield trackday next mth.
Well I think I am now *that* close to swapping out the 4.6 for a 3.9. I think that ratio would be a perfect compromise.
Tonight I finished up the speakers.
The MTX TH402 bass drivers were a pretty close fit, but still a touch too big, so a little surgery with the dremel was required. Also the flange on the speaker casing had to be cut slightly too.
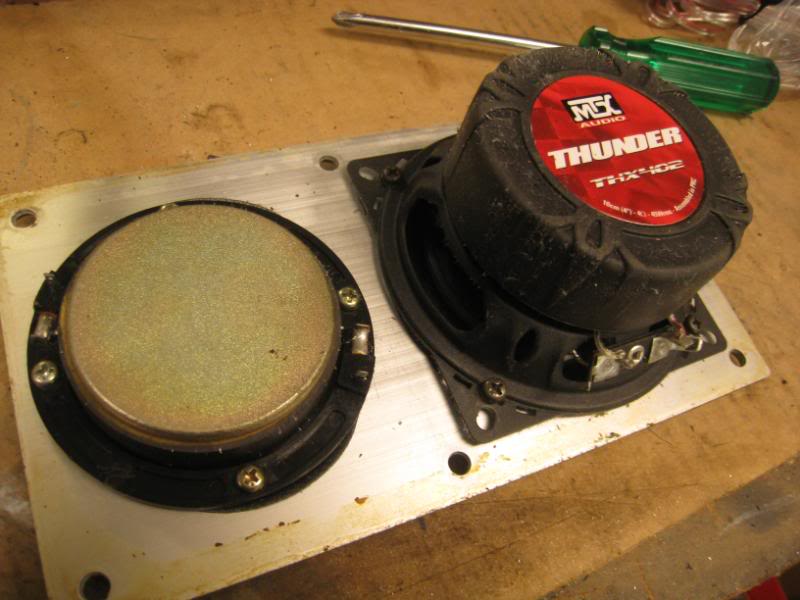
But from the outside it looks pretty good.
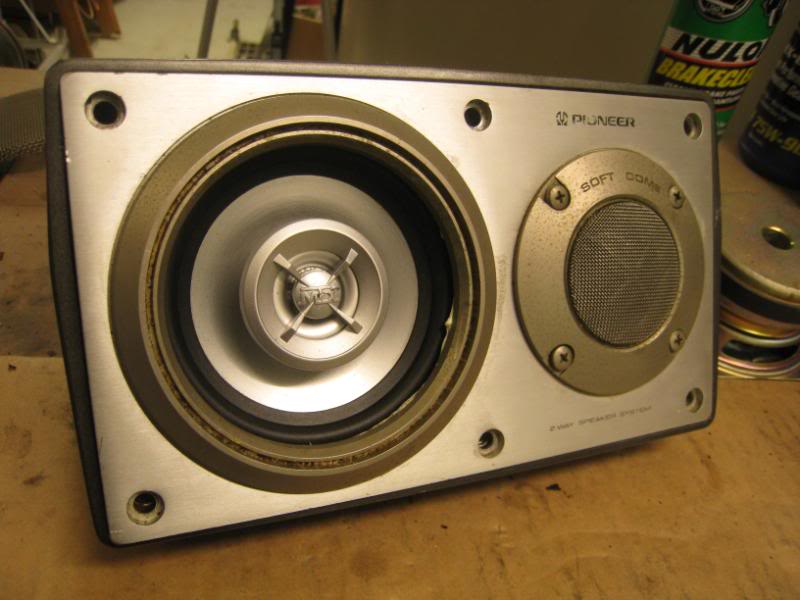
And with the grilles in place you really can’t tell.
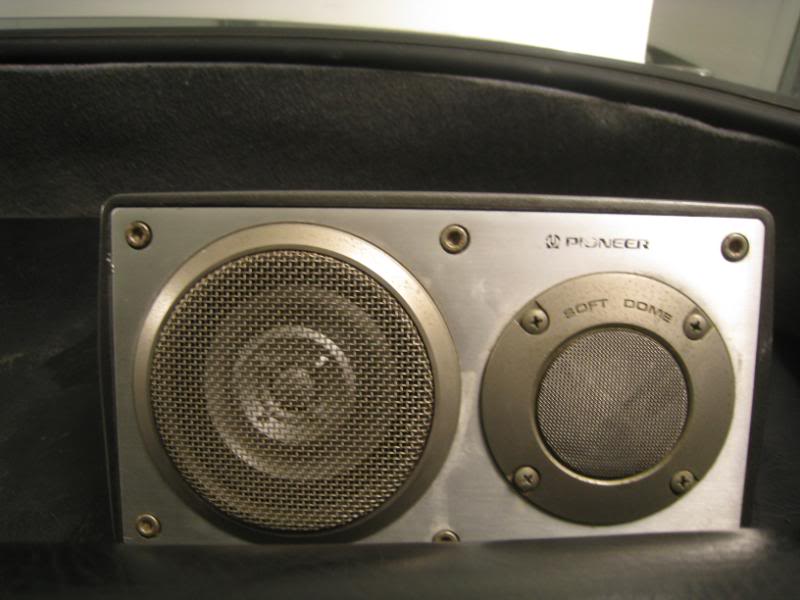
And here’s the result!
[youtube]http://www.youtube.com/watch?v=yzf4Vf0X0tA [/youtube]
The vid makes it sound a bit tinny but actually it’s not too bad at all, and you can now crank it a lot, lot louder than with the blown old speakers too and I can turn up the bass a heap more.
Someone suggested that maybe it’s better to ignore the old tweeter and crossover and just hook up the MTX speakers to run full range. So I hooked up one side with the crossover/tweeter and the other wide with MTX-only, and…there really wasn;t much in it, but I thought that the crossover/tweeter combo sounded a touch warmer. So some of the 30yr old Pioneer parts live to fight another day ![]()
Next job is to tidy up the deck install a bit!
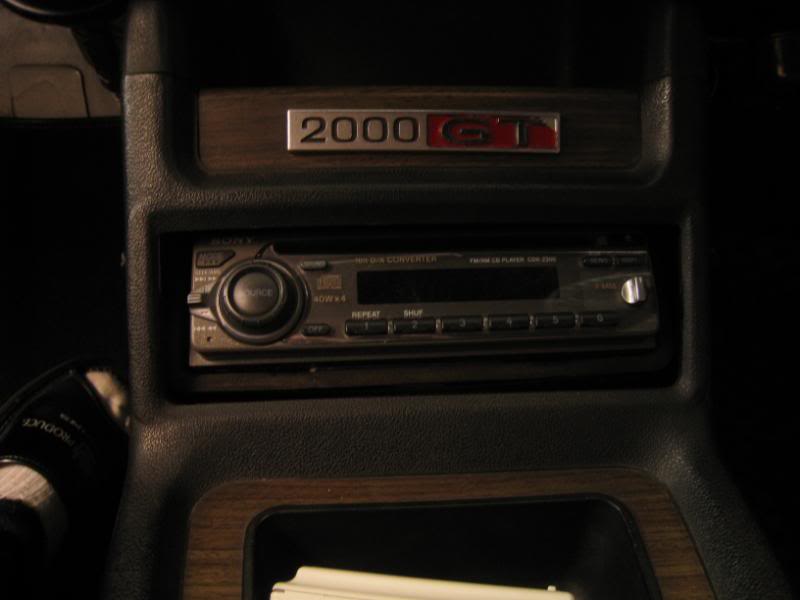
Latest job is to fit the Recaro I’ve had sitting around for years….I bought it in 1991, and it was only used for a couople of years in my AE86 and my brither’s MR2, before it was put into storage. It’s an appropriately subdued design, and surprisingly, it’s still in production, but it’s called the Specialist today (IIRC it was Recaro RS back then).
First step was to get a frame made up, and for that I went to Pacific Motors, which is one of the authorised NSW Recaro dealers.
The Hako stock seat mounts in an unusual way, at the front the seat bolts horizontally to this big crossmember that spans the floorpan. So the Recaro adapter base bolts to that.
And at the back they chose not to use the stock mounts, but to fabricate their own mounts that bolt directly to the floor (you can see the stock mount at the right of the pic). This was partially for strength, and partially to get the mount lower, so that the Recaro wouldn’t end up too high. Some nice work here…
And in it goes! The Recaro is a lot bulkier than the stock seat, and the fancy fabrication on the seat base does mean that your bum is slightly lower than stock, but the front of the seat is a little higher for more support.
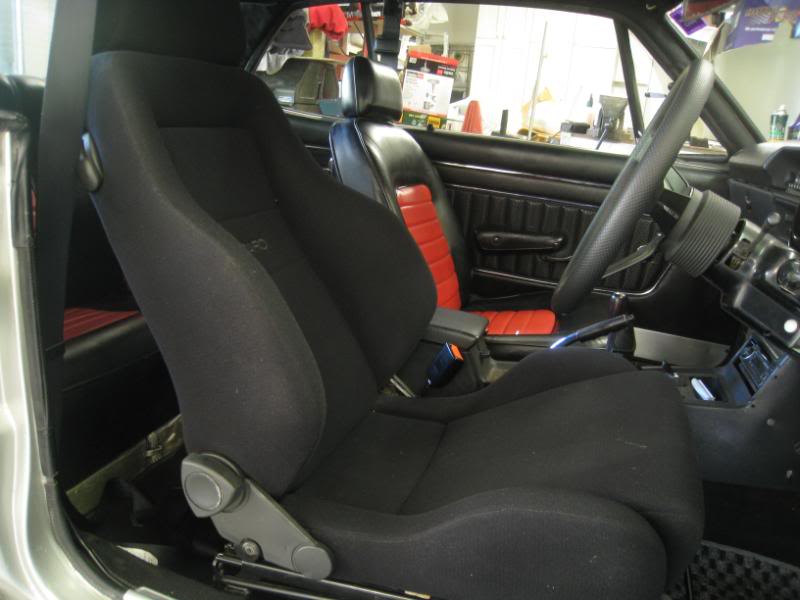
The wider seat does foul slightly on the door…

But there’s not much that can be done, since the adjuster would foul the centre console if the seat was moved inboard.
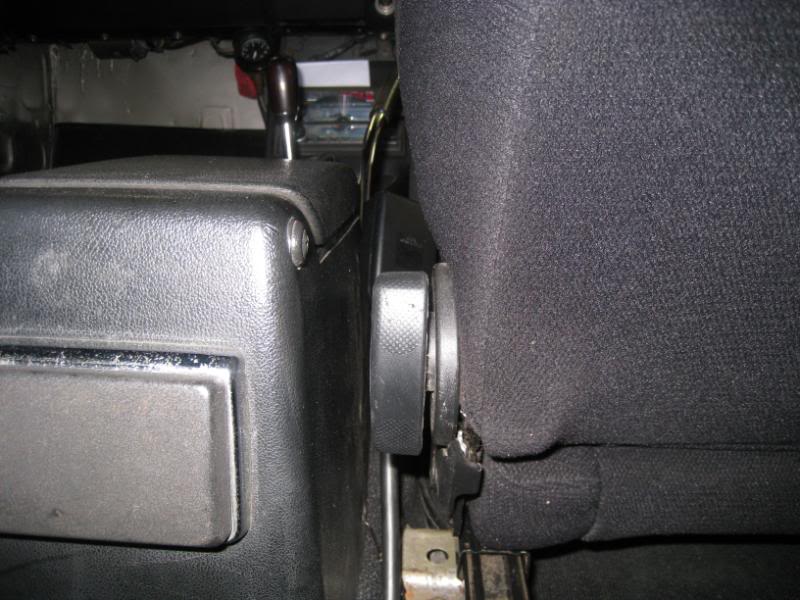
So far I’m quite happy with it, it’s infinitely more comfy and supportive than the stock tombstone seats…my only gripe is that with the seat being a little close to the door, and the side bolsters sticking out quite a bit, there isn’t enough room for your right elbow when you are swinging the steering to the right…but I reckon I’ll muck around with the seat base adjustments and see what we can accomplish.
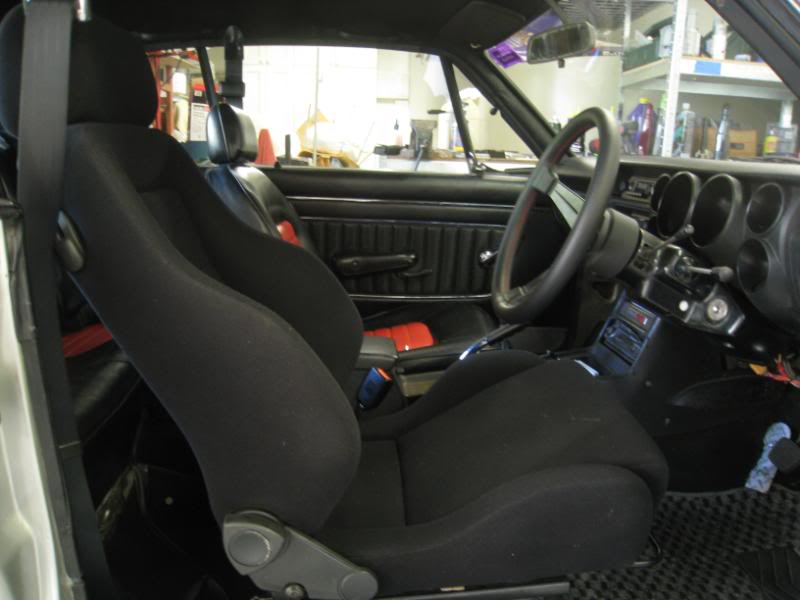
With the Wakefield trackday being next weekend (the 15th) there is a lot to do to prepare the car.
The first thing is brakes…the front discs are thin and unvented and the pads inside the twin piston calipers are tiny. I was going to upgrade the hoses to braided but the stock hoses look like they were replaced not too long ago, the rubber is still supple and there are no cracks.
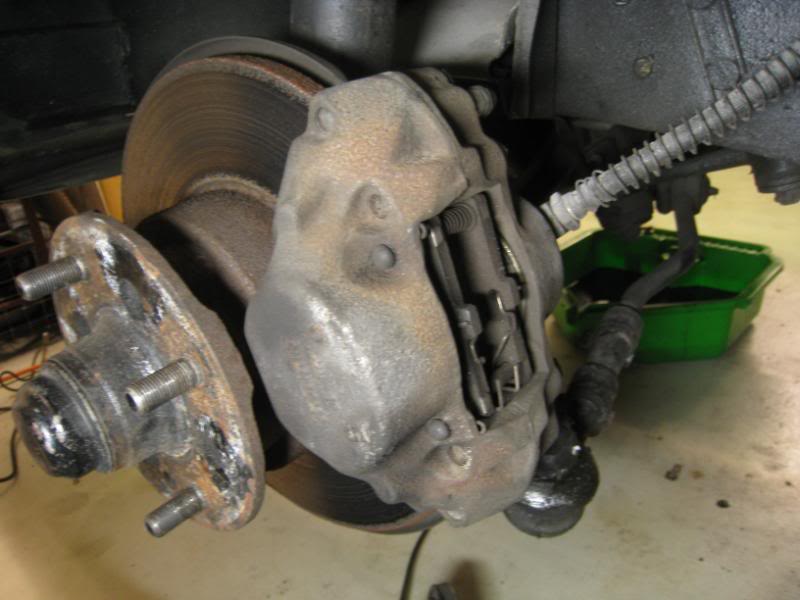
So to make the most of what we’ve got, I have some street-spec Endless pads to put in (with oil filler cap for size reference!) To be honest I don’t think these brakes will last too many laps but you work with what you got…
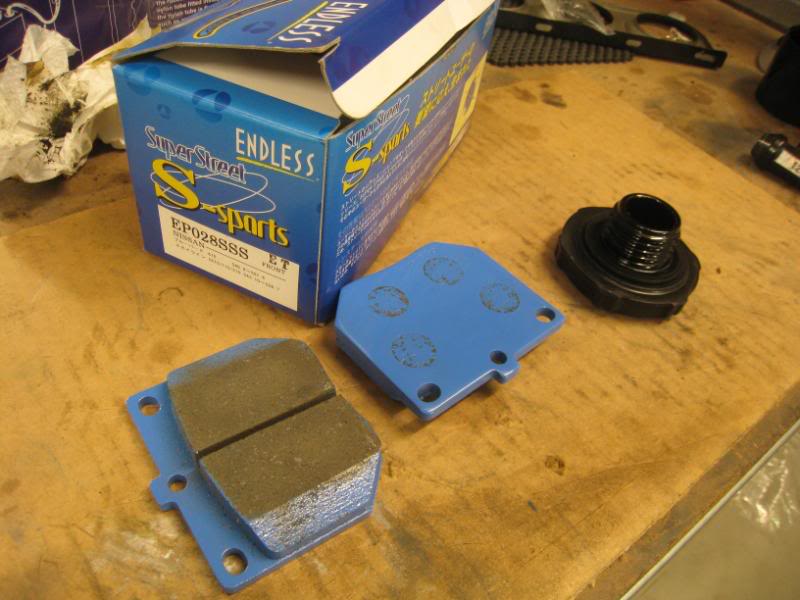
Changing the pads is super easy compared to a modern sliding caliper. First you remove these pins (like RC car body pins) and then remove these rods, and then the pads are free to slide out. To push the caliper pistons back in (to make room for the thicker new pads) I just use an old pad to lever the piston in against the disc.
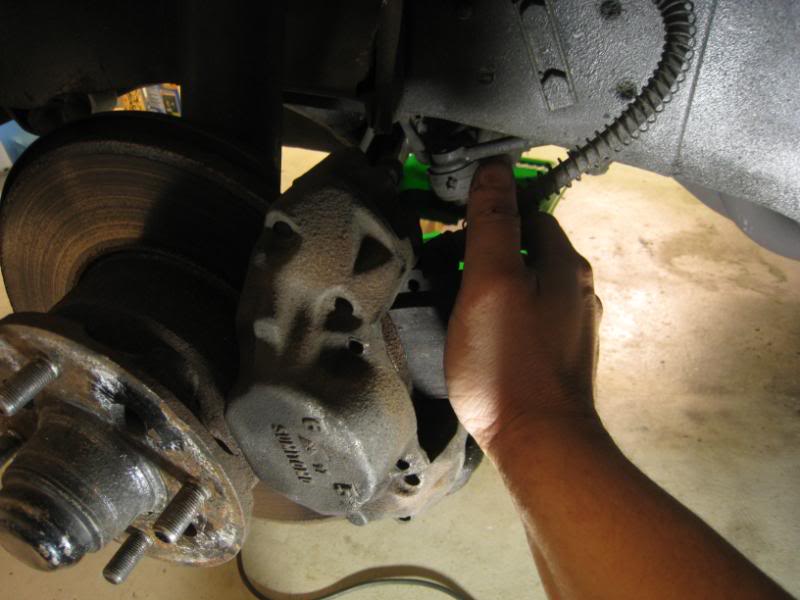
But as you do it, keep an eye on the fluid level, which will rise, so I use a plastic syringe to rmove the excess (eg the oral syringe type that comes with children’s cough mixture)
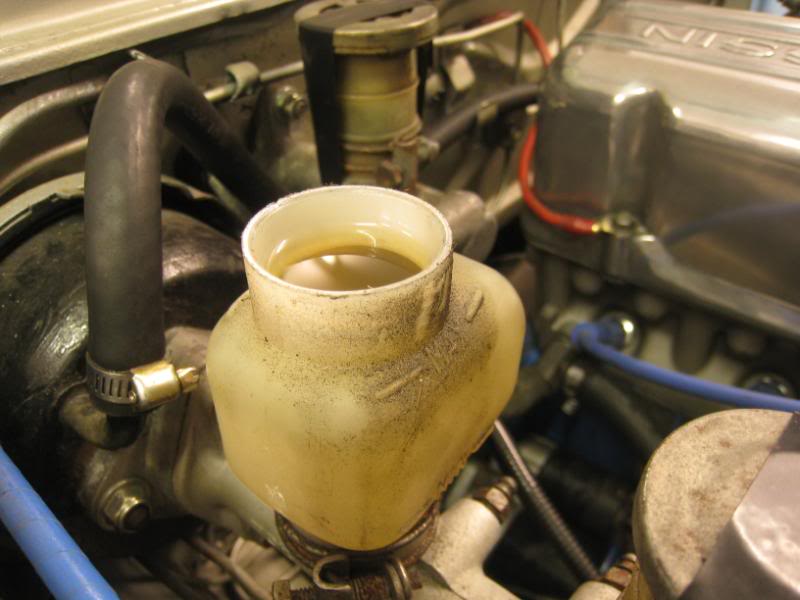
New pads in…
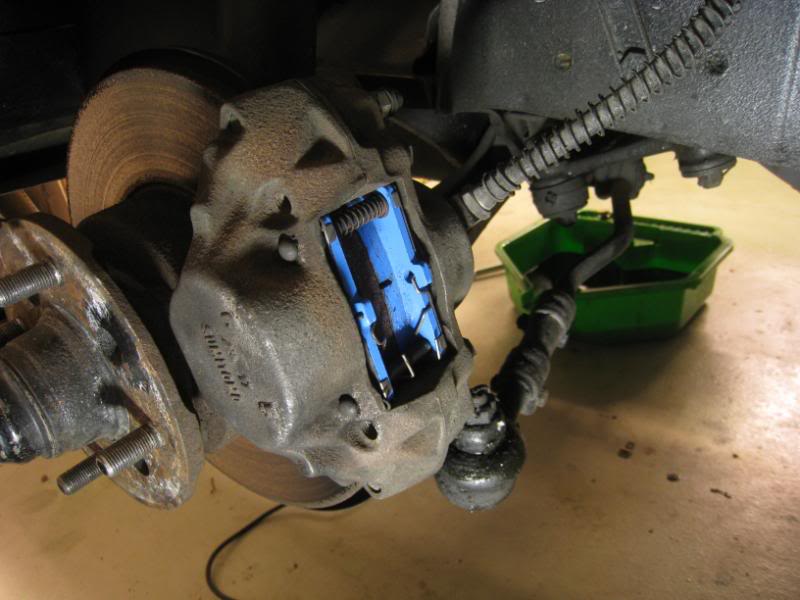
Then I bleed the brakes…long ago, I fitted Speedbleeders so you can do it without the help of a second person. Also the Speedbleeder bag and hose makes it convenient too.
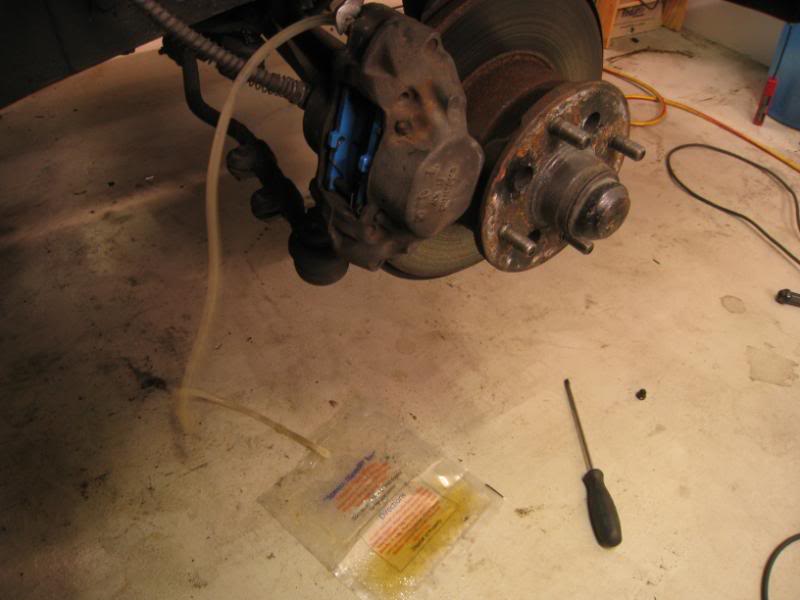
Top up with HKS Dot 4 fluid…and we’re done. I’ll bleed the rears later…I think I might be doing some work back there in the next few days. To bed in the new pads, I take it out onto the road and do 15 or so consecutive stops from 80kmh. I brake with medium pressure (just enough to dip the nose) and accelerate back up to speed again once teh car slows down to walking pace. After about 12 stops there’s a little smoke from the pads, which means that the resins and chemicals used in manufacturing are leeching out.
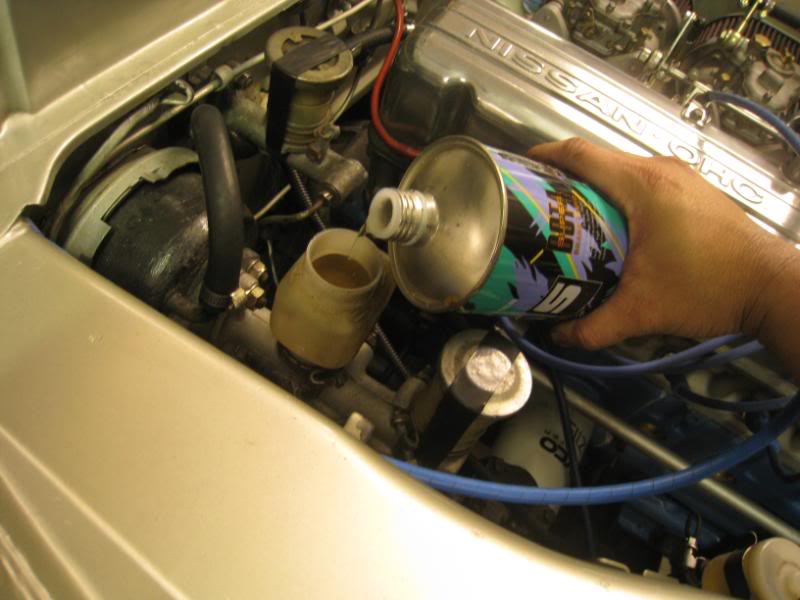
Then a 4pt harness…
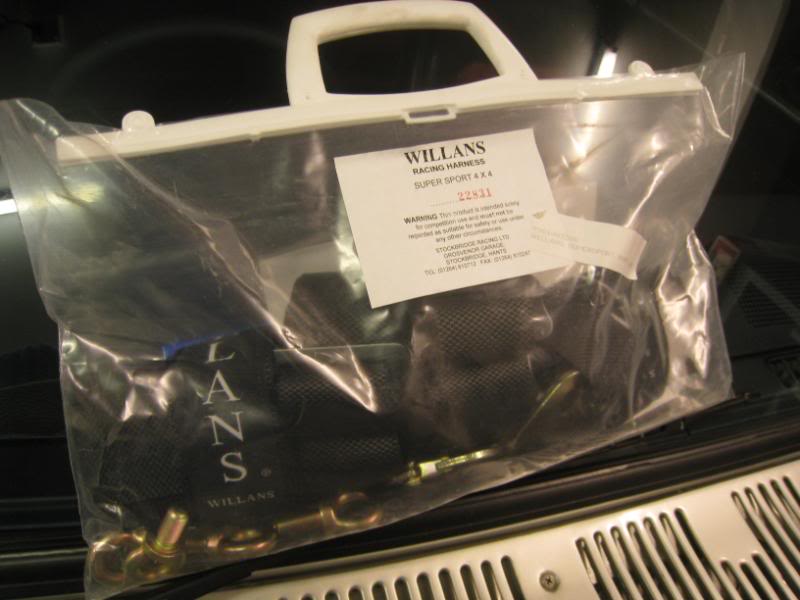
Which is the clip on type, so you remove the seat belt bolts and replace them with eye bolts that allow the harness to clip on a the factory mountings. I did have to get longer eyebolts for the lower mounts, which have thick spacers to allow the belt to swivel.
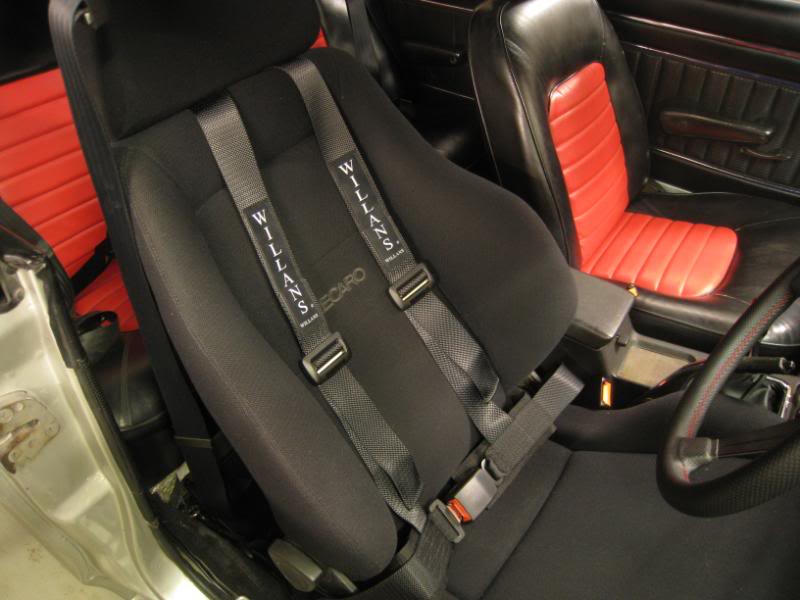
The Hako doesn’t have a recovery bottle for the radiator, and sometimes, you leave a little puddle of coolant after you park the car. So checking the coolant level and topping it up is something you have to do every few weeks. For the track, I figure temps will be quite a bit higher than the street, so it will possibly be belching out quite a lot fo coolant between runs. So I fitted a universal recovery bottle, which fitted neatly next to the radiator once I relocated some relays and wiring that was previously bolted there.
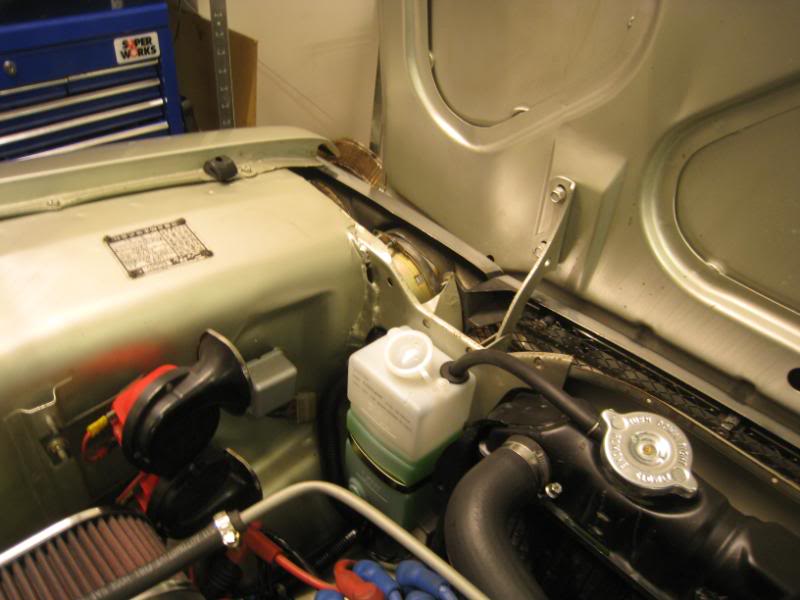
The thing is, the coolant overflows into the bottle, but doesn’t get sucked back when it cools. Then I learn that there is a different kind of radiator cap for recovery systems and I have to get one of those instead.
Here’s what a recovery-bottle radiator cap looks like (on the right) compared to a non-recovery type. It’s basically got a second seal at the top of the cap. With the non-recovery type, it was trying to suck the coolant from the bottle back into the radiator but lots of it was leaking out around the cap. No problem now with the proper cap tho.
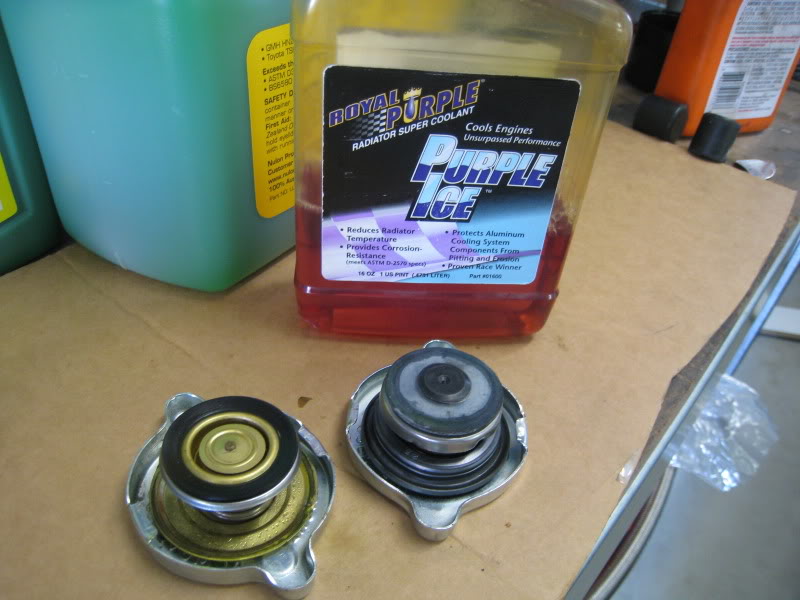
And oh, I refilled the cooling system with some Royal Purple “Purple Ice” which is an additive meant to make the engine run cooler by reducing surface tension. Half a bottle for the whole cooling system (which is 5L).
http://www.royalpurple.com/street-thunder-2.html
The RP catalog has some interesting blurb on the coolant/water mix however. A normal 50/50 coolant/water mix doesn’t cool as well as straight water, but straight water has no corrosion inhibitors. A surprisingly big temp difference. So I settled for a 1/3 mix of coolant to water as a compromise. Plus the Purple Ice of course.
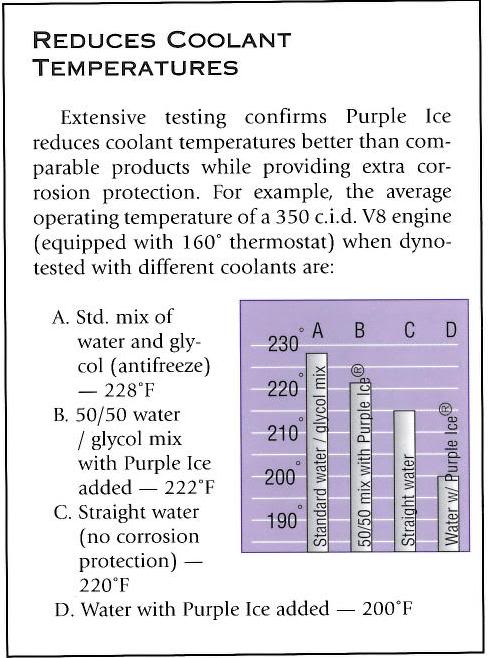
The other thing I did over the weekend was block up the heater bypass.
This is what I had before…the heater’s disconnected, and how it’s normally plumbed-in is that the outlet at the back of the head will go into the heater, then the hose that comes out of the heater will go into that silver pipe (which then goes into the water pump). When you bypass the heater on an L-series, the easy and common thing to do is simply to join the outlet from the back of the head to the water pump inlet like so:
But what some ppl say is that this is the wrong way to do it. When the heater is off, the argument is that no water will flow from the back of the head to the water pump inlet. And when the heater is on, then what happens is that hot water will go from the head to the heater, and then what comes back to the water pump is cooled water….and by connecting the two, what you get is hot water being recirculated from the head back to the pump. Which is not how it’s supposed to work and your engine will run cooler if you plug the outlets instead of joining them.
So for the time being I’ve plugged up the outlets, but after the trackday I will get a proper brass plug for the water pump inlet and remove that silver pipe.
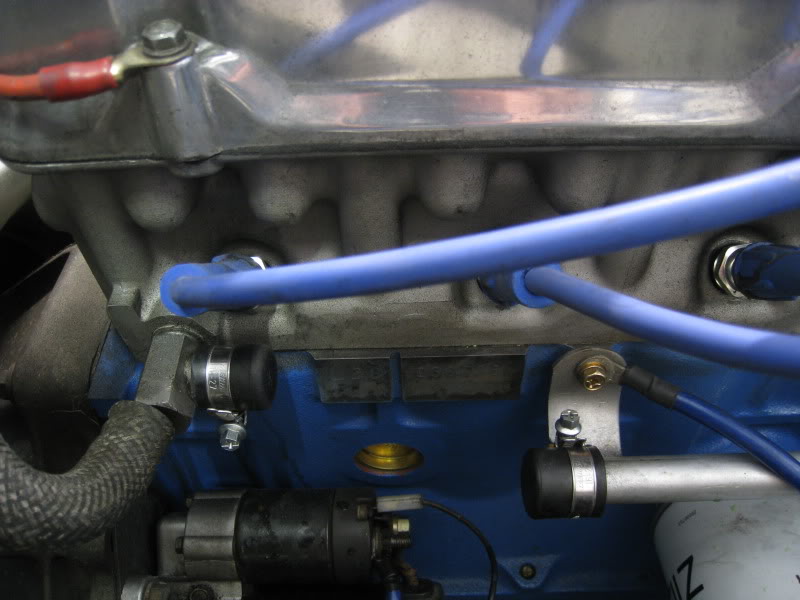
Hopefully all of this will keep the overheating at bay at Wakefield this weekend…
The other thing that happened this morning that has started to concern me tho is that when I cranked the engine, something at the back of the alternator started (around where the diode pack is) to glow…and the battery +ve terminal on the alt got red hot too (he says ruefully, inspecting the burn mark on his thumb). Once it started, I couldn’t get it to do it again, and it still seems to charge ok, 13.5V at idle and 14.1V with a few rpm up.
I think I’ll take it to the electrician who rebuilt the alt to let him have a look tomorrow.
Well…it turns out that blocking off the heater bypass with those rubber plugs wasn’t such a great idea…
So anyway, I had gone to pay my old mate Greg (you’ll recall he has the silver Hako with the Hayashis) a visit to borrow some shocks which were surplus to his requirements (more of which anon). So after we had a bit of a chat, I jumped back in the car, fired her up, drove around the corner and…*sniff, sniff*…is that….coolant? (thank goodness it has quite a distinctive smell)
In the corner of my eye I notice the water temp gauge start to drop, a sure sign that the water is gone and the sensor is just reading air. So I pull over as soon as I can, shut off the motor, and see this:
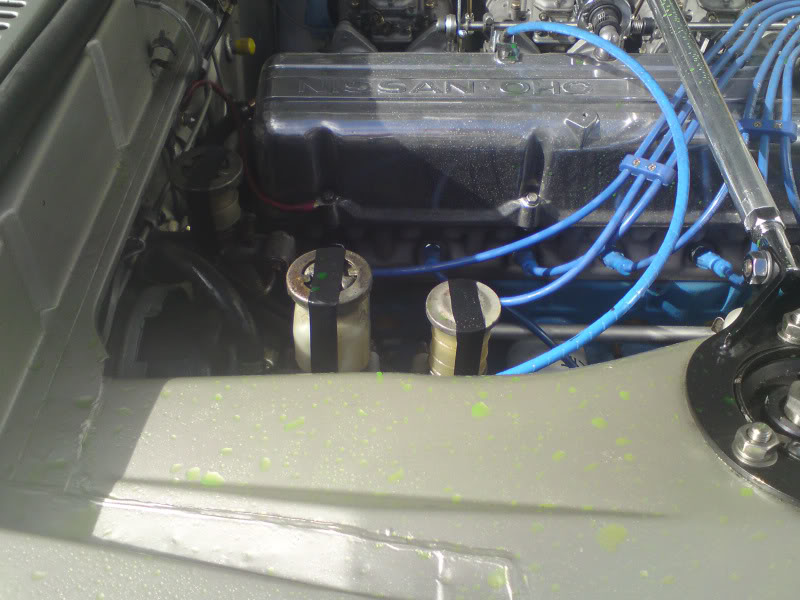
Coolant…everywhere. And the culprit was not hard to find, one of the rubber plugs had a nice neat round hole!
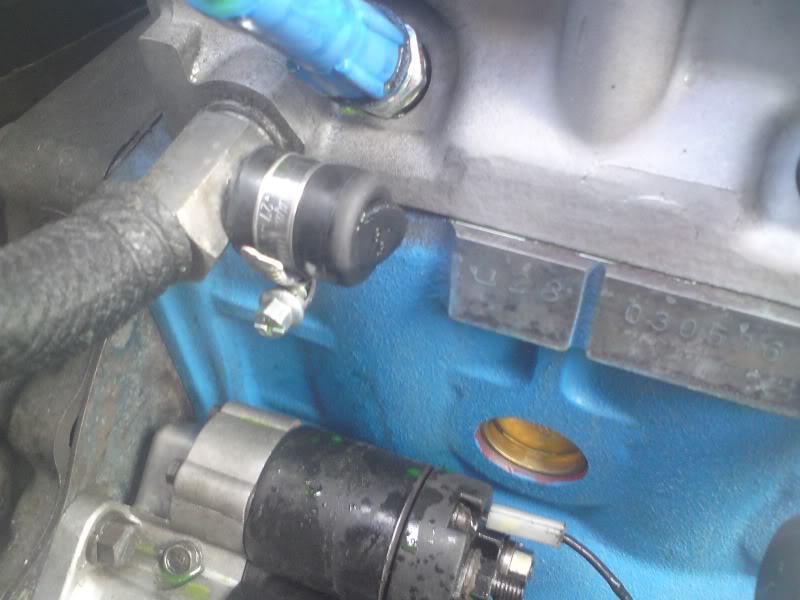
Thankfully I’d only driven a few hundred metres before shutting down, so I waited a half hour for the engine to get really cool down, then made a beeline for an underground parking station a few hundred metres down the road (wasn’t any parking spaces on the street anyway). Then I locked up the car, came back up to street level, and hailed a cab….took the cab home, picked up several containers of water and some heater hose and hose clamps…jumped back in the cab to go back to the Hako.
Then replaced the heater hose bypass (so it’s back to what it was before) refilled it with water, and drove back to work ![]() Thankfully the plug decided to burst at a time when it was most likely to be noticed, if say I was on the freeway with nowhere to pull off to, or nowhere safe to leave the car, then it would have been much worse.
Thankfully the plug decided to burst at a time when it was most likely to be noticed, if say I was on the freeway with nowhere to pull off to, or nowhere safe to leave the car, then it would have been much worse.
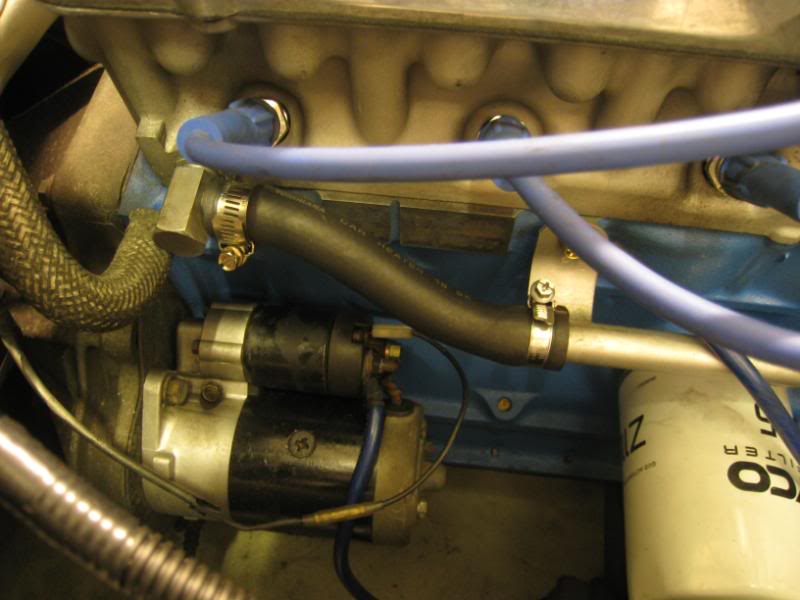
So yes. The coolant bypass is back the way it was…and I reckon I’ll probably leave it like that. Forever ![]()
The reason for the plug failing isn’t hard to fathom either….on the left is standard heater hose, which is about the same thickness of rubber, but, crucially, it is reinforced with fabric. The plug is just plain old rubber.
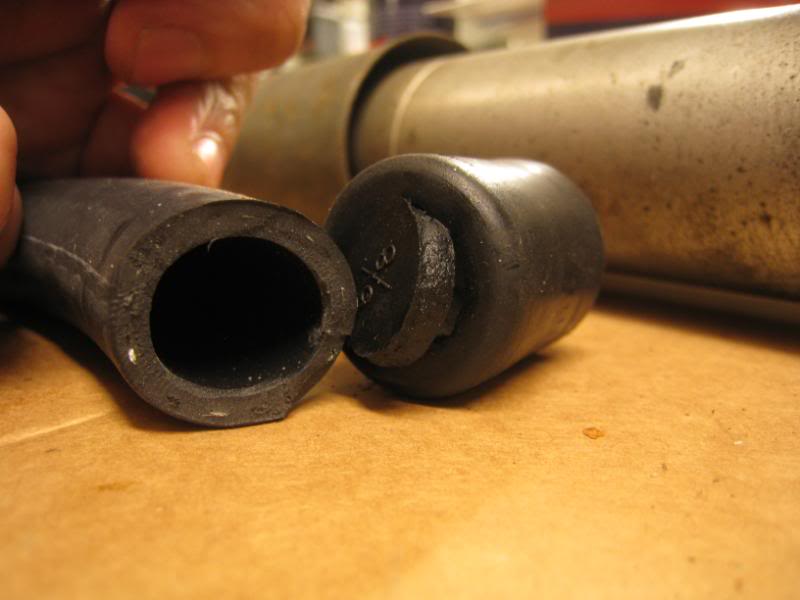
Anyway…about those shocks. You might recall that since we raised the bumpstops, the rear tyres do touch the inner wheelarch on fast dips. But I’ve since discovered that if youy get the tail out, when it regrips the tyre will scrape the wheelarch too, which might be a drag if it’s going to do that all the time at Wakefield this weekend.
So Greg kindly offered to lend me a set of gas KYB shocks he had spare.
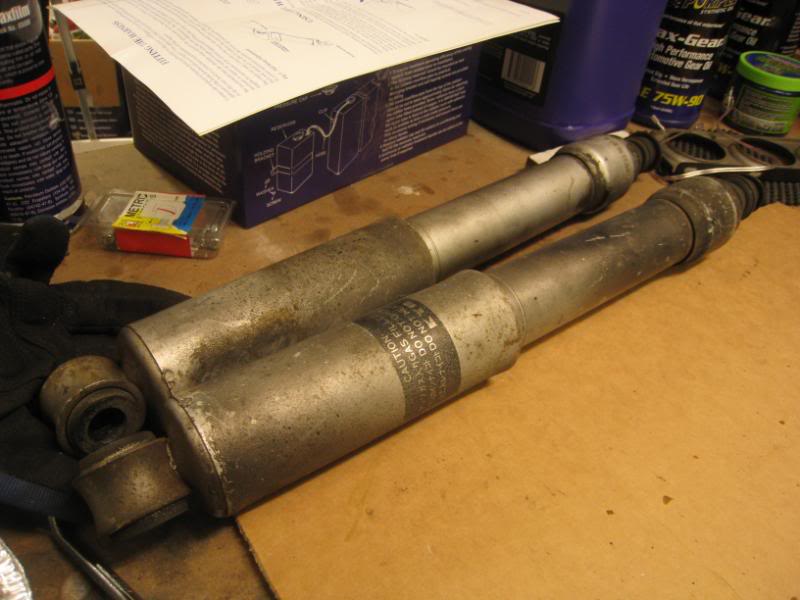
They are the same length as the non-gas red KYBs that were in the Hako from before, and just from pushing down on the shocks by hand, the silver KYBs seem to have a lot firmer bump damping.
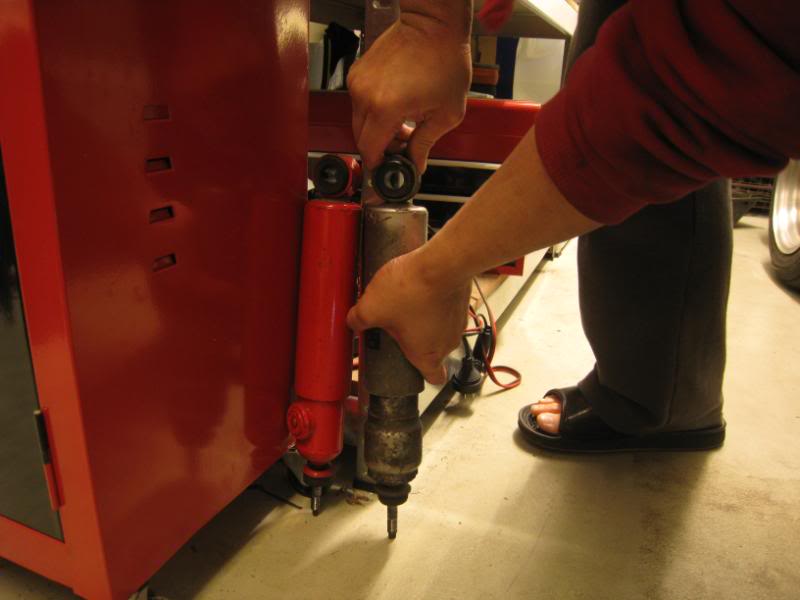
So in they go, and after a short drive they certainly are a lot firmer in the back than the old shocks were, and now it doesn’t seem like it wants to sit down at the back under power anymore, which is great. I didn’t push it, but the balance seems like there’s less understeer now, too, which should be interesting at the track.
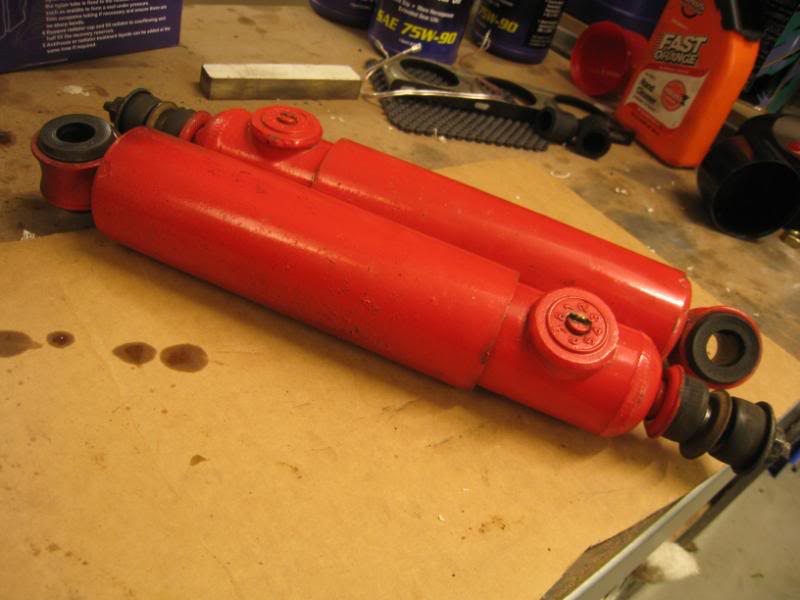
I reckon I’m not going to fiddle with the car anymore between now and the trackday ![]()
Well the trackday and come and gone, and the good news is that the Hako is still in one piece ![]()
It’s been running well but you can’t be too prepared, so we have packed most of my tools, spare oil and coolant, extra fuel and some spare heater hoses, fuel hoses, clamps, you name it ![]() This is not just insurance againt problems at the track but also the long 2.5hr drive to the track (which would be the longest journey undertaken in the Hako ever)
This is not just insurance againt problems at the track but also the long 2.5hr drive to the track (which would be the longest journey undertaken in the Hako ever)
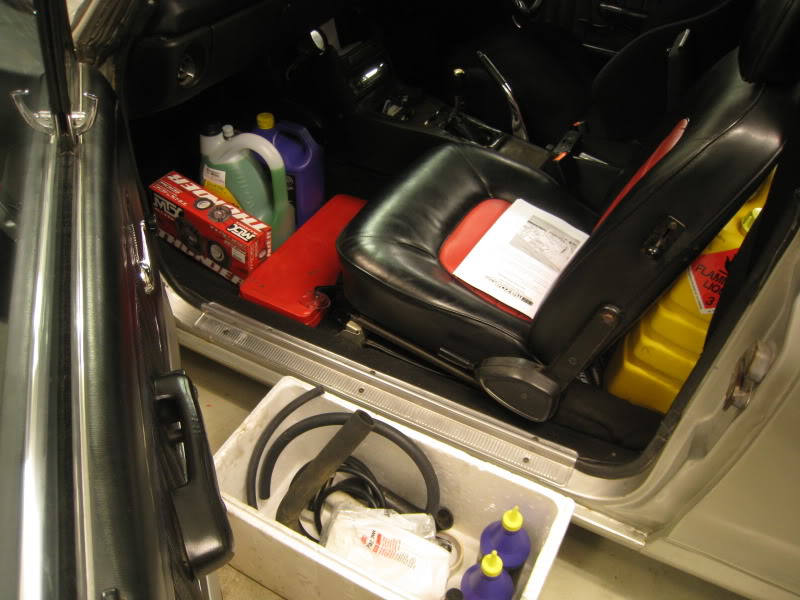
But the long drive down passed without incident and we arrived safely at Wakefield Park. I had been concerned about the low diff ratio limiting the practical speed on the freeway but even at 4000rpm in 5th gear (which was only 110kmh) the motor is pretty smooth and unstressed, and even the fuel consumption wasn’t that shocking.
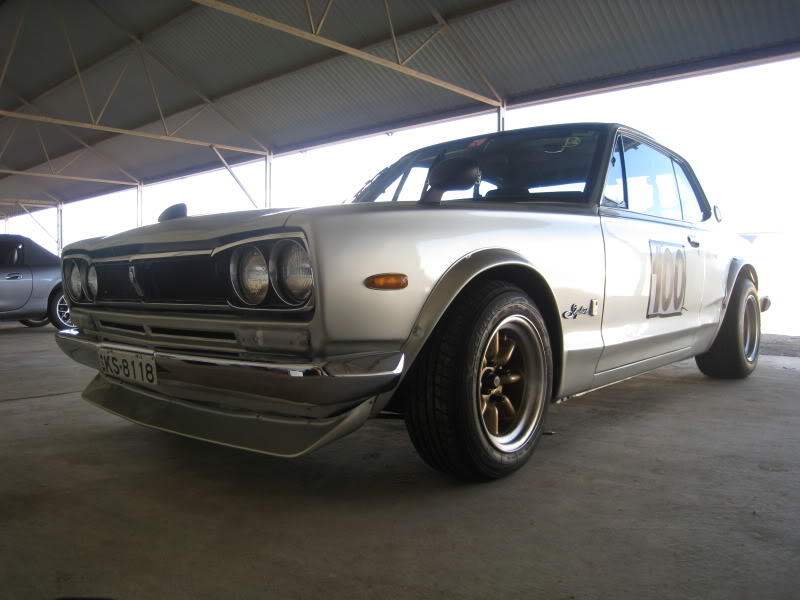
And here’s the first run!
[youtube]http://www.youtube.com/watch?v=8qSwIQWtbCE [/youtube]
The car ran great! We gave it hell all day and the oil pressure and temps remained stable and it felt tight and strong. The low gearing worked out great for Wakefield, being in the powerband in all crucial corners and pulling to 5700rpm in 5th gear (about 165kmh) down the straight before braking. Plenty of hump in a straight line, I found myself shifting up at 6000rpm, which dropped the revs back into the midrange torque in the next gear.
[youtube]http://www.youtube.com/watch?v=z3yytYZ-t4g [/youtube]
In terms of handling, the good news is that there’s decent cornerspeed, and it’s very benign and forgiving. Anyone could jump in it and go fast, it doesn’t bite, not even while jumping over the amazingly tall Wakefield ripple strips, so the foundations are there. The gripe I do have is that there is rather a fair bit of turn-in understeer. Once you’re up to the apex and powering out, it’s quite neutral, so it’s mainly just the initial tip-in which is a bit washy. In the vids you can probably tell I’m using a lot of trailbrake and then getting on the power quite hard on the exit to neutralise it, and that does dial out most of the understeer, but we are losing a fait bit of entry speed into some crucial corners as a result.
As to the reason behind it, I think we don’t have to look too far ![]() The front tyres wore very evenly and there isn’t any overheating or chunking of the outside tread, so i think it’s quite evenely loaded and there isn’t any geometry problem like insufficient camber. The problem I think is that we just don’t have enough tyre.
The front tyres wore very evenly and there isn’t any overheating or chunking of the outside tread, so i think it’s quite evenely loaded and there isn’t any geometry problem like insufficient camber. The problem I think is that we just don’t have enough tyre.
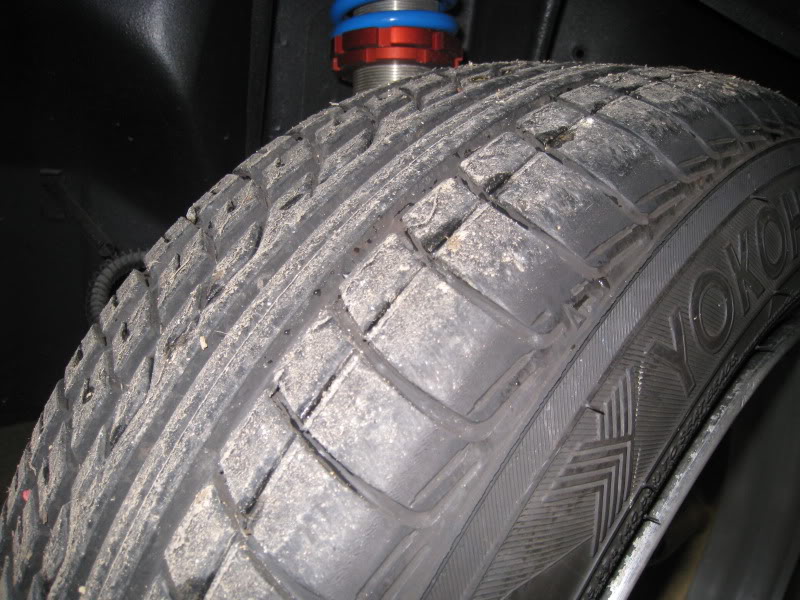
At the back, we have 245/50-14 Yokohama 352s, and at the front we have far skinnier 185/60-14 Yokohama C-Drives. Compared to the fronts, the rears hardly look worn at all after the trackday. One positive aspect of the big n little tyre combo was that we didn’t have any problems with traction at all, and even with the open diff, there is very little single tyre wheelspin and great powerdown coming out of corners.
The other issue we had was brakes. It probably didn’t help that I was riding the brakes a lot going into the tight corners, but they faded quite dramatically after about 2 hot laps. That meant that I couldn’t trailbrake as much and so we had more understeer…which led to even more overheating of the front rubber. So in the end, I had to approach each run with one hard lap, then 2 cooldown laps, then another hard lap.
The problem was that often when I got back into the pace, I would have good brakes or good front grip but not both at the same time! So my fastest laps were always the first timed lap in each run. If we can fix the braking power then I think it would be a lot more effective as a trackcar, but at the moment it’s fast only for a very short handful of laps time.
The organisers of the trackday rather optimistically seeded the Hako in the second-fastest run group…so the Hako would have to mix it (in Group D) with Lancer Evos, a 350Z, and other hot metal like S2000 and Megane 225. I found that I could stay with the pace and not hold anybody up for maybe 2 laps, but after that everything would be getting very slidey and brakeless and I’d have to back off and let ppl behind go thru.

Here’s me chasing a Mazda MPS6 (Mazdaspeed Atenza in Japan)
[youtube]http://www.youtube.com/watch?v=mNKvVG3ocUo[/youtube]
And a Lancer Evo6.
[youtube]http://www.youtube.com/watch?v=AicTGQgFI3c [/youtube]
Generally I found that I wasn’t losing much in a straight line, and if the brakes were in good shape I could hang in there too…but after about a lap of hanging on, I’d have to back off and fall back.
But overall I’m pretty happy with how the Hako went. Best laptime was 1’15, which was about midfield. Fastest time of day was a tussle between some hot Nissan S15 Silvias which were circulating at 1’08s, and then there were a whole bunch of Lancer Evos, 350Zs and other S15s around the 1’13 and 1’14 mark.
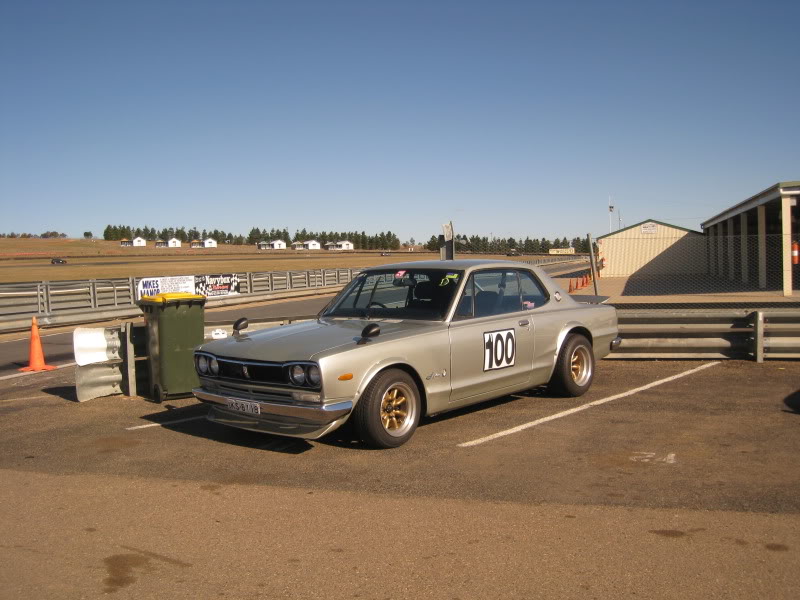
So for a 40year old boat with skinny tyres and no brakes I think we did okay ![]() To be honest 1’15 was a bit quicker than I though it would go, and I’m really, really pleased that it’s quite fast around a track by modern standards…I really didn’t see that coming. The final laptimes will be posted up on a website soon and I’ll put the link up when it’s available.
To be honest 1’15 was a bit quicker than I though it would go, and I’m really, really pleased that it’s quite fast around a track by modern standards…I really didn’t see that coming. The final laptimes will be posted up on a website soon and I’ll put the link up when it’s available.
Oh, and a question was answered for me on the day too! In japanese magazines, I always see Hakos with the wipers like this below. The oldschool wipers in the Hako don’t self-park at the bottom of the windscreen when you turn them off (t will simply stop where they are when you flick off the switch). So maybe I figured that it was some bizarre affectation about reducing air resistance by parking the wipers upright….but now I know the reason why.
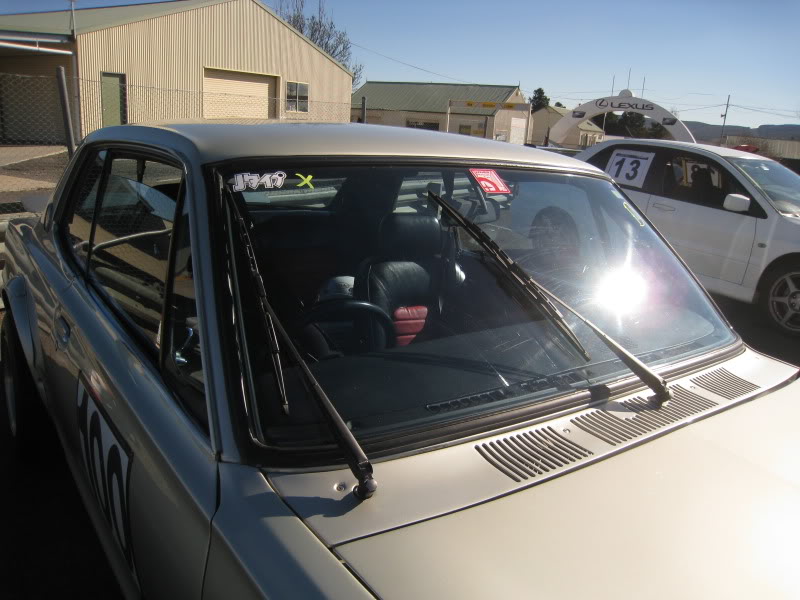
After a few laps at speed, the wind resistance overcame the wiper mechanism and the wipes started to creep up the windscreen by themselves. So after 2 laps they were at 45 degrees across my field of vision. The solution? Park ’em upright….. ![]()
There’s room for improvement…I think that upgrading the 600lbs rear springs to…maybe as much as 750lbs would work well, but fitting a rear swaybar (there isn’t one back there) would be a better solution. Brakes…well anything we do would make it better and I think I might look into the Toyota 4-pot caliper and Mitsubishi vented disc conversion that a lot of the Zed guys seem to swear by. If we had better brakes and turn-in I think a time in the mid 1’14s would be achievable…but it’s it’s a lot of fun anyway as it is.
There were lots of pics taken by my friends on the day, and I’ll post them here as they get uploaded. Until then here are some great pics from various forum posts.
These great shots are from Silver6 at ozmazda.com
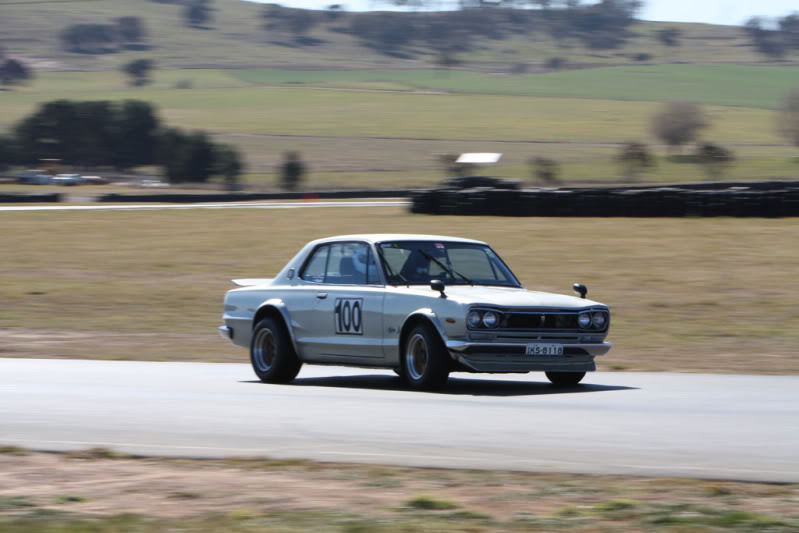
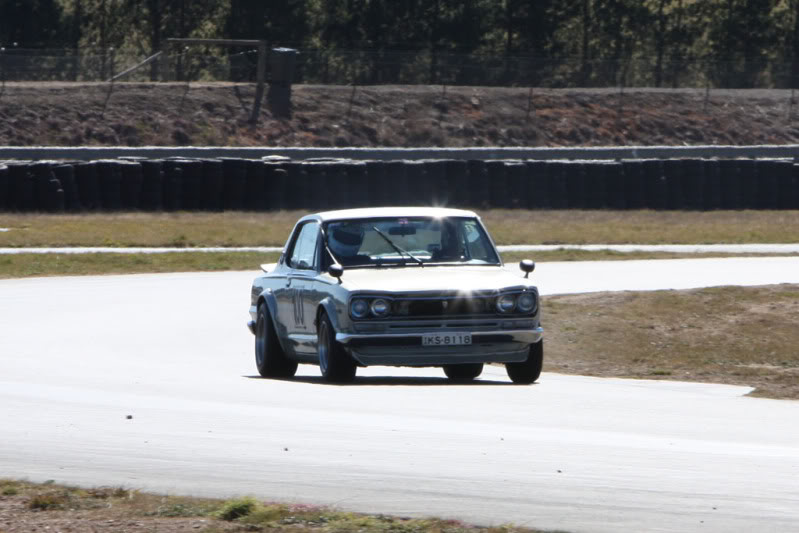


And these are from Jalapeno at jdmstyletuning.com
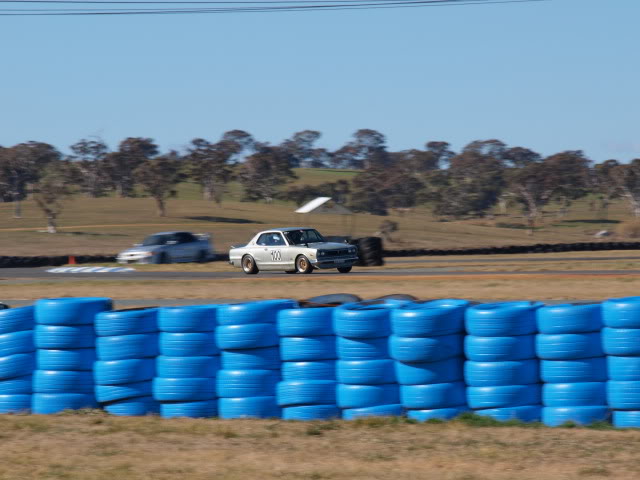

These are from my mate Derek Lau:


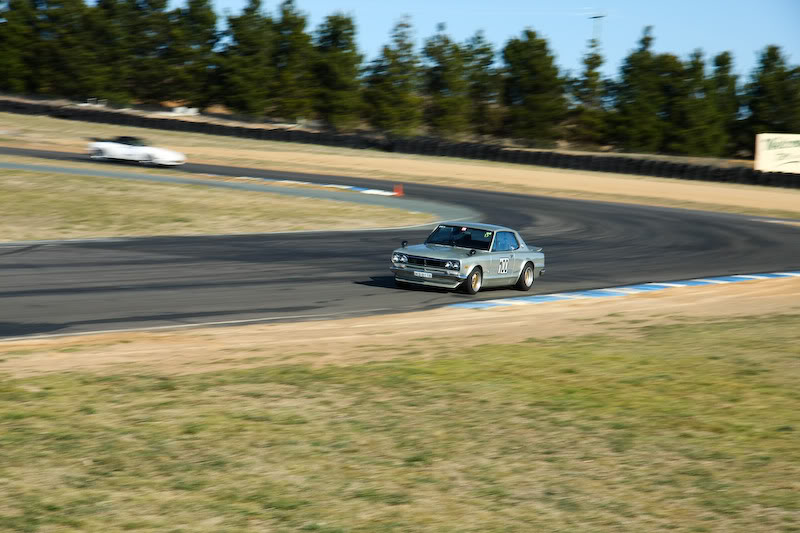
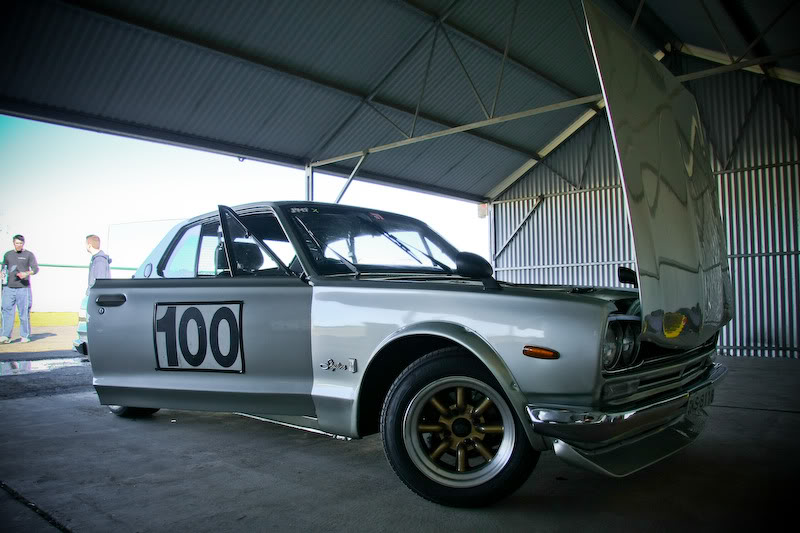
Where there’s smoke, there’s fire…where there’s fire, there’s brake fade ![]()
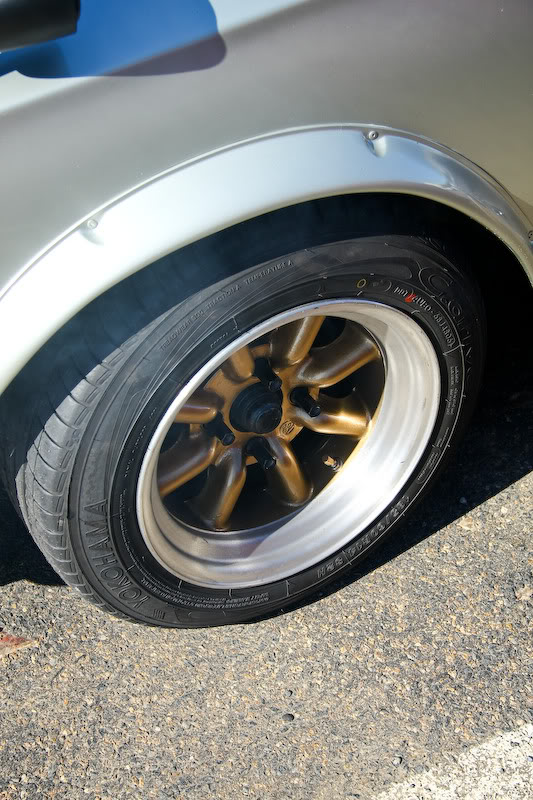
And these are from my mate Richard Hinze

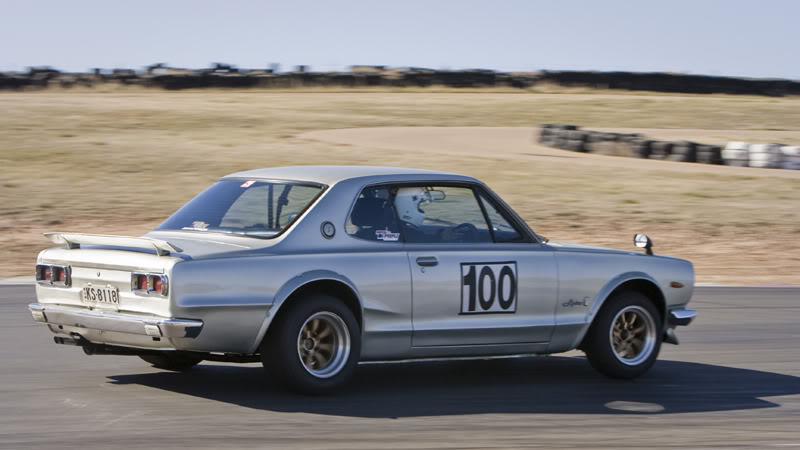
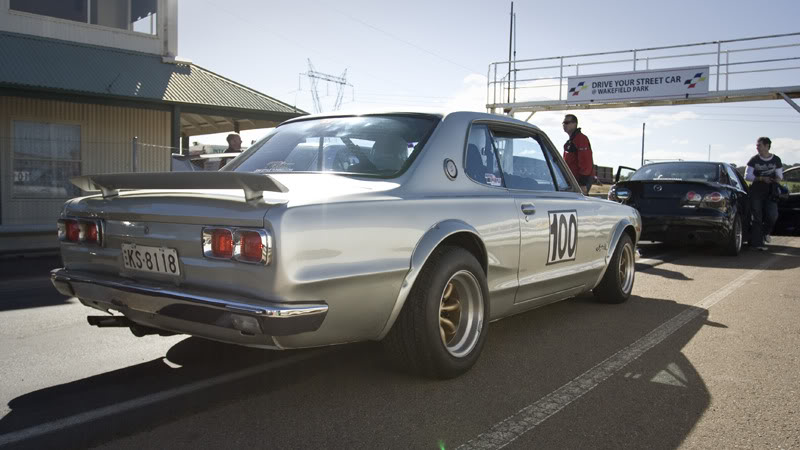

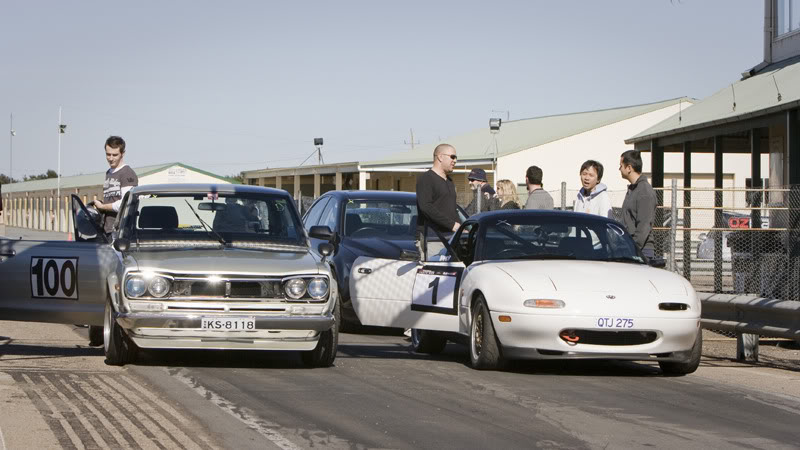
What did I say about the Wakefield ripple strips being high? ![]()
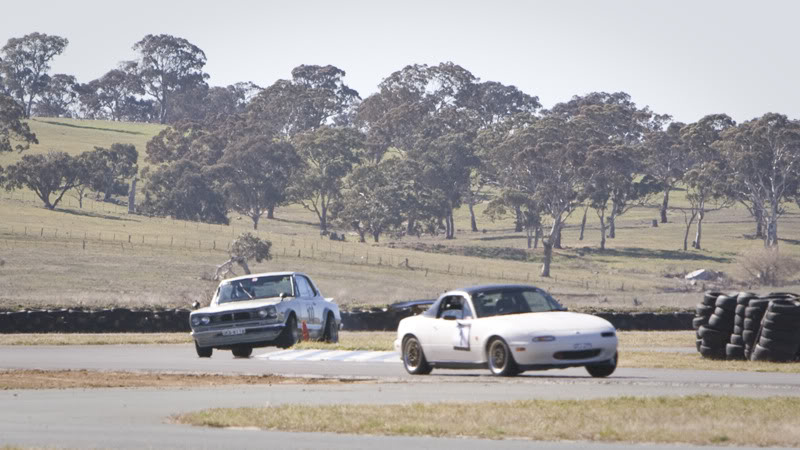
Lately the starter motor has been starting to play up. You would turn the key, and it would only be able to rustle up a half turn of cranking before weakly giving up. Oh, eventually it would manage to turn over more than half a turn and then the engine would catch and fire but it was getting annoying.
The wiring was fine, the connections were good and there was only 0.8V of voltage drop between the battery and the starter when cranking, so the starter was getting plenty of juice, and the problem would have to lie within.
So off comes the starter. Thankfully in the Hako it’s an easy thing to remove, just undo two easy to reach bolts and it pretty much just falls off. But before we do all that it’s important to disconnect the battery. The Hako starter is switched on the earth side, so it gets a constant +ve feed from the battery, so that power wire will short against the bodywork if the battery is not disconnected first.
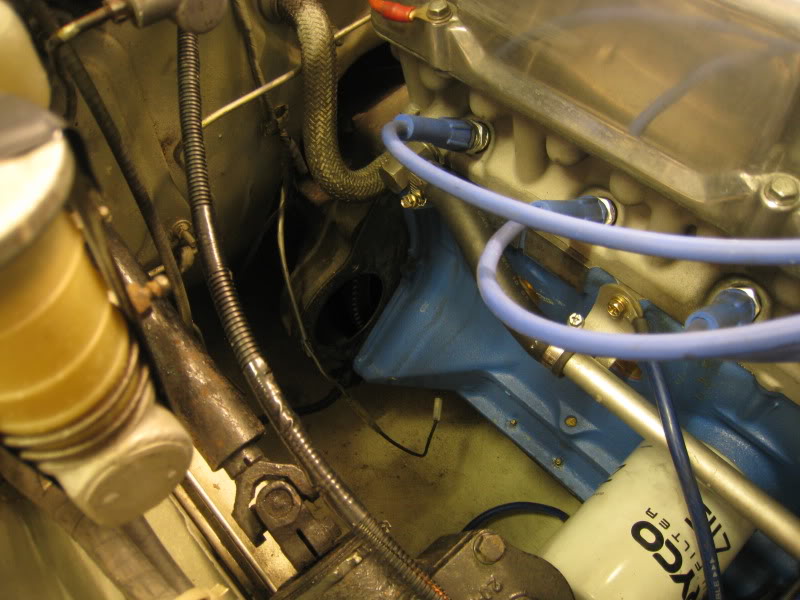
Once it’s on the bench, the starter isn’t a very complicated device to understand. The big part is the starter itself, which is just a huge electric motor.
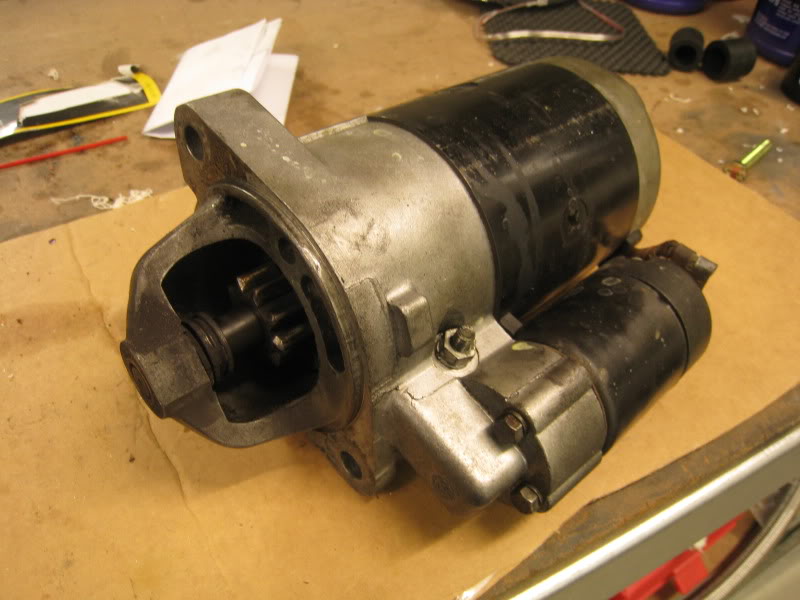
But notice that there are no wires going into the starter at all, just a big braided copper wire that goes into the smaller thing.
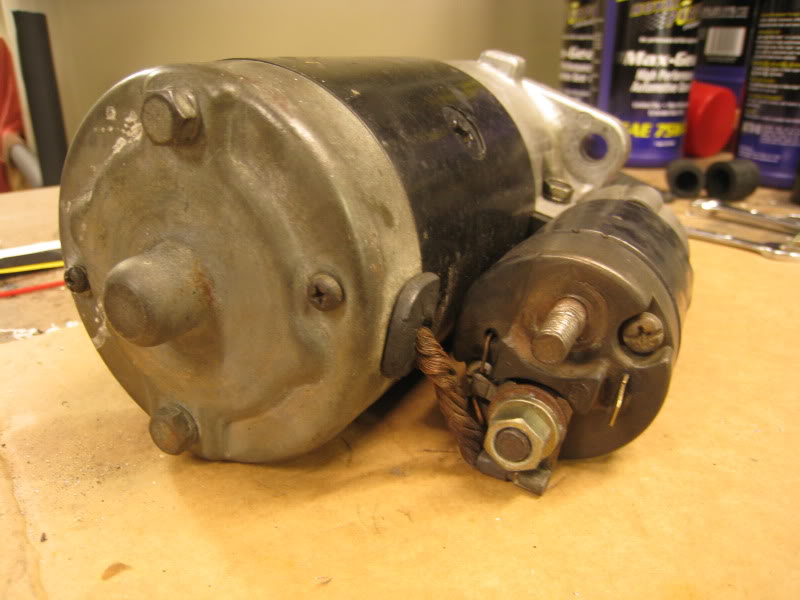
That smaller thing is the solenoid, which does two things. Inside it is an electrically operated plunger, which draws back this piston, which is attached to the starter shaft itself. When the piston is in its normal position, the starter gear is retracted.
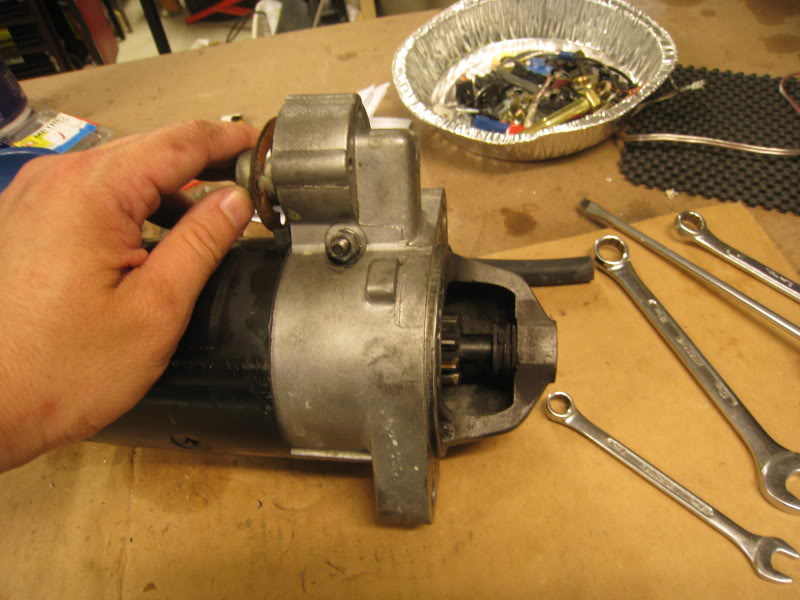
But when you crank the starter, the piston draws back, and you can see that the starter gear now moves forward to engage with the flywheel.
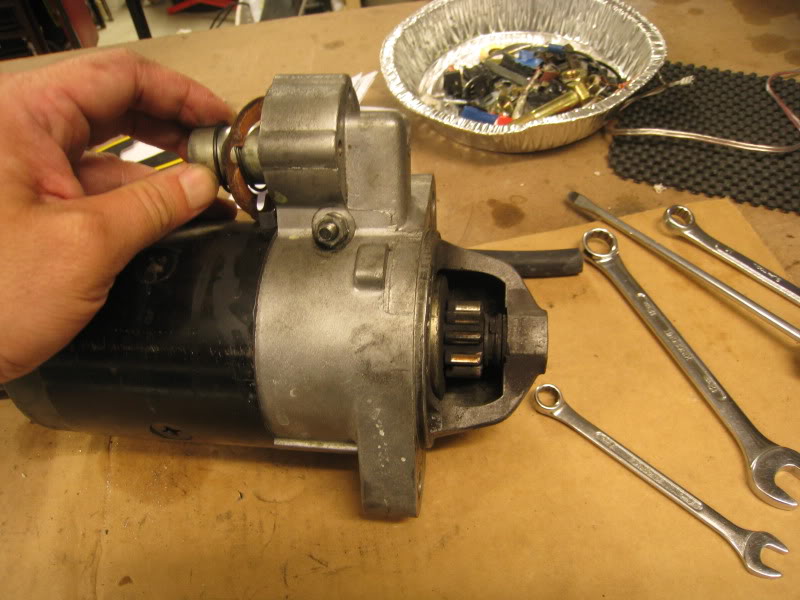
The second thing the solenoid does is redirect the juice to the starter to make it turn. At the back of the solenoid are these two huge terminals. The one on the bottom is the +ve feed to the battery, and the one at the top takes the current from inside the solenoid to the starter (its where that big braided wire attaches to).
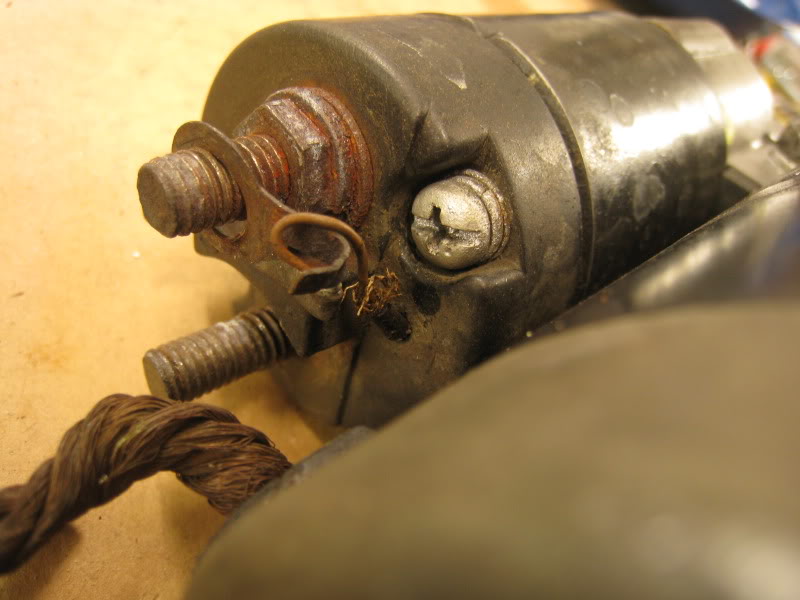
But when we take apart the solenoid the problem is apparent straight away. When you crank the starter and the piston slides back, its second function is that it pushes the rectangular copper bar on the right back too. It then touches those two copper pads (which are the inside of those big terminals), bridges the connection and the juice will flow to the starter. But as you can see, the copper contacts are toast, and there’d be tons of resistance with all that crud…no wonder the starter couldn’t get enough torque to turn the engine over.
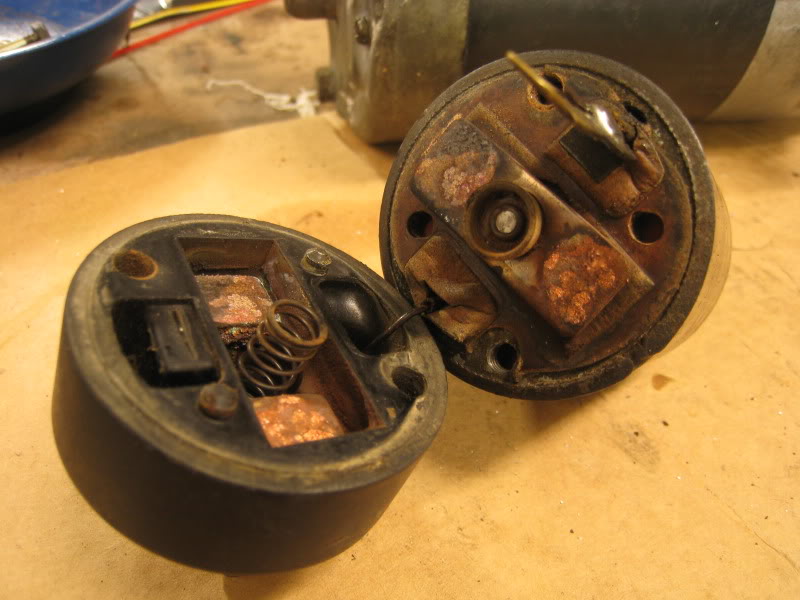
After a bit of sanding, the contacts are nice and shiny again. At this point, I reckon we could have just put it all back together but we might as well disassemble the starter to see if there is anything weird going on in there too.
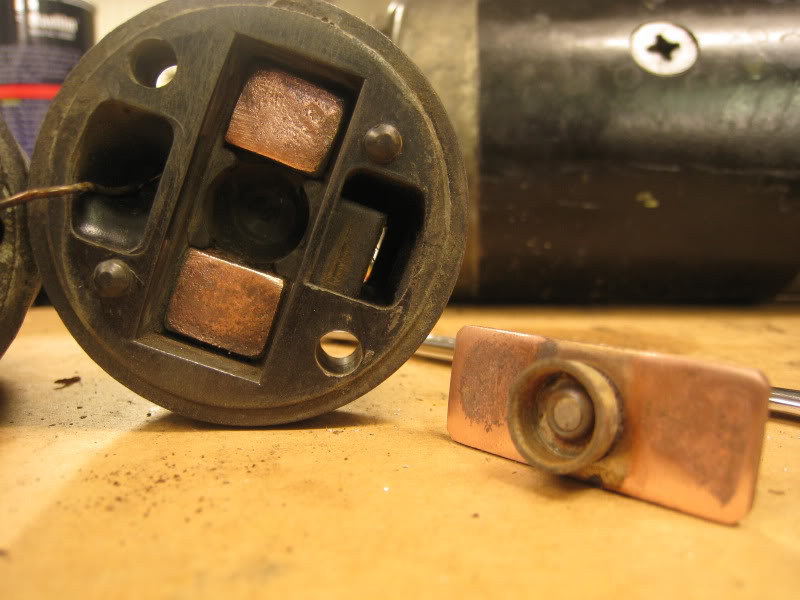
It’s easy to take apart, and you can see the fork that slides the starter gear back and forth, and the guts of the starter.
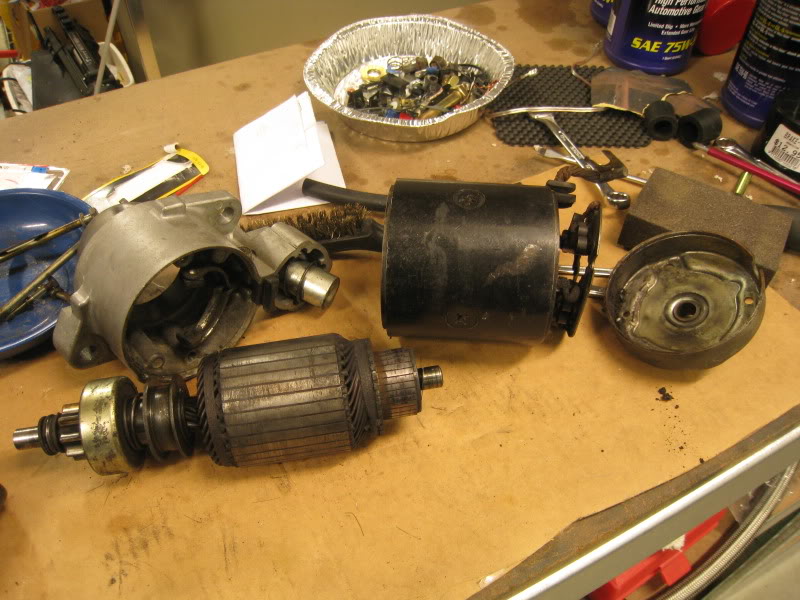
The comm looks a bit worn at first…
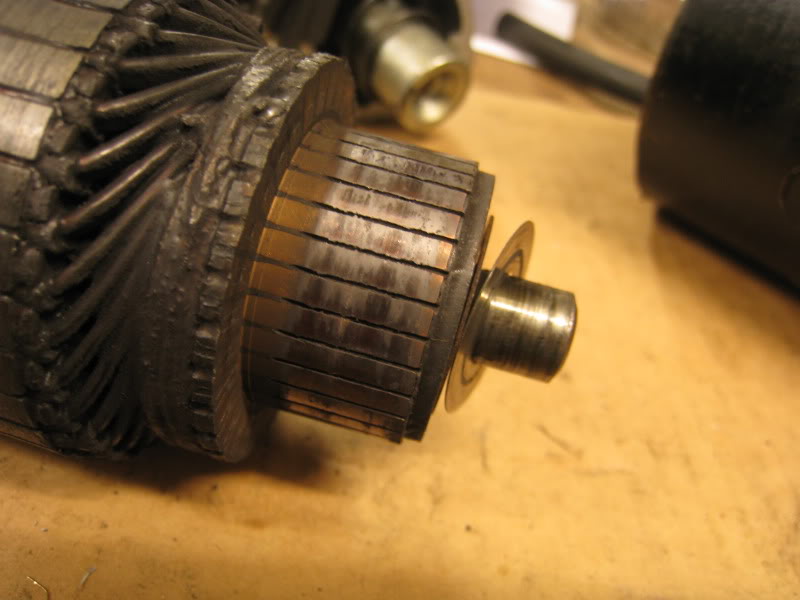
…but after a bit of sanding the copper came good again. Also I cleaned out the grooves between the copper sections with a pick tool, apparently the gunge that accumulates in the grooves can contain metallic particles from wear, and those can conduct current and reduce the torque of the starter.
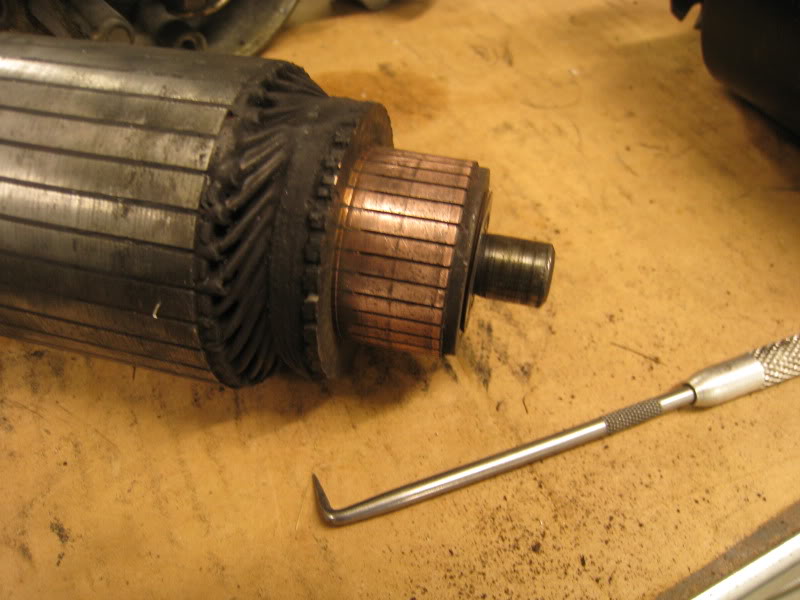
And here’s the business end, the brushes (which conduct the current, so are ultra important). The brushes look ok and are not cracked or broken, and the springs that keep them pushed against the comm look ok. The manual says that they should be changed when they are worn down to 12mm, so they are quite borderline in this case, but I figure that’s something we can fix later and let’s see if the solenoid repair has fixed it.
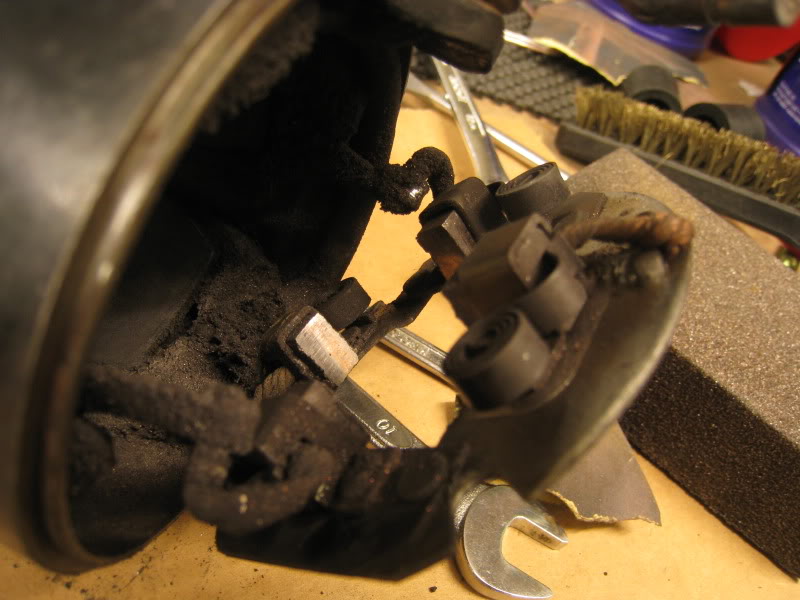
Back together it all goes….
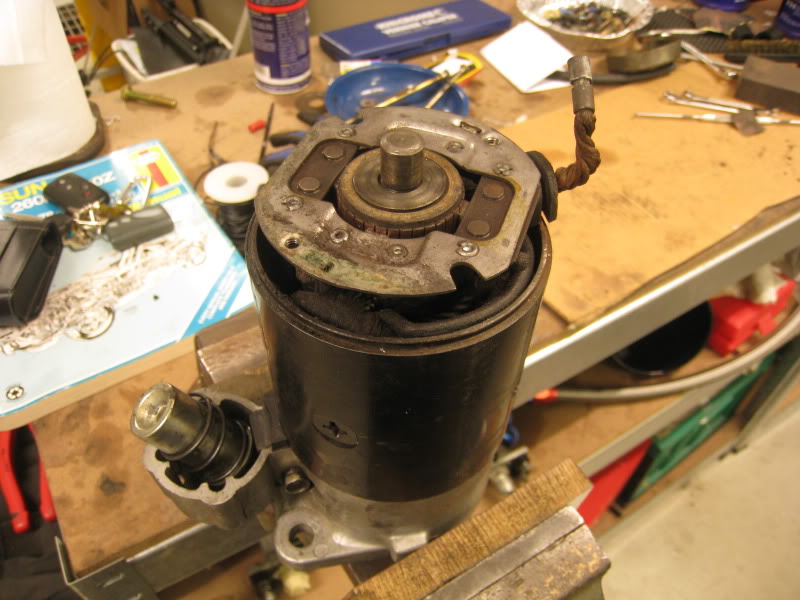
…and into the car it all goes.
The result? Success! ![]()
[youtube]http://www.youtube.com/watch?v=4-HKQzGDXC0[/youtube]
The starter now cranks great. One of these days I’ll take the starter off again and get an electrician to solder in new brushes. I was surprised at how simple the starter is inside, but i’m really glad that it’s one of those oldschool things that can be fixed, rather than thrown away and replaced.
I decided to finish off the restoration of the original starter, and got an electrician to solder in new brushes for me, and machine the comm nice and clean again. Thanks to Mark at North Shore Auto Electrical for doing a great job.

And as you can see compared to before the new brushes are a lot longer, so the old ones were definitely worn pretty low.
Before
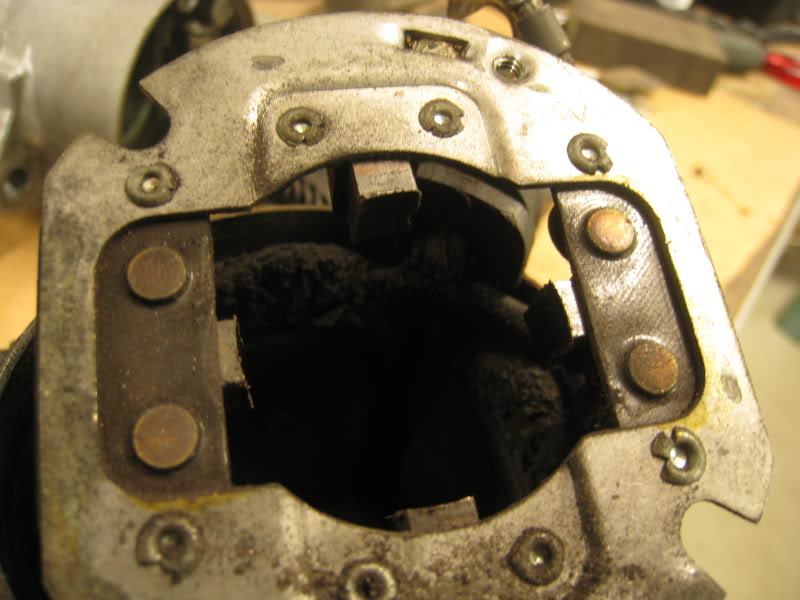
After ![]()
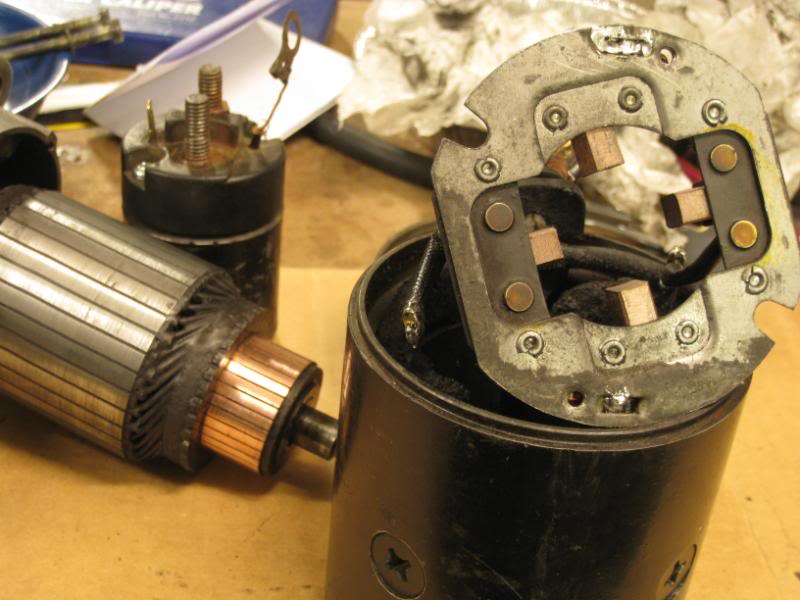
Once all refitted, it did noticeably spin up with more energy so the new brushes have definitely made a difference.
But…while I was out tracking down starter motor parts, it turned out that a new starter isn’t really all that expensive. So I ended up with a 1.2kw model from a brand called OEX for the not unreasonable sum of $200. AFAIK the original starter is a 1.0kw 240Z starter and even though the new one’s 20% more powerful it’s noticeably more compact and lighter. We were always a bit concerned that the old starter would struggle to turn over the hi compression big six, and maybe having to work so hard has hastened its demise. Unlike the old starter, the new one can’t be opened up for repairs so it’s a throwaway once it’s worn. But now that the old one is ship-shape I’ll stow it away as a spare, who knows, maybe in years to come you won’t be able to get new ones anymore and the old one seems to be infinitely rebuildable.
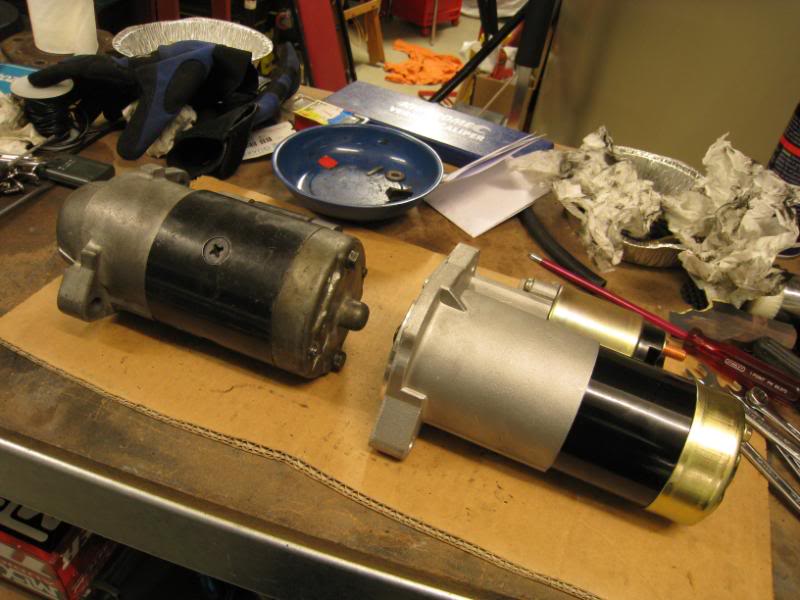
No problems with fitment of the new one…
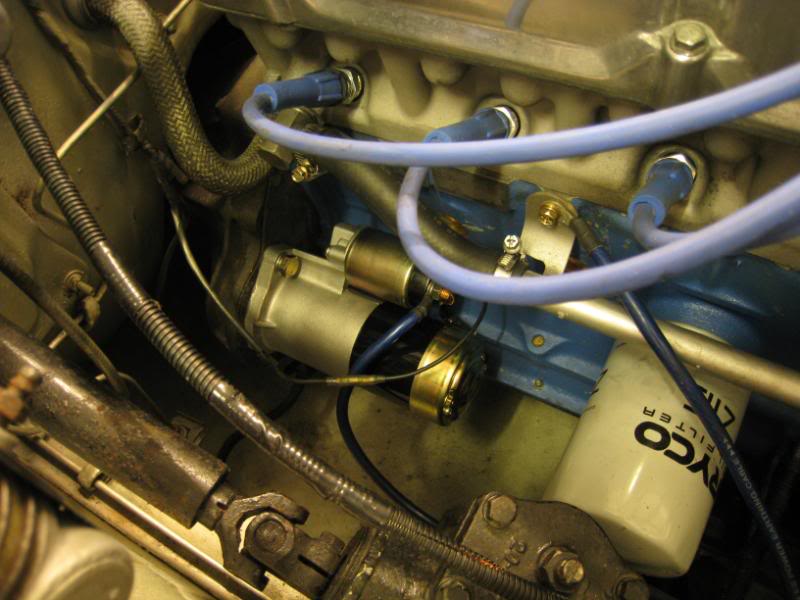
Works pretty good…if I had to put my finger on it I’d say that it doesn’t sound like it’s turning as fast as the old starter, but seems to have more torque and the cranking speed doesn’t seem to dip slightly when it does that first turn.
Right…it’s been a while since I did an update. Basically the new motor’s got 5000kms on it now and everything’s running great.
Before we get on with the latest mechanical update, my old friend Justin at www.jdmstyletuning.com decided to feature the Hako as their latest “Members Ride”.

My buddy Kelvin Ng took some awesome shots of the car as you will see too. The whole article is at: http://forum.jdmstyletuning.com/showthread.php?t=19640
The shots look like the whole car park is dark, but in fact it’s brightly lit. That dark effect is done with certain unusual camera settings and lots of flashes with those umbrella things. Love those pics.
But the one thing I had to fix lately is a squeaking noise from the rear axles. It started to appear a few thousand kms after I’d renewed the rear bearings, and you can see where they fit in this pic, it’s that black ring between the inner bearing and that big companion flange. Basically it’s a lip seal that the inner stub of the companion flange rotates in:

The noise was a squeak, squeak, squeak that was only at low speed and went away the faster you go. If you look at the pic above, you’ll notice that you can see right thru to the balls in the old-style bearings. When you replace those, you partially fill the cavity where the bearings live with handfuls of grease. I figure this ensures that when the bearings get hot and the grease tries to run out, it’s got nowhere to go. But modern cartridge bearings are sealed, and you don’t need to add any grease when installing. So I installed them nice and clean…but I didn’t realise that you still have to put a bit of grease on the lip seal to make them last. I guess at first it was okay, but over time the seal might have gotten burnt from all the friction and now you have this squeak. These are the old seals btw.
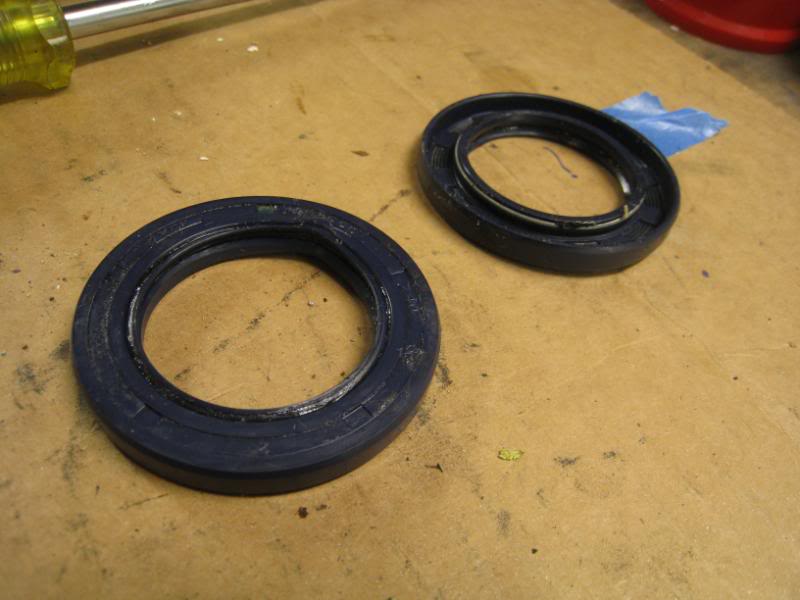
So off comes the old lip seal, and since new ones are cheap, I figured I’d put in new lip seals and install them with an approriately overkill amount of grease. But first the companion flange has to come off, which you’ll recall looks like this, with an indentation peened onto 2 sides of the axle nut, to ensure that it doesn’t come loose. They’re a bit of a bugger to get off since you have to undo the indentations and then deal with the fact that the nut is done up to 200ft pounds of torque (that’s 200pounds of pressure on the end of a 1ft long spanner)
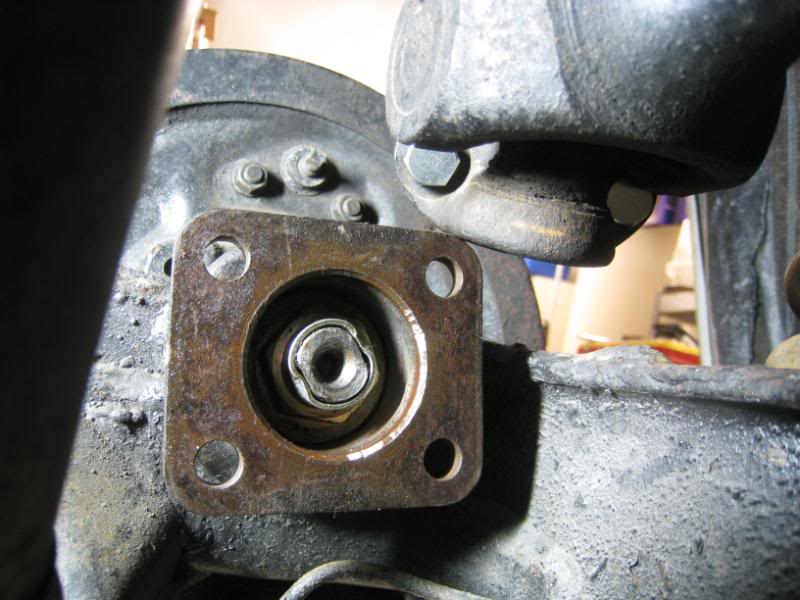
I used a dremel with a cutting disc to thin and weaken the metal where the indentations are, and then slowly turn the nuts loose, and the indentations should just pop out as the nut backs out.
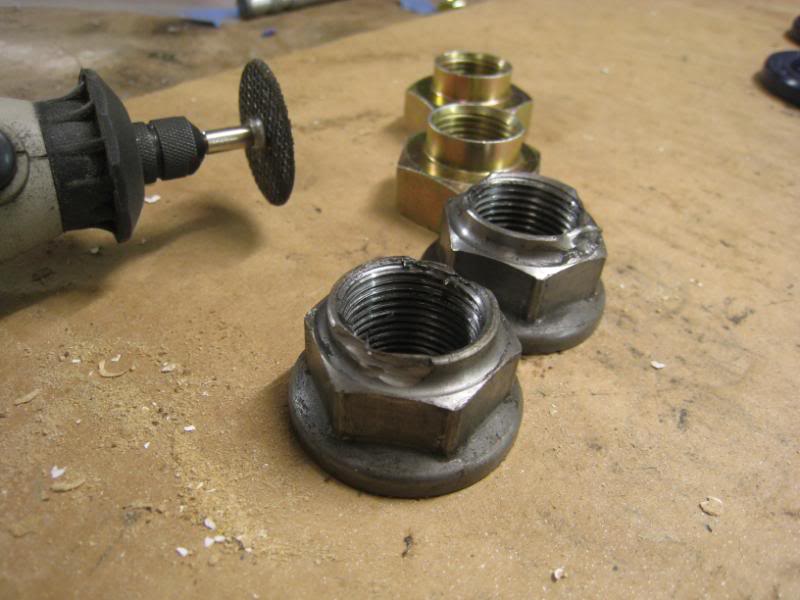
You’ll remember the first time I used a breaker bar to loosen the nut (which is very tight), this happened ![]()

So this time I have a stronger breaker bar, which is just two 1m lengths of square section tube, one inside another.
Then brace the hub with another long bit of square tube and the nut comes off quite easily with all that leverage.
Then when I was reinstalling everything, I notice that one of the bolts that attach the driveshaft to the axle flange had a damaged thread. I tried to clean it up with a die, but that just scraped off too much material off the threads and thinned them. So when I tried to retighten, the bolt stripped. Luckily Nissan still had some (for the bargain price of $2.50ea) so I bought a whole new set of 8.
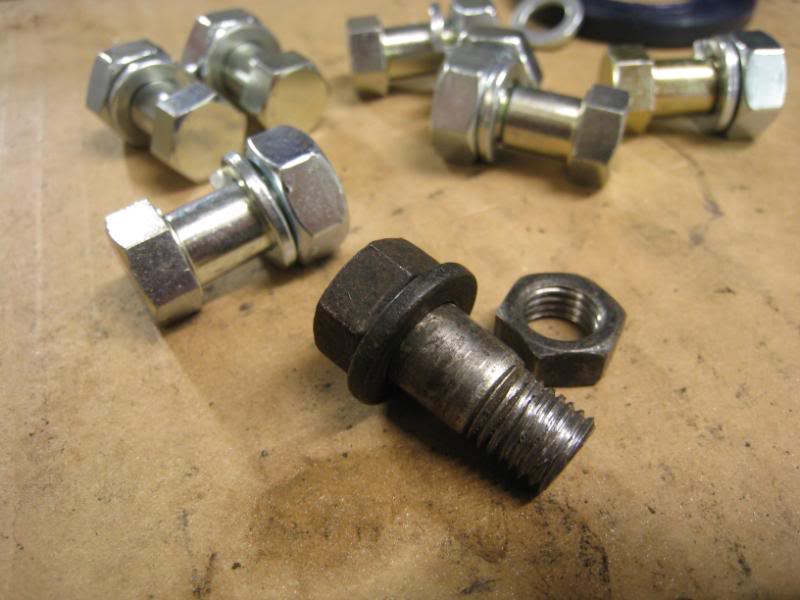
Interestingly, the first half of the bolts don’t have any thread, and they have a very snug fit into their holes in the driveshaft. So it isn’t the bolt clamping tension that attaches the driveshaft to the axle, the nuts act like drive pegs, which sounds like a much stronger arrangement. The old bolts (probably from being taken out and put back a few times over the decades) weren’t a tight fit in the driveshaft anymore, so replacing them was a good idea. As you can see the new ones are such a tight fit they don’t fall out.
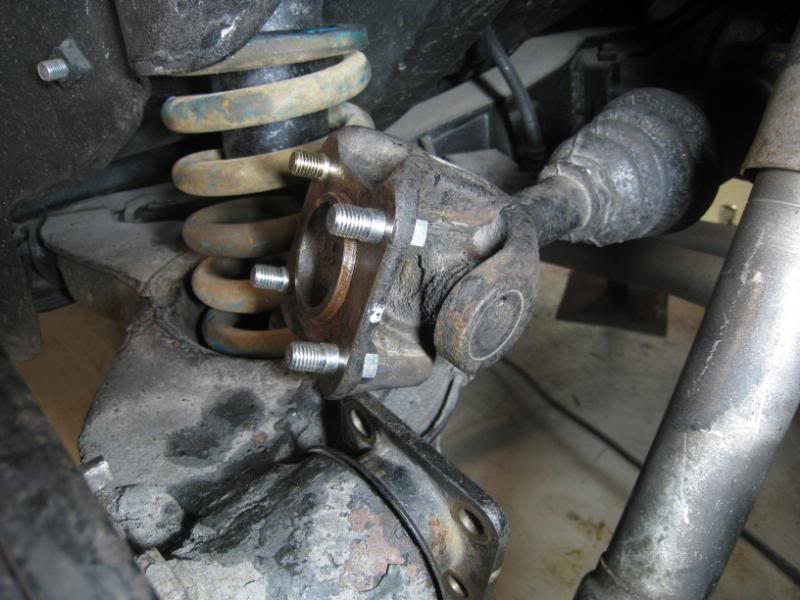
Add some new spring washers and hi-tensile nuts and we’re good to go.
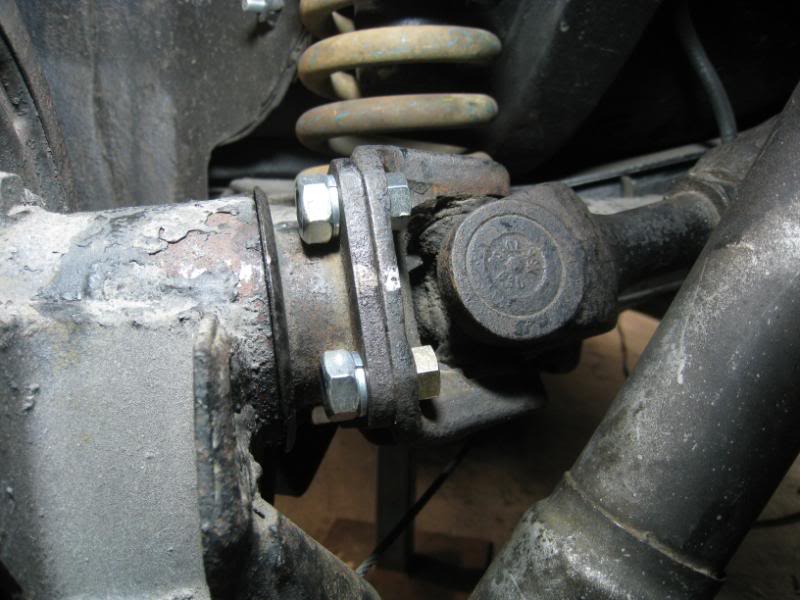
On the road, the squeaking has gone, hopefully for good! The next round of mods will revolve around some cheaply-priced brake discs I found on Ebay. They are DBA slotted and drilled discs for 240K/Kenmeri Skyline and I’ll replace the front wheelbearings and get the brake calipers rebuilt at the same time.
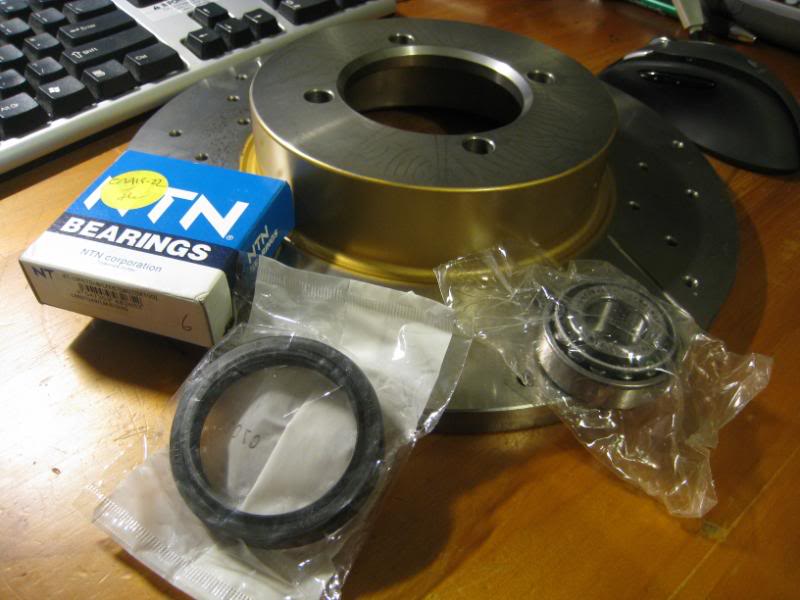
You might recall that a couple of weeks ago I found a cheap pair of these on Ebay: slotted and crossdrilled discs for a 240K/Kenmeri Skyline. Since the hubs have to come off the car to replace the discs, I organised a set of new wheelbearings to replace while I’m at it.
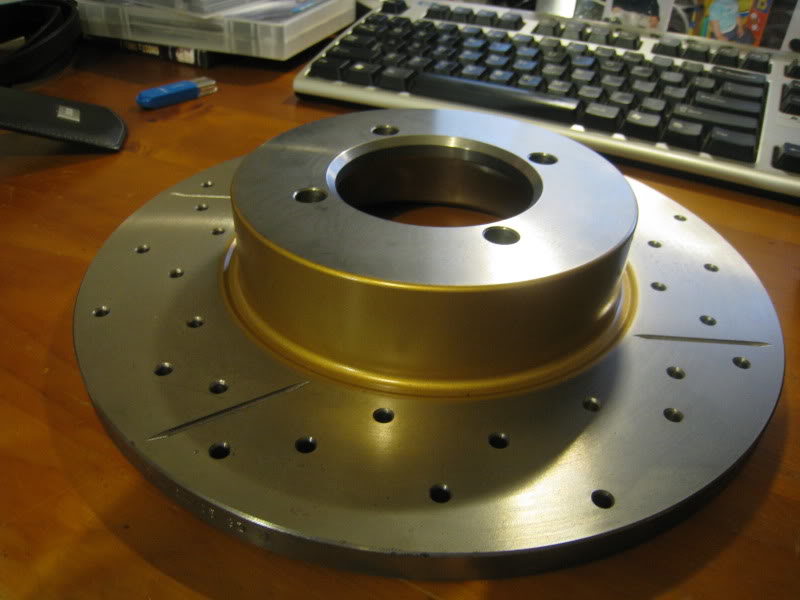
The first thing to do is to remove the caliper (since we’ll be sliding the disc out) and hang it up with a bit of bent coathanger so that the brake hose doesn’t stretch.
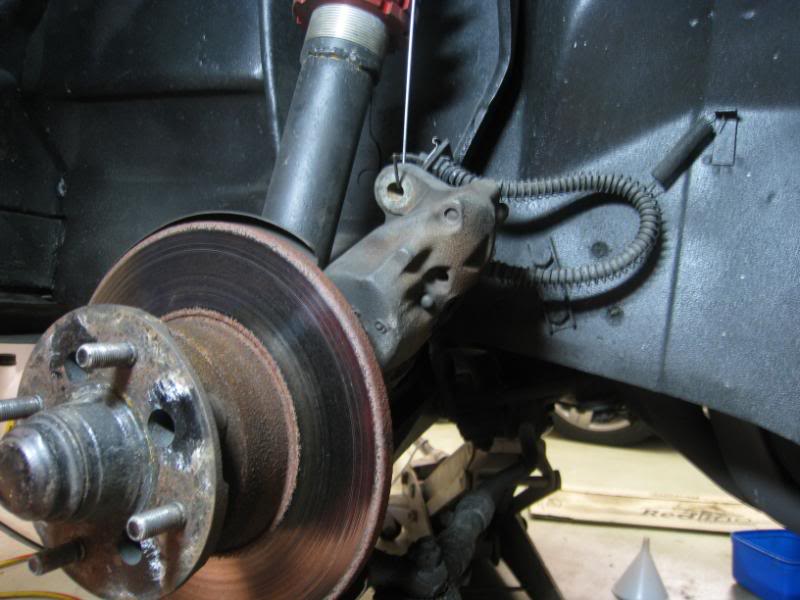
Then prise off the dustcap on the hub.
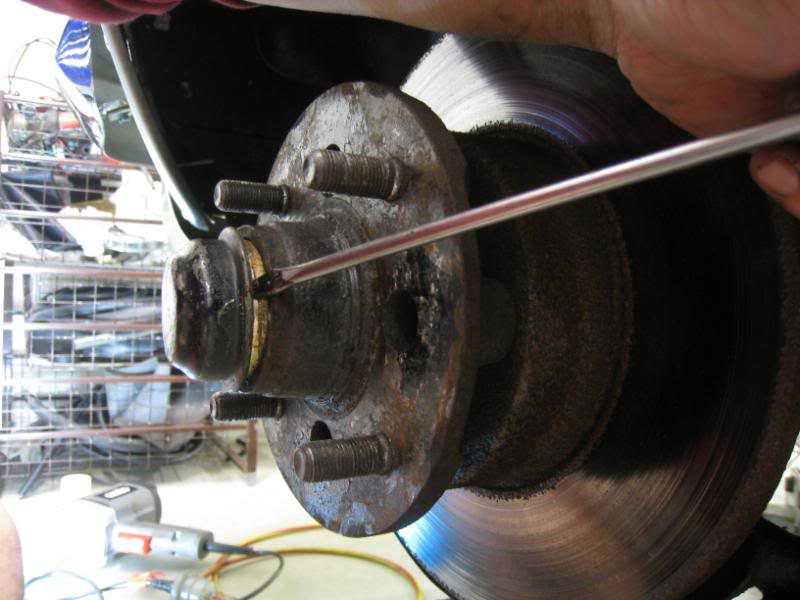
Which reveals the hub nut, split pin and star cover. Naturally you don’t want the axle nut to be coming off, but unlike the rear axle nuts which are staked in place, the front nuts are prevented from loosening by that starcover, which is fixed to the axle by a split pin. This is important, because as you’ll see later, this nut isn’t done very tight.
Unlike the rear axle nut, which is tightened to 200ft pounds, the front hub nut is not tight at all. After it’s removed, the washer and outber bearing slides out quite easily.
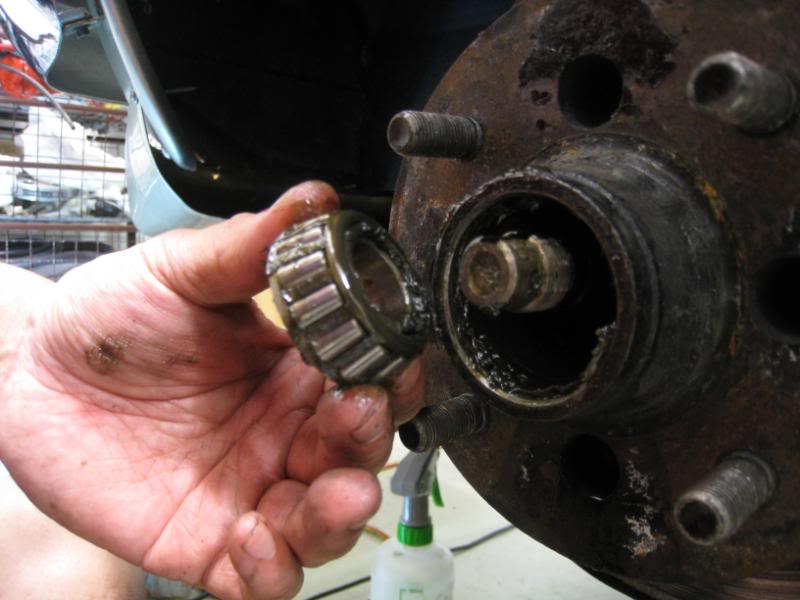
Pull off the disc, and the inner bearing and grease seal come off quite easily too.
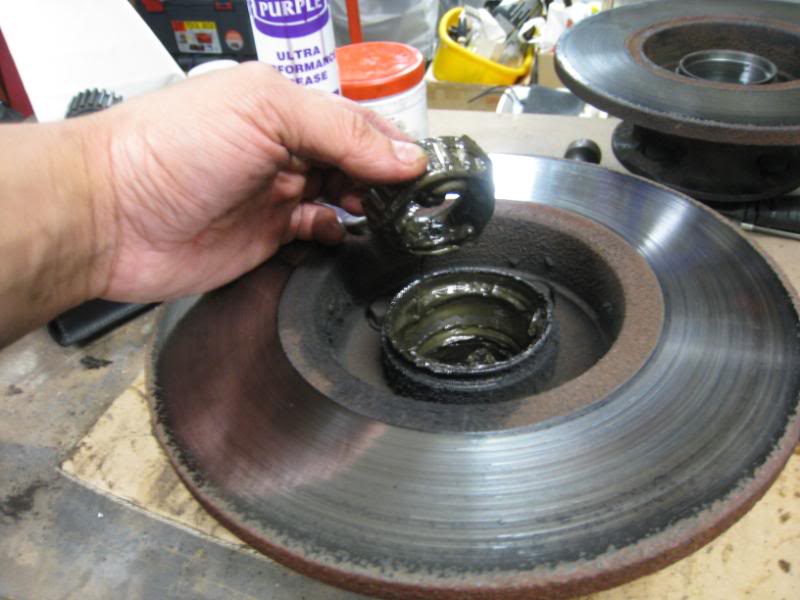
First, the bad news….it seems as if the kenmeri Skyline has slightly bigger discs than Hako Skyline..so they won’t fit at all. In addition to being bigger in diameter, the bolt pattern (where it bolts to the inside of the hub) is a bit different too. Oh well, at least we can renew the bearings while it’s all part, so all is not totally lost…
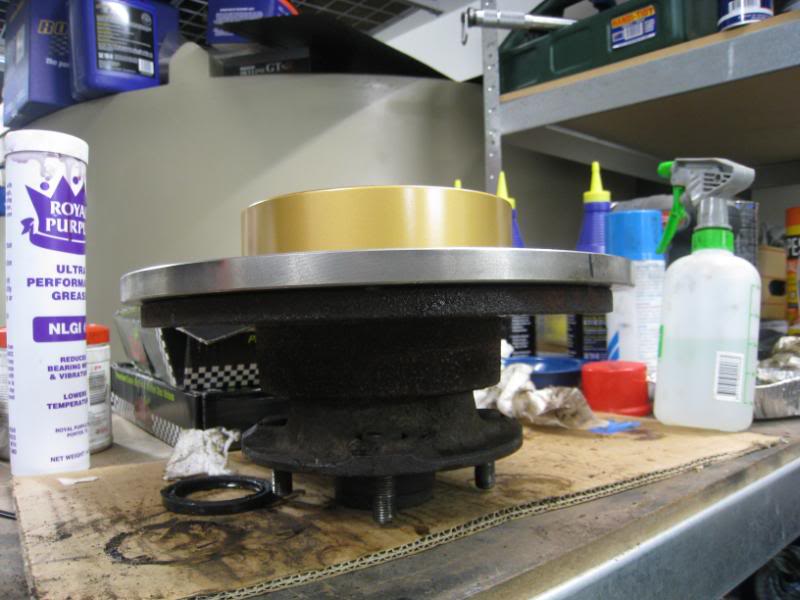
Now unlike the rear bearings, the front bearings are tapered, and there is a male and female part that can come apart. We’re jumping ahead a bit here, but the old bearings looked ok. Normally if it’s really worn you can see the tracks worn into the outer race. But as you can see, it’s not that different to the new one, although the black colour of the grease on the inner race suggests that the grease hasnt been renewed in a long while.
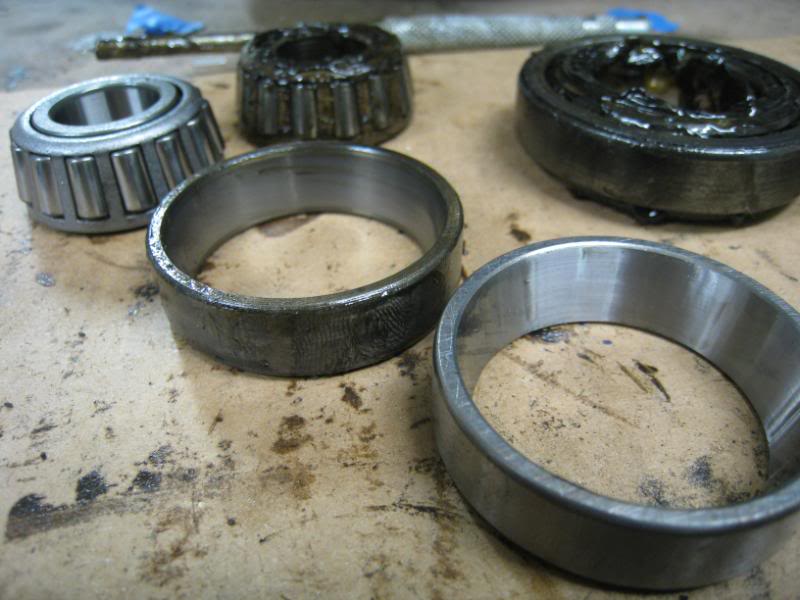
The inner race (the bit with the rollers) just lifts out, but the outer race (that outer “band”) is such a precise fit into the hub that it has to be tapped out with a drift from the inside. It’s really tight, so it takes a few minutes of tapping to get it to come out.
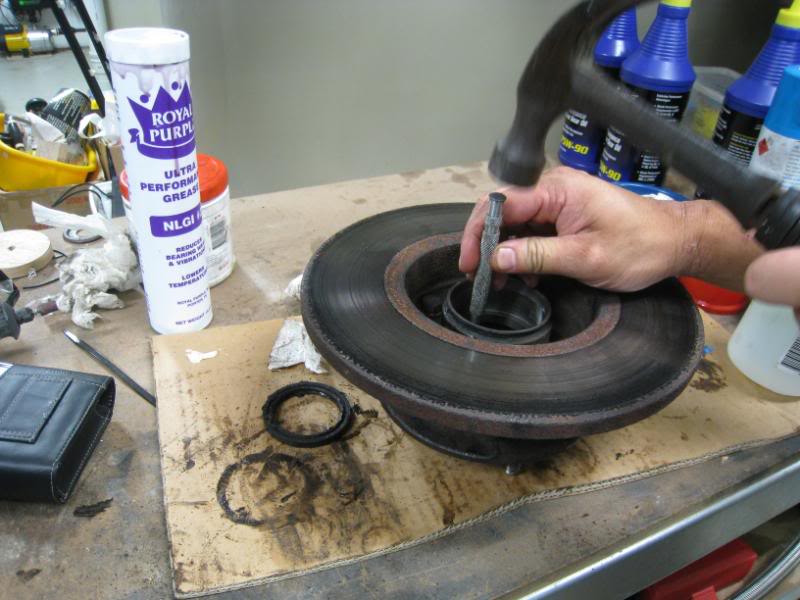
Unfortunately, it’s hard to avoid nicking and burring the hub surface a little bit as you tap out the outer races. Since the races are such a tight fit, this could cause the new one to get stuck as you try to install it.
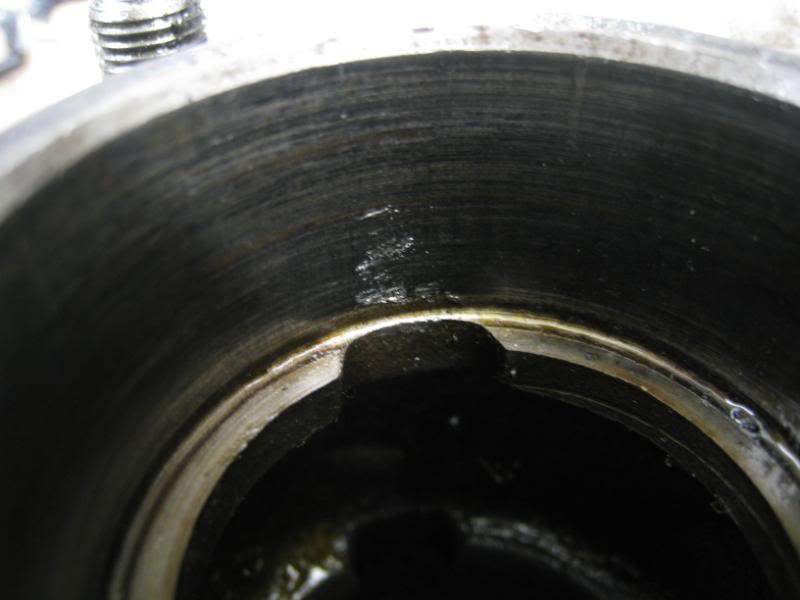
The solution is just to smooth off the nicks with the sanding drum of a dremel.
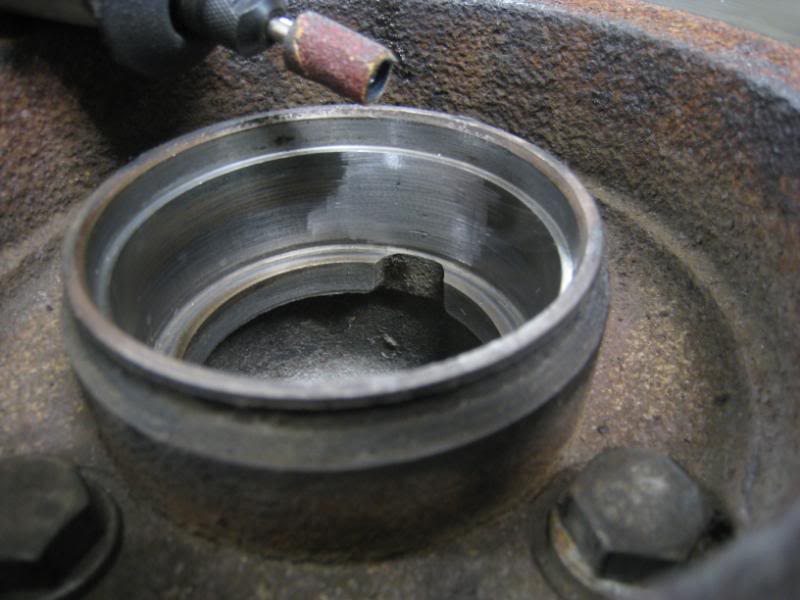
Polish the rest of the inner hub with a scotchbrite pad…
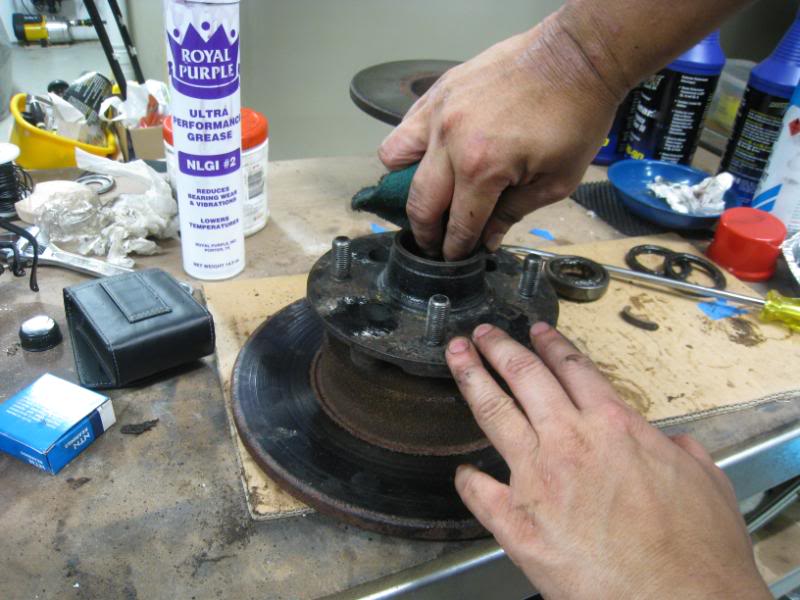
…and it’s all nice and clean, ready for the new outer races to be pressed in.

But actually, that’s as far as I could go. The manual says at that point that you can use tubing of the exact diameter needed as a drift and tap the outer races into place. But it takes a fair bit of force with the hammer, and with the surface of the outer races needing to be undamaged and perfectly smooth, I took the hubs to my friend John Edwards workshop and he kindly used his press to safely push the outer races into place for me. Oh yes, each inner and outer race are matched sets, so don’t mix them up ![]()
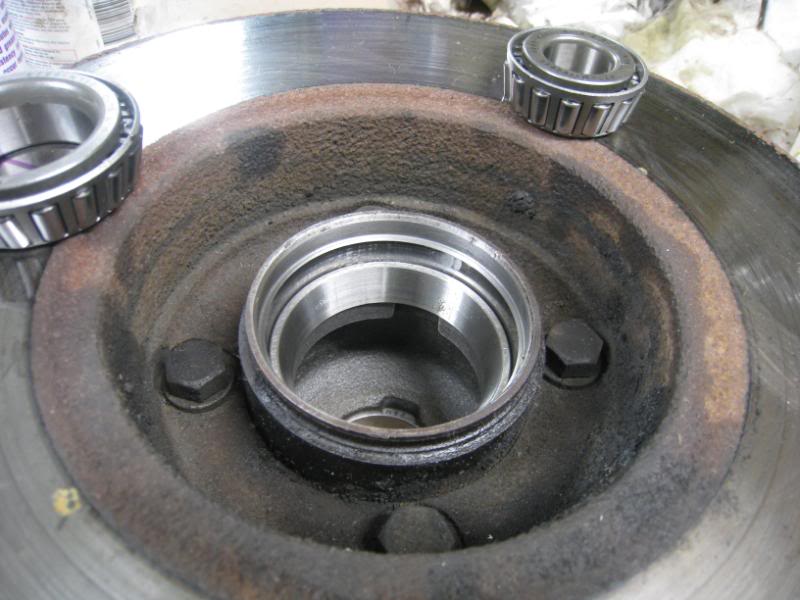
Oh, while the drilled discs may not fit, we can still improve the brake cooling a little by removing the disc stonesheilds….which are screwed to the strut with phillips head screws. Unfortunately, 4 decades of corrosion meant that getting the screws off with a screwdriver was impossible without butchering the screwheads, so I used an impact driver. Basically it’s this telescopic tool with a screwdriver bit at one end, and as you bash it with a hammer, it drives into the screw head and rotates it loose. Great gadget, it got all the screws off no problem.
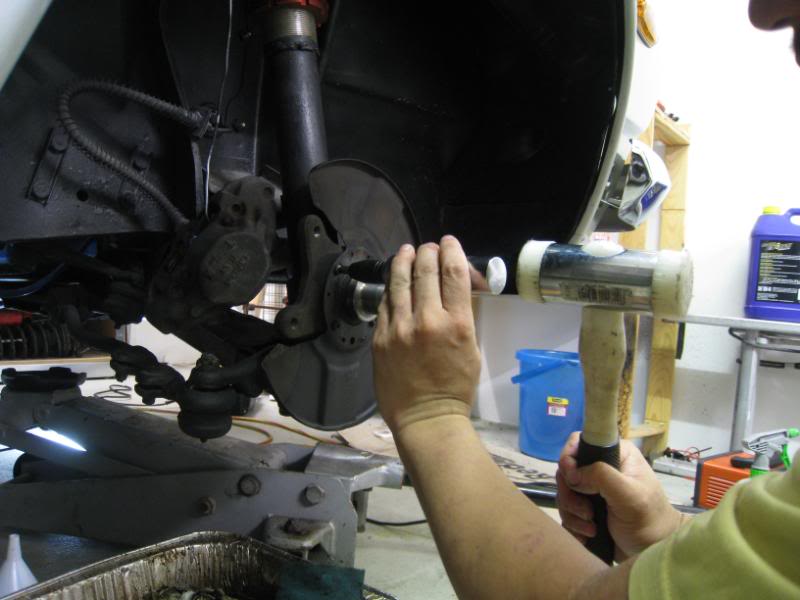
Oh yes, we cleaned the stub axle with scotchbrite too.
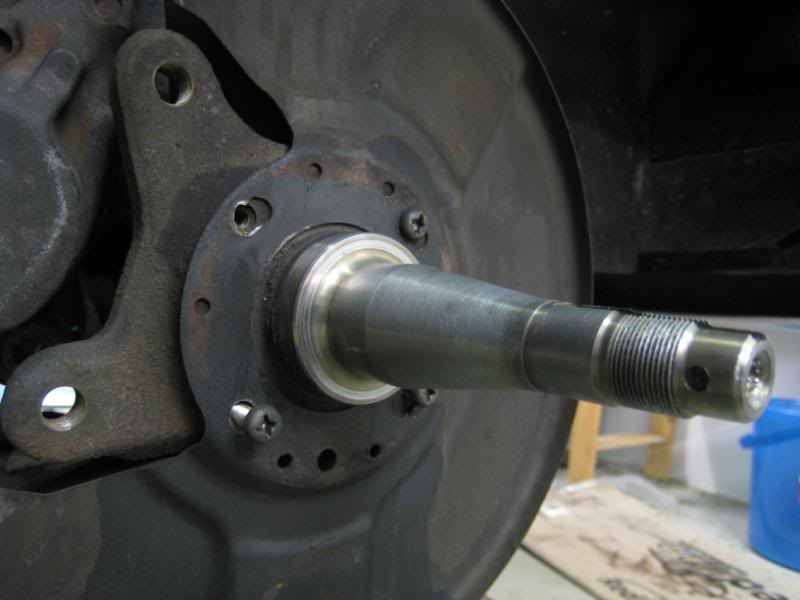
Next step is to lube the new bearings. I’m going to use Royal Purple Ultra Performance Grease, which is a synthetic bearing grease that’s claimed to lower friction, and make bearings run smoother, cooler and last longer. It has the same slippery Synerlec additive that goes into the Royal Purple engine oils too, and because it’s synthetic, it can withstand heat better, which is all good.
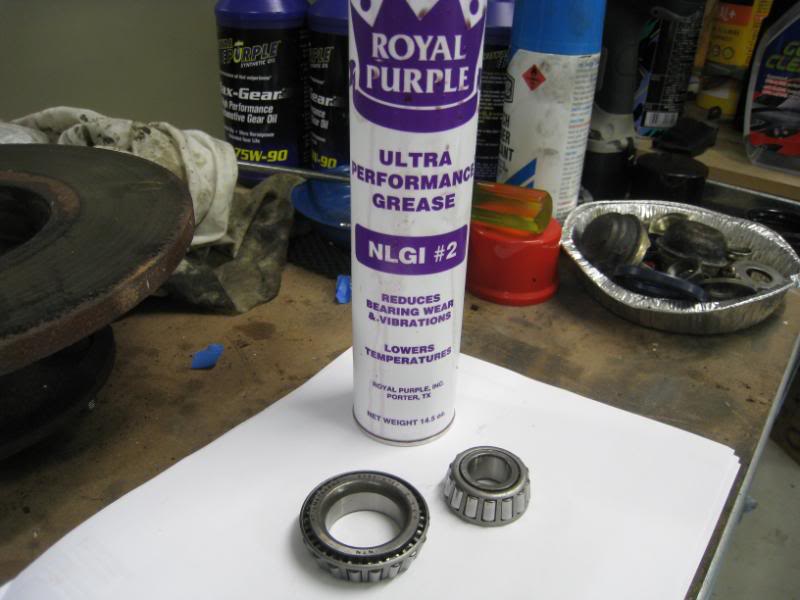
If you want to know more ![]() here’s a fact sheet: http://www.royalpurple.com/prod-pdfs/ultra-grease-ps.pdf
here’s a fact sheet: http://www.royalpurple.com/prod-pdfs/ultra-grease-ps.pdf
And there’s also a cool story about how Ultra Performance Grease solves some problems on the China superfast train: http://www.royal-purple-industrial.com/machlub2/ml2p1.html
Anyway ![]() the way to grease a wheelbearing is pretty simple…the idea is to get grease into the cavity inside the bearing, so that there are no dry spots on any of the rollers. So you start with a glob of grease, and see that gap at the back of the bearing? You just massage the grease into that gap, forcing it inside the bearing until the new grease starts to squeeze through to the outside, past the rollers.
the way to grease a wheelbearing is pretty simple…the idea is to get grease into the cavity inside the bearing, so that there are no dry spots on any of the rollers. So you start with a glob of grease, and see that gap at the back of the bearing? You just massage the grease into that gap, forcing it inside the bearing until the new grease starts to squeeze through to the outside, past the rollers.
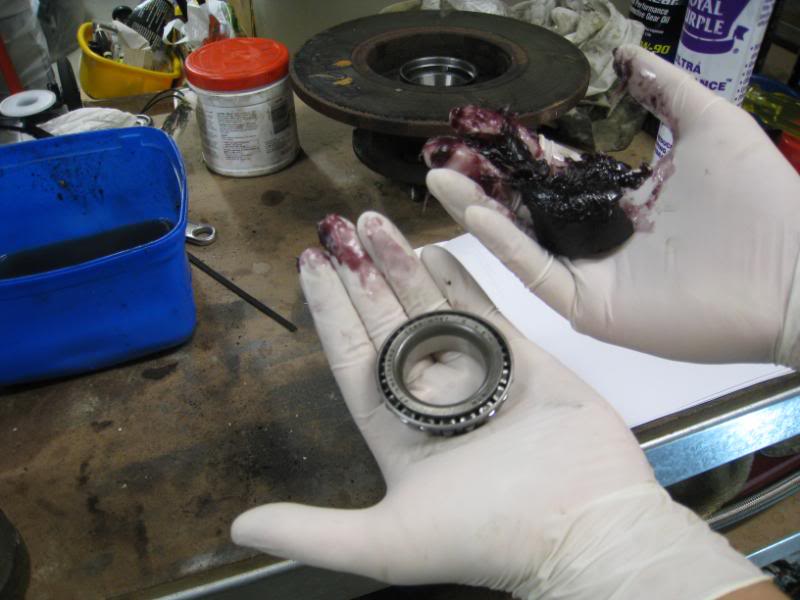
It’s a bit messy, but when you’re done it’ll look like this.
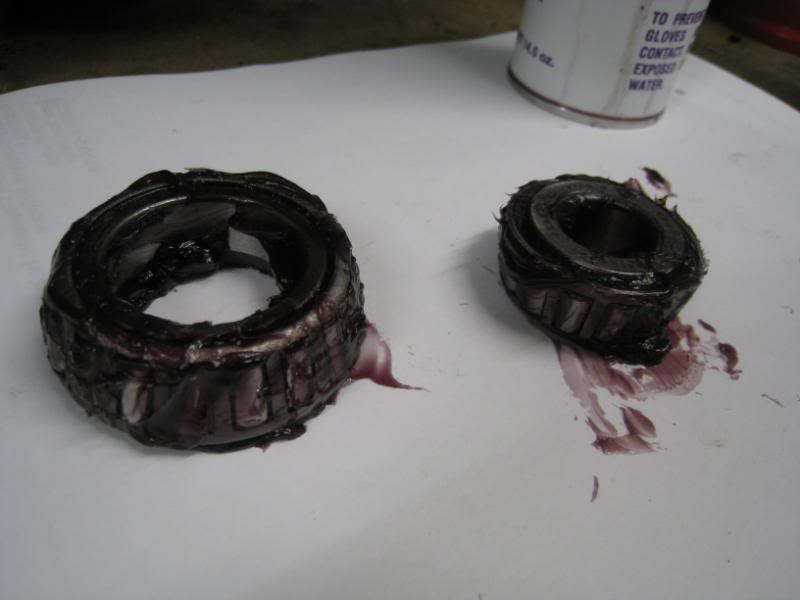
Put a smear of grease on the outer races too…and you’ll also notice that that space in the middle of the hub’s been partially filled with grease too….at this stage the temptation is to force wodges of grease in there, in the fear that not enough grease will kill the bearings, but the idea is not to make the inside of the hub a solid ball of grease. There’s meant to be an air gap between the stub axle and the inside of the hub, otherwise the bearings will overheat, and grease will start to leak out everywhere.
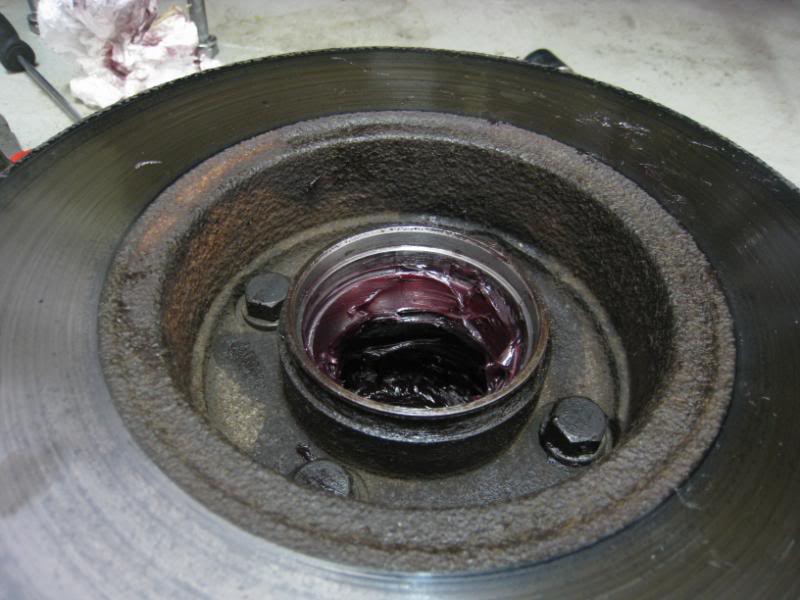
There’s a step to the hub, which is for the inner grease seal, and you’ll notice that I’ve been careful not to get any grease on that. Before installing the grease seal, I also wiped the hub with a bit of brakekleen on a rag. If there is grease there, the seal might find it too easy to pop out one day, and all sorts of crap will go into the bearings.
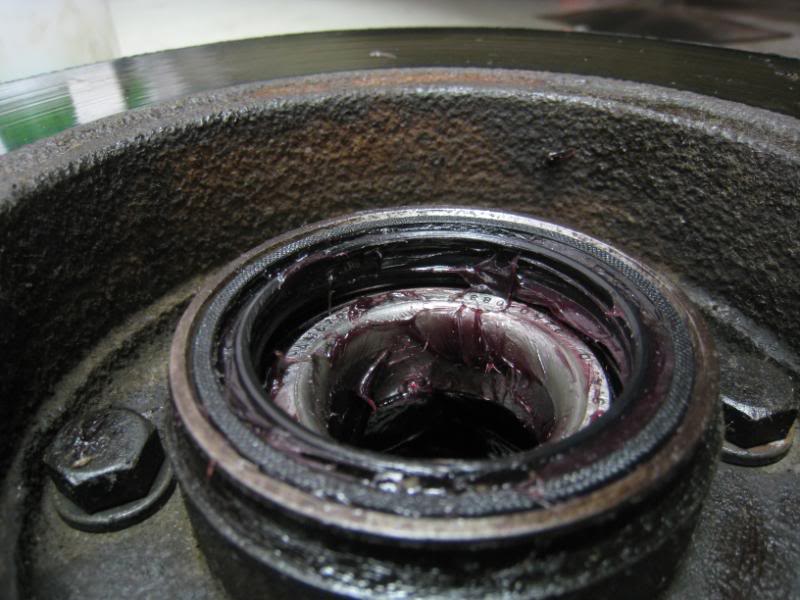
Speaking of grease seals…I ordered bearings and seals for a Kenmeri Skyline, and while the bearings fitted just fine, the grease seals look a bit different. So I’ve recycled the old ones.
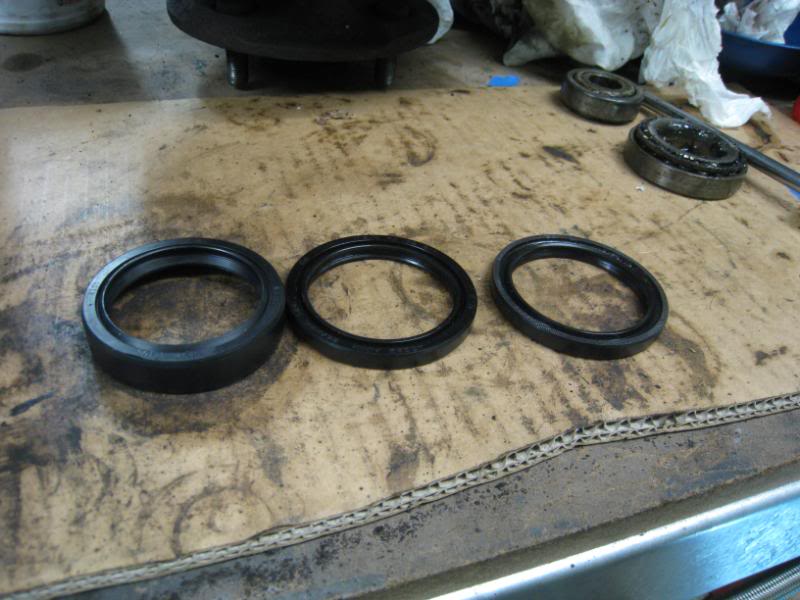
Put a bit of grease on the stub axle, and slide on the disc.
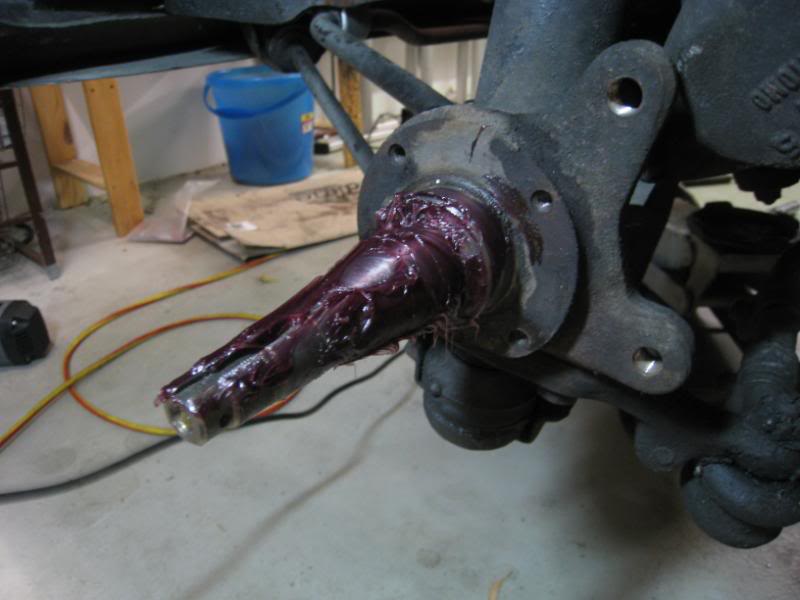
Pop in the outer bearing and washer, then tighten the nut by hand. At this point, rotate the disc by hand to spread the grease around and to help to seat the bearings. At this stage it’ll spin really freely. Give it a good spin and it’ll go for a few revolutions.
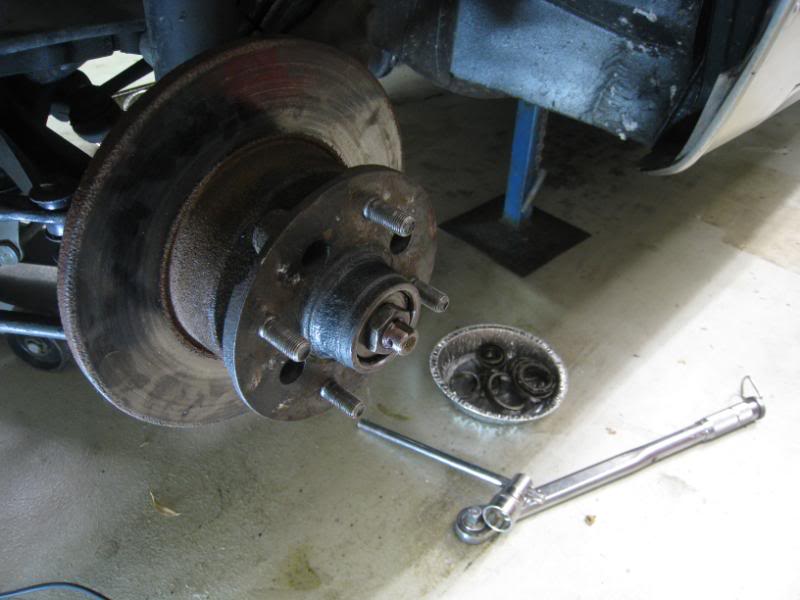
Now, the next bit’s quite cool….because the bearings are tapered, the tightness of the nut is super-critical. Too loose and the hub will have play, and too tight and the bearing rollers will be crushed and won’t last very long. Talk to proper mechanics and many will talk about zen-like methods where they do it by hand and feel ![]() but the Haynes manual has a pretty foolproof method. Set your torque wrench to 22ft pounds, and tighten the nut to that. The you loosen the nut 60 degrees. Now at 22ft/lbs, the hub is noticeably tight to turn, but when you back it off that 60 degrees, it’s free again, just like when the nut was only finger tight. So it’s a pretty good method of getting the nut just tight, where another 60 degrees (barely more than an 1/8th of a turn) will start to bind the bearings. Any looser and the hub starts to show some play, so this is a good way to do it.
but the Haynes manual has a pretty foolproof method. Set your torque wrench to 22ft pounds, and tighten the nut to that. The you loosen the nut 60 degrees. Now at 22ft/lbs, the hub is noticeably tight to turn, but when you back it off that 60 degrees, it’s free again, just like when the nut was only finger tight. So it’s a pretty good method of getting the nut just tight, where another 60 degrees (barely more than an 1/8th of a turn) will start to bind the bearings. Any looser and the hub starts to show some play, so this is a good way to do it.
Just to be sure, I did it a few times though. Tighten the Haynes way, then loosen 60 degrees, spin the disc both ways a few times, then loosen the nut and retighten the Haynes way again. Repeat 2 more times. This is to make sure that the bearings are seated as firmly as possible. Then put the starcover over the nut, and the splitpin locks everything in place.
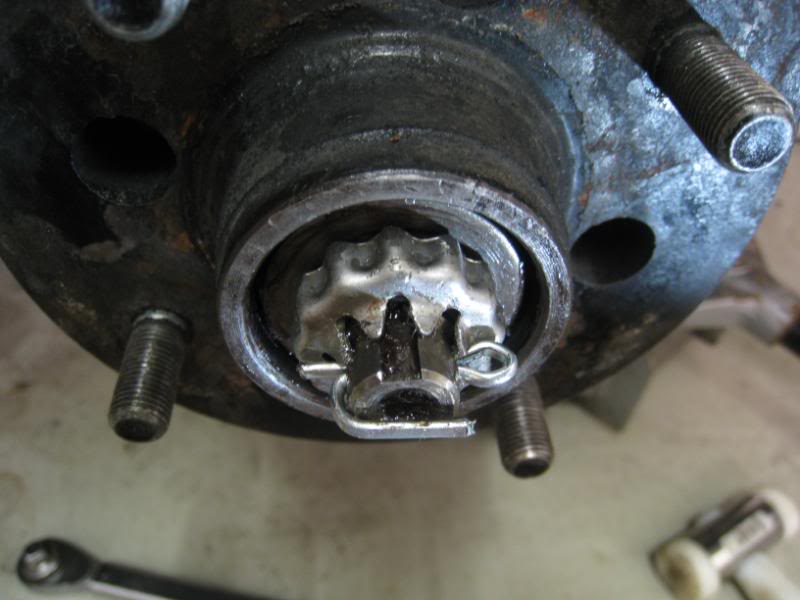
Partially fill the dustcap with new grease, pop it in, replace the caliper and we’re all done!
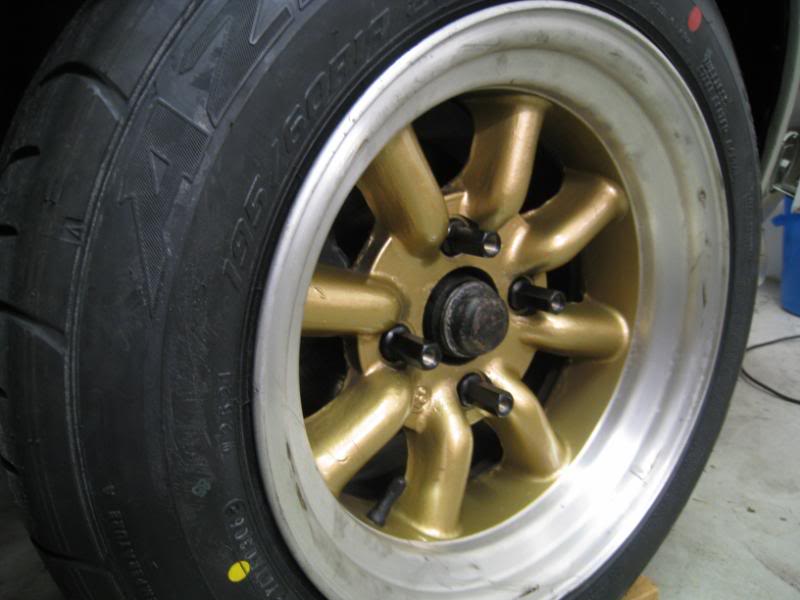
It worked out quite okay, the bearings are nice and quiet and there is no play. After a test drive, touch the hub and see if it’s hot, but the Hako’s were just slightly warm to the touch. If it’s too hot to touch then the nut may have been too tight. Result! Compared to the rear wheel bearings, the fronts are definitely easier, if a bit more messy with all that grease (many thanks to Royal Purple Australia for providing the grease).
One less set of components to worry about on the Hako ![]()
Some goodies came today from Japan!
New doorlock plungers (I think these might be repro rather than NOS)
New gearlever tunnel gaiter..
…to er…replace…um…this:
Endless streetspec brake shoes
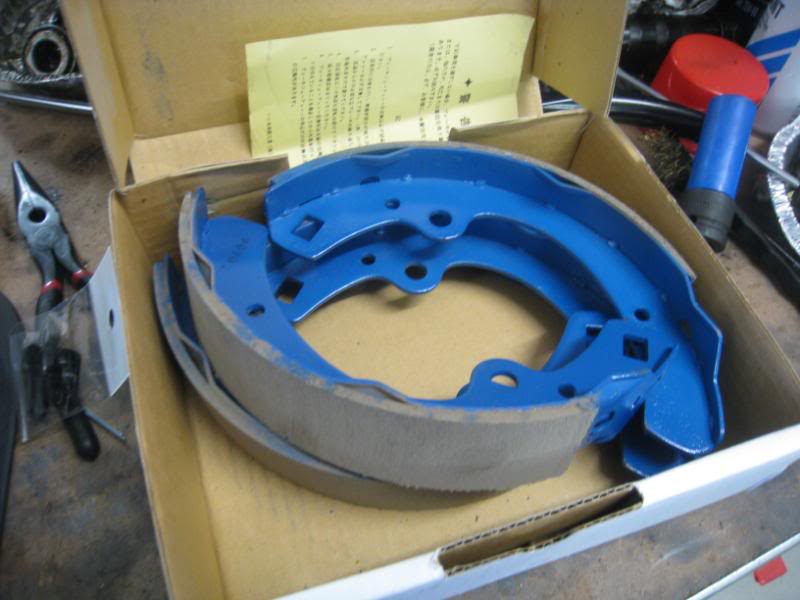
Tail light gaskets…unusual design, really thick sculpted foam and headlamp retaining rings
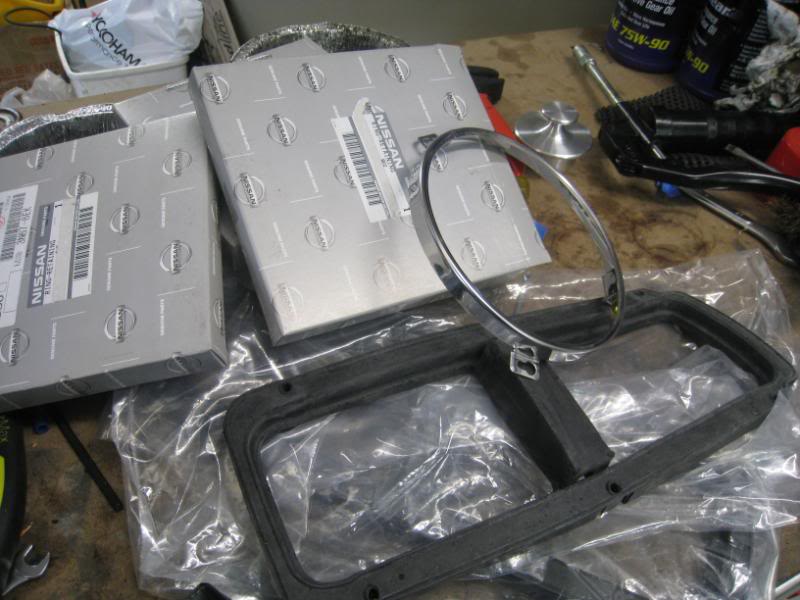
And a new fuel cap. Instead of a twist-lock fuel cap the Hako just has this plastic plunger! The first few times you try to remove it, you’re convinced it’ll break off at the stem but it never does. I’ve been meaning to get a spare but when these trick billet ones became available I had to have one.
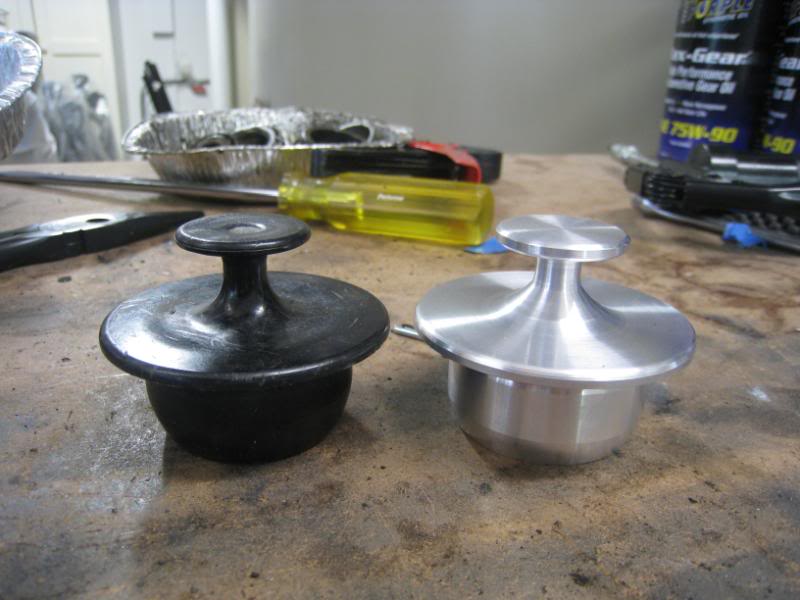
…you’ll have an appointment with the polishing machine, my little friend ![]()
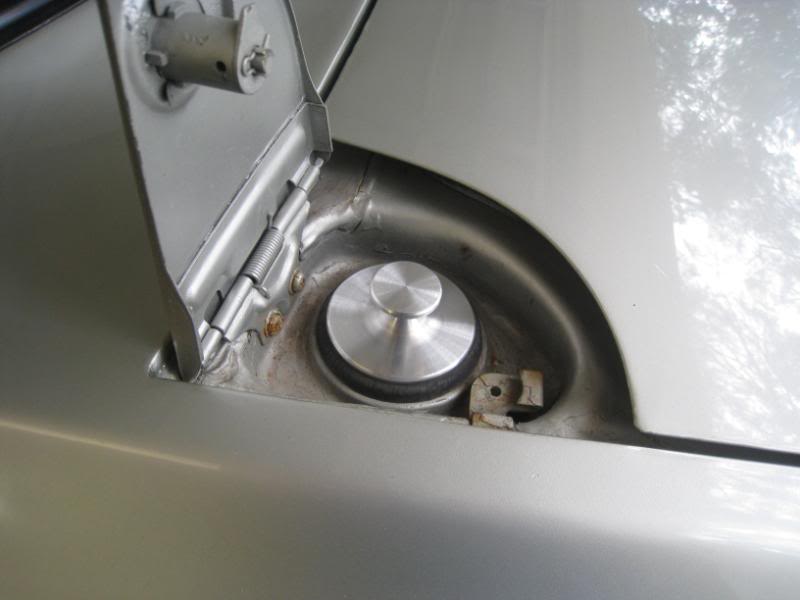
Repro radiator warning labels became available too. I removed the old one (which had been painted over a few times over the years anyway).
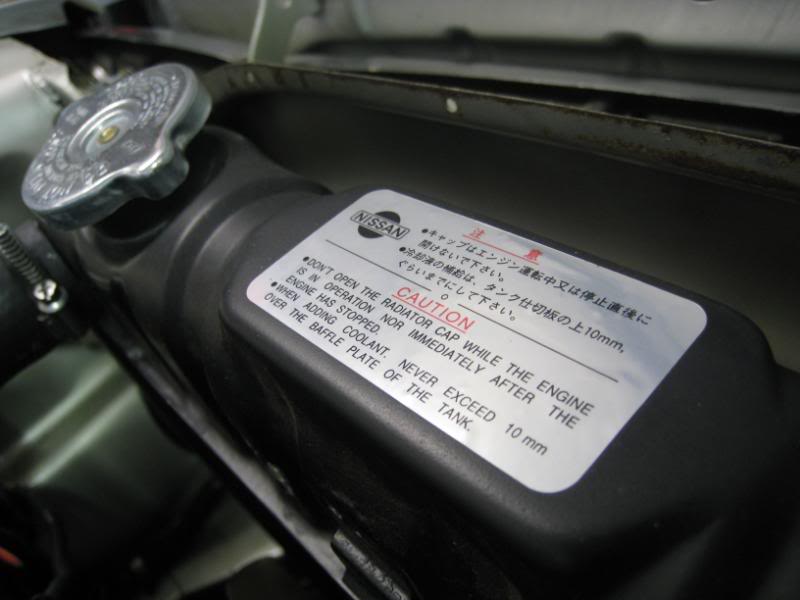
Couple of the other Hako fellas wanted a few things too, late-model tunnel gaiters and window winders too.
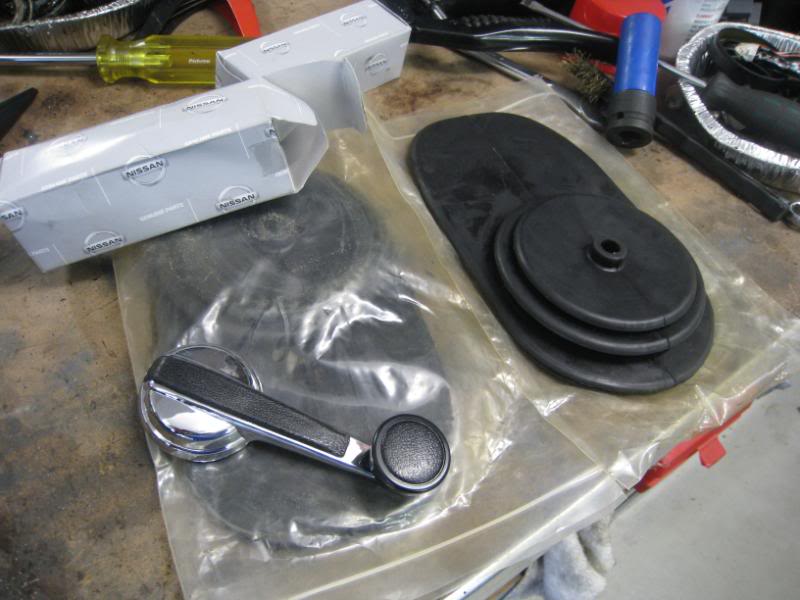
The balljoints have come back from rebuilding, so I should get my act together and install them over the weekend.
Alrighty…the key take-away from the latest round of repairs is that I suck at balljoint separation ![]()
You might recall that I was lent this huge set of balljoint separation tools. Virtually one of every shape possible, how could I possibly go wrong. Did I manage to figure out how to use them? Err…no ![]()
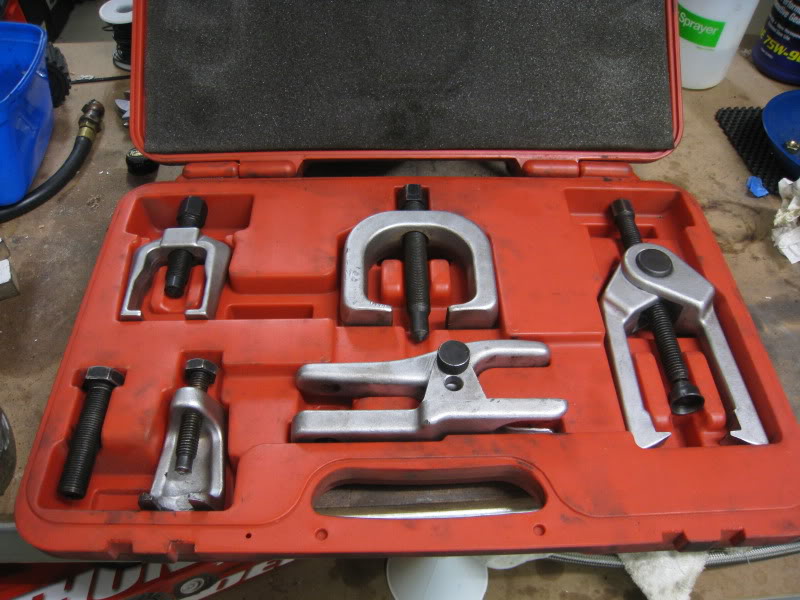
First you expose the balljoint stud by unbolting the strut and swinging it aside (the camber tops help tremendously here).
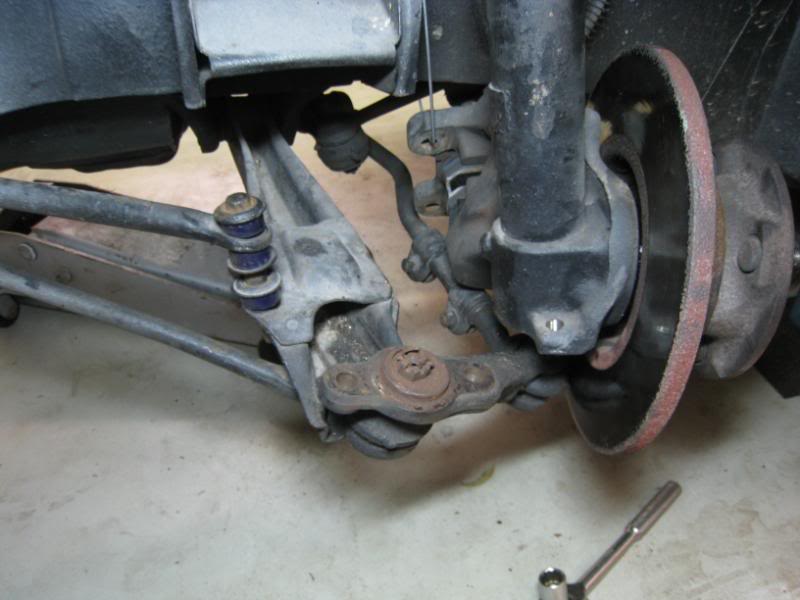
Remove the split pin and castellated nut and you’re ready to separate balljoints!
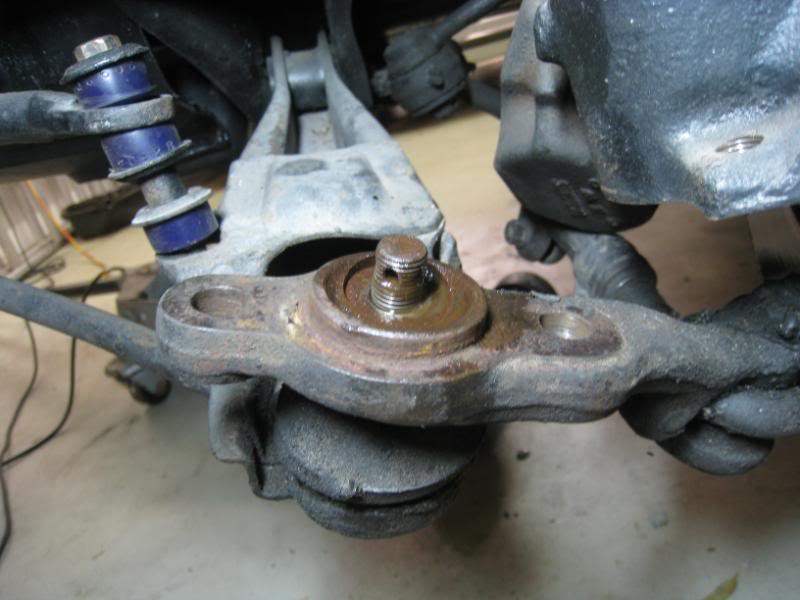
Er…umm…this doesn’t seem right.
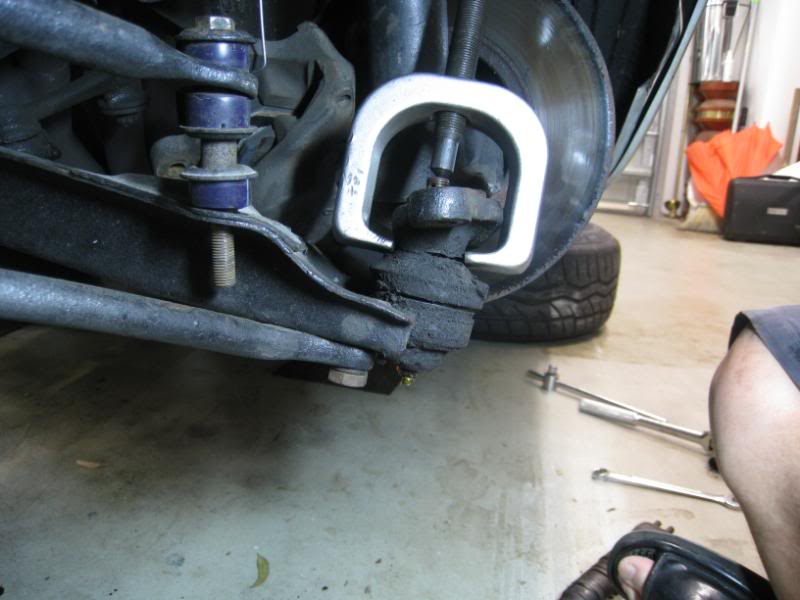
And this fancy one doesn’t fit!
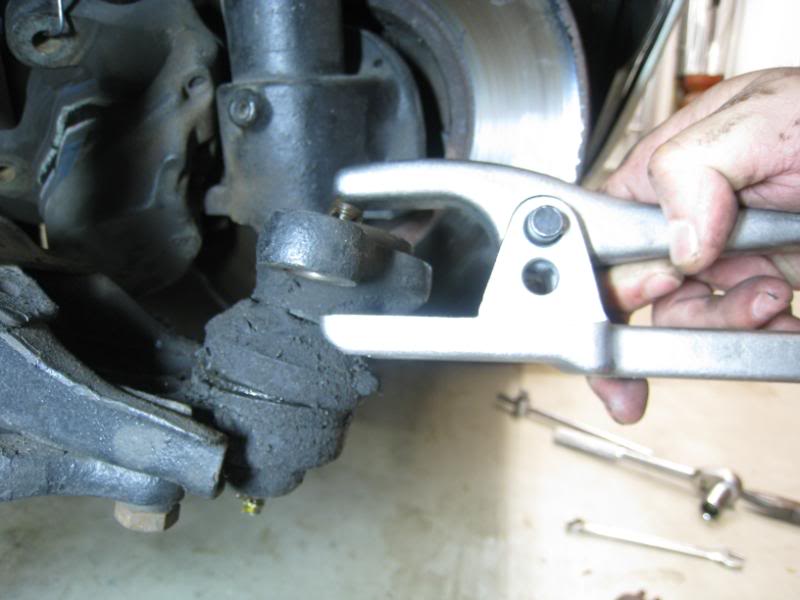
Anyway…eventually I worked out that to use the tool just above, I should have pushed down the greaseboot on the balljoint, which exposes the balljoint stud…then you push the prong of the tool just above into the gap and off you go…
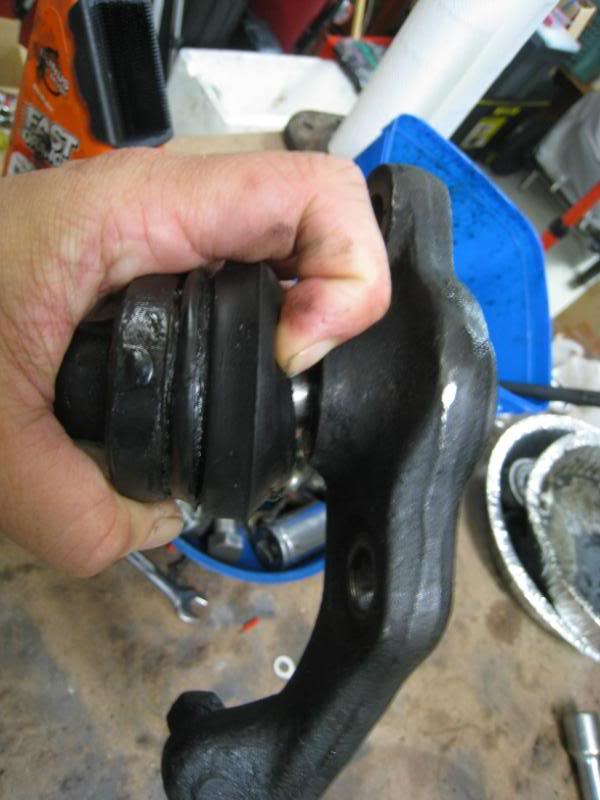
But by then what I had already done was use one of the separators on the steering rod end…
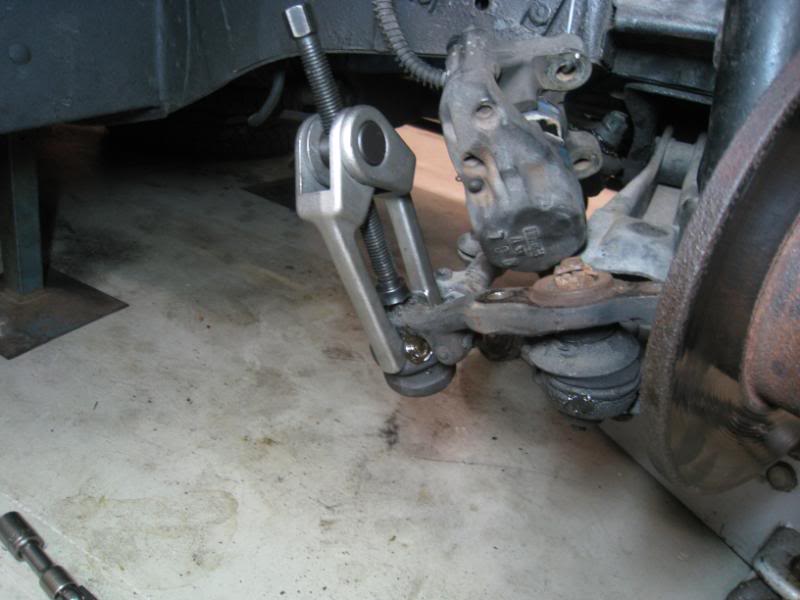
…and removed the balljoint with the steering arms attached ![]()
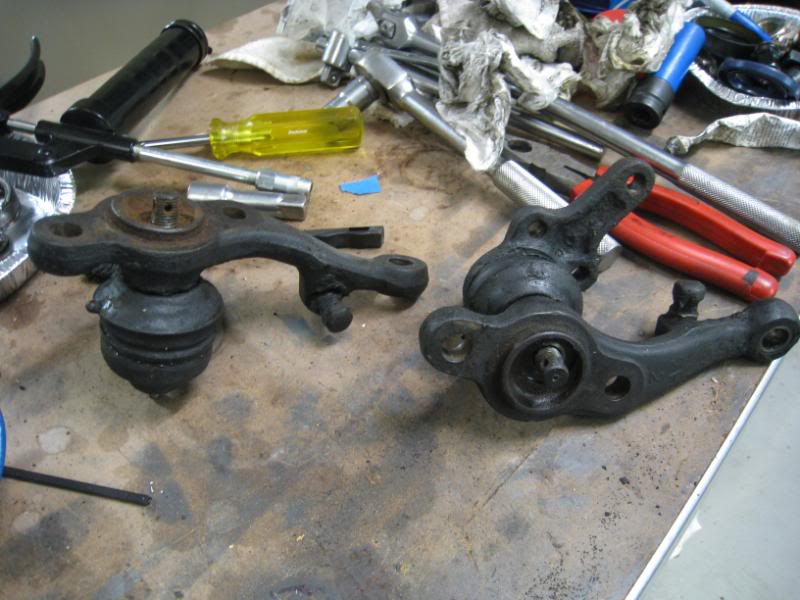
I delivered the balljoints to Accurate Steering in Marrickville like this, but it wasn’t a problem for Cas, who just popped them off on his press. And a day later they’re ready! How it works is that inside the balljoint there’s a….ball. It’s held in place by an upper and a lower cup, which in the Hako’s case is made of metal (in newer cars it’s some sort of nylon).
Over time the cups wear, and the resulting slop is taken up by a spring below the bottom cup, which pushes it up to take up the slack. But eventually the cups wear so much that the spring can’t compensate and you get slop in the balljoint. What Cas did was take it all apart, and mill a new surface into the cups. Then he put it back together with a longer spring to restore the preload (so basically it’s like new again). Apparently there’s a few different ways to do it, including injecting a liquid nylon into the balljoint without taking it apart. Cas reckons this sometimes works but often doesn’t if the ball itself is a bit pitted, so it’ll wear into this plastic layer quite quickly. Actually Accurate Steering is a cool place, full of presses, lathes and mills which look at least 50yrs old! Great oldschool vibe, and Cas was more than happy to show me around (‘didn’t have to twist my arm to look at all the machines!) $80 per side, I thought it was pretty good value.
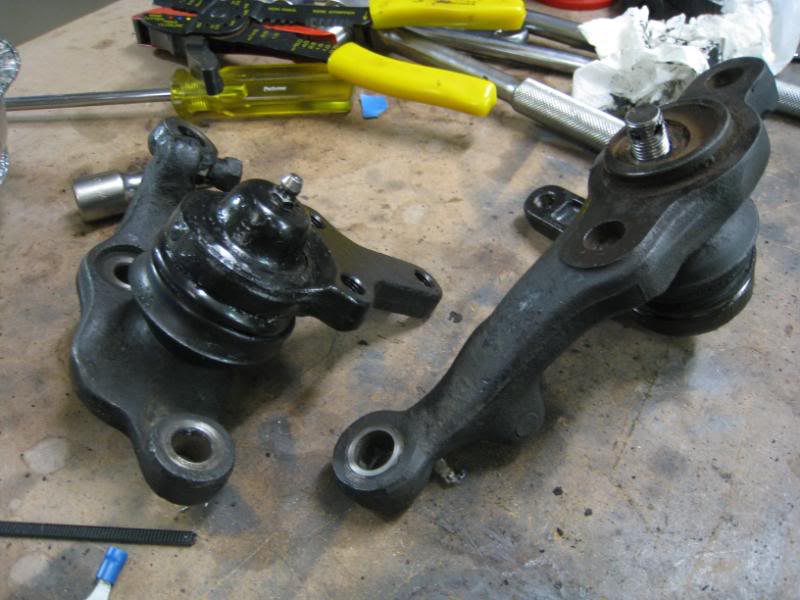
Back home, we have the exposed lower control arm, with the strut swung to the side and caliper removed. The balljoint bolts to the lower arm at those 3 points.

Bolt on the balljoint, and reinstall the castellated nuts and split pins.

Bolt the strut and caliper back and we’re done.
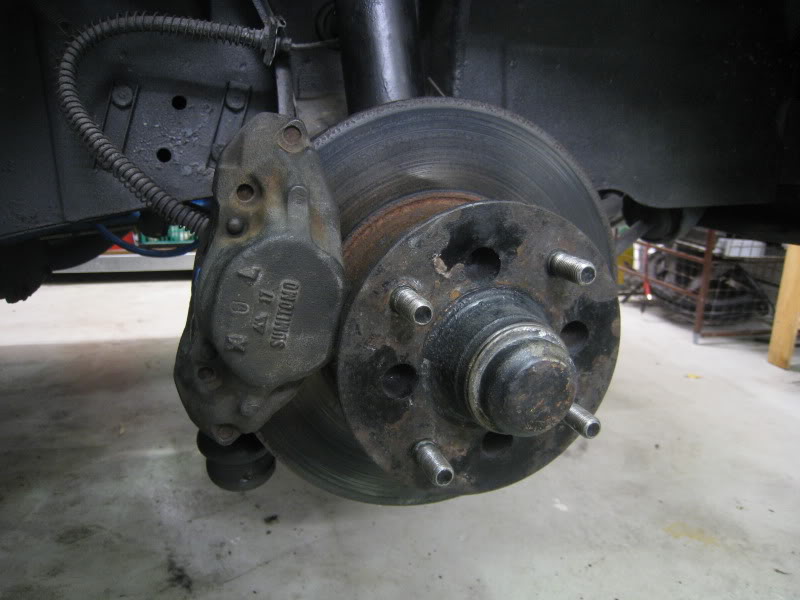
Feels like it’s done the trick…last week, when I wiggled the tyre with my hands at 12 and 6 o clock, there was a bit of vertical play, which was sorted when I put in new bearings. But there was a lot of horizontal play when I grabbed the tyre and wiggled with my hands at 3 and 9 o clock. This was due to the balljoint play.
But now it’s nice and solid all round. Result.
Long time ago, I’d cleaned up and replated the headlight assemblies, which were corroded and ugly looking.
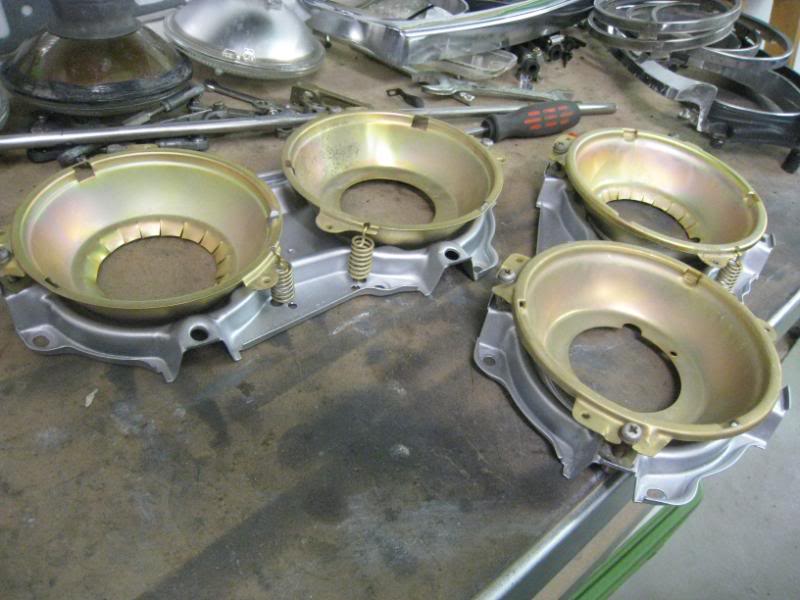
But one thing I didn’t do was change the headlight retaining rings. I think I didn’t have a single good one in the whole lot, every one either had a missing tab or the weld had broken.
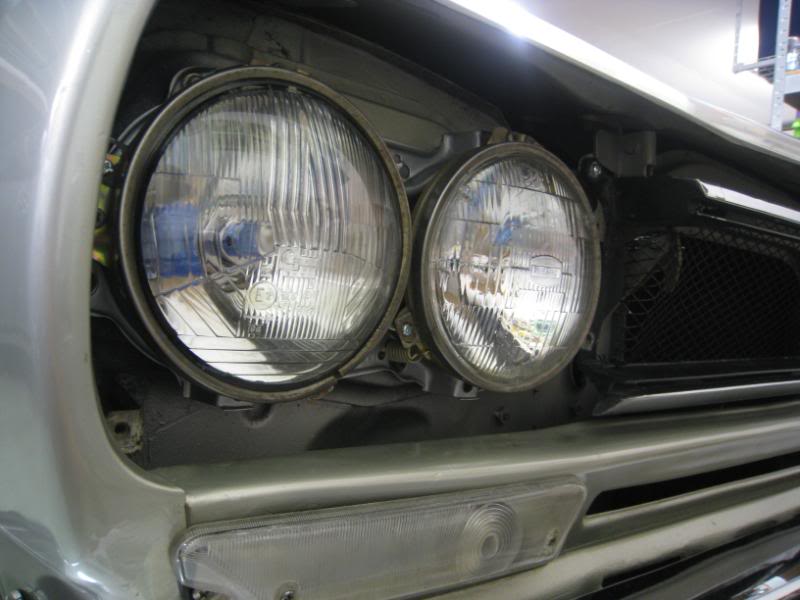
So it’s as good a time as any to put in the new rings that just arrived from Japan. Strangely enough, headlight rings from an HZ Kingswood almost fit, but are too deep.
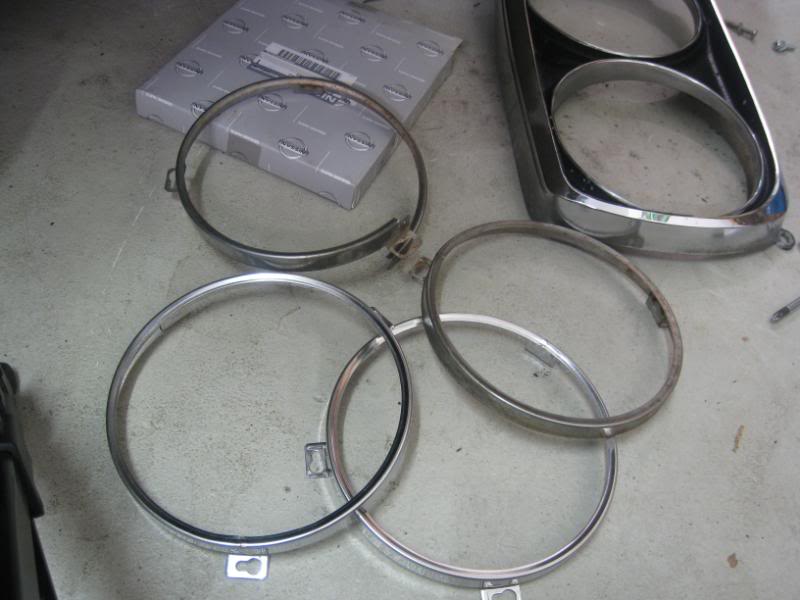
Looks better already…
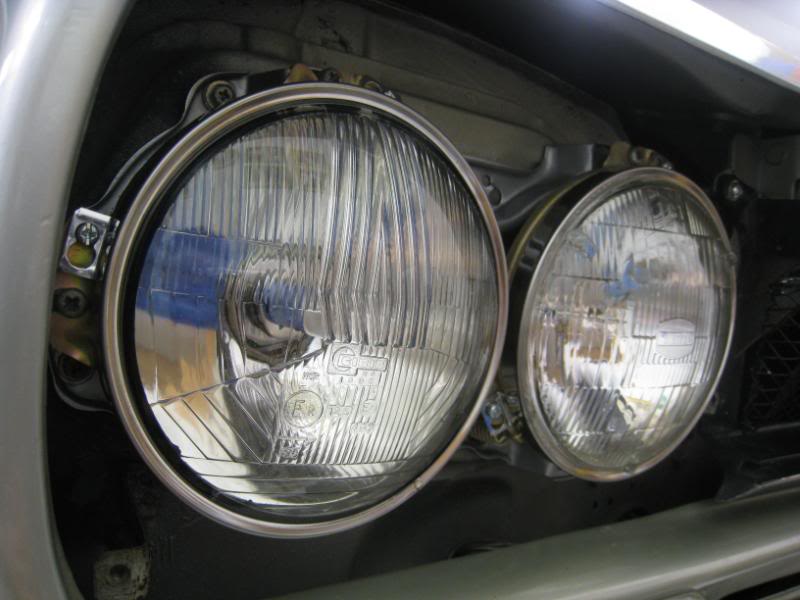
The new rings are pretty hidden behind the headlight trim panel but hey, we know they’re there ![]()
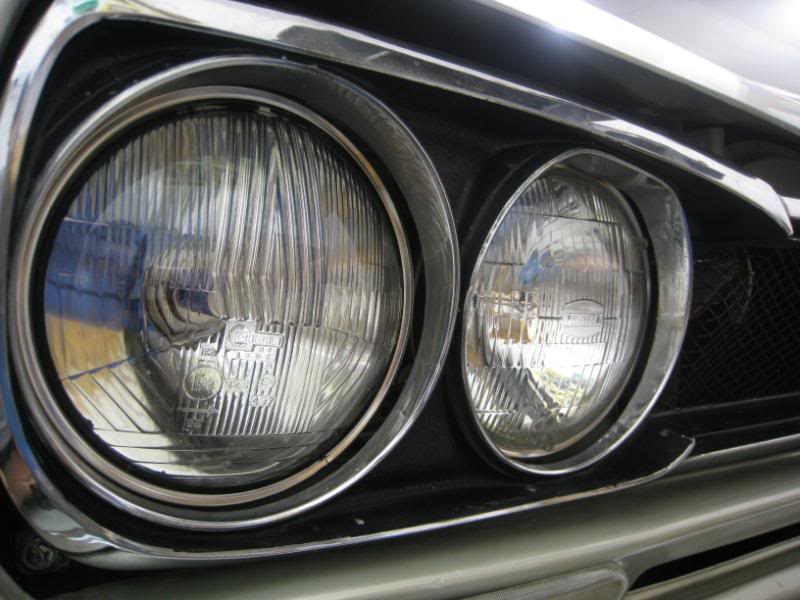
The parts situation for the Hako is a little funny. Some parts like the headlight rings have always been available, but some things like the gearlever gaiters were NLA for a long time, and then all of a sudden they’re available again for a short time. I got the parts from www.rubber-soul.net who said that there are only a few of those left, and since I was buying so many of their remaining stock I had to pay a bit extra
Ok, today I decided to have a go at fitting the new tail light gaskets.
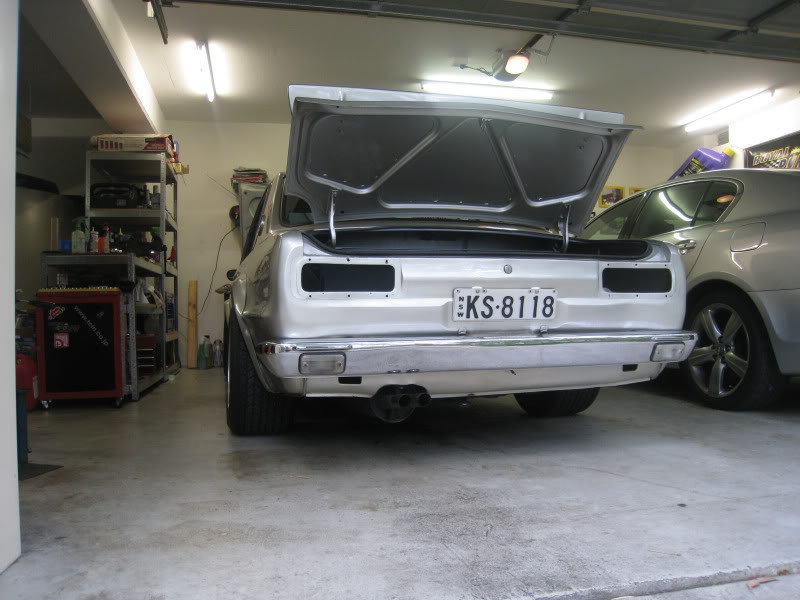
…and upon removing the tail light lenses, the mystery of why water leaks into the boot when it rains has been solved ![]()
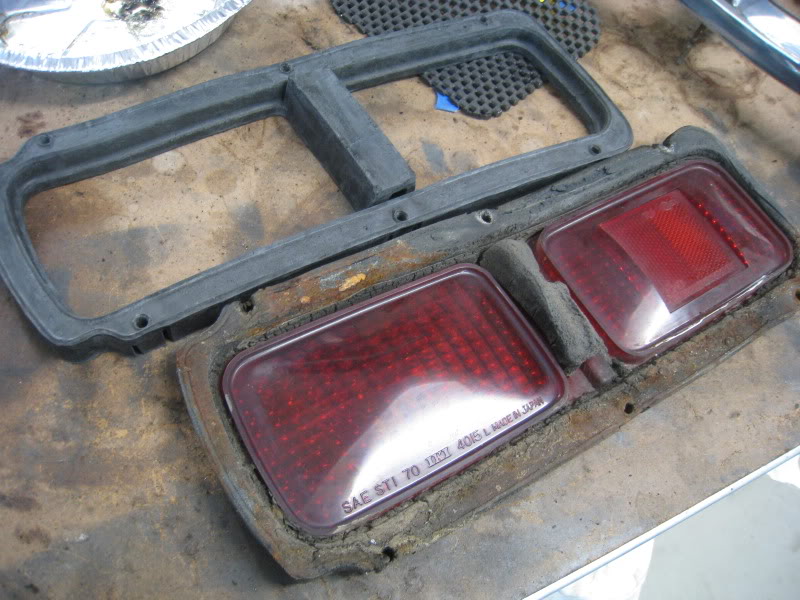
The old gaskets were pretty rotted and had gone cracked and hard on the bottom edge, and pretty much just crumbled away when I tried to remove them. But while the tail lights were apart, it was a good opportunity to give the lenses a good polish. I’ve used this Meguiars plastic cleaner and polish for years, works great on removing the cloudiness from plastic rear windows of MX5s. But it works pretty good on tail lights and instrument covers too. I’ve done the one on the right, which looks nice and shiny compared to the one on the left, which is still a bit cloudy.
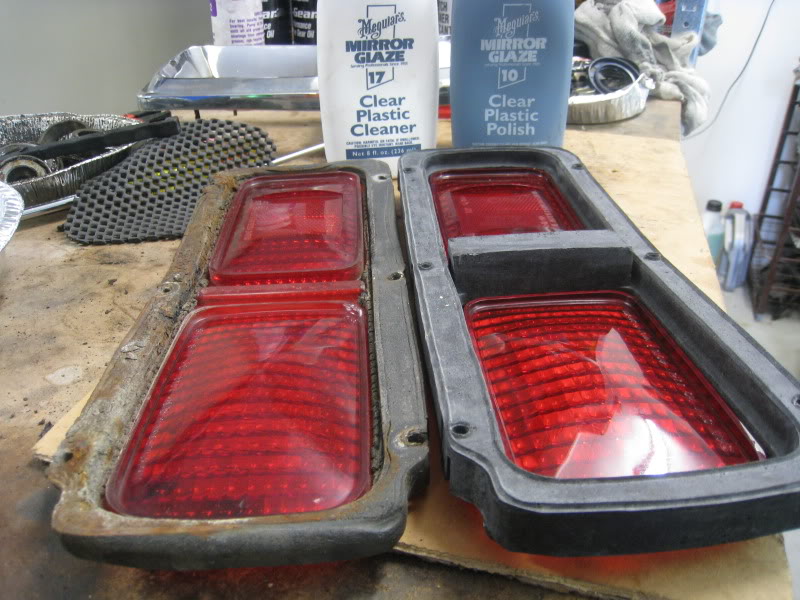
While they’re out, it’s easier to give the tail light bezels (which are cast metal by the way, not plastic) a proper polish and restore the grotty plastic tail light housings back to a semblance of their original colour.
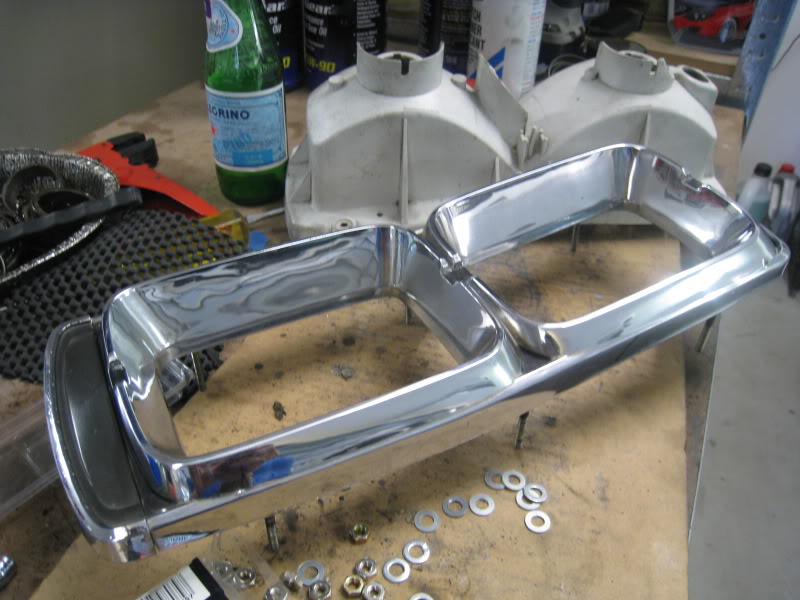
Done!
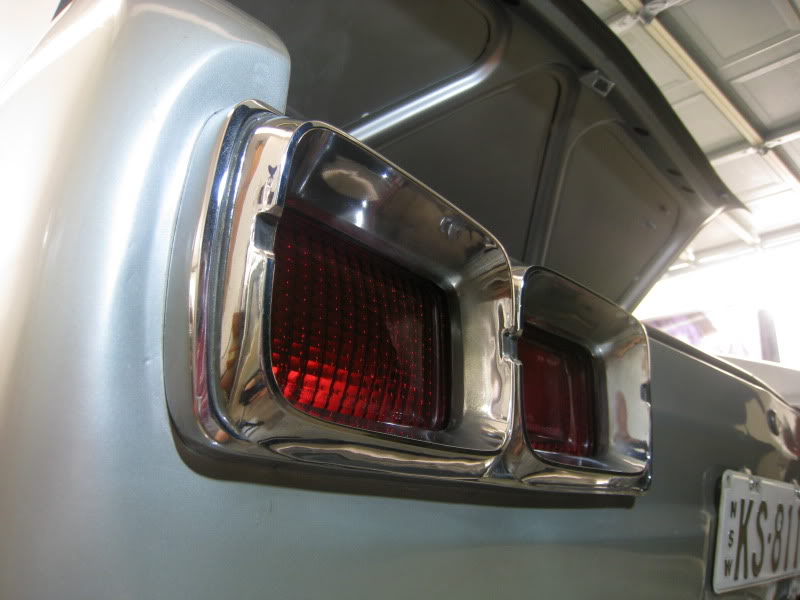
Spent a little time fitting the new gearlever tunnel gaiter tonight, so the old one can finally take a well earned rest. You gotta admit, the old one certainly has “patina” ![]()
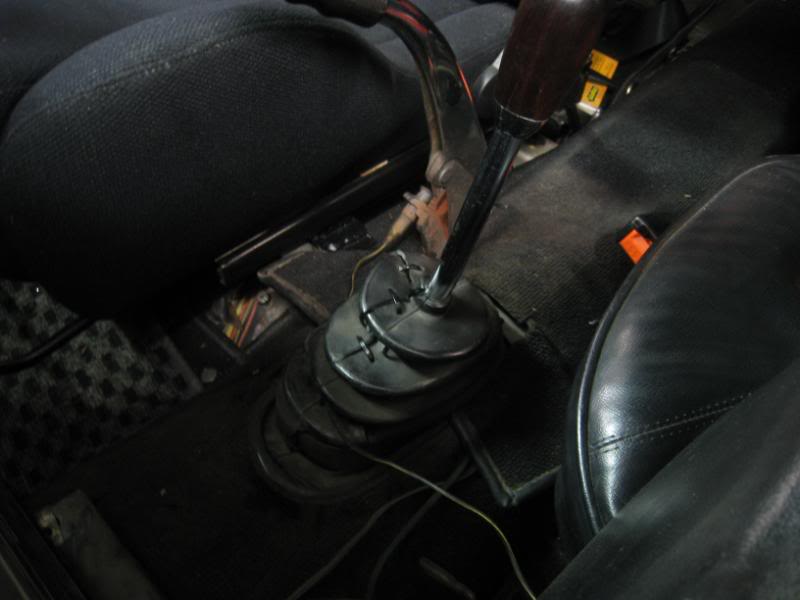
But the new one will actually do things that such components are supposed to do, like keep out exhaust gasses and underbody heat from coming into the cabin.
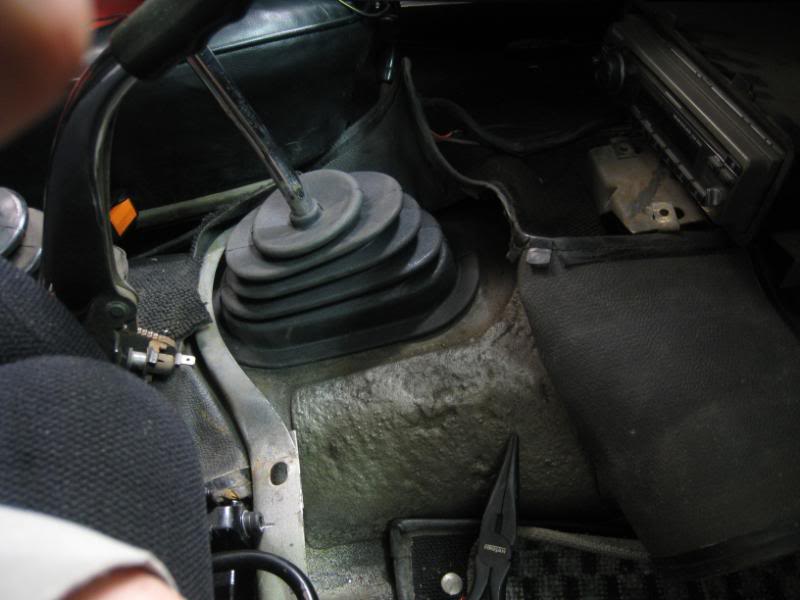
While the console’s out, I thought I’d finally tidy up the stereo install a bit. It’s always been crooked (it’s not mounted to anything at the back) and there’s a gaping big hole all around it.

The car came with a really ugly looking facia plate around the deck that never fit properly and kept popping off…
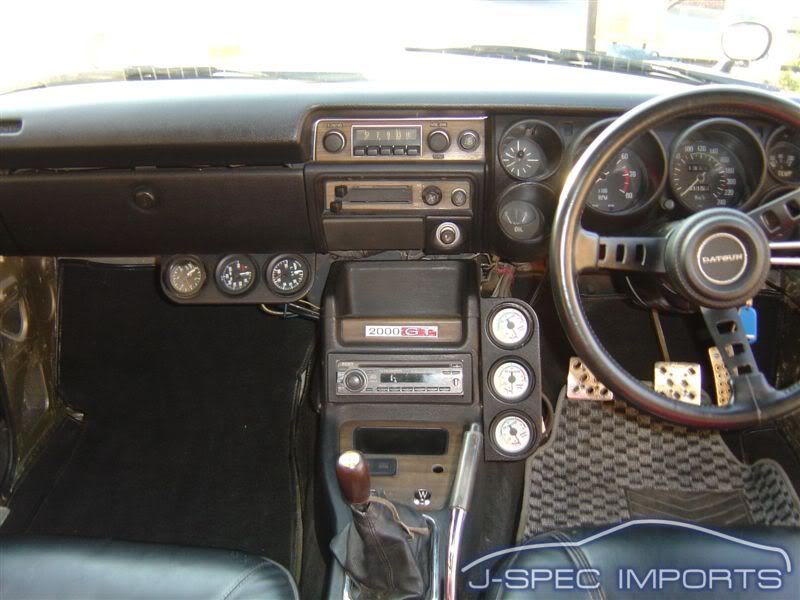
I rummaged around my big box of old stereo bits and magically found something that fits! Also found that the cradle the head unit sits in actually has threaded holes for mounting bolts on the side towards the back, and they lined up with existing holes in the console. I guess those holes might have drilled in Japan in the original installation, but somewhere along the line someone was lazy and didn’t bolt it all back together properly.
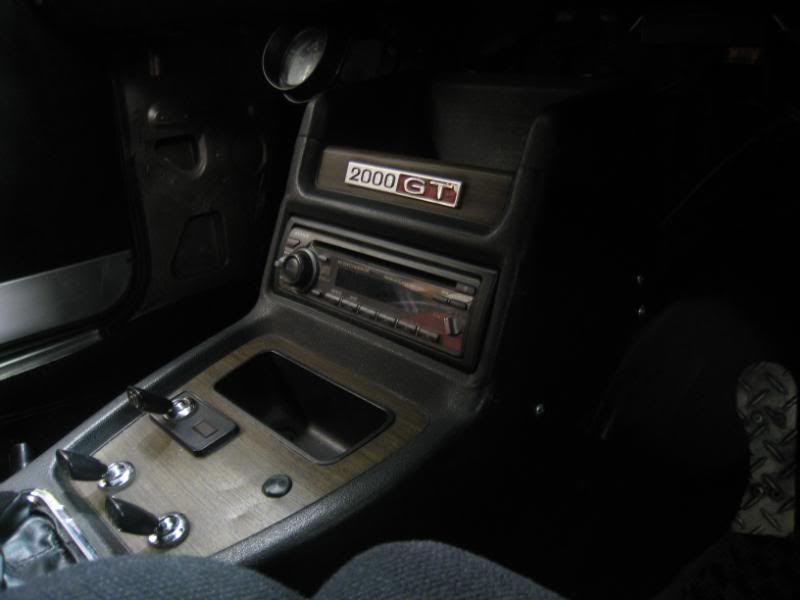
Hmm…I really should get my act together and make new kick panels for the footwell.
Well we had one of them remounted and that made a big difference to the runout, basically its perfect now, but there is still a bit of a wobble. I’ll try putting a different wheel and tyre on one at a time at the front to see if the issue is with one of the new tyres or both. And no, the back wheels are a lot bigger, so a swapperoo isn’t going to fly.
The latest project has been to make up a set of kickpanels for the front footwells, since the car didn’t come with any.
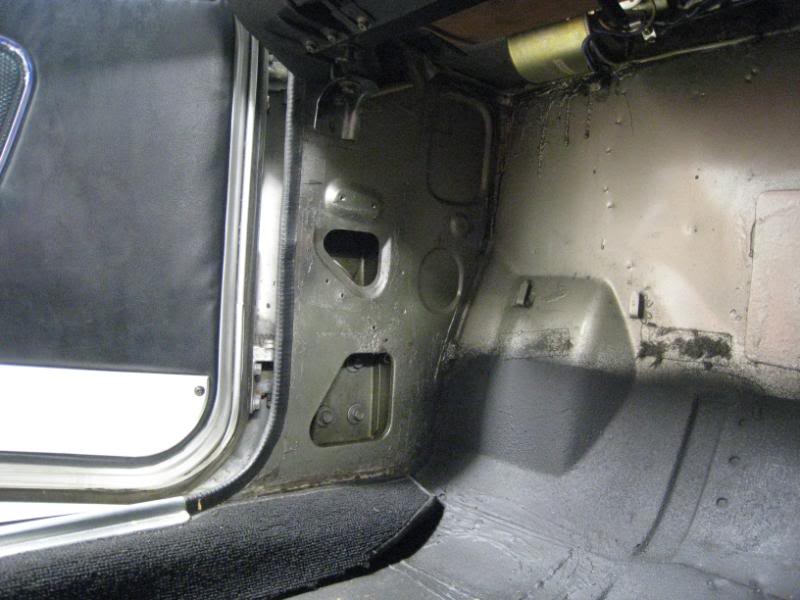
It is actually possible to get reproduction ones from Japan, but they’re over $200 and are basically compressed carboard with a bit of textured vinyl on top.
So I decided to make my own ![]() First step is to make a paper template.
First step is to make a paper template.
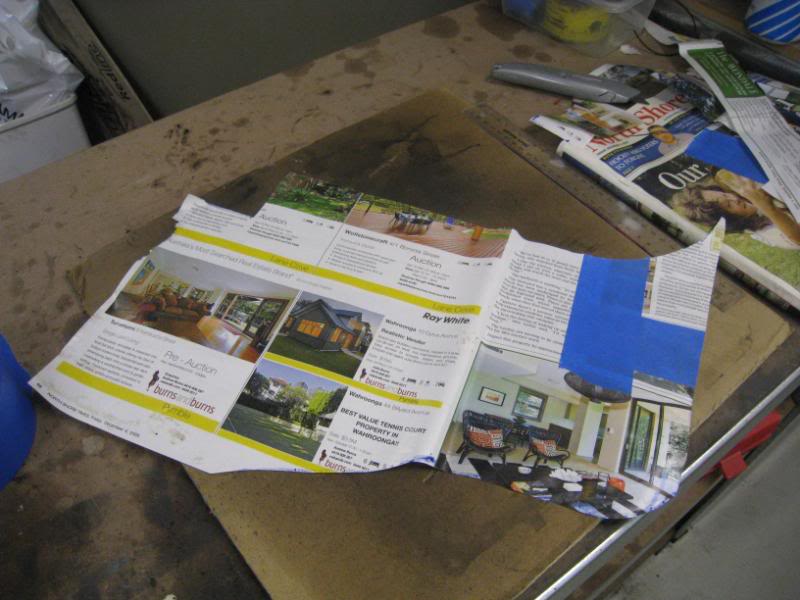
Transfer the shapes onto some fibreboard
Then cut out the shapes with a jigsaw.
To attach the panels to the car, I’ll be using these christmas tree clips. You just drill a hole slightly smaller than the diameter of the prongs on the clips and they are a push fit. The good thing is that you can lever then back out again without damaging the panel, but they hold pretty solid.
Cut the vinyl, leaving about 3cm extra material all round.
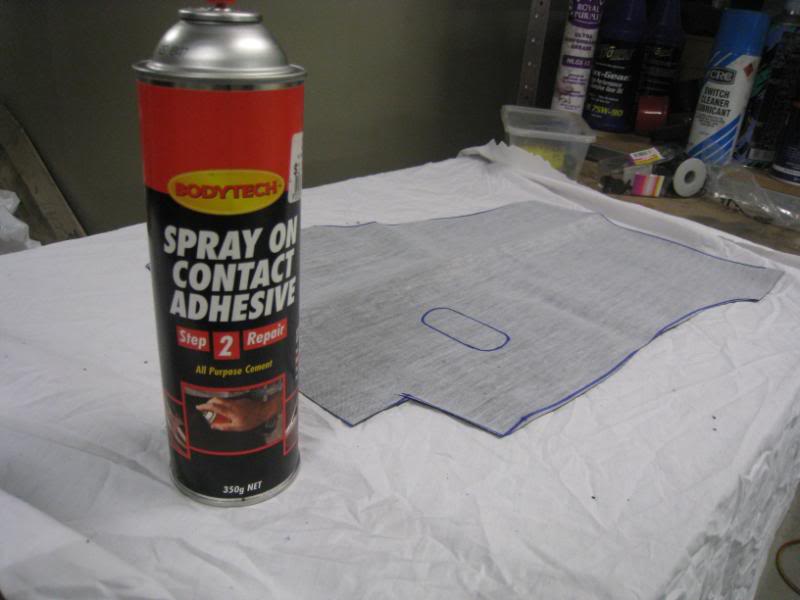
Spray with some contact glue, wait a little while for it to get tacky and then press together.
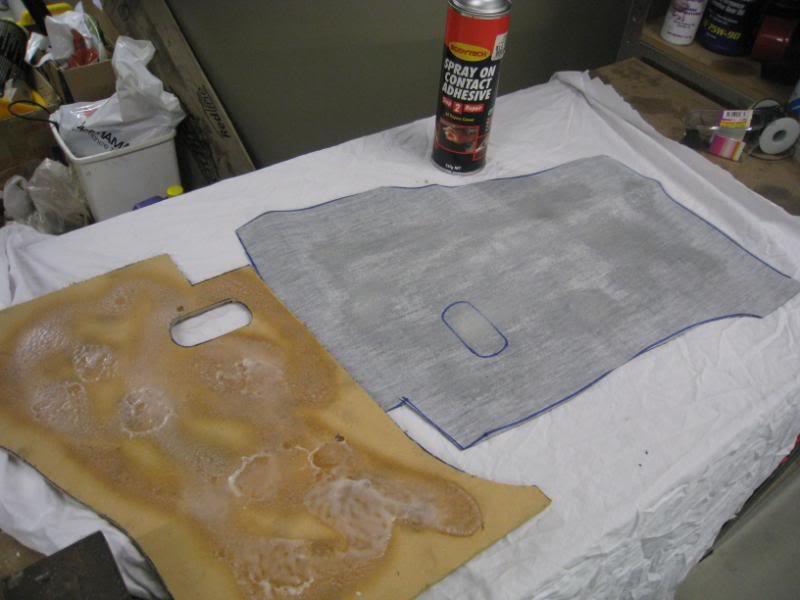
Smooth out the vinyl on the panel and to stop it from drying with wrinkles, put some magazines or something on top to make sure they dry flat.
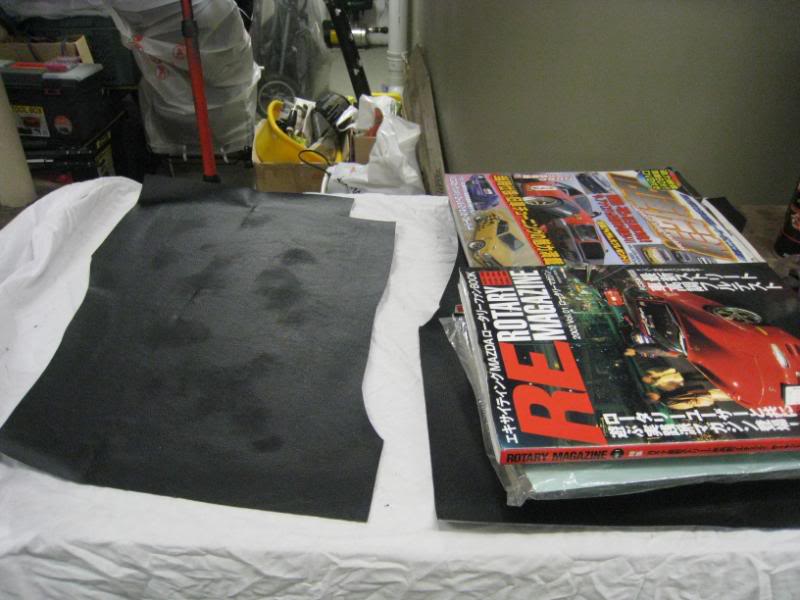
Turn then around when dry, spray the glue around the edges and wrap the vinyl around.
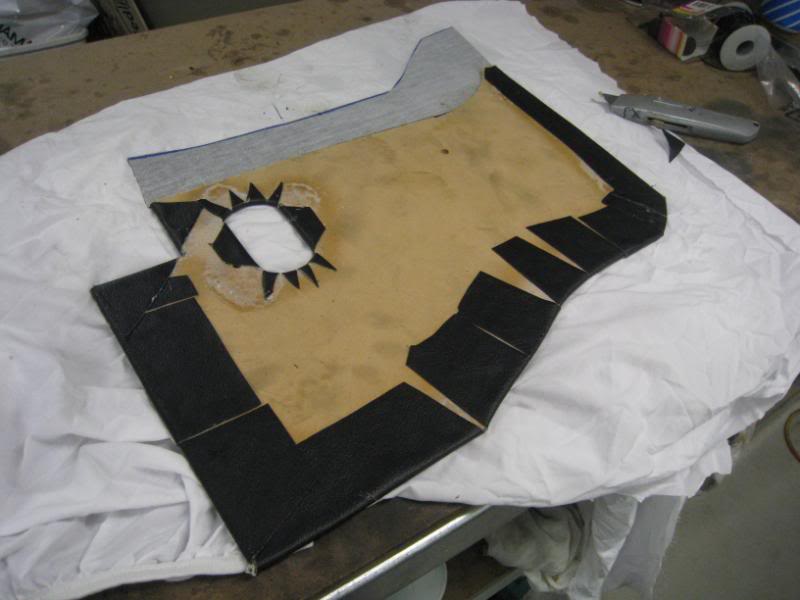
Done! Now I haven’t wrapped the front edge of the vinyl, for reasons which will be obvious soon.
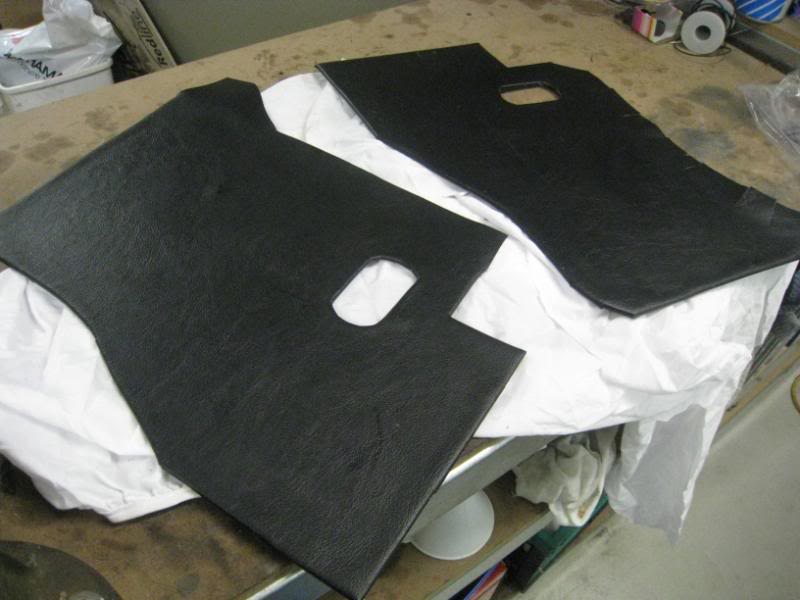
But before I attach the kickpanels, I’m going to spray the area behind it with this stuff. I bought 3 cans a long time ago and have been spraying it in various areas of the car where I’ve done some work. Since the kickpanels will be covering up that a-pillar area for some time, it’s a good time to treat that spot.
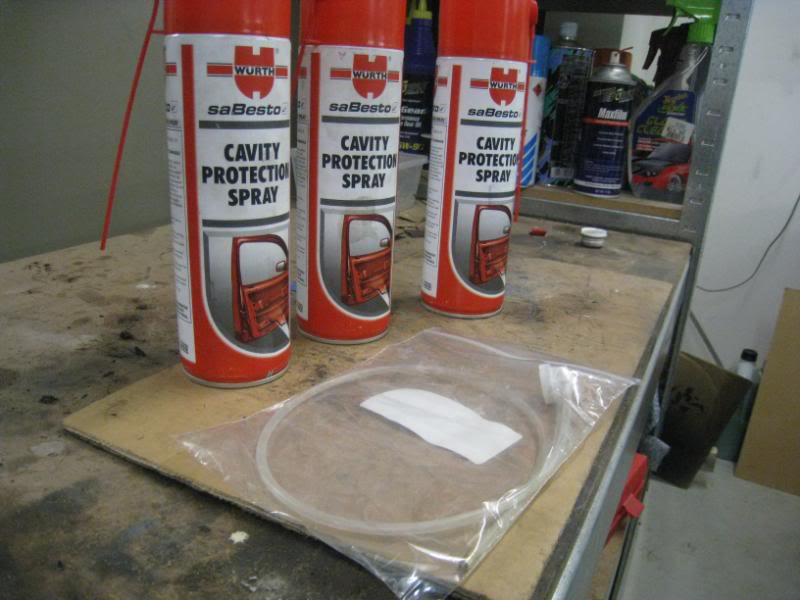
It comes with this great nozzle which sprays a wide area, so you can poke it right up into the a-pillar cavity and mist the whole inside with wax. The stuff is claimed to displace water, and seep into the nooks and folds, which it definitely does do. It’s quite thin and after you spray an area you do see it seep out from body seams, etc which is great.
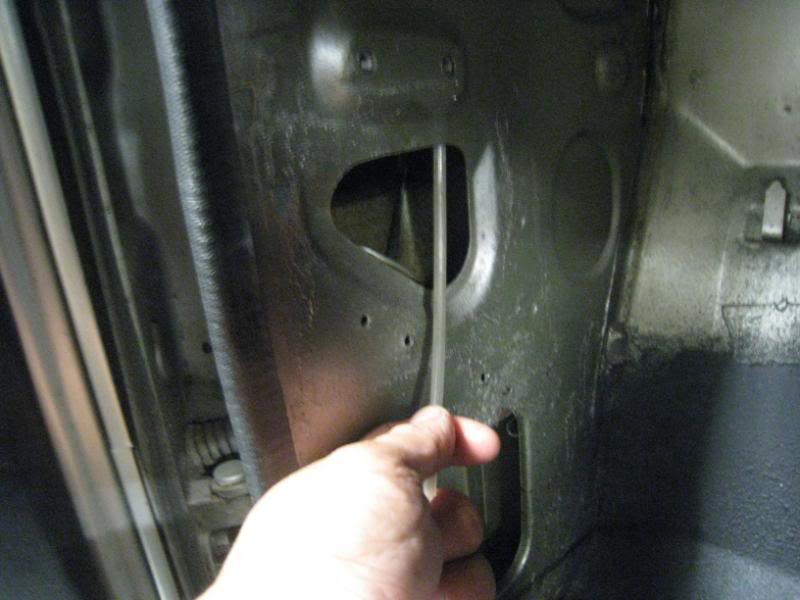
But on any horizontal areas which might collect water I just go crazy and lay down a thick coating. So far I’ve used up one of the cans and we’re halfway thru the second.
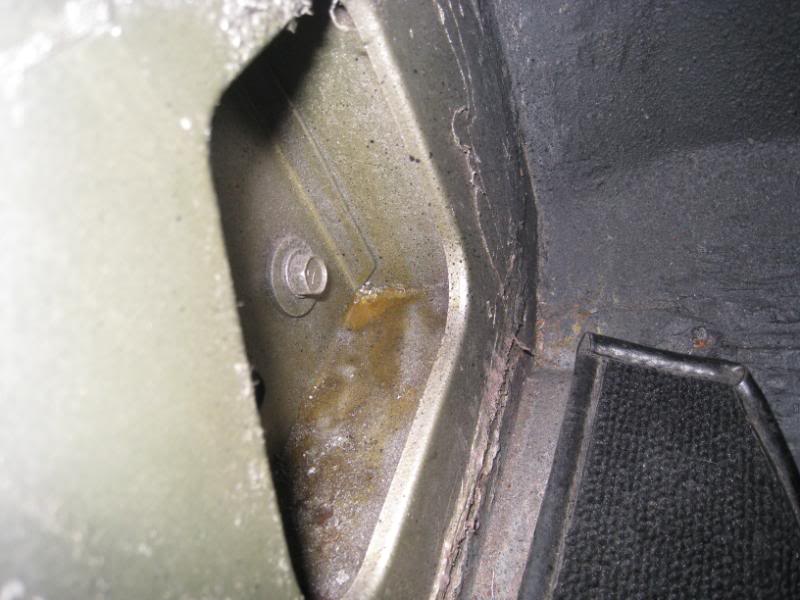
Drill the holes in the metalwork for the christmas tree clips and then just push them into place. I’ve tucked the loose material at the front edge of the panel behind the pinchweld rubber strip, I figured that would be neater than wrapping it and then maybe seeing a bit of a gap where I didn’t cut the panel exactly right (that’s how the stock ones are anyway).
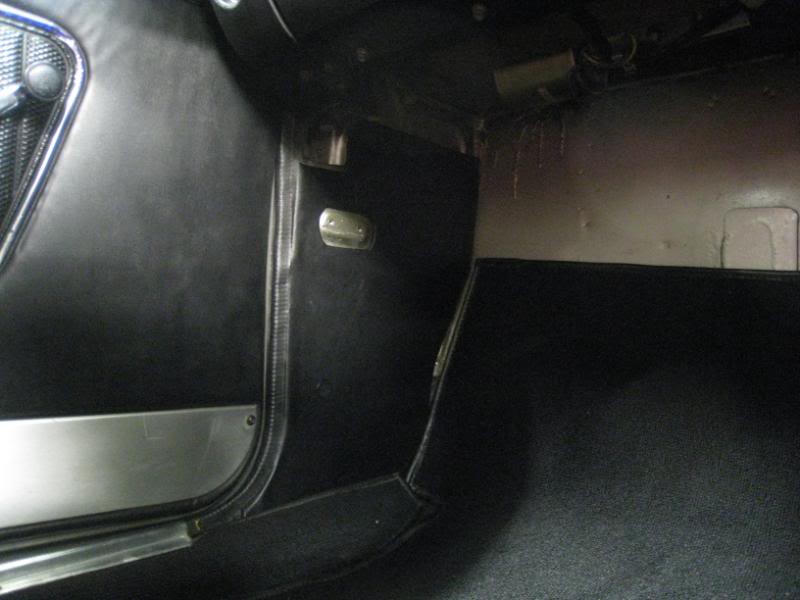
…driver’s side has a bit more going on, with the fusebox and the bonnet release bracket needing to be mounted thru the panel but that wasn’t a big drama.
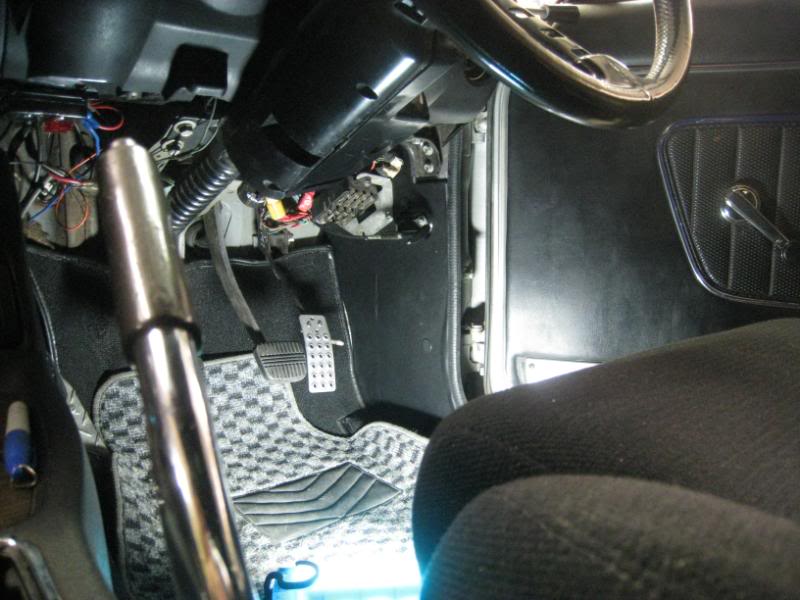
Something else that was an easy upgrade recently was to address the issue of the rather patinated GT badges on the front fenders, they were a little sorry looking, with most of the red inlay having fallen out.
But luckily the fender badges are still available, so on go a new set and it does make a nice difference ![]()
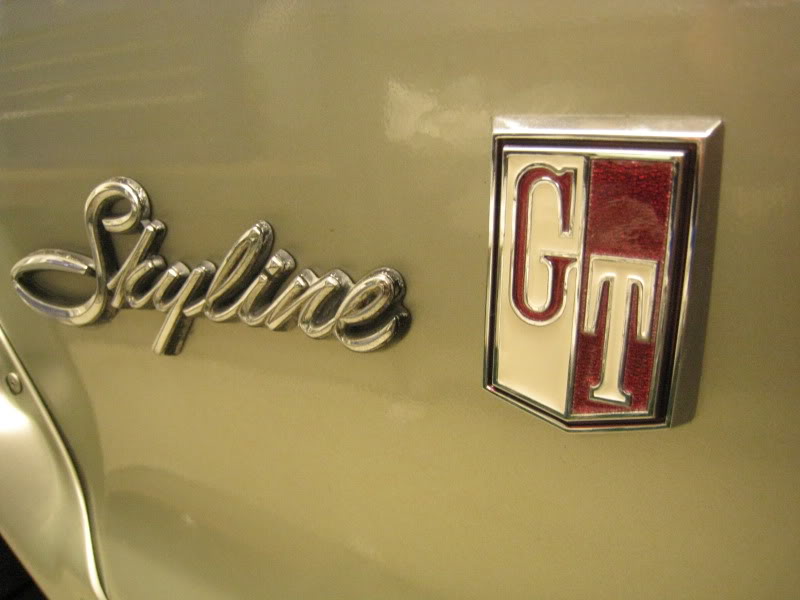
One thing that a few guys have asked me about, is that when I made up the kickpanels the other day, how come I didn’t vinyl-over a funny looking hump in the sheetmetal.
Well, one thing I wanted to add to the car for a long time is a flashlight. I think it’s pretty essential for old cars that tend to break down in the middle of nowhere on a dark night ![]() But when I saw this picture of a real 2000GTR interior, it gave me an idea. Back in the day, the Hako would have come with a flashlight, with a red cover on it. Basically the precursor to the emergency flare that’s commonly found on Japanese market cars, it’s mounted to the passenger side kick panel. So that gave me an idea…
But when I saw this picture of a real 2000GTR interior, it gave me an idea. Back in the day, the Hako would have come with a flashlight, with a red cover on it. Basically the precursor to the emergency flare that’s commonly found on Japanese market cars, it’s mounted to the passenger side kick panel. So that gave me an idea…
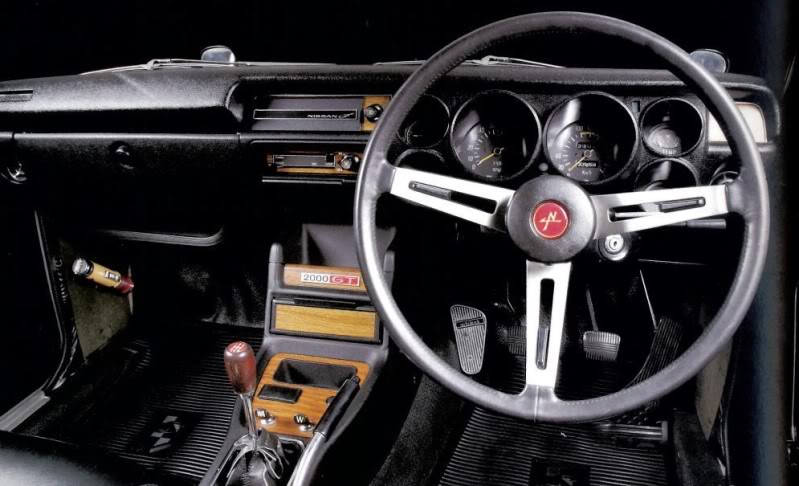
I found this vintage-repro flashlight on eBay, basically the metal kind that Japan churned out zillions of in the late 60s and early 70s, and a pretty close match to the original Nissan item. Designed for mounting to the handlebars of vintage bicycles, it even comes with a handy little bracket.
Drill a few holes in the bracket, and on it goes! At least now I don’t need to use my phone as a source of light the next time I’m stuck by the side of the road!
One last project for tonight was to spruce up the steering column surround, which showed a fair few scratches and scrapes and was dulled in places.
I thought about painting the column with a black vinyl paint, but I’ve always found that the end result looks obviously like you painted over it, and tried to hide something. So, not for the first time in this build, we will be doing it the long and hard way ![]() First I start out with some 800 and 1200 grit wet n dry paper, and some water.
First I start out with some 800 and 1200 grit wet n dry paper, and some water.

Start off with some wet 800 grit, which is pretty fine and not rough at all. Straight away this brown gunk starts to come off the plastic.
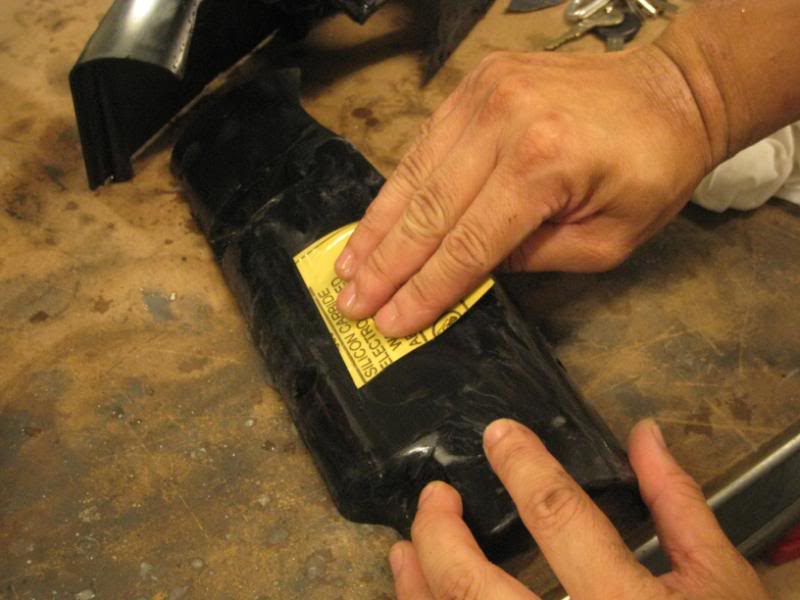
The 800 will get off the scratches and get the surface smooth, but it’s left with lots of fine scratches.
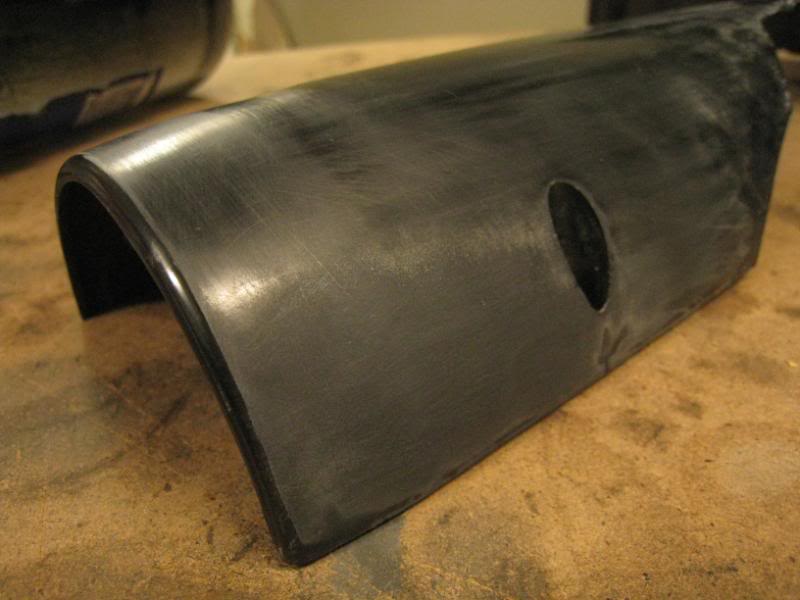
Hit it with some wet 1200grit, and the fine scratches are more or less gone, but the whole thing is dull.
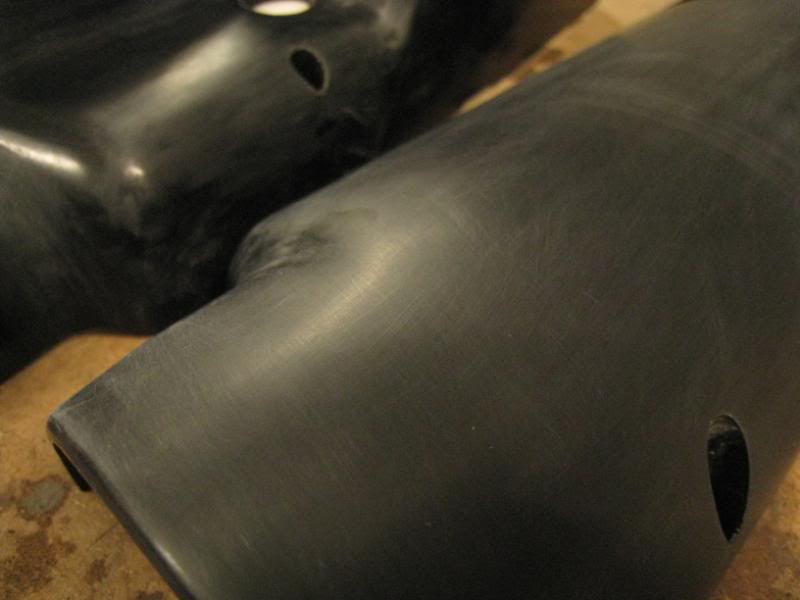
Next step is to work the plastic with some plastic polish. I really like this product, it’s great for restoring the shine to dulled tail lights, and making things like instrument lenses and convertible plastic rear windows crystal clear again.
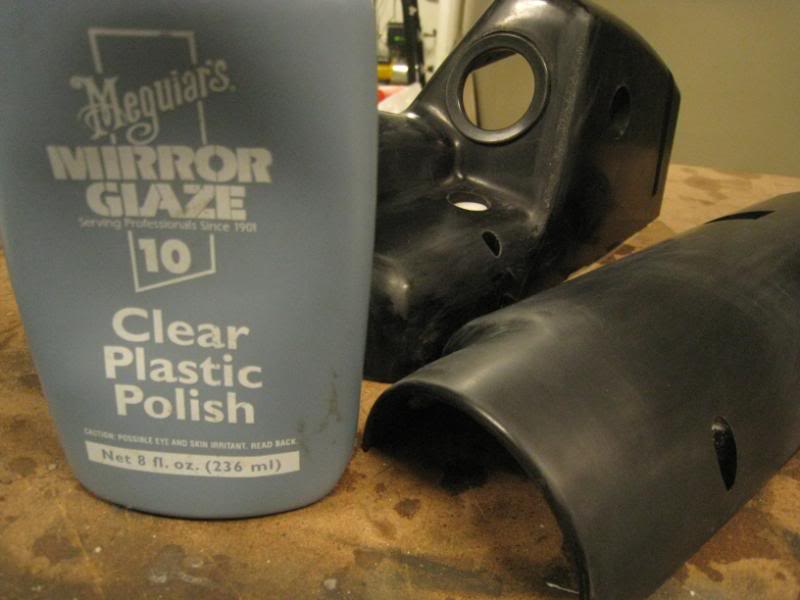
The dullness is gone, and it’s back to a nice shine.
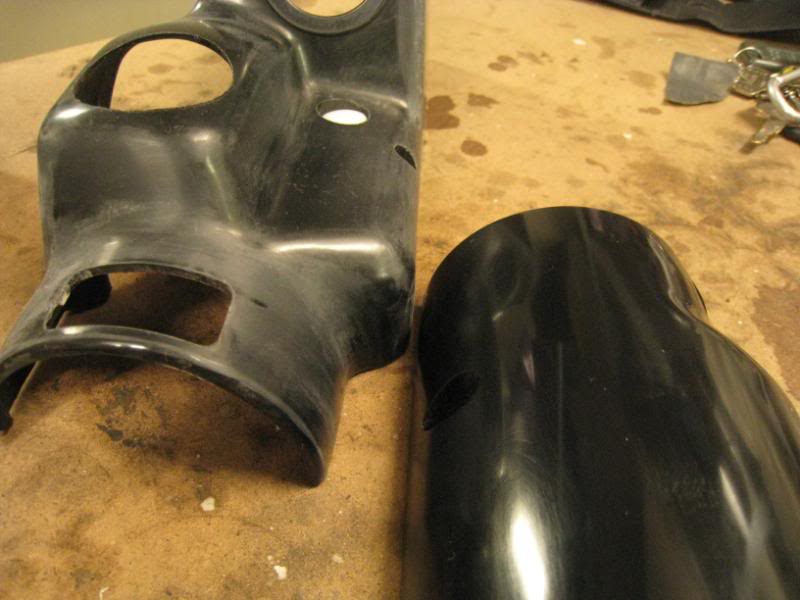
Done!
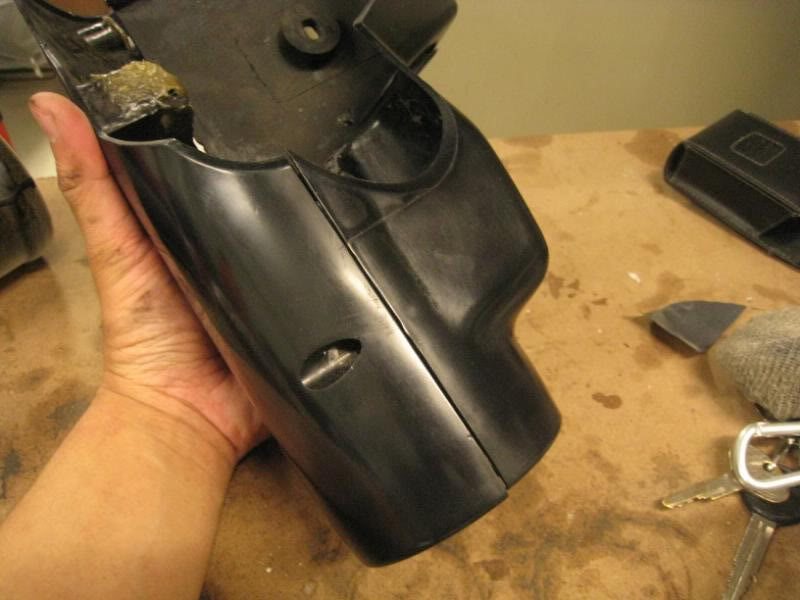
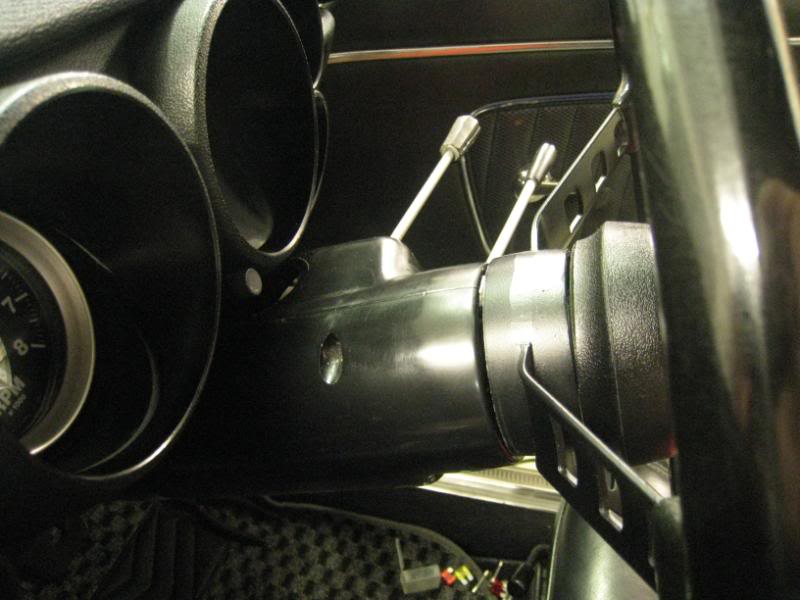
Been taking it a bit easy lately, just tidying up a few little things.
The back of the Hako is totally debadged, so does look a little bare.
One of the things that was a pleasant discovery was this “5Speed” badge, which was unearthed by fellow JNCer Bullitt in Malaysia. It’s not actually a 2000GT-R badge, it’s a badge for the 2000GT and GT-Xs with the 5 Speed option, from the last yr of production (Sept 71 onwards). So it’s a rare badge from a rare option, and it’s a proper GC10 badge. Not sure if it was available in any other Datsun (does anybody know?)
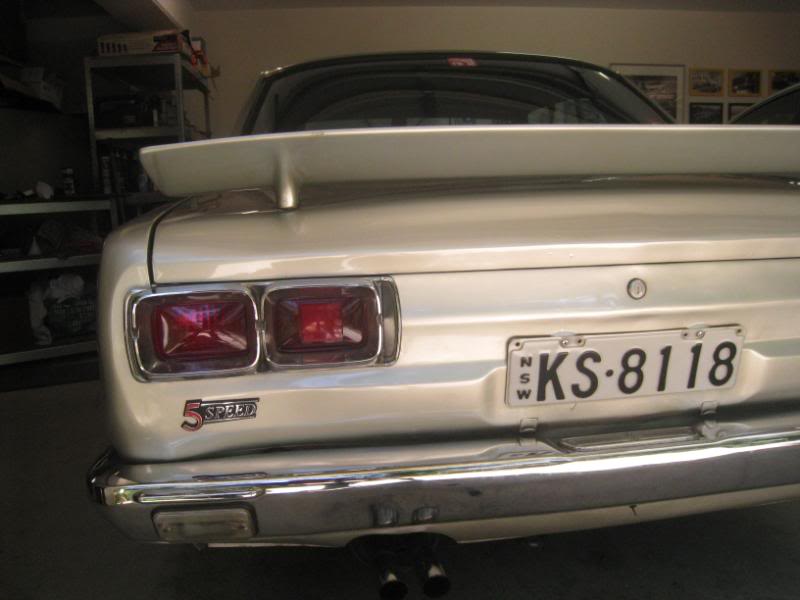
These have been out of stock in Japan for a long time, so it’s a cool find, and I think makes the tail look a little less plain.
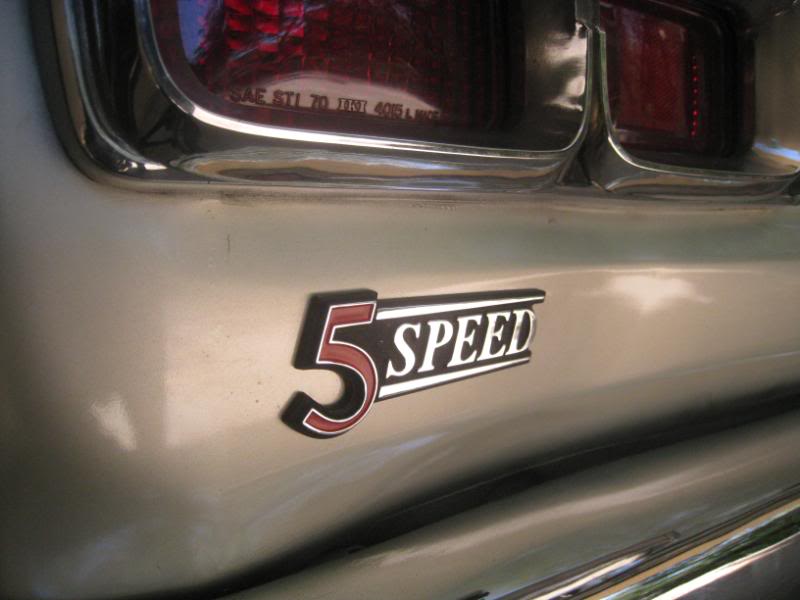
Other thing that’s been bugging me for a while is the rusty sunvisor arms. The chrome has mostly flaked off and it’s got some nasty surface rust.
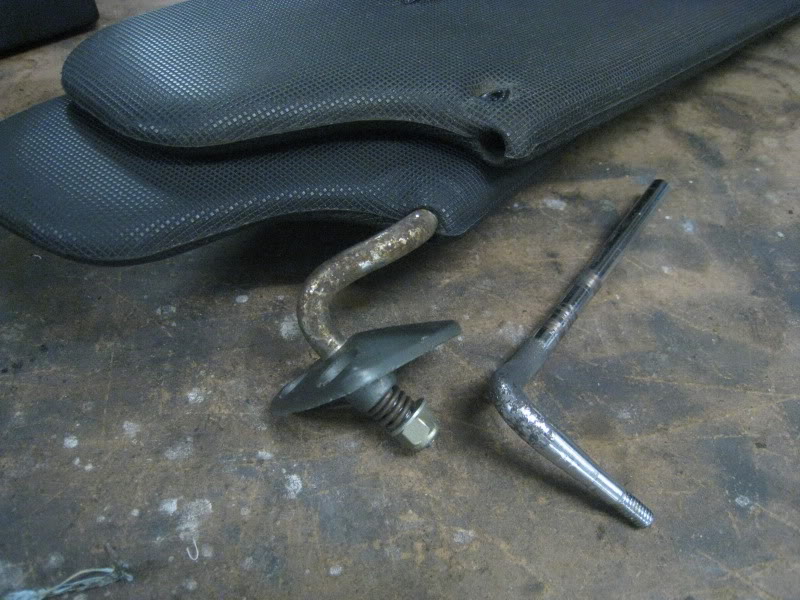
Wire brush the rust away…
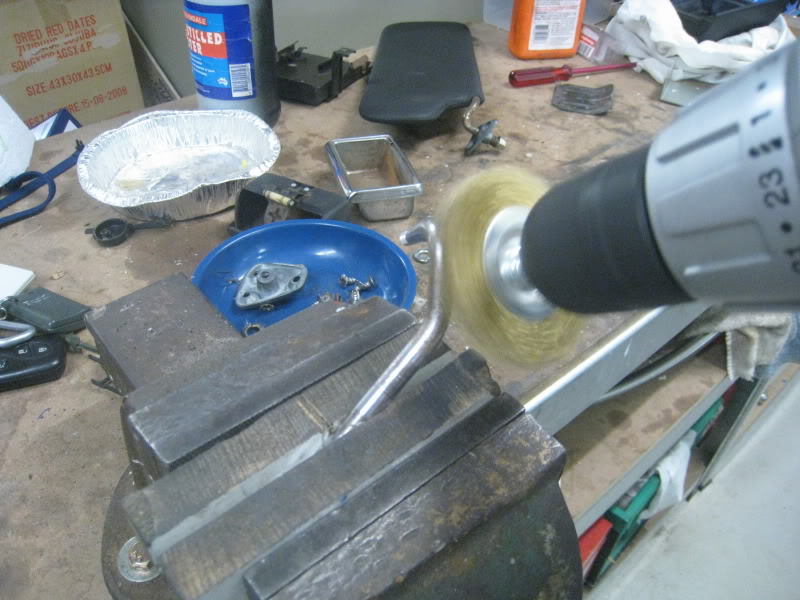
Give it a good sand with 400grit paper…and it’s ready for paint.
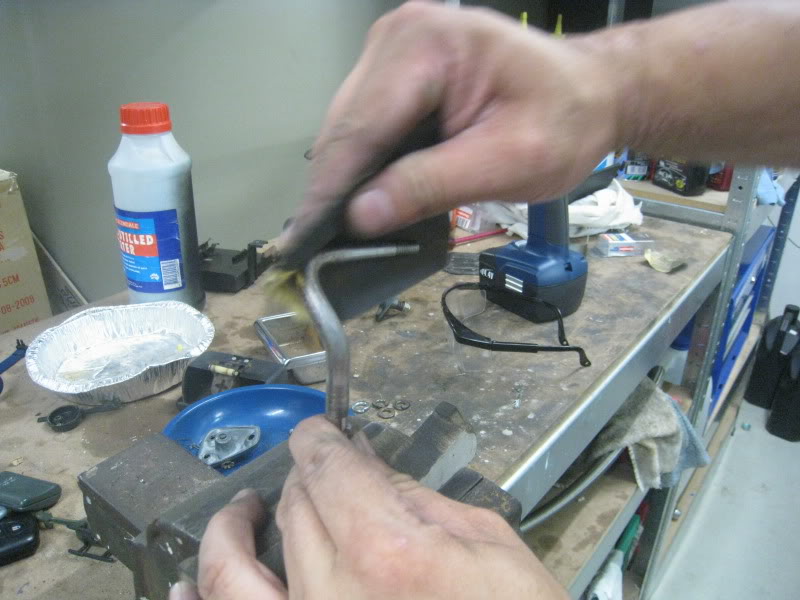
One coat of etch primer and a few coats of satin black later and it’s looking much better. I’m not sure if I’m feelin the black though, and I might redo it again in the future in the proper chrome. The thing about chrome plating is that it only makes sense if you have a decent amount of stuff to be done. So I thought I’d try paint first, but maybe I’ll do it properly one day.
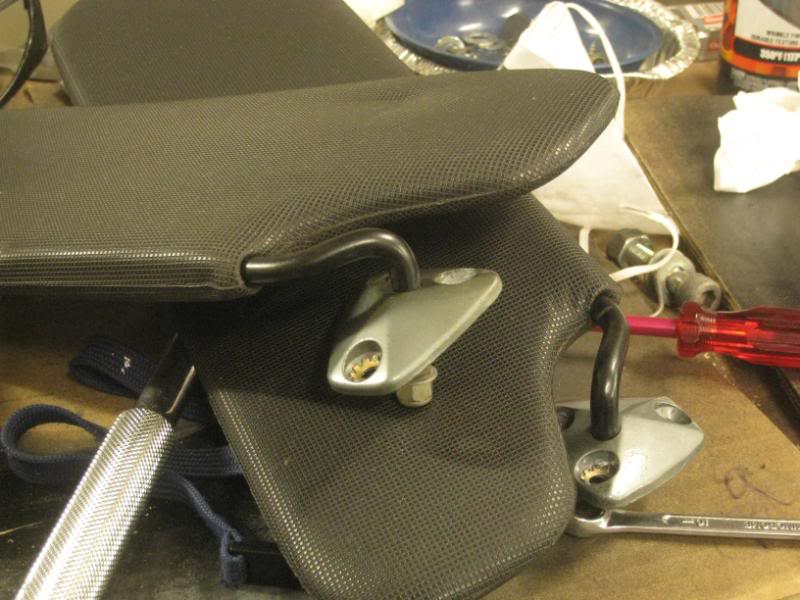
Another little thing to sort out, was the tired looking ashtray, which goes in the back of the centre console. It’s actually made of metal, with a wrinkle black finish, which was a bit chipped and scratched.
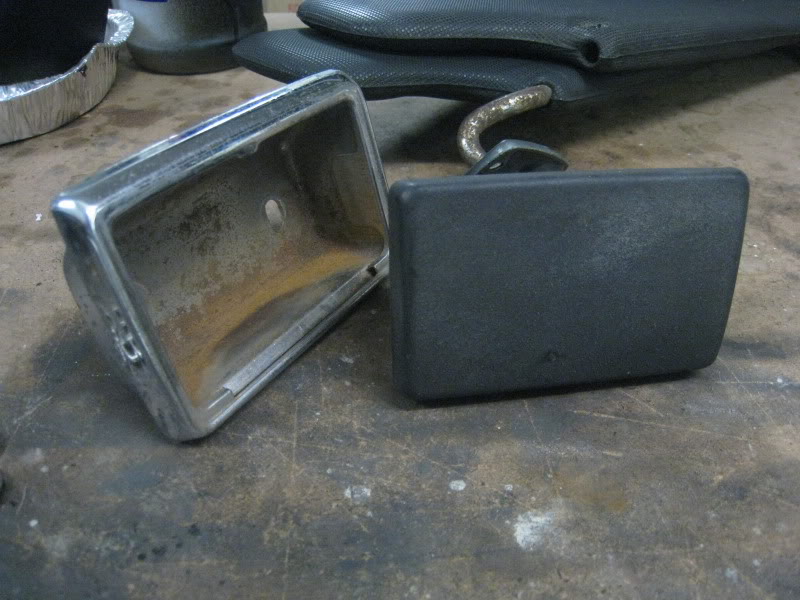
Now, I like messing around with wrinkle paint, so first I flatted off the old paint with some 400 grit paper and a sanding block. Then I hit it with some ecth primer, and the we start on the VHT wrinkle paint. The instructions say that you should lay down 3 heavy coats, but in my experience you don’t need to get carried away because the nozzle (on this particular brand anyway) is quite big and so 2 passes over the ashtray are enough to lay down quite a lot of paint. 1st coat is left to right, second coat is up and down, and third coat is diagonal. Give 5mins drying time in between, and be careful to make sure that the paint is an even depth all over. Otherwise the parts which have thicker paint will have bigger wrinkles and it’ll look funny. But after the 3rd coat it’ll look like this:
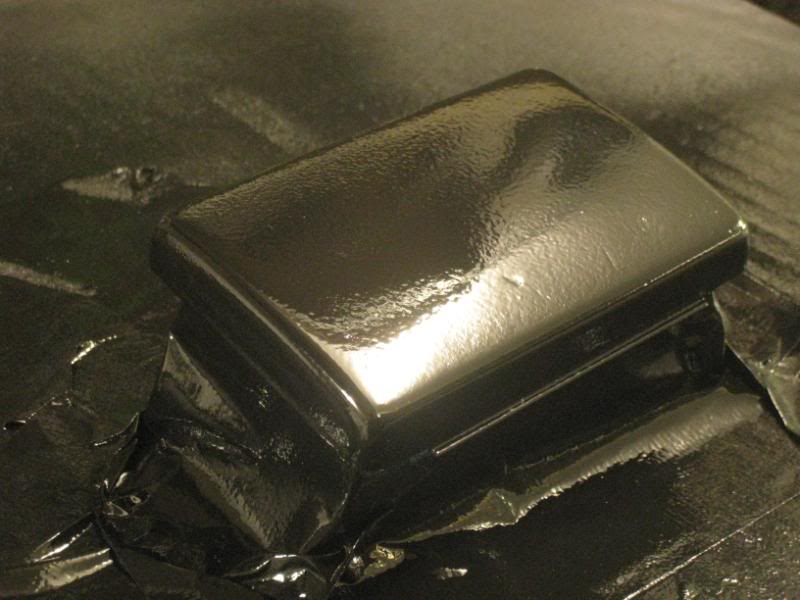
The 2hrs later it transforms to this…
And 24hrs later it dries even more and becomes more matte.
Then, while the console was off, I decided to look into the gearshift bushes, since the lever had quite a bit of play. Once you take up that initial slack, it’s quite accurate but I figured the bushes were probably past their best. The gearlever is held in by a clevis pin, which is secured with a circlip.
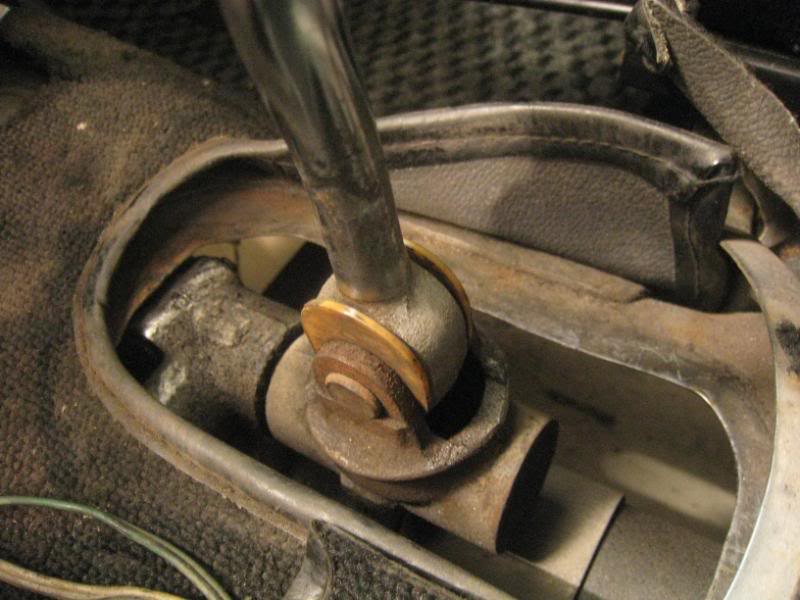
Pop off the circlip, and the whole thing just lifts out. There should be 3 bushes, the orange ones between the clevis pin and the lever, and the other is a nylon cup which pops over the ball at the bottom of the lever. And immediately the reason for the sloppy shift is quite clear…the nylon cup bush was missing!
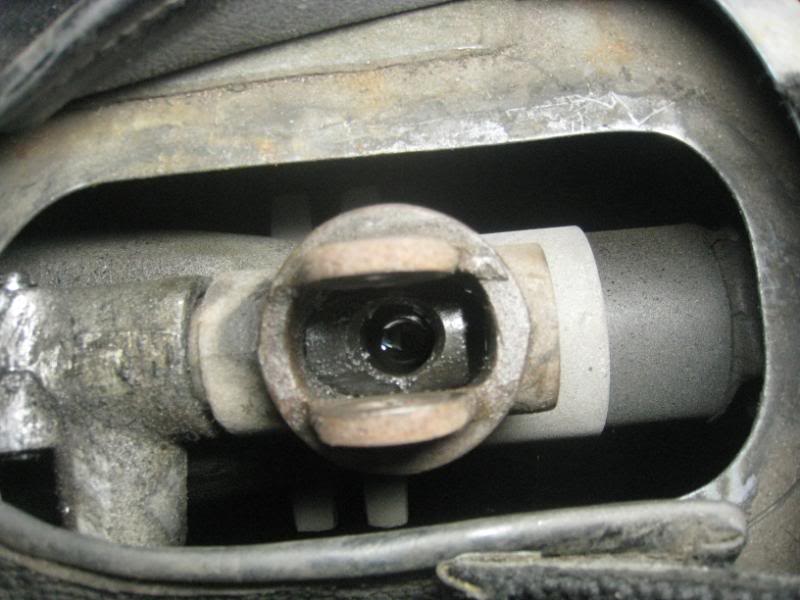
Five bucks later, we have a new one from Nissan. The clevis pin bushes were in good shape though, so I left those alone.
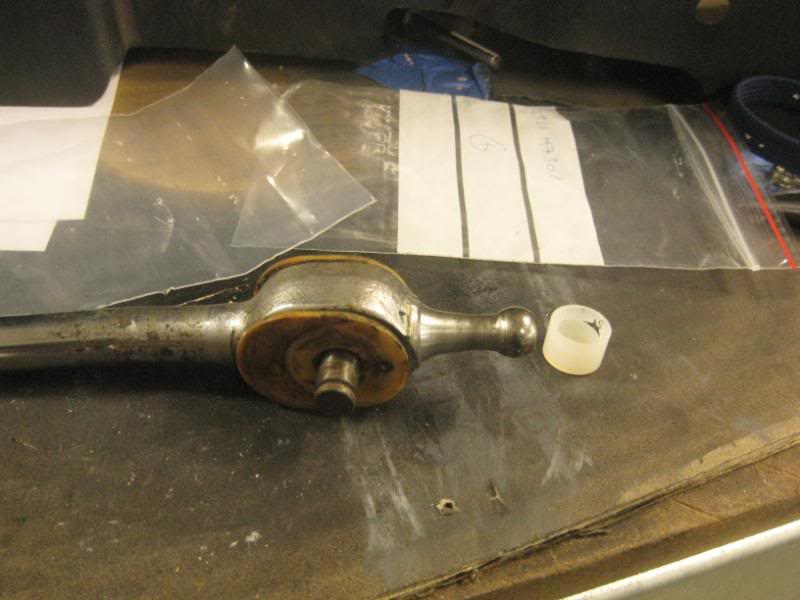
Assemble it all back together and the shift is heaps better. No more slop!
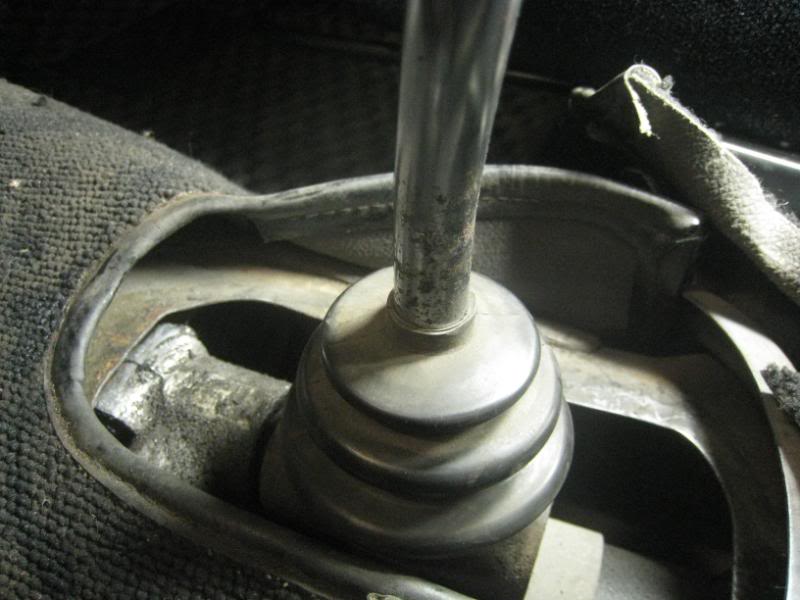
One thing I decided to do, while mucking around with the centre console last night, was to restore the 2000GT badge that lives on the centre console. The red paint was peeling and cracked.
So much so, that all it took was a little prodding with a screwdriver and all the old paint just fell off ![]()
So first step is to mask…the pinstripe masking tape is actually from Tamiya, a relic from my model-making days.
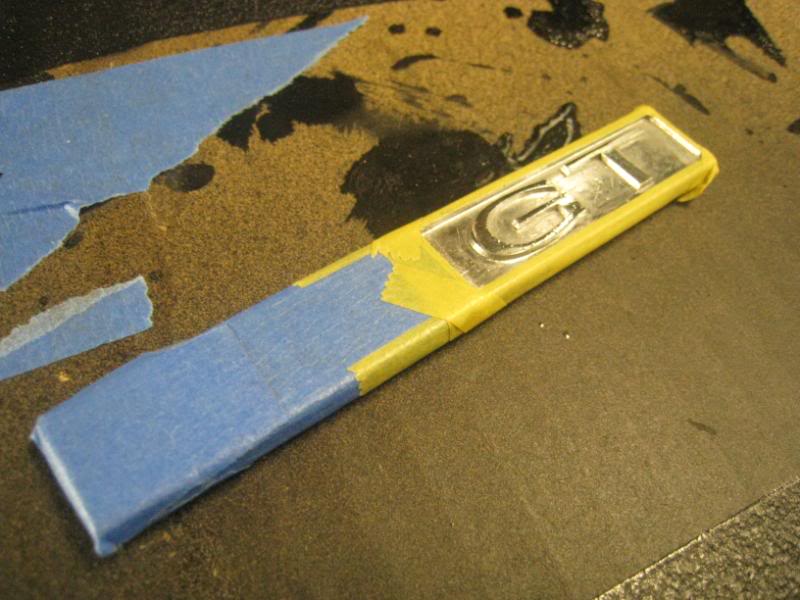
First primer…
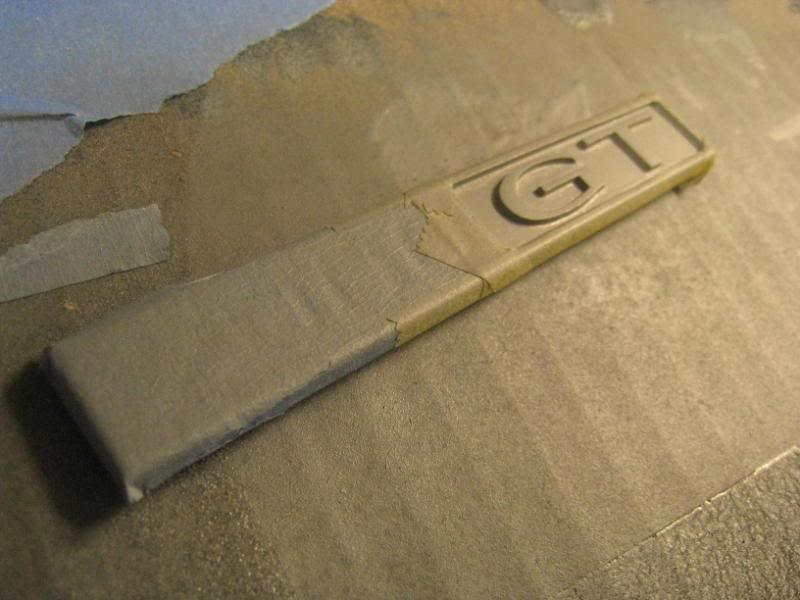
Then red. 3 coats of red in the end.
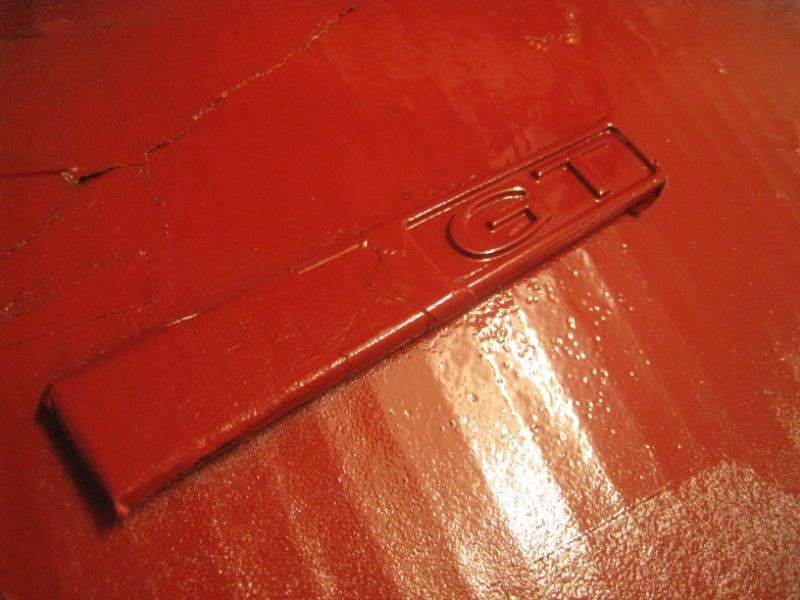
When its dry I remove the masking tape, and start to sand away the paint from the “GT” letters. First start with 400grit emery, then polish the badge all over with 800 and finally 1200 grit paper.
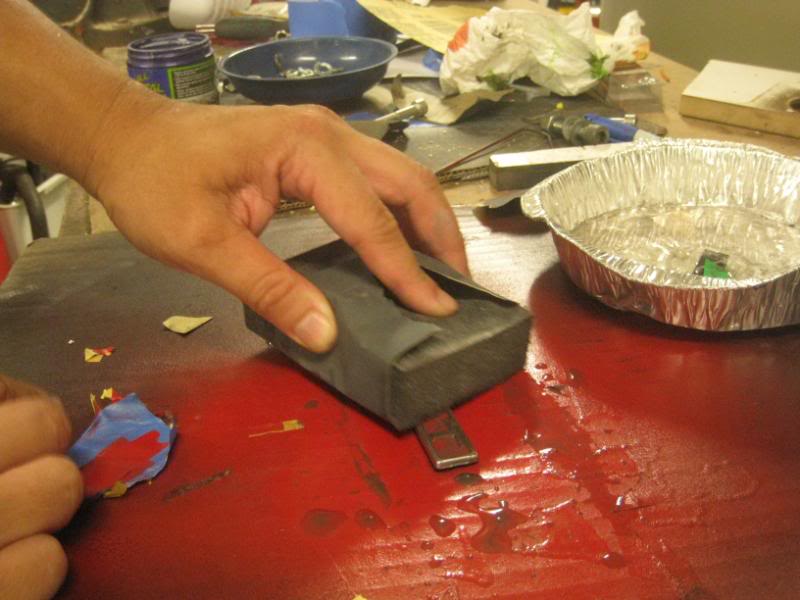
The finished product…much better.

…been wanting to do this since I got the car ![]()
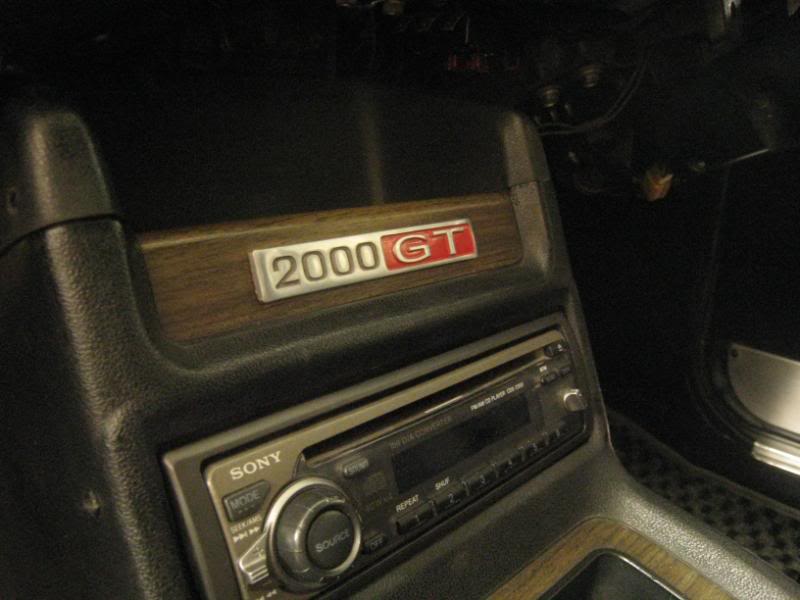
Many, many thanks to Greenmonster80 for arranging a group buy recently from www.victory50.com! It’s always good to get more swag ![]()
The first item wasn’t available until very recently. You might remember that the plastichrome trim around my gearlever is very cracked and broken, and it’s a part that I’ve been trying to source for a very long time. Even combing through the trade stands at the Tokyo Nostalgic Show a few years ago didn’t net any results.

Just about a month ago, reproduction ones appeared on the www.victory50.com site, and for $80 they were good value.
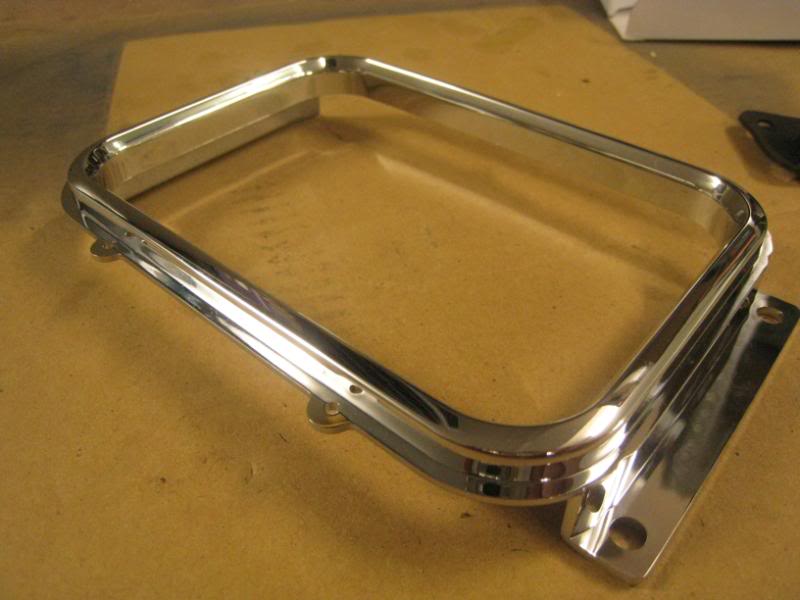
The vinyl gaiter around the lever itself, I managed to get new for a bargain $25 a few years ago, and it clips to the underside of the trim piece.
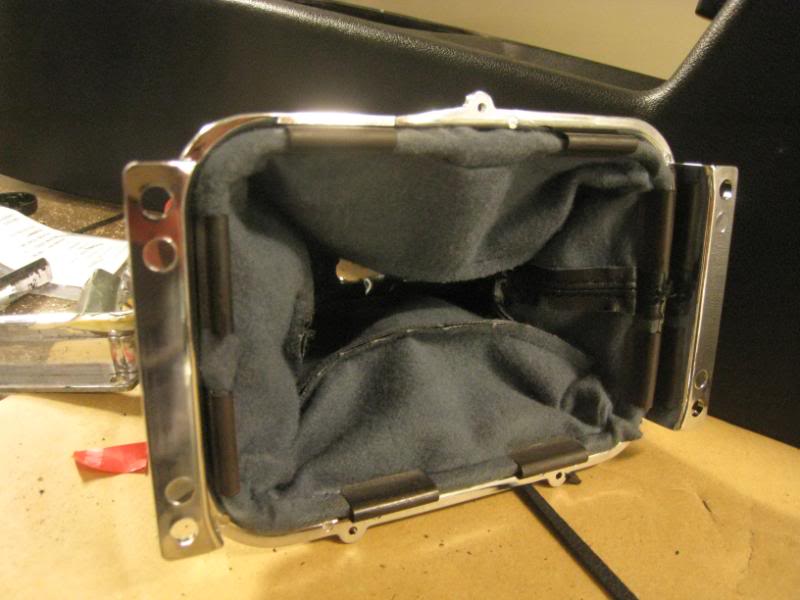
…which just screws onto the console. It never ceases to amaze me, how easy it is to get parts for this car. If it was a classic Celica or rotary, I’d be screwed, but there’s Hako specialists in Japan with all this gear just sitting on the shelf….repro stuff appears all the time, but often they’re limited-run, so when they come up, you have to act fast.
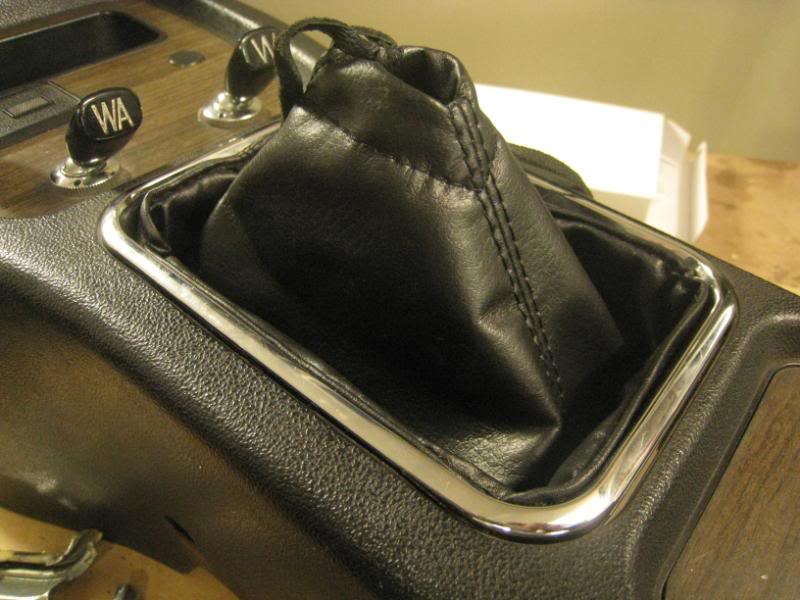
Other thing was the little rubber boots that go around the wiper posts. My old ones were cracked, and they can allow water to get inside the wiper mechanism, and the resulting rust will wear it all out very quickly.
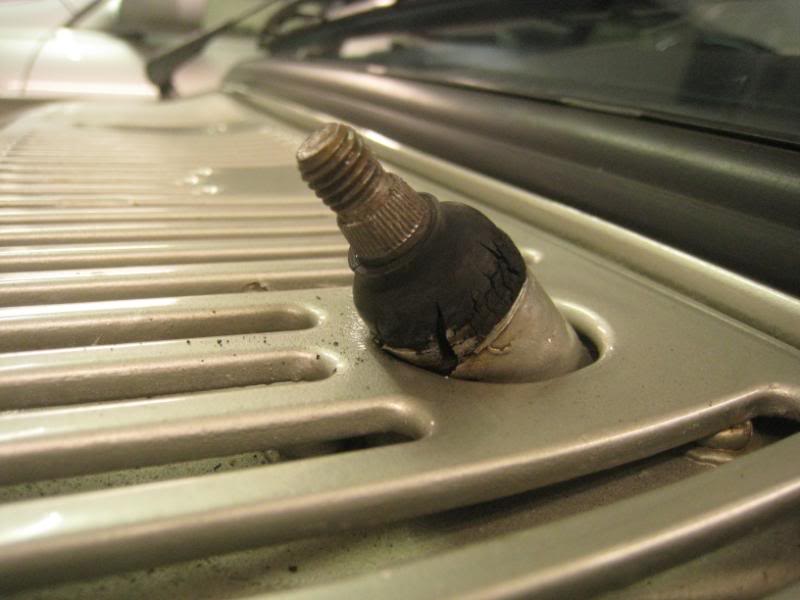
New ones were only $10 and just slide on.
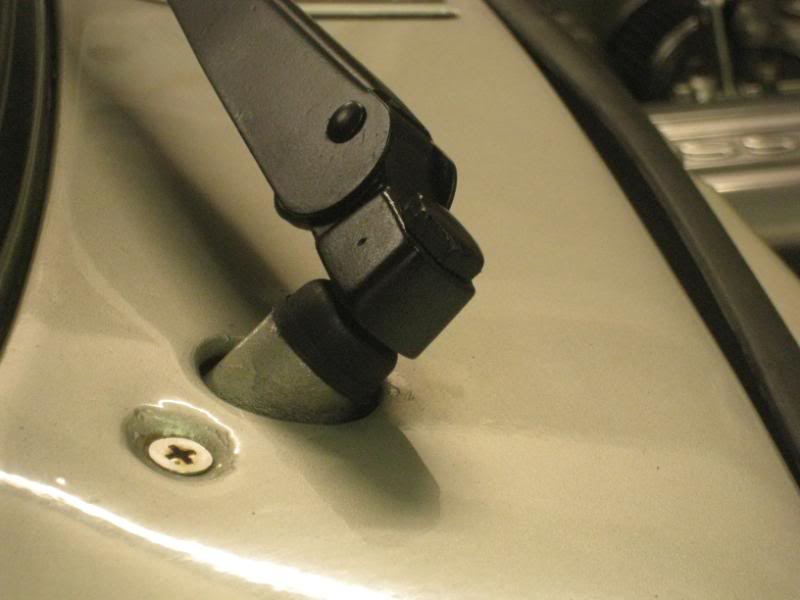
Last bit for tonight is the handbrake lever. I’d fitted a new rubber tunnel gaiter for the gearshift lever not long ago, and when I was done, I triumphantly declared that the cabin was now sealed from the underside of the car…and that’s when I noticed that the handbrake seal was totally gone ![]() Here it is from underneath, and removing it is easy enough, just undo 4 bolts and remove that er…paperclip that’s holding on the clevis pin.
Here it is from underneath, and removing it is easy enough, just undo 4 bolts and remove that er…paperclip that’s holding on the clevis pin.

The rubber seal is largely non existent…
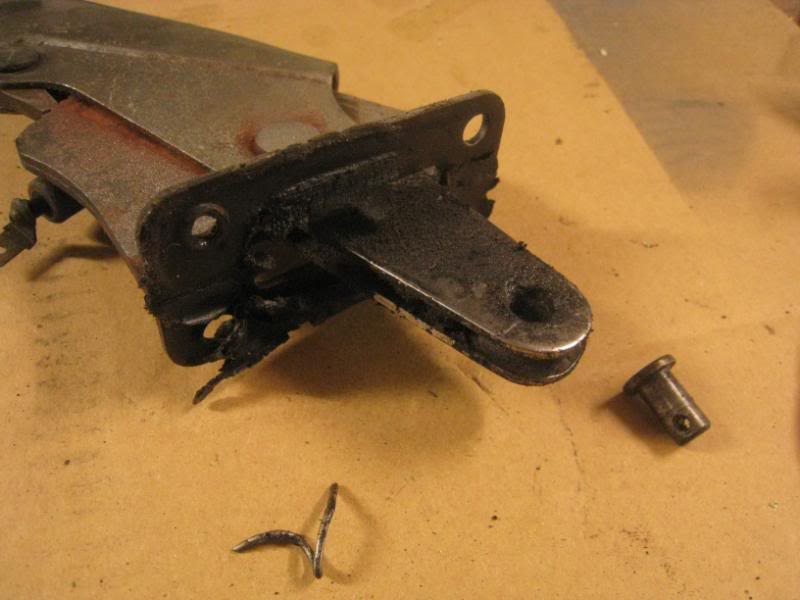
After greasing up the internals of the handbrake, it all slides together with the new seal ($25)…
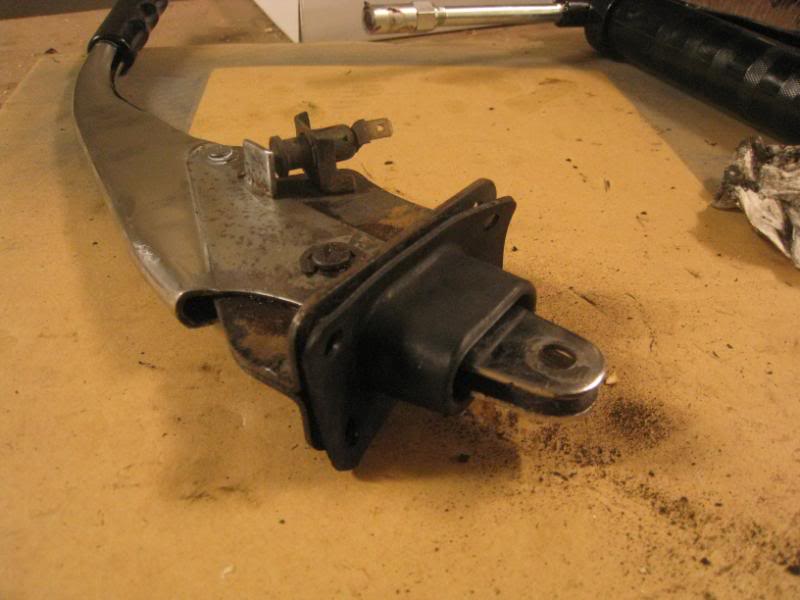
…and into the car it goes.

And no paperclip this time ![]() We’re using a proper split pin…well…since I didn’t have a split pin of the right diamater, I cut a bigger one down to size, so we have half a split pin
We’re using a proper split pin…well…since I didn’t have a split pin of the right diamater, I cut a bigger one down to size, so we have half a split pin ![]()
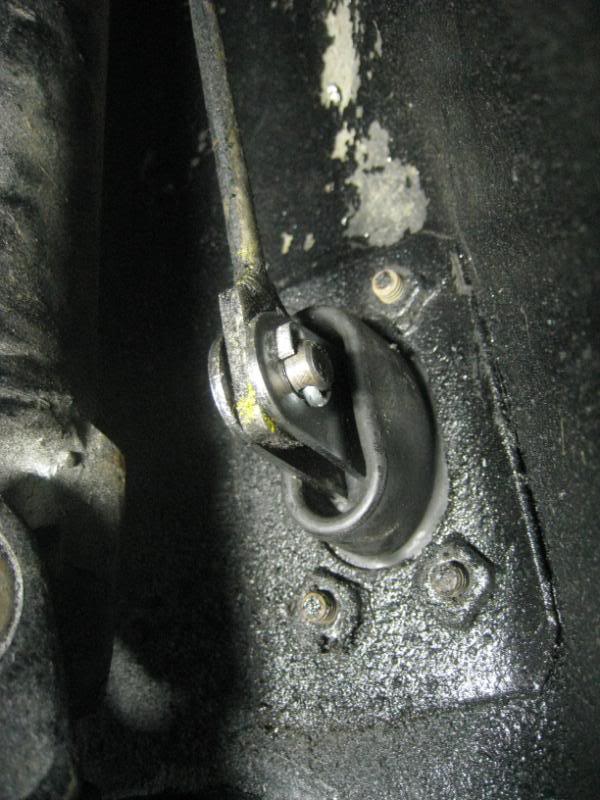
Was driving along the other day, when I looked up, and noticed that the mouldings that run along the inside of the windows were a bit manky looking. In a modern car, these pieces would be plastic, but in the Hako, it’s a strip of textured metal, which has started to get a bit of rust and the paint is flaking off.
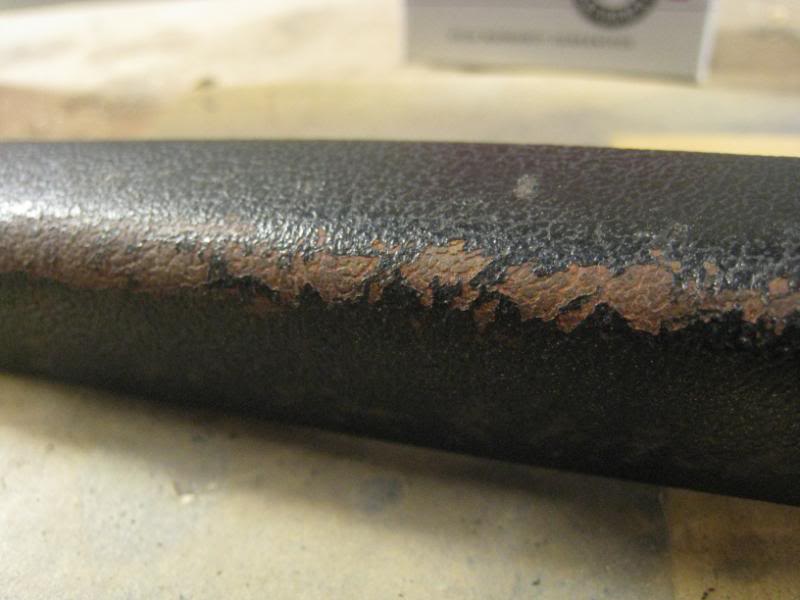
After a bit of experimentation with some sanding on a hidden bit, it seems as if the leathergrain texture is really quite soft, and sands flat quite easily, so wire brushing the surface clean is probably not going to work.
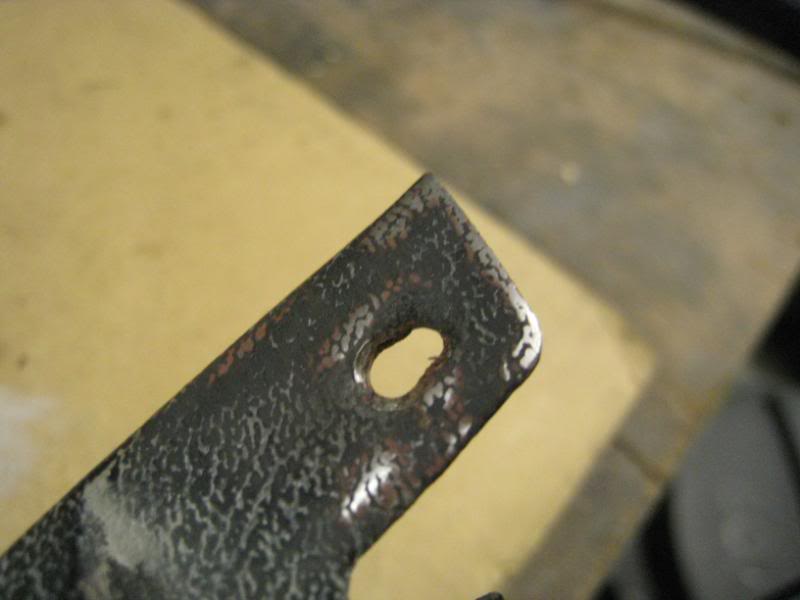
So I decided to have a go at removing as much of the rust as possible chemically, with the POR-15 Metal Ready.
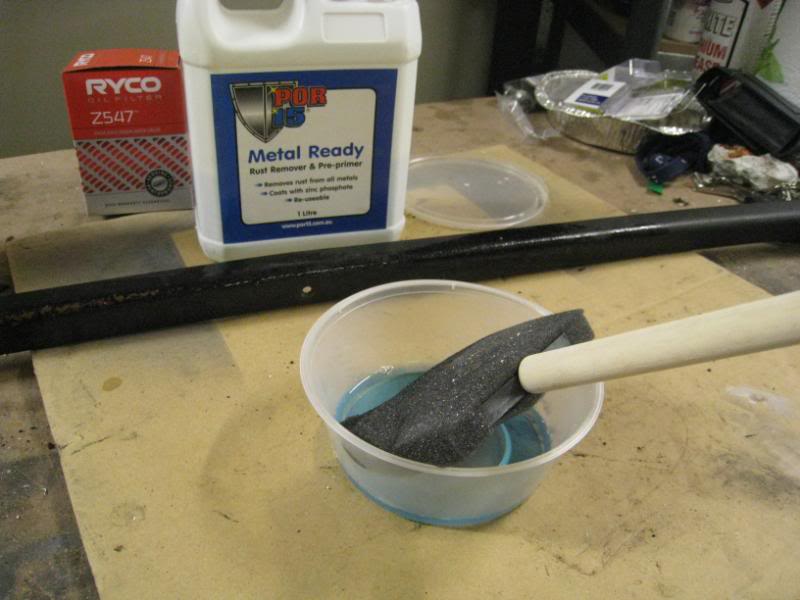
After 15mins and a good rinse, most of the rust is gone.
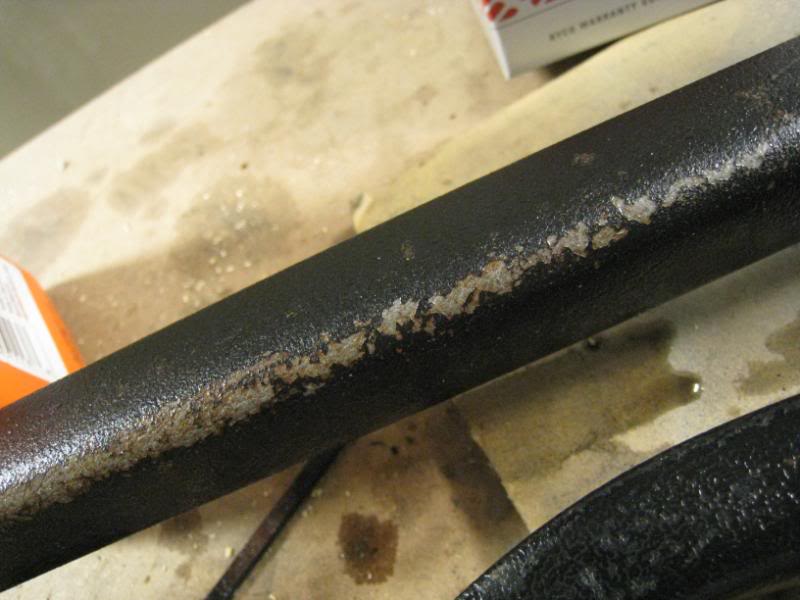
Other parts of the trim strip had some rust bubbling from under the paint…
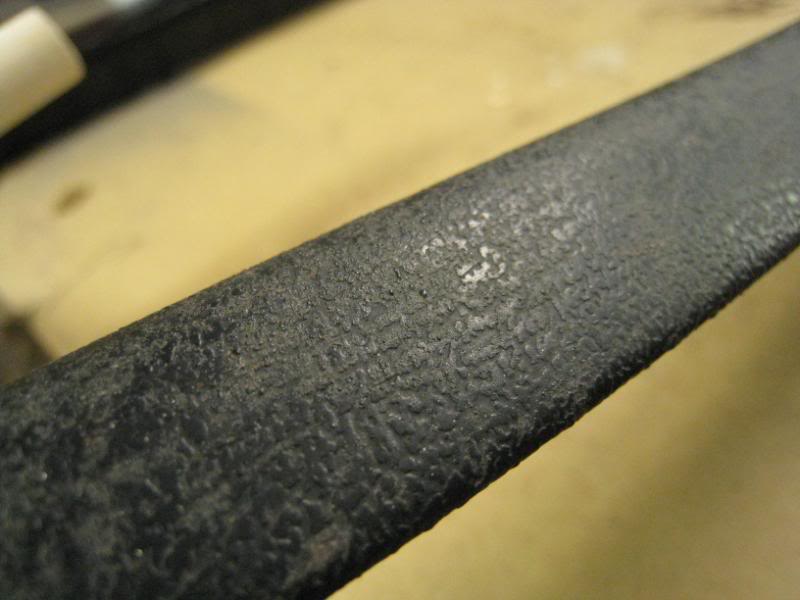
…so I lightly flatted back the paint with some 400 grit emery, just to expose the rust, so that the Metal Ready can do its thing.
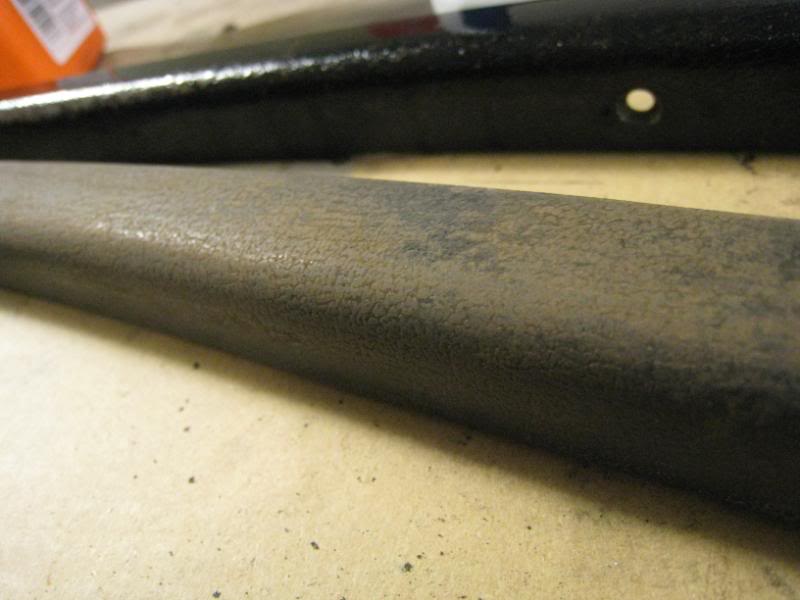
Then rinse, dry, wipe down with prepsol, hit with 2 coats of etch primer and 5 coats of VHT roll bar satin black.
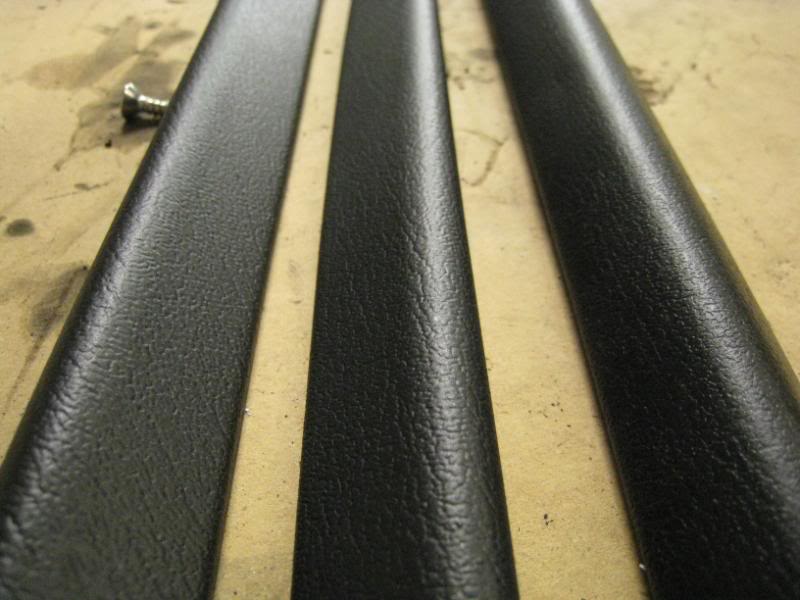
You can still tell where the rust was the worst, but overall it’s not too bad a finish.
At first I thought that polished stainless screws would look nice, but the effect was a bit cheesy, so in the end I painted the screws satin black too….and back on the car they go!
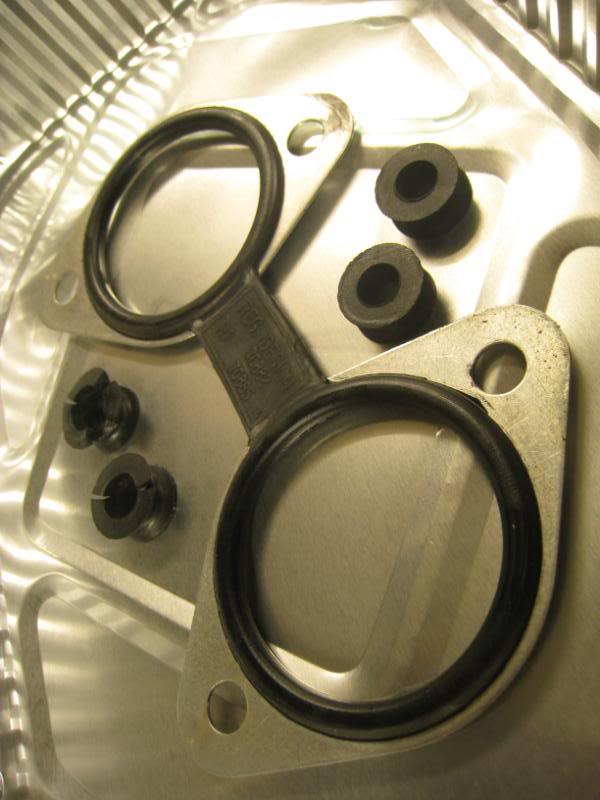
So how does it drive? Well it’s certainly very different! It seems to have lost a lot of tractability below 3000rpm. It’ll still lug about at low revs, but if you give it more than half throttle, it starts doing an impersonation of a 3 pack a day smoker by coughing and stumbling a lot. But as long as I roll-on the pedal gradually and not get to full throttle until above 3000rpm, it seems to be fine.
Power-wise, everything seems to have moved on 1000rpm. Before, the natural changeup point was 6000rpm (and that’s where the power peaked on the dyno). But now, the natural changeup point is more like 7000rpm, with a real big surge after 6k. It doesn’t idle any differently and as long as you keep the throttle openings small below 3000rpm, it’s happy, but the bigger chokes seem to have changed the character of the engine somewhat. It’s not so much of a midrange torque motor now, it’s more top-endy and I find myself subconciously revving it out to 5k a lot in normal driving and it feels very zingy and free at the upper reaches of the revrange.
After playing around with the corrector jets, I settled on the 200s, which would be leaner up top than the original 175s. A proper analysis will have to wait until the dyno session next week, but from looking at the plug colour, I’d say we’re in the ballpark. I’d like to tune out as much of the sub 3000rpm stumbles as I can, and I’ll do some research on idle jets and correctors, the answer might be there.

I wonder what the new power figure will be
Update: The bigger chokes have definitely improved the top end power, but as I reported before, the driveability at low rpm was reduced somewhat. Give it too much throttle, and it would not only bog, but also cough and spit. So you had to baby the accelerator until it got to 3500rpm before giving it some serious pedal. Now, I was expecting some of this tractability compromise, but there was definitely room for improvement, and the obvious port of call was the idle jets.
Now, we’ve already spent a bit of time looking at how the main jets and correctors work. In a nutshell, the main jets control the fuelling from about 3000rpm onwards and the corrector jets lean off the mixture at the top end..
…and that’s it really. To influence the fuelling above 3k, you have to change the jetting. Below 3k, you’ve probably heard me mention that there is a idle mixture screw, which I’m pointing out with the screwdriver here.
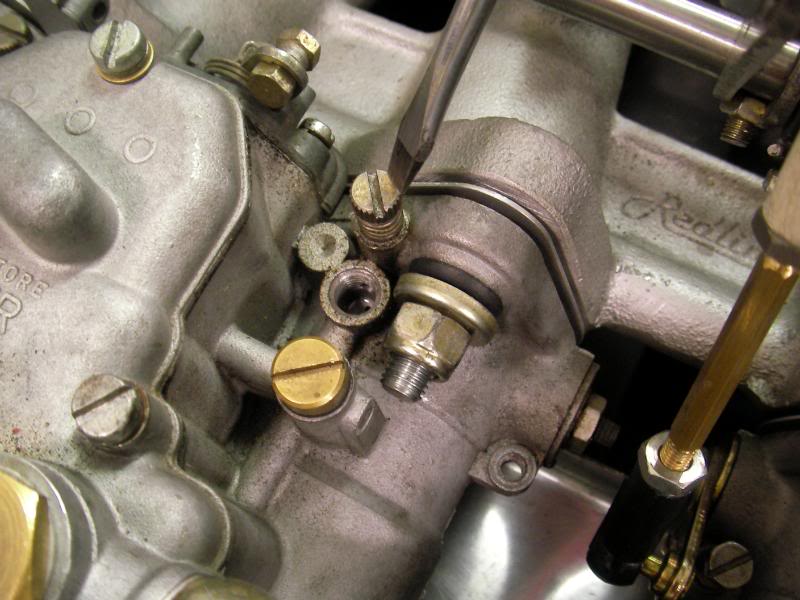
But the idle mixture screw doesn’t really control all of the fuelling below 3k as we will see. Sorry I haven’t got a better pic, but check out this pic from the back end of the carb. See that small red circle? That’s meant to be a picture of a single little hole, and that is where the fuel from the idle mixture screw comes out of. When the throttle flaps are closed, this single hole is the only source of fuel. You’ll also see that I’ve circled these 3 little holes a little further back too.
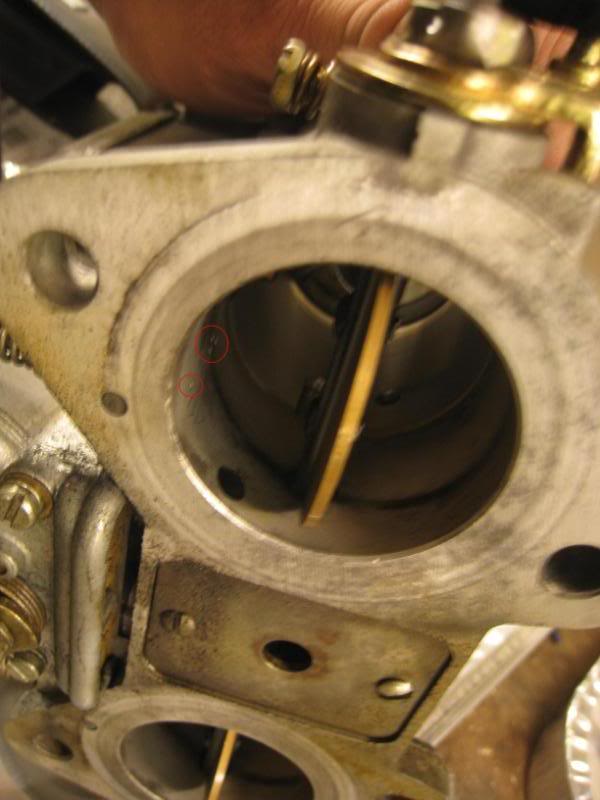
…those 3 little holes are the progression holes. You can see them from the top of the carb, there’s a cover that you can unscrew to inspect them….you can also see the fuel passage for the idle circuit too (that raised tunnel going from the float bowl to the idle jet mixture screw). You can see that the fuel goes to the progression hole chamber, and only after that does it go to the mixture screw. After the mixture screw, the fuel takes a 90 degree turn downwards and sprays fuel into the intake airflow. So the idle mixture screw has no effect on the progression holes.
The reason for the existence of the progression holes is because the carb simply cannot react fast enough when you crack open the throttle from idle. It won’t be able to deliver fuel fast enough, and you end up with a flat spot. So Weber had the great idea of having these progression holes. At idle, the progression holes are closed, and out of action. You can see in this pic that there are 3 holes, and you can see the top of the throttle flap covering the top hole. So at idle these things do nothin.
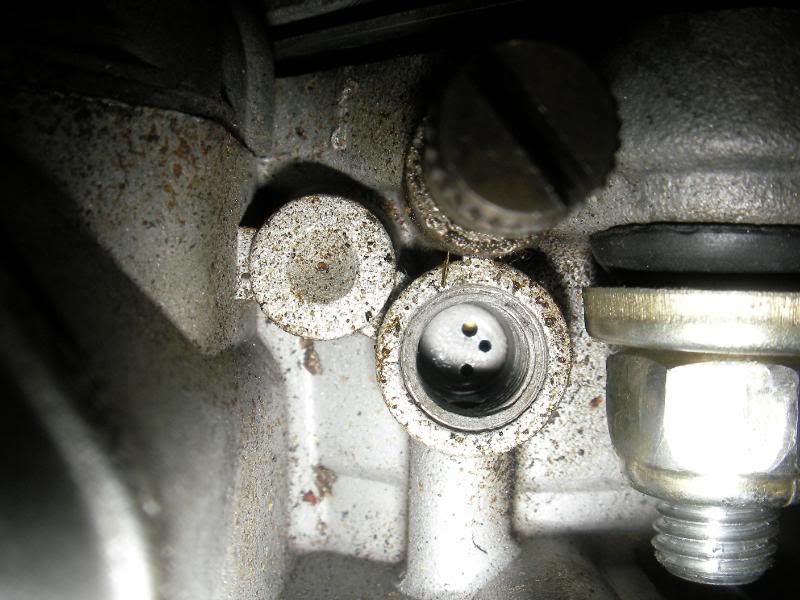
But when you crack open the throttle, even a hair, the progression holes will start to be exposed to manifold vacuum, and fuel will spray into the intake. This gives a slug of enrichment to cover that initial lean-condition that otherwise would occur. Now in my case, when I was cracking open the throttle at low rpm, it was spitting and coughing, which is a sure sign of lean mixture. You can to a certain extent compensate by enrichening the mixture screw, but as you can see from the blurry pic above, there is only one idle fuel hole and three progression holes. So tweaking the mixture screw can only compensate so much (and at the expense of an over-rich idle and fouled plugs too).
And to increase the amount of fuel going thru the progression holes, the only thing you can do is to increase the size of the idle jets, which is what I decided to do. The idle jets live under the round top cover, and are just behind the main jets holders.
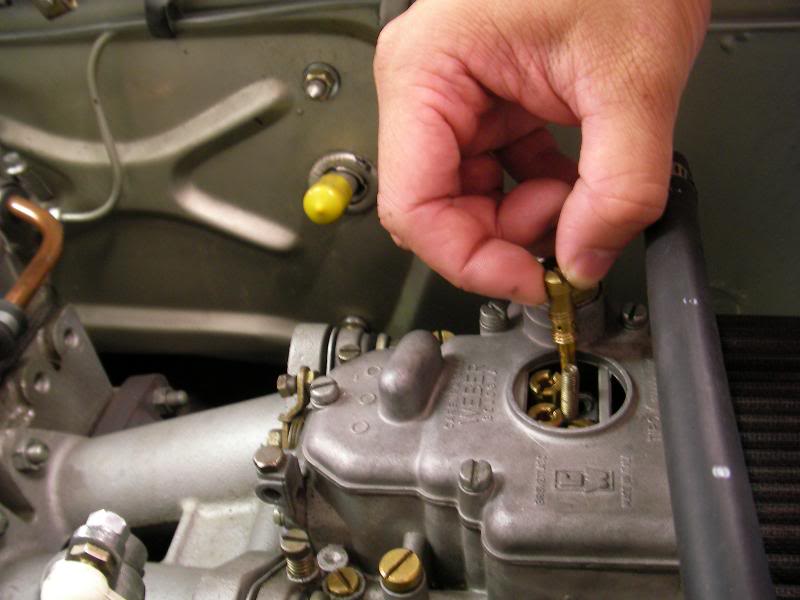
And unlike the mains (which need a separate corrector jet) the idle jets have the correctors built in. My old ones were 50F9, and the new ones are 2 clicks richer at 60F8.
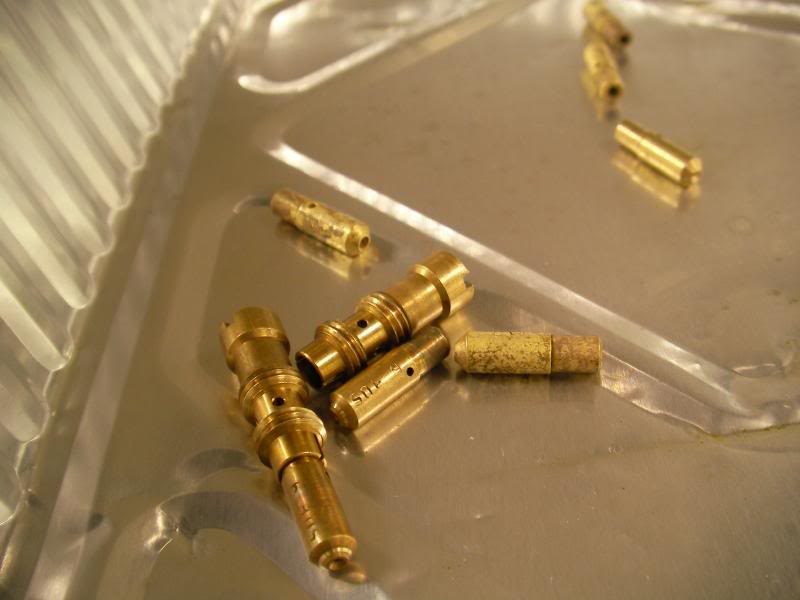
I took the car for a spin around the block after installing these, and it’s made a HUGE difference. I wouldn’t say that I can now floor it at low rpm without a protest from the carbs, but it’s much, much cleaner and I can get heaps more acceleration at low revs before the carbs complain and cough, and it’s opened up the 2500-3500rpm range now, where before I really had to baby the throttle thruthat rev range, I can now really nail it and the engine will just pull. Result! ![]()
So overall the Webers aren’t reallythat hard to understand. Hardware like the choke size and aux venturi are to size the airflow capacity of the carbs to the engine’s power potential, and once those components are chosen, you have to work backwards to figure out the fuelling requirements, as we have in the past week. You first have an idle jet which controls fuelling up to 3000rpm, and the main purpose of the jet sizing is to get a nice crisp response at low rpm from the fuelling that comes thru the progression holes. Idle mixture can be tuned by the mixture screw, so there is a lot of scope for juggling and adjusting. Above 3000rpm, the idle circuit has faded out (although it is still in play to a certain extent for initial tip-in response) and the main jet takes over. However the main jet will end up over-fuelling at high rpm, so the corrector jet adds an air bleed to balance things out near redline. And that’s it! Not really all that complicated after all
Since the last update, we’ve been to the dyno, which is my friend Scott’s shop at Insight Motorsports ![]()
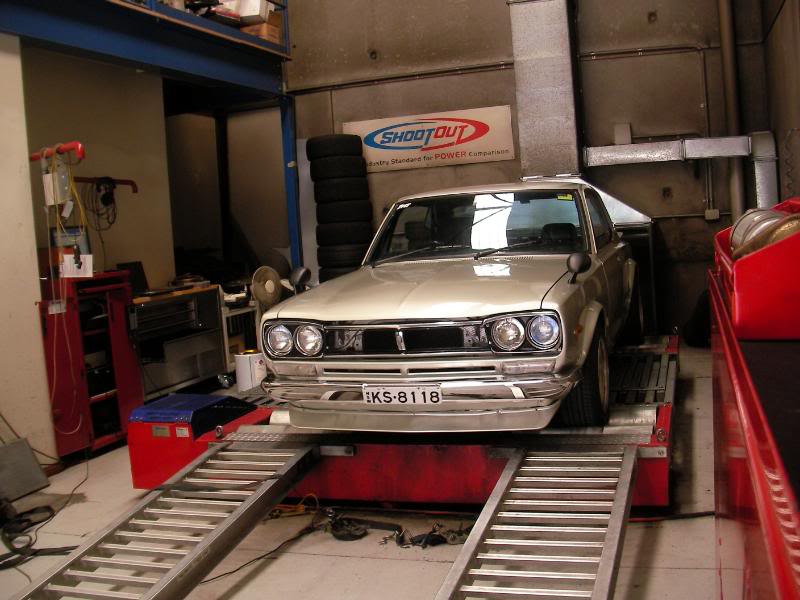
However…things didn’t quite go according to plan. To refresh, I’d had fitted bigger 60F8 idle jets, 140 mains and 200 correctors to match the bigger 36mm chokes. With that setup, it felt pretty damn good…if you asked too much of it at low rpm it would still cough and splutter a bit, but generally it was driveable and pulled cleanly without any flat spots or hesitation and really ripped in the midrange. It revved out at the top end more freely than before too. The sweet spot seemed to be in the midrange, so when I rolled up to the dyno, I was expecting that perhaps we might only have to tune for the top end.
Well I was wrong, because this is what the dyno plot looks like:
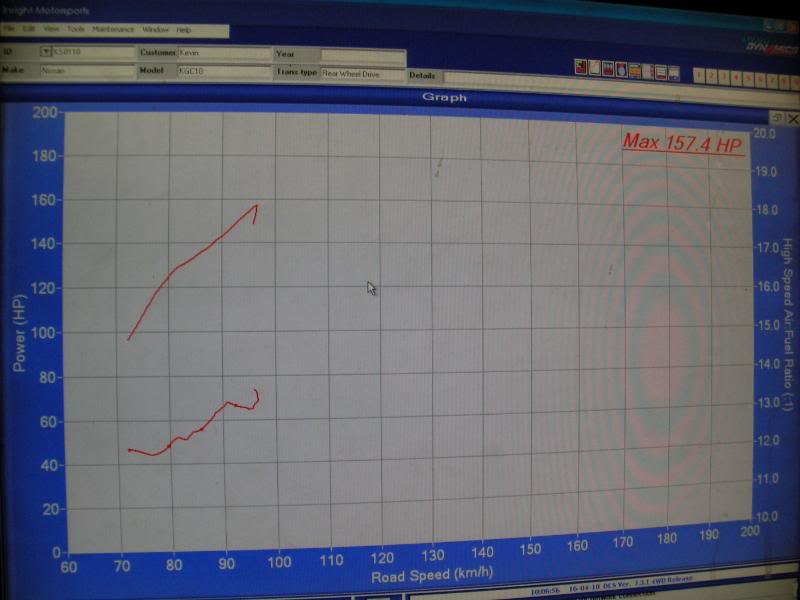
Basically it starts off just fine. The dyno plot begins at 3000rpm or so (so we are no longer on the low rpm idle circuit) but as the power climbs, it started to get really lean in the midrange and Scott pulled the pin on the dyno run and shut it all down before the revs got too high. You can see clearly that the power curve is starting to really climb, and it’s simply running out of fuel and the AFR is heading sharply north towards 14:1 just as we aborted the run. I was a little disappointed, but Scott pointed out that it’s a good sign that the engine is hungry for more fuel, because that means it’s working and wanting to make power….he also thought that the 160rwhp power figure in the midrange was a great result. It didn’t make that power until later in the revrange (5000rpm) before, so it’s making more power, earlier. So we should easily eclipse the previous power peak of 176rwhp without any trouble at all.
So it was good news, but the bad news was that Scott didn’t have any main jets in the right size we needed. And since I was expecting to not touch the mains, I hadn’t brought any along either. But the recommendation was that the mains would have to be richened maybe as much as 3 steps, so that meant a 155 jet instead of the 140.
I’ll have to reschedule the dyno run for another time, but in the meantime we can sort out those main jets.
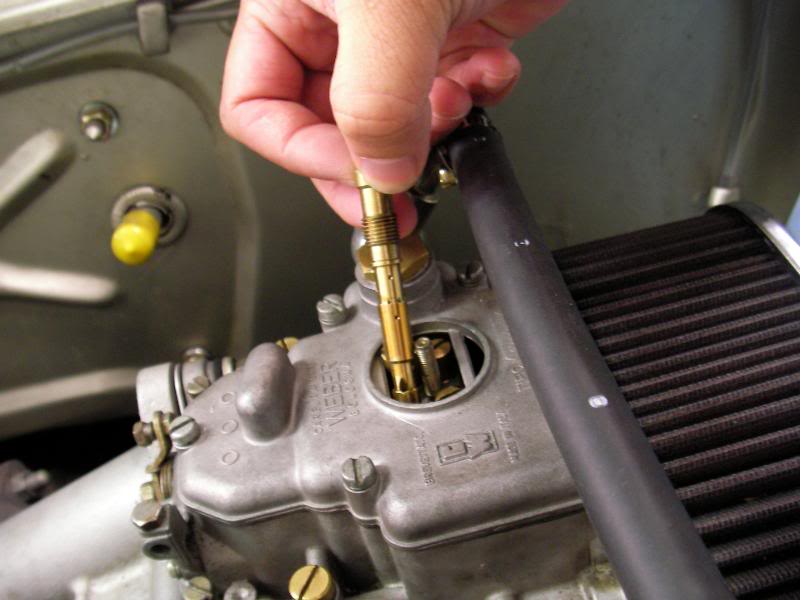
And here they are…155 mains, shiny and new.
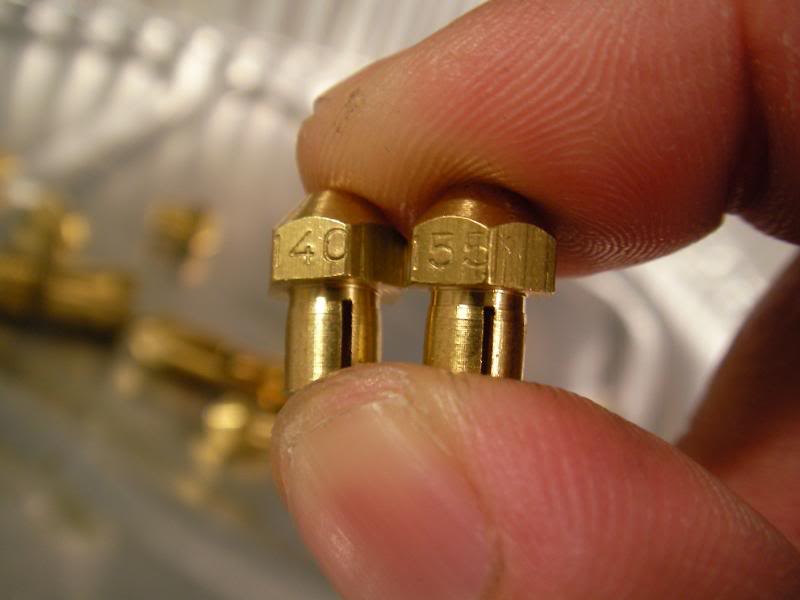
With the 155s installed, the plug colour looks…okay. It’s certainly not over rich (and now I’m thinking maybe it’s still not big enough and I need to go to 160s).
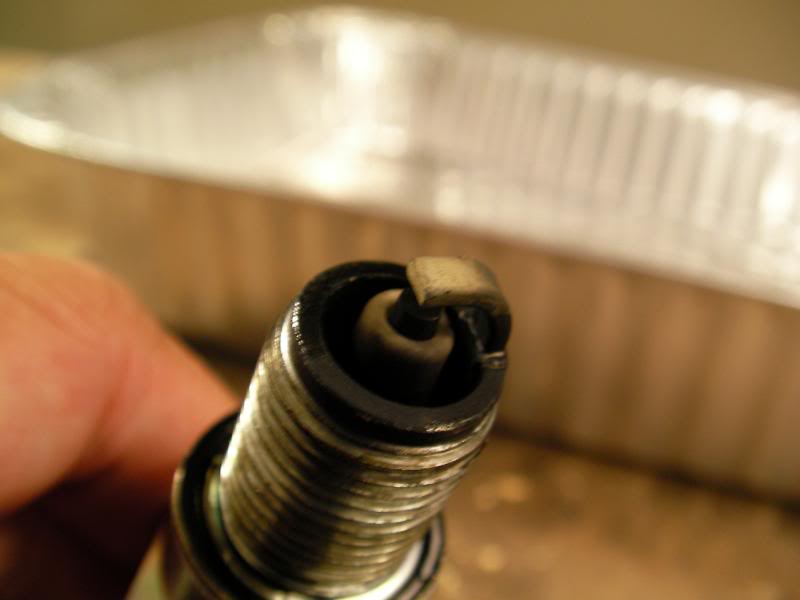
So to experiment, I put in the old 175 correctors, which live on those long tubes that hold the mainjets, but at the opposite end, under a cover. These should richen the top end somewhat.
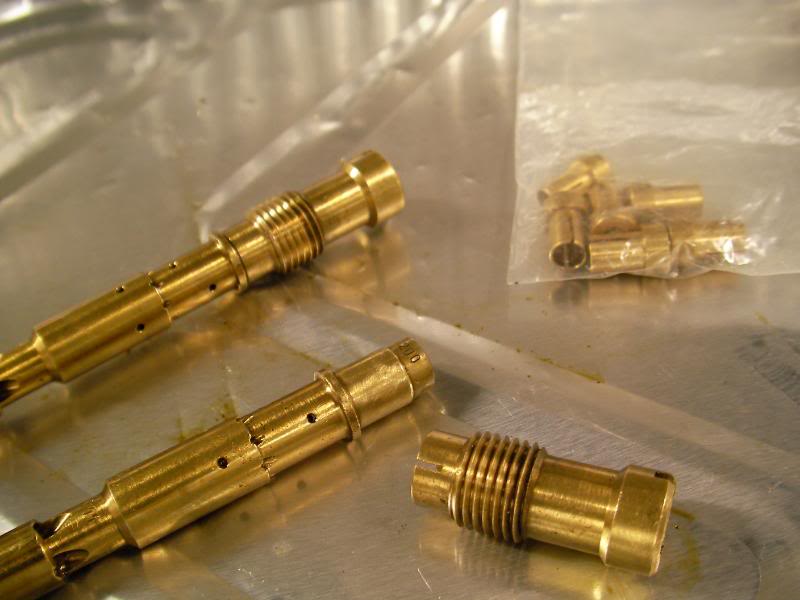
And the result is…maybe a bit too rich.
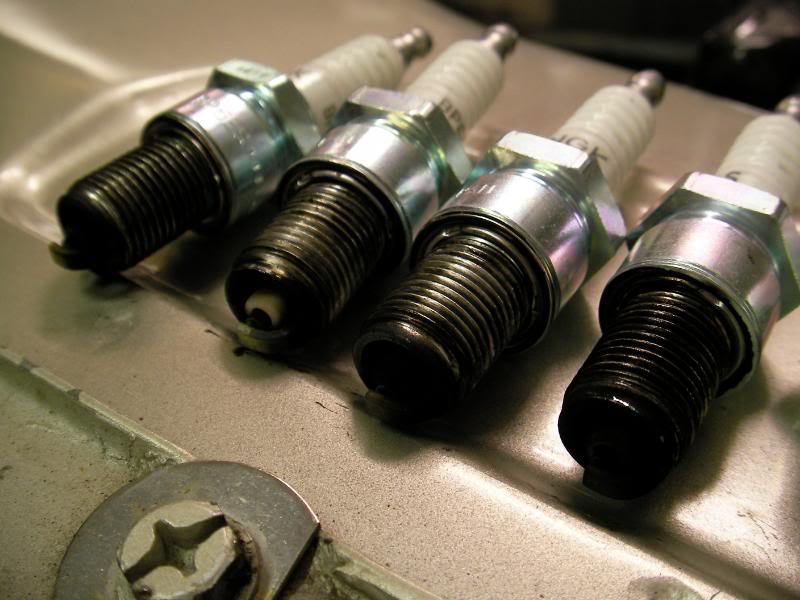
So how does it feel?
Well, pretty good actually. All the low rpm stumbles are gone, it pulls cleanly at low revs and you can floor it at low speed and it’ll take it without complaint. In terms of response, it’s the smoothest it’s been. Power feels pretty good too, definitely more grunt than before with the 32mm chokes.
But…subjectively, maybe it’s my mind playing tricks, but I thought that, from the seat of the pants, the disastrously lean pre-dyno setup felt the fastest and zingiest. Well….let’s see what happens at dyno run part deux
Okee dokee….quite a lot’s happened since the last update ![]()
Where we left things was that the DCOEs ran dangerously lean on the dyno, and so we shut things down before even getting a peak power figure. The recommendation was to fit bigger main jets, which would have addressed the lean mixtures that the dyno found in the midrange. I did install bigger jets, and while it was smoother, it felt like it had somehow lost something.
One of the guys following the build thread suggested that maybe I was going about it the wrong way. I hadn’t upgraded the emulsion tube size when I increased the choke size, and I was compensating for an over-lean emulsion tube with really large jets, which wasn’t a very good compromise.
Now the emulsion tubes are these long brass things:
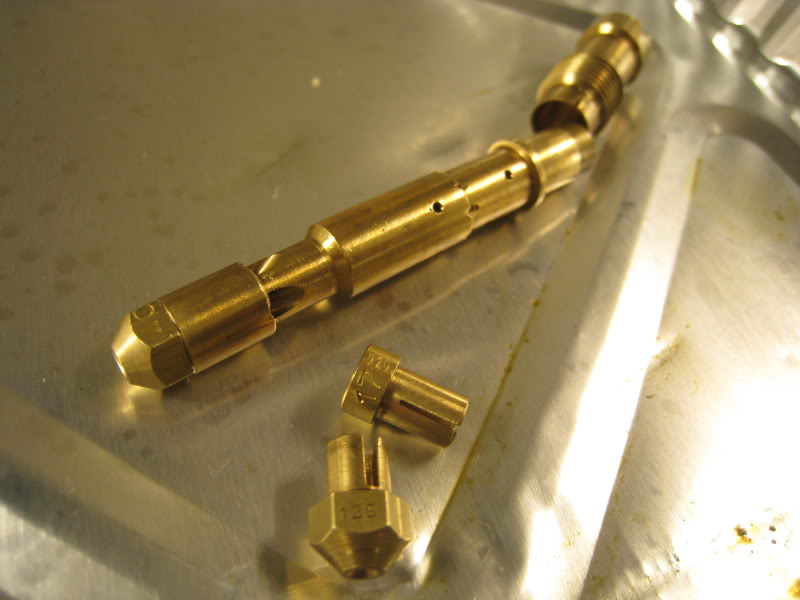
You’ll recall that the main jet and correctors are the little brass mushrooms that go in either end of the tube. But the emulsion tube isn’t just a pretty brass holder for the jets, it also acts like a “cache” for the fuel feeding thru the main circuit. So when you apply throttle, or when the main jets kick in and take over from the idle circuit at 3000rpm, that’s when the emulsion tube comes into play. What this guy was saying, was that the lean emulsion tube wasn’t allowing the mains to kick in fast enough, thus creating this lean spot right in the middle of the rev range. Sure I can compensate by fitting really rich jets, but while that fills the hole, it makes it over-rich everywhere else.
Now this made perfect sense, but what was also becoming clear was that there was a lot more to this, than initially met the eye, and what I had at the moment was settings that worked well at parts of the rev range, and horrible at other parts. Scott at Insight Motorsports was kind enough to invite me back for another go at the dyno, but to be honest I felt like that would be wasting his time. So I went and bought one of these:
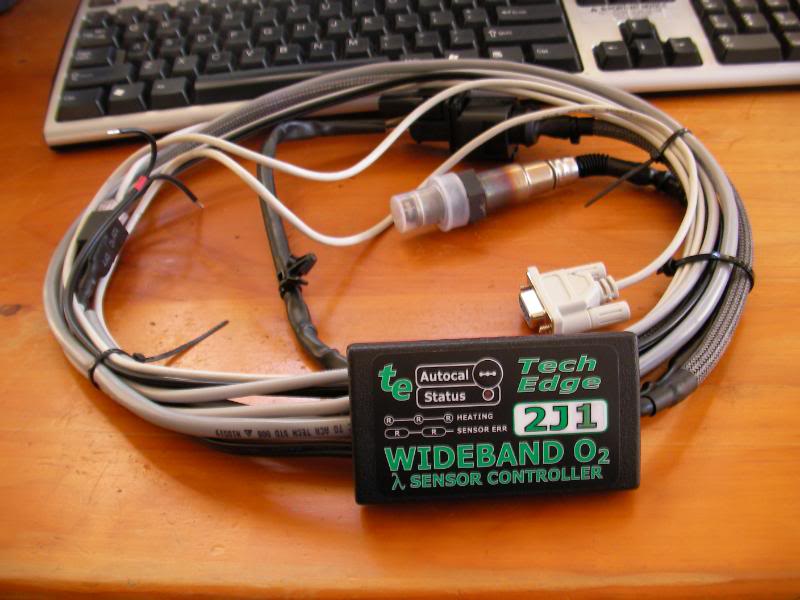
It’s a wideband O2 sensor from an aussie company called Tech Edge. Not really that expensive at $256 and for that you get a Bosch-made wideband O2 sensor, like you get in any EFI car, but with a wider sensing range.
That lives in the exhaust headers, and fitting it required a threaded bung to be welded in, which was expertly done by the boys at CHE.
The wire then runs up the side of the engine bay, where it enters the cabin thru these two big holes in the firewall, which are for the aircon tubes (which my car doesn’t have).
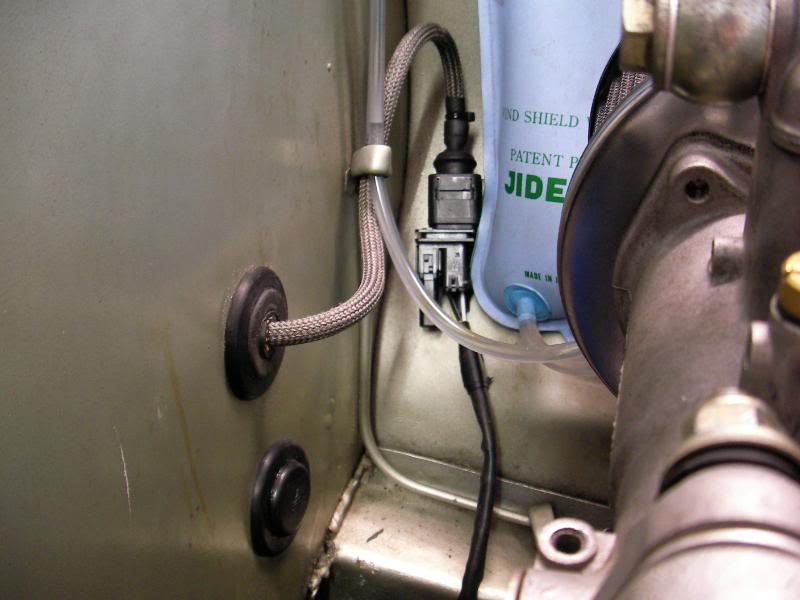
The little techedge unit just mounts on the kickpanel…
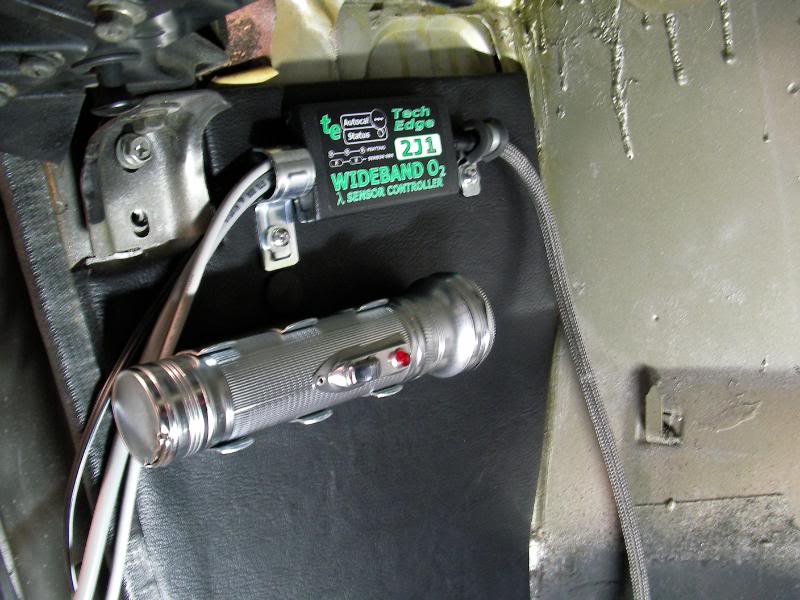
And then you wire it up. There’s a power and ground wire of course, and lots of other wires for things like boost sensors, TPS, speed sensors etc…which are useful for tuning an efi turbo car, but which the Hako of course does not have! The only input that we can use is the RPM signal, but ironically I could never get that to work. After a few calls to the TechEdge guys, it seems that I did have it wired up properly (to the coil -ve post) but perhaps I just have a dud. They offered to take it back and have a look, but for my purposes I thought it wasn’t a dealbreaker for reasons that we’ll see later.
Then there’s another cable that goes into your laptop, and after you load up the free software, you’re good to go! Well in my case the wideband output is a serial port, and since my laptop didn’t come with one, I had to get a serial port to usb adapter. But after that it worked just fine.
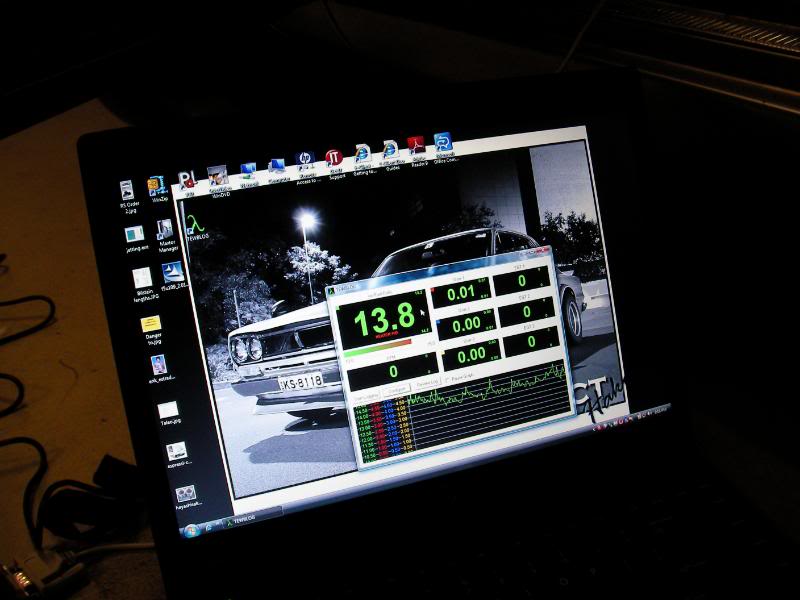
Now we have the ability to view and record the air to fuel ratio in real time…like a dyno, and the first run was quite illuminating. What I did was ask a mate to ride shotgun, and start recording a run just as I floored the pedal at 2500rpm. When I hit 7000rpm and backed off, I’d give ayell to stop recording. So what we’d get would be close to an AFR reading across that revrange. For our purposes, not exactly super-accurate, but good enough. The datalogger would save the data to a .txt file, which we then opened in Excel and graphed into a line chart.
At this point, we had the F11 emulsion tubes, richer 155 main jets, richer 60F9 idle jets and 200 air correctors. What the power run showed was that we were quite rich, at 11.5 AFRs for most of the rev range, not improving until the very top end to the ideal 12.5.
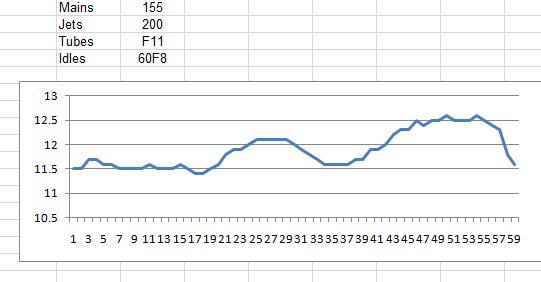
But what was more interesting were the AFRs on cruise. That is to say, when you just have a little throttle open, just enough to maintain 60kmh in 4th gear. The mixtures were really rich, staying at the high 10s and low 11s at 2500~3500rpm. The ideal is a much leaner 14:1.
What this initial run told us was that this guy was right: we’d fixed the lean hole in the midrange, but at the expense of making it too rich everywhere else. In order to lean off the cruise mixtures, we’d have to run a leaner idle jet. But that would mean it would be too lean at 3000rpm when the carbs transitioned to the mains. Compensating with a richer main jet again would be counter productive, because the full-power AFRs are already too rich in the midrange anyway. So with this setup, we’re essentially backed into a corner, there’s no real way to fix it with just jet changes, we’d have to look into changing the emulsion tube too.
So I went and ordered a whole bunch of stuff from http://www.fastroadcars.co.uk/ some mains, some correctors, some idle jets and most importantly, some richer F16 emulsion tubes. I’ve found that ordering from the UK is pretty cost effective right now, basically everything is 1/3 of the price of buying locally. So I might have gone a bit overboard buying bits, but hey, it’s all in the name of science ![]()
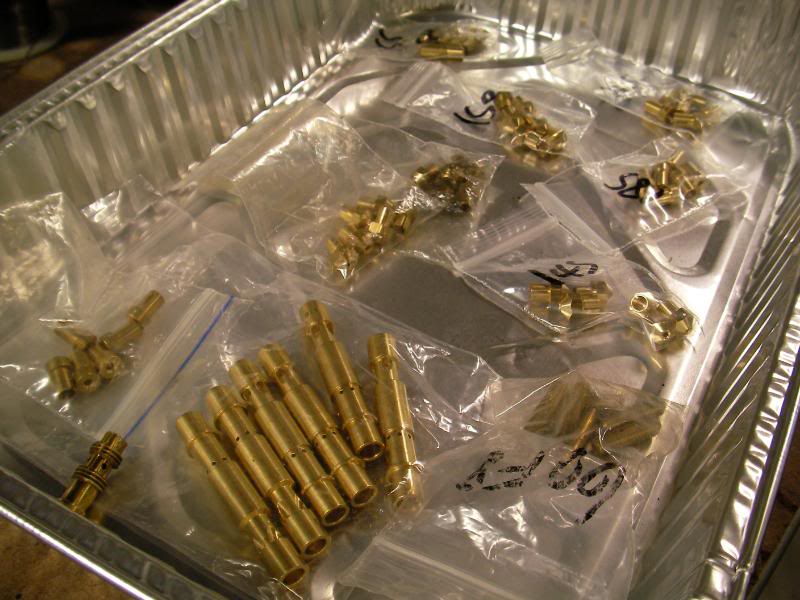
First try, I started off with 2-steps leaner idle jets: 50F9s. This would make the cruise AFRs a lot leaner.
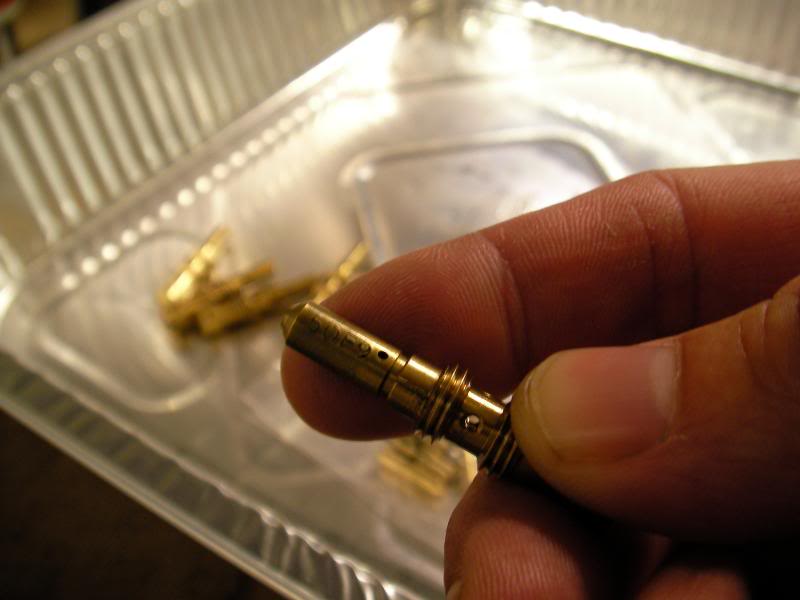
Then on go the richer F16 emulsion tubes (the top ones)…you can see that the fuel holes on the left are noticeably bigger, and the whole tube is fatter in diameter, so would hold more fuel inside. This I teamed up with leaner 145 mains and 200 correctors.
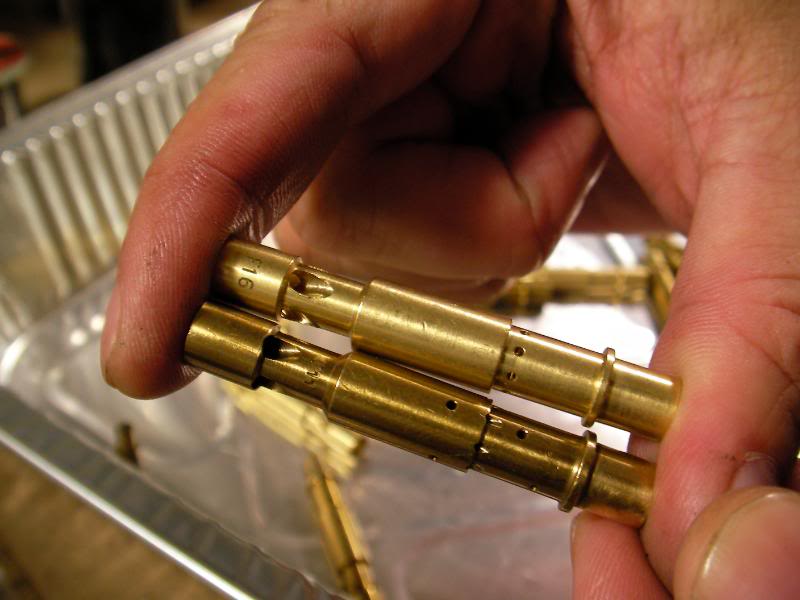
This was a bit of a disaster, we went a step too far. The cruise AFRs were very lean at 15~16 and the throttle response was very hesitant, and there were some massive coughs and stumbles as it transitioned to the mains at 3000rpm (that’s the huge spike to 20+ you can see). We didn’t even bother to do a power run, this was way too lean on the idle jets. Back to the drawing board.
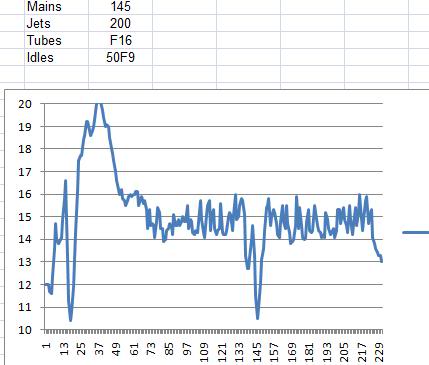
Now we swap the 50F9 idle jets for one step richer, 55F9.
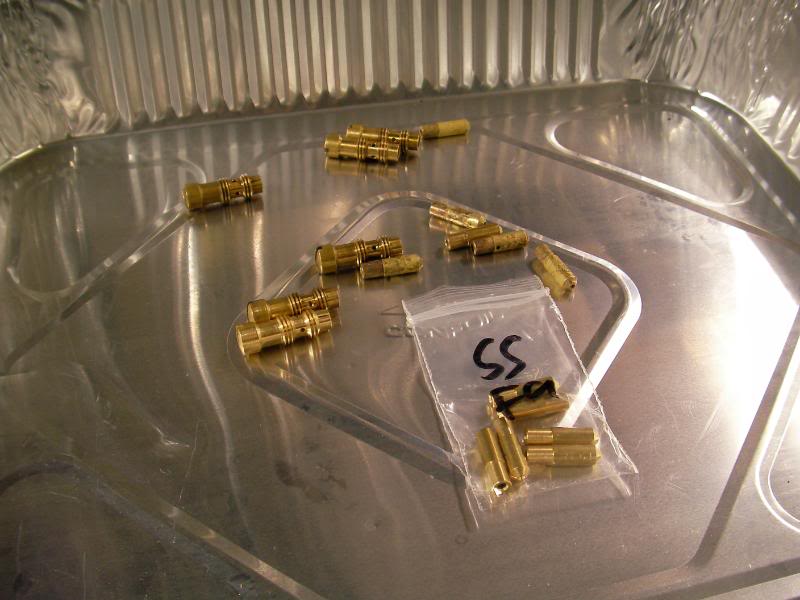
Straight away, this felt a lot better. Here are the AFRs on cruise, hovering at about 14:
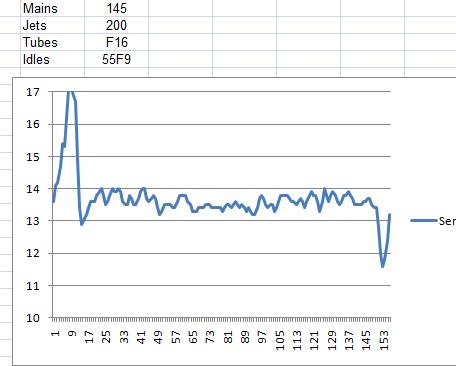
And here’s a full power run, you can see there’s a lean spike at the beginning as it did a bit of a cough and splutter, but once it cleared its throat, the AFRs more or less stayed between 12 and 13 until the top end, where it got a bit richer.
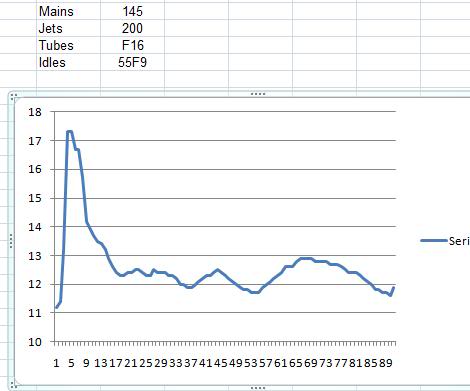
I then replaced the 200 correctors with one step leaner, 215. We mucked up the datalogging of this, so we have no graph ![]() but the AFRs at redline looked to be about the high 12s.
but the AFRs at redline looked to be about the high 12s.
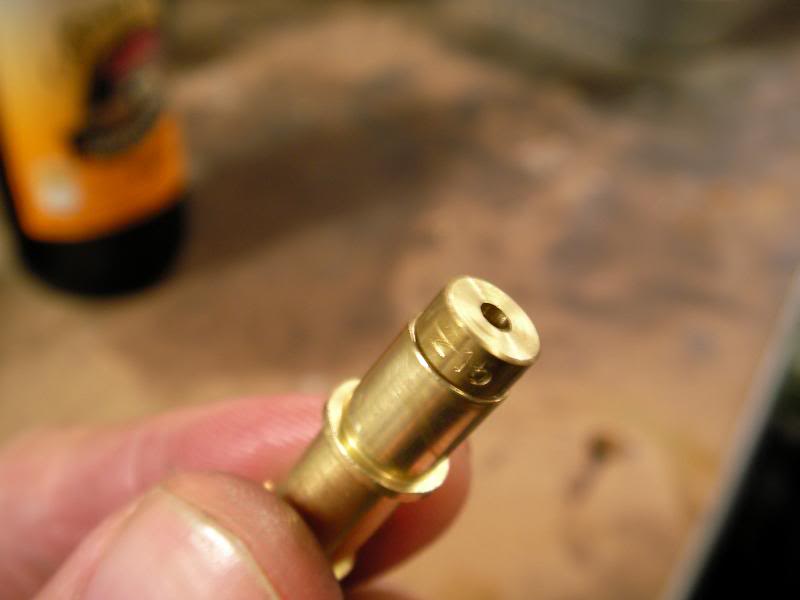
How is it to drive?
The response is a heck of a lot better than when we started. I still can’t seem to eradicate that stumble at low rpm, but maybe it’s something I have to live with. But overall this seems to be a much better compromise, and to be honest I reckon I couldn’t have done it without the wideband. Damn tricky things, these DCOEs ![]()
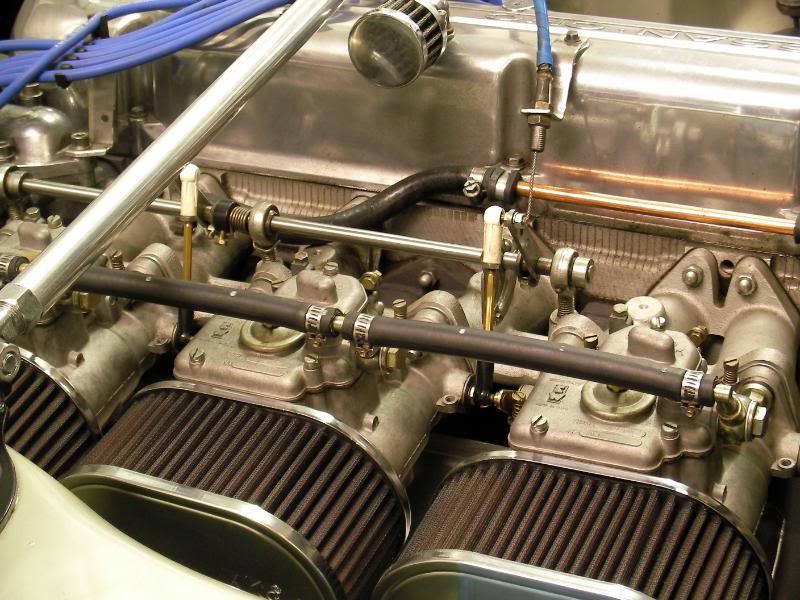
I’ll drive the car around for a few more days to get more of a subjective impression, but for the moment, I reckon we might be ready for another dyno session
Update!
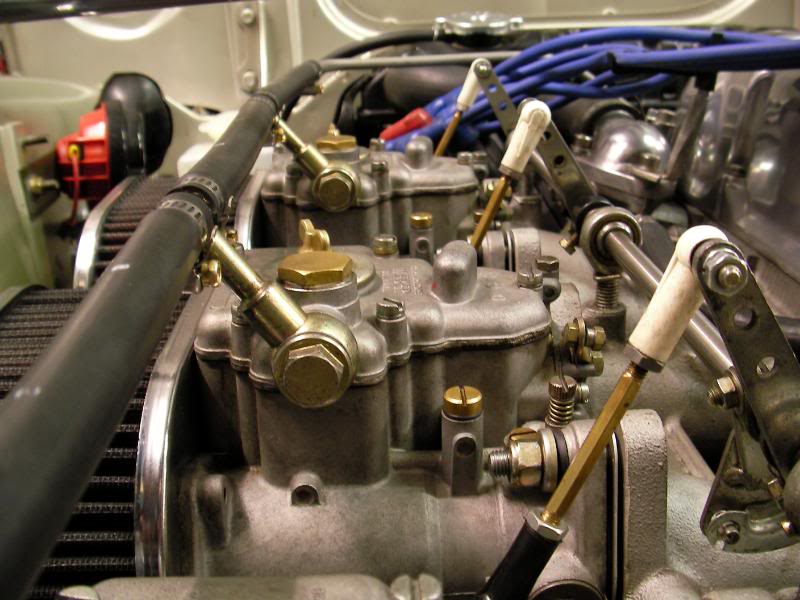
After the recent findings that the engine ran a whole lot better with the ignition advanced, I decided to look into that part a bit more. When the motor was rebuilt, the distributor was outsourced and was rebuilt and recurved. But the more I played around with it, the more it seemed to be a poor compromise. Advance it enough so that it felt good at the bottom end, and it would ping up top. Back it off so that the pinging stopped, and it would be all doughy down low again.
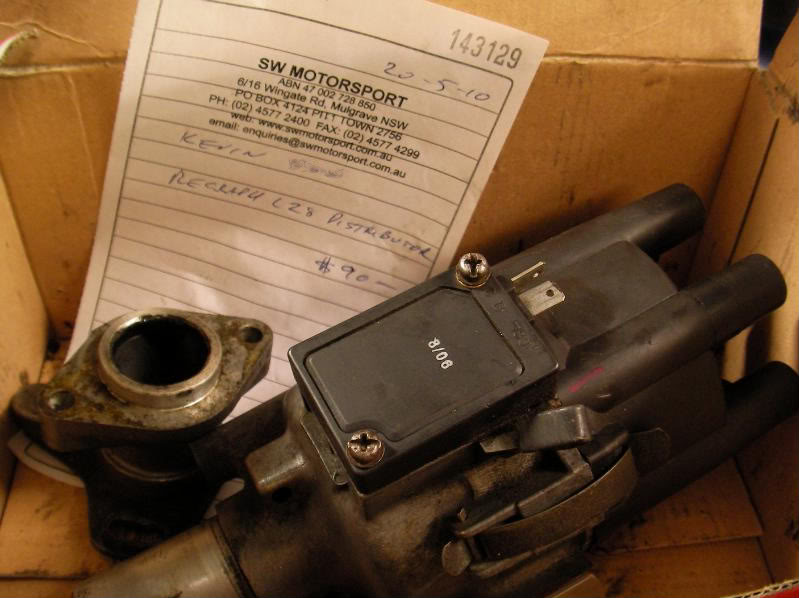
So I bit the bullet, removed the distributor and dropped it off with L-Series guru Stewart Wilkins at http://www.swmotorsport.com/ Straight off, he says that the advance spring feels way too stiff. Now you might recall that when I took apart the dizzy, the insides looked like this:
As revs rise, those metal weights (at 3 and 9 o clock) swing outwards, rotate the shaft a few degrees and advance the ignition. The rate of advance is controlled by that spring you see. The stiffer the spring, the slower the timign is to advance with rpm. The total range of advance depends on those slots in the weights that you see in the pic above. Stewart tested the distributor and confirmed that it wasn’t offering full advance until 4500rpm, which wasn’t suited to the big cam and webers. So he fitted a pair of much softer springs, and now the dizzy gives us 15 degrees of advance all-in by 2700rpm (compared to 4500rpm before). So now we have a much more aggressive ignition curve than before.
And it’s all to do with these tiny little springs!
Stewart gave me some strict instructions to set the base timing at 13 degrees at 800rpm, so that when the dizzy added its 15 degrees, we would have a total ignition advance of 28 degrees at 2700rpm and above. And once refitted, I was surprised at how much cleaner it was at low rpm. There is still a little bit of hesitation if I floor it at low revs, but it’s almost unnoticeable compared to before.
So on we continue with the wideband testing ![]() First run was with 140 mains, and maybe is a bit too lean, with portions of the midrange and top end peaking above 13:1 AFR. You can still see a big lean spike at 2500rpm when I floor it…it looks worse than it feels, rather than a hesitation, you just feel a bit of a hiccup in the power delivery and the engine just accelerates through it. But in terms of day to day driveability, it doesn’t happen unless I’m really ham fisted with the loud pedal at low rpm.
First run was with 140 mains, and maybe is a bit too lean, with portions of the midrange and top end peaking above 13:1 AFR. You can still see a big lean spike at 2500rpm when I floor it…it looks worse than it feels, rather than a hesitation, you just feel a bit of a hiccup in the power delivery and the engine just accelerates through it. But in terms of day to day driveability, it doesn’t happen unless I’m really ham fisted with the loud pedal at low rpm.

Next combination was to go a step richer on the mains to 145, and you can see that it’s richened everything slightly across the board.
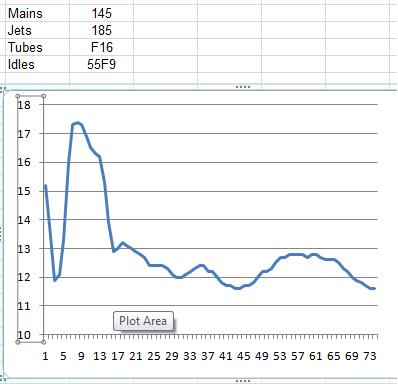
Cruise AFRs were more or less where I wanted them too, this is a gentle pull from 2000rpm to 4000rpm on 1/4 throttle, and it stays between 13 and 14 AFR all the way.
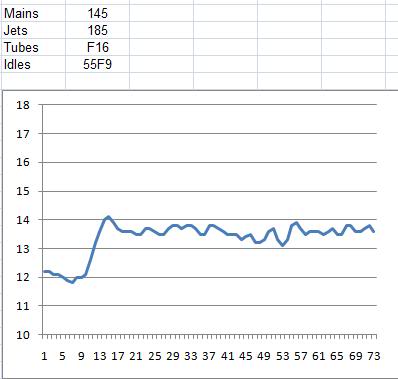
If I could nitpick, it looked like it got too rich right at the top end, so I bumped the air corrector up from 185 to 200, which only made it slightly leaner, but moved the rich point 500rpm further up the scale.
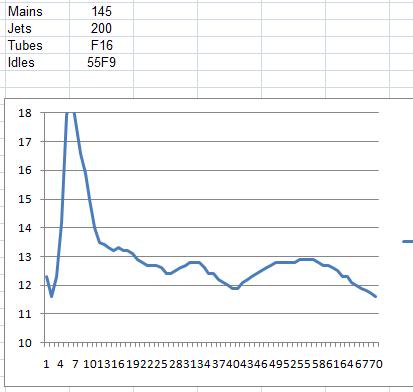
So with that…it was…TO THE BAT DYNO!!
Onto the dyno we go…

…I would have taken video, but all you tend to hear is the dyno fan….
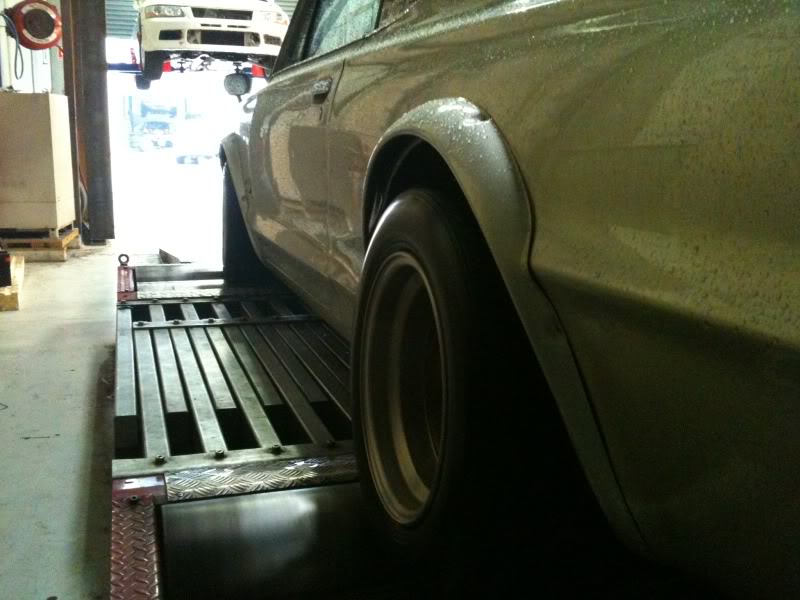
And the result of the first power pull, 189rwhp (up from 176rwhp before). It was felt that the top end was too lean, it’s just above 13:1 at peak power, so out came my box of jets and…
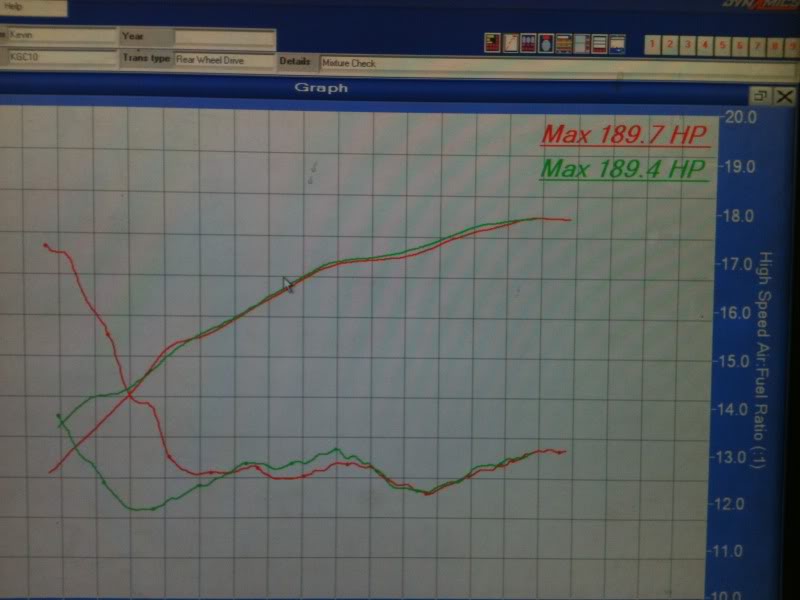
…we swap the 200 correctors for 175 air correctors, which has richened things up at peak power by half a point, as you can see from the new blue and pink lines below. Scott wanted an AFr of between 12 and 12.5 and that’s pretty much what we got.
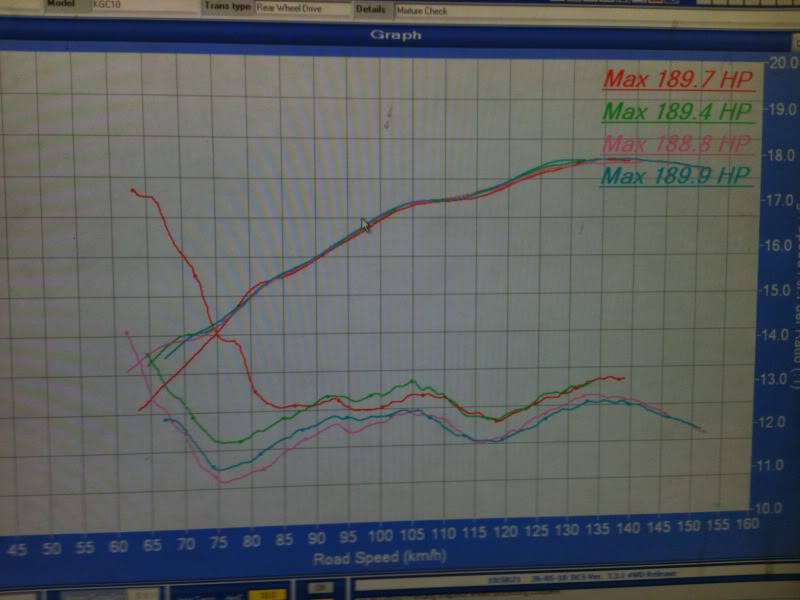
All we’ve done is upgrade the choke tubes in the carbs from 32mm (on the left) to 36mm (on the right), which will increase the airflow potential of the Webers, but at the expense (as we have discovered!) of making it a bit fussy and finicky to tune.
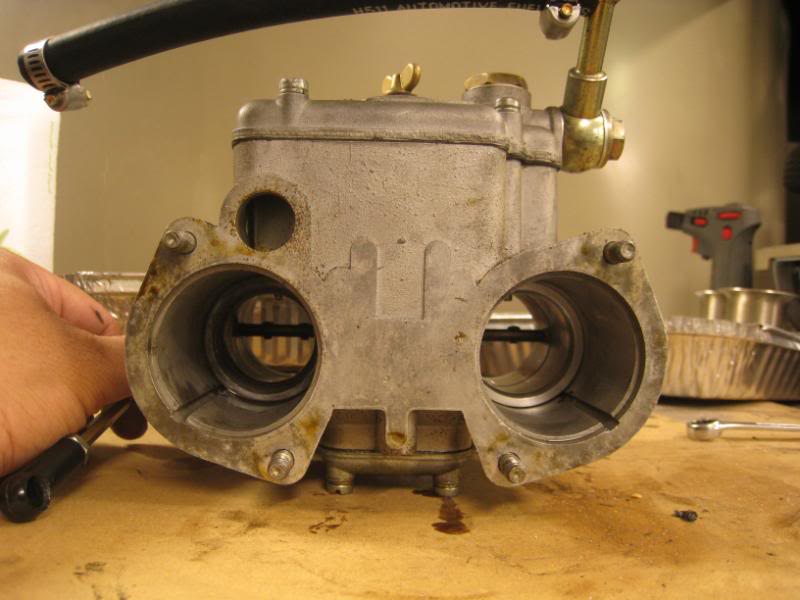
But here’s the final result, flat-out, the new setup makes more power right across the range, with peak power being 14rwhp more, or about 20hp at the crank.
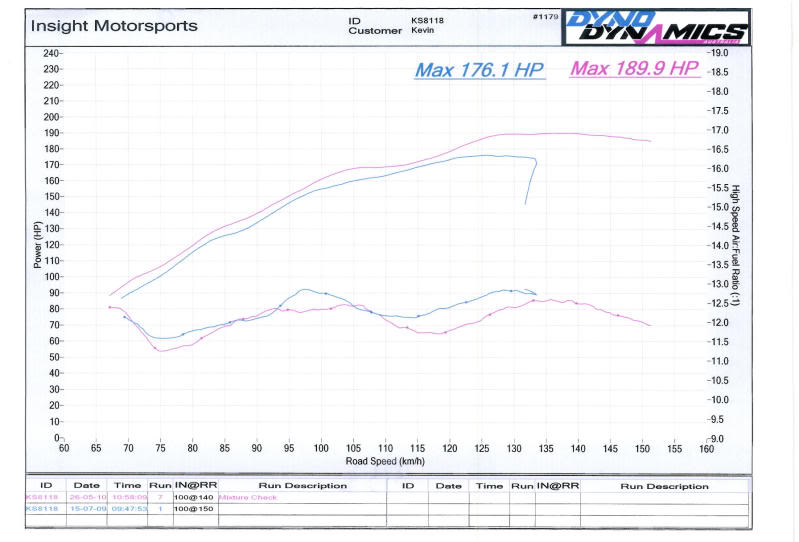
To drive, top end power is definitely stronger, but at low rpm it’s lost some of the brutal punch it used to have at 2500rpm with the smaller chokes, so it’s definitely a compromise. But the good news is that the wideband sensor has been a very accurate tuning tool for just $250, its readings are bang-on identical to what the dyno says.
But it certainly has been an interesting exercise in understanding how these Webers tick ![]() In theory, the idle circuit handles the low rpm, the mains the midrange and the correctors the top end. However, changing the idle jets will have an effect on part throttle fuelling right up to as high as 4500rpm. And changing the correctors can actually fatten the midrange, as you can see from the last minute jet change on the dyno. Emulsion tubes are a different science again, but I think it’s fairest to say that they mainly affect the interplay between the main jet and the corrector, and hence the “shape” of the AFR curve above 3000rpm. So there is a fair bit more to these things than what the books say.
In theory, the idle circuit handles the low rpm, the mains the midrange and the correctors the top end. However, changing the idle jets will have an effect on part throttle fuelling right up to as high as 4500rpm. And changing the correctors can actually fatten the midrange, as you can see from the last minute jet change on the dyno. Emulsion tubes are a different science again, but I think it’s fairest to say that they mainly affect the interplay between the main jet and the corrector, and hence the “shape” of the AFR curve above 3000rpm. So there is a fair bit more to these things than what the books say.
It drives great now, but there is still a bit of a rich spot at 4000rpm, which might be able to be tuned out if I try some richer F2 emulsion tubes. But I think we’re done for now
The latest addition to the car had been new rear shocks. The KYBs that I’d been using were a bit tired and while they were okay, the back end was a little bit bouncy.
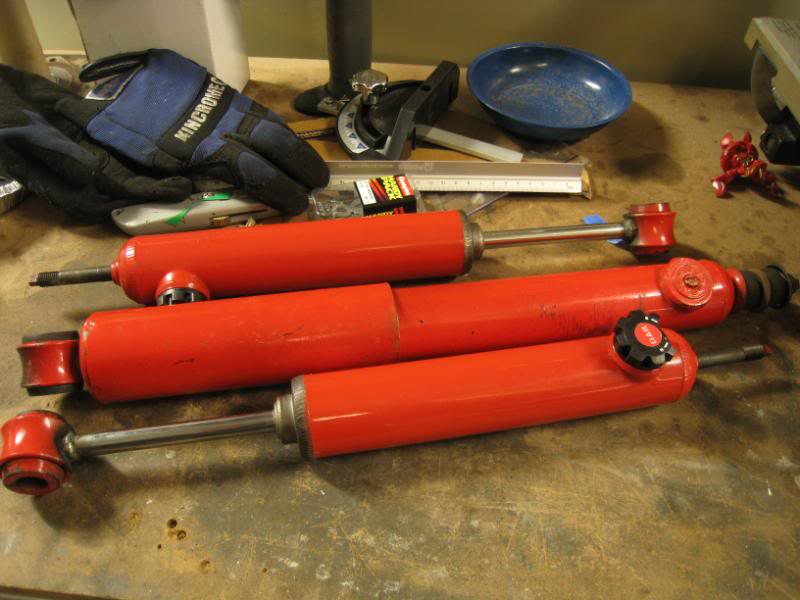
So I ordered a pair of 50mm shortened GAB adjustables from www.rubber-soul.net When you order them, you have to specify if you want 40mm shorter or 50mm shorter.
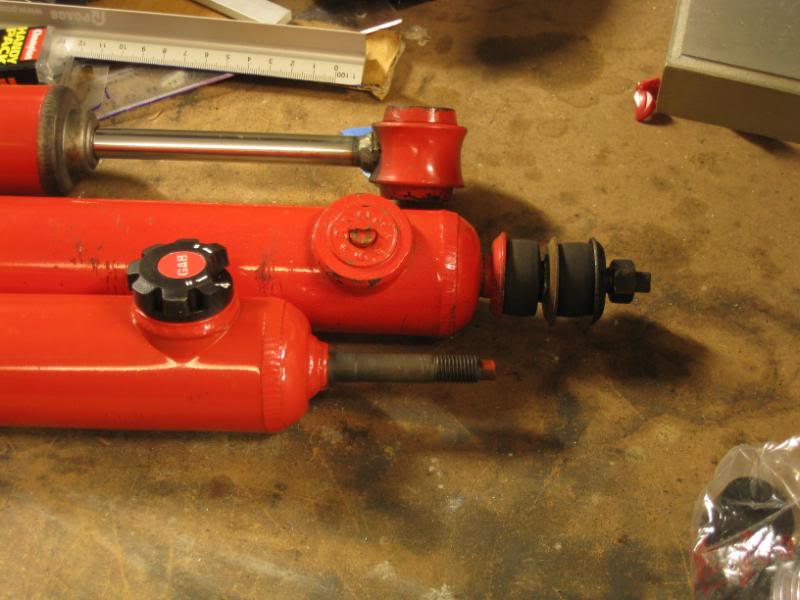
Interestingly, it’s only the shock rod that’s shortened. The shock body itself is the normal length.
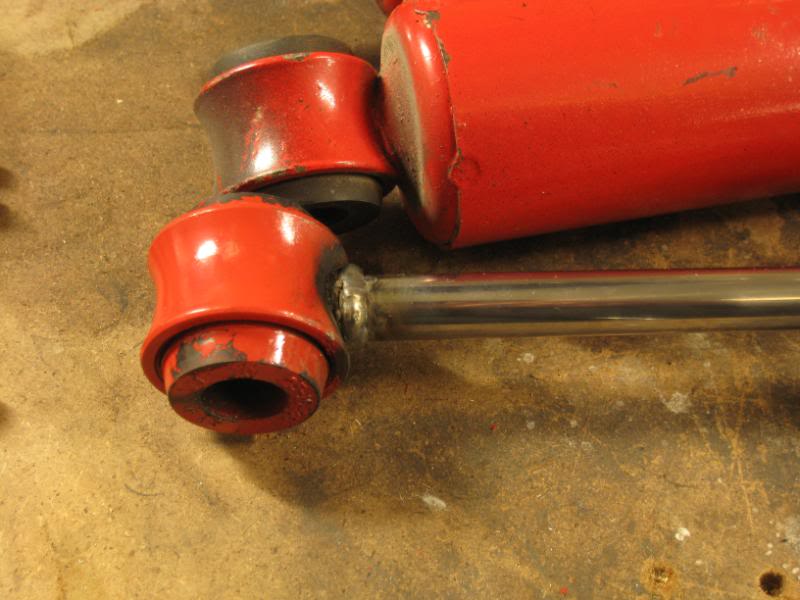
…so the compressed length of the old and new shocks are actually the same.

The main benefit of these shortened shocks, as far as I can see, is that there is less droop travel. With the old shocks, there was 5 inches of droop travel ![]()
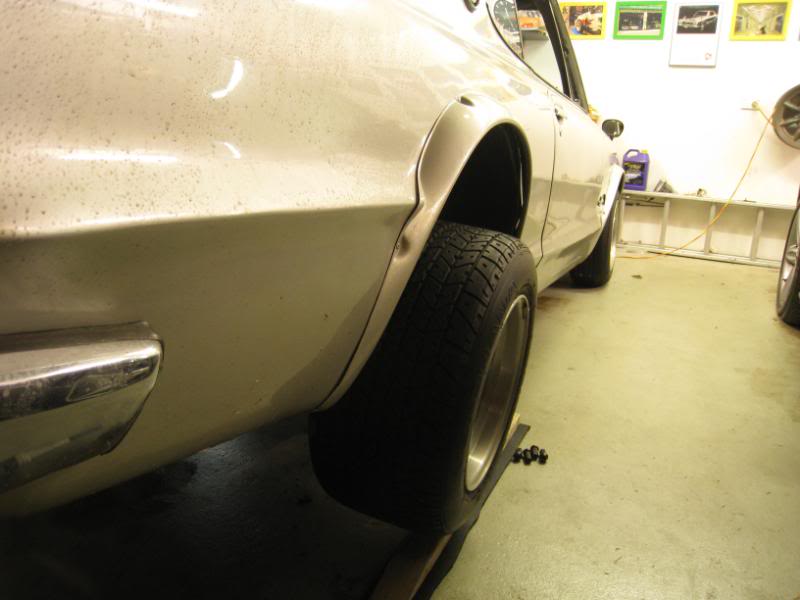
With the new GABs there is only 3 inches of droop travel, and where the spring wasn’t trapped before at full droop, now they are. Also I guess another benefit is that at the static ride height, the piston of the shock will be in the middle of the shock, rather than right down the end, where there is less oil volume in front of it. With the current setup there is 3ins of droop travel and 2.5ins of bump travel at the static ride height, so I think this is where we want it to be.
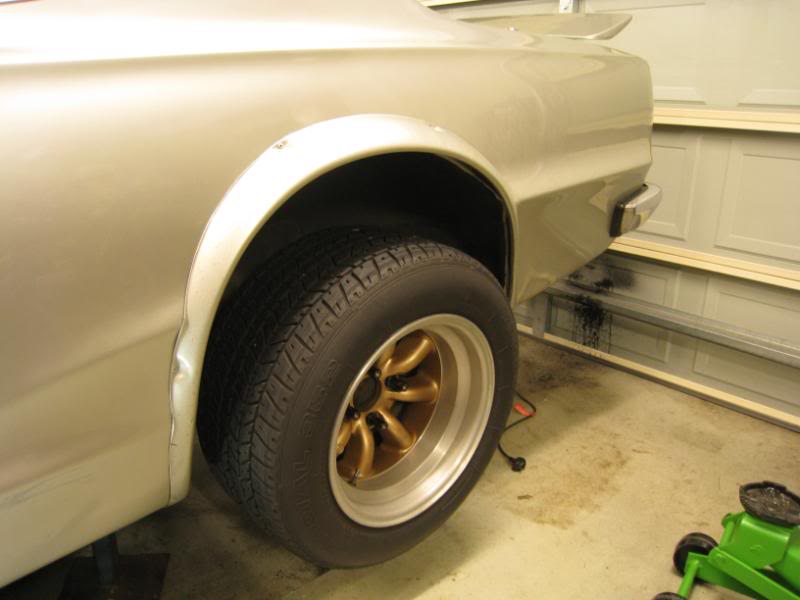
But while I’m at it, I’m going to check the bump travel too. To do this on a Hako is easy, I just raise the suspension arm with the spring removed….
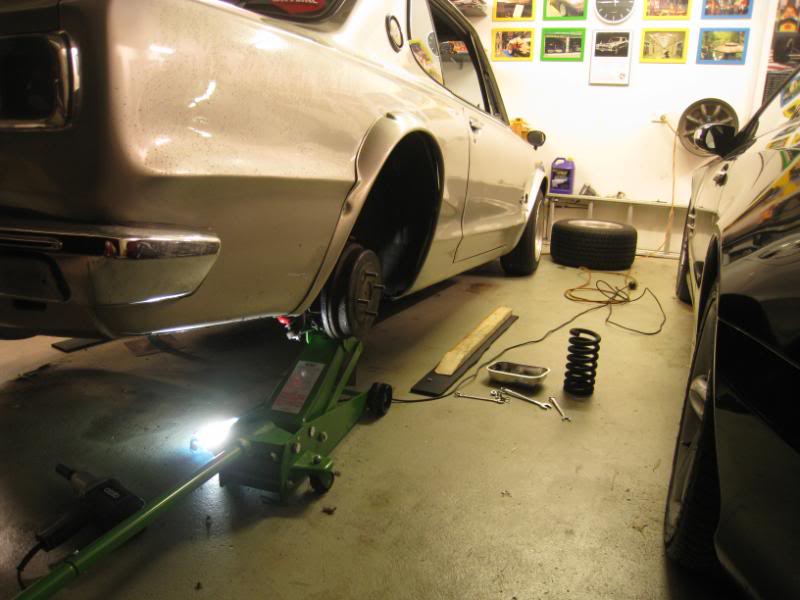
…and at the point where the bumpstop comes into play…
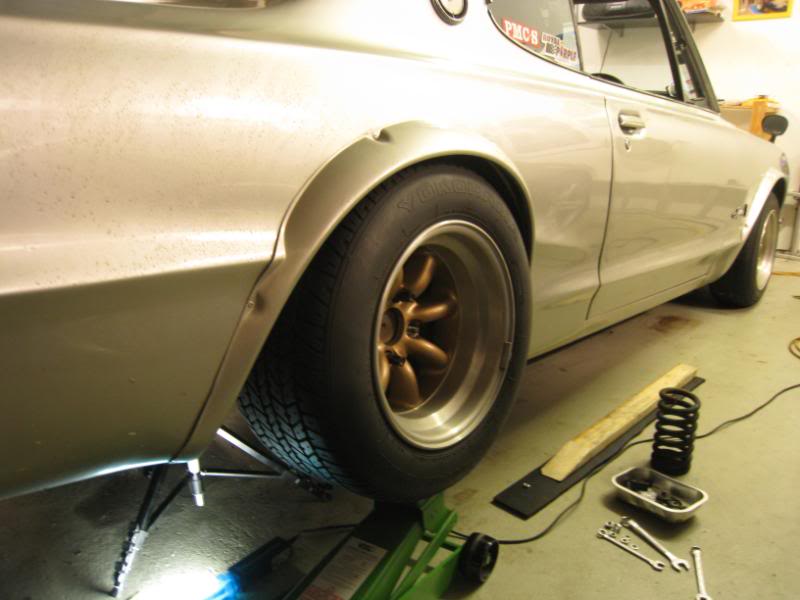
The shock is actually very close to its travel limits….hmm…not good
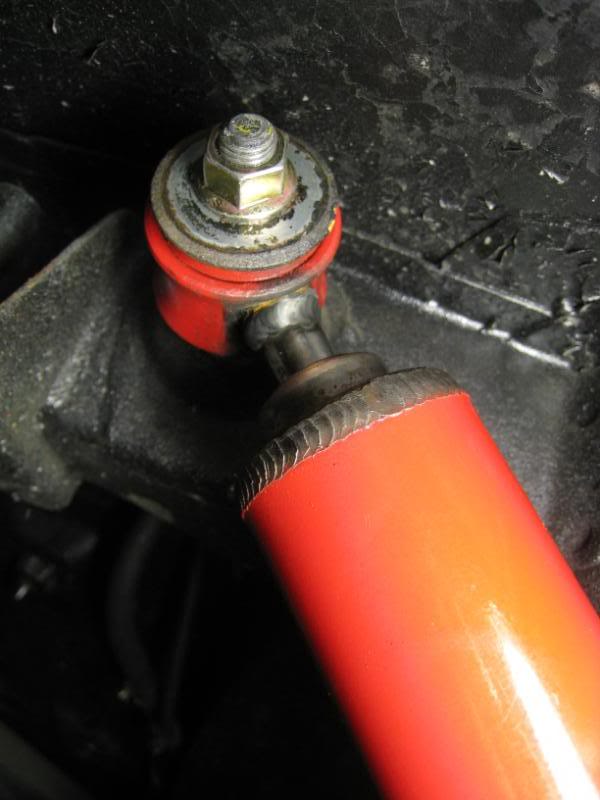
But with this kind of shock, it’s actually very easy to check how much travel you’re using up. Just snug a cable tie tightly onto the shock rod, and go for a drive. Later you can see how much travel is used up, by seeing how far up the cable tie goes. This confirms that we’re aaaalmost using up all the travel that the shocks have got.
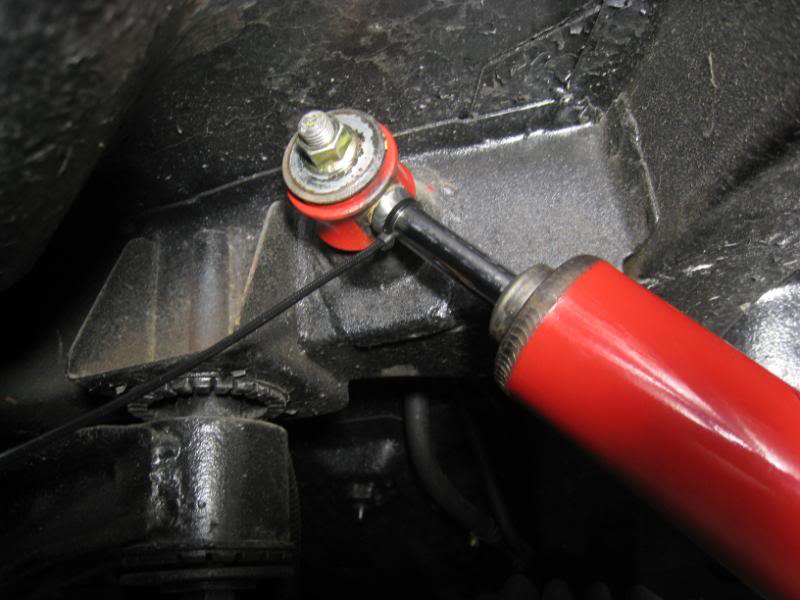
So the solution is to make up a thicker spacer to sit under the bumpstop. There was one there before, but I made a new one out of nylon, that’s 4mm thicker. That should work out to 8mm travel at the shock.
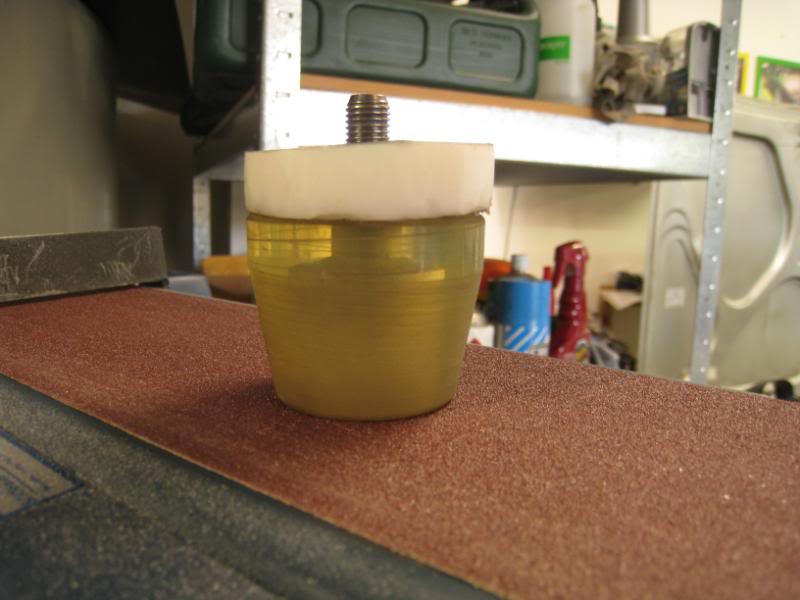
Back into the suspension the bumpstop goes. It sits in the middle of the spring pan, so it’s a bit of a faff to remove the shock and the driveshaft, so that you can get the spring out to access the bumpstop.
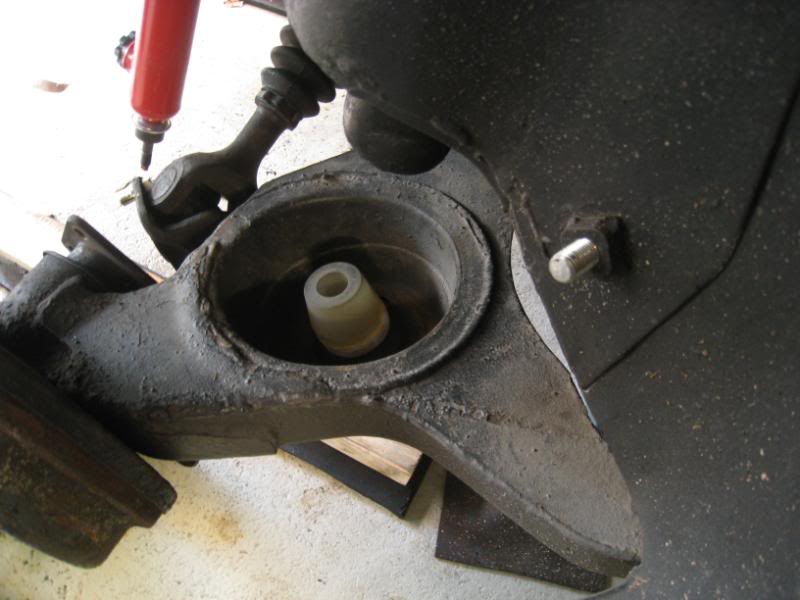
But after a drive, we got the result we wanted, there is about an extra 8mm of unused shock travel. It might go beyond this if we hit a really big bump under power and really compress the bumpstop, but if that happens, at least we have another 10mm of shock travel left.
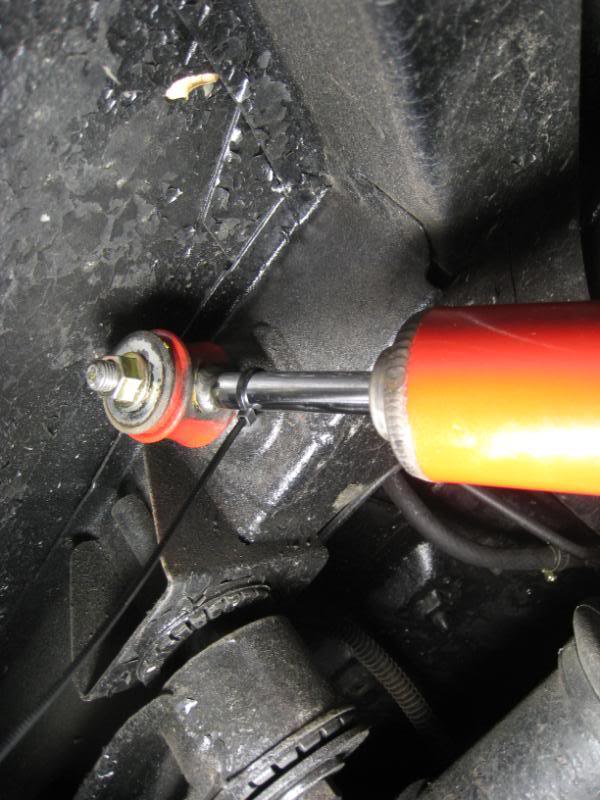
But overall I’ve pretty happy with it, the GABs are firmer than the KYBs and there is no more bouncing from the back end. The ride’s pretty good, firm but not harsh and still comfy and more of a road compromise than a track setup. The firmer back end should help eradicate some of the understeer we’re finding at the track though, can’t wait for the next trackday.
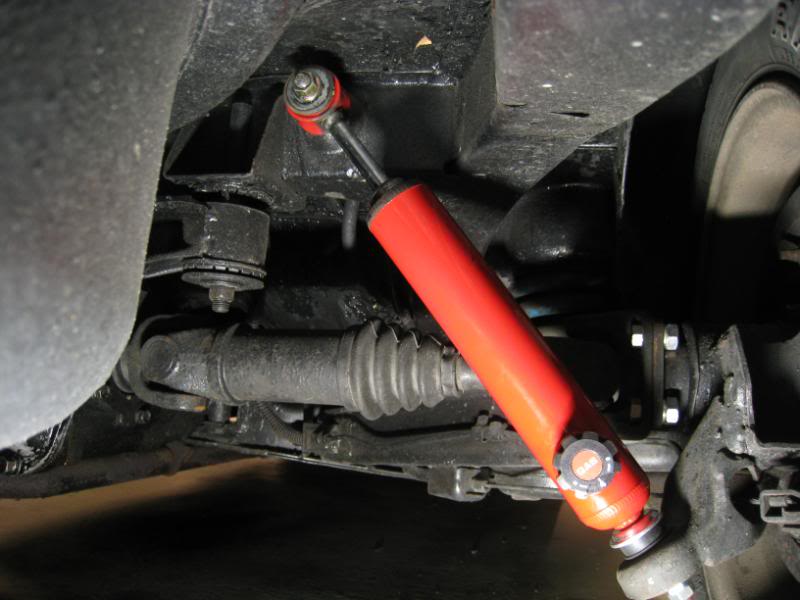
Update!
Since the Webers were upgraded to the larger 36mm chokes, I’ve enjoyed the extra 20hp at the top end, but at the bottom end, where let’s face it, you spend most of the time in everyday driving, it was, well…only ok. Sure it pulled decently if you “rolled” onto the throttle below 4000rpm instead of stomping on it, but even so, you could feel the little hiccups and kinks at low rpm. I was starting to get used to it, but I decided to get around the problem by cheating ![]()
One thing that seemed to help a lot with the low rpm running was ignition advance. The more, the better, but anything more than 12deg base/26max and I’d get some pinging at 4000rpm. So I had the idea of fitting an MSD 6A CDI unit. As you can see, it’s a big sucker. US$165 (about A$280 delivered) from JEGS.
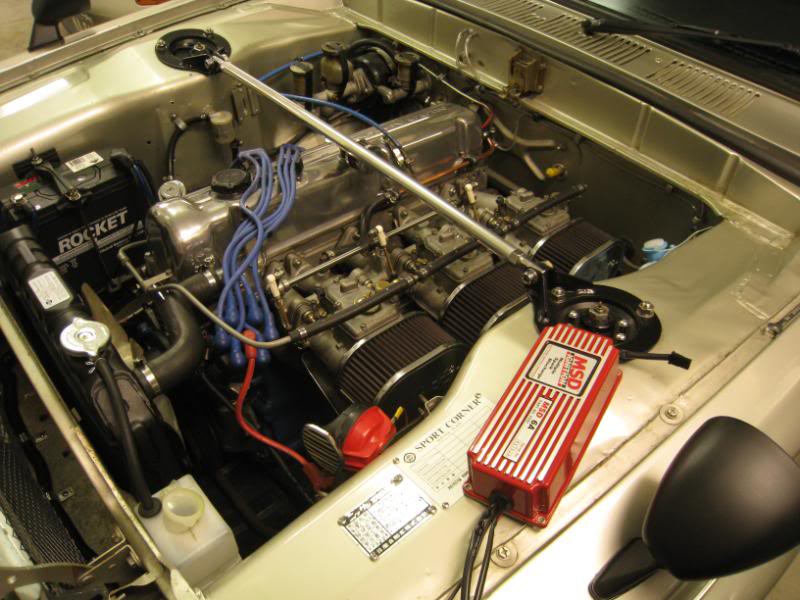
The spot near the coil seemed logical, but it meant moving some things around. To free up space for the radiator overflow bottle, I’d already relocated a few relays around, but it looks like those relays have to move again to make space for the MSA 6A.
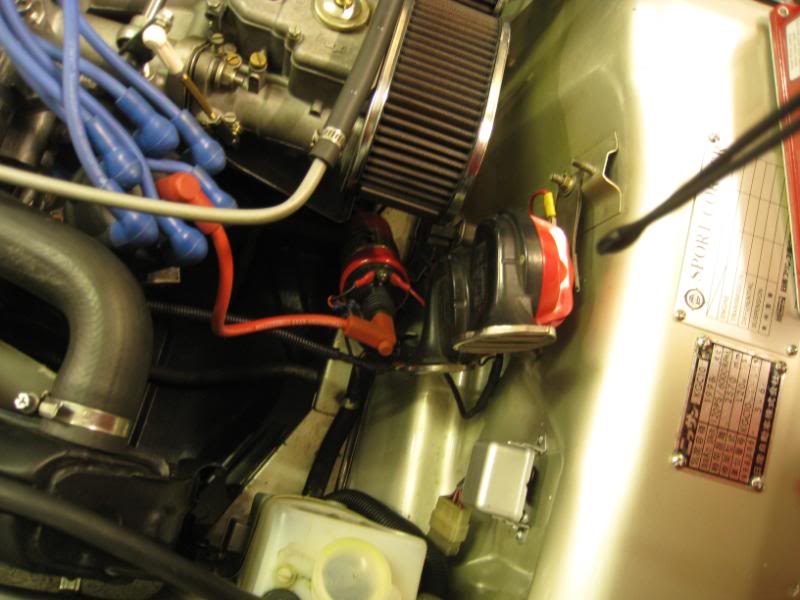
It may seem like there’s a mess of wiring here but it’s actually quite easy to wire up. There’s just 6 wires to worry about. One wire is the power feed for the MSD unit, and goes directly to battery. Another is a ground (I put it onto the engine block). Two wires go to the dizzy, and two go to power the coil. Basically the coil takes all its juice from (and grounds to..) the MSD unit and is disconnected from the car’s loom. The ignition-on power wire from the stock loom gets spliced into the trigger wire for the MSD (which goes to the +ve terminal on the dizzy).
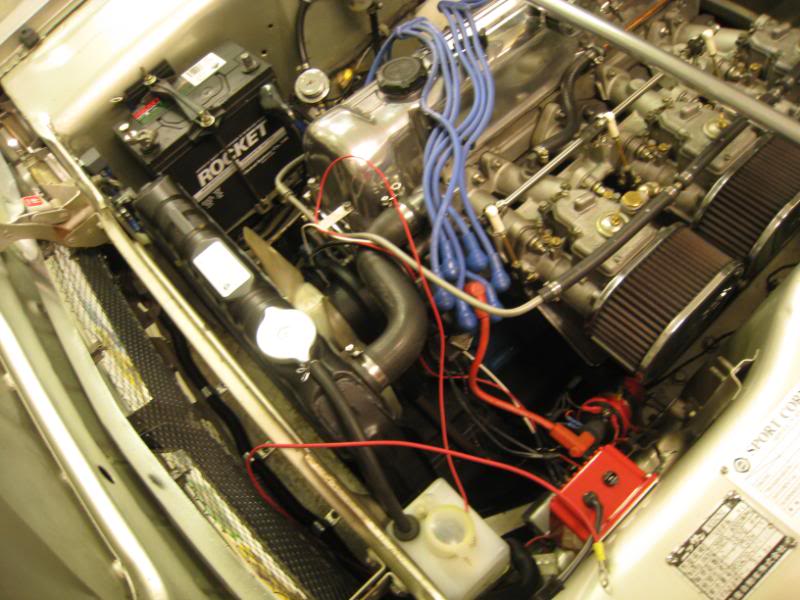
How it works is that the MSD unit takes power straight from the battery, and has capacitors which store up current in between the firing cycles: the idea is that the stored juice is released in one big go, giving you a bigger zap. The electronic dizzy’s magnetic pickups send a trigger signal to the MSD 6A, which then fires the coil.
The capacitive discharge means that you get a considerably bigger spark, but in addition, at lower rpms the MSD 6A will actually fire multiple sparks. So the idea is that not only do you get a bigger spark, but at low revs you will get about 10 rapid-fire sparks over a period of about 20 degrees of crank rotation. You know…just to make sure the job’s done ![]()
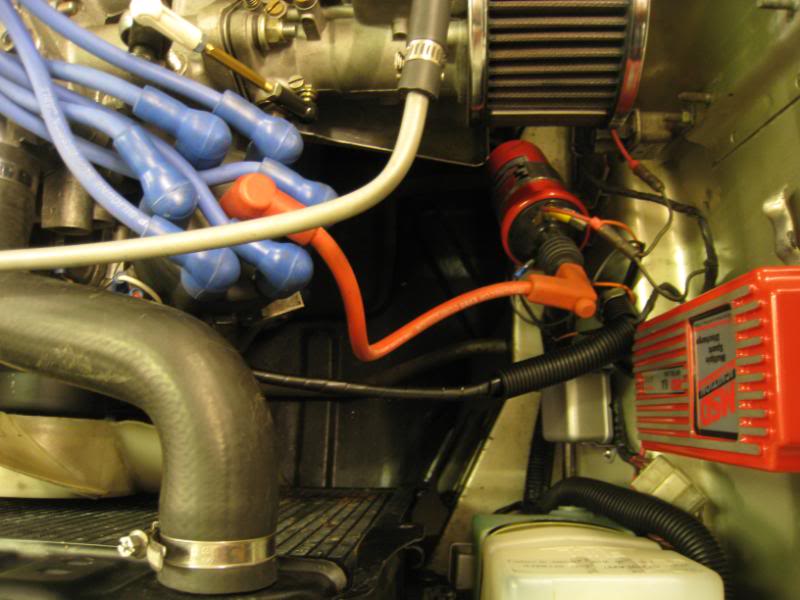
So I figured that this gadget might help to fill in the driveability holes, now that the Webers were not as efficient at low rpm. If adding more ignition advance helps, then maybe this spark-increasing device would have the same effect? The more I looked into it, the more it seemed to be the sort of overkill that the Hako needs at low revs.
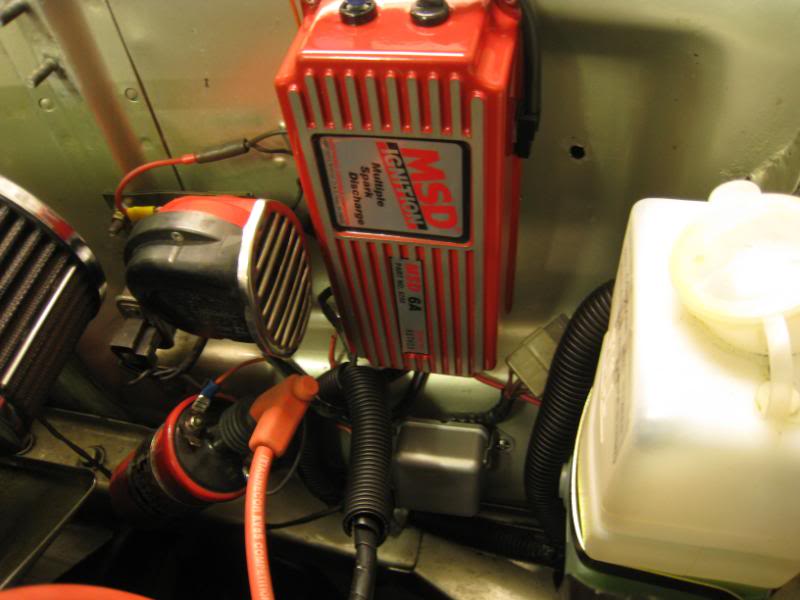
Well that was the theory…it didn’t take long to install, once I’d made room for it in the engine bay. As you can see, I’ve moved some of those relays to a new spot under the MSD unit. Wiring was pretty straightforward, and the only deviation I made to the instructions was that I ran the main power feed thru a 15A fuse block (the instructions say the MSD has an internal fuse). The only thing I didn’t like about the install in hind sight is that the tacho signal wire has to plug into the side of the MSD. Plugging the tach signal it to the negative post of the coil doesn’t work anymore, presumably because the multiple sparks fire the coil many more times than usual, and so that will confuse the tach (which works by counting the sparks). I think it’s a little ugly to have that straggly orange wire wiggle around to the top like that.
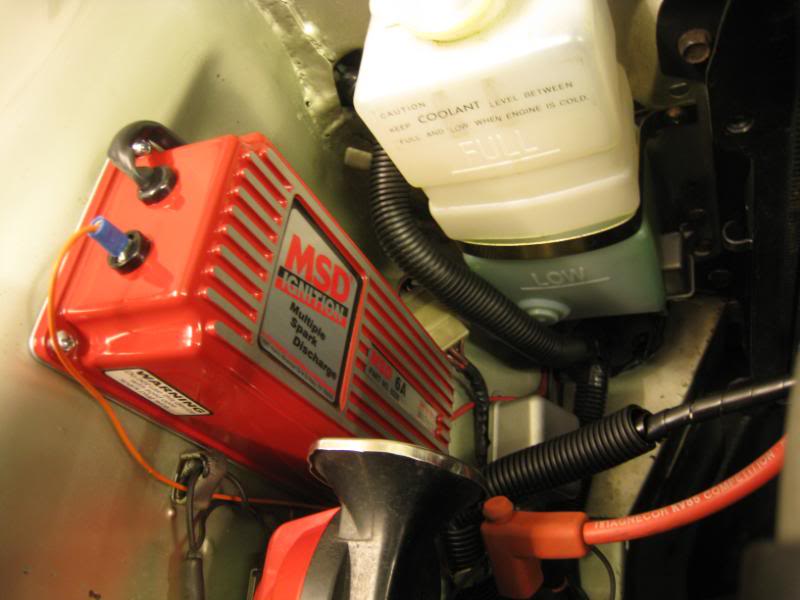
But…it seems to work. I’ve only had the chance to take it for a quick spin around the block, but it seems that I can now floor it at low rpm and it’ll just pick up smoothly without any stumbles. And there does seem to be a lttile bit more grunt in the midrange too. The instructions say that I can now open up the spark plug gap to take advantage of the bigger zap, and I’ll definitely give that a go, and I reckon it’ll be interesting to fire up the wideband sensor to see if the fuel curve is smoother too (it certainly feels like most of the kinks have been ironed out now).
Lately I’ve been noticing something a little weird. When I reverse, I feel a bit of a muffled clunk coming from the back end. And when I’m accelerating and backing off sharply in 1st gear, I feel it again.
In the Hako, the front of the diff is hardbolted to the suspension subframe, and the back of the diff is supported by this transverse bar called the Moustache Bar, for obvious reasons. I was thinking that maybe the bushings in the ends of the moustache bar were gone, and so the back of the diff is thudding up and down against those rubber snubbers as it reacts to the torque of accel and decel.
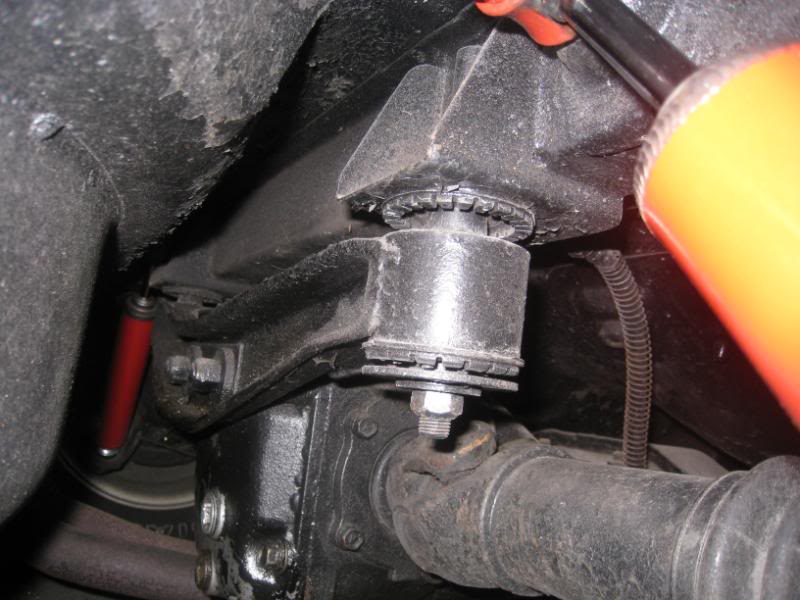
Datsunfreak (Technical Editor John Roper from the magazine) reckoned that the end of the moustache bar isn’t meant to be sitting on the lower snubber like that, and is meant to be more like in the middle. So it looked like those bushings have to be replaced.
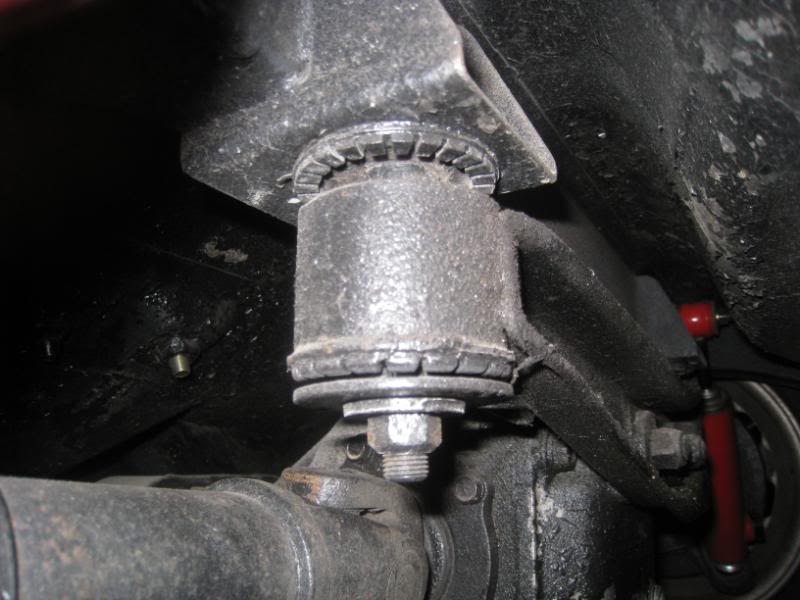
Getting the moustache bar off wasn’t easy…unbolting it at the bushing end is easy, but it locates to the diff via these two studs, and so the protruding studs prevent you from dropping the bar down vertically. Unbolting the front of the diff to ease it fwd’s so that the studs can slide out seemed like the hard way to do it, so I decided to try to unscrew the studs by locking two nuts together, and unscrewing the inner nut. The steel stud was pretty corroded to the alloy diff casing, so this part was a bit of a pain, as it was one of those things where it was really tight to unscrew, bit by bit all the way.
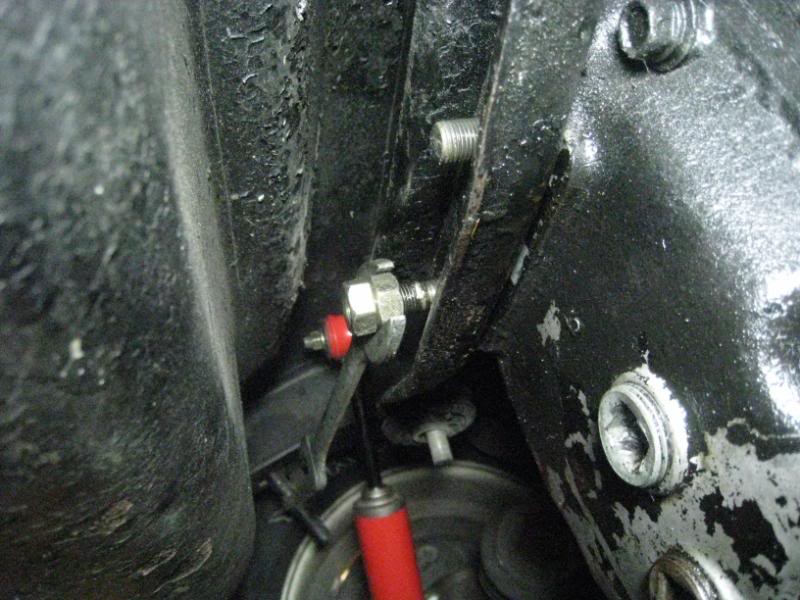
But in the end the bar’s off…
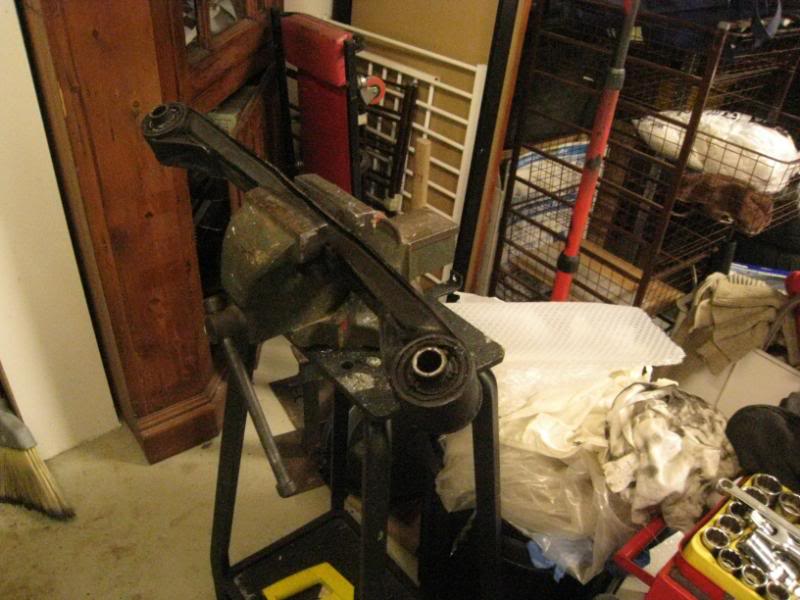
And on closer inspection the bushes do look a bit ruined, the rubber has torn clear of the metal crushtube in the middle.
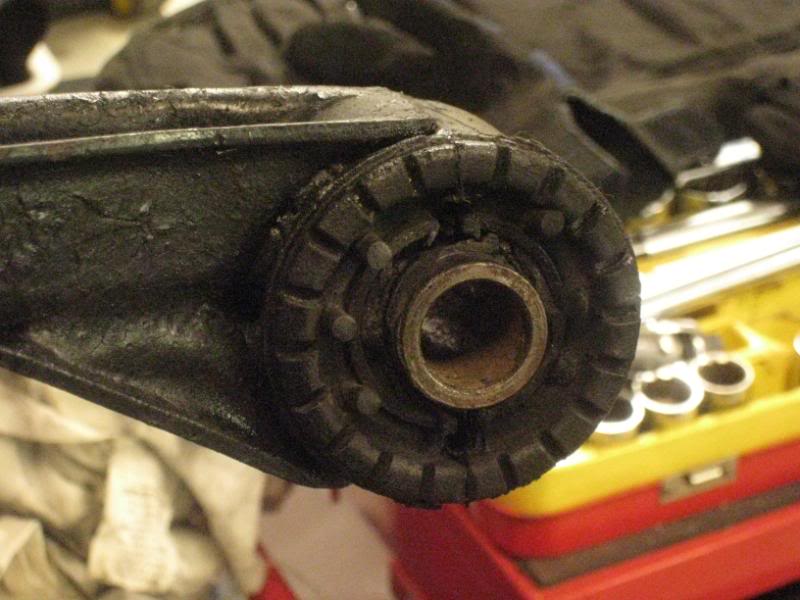
To remove the bushes, first we cut off the rubber lip that mushrooms out on one side.

And for the next step, say hello to my little friend ![]() It’s a 6ton hydraulic press! Basically it’s just an upside down trolley jack, as you pull this lever, the piston comes down, and there is a beam and some sturdy metal plates below to brace things against. It’s not a very hi-quality one, and was inexpensive (some might say…super-cheap, even..aussies will get this
It’s a 6ton hydraulic press! Basically it’s just an upside down trolley jack, as you pull this lever, the piston comes down, and there is a beam and some sturdy metal plates below to brace things against. It’s not a very hi-quality one, and was inexpensive (some might say…super-cheap, even..aussies will get this ![]() ) but I figure I’m only going to use it a few times a year to press out a few wheel bearings and suspension bushes, so it didn’t make sense to buy a really expensive one.
) but I figure I’m only going to use it a few times a year to press out a few wheel bearings and suspension bushes, so it didn’t make sense to buy a really expensive one.
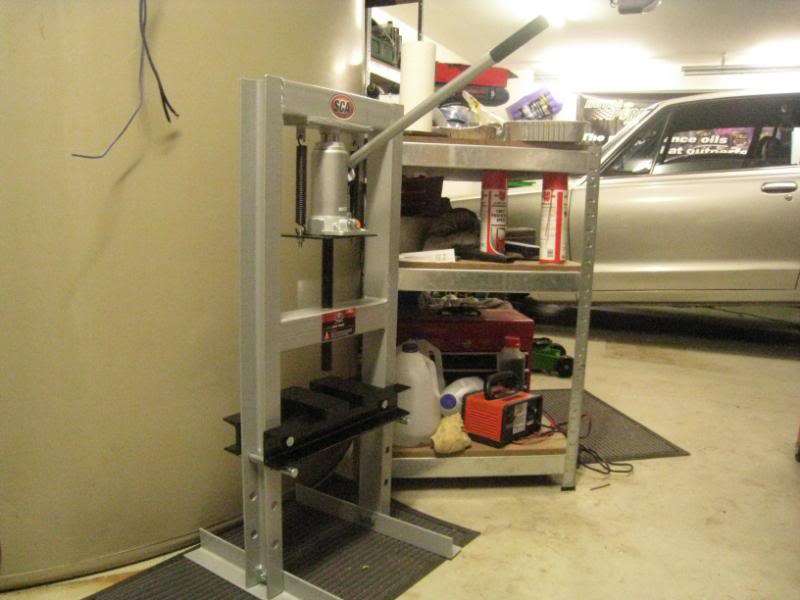
Take a closer look, and the bushing (yes I pushed out the centre tube just for fun) has a few concentric metal tubes. The outer one is the bushing’s outer metal jacket, and the inner one is the one we will be pushing out.
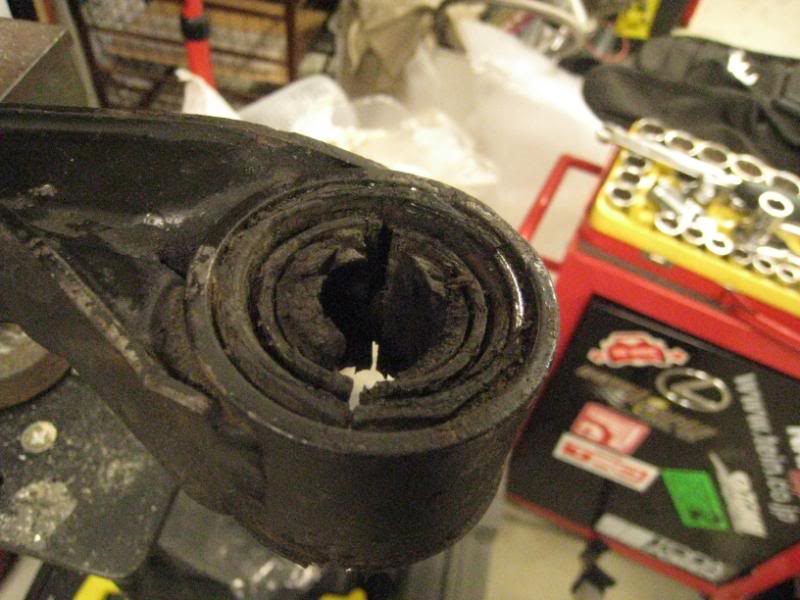
Brace the moustache bar carefully in the press, and then pick a socket that’s just the right diameter to push on the metal tube of the inner bush. You’ll notice that I’ve got clamps holding down the metal plates under the ‘bar…when you’re working, everything’s under tremendous pressure, so the clamps are to prevent the plates from slipping out and flying across the workshop, narrowly missing your head (um…appparently).
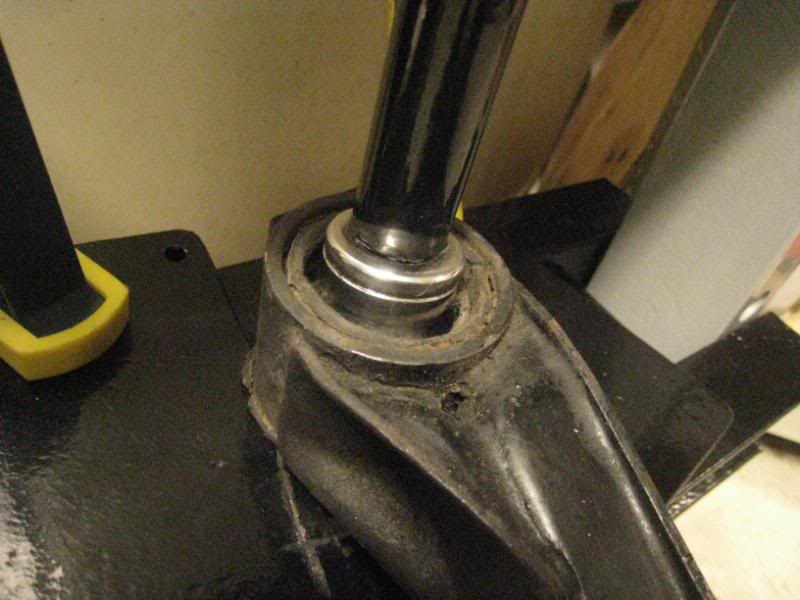
The press makes light work of pushing out the inner bush.
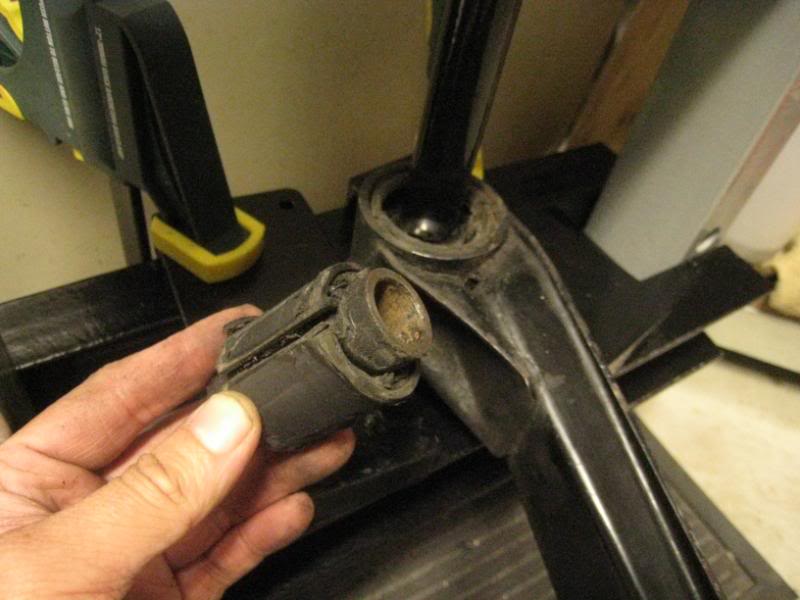
What’s left is the outer bush jacket, which is in 2 pieces, so it’s easy to tap out with a chisel and hammer
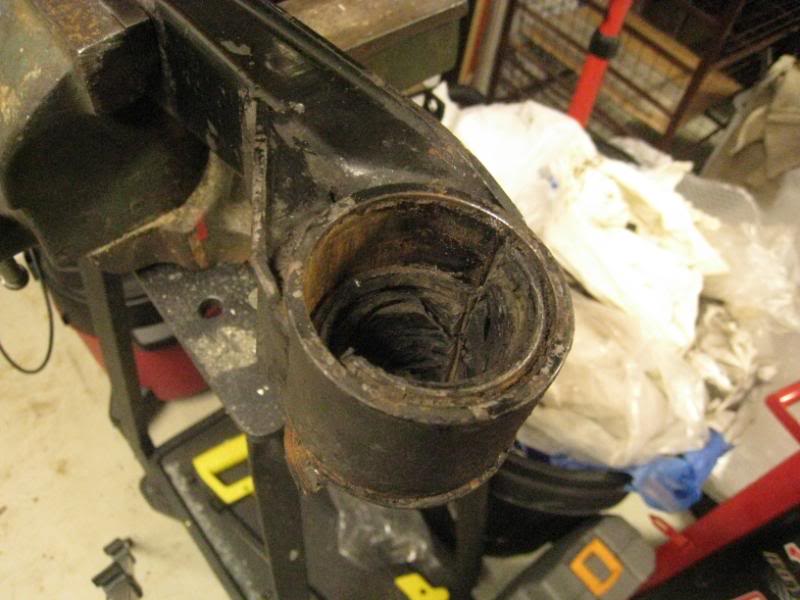
…the remains of the diff bushes.
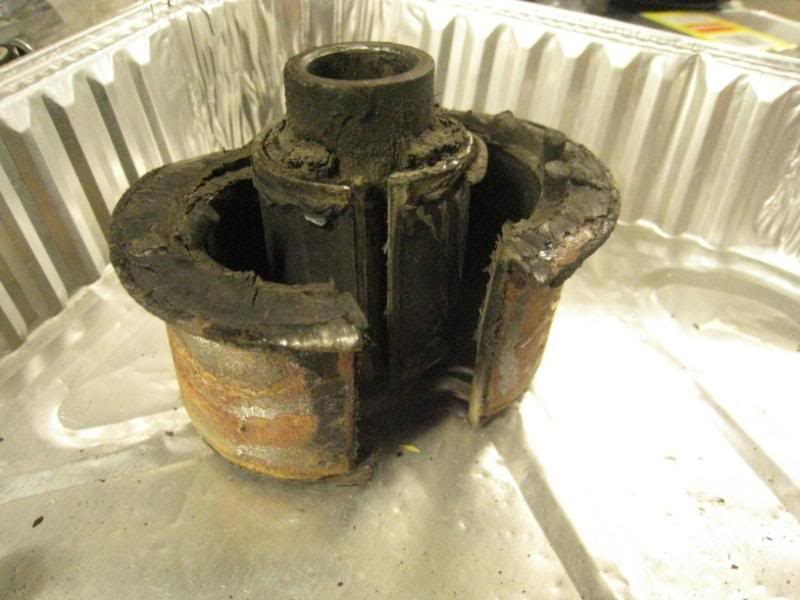
Then I cleaned up the inside of the tube with a wire brush
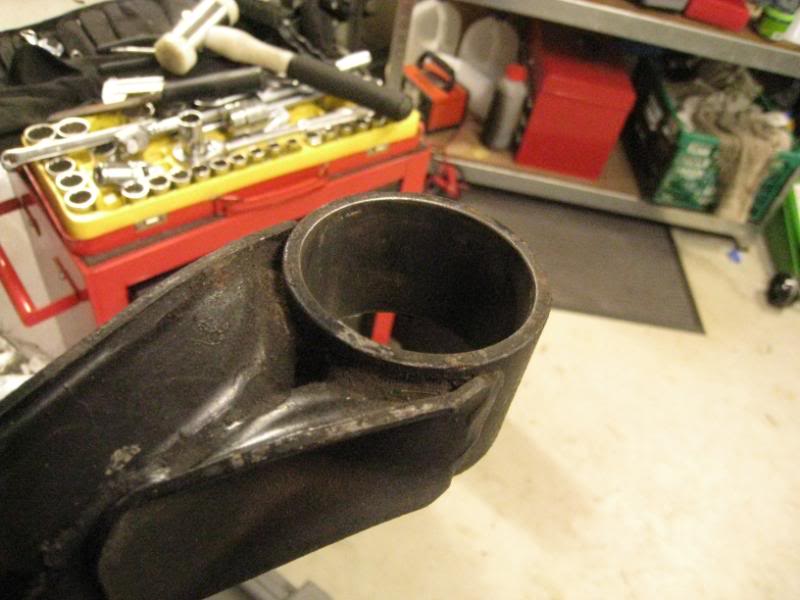
And the new poly bushes (from SSS Automotive) just press in by hand.
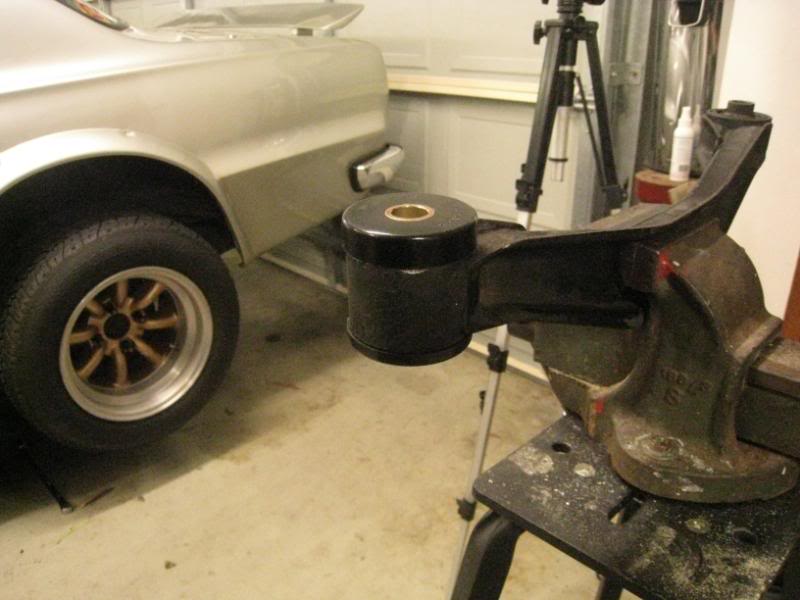
The rejuvenated moustache bar in place! You’ll also notice that I didn’t put the stock diff studs back in place, but I used bolts instead. So the next time, I can just take out the bolts and the moustach bar will just drop down, which will make diff removal easier too. (This was also a Datsunfreak suggestion)
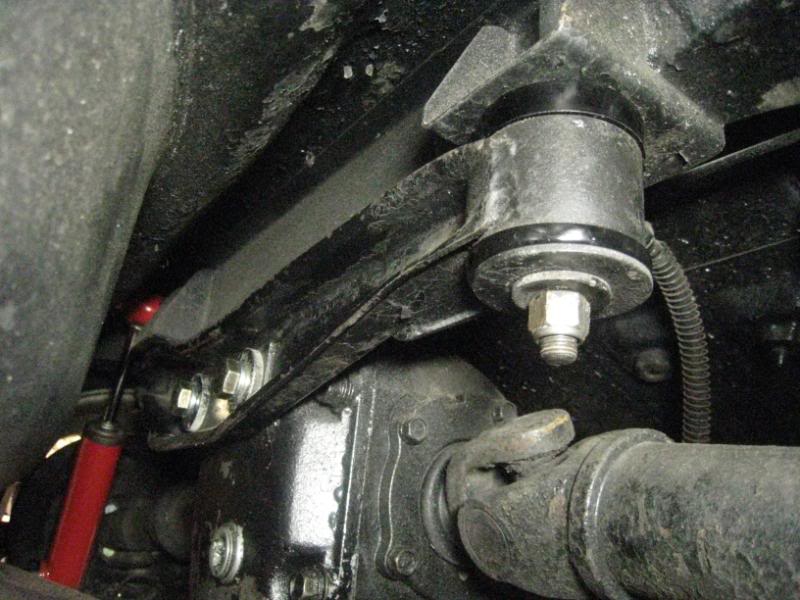
…and that’s where we’re at…I’ll see how she drives tomorrow, but I’m sure it’ll be better than it was…
Lately I’ve been noticing a bit of a rattle from the exhaust when I start her up, and when I tap the pipes with a hammer, it does seem like maybe one of the baffles inside are loose. So it’s out with the old ![]()
The old setup was a Trust Dual, which is to say that the headers go from six into two, and then there are two separate pipes all the way down the car, that don’t merge until they enter a common rear muffler. In fact, back in the early 70s, Trust was the supplier for some of the Nissan Sports Corner exhaust systems, and their dual systems for the older Nissans were still available until quite recently.
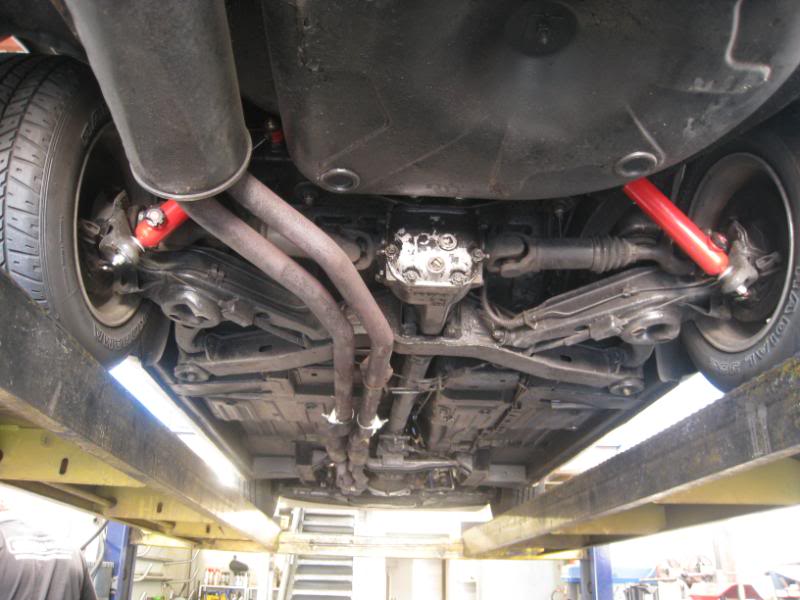
So really, it’s like two 3cyl, 1 ‘3/4 inch exhaust systems running in parallel. This was the original design of the 2000GT-R exhaust, and back in the day the optional Sports Corner street and race systems followed the same format. So to this day, Japanese aftermarket systems for the Hako are almost always dual systems like this.
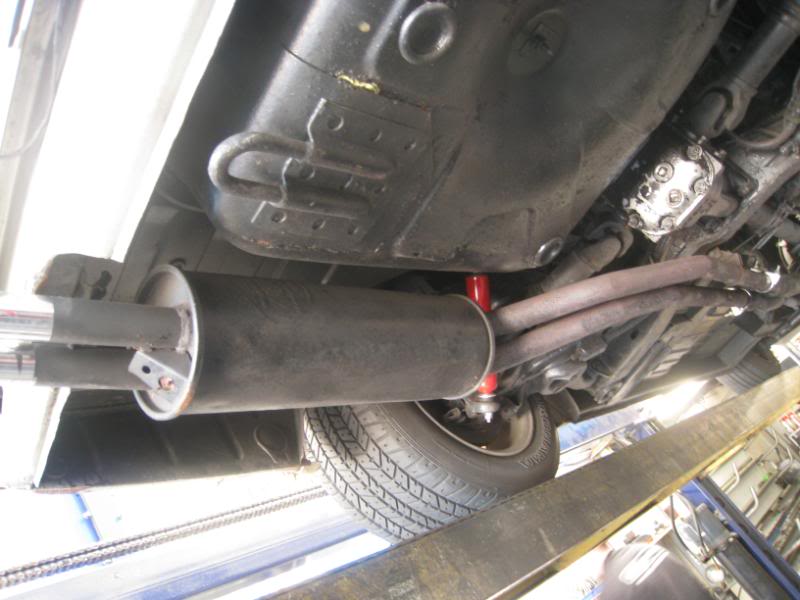
After a bit of discussion, one option was to fit a 2.5in single system. My initial thoughts were that from a cross section area point of view, the existing twin 1.75in setup would have more cross sectional area than a single 2.5in. But the guys at Castle Hill Exhaust pointed out that all six cylinders don’t fire at the same time, so each “puff” of exhaust would be less restricted if it had a 2.5in tunnel to flow down, and it would be significantly less restrictive than the current setup. Good point….but eventually we decided to follow the original twin pipe format, but in a bigger 2inch size. So it all starts with this Genie twin entry muffler.
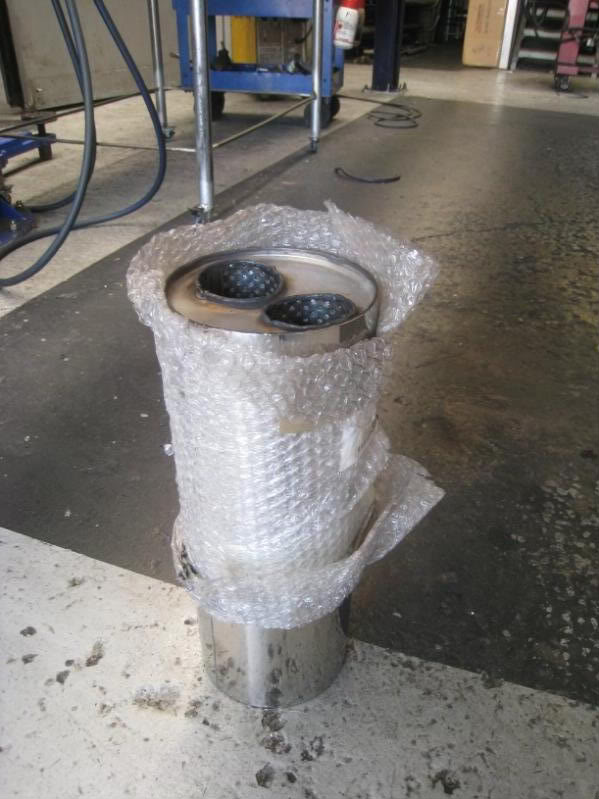
First, the old pipes were removed, and the Trust flange cut off and welded to a pair of 2in pipes that lead to two 12in resonators. The collectors on the Trust headers were 2in, too.
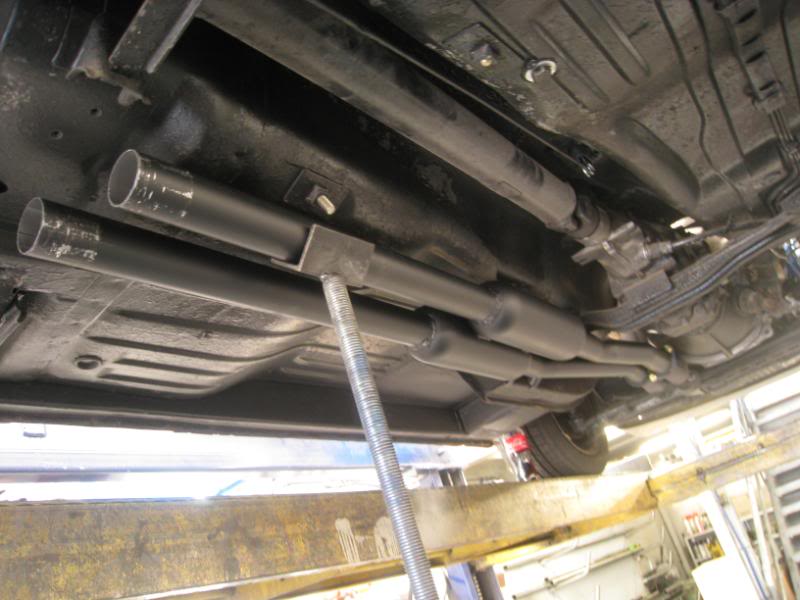
A new bung was welded on for the wideband sensor…
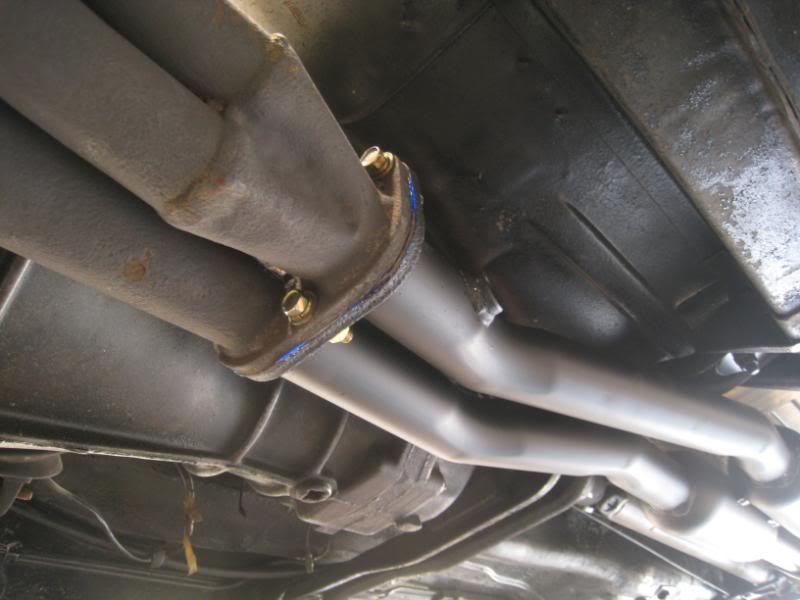
Going neatly all the way back…
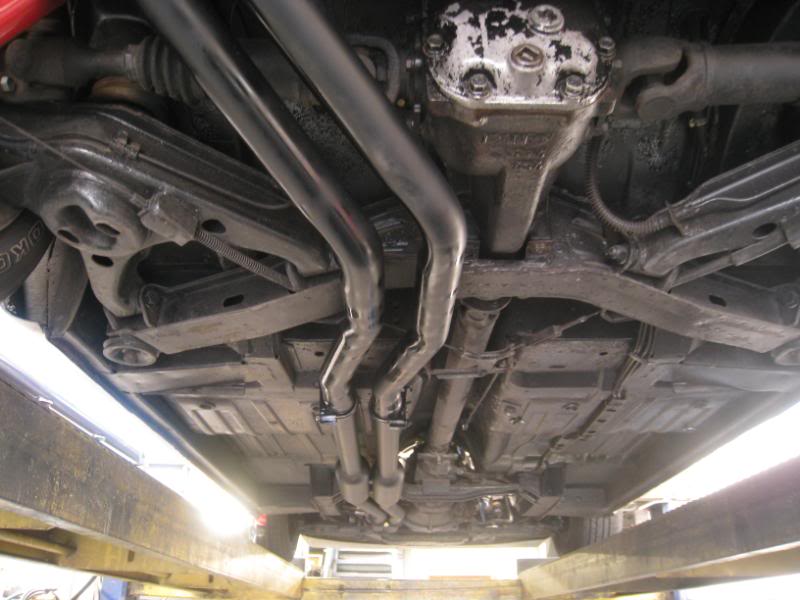
To the new muffler.
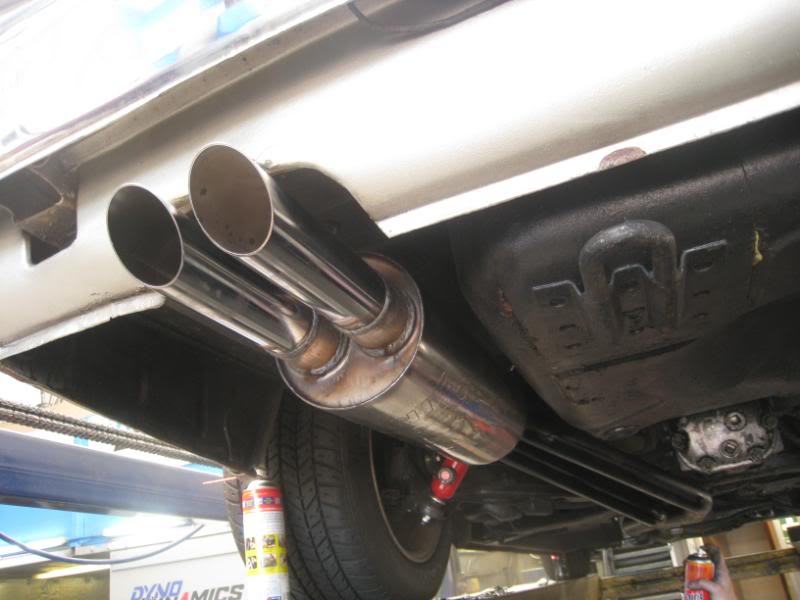
CHE did a great job, and I’m very happy with it. The Trust system was very good in the sense that it was very quiet, in fact most of the time the exhaust note was drowned out by the induction noise. But the new system is certainly a bit louder and has a much more crackly, snarly tone to it ![]()
[youtube]http://www.youtube.com/watch?v=SHZMJliUk60 [/youtube]
And the overall appearance is still close to the original, too. I need to drive it a bit more, but so far it seems to have uncorked the top end power a little, which is a good thing and it has a really nice bark to it when it’s in the powerband. Much more rude, anti-social and uncouth, and well-suited to the car ![]()
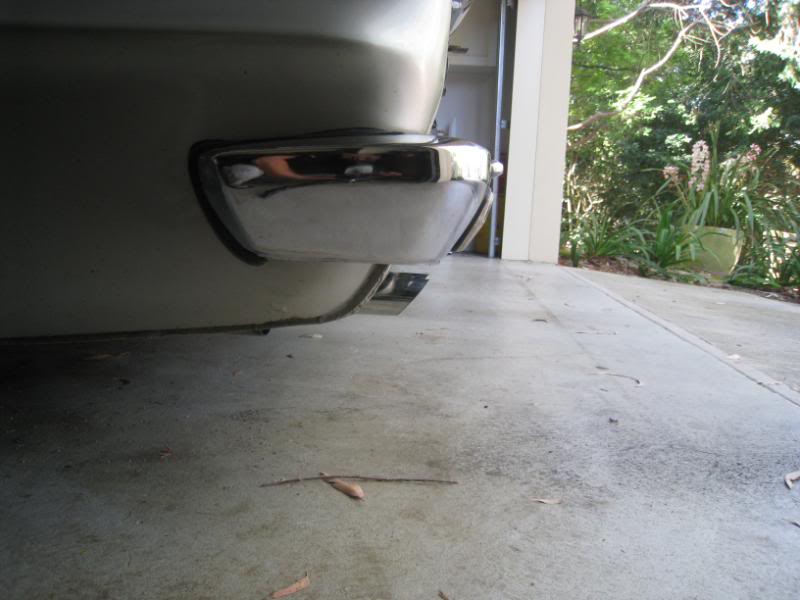
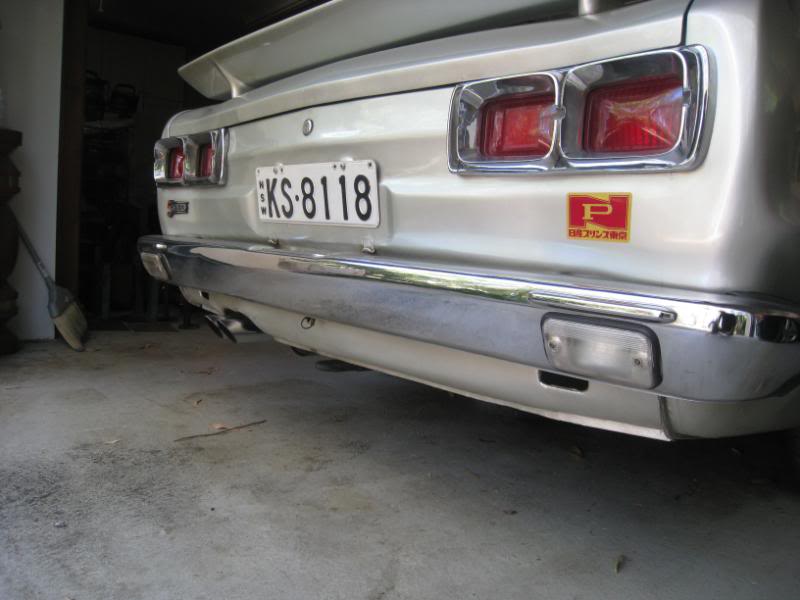
…more mods to come in the next couple of days
One of the things I’ve been meaning to have a go at was the rear spring rate. When I was setting up the car initially, it sounded about right to have 250 pounds front and 600 pounds rear, but while the front is about spot on, the rear is too soft. It’s fine on the road, and has a high grip limit before pushing the front slightly. But it understeers at track speeds, and when I have 4ppl on board, the rear tyres touch the guards on hard acceleration. The new GAB shocks and raising the bumpstops helped a little, but eventually I figured I’d have to change the springs.
Rubber-Soul (which is the Japanese shop I get most of my parts from) offers a few sets of springs, and their stage-2 set is 250/900 (or 4.4:16 kg/mm):
http://www.rubber-soul.net/p-asimawari.htm
But they have another set, which they call the Suzuka Works spring set, and that’s 275/1090 (or 5:19.8 kg/mm). My problem is that springs intended for Datto 510s or 240Ks are 240mm, whereas I’m using 225mm long rear springs. A bit of research unearthed some 1100pound springs at www.datsport.com, which were of a 225mm free length. Baz from Datsport recommended 275/1100 for a track oriented 510, and figured that with the heavier Skyline, it would work very well on the road. Baz by the way, is currently laid up in hospital recuperating from a bit of a health wobble, so get well soon, mate.
Here they are, the Datsport springs are the yellow pair in the middle. The blue is the current 600pound/225mm spring and the red one is the soft one that came with the car, that even with that 20mm spacer had the car sitting on its bumpstops all the time ![]() Surprisingly, there isn’t that much visual difference between the 600 pound blue spring and the 1100 pound yellow springs, the coil material is the same thickness, but the yellow spring has 6 coils, vs 7 for the blue one, so the yellow one is stiffer.
Surprisingly, there isn’t that much visual difference between the 600 pound blue spring and the 1100 pound yellow springs, the coil material is the same thickness, but the yellow spring has 6 coils, vs 7 for the blue one, so the yellow one is stiffer.
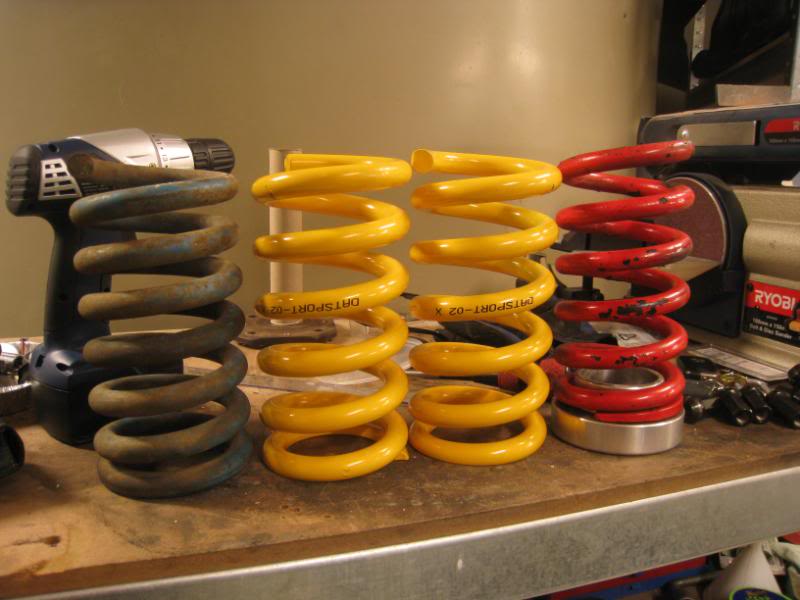
So in go the springs, which as usual, requires the shock and halfshafts to be unbolted, so that the suspension arm can swing low enough to release the spring. I figure that since the yellow springs are the same free length as the old blue ones, and since they’re almost twice as stiff, that the ride height will go up a bit…the question is how much?
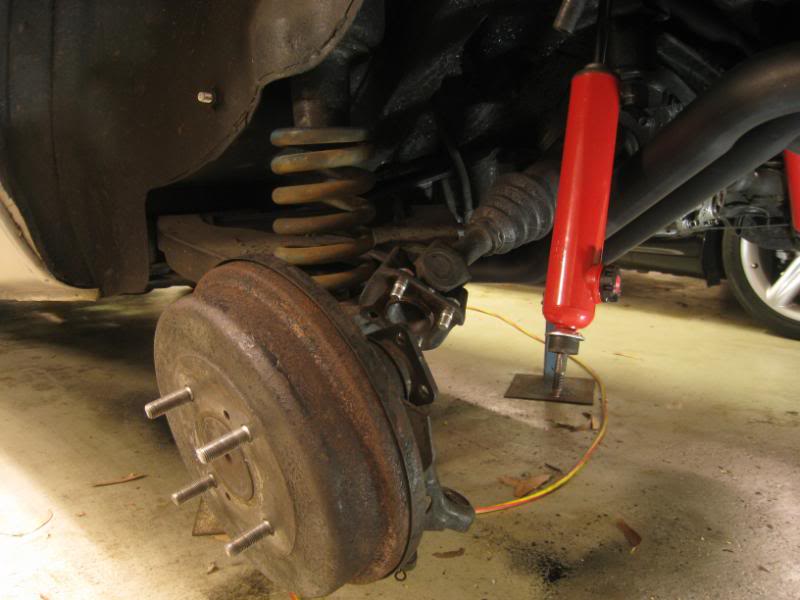
But before we get the car back on the ground there was a bit of maintenance I had to do on the rear drums.
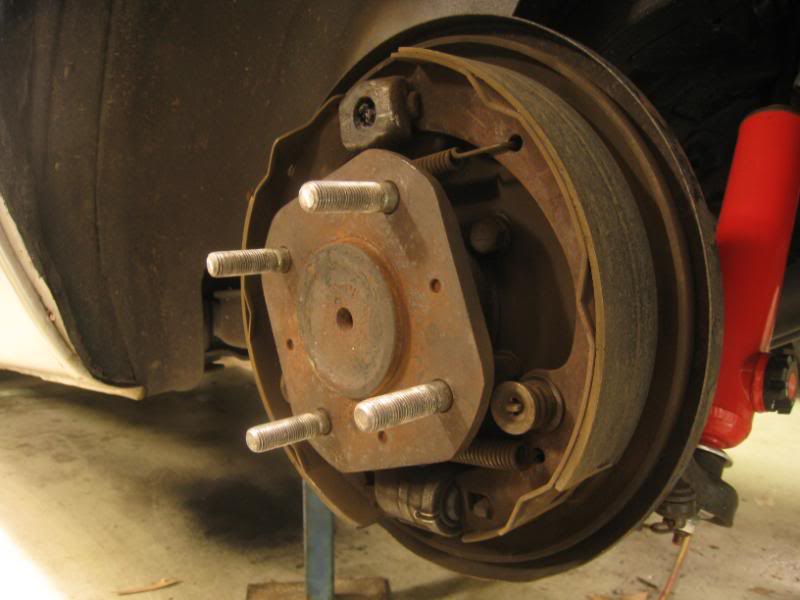
If you haven’t done this before, it’s pretty easy. First you remove the locating pins, which are held in with these buttons. Press down the spring with one hand, and rotate the button, and the pin slides out of its slot.

The brake shoes can then be manhandled out, I find that if you pull one side out of its slot first, the spring slackens off and it’s easy to get the other side off.
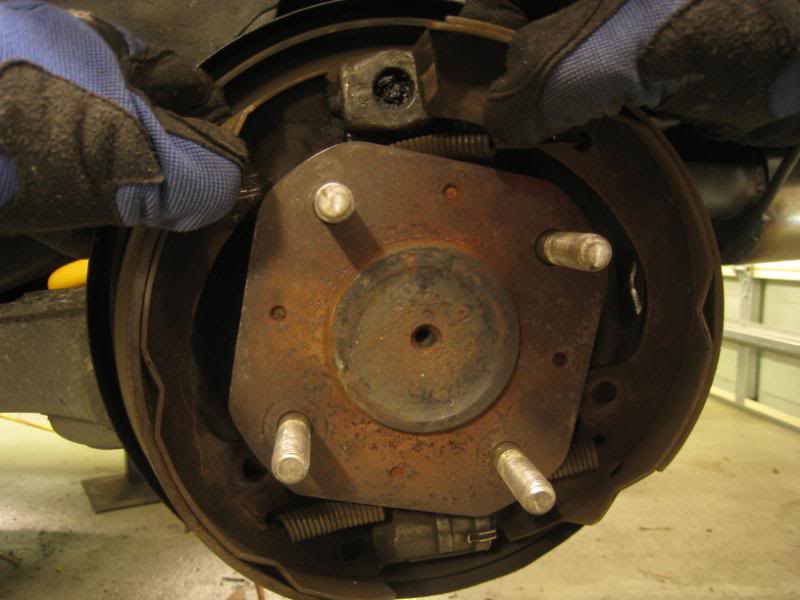
I’m replacing the shoes with these, which are upgraded shoes from Rubber-Soul. I think they might be made for Rubber-Soul by Endless, since they’re painted the same colour as the Endless Street-Spec pads we have in the front brakes.
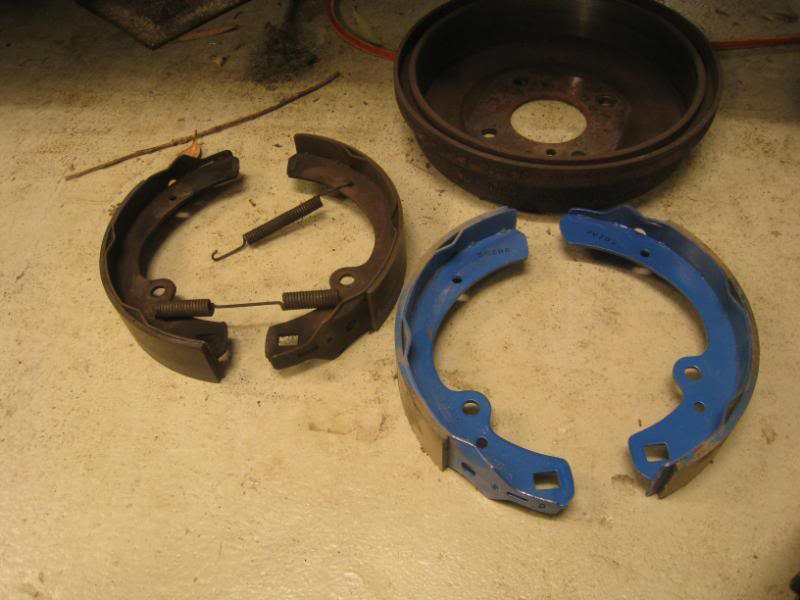
The shoes slide on these raised oval pads, so it’s a good idea to give them a smear of brake grease before fitting the new ones.
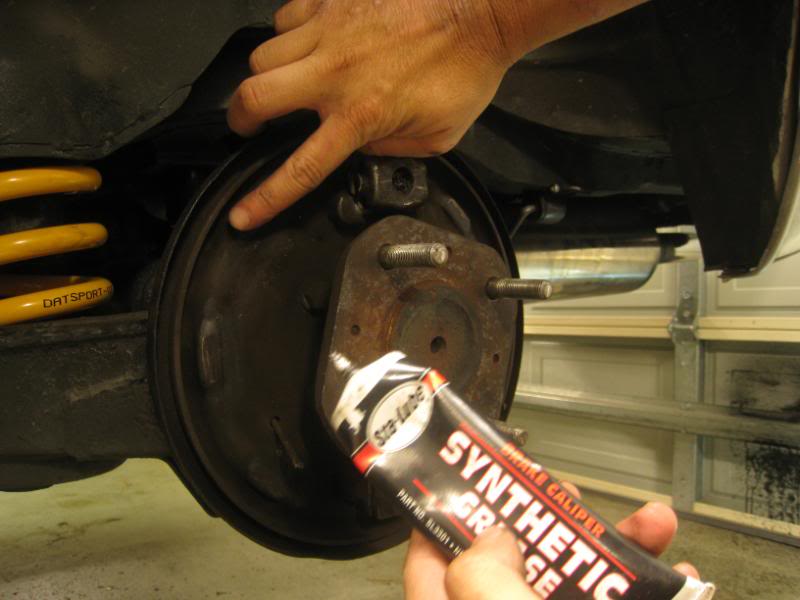
Assembly is the reverse of disassembly ![]()
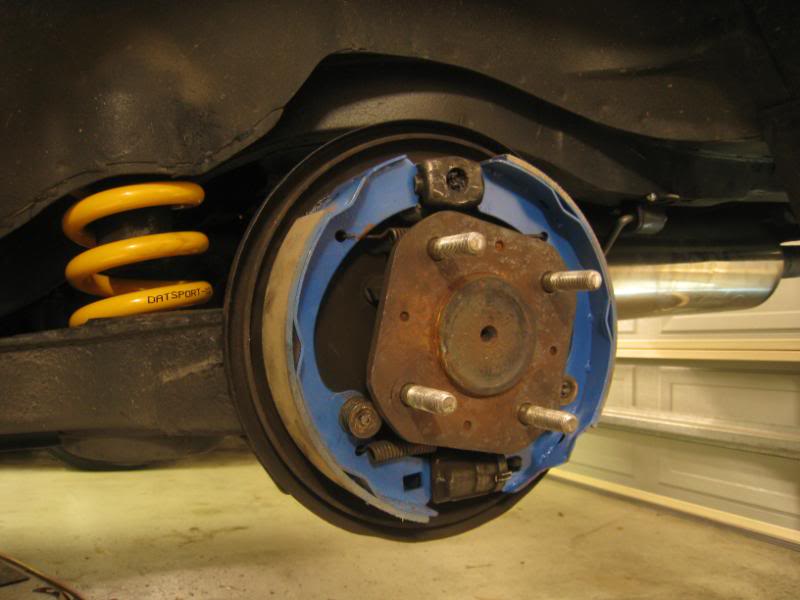
But the new shoes are thicker than the old ones, so the drum won’t be able to slide on in place. So you next need to slacken off the adjuster here at the back (it’s that square peg sticking out at 12 o clock on the brake backing plate).
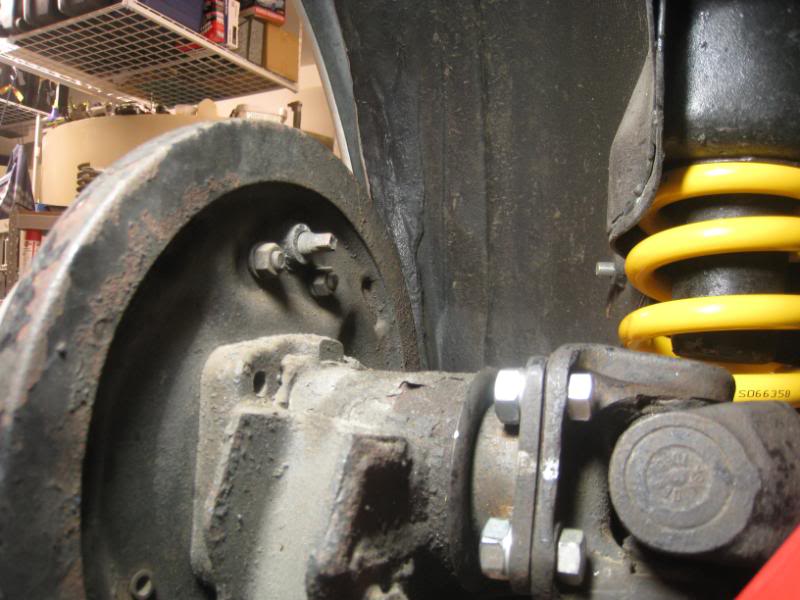
I loosen it, and it will draw the shoes inwards, until I can slide the drum on. You then tighten the adjuster until you feel the drum start to bind, then back it off one click. Then I give the brake pedal a few prods to center the shoes in the drum, and re-adjust it again. And then it’s all done.
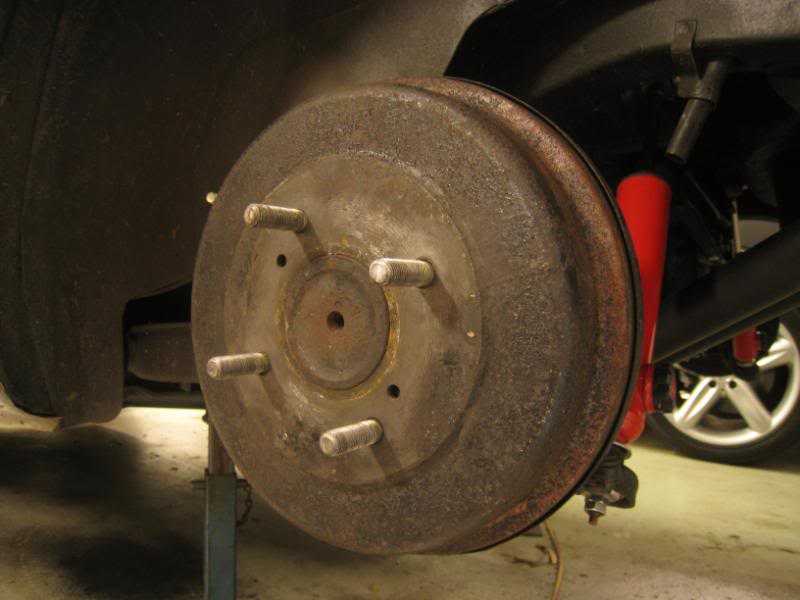
Now that it’s back on the ground the ride height is 10mm higher.
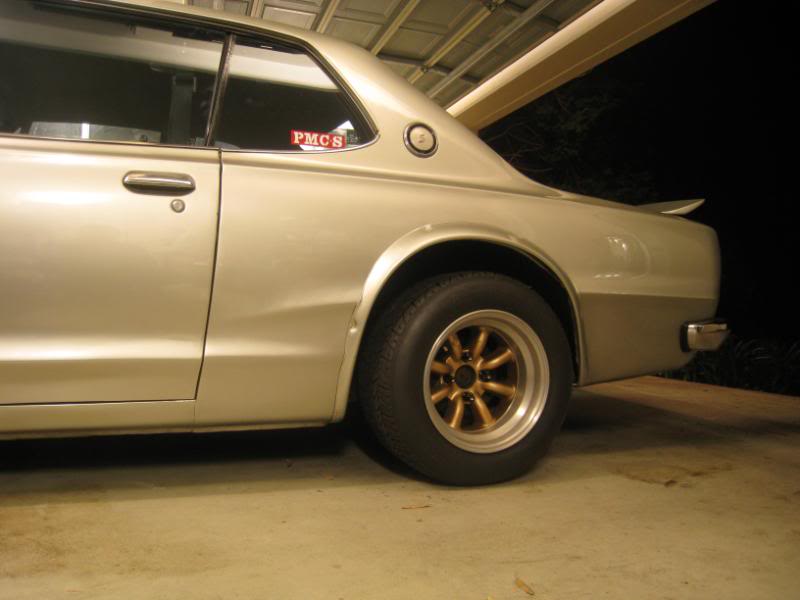
I took it for a drive to let the springs settle, and maybe a bit more driving will settle it some more, but it’s definitely sitting noticeably higher. The solution is simple, which is cutting a tiny bit off the coil….I figure 10mm at the wheel is probably more like 5mm at the coil, so I’d just have to Makita off maybe 1/8th of the bottom coil, which shouldn’t affect the spring rate.
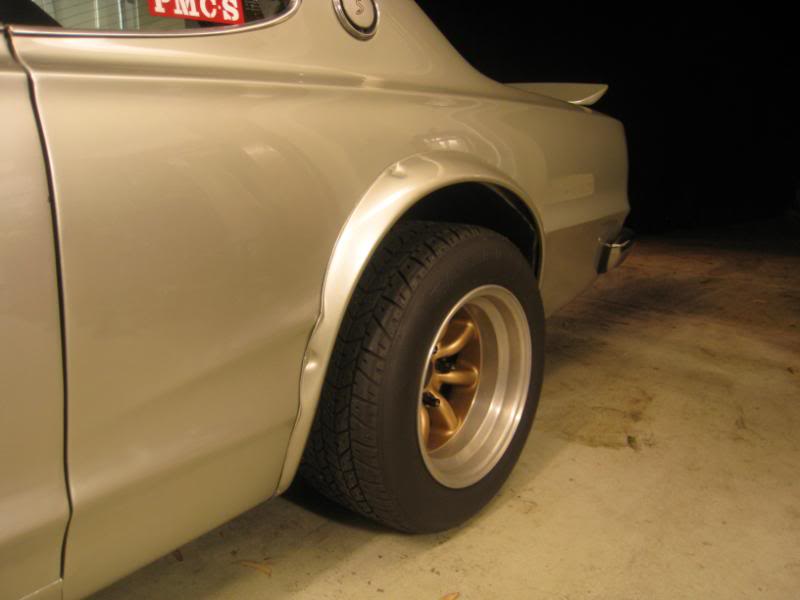
To drive, it’s definitely lost that soft-in-the-rear feeling, and now seems more balanced. It’s not too stiff at all, and is just nicely firm, rather than race car hard. I haven’t thrown it into any hard corners yet, but we’ll see
Ok, here’s how it looks with the new springs:
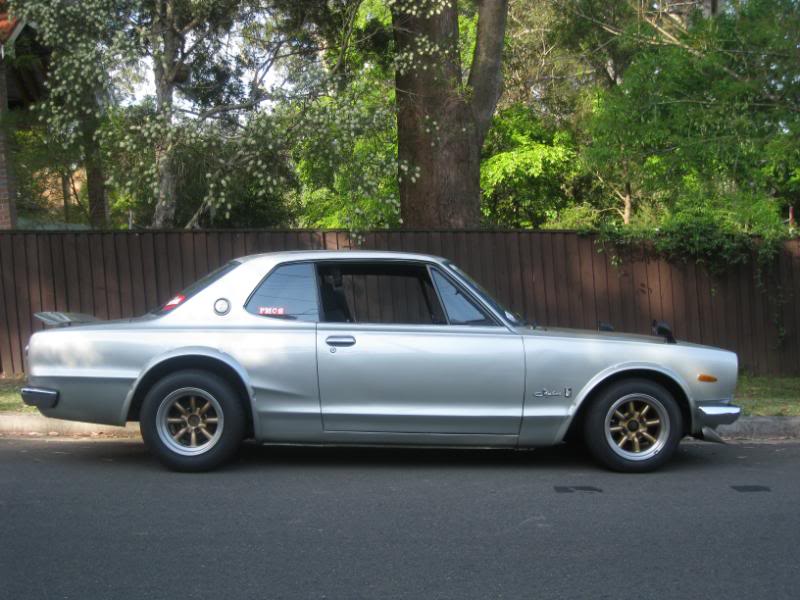
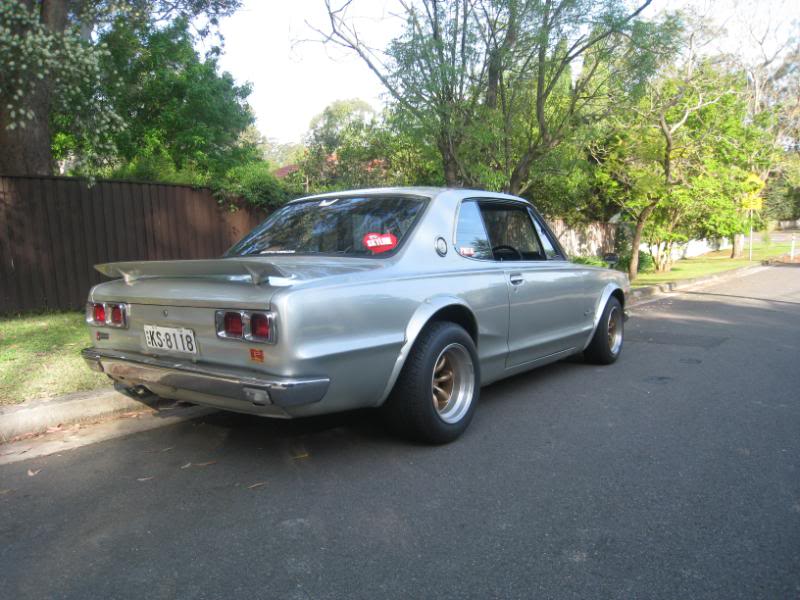
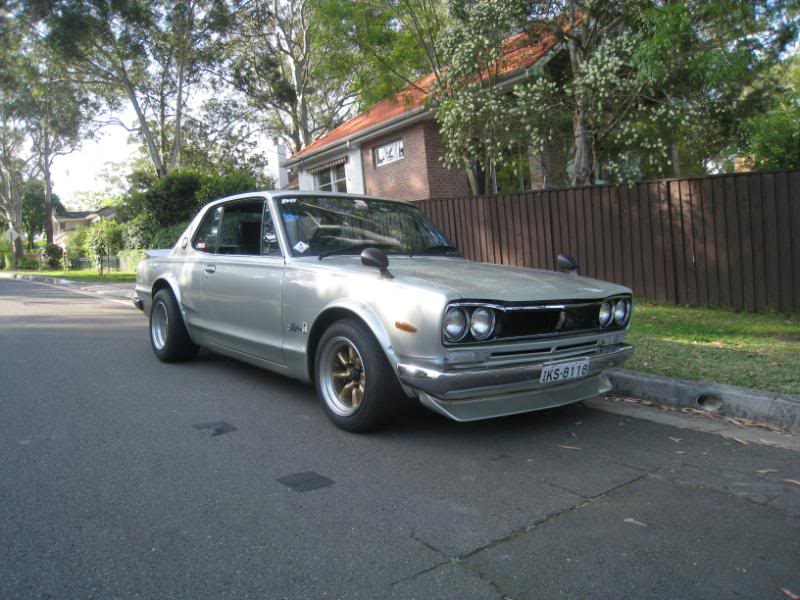
….it’s about 10mm higher than before. At this height, there is about 90mm of bump travel (bumpstop in play after 70mm) so I think we can lower it 10-15mm without any worries, and the stiffer springs should help it stay off the bumpstops too. I reckon I’ll drive it a bit more to see if it settles some more, before we get the angle grinder out.
So far, the handling balance is definitely changed. It’s staying noticeably flatter at the back, and instead of starting to nose into understeer mid corner, it’s quite neutral and edges the tail out under power a lot more easily. One downside is that traction is reduced, and it spins up the inside wheel on corner exit more easily now too. Need to drive it more, but I would say that it’s definitely more neutral and balanced, and faster…if a bit more challenging to drive.


Your flywheel HP calculation is too high. 170whp would not equal 240bhp, that would be a loss factor of more than 40%.
The generally accepted rule of thumb for WHP-BHP calculation in a RWD car is about 15-20%. Your 190whp is about 219-228bhp.
Please learn to drive before you crash, roll, or damage that beautiful car.
Bro, awesome work.
Very clean and thought through restoration.
🙂
Love the blog….I’ll spend a little more time in the details of your writings as I work on the individuals of my own car.
Really wanted to write you as you helped me solve a problem of my own. A couple of months ago, my workplace was having a car show for its employees. My Hakosuka was in desperate need of engine bay rework (very dirty, faded and wiring was horrid). So I pulled everything, refreshed the block, tranny, headers, all auxilliaries, and re-wired a good chunk of the bay to give it a much more clean appearance. After I puth the engine back in, and connected everything back up….no spark. I had been meticulous about wiring, particularly correcting all the original hack-jobs (poor crimps, wrong connector types, innappropriate splices). Trouble shooting the ignition system didn’t help much save a wierd reading I was getting from the coil. Turned out (as you noted), the dizzy doesn’t appear to ground very well to the head….a simple grounding strap from the mech advance screw to the battery and everything was hunky dory again. If only I hadn’t lost these past couple of months…had some beautiful weather…..
Thanks again…
Hello.
I just love the hard work you’ve been putting on this car, congratulations !
Here in Portugal I have a 4 door 1971 Skyline, in Europe they have 2400cc instead of the original 2000 motor ( the same engine has the 240Z ).
The car I have has less than 10.000 km’s on it, because it was parked on a Nissan garage for years 😉
Please continue the good work on this car.
Regards
Jorge
How did this gt2000 get to Australia? What is a contact to get one here???
Awesome resto write ups and pictures! Your project Hako is one of my fav cars to date.
Generally I do not read article on blogs, however I wish to say that this write-up very pressured me to take a look at and do so! Your writing style has been surprised me. Thank you, very great post.
I read every single letter of this write-up.
One day I will stop playing around with my E30’s and get myself a proper Nissan Skyline C10, C110 or a Datsun 240Z.
Thank you.
Hi , I’m from Belgium .First I didn’t know anything of the car . But when I saw the car on a sight it was love on first sight . I wanted to know everything about the car’s history . So I came on your blog . Normally I don’t read blogs.But it reads like bestseller ! It’s a great blog . I wish I had money enough to buy one of those Skyline . I keep dreaming . Thank you, very great post .
Holy mother of god! You have been so meticulous and patient with her!! Awesome job and what was the final dyno output after the exhaust swap? Also did you try any ram air adapters ?
Well done, it looks like you have invested every part of you; the Hakasuka looks awesome.
amazing.
After reading this entire write up, I must say this is one of the most inspiring things I have ever read! I feel like I was right there with you, from the day it was loaded onto the RORO, to the very latest suspension tweak. I can only dream to one day be as knowledgeable and patient as you are, and to have a car of this stature of my own. Thank you for sharing this experience with the rest of the world!